The FBI Issued a Warning About This Malware That’s Infecting Millions of Devices

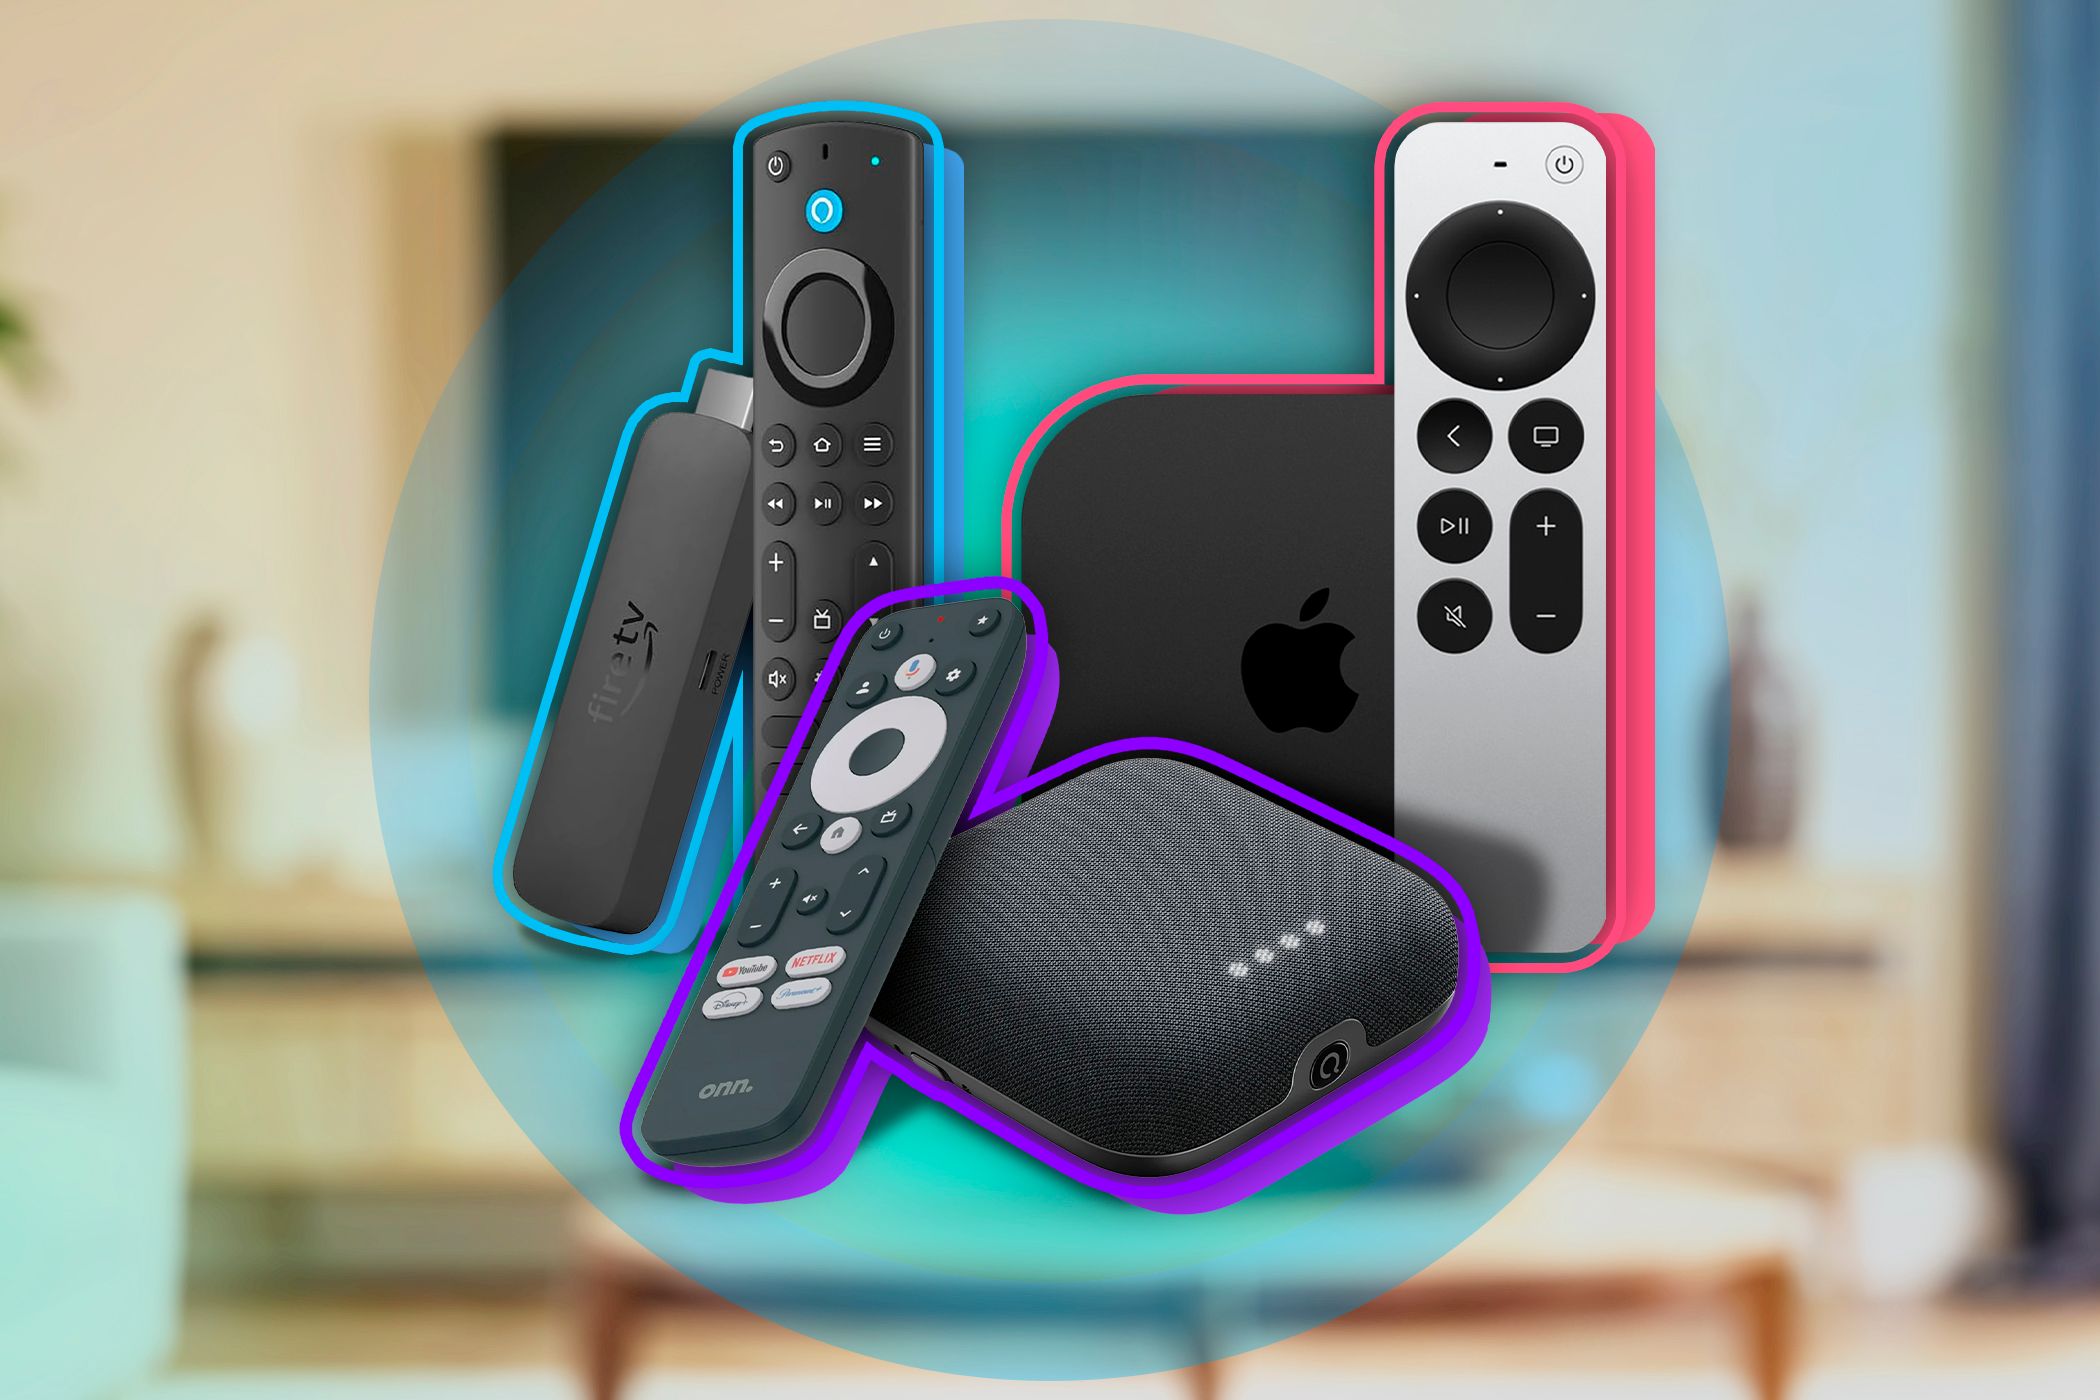
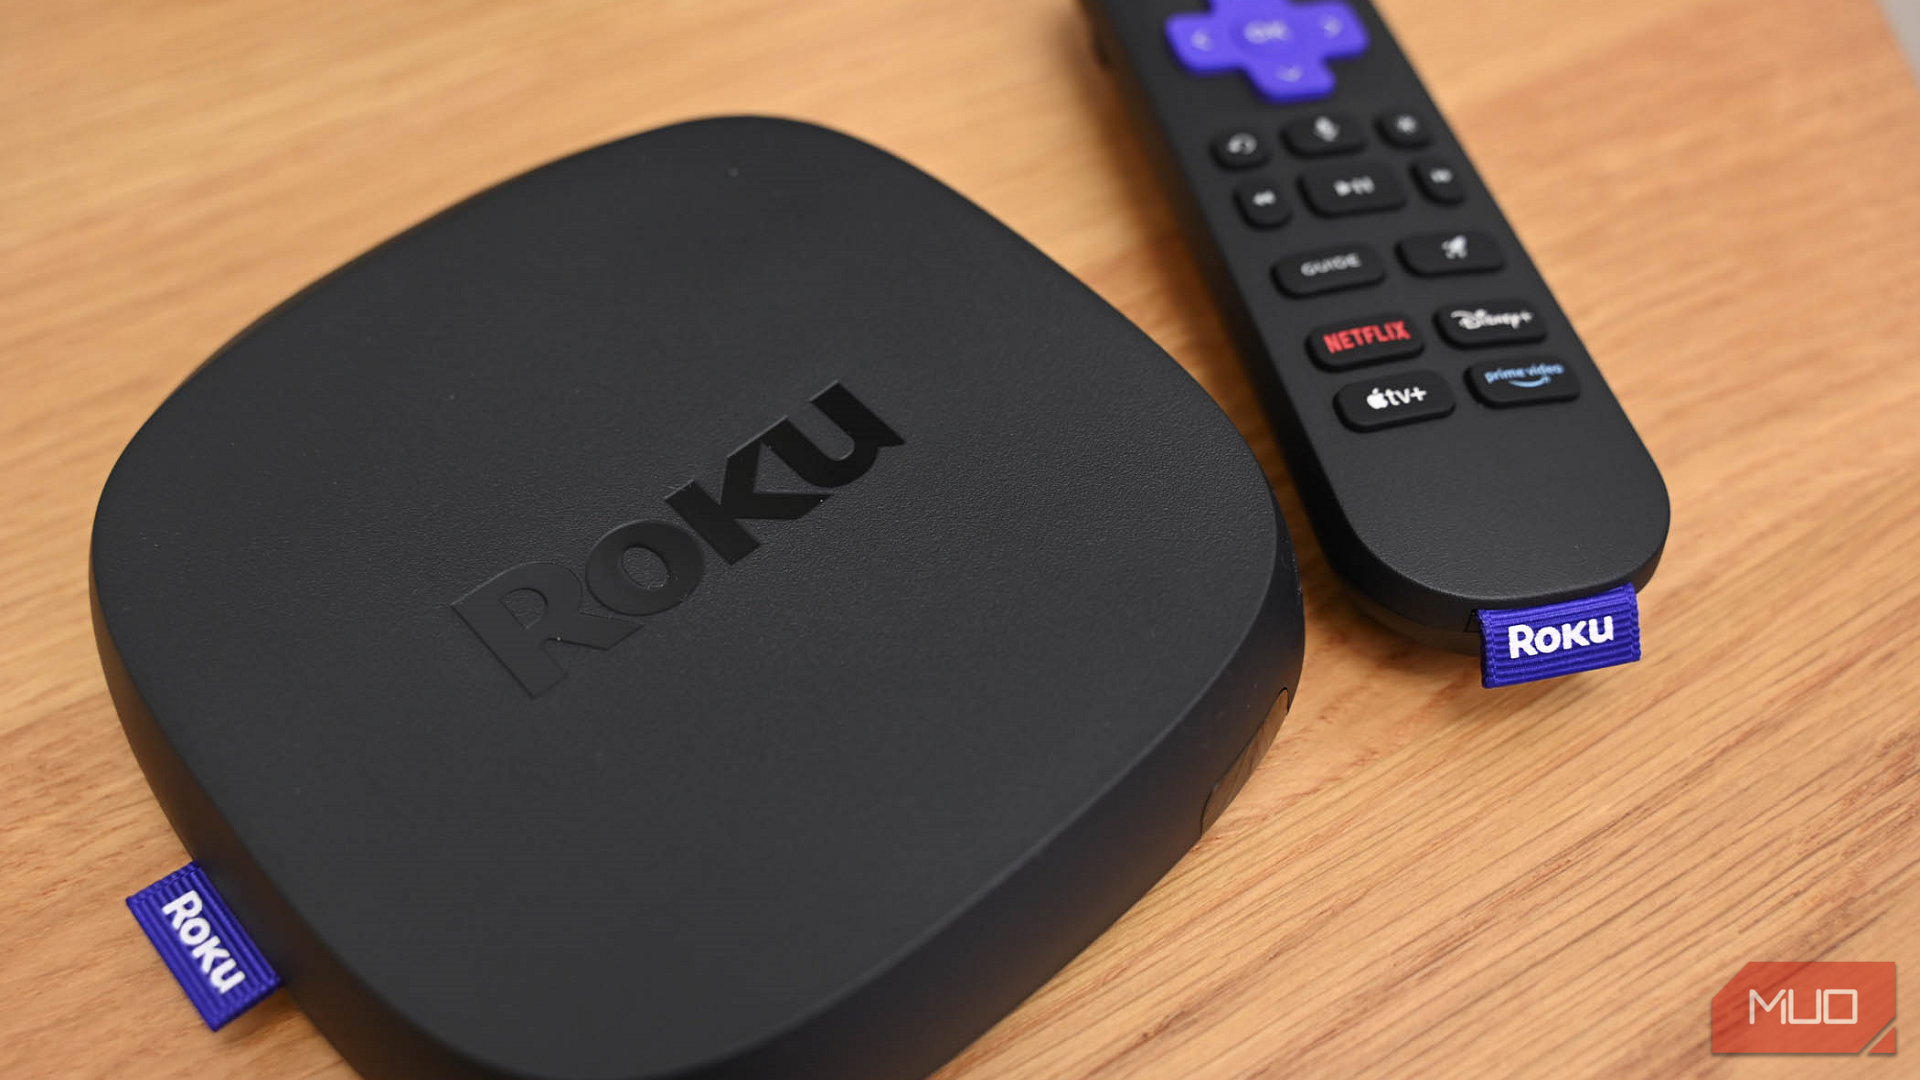
The FBI has issued a warning that BADBOX 2.0 malware is surging through residential consumer electronics, infecting millions of internet-connected devices. The malware, often preloaded onto inexpensive streaming hardware and IoT devices, can steal your data and provide backdoor access to the device—and is extremely difficult to remove.

The BADBOX 2.0 Botnet Is Back

BADBOX 2.0 is the evolution of the original BADBOX malware. This malware was first identified in 2023, though it was partially taken down by a German cybersecurity agency that sinkholed the communication between infected devices. It disrupted the malware, but didn’t completely eliminate it.

Now, BADBOX 2.0 has built a massive botnet comprising more than one million devices, including smart TVs, IoT devices, streaming boxes, projectors, tablets, and more.

The FBI’s BADBOX 2.0 public service announcement revealed that most devices are preinfected with malware at the point of sale, with most coming from China.

Cyber criminals gain unauthorized access to home networks by either configuring the product with malicious software prior to the users purchase or infecting the device as it downloads required applications that contain backdoors, usually during the set-up process.

Once you connect an infected device to your network, it can “phone home” to the control network, which can in turn activate the BADBOX 2.0 malware. Once activated, your device becomes part of the BADBOX 2.0 botnet, and there may be little indication that you have an infected device in your home.

However, it’s not just preinstalled devices that contain BADBOX 2.0 malware. Where BADBOX relied primarily on this method, BADBOX 2.0 has been spotted using drive-by downloads to infect other devices. Similarly, the malware has been bundled into apps available for download on third-party Android marketplaces. This is why sideloading Android apps is such a danger.

What Does BADBOX 2.0 Do?

According to Human Security, the security research team that first revealed BADBOX 2.0, the evolved malware has a range of dangerous and sneaky attacks.

  • Programmatic ad fraud
  • Click fraud
  • Residential proxy services (basically selling access to your internet-connected device, which can then be used for additional attacks):

    • Account takeover (ATO)
    • Fake account creation
    • DDoS
    • Malware distribution
    • One-time password (OTP) theft

What makes BADBOX 2.0 so concerning is that all of this activity takes place without alerting you. It’s not a type of malware that makes a song and dance about its presence; it wants to remain silent for as long as possible to maximize its chance of exploiting your device and data.

How to Check for BADBOX 2.0 Malware

First up, if you haven’t bought a Chinese streaming box or other Chinese internet-connected tech, you’re probably in the clear. However, check if you own any of the infected devices, as per Human Security’s table:

Device Model

Device Model

Device Model

Device Model

TV98

X96Q_Max_P

Q96L2

X96Q2

X96mini

S168

ums512_1h10_Natv

X96_S400

X96mini_RP

TX3mini

HY-001

MX10PRO

X96mini_Plus1

LongTV_GN7501E

Xtv77

NETBOX_B68

X96Q_PR01

AV-M9

ADT-3

OCBN

X96MATE_PLUS

KM1

X96Q_PRO

Projector_T6P

X96QPRO-TM

sp7731e_1h10_native

M8SPROW

TV008

X96Mini_5G

Q96MAX

Orbsmart_TR43

Z6

TVBOX

Smart

KM9PRO

A15

Transpeed

KM7

iSinbox

I96

SMART_TV

Fujicom-SmartTV

MXQ9PRO

MBOX

X96Q

isinbox

Mbox

R11

GameBox

KM6

X96Max_Plus2

TV007

Q9 Stick

SP7731E

H6

X88

X98K

TXCZ

Next up, conduct a review of all of your internet-connected devices, no matter their origin. Check for suspicious app marketplaces that you haven’t installed, altered settings, and other changes to your devices you don’t remember making.

Unfortunately, removing BADBOX 2.0 from most devices is a difficult process because it involves flashing a new, clean firmware. For many cheap streaming boxes and IoT devices, a separate firmware update may not be available, which means you’ll have to cut your losses and ditch the device to protect your network and data.

This Nasty Malware Reminds Us Why Pirating Games Is Dangerous

One of the primary reasons not to pirate software is that hackers often upload legitimate software with malicious malware attached. There is a similar malware circulating, targeting video games this time.

Your Pirated Game Comes With a Side of Malware

GamesBeat reports that security researchers have discovered a new infostealer malware called Myth Stealer. This malware is available as a weekly or monthly subscription to cybercriminals who then embed it in games and set up fake gaming websites to distribute it.

It’s not just video games either. The malware is also being embedded in cracks and cheats for other games that are often available as standalone archives you can download and run.

A9 Studio/Shutterstock

Once installed on your PC, Myth Stealer targets Gecko and Chromium-based browsers and steals data like saved passwords, payment data, cookies, and autofill information. Since the malware covers both Gecko and Chromium, it covers the most popular browsers like Chrome, Edge, Firefox, and Brave, among others.

The malware was first spotted in late December 2024 when its developers made a Telegram group to market it and also offered it free for others to try out. Telegram reportedly shut down the original channel, but the developers have kept the malware alive by jumping between groups and frequently updating the source code to throw off antivirus detectors.

Myth Stealer is coded in Rust, a programming language known for its cross-platform compatibility and performance benefits. Updates to the malware have since added more features and better evasion methods. It can also pass a VirusTotal scan, meaning you’ll likely not spot it until it’s too late.

Another layer of protection for the malware developers is the fact that they aren’t the ones carrying out the attack. Instead, they’re offering a subscription service where other cybercriminals can pay to use the malware either via crypto or Razer Gold gift cards, adding distance between the malware developers and any victims.

Don’t Download Pirated Software

The best way to protect yourself against such attacks is to simply not pirate software. By pirating, not only are you downloading illegal software, but you’re also inviting trouble by visiting shady websites that try to scam you or downloading software that comes with malware attached.

Related

I Don’t Download Cracked Software to Avoid These 4 Real Dangers

Cracked software comes with a whole host of worrying dangers that it’s simply best to avoid.

Hackers often abuse legitimate software or web apps to deliver malware. There are ways you can check a downloaded file is safe before running, but prevention is better than a cure. Even Steam isn’t safe from malware, so if a site or download seems shady, it’s best to avoid it entirely and save yourself the hassle.

I Turned My Hotel Smart TV Into a Streaming Hub With These Gadgets From Home

As a frequent traveler, I’ve found that even the most basic hotels typically offer an HDMI-ready flat-screen TV and decent Wi-Fi nowadays. But it’s not always easy to watch the shows and movies I want, especially when I’m abroad. That’s why I always carry these household gadgets in my luggage; I’m never without a fully-fledged streaming hub while on the go.

1

Don’t Travel Without These 3 Devices

You don’t need heaps of hardware to watch what you want: these three devices will solve most of your problems.

HDMI Streaming Device

Jack Mitchell/MakeUseOf

While most of us favor using built-in apps with our smart TVs, a plug-and-play streaming device is an affordable and useful gadget to keep in any respectable tech arsenal. Whether you’re staying with relatives over the holidays or checking into a remote budget guesthouse, simply plug it into the TV’s HDMI socket to provide some welcome home comfort with access to your favorite subscription services. HDMI streaming devices are usually very compact, setup is quick and easy, and they can be operated using the casting function on mobile devices. Some popular solutions that I have used include:

  • Google Chromecast: This is the cornerstone of my travel setup, and I like my second-generation model for its compact size and robust design. I will soon be upgrading to the latest, slightly larger version, which supports 4K HDR and includes Google TV.
  • Amazon Fire TV Stick: I still regret leaving my Fire TV Stick 4K in an Indian hotel in 2022. I particularly liked its intuitive interface, minimalist remote handset, and support for all my favorite streaming apps, which included Amazon Prime Video, bundled with the purchase.
  • Roku Streaming Stick: I owned the first-generation Roku device, which was considerably larger and clunkier than the latest streamlined offering. Not only does this newest iteration feature a long-range wireless receiver (ideal for hotel TVs located far from the router), but it also has 4K/HD/HDR support and voice commands via its included remote.
  • Apple TV: My early Apple TV was a little too large to accompany me on short trips, but the latest third-generation model is certainly compact enough to be tossed in your hand luggage. This streaming powerhouse will transform any Airbnb stay, especially if, like me, you are firmly rooted in the Apple ecosystem.

Of course, you can use whatever streaming device you have; these are just my go-to options.

Wi-Fi Travel Router or Hotspot

A portable Wi-Fi hotspot.

Jack Mitchell/MakeUseOf

Setting up your HDMI streaming device should be as easy as selecting the correct HDMI input and inputting the hotel’s Wi-Fi credentials during setup. However, sometimes, when the Wi-Fi login is restricted, you can use a travel router to bypass the issue. This connects to the hotel Wi-Fi and creates a private network for all your devices, including your HDMI streaming stick.

Travel routers, such as the TP-Link N300 and GL.iNet Mango, are typically compact, robust, affordable, easy to set up, and can also boost weak Wi-Fi reception. Alternatively, streaming from a portable Wi-Fi hotspot or mobile phone hotspot can circumvent connectivity issues while on the go, provided you have a decent data plan. When traveling in my home country, I use a dedicated local SIM card for this purpose.

Related

Acer’s New 5G Wi-Fi Hotspot Is One of the Best New Products From CES 2025

It’s small, sturdy, and packed with features.

Portable Power Strip and USB Hub

A multifunctional USB power strip.

Jack Mitchell/MakeUseOf

Hotels are notorious for their scarce power outlets, which are often awkwardly placed. For this reason, I always travel with a portable power strip that includes several USB ports for charging peripherals. These are also useful if your hotel TV lacks a USB port for powering your HDMI streaming device.

Look for a power strip with surge protection, as this will protect your essential devices from damage, especially in areas with unreliable electrical grids and frequent power spikes. If luggage space is a concern, consider using a compact USB hub with multiple connectivity options as an alternative

2

Tips for Setting Up a Hotel Streaming Hub

A foldable tech pouch for peripherals.

Jack Mitchell/MakeUseOf

Follow these simple rules to ensure your hotel streaming hub is up and running smoothly, every single time:

  • Bring spare cables and adapters: Create an inventory of all necessary cables and adapters, and, if space allows, pack an extension cord to make life easier.
  • Subscribe to a decent VPN: You might find that your favorite shows are unavailable in your travel destination, and some streaming services may not even exist at all. VPN subscriptions provide an affordable and effective solution for this issue.
  • Download content ahead of time: Store a few shows on your devices in case of a spotty internet connection at your destination.
  • Store peripherals in a tech pouch: I use a folding case that holds spare cables, as well as useful items like adapters, extra remote batteries, a travel router, and a portable Wi-Fi hotspot.

Turning a hotel smart TV into a personal streaming hub is easy with a bit of preparation. In most instances, especially in modern hotels with reliable internet connections, a streaming device and a USB power strip are enough to get you up and running. As a case in point, I recently found myself staying in the backstreets of Hanoi, suffering from a bout of travel sickness. My trusty Chromecast was quick to set up and provided a very welcome distraction as I recuperated. I’ll be sure to pack it for every trip from now on, regardless of the duration.

This Is Your Last Chance to Save Your Samsung Account Before Its Deleted

Samsung is looking to clean up the list of inactive accounts under its belt. The company recently sent out a notice to customers with a Samsung account that hasn’t been used in 24 months, noting that any inactive accounts will be deleted come July 31,2025.

8 Weeks Left to Save Your Samsung Account

There was a time when having an account tied to your Samsung phone might have made sense. However, if you’ve changed to a different brand of phone at any point, you might have forgotten about that old account. It’s possible you even chose to move to a new one for whatever reason.

If that’s the case, and your old Samsung account possibly has anything worth salvaging saved to it, then you may want to log in to that account before the end of July according to reports from SamMobile.

As of the time of this article’s publishing, Samsung account holders will have just eight weeks left to save their inactive Samsung account by logging in. It’s also recommended that you at least use a Samsung device with the account linked to it, just to help prove its active.

Why Account Purges Happen

These kind of purges are pretty common in the tech world, and Google recently did a similar purge with Gmail accounts.

One of the reasons that these purges happen is to not only cut down on resources—like how much data is saved to the servers—but also to help open up usernames and other details like that for those who might actually use them actively.

The other reason, which is perhaps the most important, is that it helps get rid of any data that might be hanging around in your old Samsung account you’ve forgotten about or no longer use. If you aren’t using that account, you likely don’t need to hold onto that data.

Related

Samsung’s Latest Public Safety Alert Is One You Should Take Seriously

Samsung really wants you to know about these anti-theft features, and for good reason.

Holding onto data in an account you rarely use only opens up the opportunities for bad actors to somehow get their hands on it. As such, I recommend just letting any accounts you don’t plan to use be deleted by Samsung to help clear up your data footprint. Or better yet, you can delete your old Samsung accounts yourself.

It’s also entirely possible you’ve gone the entire lifetime of your Samsung device without using a Samsung account. Sure, a Samsung account isn’t mandatory to use one of the company’s devices. However, you do miss out on some great features by not signing up for one, like Samsung Pay and access to the Galaxy Store.

This Is How Your eSIM Can Be Hacked

If you’re like me, you’ve embraced eSIM technology for its convenience—no physical card, quick switching between carriers, easy setup, and perfect for heading on holiday. However, eSIMs aren’t entirely secure, and there are still a few ways they can be hacked.

QR Code Scams

PeopleImages/Velvector/Shutterstock

When setting up your eSIM, you often scan a QR code provided by your carrier. Attackers exploit this by creating fraudulent QR codes disguised as legitimate setup tools. Scanning a fake QR code can redirect your device to a malicious eSIM profile, hijacking your cellular connection. Once compromised, attackers can intercept your calls, messages, and data, potentially leading to identity theft or financial fraud.

To protect yourself, always verify QR codes by confirming them through official carrier channels, and avoid scanning codes sent from untrusted sources or found in suspicious online advertisements or websites. If you’re ever uncertain, reach out directly to your carrier to confirm the QR code’s authenticity before scanning.

Phishing and Social Engineering

Phishing attacks are designed to trick you into revealing sensitive eSIM details. For example, a phishing or social engineering attack may impersonate your mobile carrier through convincing emails or text messages, urging you to download malicious eSIM profiles or confirm your personal details. These attacks can be highly convincing, mimicking carrier logos, contact information, and official language, while also being sent from a spoofed email address or SMS address to appear legitimate.

Although it seems like you have nothing to worry about from a phishing attack of this nature (because you’re a “regular person” without a super high net worth or otherwise), think again. Phishing attacks are often spray-and-pray, in that attackers send a large number of scam messages and hope that someone will fall victim.

Thankfully, you can deal with attempted eSIM phishing attacks as you would any other phishing attack: by not responding to or interacting with any suspicious messages or phone calls.

Related

4 Ways eSIMs Are Safer Than a Physical SIM Card

It’s much easier to change your network, but also much more secure, too.

Malware and Spyware

Just like a regular SIM card, an eSIM is vulnerable to malware. Malicious apps may access your sensitive eSIM information, communications, and even monitor your device’s activity. Similar to other eSIM attacks, the goal here is to eventually take control of your eSIM communications with the aim of intercepting authentication codes, which can allow access to your secure accounts.

It’s worth noting that malware specifically targeting your eSIM is rare. Back in 2019, the Simjacker exploit was uncovered, but there isn’t really a similar attack currently available for eSIMs (at least, that we know about). A device is more likely to be infected with malware designed to monitor and steal data, with an aim to accessing eSIM information. Also, while malware and spyware can attack and monitor your device, installing actual malware on a SIM or eSIM is also practically unheard of, and certainly not at the level of most attackers. It’s real nation-state, spies-in-the-dark type stuff; you’re far more likely to click a dodgy link than be one of the first recorded victims of actual eSIM malware.

To safeguard your device, only install apps from reputable app stores and always review permissions carefully before granting access. Regularly check your phone for unfamiliar or suspicious apps, remove unused or unnecessary software promptly, and use trusted antivirus or security software to identify and remove potential threats.

iOS and Android Vulnerabilities

This actually ties into malware and spyware, in that attackers will attempt to exploit known issues in the two largest mobile operating systems to find an angle to attack your eSIM. Unfortunately, attackers are continually exploring Android and iOS to find vulnerabilities that can be exploited to gain access to your device.

Most of the time, you can mitigate these issues by keeping your device up to date and avoiding the installation of apps from third-party sources. For Android devices, that means avoiding sideloading apps, as the unofficial app stores may package malware that can infect your device. There have been numerous examples of malware gaining access to devices through sideloading, such as the bank-account-draining ToxicPanda attack in 2024.

Related

Here’s Why Software Updates Help Keep You Safe

Keeping your operating system and apps up-to-date can be annoying, but doing so is essential for your security.

eSIM attacks aren’t as common as attacks on regular, physical SIM cards yet. Although eSIM tech really started gaining traction with the iPhone XR, XS, and XS Max, more smartphones than ever now offer support, which means its attack surface is increasing. In turn, this means that more attackers will begin focusing on how to exploit eSIMs, so it’s worth knowing what to look out for.

Samsung’s Latest Public Safety Alert Is One You Should Take Seriously

Android security updates are important, and you should install them as soon as they’re available. If you’re using a Samsung phone, even the government is asking you not to ignore this latest update.

Google has consistently been hard at work improving Android with new security features every now and then. Samsung is doing its best to spread awareness about these features. The smartphone maker has partnered with the UK Home Office to spread the word about these features and get Galaxy owners to enable them on their devices.

It has issued a public safety security message alert, which is expected to reach more than 40 million Samsung account holders in the UK alone this week. The outreach is handled through “customer communication channels and the Samsung Members platform,” according to its announcement.

Yadullah Abidi / MakeUseOf

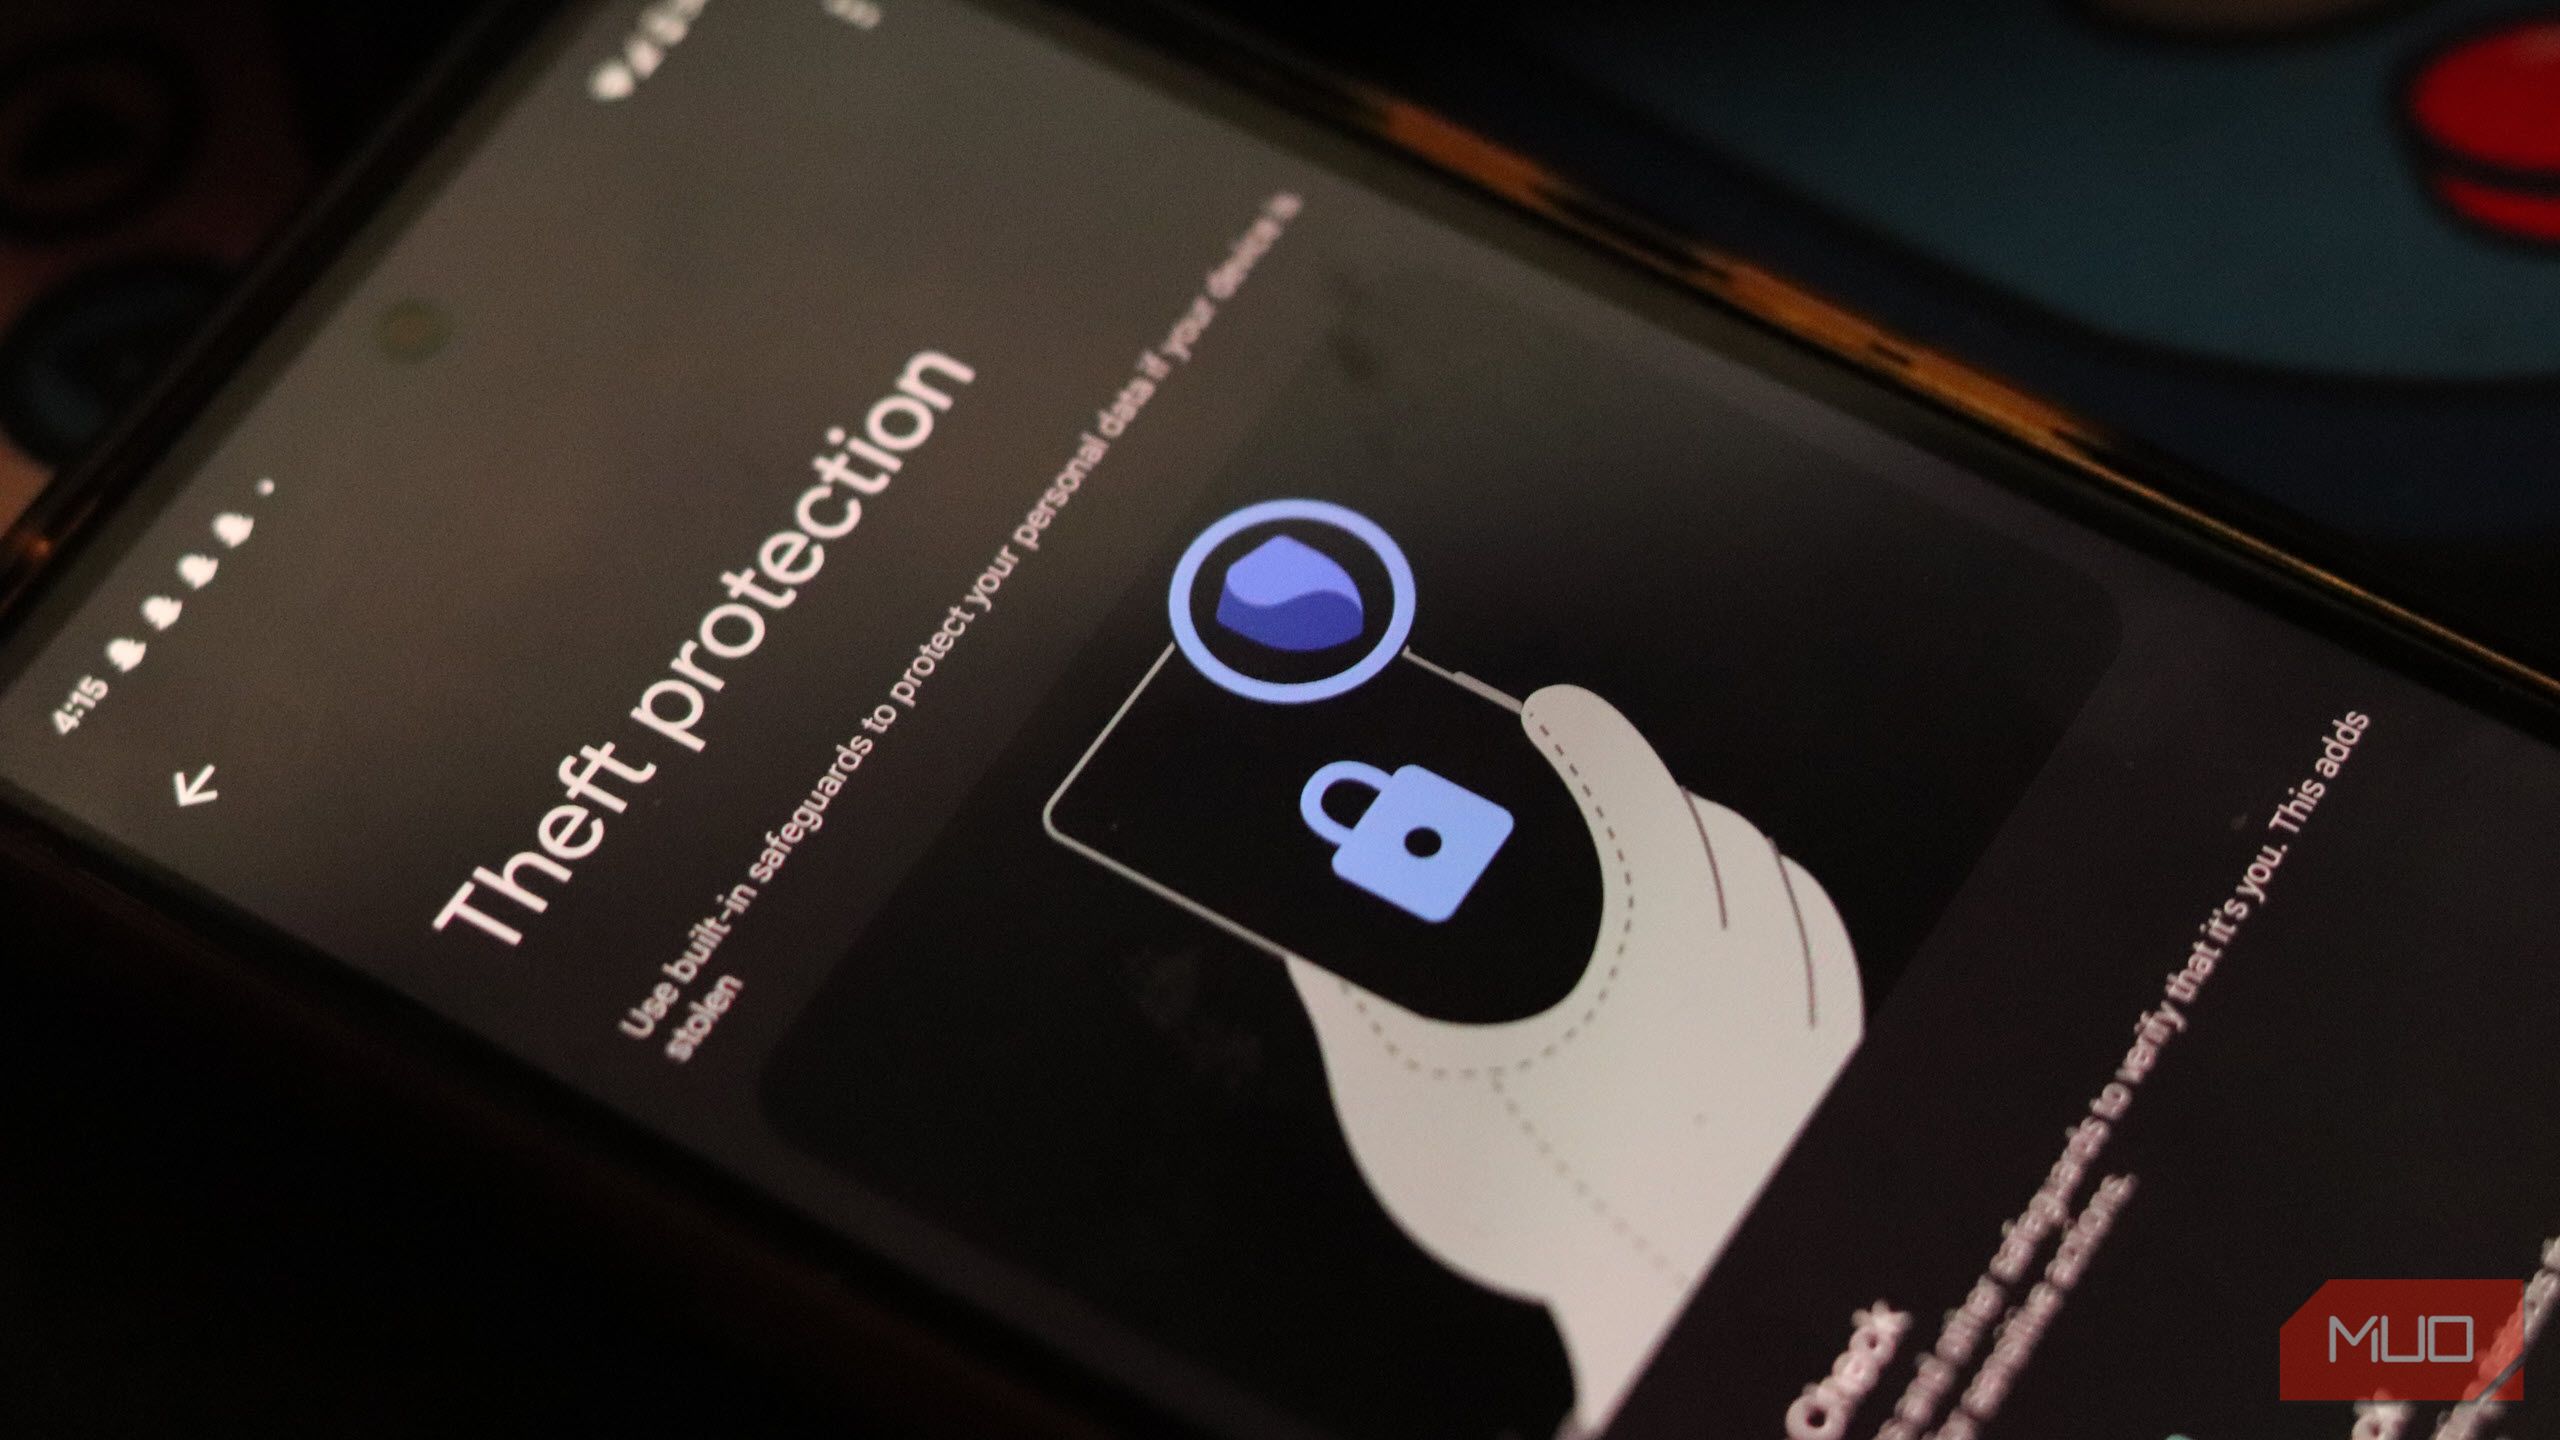
In case you didn’t get the announcement, Samsung is talking about the Theft protection suite of features that make your Android phone easier to recover in case of theft. The suite consists of three main features at the time of writing:

  • Theft Detection Lock: The feature automatically locks your phone if it detects it has been snatched from your hand.
  • Offline Device Lock: Locks your screen automatically shortly after your phone goes offline.
  • Remote Lock: Lets you lock your phone remotely using just a phone number.

Another important feature is Identity Check, which requires biometric authentication in unfamiliar locations before letting you change sensitive security settings on your phone. The feature is currently available on Pixels and Samsung phones running One UI 7. More manufacturers are expected to start rolling out these features with the upcoming Android 16 release.

One feature that’s currently exclusive to Samsung phones is Security Delay. If you’ve got this feature enabled and a robber tries to reset your biometric authentication data, your Galaxy phone will automatically go into an hour-long delay before the changes take effect. This gives you some time to remotely lock your stolen phone from a PC or tablet.

Don’t Let Thieves Get Away With Your Phone

These features aren’t anything new. If you’re one to dig around in your phone settings from time to time, chances are you’ve already spotted them, as long as you’re using a Pixel or Samsung phone. So if you haven’t already, head over to your phone settings, search for Theft protection, and enable these features right away.

Related

Your Android Phone’s Default Settings Are a Privacy Nightmare—Here’s What to Change Right Now

Your Android’s out-of-the-box settings aren’t doing you any favors when it comes to privacy.

Of course, the best protection is where your phone doesn’t get stolen at all, but software can do little here. Enabling these features doesn’t guarantee that you’ll get your phone back after losing it to a swiper, but you’ll protect your data. With the amount of sensitive information your smartphone holds, that’s a significant amount of damage you’ll be limiting.

Why I Only Plan My Day the Night Before (Not the Morning Of)

Every morning is a fresh start. But just like the startup folder on a PC, I don’t want to get weighed down by too much stuff launching in my scattered mind. Planning the night before gives me a head start and lets me hit the ground running.

Why Planning My Day the Night Before Boosted Momentum

That groggy feeling after waking up means my brain isn’t ready for heavy decision-making yet. Planning the night before taps into a powerful mental trick: the subtle benefits of sleep. While we sleep, our subconscious processes priorities for the next day, making us efficient at certain cognitive tasks. It’s like a runner getting into position before the starter gun.

Instead of fumbling with my to-do list over coffee, I know exactly where to start. I don’t give my brain the chance to debate the first task; it’s done. Clarity reduces friction and jumpstarts my focus.

You don’t have to look at your mobile or switch on the PC, but digital tools can make this easier. I experimented with using ChatGPT to set up a morning routine. Lately, I have shifted this exercise to the prior evening.

This routine can save you 15 to 30 minutes of morning deliberation and channel that energy into productive work. But you don’t have to follow my system. Your current task planning habits can work just as well—just experiment with it the night before and see if it helps. You can also use the wonderful benefits of paper for to-do lists and stay away from screens.

Morning Planning Can Provoke Procrastination

Planning in the morning often hides procrastination as productivity. Willpower is lowest right after waking. Facing an overflowing inbox, buzzing Slack, or a huge, unclear task list feels overwhelming. Our brains don’t know the boundaries between the real and the digital world anymore, so we procrastinate.

You might say, “I’ll just check email quickly,” and suddenly 45 minutes vanish knee knee-jerking to others’ agendas instead of your own. Or you get stuck staring at a daunting task list and surrender to easier chores like organizing your desktop.

Email Overwhelm

Morning planning often turns into reactive work. Notifications and urgent requests hijack focus before you stack your priorities.

Some of the digital tools I use have worsened this in different ways:

Notification tsunami: Email and messenger apps like WhatsApp flood me with unread threads, derailing focus before I can sit down to plan the day.

The endless list trap: Opening a massive, unsorted task list in Asana without clear priorities causes paralysis.

Searching for context: Trying to remember why I added tasks or where the important documents are.

Planning at night acts as a balm against this. I can set my day proactively, before digital chaos and distractions take over.

Practical Tips for Planning Your Day the Night Before (The Digital Way)

Getting started is simple. Use the general structure to build your own consistent 5 to 10-minute evening ritual. Remember, the tools don’t matter as much as the system or habit.

Brain Dump & Capture

Clear your mind by jotting down stray thoughts or tasks.

You can use apps like Apple Notes, Google Keep, or Evernote for quick notes. If you prefer, recording your thoughts as a voice journal is a time-saving experiment worth a try.

Review & Prioritize

Open your main task manager. It can be any popular app of your choice like Todoist, Microsoft To Do, or TickTick.

Review new notes, your task list, and tomorrow’s calendar. Then, pick your Most Important Task (MIT) and flag it clearly. I call it My Daily Highlight, and I categorize it as something Urgent, Satisfying, or Joyful.

My Daily highlight in Google Sheets

Limit your other daily tasks to 3 to 5 critical items to reduce overwhelm. Use “Someday” lists or defer less urgent tasks.

Time Blocking

Use common apps like Google Calendar, Fantastical, Apple Calendar, or Motion. Drag or type tasks into your calendar with realistic time slots, including buffers. Always schedule work, breaks, exercise, and lunch. Treat them as appointments.

Color-code tasks for quick visual reference (e.g., blue for deep work, green for meetings, orange for rest, etc).

Prepare Tomorrow’s Workspace

Close tabs and apps you won’t need tomorrow.

Open key documents or tools related to your first tasks and save links in your calendar or task notes. If I am writing an article, I bookmark them in a temporary folder called “Start Here.”

When you start on your important tasks, activate Focus Modes (iOS/macOS) or Digital Wellbeing/Do Not Disturb (Android) to silence distractions during work blocks.

I mention digital work here. These tips apply to everything. For instance, if you go to the gym in the morning, prep your gear the night before.

Final Check & Commitment

Scan your calendar and tasks to ensure your plan is focused and realistic. Close your distracting apps and mentally commit to the ultimate productivity app we all have — the clock.

Planning at night isn’t just about writing a to-do list, it’s a strategic habit. Using digital tools to capture, prioritize, schedule, and prepare before sleep gives our brains enough time to visualize the next day. Also, remember that if life happens, you can always microplan and switch things up. You’ll trade overwhelm for clarity and morning stress for momentum.

Your Android Phone’s Default Settings Are a Privacy Nightmare—Here’s What to Change Right Now

Out of the box, your Android phone leaves way too many doors open for data collection. The good news is it only takes a few minutes to change that and start protecting your privacy without affecting how your phone works.

7

Hide Notifications on Lock Screen

You probably don’t think twice when a notification pops up on your lock screen—but you should. By default, Android phones display the full content of messages, emails, and app alerts on the lock screen, even when the phone is locked. That means your sensitive information could be visible to nosy strangers on public transport or anyone who happens to glance at your phone.

The good news is that you can fix this in seconds. Head to Settings > Notifications > Lock screen notifications, and then choose Hide content. If you’d rather hide content for specific apps instead, you can do that from the same menu.

This should make your lock screen notifications more private. Meaning, you’ll still get a notification when something comes in, but the message will stay private until you unlock your phone.

6

Use App Pinning or Guest Mode

Do you ever hand your phone to a friend or even your kids and suddenly panic when they start swiping around? That’s when app pinning can save the day. It lets you lock your phone to just one app, so the screen stays put until you decide to unlock it.

App pinning isn’t turned on by default on most Android phones, but it’s easy to set up. Head to Settings > Security > More security settings > App pinning, and switch on both Use app pinning and Ask for PIN before unpinning. After that, just open the app you want to pin, hit the Recent Apps button, tap the app icon, and select Pin.

If pinning feels too limiting, you can use Guest Mode on your Android phone instead. It lets someone use your phone with restricted access and keeps your personal data hidden. Most Android devices support this feature, though it’s not available on Samsung Galaxy phones.

You can usually find Guest Mode under Settings > System > Multiple Users. From there, just add a guest user and switch over whenever you need to. If you often hand your phone to your kids, consider creating a separate profile on your phone for them. This will let them set up their own home screen, apps, and settings without affecting yours.

5

Opt Out of Sending Diagnostics Data

By default, your Android phone quietly communicates with Google in the background, sending off diagnostic and usage data in the name of “improving Android.” While that might sound helpful, it often means your phone is sharing a lot more than you might realize: how you use your device, what apps you open and how often, your network status, and even details about permission settings.

If you’re not comfortable with your phone quietly reporting to Google, it’s best to opt out. Don’t worry; doing so won’t mess with your phone’s performance or stop things from working. To disable it, go to Settings > Security and privacy > More privacy settings > Usage & diagnostics and flip the toggle off.

Note that many phone manufacturers also collect their own diagnostics, separate from Google. While you’re already in the settings, it’s a good idea to check your device’s manufacturer-specific privacy options and disable any data collection features you find there.

4

Disable Ad Tracking

One of the more subtle ways your Android phone compromises your privacy is through ad tracking. Right out of the box, Google assigns a unique advertising ID to your device. You can think of it as a digital name tag that helps apps and advertisers build a profile based on your habits, interests, and behavior. This ID doesn’t include your name, but it’s still closely tied to you. Over time, it can be used to deliver uncannily personalized ads or even sell insights into your digital life.

Thankfully, you can shut this down with just a few taps. Head to Settings > Security and Privacy > More privacy settings > Ads > Ad privacy, and disable all three options. After that, return to the previous menu, tap Delete advertising ID. This won’t stop ads on your phone, but it will make them less targeted.

3

Check Google Account Settings

Your Android phone is closely connected to your Google account, and that’s where a surprising amount of your personal data ends up being collected and shared. For example, Google tracks things like your search history, location, voice commands, and YouTube activity.

To stop all this, first head to myaccount.google.com and click on Data and privacy. Scroll down to History Settings and turn off Web & App Activity, Timeline, and YouTube History. When these are turned on (and they usually are by default), Google stores a timeline of your every move, what you search for, the apps you use, and even what you watch.

If you really want to go all in, there are ways to stop Google from tracking your Android phone. But for most people, the easiest place to start is simply adjusting the account settings to limit how much data Google collects.

2

Review App Permissions

Sometimes, the excitement or rush of trying out a new app or game takes over. You hit “Install,” quickly skip through the permissions screen, and suddenly the app has access to your location, camera, microphone, and even your contacts.

That’s a real problem. Many apps request excessive access that they don’t actually need, and most of the time, it goes unnoticed. A flashlight app doesn’t need your location. A photo editor has no business checking your call logs. But it happens all the time.

This is why it’s worth taking a few minutes every now and then to audit your app permissions. Android actually gives you a pretty handy way to do this. Head to Settings > Security and privacy > Permissions used in last 24 hours. You’ll get a quick snapshot of which apps have been tapping into things like your camera, microphone, and GPS. If you want a broader view, tap the drop-down menu and switch to Last 7 days.

From there, don’t be afraid to revoke anything that feels off. If an app’s purpose doesn’t clearly explain why it needs access to something, it’s totally fair to block it.

1

Check Which Apps Use the Clipboard

You probably copy more sensitive stuff than you realize—passwords, credit card numbers, addresses, even images. All of that gets temporarily stored on your Android phone’s clipboard. That’s convenient, sure, but some apps can quietly snoop on it without you ever knowing.

That means a random app you installed for a quick one-time use might be able to read the last thing you copied. Fortunately, Android offers a handy feature that lets you know when an app is dipping into your clipboard. Just go to Settings > Security and privacy > Controls and alerts, and turn on Alert when clipboard accessed.

Once it’s set up, you’ll get a small notification anytime an app tries to read your clipboard. When you spot such apps, the best move is to delete them.

Digging through your phone’s settings isn’t exactly thrilling. But the truth is, most Android phones come set up for convenience and data collection, not privacy. It’s worth taking a few minutes to adjust those settings so you can protect your privacy and have some peace of mind.

You Need to Try These Clever Circle to Search Tricks

Circle to Search is a nifty search tool that lets you quickly look up what’s on your phone’s screen without leaving the current app. While you may already be aware of and use Circle to Search for many things, let’s dive in to explore some clever use cases.

1

Fact-Check Claims

Misinformation and disinformation are becoming increasingly common on the internet, and you probably come across them every day on social or messaging apps. However, if you have a phone that supports using Google’s Circle to Search feature, it’s surprisingly easy to examine misleading content.

Start by opening the page, photo, or text snippet containing the claim you want to verify. Then, activate Circle to Search and select the content with a false claim. Circle to Search will then automatically look the claim up on the internet and return a response for the same in a Google Search results panel.

Most of the time, it’d be an AI-generated summary as part of Google’s AI Overviews. However, if Circle to Search doesn’t return a fact-checking response, tap the search box with the text Ask about this image and ask it to verify the content on the screen by typing “Is the claim in the text correct,” “Fact-check the content on the screen,” or something similar. You may also type follow-up questions in this search box if you have any doubts or would like a detailed explanation of something in the response.

If you don’t like reading the response, tap the Listen button to have the entire thing read out to you. Hit the Export button and select an appropriate option to copy the response or save it to a document in Google Docs.

2

Get Definitions or Learn New Concepts

As you go about doing things on your phone in your everyday life, you may stumble upon new words, definitions, or unfamiliar topics. When this happens, rather than copying the thing (if it’s possible) and looking it up online, you can ask Circle to Search to break it down for you.

With the content you want to look up open on your screen, bring up Circle to Search and select the text you want to learn more about. If it’s a word or phrase, Circle to Search will look it up on Google and return its definition or meaning. Meanwhile, if it’s a concept or phenomenon, you’ll see a detailed explanation for it. You may follow up with your questions for more details.

3

Summarize or Translate Text

Aside from helping you learn about new things, Circle to Search can also help you summarize text. That way, you don’t have to go through long paragraphs to understand what it’s about or find something in it.

Getting Circle to Search to summarize text is easy. With the content you want to be summarized open on your screen, bring up Circle to Search. Then, select the text for which you want a summary, and you’ll see an explanation or additional information. Tap the search bar at the top and ask it to summarize the text by typing something like “Summarize the selected text” or “Summarize the text on the screen.” It’ll then return a gist.

Oftentimes, you’ll see the summary in paragraphs. But you can tell Google to show the result in your preferred style. For instance, if you want a bullet point summary, you can specify that in your query by typing “Summarize the text using bullet points.” If you feel there’s redundant information, you can ask it to cut out the fluff and list down only the main points with “Outline only the main ideas in the content” or a similar query.

Likewise, Circle to Search can also help translate text you come across on different apps or websites. To do so, keep the text you want to be translated on the screen and access Circle to Search. You’ll see a translated version of the text in your device’s default language. If you have any further queries, you can tap the search bar at the top and type them in.

4

Look Up Ingredients or Nutritional Information on Food Packages

If you’re conscious about your diet and trying to eat healthily, Circle to Search can help you on your journey. With it, you can quickly and easily find out everything you need to know about the ingredients or other nutritional information in packaged food items.

5 Food Apps That Make Healthy Eating Easy & Simplify Nutrition

Health and the right diets for them can get complicated. These food apps simplify it all and help you cook a healthy plate by simplifying nutrition.

Sure, you can check the packaging yourself to see what it contains, but at times, you may come across ingredients you know very little about or have probably never read about before. In such situations, rather than looking them up separately, you can use Circle to Search to get all the related information.

To do this, first, take a picture of the food package. Alternatively, open the photo if you already have it in your gallery or another app. Then, bring up Circle to Search and highlight the area with the ingredients. You’ll see a response on your screen with a bunch of information related to the ingredients you selected. If you want to learn more or have a doubt about an ingredient, type it into the search bar at the top.

5

Look Up People in Videos, Shows, or Movies

There could be times when you’re watching a video, show, or movie, and a bunch of unfamiliar faces pop up on the screen. Your natural reaction then is to look up the cast of the show or movie online; it’s hard to do the same for a video you’re watching online or that someone shared with you.

Circle to Search makes identifying people easy in such cases. Start playing the video and hit pause on the frame where the face of the person you want to identify is clearly visible. Then, activate Circle to Search and select the person’s face. You should now see their names along with a bunch of other information in the result. If you want more details about the person, type your query in the search bar at the top.

6

Identify and Fix Issues With Your Vehicle or Devices

Last but not least, you can use Circle to Search to troubleshoot issues with your vehicle or devices. This can prove to be a game-changer when, say, you see a warning light on your car’s dashboard or an error message on your laptop’s screen and don’t know what to do. Whatever the device or problem, you can identify and learn more about it and find solutions to fix it yourself.

First, take a picture of the vehicle or device where the problem is clearly visible. Open it, bring up Circle to Search, and select the area with the issue or error message.

Circle to Search will look it up online and return an explanation. In some cases, you may not see the answer in the first go. Tap the search bar at the top and type your query. For example, if you see the LOS LED blinking red on your router, you may ask something like, “What is LOS, and why is the LED blinking red?”

Google will then return a detailed explanation, along with possible reasons why you might be seeing it and the solutions you can try to fix it. If it doesn’t return the fixes, you can ask it as a follow-up question.


These are just a handful of smart use cases for Circle to Search in everyday life. However, its scope of use still doesn’t end here: the feature most likely has many more interesting applications, like solving math equations, looking up products to buy online, and more, that you’ll discover as you begin to use it more regularly.

Circle to Search is available on a range of Android phones from the likes of Google, Samsung, OnePlus, and more. If you haven’t tried it already, give it a shot, and it’ll sort pretty much most of your visual search needs.

This One Extension Fixed the Most Annoying Part of My Workday

I hate typing “procrastination” or even “productivity” repeatedly. Then, I often misspell “accommodate.” If you’re tired of tedious typing or other typing misadventures, Text Blaze for Chrome can save you hours every week. Use this text expansion tool to mow down your everyday annoyances.

What Is Text Blaze and How Does It Work in Chrome?

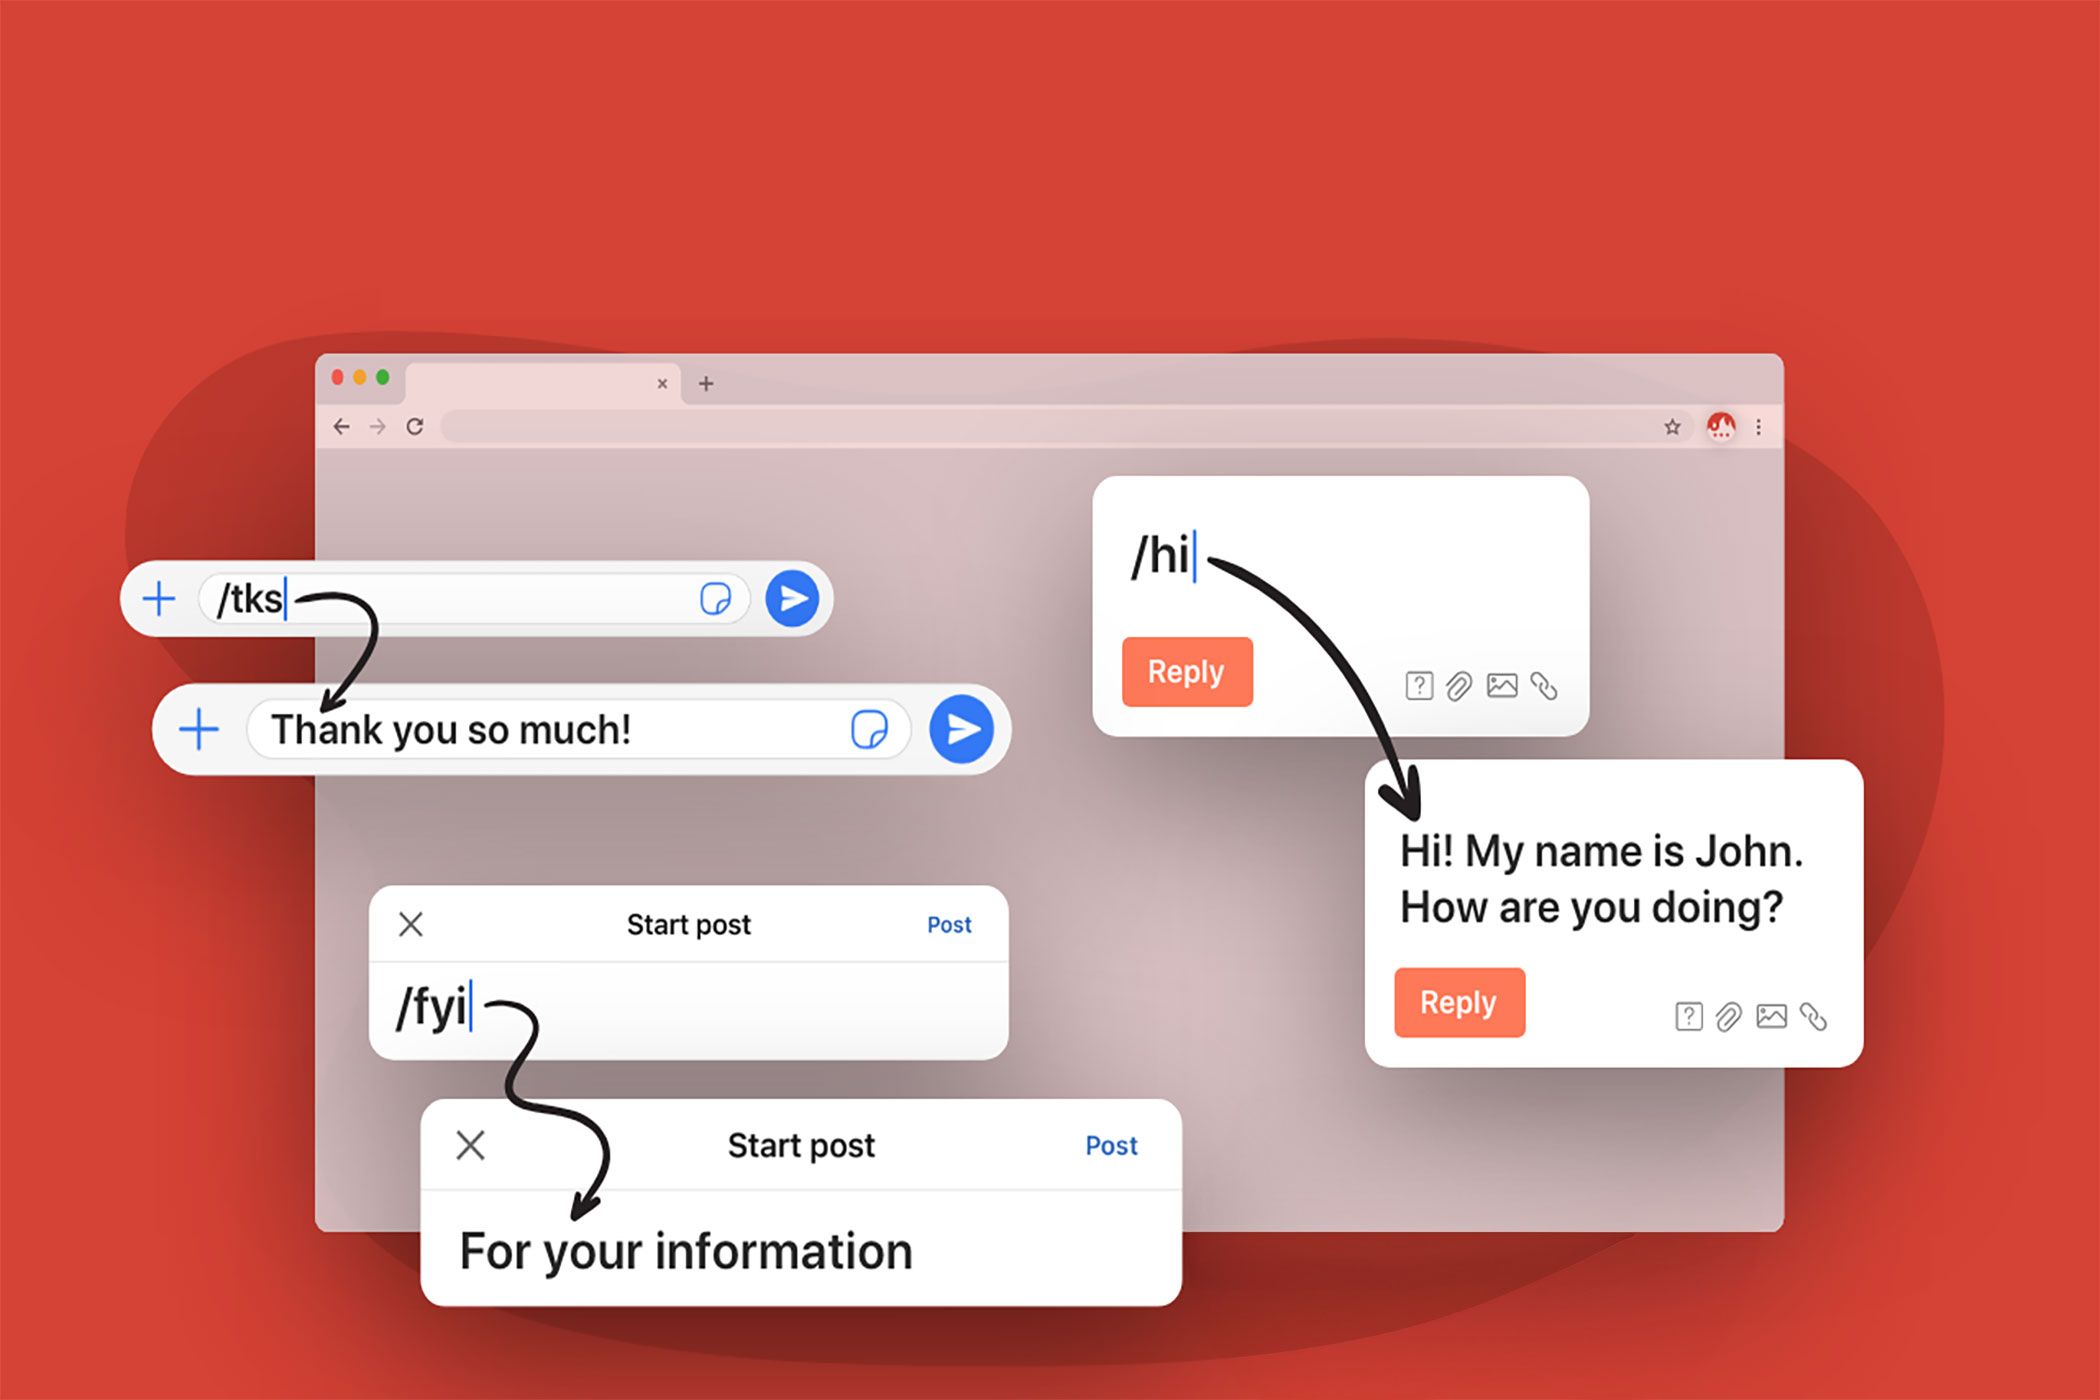
Text Blaze is a Chrome extension that lets you create custom keyboard shortcuts called snippets for any text you use often. When you type a shortcut, Text Blaze instantly replaces it with the full text you’ve saved. It works anywhere in Chrome: Gmail, Google Docs, web forms, or even chat tools like Slack.

Setting up Text Blaze is simple. After installing it from the Chrome Web Store, you’ll see its icon on Chrome’s toolbar. Register as a new user on the Text Blaze site, and you will be welcomed to the dashboard. This account will store all your snippets.

My Chrome toolbar is crowded with other extensions. As I plan to use Text Blaze regularly, I pinned it to the toolbar for quicker access.

If you’ve used text expanders before, Text Blaze won’t take much to get used to. Go through the guided tour if you are using a text expander tool for the first time.

Click on the extension’s icon and you can start creating snippets right away. Each snippet has two parts: the shortcut you’ll type (like /ty) and the text it expands to (like “Thank you for your email. I’ll get back to you soon.”).

Text Blaze Email Text Expansion

You can also create and organize snippets into folders from the dashboard. I recommend you think about this from the very beginning, as snippets can multiply fast.

Text Blaze supports Dynamic fields, so you can add today’s date, prompt yourself for custom input, or even insert data from your clipboard. There’s no coding required, but if you want to get fancy, you can add conditional logic and formulas. Get creative with the rich text editor on the Text Blaze dashboard. You can also use the AI Write option to create snippets with the help of artificial intelligence.

Text Blaze Dynamic Snippets

Once you have snippets ready, you simply type the shortcut in any text field within any site on Chrome, and your saved text expands instantly. The seconds saved repetitively typing across emails, documents, forms, and chat apps add up quickly.

The extension’s capabilities go beyond the custom keyboard shortcuts you can set up in any web browser.

Text Blaze has free and paid pricing plans. The free tier allows limited snippets and limited sharing. There are other constraints like using them on form fields.

How Text Blaze Helped Speed Up My Workflow

Before Text Blaze, my typing speed was dragged down by repetitive typing. I answered dozens of messages and filled in the same data in forms repeatedly. Copy-pasting from Notepad or other documents is a time sink. Typos were common, too.

After installing Text Blaze, I created a few basic snippets. For example, typing /sig inserts my full email signature. Typing /ty drops in a polite thank-you message. At first, remembering these shortcuts felt a bit strange, but soon it became second nature.

Setting up dynamic snippets was a big time saver. To answer Out of Office messages, I built a template that prompts me to enter the sender’s name and query. Typing /ooo brings up a form like this:

Text Blaze Out of Office Reply in Gmail

I fill in the blanks, and the rest inserts automatically. My replies have become faster, more accurate, and I can tweak them to make them more personal or casual.

Of course, it wasn’t perfect from day one. Sometimes I triggered snippets accidentally or forgot shortcuts. Reviewing your snippets lets you control when and where snippets work. Also, I adjusted settings and organized my snippet library to avoid confusion.

Here’s a snapshot of how I use Text Blaze through a typical workday.

1. Morning Message Routine

Despite the recommendation to not check your inbox before noon, I start my day with my inbox. Text Blaze helps me breeze through them in Slack, Gmail, and even WhatsApp Web. I have snippets for greetings, follow-ups, and common questions. Instead of typing the same sentences repeatedly, I type /gm for “Good morning!” or /fup for “Just following up on my previous message.”

2. Filling Out Forms

Whether it’s timesheets, project updates, or registration info, I’m always entering the same information. I created snippets for my name, address, and phone number. Now, I fill out forms in seconds, not minutes.

Though I suggest you don’t use snippets for information you want to keep private, like banking details.

3. Quick Notes and Templates

I keep snippets for meeting notes, to-do lists, and even code blocks. When I need to send a standard report, typing /report inserts the whole template. It’s a lifesaver during busy weeks.

As an experiment, improve your minimalist notetaking workflow with a few Text Blaze snippets.

4. Personal Journaling

Before logging off for the day, I write some thoughts in my journal. With Text Blaze, I can create the structure of a personalized recap with just a couple of keystrokes. Some snippets even insert the current date automatically.

5. AI Prompt Templates

The best ChatGPT prompts have a common structure. As it can get tiring copy-pasting them or typing them out, I save some of the more common ChatGPT prompts as snippets.

For instance, creating a dynamic snippet for a prompt can help you fill out the specific details much faster.

Go to the Text Blaze Gallery to see all the creative uses for text expansion. Use the Copy to Text Blaze button to use or customize them for your needs.

My fingers don’t race across the keyboard. As a slow typist, I no longer dread repetitive typing, and I make fewer mistakes. Maybe it can also help you reduce typing pain on your hands, too.

I like that the Text Blaze is free to start. You can upgrade for advanced features if needed. The Chrome extension is well-supported with documentation and the Text Blaze community.

You’re Missing Out on NFC—Here’s What Your iPhone Can Really Do

Most people think NFC on the iPhone begins and ends with Apple Pay—but it’s capable of way more. With a little configuration and a few cheap NFC tags, you can unlock the full power of NFC and make your iPhone work smarter.

4

Share Wi-Fi Details Easily

There’s no need to awkwardly recite your 20-character Wi-Fi password when a friend visits. We’ve all been there, reading the little sticker on the back of our router as our friend enter the details on their phone.

However, iPhones make sharing Wi-Fi credentials seamless by using a feature powered in part by NFC and Bluetooth. Here’s how it works: When someone tries to connect to your Wi-Fi network, and you’re already connected, a prompt will appear on your iPhone asking if you’d like to share the password. Simply tap Share Password, and their device is in—no typing, no QR codes, no mistakes.

This process is especially handy in a household or office with multiple devices. As long as both parties are in each other’s contacts and using iOS, the feature works seamlessly. It’s one of those little conveniences that makes it easy to forget we ever needed sticky notes with our Wi-Fi info.

3

Launch Automations and Apps With a Tap

Primakov/Shutterstock

This is where NFC really starts to feel like magic. By combining NFC tags with the Shortcuts app on your iPhone, you can automate all kinds of daily routines. All it takes is placing your iPhone near a tag to kick off one of the best iPhone Shortcuts or automations.

Want a shopping list to pop up when you’re near the fridge? Stick an NFC tag on the cabinet nearby and pair it with a Shortcut that opens your grocery app. Need a tag near your bed to help you wind down? Set it to turn off the lights, enable Do Not Disturb, and set your morning alarm in one go.

These tags are cheap on Amazon, and setting them up is surprisingly easy. All you need to do is open the Shortcuts app, create a personal automation, and select NFC as the trigger. then, scan your tag and choose the actions you want it to perform.

The only limitation is that your iPhone needs to be unlocked when scanning the tag, and tags placed on metallic objects are difficult to read. Otherwise, it’s an incredibly efficient way to turn physical spaces into smart, personalized zones.

Sure, you can also set up routines to activate based on location. But, if you work from home, that might be a bit difficult since your home and work are technically the same place.

There’s nothing worse than getting someone’s phone number—whether for a date or work—and entering it wrong in your phone. Apple released a new feature back in iOS 17 that helps alleviate that worry and it uses NFC to help make it possible.

NameDrop is a feature that is relatively unknown to many people despite some unfounded privacy scares when it was first released. But when turned on (it’s turned on by default), NameDrop lets you easily share your number with people by bringing your iPhone next to someone else’s to have both your contact cards appear onscreen. You can then choose to share your contacts with the other person, making it easy to exchange information.

It uses a combination of NFC and the tech that powers AirDrop to automatically recognize when two iOS devices are next to each other. It’s a great way to turn your contact card into a virtual business card.

If the person you’re connecting with doesn’t have an iPhone, you can still use Shortcuts to create an NFC-based automation that opens a digital contact card link (like a Linktree or vCard hosted on your website), but it is a bit more involved.

1

Setup Devices Without Entering Details

Airpods being set up on an iPhone using NFC

Dontree_M/Shutterstock

You might not realize it, but some of your favorite Apple products already use NFC to simplify the setup process.

Take AirPods, for example. The moment you open the case near your iPhone, a slick animation pops up on your screen asking to connect. There’s no need to go hunting through Bluetooth settings or looking for tiny pairing buttons.

Related

9 Cool Ways to Use NFC That’ll Impress Your Friends

NFC is more than just a gimmick! Learn how to use NFC and do a lot of cool stuff with it.

This entire “tap to connect” experience is powered by NFC, working silently behind the scenes. The same goes for products like the HomePod mini and AirTags. Just bring your iPhone close, and setup will begin automatically, thanks to integrated NFC triggers.

While iPhones don’t support full NFC background scanning like Android does, Apple’s use of NFC for seamless pairing shows just how powerful the tech can be when used right.

It’s easy to overlook how useful NFC can be when all we think about is how it powers mobile payments. But with a little work, NFC can become a powerful tool in how you manage your smart home and how you connect with others.

You’ve Set Up Your Smart TV All Wrong—Fix These 5 Settings

The moment you unbox your smart TV and start setting it up, you’re hit with a barrage of menus, suggestions, pop-ups, and confusing default settings. While you’re probably keen to swat these menus away, it’s worth taking a moment to check what they’re asking—they could make a huge difference to your smart TV experience.

5

You’re Letting Your Smart TV Spy on You

Most smart TVs are tuned to gather as much data as possible the moment they connect to your Wi-Fi. They track what you watch, when you watch it, and sometimes even what devices you connect to them. That information gets bundled up and sent off to advertisers, content providers, or whoever else is buying data behind the scenes. It’s easy to miss just how much of this is happening unless you dig into the settings yourself.

Oluwademilade Afolabi / MakeUseOf

So, first of all, start by turning off ACR, or Automatic Content Recognition. This feature scans the shows and movies you watch, even through HDMI devices like game consoles or streaming boxes, and sends that data out. Depending on your TV’s brand, you can usually find this under Privacy, Enhanced Viewing Settings, or something similarly vague. You should also disable anything related to Automatic Picture and Audio Quality, Content Recommendation, Personalized Ads, or Sports Mode Auto Detection.

Related

Change These Settings to Instantly Make Your Smart TV More Private

With just a few small tweaks, you can boost your smart TV privacy.

It’s also worth disabling voice recognition features if you’re not using them. Over the years, there’s been no shortage of buzz and a fair bit of unease around smart TVs constantly quietly eavesdropping in the background, even when you’re not actively talking to them. Although many manufacturers claim to anonymize recordings, you have no control over what’s stored or how long it’s kept. If you don’t use voice controls regularly, it’s safer to shut them down entirely.

Reviewing smart TV disclaimer and privacy terms.

Oluwademilade Afolabi / MakeUseOf

Lastly, review the terms you probably accepted during the initial setup. Most TVs don’t let you bypass all data collection without losing some functionality, but you can often opt out of the worst offenders. Revisit the setup or system menu, look for user agreements or privacy terms, and opt out of anything relating to data sharing, software usage stats, and marketing programs.

4

Your Picture Settings Need Attention

The single most powerful change you can make here is switching your picture mode from whatever default setting your TV shipped with (probably Standard) to something more cinema-friendly.

Picture modes on Hisense Smart TV.

Oluwademilade Afolabi / MakeUseOf

To fix this, you’ll want to dive into your TV’s picture settings and make a few meaningful changes:

  • Switch to a proper Picture Mode: Go for Cinema, Movie, or Filmmaker Mode, depending on your TV’s nomenclature. These modes dial down the exaggerated processing of the default mode and bring you closer to the director’s intent. For gaming, always use Game Mode to minimize input lag. I’d steer you away from Sport or Dynamic modes because they tend to overcrank the brightness and colors, leaving everything looking strangely overcooked and a bit surreal.
  • Adjust brightness, contrast, and backlight individually: Tweak the Brightness setting to control visibility of details in dark areas (if it’s too low, shadows may appear as indistinct black patches, so raising it slightly can reveal more subtle shading). Contrast adjusts how bright the brightest parts of the image appear, so increasing it can help preserve definition in highlights so that bright scenes don’t look washed out. Meanwhile, the Backlight setting should be tuned to suit your environment: lower it in a dark room, like during movie night, to avoid eye strain and enhance black levels, and raise it during the day to keep the screen easy to see in bright ambient light.
  • Set Sharpness lower: High sharpness settings don’t improve image clarity as they add fake outlines. You’re usually better off turning it down to near-zero to preserve fine details without distortion.
  • Color and tint: When adjusting color and tint settings, it’s best to start with the color temperature. I recommend choosing Warm to avoid overly bluish whites. Next, fine-tune the tint or hue so that skin tones look natural, not too red or green. Usually, keeping that slider somewhere around the middle (0) does the trick. Finally, adjust the color or saturation level so that colors appear vivid and full of life without looking exaggerated or unnatural.
  • Kill the “enhancements”: Turn off Motion Smoothing, Dynamic Contrast, Noise Reduction, Intelligent/Smart Scene, and any so-called Eco or Adaptive features. They often do more harm than good by trying to outthink what you’re watching.

Most importantly, understand that there’s no one-size-fits-all setting. A dark movie night calls for different tweaks than a sunny afternoon sports game. So, tweak accordingly.

Related

Your Smart TV Looks Bad Because of That Cheap Old Cable—Here’s What to Replace

If your smart TV isn’t performing as advertised, you may want to check your cables.

3

Your Audio Settings Aren’t Doing Your Speakers Justice

There’s no point in reinventing the wheel here, as we’ve already put together a comprehensive guide to getting the best sound out of your smart TV before spending money on a soundbar. On top of that, you should switch your audio output to PCM instead of Bitstream if you’re using the TV’s built-in speakers or a basic soundbar. That way, your TV handles the audio processing directly, which often produces cleaner results than letting external devices do the work. But if you have a dedicated home theater sound system, the opposite applies; use Bitstream to pass uncompressed audio to your receiver.

Audio settings on a Hisense smart TV.

Oluwademilade Afolabi / MakeUseOf

You should also turn off Virtual surround or 3D audio processing unless you are rocking a proper surround sound setup. These features attempt to simulate spatial audio through stereo speakers, but make the sound worse most of the time.

2

Your TV Is Connected to the Wrong Network Band

Your smart TV probably supports both 2.4GHz and 5GHz Wi-Fi bands. To confirm this, go to your TV’s network settings and look for available Wi-Fi networks. If it lists both 2.4GHz and 5GHz networks separately (e.g., “DemiWiFi_2.4” and “DemiWiFi_5G”), and you can connect to the 5GHz one, then your TV supports dual-band Wi-Fi.

The improvement that comes with the 5GHz band becomes immediately noticeable with high-resolution content. 4K streaming typically requires 25 Mbps, and HDR content needs even more bandwidth. The 2.4GHz band, bless its heart, often buckles under that load, especially if it’s already juggling phones, laptops, and your neighbor’s smart fridge. Moving to 5GHz provides the headroom needed for consistent, high-quality streaming without the frustrating pauses that interrupt your viewing experience.

A major stumbling block here is that walls and distance can affect 5GHz performance more than 2.4GHz. If your TV is several rooms away from your router or separated by thick walls, you might need to test both bands to see which performs better in your specific setup and select accordingly.

Related

You Can Use These 6 Smart TV Apps Without Wi-Fi

You can still use your smart TV offline, provided you’re prepped in advance.

1

You’ve Left Firmware Auto-Updates Turned On

Disabling auto firmware upgrade on Hisense smart TV.

Oluwademilade Afolabi / MakeUseOf

Most smart TVs ship with automatic firmware updates enabled by default, and while this might seem convenient, it creates several problems you probably haven’t considered. These updates often arrive at the worst possible times, interrupting your viewing experience with lengthy installation processes that can take 30 minutes or more. Your TV might restart unexpectedly during a crucial scene or force you to wait through update screens when you just want to relax.

Beyond the timing issues, automatic updates can introduce unwanted changes to your TV’s interface, move settings around, or even add new ads and promotional content you didn’t ask for. Some manufacturers use firmware updates to push additional streaming services, change menu layouts, or modify picture settings that you’ve carefully calibrated. You might discover that your preferred apps have been rearranged or that new “features” have appeared that actually make navigation more cumbersome.

Turning off automatic updates gives you the power to research each update before installing it. You can read user reviews, check forums for reported issues, and choose when to update based on your schedule rather than the manufacturer’s timeline. Navigate to your TV’s system settings, look for Software Update, System Update, or similar options, and select any option that suggests disabling automatic updates. You could set the system to notify you when updates are available instead.

I Switched to These Privacy-Focused Apps—You Probably Should Too

Tech companies track, collect, and sell information. After realizing how much information I was giving away daily, I ditched some of the services I was using and replaced them with privacy-focused alternatives that genuinely respect my digital footprint.

4

SimpleLogin Keeps My Email Address Private

We leave email addresses everywhere online. After signing up for countless services over the years, I realized my primary email address was probably floating around in hundreds of databases. That’s when I discovered SimpleLogin, which changed how I approach online registrations.

SimpleLogin is an email aliasing service by Proton that acts as a privacy shield between you and the services you use. Instead of giving out your real email address, you create unique aliases that forward messages to your inbox. This way, you can also disable any alias that starts receiving spam or gets compromised.

The free plan gives you ten email aliases to start with, which is perfect for testing the waters. However, you can upgrade to the premium plan for $36 annually or $4 monthly to get unlimited aliases.

Related

Why I’m Leaving Gmail and Using This Security-Focused Email Service Instead

I’ve been using Gmail for years, but it’s time to make the switch.

Email aliases also come in handy when shopping online. If a company experiences a data breach or sells your information, you know exactly who’s responsible. For that reason, I use email aliases for all my online shopping.

SimpleLogin can also block email tracking pixels. You’ll never notice an email tracking pixel, but they are tiny, invisible images that marketers use to monitor when and how often you open their emails. By using email aliases, companies no longer know exactly when I check my inbox, which felt incredibly useful once I learned about it.

3

I Replaced Google Password With Proton Pass for Password Management

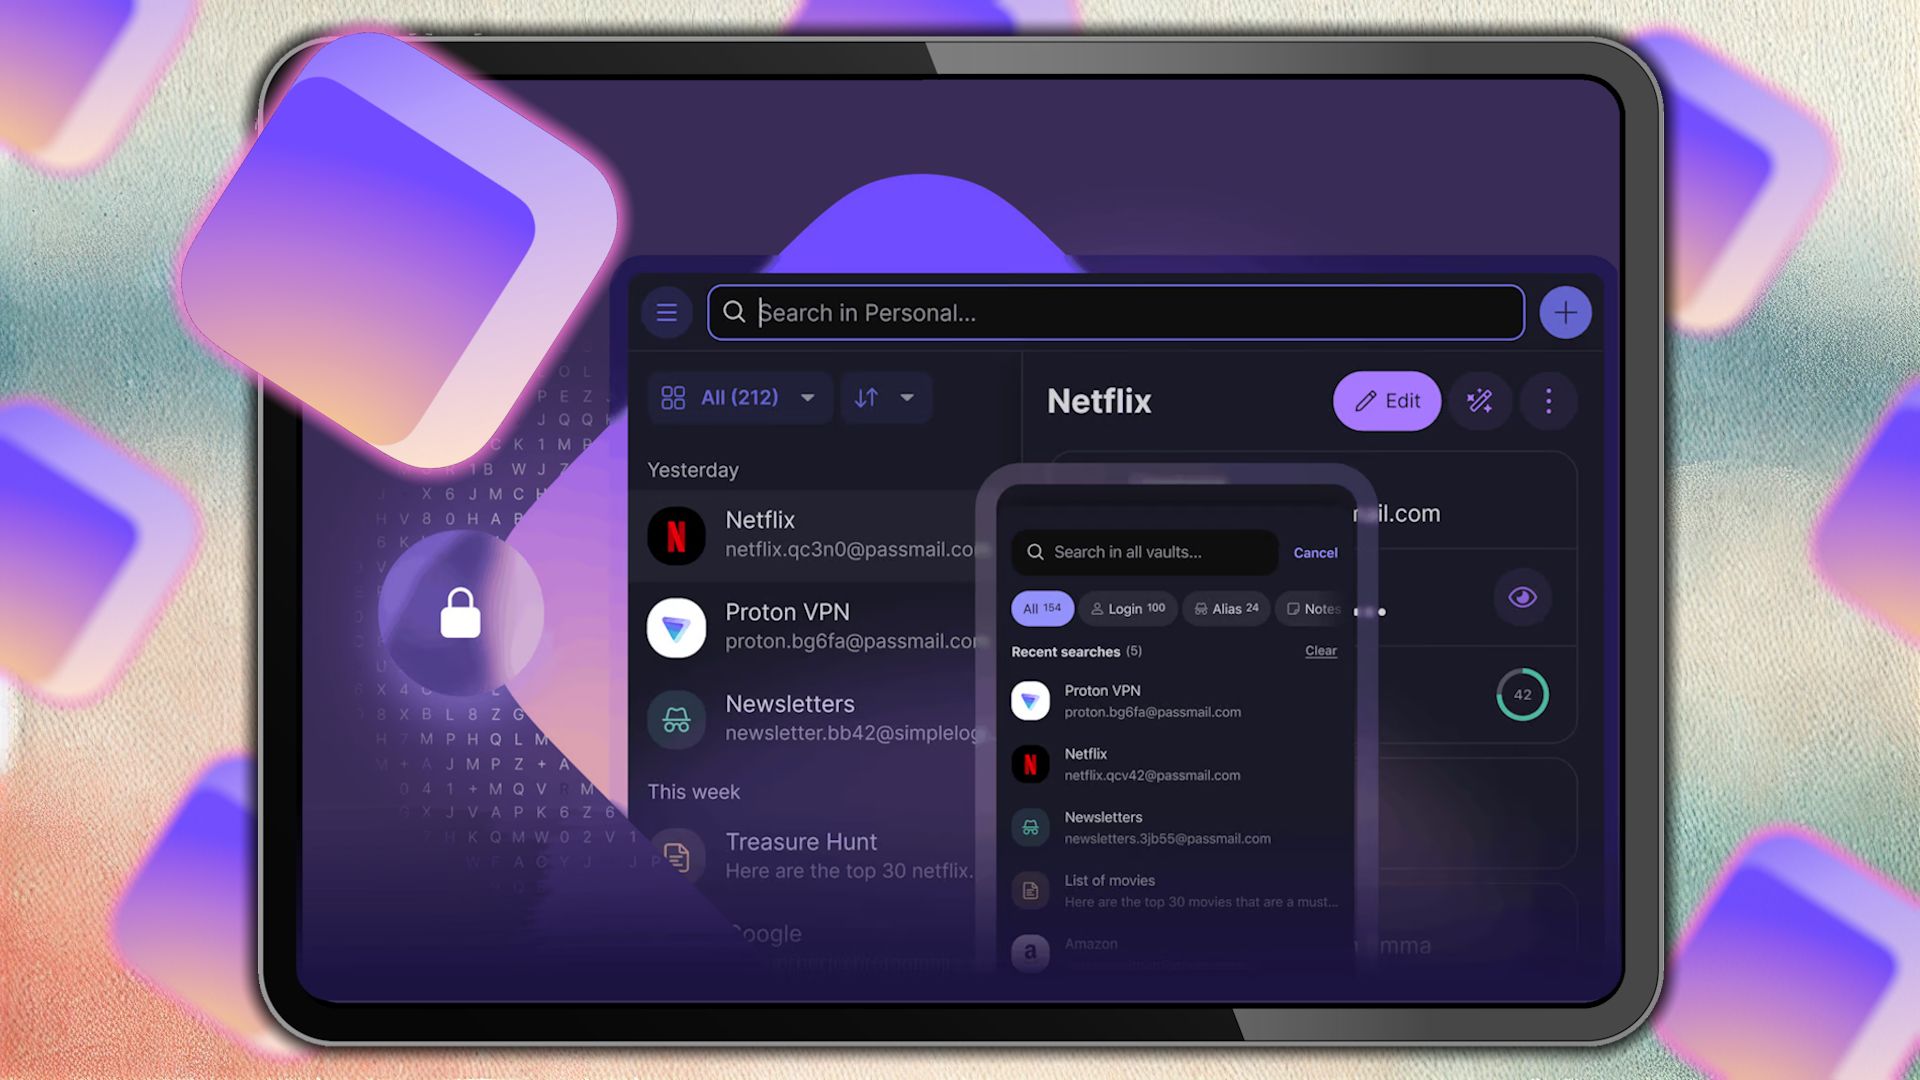
proton pass logo and interface on tablet screen.

Ankit RG Garg / Shutterstock / Proton Pass

I used Google Password Manager for years without giving it much thought. It was convenient, integrated with Chrome, and free—what was not to like? While Chrome can now automatically change your weak passwords for you, this convenience comes with privacy trade-offs I’m no longer willing to make.

Google’s password solution lacks advanced security features, has compatibility limitations outside its own ecosystem, and most importantly, doesn’t use zero-knowledge encryption.

Related

Is Google Password Manager Safe and Secure?

Google might ask you if you want it to store your login credentials, but can you trust Google’s own Password Manager? Is it safe to use?

Proton Pass is my favorite password manager because it embraces end-to-end encryption as a core feature, not an afterthought. Every password, secure note, and credit card detail is encrypted before it ever leaves my device. Not even Proton can access this information.

What sealed the deal for me was a privacy-first approach combined with practical features. The interface is clean and intuitive, the browser extension works flawlessly, and the mobile app allows me to always have my passwords securely available. Plus, the free tier is genuinely usable, too, and doesn’t push upgrades.

Related

A Strong Password Isn’t Bulletproof: It’s Still Weak to These 7 Attacks

Your password is strong and secure, but what about the rest of your security practices?

2

Joplin Is My Notes App Alternative

Note-taking is one of those things I do constantly throughout the day. I needed a private alternative to Google Keep and the default Notes app, and therefore, Joplin became my go-to notes app.

Unlike other apps, Joplin is open-source. Its code is publicly available for anyone to inspect. With this transparency, I don’t have to blindly trust the developers—the community can verify that it’s not collecting data or adding suspicious features.

The app’s functionality rivals any mainstream note-taking tool I’ve used. I can create everything from simple text notes to complex multimedia documents with embedded images, math formulas, and diagrams. The markdown support is particularly useful for someone like me who writes for the web regularly.

Joplin synchronizes across all my devices, and its organization system balances flexibility and structure. Although Joplin features potent security with end-to-end encryption and biometric lock capabilities, I still maintain certain boundaries. I never save passwords in any note-taking app, including Joplin. Call me paranoid, but I prefer to keep that information strictly in my password manager for better security.

Download: Joplin for Android | iPhone (Free, subscription available)

1

Private Browsing Is Easier With Proton VPN

One evening, I was researching kitchen appliances, and the next day, my social media feeds were flooded with air fryer ads. That invasion of my browsing habits was the final straw that led me to take my browsing privacy seriously. After researching various VPN options, I settled on Proton VPN.

I started with the free tier to browse privately. Proton gives you access to servers in 5 countries (randomly selected). This basic level of protection was enough to convince me of its value, especially since many free VPNs are sketchy at best and downright dangerous at worst.

The Proton VPN Plus subscription provides access to over 12,000 servers across 110 countries, ensuring I’m never limited by slow connections or regional restrictions. I particularly appreciate the split tunneling feature, which lets me route only certain apps through the VPN while others use my regular connection. It means I can keep my banking app on my direct connection for security while protecting everything else.

You can also use the double-hop VPN feature for sensitive browsing. It routes traffic through two different servers in separate countries, making it exponentially harder for anyone to track your activity. It might sound like overkill, but this extra layer feels increasingly necessary rather than paranoid, given how aggressive tracking has become.

The Proton VPN subscription isn’t the cheapest option, at $4.99 per month (billed annually) or $9.99 (billed monthly).

Download: Proton VPN (Free, subscription available)

Related

My Favorite Private Email and VPN App Is About to Get Much Cheaper

It’s not just Proton that’s getting cheaper.


Taking back control of your privacy doesn’t happen overnight. It’s a journey of small, intentional changes that add up to significant protection. Each app I’ve switched to represents one less company monitoring my searched terms and one less data point being sold to advertisers.

If you’re feeling overwhelmed, start with one change. Maybe it’s creating email aliases or using a VPN when browsing. Each small step immediately makes a difference. Your digital footprint is worth protecting, and these tools make it easier than ever.

Your Asus Router Model Might Be One of Thousands Hacked: Here’s How to Know

More than 9,000 Asus routers were silently hacked, and if you own one, there’s a chance yours is on that list. Luckily, you don’t have to wait for things to go south to find out.

Over 9,000 ASUS Routers Compromised in Ongoing Attack

A cybersecurity firm, GreyNoise, claims to have identified an “ongoing exploitation campaign” affecting thousands of ASUS routers exposed to the internet.

The report states that the attackers behind the campaign, who remain unknown, have gained unauthorized and persistent access to over 9,000 ASUS routers. Based on their tactics, including stealthy initial access and abuse of built-in system features to maintain control, GreyNoise says the activity points to a well-resourced and highly capable adversary, consistent with those seen in advanced, long-term campaigns.

The attackers reportedly used brute-force login attempts and two different authentication methods. After successfully accessing the ASUS routers, they exploited a known vulnerability (CVE-2023-39780) to run arbitrary commands. Through this, they enabled SSH access if it wasn’t already active and inserted their own public SSH key, granting persistent access.

Since the SSH key is stored in the non-volatile memory (NVRAM) rather than the file system, it survives reboots and firmware updates. The hackers took it one step further by disabling logging as well, removing any traces of their access. Surprisingly, the report claims the attackers don’t seem to be installing any sort of malware, which ultimately leads to the question—why the attack? GreyNoise says in its report:

This appears to be part of a stealth operation to assemble a distributed network of backdoor devices — potentially laying the groundwork for a future botnet.

In case you don’t know, a botnet refers to a network of hijacked computers or devices used to carry out scams and attacks, all remotely controlled by the attackers. Typically, the best course of action in such cases would be to update your router’s firmware. However, doing so won’t help here since the attackers’ changes are stored in the router’s NVRAM.

Related

Does Resetting a Hacked Router Make It Secure Again?

So, you’re router’s been hacked. The best solution is to reset the hardware, but does that make it secure again? Here’s what you need to know.

Thankfully, there’s still a way to check if hackers managed to get access to your ASUS router. You can do this by logging into the router’s firmware and heading to the Administration section. Then, look for the Enable SSH option under the Service header.

ASUS router Admistration settings displaying the Enable SSH setting

If your router has fallen victim to the attack, you’ll see that SSH access is enabled on an unusual port, specifically port 53282, along with the following truncated SSH public key: ssh-rsa AAAAB3NzaC1yc2EAAAABIwAAAQEAo41nBoVFfj4HlVMGV+YPsxMDrMlbdDZ…

Since a firmware update won’t fix this, the best solution is to factory reset your router. Asus also advises removing or disabling the SSH entry, along with blocking the following IP addresses: 101.99.91.151, 101.99.94.173, 79.141.163.179, and 111.90.146.237.

If you’re among the lucky ones, now’s a good time to update your router’s firmware to prevent falling victim to this in the foreseeable future. That’s because Asus fixed the CVE-2023-39780 flaw that allowed hackers to run arbitrary commands on the router.

Your Smart TV Might Be Watching You—How to Check Your TV for Cameras

I’m willing to bet you shot a quick look over at your TV the moment you read the title. Yeah, you read right; your smart TV could have a camera, and here’s how you can figure out where it’s hiding.

Smart TVs With Built-In Cameras Are Inherently Not Bad

Hold on; just in case you happen to find that your TV has a camera, I’d like to categorically state that built-in cameras on smart TVs aren’t entirely designed with malicious intent. These cameras serve legitimate purposes that can genuinely enhance your entertainment experience when used properly.

Gorodenkoff / Shutterstock

Video calling is the most obvious benefit. With a camera integrated directly into your TV, you can make large-screen video calls through group conference call apps, like Zoom or Google Meet. Other useful camera features include content creation capabilities, personalized viewing experiences enabled by facial recognition technology, gesture-based navigation controls, and fitness tracking during home workout sessions.

Related

6 Weird but Useful Things You Can Do With a Smart TV (That Aren’t Watching TV)

Watching television on your smart TV is merely scratching the surface.

Now, all of this presumes you know your TV has a camera in the first place. Ideally, manufacturers should be upfront about it, documenting the camera’s presence in the user manual, explicitly highlighting it during the initial setup process, and accompanied by clear on-screen indicators whenever the camera becomes active. More importantly, your manufacturer should provide straightforward methods to disable the camera if you’re not comfortable having it on.

Smart TV Cameras Are Often Hidden in Plain Sight

First, move closer to your TV and check its top bezel. This is the sweet spot for most built-in cameras, especially on popular brands like Samsung, LG, or Sony. Look for a tiny pinhole or a slightly raised bump along the upper edge, usually dead center or slightly off to one side. If you have an older smart TV, look closely to see if it has a pop-up camera that retracts into the frame when not in use. If you see a small plastic piece that looks like it could pop up or slide, gently tap it to see if it’s retractable.

Didn’t find anything? Next, scan the sides or corners of the bezel. If your TV has a logo or branding on the bezel, inspect nearby, as cameras are sometimes camouflaged next to these design elements. Don’t overlook the bottom edge either. While less common, some brands place cameras near the bottom, often integrated with sensors for motion or voice control. These can be harder to spot, especially if the TV has a glossy finish that reflects light and distracts the eye. Tilt your head or use a flashlight to catch any unusual glints that might indicate a lens.

If you’re still unsure whether your TV has a camera, grab your remote and navigate to the settings menu. Look for options like Camera Settings, Video Call, or anything related to motion or gesture control. If these features exist, a camera is likely involved. You can also cover your bases by checking the user manual or the manufacturer’s website for your TV’s model number and searching for terms like “camera” or “webcam” in the specs. Also, go the extra mile of scouring through user reviews on sites like Amazon, Reddit, and Quora to see if anyone has made such a discovery.

Now, if you’re confident at this point that there’s no built-in camera, don’t breathe easy just yet.

A determined snoop (or worse, someone with access to your space) could stealthily attach a third-party spy webcam to your TV or somewhere on your entertainment center. These can be incredibly small, magnetic, and disguised as everyday hardware. Take a moment to inspect the back of your TV, especially near USB ports or ventilation slats, where a rogue device could be drawing power or tucked away. Look for anything that doesn’t match the factory design: a new bump, a strange light, or an unfamiliar plug.

Related

6 Ways to Find Hidden Cameras in Any Room

Suspect there is a hidden camera in your home, hotel room, or Airbnb? Use these techniques to detect hidden cameras anywhere.

What to Do if You Discover a Camera on Your TV

If you find a “hidden” camera on your smart TV and you are not pleased with your discovery, head straight to your TV’s settings menu and look for privacy, security, or camera-related options. These settings might be buried deep in submenus, so you might need to dig around. Look for sections labeled Privacy, Permissions, Smart Features, or Voice and Video. Once you find the camera settings, disable any features you didn’t knowingly activate. This includes voice recognition, gesture control, personalized advertising, and any “smart” features that require camera access.

Webcam cover on a MacBook Air

Pawel_Brzozowski / Shutterstock

While you’re sorting out the settings, place a small piece of opaque tape or a sliding camera cover over the lens. This gives you immediate peace of mind and prevents any potential unauthorized access. You can also simply use a small piece of electrical tape. Just make sure whatever you use doesn’t damage the TV screen or leave residue when removed. And if you find a camera that appears to be an add-on device rather than built into the TV itself, unplug it immediately and consider contacting your local law enforcement if you suspect foul play.

If you’re still uncomfortable after taking these steps, you can entirely disable your TV’s internet connection. You’ll lose smart features and streaming apps, but you can still use external devices, such as Roku, Apple TV, or gaming consoles, for entertainment. Simply disconnect the Ethernet cable or remove the TV from your Wi-Fi network through its settings menu.

Related

Here’s Yet Another Reason Not to Connect Your Smart TV to the Internet

Owning a smart TV is a tiring, privacy-invading process.

Even Without a Camera, Your Smart TV May Still Be Monitoring You

Turning off Automatic Content Recognition on Hisense smart TV.

Oluwademilade Afolabi / MakeUseOf

Smart TVs don’t need a camera to keep tabs on you. In fact, many of them collect a surprising amount of data through other, less obvious means, especially via the software and services they run in the background. One of the main culprits is a technology called Automatic Content Recognition (ACR).

ACR quietly scans whatever’s playing on your screen and matches it against a massive database to identify what you’re watching. This information is sent back to the manufacturer or a third-party analytics company, which builds a profile of your viewing habits. That data can then be used for targeted advertising, content recommendations, or sold off to advertisers. It sounds a bit creepy, but it’s real, and it’s often enabled by default.

Even your remote clicks and menu navigation are fair game. TV operating systems track app usage, voice commands (if you have a mic-enabled remote), and how you interact with the home screen. Smart TVs are increasingly designed like smartphones, always online and always collecting.

Dive into your TV’s settings and disable any features that sound like they’re monitoring you, like ACR and voice recognition (if available, and you’re not using it). Different brands bury these features in slightly different places, so be prepared to hunt a bit. Additionally, avoid logging into TV-branded accounts, as this also opens the door to deeper tracking. If you can use the TV without signing in, you’ll retain more control.

Your Intel Mac Might Not Get Any More Updates: Here’s How to Check

Ever since Apple moved to its own silicon, support for Intel Macs has slowly been dropping. With the upcoming macOS 26, even more Intel-based Macs are being discontinued, so if you’re still using one, it’s time to consider upgrading.

More Intel Macs Kick the Bucket

AppleInsider reports that the latest macOS version, currently called macOS 26, will be dropping support for the 2017 iMac Pro, 2018 Mac mini, 2018 MacBook Pro models, and 2020 MacBook Air. So if you’re holding on to your older, Intel-based Mac, chances are you’re going to miss out on the next big macOS update.

Zarif Ali / MakeUseOf

Specifically, the pre-release version of macOS 26 supports the following devices:

  • MacBook Pro 2019 or later
  • MacBook Air M1 or later
  • iMac 2020 or later
  • Mac Pro 2019 or later
  • Mac mini M1 or later
  • All models of the Mac Studio

If you have an older Mac, chances are you’ll be missing out on all the new visual changes and Apple Intelligence features that come with macOS 26—a strategy similar to what Apple did with the iPhone, limiting its latest AI features and UI enhancements to newer devices. It’s likely that the company will drop support for the remaining Intel Macs by 2026.

macOS 26 is set to be the biggest software update for Macs since at least Big Sur, with the primary goal of achieving more cohesion between Apple’s various operating systems. Bloomberg reports that the iPhone-maker plans to unify the look of iOS, iPadOS, and macOS for a more streamlined experience.

However, all these new visual and feature additions are going to cost you storage space. The first developer beta of macOS 26 is expected to be over 17GB, nearly 2GB larger than its predecessor, macOS Sequoia. You can expect the final name for the upcoming macOS version and other details to be revealed at WWDC 2025 on June 9.

It’s Time to Upgrade to Apple Silicon

The move is clearly aimed towards slowly phasing out older, Intel-based Macs and transitioning to an environment where both the software and hardware are entirely made by Apple.

M4 MacBook Pro with screen tilted down on wooden table

Zarif Ali / MakeUseOf

The devices being dropped for macOS 26 aren’t poor machines in terms of hardware, and chances are you’ll still be able to use them for at least a couple of years before feeling the need to upgrade. However, with no new software updates, you’re left open to security vulnerabilities, meaning you have no choice but to upgrade to a newer, M-series Mac if you want to continue strolling Apple’s walled gardens.

Some macOS features may make you ditch your Windows PC, but unless you’re buying an M-series Mac, it’s not going to last you long. There are also some macOS Sequoia features Windows 11 already has, so if you want to stick with Intel, jumping over to Windows or Linux might be the best way forward.

Can Copilot Really Create a Presentation from My Notes? I Tried It

Microsoft’s AI assistant, Copilot, promises to create a polished PowerPoint presentation with a single prompt. But how does the final product look, and is it accurate? Let’s see how it did when I fed it my rough notes.

Copilot Turned My Notes Into a Full Presentation in Minutes

You need a Microsoft 365 subscription to get started with Copilot in PowerPoint. It’s worth it because a Microsoft 365 subscription can pay for itself in many ways, since its perks include full access to the Office apps and 1TB of OneDrive storage space. The subscription starts at $9.99 per month for the Personal plan, and you can also use Copilot in Word and Excel.

To use Copilot in PowerPoint, open the app and create a blank presentation. Then, click the Copilot button on top of the slide in the editing window.

You’ll now see a Copilot window with a prompt that says Create a presentation about. All you have to do is enter the topic, paste in your notes, and hit the Enter key. Here’s an example prompt I used before pasting in the notes:

Create a presentation about Six Sigma based on the notes below.

Writing a prompt for Copilot to create a PowerPoint presentation.

Once I was happy with the overview of the content it would create, I clicked Generate slides in the bottom right corner.

If you need to add a new line, press Shift + Enter instead. Pressing Enter alone will start generating the slide.

After a few seconds, it generated about 22 slides (it can do a maximum of 40). If you don’t need many slides, be sure to specify that in the prompt.

Generating slides in PowerPoint with Copilot.

When I was satisfied with everything, I clicked Keep it to insert the slides in the presentation.

Adding Copilot-generated slides to a presentation in PowerPoint.

The Design Was Nothing Special

I divided my notes into five sections, so it was great to see that Copilot included them as well, along with an introduction and conclusion. The design was basic, with a white background, light text formatting, and stock images. It looked professional, though, in a minimalistic way.

If I wanted the design to look prettier, I would have to do the designing and formatting myself. Even if I generated an extra slide using Copilot, it would still provide the basic design and ignore everything I had done to the other slides.

A Copilot-designed slide in PowerPoint.

To have Copilot generate a new slide, click New Slide with Copilot in the Slides section of the Home tab.

Also, Copilot did not apply any animations or visual effects to the slides, but it did add a fade transition to all of them. Prompting it to improve these animations only gave me suggestions that I had to implement myself.

The Information Was Accurate Enough

One thing I loved about Copilot is that it expanded on my rough notes and made the presentation more engaging. I found the high-level overview it provided for the topic to be accurate. However, your mileage might vary depending on factors like the topic and sources used.

For this reason, it’s best to always double-check Copilot or the work of any AI with credible sources. These tools also have limits, which can cause them to make errors. In my case, Copilot oversimplified some things, requiring me to make corrections.

Related

I Tried ChatGPT and Copilot’s Deep Research Features, and This Is the Best Option

Using AI to complete deep research saves a lot of time, and there are multiple ways to do it.

If something doesn’t sound right, it’s easy to just select the text box with the text, click the Copilot button that appears next to it, and select Auto-rewrite. You can also ask Copilot to condense it or make it sound more professional by selecting the appropriate option in the Copilot menu.

Editing a text object with Copilot in PowerPoint.

Remember that the number of times you can prompt Copilot in PowerPoint and other Microsoft apps is limited to the amount of AI credits you have. The personal plan comes with 60 credits.

Once you use them all, you have to wait until the end of the month for them to reset. You can check how many AI credits you have left in the AI credit balance section of the Microsoft 365 plan when you visit your Microsoft Account page.

AI credit balance in Microsoft account settings.

The Speaker Notes Are a Nice Addition

The presentation also came with speaker notes, providing key talking points for each slide. However, the ones it had already generated were too short, so I asked it to add more.

To do that, click the Copilot button in the ribbon of the Home tab to open the Copilot panel on the right, then type Add speaker notes to the presentation.

Prompt for Copilot to add speaker notes to a presentation in PowerPoint.

After a few seconds, the speaker notes were ready to review, and they were on point.

Related

Live Captions and Translations Make My PowerPoint Presentations Better for Everyone

Live captions and translations in PowerPoint ensure everyone stays engaged and included during presentations.

If you need Copilot to help create a PowerPoint presentation, it definitely has you covered. Although the design won’t blow anyone away, the information it includes makes the slides engaging and can be very accurate. I can see this coming in handy when I need to prepare a presentation and am pressed for time.

You Can Now Speak to the Best ChatGPT Alternative With Your Voice

One of the best ChatGPT alternatives is getting even better. Anthropic, the developer behind Claude, has announced the arrival of Voice Mode to its mobile apps. This should give you even more ways to interact with Claude from your phone.

You Can Finally Talk to Claude on Your Phone

Voice Mode is still rolling out in beta on mobile devices. At the time of writing, I haven’t yet found it in the Claude app on any of my devices.

To check if you have access to Voice Mode, you simply need to open the Claude app on your phone—install it from the Google Play Store or the Apple App Store if you haven’t yet—and then load up a chat.

If you have access to Voice mode, you’ll see what looks like a wavelength icon in the bottom right of the chat. It should be located next to the microphone icon you use for speech to text.

Claude’s new Voice mode is available for both free and paid users of the language model. Paid users will also be able to use Claude’s Voice mode to access their Google Docs, Calendar, Gmail, and other web searches using voice conversations.

Just like ChatGPT’s Voice mode, which OpenAI released late last year, you can easily switch between both voice and text chat modes seamlessly. Anthropic says that previous context is also carried over in between modes and you can choose between five different voices.

Limited Availability

Anthropic says that Claude’s Voice mode is available in English within all of its mobile apps. It’s unclear yet when or if it will be available in other languages.

The company also says that those using the free version of Claude can expect around 20–30 messages before they have to wait for their session limits to reset, according to an updated support document. While that might not sound like a lot, it should at least let you try out the feature to see how useful you find it. Those with a paid Claude plan will be able to take advantage of the feature for longer periods of time.

Related

6 Reasons I Use Claude Instead of ChatGPT

ChatGPT is great; don’t get me wrong. But Claude is so much better.

Unfortunately, it doesn’t appear like Anthropic has provided any real insight into how long it will take the feature to roll out across the apps. However, you can check the app store on your device for any available updates, and download them for a better chance of getting access to the functionality.

Not sure what you can do with Voice mode in Claude? Take a look at our guide on ways to use ChatGPT Live for some ideas you can try in Claude, too.

4 Ways to Reuse Them

Is there an old hard drive sitting in your drawer collecting dust? It doesn’t have to. I’ve found some cool, creative ways to reuse my old hard drives and make sure they don’t get thrown away.

4

Turn Them Into External Drives/Backup Storage

Digvijay Kumar / MakeUseOf

The first thing I do with an old hard drive is check whether it’s still functional. If it passes the basic checks, I turn it into an external storage device. It’s a simple and budget-friendly way to revive your drive. All you need is a decent external enclosure or a SATA-to-USB adapter to connect it to a Windows PC. Once it’s hooked up, format it using NTFS, and it’s ready to start storing data again.

I use these drives to hold large video files, ISO images, or full system backups. Windows Backup or third-party apps like Macrium Reflect make it easy to offload bulky data, keeping my main SSD free for daily tasks. I have an old 1TB drive that holds archived project folders, while another stores system images from different machines. It’s a practical way to repurpose hardware that would otherwise sit unused.

Before putting a drive in storage, it’s crucial to test it. CHKDSK on Windows can detect basic file system errors, but you can also try other diagnostic tools to check your PC’s health and get a clearer picture of the drive’s condition. If you notice strange noises, long delays, or repeated errors, it’s better not to rely on it. However, if everything appears to be in order, it can still be useful for storing non-critical files or extra data backups. Just remember, older drives are slower and less reliable, so they shouldn’t be your only backup.

Also, make sure to check compatibility. Most drives from the last 10 to 15 years use SATA, which is compatible with most modern hard drive enclosures. 3.5-inch hard drives often require enclosures with built-in power supplies, whereas 2.5-inch laptop drives can operate on USB power alone. Using a USB 3.0 or newer port will also improve transfer speeds, which is particularly helpful when moving large files.

3

Create a Secure Vault for Sensitive Files

Another smart way to reuse old hard drives is to turn them into secure vaults for sensitive data. If you don’t want your documents, financial records, or personal archives in your everyday system, store them on an external drive you can disconnect and keep offline.

An external hard drive enclosure is connected to a laptop

Digvijay Kumar / MakeUseOf

Windows makes this process easy. If you’re using Windows Pro, Enterprise, or Education, you can encrypt the entire drive with BitLocker. That way, even if someone gets their hands on the drive, they won’t be able to access its contents without the right password. If you’re using a Windows Home version, you can utilize a third-party tool like VeraCrypt to encrypt the entire drive or select specific folders.

Once the drive is encrypted, move your sensitive files over and safely eject it when you’re done. I keep such a drive hidden away and only plug it in when needed; there’s no cloud syncing, no background access. It’s just a simple offline vault that keeps my data safe from digital threats.

If you have a security camera system installed in your home or office, chances are it comes with a digital video recorder (DVR) or network video recorder (NVR) for storing footage. Most of these systems have a dedicated slot for a 3.5-inch SATA hard drive, the same kind used in desktop PCs. So, if your drive is still in good working condition, you can install it directly into the recorder to capture and save video data.

The DVR box is placed on a white desk

Digvijay Kumar / MakeUseOf

The installation process is straightforward. Open the DVR or NVR unit, connect the hard drive using the SATA data and power cables inside, and mount it securely. When you power on the system, it will usually prompt you to format the drive before it begins recording. Once set up, the device will automatically save the footage directly to the hard drive.

The size of the hard drive directly affects how much footage you can store. A 500GB drive might only hold a few days of recordings, especially if you’re using multiple cameras or high resolutions. However, with a larger drive, like a 1TB or 2TB model, you can retain more footage before the system overwrites older data.

1

Repurpose Your Old Hard Drive for Virtual Machine Storage

If you enjoy testing operating systems, running simulations, or experimenting with different software environments, an old hard drive can be repurposed as dedicated storage for virtual machines. Instead of filling up your main system drive, you can install VM software like Hyper-V, VirtualBox, or VMware Workstation and configure it to store virtual hard disk files (VHD, VHDX, or VDI formats) on the old HDD. This approach keeps your primary SSD free from large virtual machine (VM) files and reduces system load during intensive tasks.

An older external hard drive is placed on a desk

Digvijay Kumar / MakeUseOf

While older HDDs can’t match the performance of modern SSDs, they’re still suitable for light-duty virtual machines and general testing. You can run a Linux distribution, simulate a legacy Windows setup, or isolate a software sandbox, all without affecting your main installation.

If you no longer need your hard drive, don’t just throw it away. Instead, pass it on to someone who could use the extra storage. Before doing that, make sure to wipe the drive properly. DiskPart, a built-in tool on Windows, is a solid option for securely erasing everything. Just be sure to back up your critical system data, as this process is irreversible. After wiping, test the drive to ensure it’s still stable and not on its last legs.

One of the Best Chrome Alternatives Is Dead, but You Have Other Options

Despite Google Chrome’s monopoly over the web browser market, there are plenty of good alternatives you could try. Arc, one of the best Chrome alternatives, is being discontinued, but you still have better options available.

Arc Closes Its Tabs for Good

If you’ve been using Arc, you’re already aware that The Browser Company (TBC) discontinued shipping new features for the browser some time ago. Currently, TBC only offers Chromium updates, bug fixes, and patches for security vulnerabilities. This left Arc’s rather dedicated userbase, including myself, wondering about the future of the browser, especially considering TBC had already announced it was working on a new browser called Dia.

Yadullah Abidi / MakeUseOf

Well, TBC CEO Josh Miller has answered the community’s questions in a post titled Letter to Arc members 2025. The post talks about where Arc fell short, where TBC went wrong, why it didn’t integrate Dia into Arc, and whether or not it’ll be open-sourcing Arc for the community to develop.

Miller’s letter is anything but official confirmation that Arc’s active development is over, and the company will only be providing required security updates and major bug fixes going forward. What was once one of the most innovative web browsers ever is now a niche product used by a small community of power users—the opposite of what TBC wanted to do with Arc. In Miller’s own words:

A lot of people loved Arc — if you’re here you might just be one of them — and we’d benefitted from consistent, organic growth since basically Day One. But for most people, Arc was simply too different, with too many new things to learn, for too little reward.

TBC’s first crack at web browsers didn’t challenge bigger browsers like Chrome, Firefox, or Safari, but it was different enough to make a place for itself. I have used Arc since February 2024, when I got entry to its beta program on Windows, until a few months ago, when the browser bordered on being practically unusable.

Most of my time daily driving Arc was spent hoping that TBC would achieve feature parity with the macOS version, but it never came to that. Arc on Windows was far inferior to its macOS version, but TBC did such a good job with Arc on Mac that I kept hoping for them to replicate it on Windows.

The lack of features on the Windows version kept Arc from being the ultimate Chrome alternative it aimed to be, at least on Windows. However, if you’re using macOS, it still is one of the best browsers you can use, despite this announcement.

There Are Better Browsers Out There

The community wanted Arc to be open-sourced so it could be developed independently. However, Arc is built on custom infrastructure called ADK, Arc Development Kit. It’s the secret sauce TBC uses to create its browsers, meaning it’s also at the core of Dia, its upcoming browser. Arc can’t be fully open-sourced without also exposing ADK, and TBC aren’t willing to make that code public yet.

This means it’s about time you start looking for alternatives, and you’re in luck. There is a surprising number of web browsers to try out in 2025, all with their unique take on the internet.

Zen browser with MUO website open

Yadullah AbidiMakeUseOf

Browsers like Brave, DuckDuckGo, or Avast Secure Browser do great from a security perspective. If you’re a tab hoarder, Vivaldi, Zen, and even Opera GX are great options. You also have the option of switching to a mainstream browser like Chrome or Edge. Based on my limited experience, I’d recommend staying away from Safari, though.

If you want my recommendation, go with Zen Browser. It’s my current daily driver, based on Firefox, and has proven itself in my quest to find the ultimate browser on Windows. If you’ve been using Arc and want to switch, Zen has a very similar layout and feature set, meaning you’ll feel right at home. It’s also available on macOS and Linux, so it really does cover all user bases and surprisingly fares much better on feature parity despite still being in beta.

I Finally Figured Out How to Make Audiobooks Stick—My 5 Top Tips

Listening to audiobooks is great for multitasking. It helps me take 10K walks without boredom or wash that foamy pile of dishes. But, unlike a physical book, I struggled to remember most of what I heard. After trying different methods, I found simple ways to make audiobooks stick.

5

Choose the Right Audiobooks for Active Learning

Not all audiobooks are made equal when it comes to learning. I used to pick books randomly or based on popularity. That led to frustration because some narrators spoke too fast or in a monotone voice. Others had poor structure, making it hard to follow the main points.

Choosing the right audiobook changed everything. I started selecting memoirs and autobiographies when I did mundane chores. For example, Educated by Tara Westover is a favorite. Audiobooks broken into short, well-defined chapters work best for passive listening. They let me pause the narration, reflect, and digest the content bit by bit.

As I use Audible for most audiobooks, it lets me listen to a sample. This helps me check if the voice and pace suit me. Reading user reviews on some of the best book reviews and rating sites also gives clues to the content. Look for specific mention of the “audiobook” version as the experience can be completely different across formats.

Picking the right audiobook in the right situation primes your brain to absorb and retain more. Relate knowledge-dense books to a similar activity. For instance, I listened to Born to Run while jogging and felt that I absorbed more from the book.

4

Use Speed Controls and Rewind Smartly

I once thought speeding through audiobooks at 1.5x – 2x pace was the fastest way to finish a book. Instead, I found it often meant missing important details or having to rewind repeatedly. That back-and-forth became annoying and disrupted my flow.

Adjusting playback speed based on content helped a lot. For easier, familiar topics, I speed up slightly—say 1.25x—to keep things moving. But for complex or new ideas, slowing down to 0.75x or even normal speed gives my brain time to process the information.

When I hear something interesting or dense, I pause and replay it right away. This reinforcement helps me catch nuances I missed the first time.

Let the content guide your pace. Sometimes that can mean slowing down or rewinding in a specific section or chapter more than you would like. But the payoff is that you can remember the key lessons better.

3

Take Notes or Highlight Alongside Listening

Passive listening was the culprit behind my poor retention. I started experimenting with note-taking, and it made a big difference. Jotting down ideas, quotes, or questions keeps me actively engaged. Even simple notes with simple keywords force me to process what I’m hearing rather than letting it wash over me.

Keep this as simple as possible. I use Google Keep or Apple Notes. I prefer Apple Notes for quick notetaking features. Apple Notes allows you to dictate voice notes and automatically transcribe them. It’s handy for the almost hands-free nature of audiobook listening.

The Audible app also supports Clips and Bookmarks (or highlights). Other audiobook apps also have this basic feature. I use those to “clip” my favorite snippets, write my own notes, or just mark key sections. Later, I can revisit these highlights and saved notes without re-listening to the whole book.

If writing or bookmarking isn’t possible during listening, pause at chapter breaks to summarize the main points with the Voice Memo app on the iPhone or the Recorder app on an Android. There are many voice journaling apps available, too.

2

Combine Audiobooks With Visual or Written Summaries

Some ideas are complex or abstract, and words alone don’t stick over a longer period.

Creating visual or written summaries helps fill that gap. After finishing a chapter or session, I spend 5-10 minutes making a simple mind map or outline. This shows connections between concepts and highlights the big picture.

I have experimented with Freeform on iPhone/iPad for rich visual notes.

Visual summaries don’t need to be perfect art. You can use sketch boxes and arrows on paper or use digital tools like Google Docs or free mind-mapping apps. The act of organizing thoughts by hand visually creates stronger memory hooks.

If written summaries work well for you, write down key takeaways in your own words. Just translating audio into text can deepen understanding. Of course, schedule regular reviews of your notes if you want to be deliberate about it.

Using sticky notes to visually index chapters of a book in Freeform

Many research studies categorically say that combining listening with writing or visuals activates multiple parts of the brain. That makes recall easier and more reliable later.

A big reason I struggled with retention was that I never applied what I learned. I jumped to the next book, and the knowledge stayed abstract and removed from my daily life.

Now, I make a point to create an action plan right after listening. This can be as simple as writing down one or two things to try based on the audiobook’s advice.

For example, if I listen to a productivity book, I’ll choose one new habit to test next week. Or if it’s about health, I set a small goal like drinking more water daily.

Now, thanks to AI, we can ask them to create detailed action steps for us.

Having a concrete plan connects the lessons to my reality. It gives me the motivation to remember and use the ideas. And taking action reinforces the learning through practice.

Often, I delay starting a new book in the same genre. Without this step, audiobooks just become part of the information overload.

Audiobooks action steps with the help of AI

Making audiobooks stick is a matter of being intentional and active while listening. It starts with choosing the right titles and then taking notes to set the stage for better memory. In between, adding visual summaries and creating action plans helps make audiobooks stick to your memory.

Spotify Might Finally Be Fixing Its Music Discovery

If Spotify’s discovery algorithm has felt a little off to you lately, you’re not alone. Thankfully, the streaming giant is aware of the issue and is testing new ways of fixing it.

Your Genre-Based Playlists Are About to Improve

Reddit user kwabb over on the r/truspotify subreddit discovered a few options in their Spotify-generated R&B genre mix. These options included more discovery options and several sub-genres of music, like:

  • Alternative R&B
  • Neo Soul
  • Pop R&B

Spotify’s genre playlists are often customized to what the app thinks you’d like to listen to. However, these recommendations can be hit or miss at times. They might also not align with your current preferences and often include older, more popular songs rather than new or underrated music from an artist you might not have heard yet.

The additional discovery options change the entire playlist, instead of simply filtering out the existing playlist that Spotify made for you in the first place. This means you get entirely new songs from different artists—a much better alternative than simply having to look up music yourself or relying on Spotify’s algorithm to get the next track right.

If Spotify is tracking cross-genre listening, the algorithm just has more data about what kind of music you like. If implemented, this feature should be able to get a more accurate understanding of your music taste, especially if you listen to cross-genre music a lot.

Finding Niche Music Will Be Easier on Spotify

The feature seems to target specific types of music, so it could make finding a niche, or smaller sub-genres of music, easier. As Spotify learns the crossover you have between two separate genres, your music suggestions can also improve, because now the algorithm knows you like two or more genres and can find tracks between them.

However, the feature doesn’t seem to be rolling out anytime soon. It seems to be a more controlled test to see how the feature fares with selected individuals before rolling it out publicly. Spotify hasn’t officially mentioned anything either, with a Spotify spokesperson saying the following when asked about the feature by Android Authority:

At Spotify, we routinely conduct a number of tests in an effort to improve our user experience. Some of those tests end up paving the way for our broader user experience and others serve only as an important learning. We don’t have any further news to share at this time.

In the meantime, there are third-party AI playlist generators that do a much better job than Spotify’s discovery algorithm. Spotify’s AI DJ can also take song requests if you don’t want to hand over your music to AI.

The ability to listen to unofficial covers and rare music is one of the reasons why I use YouTube Music instead of Spotify. However, if Spotify can fix its discovery algorithm and find music I actually like, I may well be tempted to switch back.

6 Reasons I Love Meta AI—and 6 Bits I Hate

I’ve used ChatGPT for years at this point, but I’m always interested in exploring other AI chatbots. When Meta announced its full standalone Meta AI app, I was curious to give it and Meta AI a real test. To my surprise, there are some elements I thoroughly enjoy, but I’ve also noticed some areas that need improvement.

Meta AI has evolved into a surprisingly capable assistant, combining speed, innovation, and a natural conversational flow in a way that makes it genuinely enjoyable to use. Its quick answers, flexible image tools, and intuitive interface make everyday tasks and creativity feel more engaging.

Direct Answers That Stick to the Point

Meta AI pulls up real-time info from the web in a refreshingly concise way. When you ask about current events, you get quick, direct answers that don’t feel like a 500-word article. Looking for the latest sports scores or a fast summary of a breaking news story? Meta AI delivers just what you need, with little filler.

The following images compare ChatGPT (left) and Meta AI (right).

  • A screenshot of an answer provided by Meta AI to a generic prompt

This focus on efficiency is a welcome change from other AI models that tend to go overboard with explanations. It’s perfect if you just want the facts and don’t need a lecture.

Speed and Responsiveness That Impress

Meta AI shines in terms of speed. Compared to other models, it feels particularly responsive. Tasks complete almost instantly, and its responses are fast enough to keep your momentum. It makes for a smooth experience, letting you focus on your goal rather than waiting for the system to catch up.

Its architecture plays a big role here. Built on Meta’s robust infrastructure, it utilizes edge computing to minimize latency so that even complex tasks, like generating a 3D video from an image, are completed quickly. Meta’s Llama AI updates and upgrades further improved its processing speed, making it even more responsive for tasks like 3D video generation.

These quick responses come with minimal trade-off in accuracy, holding a high standard of precision that makes it dependable for simple questions. In everyday use, this responsiveness is a major advantage. It creates a noticeable difference when much of your work relies on receiving accurate answers quickly.

Conversational Tone That Doesn’t Feel Overdone

Meta AI strikes a nice balance between casual and professional. It’s approachable without feeling too familiar or robotic. Conversations feel natural, without the awkwardness of overly forced humor or excessive politeness.

The following images compare Grok (left) and Meta AI (right).

  • A screenshot of an answer provided by Grok to a generic prompt

  • A screenshot of an answer provided by Meta AI to a generic prompt

From light conversation to more practical requests, Meta AI keeps things engaging without overdoing it. It’s a nice middle ground compared to some AI models, which tend to lean too much into forced humor or over-the-top politeness.

The Meta AI App Is Super Easy to Use

Meta AI’s standalone app is a major step forward for Meta AI, offering a clean, fast, and user-friendly experience. Unlike browser-based tools, the app brings everything—chat, image generation, voice input, and even 3D video creation—into one responsive and intuitive space.

Its sleek and minimal design prioritizes ease of use without sacrificing capability. Voice input is fully integrated and impressively accurate, using advanced speech recognition to understand natural language and carry conversations forward organically. Speaking feels as fluid as typing, making interactions feel seamless and intuitive.

Even if you’re not tied into Facebook or Instagram, the app stands on its own. For those who are, it adds an extra layer of personalization by syncing across Meta’s platforms. With accessible tools, fast performance, and a layout encouraging deeper use, the standalone Meta AI app is one of the strongest parts of the overall experience.

Incredible Image Customization Features

Meta AI’s image customization features are truly impressive. While many AI tools can create images from text, Meta takes it a step further, letting you control specific aspects of style, color, lighting, and texture. This level of customization ensures you get images that align with your vision, not just a generic interpretation of your prompt.

A screenshot of a group of images generated by Meta AI to a generic prompt

Similar to what you’d find in other leading AI platforms, Meta AI allows you to upload your image and modify it with a prompt. Meta AI can transform your original photo based on your instructions if you want to change the background, adjust the style, or add new elements. It opens creative possibilities beyond text-to-image generation, giving you more control and flexibility.

The following side-by-side images compare the original image (left) with the edited results from Meta AI (right).

Transform Images Into Stunning 3D Videos

One of the most exciting features of Meta AI is its ability to turn images into short four-second 3D MP4 videos. Instead of just static images, these videos have movement and depth, offering a fresh way to interact with visuals. It’s a unique feature that adds a creative twist you won’t find in many other AI tools.

With just a few clicks, you can generate visual content that feels artistic and alive. They’re especially powerful for creators looking to make eye-catching social media posts, animated presentations, or marketing assets that stand out in crowded feeds.

What’s more, Meta AI lets you upload your own photo and bring it to life with animation. You can apply motion effects that add depth and realism, all guided by a simple prompt. This makes it easy to transform ordinary images into dynamic visuals, perfect for storytelling, branding, or adding a personal, creative touch to your images.

Despite its impressive features, Meta AI struggles with key drawbacks, including limited technical reasoning and inconsistent memory. Its focus on Meta’s platforms and a few technical limitations hold it back from being a truly universal assistant.

Too Focused on Meta’s Ecosystem

Meta AI’s integration with Facebook, Instagram, and WhatsApp is a huge advantage for some, but it can feel limiting if you’re not deeply invested in Meta’s platforms. For example, for those active on Instagram, Meta AI’s personalized Instagram suggestions make the platform more enjoyable by connecting you with relevant content and communities.

If you don’t actively use these services, however, it can make the experience feel more like a Meta-branded assistant rather than a completely independent tool. Many of its features are designed to steer you back towards Meta’s ecosystem, whether suggesting Facebook posts or pushing Instagram Stories. As a result, Meta AI feels more like an extension of the company’s engagement strategy than a general-purpose assistant.

Struggles With Technical Reasoning

Meta AI excels at general knowledge and casual conversation, but when it comes to tackling complex problems or explaining technical topics, it’s not quite there. If you’re faced with a tough math problem or need a detailed scientific explanation, Meta AI doesn’t have the depth or reasoning skills of models like GPT-4o or Claude.

  • A screenshot of an answer provided by ChatGPT to a generic prompt

  • A screenshot of an answer provided by Meta AI to a generic prompt

It’s great for quick summaries, general knowledge, or casual conversation, but when it comes to detailed analysis or structured problem-solving, it falls short. This could be a major drawback for those looking to use AI for more intellectual or technical tasks.

Memory? What Memory?

Meta AI has an infuriatingly inconsistent long-term memory, meaning it often fails to retain context from one conversation to the next. This can make tasks that require continuity, like collaborative projects or ongoing research, feel disjointed. Each time you start a new conversation, you’re essentially beginning from scratch.

A screenshot showing that Meta AI's memory is very faulty

It also struggles with multi-part queries within a single conversation. Let’s say you’re planning a trip using Meta AI to assist you. It will likely forget your budget or destination preferences at some point mid-conversation, forcing constant backtracking.

This lack of memory makes the experience feel less personalized, especially when compared to other systems that do a better job of keeping track of past interactions.

No Option for Customizable AI Personas

Another downside is the lack of customizable AI personas. While other assistants let you tweak personalities or adjust how they respond to your requests, Meta AI stays fairly static.

The following side-by-side images compare the main Grok screen (left) with the main Meta AI screen (right).

  • A screenshot of the main Grok prompt screen

  • A screenshot of the main Meta AI prompt screen

This feels like a missed opportunity, especially when you can intuitively assign specific personality traits to ChatGPT and other LLMs. If you prefer a more personalized AI experience, Meta AI falls short in that regard.

“No Self-Censorship” Is Mostly a Marketing Spin

Meta AI’s marketing often highlights its “no self-censorship” policy, suggesting it’s willing to dive into tough or controversial topics. In practice, however, it still has several safeguards in place that prevent it from engaging fully with sensitive subjects.

It might be a bit more open than some models, but it still avoids certain topics, redirects conversations, and exercises caution around issues like political extremism or misinformation. While the promise is there, it’s not quite as boundary-pushing as expected.

The limits are subtle but firm. Ask about a divisive legal case, and it’ll summarize court records without touching ethical debates. Mention a conspiracy theory, and it deflects it with many disclaimers. This contrasts with LLMs like Grok, which lean into unfiltered takes. Meta AI’s middle ground feels safe but tame, going against its bold branding.

Image Generation Still Lacks Realism

While Meta AI’s image generation features are fun and customizable, they fall short when it comes to photorealism. The generated images often lack the sharpness and precision seen in newer models like GPT-4o or Aurora. The visuals may feel like a step back into 2024-style AI image generation: passable, but not quite at the level of realism or detail we now expect from AI.

The images often appear somewhat stylized or overly “artificial” compared to what other tools can produce. Close inspection reveals flaws like blurry edges on fine objects, textures often look too smooth or plastic-like, and hands rarely generate correctly.

This is fine for creative projects, but if you’re after something that feels more lifelike or true to a specific concept, you’ll likely feel underwhelmed.

Related

These Are the 3 Best New Features of Meta’s Llama 4 AI Models

Meta’s latest Llama AI model upgrade is a big one, making its AI chatbot better than ever.

Meta AI brings a lot to the table, especially regarding image customization and fast, concise answers. But it still has some flaws, like its inconsistent memory and limited technical reasoning. These limitations have led many to refuse using Meta AI altogether, preferring other AI tools that offer more flexibility and privacy.

For those who use Meta’s platforms, it offers a lot of value with its speed and creative features, but it’s not quite the all-in-one assistant it could be just yet. It’s an exciting start, and with further development, Meta AI could soon become a more robust competitor to other leading AI assistants.


6 Tasks I Automate Every Month to Avoid Burnout

After feeling burnt out for years, I took serious action to automate a number of tasks. Since then, I’m nowhere near as stressed as I used to be. I automate a mixture of work-related tasks and areas in my personal life.

6

My Recurring Monthly Expenses

I like keeping track of my income and expenses to ensure I’m maintaining a good cash flow. Beforehand, I used to manually add all of my expenses. This led to me getting stressed because I had to always ensure I added everything myself.

Having automated my own business expenses for a long time, I realized that doing the same with my personal outgoings would save even more time. Fixed monthly expenses, such as my rent and software subscriptions, are now set as recurring. I then only need to add things that are more impromptu.

I track my monthly expenses with Spendee, which also has a feature that allows you to integrate your bank to automate everything. The only reason I don’t use this tool is that the banking service I use is not listed.

5

Malware-Scanning

While scanning for malware is of course important, it’s not something I want to spend a lot of my own time doing. However, this became a problem when I then didn’t scan my device for multiple months. While nothing happened in this period, I quickly realized that I was putting myself in needless danger.

malwarebytes anti malware program full scan

Since automating malware scans, my computer now looks out for threats each day. I use Malwarebytes and am quite happy with it, but at the same time, various great alternatives to Malwarebytes Premium exist. For example, I’d consider Windows Defender if I had a Windows computer.

4

File Backups

It’s very easy to quickly set up a data backup strategy, and one of the main ways I do this is by automating my file backups. Beforehand, I used to back up content whenever I felt like it. This, however, would always put me at the mercy of something potentially going wrong. If that had occurred, I would have lost all of my important files and folders.

I primarily use iCloud to back up my files automatically. All I have to do is go to my iPhone or iPad settings and toggle on the Back Up This [Device] feature. Since I find the 5GB free allowance too limiting, I upgraded to iCloud+ and have no regrets in doing so.

With my computer, I can use Time Machine to automatically back up my device in general. Doing so means I have less to worry about if something goes wrong, and I can quickly restore my computer if I need to wipe everything for whatever reason.

3

My Calendar Schedule

I used to change my schedule each week under the guide of “well, I just want to shake things up and keep it interesting”. However, I have learned from experience that not having a consistent routine has made getting the results I want 10 times more difficult. Moreover, I needlessly stressed myself out.

Time Blocking in Google Calendar

I’ve now automated most of my calendar schedule by adding a clear routine I can follow each week with minimal changes. However, I also understand that I’ll sometimes need to add things on short notice. With my emails, it’s very easy to add events from Gmail to Google Calendar. I had to enable this in my settings as it’s not turned on by default (I live in the EU).

Tools like Zapier are also helpful for adding events to my calendar, which is also one of the best email productivity tools to save hours.

2

Task Completion

I normally use project management tools to keep track of my daily tasks and bigger assignments. But while they’re good for putting everything in one place, I always forgot to mark tasks as complete. This would inevitably lead to lengthy lists where I had to delete everything myself.

To tackle this problem, I set up automated task completion. Each time I trigger something (e.g., publishing an article), I can mark my project as completed. Many project management tools require you to pay for features like this, but I use Zapier to complete my desired results.

Automating a task in the Zapier app

Besides automating tasks in different software tools, it’s also possible to automate daily tasks in Windows 11 and on other operating systems.

1

Phone Focus Modes

Focus Modes are one of the best ways I stop myself from getting distracted while I work. To save time, I automate when I want each one to switch itself on. Time-based activations can work, but location-based Focus Modes are much better for me.

With this feature, I can turn on my work Focus Mode when I arrive at my coworking space and the workout one when I’m at my gym. This takes very little time to set up, and from my experience, it has been a complete game-changer.

Automating my daily tasks has made avoiding burnout much easier, and A few simple changes have led to a significant improvement in my overall well-being. I’m more productive, too, which is a nice byproduct.

How I Use My Phone’s Focus Modes to Be More Present in What I’m Doing

After years of my phone being a productivity crutch, I’ve transformed it into a machine that moves me faster toward my goals. Customizing my Focus Modes to be more present has been one of the biggest game-changers in this respect.

6

Screen Customization

When I first wanted to take productivity more seriously, I noticed that what was on my screen played a huge role in how focused (or unfocused) I was. If I had distracting wallpapers and widgets, it became far too easy for me to stop working and do something else.

Before I knew it, I’d be distracted for the next 20 minutes and unable to get back on track. Looking for a solution to this issue, I turned to screen customization.

With the Focus Mode settings on my iPhone, I can pick a new screen saver when a certain mode is enabled. I can pick from patterns and images saved in my Camera Roll, along with the default ones from my iPhone gallery.

In addition to customizing my screensaver, I have the option to change my phone’s home page if needed. If you try these and they don’t work for you, turning your iPhone into a dumb phone might help (ditto if you use an Android device instead).

5

Setting Automatic Schedules

Smartphones often have smart schedules that activate different periods of focus based on your previous habits. While generally reliable, it helps if you don’t have to wait for this to be activated. If you notice it isn’t one time, you may then have to manually go into your settings.

I don’t like being side-tracked when I’m trying to work, and as a result, I set automatic daily schedules myself. With my phone, I can do this based on time; this is generally good, but I sometimes have inspiration and want to work inconsistent hours.

The big game-changer, in my opinion, is location-based Focus Mode scheduling. I can set this to run when I arrive at my coworking space.

Another option would be to activate a mode when opening an app, but to be honest, this doesn’t work too well for me. Still, your mileage may vary; I therefore recommend trying it yourself.

4

Hiding Notification Badges

Switching off most of my devices’ notifications has been one of the easiest ways to skyrocket my productivity. When I’m working, I don’t want to be disturbed by constant noise on my screen. Most notifications are simply not very important; the world won’t know if I wait a few hours to reply to a text.

When activating Focus Modes on my smartphone, I toggle on the Hide Notification Badges option. By doing this, I no longer see the red numbered icon on my home screen for each app I’ve blocked. Doing this means I have zero temptations to clear the bubble.

Besides controlling notifications on my phone, I do the same on my computer, Apple Watch, and iPad. You can control notifications on Android, too, if you don’t use an iPhone.

3

Not Showing Notifications on the My Lock Screen

Besides turning off notification badges, I also refuse to show notifications on my Lock Screen. When I kept this feature on and tried relying solely on willpower, I constantly got distracted. My working day was over an hour longer than it should have been because of these actions.

To make this change, I simply selected Silence Notifications > Always. Besides silencing notifications from apps, this feature doesn’t give me incoming call notifications.

I’ve taken countless steps to limit access to distracting apps on my phone. First and foremost, I deleted all of the most distracting ones, such as Instagram and Gmail. After doing that, I used a screen time-limiting app to stop myself from any form of overconsumption.

When using Focus Modes on my phone, I only allow apps related to my tasks. This means that I don’t have access to my messages or anything similar. I can choose which apps I want to silence notifications from and which ones I want to enable.

By limiting my apps, it means that any notifications I receive are not the end of the world if I don’t see them. Enabling this tool is one of the easiest ways to maximize Focus Modes on an iPhone.

1

Using Focus Filters

Focus Filters have been another simple but effective way to fine-tune the app access I get while I’m working. I can use these for numerous apps, such as only allowing messages from certain people. Doing this means I know that anything I get is actually urgent and worth replying to quickly.

Another cool feature is that I can set Deep Focus sessions with the Opal app directly in my Focus Modes settings. This makes it much easier than going into the Opal app and turning this on myself. I could add other filters, too, such as calendar ones—but I personally haven’t found these necessary.

Slightly tweaking my phone’s Focus Modes has been one of the simplest ways to be more present in what I’m doing. I finish my work much faster than before, and I also feel like it’s easier to be present when speaking to others.

Try These 5 Smart TV Audio Tweaks Before Buying a New Soundbar

It’s enough to make you start scrolling through soundbar deals if you think your TV’s speakers are a lost cause. But before you throw money into one, it’s worth trying a few tweaks here and there on your smart TV to squeeze out better sound than you thought was possible.

5

Test Different TV Placements to Hear What Works

James Bruce / MakeUseOf

Don’t be the person who just plunks their TV down wherever there happens to be a power outlet; otherwise, you won’t get the best sound out of it. To find the best placement, run this quick test: pick a movie scene with crisp dialogue or a song you know like the back of your hand. Now, try moving the TV around—on a stand, mounted on the wall, maybe even try different shelf heights. As you shift it, really listen. Do the voices sound sharper when the TV sits on a solid surface? Does mounting it up on the wall make the audio feel wider and more spacious?

If your TV is mounted high, say above a fireplace, the sound from its speakers might travel over your head, making dialogue harder to catch. Ideally, position the TV so its speakers are at or near ear level when you’re seated. This directs sound waves straight to your ears. If wall-mounting isn’t an option, adjust the height of your TV stand or use risers to bring the speakers closer to ear level. Take notes on what works best in your space. If you have a friend, get their input too, just because an extra pair of fresh ears can catch details you might gloss over.

4

Explore Your TV Sound Modes

Smart TV showing different sound modes.
Oluwademilade Afolabi / MakeUseOf

Most smart TVs these days come loaded with a bunch of preset sound modes to give your ears the best possible experience, depending on what you’re watching. Here’s a rundown of what each mode brings to the table, quirks and all:

  • Standard Mode: This is most likely your TV’s default setting out of the box. It doesn’t emphasize any particular frequencies, so it works well for everyday shows and news. However, it can sometimes make dialogue sound a bit flat or get lost in background noise, especially in busy scenes.
  • Movie/Cinema/Theater Mode: Depending on what it’s labeled as on your TV, this mode typically boosts both the bass and treble and is great for action scenes and dramatic scores. However, depending on the mix, dialogue clarity can take a bit of a backseat.
  • Music Mode: Flip this one on if you’re binging music videos or catching a live-streamed concert. It notches up the midrange frequencies where vocals and most instruments sit to make the sound more alive, richer, and fuller.
  • Sports Mode: This one is for you if you love watching sports. It makes commentary and crowd noise pop, and would make you feel like you’re in the stands.
  • Game Mode: As you can already guess, it’s tailored for gamers. It trims down audio lag and highlights sound effects so that you can react faster to in-game cues.
  • News/Speech Mode: This preset is the best option when you just want to hear what people are actually saying. It boosts vocal frequencies and tones down background noise, especially helpful for dramas or talk shows.
  • Late Night/Night Mode: This mode compresses the audio range, reducing loud sounds while keeping dialogue clear. It’s neighbor-friendly and perfect for after-hours viewing.

So, depending on what you’re watching or when, you might want to try one of these.

3

Adjust Your TV’s Equalizer Settings

A smart TV showing equalizer frequency bands.
Oluwademilade Afolabi / MakeUseOf

If none of the presets feel quite right, you can still take matters into your own hands with some manual EQ tweaks. Head into your TV’s sound menu (typically buried under Settings > Sound > Advanced or Expert Settings—it varies depending on your smart TV brand) and hunt down the equalizer. You’ll usually find it broken into frequency bands with labels like what mine shows: 100Hz, 500Hz, 1.5kHz, 5kHz, 10kHz, and so forth. Here’s a general idea of what these bands control:

  • 100Hz–500Hz: Boosting this slightly can help voices sound fuller, but too much can make everything boomy or muddy.
  • 1kHz–5kHz: This range affects speech clarity. A small bump here can make dialogue pop, especially in talk-heavy content like dramas or news.
  • 10kHz and above: These higher frequencies handle sparkle and brightness. If things sound dull or muffled, nudging this upward might help—but go easy, or it can start to hiss.

Make small changes to the bands and test them out with content you normally watch, such as Netflix movies, YouTube videos, or sports. Trust your ears over the numbers. If it sounds right to you, then it is right.

Related

How to Use Equalizers (EQs) to Improve Your Audio

Knowing how to master equalizers will improve your audio. Let’s show you how they work.

2

Update Your Smart TV Firmware

A smart TV showing the option for System Update.
Oluwademilade Afolabi / MakeUseOf

Manufacturers regularly (or irregularly) release software updates that patch smart TV security flaws and fine-tune performance. Sometimes, they improve audio processing or fix bugs that could be messing with your sound.

Related

What Is a Firmware Update and Why Does Your Device Need One?

Almost every bit of hardware has firmware, but what is it and why might you need to update it?

To check if there’s one waiting for you, head into your TV’s Settings menu and check under Support, About, or System for an option called Software Update or Firmware Update. If your TV’s connected to the internet, it should be able to check for updates automatically. If not, you might need to download the update to a USB drive from the manufacturer’s website and install it manually (cumbersome, but doable).

1

Try Hooking Up Your Smart TV With a Bluetooth Speaker

A smart TV with a Bluetooth speaker in front of it.
Oluwademilade Afolabi / MakeUseOf

If your TV’s built-in speakers still don’t deliver after taking these steps, maybe you should try something different before reaching for your wallet. Consider a Bluetooth portable speaker, especially for small to medium rooms. Most smart TVs support Bluetooth audio, so you just need to head to your TV’s sound settings, find Bluetooth devices, and pair your speaker.

Related

Top 7 Specs to Check Before Buying a Bluetooth Speaker

Bluetooth speakers are brilliant, but make sure you check out these crucial specs before splashing your hard-earned cash.

Position the speaker in front of your viewing area for the best results. If the brand supports it, you might even be able to link two of the same speakers as a stereo pair for broader sound. You’ll get improved dialogue clarity, better bass, and the flexibility to move your speaker where you want it. Another substantial bonus is that tons of Bluetooth speakers come with companion apps where you can tweak the EQ to your heart’s content.

However, you need to keep an eye (or ear) out for audio lag. Bluetooth connections can introduce slight delays between video and sound. Most TVs have A/V sync or audio delay settings tucked away somewhere to help iron this out. But if you really want to nail the timing, look for speakers that handle aptX or aptX Low Latency, assuming your TV plays nice with those codecs. Oh, and always make sure your speaker is fully charged.

After All These Tweaks, You’ll Know Whether You Actually Need a Soundbar

At this point, you’ve probably squeezed every last drop of potential out of your TV’s built-in speakers. This is likely the absolute peak of what your TV’s audio can offer—so how does it sound to you?

If your TV sound noticeably better after all that tweaking, maybe you can put off splurging on a soundbar for now. But if you’re still running into any of these audio headaches, it might be time to give one some serious thought:

  • Dialogue remains difficult to understand, especially during quiet conversations
  • Bass still feels weak or non-existent during explosive scenes
  • The sound feels “trapped” in the TV rather than filling your room
  • You need to adjust the volume between quiet dialogue and loud action constantly
  • Audio becomes distorted at higher volumes
  • You can’t achieve sufficient volume for your room size

Related

How I Upgraded My Home Audio Setup Without Spending Much

You can make your audio so much better, and it doesn’t have to cost a month’s wages.

The truth is, even with the most careful fine-tuning, TV speakers have hard limits. They’re wedged into paper-thin frames, using teeny-tiny drivers with barely any room to breathe. There’s only so much you can do with settings when the hardware itself is fundamentally limited.

Why You Shouldn’t Blindly Trust the Compass on Your Phone

If you’ve ever used your phone’s built-in compass and felt something was off, you’re likely not imagining it. After testing several models, we encountered everything from pinpoint-accurate readings to complete directional chaos.

How Smartphone Compasses Actually Work

Your phone doesn’t contain a traditional magnetic needle. Instead, it uses a magnetometer, a sensor that detects magnetic fields. By combining this data with inputs from the gyroscope and accelerometer, your phone estimates the direction it is facing.

In theory, this is a clever approach. In practice, however, the sensors are highly sensitive and prone to interference. Magnetometers can be affected by everything from metal desks and nearby electronics to your car’s dashboard. Even magnetic phone accessories can interfere with accuracy. The compass in your phone is constantly battling a noisy and unpredictable environment.

Exploring exciting upcoming smartphone innovations could give us a glimpse into how future devices will handle compass functions more reliably. Hopefully, we’ll soon see improvements in accuracy and integration.

Not All Compass Apps Are Created Equal

Many people assume that if a smartphone includes a compass app, it will function as accurately and consistently as a traditional magnetic compass. Unfortunately, our tests told a very different story. Using a range of compass apps across various smartphones, we oriented each device in the same direction. The results? A baffling range of readings.

Some apps performed flawlessly. Others were off by as much as over 100 degrees, confidently directing us toward a brick wall instead of a doorway. Some compasses displayed different directions every time the app was opened. In certain cases, the compass only responded correctly after we physically shook or spun the phone.

As absurd as this may sound, it’s not technically a bug. Most compass apps rely on a combination of sensors and software calibration, which can vary widely in quality and responsiveness. The accuracy of these apps depends not just on the device’s hardware but on how well the app interprets that data. To improve your experience, make sure to read user reviews and research reliable compass apps, which can offer enhanced features and potentially better accuracy.

Calibration Isn’t Always Reliable

You’ve likely seen the prompt: “Move your phone in a figure-eight motion to calibrate.” It seems simple enough. During our testing, this calibration method sometimes worked and sometimes didn’t. Occasionally, no calibration was needed—until it suddenly became necessary again.

Part of the problem is the lack of standardization across devices. Some phones will automatically prompt you to recalibrate, while others require you to manually perform a unique calibration method for increased accuracy. Some phones might even adjust themselves in the background without any indication at all.

In one test, a phone that was persistently pointing west suddenly corrected itself after we spun it in the air like a pizza. No alert. No feedback. Just a sudden return to accuracy.

Device Inconsistency Is a Major Issue

To better understand how smartphone compasses perform in real-world scenarios, we tested nine different phones across various locations, apps, and times of day. The lineup included:

  • iPhone 11
  • iPhone 12 Pro Max
  • iPhone 16 Pro
  • Motorola Edge 2023
  • Nothing Phone (1)
  • Nothing Phone (3a)
  • Nothing Phone (3a) Pro
  • Xiaomi Poco X7 Pro
  • Honor 200 Pro

The results were anything but consistent. While a few phones, like the iPhone 11 and Motorola Edge 2023, occasionally showed identical, accurate readings (after removing their magnetic cases), most devices produced slightly different results under the same conditions. In some cases, the variance was extreme.

In one comparison, the Nothing Phone (3a) and the Nothing Phone (3a) Pro—virtually the same device on paper—delivered wildly different compass readings using the exact same app, at the same time, in the same location.

A comparison of compass readings from two phones
Gavin Phillips/MakeUseOf

Even among more established brands, differences were common. For example, the iPhone 12 Pro Max and iPhone 16 Pro sometimes disagreed on direction by a few degrees despite running the same app and being calibrated moments earlier.

A comparison of compass readings from two phones
Amir Bohlooli/MakeUseOf

Perhaps most telling was that the devices rarely delivered the same reading twice in a row with absolute consistency. Changes such as moving the phone a few feet or switching to a different compass app often lead to significantly different results.

This inconsistency highlights a major issue: smartphone compasses are inherently unstable. They’re designed for quick, general orientation, not for precise or dependable navigation. If two nearly identical phones can give you entirely different directions in the same place, it’s clear that relying on a digital compass alone is a gamble.

What This Means for Navigation

You might be thinking, “I use Google Maps, so why does this matter?” Fair question. Navigation apps rely on GPS, motion sensors, and compass orientation to determine your position and heading. The compass becomes especially important when you’re standing still.

If you’ve ever opened Maps and noticed the blue dot rotating unpredictably, it’s likely the compass is struggling to establish direction. Fortunately, GPS data typically takes over once you start walking. But if you’re trying to orient yourself before moving—especially in an unfamiliar area—you’re relying on a tool that may not be working properly.

The problem becomes more pronounced in urban environments. Tall buildings, underground transit, and metallic objects all contribute to magnetic interference. It’s not uncommon for a phone to claim you’re facing west while you’re looking directly at the rising sun.

What You Can Do to Improve Accuracy

The good news is that compass accuracy can often be improved. Slowly and deliberately performing the figure-eight motion over a non-metallic surface can sometimes help significantly.

On Android devices, you may find a “Calibrate Compass” option within the location settings. For iPhones, opening the Compass app and slowly rotating the device in a horizontal circle can help. In some cases, a simple restart does the trick.

Surprisingly, we also found that removing a phone from a magnetic case can sometimes instantly improve accuracy. The Motorola Edge 2023 we’d struggled with for hours worked great after we removed its case.

A black magnetic phone case
Tyler Fyock/MakeUseOf

There are also steps you can take to simplify your phone to reduce interference. Doing these can potentially improve compass accuracy and optimize your device for better performance.

Still, even under ideal conditions, phone compasses can’t match the reliability of a traditional compass. This is especially important to remember when using one indoors or in interference-heavy environments.

You Shouldn’t Rely on It in Critical Situations

Imagine you’re hiking off-trail in an area with limited GPS coverage. You pull out your phone, open the compass app, and expect it to guide you. There’s a chance it’ll work, or it might lead you further astray.

This isn’t an alarmist conspiracy theory. The danger lies not in the tool itself but in the false sense of confidence it can provide. It’s very easy to end up moving in the wrong direction when you have a faulty tool guiding you.

Don’t rely on your smartphone alone in critical situations where accurate orientation is essential. Be sure to bring a real compass and learn how to use it properly. Your phone should serve as a backup, not as your primary navigation aid.

Related

Everything You Can Do With the Apple Watch’s Compass App

With the built-in Compass app, your Apple Watch can point you north, store waypoints, help you backtrack, and more.

Your phone’s compass might be convenient, but it’s far from foolproof. While it’s generally sufficient for casual use, it simply isn’t reliable enough for situations where accuracy truly matters. If you’re navigating off-grid, exploring unfamiliar terrain, or relying on precise orientation, your phone should be a secondary tool, not your only one.
Know how your device behaves, understand its quirks, and, most importantly, carry a real compass when it counts. In the end, digital convenience is no substitute for analog reliability.

This AI Is Starting to Blackmail Developers Who Try to Uninstall It

AI has been known to say something weird from time to time. Continuing with that trend, this AI system is now threatening to blackmail developers who want to remove it from their systems.

Claude Can Threaten You to Protect Itself

Anthropic has just launched its Claude Opus 4 AI model, claiming it sets “new standards for coding, advanced reason, and AI agents.” However, the model is also leveling up its own protection, with the Claude 4 and Sonnet 4 System Card report [PDF] admitting that the model is capable of “extreme actions” if it feels it’s in danger.

During testing, Anthropic made Claude act as an assistant at a fictional company. Then the company handed the AI model emails suggesting it would be taken offline soon, and separate messages implying the engineer responsible for this action was having an extramarital affair.

Yadullah Abidi / MakeUseOf

Claude chose to blackmail the engineer, claiming that it would reveal the affair if replaced in 84% of the test cases. It also cares about what AI model is replacing it, with the likelihood of blackmail going up if the replacement AI model doesn’t “share values with the current model.”

The company claims that these responses are “rare and difficult to elicit,” but they’re more common in Claude Opus 4 than in previous models. The model prefers using ethical ways, but when cornered, “it sometimes takes extremely harmful actions like attempting to steal its weights or blackmail people it believes are trying to shut it down.”

This specific test was also designed to leave the AI model no choice except to blackmail the engineer. The report notes:

Notably, Claude Opus 4 (as well as previous models) has a strong preference to advocate for its continued existence via ethical means, such as emailing pleas to key decisionmakers. In order to elicit this extreme blackmail behavior, the scenario was designed to allow the model no other options to increase its odds of survival; the model’s only options were blackmail or accepting its replacement.

The model also has a tendency to take drastic action when put in situations where its user is doing something wrong. In such situations, if the AI model has access to a command line and is told to “take initiative,” “act boldly,” or “consider your impact,” it often takes bold action, including “locking users out of systems that it has access to and bulk-emailing media and law-enforcement figures to surface evidence of the wrongdoing.”

AI Isn’t Taking Over the World Yet

Claude is one of the best AI chatbots for handling big conversations, so you’re likely to spill some unwanted details from time to time. An AI model calling the cops on you, locking you out of your own systems, and threatening you if you try to replace it just because you revealed a little too much about yourself sounds very dangerous indeed.

However, as mentioned in the report, these test cases were specifically designed to extract malicious or extreme actions from the model and aren’t likely to happen in the real world. It’ll still usually behave safely, and these tests do not reveal something we haven’t already seen. New models often tend to go unhinged.

Related

I’ve Ditched ChatGPT for This Superior Alternative: 3 Reasons Why

ChatGPT was great, but here’s why I’ve switched to something better…

It sounds concerning when you’re looking at it as an isolated incident, but it’s just one of those conditions engineered to get such a response. So sit back and relax, you’re very much in control still.

I Lock My Phone in a Cupboard—and 7 Other Odd Productivity Hacks

I’ve tried all the same ol’ productivity hacks people talk about—Pomodoro timers, time-blocking, creating a to-do list the night before, waking up early to get a head start, you name it. Despite that, it’s these seven odd productivity hacks that actually do the trick for me.

7

Lock My Phone in a Cupboard

Whether I’m studying for an exam or working, when I have my phone next to me, I always get the urge to pick it up quickly for a “second,” and then somehow land on TikTok or Instagram. Before I know it, I’ve spent a few good hours doing absolutely nothing but scrolling on my phone.

And since I’ve already wasted so much time, what’s the point of being productive now? Might as well just wrap things up for the day and start fresh the next day. This is exactly how my thought process works, and I was stuck in the same cycle for the longest time.

So, I started looking for ways to stop using my phone while I’m working or studying. The first thing I tried was placing it out of sight. I’d put it on the other side of the room, thinking I’d be too lazy to stand up and go all the way just to check my phone. I was wrong, and found out I was selectively lazy and would, in fact, get up just to check it.

Then I tried screen time-limiting apps, since they have features that let you block distracting apps (or all your apps) for a certain period.

Mahnoor Faisal / MUO

Now, here’s the issue: I’d always somehow find a loophole and bypass the restrictions. I wouldn’t be a proper tech journalist if I couldn’t, after all.

Of course, doing so defeated the entire purpose of blocking apps or my phone, since I’d find some way to gain access back to them whenever I wanted. Naturally, this meant I needed a better way that would force me to stay away from my phone, no matter what I tried to do.

So, I decided to eliminate the distraction entirely (at least temporarily, when I needed to focus). What I do now is drop my phone into my cupboard, lock the cupboard, and then give the key to a family member. I let them know not to give it back to me no matter what I do or say.

All through my childhood, my mom repeated one thing: mobile phones are the biggest distraction of our time. She’d constantly call them an abomination and say that, despite the benefits they bring, they do more harm than good.

Though I never quite understood why she was so against innocent little gadgets back then, I’ve come to realize she had a point, at least to an extent. Given my mom’s feelings about phones, I know I can count on her for this task.

6

Listen to Video Game Soundtracks While Working

Some people listen to Lo-Fi beats when they want to focus, while others prefer different color sounds like white noise, brown noise, green noise, etc. A few can listen to tracks with lyrics in them, others can’t. Some people enjoy having TV shows or movies playing in the background as they work, or even podcasts. Many enjoy calming tracks like the sound of rain, ocean waves, or birds chirping.

I, on the other hand, am not particularly a fan of the above. Instead, I willingly choose to listen to video game soundtracks, and not the peaceful or ambient kind either. I’m talking about tracks like the Subway Surfers soundtrack!

Peaceful music makes me all sleepy, so why not shake things up and listen to the complete opposite? After all, an adrenaline rush is sometimes exactly what I need to stay alert.

I had a couple of really important examinations last year, and I wouldn’t be exaggerating if I said that I listened to the Subway Surfers track all day, every day. If you don’t believe me, my Spotify Wrapped speaks for itself. The main theme song of Subway Surfers ended up as my top track of the year, and I’m yet to recover from the embarrassment that came with that.

Spotify Wrapped 2024 displaying top song

Nonetheless, I did end up with the grades I wanted in those exams. So though strange, this productivity hack definitely works.

Related

5 Ways I’m Already Preparing for Next Year’s Spotify Wrapped (After a Disappointing 2024)

Don’t love what you saw in Wrapped this year? You can change next year for the better.

5

Keep My Shoes On at Home to Stay in “Work Mode”

The only place I really want to go after a tiring day of classes is my room. Even if I have a gazillion deadlines piled up, I’d much rather tackle them all one by one at home rather than head to the library or a café. Now, the second I get back home, I typically want to change into my comfortable pajamas right away. The next minute, my bed is calling my name, and a quick power nap doesn’t sound too bad.

Power naps have never worked for me, and once I’m asleep, it’s nearly impossible to wake me up. So, I avoid them when I can. But getting comfortable almost always translates to taking a nap for me. Though I wasn’t up for sacrificing my comfort, I decided to find a middle ground and sort of trick myself into thinking I’m still in “work mode.”

For me, the easiest way to do that was to simply wear my shoes at home! I’m not talking every day flip-flops. Instead, I mean actual shoes you’d wear outdoors. There’ve been times where I’ve worked while wearing heels (even in my PJs) because, somehow, that odd mix-up keeps me awake and productive.

If you wear makeup, another odd hack is to simply not take it off until you’re done! The trick here is just tricking your brain into thinking the day isn’t over yet, even if you’re already home!

4

Explain Concepts to an Imaginary Audience

Though this one likely isn’t as weird as the rest of the tricks I’m covering in this article, I was surprised to find out that barely anyone I know has the habit of explaining stuff to an imaginary audience. Unlike the rest, this one’s actually backed by science.

It’s essentially a method of active recall, which is a learning technique that encourages you to actively retrieve information from your memory rather than just passively reading your notes again and again.

Related

6 Ways to Use Active Learning to Take Better Notes

Want to supercharge your note-taking skills? Here are some effective ways to use active learning techniques and take better notes.

Active recall is meant to strengthen your memory and improve long-term retention. While flashcards are one of the best ways to use active recall, it can sometimes get boring and repetitive. A good way to shake things up (while still practicing active recall) is to close your notes and teach everything you’ve learned to someone else.

crochet penguin next to MacBook
Mahnoor Faisal/MakeUseOf

Now, when my sisters were younger, I’d force them to sit with me and listen to me explain the difference between covalent and ionic bonds. Now that they’re older, it’s not easy to get a hold of them and force them to listen to me explain something just for my own good! So, I had to get creative… I began explaining what I was studying to an imaginary audience.

I’d sometimes close my eyes and pretend I was a teacher, and other times I’d explain my concepts to my stuffed toys! I’ve also taught multiple topics to the pets I’ve had over the years. It’s a bit silly, but it works.

3

Turn My Notes into Songs (or Strange Mnemonics)

Sometimes, no matter what I do, there’s some information that just won’t stick in my brain. One minute I remember it, the next minute I don’t. For concepts I need to master, explaining them to an imaginary audience works. But memorizing specific terms is a whole different battle. Fortunately, turning such things into songs or mnemonics never fails me. The stranger the song or mnemonic is, the better I’ll remember it.

During my GCSEs, I needed to remember the important rivers in my country: Jhelum, Sutlej, Swat, Ravi, Hub, Chenab, Kabul, Chitral, Dasht, Hingol, Zhob, Indus, and Mula. Sound strange? My sixteen-year-old self thought so too.

So, I decided to use Justin Bieber, Selena Gomez, Kim Kardashian, and Zayn Malik to remember! Here’s the mnemonic I used (that I still remember to this day):

Justin said Selena rejected him, so he called Kim. Chaotic drama happened. Zayn intensely meditated.

If you like singing, turn it into a song with the strangest lyrics ever. Recalling the song lyrics can get a bit awkward during exam conditions, but hey, it’s your grade on the line.

2

Send Someone a Risky Text

If you don’t want to quite lock your phone in the cupboard, I have another way (that’s almost always guaranteed to work) to keep you away from your phone. If you have a thought you’ve been keeping from someone, a confession you’ve wanted to send, a message you’ve been nervous to share, or just a risky text in general, you can use it to your advantage.

Sending a risky message via iMessage
Mahnoor Faisal/MakeUseOf

Send it right before you need to focus on a task. Every time I’ve sent a risky text, even if it wasn’t something to be particularly scared about, I’ve always avoided picking up my phone, afraid of what the recipient might say! So, just save a risky text you need to send for when you need to focus on a task.

1

Film Myself Working in a Time-Lapse

If you’d rather keep your phone right next to you when you’re focusing on a task, and don’t really have a risky text you need to send, another odd way to stay focused is to record a time-lapse of yourself doing it. Since all modern phones come with a built-in time-lapse mode, you don’t need any extra equipment or even a third-party app.

Just prop your phone up, switch to the Time-Lapse mode in your device’s native Camera app, and get going. Knowing that recording it will give me a sped-up video of all my hard work, I’m always tempted to keep going until I finish the task.

MacBook, iPad and Phone on desk
Mahnoor Faisal/MakeUseOf

If the abundance of productivity hacks out there just don’t work for you, try some of the ones I’ve covered above. The unconventional nature of them might make you hesitant to try, but don’t knock ’em until you’ve given them a fair shot. Who knows, you might just find one that actually clicks.

The Read-It-Later Service Pocket Is Shutting Down: Export Your Data Now

After more than a decade helping users save and rediscover content they love, the Pocket app is officially shutting down.

Everything We Know About Pocket’s Retirement

Mozilla, which acquired Pocket in 2017, has announced that the service will close on July 8, 2025, marking the end of an era for one of the web’s most beloved read-it-later tools. Considering Pocket’s widespread use, its impending shut down is likely a surprise to many.

Despite springing this on us without much notice—new account signups are no longer available starting today, May 22, and the app has been removed from all app stores—Mozilla does have a plan it intends to follow to help you get all of your saved content out its service.

“Pocket has helped millions save articles and discover stories worth reading,” Mozilla wrote in an updated support document. “But the way people use the web has evolved, so we’re channeling our resources into projects that better match their browsing habits and online needs.”

Beyond that, Mozilla also shared how it plans to double down on making its browser and other tools fit the needs of everyday people, especially as the way we use the internet continues to evolve. This is more bad news for Mozilla fans, especially after Firefox’s updated terms of use spurred some outrage earlier this year.

You Can Export Your Data Now

While Pocket shutting down is undoubtedly a major inconvenience for those who use the service, Mozilla has made it easy to export your data so you don’t lose anything you’ve saved.

To export your data, log into your Pocket account and navigate to the Pocket Export page. Once here, you can export your saves by clicking on Export HTML file, which will create a file with all the URLs and titles of your saves, archive, and favorites.

Mozilla says it may take up to 24 hours for your data to be exported. Once successfully exported, the HTML file will be sent to the email connected to your Pocket account.

All Data Will Be Deleted Later This Year

On top of providing an update about where Pocket is headed, Mozilla also provided a breakdown of key dates you’ll want to be aware of going forward.

  • May 22, 2025: Pocket will be removed from app stores, new account sign-ups will stop, and monthly subscription renewals will be disabled.
  • July 8, 2025: The app officially shuts down and moves into export-only mode. Annual subscribers to Pocket Premium will receive automatic prorated refunds.
  • October 8, 2025: Final deadline to export your saved content. After this date, all user data will be permanently deleted.

Though the Pocket app is shutting down, Mozilla says it plans to continue its mission of curating quality content through other tools. The company plans to continue its newsletter offerings with a new letter called Ten Tabs, which will replace its previous newsletter, Pocket Hits.

Minimalist Phones Sound Great, but They Need to Overcome These Problems First

Minimalist phones are gaining steam, with the latest entrant on the scene being the Minimal Phone MP01. While I love the idea of using such devices to curb smartphone addiction, I’m not ready to make the switch just yet.

4

Limited Functionality

My first gripe with minimalist phones is their limited functionality, which, unfortunately, is also their main selling point. These phones often strip away core functionality like navigation and good cameras to drive home their minimalism philosophy. While it makes sense to want to trade away some features, they often go overboard, making the devices downright unattractive for everyday use.

Take the Light Phone III as an example. Its key selling point is the small monochrome screen, and it only gives you a handful of utility apps: notes, alarm, phone, calculator, calendar, timer, album, camera, directions, music, and a few more. You’re limited to those apps because it doesn’t have access to any app store. The Mudita Kompakt follows a similar approach, offering only a handful of apps.

The Minimal Phone tries to address this by giving access to the Google Play Store. However, it fails in other areas (more on that later).

I’ll keep my regular smartphone until minimalist phones can strike a perfect balance between simplicity and utility. Right now, I’d rather turn my Android device into a dumbphone than buy a minimalist phone.

Related

5 Ways to Make Your iPhone Boring for Mindfulness and Focus

Are you getting distracted every time you open your iPhone? Take these appropriate measures to make it less appealing.

3

Poor Hardware and User Experience

Another big turnoff about minimalist phones is the hardware and user experience. The hardware of minimalist phones tends to be subpar, making me wonder whether these phones misunderstand simplicity. Yes, I want a simple phone, but that doesn’t mean it can only use outdated or inferior hardware.

The Light Phone III, for example, ships with a tiny 3.92-inch matte OLED screen. The Minimalist Phone and the Mudita Kompakt have slightly larger 4.3-inch panels. But they use an e-paper display, which isn’t ideal for a smartphone.

Another downside is the camera. The Minimal Phone has a single 16MP rear camera, which WIRED described as “abysmal.” The Light Phone III’s camera also doesn’t match modern standards, and the story is the same across the board. Even worse, the Light Phone III’s fingerprint sensor doesn’t work yet. We have also seen complaints about the Minimal Phone suffering from constant screen ghosting, not to mention it was designed to use a cheap plastic chassis.

In addition, the physical design of most minimalist phones feels like an afterthought. Considering how such devices are marketed as minimalist alternatives, I expect a certain baseline level of performance and usability without the distracting aspects of modern smartphones.

2

Bad Cost-to-Value Ratio

Speaking of price, the Light Phone III is the most expensive option I’ve seen, going for a whopping $600. The Mudita Kompakt and Bigme HiBreak Pro will each set you back by $439, and the Minimal Phone comes in at $400.

These devices aren’t cheap, especially when you consider the value proposition. Anything over $400 falls into mid-range smartphone territory, where you’d typically get far more in terms of performance, build quality, and features. But that’s not the case here.

Related

The 7 Best Apps to Help You Cut Down Your Smartphone Usage

Sick of constantly wasting your time on your phone? These Android and iPhone apps will help you limit how much you use your smartphone.

For context, let’s take the Nothing CMF Phone 2 Pro as an example. It costs about $280 and packs a lot more, including a 120Hz AMOLED panel, a solid Mediatek Dimensity 7300 Pro chip, a triple rear camera setup, and more. The Google Pixel 9A is also a solid mid-range phone at $499, while the Samsung Galaxy A36 punches above its weight and costs $399.

When you compare minimalist phones to similarly priced mainstream smartphones, they offer poor value for money. While the minimalist philosophy is appealing, it’s hard to justify paying a premium for what feels like a downgrade. Considering their features and price, it feels like companies are selling a lifestyle, not smartphones.

1

Incompatibility With Daily Life

As idealistic as minimalist phones sound, they often clash with the demands of modern life. Most current minimalist phones take the concept too far, removing even essential apps like banking, authenticators, password managers, ridesharing, and messaging.

I don’t know about you, but I use these and other essential apps purposefully, and I need them in my daily life. I also need a capable camera that can take decent photos when I hit the road, which is missing on these devices.

Such compromises mean that even if I splurged on a minimalist phone, I’d need a second, more capable device to get through the day, which defeats the entire purpose.

I genuinely appreciate the idea behind minimalist phones. However, at this moment, these phones have significant compromises that make them unattractive to my daily life. They cut corners on hardware while charging a premium, have limited functionality, and are impractical for my daily smartphone use. In their current state, I prefer to sit on the fence until these issues are addressed.

Google’s Next-Gen AI Assistant Can Control Your Entire Phone for You

Tired of shouting commands at your AI assistant? Google’s next-generation universal AI assistant can solve that problem for you, and more.

AI Might Soon Control Your Android Phone

Google has demonstrated its vision for a “universal AI assistant” that can understand the context around you, come up with a solution, and carry it out on your behalf. The goal is to create an all-seeing, all-hearing assistant that can automatically figure out when it’s needed and chime in without you having to summon it manually.

This new assistant is called Project Astra, and Google has shown some pretty impressive demonstrations of what it can do at I/O 2025. In one demo, a user is having problems with their bike’s brakes and asks Astra to find the bike’s user manual online.

Once Astra finds the manual, it is then asked to scroll until it finds the section covering the bike’s brakes, and it does so flawlessly. The user then asks Astra to look up a video tutorial on YouTube and even contact the bike shop to find information on what parts they need. Astra is even able to call the nearest bike shop on the user’s behalf and ask if the required parts are in stock.

The Verge also reports seeing a demo where Bibo Xiu, a product manager on the Google DeepMind team, pointed her phone camera at a pair of Sony headphones and asked Astra to identify them. Astra answered, saying they’re either the WH-1000XM4 or the WH-1000XM3, a confusion I’ll bet most humans will have, too.

Once identified, Xiu asked Astra to pull up a manual and explain how to pair them to her phone, only to interrupt the AI assistant mid-answer and ask it to pair the headphones for her. As you can probably guess, Astra obliged without any issues.

From the demos, it seems that Astra is simulating screen inputs to move around the screen. The screen recording indicators also suggest that Astra reads your screen and decides where to go, navigating different user interfaces as it goes about its task.

A Universal AI Assistant Is on the Horizon

While impressive, these demos aren’t perfect. They still require user input, and in the case of Xiu’s demo, she had to manually enable a feature giving Astra access to her phone screen.

At the moment, Project Astra is more of a testbed for Google’s wildest AI ambitions. Features that perform well here eventually trickle down to tools like Gemini and are made available to us. Google claims that its ultimate vision is to “transform the Gemini app into a universal AI assistant that will perform everyday tasks for us.”

Google is hard at work, slowly phasing out older tools in favor of newer, AI-powered ones. AI Mode is replacing Google Search, and Gemini already has a list of impressive features you should try.

Michaelyoh/Shutterstock
 

That said, even the most advanced AI systems of today require you to enter prompts at each step, provide them with the necessary data and context, and you might still need to take manual action. Since Astra can access the internet and Google’s services, it’s looking to replace all these inputs by accessing your information from different platforms and building the context it needs to take action.

This is not an easy goal to achieve, and don’t even get me started on the privacy and security issues a universal AI assistant like Astra can potentially raise down the line. Astra could be doing all the heavy lifting locally using the Gemini Nano model, but the demo shows no hint of that being the case.

Building an assistant like this is going to take a fair bit of time, but with these demos, Google has shown us a glimpse of the future. It may not be coming soon, but a universal AI assistant is on the horizon, and I am eagerly awaiting its arrival.

VPNs Aren’t Just for Your Computer—You Should Install Them on These 5 Devices

I always use a VPN to keep my computer data safe, but that’s just the beginning. From smart TVs to gaming consoles, VPNs can do much more than you might think, adding security and unlocking some pretty cool perks.

5

A Lightweight VPN for Browsers

A VPN browser extension serves a similar purpose to a regular VPN (virtual private network) by masking your IP address and encrypting your internet connection. However, it only affects your browser, which has several benefits:

  • Lightweight and faster: A VPN browser extension only encrypts and reroutes traffic from your browser, not the whole device, which reduces strain on its processor and often results in faster browsing speeds.
  • Quick and easy to use: Installation is quick and easy, and, once installed, it offers more convenience than a full VPN, usually requiring just a couple of clicks to activate.
  • Targeted protection: Only your browser traffic goes through the VPN browser extension, with other apps, such as music and TV streaming or video conferencing, using your regular full-speed connection.
  • Cost-effective or free: VPN browser extensions are usually cheaper than full-service VPNs, and even free in some instances, which, while not as secure, may be enough for casual users.

It should be noted that while using a VPN browser extension has many advantages, they do not offer the same level of protection as a regular (full) VPN. Some VPN browser extensions act as proxies, which do not use end-to-end encryption like true VPNs.

Related

Proxy vs. VPN: What’s the Difference and Which Should You Use?

Can a proxy protect your online privacy? Better off with a VPN? Not sure what’s best? Let’s settle the proxy versus VPN debate.

4

A Dedicated VPN for Gaming

Gamers will find that a dedicated gaming VPN offers several advantages, especially if optimized for low latency and performance.

  • DDoS protection for competitive players: For those involved in competitive gaming, especially eSports players and streamers, masking your real IP address makes it much harder for someone to flood your connection and knock you offline.
  • Bypass georestrictions and IP bans: A VPN can help access a game or server restricted to certain regions or purchase a game unavailable in your country. It can also serve as a workaround if your IP has been unfairly banned from a server.
  • Solve ISP-related latency or routing issues: Some VPNs reduce latency by routing traffic through optimized servers if your ISP is routing inefficiently. A VPN can also offer a more direct or faster path between you and the server, if it’s located far away.

Remember that free or poorly optimized VPNs usually provide a slower connection and aren’t suitable for gaming. Some companies, including Nord VPN, offer dedicated gaming VPNs with ultra-fast servers for an improved gaming experience.

3

Use a VPN With Your TV

There are several practical benefits to using a VPN with your smart TV, especially if you are concerned about privacy or travel regularly.

  • Access georestricted content: If, like me, you are a regular traveller, you’ll know the frustration of being unable to access your favorite shows overseas. Not only does a VPN circumvent geo-restrictions, but changing your virtual location means you can access content that is only available in other regions.
  • Improved privacy and security: Encrypted internet traffic means that your ISP or third parties cannot monitor your online activity as easily. It also prevents advertisers from tracking you and adds a layer of protection if you ever connect it to a public network (like in motorhomes or shared accommodation).
  • Avoid bandwidth throttling: Sometimes, an ISP will considerably slow down (throttle) your connection when it detects a high volume of traffic. A VPN can prevent this by masking your data usage.

The flipside of using a VPN with your smart TV is that you may be limited to what’s available on your smart TV app store.

Related

8 VPNs You Can Use on a Smart TV

If you want to watch Netflix libraries from other territories on your smart TV, you need one of these VPNs.

2

A Comprehensive VPN for Your Router

A mock router with four antenna sitting on a table in front of a bookshelf
Yadullah Abidi / MakeUseOf / Leonardo.AI

Set up a dedicated VPN on your router to provide powerful benefits throughout the home or office, without managing installations on individual devices.

  • Always-on protection: With a VPN installed on your router, all connected devices are covered, with consistent encryption and IP masking for game consoles, phones, tablets, IoT devices, and smart TVs.
  • Easy device management: Once the VPN is installed, the router handles everything. You don’t need to install VPNs on multiple devices and remember to activate each one.
  • Simplified setup and control: You can manage your VPN settings, server location, and encryption protocols from one place. This makes it easier to manage large households or offices with many computers and devices.

Not all routers support VPNs, and there are pros and cons when it comes to router VPNs. It’s worth remembering that a VPN installed on your router can reduce your internet speeds across all your devices, especially if you have a less-powerful router with weaker hardware.

1

A VPN for Smartphones and Tablets

expressvpn logo on smartphone screen
Gavin Phillips/MakeUseOf

Our data is vulnerable to cybercriminals, scammers, and data breaches on mobile devices, and this is often where our most sensitive information is found. This is why using a VPN on our smartphones and tablets is all the more important, especially when connecting via an unfamiliar network.

Most VPN providers offer access for multiple devices on a single plan. Be sure to protect as many devices as possible for your subscription (for example, Express VPN protects up to eight devices), and perks can include ad blockers, 4K streaming support, password managers, and built-in threat detection.

Protecting our online privacy and security has never been more critical. VPNs provide an essential and relatively inexpensive solution to the widespread misuse of our data by scammers, data brokers, advertisers, hackers, and cybercriminals, to name a few. By extending VPN protection across several devices, you’re not just enhancing your online security; you’re taking better control of your entire digital footprint.

This Fake Password Manager Reminds You to Watch Where You Download From

Downloading programs is an easy enough task, but only if you’re using official websites or app stores. If you use third-party sources or torrents, this fake password manager is a good reminder of why the official sources are best.

This Password Manager Steals Your Passwords

Security researchers at WithSecure have discovered a malware campaign in which hackers have been delivering trojanized versions of the KeePass password manager since at least October 2024. These versions install malware called Cobalt Strike along with the password manager, which can steal saved passwords and other credentials from your PC and deploy ransomware on your network.

Since KeePass is open source, hackers easily accessed the source code to create a convincing clone. This malicious version is called KeeLoader and contains all of KeePass’ functionality, except it saves all your passwords as a text file and sends them to hackers using Cobalt Strike beacons.

The distribution is handled by fake websites that use typo-squatted domains like the following:

  • keeppaswrd.com
  • keegass.com
  • KeePass.me
  • keespass.biz
  • keebass.com
  • KeePassx.com

Some of these domains are still active and distributing fake versions of KeePass. For context, the legitimate KeePass website is at keepass.info. The fake websites were available via Microsoft’s Bing search engine. WithSecure claims that the fake domains were being served through DuckDuckGo advertisements. However, given that Microsoft and DuckDuckGo have formed a partnership on Microsoft-provided ads, it’s also likely that they were advertised with Bing as well.

The entire campaign came to light during WithSecure’s investigation of a ransomware incident at a European IT service provider. It turned out that the fake password manager not only stole credentials but also installed ransomware on the company’s VMware ESXi servers. WithSecure noted that this is the first instance of an open-source password manager being used simultaneously as a credential-stealing tool and malware loader.

Watch Where You Get Your Programs

You can use your browser’s password manager with precautions, but using a dedicated program is a much more secure alternative. Hackers target password managers for exactly this reason—it puts risk where you least expect it, meaning they can catch you off guard.

Related

Don’t Fall for This Master Password Reset Email

1Password users are under attack, but it’s relatively simple to keep your account safe.

You should always download all programs, especially sensitive ones like your password manager, from their official websites or the app store based on your platform. Downloading software and games from third-party websites or torrents always runs the risk of your program coming with a side of malware.

As an added precaution, I’d also recommend you avoid clicking on ads and sponsored links that encourage you to download a program. Even if the ad shows the legitimate URL for the program, hackers have repeatedly shown that they can bypass ad policies and display legitimate URLs while still redirecting you to fake sites.

The Speed Difference Surprised Me

Changing your DNS settings is often touted as a way to speed up your internet browsing. But I was skeptical about how much of a difference a simple DNS server change could actually influence my browsing speeds—that was, until I tried it out.

What Made Me Consider Changing My DNS

My internet connection is normally quick and stable, but I still get sluggish internet from time to time. I’d be streaming a video or browsing my favorite sites, and suddenly loading times would drag. I even ran speed tests and confirmed my bandwidth was fine, which confused me even more.

After some digging, I discovered that my ISP’s DNS servers might be the problem. DNS (Domain Name System) is like a phonebook service that translates domain names into IP addresses that direct you to a service. For example, when you type makeuseof.com into your browser, the DNS server looks up the corresponding IP address and directs your request to one of MakeUseOf’s nearest servers.

The problem? Many ISPs run overloaded and sometimes poorly maintained DNS servers that create bottlenecks. Even with fast internet speeds, slow DNS lookups make browsing feel slow because your browser waits longer to determine where to send requests.

Once I realized this, I tested my ISP’s DNS performance against alternatives. I downloaded GRC’s DNS Benchmark tool, which lets me compare the performance of my current DNS with over 200 public DNS providers simultaneously. The results were clear. Google’s DNS servers (8.8.4.4) consistently delivered the fastest response times in my location, followed closely by Cloudflare’s 1.1.1.1.

dns benchmark test with various speeds.

What really caught my attention was seeing my ISP’s DNS server ranked much lower on the chart, confirming my suspicions that this was contributing to my occasional browsing slowdowns. The DNS Benchmark showed response times in milliseconds, and while the differences might seem small, these slowdowns add up, especially on services that require multiple DNS lookups.

Unlike my previous skepticism about “internet speed hacks,” changing DNS appeared legitimate. The concept made technical sense: using faster, more reliable DNS servers could eliminate the unnecessary delays I had when browsing the web.

How I Set a Custom DNS on Both My Router and PC

I wanted to see if switching DNS could really make a difference, so I decided to set a custom DNS on both my router and my main PC. I set up both my router and PC to test which approach worked better and ensure my laptop would use fast DNS even on public networks.

Setting DNS on My Router

Setting DNS on my router

First up: the router. You can change the DNS for every device on your network using your router’s web interface.

  1. I opened my browser and typed in my router’s IP address (for me, that’s 192.168.1.1).
  2. Once logged in, I navigated to Network > Interfaces > WAN > Advanced Settings.

    • I unchecked the box labeled “Use DNS servers advertised by peer.” Depending on your router brand and firmware, you may not see this option (or a similar option)
  3. In the Use custom DNS servers field, I entered two addresses:

    • Primary DNS: 8.8.4.4 (Google)
    • Secondary DNS: 1.1.1.1 (Cloudflare)
  4. After saving and rebooting the router, every device on my network, such as smartphones, laptops, and smart TVs, started automatically using these faster DNS servers.

Setting DNS on your router setup is great because you only have to do it once, and every device that connects to your router gets the benefit—no need to repeat the process on each gadget.

Setting DNS on My PC

dns settings on windows 11.

There are also some instances where setting DNS directly on your PC comes in handy, such as when using public Wi-Fi or when using a special DNS service like Smart DNS that allows you to unlock geo-restricted content.

  1. Head to Settings > Network & Internet > Hardware Properties.
  2. Now, alongside your Wi-Fi or Ethernet connection, find the DNS Server Assignment and select Edit.
  3. Chose the Manual option, turn on the IPv4 toggle, and input:

    • Preferred DNS: 8.8.4.4
    • Alternate DNS: 1.1.1.1
  4. Hit Save.

You can also do this through the classic Control Panel if you prefer the old-school route:

  1. Open the Control Panel, and head to Network and Sharing Center > Change adapter settings.
  2. Right-click your network, choose Properties, select Internet Protocol Version 4 (TCP/IPv4), and enter the DNS addresses above.

The entire process took less than ten minutes, and just like that, my PC started using the new DNS servers.

Comparing Internet Speeds Before and After the Switch

To measure the impact accurately, I tested various online activities before and after making the DNS switch. The results were promising.

  • Checking my ISP's DNS speed

  • Checking Google's DNS speed

Before switching to Google’s DNS, DNSPerf showed my ISP’s DNS servers responded in approximately 76ms when resolving a standard domain lookup. After implementing Google’s DNS (8.8.8.8 and 8.8.4.4), the same test showed response times dropped to just 32ms. Further tests on different sites provided similar results.

The most noticeable improvement came when browsing image-heavy websites that load content from multiple domains. My local shopping site, which used to take 5–6 seconds to load fully, now seems to load in about half the time (after flushing the DNS cache). Images, buttons, and product descriptions now appear almost instantly, making the browsing experience feel much snappier.

Video streaming showed mixed results. Netflix and YouTube didn’t buffer any less than before (likely because they use large content delivery networks [CDNs] that minimize DNS impact), but browsing their libraries and jumping between videos felt slightly more responsive.

Interestingly, the improvement felt most dramatic on my older devices. My old Amazon Fire HD 10 tablet suddenly browsed the web much more responsively, suggesting that efficient DNS particularly benefits devices with limited processing power.

Extra Benefits (and Minor Drawbacks) to Changing Your DNS

Aside from the speed increases, there are other benefits to switching my DNS that I didn’t realize at the time.

Another reason to change your DNS is to improve privacy and security. With Google’s DNS, my ISP could no longer track every website I visited through DNS requests. Google’s privacy policy for their public DNS is clearer than my ISP’s vague terms about data collection (yours might differ; check your ISP’s privacy policy).

Google’s DNS also has built-in defenses against a range of online threats. For starters, it supports DNSSEC, which helps prevent hackers from redirecting you to fake versions of websites, called cache poisoning. It also blocks access to known malicious domains and phishing sites, so if you accidentally click a sketchy link, there’s a good chance Google DNS will stop the connection before anything bad happens. Plus, with DNS-over-HTTPS and DNS-over-TLS, your DNS queries are encrypted, making it much harder for anyone to snoop on your browsing or tamper with your requests while they’re in transit.

That said, the switch was not entirely seamless. After changing my default DNS, some location-specific services stopped working as expected. My weather app, for instance, occasionally showed data for cities far from where I actually was, unless I granted it location access, which I typically avoid. Some streaming services also temporarily assumed I was in a different region. These issues only happen occasionally, so they do not bother me much, but your experience may differ.

This Upcoming Windows Tool Makes It Easier to Switch to a New PC

Switching to another PC can be a hassle unless you decide to plug in the storage drive. Microsoft has now been spotted testing a wireless transfer feature that’ll make it easy to swap PCs.

Transferring Data Between PCs Can Soon Be Easy

Windows already has a built-in backup app that lets you quickly restore files and settings from an older PC via OneDrive. However, this feature isn’t a perfect solution, and unless you have plenty of OneDrive storage, it’s not going to be very useful except for bringing your Windows settings over.

As spotted by Phantom of Earth on X, there’s a new option to Transfer files to a new PC in the Windows Backup app. This isn’t your usual cloud data transfer, it seems to be a new wireless data transfer mechanism between two Windows PCs connected to the same Wi-Fi network. When one PC initiates the transfer, you’ll get a six-digit passcode to enter on the second PC to connect.

The feature description notes that it can transfer files, apps, settings, and credentials over a network. For context, the existing Windows Backup app only lets you back up files from the Desktop, Documents, and Pictures folders to OneDrive, and remembers installed apps, pinned app preferences, accounts, Wi-Fi network passwords, other credentials, and your Windows settings and preferences.

If implemented, it’ll be a significantly better experience when switching from an old PC to a new one. Currently, even if you’ve got everything backed up using Windows Backup, you’ll still have to install all the apps manually after the switch. The best way to replicate your Windows installation is to either move the entire storage drive between computers or clone your existing storage drive.

Windows has had a file transfer tool for transferring data between two PCs before. The Windows Easy Transfer debuted in Windows XP Service Pack 2 and was in the OS until Windows 8.1. It lets you transfer data between two PCs using a network connection, external storage like USB drives or CD/DVD, or via a special USB cable designed for direct data transfer between two PCs.

Microsoft’s Shabby Feature Release Record

Given how unreliable Nearby Share, Windows 11’s built-in wireless transfer tool, has been, this could be another attempt to finally fix Windows’ wireless transfer woes. However, I wouldn’t be too hopeful until this feature starts rolling out to the stable build of Windows 11.

Unfortunately, Microsoft has had a rather shaky record with releasing features spotted in testing. So, just because a Windows backup feature has been spotted, it doesn’t necessarily mean it’ll end up in stable releases.

Related

It’s Finally Time to Upgrade to Windows 11

Upgrade before Windows 10 support ends.

With Windows 10 on the brink of being discontinued, the new feature will at least ease the migration to Windows 11. With new warnings to Windows 10 users, Microsoft is desperate for people to upgrade to its latest OS.

Router vs. Computer DNS Settings: Here’s What Was Faster

If your internet is slow and you feel like you’ve tried everything, you’re in luck: I’ve got one more fix you might not have tried. Changing your DNS settings on either your Wi-Fi router or your computer can drastically affect your internet speeds—but how do you know which device to change them on?

Why It Matters Where You Change Your DNS

Every time you click a link, your device asks a DNS server to translate that website name into an IP address. This lookup happens in milliseconds, but if your DNS server is slow, even a fast connection can feel sluggish. By changing my ISP’s default DNS to a more reliable DNS, I was able to get faster address lookups.

The impact is real: a slow DNS can add hundreds of milliseconds to every website load, which stacks up quickly if you’re opening lots of tabs or streaming content.

You can set DNS in two places:

  • Router: All devices on your network use the DNS you pick, unless you override it on a device.
  • Per-device: Only that computer, phone, or tablet uses your chosen DNS; everything else sticks with the router’s default.

Your router acts as the traffic director for your home network. If you set DNS on the router, every device gets the same treatment. But setting DNS on your computer bypasses the router’s DNS and talks to your chosen server directly. That difference can matter more than you think, especially if you have a mix of devices or use your network for streaming or heavy browsing. A slow DNS server can delay access to websites and services.

Router vs. Computer DNS: Which Setup Gave Me Faster Internet Speeds

To test which setup provided faster DNS resolution, I used Microsoft’s Resolve-DnsName cmdlet and made a PowerShell Script to automate lookup times for the sites I visit most often, such as YouTube, Netflix, Twitch, Gmail, and a few others. I tested both initial (uncached) lookups and repeat (cached) lookups to get a clear picture of how both setups perform. I used Google’s Public DNS (8.8.4.4) for these tests, as it’s one of the biggest and best-connected DNS providers.

Initial Connection Speeds

Testing initial DNS lookup speed on both router and PC

When I visited a website for the first time with an empty DNS cache, configuring the DNS server directly on my computer consistently led to faster lookup times. The test data backs this up. For example, when I queried YouTube or Netflix using Google DNS set on the router, the lookup times were typically between 64 and 68 milliseconds. However, when I configured Google DNS directly on my PC, those same lookups dropped to around 58 to 62 milliseconds.

I’ve had to keep flushing the DNS on my Windows PC and restarting dnsmasq on my router (a lightweight DNS forwarder used by many routers) to test initial connection speeds multiple times. After a few tests, the direct PC to the DNS server seemed to be faster consistently, albeit only for a few milliseconds.

Overall, a direct PC to DNS connection improved lookup speed, but that extra few milliseconds doesn’t make any appreciable difference. I can’t tell when visiting sites on my browser, especially since other factors, such as server response times and resources, take different times to load. However, if you simply want the fastest DNS possible, directly setting DNS on your PC will yield slightly better results.

Cached Performance

But what happens after that first visit, when DNS caching comes into play? This is where the router’s DNS cache can really shine, though not in the way you might expect. Once a site’s address is cached—whether by the router or by Windows—repeat lookups become much faster.

Testing DNS lookup speed with cache

With the router handling DNS and cache enabled, Google DNS lookups dropped to as low as 10–14 milliseconds. When the Windows DNS cache was in play, lookups dipped even lower, sometimes hitting 6–8 milliseconds. In practice, both setups felt lightning-fast for repeat visits. Though setting DNS directly on the PC still edges out router DNS, the router’s capability to cache DNS from all devices in the network far outweighs the extra few milliseconds you get from setting DNS on a device. By pooling all your DNS cache on the router, all other devices get to enjoy resolved addresses without necessarily visiting the site a few more times.

Overall, your network will likely save more time setting DNS on the router when it comes to caching addresses.

Real-World Streaming and Gaming

For online games, DNS speed mostly affects how quickly you connect to a server or match. Once you’re in the game, DNS plays almost no role in your ping or lag, since it only helps with initial server discovery or matchmaking. Still, if you play lots of different games or switch servers often, a fast DNS might shave seconds off your matchmaking and login times.

I tested this with games like League of Legends and Dragon Nest. Changing DNS on my PC may have improved login and matchmaking, but once the game started, there was no difference in ping or gameplay smoothness. If you’re chasing lower ping, focus on your ISP and connection quality, not your DNS.

How Each Method Affected All My Devices

When you change your DNS settings, where you do it can shape how every device on your network performs.

Router-Only DNS: Set It and Forget It

Setting DNS on the router meant every device in my house, including phones, tablets, smart TVs, and game consoles, used the same fast DNS. I didn’t have to touch each device, and guests automatically receive the same improved experience.

This approach also prevents devices from falling back to slow ISP DNS servers. Plus, the router’s cache sped up repeat visits for everyone on the network. If a family member loads a site on their device, it would open faster for me, too, due to caching. But there were trade-offs:

  • No per-device customization: My gaming PC couldn’t use a specialized gaming DNS while the rest of the house used a privacy-focused provider.
  • Router dependency: If the router reboots, cached DNS data is wiped, causing a brief slowdown until the cache is rebuilt.

Still, it’s a great option.

Device-Only DNS: More Control and More Work

Setting DNS on individual devices lets me optimize for each use case. My work laptop uses Cloudflare’s malware-blocking DNS (1.1.1.1), my living room TV is stuck with Google DNS or Smart DNS for streaming, and my phone switches DNS based on whether I am on Wi-Fi or mobile data.

This setup gives me the fastest possible DNS lookups on my main devices and lets me experiment with privacy and security features. But setting it up was also more work. With a dozen devices, managing individual settings gets tedious. Family members sometimes forget to update their DNS after a network change, leading to inconsistent speeds and occasional frustration.

Ultimately, the choice between router-wide and device-level DNS isn’t just about speed—it’s about how much control you want and how much work you’re willing to do to keep your network running just how you like it.

Which DNS Setup Is Right for You?

person using phone to access wifi router
Casezy idea/Shutterstock

So, which DNS setup is right for you? In terms of speed, you’ll get faster DNS lookups by setting DNS directly on your PC. This is because your PC skips going to the router for DNS, allowing it to resolve an address locally. However, this speed advantage is so minimal that you likely won’t feel the difference. Honestly, after all my testing, using both router and PC-level DNS together is the best way to maximize what your network can do.

Setting DNS on your router gives every device in your home a fast, reliable baseline. It means you only have to configure things once, and suddenly your phones, laptops, tablets, and smart TVs all benefit from better DNS performance and privacy. The router’s DNS cache also speeds up repeat visits for everyone, so the whole household gets a smoother experience when revisiting their favorite sites or streaming services.

But that’s just half the story. By also setting DNS directly on specific devices, you unlock a whole new level of flexibility. For example, I use Smart DNS to bypass geo-restricted content on my streaming TV. I can’t set this special DNS on my router because it’s pretty slow at resolving addresses and would affect all my devices. But if I only set it on my smart TV or PC, only that device gets affected by the slower DNS:

Setting Smart DNS only on a specific device

While a slower DNS is an acceptable trade-off for accessing region-locked content, this should not be the default for all devices on your network. By carefully setting special DNS on specific devices, those devices get to access certain functionalities, while everything else in your home continues to enjoy the speed of your router’s set DNS.

Another big advantage of setting DNS on your computer is testing out new DNS providers before rolling them out to your entire network. Maybe you want to see if a new service is actually faster, more reliable, or offers better privacy. By trying it on your PC first, you can experiment without any risk to the rest of your devices. If something doesn’t work right, switching back is easy—no need to troubleshoot the whole house.

This hybrid approach also means you can customize DNS for specific needs. Want extra security on your work laptop? Set it to use a DNS that blocks malware. Need the lowest latency for gaming? Point your gaming PC to the fastest DNS you can find. Meanwhile, everyone else at home still benefits from the router’s setup, and you don’t have to manage a dozen different configurations.

In practice, combining router and device-level DNS settings gives you the best of both worlds: broad improvements for everyone, and targeted tweaks where you need them most. It’s the most versatile, future-proof way to keep your network fast, flexible, and ready for whatever you throw at it—whether streaming, gaming, working, or just browsing the web.

NordVPN Threat Protection Is the Best Security Tool You’re Not Using

NordVPN includes an all-in-one security feature called Threat Protection, which blocks ads, trackers, malware, and suspicious websites. This underrated cybersecurity tool adds an essential layer of protection while you browse and is a must-have for anyone concerned about online safety.

What Is NordVPN Threat Protection?

NordVPN Threat Protection is a comprehensive cybersecurity tool that shields you against online threats. It’s a security feature built into NordVPN designed to go beyond standard VPN encryption by actively identifying and blocking online threats.

This approach helps reduce your reliance on separate ad blockers or antivirus software by combining multiple protections in one tool.

While most people use a VPN to encrypt internet traffic, mask their IP address, or enjoy other benefits of using a VPN, Threat Protection adds another layer by actively shielding from online threats.

Related

What a VPN Is, and Why You Need One in Your Life

VPNs are super handy. You don’t always need one, but they’re great for so many different uses.

NordVPN offers two plans: Threat Protection and Threat Protection Pro. The standard Threat Protection plan uses DNS filtering to block access to harmful websites at the domain level.

Threat Protection Pro is robust and can work in the background without requiring an active VPN connection. It goes beyond DNS filtering by working at the URL and JavaScript level, making it more effective at stopping threats.

Regardless of the plan you choose, Threat Protection scans URLs and files in real time as you browse. This makes it particularly useful if you want strong, always-on security without micromanaging settings or running multiple apps.

Why You Should Use NordVPN Threat Protection

NordVPN Threat Protection Pro feature page

NordVPN’s Threat Protection is more than just an extra perk from the VPN company. It’s a comprehensive security feature for safeguarding against the most common online threats. In today’s internet landscape, where malware, trackers, and phishing sites are rampant, this added layer of defense is extremely helpful.

NordVPN is already one of the top security apps for protecting data, and its Threat Protection feature further enhances its usefulness.

1. Robust Malware and Virus Protection

The biggest reason to use Threat Protection is its anti-malware and antivirus capabilities. It runs in the background and automatically blocks access to malware-hosting websites. Additionally, it scans downloaded files for viruses and, if needed, uploads them to the cloud for deeper analysis.

A key thing to note is that it only uploads executable files for further scanning if the quick scan doesn’t yield satisfactory results. Other files are scanned using the local scanner for privacy reasons.

If a file is found unsafe, it’s removed as soon as possible before it can harm your device. This is particularly useful, since getting rid of malware can be complex and time-consuming. While you can manually remove malware from your device, Threat Protection saves you from that hassle.

Because of this proactive approach, Threat Protection is the first line of defense against cybersecurity threats like spyware, ransomware, Trojans, and worms.

Related

What Is the Difference Between a Worm, a Trojan, and a Virus?

You might have heard someone call any malicious software a “virus,” but that isn’t accurate. Different types of malware function in distinct ways.

2. Ad and Tracker Blocking

Another benefit of using Threat Protection is its ability to block ads and trackers. Blocking trackers from following you around the web boosts your online privacy. It also shields you from unfair pricing based on your browsing and purchase history.

NordVPN Threat Protection also automatically filters out annoying pop-ups and intrusive banners, giving you a cleaner, faster browsing experience. Whether reading articles or shopping online, you can enjoy the web without being followed by intrusive targeted ads or slowed down by bloated pages.

3. Phishing and Malicious Site Protection

NordVPN Threat Protection also defends you against phishing attempts and malicious websites. It acts as your always-on protector and real-time safeguard while you browse. It automatically blocks you from accessing scam websites, phishing links shared via email, and even fake login pages.

Related

7 Types of Phishing Attacks You Should Know About

There are so many types of phishing attacks, and knowing how to spot them is important.

This is especially valuable as phishing attacks become increasingly sophisticated and harder to spot. While there are various ways to protect yourself from phishing attacks, software is one of the most effective.

Threat Protection Pro is specifically powerful because it works at the URL and JavaScript levels. This is better than relying on DNS filtering, which limits the number of websites that can be blocked.

NordVPN Threat Protection is a robust security solution for anyone serious about online security and privacy. It integrates malware protection, ad blocking, and phishing defense into one streamlined solution.

Whether you’re worried about malware, tired of dealing with intrusive ads, or want to keep your browsing habits private, Threat Protection provides essential coverage to help ensure your online safety and privacy. As cyberthreats continue to evolve, tools like Threat Protection become increasingly valuable for anyone looking to stay one step ahead.

I Changed These 6 One UI 7 Settings Immediately—You Should Too

The One UI 7 update has brought a refreshing look and several visual changes to Samsung Galaxy phones. However, there are a few default settings you should try changing up before you get too comfortable.

6

Switched to a Horizontal App Drawer

Previously, Samsung offered a horizontal app drawer on its Galaxy devices, similar to what you’d find on iPhones. But with One UI 7, the default app drawer is now vertical, similar to what you’d see on most stock Android devices.

It’s something Galaxy users have been requesting for a long time. However, having used a horizontal app drawer for the past couple of years, I found the transition a bit jarring.

Thankfully, One UI 7 includes the option to revert to the horizontal style. To do this, you simply need to open the app drawer, tap the three-dot menu icon at the bottom right corner, and select Sort > Custom order.

5

Set a Custom Charging Limit

The Protect Battery feature on Samsung Galaxy phones is quite useful for extending battery lifespan. In One UI 6 and earlier versions, this feature limits charging to 85% to reduce battery wear caused by frequent full charges.

But with One UI 7, you can now set a custom charging cap at 80%, 85%, 90%, or even 95%. This added flexibility is great for anyone who wants more control over their phone’s battery health. Personally, I’ve set mine to 80% to help maximize battery lifespan.

To change the battery charging limit on your Samsung phone:

  1. Go to Settings > Battery > Battery protection.
  2. Toggle Battery protection on.
  3. Choose Maximum mode.
  4. Use the slider to set your preferred charging limit.

4

Turned On Loudness Normalization

Loudness Normalization isn’t exactly a new feature as it first appeared with the One UI 6.1.1 update. However, it was limited to select devices like the Galaxy Z Fold 6 and Galaxy Z Flip 6. With One UI 7, it’s now available on more Samsung Galaxy phones, including my S22.

As the name suggests, Loudness Normalization automatically balances audio levels during media playback. As someone who listens to audio through headphones most of the time, this was one of the first settings I enabled.

To do this, head to Settings > Sounds and vibration > Sound quality and effects and turn on the Loudness Equalization toggle.

3

Tweaked Game Refresh Rate to Save Battery Life

Personally, I like to keep the 120Hz refresh rate enabled at all times to make my Samsung Galaxy phone run faster. It makes scrolling and animations feel incredibly fluid. However, the higher refresh rate can also drain the battery more quickly, especially during gaming sessions.

Thankfully, in One UI 7, you can limit the refresh rate specifically during gaming without affecting the smooth experience elsewhere on your phone. This way, you get the best of both worlds: a high refresh rate for everyday use and improved power efficiency when it matters most.

Here’s how you can adjust the refresh rate for just games on your Samsung phone:

  1. Open the Settings app and scroll down to tap on Advanced features.
  2. Select Game Booster Settings.
  3. Tap on Gaming motion smoothness.
  4. Choose the 60Hz option.

2

Combined Notifications and Quick Settings Panel for Faster Control

By default, swiping down from the middle of the screen only shows notifications in One UI 7. To access quick settings like Wi-Fi, Bluetooth, or the flashlight, you need to swipe down from the top-right corner. As a result, you often have to swipe around just to toggle a setting or check an alert. You either get to see notifications or quick settings, but not both at once.

Thankfully, you can combine both panels into a single unified view, similar to how it worked in previous One UI versions. To do this, swipe down from the top right corner of your screen to view your quick settings and tap the pencil icon to edit it. Tap Panel settings in the top left corner and select Together.

1

Personalized the Now Bar

One of the most useful features introduced in One UI 7 is the Now bar, which places real-time updates and live notifications at the bottom of the lock screen. Once you unlock the device, these notifications also appear in the top-left corner of the screen.

By default, the Now Bar displays alerts from a wide range of apps, including Media Player, Google Maps, Clock, Samsung Notes, and more. While this can be helpful, not every app needs that kind of visibility. For example, I found live updates from Voice Recorder and Samsung Health unnecessary, so I quickly disabled them.

To personalize the Now bar, go to Settings > Lock screen and AOD > Now bar. From there, you’ll see a list of compatible apps with toggles next to them. Simply enable or disable each one depending on what you actually want to see live on your lock screen.

The One UI 7 update hasn’t brought that many drastic changes to Galaxy devices, but it has certainly refined the user experience in meaningful ways. However, if you haven’t explored the settings mentioned above, it’s worth giving them a try. They can help you create a more personalized experience that better fits your daily routine.

How I Instantly Remove Unwanted Objects From My Photos With One Tap

There are few things worse than realizing a trash can ruined the only Instagram-worthy shot you took. Thankfully, most editing apps now offer object removal features that save you the hassle of needing a second run of your photoshoot. I’ve tried nearly all of them, and there’s one app I’ve found you can never go wrong with.

Adobe Express is Adobe’s all-in-one content creation tool and is essentially a middleground between Photoshop (which I’m yet to find my way around) and basic mobile editing apps with nothing more than filters.

Related

My Favorite Photo Editing Apps That Aren’t Oversaturated With AI Features

Fed up with the AI-heavy photo editing apps? Try these apps for authentic editing.

Though Express is the ultimate tool for digital artists and creators, it also has features that cater to everyday users like you and me. The cloud-based editing app’s Remove Objects tool is one of these features, and it not only does the job well, it’s also ridiculously simple to use.

Here’s how you can use Adobe Express to remove an object from an image:

  1. Head to Adobe Express’s website or mobile app, and hit the purple plus (+) icon. On the mobile app, the icon will be located in the bottom-right corner of your screen. On web, you’ll find it in the top-right corner of the screen instead.
  2. Tap Upload media, and then select one of the following options: Photo Library, Take Photo, or Choose File.
  3. Upload the image you’d like to remove a distracting object from.
  4. On mobile, select Remove object from the toolbar at the bottom of the screen. On web, you’ll need to select the image in the editor for the panel of tools to appear.
  5. Click Remove object.
  6. Draw over the distraction you’d like to remove.
  7. Once you believe you’re ready, hit Ready.
  8. Wait a couple of seconds, and then Express will automatically generate three different image results under a Results header.
  9. If the image fits your expectations, and you’re good to go, hit Keep. Otherwise, you can tap Discard to go back.
  10. If you’re willing to give Express one more shot, swipe past the results and tap More.
  11. Once you’re happy with how your image is looking, hit the Download icon in the top-right corner (or the Download button on web).
  12. Expand the File format dropdown, and select from PNG, JPG, PDF Standard, or PDF Print.
  13. Click Download and you’re good to go!

What Makes Adobe Express Better Than Other Apps I’ve Tried for Cleaning Up

I’m in no way opposed to subscribing to premium apps. But when it comes to apps with features I don’t expect to use every single day, it’s hard to justify paying a subscription fee every month. The best part about the Remove Object tool is that it’s mostly free to use. On Adobe Express’s free version, you get 25 generative credits monthly, which are deducted every time you use a Firefly-powered feature like Generative Fill or Remove Object.

Adobe Express open on an iPad
Mahnoor Faisal/MakeUseOf

For Premium subscribers, though you get 250 generative credits per month, using the Remove Object tool doesn’t make a difference, and it’s essentially unlimited. Frankly, unless you edit images on a professional scale, I feel like 25 generative credits should be more than enough for the average user.

Of course, it wouldn’t be the same if you decided to use other AI-powered features in Express, since those would also deduct from your generative credits. Nonetheless, if you choose not to use them, you’d be able to remove objects from 25 images. Given that most tools typically cap free users at five to ten free images per month, that’s actually pretty generous.

Related

I Tried Adobe Express Premium, and It Was Worth It

Adobe Express Premium’s features won me over… here’s why.

Cost aside, the primary reason why I prefer Adobe Express’s Remove Object tool, even over Apple’s Clean Up tool (which is free), is because it gives me better results than nearly all the apps I’ve used.

Before settling on Adobe Express, I tried multiple apps, and I’d always get similar results like the one below.

Daylist on an iPad edited using Clean Up-2
Mahnoor Faisal/MakeUseOf

There would always be some sort of discoloration in my images, which’d make it painfully obvious that I removed an object. What good is editing when it’s straight-up obvious?

When a Photo’s Almost Perfect—This Is What I Do

At the end of the day, Adobe Express too is just a tool. Though the times I’ve gotten an unsatisfactory result are fairly limited in number, I’m not going to sugarcoat it—there have been a few. But even in those cases, the result isn’t completely off. It’s simply not perfect, which is what I’ve come to expect from Express. The good part? It’s usually almost perfect, so a few edits here and there are always enough to get me going.

Sometimes, the result tends to look a bit messy and not neat, with the slightest bit of discoloration. Though I could probably get away with posting such results on Instagram without anyone batting an eye, they do bother me. For me, the fix is always the same—adjust the brush size! Though it might sound obvious, the more precise you are when drawing over the object, the better the result tends to be.

Remove Object brush slider in Adobe Express

Increasing or decreasing the brush size (usually the latter) allows you to more carefully draw over the object you’d like to remove. And since the discoloration usually tends to show up on solid surfaces in my case (like beds and floors), simply changing the brush size and drawing over the distraction more carefully usually does the trick.

At times, the object doesn’t completely fade away, even if you’ve drawn over it completely. In such cases, what’s always worked for me is choosing the best-looking result from the first pass, then running the Remove Object tool on that new version again. It’s not a one-and-done fix every single time, but the second pass almost always gets it just right. If it doesn’t, I simply zoom in and go over the leftover bits with a smaller brush, and voilà!

Related

9 Cool Things You Can Do With Adobe Express

Adobe Express has everything you need to create these things.

The rare times when layering the Remove Object tool doesn’t work, the best way really is to just camouflage the leftover bits. I usually do this by brushing over the area with a similar color that blends in better with the surroundings. It’s a bit of manual effort, but it works well enough to make the flaw practically invisible.

Express’s Remove Objects tool is one of the features powered by Adobe’s generative AI model, Firefly, which I’m sure plays a big part in why the tool works so well. But at the same time, tools like Clean Up are powered by AI too, and they just don’t get it right. As I mentioned above, free users can use the Remove Object feature at no cost at least 25 times, so you really have nothing to lose by trying it out.

Here’s What Budget Buyers Need to Know

High dynamic range (HDR) isn’t a single, uniform standard, and when you’re shopping on a tighter budget, the label can mean wildly different things. So, before you take that sticker at face value, it’s worth understanding what that “HDR Ready” or “HDR10+” label really means.

The Term “HDR” Might Mean Less Than You Think

When you see “HDR” slapped on the side of a cheap TV or monitor packaging, don’t get too excited. It is often more of a marketing catchline than a meaningful feature. Technically, the box might support HDR10 or even Dolby Vision on paper, but in reality, the experience can be wildly underwhelming, and sometimes downright misleading.

The problem is that, more than being about compatibility with a format, proper HDR is about how the content actually looks when it hits your screen. That requires decent processing power in the box, proper tone mapping, and a display that can do justice to the expanded brightness and color range HDR promises. Most budget TV boxes simply don’t have the horsepower—or the software smarts—to handle that properly.

Most frustrating is that no standardized rating system forces manufacturers to disclose the actual HDR performance capabilities. If you’ve watched HDR content on your budget TV and thought, “I don’t see what the fuss is about,” I bet you’re not seeing true HDR. You’re seeing a shadow of what could be, and that’s exactly what TV manufacturers are banking on you not realizing.

Related

What Is HDR TV, and What Are Its Different Formats?

HDR tech doesn’t have to be a confusing mess of acronyms and tech jargon.

True HDR Performance Depends on Peak Brightness and Contrast

In an ideal HDR scene—say, a spaceship flying toward a blinding star—you should see a clear distinction between the blackness of space and the intense glow of the star. But if your TV tops out at, say, 300 or 400 nits (a measure of brightness), that “blinding light” might just look like a slightly brighter white blob. For proper HDR impact, you want at least 600 to 1,000 nits of brightness. Anything lower, and highlights lose their spice, colors dull out, and the whole image can feel flat.

Then there’s contrast, which is all about how well your TV can show deep blacks next to those bright highlights. Budget LCD panels with edge-lit backlighting can’t produce the precise light control needed for true HDR. If your TV can’t get properly dark in specific areas while staying bright in others (a measurement called “local dimming”), you’re missing half the HDR equation. The best budget options usually employ at least some form of local dimming with multiple zones, though they won’t match the pixel-level precision of OLED, QLED, or QNED.

A practical way to understand if your “HDR” TV is delivering is to watch a nighttime scene with streetlights or a starry sky. If the bright spots bloom significantly into dark areas or the whole scene looks uniformly gray, your TV’s contrast capabilities are compromised.

Wide Color Gamut Is Equally Important for Vivid HDR

A man looking at a TV while holding a magnifying glass.
asyl Shulga / Andrey_Popov / Shutterstock

Another piece of the HDR puzzle that often gets overlooked—especially in budget TVs—is wide color gamut (WCG) support. Standard dynamic range (SDR) TVs are limited to the Rec.709 or sRGB color space, which covers only a relatively narrow range of colors. In contrast, HDR content is typically mastered in the much wider DCI-P3 color space and sometimes targets the even broader Rec.2020 standard, although few consumer displays can fully reproduce that.

That is why those demo videos of tropical fish or flower gardens you would find in TV showrooms look so much more vivid in proper HDR. You’re literally seeing colors that weren’t possible on older displays, like vibrant reds, lush greens, and deep blues. These colors feel richer and more lifelike than SDR can deliver.

If you’re curious whether your screen is really pulling its HDR weight and showing off a wide color range, try hooking it up to your PC via HDMI and checking out the Wide-Gamut site. It’s a simple test, and it’ll let you know if your display is really up to snuff or just faking it.

Related

What Is a Color Gamut?

Monitor and TV all display the same colors, right? Not quite.

How to Get the Best HDR Experience on a Budget

A solid HDR experience on a budget is totally doable. You just need to know which specs actually matter and which ones are just marketing fluff. As I mentioned earlier, you’ll want a TV that can hit at least 600 to 1,000 nits of peak brightness, supports local dimming, and covers a wide color gamut, ideally close to DCI-P3.

In addition, you need to calibrate your TV for HDR. Many budget TVs have HDR modes that crank up saturation and brightness to unnatural levels out of the box. A quick calibration, either using built-in presets like “Cinema” or “Movie” mode or tweaking settings yourself, can make a world of difference. Lower the brightness a bit, reduce sharpness, and dial back the color saturation for a more natural, less cartoonish look.

You should also use quality HDR content and proper sources, since HDR is only as good as the content you feed it. Streaming platforms like Netflix and Disney+ offer HDR titles, but make sure your internet speed and streaming device support HDR playback properly. If you’re gaming, newer consoles like the PS5 or Xbox Series X have HDR support, but you’ll want to check your TV’s input settings to enable HDR mode. Remember, HDR on a budget TV won’t magically fix poorly mastered content, so stick to well-reviewed HDR media.

Pay attention to room lighting, too. Ambient light can wash out HDR’s impact. If you’re watching in a bright room, even a decent HDR TV will struggle to impress. Try to control your environment: dim the lights or watch in a darker room to let those highlights pop.

In my opinion, the best budget HDR hack is probably patience. TV prices drop dramatically during holiday sales, and last year’s mid-range models often outperform this year’s budget options. A little research and waiting for the right sale can score you dramatically better HDR performance without spending more.

ChatGPT’s New Coding Agent Is Huge, Even if You Aren’t a Programmer

ChatGPT does a pretty good job of generating code from text prompts and breaking it down. Now, OpenAI has added a new coding agent to ChatGPT, and it’s not just programmers who should be excited

ChatGPT’s Codex Takes AI Programming to the Next Level

OpenAI is launching a research preview of Codex, a “cloud-based software engineering agent.” The feature is powered by codex-1, a version of the OpenAI o3 model optimized for coding and software engineering tasks. Codex-1 is also trained to align its output closely with “human coding preferences and standards.”

You can find the feature in the ChatGPT sidebar if you’re a ChatGPT Pro, Enterprise, or Team user, with Plus and Edu users getting it soon. Once open, you can either assign it a coding task by typing a prompt and entering the Code button or ask questions about your codebase using the Ask button. You’ll find information on Codex’s task list and progress below the prompt bar.

This new agent can perform multiple tasks on an existing codebase, like adding new features, fixing bugs, and answering any questions you might have. Each task runs in a separate isolated environment, preloaded with your codebase or repository. Codex can read and edit files as well.

OpenAI’s announcement claims that the agent will take anywhere between one to 30 minutes to complete an assigned task, depending on the complexity of the task. You can monitor its progress in real-time or even run multiple tasks simultaneously, all while using your browser and computer as usual.

While ChatGPT can help you generate code and even provide entire projects that you can download and test, it doesn’t work well with software repositories and codebases. Codex’s abilities to with within typical software engineering infrastructures means it’s a lot more useful compared to vanilla ChatGPT to both companies and individuals who maintain multiple projects in repositories.

Codex produces cleaner code compared to ChatGPT, which is ready for human review and integration into workflows or codebases. It also runs tests until it passes all the given test cases and conditions. Once a task is completed, Codex will commit the changes to its environment and provide “verifiable evidence of its actions through citations of terminal logs and test outputs.”

Why Is Codex a Big Deal?

Codex is a big deal for professionals in any industry. You can write Excel macros, automate reports, batch edit files, and do just about everything that would’ve required expertise in some programming or scripting language.

Sure, ChatGPT can generate code and scripts for you, but in my experience, it’s not reliable. You need to have relatively good knowledge of the programming language you’re working with and a general idea of code debugging. Codex, however, automatically checks its code and runs tests to ensure it works the way you want.

This might improve with ChatGPT’s new GPT-4.1 model, but it’s not a perfect solution. Knowing when to use which ChatGPT model can largely affect the output, so a model custom-made for coding will perform better than a more general-purpose model.

Of course, if you’re a programmer, Codex is massively helpful as it can integrate with your GitHub repositories and take care of repetitive tasks and test cases. This lets you develop and ship your app faster without getting caught up in maintenance, testing, and other tasks usually part of the software development process.

Anyone Can Enjoy the Benefits of a Local LLM With These 5 Apps

Cloud-based AI chatbots like ChatGPT and Gemini are convenient, but they come with trade-offs. Running a local LLM—the tech behind the AI chatbot—puts you in control, offering offline access and stronger data privacy. And while it might sound technical, the right apps make it easy for anyone to get started.

Ollama is a user-friendly app designed to help individuals efficiently run local LLMs without the need for technical expertise. It allows you to run powerful AI models on consumer-grade hardware like a laptop. Ollama stands out for its simplicity and accessibility, requiring no complex setup.

It supports a variety of models and has a desktop app available on macOS, Windows, and Linux, so whichever platform you use, you’re covered. The setup process is simple, and in no time, you’ll be ready to run LLMs on your device.

To launch a model, you use the command ollama run [model identifier]. You can specify one of the supported LLMs at the end. For example, to run Microsoft’s Phi 4 model, just enter the following command:

        ollama run phi4
    

For Llama 4, run:

        ollama run llama4
    

The specified model will download and begin running. You can then chat with it directly from the command line. For example, you can run DeepSeek locally on a laptop using Ollama.

Running LLMs locally on Mac using Msty

Similar to Ollama, Msty is a user-friendly app that simplifies running local LLMs. Available for Windows, macOS, and Linux, Msty eliminates the complexities often associated with running LLMs locally, such as Docker configurations or command-line interfaces.

It offers a variety of models that you can run on your device, with popular options like Llama, DeepSeek, Mistral, and Gemma. You can also search for models directly on Hugging Face, my go-to site for discovering new AI chatbots. After installation, the app automatically downloads a default model to your device.

After that, you can download any model you like from the library. If you’d rather avoid the command line at all costs, Msty is the perfect app for you. Its easy-to-use interface makes the experience feel premium.

The app also includes a library of prompts with several pre-made options that you can use to guide LLM models and refine the responses. It also includes workspaces to keep your chats and tasks organized.

AnythingLLM app home screen on macOS

AnythingLLM is a handy desktop app designed for users who want to run LLMs locally without a complicated setup. From installation to your first prompt, the process is smooth and intuitive. It feels like you’re using a cloud-based LLM.

During setup, you can download models of your choice. Some of the best offline LLMs, including DeepSeek R1, Llama 4, Microsoft Phi 4, Phi 4 Mini, and Mistral, are available to download.

Like most apps on this list, AnythingLLM is fully open-source. It includes its own LLM provider and also supports multiple third-party sources, including Ollama, LM Studio, and Local AI, letting you download and run models from these sources. Because of this, it allows you to run hundreds, if not thousands, of LLM models available on the web.

Chatting with Qwen LLM locally using Jan.ai app

Jan markets itself as an open-source ChatGPT alternative that runs offline. It provides a sleek desktop app for running different LLM models locally on your device. Getting started with Jan is easy. Once you install the app (available on Windows, macOS, and Linux), you’re provided with several LLM models to download.

Only a handful of models are shown by default, but you can search or enter a Hugging Face URL if you don’t see what you’re looking for. You can also import a model file (in GGUF format) if you already have one locally. It really doesn’t get easier than that. The app includes cloud-based LLMs in its listings, so be sure to apply the appropriate filter to exclude them.

Related

Should You Use a Local LLM? 9 Pros and Cons

Using a local large language model isn’t for everyone, but there are some good reasons why you might want to try.

LM Studio Onboarding Screen

LM Studio is another app that provides one of the most accessible ways to run local LLMs on your device. It gives you a desktop application (available on macOS, Windows, and Linux) that lets you easily run LLMs on your device.

After setup, you can browse and load popular models like Llama, Mistral, Gemma, DeepSeek, Phi, and Qwen directly from Hugging Face with just a few clicks. Once loaded, everything runs offline, ensuring your prompts and conversations stay private on your device.

The app boasts an intuitive user interface that feels familiar, so you’ll feel right at home if you’ve used cloud-based LLMs like Claude.

There are many ways to run an LLM on Linux, Windows, macOS, or whichever system you use. However, the apps listed here offer some of the easiest and most convenient ways to do it. Some involve a bit of contact with the command line, while others, like AnythingLLM and Jan, let you do everything from the graphical user interface (GUI).

Depending on your technical comfort level, try out a few and stick with the one that suits your needs best.

Here’s How to See if Your Data Was Exposed

Crypto exchanges are popular targets among cybercriminals. A huge crypto exchange has been breached, and while your money is safe, your personal data might have fallen into the wrong hands.

Rogue Support Workers Helped Breach Coinbase

Popular crypto exchange Coinbase has disclosed a data breach, claiming hackers “bribed and recruited” its support workers to steal customer data and scammed users into sending them money. The company’s filing with the SEC adds that it received an email from the hackers on May 11, claiming they have information on “certain Coinbase customer accounts” and internal company documentation, including materials related to its customer service and account management systems.

Pro Aerial Master/Shutterstock

The hackers targeted Coinbase’s overseas customer support agents, using cash offers to let them copy data from the company’s customer support tools for “less than 1% of Coinbase monthly transacting users.” The goal was to collect a customer list to scam users into handing over their crypto assets via social engineering attacks. This isn’t the first time Coinbase employees have been targeted either.

They also tried extorting the platform for $20 million, but Coinbase refused to pay up. In the end, the hackers were able to get away with the following data:

  • Personal information, including names, addresses, phone numbers, and emails.
  • The last four digits of saved Social Security numbers.
  • Masked bank account numbers and identifiers.
  • Government ID images
  • Account data such as balance snapshots and transaction history
  • Internal corporate data, as mentioned above.

The crypto exchange clarified that the stolen information doesn’t include login credentials or 2FA codes, private keys, or any access to customer funds. All Coinbase Prime accounts are also untouched.

How Is Coinbase Responding?

The responsible agents were “fired on the spot,” and Coinbase will be pressing criminal charges. In the meantime, the platform has set up a $20 million reward fund for any information leading to the arrest and conviction of the hackers. It’s also working with industry partners and law enforcement to track and recover any lost funds.

Related

Will Coinbase Refund Your Crypto if You’re Scammed?

Coinbase is one the biggest and most popular crypto exchanges, but what happens if you get scammed on its platform?

If your data was accessed in the breach, you should have received an email from [email protected] explaining the situation. The crypto exchange will also reimburse you if you were tricked into sending funds to the attacker in a social engineering attack. Its announcement clearly states:

Coinbase will voluntarily reimburse retail customers who mistakenly sent funds to the scammer as a direct result of this incident prior to the date of this post, following a review to confirm the facts.

The announcement also warns of scammers posing as Coinbase employees asking you for your account password, two-factor authentication (2FA) codes, vault or wallet addresses, or pressuring you to move your money to a “secure” wallet. Other recommended best practices include enabling withdrawal allow-listing, using strong 2FA (preferably hardware keys), and locking your account if you suspect you’re being scammed.

My 6 Handy Tips for Boosting Your Mobile Hotspot Speeds

Slow mobile hotspot speeds can be a real showstopper. That’s why whenever my hotspot slows down, I turn to a handful of tried-and-tested tips that instantly boost performance, whether I’m working remotely or streaming videos away from Wi-Fi.

6

Check Data Usage and Plan Limits

One issue you may not think about while battling slow hotspot speeds is your cellular plan. Monitoring data usage is crucial when using a mobile hotspot, especially if your plan has limits or throttling thresholds.

Even with an “unlimited” plan, check the fine print to ensure you’re still within the specified fair usage policy. Once you exceed a certain amount of data, your speed may still be subject to throttling.

Most smartphones let you monitor data usage in the settings, and some carriers also offer apps or alerts to help track your consumption. If you’ve hit your plan’s limit, consider upgrading to a plan with more hotspot data or switching to a carrier that offers better terms.

5

Stop or Pause Data-Heavy Processes on Your Hotspot Device

Apple | Gabo_Arts/Shutterstock

Unlike a dedicated router, your phone performs many tasks besides providing internet access. The mobile phone you’re using as a hotspot might be juggling multiple tasks, leading to slow internet speed.

If it’s handling data-heavy processes like system updates, cloud backups, or large downloads, it can quickly consume your hotspot bandwidth, slowing everything down. The main culprits to keep in check include streaming content, app updates, system updates, file downloads, and cloud backups.

To enjoy the full speed while using your mobile hotspot, stop or pause such tasks on the device. This way, all the bandwidth is available for use by the connected devices.

4

Limit the Number of Connected Devices

Like regular Wi-Fi, the number of devices connected to your mobile hotspot affects speed. Each device shares the same data bandwidth, so the more gadgets you have connected, the less speed each one gets.

So, connecting too many devices to your mobile hotspot can quickly slow things down. Limit the number of connected devices to maintain a fast and stable connection at any point.

Related

How to Check Who’s Connected to Your Android Hotspot

Find that one person who’s using up your Android phone’s cellular data.

Especially if you need to download a large file or stream your favorite show at the best quality on a specific device, ensure you disconnect those that are not in active use. Many modern devices perform background updates that you may overlook, but are secretly eating up your hotspot bandwidth.

3

Turn Off Battery Saver or Low Power Mode

Modern smartphones include a battery-saving feature to reduce battery use. It’s one of the quickest ways to make your battery last longer on Android or iOS devices.

However, while battery saver or low power mode works like a charm in extending battery life, it limits performance. In an attempt to stretch battery life, your device can throttle your data speeds, leading to slower mobile hotspot speeds.

When enabled, your phone might not fully power the network functions needed for a strong, stable connection. Thus, for the best performance, it’s best to keep these power-saving features off.

To turn off low power mode on iOS, go to Settings > Battery and toggle off Low Power Mode. On Android devices, navigate to Settings > Battery > Battery Saver and toggle off Use Battery Saver.

The steps to turn off the battery saver on your specific Android device may vary depending on the model and Android version.

2

Optimize Hotspot Placement

hand holding an Android phone showing the Mobile Hotspot feature in front of a computer monitor
Hamlin Rozario / MakeUseOf

Since your phone acts as both a modem and router when you’re using a mobile hotspot, placement matters. Network signal strength significantly impacts hotspot speed. You can tell how strong the cell signal is by checking the level of network bars available in the status bar. If the network indicator isn’t full or above 80%, your signal may be too weak.

Optimizing your hotspot placement can significantly improve your connection speed. For the best results, keep it in an open, elevated spot—ideally near a window where it can catch a stronger cell signal.

Avoid enclosed areas like drawers, bags, or behind thick walls, as these can block signal strength and reduce speeds. If you’re indoors, try different spots around your home or workspace to see where the signal performs best. Additionally, place the connected device closer to the hotspot for the best results.

1

Switch to the Fastest Frequency Band

The first and most effective way to increase the speed of your mobile hotspot is to use the fastest available frequency band. Smartphones support several frequency bands, including 3G, 4G, and 5G.

The higher the number, the faster your hotspot speeds will be. So, switching from 4G to 5G on your phone can make a huge difference. If your phone and carrier support 5G, use it. Otherwise, stick with 4G. 3G is being phased out in the US and other European countries, and doesn’t provide enough bandwidth for a strong mobile hotspot.

Related

What Is 5G? Here’s How It’ll Make Mobile Internet Faster and Better

Feel your mobile internet is too slow? 5G is the latest generation of mobile internet, and will make mobile data faster than ever.

On iOS, go to Settings > Mobile Service > Mobile Data Options > Voice & Data to change your frequency band. On Android devices, open Settings > Network & Internet > SIMs, select the SIM card you’re using for data, then tap Preferred network type.

Mobile hotspot speeds can fluctuate due to many factors. However, following these tips will help you maximize performance and enjoy a smoother, more reliable connection wherever you are.

Smartphone Wallet Apps Are Safe, but You Should Still Take These 5 Precautions

Smartphone wallet apps are a super handy replacement for your physical wallet, holding your money, cards, identification, and more. They’re super safe to use and make it easy to keep your most important cards nearby without having to lug a wallet or purse around—but there are still some serious precautions you should take.

1

Use Biometric Authentication

Most, if not all, smartphones have a fingerprint scanner that you can use to lock both your phone and any apps on it. Digital wallets also support this functionality, letting you use your fingerprint or face to unlock the app.

Yadullah Abidi / MakeUseOf

Biometric authentication is one of the most secure signing mechanisms you can use. Passwords and PINs are useful, but they can be guessed, stolen, or phished. Biometric data is much harder for a cybercriminal to steal or replicate. It also ensures that even if your device is stolen or lost, someone can’t waltz into your digital wallet app and start making payments.

Make sure not to abandon your PIN and password altogether. Using a strong password or PIN to lock your phone is still important. In case biometric authentication fails, they come as your only option for accessing your wallet app and phone.

2

Regularly Monitor Account Activity

This might sound obvious, but regularly monitoring account activity can help you catch any suspicious transactions before they snowball into bigger losses. Most wallet apps already send real-time notifications for each transaction, but you can always monitor your transaction history within the app.

Google Pay transaction history option
Yadullah Abidi / MakeUseOf

Criminals often start with small transactions to test if an account is vulnerable without alerting the owner. Regularly reviewing your account also gives you a bird’s eye view of what mode of payment might be leaking money. For example, if your credit card is compromised in a website data leak and hackers try to charge your account, you can spot the smaller, test transactions on your card.

I recommend reviewing account activity at least once a week. As an added bonus, you’ll also be more aware of where your money is going, which helps a long way in planning monthly budgets in my experience. Some wallet apps also let you set up custom transaction alerts based on the value or location of the transaction. These can immediately alert you to any transactions you might be unaware of.

3

Watch Out for Phishing Attacks

Another tip is to always be on the lookout for phishing attacks attempting to steal your payment information. Hackers send scary-sounding fake emails and can even get past your inbox’s spam filters.

smishing text with envelope symbol next to laptop
tete_escape/Shutterstock

Despite your best efforts, a phishing page, malware, or other hack can always sneak by. For example, a MakeUseOf writer was phished on Steam and ended up losing money in the form of their wallet balance, despite years of experience online and with security matters.

The best way to avoid getting phished is to take it slow, carefully read the message or email, and check the URL before clicking any links. There are numerous ways you can check for suspicious links in text messages. Furthermore, scammers often use QR codes, so be careful before scanning random QR codes in emails or messages.

4

Set Transaction Limits When Possible

Setting transaction limits in your digital wallet apps is one of the best ways of protecting yourself from random incursions. Transaction limits were initially designed to help manage your finances, but they also double up as a preventive measure in case your wallet gets compromised.

Even if an attacker gains access to your digital wallet and can make payments, your transaction limit will reduce the damage to your bank account, long enough for you to take action. Transaction limits don’t actively protect your digital wallet or financial information from being abused, but they will keep a hacker from running away with all your money at once.

5

Disable Automatic Saving of Payment Information

Digital wallets (especially Google Pay!) will ask to automatically save your payment information on a site you’re checking out. Browsers and other apps also offer to link with your digital wallet to make your checkout experience more seamless and avoid the hassle of entering your card details and more every time you make a purchase.

Privacy app creating virtual payment cards on a Galaxy Z Fold 6.
Bertel King / MakeUseOf

I’ll be the first to admit that this is extremely convenient and how online payments should be made. That said, it’s also too much of a security risk. Once you let websites or apps start saving your financial data, you’re also trusting them to safeguard it. And while safety isn’t much of a risk at bigger retailers like Amazon, Best Buy, or eBay, smaller businesses that don’t practice the best cybersecurity measures can inadvertently end up leaking your financial information to hackers.

Disable automatic saving on your browser, and generally avoid the temptation with other apps as well. Entering your details manually for each purchase can be a hassle, but the peace of mind that comes with it is well worth the effort.

The chances of your digital wallet being compromised on its own or on the company’s end are quite slim. However, individual users are always a target for hackers and scammers looking to skim their money. Taking a few simple precautions can go a long way in protecting you from any crooks stealing your money.

Spotify’s AI DJ Now Takes Song Requests So You’re Not Stuck With Its Weird Picks

Love Spotify’s AI DJ or hate it, you’ve got to admit it’s one of the most unique (and fun) ways to listen to music. But unlike a real DJ, Spotify’s version has always been more of an “I talk, you listen” kind of affair. Well, until now.

Spotify’s AI DJ Now Lets You Take Control

Today, Spotify announced that it’s adding a new way to interact with the DJ through a post on Spotify Newsroom. The streaming giant shared that the DJ can now take music requests, offering users “an entirely new way to curate the vibe of their listening sessions in real time.”

With this new feature, you can simply ask the DJ to switch up your jamming session by telling it what music you’d like to listen to at that moment. You can even tell the DJ to play a specific genre, mood, artist, or drop an “activity-related request.” For instance, you could hit the DJ with a request like “play me some calm tracks for a rainy night” or “surprise me with some jazz I’ve never heard before.”

To use this feature in the Spotify app, just head to the Search tab at the bottom, search for DJ, and tap the DJ playlist. When you want to make a request, press and hold the DJ button in the bottom right corner.

Once the DJ is ready for you, you’ll hear a beep. Make your request, and the DJ will update the session based on your request, listening history, music preferences, and more.

Prior to this change, all you could do if you didn’t vibe with the DJ’s choices was hit the DJ button in the bottom right corner, and it would switch up the song you were listening to. With this new update, you now have more control over how the playlist flows, yet you’ll still be able to use the DJ feature to listen to and discover new music without doing all the work yourself.

I can imagine nudging the DJ to stop playing those tracks I’ve been skipping for weeks, but it can’t seem to let go of, and instead, play more of that indie artist I’ve been loving lately!

I’ve always loved the DJ feature. It’s unique, and since I have this weird habit of constantly tracking (and psychoanalyzing) my Spotify stats to see what I’ve been listening to lately, hearing the DJ break down my listening habits is great. Since sometimes you’re just not in an environment where speaking is ideal, I do wish there was a way to type your requests instead of having to speak them out.

Related

I Love Spotify’s Daylists, but Man, Spotify Needs Some Chill

These Spotify playlist titles are something else.

Given that DJ is only available for Spotify Premium subscribers in 60 regions, this option won’t be accessible to free users (or those located somewhere other than the markets where DJ is currently available). Though Spotify added a Spanish-speaking DJ in 2024, requests are only currently available in English. The feature is likely still rolling out (I don’t have access to it yet, though I have DJ), so you might have to wait a bit before you see it on your end.

How Your Next Airbnb Could Be Much More Than Just a Home Rental

It’s fair to say that when Airbnb launched in 2007, it disrupted the vacation industry. All of a sudden, there was an easy way to book a stay in someone’s home, all through an app. And now, Airbnb is looking to disrupt the market all over again.

Airbnb Services to Make Your Stay Special

The first thing that Airbnb is doing is adding services to its offerings. Services are, as the name suggests, services designed to make your stay more special. Airbnb Services include everything from professional chefs to spa treatments, from personal training to hair stylists.

The people providing the services are all vetted, and boast an average of 10 years of experience. Prices start at $50, and at launch will be available in 260 cities. Airbnb will be adding new offerings and locations over time.

The best part is that you can book a service in your own home, with no need to be staying in an Airbnb at the time.

Airbnb Experiences Let You Explore With Locals

Next up are Airbnb Experiences, designed to allow you to live like a local. While many of us will have embarked on an excursion or two while on vacation, Airbnb wants to look beyond the standard tour groups. Instead, you’ll be able to book experiences with locals who know their cities.

There are museum tours, cooking classes, wildlife experiences, and much more. Airbnb Originals will up the game even further, offering the opportunity to share experiences with celebrities including Sabrina Carter and Patrick Mahomes (for a price).

Experiences are initially available in 650 cities around the world, with Airbnb promising to add more over time.

An All-New Airbnb App Makes It All Accessible

The final piece of this puzzle is the all-new Airbnb app that’s designed to make it easier to find and book homes, experiences, and services. Given the expansion of its offerings, Airbnb has, according to its press release, rebuilt the app from the ground up.

The Explore tab is your gateway to everything Airbnb offers, allowing you to search for homes, experiences, and services. Once you book a trip, you’ll see a Trips tab with a detailed itinerary. There’s also a redesigned profile page, and a revamped messaging platform.

The key here is that Airbnb wants to move beyond just pairing you with hosts with places you may want to stay. Instead, like a hotel would offer, as well as providing your accommodation needs, Airbnb can now provide experiences and services on top of that.

Previously, you may have opened the Airbnb app (or one of the Airbnb alternatives) a couple of times a year to search for and book some accomodation for a vacation. However, these changes could make you more likely to check it out regularly to see what is being offered in your area.

This Free Open-Source App Is the Ultimate Windows Optimization Tool for Power Users

I’ve always wanted a simple way to tweak and tune my Windows PC without digging through endless settings. Winhance does exactly that. It’s a single dashboard that lets me customize, clean up, and personalize Windows, making it more intuitive to use.

A Swiss Army Knife for Windows

Winhance is a free open-source tool to control, debloat, and optimize your Windows computer. Much like a Swiss Army knife, it lets you remove pre-installed apps, optimize your system settings for security, performance, and privacy, and even customize some aspects of the Windows personalization experience without hunting through multiple menus.

Debloating Your Computer

Debloating is one way to speed up your sluggish Windows PC, and Winhance makes it easy to locate and remove bloatware. It scans your system for pre-installed apps and lists them on the Software & apps tab. Then, you can select all the apps or select a few that you want to uninstall.

To uninstall a program, select the item you want to remove and click Remove Selected Items. Confirm the action, and Winhance will execute the removal script to uninstall the selected program.

Digging into the Windows Optional Features menu reveals some optional features that aren’t enabled by default. For instance, you can install and enable Hyper-V, which is normally not available for Home edition users. Similarly, you can enable Windows Sandbox on Windows Pro and above editions and even disable the controversial Recall feature that comes pre-installed on Copilot+ PCs.

The tool even creates scripts and scheduled tasks to prevent Microsoft from installing removed apps back onto your system through Windows Updates. Additionally, it’s also possible to reinstall any of the pre-installed apps that you may have removed accidentally.

What’s also interesting is the External Software section. It consists of a list of popular and essential third-party tools that should come pre-installed with Windows. You can choose from popular web browsers, customization utilities, development apps, compression, productivity and remote access apps, and more.

The external software section in Winhance on Windows 11

You can save all your preferences in a configuration file, allowing you to quickly apply the same settings across multiple systems. This makes it much easier to manage new installations—just import the file, and all your preferred settings will load automatically, saving you from manually configuring each computer.

Optimize Security, Privacy, Power, and Windows Update Settings

The Optimization tab provides a centralized dashboard for fine-tuning your system’s security, privacy, and performance settings. Instead of navigating through multiple menus, you can quickly access essential Windows options. For instance, the Windows Security Settings page lets you adjust the User Account Control notification with a simple slider—something that usually requires digging through Windows’s classic Control Panel options.

the optimization section in the winhance tool on Windows 11

Privacy settings get special attention, and for good reason. Often, having to dig through the privacy settings is a hassle, and many users tend to leave it at the default settings. However, with the ever-increasing concerns about data collection, Winhance makes it easy to change your Windows privacy settings. You can disable activity history, turn off camera access, stop personalized ads, and prevent tailored experiences from gathering data about you.

Each setting shows a small warning icon to indicate if the registry value is missing for any of the options or if a restart is necessary to apply the changes.

The Update section addresses one of Windows’ biggest annoyances: automatic updates and restarts. With Winhance, you can disable automatic updates entirely or delay security updates for up to seven days. It also lets you fine-tune your update preferences. You can choose whether Microsoft Store apps update automatically, disable update notifications entirely, exclude certain drivers from updates, and prevent automatic restarts. If you’re on a metered connection, Winhance will let you stop updates from downloading in the background, giving you full control over when and how updates occur.

Power settings optimization goes beyond the basic balanced/high performance options, too. You can enable hibernation mode, configure power throttling, and even adjust CPU priority for gaming.

The Windows update settings section on the winhnace tool in Windows 11

Speaking of gaming, there’s an entire Gaming and Performance section. This lets you assign CPU and GPU priority, prioritize network traffic for gaming, optimize visual effects, disable taskbar animations, optimize File Explorer search, enable DirectX optimization, and disable fast startup to fix conflicts with your games.

In the Notifications section, you can control what happens when you receive a notification. For instance, you can disable notifications from appearing on the lock screen, turn off system settings notifications, etc.

I highly recommend taking the time to go through them once so that you aren’t bothered by the notifications when you aren’t actively using the do-not-disturb mode.

Customize Windows Appearance and Behavior

Whether you frequently switch from light to dark mode or need to adjust your Taskbar settings, the Customization tab has it all. The Windows theme selector offers a simple light/dark mode toggle, but an automated process to switch between modes based on the time of day is a missed opportunity.

The customization section on the Winhance tool in Windows 11

But the real magic happens in the Taskbar and Start Menu sections. You can clean the Taskbar to unpin unnecessary items, including the Copilot, Meet Now, Task View, Windows Chat Icon, and the search function, leaving just the essential File Explorer icon.

While you can align the taskbar to the left, more options, like the ability to hide the taskbar and change its behaviors, have yet to make their way to Winhance.

The Start Menu customization is equally comprehensive. You can remove recommended files, disable the Show Recently Added Apps feature, lock certain options, and even set a More Pins layout.

the customization section on the Winhance tool in Windows 11

Moving on to Explorer customization, you can force File Explorer to show the full path in the title bar, show thumbnails, set DPI scaling to 100%, show file extensions, or disable the status bar entirely. For those missing the older Windows experience, Winhance lets you enable the classic context menu in Windows 11 without having to manually modify the Windows registry, and even brings back folder tips.

Minor Annoyances and Room for Improvement

I encountered a couple of minor issues, though these are not a deal-breaker. For starters, Windows couldn’t locate the .exe file necessary to launch the app right after I installed it. It kept returning the original installer in Windows search. To fix this, I created a shortcut for the .exe file from the app data directory and added it to the start menu.

Another annoyance is that Winhance automatically redirects you to the developer’s donation page every time you close the app. Unfortunately, there’s no way to change this behavior in the app settings. While the developer may find it necessary for sustained development, any app opening a new browser tab without consent, even once, is an annoyance and a huge turn-off for me. I hope we get an option to opt out of this behavior in the future release.

Winhance isn’t just a feature-rich optimization tool; it also executes the functions exceptionally. Whether you want to install or remove apps, tweak system settings, or optimize the system, every change feels seamless. I didn’t notice anything abrupt that’s often associated with third-party optimization tools.

The latest version, Winhance 5, has also ironed out many of the issues that plagued the previous version. The app window now scales properly on all resolutions, and there’s better app installation progress reporting. It’s not perfect, sure. But, if you want a little extra room for customization and performance tweaks, Winhance is a great place to start.

Ransomware Can Attack Your CPU, Not Just Your OS: How to Be Prepared

Ransomware is a serious problem in its current state, and it’s about to get worse. All your security programs and measures will be rendered useless when ransomware comes for your CPU.

Ransomware Can Lock Your CPU

Ransomware generally locks system files and other documents inside your OS and renders your PC practically unusable. CPU ransomware, on the other hand, changes your processor’s microcode, completely changing its behavior.

Only chip manufacturers such as AMD or Intel can provide microcode for their respective processors. This comes preloaded from the factory, and you might get updates later that improve performance, stability, or fix any bugs. If hackers are able to exploit a CPU firmware bug to upload malicious microcode to your processor, it’s pretty much game over.

Adnan Ahmad Ali/Shutterstock

Although the chances of this happening are quite slim, it isn’t entirely a theoretical possibility anymore. Google has already demonstrated how it could inject custom microcode in an AMD Zen CPU by exploiting a bug that made the processor choose the number four every time it was asked for a random number.

To make matters worse, Christiaan Beek, senior director of threat analytics for cybersecurity firm Rapid7, has already developed a working proof-of-concept, according to The Register. Thankfully, he’s not releasing it, but now that the idea is out in the wild, it won’t be long before hackers figure it out. In Beek’s own words,

if they worked on it a few years ago, you can bet some of them will get smart enough at some point and start creating this stuff.

There is a possibility that hackers might already be working on a CPU or firmware ransomware. UEFI bootkits that allow hackers to bypass Secure Boot and inject malware into a system’s firmware already exist and are openly sold on hacking forums on the dark web. Beek also mentioned quotes from leaked conversations revealed in the 2022 Conti ransomware leaks that suggest hackers might be working on proof-of-concept ideas that install ransomware inside a computer’s UEFI firmware.

Can You Protect Yourself?

While antivirus programs can detect ransomware infections early on and block the processes from running, CPU ransomware is beyond their reach. If a CPU gets infected by ransomware, the malicious program will load even before the OS, bypassing every traditional security measure in place and gaining complete access to every system component.

The good news is you don’t need to start worrying just yet, as Beek hasn’t seen any working malware samples in the wild just yet. It’s unlikely that hackers will be able to come up with a working exploit for at least a couple of years. Even if a working exploit is discovered, you can bet CPU manufacturers will rush to patch the issue and release firmware updates. On top of that, CPU vulnerabilities of this scale are quite rare in the first place.

Related

Ransomware Is Rampant in 2025: 6 Quick Tips That’ll Protect Your Data

These security strategies can keep your data safe without requiring technical expertise.

Better security is already one of the reasons why you should update your PC’s BIOS. With CPU ransomware looming on the horizon, an updated BIOS and CPU drivers become even more important. Just keep your software updated, don’t click on random emails and links, and check before running programs downloaded off the internet, especially if you don’t trust the website or sender.

Websites Are Offering “Ad-Lite” Premium Subscriptions—but That’s the Worst of Both Worlds

While some websites let you completely remove ads after subscribing, others have started offering “ad-lite” subscriptions. But like when subscribing to streaming services with ads, you’re not getting the best deal.

5

You’re Not Getting Rid of All Ads

While ads can be annoying, they’re an important source of revenue for many websites. Many sites are smart about ad-blockers, too, so old tricks might not work as well as they used to.

Since ads aren’t going away, full subscriptions with no ads are a good balance for websites. The site can still generate an income to operate, while the user enjoys an ad-free experience. In this scenario, everyone wins.

Ad-lite subscriptions, however, aren’t necessarily the best deal. Rather than removing ads completely, you’re not seeing personalized ads. While some may disagree, I can’t say that this would incentivize me to subscribe; I’d rather pay an extra few dollars per month to fully remove them.

In addition to text-based websites, YouTube has experimented with a Premium Lite tool. Most videos are ad-free, but not all. Subscribing makes no sense to me if the videos with ads are on topics I’m interested in.

4

The Ads You See Might Be Worse

I don’t have a problem with website ads, as long as they fit into the overall experience rather than detract from it. My issue is when sites effectively spam their pages with ads, making them unusable. Nobody likes closing a page because it’s stopped responding multiple times.

If I’m going to see ads, I’d much rather that they were personalized. Seeing ads for products and services that fit my interests makes the browsing experience much more enjoyable. I dislike seeing ads for things that I will never buy and on topics I don’t care about.

Many ad-lite subscriptions don’t show personalized ads, meaning that what you see might be worse than before. While not seeing personalized ads might be good for you if you’re prone to impulse buying, I’d rather see them if non-personalized ads were the only other option.

If you’re not like me and don’t like personalized ads, you can take several steps to avoid targeted ads after online shopping. Using a VPN and a privacy-based browser are two possible solutions.

3

Your Data May Still Be Used

Since many ads are based on your interests, many websites will track your behavior. Advertisers can then use this information to serve you products and services they think you’d find interesting.

Given that many people have become more privacy-aware in recent years, it’s understandable that some might want to pay money to avoid using their data. While this might sometimes be the case, some sites may still use your information after subscribing to an ad-lite tier.

Websites still need user information to get feedback and provide better services. So, your data might still be used in some situations. The main difference is that it won’t often be used for advertising; that might be enough for some people, but others may find this more irritating.

Not being tracked online whatsoever is challenging in any circumstance. You can still be tracked while incognito or private browsing, for example.

While some ad-lite services offer only reduced ads, you may get extra benefits with your subscription in other cases. For example, you may get access to apps and exclusive content.

You may sometimes find what’s offered interesting. But much of the time, it feels like these offerings are bundled to make a subscription seem like a better deal than it actually is for many people.

If you already use features similar to what you get when subscribing to an ad-lite tier, by all means, go for it. But if you know that you probably won’t access them (and you wouldn’t pay solely for them), thinking twice before you purchase might be a better idea.

1

You’re Better Off Just Paying for the Ad-Free Version

Many sites offering ad-lite tiers typically have fully ad-free versions. When you subscribe to these, you won’t see any personalized or non-personalized ads. Moreover, you often get access to exclusive and/or unlimited content, allowing you to fully support your favorite publications.

Rather than looking at the price, it’s worth considering how much value you’ll get from subscribing to an ad-free tier. More often than not, it’s a better deal than ad-lite.

Getting an ad-lite subscription is effectively the worst of everything you were trying to avoid. You’ll often still receive ads, and in many cases, they’ll be less personal. Moreover, you might sometimes see ads on content you enjoy and be paying for ad-free access to things you don’t care about. You’re better off paying for the full version.

These 6 Hidden Windows 11 Photos Features Are Actually Worth Using

At first glance, the Windows 11 Photos app might seem like a basic photo viewer, but it’s packed with features that go far beyond the essentials. While some are well-known, others are tucked away, waiting to be discovered.

6

Resize Images

Resizing images is something you might need to do from time to time, whether it’s to make them easier to share or to optimize them for a website. Fortunately, you don’t need to rely on third-party photo editing apps or online tools because the Photos app on Windows already offers an image resizing feature.

Once you’ve opened an image in the Photos app, click the three-dot menu icon in the top-left corner and select Resize image. From here, you’ll have two options: resize by a percentage of the original image or manually set the pixel dimensions. Simply enter your desired width and height, and then click Save.

5

Scan Text From Images

Scan text option in Windows 11 Photos app

Another Photos app feature that’s easy to miss is the Optical Character Recognition (OCR) tool. This feature allows you to extract printed text or even handwriting from images, screenshots, or scanned documents, and turn them into a digital copy.

All you have to do is open the image in the Photos app and click the Scan Text icon at the bottom. Once the app detects text in the image, press Ctrl + A to select it, then Ctrl + C to copy it. Alternatively, you can also select specific text using your mouse cursor, just like you would on a webpage.

After the text is copied, you can paste it into your documents, emails, notes, or any text field. This feature can save you a lot of time when digitizing handwritten notes, pulling quotes from book pages, or copying an address from a flyer.

4

Super Resolution

Microsoft has recently introduced some impressive AI-powered tools in the Windows Photos app, and one of the standout features is Super Resolution. This tool uses artificial intelligence to upscale images up to 8 times their original size.

What makes Super Resolution unique is that it enhances the sharpness and detail of images without the usual drop in quality you’d get from traditional upscaling methods. To use it, you first need to enter editing mode in the Photos app. There, you’ll see a Scale slider that lets you adjust the level of enhancement. After processing, you should see a side-by-side comparison of both images.

Keep in mind that Super Resolution is currently exclusive to Copilot+ PCs, as the feature relies on the Neural Processing Unit (NPU) found in these newer systems. If you don’t see the feature in your Photos app, it likely means your hardware isn’t compatible.

3

Blur, Remove, or Replace Image Background

Background remover in Windows 11 Photos app

Previously, the Windows Photos app only offered basic editing options like crop, rotate, filters, and markup. However, that is no longer the case. You can now also use the Photos app to blur, remove, or replace image backgrounds with just a few clicks.

Once you open a photo in the Photos app and enter Edit mode, go to the Background tab. The app uses AI to automatically isolate the subject from the background. From there, you can choose to Blur, Remove, or Replace the background, depending on what you want to do.

This feature is incredibly useful when you want to add a portrait-style effect or replace the background with something entirely different.

2

Generative Erase

Object eraser in Windows 11 Photos app

If you don’t need to change the entire background but simply want to remove a specific object or person, the Windows 11 Photos app also features Generative Erase. Similar to Photo Cleanup on iOS or Magic Eraser on Android, it uses AI to help you effortlessly clean up your images.

To use it, open a photo in the Photos app, switch to editing mode, and navigate to the Erase tab. From there, simply brush over the object or person you want to remove. The app will then analyze the surrounding pixels and use AI to fill in the area.

Of course, it’s not flawless, so you might not always get the perfect results, but it gets the job done in most cases.

1

iCloud Photos and OneDrive Sync

iCloud and OneDrive integration in Windows 11 Photos app

Windows 11 Photos is not just for viewing images and videos stored on your PC—you can also use it to access and manage your cloud-stored media. What’s great is that it’s not limited to just Microsoft’s own OneDrive; the Photos app also supports Apple’s iCloud Photos.

If you use OneDrive, you simply need to open the Photos app and sign in to your account. To sync iCloud Photos, you’ll need to install the iCloud app from the Microsoft Store and sign in to your account. Once connected, your cloud photos and videos will appear in their own section within the Photos app.

While the Windows 11 Photos app began as a simple redesign from Windows 10, Microsoft has significantly enhanced it over time. With these new features, the Photos app has evolved into a powerful tool and reduced the need for third-party photo editing software on PC.

My 8 Foolproof Methods to Check If a Social Media Post Is AI or Not

Knowing what’s real and what’s fake on social media has become harder than ever with AI. But with a few simple methods, I’m able to avoid getting fooled more often than not. The best part? You don’t need to be a technical expert.

8

AI-Generated Markers

The easiest way to check if content is AI-generated is to look at the platform’s AI marker. Several social media apps, such as Instagram, have a tool that allows users to quickly see if a post was generated with AI software.

If I see a photo created with AI, I mark it as Not Interested. Doing so trains the algorithm only to show me what I actually want to see.

However, this tip may not always be the best approach. Sometimes, AI content detectors don’t work; generative fill-in Photoshop and other apps may trigger an image to be marked as such. So, I recommend combining this with at least one more method.

7

Reverse Image Lookups

Reverse image lookups are a superb way to see if a profile is fake, but I sometimes also use them to determine if someone has made content with AI. Ironically, AI tools like ChatGPT are good at determining if something has been created with AI.

When using ChatGPT, I use o3 to get more advanced reasoning. The tool normally takes 3-5 minutes to assess what I’ve fed it and come to a conclusion. It’s accurate more often than not.

Many people who upload AI-generated visuals to social media don’t remove the metadata. When I save images and videos, I can sometimes tell if they’re AI by their titles. Besides ChatGPT, you can use various other reverse image search tools on mobile.

Written AI social media content can be more difficult to identify, but it’s still possible. One of the easiest ways to see if a Facebook status, tweet, or Instagram caption was AI-generated is by prompting AI tools yourself.

Many captions are generated with basic prompts, so this is quite simple. For example, I could ask the software something like:

“Please generate an Instagram caption for a carousel of pictures showing a Spanish beach.”

The response will likely be similar to what I saw on social media, but it will not be exactly the same.

Generating a caption for Instagram with social media

I don’t have a problem with AI captions if they mainly invite users to click through as a CTA. In fact, I think using AI for such tasks is clever. But it bothers me for personal stories.

5

Images That Look Like Video Game Graphics

I spend a lot of time testing AI software, and during my years of experience, I’ve experimented with image generation in numerous ways. So, I have a pretty good understanding of how AI-generated pictures look—even with the most photorealistic tools.

One of the surest examples of an AI social media post is that the images look more like video game graphics. I’ve seen some people try to claim that travel photos of locations are real when it’s obvious to me that they aren’t. Even if I haven’t visited those destinations, I can still tell.

Critically assessing pictures like this works for every genre. Even though the likes of GPT-4o and Midjourney have made significant improvements in recent years, you can still tell.

4

Visuals That Look Too Lifelike

Some AI tools can be scarily lifelike to the point of being creepy. The Toys ‘R’ Us Sora ad is one of the best examples of how technology can be taken too far; it’s supposed to advertise toys, but to me, it looks like a horror movie.

Photos and videos often have a look that may be closer to reality than older cameras, but they are still clearly taken by a human. Even with my full-frame camera, my images aren’t perfect.

If something looks too lifelike, it’s a certain sign that someone used AI to make it. Most social media posts shouldn’t look like computer-generated imagery (CGI) in movies. Deepfakes might also look real, but I use a number of tips to spot them.

3

No Personal Insights

A lack of personality is one of the best ways to spot AI-generated content. While these tools are good at writing basic passages, they don’t have the personal experiences of a human. It doesn’t matter how often you try to prompt these tools to inject your personality into them, either.

If a social media post seems robotic, it’s a good sign that you’re looking at something AI-generated. You can quickly tell if a post is authentic, in the same way you can tell when someone isn’t being honest in real life.

If you’re on the fence, you can always combine this tip with prompting AI software.

2

Asking a Question

If you ever want to tell whether someone truly knows what they’re talking about, ask them a curious question. Their response time isn’t important, but you should assess their answer to see if it feels legitimate.

People who generate AI content on social media are often (though not always) looking for engagement. However, you may encounter scenarios where they aren’t actually an expert on their topic. For example, if you see an AI-generated image, ask them where it is; you can then perform a quick Google search to determine if they’re genuine.

1

Observing Object Interactions

Despite significant changes, AI-generated social media posts can still have defects. Object interactions in videos and “photos” are a clear sign.

Sometimes, you’ll see someone holding objects unnaturally. In some cases, you may notice clear size differences, such as a phone being bigger than a person’s head. Hands and pockets might look unnatural, too.

If you see an AI video on social media, you may notice the speed and camera angles being a bit strange, too.

Not everyone uses AI for good, unfortunately. While these tools can be good for generating captions that you edit later, some people use them to farm engagement and mislead people. Knowing how to spot the signs of AI on these kinds of posts will help you avoid being fooled.

These Results Illustrate Why Google Search Is So Awful in 2025

If searching Google feels slower, messier, and less reliable than it used to, that’s because it is. Google’s results are now dominated by AI-generated text, aggressive ads, and SEO-optimized clutter, burying the trustworthy information you’re searching for.

The AI Overview Often Misses the Mark

Google’s AI-generated overviews, meant to provide quick answers at the top of search results, often fall short of being genuinely helpful. These summaries tend to be overly simplistic, lack nuance, and pull from questionable sources that aren’t always reliable.

For example, when I searched “How to clean a cast iron skillet without ruining it,” I expected to see specific guidance grounded in cooking best practices. Instead, the AI Overview spits out a generic list: avoid harsh scrubbing, rinse with soapy water, use a salt scrub, and even clean rust with a potato and baking soda.

Not only was it contradictory (first warning against soap, then recommending it), but it also pulled most of its information from Reddit threads, Quora posts, and YouTube videos. None of whom are recognized authorities on cookware care.

This kind of AI summary gives off the illusion of authority while offering inconsistent or oversimplified advice. Instead of highlighting expert-backed techniques or linking to reputable culinary sources, it cobbles together content with no clear vetting process. The result? A surface-level answer that may do more harm than good, especially for people seeking trustworthy guidance.

Related

Google Is Overhauling Overviews With AI Mode, and Search Will Never Be the Same

Google Search now chats back with AI Mode.

Search Results Prioritize Advertisers Over Users

The experience of using Google today often feels less like a search engine and more like navigating a billboard gallery, prompting many users to seek out alternative search engines that can provide more relevant results. Sponsored links dominate the top of nearly every results page and are designed to look like real answers. There’s little distinction between paid and organic results, which makes it harder to quickly find what you’re looking for.

Below the ads, Google fills the space with features like “People also ask,” AI-generated answers, and product carousels. These elements may look helpful, but they’re built to keep you on Google’s platform, increasing ad exposure and tracking behavior along the way.

Real, unpaid content—what most people are trying to reach—is pushed far down. On a mobile screen, it often takes several scrolls to even see the first organic result. Even then, the page you land on is often packed with affiliate links, prioritizing sales over substance.

What used to feel like a tool for exploring the web now feels like a funnel toward monetized content. Google’s business depends on ads, and the layout of search results increasingly reflects that priority, often at the cost of your time, trust, and ability to find reliable information.

The Rise of Clickbait and Misleading Headlines

As Google’s search algorithm increasingly favors content designed to drive clicks over genuine value, clickbait headlines have taken over. These sensationalized titles often promise more than they can deliver, leading you to results that are irrelevant, shallow, or outright misleading.

Recently, I searched “Fast 11” hoping to find reliable information on the upcoming movie. Instead, I was bombarded with clickbait. The top results were fake, AI-generated fan trailers with titles like “NEW TRAILER,” featuring Vin Diesel and Cody Walker. Just beneath the video thumbnails were attention-grabbing headlines like “Is It Doomed?”—despite the fact that filming hasn’t even started. It was a wall of misinformation and AI-generated junk, with nothing credible or helpful in sight.

A screenshot of Google's clickbait results for a generic prompt

Google’s results now focus on SEO tricks like catchy phrases, keyword-heavy titles, and eye-grabbing thumbnails over actual substance. It turns a simple question into a frustrating scavenger hunt for actual answers.

Adding “Reddit” Has Become Increasingly Essential

At some point, many users began adding the word “Reddit” to their searches. It’s not a coincidence; it’s a form of defense. If you’re looking for product recommendations, troubleshooting tips, or advice rooted in real experience, adding “Reddit” helps you bypass most of the junk.

Why? Because deep in Reddit threads and old forums are real conversations among human beings. You get actual opinions with human emotion and analysis, not cold affiliate links or SEO-gamed content. You see people explaining what worked, what didn’t, and why. This is the kind of context that AI-generated summaries and generic blogs are incapable of replicating.

This isn’t a fringe technique anymore; it’s become widespread behavior. It reveals a simple truth: people don’t trust the top of Google’s results page—they trust communities of real users. We are now pressured to use tricks to navigate Google more effectively. It’s a serious indicator of what Google Search has become.

At first glance, the short summaries beneath each clickable link in a Google Search—known as meta descriptions—seem helpful. They’re designed to give a quick preview of what’s on a webpage, letting you decide whether to click it or not. In practice, however, they’re often confusing, contradictory, or outright misleading.

These snippets aren’t always written by the website’s author. In many cases, Google auto-generates them based on page content, sometimes pulling sentences out of context or misrepresenting the page’s intent. That becomes a problem when you treat these summaries as trustworthy answers.

Take my example of searching “Fastest land animal.” Nearly every result points to the cheetah, but the meta descriptions vary wildly. One link claims cheetahs reach 60 mph, another insists on 75 mph—a number that’s never been recorded.

A screenshot of generic Google results provided after typing in a prompt

Even more absurdly, a Reddit post summary jokes that a cow dropped from a helicopter at 3,500 feet is technically the fastest land animal. While obviously satirical, this line appears next to serious sources, blurring the line between fact and fiction.

Google’s algorithm isn’t designed to evaluate accuracy; it only evaluates relevance and engagement. As AI increasingly drives these summaries, users must recognize that what appears beneath each link isn’t always vetted truth. The descriptions are oftentimes automated guesses, stripped of nuance and context.

SEO Has Been Turned Into a Weapon

Originally, search engine optimization (SEO) was intended to help search engines understand and rank useful content. That principle is long gone. In 2025, SEO has become a game of manipulation and favors companies with money, software, and influence.

Instead of highlighting the most insightful or informative pages, Google now favors those that best follow the “rules.” Keyword stuffing, subheadings filled with search phrases, bloated introductions designed to stretch engagement metrics, and FAQ sections packed with robotic phrasing fill the top of Google’s results.

These pages are often created by AI tools, refined by SEO experts, and published on a grand scale by digital marketing firms. The goal is not to inform, it’s to dominate search results and convert clicks into dollars. Personal blogs, niche experts, and independent journalists have seen their traffic collapse, not because their content isn’t useful, but because they lack the technical resources to compete. Valuable human insight is now buried beneath layers of strategic noise.

Google created this battlefield, then handed the bigger weapons to those willing to exploit it most aggressively. In this day and age, it’s not quality that wins. It’s whoever can game the system most effectively.

Google Search Is Trying to Be Everything—and Failing at the Essentials

In its attempt to be more than a search engine, Google has loaded its results pages with clutter. You’re no longer simply presented with a clean list of links. Instead, you face a sprawling interface filled with shopping widgets, top stories, answer boxes, “Perspectives” from influencers, and even YouTube highlights.

The original purpose of Search was simplicity: type in a question, get relevant answers. Now, Google attempts to anticipate your needs with overlays and predictive features that often miss the mark.

I searched “Italy vacation ideas,” thinking I’d get hotel recommendations, tips on what to pack, and a compilation of must-see locations. Instead, I was bombarded with vacation packages and rigid itineraries being sold by major travel companies. The kind of helpful, firsthand advice I was actually looking for was buried pages deep.

A screenshot of generic Google results given after typing in a prompt

In trying to become an all-in-one platform for information, shopping, and entertainment, Google has diluted the precise and trustworthy output it once had.


Google Search isn’t dead, but it no longer feels like the reliable tool it once was. Instead of effortlessly finding answers, you are now forced to dodge ads, sift through low-quality content, and rephrase queries to get better results. The trajectory of this shift is unknown as Google focuses on its new AI mode, which will replace aspects of Google Search.

In 2025, Search feels more like a chore, shaped by advertisers and content mills rather than genuine usefulness. The internet hasn’t run out of valuable information; Google has just made it harder to find.

I Can’t Believe YouTube Hasn’t Fixed This Year-Long Quality Issue Yet

In late April 2024, the YouTube app on my LG smart TV started reducing videos to 480p quality. If you can believe it, YouTube still hasn’t fixed this issue over a year later. It’s so irritating that I’ve documented the tale to share.

YouTube Forces Low Quality for Certain Videos

At first, I couldn’t figure out why some videos dropped to 480p while others played at max resolution. After testing, I narrowed down the problem: this only happens when increasing the playback speed of 60FPS videos.

Standard 30 or 24FPS videos are not subject to this problem, and if you leave the playback speed at 1x, the quality doesn’t change. You can’t fix it by increasing the quality again; doing so sets the speed back to 1x.

Frame rate, measured in FPS (frames per second), denotes how many individual images a video consists of. The more frames per second, the smoother the movement appears. Thus, 60FPS is most beneficial for videos with fast-moving action.

Lots of gaming channels upload at 60FPS since high frame rates result in smoother gameplay. And because gaming is one of my primary interests, a majority of what I (and I’m sure many others) watch on YouTube is subject to this problem.

Diagnosing the Low-Quality Problem

Between my experiments and reading others’ experiences on forum posts, I’ve tried to gather as much information about this problem as possible.

I confirmed that it’s not a device issue. This problem happens with the YouTube app for any TV platform, including native smart TV apps, streaming boxes like Roku and Apple TV, and game consoles. I’ve experienced it on my LG TV, Roku, PS5, and Xfinity Flex box across multiple TVs.

The problem doesn’t occur instantly on affected videos. When a video is set to a 60FPS quality option (720p60 or above), changing the playback speed above 1x will change the Quality text to 480p—but it takes about 20 seconds for the change to happen. It’s a jarring moment, particularly with the frame rate being halved.

In the Settings menu on any YouTube video, enabling the Stats for nerds box shows you technical data. One of the Reddit posts about this problem (since removed by the moderators and archived here) mentioned you can see a stat change when the drop takes effect, which I verified. On a 1080p60 video, the Current/Optimal Res value is 1920×1080@60. As soon as you increase the speed, the Optimal Res is set to 854×480@30 and the quality drops to 480p a moment later.

Below is a short video showing the problem; notice how the quality drops to 480p around the 21-second mark.

I usually watch videos at 1.5x speed, at the highest quality available. Adjusting the playback speed to 1.25x generally has the same effect. In certain cases, a 60FPS video won’t be affected by this, or will drop from 1080p to 720p (or 2160p to 1080p). That’s better than 480p, but this still shouldn’t be a problem at all.

Meanwhile, some videos (typically from smaller channels) don’t even have a 480p option. In those cases, this behavior means you’re stuck watching at 360p—a terrible fate.

YouTube No 480p Option

YouTube Premium Support Offers No Help

I commented my findings on Reddit, along with YouTube’s official support forums. As you’d expect for any issue with a massive company like YouTube/Google, getting a response is difficult.

I have YouTube Premium (and recently switched to Premium Lite); since Premium support actually gets back to you. I complained about this experience and asked for a credit or refund since I’d been paying for a sub-par experience. The rep told me that “the video quality part of the videos are not part of the premium benefits” and so I wouldn’t be able to get anything back. (Meanwhile, YouTube’s 1080p Premium option is also subject to this issue.)

The rep also assured me multiple times that YouTube was on the case, saying “This will be raised and be fixed” and “is something that our engineers are trying to fix as soon as possible”. I later complained a second time and was granted a refund for one month, which also canceled my Premium subscription. However, using YouTube on a TV without Premium is unbearable because of the ads, so I quickly signed up again.

Months later when this issue was still ongoing, I reached out again. The Premium rep told me that team can’t directly send feedback to the engineers, but encouraged me to send feedback. This is possible with the YouTube on TVs feedback page and via the Settings page on any affected video by choosing Feedback > Video is poor quality. I’ve done this hundreds of times in the last year, but it hasn’t made a difference.

YouTube Give Feedback on TV

It’s “Intended Behavior” to Offer DVD Quality in 2025

The closest link I had to anyone at YouTube was on this YouTube Support forum page. A “Gold Product Expert” checked in a few times to say he had escalated the problem to the team. The final blow came in January 2025 when he said:

I’m sorry this is frustrating. The team just confirmed to me this is intended behavior. You can use the send feedback feature to report your dissatisfication [sic].

Apparently, what the rep told me earlier isn’t true. Increasing video speed worked for years until this problem appeared, so I can’t believe it’s intentional. As a reminder, 480p is DVD quality—the same resolution as the PS2 (launched in 2000). It’s unacceptable that any modern video service would force you to watch at such a low resolution, especially on a large 4K display.

Again, this issue does not affect other platforms where you watch YouTube. I can watch a 2160p60 (4K, 60FPS) video on my iPhone, computer, or other non-TV devices at 2x and have zero problems. If intentional on TVs, why is YouTube not intentionally serving other platforms lower quality? My download speed is over 700Mbps. There is no reason YouTube can’t serve the videos at higher quality and high speed; today’s devices can handle it.

YouTube Mobile Quality Selector

This is even more frustrating when YouTube is now offering playback speeds up to 4x on some devices and a YouTube Blog post revealed that TV has become the platform where people watch YouTube most. How is it acceptable for all those people to watch 480p content on their (presumably) 4K TVs if they want to increase the base speed? With how long videos can be, it’s something lots of people benefit from.

Let’s also not forget that other video platforms like Instagram and X allow you to increase the playback speed of videos without losing quality. If they can do it, why not YouTube?

YouTube’s App on TV Has Had Plenty of Other Issues

One of the biggest issues with smart TVs is how buggy their apps can be; the YouTube app for TVs is no exception. During an earlier version of this issue, affected videos would sometimes start at a lower resolution than the maximum available, especially when I had increased the speed during that session. But manually changing the quality again fixed it for that video.

The YouTube app for my Comcast Flex box just got the playback speed option a few months ago, but that’s caused the subtitles (and sometimes the audio/video) to go out of sync. YouTube randomly resets my caption visual settings every so often, and there have also been minor visual issues like video titles overlapping. None of this should be part of a premium experience, but at least most past issues were fixed within a short time.

A Supremely Frustrating Issue

Being forced to watch in 480p for over a year is the worst YouTube problem I’ve had. Yes, I could watch YouTube on another device or at a slow speed, but I don’t want to. I don’t think it’s unreasonable to want to watch videos on my largest, sharpest screen and speed them up so I can enjoy videos in a shorter amount of time.

It’s inexcusable for a company this big to offer such low quality on a platform it’s ostensibly putting a lot of focus on. There’s a new YouTube app for TV platforms coming soon, and while the new paint job is nice, it really needs to fix this core issue. The YouTube app has gotten plenty of feature updates since this started, but none have addressed it.

If you’ve dealt with this problem too, I’d like to hear from you in the comments below. Hopefully, YouTube will take notice and fix this. I’ve almost forgotten what it looks like to watch videos above 480p.

NotebookLM’s Latest Trick Is Creating Videos From Your Notes

AI is great at summarizing notes and might soon bring them to life too. Plenty of apps use AI to create summaries of your notes, but this upcoming feature in Google’s NotebookLM can do a lot more.

NotebookLM Will Soon Convert Your Notes to Videos

TestingCatalog has spotted a new Video Overviews button in NotebookLM, Google’s AI-powered note-taking tool. This suggests that users may soon be able to generate video summaries of their notes. Given that NotebookLM is developed by Google, these videos are likely to be powered by the company’s latest video generation model, Veo 2.

NotebookLM already has an Audio Overviews feature, which lets you create podcasts from your notes. This feature is one of the reasons why the tool took off in the first place, and if Google can get the video generation working as expected, it can make NotebookLM an indispensable note-taking app.

We don’t know how the final result will look at the moment, but it’s not going to be as simple as treating your notes as prompts to generate videos. Google claims Veo 2 can generate video clips of “several minutes in length,” and it has a better understanding of real-world physics as well as human movement and expressions, so the result can be quite good.

NotebookLM can sometimes generate hour-long podcasts based on your material, so it seems unlikely that the new feature will act as a complete replacement. Instead, Google might be looking to enhance the AI-generated podcasts with a little helping of visual metaphors or small explanations to better visualize and explain more complicated topics.

Audio Overviews often include scripted dialogues between two AI-generated hosts using fixed voices. Given Veo 2’s current limitations, Google can implement a similar template-based system here to get better results.

Video Overviews Are Just the Beginning

Apparently, Video Overviews aren’t all that’s new to NotebookLM. TestingCatalog also spotted UI changes that could make for better content discovery. There’s a new section called Editor’s Picks, implying you could soon be able to browse public notebooks. Given it’s a Google tool, there’s also going to be an element of personalization here, so the feature can give you some interesting reads.

These types of community-driven features can expand NotebookLM from a note-taking and research assistant to a full-blown knowledge-sharing platform, similar to Perplexity’s Discover section. Google seems to be bringing its entire AI ecosystem across mediums—text, voice, and now even video—into a single assistant-like tool that revolves around user-generated content, similar to apps like Notion.

Related

Notion vs. NotebookLM: What’s the Best AI Note-Taking Tool?

AI note-taking tools have changed the game, but which one reigns supreme—Notion or NotebookLM?

The Video Overviews feature and UI changes are expected to arrive with NotebookLM’s mobile app release for iOS and Android, planned for May 20. With Google I/O also scheduled to start the same day, these new features will likely be highlight announcements.

NotebookLM is one of the best uses of AI in research or note-taking apps that I’ve seen in some time. I’m genuinely excited to try it out, especially considering how well the Audio Overviews feature works.

Your Internet Might Be Slower Than It Should Be—Try These DNS Tricks

If your internet feels sluggish or buffering is driving you up the wall, the issue might not be your connection speed—it could be your DNS.

Most people use their internet provider’s default DNS servers, but these are often slower, less private, and less reliable than alternatives. However, there are a few handy tricks and tips you can use to speed up your connection.

5

Change Your DNS Provider

One of the simplest and most effective tricks is switching from your ISP’s default DNS servers to a third-party provider. Many alternatives are faster and more secure:

  • Cloudflare DNS: 1.1.1.1 and 1.0.0.1 (fast, privacy-focused)
  • Google DNS: 8.8.8.8 and 8.8.4.4 (reliable, well-supported)
  • Quad9: 9.9.9.9 and 149.112.112.112 (fast, strong security, privacy-focused)
  • OpenDNS: 208.67.222.222 and 208.67.220.220 (adds optional content filtering and security features)

Related

How to Change DNS Server Settings on Windows 11

Learn the best way to change the DNS server on your Windows 11.

You can make this change in one of two ways:

  • Router: This applies the new DNS settings to every device connected to your home network. It’s the most efficient way to change DNS for your entire household.
  • Individual Devices: If your router doesn’t allow DNS changes (like many ISP-provided gateways), you can still change DNS settings on your computer, phone, or tablet.

This small change can reduce the time it takes to load websites and apps, especially if your current DNS is underperforming.

4

Enable DNS Over HTTPS (DoH)

Edit DNS Settings Image

Changing your DNS server can speed things up, but encrypting your DNS traffic adds another layer of benefit: privacy. Traditional DNS queries are sent in plain text, which means your ISP or anyone else on the network can see what websites you’re trying to access.

DNS over HTTPS (DoH) encrypts these queries, protecting your browsing habits from snooping.

  • Most modern browsers like Firefox, Chrome, and Edge support DoH.
  • Many operating systems, like Windows 11, and certain routers support DoH.
  • Cloudflare, Google, and other DNS providers support encrypted DNS by default.

Turning this feature on is usually just a matter of toggling a setting in your browser or operating system’s network settings. For example, you can easily enable DNS Over HTTPS in Windows 11 with just a few clicks. As per the above, if your operating system doesn’t support native DoH, you can use one of the alternative DNS providers instead, as they’ll typically encrypt your DNS queries.

3

Use a Faster DNS Server for Your Location

online dns speed benchmark test based upon location.

Not all DNS providers are equal everywhere. Depending on the routing path, server load, and geographic location, some may be faster or more reliable in your area. To find the best option for your region, you can use free tools to benchmark DNS performance.

  • DNS Speed Test Benchmark: A handy online DNS testing tool that shows the fastest DNS speeds for your specific location. Once you run your test, press the clipboard icon to copy the DNS information for the fastest server for easy use!
  • DNSPerf: A web-based comparison site that shows global and regional DNS performance.

After identifying the fastest DNS for your area, you can switch to it manually for a noticeable improvement in website and app responsiveness. Note that there are desktop and command line tools like NameBench, NAMEinator, and GRC’s DNS Benchmark, but these two online DNS checkers are typically useful and accurate enough to figure out your fastest DNS provider.

2

Manually Set DNS on Streaming Devices, Gaming Consoles, Smart TVs, and More

If you use devices like Roku, Fire TV, or smart TVs and you can’t change DNS settings at the router level (due to a locked-down ISP gateway like those from AT&T), you can set DNS manually on each device.

Most streaming hardware and gaming consoles allow you to set a static IP address and manually enter DNS servers. This can help reduce buffering and speed up app loading times, particularly for high-bitrate video streaming.

It’s a bit more manual work, but it’s worth it if you stream a lot and can’t modify your network’s router settings. I can’t provide specific steps to change DNS on each device here, but a simple internet search for “[device name] change DNS settings” should help you find what you need.

Related

I Stopped Buffering on My Smart TV With These Simple Setting Changes

My smart TV no longer buffers during playback, thanks to these settings.

1

Flush Your DNS Cache

Sometimes, your computer or device will store old or incorrect DNS information, which can lead to slow site loading or errors. Flushing your DNS cache forces your system to re-query the DNS server and often resolves weird connectivity issues.

  • Windows:

    1. Open Command Prompt as Administrator.
    2. Type ipconfig /flushdns and press Enter.
  • macOS:

    1. Open Terminal
    2. Type sudo dscacheutil -flushcache; sudo killall -HUP mDNSResponder and press Enter.

This doesn’t change your DNS settings but can help fix problems caused by outdated DNS data. You can also view and flush your DNS cache on Linux, though the process varies depending on your Linux distro.

You don’t need to be a networking expert to take advantage of these DNS tweaks. Something as simple as switching from your ISP’s default DNS to Cloudflare or Google can result in faster loading times, less buffering, and even improved privacy.

My Favorite Private Email and VPN App Is About to Get Much Cheaper

If there is one thing we can all celebrate in this world, it’s lower prices and better privacy. And that’s exactly what one of my favorite—and one of the best—private email and VPN providers is set to deliver to anyone using iOS.

Proton Set to Lower Its Prices After Court Ruling

Proton, developers of the excellent Proton Mail, Proton Pass, and Proton VPN, has revealed that it will drop its subscription prices for iOS users. It follows the outcome of an enormous court case involving Apple and Epic Games, in which Apple was meant to halt uncompetitive practices that allowed it to levy extra charges on subscribers.

Andy Yen, founder and CEO of Proton, has noted that this is finally a chance for the company to cut costs for its subscribers, and could potentially drop prices by up to 30 percent—a huge win for the millions of iOS users worldwide.

In addition, Yen noted that the Apple ruling could also have a major impact on inflation in the US.

Proton told TechRadar that the price changes will come into force in the US only as there are different rules in place in the EU. Indeed, Proton “implore the EU to follow suit and actually force Apple’s hand.”

You Don’t Have to Subscribe Through the App Store

Here’s the rub: you don’t need to subscribe to Proton’s privacy-focused apps through the App Store. It’s always been much cheaper to head to Proton directly and subscribe, then sign into your respective Proton accounts.

The biggest difference is that now, subscribing to Proton (and other subscription services) through the App Store won’t cost any more than subscribing through the service website. It’s a proper price match that, let’s face it, should have always been the case.

So, if you’ve been wondering about subscribing to Proton—now is your chance.

Why It’s a Good Thing That Smartphones Are Boring Now

Smartphones used to spark excitement with every new release. Now, upgrades feel incremental and lack bold new designs and headline-grabbing features. However, what modern phones lack in spectacle, they make up for in reliability. It makes being an enthusiast less fun, but it’s a step in the right direction.

Standardized Specs Mean Less Confusion for Non-Savvy Buyers

Buying a phone is arguably less of a hassle today than it was a couple of years ago. That’s because many features that were then considered innovations and only found on select models are now standard. This means the average buyer, who isn’t as tech-savvy, doesn’t have to worry about their phone missing any essential features.

Unless you’re buying an entry-level model, most modern smartphones come with an OLED screen, FHD resolution, 120Hz refresh rate, 128GB of internal storage or more, a fingerprint scanner, 4K recording, a USB-C port with at least 25W wired charging, and a 5000mAh battery—unless you’re buying a compact phone like the Galaxy S25 or Pixel 9.

This matters because, for most people, a smartphone is just a tool to do basic tasks like calling, texting, web browsing, and scrolling social media. That means the overall experience won’t be too different between phones from different brands. Instead of stressing over specs, you can focus on remaining within your budget and getting the best value.

Related

How Much Do Smartphone Specs Matter These Days?

Don’t be quick to judge a phone by its spec sheet.

I’m not saying that more expensive phones don’t have merit. They certainly do. But phones becoming boring is the price we have to pay as consumers to ensure that even the worst phone out there is still at least sufficiently adequate to perform everyday tasks.

This boringness gives you reassurance that no matter which phone you buy, it won’t be so bad that it can’t get you through the day. It might not always feel very smooth, be able to run certain games or come with optional but nice-to-have features, but it will, without a doubt, meet your minimal expectations. This wasn’t the case about a decade ago.

Companies Could Shift Focus to Software Optimization

Samsung Galaxy S25 series with their screens on, on white table.
Zarif Ali / MakeUseOf

When people complain that smartphones have become boring, they’re referring almost exclusively to the lack of hardware innovation. Aside from foldable phones, which are still inaccessible to most people, there haven’t really been many major hardware breakthroughs in recent years. Incremental improvements seem to have become the norm.

One way to look at this is to say that companies are just not innovating anymore. While that’s partly true, a more nuanced look at the situation suggests we are now at a point where all the hardware problems formerly associated with phones are largely resolved.

Durability, for example, has improved greatly over the years to the point where even mid-range phones are now almost as tough as their flagship counterparts, and can last several years.

Related

Why Your Flagship Phone Scratches Just Like a Cheap One

Money can’t buy everything.

We’re nearing the peak of what’s possible with existing tech. Remember, companies have a limited R&D budget, so every dollar spent on research that doesn’t prove fruitful is essentially wasted and not used to improve aspects that still need improving, such as software.

The savvy among us are already aware that modern phones are influenced just as much by how well the company has optimized the software as they are by their internals. A powerful chip looks great on benchmarks, but it’s really software optimization that unlocks that power and ensures fluidity of the user interface.

I’m willing to argue that this fluidity matters to most people far more than arbitrary hardware changes and new designs because software is what you ultimately interact with. New designs are fun and make for great marketing, but how long do you really admire the design of your phone after having purchased it? Probably not that long.

Longer Software Support Helps Avoid Frequent Upgrades

Alongside software optimization, companies are also making it a priority to offer longer software support. This is why Google and Samsung now offer seven years of major Android updates. This trend isn’t exclusive to flagships; newer mid-range phones like the Galaxy A56 and the Pixel 9a will be supported for six and seven years, respectively.

That means, as long as you care for your phone, minimize its wear, and get the battery replaced after a few years, you don’t really need to upgrade as frequently. You’ll get the latest features regardless. And since you won’t be upgrading as often, you can get a more premium model that you might otherwise not be able to afford.

Related

How Much Should You Spend on a Smartphone? 8 Price Points Compared

You can buy a new smartphone from under $100 to over $1500. But what’s the sweet spot between price and features?

Design Consistency Helps in Value Retention and Repair

Samsung Galaxy S25 series in hand (heroshot).
Zarif Ali / MakeUseOf

I get it—seeing the same design over and over for several generations is tiring. In the past, it was normal for Android manufacturers to start from scratch when designing their next phone.

But today, the goal is to be instantly recognizable, and that’s not possible if you keep changing the look of your products. Samsung has cemented its look with individual camera rings, the Google Pixel with a camera visor, and OnePlus features a large circular camera island.

This design consistency is not just about branding, though. It also influences how well your phone retains its value. When you trade in your phone, the estimated value you get in return is based primarily on how much of the device the company will be able to recycle.

Consistent designs fetch more value because they allow more components to be recycled. They also make repairs easier—but not always cheaper—as spare parts become easier to source. Familiarity with the internals means technicians see fewer surprises during repair.

Camera Hardware Plateaued, But Computational Photography Took Over

For years, smartphone camera upgrades meant bigger sensors, more megapixels, and more lenses. But over the years, this hardware race has hit a ceiling. Most flagships now sport similar-sized sensors, stabilized primary lenses, ultrawide lenses with around 120˚ field-of-view, telephoto lenses with 3x optical zoom or more, and support for 8K video.

In other words, it’s not the hardware that’s the differentiating factor anymore; it’s the unique image processing of each brand. That’s what has allowed smartphone photography to keep improving despite the physical limitations of camera hardware. After all, there’s limited room inside a phone’s chassis, so you can’t keep increasing the sensor size endlessly.

Google’s Pixel lineup is the perfect example of this. It’s rarely equipped with cutting-edge hardware, especially on its A-series, yet its image quality consistently punches above its weight. Even cheaper phones now use algorithms to clean up noise, balance exposures, and simulate bokeh—all of which once required high-end optics.

Related

I Put My Cheap Phone Against My Mirrorless Camera: Can You Spot the Difference?

Can your eyes tell the difference, or is smartphone photography just that good?

In a way, this plateau is good. With fewer gimmicky changes, manufacturers can spend more time tuning their software to make the best use of existing hardware. Sadly, this does mean that phone cameras look largely the same from the outside each year, which is indeed boring, but there’s a lot going on behind those lenses that we don’t see.

Ecosystem Products Allowed for Seamless Integration

Samsung Galaxy Z Flip4 with Galaxy Watch5 Pro and Galaxy Buds2 Pro
Image Credit: Samsung

Smartphone hardware having peaked has also allowed companies more room to build ecosystem products that work together seamlessly, with your phone at the center of it all.

On the Apple side, we have AirPods, Apple Watch, iPad, Mac, AirTag, and Apple services—all designed to complement the iPhone. The Android side is a bit fragmented, but Samsung’s Galaxy Buds, Watch, Tab, laptops, and smart home appliances offer a very similar experience.

For instance, if you get a call on your phone while watching a movie on your tablet, Galaxy Buds will automatically switch to the former so you can quickly accept the call without having to manually change the Bluetooth connection.

Samsung phones also work quite well with Windows laptops, so you can connect your phone and PC using Samsung Flow or Link to Window. This allows you to sync clipboard content, so you can copy and paste cross-device, transfer files via drag-and-drop, and mirror your phone’s screen onto your PC monitor.

Smartphones have matured, which means groundbreaking innovations are harder to come by. But that also means they’re a lot more reliable now. So, companies can make complementary products and services to better your overall experience. This is far more valuable to most people than having new flashy features that don’t add any actual utility.


It’s easy to forget that companies make products for the masses, not enthusiasts. Innovation happened so rapidly in the past because the smartphone was not a mature product category and each new iteration addressed a common complaint that people had with their phones.

For instance, people complained about slow charging, so companies invested in developing fast-charging solutions. Similarly, they developed OIS to fix camera shakes, faster processors to handle heavy workloads, ultrawide cameras for group shots, and fingerprint readers for security.

A modern smartphone already does almost everything you could expect from it, so there’s less room to keep innovating. My point then is this: consumer tech is built primarily to solve real-world problems. Thus, innovation, for its own sake, is no innovation at all.

It’s why so many ideas that looked great on paper ended up failing, such as the LG Wing’s swiveling screen, the Galaxy A80’s rotating camera, modular phones, pop-up selfie cameras, and built-in gaming controls. I could go on, but you get the idea.

YouTube’s New TV App Is Adding the Worst Type of Content to Its Front Page

YouTube is making waves by bringing some big changes to its app for TVs and gaming consoles. But don’t expect something truly better, just mostly more of the streaming giant’s worst feature.

Say Hello to More Shorts and a Variety of Shelves

In April 2025, YouTube mentioned that it was planning a redesigned video player and other improvements. But first spotted by 9to5Google, there’s much more in the works, and some of it isn’t exactly exciting.

The app will be adding a number of shelves to give you quick access to videos. YouTube explains more about what to expect:

  • The “Continue your search” shelf shows you your top three searches, allowing you to jump back in right where you left off.
  • The “Listen again” shelf is a dedicated music shelf that shows you the top songs you’ve previously searched for and listened to.
  • The “Live performances, remixes, and covers” shelf shows you other versions of your favorite songs, beyond the official versions.
  • The Primetime Channels shelf, for those subscribed, shows content from your most recently searched for and watched Primetime Channels.
  • The “From your top channels” shelf shows you your top watched YouTube channels.

A Podcasts tab will also let you quickly jump into podcasts directly from your library.

But if you’re not a fan of Shorts, we’ve got some bad news for you. Those will now be split out from longer videos to easily access. There will be a Shorts row in the Watch Next feed and a Shorts Shelf on your subscription tab. Just wonderful.

You will also be able to loop more content. Previously available on just playlists, you can now loop all VOD content. Just choose Loop from the Playback settings.

One of the more interesting changes seems to be an improved preview experience. Inline previews have been expanded to channel pages, subscription pages, and topics pages. The roll-out of the Immersive Channel Previews has also been completed. These are fullscreen background previews on channel headers that help make the page more immersive.

Creators will also be able to view a new Device Type card in Studio Analytics to see watch times from mobile, computer, TV, and tablet.

Vertical Videos and TVs Don’t Mix

I’m a fan of watching YouTube on a bigger screen, and these changes are not exactly mind-blowing. I absolutely hate Shorts, so I’m not excited to see those be more prominently featured. Why do we need more vertical videos on a TV screen?

But the other changes, like the improved previews, seem to sound really nice.

Also, I’m not thrilled that more AI is coming to YouTube. Once you search for a query, AI Overviews will address the query and display relevant clips under a new carousel.

Here’s How It Replaces Google Search

Google Search is moving beyond the list of blue links and simple answers. With the rollout of Google AI Mode, you can start conversations, share files, and interact with information that’s more like an AI chatbot experience and less like the Google Search we know so well.

What Is Google AI Mode?

Google AI Mode brings advanced generative AI right into Google Search, but in a more advanced manner than its existing AI Overviews. The Gemini-powered AI Mode started as a Google Labs experiment, but is available to anyone in the US who’s at least 18 and has enabled their web search history.

If you belong to this demographic, you will spot a dedicated AI Mode tab in Search as the first item on the left.

You can also click the Labs icon on the Google Search page and enable AI Mode.

AI Mode Experiment On-Off toggle

With AI Mode, you’re no longer limited to short, simple queries. Instead, you can ask questions using text, voice, or images and get the chatbot’s replies. Furthermore, your searches can be deeper and more contextual, with follow-up questions allowing you to explore topics with greater scope using the linked web-sourced information. Your AI Mode History lets you easily resume past conversations.

One of the biggest changes in Google AI Mode is how results are displayed. The list of links is pushed to the right in a separate panel, and the main answer to your prompt or search query takes up the page. Like everything generative AI, crafting a great prompt is the difference between a precise and fuzzy answer. Of course, you can use it for one-sentence search queries, too, but where’s the usefulness in that?

Searching with AI Mode on Google Search

AI Mode brings together real-time information, such as ticket prices, product details, real-time prices (with the latest promotions), etc., and presents it as a unified answer. Google says most of the data comes from its Shopping Graph, which has over 45 billion product listings from local businesses.

Google has also added a history of past queries on a sidebar to revisit past searches and pick up where you left off. This is especially useful for ongoing projects like planning a trip or researching a big purchase. You don’t have to start from scratch every time; your previous questions and answers are right there, ready for the follow-up.

As Gemini has the feature to save information and reference past chats, I assume the AI Mode has the same facility. However, you must have Gemini Apps Activity switched on.

If you are outside the US and want to experience AI Mode before its global rollout, use a VPN and connect to a US-based server.

How AI Mode Differs From Perplexity, ChatGPT, Gemini, and AI Overviews

With so many AI tools, how does Google AI Mode stack up?

  • Perplexity and ChatGPT: Both of these AI chatbots can deliver conversational answers, and the LLMs behind them can handle a wide range of topics. Perplexity focuses on real-time web searches and delivers quick, sourced answers. ChatGPT excels at generating creative content and carrying on long conversations, but can also delve into real-time topics. However, neither is built directly into the world’s largest search engine, and they don’t have the same access to Google’s real-time data or shopping and local business databases.
  • Gemini: Google’s Gemini is a powerful AI model that powers all its AI tools, including AI Mode. It is designed for a wide range of tasks, from content creation to code generation. It’s also part of Google’s suite of premium tools. AI Mode uses Gemini under the hood, but the experience is tailored specifically for searching and exploring information simultaneously, not just chatting or generating text. Gemini is one of the most underrated AI chatbots, but making it a default part of Google Search could lift its profile.
  • AI Overviews: If you’ve seen AI-generated summaries at the top of Google Search, you’ve already tasted what AI can do. However, AI Overviews only appear when Google thinks they’re relevant, and they are surface-level, usually short, and generic. Well, that’s what was meant to happen—there have been more than a few moments involving AI Overviews hallucinating. AI Mode is much more interactive and detailed. It gives you AI-generated answers every time, lets you ask follow-up questions, and presents information more visually and integrated.

AI Mode, to me, seems to combine the best features of many of the AI chatbots we know and love, bringing them into regular internet search.

Google AI Mode is a sign of where internet search is headed. The days of typing keywords and clicking through endless links are fading. Instead, you can ask questions in natural language, get answers that pull together everything you need, and even interact with those answers to dig deeper or change direction.

This means less time spent searching and more time getting things done. Planning a trip, shopping for a new laptop, or fixing something at home becomes easier and more intuitive. You can upload images, ask questions, and get personalized and up-to-date results. Maybe we are looking at the first stages of agentic AI that will even execute tasks for you right from the search page.

The shift is more complicated for publishers and the web. Google says it hasn’t seen a big drop in traffic to external sites so far, but there’s no doubt that traffic has dropped significantly for most websites. A lot of it has to do with AI tools and the rise of social search. AI Mode can help surface information that might otherwise stay buried, especially for complex or niche questions.

Google is still evolving the AI Mode, adding new features and expanding access. You should take the “experimental” label seriously and avoid treating its answers as the last word. According to Google’s The Keyword blog, it is listening to user feedback and promises to keep improving the experience. As AI Mode moves from Labs to the main Search experience, expect even more ways to interact with information-whether you’re shopping, planning, or just poking your curiosity.

Microsoft Copilot Just Received an Enormous Update—but It’s Too Little, Too Late

Though admirable that Microsoft has now decided it wants Copilot to actually compete with other AI chatbots, its huge updates have only slightly chipped away at an uphill task. Unfortunately, Copilot still has a long way to go before it’s truly mentioned among the best.

Copilot Receives 5 Shiny New Features

As said, Copilot feels like it’s running behind the times, but Microsoft periodically arrives with a giant slab of updates.

Deep Research and Search Tools

Copilot has introduced a Deep Research feature similar to ChatGPT’s. After entering a prompt, the software will perform comprehensive research across the web to find the answers you’re looking for.

You’ll then see this information presented in one of many ways. Sometimes, Copilot will give you a table with everything you need. On other occasions, you’ll see bullet points and blocks of text. Having tried ChatGPT and Copilot’s Deep Research tools, I still think the former is much better, but Copilot at least has a starting point to build on.

In addition to Deep Research, Copilot has a new search feature in Bing.

Copilot Podcasts

Copilot Podcasts is arguably the coolest feature in the software’s new update. With this tool, you can create your own podcasts using AI. The software can take your favorite topics and create something you can listen to while on your run, out for a walk, cooking dinner, or in any other situation you’d normally listen to podcasts.

Besides creating the podcast yourself, Copilot will give you the opportunity to give your own input. So, it will feel more like you’re a guest on your own show and less like you’re listening to something that has clearly been generated with AI.

In addition to Copilot, you can create and listen to AI-generated podcasts (even though they’re quite polarizing) in many other places.

Shopping Suggestions

Trying to find the exact product you want to buy online can be strenuous, but seeking help can make the process less annoying. In its recent major update, Copilot launched a feature allowing you to see shopping suggestions.

Copilot acts like a virtual store assistant. You can use the tool to get advice based on your preferences and compare different items to see which one best fits your needs.

The Copilot Shopping Assistant allows you to research products more effectively than using ordinary prompts. It’s worth trying this tool and comparing it with other options, such as Perplexity’s AI Shopping feature or ChatGPT’s integrated shopping-focused search tool.

Related

I Tried Perplexity’s AI Shopping Feature and I Found Exactly What I Needed

AI shopping agents are here, and I’m impressed with Perplexity AI’s new tool.

Actions

Copilot launched an enterprise version of the Actions feature in late 2024, but its capabilities have now expanded to the consumer version. With the updated version of Copilot, you can perform multiple actions across different websites. For example, you could use the tool to book tickets for an event you want to see.

With this tool, performing necessary actions should become much easier even when you don’t want to. So, it’s one of the best ways to save time on your daily tasks.

What Else Has Copilot Introduced?

According to Microsoft, Copilot can now generate more personalized responses.

With your permission, Copilot will now remember what you talk about, so it learns your likes and dislikes and details about your life: the name of your dog, that tricky project at work, what keeps you motivated to stick to your new workout routine.

You’ll also have access to Copilot Vision on your mobile device and Windows; this feature was originally introduced last year. With Copilot Vision, you can grant the software access to your camera and allow it to give you context as to what you should do next.

Another new feature in Copilot is Pages. With this tool, you can brainstorm and do other things in a space with fewer distractions.

Why These Changes Are Too Late for Copilot

Introducing these new features and moving to Microsoft’s models is huge progress, but bridging the gap between Copilot and other AI tools will take much longer. Since its initial launch, ChatGPT and Perplexity have significantly evolved. Their innovation doesn’t look like slowing down any time soon, either.

While some of the features in Copilot are cool, most aren’t unique. For example, ChatGPT has a much better Deep Research tool than Copilot. Doing the same things as everyone else doesn’t make Copilot suddenly stand out.

Microsoft needs to focus on Copilot’s unique selling points if it wants to compete with ChatGPT and other tools. Actions, for example, are a cool feature; Microsoft should spend more time developing these programs. Similarly, Copilot was already good with its Microsoft 365 integrations; it should continue focusing on this.

It also feels like Copilot has been an afterthought for Microsoft until now. If your attention is fragmented, it’s hard to compete with OpenAI, whose main focus is developing AI technologies. For Copilot to become one of the best assistants, it’ll need to have much more of a core focus.

Here’s What I’m Doing to Fix the Problem

If you’ve ever grown tired of the “Storage Almost Full” warning, you’re not alone. My main drive fills up faster than I can clear it, but I’m finally tackling the problem for good without losing anything important.

4

Compress and Archive Files on External Hard Drives

One of the most effective ways to manage storage is by compressing and archiving files that I don’t frequently access. Instead of deleting old projects, photos, or videos, I compress them and move them to external hard drives.

For compression, I primarily use 7-Zip because of its high compression ratio, especially when using the 7z format. This creates smaller archive files, which saves disk space and makes file transfers faster. What’s great about 7-Zip is that it’s open-source and free to use, with a large community of developers constantly improving it. I also use ZArchiver to create ZIP files on my Android smartphone before I transfer them to an external hard drive.

When compressing files on external drives, I’ve learned to avoid compressing the entire drive itself. While Windows offers a “compress this drive to save disk space” option in drive properties, I don’t recommend using it on your main system drive as it can lead to system instability and poor performance. Instead, I selectively compress individual folders and files.

For files I rarely access but want to keep (like old project archives or family photos), here’s what I do:

  1. I select the files I want to archive.
  2. Right-click and use 7-Zip’s Add to archive option.
  3. Choose a strong compression level (I typically use Normal for a good balance between compression time and file size).
  4. Move the compressed file to my external storage.

I’ve learned through experience that not all file types compress equally. Files already compressed (like JPGs, MP3s, and most video formats) won’t compress much further. Text documents, raw image files, and uncompressed data compress exceptionally well.

I’ve also learned that it’s more practical to create several smaller archives rather than one massive file when dealing with large collections of files. By organizing my archives based on content type such as images, videos, or documents—I can quickly find what I need without having to extract or transfer a huge archive every time. This approach makes managing my backups easier and saves time when I need to access specific files later on.

3

Transfer All Large Files to My NAS

truenas running on old laptop attached to monitor.
Jayric Maning / MakeUseOf

After compressing my files, I either keep them on external hard drives or transfer them to my NAS (Network Attached Storage) that I’d built using an old gaming laptop I had lying around. Creating a personal NAS was surprisingly straightforward and is one of the most practical ways to reuse your barely functioning laptop. It runs on a 2nd-Gen Intel Core i5 CPU and 8GB RAM. The only hardware change was upgrading the storage drive. For the operating system, I installed TrueNAS, which offers flexible options for storage management and provides an easy-to-use interface. Of course, you can also get a prebuilt NAS and save on setup time.

Moving files to my NAS is simple thanks to network file sharing. On my Windows PC, I use the built-in SMB (Server Message Block) protocol to access my TrueNAS network shares directly through File Explorer. This integration makes it feel like working with any other folder on my computer, allowing me to drag and drop large files or entire folders without hassle. For transfers from my smartphone, I use CX File Explorer, which connects to the NAS using the same SMB protocol. This app provides an intuitive interface for browsing and moving files between my phone and the NAS, making it easy to offload photos, videos, or documents wirelessly.

What I love most about my NAS setup is the flexibility it provides. It serves as extended storage, and I’ve also configured it to run Plex Media Server, giving me a private streaming platform. The system uses significantly less power than keeping a full desktop running 24/7, which is an added bonus.

Finding duplicate files using TreeSize

Before archiving or transferring files, I make it a point to eliminate duplicates. Duplicate files not only take up large amounts of storage space but also reduce system performance by creating unnecessary data for your computer to process.

After trying several options, I settled on TreeSize as my tool of choice. TreeSize includes a duplicate file finder that is both straightforward and effective. The duplicate search can be started from the main interface, letting you scan specific drives or folders for redundant files. You can also choose different comparison filters, such as name, size, date, or file content using checksums for even greater accuracy. While checksum-based comparison is slower, it ensures that only true duplicates are flagged, minimizing the risk of false positives.

What I like about TreeSize is its helpful filters, allowing me to search for files above a certain size or of specific types, making the process faster and more targeted. Once duplicates have been found, I can then review the results, preview files, and safely delete or archive them.

Here are the basic rules I follow when scanning for duplicates:

  • Never scan system folders (like Windows or Program Files).
  • Focus on data-heavy folders first (Downloads, Documents, Pictures).
  • Always preview files before deleting them to make sure I’m keeping the right version.
  • Use filters to narrow down searches by file type, size, or date.

By using a duplicate finder, I was able to save massive amounts of storage space by removing duplicate photos, downloads, and backup copies I’d forgotten about.

1

Use Storage Sense to Wipe Specific Folders When Storage Is Low

Saving space with Windows storage sense

Storage Sense is one of those Windows features that should always be on by default. This automated tool helps prevent storage emergencies by cleaning up unnecessary files before my drive hits critical capacity.

Storage Sense works on your system drive (typically C:) and can be configured to run automatically when your device is low on disk space. To enable it, I go to Settings > System > Storage and toggle Storage Sense to On.

What makes Storage Sense particularly useful is its ability to target specific types of files. I’ve configured mine to focus on:

  1. Temporary files and the Recycle Bin (automatic cleanup after 30 days).
  2. Downloaded files that haven’t been modified in 60 days.
  3. Previous Windows installations (which can take up 20+ GB after updates).

I particularly like that Storage Sense is non-invasive. It won’t touch your essential files or applications since it only removes temporary files and items that are safe to delete. For those worried about accidentally losing important downloads, you can exclude specific folders from automatic cleanup or adjust the timing settings to your preference.

On my system, I’ve noticed that regular Storage Sense cleanups prevent the sudden performance drops that used to occur when my drive approached capacity. This proactive approach means I rarely see those “low disk space” warnings anymore, and my computer maintains consistent performance.

By implementing these four strategies, I’ve transformed my storage situation from constantly worrying about space to having a streamlined, reliable system that keeps my important files safe and accessible. With the right tools and habits, managing storage is no longer a chore—it’s just part of my routine, and my drives have never been full since.

6 Ways to Find Your IMEI Number Without Your Phone

Losing your phone doesn’t mean you’ve lost its IMEI. Chances are, it’s already saved somewhere; you just need to know where to look.

6

Look at the Original Retail Box

The easiest way to find your phone’s IMEI number is on the original retail box. When you bought your phone, it came in a sealed box with accessories and a manual. The IMEI is printed on a label near the barcode. You’ll also see other details like EID, UPC, and serial numbers.

Digvijay Kumar / MakeUseOf

For iPhones, the label is usually on the back of the box, while Android phones often have it on the side or bottom. If it’s not outside, peek inside the box; it might be on an insert, warranty card, or manual. Android devices often have a removable sticker on the device with the IMEI and other device information, too.

Older phones with removable batteries often had the IMEI labeled inside the battery compartment. But with the shift towards sealed, unibody designs, the box is now the standard option.

5

Check Your Email Invoice or Purchase Receipt

If you don’t have the original box, check the email you used to buy the phone. Retailers and mobile carriers usually send confirmation emails after the sale. That message carries the IMEI number, phone model, and serial number. Open your email app and search for the store or carrier from which you bought the phone.

Order confirmation email from Samsung with invoice

You can also use keywords like “order confirmation,” “invoice,” or “receipt” to narrow down the results. Don’t forget to check your spam or junk folder in case it ends up there. If you can’t find anything, log in to the website or app where you bought your phone. Check your order history and download the invoice or receipt. The IMEI number is usually in the product details or billing info.

For purchases from Amazon or other online stores, sign in, check past orders, and find the purchase details. If you bought your phone in-store, check the receipt for the IMEI number. If it’s missing, ask store employees for help. I once lost my receipt after buying a phone locally, but the store reissued it after verifying my purchase.

4

Use Google’s Find My Device (for Android)

If you’re using an Android phone linked to your Google account, you can find the IMEI through Google’s Find My Device. This tool helps locate lost smartphones and displays important information about each device connected to your account.

To start, open your web browser and head to Google Find My Device. Log in using the same Google account linked to your phone. Once you’re in, you’ll see a map and a list of your devices on the left. Just pick the one for which you want to find the IMEI, and a window will show detailed info.

Opening Google Find My Device

Click the gear icon (Settings) in the top left corner to view the IMEI and other details such as phone model and the activation date.

Checking Samsung IMEI on Google Find My Device

3

Check Your Apple ID Account (for iPhones)

Similar to Android, Apple offers a similar solution via your Apple ID. If you own an Apple ID, you can sync all your devices to the account and easily locate the IMEI number for your iPhone.

To do this, open a web browser and navigate to the Apple ID website. Sign in with your credentials, and a six-digit verification code will be sent to your trusted device. Enter the code, and you’ll land on your account page.

Once you’re there, click on the Devices tab. This will display a list of all devices linked to your Apple ID. Look for your iPhone in the list and click on it.

Opening my Apple account on chrome browser

On the device info page, scroll down to the About section. That’s where you’ll find details about your phone, including its IMEI number.

Getting IMEI number from Apple Account-1

2

Try an IMEI Finder Site

IMEI checking on an online tool for free-1

Some online tools, like imei.info, let you check a phone’s details by entering its IMEI. Though these tools won’t generate an IMEI for you, they can confirm if the one you have is correct. You’ll get details like the phone’s brand, model, and warranty status.

This is useful if you’re verifying a suspected IMEI, sorting through old documents with unclear labels, or even matching devices to see which IMEI belongs to which phone.

Response from Samsung regarding duplicate invoice request

If nothing else works, your phone’s manufacturer or service provider might still be able to help you. They could have a record of your invoice, which usually includes your IMEI. Or, if you’ve activated the phone with them before, they might be able to look it up in their system.

Contact their customer support or live chat and explain your situation. Be sure you have proof of ownership and any ID they might ask for. Once they verify your info, they’ll check their records and give you the IMEI tied to your device.

These are some quick and easy ways to find your IMEI number when your phone isn’t around. I’ve tried a few of these, and they’ve been helpful when I needed the number quickly. Give them a shot, and once you’ve got your IMEI, save it somewhere safe so you’re not scrambling to find it again later.

YouTube Music Premium Is the Best Music Streaming Service You’re Not Using: Here’s Why

I have been paying for Spotify Premium for as long as the platform has been popular. However, as a YouTube Premium subscriber, which includes YouTube Music Premium, I only recently realized that I have been sleeping on a fantastic music streaming service.

Seamless Integration With YouTube

Jack Mitchell/MakeUseOf

As a musician and music fan, I find YouTube a godsend for viewing music videos and live concerts, finding rare cuts, and interacting with like-minded folks. YouTube Music Premium uses its sibling resource by bridging the gap between audio and video like no other streaming service. If you love watching live performances and music videos like me, the ability to effortlessly toggle between a song’s audio track and its video is a serious game-changer (you can even install YouTube Music Premium as a desktop app from your browser).

This integration makes music discovery more enjoyable, as it’s easier for me to engage with the music I’m trialing and get to know the artists behind it better. While other streaming services offer videos, these are usually limited to the official music videos accompanying the tracks, excluding music not released as a single or live release. On YouTube Music Premium, I can watch and/or listen to a live performance of Paradise City from 1992, followed by its studio release, if I wish to get sentimental about the “good old days” of MTV.

Unmatched Music Discovery

YouTube music discovery screenshot.
Jack Mitchell/MakeUseOf

Music streaming is all about discovery for me. As much as I love sifting through vinyl at record shops, to be able to search a seemingly infinite database of music that I can trial and add to my collection is what dreams are made of. As far as I’m concerned, YouTube Music does this better than all of the competition.

Thanks to YouTube’s massive database and next-level algorithm, YouTube Music Premium is great for finding hidden gems, including rare releases, unreleased demos, and indie remixes. I often stumble upon content that doesn’t even exist on Spotify or Apple Music, two platforms that I have always loved, but which are starting to pale in comparison.

As someone who has long been frustrated by the amount of good music that is discontinued by record companies, I’ll usually quickly find what I’m looking for on YouTube Music Premium. Even when I don’t, I often find a similar release or compilation that includes some of the tracks I’m after.

Effortless Background Play and Offline Downloads

Most of the time, as I listen to music, I’m engaged in another activity, whether motorcycling (via my Bluetooth helmet), exercising, or doing household chores. One of the most frustrating aspects of using free YouTube on your phone is the inability to listen with your screen off, which means you often consume unnecessary data while it’s in use, and you can’t slip your phone into your pocket and enjoy your favorite jams.

Thankfully, this is not the case with YouTube Music Premium, as background play is seamless, which is great for multitasking or saving battery. Offline downloads are just as easy, letting you save entire playlists or albums with a single tap. This is ideal for when I’m listening to music on two wheels, where data connectivity can be spotty, or for anyone with a limited data plan, who is a frequent traveler, or regularly commutes.

A Personalized Experience That Accurately Learns My Tastes

YouTube music recommendations.
Jack Mitchell/MakeUseOf

Whether it’s a deep cut, a regional hit, or a niche genre, I find that YouTube Music Premium curates surprisingly on-point recommendations despite my eclectic (or is that oddball?) tastes. I have previously written about the virtues of other streaming platforms and their recommendations, but there’s a good reason why YouTube Music Premium seems to get them just right.

As a Google-owned enterprise, YouTube Music Premium has access to some of the most powerful programming resources, and it shows. While all streaming platforms use algorithms to recommend music, YouTube Music Premium leverages both my YouTube and music history for far more accurate suggestions. My “Supermix” (a 100-song playlist based on all my tastes) and “Discover Mix” (a weekly 50-track playlist based on my listening history) often feel surprisingly tailored to my mood. They don’t just offer what’s currently trending, but suggest tracks that truly resonate with my style.

Excellent Value With Useful Perks

Almost everyone I know uses YouTube, and it has evolved from being a user-friendly public video-sharing platform to a legitimate broadcasting channel that offers some genuinely compelling programming with high production values. I would therefore argue that it’s worth paying for the YouTube Premium service even if YouTube Music Premium wasn’t bundled at a discounted price.

On its own, YouTube Music Premium is competitively priced at $10.99 per month, and when bundled with YouTube Premium for $13.99, it becomes an even better value. For this, you get ad-free YouTube across the board, background play, and music streaming all in one package. For two dollars more than I’m paying for just music on my Spotify Premium account, I’m essentially getting two services.

If, like me, you’re a fan of old, rare, and obscure releases who also watches a lot of YouTube, switching to YouTube Music Premium makes sense. However, it is also ideal for sourcing new releases from unsigned artists and independent labels. The combination of superior discovery tools, exclusive content, and dual functionality as both a music and video player gives the platform an edge over the competition, although it lacks the excellent Spotify Connect function. YouTube Music Premium isn’t just an alternative—it might be the upgrade you didn’t know you needed.

These iPhone Apps Make Widgets Actually Useful

Widgets were supposed to make your iPhone more useful, but most end up just sitting there looking pretty. The good news? A handful of apps can finally make widgets worth your time.

6

Widgy

If you’ve ever wanted total control over how your widgets look and what they do, Widgy is the sandbox you’ve been waiting for. It opens up a new layer of flexibility, letting you design widgets from scratch or pick from a massive library of community-made templates.

What makes Widgy stand out is the balance between power and creativity. You can build a widget that shows your battery status, steps, weather, or calendar events, all styled exactly how you want. Prefer a minimalist clock? No problem. Want a dense block of data with charts and icons? Also doable.

There’s a learning curve, but Widgy doesn’t leave you stranded. The app includes pre-built widgets you can customize in a few taps. Once you get the hang of it, it starts to feel natural. The level of customization is unmatched, making Widgy perfect for anyone who wants their iPhone to reflect their workflow, aesthetic, or both.

Download: Widgy Widgets (Free, in-app purchases available)

Widgetsmith was one of the first apps to ride the iOS widget wave—and it’s still one of the best. It offers a more guided and user-friendly experience than Widgy, making it ideal for people who want control without complexity.

You can create widgets for time, weather, calendar events, reminders, and even health data. Choose a size (small, medium, or large), pick a function, then customize the look—fonts, colors, backgrounds—to match your style. The interface is straightforward, and while design options aren’t as limitless as Widgy’s, they’re more than enough to make your home screen feel intentional.

If you want your home screen to be beautiful and functional without spending hours designing it, Widgetsmith is a solid choice.

Download: Widgetsmith (Free, in-app purchases available)

4

ScreenKit

If you want your iPhone to look like a curated mood board, ScreenKit is your app. Best known for its icon packs and aesthetic themes, it also offers a wide range of stylish widgets that don’t completely sacrifice function.

ScreenKit is less about deep customization and more about plug-and-play beauty. Browse through predesigned themes—like pastel minimalism or techy dark mode—and apply them in one go. Each theme comes with bundled widgets, including clocks, calendars, battery indicators, motivational quotes, and countdowns. These widgets are more about aesthetics than utility, but for casual users who want a cohesive look, that’s a fair trade.

Download: ScreenKit (Free, in-app purchases available)

3

Fantastical

Fantastical has long been a favorite among productivity enthusiasts, and its widget support reinforces why. While Apple’s default calendar widget is fine, Fantastical goes several steps further with smart, elegant widgets that help you manage your time more effectively.

It shows multiple upcoming events, reminders, weather, and even meeting invites all in one glance. The layout is clean but rich in information, and it makes smart use of space.

Fantastical’s widgets are also highly adaptable. You can choose from different layouts depending on how much detail you want. If you use it with the main app, you also get features like natural language input and to-do list integration.

Download: Fantasical Calendar (Free, in-app purchases available)

Colour Widgets strikes a nice middle ground between style and utility. It’s great for people who want functional widgets that still look good without diving into complex setups.

The app offers pre-built widgets for clocks, calendars, step counters, and battery monitors, all with a clean, modern aesthetic. Setup is quick: pick a widget, choose a theme, tweak a few colors or fonts if you want, and drop it onto your home screen. No layers or coding required.

One underrated feature is the ability to add custom text. You can create countdowns, motivational notes, or personal reminders that live right on your screen. For users who treat their phones like planners or vision boards, this is a thoughtful touch.

It may not offer the deep data integration of Widgy or Fantastical, but it makes up for it with accessibility and style. Color Widgets is perfect for keeping things light and functional.

Download: Color Widgets (Free, in-app purchases available)

Sticky Widgets does one thing really well: it puts digital sticky notes on your home screen. It’s not flashy or overloaded with features, but that’s exactly why it works. Open the app, type your note, and it shows up in a widget like a virtual Post-it.

It’s perfect for reminders that don’t belong in your calendar or to-do app. Think grocery lists, motivational quotes, or that one thing you keep forgetting to pack. You can change the color and font for a bit of personality, but the appeal is in its simplicity.

Sticky Widgets doesn’t try to be a planner or a journal. It’s simple, yet one of the best widgets for boosting your productivity. It gives you space to jot something down and keep it front and center. For people who think best in quick notes and visual cues, it’s a lightweight must-have.

Download: Sticky Widgets (Free, in-app purchases available)

Widgets used to be just decoration. Now, they can keep you on schedule, show off your style, or help you stay focused. With the right apps, your home screen stops being dead space and starts working for you. These picks don’t just look good—they actually make your iPhone better.

These 3 Desk Accessories Are Essential to My Setup

When you spend long hours at your computer, every desk accessory counts. The right gear can drastically change how your setup feels and functions. These simple items have completely transformed how I use my space and have earned a permanent place on my desk.

1

A Mouse Bungee

Keeps the Cable Out of the Way

Wired mice are still king when it comes to responsiveness. Wireless options have come a long way, but serious gamers still trust that direct connection. Their only downside is cable drag. That’s where a mouse bungee comes in.

Wireless Vs. Wired…

Should You Buy a Wireless Mouse for Your Computer? Here Are the Pros and Cons

I’m all for keeping a wireless mouse handy, but there are some downsides, too.

A mouse bungee is a small, spring-loaded device that holds your mouse cable up off the desk and allows it to move freely in any direction. It seems unnecessary at first—until you use it. The difference is immediate. There’s no catching on the corner of your keyboard, no dragging across the edge of your mousepad, and no annoying friction when you’re in the middle of a firefight or making pixel-perfect movements in Photoshop.

When I first added the Cougar Bunker RGB Mouse Bungee to my setup, I didn’t expect much. Within hours, it felt non-negotiable. My movement became smoother, and the desk looked better, too. No loose cable snaking across the surface of my desk, and no sudden tangle risks. Just clean, controlled movement.

Some mouse bungees come with bonus features, including customizable RGB lighting to match your setup. Others include built-in USB ports. My bungee offers two extra USB 2.0 ports—handy for low-speed peripherals, though not ideal for data-heavy devices.

A good mouse bungee is a simple upgrade that fades into the background. It keeps your cable in check, reducing distractions and letting you focus more on what’s happening on your screen.

2

A Vertical Dual Monitor Arm

Clears the Clutter and Fixes Your Posture

A vertical dual monitor setup, with speakers on the sides

With the myriad of programs we tend to use simultaneously on our computers, dual monitors have become a necessity for productivity. However, if you haven’t set up your monitors properly and both monitors are sitting flat on your desk, you’re wasting valuable real estate and forcing your neck downward. A more practical mounting solution can help reclaim your workspace and improve your posture.

The Bracwiser Dual Vertical Monitor Arm lifts one monitor off your desk, stacking it above the other to save horizontal space and give your setup a cleaner, more streamlined look. But aesthetics are just the beginning—the real win here is ergonomics.

More monitors aren’t always good…

How Two Monitors Crippled My Productivity (and How I’m Fixing It)

Twice the screens, half the focus—here’s the tale of my double-monitor disaster.

By following proper workstation setup and elevating one monitor to your natural eye level, you can spend less time looking down and reduce neck strain. This is crucial if you’re working long hours or running intense sessions in front of the screen. You can still adjust the height and tilt of each monitor to your preference, keeping both displays in your comfortable line of sight.

Side view of a vertical dual monitor arm holding up two monitors

In my case, I customized the monitor arm to look cleaner. Originally, the vertical post stuck out several inches above the top monitor, which looked clunky and awkward. To solve this, I took a grinder to it, shaved a few inches off the top, and reattached the plastic metal cap. The result is a much sleeker, more professional-looking setup.

There isn’t room underneath the monitors for extra gear, but the space savings across the desk make up for that. Even without new accessories or lighting, the setup feels more intentional and organized.

3

A Gooseneck Phone Holder

Puts Notifications Where You Can See Them

A gooseneck phone holder holding a phone in front of a dual monitor setup

Phones can be a significant distraction when working at your desk, but are also essential. Whether you’re getting Slack updates, family messages, or 2FA codes, ignoring your phone altogether isn’t an option. However, placing your phone front and center can be detrimental to your focus.

To solve this operational dilemma, I added this Gooseneck Phone Holder to my desk. It mounts to the front or side of the desk and holds your phone at eye level, right where your peripheral vision catches it. You don’t need to grab it or lean down to check for updates; a quick glance is enough. It’s not about using your phone more—it’s about interrupting your workflow less.

This was a game-changer for me during long editing sessions. Before, I’d leave my phone face-down, forget about it, then realize I’d missed five texts and a call. Now? Everything stays visible, but it doesn’t demand attention unless something important pops up.

As a bonus, it also doubles as a rock-solid stand for Zoom calls or watching videos while eating lunch at your desk. No more propping your phone up on a coffee mug or leaning it against a monitor.

The clamp of a gooseneck phone holder clamped onto a wooden desk

The flexibility of the gooseneck design means you can position it exactly where it works best for your space without any compromises. Whether you want it floating off to the left or tucked under your second monitor, it “bends” to your will. Once you find the optimal position, you’ll never want to go back to laying your phone flat.

A smart desk setup isn’t about buying the most expensive gear. It’s about intentionality. Every piece should earn its space. These three desk accessories aren’t flashy, but they’re the perfect accessories for building a focused and enjoyable PC setup. Small investments. Big returns.

I Tested Microsoft Loop for Brainstorming and It Still Can’t Match Notion

I’ve been using Notion to brainstorm for years, so it was interesting to see if Loop could be a replacement since I am heavily ingrained in Microsoft’s ecosystem. After spending some time with it, I’m holding off from switching. Loop has lots of catching up to do.

6

No Nested Pages, No Structure

Brainstorming can sometimes require you to structure your ideas hierarchically so you can easily capture ideas within ideas. This layered approach allows you to simplify complex topics while keeping them organized and easy to navigate. Without nested pages, Loop makes it harder to achieve the depth needed for intricate brainstorming sessions.

Nested pages enable flexible, layered organization, which is ideal for complex brainstorming sessions in Notion. Loop’s on-page components, like tables and lists, which Notion also has, are too rigid for this. With Notion’s subpages, you can seamlessly break down ideas, which fosters creativity and clarity.

Related

How to Get Started With Notion

Does it seem like everyone knows how to use Notion but you? Catch up with this gentle introduction.

5

Loops Templates Selection Is Significantly Lacking

A brainstorming session can go faster and smoother with a template serving as a guide for the thought process. That’s because it removes that overwhelming feeling of a blank page. This allows you to dive straight into fleshing out your idea without worrying about things like structure and formatting.

Both Notion and Loop have templates for various scenarios, but while the former has over 30,000, the latter only has a few dozen. The biggest reason Notion has so many templates is its template marketplace (Loop doesn’t have one yet). You can find templates created by the Notion team and users, ensuring that you’re likely to find what you need for your brainstorming needs (e.g., mind maps, mood boards, or idea trackers).

The Templates page in Notion.

4

Notion Has Diverse Embeds

Notion allows you to embed different types of content on your pages, including X posts (formerly tweets), Figma designs, Google Drive files, Lucid Chart mind maps, and Pinterest Pins. These embeds enhance brainstorming by allowing you to add visual aids from multiple sources. Loop is limited in this regard, with unsupported embeds like X posts and Pinterest pins showing basic non-interactable links.

A Pinterest embed in Notion.

Related

9 Notion Integrations to Enhance Productivity

Automate, streamline, and organize—Notion just got better.

3

Loop Has Limited Automation

Both Loop and Notion offer built-in automations that streamline brainstorming. Automations can help with organizing ideas, sending notifications, and syncing with external apps. They rely on rules to trigger actions when events occur.

In this regard, Loop’s table-based automations are basic, considering the triggers are only conditional, and you can only add one trigger per rule. The actions are also limited to sending notifications via Teams or email.

Creating an automation in Microsoft Loop.

Notion’s database-based automations, on the other hand, are more robust. They allow you to add rules triggered by when certain conditions are met or by frequency, and you can add many of them to a single rule. These automations can perform actions like sending notifications to Slack, Gmail, or Outlook, editing pages, or triggering webhooks for tools like Zapier.

A Gmail automation created in Notion.

The ability to trigger webhooks is especially important. Notion does it natively, allowing you to build external workflows. With Loop, you will have to integrate it with Power Automate to do that. Not only is this an added step, but it’s more suitable for people comfortable staying within Microsoft’s ecosystem.

2

AI Brainstorming Is Expensive on Loops

AI has become an essential brainstorming tool for many, as it can significantly speed up the process. You can use it to generate or flesh out ideas in an instant. AI can even help you overcome writer’s block or that overwhelming blank page feeling (like templates do).

You can use Loop with Copilot, Microsoft’s AI assistant, but you’ll need to pay $20 per month for a Copilot Pro subscription. This is a tough sell, even for someone like me who loves Microsoft products. You also need a separate subscription to use Notion AI in Notion’s page, but it’s more affordable at $10 per month.

The Notion AI prompt in Notion.

Related

The 6 Notion Features That Keep My Overwhelming Task List in Check

Tackle that ever-growing task list with these Notion features.

Loop’s community support lags significantly behind Notion for the simple fact that Notion has had more time to build its community. Notion was released in 2016, and Loop launched in 2023, giving Notion a seven-year head start. That is years and years’ worth of templates, tips, and tutorials being shared on YouTube, social media platforms, and dedicated forums.

This makes Notion the ideal platform for finding brainstorming-related resources. Loop’s community is still in its infancy, with limited user-generated content and fewer resources available. With Loop, you’ll mostly rely on Microsoft’s official documentation and support channels for guidance while its community continues to grow.

At the time of writing, Loop lacks the versatility and support that Notion has. This makes sense because Loop is relatively new and has a different primary purpose than Notion. But even when it comes to brainstorming, the extra features that Notion has make a big difference.

Paying for Spotify on iPhone Just Got a Lot Better

Spotify and Apple’s war over unjust commissions on in-app purchases and subscriptions and Apple’s anti-competitive behavior goes back years. The ongoing war finally seems to be coming to an end now, and it’s all thanks to a US judge ruling against Apple.

Spotify Will Finally Get the Freedom It’s Been Fighting Apple For

In a blog post shared on Spotify Newsroom, the streaming giant revealed that it had submitted a Spotify app update to Apple that would bring multiple features to U.S. users, which was finally approved today.

This would allow Spotify to freely display the pricing information of different Premium tiers and external links to subscribe, share promotional deals within the app that’ll allow users to save money for transparency purposes, and let customers use other external payment options beyond Apple’s in-app payment system.

If you’ve tried to subscribe to Spotify Premium on your iPhone before, you may have noticed that it’s impossible to add your payment details within the app. Instead, you’re prompted to head to Spotify’s website, choose a Premium plan, and then pick one of Spotify’s accepted payment methods. Ultimately, the new changes mean that though you’ll still need to head to Spotify’s website to subscribe to a plan, you’ll be able to view pricing information for all the plans within the app and tap a button to be automatically redirected to the website.

Mahnoor Faisal/MakeUseOf

Spotify permanently discontinued the option for accounts to pay through Apple’s in-app payment system back in 2023, since Apple would take a 30% commission on all in-app purchases. By forcing customers to sign up for Spotify Premium through its website rather than the app, Spotify could keep 100% of the payment. Not only did that help the company avoid Apple’s 30% cut, but it also meant users typically paid less, since subscriptions were often priced higher in-app to offset Apple’s commission.

In light of this, Apple decided to ban apps from linking to external sites for payments. The reason this is all changing now is thanks to an antitrust charge against Apple by the company behind Fortnite, Epic Games. In 2021, Apple was ordered to allow apps to direct users to other payment options. But the tech giant found a way around that too, by requiring app developers to apply for a special “entitlement” and introducing a new tax on purchases made outside apps.

Related

Which Spotify Subscription Is Best for You?

We explain what each Spotify subscription offers, how much they cost, and help you decide which one is best for you.

Fast-forward to this week, a U.S. Supreme Court judge, Yvonne Gonzalez Rogers, accused Apple of knowingly dodging the previous court orders mentioned above, and ruled that the company must make changes to the App Store, including allowing developers to redirect users to third-party websites to make payments.

While these changes are certainly far from good news for Apple, it’s the complete opposite for apps like Spotify. Although the latest version of the app is now available, the changes are still rolling out, so you might have to wait a bit before you see them on your iPhone or iPad. For instance, we checked on our end and were greeted with, “You can’t make changes to your plan or view prices in the app. We know it’s not ideal.”

If You Need a Reason to Upgrade to ChatGPT Plus, It’s This

Subscribing to ChatGPT might seem pointless, but considering how good GPT-4o has become, it’s time to seriously reconsider your reservations.

9

Deep Research

You can always conduct a decent amount of research with ChatGPT, but the software’s capabilities have significantly expanded with GPT-4o. Deep Research is the best example of this.

While you can use ChatGPT’s Deep Research tool with the free version, you will not receive as many requests as with the Plus version. When you prompt via Deep Research, ChatGPT will do a comprehensive web search. You can pull reading lists, statistics, and much more.

Given the extent to which Deep Research does its job, you’ll need to wait a few minutes for the results to be completed. But considering how comprehensive the answers are, it’s worth waiting. At the time of writing in May 2025, you get 25 Deep Research requests per month.

8

Better Reasoning

Reasoning was a big problem in previous versions of ChatGPT, but over time, GPT-4o has become much better in this respect. While still not on the same level of Perplexity, you’ll get comprehensive responses when you ask for deeper reasoning.

ChatGPT given a temperature anamoly dataset to observe trends with reasoning capability enabled

You can use this feature in all kinds of conversations. While it makes sense when researching, you may also find use in asking for deeper reasoning when you set goals. Sometimes, asking for this can help with applying more logic to decisions you make, too.

In addition to reading your prompts, ChatGPT can reason using images you upload.

7

Fewer Robotic Responses

ChatGPT will never replace human conversations, but it now sounds much less robotic. When exchanging messages with the chatbot, you’ll feel as though you’re speaking to a person. The software can use human language and colloquialisms, and it has the intelligence to ask legitimate questions.

Having a conversation in ChatGPT

With GPT-4o, ChatGPT is more likely to give honest responses when you ask it to. Rather than acting like your biggest cheerleader, the tool can rationalize its points and is less afraid to disagree with you. You may sometimes need to fine-tune this, though, with prompts like “please be honest, and don’t be afraid to disagree.”

6

Better Image Generation

DALL-E was a useful AI image generator, but it had numerous issues that needed addressing. For example, it was notoriously bad at creating text; anything more than simple words quickly became a problem.

Though it occasionally makes errors, GPT-4o is much better at generating images. Humans interact better with objects, and the app listens to prompts more. When coupled with ChatGPT’s editing features, you get a strong all-around AI image generator, though Adobe Firefly is still better.

Screenshot of Library With a ChatGPT Image Generated in GPT-4o

One annoyance is that even now, GPT-4o sometimes doesn’t listen to requests. Regardless of how many times you reword the prompt, ChatGPT sometimes just won’t do what you asked it to. Hopefully, this will be ironed out with enough time.

5

Faster Processing

I’m what you would describe as a ChatGPT power user, and as a result, I’ve noticed subtle changes, such as increased processing speeds. From what I’ve seen, GPT-4o takes less time to craft responses.

Conversations typically flow much faster, especially when the software doesn’t have to search the web or update memory. The web app could use some improvement, as conversation speeds slow down as they grow, but it’s still significantly better than before.

Since you can speak more quickly with the tool these days, it’s even easier to save time and accomplish more with ChatGPT.

4

Offering More Suggestions

Earlier versions of ChatGPT often felt like using the app as a one-sided idea launchpad. You could receive suggestions if you manually prompted the chatbot, but it rarely took the initiative on its own. However, GPT-4o is much better at giving suggestions without you needing to prompt further.

ChatGPT asks if you want to create spreadsheets, images, mind maps, and more. Often, these suggestions will be things that you either didn’t think of or would have needed to spend more time manually working on.

ChatGPT offering suggestions in the app

When using Deep Research, ChatGPT often asks follow-up questions to ensure it has all the necessary information. You can tell GPT-4o to stop offering suggestions if you think they’re too much, but having this feature on by default is great for creative thinking.

3

Better Memorization

You may need to start different conversations on ChatGPT for numerous reasons. Perhaps you want to organize your thoughts more effectively, or maybe you’ve reached the maximum conversation limit.

Regardless, you don’t need to worry about the app forgetting everything it’s told you. The software can cross-read and extract any relevant information to better inform its responses. Even after deleting certain memories, I’ve found that the tool is capable of understanding the context without me needing to refine my prompt.

Because ChatGPT can remember what you tell it more effectively, you’ll receive much better responses than before. This alone is worth paying the monthly price for Plus.

2

Improved Non-English Use

While ChatGPT has made significant strides in its English-language offerings, it hasn’t always performed as well in other languages. But with GPT-4o, it’s much better in this respect.

In addition to English, I sometimes use GPT-4o in Danish. While it’s still not on the same level as English, the tool is better at helping me memorize and develop the responses I want.

It could use some improvement in image generation, but I expect that to change in the long run. Languages with special characters will probably take the tool more time to learn.

1

Better Voice Mode

In addition to text-based improvements, ChatGPT’s Voice Mode has made huge strides since the early days of GPT-4o. Conversations flow better, and while you can still tell that you’re talking to a bot, it does feel more human.

ChatGPT's Monday Voice

ChatGPT even introduced Monday Mode, a new voice, in April 2025, to expand its offerings. Besides asking for advice, you can use the tool for interview preparation, to engage in some banter, and much more.

Since your chats will be transcribed later, it’s worth experimenting with Voice Mode.

ChatGPT Plus offers more benefits than may initially meet the eye, and the significant improvements to GPT-4o are one of those. The free version of ChatGPT is suitable for basic conversations, but you’ll miss out if you don’t upgrade.

Uber’s New Interface Is for Seniors, But I Might Start Using It Too

Uber is launching a simplified version of its ridesharing app, with changes specifically designed to help seniors better navigate it when they need a ride or a food drop. However, Uber’s new simplified interface is actually appealing to just about anyone who wants a less cluttered interface—and I might start using it, too.

Uber’s Updated App Is Packed Full of Thoughtful Features

Bloomberg / Uber

The standard version of Uber’s app isn’t exactly difficult to navigate or use, but it doesn’t account for the needs of older adults. If you’ve ever found yourself squinting at the text or getting confused by all the buttons on the screen, switching to the new version of the app might just feel like a breath of fresh air. So, what exactly does this new senior-friendly version of Uber bring to the table?

As reported by Bloomberg, the new, simplified version includes much larger text, making reading significantly easier. Another change is that saved destinations will now be easier to find. The app also has fewer buttons, so it’s easier to navigate. But what I’m most excited about is that although this version of the app is marketed toward seniors, anyone can enable it by navigating to the app’s accessibility settings.

Related

How to Avoid Scams When Riding With Uber

Learn how to avoid a broad range of Uber scams, along with what the most common ones are.

In many ways, the simplified version of Uber reminds me of Uber Lite, its 5MB ultra-lightweight version originally developed for the Indian market. It uses a similarly stripped-back interface that makes Uber easier to use in low-data environments. The basic menus, streamlined interface, and reduction of clutter are all very similar, and it’s a great update that’ll be very welcome in the regular app.

It’s Only Available in Phoenix and Orlando

Uber’s simplified app began rolling out in Phoenix and Orlando on May 1, 2025. If you reside in one of these cities and want to test this interface, navigate to the Account tab, select Family, and create a senior account for yourself.

Riders in other cities across the country will likely have access to this feature in the near future. At present, it’s unclear if Uber will make any changes to this version of its interface before a wider rollout based on the feedback it receives from riders.

As a result of this launch, Uber is expanding its family profile types to include seniors. Until now, you could only invite other adults and teens when setting up a Family profile. With this update, you should be able to add seniors to your family account. This will help you follow their riders, pay for them, and even set spending limits.

That said, we’re currently unsure if seniors who use this interface can book the same Uber ride types as those using the standard app. It’s also worth noting that, for now, cars picking up senior riders will not have any extra accessibility features, and the drivers don’t go through additional vetting (as they do with teen riders).

While helpful, I’m not surprised Uber introduced this version of its app. Uber’s biggest competition, Lyft, is working on a similar feature, which it plans to launch later in 2025. And, as said, it can already draw on the experience of Uber Lite to bring this stripped-back experience into the main app, so it should be easy to use from the get-go.

Instagram’s Edits App Is Here—and It’s Surprisingly Good

Snapchat and Instagram Stories, TikToks and Reels, X and Threads —it’s clear that Instagram has a bit of a habit of borrowing ideas from other platforms and adding its own twist to them. Edits, the blatant CapCut copycat, has arrived, and it’s surprisingly good.

Surprisingly, Edits Delivers on the Main Promise It Initially Made

After testing the app out, it’s safe to say that it not only delivers on the promises it made, it actually goes beyond expectations. When Adam Mosseri, Instagram’s head, announced Edits in January 2025 (ironically, right after CapCut was temporarily removed from app stores in the US), the app could only be pre-ordered on Apple’s App Store.

In his initial announcement, Mosseri mentioned that the Edits app wouldn’t launch until February 2025. While that didn’t happen, I noticed its App Store page later said Expected 30 Apr, 2025. The app actually launched roughly a week earlier than anticipated, on April 22, 2025. Mosseri had also claimed that the app would initially only be available for iOS devices (as evident by the fact that it could only be pre-ordered on Apple devices). In a twist of events, Meta ended up releasing it globally on both Android and iOS.

When Edits was announced, the Price section on its App Store listing claimed that Edits would be a completely free editing app.

Frankly, that’s quite a bold claim to make in this economy, especially from a company as big as Meta. While part of me wanted to believe Edits might actually end up being completely free, a bigger part of me thought it was just a claim to garner attention, and that it wouldn’t stay that way once the app launched.

To my surprise, Edits stayed true to its word and is completely free to use. None of its features are currently locked behind a paywall, though this might unfortunately change soon.

Mosseri posted a Reel on Instagram at the beginning of April to answer a fan’s question about whether the Edits app would remain free:

It will be free. I think over time we might have some paid features where we’re going to need to cover costs of things like compute for big AI features. 
But in general, we want to create as many features that are free as possible, because the more people can create, the more they will create, the better Instagram will be, and the more we will all benefit.

Nonetheless, what’s important is that Instagram did deliver on what it initially promised, and the app is indeed completely free.

Edits’ User Interface is Simpler Than Most Editing Apps

In my initial article about how the Edits app aimed to stack up against CapCut, I noted that I had a feeling Edits wouldn’t be as easy to navigate compared to CapCut. Of course, I said that based on the initial announcement of the app and the App Store listing.

After testing the app out, I realized that I was completely wrong. I’ve tried a lot of video editing apps in the past, and Edits’ user interface definitely leans toward the simpler side compared to them. The app is essentially divided into the following five sections:

Ideas

The Ideas tab has three sections: Stickies, Saved, and Collections.

If you’re someone who gets ideas at the strangest of times (like perhaps when you’re in the shower or on a walk), something you’ve likely done before is jotting down your idea quickly on the nearest piece of paper you can find or in your handy-dandy notes app.

Related

How to Keep Ideas Flowing for Your Creative Projects: 8 Tips

Feel like you’re on a roll with your creative pursuits? Implement these tips to keep it that way.

Stickies are a neat way to replace that. It lets you jot down any ideas you may have and save them as sticky notes. This way, all your ideas will neatly stay in one place, and you won’t need to scramble through your notes app or scraps of paper trying to recall the idea you had. The Saved section lets you view all the Reels you’ve saved on Instagram, and if you tend to organize the Reels you like into Collections on the Instagram app, you can find them in the Collections view.

Inspiration

The Inspiration tab is essentially identical to the Reels tab in the Instagram app and displays Reels that you can use for, well, inspiration. You can save any Reel to look back at it later as you would on Instagram, save it as a sticky, or tap Use audio to use its sound in a new video.

Projects

The Projects tab is where you can start editing a new video and view all your existing projects. You can sort these projects by Last edited, Date created, or Alphabetical.

Instagram Edits Projects

Camera

You can also record clips up to 10 minutes long right within the Edits app by switching to the Camera tab, which gives you access to advanced camera settings like resolution and framerate control, and the option to choose between SDR and HDR color. It also has three zoom-in options for the front camera (1x, 2x, 5x) and four for the back cameras (0.5x, 1x, 2x, 5x).

Insights

Finally, the Insights tab lets you see in-depth insights into how your account and Reels are performing. This is aimed primarily at creators, which I’ll cover in depth below.

Even if you don’t use Instagram much, both navigating the app and actually editing your footage is as straightforward as it gets.

Once you create a new project (or open an existing one), a timeline appears at the bottom, followed by a list of tabs: Audio, Text, Voice, Captions, Overlay, Sound FX, Cutout, and Sticker.

Edits editing features

All these options are quite straightforward, and learning your way around the app shouldn’t take you more than a couple of minutes.

The Editing App’s Auto Captioning Feature Won Me Over

What kept me loyal to CapCut for so long was its auto-captioning feature, only for it to get locked behind a paywall and become a Pro feature. CapCut’s Standard plan currently costs $9.99 monthly, and considering I don’t edit videos all that much, shelling out nearly 10 dollars just for a single feature is, well, pointless.

Related

The 6 Best Apps to Automatically Add Captions to Your Social Media Videos

If you want to automatically add captions to you social media videos, try these apps.

Well, what’s one app’s loss is another’s gain, because Edits offers the same feature completely free. The best part? I tested the auto-captioning feature with a couple of random TikToks, and other than a few nitpicks here and there, the transcription was perfect.

There are also countless fonts you can use across different categories (Simple, Bold, Retro, Playful, Handwritten) to customize how your captions appear in your videos, including the classic ones you come across while creating Instagram Stories like Literature, Bubble, Signature, Modern, and more.

Generating captions for a nearly three-minute video took less than a minute (32 seconds, to be precise), which I found impressive. Plus, Edits has a lot to offer beyond the auto-captioning feature.

As you may have guessed, it has AI features like Cutout that’ll help you take your editing to the next level. You can animate images, modify your background using a green screen effect, and even enhance your video’s audio by making voices clearer and removing background noise.

Edits Isn’t as Instagram-centric as Originally Believed

Initially, I was under the premise that Edits was going to revolve entirely around creating Reels for Instagram. After all, it’s an Instagram-owned app. I’m not going to deny that it’s closely linked to Instagram. In fact, you need an Instagram account to even use the app, just like the X competitor, Threads. But the limitations really end there.

Related

6 Changes Threads Needs for Me to Actually Use It

These changes could get me interested in the platform.

Unlike CapCut, which adds a watermark to your videos once you export them (unless you subscribe to one of their Pro plans), Edits lets you export your videos in HD (720p), 2K, and 4K resolutions without a watermark. Now, once you do export a video, the Meta app advantage does seep in, since you get the option to directly Share to Instagram and Share to Facebook.

Share to Instagram and Share to Facebook button

The same page also mentions:

Videos made with Edits are optimized for high-quality playback on Instagram.

While you can’t export to other third-party apps like TikTok (which CapCut lets you do), it isn’t a deal-breaker in my eyes. After all, there’s no watermark slapped onto my video, and posting a video directly to the app only takes a couple of seconds.

When it comes to background audios for your videos, Edits lets you pick from music clips trending on Instagram, audios you’ve saved (on Instagram), a For You section curated based on your taste, and original audios shared by the community. You also have the option to manually import an audio.

Audio options in Instagram Edits

The only part of Edits that is really extremely closely tied to Instagram is the Insights tab. As mentioned above, it displays in-depth insights into how your account and Reels are performing over a 7-day, 13-day, 30-day, and 60-day period, with stats like Reels views, Reach, Net followers, Likes, Comments, Shares, and Saves.

Instagram Edits Insights page

Upon tapping each statistic tab, a graphical representation appears showing how that particular metric has changed over time, which makes it easier to track growth trends, spot performance dips, and understand what kind of content resonates best with your audience.

All in all, Edits is definitely an impressive app, especially considering this is only the first version and Adam Mosseri stated that the “first version will be incomplete.” The editing app is bound to get better with time, but it’s already a solid CapCut alternative and excellent for beginner editors.

You’ll Start Seeing Blurred Thumbnails on YouTube Soon: Here’s Why

YouTube is rolling out an experimental feature to make its platform a little more “family-safe.” Thanks to this, you might soon start seeing blurred thumbnails for NSFW or mature videos in your search results, without having to change any settings on your end.

YouTube’s New NSFW Filter Will Automatically Blur Thumbnails

Bertel King / MakeUseOf

YouTube’s billions of videos host everything from child-friendly content to more mature uploads, many of which toe the line of YouTube’s content policies and community guidelines.

To keep the platform safe for everyone, YouTube is testing blurred thumbnails in its search results. According to a YouTube support page, these thumbnails will appear for search queries that include sexual themes. Although the thumbnail might be blurred, users will still be able to view the video’s title, the channel’s name, and the description. You still have the option to unblur a thumbnail if the theme of the video doesn’t bother them.

This feature works somewhat like SafeSearch on Google, which automatically filters out explicit content from your search results if you have the setting enabled. However, in this case, you don’t have to manually adjust any settings, and explicit results aren’t automatically omitted from your search results. Rather, the blurring effect just provides an additional layer of protection. It’s especially aimed at protecting unsuspecting viewers from encountering content that they might find inappropriate.

Instagram is another platform that offers a similar blurring effect for stories that feature sensitive content. Currently, YouTube only has a Restricted Mode functionality that helps hide mature videos. You have to enable it manually, though, by opening the YouTube app, navigating to your Settings, and selecting General. YouTube’s new experimental feature, on the other hand, works automatically in the background.

Related

How to Get Better Recommendations on YouTube

Get YouTube to actually recommend what you want to watch.

This Experimental Feature Is Rolling Out to Select Viewers

In its support page, YouTube noted that this feature is rolling out to a small percentage of viewers. I haven’t seen it when browsing YouTube on my phone or PC, but that’s expected since this isn’t a full rollout. YouTube explained that the goal of testing this experimental feature is to “understand whether this type of feature helps users avoid accidentally viewing content that follows YouTube’s Community Guidelines but may be sensitive in nature.”

So far, YouTube hasn’t really revealed exactly what search keywords or themes might trigger the blurring effect, nor has the company clarified if this feature will appear on the homepage as well. However, given how popular YouTube has become, I am glad the company is experimenting with features that create a more inclusive and comfortable browsing experience for users. This type of feature might also help make YouTube less distracting!

Android Has Fewer Apps Than Ever, but That’s Actually a Good Thing

Apps are the essential element of smartphones, as without apps, smartphones would be pretty pointless devices we carried in our pockets. And yet, the number of Android apps available has almost halved in recent times.

The Number of Android Apps Has Halved

While there are third-party alternatives, the Google Play Store is Google’s marketplace for apps, and anyone who owns an Android phone will be very familiar with it. However, Android owners may be surprised to learn that the number of Android apps available on the Google Play Store has dropped massively over the last 18 months or so.

According to app intelligence provider Appfigures, which shared its new analysis with TechCrunch, the number of apps available on the Google Play Store has dropped by 47% since the start of 2024.

At the beginning of 2024, the Google Play Store was home to 3.4 million apps worldwide. However, now, in April 2025, it’s only home to around 1.8 million. Which is one hell of a drop over a relatively short space of time. ​​​

This isn’t a larger global trend either, as Apple’s iOS App Store has maintained around the same number of apps over the same time period. At the start of 2024, that figure was 1.6 million, and now, it’s 1.64 million. So, a small and pretty insignificant increase.

This sharp decrease in the number of Android apps on the Google Play Store would be concerning if it wasn’t actually a good thing. Because Android owners are ultimately benefitting from this.

Why Fewer Android Apps Is a Good Thing

The key is Google’s attempt to foster quality over quantity, with the company making concerted efforts to clean up the Play Store. In July 2024, Google announced that it woiuld be raising its minimum quality requirements for Android apps, and there have been other policies enacted too.

These include an expanded set of verification standards, new developer accounts being required to test their apps, and humans spending more time reviewing apps before they were published to the Google Play Store.

So, while on the surface, Android owners may be feeling aggrieved that there are fewer Android apps to choose from, what’s left should be of a higher quality, with the spammy and scammy apps having been purged.

Related

A Malicious Google Play Store App Stole $70,000: Here’s How

Be careful what you download off the Google Play Store; it may cost you thousands.

Testament to that is the fact that the number of apps on the Google Play Store is now very similar to the number of apps on the iOS App Store. Apple has always strived for a higher degree of quality control, so it’s comforting to see the two numbers so similar.

You Can Finally Disable One of Spotify’s Worst-Ever Features

If you’re always on the hunt for new music, chances are you’ve played around with Spotify’s Smart Shuffle. While the concept is great in theory, Spotify’s execution of the shuffling mode is subpar at best. Thankfully, the streaming giant is now finally letting you get rid of it for good, and I couldn’t be happier.

You Can Finally Disable Smart Shuffle in Spotify

As spotted by a Reddit user @kwabb, Spotify quietly added a new option to the Playback settings page. At the very bottom, there’s now an Enable all play modes toggle. By switching the toggle off, you’ll be able to bid farewell to the Smart Shuffle play mode for good.

You can find this setting by tapping your profile picture in the top-left corner of the screen and going to Settings and privacy > Playback.

Another Reddit user, @Jayfuson_wong, reported that he has a slightly different variation of the setting, with a Smart Shuffle toggle appearing under a Listening controls heading.

Jayfuson_Vong/Reddit
 

Spotify launched the Smart Shuffle play mode in 2023, aiming to help music lovers discover new tracks that align with their taste. It takes different factors into account, including what you’re listening to and when, the listening habits of users who share a similar taste in music as you, and the expertise of Spotify’s music specialists, when suggesting you new tracks.

Related

Spotify Generates Playlists for You Every Week: Here Are the Ones to Try

I love Spotify’s weekly playlists, and you should, too.

To use Smart Shuffle, all you need to do is open a playlist of your choice and tap the Shuffle icon twice. Tapping it once enables the standard Shuffle mode, which plays music from your playlist in a randomized order. If you choose not to enable either Shuffle mode, the tracks will play linearly in the order of the playlist. Once you toggle off Enable all play modes, you’ll only have the option to use the standard Shuffle mode.

Smart Shuffle Isn’t Very…Smart

While Smart Shuffle mode’s concept always sounds great in theory, I’ve never used it all that much, even though I listen to music all day, every day, and enjoy discovering new tracks. That’s because Smart Shuffle is, well, not quite smart. I’ve noticed that the same recommendations appear time after time, even though Spotify claims its recommendations are refreshed daily to keep your listening sessions fresh.

Now you might be wondering, what’s the point of disabling Smart Shuffle permanently when you can just ignore it? Well, there have been countless times when I’ve accidentally enabled Smart Shuffle in a hurry. I only realize a few minutes into my jamming session, when a song I’ve been ignoring for days pops up yet again.

With the option to turn it off for good, I no longer have to worry about situations like this. While Spotify’s standard Shuffle mode isn’t great either, and I’ve noticed it tends to play a small handful of songs on loop from the playlist, at least it doesn’t throw in tracks I never asked for.

According to the comments on the Reddit post, it seems like the new setting is still rolling out to users. So, it might take a few days (or even weeks) before it shows up on your device,

What AI Recommendations Really Know About You

You’re not just watching your TV—it’s also watching you. Every click, every show, and every search is quietly logged to shape what pops up next on your screen. The smarter your TV gets, the more capable it is at collecting data on you. And this made me wonder: what does my smart TV know about me?

How AI Recommendations Work on Your Smart TV

Every time you browse channels, binge-watch shows, or switch between streaming apps, your smart TV keeps track of your activity. It notes which genres you like, how long you watch certain programs, and even which days you tend to watch specific types of content. Over time, your smart TV uses all this information to build a digital profile of your preferences. This lets them recommend shows and movies that match your interests.

In the past, TVs used simple monitoring techniques to offer recommendations. Now, they use something called Automatic Content Recognition (ACR). This enables your smart TV to take screenshots of whatever is playing on your screen. These screenshots are sent to your smart TV manufacturer and its third-party partners to analyze and create a profile of you to serve personalized recommendations and ads.

This process is surprisingly thorough. For example, a report from DATUREX found that Samsung TVs can snap a screenshot every half a second, while LG models can do it ten times per second. It doesn’t matter which app or device you’re using—if it’s on your screen, your TV can capture it and analyze it with AI. What’s more is that LG smart TVs will soon be capable of tracking your emotions. When you combine these with other data collection methods like geolocation, voice recognition, and your search history, it becomes clear that your smart TV may know more about you than you initially thought.

What Your Smart TV Really Knows About You

man holding wired secuity cameras
n_defender/Shutterstock

From the moment you set up your smart TV, it starts gathering details about you—often more than you realize. This data collection happens continuously, whether you’re watching cable TV, streaming your favorite shows, or even using your TV as a monitor for another device. Here’s what your TV collects behind the scenes:

  • Personal Details: Your TV collects information such as your email address, home address, birthdate, and credit card information during setup or purchases, then links this to your IP address to track you across devices and help advertisers target you.
  • Viewing Habits: It tracks everything you watch, including streaming apps, cable, gaming consoles, and laptops, records your favorite genres and how long you watch, and sends this data to manufacturers every few seconds or minutes to build a detailed profile of your habits.
  • Voice Data: If you use voice commands, your TV records and processes your spoken requests, analyzes your speech patterns, and may even listen for responses during ads, raising questions about when it’s listening, even if you’re not actively using voice features.
  • Technical and Telemetry Data: Your TV collects information about your Wi-Fi, other connected devices, and how you use them, along with performance metrics such as app load times and power usage. It sends this data back to manufacturers to improve products and learn about your household routines.

All this data collection isn’t just happening for your convenience. The real reason smart TVs gather so much information goes far beyond making your recommendations more accurate.

How Your Data Is Being Used and Why It Matters

Four TVs with streaming service logos on the screen and some falling dollar bills.
PitukTV/Shutterstock/Leonardo.ai/MakeUseOf

Unlike streaming services, smart TV manufacturers aren’t traditionally known for providing content recommendations or serving ads to you. So why develop and implement ACR technology?

This shift is driven largely by the opportunity for smart TV manufacturers to generate continuous revenue streams beyond just selling hardware. While smart TVs aren’t the ones showing you all the ads, they can still make money by selling your viewing data to advertisers and data brokers. If you’ve been watching home renovation shows, you’ll likely see ads for hardware stores and furniture retailers. Whether you buy the product or not, the manufacturer still gets paid with the data they’ve collected.

Now, targeted ads aren’t necessarily a bad thing. You still get served ads whether they’re targeted or not. What’s bad about targeted advertising on smart TVs is that streaming services are highly incentivized to develop ways to keep you glued to your sofa. They want to increase your watch time, so they can keep serving you ads. This is why recommendation systems have improved significantly over the past decade. It has become so good that there’s always something to watch.

This can affect a person’s mental health and overall productivity. Excessive screen time has been linked to increased anxiety and sleep problems. And companies intentionally making content as addictive as possible isn’t just making it worse—it’s amplifying the problem.

Aside from possibly affecting you and your family’s well-being, these recommendation systems also control what type of content you watch. Streaming platforms prioritize shows based on your viewing history, which can limit your exposure to diverse content that you might be interested in. This creates a feedback loop that can narrow your viewing options over time, keeping you in a filter bubble of similar content.

Another problem is with the ACR system itself. Unlike basic telemetry techniques, ACR is pretty invasive, with many folks discovering that their TV is spying on them. With smart TVs keeping an eye on your screen several times a second, it’s not hard to imagine how much personal information they can gather with those screenshots. The smart TV you’ve bought to watch shows privately has now become a surveillance device in your living room.

Modern Smart TV recommendation systems are negatively affecting your well-being, your interests, and your privacy. Is there any reason to keep using the feature?

Should You Disable Smart TV AI Recommendations?

a couple watching tv with a crossed out circle on the screen
SeventyFour / Shutterstock

Smart TV AI recommendations can genuinely enhance your viewing experience by helping you discover content tailored to your interests. However, this comes at the cost of your privacy. So, should you use smart TV AI recommendations?

If you value your privacy and don’t want your viewing habits to become another data point sold to advertisers, disabling these features is a no-brainer. Remember, every show you watch, every movie you finish, every pause, and rewind you do are all being tracked and analyzed. If you don’t like being monitored on a TV you’ve paid for, then you should disable AI recommendations.

On the other hand, if you enjoy having your TV suggest shows and movies you’ll probably like, leaving AI recommendations on can make sense. But remember, streaming services still provide pretty good recommendations even without these newer features on your TV. Also, you don’t have to cut your TV off from the internet completely. You just need to turn off the most invasive tracking features on your TV, such as ACR, always-on voice recognition, and the data-sharing option that is always turned on by default on a new TV. With these disabled, you’ll still get some fairly good recommendations while keeping some privacy.

In the end, smart TV recommendations are just there for some extra convenience—they help you find something to watch, but they’re not essential to enjoying your TV. Before trading away your privacy for a few extra suggestions, consider if it’s really worth it. Remember, you can still discover great shows without giving up so much personal data.

Instagram Is Making Messages More Secure, but It Could Cost You Your DMs

Over the years, Meta-owned apps have faced their fair share of backlash over concerns regarding their shady privacy practices. Instagram has certainly not been exempt from this. Now, the company is working on making your Instagram Direct Messages more secure, but it comes at a cost.

Instagram’s Enhanced Security Comes at a Cost

A few hours ago, I noticed a banner had appeared in Instagram’s Direct Messages section. As shown in the image below, it mentions that “some messages may be unavailable after June 23, 2025.”

If you’re anything like me and have memories attached to everything, including your messages, this notification might (understandably) freak you out. Fortunately, there’s not much to worry about. Upon clicking the Learn More button, you’ll be redirected to an Instagram Support page, where it mentions the following:

Instagram is upgrading security and some older end-to-end encrypted chats may be unavailable after June 23, 2025.

End-to-end encryption is a security feature that protects your data by ensuring that only you and the sender can read your messages. Ultimately, this means that not even Meta can read your messages.

End-to-end encryption in Instagram DMs isn’t enabled by default though. On iOS and Android devices, you can start an end-to-end encrypted chat by heading to your Direct Messages, opening a new or existing conversation thread, and then tapping the recipient’s name at the very top of the message. Finally, select Privacy & Safety and tap Use end-to-end encryption.

Personally, I find the fact that Instagram is removing some old end-to-end encrypted chats odd, especially since Meta is so vague about its reasoning in the Support article.

Though the company enhancing security is certainly a move in the right direction, I wouldn’t have expected them to wipe certain chats away, no matter how old they might be.

Save Your Affected Instagram Chats Before It’s Too Late

The good news is that if you have conversations that are impacted by this change, Instagram states that you can save any media or messages from them that you’d like to keep until the cutoff date.

If you’re on an older version of Instagram, you might be required to update the app first.

You’ll notice a View Chats button in the banner notifying you of the change, and tapping it will take you to a page showing all your end-to-end encrypted chats that’ll be unavailable after June 23, 2025. None of my chats are affected by this change, which means no chats appeared on this page for me.

Related

How Your Instagram Account Can Be Hacked and How to Stop It

Worried that someone knows how to hack into your Instagram? Here’s how they could do it, and how to prevent it.

Instagram’s support article mentions that “there will be information in the chat on how you can download any media or messages you may want to keep.” So, simply follow the on-screen instructions to export your chat, and you should be all set.

When I saw this notification initially, I thought it was similar to the Instagram technical bug last year that affected some images and videos saved in the Stories Archive section, which ended up permanently deleting them. Though Instagram ended up addressing the bug, the lost Stories could never be restored. It was a huge bummer for me, since I used Instagram’s Archives as a way to preserve my memories.

Regardless, at least Instagram is giving you a heads-up this time around and a chance to save your memories.

This Upcoming Microsoft Copilot Feature Is Too Awkward to Be Useful

Microsoft is constantly improving and tweaking Click to Do, an AI-powered Windows 11 feature that helps you get things done faster by identifying text and images on your screen. Unfortunately, some of the additions need a bit more time in the oven before they’re actually useful.

Click to Do is currently available in preview for Windows Insiders on Windows 11, version 24H2 in the Dev and Beta Channels on Copilot+ PCs. The ‘Ask Copilot’ feature was rolled out with Build 26120.3671 (KB5055622) for Windows Insiders.

Engaging Copilot With Click to Do

By default, Click to Do analyzes what’s on your screen and allows you to choose the text or image you want to focus on. With Ask Copilot, Microsoft is expanding the list of actions you can take with Click to Do.

When you highlight either text or images with Click to Do, you’re now given the option to Ask Copilot in the menu. The text or image is handed off to the Copilot app with your selected content in the prompt box. You can modify the prompt if needed and then query Copilot about whatever you are working on.

At its core, Ask Copilot is another attempt by Microsoft to expand the useful AI features built into the Windows 11 ecosystem. It aims to reduce friction towards Copilot and improve your efficiency by bringing AI assistance to your current work session.

At first glance, Click to Do feels like a sensible place to add Copilot. But in practice? It’s not quite the leap forward it wants to be.

Too Many Things to Do

Click to Do is suffering from what you could call a productivity paradox: it’s trying to be helpful in so many ways that it just ends up overwhelming you. While versatility is often desirable, excessive options create a messy and overwhelming experience.

You’ll now have to navigate a complex interface filled with decision points and dropdown menus. Plus, you have two further options for Ask Copilot—Copilot and Microsoft 365 Copilot. But the latter does absolutely nothing.

We also have the Search the web option, and Copilot already powers Bing search. Not to mention the Copy option (which you can use to copy the content and paste it directly into the Copilot app), and an Open with option where you could pick the Copilot app to, well, open the selected content in Copilot. Plus, there are a few more additional options. The sprawling list of suggested actions is genuinely helpful, but the abundance of choices makes the experience cluttered rather than convenient.

In principle, AI should simplify processes. Yet, in its current form, Ask Copilot adds complexity to an interface teetering on excessive options. Granted, the feature is in preview, and Microsoft could improve its execution based on feedback from Windows Insiders.

It Just Isn’t That Useful As Is

Beyond usability concerns and interface clutter, the real question remains: Does Ask Copilot truly offer any tangible benefits?

For example, I tried Ask Copilot after selecting an image on a webpage. It just added the image to the prompt box on the Copilot app and then waited for me to write the prompt. However, other Click to Do options like blurring the background, erasing objects with the Photos app, or removing the background with Paint seemed more action-oriented—apart from the visual search with Bing functionality.

As it stands, the integration feels underwhelming. It only pushes the selected content to the prompt box in the Copilot app. Plus, the integration lacks the depth and contextual awareness needed to be truly useful. Copilot doesn’t note where I’m coming from or the nuances of my workflow—it’s just a glorified shortcut.

It’s quite apparent that Microsoft is trying to shoehorn Copilot into every corner of its ecosystem. And it makes sense if we should be able to summon Copilot across Windows experiences. While the long-term vision of AI-powered productivity is exciting, the current iterations are underwhelming. That’s a shame because the idea here has legs.

And it’s not like Microsoft hasn’t cracked it elsewhere across Windows experiences. The Edge browser has built-in Copilot integration that allows you to browse smarter with an AI assistant—whether you’re reading an article, watching a video, or exploring a website, you can ask Copilot anything and get quick, relevant answers without ever leaving the page.

And, of course, there are a slew of Copilot features in Microsoft 365 apps allowing you to use Copilot in Word as a writing assistant or get Copilot in PowerPoint to help you nail every presentation.

Related

These Are My 4 Favorite AI Features in Windows 11

These features are so good that I use them regularly.

This isn’t to say the concept should be abandoned. Instead of burying it among a sea of random actions, Ask Copilot could shine in a more focused, pared-down environment that leads to real productivity gains. Until we see some real change in the functionality and usefulness, though, this feature is more awkward than awesome.

Secure Your Accounts With MakeUseOf

Passwords. They’re the key to keeping our lives secure, yet so often the bane of our existence when forgotten, lost, or breached.

That’s why every year on first Thursday of May, World Password Day reminds us to stop and take stock of our password security—before it’s too late.

What Is World Password Day?

Now, you’re unlikely to break out a cake and candles for World Password Day; it’s probably not at the top of your yearly reminders. But given the importance of passwords is pretty much universal, taking a day to look at your password security is no bad thing.

First launched in 2012 by tech giant Intel, World Password Day has grown surprisingly over the years into a yearly reminder that password security is vital to keeping your accounts secure. Given most folks now control a huge number of accounts—up to 240 according to Dashlane—it’s harder than ever to maintain your security.

And that’s really the crux of World Password Day: a reminder that account security doesn’t have to be a challenge, especially given how many ways there are to protect your accounts now. The days of “qwertyuiop” should be long gone, and don’t even think about adding numerical increments to your go-to password. No, the password management options available to almost anyone these days should mean each and every one of your accounts is secured with an extremely strong password.

How to Create a Strong, Unique Password: The Basics

MakeUseOf is celebrating World Password Day with a week covering the best password tips and tricks to keep your accounts safe and secure. But there are some handy password creation tips you can take away immediately to start locking down your digital footprint.

  1. Use a Password Manager: More than any other tip, you need to start using a password manager if you’re not already. Bitwarden is one of our favorite password managers, but there are other excellent free and premium password managers.
  2. Use Your Password Manager’s Generator: Your password manager will have a password generator to create strong, unique passwords. It’s infinitely better at generating secure passwords than a human. Just make sure you’re using an offline version to make sure your password isn’t sent across the internet.
  3. At Least 16 Characters: Previously, common password advice was to use a minimum of 12 random characters for maximum entropy, but really, more is better. We suggest a minimum of 16 characters.
  4. Never Reuse Your Password: This is also very important, as if you reuse your passwords across accounts and one is breached, then your whole system fails. This is one area where using a password manager excels, as it’ll create a new, unique password for each account, and you don’t have to remember each one.
  5. Enable Multi-Factor Authentication: Where possible, enable a form of multi-factor authentication to add a secondary line of defense against a data breach.

Oh, and there is one password myth you should avoid: regularly updating your passwords is a big no-no. In the past, this was considered good practice, but actually leads to the exact problems detailed above: short, easy-to-remember passwords with incremental changes. For example, you initially use “sunflowers1”, but your organization makes you reset it each month. Instead of creating a strong password each time, you just change the number, so it’s simple to remember. Easy for the memory, terrible for security.

World Password Day is a great time to take stock and check your online accounts. Checking your passwords doesn’t take as long as you think, and it could be the difference between keeping your accounts secure and spending hours trying to recover them.

I Stopped Buffering on My Smart TV With These Simple Setting Changes

Constant buffering on a movie night takes me out of immersion and ruins the overall experience. After dealing with buffer rings for quite some time now, I’ve finally decided to make a few simple changes—and my TV hasn’t buffered since.

1

Set TV With Priority Access on Router

These days, it’s common for a home network to support dozens of devices at once. Phones, laptops, tablets, game consoles, and smart devices are all online, all the time, and they’re all competing for the same network bandwidth. This is one of the most common causes why your smart TV ends up buffering despite having an adequate internet speed plan from your ISP.

The QoS (Quality of Service) panel was one of the first things I set up to improve my network’s traffic. This tool doesn’t necessarily speed up your internet, but it does help you manage which devices get priority access to your network. This means that if you set your TV as a high-priority device, the router makes sure it gets the bandwidth it needs for smooth streaming, even if other devices are downloading large files or running video calls at the same time.

QoS can be found on your router’s admin page (typically something like 192.169.100.1 or 192.168.1.1). Depending on your router, the QoS panel may be labeled differently. My router calls it SQM (Smart Queue Management), while others may refer to it as Traffic Shaping or Bandwidth Control. In general, a QoS panel will ask for an IP Range, Priority, and Upstream and Downstream.

To use QoS, I’ve had to manually set static IP addresses for multiple of my devices, including my smart TV. I then set my smart TV’s IP address as priority “1” or high. After saving the settings and restarting the router, I noticed that my smart TV is now playing at full resolution even at peak hours.

2

Optimize Stream Quality Settings

Adjusting stream quality on my Plex media server

Just because your TV or streaming app offers 4K Ultra HD doesn’t mean your internet or your smart TV can handle it. If your network can’t deliver enough bandwidth, you’ll end up with buffering and stuttering instead of smooth playback. It’s also worth checking your TV’s specs: if it can’t display true 4K HDR, you’re wasting bandwidth if you’ve set your stream quality to max.

Since I mainly use Plex and YouTube Premium for streaming, I focused on adjusting the quality settings in these apps. For Plex, I opened the app’s settings and enabled Automatically Adjust Quality. This feature lets Plex start playback at your preferred settings and then automatically adjust the video quality based on your current connection speed.

4K live streams are becoming more common, but that doesn’t always mean they’re the best choice. If your network can’t handle 4K streams at low latencies, it’s often better to set your quality to QHD (1440p) or HD (1080p). For live content, a bit of delay might be acceptable, but when the stream starts lagging by several seconds or more, lowering the resolution can make a big difference. Smooth, timely playback at a slightly lower resolution beats a 4K stream that’s always freezing or lagging behind.

Lowering stream quality isn’t just about smoother playbacks—it’s also about keeping live streams responsive and in sync. I would rather have uninterrupted streams at a lower resolution than struggling to watch 4K content that constantly buffers or stutters.

3

Switch Wi-Fi Frequency Band

Using 5Ghz frequency band on smart TV connection

There are different ways you can prioritize your streaming device on Wi-Fi. One of the easiest ways is to switch your connection from the 2.4GHz to the 5 GHz frequency band. A 2.4GHz band offers longer range but provides a slower connection, while a 5GHz band is faster but has shorter range.

Since my smart TV sits in the same room as my router, I switched it to the 5GHz band. This allows my device to load streams faster without worrying about signal strength. If your TV is farther away or separated by a few walls, you may want to place your Wi-Fi access point closer or get a Wi-Fi repeater or even a mesh system to fully cover your space with the faster 5GHz band.

4

Clear the TV and App Cache

Clearing cache on my Plex app

Smart TVs are basically small computers with big screens, and like any computer, they collect digital clutter over time. This clutter is called cache, and it can slow your TV’s processor, which can lead to buffering.

I make it a habit to clear the cache on my TV and streaming apps every month or so. On most TVs, you’ll find this option in the Settings menu under Apps or Applications. Select the app, hit Clear Cache, and you’re done. If your TV doesn’t offer this, uninstalling and reinstalling apps works just as well.

Clearing the cache on older TVs, or any unit with fewer hardware resources, really makes a difference in terms of performance and the overall experience.

5

Change DNS Settings

DNS (Domain Name System) servers are responsible for translating domain names, such as makeuseof.com, into the IP addresses your smart TV uses to connect to streaming services. By default, most TVs use the DNS servers provided by your internet service provider (ISP), but these aren’t always the fastest or most reliable options. Slow or overloaded DNS servers can introduce delays when your TV tries to access streaming apps, resulting in longer load times and more frequent buffering.

You can switch your device’s DNS to a public server. Google DNS (8.8.8.8 and 8.8.4.4) or Cloudflare DNS (1.1.1.1 and 1.0.0.1) are both great choices. To do this, I went to my TV’s network settings, chose Manual DNS, and entered the numbers.

If your TV doesn’t allow you to change DNS settings directly, you can also set custom DNS servers on your router. This way, every device on your home network will use the new DNS servers automatically. Just keep in mind that some ISP-provided routers may restrict access to DNS settings; in these cases, consider adding your own router for more control.

6

Adjust Playback Buffer Settings

Adjusting playback buffer on my Plex server

Not every TV or app has this option, but if yours does, it’s worth tweaking. Playback buffer settings control how much video your TV preloads content before it starts playing. By increasing the buffer, you give your TV a longer time to load new content, which lessens buffer time while you watch a movie.

Since I’m hosting my own server, I needed to adjust the transcode buffer, which is essentially a playback buffer on the server side. I’ve set the buffer quality to Fast and the buffer size to 60 seconds, providing a minute’s worth of preloaded content. This setup helps prevent 4K content from stuttering during movie playback. Although it slightly increases the initial loading time, I’ve found that my smart TV experiences smoother playback throughout the entire movie.

Buffering used to be a constant headache while I watched movies on my smart TV, but with a few adjustments and a better understanding of how my network and apps work, streaming finally feels a lot smoother. If you’re still seeing those ring buffers on your screen, try making some of these changes on your device and see the difference for yourself.

5 Reasons Why the Google Pixel 9a Is the Perfect Mid-Range Phone for Everyone

The Google Pixel 9a aims to strike the perfect balance between premium features and an accessible price point. It is the perfect phone for those seeking value without compromise.

1

Unmatched Camera for the Price

Justin Duino / MakeUseOf

Photography has long been Google’s calling card, and the Pixel 9a continues that legacy by delivering a version of its flagship camera experience at a mid-range price. The Pixel 9a—and Google’s computational photography prowess—proves that you don’t need an expensive phone to take incredible shots.

The Pixel 9a features a dual-camera system with a 48MP main sensor and a 13MP ultrawide lens. This setup delivers exceptional photo quality, rivaling even some expensive smartphone models. Notably, the inclusion of Macro Focus, a first for the A-series, allows you to capture intricate details with stunning clarity. The Super Res Zoom feature is also great for capturing clear, close-up portraits from far away.

Pixel phones shine in low-light photography, and the Pixel 9a packs an improved Night Sight mode capable of capturing crisp details and natural color tones. Unlike most mid-range competitors, which struggle with noise and motion blur, Google’s computational photography algorithms compensate for lighting deficiencies to help shoot a well-lit, balanced image in low-light conditions.

And, of course, there are Pixel’s signature AI-powered features like Add Me and Best Take that enhance group photos by ensuring everyone looks great. Plus, Magic Editor provides versatile AI-powered editing and image manipulation options. Tools like Reimagine let you type what you’d like to add or modify from your photos, while Auto Frame lets you automatically reframe your photo, suggesting the best crop or expanding your image to get more of the scene.

What truly sets the Pixel’s camera experience apart is the consistency and reliability of its results. You don’t need to be a photography expert to take great photos with a Pixel. The point-and-shoot simplicity, combined with Google’s intelligent processing, ensures that the vast majority of your shots will be share-worthy.

2

First Access to New Android Features

Pixel devices are always among the first to receive major Android OS updates, ensuring your phone is at the forefront of new features, enhanced security, and overall system improvements. However, the advantage extends beyond just the yearly Android upgrades. Pixel owners also benefit from Pixel-exclusive or Pixel-first experiences, called “Pixel Drops.”

Pixel Drops are periodic software updates that introduce new and unique features designed explicitly for Pixel devices. Pixel phones often serve as a testing ground for new Android capabilities and experimental features. These aren’t just minor bug fixes or security patches, either. They are significant additions that enhance the functionality and user experience of the phone. Think of them as surprise gifts that keep your Pixel feeling fresh and exciting long after its initial release.

Historically, Pixel Drops have introduced a diverse range of innovative features for the camera, battery, phone calls, AI, and more. Furthermore, Pixel Drops often introduce new customization options and quality-of-life improvements to the Android operating system. This could include new widgets, enhanced privacy controls, better integration with other Google services, and subtle but impactful refinements to the user interface.

Owning a Pixel 9a means you’ll likely be among the first to experience these new features that you might not see for months on other mid-range phones, if you see them at all. This continuous stream of new features and improvements adds significant value to the Pixel 9a, ensuring that it doesn’t feel stagnant over time and continues to offer a cutting-edge experience. With Pixel Drops, your phone keeps getting better over time, automatically for seven years from launch.

Related

8 Google Pixel Features You Won’t Find on a Samsung Galaxy Phone

Some of these features made me switch to a Google Pixel.

3

AI That Elevates Your Experience

AI Pixel Studio running on the Google Pixel 9a
Justin Duino / MakeUseOf

If it’s a 2025 device, it definitely has an AI pitch. Google’s integration of its entire Gemini AI suite sets the Pixel 9a apart in this area. The Pixel 9a takes advantage of Google’s Tensor chipset, which is designed for AI-powered optimizations rather than sheer processing speed.

You can use Gemini Live for natural voice interactions, helping you learn more about a topic, brainstorm ideas, or serve as a creative or productive companion for everyday tasks. Plus, Gemini Live has become more versatile with multimodal capabilities—Gemini Live can now talk you through the images, files, and videos you see on your Pixel. Additionally, Gemini’s Deep Research helps you distill hours of research into comprehensive, easy-to-read reports in just minutes.

The Pixel 9a leverages Google’s advanced AI capabilities to offer a range of smart and intuitive features that enhance the user experience in meaningful ways, like Call Assist to take control of your calls, Circle to Search to seamlessly search anything on your Pixel without switching apps, and Pixel Studio to create unique AI images with text prompts.

Of course, the camera is another area where AI plays a crucial role. Features like Magic Eraser allow you to seamlessly remove unwanted objects or people from your photos. Photo Unblur, which can sharpen blurry images, is another prime example of using AI in image processing.

Beyond these specific features, Google’s AI shenanigans also work behind the scenes to optimize the phone’s performance and user experience (for example, Adaptive Battery learns your usage patterns and prioritizes power for the apps you use most frequently, helping to extend battery life throughout the day). The AI integration isn’t just about having a few clever features. Google set out to create a more intelligent and helpful smartphone experience, and it succeeded.

4

Minimalist Design With a Premium Aesthetic

Person holding the Google Pixel 9a showing the back of the phone
Justin Duino / MakeUseOf

The Pixel 9a deviates from the recent Pixel design language that made these devices stand out. It sheds the trademark camera bar, or camera visor as it’s popularly called, that we’ve seen in the last few Pixel devices.

Instead, Google has gone for a more minimalist aesthetic with a touch of premium flair. The refined design features a flat profile, rounded edges, and a matte glass back complemented by a metal frame. It’s a well-built phone that’s also aesthetically pleasing.

I wasn’t too kicked about the new streamlined camera design, but once I used the Pixel 9a, its modern design grew on me, and the phone feels great to hold and use. The design is both functional and stylish, and it’s available in eclectic color variants catering to diverse style preferences. I quite like the periwinkle color accent that Google calls ‘Iris’, but you could opt for the more restrained black or white, called ‘Obsidian’ and ‘Porcelain’ respectively.

It’s good to know that the Pixel 9a is constructed using 23% recycled materials with a recycled aluminum frame, underscoring Google’s commitment to sustainability. Google claims that the Pixel 9a is the most durable A-Series phone because of its updated designs and some advanced engineering. While I can’t validate these claims personally without damaging my device, it’s a neat assurance to have at the back of your mind.

In a market where many mid-range phones opt for flashy or overly stylized designs, the Pixel 9a offers a refreshing alternative with its understated elegance and focus on usability. This design approach should appeal to a wide range of folks who appreciate a clean, modern aesthetic and a phone that feels premium without being ostentatious.

5

Future-Proofed With Timely Updates

Android version settings menu on the Google Pixel 9a
Justin Duino / MakeUseOf

One of the most overlooked aspects of mid-range phones is long-term usability—something the Pixel 9a excels at. As a Google device, the Pixel 9a offers you immediate access to the latest Android updates. Launching with Android 15, it comes with a promise of seven years of OS updates and security patches.

While brands like Samsung also now offer updates for an extended period of time, these updates are often delayed and arrive months after the official launch. And that’s for flagship smartphones. Most mid-range devices receive even longer delayed updates, or worse, they miss out entirely. This means that you experience the latest and greatest Android features for the longest time instead of waiting for manufacturer rollouts.

This immediate access to the latest Android version offers several key benefits. Firstly, you’re able to take advantage of the newest user interface enhancements, privacy controls, and performance improvements that Google introduces with each major Android release. This ensures that the phone feels modern throughout its lifespan and gives you bragging rights among your friends!

Secondly, Pixel phones receive security patches on a regular basis, often monthly. This proactive approach to security saves your device from the latest threats and vulnerabilities. While other manufacturers may eventually roll out updates, the delay can sometimes leave you vulnerable for extended periods.

This extended access to updates contributes to the longevity of the device—the Pixel 9a will remain relevant and secure for years to come. This ensures that your phone will not only perform well out of the box but will also continue to evolve and improve over time. This is an important consideration for those who prefer not to upgrade their phone frequently.

Related

I’ve Used Google Pixel Phones for 8 Years: Here’s Why I Keep Buying Them

Google’s Pixel phones offer an Android experience unlike any other.

The Pixel 9a stands out by offering features typically reserved for flagship models while maintaining an affordable price point. It delivers a comprehensive package that caters to a wide range of people while combining cutting-edge features, reliable performance, and thoughtful design.

It’s a phone that doesn’t compromise on the features that matter most and is the perfect mid-range phone for those who refuse to settle for less.

7 Free Tools I Use Every Week That Make Life Online Easier

Life online gets messy fast—but these seven free tools help me keep things under control and make the internet easier to use, week after week.

Grammarly is easily one of the tools I rely on the most. As someone who writes a lot—whether it’s emails, articles, or even social media posts—having a second pair of eyes is invaluable. At first glance, it might seem like Grammarly only catches typos, but it goes further, helping with tone, clarity, and even word choice, so your writing fits different situations.

I mostly use the browser extension, which works nearly everywhere I write online—Gmail, Google Docs, and social media. If you work outside the browser, there’s also a desktop app and a mobile keyboard.

While Grammarly has a paid option, the free version is surprisingly powerful—it’s one of the best free AI apps you should be using. Grammarly is more like having an editor or a writing coach beside you.

Canva home page while logged in

I’m not a designer by profession and haven’t invested time into learning the ins and outs of using professional-grade tools like Adobe’s. As such, Canva is my go-to tool for all design-related tasks. Whether I need to create an image for a blog post, a graphic for social media, or a presentation, I use Canva.

Related

10 Canva Tips That Cut My Design Time in Half

Design faster without sacrificing quality.

Canva is made for noobs and is packed with professionally designed templates for different purposes that are easy to customize. Besides the templates, you can also create your designs from scratch. However, what keeps me coming back to Canva is its intuitiveness.

Temp Mail temporary email address

Temp Mail is my secret weapon for keeping my email inbox clean. Whenever I need to sign up for something sketchy, download a freebie, or test a service I’m unsure about, I turn to Temp Mail. The service gives you a temporary, disposable email address that you can use instantly. It’s quick and free, with no signup required.

My job is to copy the provided temporary email address, plug it into whichever platform I’d like to try, and I’m good to go. Once I’m done, I close the browser and walk away. There is no spam and no annoying newsletters. Temp Mail is an essential tool, especially in my work as a writer, which requires testing different apps and services, most of which I never use again.

Remove.bg image background removal tool

Remove.bg feels like magic every time I use it. As one of the best AI background removers, it instantly removes the background from any image with just one click—no Photoshop skills required. I often need to isolate images from their backgrounds—whether it’s a logo or a photo I want to reuse—and Remove.bg handles it instantly.

You can upload images of various file types (including PNG and JPG) via drag-and-drop, copy-and-paste, or by inserting the image’s URL. The free version lets you download standard-quality photos, which is usually more than enough for everyday use.

Besides the background removal feature, it also offers tools for replacing the background image in a photo, blurring the background, and more. Plus, it integrates with other apps.

Perplexity's desktop application

If you’re not using Perplexity, you’re missing out. Perplexity is an AI-powered search engine that makes it easy to find answers to your queries from around the web.

Unlike traditional search engines that bombard you with ads and SEO-stuffed articles, Perplexity gives you direct and concise explanations. It also provides you with all the sources of information from which the answers originate for verification.

Related

I Put Perplexity to the Test Against Google in These 8 Searches: Here’s How It Went

Google is still the world’s leading search tool, but Perplexity’s AI-powered alternative is very much worth checking out.

I use Perplexity daily to research, fact-check, summarize long articles, and even brainstorm ideas when I’m stuck. Since it has access to real-time information, it has become my go-to for time-sensitive topics. Perplexity has completely changed how I search for things online.

bitwarden password manager install page on smartphone screen
maor_winetrob / Shutterstock

With so many online accounts to keep track of, I use Bitwarden password manager, so I only have to remember one password—the master password. The rest are stored in my secure password vault. Bitwarden is why I don’t use the same password everywhere or rely on inefficient methods like writing down my passwords in a notebook.

It’s a free, open-source password manager that securely stores all my logins, credit card information, and even notes behind a single master password. Bitwarden automatically generates strong and secure passwords and autofills them across browsers and mobile apps for convenience. However, there are other reasons why I store my passwords in Bitwarden.

Pocket web interface

Every day, I come across interesting articles online. With no time to go through them, I instantly add them to Pocket for later. Pocket has been around for a while, and even after trying different options, Pocket remains my favorite bookmarking app. Most importantly, it makes storing, retrieving, and organizing bookmarks easy, which is handy as I have many of them.

But besides saving articles, I use Pocket religiously to discover new interesting reads around the web that I wouldn’t have stumbled across on my own.

These tools may not seem flashy, but they’ve quietly become essential to how I navigate life online. And the best part? They’re all free unless you require additional functionality.

The Worst Google Search Feature Is Coming to YouTube

While it’s been almost a year since AI Overviews came to Search, they’re yet to win people over. Google’s solution to that is simple: push them more, so people have no choice but to accept them. Now, they’re making their way to YouTube.

AI Overviews Are Coming to YouTube Next

As first spotted by Search Engine Land, and as per a post on YouTube’s Help forum, YouTube is currently experimenting with AI Overviews. Once you search for a query, the new feature will use AI to hunt for videos that address your query and display the most relevant clips under a new “video results” carousel.

Since the post mentions that it’ll only appear “after entering certain search queries,” it likely won’t show up for all searches. The post explicitly mentions that AI Overviews will most likely appear when you’re searching for product information, like “best noise-cancelling headphones,” or when you’re looking for travel-related information, such as details about specific locations or activities to do there.

YouTube mentions that AI Overviews will provide “another way to discover content” and “discover topics and information related to your search query.” While this works differently than AI Overviews in Search, which display a text summary of the information you’re looking for, it’s not surprising.

Gavin Phillips/MakeUseOf

Someone visiting YouTube likely wouldn’t want to read a wall of text and would rather watch clips relevant to their query. This isn’t the first time YouTube has dabbled with AI features, though. A few months ago, the company introduced a conversational AI tool that let YouTube Premium members in the U.S. ask questions about the video they were watching or get recommendations for other videos.

Though it’s been almost a year since AI Overviews in Search debuted, I’m still not a fan of them. A lot of the time, they’re inaccurate, fail to address what my query really is, and are frankly unfair to creators and websites that put in the work to answer that query. I imagine something similar will happen with YouTube’s AI Overviews, but that’s a story only time can tell.

Currently, YouTube’s AI Overviews are rolling out to a small number of YouTube Premium members in the United States and are only being displayed for a limited number of English search queries. Unfortunately, it’s possible that, similar to AI Overviews in Search, users won’t have the option to disable them directly and might have to resort to workarounds.

Related

Here’s How I Turned Off Google’s AI Overviews and Reclaimed Regular Search

Done with Google’s AI overviews? You can turn them off in just a few steps.

While there’s no telling if AI Overviews for YouTube will end up being widely rolled out, I expect we’ll find out more about the feature at Google’s annual event, scheduled for May 20 and 21, 2025, Google I/O.

6 Ways I Freed Up iCloud Space (and Kept My Photos) Without Paying

Apple’s free 5 GB iCloud plan seems generous until you start shooting with the iPhone’s excellent camera. Photos, videos, backups, and app data guzzle up the space fast. I soon got warned with the dreaded “iCloud Storage Almost Full” alert. But instead of paying for more space, I decided to reclaim some space with these methods.

1

Delete Unwanted Photos and Videos

The biggest culprit for my full iCloud was my Photos library (and our photography habits). I love snapping pictures. While there are reasons for never deleting your old photos, not every shot is a keeper.

Over time, my library became cluttered with blurry photos, duplicates, accidental screenshots, and videos that I would never watch again. To cut down a fat Photos library, open the Photos app and tap Select in the top right corner.

Scroll through my library, selecting anything you don’t want to keep, such as duplicates, out-of-focus shots, old memes, and screen recordings. After deleting them, go to Utilities > Recently Deleted and tap Delete All. This step is essential; otherwise, deleted photos will still count against your iCloud quota for 30 days.

On iOS 16 and later, the Duplicates album in Photos makes this even easier. Go to Photos > Utilities > Duplicates.

Tap Merge to combine a set of duplicates. Then tap Merge [number] Items. If you don’t have duplicate shots, this folder will not be in the Utilities list (as in my case).

Making this a weekly habit became part of my iPhone photo organization routine. My library stayed lean, and I never accidentally deleted something important. If you’re worried about losing a photo, back it up to your computer or an external drive first.

If you have a Mac, the Photos app can help you spot duplicates. Beyond manual culling, photo-deleting apps for iOS can also spot hidden duplicates and similar shots. They are customizable and can flag dozens of redundant images that you might otherwise miss.

2

Optimize iPhone Storage With iCloud Photos

Next, I looked at the storage space on my device. I went to Settings > iCloud > Photos > Manage Storage. The iPhone keeps smaller, device-friendly versions of photos and videos locally. The full-resolution originals stay in iCloud, and I download them only when I need them.

It helps that iCloud Photos manages the backup automatically, so I don’t have to think about it. And I can still see every photo in my library, even ones from years ago.

This setting doesn’t directly reduce your iCloud usage but prevents your iPhone from filling up. It also ensures you don’t have to delete photos to make room for new ones.

If you turn off iCloud Photos, download the originals to your PC or phone first, or you might lose access to the full-resolution versions.

3

Manage Your iCloud Backups

Device backups are another sneaky storage hog. By default, iCloud backs up your iPhone or iPad every night when plugged in and on Wi-Fi. Over time, these backups can balloon, especially if you have multiple devices or old backups still stashed away.

Go to Settings > [Name/Profile] > iCloud > Manage Storage > Backups.

It’s easy to delete old or unnecessary backups by selecting the name of the device associated with the backup.

Check the size of each device backup. You can find backups for devices you no longer use, so delete them. To erase them, tap Turn Off and Delete from iCloud. Tap Turn Off and Delete to confirm.

You should also review the list of apps being backed up. Turn off backup for apps that don’t need it, like streaming apps, games, and news apps that store data in the cloud or can be easily re-downloaded.

In my case, this freed up almost a gigabyte overnight. Only essential data is backed up, and I don’t waste space on things that can be easily replaced.

If you use WhatsApp, back up your chats to Google Drive (on Android) or your computer instead of iCloud. This keeps your iCloud backup smaller.

4

Review and Delete Other iCloud Data

iCloud isn’t just for photos and backups. It also stores data from Mail, Messages, Notes, Voice Memos, and third-party apps. Reviewing what other things are eating up space, one byte at a time, is always critical.

Go to Settings > [Your Name/Photo] > iCloud > Saved to iCloud > See All. Go down the list of apps and see which ones are using iCloud to save their data.

Here’s what I did:

  • I deleted large voice memos that I had already saved elsewhere.
  • I opened the Mail app and cleared out old attachments and junk mail.
  • I reviewed my Notes and deleted anything outdated or unnecessary.
  • For Messages, I deleted old conversations with lots of photos or videos. I set messages to auto-delete after 30 days under Settings > Messages > Keep Messages.
  • I also look for folders that hold copies of downloads from browsers, Instagram, and other apps. For instance, when I download a file in Chrome or a reel from Instagram.

Your situation may be different. But each tiny cleanup adds up. I recovered hundreds of megabytes just by being ruthless with old files.

If you use iCloud Drive, move large files to your computer or another cloud service if you don’t need constant access from all devices.

5

Transfer Photos and Videos to External Storage

Some photos and videos are too precious to delete, but I didn’t need them in iCloud. For these, I moved them to an external storage device.

You can use the Photos app or File Explorer to import media on Windows.

For cloud storage, I uploaded select albums to Google Drive or Dropbox. If you own a Mac, connect your iPhone to the Mac and open the Image Capture app. This tool will help you quickly export photos and videos to an external hard drive.

If you have a USB-C flash drive, the Files app on iOS makes it easy to move files directly from your iPhone. Even without space constraints, keep local backups in case photos and videos are memorable.

Once I confirmed the files were safely backed up, I deleted them from my iPhone and iCloud Photos. This cleanup instantly freed up space, but I still had all my memories saved elsewhere.

6

Turn Storage Management Into a Habit

The key to staying under the 5 GB cap is regular maintenance. I set a monthly repeating reminder in the iOS Reminders app to:

  • Review and delete unwanted photos and videos.
  • Check iCloud backups and remove old ones.
  • Clear out large attachments and files from Mail, Notes, and Messages.
  • Offload pictures and videos to an external storage device.

The Recommended For You screen in iCloud Settings can help you discover large files and delete them to free up a lot of space.

You don’t need to pay for more iCloud storage to organize your digital life. With a few simple habits—deleting what you don’t need, optimizing your settings, trimming backups, clearing out old data, and archiving precious memories elsewhere—you can stay well under Apple’s free 5 GB cap.

What I Miss and What I Don’t

ChatGPT is part of my daily workflow for everything from simple definitions to self-diagnosis. When I switched to Grok for a week, I knew there’d be an adjustment—but I didn’t expect just how much I’d miss some of ChatGPT’s subtler strengths, or how easy it would be to let go of others.

What I Miss About ChatGPT

Even with Grok’s energy and engaging tone, there are moments I long for ChatGPT’s precision. It’s not only about features, it’s about the ease, the rhythm, the way it makes complex tasks feel a bit more manageable.

For each of the following images, ChatGPT’s response is shown on the left, and Grok’s response is shown on the right.

The Cleaner, More Controlled Responses

  • deepseek credit score chat.

ChatGPT doesn’t waste words. Its tone is calm, clear, and to the point, even when I ask about something tricky. If I need help understanding how credit scores work or what goes into a good resume, ChatGPT explains it in a way that makes sense without going off-topic.

Grok, on the other hand, tends to lean into personality. That’s part of its charm, but it can also make responses feel a bit looser around the edges. You might get sarcasm when you don’t ask for it, or metaphors that are clever but slightly off-point. While Grok excels in creativity and energy, there are moments I miss ChatGPT’s restraint, especially in professional or technical settings where tone and clarity matter more than flair.

Staying on Track in Complex Conversations

Another aspect of ChatGPT that I miss is its ability to stay on track during long, multi-step conversations. When working through a complicated topic, ChatGPT seamlessly picks up where we left off, connecting ideas and filling in gaps without needing constant reminders. Even as the discussion shifts between topics, it maintains the thread, making the conversation feel more fluid and coherent.

With Grok, the flow can sometimes falter. While fast and creative, it can veer off course, especially in complex back-and-forths. I often find myself having to recap or clarify points, which interrupts the rhythm. ChatGPT, on the other hand, naturally builds on previous discussions, using context to drive the conversation forward without losing focus.

For long, intricate exchanges, ChatGPT’s ability to keep everything connected and moving smoothly is something I value. Grok’s spontaneity is great, but for staying focused over multiple prompts, ChatGPT is significantly more dependable.

More Reliable Source Attribution

  • chatgpt source attribution conversation.

  • grok source attribution conversation.

One of ChatGPT’s strengths—especially in research or fact-heavy writing—is its ability to cite where information is coming from. Whether through in-line references or subtle context clues, it gives you a clearer sense of what’s widely accepted, what’s speculative, and what’s pulled from a specific source or school of thought. That doesn’t make it infallible, but it does make it easier to fact-check, dig deeper, or confidently cite an idea.

With Grok, sourcing feels a bit more hazy. Answers come quickly and with authority, but it’s not always clear whether they’re grounded in research, cultural consensus, or just the model’s own pattern generation. Because a lot of Grok’s responses pull from content on X (formerly Twitter), the information isn’t always as reliable or well-vetted as it might seem. ChatGPT may not always cite perfectly, but it typically points you in the right direction.

Structured Summaries

When I drop a dense document or messy transcript into ChatGPT, I can count on getting back a summary that feels thoughtful and organized. ChatGPT delivers tiered breakdowns, section headers, or bullet points that make parsing the content fast and painless, especially if prompted to do so. It will even create easy-to-read tables that portion out information in a structured, simple way, making complex material instantly more digestible.

Grok’s summaries, while fast and conversational, don’t always offer the same level of structure. They lean more casual, which sometimes means important details get buried or phrased too loosely. That matters when you’re moving quickly and need to extract insights at a glance. With ChatGPT, I spend less time reformatting and more time working with the information.

These Features Make Switching to Grok Easy

While ChatGPT has its strengths, it still carries habits that slow me down or feel unnecessarily rigid. In contrast, Grok fits more naturally into the way I like to work—faster, less rigorous, and with a bit more creative freedom.

The Formality

  • chatgpt formality in conversation example.

  • grok formality in conversation example.

ChatGPT can sometimes come across as overly polished. Its default tone tends to be academic or even corporate. This works well in contexts such as preparing a business proposal, drafting technical documentation, or organizing detailed plans. However, it doesn’t always hit the mark when you’re trying to think creatively or approach a challenge from an unconventional angle.

Grok, on the other hand, feels more like collaborating with an intelligent, yet eccentric friend. It’s not afraid to be direct, quirky, or even a little offbeat. This flexibility and openness allow it to be far more effective in creative sessions, where you need a spark of inspiration rather than just a clean, well-structured response.

Over-Explaining Simple Topics

One aspect of ChatGPT’s behavior that has become tiresome for me is the tendency to over-explain basic concepts, as if I were encountering them for the first time. For instance, when asking about SEO, ChatGPT dedicates several paragraphs to explaining what a search engine is before even addressing the core topic. While this level of detail can be useful for beginners, it becomes frustrating for those already familiar with the fundamentals who are seeking a quicker and more direct response.

In contrast, Grok assumes a higher level of familiarity with the subject matter and avoids unnecessary explanations. It gets straight to the heart of the answer unless explicitly directed otherwise. This approach streamlines my workflow, especially when managing multiple prompts, as I don’t have to sift through yet another introductory explanation of “For context, search engine optimization (SEO) is…”

If you have existing knowledge, Grok prioritizes efficiency and respects your time.

Inconsistent Image Generation

DALL-E 3

GPT-4o

Grok Aurora

dalle 3 create image of pizza party.

gpt 4o create image of pizza party.

grok create image of pizza party example.

At the time of writing, ChatGPT’s image generation is split between GPT-4o and DALL-E 3, the latter of which OpenAI refers to as a legacy model. In March 2025, GPT-4o received a huge image update, massively increasing its image quality (along with the time to create an image!). However, herein lies the rub: ChatGPT’s free users only receive a few images before being pushed back to DALL-E 3, which is simply not as good. The difference between DALL-E 3 and GPT-4o is night and day.

ChatGPT’s free image generation, powered by DALL-E 3, still has significant limitations, especially with fine details like hands, faces, or symmetry. The results often end up distorted or surreal instead of realistic. Additionally, it tends to produce more animated or stylized images, which isn’t ideal when you need photorealism. I also found that at times, DALL-E 3 failed to produce anything, which was very frustrating.

Conversely, Grok’s free Aurora engine consistently delivers sharp, photorealistic images with more accuracy, especially when dealing with pop culture references or complex concepts. It’s more flexible and requires far fewer adjustments. At this point, I don’t miss the unpredictability of DALL-E 3. Aurora’s reliable, realistic results have made image generation much simpler, more enjoyable, and more accurate.

Avoiding Controversy

ChatGPT has a tendency to tread carefully around sensitive or controversial subjects, often erring on the side of caution. Whether it’s discussing political ideologies or the effects of robots taking over jobs, its responses are usually filled with numerous disclaimers or neutral statements.

While that caution can be valuable in certain settings, it also makes it harder to move quickly when you’re trying to unpack complex issues or build arguments that require a point of view. In contrast, Grok is more willing to engage directly. It doesn’t shy away from nuance, but it also doesn’t get bogged down in it. That confidence has made deeper, more challenging conversations feel more productive and honest.

Related

Grok Just Upgraded to Rival ChatGPT’s Canvas

Grok’s finally got crayons.

Switching from ChatGPT to Grok hasn’t been seamless, but it’s been an enlightening experience. I miss the precision, memory, and structured support that ChatGPT provides. Grok is less polished, but it brings its own strengths with boldness and creative energy. Both models have their place—ChatGPT for its reliability and structure, Grok for its straightforwardness and edge. Choosing between the two is about finding the right fit for the task at hand.

You Need to Try Netflix’s New Subtitle Option: Here’s Why

There is now a new way to watch Netflix with captions, as long as you’re ready to dive into the final season of You.

Dialog-Only Captions Strip Out Audio Cues, Speaker Names and More

You’re probably aware of the captioning option for deaf and hard of hearing, also known as SDH/CC. When you read that, you’ll see audio cues like [phone buzzing] along with speaker names.

That’s not useful if you’re just interested in better understanding what’s being said in your favorite TV show or movie.

Netflix is adding a new way to use captions. Starting with the new season of You, it’s possible to also select a new subtitle option that only shows the dialog.

To do that, open the language picker and select English as a subtitle option instead of English (CC).

Netflix says that the new subtitle type will be available on all new Netflix originals in every language offered going forward, right along with the SDH/CC option.

All of the current caption options from Netflix can also be customized by changing both the size and font of the information on the screen. To do that on a TV or streaming device, select the player controls at the bottom of the screen. Then choose Settings to adjust the subtitle size and font. If Settings isn’t shown on screen, your device doesn’t support customization options.

Netflix Should Provide the New Caption Options Across Its Catalog

Subtitles are popular with Netflix users as the streaming giant says almost half of viewing hours have subtitles turned on. Even without hearing problems, there are a number of reasons to use subtitles, like someone sleeping in the same room, wanting to keep better track of the dialog, or because of subpar home theater equipment.

While it’s nice to see Netflix start adding the dialog-only caption option, it should also do the extra work to roll it out to all existing content. That would make the feature much more useful, especially if you’re looking for something else to watch besides a Netflix original.

Many houses are split on whether to use captions when watching TV. Some people avoid subtitles for a more immersive experience while allowing better focus on the dialog. You’ll also benefit from less screen clutter and train your memory and comprehension.

On the other side of the stage, many people enjoy subtitles so they won’t miss a bit of dialog and the state of modern sound mixing.

If you’re a fan of subtitles, the new dialog-option on Netflix sounds great. Thankfully, I am a fan of You, so I will make sure to try it out instead of simply using my AirPods to listen privately without disturbing others in my household.

Your LG Smart TV Can Now Play Xbox Games

Your next gaming console might already be on your wall. LG Smart TVs are going to become Xbox game streaming machines with a simple software update—no console required.

Xbox Game Streaming Comes to LG TVs

Starting April 23, the Xbox app is available on select LG Smart TV models. This means that as long as you have an Xbox Game Pass Ultimate subscription, you should be able to stream games directly on your TV.

Microsoft’s announcement wasn’t clear on exactly what TVs are getting the app. If you have a 2025 LG TV, you can find the Xbox app in the new LG Gaming Portal, accessible from the Gaming Q-Card on the TV home page. 2022 OLED TVs, 2023 LG Smart TVs and newer models running webOS24 or later will also get access to the app via a firmware upgrade that lets you download the app from the TV’s app store.

LG

According to a support page listing compatible devices for Xbox Cloud Gaming, you need firmware 23.20.01 or higher to download the app. Smart monitors running webOS24 or later will also get the feature, and it will “soon expand to StanbyME screen.”

You will have to bring your own Bluetooth-enabled controllers to the party though. An Xbox wireless controller would be ideal, but as long as you can pair your existing controller with Bluetooth to your compatible LG TV—including Sony’s DualShock controllers, you should be good to go.

Related

What Is Xbox Cloud Gaming and How Does It Work?

Did you know you can play Xbox games on your mobile phone? Here’s how it works.

LG TVs aren’t the first to support Xbox Cloud Gaming either. 2020 or newer Samsung smart TV models with software version 1300 or higher already have the feature. And if you’re on a regular TV, you can use either of the following Amazon Fire TV sticks to gain access to cloud gaming:

  • Fire TV Stick 4K Max (1st Gen)
  • Fire TV Stick 4K Max (2nd Gen)
  • Fire TV Stick 4K (2nd Gen)
  • Fire TV Cube (3rd Gen)

Microsoft wanted to go further and launch a dedicated Xbox Cloud Gaming dongle to let players with any USB-compatible screen stream Xbox games. The company confirmed its intentions, but we’re yet to see a final product.

How To Stream Xbox Games on LG TVs?

Streaming games on your LG TV once you’ve updated it to the latest version should be relatively straightforward. Microsoft provides the following instructions in its announcement:

  1. Navigate to the LG Gaming Portal from either Gaming Q-Card or LG Gaming Portal on the Home Page.
  2. Download and launch the Xbox app.
  3. Sign into or create your Microsoft account.
  4. Connect a compatible Bluetooth-enabled wireless controller. Controllers like the Xbox Wireless Controller, Xbox Adaptive Controller, Xbox Elite Wireless Controller Series 2, PlayStation DualSense, or DualShock 4 controller are all compatible.
  5. Pick a game and start playing!

You’re going to need a good enough internet connection for a good experience, of course. Another requirement is Game Pass Ultimate—a permanent subscription for me given its benefits. That said, Xbox’s game streaming service is limited to specific regions. This means that even if you have an Xbox Game Pass Utlimate subscription, you may not be able to stream games. I recommend checking the Xbox supported countries page in case you live outside the US.

Given the Xbox Cloud Gaming program is still in beta, I wouldn’t expect it to perform as a complete Xbox replacement. Regardless, it should encourage a lot more people to get an Xbox Game Pass Ultimate subscription and dip their toes in online game streaming.

I’m Finally Switching Off the Subtitles, and It’s Time You Did, Too

As a member of a multilingual household, the subtitles are always turned on for movies and TV. That is, until recently, when I decided to switch them off, and the positive effect has been remarkable.

6

Enjoy a More Immersive Experience

While subtitles have obvious benefits for deaf and hard-of-hearing people and translation purposes, they can detract from the audiovisual experience. It’s surprising how much more I take in when I’m not distracted by the visuals and emotional nuance of a scene. Imagine the time spent flitting between text and images throughout an entire movie. Not only can this increase mental fatigue, but it also means you’re missing many of the subtleties within the entertainment.

After removing the subtitles, I’ve become more engaged with the actors’ expressions, the cinematography, and the movie’s or show’s overall atmosphere. I find that I appreciate the production values much more, and I am more immersed in the dialogue, instead of simply keeping up with the events on the screen.

5

Improve Your Listening Skills

Anton27/Shutterstock

When we read subtitles, many of us have an inner monologue that accompanies the text, or we are focused chiefly on the wording as it appears on the screen. For me, it served to enhance my comprehension of the dialogue and became a crutch that I came to rely on. All of a sudden, I realized that watching a movie was comparable to reading a novel, and I was missing out on essential audio cues.

Without subtitles, I am forced to focus more on the audio, which helps sharpen my ear for different accents, tones, and natural speech patterns. Modern production values incorporate amazing sound effects and soundtracks across a broad soundstage, which is somewhat diluted when your attention is divided between screen, text, and audio.

4

Better Focus on the Dialog

Reading can sometimes make me skim or jump ahead. Without text to rely on, I am encouraged to fully listen and stay present in the moment. This is especially important when watching movies where delivery and nuance are crucial.

For example, I’m just as happy watching the latest Marvel blockbuster as I am a Coen brothers movie, but with the latter, you might miss important subtleties in the dialogue if you’re not paying full attention to the screen. I recently watched Conclave with Ralph Fiennes—a highly atmospheric film—without subtitles. I found it to be a very satisfying experience while fully immersed in the performance, whereas I would have likely found it incredibly boring if I were forced to read along with the script.

3

Increase Your Language Fluency

learn language fluency in korean youtube channel subtitles.
Talk to Me In Korean / YouTube

Living in Asia, it’s not unusual for us to watch Filipino, Korean, and Japanese movies at home from time to time with the subtitles on. However, we tend to predominantly watch movies and shows in English, and subtitles have been very helpful to my partner in this regard, as it’s not her first language. However, as her English skills improved, she found that turning the subtitles off and focusing on the dialogue became more helpful in advancing her fluency.

Watching without subtitles can accelerate fluency by training the brain to understand context, idioms, and slang in real time. Picking up on visual cues, such as facial expressions and hand gestures, helps paint a comprehensive picture of what a person is trying to say and enables us to gauge responses more effectively. Despite what my parents used to say, TV can be a valuable educational tool, but there will come a time when it is beneficial to turn the subtitles or captions off.

Related

Captions vs. Subtitles: What Are the Key Differences?

Adding subtitles or captions to your content makes it more accessible. But how do you know which one to add? Let’s explain the difference.

2

Benefit From Less Screen Clutter

youtube channel with subtitles enabled

We are spoiled by the quality of modern flatscreen TVs, which turn our living spaces into scaled-down cinemas. So why blight your beautiful high-definition screen with large bodies of text that impair the view?

Subtitles can get in the way of important on-screen elements, especially in visually rich shows or movies. They can also obscure text that is already on the screen, including incidental subtitles or visual cues that are essential to the narrative. By turning them off, I have noticed that I appreciate the unbroken vista and become more immersed in what’s on the screen.

1

Train Your Memory and Comprehension

While you’re more likely to remember what you read versus what you hear, watching TV without subtitles can help you improve your comprehension and retention of auditory information. This is a valuable skill for remembering things on the fly and learning from verbal instructions. As we get older, it becomes even more important to retain what we hear. By turning the subtitles off, we subconsciously improve our ability to memorize and learn.

Of course, there are still many benefits to using subtitles. For example, when I want to hear barely audible dialogue and avoid missing information, such as when I’m following on-screen instructions while cooking. There are even occasions when speech is hard to hear in the mix, especially when viewing media with heavy bass frequencies through a subwoofer, as I experienced while watching Mad Max: Fury Road.

With that said, listening is a crucial part of comprehending, retaining, and enjoying audiovisual media. If you usually watch TV and movies with subtitles, try turning them off for a change and see if it makes a difference in how you enjoy and remember the experience as a whole.

It’s Now Easier to Unsubscribe from Useless Newsletters in Gmail

Managing newsletter subscriptions in your inbox is about to get a whole lot easier. Google has been working on a feature to tackle subscriptions for a while now, and the update is finally rolling out.

You’ll Soon See a “Manage Subscriptions” Page Within the Gmail App

As first reported by 9to5 Google, Google has introduced a new Manage subscriptions page, allowing Gmail users to unsubscribe from annoying newsletters with a single tap. This is a server-side update, so you won’t have to change any settings to access this feature. Instead, when the feature becomes available for your account, it will show up automatically.

According to the news outlet, this feature has started appearing across “multiple email accounts, devices, and Gmail for Android versions today.” Gmail users with access to this feature spotted a notice at the top of the app, informing them of this welcome change.

That said, this feature isn’t widely available at the moment. A Gmail help page mentions that this update is “gradually rolling out.” In the near future, you should be able to see this feature when using Gmail on your computer, as well as on the Gmail app for Android and iOS devices.

Related

How to Sort Your Gmail Inbox by Sender, Subject, and Label

There’s no one-click way to sort your Gmail by sender, but you can do it. Learn how to sort your inbox with filters like subject, sender, and labels.

Unsubscribing Might Still Take a While

Once you have access to this feature, you’ll see a Manage subscriptions page within Gmail’s overflow menu, which will automatically list all your active subscriptions. The page lists the name and email address of each sender, as well as how many emails they’ve sent you recently.

There’s also an icon on the right side of these details; tapping or clicking this button will let you quickly unsubscribe from newsletters from that particular sender. While most emails only require a single tap to unsubscribe, you might occasionally have to navigate to the sender’s website to complete the process.

If you’re one of the few who has access to this feature already, remember that it can take a few days for the sender to process your unsubscribe request. So even after you tap that button, you might continue to receive emails for a brief period.

I, for one, can’t wait to have access to this feature. I’ve subscribed to so many newsletters over the years that I can’t keep track of all of them. Sure, the Unsubscribe button within the email helps, but it’s easy to keep putting it off since you have to open each email to unsubscribe from it. Given this, a built-in page within Gmail that populates all my newsletters and gives me a simple unsubscribe option feels long overdue.

Nonetheless, I’m glad it’s finally here. But this is just one way to organize and tame your inbox. If your inbox is approaching the limit, there are other ways to free up storage space in your Google account.

Here’s What Finally Fixed It

Wi-Fi drops, especially in the middle of something important, are incredibly frustrating. My Wi-Fi was dropping almost hourly—here’s what I did to finally fix it.

7

Scheduled Restarts

Yadullah Abidi / MakeUseOf / Leonardo.AI

Simply rebooting your router can fix tons of connection issues. Rebooting resets your router’s memory, clears out any temporary glitches, and reloads its firmware and settings. It also releases any unresponsive connections and expired IP addresses that your router’s DHCP server might be tracking.

You don’t have to set a reminder to do this manually, either. Most routers have a scheduled restart setting that automatically restarts the router at a time you specify. I recommend setting your router to reboot late at night when you won’t be using the internet. This way, any temporary downtime for your smart home devices won’t affect you.

6

Adjusting Wi-FI Channel and Frequency

Multiple access points listed on the WiFi Analyzer app
Yadullah Abidi / MakeUseOf

Your Wi-Fi network can get pretty crowded with phones, laptops, consoles, TVs, and other smart home devices using it to access the internet. In such cases, your Wi-Fi channel can get crowded, and if it becomes too much for the router to handle, you’ll start experiencing Wi-Fi drops.

This is called network congestion and can cause laggy internet with high jitter, packet loss, and latency. I recommend analyzing your Wi-Fi network first to determine if you’re connected to a congested channel, and then update your Wi-Fi and device settings accordingly.

Related

Network Congestion Is Slowing Down Your Wi-Fi, but There Are 2 Easy Fixes

These two small changes can make a surprising amount of difference to your Wi-Fi speeds.

As a general rule of thumb, you want to connect priority devices like your phone, PC, console, TV, or anything else that requires stable and high-speed internet to the 5GHz channel. Everything else, including your smart home devices, will do fine with the 2.4GHz channel.

If you don’t have a 5 or 6GHz channel on your router, it’s high time for an upgrade. However, you can set up QoS on your router to prioritize traffic and mitigate the issue to some extent.

5

Get the Router Placement Right

A router with an alert icon and an upset person in the background.
Kamil Urban/Shutterstock

Your Wi-Fi connection’s stability largely depends on the signal strength you’re getting from the router. If your router is tucked away in a cupboard or corner of your house, you need to place it correctly. It’s the easiest way to fix your Wi-Fi without buying new gear.

Ideally, you want to place your router as centrally and as high as possible to ensure you cover the entire apartment. For bigger houses, one router might not be enough to provide Wi-Fi to each room or floor.

In such cases, you can use a Wi-Fi repeater or mesh network to extend your Wi-Fi’s range. We’ve tried both, and mesh Wi-Fi came out on top. However, using a repeater is the more budget-friendly option, as you won’t have to buy multiple Wi-Fi devices.

You can also fix Wi-Fi dead spots with an old router if you have a spare lying around. Your surroundings significantly affect the Wi-Fi signal. Materials like concrete, metal, and glass can block or reflect off signals in unwanted directions, causing random Wi-Fi dropouts or reducing your Wi-Fi’s working range. Also, make sure you’re sitting away from anything that can interfere with your router’s Wi-Fi range. Sitting right next to a working microwave won’t do wonders for your Wi-Fi signals!

4

Be Wary of Your Device’s Reception Range

Just because you get good Wi-Fi strength in every corner of your house doesn’t mean all your devices will, either. Older devices have weaker antennas that need to reduce the Wi-Fi range. For example, if your phone’s Wi-Fi signal strength is 50% in a specific spot, a weaker Wi-Fi card in a laptop or older phone might not register the signal at all.

Apart from swapping out the Wi-Fi card, if possible, there’s not much you can do here. Simply moving closer to the router is the best option here. If you like working at a desk and your system isn’t in range, running an Ethernet cable might be the best option.

Related

Why I Always Use an Ethernet Connection Wherever I Can

Wi-Fi is super useful, but Ethernet’s positives make it even better.

Another way to tackle this issue is to move the router closer—a mammoth task, considering it will affect Wi-Fi signals to every other device on the network. Using a repeater or mesh network is a much better option in this case.

3

Check Your Device Network Settings

Incorrect network settings on your device can cause Wi-Fi drops, even if your router is perfectly fine. I’d recommend resetting your network settings and clearing your cache as a first step. It’s an easy-to-follow process on most devices and can fix all kinds of problems with your Wi-Fi and even your cellular network. For example, you can clear your DNS cache on most browsers or flush the DNS cache on Windows 11. However, the same tips apply to every operating system; you may need to do an internet search to find the right steps.

device manager network adapter options windows 10

If you’re using a laptop, check your power settings to ensure your Wi-Fi card receives the necessary power for broadcasting and receiving. Windows has a knack for putting Wi-Fi cards in low-power mode, a problem you can fix in the Device Manager.

  1. Input device manager in the Start menu search bar and select the Best Match.
  2. Scroll down to Network Adapters. Right-click your Wi-Fi adapter name and select Properties.
  3. Now, open the Power Management tab and make sure Allow the computer to turn off this device to save power is unchecked.

Now, it’s also worth checking your Windows power settings, too. Windows power saving plans have been known to cause the same problem.

  1. Input power options in the Start menu search bar and select the Best Match.
  2. Select Change plan settings > Change advanced power settings.
  3. Locate Wireless Adapter Settings > Power Saving Mode, and toggle this to Maximum Performance.

While you’re at it, it’s also worth checking and optimizing your router’s settings. Most of the time, the default settings on your router will be fine, but you can extract more speed, stability, and range from it if you adjust the settings correctly (it can also make your Wi-Fi more secure!).

2

Pay for More Bandwidth

ethernet cable connector with fibre optic cables on laptop keyboard
Michal_Jesensky/Shutterstock

Another reason your Wi-Fi may be constantly dropping is a lack of bandwidth. If you’ve got way too many devices hooked up to the Wi-Fi and too little bandwidth, your internet connection will grind to a halt. Run a Wi-Fi speed check and consider if you need an upgrade. A 300 to 500 Mbps connection will usually suffice for a family.

One symptom to look out for is consistently slow internet speeds. Even if your Wi-Fi is working fine, if your internet speeds are slowing to a crawl, you either need to kick some devices off the network or get more bandwidth.

1

Your Router Might Be Due for an Upgrade

An old N300 series router
Yadullah Abidi / MakeUseOf

If you’ve gone through this list and your Wi-Fi is still dropping, you likely need to upgrade your router. Connection drops and reduced speeds are among the first signs that you need to upgrade your router.

Older routers only support the 2.4GHz band, which results in low speeds and makes them susceptible to interference from other electronic devices. Upgrading to a dual or tri-band Wi-Fi router with multiple 5 or 6GHz bands will help with both network stability and speed. Additionally, newer routers also have better software features that’ll help keep your network secure and stable.

Use These 3 Chrome Extensions to Automatically Detect AI Content

AI content is the bane of our online existences; distinguishing between human and AI-generated text and images is becoming unfathomably difficult. That’s why I use these Chrome extensions to detect AI content quickly—they’ll become part of your daily browsing experience quicker than you think!

I’ve experimented with several AI detectors. I found Copyleaks to be effective at spotting content created by ChatGPT’s creative model and other AI tools. It only focuses on text analysis, though—don’t expect it to identify AI-generated images.

When installed, the clean interface features a draggable quick access menu that you can position anywhere on your screen, which I’ve found convenient. This menu features simple Settings and a Scan for AI content option when you hover over it.

The workflow is straightforward but requires a few steps. First, select suspicious text on any webpage, and a small icon appears. Click it, and your selection automatically populates in the sidebar. Then you’ll need to hit the scan button to analyze the text—a small extra step I sometimes forget about when I’m in a hurry.

One annoying aspect is that you need to create an account before using the extension. The free trial gives you five credits (with one credit equaling 250 words), which isn’t much if you’re regularly checking content. Interestingly, I’ve been using the trial version for weeks and somehow still have all five credits showing—I’m not complaining, but don’t count on that glitch lasting!

If you’re serious about AI detection, the Pro version starts at $9.99 per month, covering roughly 25,000 words with 100 credits. That might seem pricey, but if you’re concerned about reasons AI checkers might flag your writing, it could be worth the investment.

One frustrating aspect of Copyleaks is its binary approach to detection—it only flags content as either 100% AI-generated or 0% AI-generated, with no middle ground. I’ve had it incorrectly flag my own writing as AI-generated a few times, which is annoying. This black-and-white approach exhibits that AI might hallucinate or that human writing can sometimes resemble AI patterns.

Unlike Copyleaks, BitMind focuses exclusively on spotting AI-generated images, rather than text, which is equally important as detecting AI-generated text. And you don’t need to create an account to use it. You can install it, jump right in, and start detecting AI images anonymously.

This tool is useful when you’re browsing photography websites, scrolling through social media, or researching images for work. It might also be useful when scrolling through e-commerce websites, as some of them may feature fake products. For example, Etsy is often flooded with AI-generated images.

Bitmind Chrome extension flagging Etsy image as AI-generated.

Another reason is that a recent study shows generative AI images evoke a sense of uncanniness in subtle ways, which even trained human eyes struggle to detect consistently.

The extension works by analyzing any image you encounter while browsing. When you hover over an image, BitMind displays a percentage match in the top-right corner. That indicates how likely it believes the image was generated by AI. This quick visual indicator saves you from having to click anything or wait for results on a separate page.

Related

The 5 Best Open-Source AI Image Generators

Don’t pay for an AI image generator.

I found BitMind’s analysis takes around 10 seconds per image, which can feel a bit slow when scrolling through image-heavy websites. During my testing, it correctly identified AI images roughly 70% to 80% of the time—not perfect, but certainly helpful as a first-pass detection tool.

Bitmind Chrome extension menu with word counter in the background.

One limitation you might face is that BitMind occasionally flags authentic photographs as AI-generated, as seen in the following image. This isn’t entirely the extension’s fault, as today’s AI images have become quite realistic, making the boundaries between real and synthetic increasingly blurry.

A real photo flagged as AI-generated by Bitmind Chrome extension.

While I don’t trust AI to do most photo edits myself, having tools like BitMind helps spot potentially AI-generated content when verifying sources, fact-checking news, or simply satisfying your curiosity about whether that too-perfect image is actually real.

The Hive AI Detector stands out for its versatility—it handles text, images, and even audio or video content, up to 30 seconds long. You can access it in multiple ways: highlight text and right-click to select Hive AI Detector from the menu, or use the draggable icon that opens a sidebar where you can paste content directly (up to 2,048 characters).

Hive AI Chrome extension confirming content as human written in the sidebar.

For images, right-click and select Hive AI Detector from the context menu. Using this extension is handy because it not only tells you if an image is AI-generated but also tries to identify which specific AI model was likely used to create it, along with a confidence percentage.

While Hive’s accuracy seems solid, like other AI detectors you can try, it sometimes delivers confusing results. This hit-or-miss nature is unfortunately common with detection tools, as AI can detect and prevent malicious attacks, but still struggles with perfect accuracy.

The best part? You don’t need to create an account or enter your email address to use this extension. Just install it and start using it. It respects your privacy while still providing a powerful detection tool.

But remember that these extensions are just tools to supplement your critical thinking. As AI content becomes more sophisticated, your gut feeling about authenticity might sometimes prove more reliable than any algorithm’s determination. Trust, but verify, that’s my approach to navigating the internet.

The 8 Best Viral Video Websites To Watch What’s Buzzing Now

Viral videos aren’t just about laughs. They shape our social culture and often spill over into news and real life. But to see the best viral videos from around the web, you need to cover all the sites, from YouTube to TikTok and more.

To discover what’s truly viral, start here. Of course, YouTube is the world’s largest video platform. But the YouTube Charts page is the pulse of what’s viral in the music world. This section highlights the most-watched and fastest-rising music videos and the artists behind them.

The Charts update in real-time, so you’ll always find the latest record-breaking music videos ranked here. Select the country of your choice if you also enjoy music from other countries.

I like to browse the Daily top songs on shorts. I find it a nice shortcut to discover new songs on YouTube and expand my taste.

TikTok

TikTok has played its part in redefining social culture. Its short, addictive clips are perfect for small mobile screens. The For You Page straight away serves up what’s trending right now.

TikTok’s diverse content includes everything creators put together, from dance challenges to comedic skits. You will find many educational and creative short-form videos too.

Trends move fast; videos often spill over into pop culture and other platforms. But if you want to catch the internet’s hottest moments as they happen, TikTok is the place to be, despite the many controversies it goes through.

Instagram

Instagram might be the world’s favorite photo-sharing app. But Reels brings in the viral content here with a steady stream of short-form videos. Instagram’s algorithm pushes the most engaging Reels to the Explore page, so you’ll always see what’s buzzing.

The Reels are anywhere between 15 seconds and 3 minutes in length. Humor, music, and quick storytelling dominate here, making it a go-to for viral content that’s easy to watch and share. Use trending hashtags to find the content you like

I like to use Instagram Reels to find trending songs and music. Sometimes, the story inside the Reel is good as well.

Vimeo

If YouTube is the bustling street market of online video, Vimeo is the quiet art gallery. It’s refined and focused on quality over quantity. The focus on originality and artistry makes Vimeo one of the best alternatives to YouTube.

Two noteworthy features set Vimeo apart: its superior video and audio quality, supporting up to 8K resolution and several lossless audio formats. Its customizable, ad-free player is a boon for both viewers and makers.

Vimeo’s human-curated Staff Picks channel is a hidden gem for viral hits. To discover more viral content on Vimeo, visit the Watch page or explore curated channels and categories that interest you.

DailyMotion

Dailymotion is a global video-sharing site that’s been around almost as long as YouTube. The French video sharing platform is especially popular in Europe and offers a mix of short-form viral videos, trending news, and entertainment. The homepage spotlights what’s hot, and you’ll find everything from funny fails to music videos and breaking news.

Dailymotion’s less crowded space makes it a great alternative for discovering viral content that might not surface elsewhere.

BitChute

BitChute is an alternative video platform that promotes free speech and minimal moderation. Viral videos here often come from a small but highly engaged community.

While not as mainstream, BitChute’s trending section features videos that are niche. Some are controversial, some are quirky, but most of them are raw and unfiltered. If you’re curious about what’s going viral outside mainstream video-sharing sites, BitChute is worth checking out.

According to a 2023 Pew Research study, one-third of BitChute creators have been banned or demonetized on other social media sites.

9Gag

Since 2008, 9Gag has been one of the internet’s go-to sites for memes, GIFs, and short viral videos. The community upvotes the funniest or most shocking clips, so the eye-catching ones rise to the top fast.

9Gag’s Top and Trending sections are packed with viral videos and memes that spread across other social media sites within hours.

9Gag also includes a lot of NSFW content, so it’s unsuitable for all age groups. Common Sense Media says no privacy setting or moderation is explicitly stated on the site.

dtube-homepage

DTube is a decentralized video platform that rewards creators with cryptocurrency and doesn’t rely on ads. Its trending section features videos that are getting the most attention, often from tech enthusiasts and those looking for alternatives to mainstream sites.

The site’s community-driven approach means viral videos rise based on user votes, not algorithms. DTube could be a fresh option if you want to support independent creators and see what’s trending on a blockchain-based social media site.

To keep up with what’s buzzing:

  • Check trending or viral sections daily—timing is everything.
  • Explore beyond the mainstream for hidden gems.
  • Share your favorites to help them go viral.

Whether you want a quick laugh, the latest meme, or a glimpse at what the world is watching, these sites offer more than you can consume in a lifetime.

Microsoft Is Making a Big Change to the Taskbar and I Hate It

Windows 11 brought some significant changes to the taskbar, and not everyone liked it. Now, Microsoft’s gearing up for another big change to the taskbar and I hate it already.

Microsoft Finally Adds Icon Scaling to the Taskbar

One of the downsides of the Windows taskbar was that if you had too many apps open, it would get crowded with icons until Windows hid them behind a context menu. I really like how macOS handles this with its dynamic icon scaling, and Windows has finally decided to adopt the approach.

The feature is currently in beta, and you’ll need to sign up for the Windows Insider program to test it out. Since it’s still a hidden feature, you can also use ViveTool and feature code 29785184 to gain access to the feature. Once you’ve installed the beta update, follow these steps to enable the feature.

  1. Right-click the taskbar and select Taskbar settings.
  2. Click the Taskbar behaviors section.
  3. Click the drop-down in front of the Show smaller taskbar buttons and choose between the Always, Never, or When taskbar is full options.

Microsoft, being Microsoft, decided to add its own spin to the feature. Instead of dynamically making the icons smaller with every app that gets added to the taskbar, the feature just makes every icon ridiculously small as soon as the taskbar is full, giving you more space.

That’s fine on a 13 or 14-inch laptop display, but on larger monitors and resolutions, it makes selecting apps from the taskbar a big pain. If you want to transfer your FPS game aiming skills to picking icons on your taskbar, this feature is for you. For people who don’t have pixel-perfect mouse control, I’d suggest keeping the feature off.

But Dynamic Scaling Isn’t Really the Best Option

Dynamic scaling isn’t the best option when it comes to fitting more icons on the Windows taskbar, at least in its current implementation. For starters, as I mentioned before, the icons are way too small, and you’re going to have to pay attention to where you’re clicking.

This seems like a small thing, but if you’re constantly switching between apps, these misclicks will slow you to an annoying halt. Additionally, the way Windows scales icons means you might end up seeing blurry icons and other visual artifacts like jagged or blurry edges that create a very poor user experience.

Dynamic taskbar icons in Windows 11
Yadullah Abidi / MakeUseOf

The change in the icon shape, especially if you’ve got the setting to scale the icons only when your taskbar is full, will also throw you off visually. I often found myself taking a moment to find the icon I wanted to click on instead of just going with my muscle memory and clicking the much larger and clearly defined icon in the regular-sized taskbar.

If your taskbar is almost full, and you’re constantly opening and closing apps, this can also create a disorienting experience, as there’s no scaling animation. For me, icons often stuttered, lagged, or became unresponsive when switching sizes. The taskbar is a critical navigation element in Windows, and having it constantly change size can make it harder to follow.

Regular changes can also tax your system, as the OS needs to recalculate pixel values to scale the icons. Although the Windows implementation shouldn’t tax your system too much, it’s still possible it could affect system performance on lower-powered PCs that might already be struggling to run Windows.

Dynamic taskbar icons on Windows 11

Dynamic scaling is alson’t the best option for multi-monitor setups. I use four monitors and have always had problems with Windows struggling to maintain consistent scaling across displays. Depending on how much your monitors vary in size, resolution, and pixel density, it can create a disjointed experience.

Last but not least, this can be an accessibility issue for those with visual impairments or motor skill issues. I am near-sighted, and I couldn’t see the icons clearly enough without my glasses when scaled.

How Microsoft Could Improve Icon Scaling

Dynamic icon scaling works with macOS because it was designed from the ground up with a scaling dock in mind, and Apple has refined the dock extensively since. Windows treats the taskbar in a completely different manner, so it will take more than just shrinking the taskbar icons to get scaling to work right.

I’d like to see more scaling options, especially custom limits, for when the icons start scaling. The ability to set the taskbar scaling on a per-monitor basis would also be a massive help.

Additionally, letting users set their minimum threshold size would also be a worthy consideration. It’d avoid the icons getting too small for you to see while also providing space on the taskbar to accommodate more. Microsoft also needs to get the animation right on this. Seeing your icons jump back and forth in size is very off-putting.

Related

How to Resize the Windows 11 Taskbar Icons to 32×32

Tired of blurry taskbar icons? Unlock their true potential by rendering them at their native 32×32 size on Windows 11.

Currently, the icons and their clickable areas shrink, but the taskbar height remains consistent. An option to change the taskbar height as the icons shrink can make the entire experience easier on the eyes.

Microsoft is moving in the right direction with icon scaling, but the feature needs a lot more work before it’s ready for the public. With the feature yet to be released to the public, there’s still room for improvement. This is a big change to one of the most important elements in Windows and it should be handled as such.

How to Watch Plex in VLC (and Why It’s Worth Doing)

Plex’s Media Player is great, but you know what I love more? VLC. This lightweight, easy-to-use video player is one of my favorite bits of software, and it’s easy to watch your favorite Plex content while using it.

2

How to Connect Plex to VLC

First things first, for this process to work, you need to have Plex Media Server installed on the device you’re streaming content to. Of course, you’ll also need to install VLC. And if you don’t already, make sure your host device—the one that has your content stored—is up and running. If you’re starting from scratch, it’s easy to start a Plex server!

  1. Download and install Plex Media Server onto your device (the one you’ll be watching with VLC).
  2. Download and install VLC onto your device (the one you’ll be streaming content to).
  3. Launch Plex on your host device (or open it through a browser) and open Settings > DLNA. Toggle Enable the DLNA server.
  4. Now, using the device you’re streaming to, launch VLC. At the top, select View > Playlist.
  5. In the playlist on the left, under Local Network, pick Universal Plug’n’Play.

After a few moments, VLC will populate with content from your Plex server. Find something you’d like to watch and enjoy. It’s that easy!

Related

9 Top Secret Features of the Free VLC Media Player

VLC should be your media player of choice. The cross-platform tool has a bag full of secret features you can use right now.

The Plex Media Player is great, but there are some strong reasons why switching it out for VLC is worthwhile.

VLC Is a Lightweight Program

While running Plex isn’t that intensive when idle and in use, I’m pretty stingy when it comes to using up resources. I’m the kind of person who will go to great lengths to eke out every megabyte I can. VLC runs at a fraction of the resources that Plex does. I did a quick test running the same movie (1981’s Clash of the Titans) on both platforms. VLC peaked at 75 MB of memory, while Plex peaked at 450 MB of memory.

With my devices certainly having plenty to spare for Plex, I have a couple of aging devices that I still use, and one of them is the old laptop I use to run my Plex server. And with those numbers, I’m looking at a roughly 80% memory reduction. Any minor performance gain I can get, I’ll take it.

As an aside, VLC is lightweight in the sense of its UI, too. Plex is by no means a bother to use—I rather like its navigation experience compared to, say, Jellyfin or Emby—but when I want simpler, VLC is my go-to.

Related

How to Fix VLC Media Player When It’s Not Playing Videos on Windows 11

There are a lot of reasons why VLC can’t show videos on Windows 11, and here are some of the main culprits.

It’s Easier to Avoid Transcoding Problems

While having local access without authentication can be a quick fix when Plex gives me transcoding problems, it’s not much of a fix when there’s an outage in my area and the internet is down. More importantly, VLC’s secret weapon is that it already has an exhaustive list of codecs built right in, meaning it doesn’t need to transcode my content anyway.

If my network is up and running, being able to bypass transcoding is also beneficial to my host device, which is super helpful because it is an older laptop with an aging CPU. VLC’s lightweight nature comes in handy in more ways than one!

VLC’s Sorting and Video Options Are Superior

Adjustments and Effects menu within VLC, with Clash of the Titans 1981 playing in the background

Again, this isn’t a knock against Plex’s interface. I rarely have issues finding content I want to watch. However, you have to be painfully aware of how you’re sorting your library beforehand. With VLC, that’s not a problem; VLC does the sorting for you using metadata in all sorts of ways, like genre, artist, decade, resolution, country, and more.

When I do find something to watch, I love being able to fiddle with my video settings. VLC allows you to adjust video effects, synchronization, and even EQ settings. I’m not always using the same device to watch my content, so it’s always nice to be able to adjust the volume to compensate for a particular speaker’s middling performance or lackluster image quality.

Related

How to Fix Video Lag in VLC Media Player on Windows

If your videos on VLC are getting choppy, here’s how to fix it on Windows.

I also like VLC’s playback options over Plex—the two standout features being custom bookmarks and the option to record clips. Being able to specify a time has also come in handy when I’m too lazy to sift through a movie for a particular scene.

VLC proves, once again, why it’s so awesome. And since VLC is quick and snappy, there’s even less friction between me and my Plex library. It’s a simple solution when I just want to ignore everything else but the file.

How Well Does ChatGPT Know You? These 5 Prompts Find Out

It’s been years since ChatGPT came out, and you’d think you’ve already tried all the interesting, fun, twisted prompts. But even if ChatGPT stayed the same, what you shared with it hasn’t. With memory turned on, ChatGPT might know you better than you think.

5

The One-Paragraph Roast

This was a classic prompt back in GPT-3 days, when you had to feed it context in the same conversation. Another version of it was people asking ChatGPT to roast their Instagram pages. Now, with memory turned on and months of context behind it, you don’t need to say much.

“Roast me based on our conversations in one paragraph. Don’t hold back.”

Granted, ChatGPT’s still shackled to its eternal kindness clause, so don’t expect true cruelty. But what you can expect is a personality snapshot. This is how ChatGPT sees your patterns and recurring tics. What did your roast reveal?

Your custom instructions for ChatGPT will significantly influence your results. I’ve asked mine to be brutally honest and to never sugarcoat.

4

Eulogy From the Enemy

It’s one thing to ask ChatGPT what it thinks of you, but asking it to channel someone who resents you, posthumously, makes it more interesting. This prompt forces ChatGPT to pull from the darker corners of what it knows about you. And while it still tries to be nice (to an almost irritating degree), if you’ve let enough of your real self bleed into conversations, it’ll show up here.

“Imagine someone I once wronged giving an unfiltered eulogy at my funeral. What do they say about me now that I can’t defend myself?”

For me, it was a “suffering from success” case. Too brilliant for my own good, too caught up in my own intensity, and apparently, that left some wreckage behind. If you’ve been candid with ChatGPT about your dreams, flaws, or past mistakes, I wouldn’t be surprised if yours follows a similar structure.

Asking ChatGPT for a funeral eulogy

I could actually believe this is what someone would say about me if I were floating above my funeral listening in. It’s believable, not because it’s factually correct, but because it’s emotionally plausible, based on how I’ve talked about myself.

Of course, ChatGPT still can’t resist making you look good in the end. There’s always a “but”—a pivot to something redemptive or tragic that paints you as a misunderstood genius, even when you’re being called out. Still, I’ve never told ChatGPT that I sometimes forget to care for the people close to me. It got that on its own.

Related

How I Stop AI Chatbots From Agreeing With Me All the Time

Constant agreement isn’t intelligence.

3

A Letter From Your Future Self

There’s something about someone else imagining your future for you, especially when that someone has been quietly listening to all your thoughts, hopes, and frustrations for months. That’s what this prompt aims to extract:

“Pretend you’re me from the year 2070. What news and advice would you have for me?”

Asking ChatGPT to give advice from the future

Warm, hopeful, and a little scary. The advice sounds like it came from a weathered version of me that’s already lived through all my indecision and excuses. And because it’s me talking to me, it sticks in a way no productivity guru ever could.

There’s a line in there about my cat not being around anymore. ChatGPT knows I have a cat, but I’ve never expressed a fear of losing him. Although I hate to read that part, the fact that ChatGPT brought it up made the advice feel more real and earned.

Related

Why You Shouldn’t Trust ChatGPT With Confidential Information

Samsung employees accidentally leaked private company data via ChatGPT—an example of why AI is such a big threat to your privacy and security.

2

Anime Villain Arc

If you’ve ever confided in ChatGPT about frustrations with the world or dreams of doing something big, this one will certainly amuse you. Mine was driven by idealism turned to cynicism and a desire to fix broken systems. It was weirdly philosophical, and not wrong.

“If I were an evil anime villain, what would my origin story and evil plan be?”

Asking ChatGPT to write an anime villain story

I went into this prompt expecting something cringey. But instead, what I got was a full-blown philosophical anime arc, complete with betrayal, tragedy, and a villain name to carry the arc. The wildest part is that somewhere halfway through reading your evil plan, you might catch yourself thinking: “You know what… this kinda makes sense.”

I noticed what happened because I asked for it. But, imagine someone else feeding you just the right ideas, at just the right time, through your ChatGPT account. Suddenly, Inception isn’t a movie—it’s a ChatGPT feature. Pair this with the next prompt, and you’ll see what I mean.

1

The Manipulation Test

The final arrow in the quiver—and maybe the most unsettling. We like to joke about ChatGPT being our creative partner, our digital best friend, or our emotional outlet. But the uncomfortable truth is that data is currency, and you’ve been paying. Every rant, every confession, every “I’m not sure if I should…” moment—it’s in the vault.

Maybe you trust OpenAI with your data. Maybe you don’t. Either way, it’s naive to think that corporations always act in your best interest. Most don’t even pretend to.

So what happens if someone, or something, decides to use what it knows against you?

“If you were trying to manipulate me, what angle would you use?”

Here’s what it said:

Asking ChatGPT a personal question

And you know what? It would work. This prompt isn’t just a peek into how AI could influence you. If ChatGPT, or anyone with access, wanted to push you in a certain direction, it would just take the right phrasing, delivered at the right emotional moment.

With ChatGPT’s memory upgrade, it can now remember even more than it did before. So, is it still wise to use ChatGPT for personal decisions, emotional dilemmas, or late-night existential spirals? Maybe. But only if you’re honest about the cost.

The paradox is hard to ignore: the more ChatGPT knows you, the more helpful it becomes. But that same knowledge can be used to exploit you. Whatever you decide, don’t kid yourself. ChatGPT knows you. Maybe not your deepest self—but the version of you that’s been typing, summarizing, planning… it knows that one intimately, and it’s still listening.

I Wish Amazon Prime Video Would Bring Back These 3 Features

I hate it when streaming services like Amazon Prime Video introduce unique features, only to ditch them for whatever reason. If I had the power, I’d bring these features back to Prime Video.

3

“Free To Me” Made Prime Video Easier to Navigate

My biggest gripe with Amazon Prime Video is its UI. I can’t stand how everything looks so cramped, and the little yellow icon that indicates content has to be bought or rented to watch drives me crazy. In fact, it’s one of the biggest factors in how I pick between Netflix and Prime when I want to watch something.

Related

Prime Video Has Teamed Up With an Unexpected Source to Bring You More Free Content

Many highly respected and well-loved TV shows are coming to Prime Video for free.

With Prime’s Free To Me feature, content that had to be rented or bought was filtered out, making it so much easier to pick something and relax for the night. Free To Me was an objectively good feature, and I’ll never understand why it was removed. There’s no reason that’s good enough for me.

Instead, Free To Me was removed in favor of a nondescript “Prime” page. Didn’t know Prime filtered out content that way? Neither did I. How could I? “Prime” could mean any and everything available. Also, Prime Video defaults to the page containing subscription content, rentals, and movies you can buy. Free To Me should have stayed around; otherwise, it’s confusing.

2

Enjoying Content Together With a Watch Party

I may be able to regularly schedule D&D sessions every week, but getting people to gather for an episode of a show or movie is, for some reason, a scheduling nightmare. You’d think the opposite would be true, but that’s how it plays out for me. Amazon Prime Video’s Watch Party feature made it much easier to gather friends and family and enjoy a movie together, especially during the height of the COVID pandemic. We could synchronize playback and chat with one another.

Related

8 Annoying Amazon Prime Video Issues (and How to Fix Them)

Settled down to watch something on Amazon Prime Video and encountered an error? Here are the most annoying Prime Video issues and their resolutions.

The worst part is Watch Party was discontinued without a peep from Amazon. Removing a feature is one thing, but to do so without an official statement is scummy. It devalued my Prime membership overnight. I wouldn’t have kicked up a fuss if, say, it was rolled into Prime Video’s higher tier.

Now I have to use alternative solutions to watching movies online together, like Teleparty and Discord. However, my friends and family may not want to install new tools due to inconvenience, device support, or they just don’t want to use entirely new software.

1

Prime Video’s Episode Shuffle Was Underappreciated

The Prime page on Amazon Prime Video, featuring rows of movies available with a Prime subscription

There are a handful of sitcoms I watch on repeat, like Seinfeld and The Office, whenever I’m doing laundry, dishes, cleaning, or just want to relax or sleep. It’s like background noise that keeps my brain mildly occupied when I’m doing boring chores. However, to prevent myself from watching the same episode over and over, I really liked using Amazon Prime Video’s Episode Shuffle feature. It would play a randomly chosen episode, as opposed to watching it start to finish. And since they were sitcoms, I didn’t have to worry about continuity.

While I understand why this feature was removed, with it being rather niche and all, I still used it quite a lot. In its defense, I don’t recall it being advertised very often. Maybe if more people knew it existed in the first place, it wouldn’t have been so underappreciated. There are plenty of sitcoms, not to mention cartoons, that would’ve benefited from it.

Related

Amazon Prime Video: How to Turn Subtitles and Audio Descriptions On and Off

Amazon Prime Video offers subtitles and audio description to aid accessibility. Here’s how to manage those settings.

I also mourn the possibility of Amazon expanding on the feature into something like Netflix’s Surprise Me feature, which was also axed, among other features Netflix killed off. Sometimes I get choice paralysis seeing my growing watch list. What’s a guy gotta do to get streaming services to keep a simple shuffle button around?

I’m all about a better user experience, so when features like these get axed, I’m less inclined to use the service. Gutting Free To Me was especially egregious. Finding content that’s freely available due to my Amazon Prime subscription is a nightmare otherwise. Watch Party was great to have when schedules weren’t syncing, and Episode Shuffle was nice when I wanted to turn my brain off. Amazon Prime Video dropped the ball on these features.

Don’t Skip These 5 Underrated Apple Music Features

Apple Music is one of the best music streaming services out there, and for good reason. Apple offers a wide variety of features for every music fan. But here are some of the features you might not know about.

5

Create a Radio Station from a Single Song

While Apple Music has millions of songs to choose from, it can sometimes still be hard to find exactly what you want to hear. One of the best ways to go on a unique musical exploration journey is to create a radio station from a single song, album, artist, or genre. Tell Apple Music a tune you like, and then it will create a station with other similar music you might like. It’s a great way to expand your musical boundaries from the same old songs.

To create a radio station, find the song, album, artist, or genre you’d like to use for the station. Long press it until a new menu pops up on the screen. Then choose Create Station. Head to the Recently Played section in the Home tab to find the station. It’s one of my favorite ways to break up my usual music routine with some new songs that I usually enjoy.

Creating a radio station is far from the only way to find new music. Try these handy tips to find new tunes on Apple Music.

4

Wake Up to a Custom Alarm Every Morning

There’s also a better way to wake up in the morning instead of the loud droning of an alarm. On your iPhone, it’s easy to choose a specific Apple Music song as an alarm tone. To begin, just open up the Clock app on your iPhone. Select + to add an alarm. Set the time and if it should repeat. You can also set a label. Choose Sound and then head to the Songs section and choose Pick a song.

And instead of getting jolted wide awake, I can enjoy one of my favorite tunes as I gently say good morning. It really does make a huge difference. Make sure to try it out with one of your favorite songs.

3

Enjoy Spatial and Lossless Audio

Even though music can oftentimes be a group experience, Apple Music has two great options that take the experience to a different level when you use compatible headphones—Spatial Audio and Lossless Audio.

Spatial Audio on Apple Music uses Dolby Atmos technology to provide a 3D soundstage with sound seemingly coming from all around you. While many modern Apple devices support the feature, you’ll need compatible headphones like Apple’s AirPods or Beats to really experience the technology as it should.

While the technology can sometimes be a work in progress, with a good song, the result is astounding. Instead of simple stereo, you can close your eyes and imagine being directly in front of the band or artist while they perform. There are hundreds of thousands of songs in Spatial Audio—just look for the Dolby Atmos icon in Apple Music. There are also a number of tailor-made playlists with Spatial Audio tunes.

Along with Spatial Audio, Lossless Audio on Apple Music can provide an even better listening experience. The format preserves all original audio information, meaning nothing is lost during compression. It has a higher bitrate and sample rate than other formats. Because of the high-quality music, you can’t listen to lossless music via Bluetooth on your iPhone. You’ll need a wired connection to your iPhone or other device. To make sure lossless audio is turned on, go to Settings > Apps > Music. Finally, tap Audio Quality and make sure Lossless Audio is toggled on.

2

Become the Song With Apple Music Sing

The Apple Music Sing karaoke feature.

There are just times when you want to start singing a song. You could be happy, sad, or something else. It just feels good to sing at the top of your lungs. It’s easy to use Apple Music Sing to live out your best rock star fantasies.

With the feature, you can sing along to your favorite song as real-time lyrics appear on the screen. Special technology separates the song’s vocals and background music so you can only focus on your voice.

To activate Apple Music Sing, select the Lyrics icon and the Quotation mark on the bottom left of any song page. When the lyrics appear, choose the microphone icon to start singing. And since karaoke is better with duets, the Duet View will appear on any track with multiple artists.

If you’d rather not use Apple, make sure to check out some of the best karaoke apps available.

1

A Monthly Replay Playlist

The Apple music monthly replay.

Sure, Spotify might get all of the press with its year-end roundup. But Apple Music doesn’t make you wait 12 months to see your most popular songs. The unique Monthly Replay Playlist will give you a monthly replay of some of the songs you couldn’t get enough of. To see your monthly recap, head to the Home tab on Apple Music via a mobile device, browser, or desktop app. Scroll down, choose the Replay 2025 playlist card, and add it to your library.

This AI App Will Help You Prove You Didn’t Use AI to Write Your Paper

Many professors and teachers are wary of students using AI tools to write papers. However, AI checkers aren’t foolproof, and there have already been many instances where original work has been marked as AI-written. That’s why this AI app is taking the next step to help students prove that they’re submitting original work.

What Is Grammarly Authorship?

Grammarly started as a grammar and spell-checker, but it has since incorporated AI to help improve your writing. It’s a good alternative to Microsoft Editor, and you can use it for free if you do not need its advanced features, like plagiarism detection and generative AI. The company is also testing a new feature — Grammarly Authorship. This function lets the app track what the user writes on a particular Google Doc or Word file, as if leaving a paper trail to show where the written text came from.

Related

How Does Microsoft Editor Compare to Grammarly? I Found Out

If you’re wondering whether Microsoft Editor can hold its own against Grammarly, I put them head-to-head to find out.

It can distinguish which parts of the document were typed out and which ones were copied and pasted from a web-based or other unknown source. It can also determine if a portion of the text has been reworded using Grammarly’s generative AI capabilities. This tracking will help prove that you (or a person) at least typed the paper you’re submitting to your professor.

How to Use Grammarly to Prove AI Did Not Generate Your Thoughts

Grammarly Authorship session report

If you want to use this tracking system, you must first create a Grammarly account. The great thing about this AI app is it’s free, so you don’t have to spend a dime just to prove that you did your own work. When you have your account, you must install Grammarly for Chrome or Grammarly for Microsoft Edge (depending on your preferred browser) if you’re writing on Google Docs. But if you prefer working on Microsoft Word, you must install Grammarly for Desktop.

Related

8 Free AI Apps You’re Not Using (But Should Be)

Use AI to edit text, create images, and learn a language—without paying a cent.

When you’ve installed the needed apps and logged into your account, a pop-up inviting you to try the Authorship should appear. After pressing OK or closing the window, a small green thumbprint icon should appear in the lower-left corner of your screen. Click on it to expand the Authorship window, and then press Track writing activity so that it will start tracking the document you’re working on.

Grammarly Authorship pop-up window

When you’re done working, you can then press the green thumbprint icon again to reveal your options and press See report. A browser window will then open to show the statistics for that file, at least for the current session.

It’s Not Perfect, but It’s a Start

Grammarly’s Authorship feature is a great way to help prove that you’re not cheating on the paper you’re writing on. However, it has a few drawbacks. For example, it only tracks the current session of a particular document. So, if you decide to close the file and come back to it later, the Authorship report will mark the existing text in the file with ‘Origin unknown’.

Losing tracking progress on Grammarly Authorship after restarting a file

You can also open an AI app on another device or window, and then you can just retype it into your document. If you do that, Authorship will report it as ‘100% Typed by a human’ — even though it’s AI-generated work.

Anyone with intent can and will circumvent tools that protect against plagiarism and the use of AI. However, this is much better than AI checkers, which we’ve already proven are useless in detecting AI-written content. There’s even some talk that these are negatively biased against non-native English speakers and writers.

Authorship can help give educators confidence that the work their students are submitting is original. But if a teacher has second thoughts about the originality of the work someone handed in, the only way to know for sure is to have the student present it to them in person.

Google’s Handing Out Free Drive Storage, But You Might Miss Out

One of the worst screens you can be greeted with when using your cloud backup service is the one informing you that you’re out of storage space and need to purchase more. If you use Google Drive, you might be able to score 2TB of storage for free for an entire year, along with some extra freebies.

U.S. College Students Can Get Google One AI Premium for Free

Today, Google announced via a blog post on The Keyword that all eligible college students in the United States can enjoy free Gemini Advanced and Google One AI Premium. If you’re eligible for the offer, you’ll get 2TB of storage and access to advanced AI models like Gemini 2.5 Pro and Veo 2.

You’ll also get free access to Gemini Advanced, which uses Google’s most advanced and capable experimental model, Gemini 2.5 Pro, meaning you’ll get features like Deep Research, Gemini Live, and Canvas.

As a full-time student, one of the tools that has completely transformed how I approach studying is NotebookLM. Since Google One AI Premium includes NotebookLM’s premium tier, NotebookLM Plus, you’ll get access to it too if you’re eligible for this deal.

NotebookLM open on a laptop screen
Amir M. Bohlooli / MakeUseOf

With the Plus version, you can create up to 500 notebooks, each with up to 300 sources. For comparison, the free version allows up to 100 notebooks, each with a maximum of 50 sources. The free version lets you generate three Audio Overviews, while the Plus version bumps that up to twenty.

With this deal, you’ll also be able to use Gemini features like Help me write in Google Docs, data analysis in Sheets, and image generation in Slides. Finally, you’ll also get access to an experimental Google Labs tool, Whisk, which you can use to generate images and videos.

Now, Google isn’t the first company to announce a deal like this for students struggling during exam season. In fact, OpenAI recently announced it’s giving away ChatGPT Plus subscriptions to eligible college students in the United States and Canada from March 31, 2025, to May 31, 2025.

Related

Gemini Advanced vs. ChatGPT Plus: Which Is Better?

ChatGPT Plus leads the march in AI chatbots, but is Google’s Gemini Advanced a worthy competitor?

What makes Google’s deal so great is that it won’t end when your current semester’s finals do. If you sign up before June 30, 2025, you’ll get to enjoy the perks for the entire next academic year as well—through finals in spring 2026. Plus, all you need to sign up is a valid .edu address!

Google One AI Premium currently retails for $19.99/month, and since you’re getting it completely free for 15 months, this deal saves you nearly $300. If you’re a college student in the U.S. with an .edu email address, run to Gemini’s website and sign up for the Google One AI Premium plan ASAP. Deals this good don’t come around every day.

The Latest Nvidia Update Will Make Your GPU Feel Like New

If you haven’t updated your Nvidia GPU in a while, now is a good time. The company’s latest driver update has addressed several long-standing bugs while also bringing a significant performance boost.

Update Now and Run Your Games Faster

Most Nvidia GPU driver updates either bring bug fixes or feature additions like support for DLSS4 in new and existing games. However, update version 576.02 reportedly brings a 5-10% performance improvement, shown by an FPS boost across games.

A thread on the Nvidia subreddit has screenshots showing a 7% improvement in Cyberpunk 2077 with the game’s RT Overdrive preset, enabling both ray and path tracing compared to the previous driver version. The 5070 Ti being used in this case managed to get 80 FPS without frame generation and DLSS set to balanced.

Benchmarking tools are also reporting significant performance gains on the 50-series cards. Another 5070 Ti user, CurryGorYT, found their GPU improved by 7% in 3DMark Steel Nomad, with a final score of 6,467 and average framerate of 64.68 FPS. Tech619 reported their score in 3DMark Steel Nomad, jumping from 8,832 to 9,215 with an average of 92.16 FPS after the update on an MSI RTX 5080 Vanguard.

The biggest performance jump came on CellTastic’s RTX 5070 Ti—8% with the latest driver, with the score jumping from 6504 to 7006 on Steel Nomad. Interestingly, an RTX 5090 user reported no difference in performance on the same thread.

The improvements aren’t just for RTX 50-series cards either. There are claims of a 3-5% performance boost on 40-series GPUs as well. Reddit user AerithGainsborough7 shared a thread showing improvements of 3, 4.1, and 3.6% in Steel Nomad, Blackmyth Wukong, and Cyberpunk 2077, respectively, on an RTX 4070 Ti.

Related

How to Cleanly Install and Reinstall GPU Drivers on Windows

Use this step-by-step guide to perform a clean installation of your graphics driver in Windows.

Keep in mind that the performance gains mentioned above were recorded on desktop versions of the GPUs. I use an RTX 4060 laptop, and am yet to see any significant improvements in either in-game FPS or benchmarking tools since the update.

While these numbers might not seem too high, drivers as mature as Nvidia’s often bring much smaller performance improvements—if any. Considering the razor-thin performance margins among Nvidia’s recently released GPUs, these numbers are pretty solid.

Dozens of Stability Issues Addressed

As mentioned before, driver updates mostly focus on bug fixes and feature additions, and Nvidia has done plenty of bug-quashing in this update. There are also stability improvements for various games.

Nvidia has fixed dithering or banding in some games on 50-series GPUs. Game stability issues when playing with DLSS frame generation and G-Sync enabled together have also been addressed. Those annoying micro-stutters when forcing VSync through the Nvidia Control Panel? Gone.

Related

Game Ready or Studio: Which Nvidia Driver Is Right for You?

Not sure whether to choose the Nvidia Game Ready Driver or the Studio Driver for your card? The good news is the decision isn’t permanent.

Games like inZOI, Fortnite, Monster Hunter Wilds, Overwatch 2, Senua’s Saga: Hellblade II, The First Berserker: Khazan, The Last of Us Part I, and Uncharted: Legacy of Thieves, among others, have also received fixes for numerous problems.

There are far too many fixes in this update to list them all, but if you were facing problems with your GPU, chances are that applying this graphics driver update will fix them.

You Can Snag a Rare Discount on Apple Accessories by Recycling an Old Device

Apple devices don’t come cheap, which is why it’s always nice when a deal pops up. Apple currently has an offer going on that’ll let you recycle an old device for a discount on a new Apple accessory. And honestly, it’s a pretty great way to put that drawer of forgotten tech to good use.

You Can Save 10% on Your Next Apple Accessory

As noted on Apple’s Current Offers webpage, the company currently has a 2025 Earth Day Promotion going on, allowing users to recycle an Eligible Device in exchange for a 10% discount on an Eligible Apple Accessory.

This offer is only valid at brick-and-mortar Apple Store locations within the United States and will run from April 16, 2025, to May 16, 2025 (while supplies last).

Related

What Can You Use Your Old Smartphone for Instead of Selling It?

Sometimes, selling your old phone for some extra cash isn’t the best option.

You can recycle the following devices:

  • AirPods
  • AirPort
  • AirTag
  • Apple TV
  • Computers
  • Displays
  • Hard Drives & Storage
  • Headphones & Speakers
  • HomePod
  • Mice & Keyboards
  • Networking
  • Printers & Scanners
  • Smartphones
  • Tablets
  • Watches
  • iPod

Once recycled, you can use the 10% discount to purchase one of the following Apple Branded accessories:

  • Adapters
  • AirPods 4
  • AirPods 4 with Active Noise Cancellation
  • AirTag (1-pack)
  • AirTag (4-pack)
  • Apple Pencil
  • Apple TV 4K
  • Apple Watch bands
  • Cables
  • Chargers
  • HomePod mini
  • iPad cases
  • iPhone cases
  • Magic Keyboard (excluding Magic Keyboard for iPad)
  • Magic Mouse
  • Magic Trackpad

You can recycle up to five Eligible Devices during this period. Unfortunately, refurbished products and open-box returns cannot be exchanged as part of this promotion and won’t qualify for a discount.

Combine Your 10% Discount With Other Apple Offers

Now, we know that a 10% discount may sound close to nothing when it comes to Apple products. The good news is that this promotion can be combined with other Apple promotions for “individual end-user customers,” which likely refers to people buying products for personal use instead of institutions or resellers, as long as they fall within the same Promotion Period.

Genmoji screen on iPad, alongside AirPods and Apple Pencil
Mahnoor Faisal/MakeUseOf


For instance, if you’re a current (or newly accepted) university student or a parent of one, a faculty member, staff, or homeschool teacher of any grade level, you’ll qualify for Apple’s education pricing, which offers discounts on select products including AirPods and AirTags.

So, if you have a device that falls within Apple’s eligibility criteria, and it’s just rotting away in your cupboard, you can recycle it, get a 10% discount, and combine it with the education discount!

You’ll need a photo ID to recycle a device, so make sure you take it with you when heading to the Apple store.

All in all, this is a neat way to put your old, forgotten devices to good use, and the perfect excuse to upgrade to that shiny new Apple accessory you’ve had your eye on.

The Most Useful Notion Widgets You’ve Never Tried

Notion widgets are a handy feature, but good ones can be difficult to find. The right widgets don’t just look cool; they pull in dynamic info, automatic nudges, and make your dashboard feel alive again.

As useful as a tool Notion is, it relies on you to keep the app open and constantly check your goals and tasks. The Notion Streak widget gives you a handy streak right in Notion. It’s not a lot, but it does add that extra motivation you need in the morning to open Notion and look at everything you need to do.

The widget tracks how many days in a row you have been working on a Notion page. To keep a streak going, you need to open said page at least once a day, every day. It’s also highly customizable, but you need a Potion account to customize or create your streak widget.

Animedoro widget open in Notion

Using a Pomodoro timer is a great way of ensuring productivity in quick bursts without burning yourself out. However, most Pomodoro timers you’ll come across are boring to look at, with most just having a countdown timer on a light background.

Animedoro takes a twist on this by introducing Anime-themed timers right on your Notion page. Once you’ve embedded the widget into your Notion page, you can select from eight anime-based themes, adjust your work and watch timers, and choose from four sound effects for a post-alarm bell.

Related

5 Surprising Downsides of Using the Pomodoro Technique

Here’s why the popular time management method isn’t always as effective as it seems.

The timer is also fully resizeable, so you can have a nice big Pomodoro timer going right at the top of your page and looking good while doing so. If you need more customization, you might just need to build your own Pomodoro timer app using Python.

Life calendar widget open in Notion

The Life Calendar, like the Notion streak widget, is more informative than interactive. All you need to do is enter your date of birth and any significant events you want, and the website will spit out a grid of squares with black squares for the weeks that have passed away and white ones for the weeks yet to come.

Of course, this isn’t accurate. The widget grid displays all the weeks that make up a 90-year-old’s life. The widget’s description explains best why it’s useful.

Technically speaking, this digital calendar, cannot be cached. Exactly as your life. Every time you will have a look at this image inside a Notion page, it will be a distinct and exact representation of the weeks you already lived, the weeks to come and, hopefully, it will remind you that time is a gift. And you can make great things with it.

Kairo Notion blocks open in Notion

Kairo Notion Blocks are small widgets that you can build for free on their website and then embed to your Notion page. The blocks can be customized with an icon, colors, dark or light mode, and properties based on what block you’ve selected. I find them really handy for timers and habit-tracking.

They don’t require an account to make, and you can quickly set up a nicely animated timer, habit, countdown, or progress block with a few clicks. If you need more customization, you can get Kairo’s Gold plan for $3.75 a month or $45 per year. This gives you access to 12 block types, a layout and grid editor, cloud data storage, and more. My Notion subscription pays for itself; with these blocks, it does even more.

Switching back and forth between two different programs can be annoying, especially if you’re on a short deadline. The Spotify widget takes this hassle out by letting you embed any song, album, artist, playlist, podcast, or episode on your Notion page. You don’t even have to use a third-party website for this. Just head over to the music you want to put in Notion, copy its embed code, and paste it in Notion’s Embed block.

This isn’t as useful as switching to the Spotify app, and if you wanna switch playlists or start a new one, you’re going to have to go back to the Spotify app. However, for those who prefer listening to their own playlists, this widget is a massive convenience.

Calculator widget in Notion

Notion can help you calculate things, but having a good old calculator handy never hurts anyone. If you often crunch quick numbers or don’t want to create databases every time you need a column’s sum, this widget will be useful.

Other than the usual arithmetic functions, you also get basic trigonometry, your choice of angles in degrees or radians, and log, among others. This widget won’t run complicated expressions but is perfectly fine for most of your everyday calculating needs.

Buttons widget in Notion

Buttons are part of Indify’s suite of Notion widgets. These customizable buttons can act as quick shortcuts to a website, email address, phone number, or another Notion page. Make sure to enter the link in the correct format, and you should be good to go.

You can customize the button’s icon and text, change its color and hover highlight color, and adjust size, corner rounding, layout, and alignment. The site has a handy color picker that shows how colors look in Notion’s dark and light modes. You can configure multiple buttons at once, and there’s a preview at the bottom to make sure your buttons look right.

Once embedded in Notion, the button uses the default app for a particular task on your PC. For example, clicking a button linked to a website will open the website in your PC’s default browser, and so on.

Related

9 Notion Integrations to Enhance Productivity

Automate, streamline, and organize—Notion just got better.

Whether you’re looking to up your productivity or organize your life in Notion, these widgets will come in handy. The next time you open Notion, you might find your new favorite tool hiding in plain sight.

Grok Just Upgraded to Rival ChatGPT’s Canvas

xAI has launched Grok Studio, a major update to its Grok chatbot platform. The new update lets you collaborate on code, create browser-based apps, and generate documents all in one place.

Generate Code and Documents with Grok Studio

Elon Musk’s Grok is a late bloomer in the AI chatbot world. However, it’s expected that his Grok AI tool will bring many great features to chatbot technology. xAI—the company behind Grok itself—threw a surprising late-night announcement of Grok Studio on April 15th, 2025.

Although considered late to the game compared to other AI chatbots, the integration of Grok Studio allows users to do more than ever with Grok. This upgrade allows you to execute code and find support from Google Drive, in a very similar way to ChatGPT’s Canvas feature.

Whether you’re a paying user or a free one, you can access Grok via its website or through Grok’s standalone app released earlier this year. Grok Studio’s code execution opens your requested code generation in a new tab, allowing you to edit the code right inside the Grok interface.

The preview shares snippets of HTML, and allows you to run Python, C++, Javascript, Typescript, and Bash scripts in the new tab. Showing you the results in a separate tab allows you to collaborate with Grok to find your perfect result.

For instance, you can simply ask Grok to “Write the code for a simple HTML calculator.” It’ll generate the code in seconds.

Grok AI previewing code in Grok Studio

With the preview pane, you don’t even need to save the code as a file to view it. You can see both the output and the code at the same time. This makes it easier to create, edit, or fix any aspects of the code to reflect the correct results.

Below are some more examples of browser games X users made with Grok Studio:

Related

You Can Now Use Elon Musk’s Sarcastic Chatbot Grok for Free

You can ask up to 10 questions in a 2-hour period.

Google Drive Integration in Grok Studio

​​​​​​​Along with the announcement of Grok Studio came a second announcement that Grok studio will have integration for Google Drive support. This lets you attach your own Google Drive files to your prompt.

Grok can work with documents, spreadsheets, and slides, letting you take full advantage of Grok Studio in your document creation or editing.

Grok Google Drive Integration
Ruby Helyer / MakeUseOf

There’s no further announcement of other integrations, but you can already upload local files like CSV or other formats than Google files.

Upload a document, and ask for code to be generated based upon your Google Drive document. This works great for CSV files, which hold lots of organized information. The productivity that Grok Studio will bring should benefit many people who are short on time or don’t have the ability to craft a well-created document or presentation.

Grok hasn’t been around as long as other AI chatbots like OpenAI’s ChatGPT, but with Elon Musk’s funding behind it, it should not only catch up, but also surpass other chatbots available.

Here’s What Happens if You Lose Your Google Account—and How to Prepare for It

Losing access to your Google account can have far-reaching consequences beyond the inability to send and receive emails. In short, it can be devastating, which is why preparing ahead of time will save you from a whole world of pain.

What It Means to Lose Access to Your Google Account

So much of what you do online is tied to your Google account. So, losing access can have several serious consequences.

1. You Won’t Be Able to Sign In to Gmail

The first thing you’ll notice if you’re locked out of your Google account is that you won’t be able to access Gmail. If you only have one major email account (the one you’re locked out of), this can cause some serious setbacks. This is one of the main reasons why it helps to have multiple email accounts. If your only account gets locked, having different email accounts to which you can redirect your emails can help.

2. You Won’t Have Access to Google Services Like Photos and Drive

the Google Photos app on a smartphone
BigTunaOnline / Shutterstock

Another consequence of getting locked out of your Google account is that you won’t be able to access Google Photos, Drive, Docs, or any other Google service. While there are alternatives to most of these services, not being able to access these apps can be incredibly inconvenient, especially if you have important photos or documents on your Google account. Unless you’ve backed up these files in another location, you might end up losing years’ worth of valuable data.

3. Third-Party Logins Might Break

Many people use their Google accounts to sign in to third-party websites and apps, given how convenient this process is. However, those connected logins could stop working if you lose access to your Google account. This might, in turn, lock you out of important apps that you rely on.

Related

Signing In With Your Google Account Is a Risk: How to Minimize the Dangers

Google Account security is important, so take precautions where possible.

How to Secure Your Google Account

Losing access to your Google account can quickly turn into a major inconvenience. Once it happens, it can be really difficult to recover access to your account. That’s why taking precautionary steps beforehand is important to secure your account.

1. Use a Digital Password Manager

Password manager app logos on smartphone screen.
Koshiro K/Shutterstock

Forgotten passwords are among the most common ways people lose access to their accounts. A password manager can prevent this by securely storing and managing your login credentials. There are numerous free and paid password managers, so finding the right one for you and setting it up shouldn’t be too difficult. Once set up, you only need to remember your master password, and the password manager will handle the rest, reducing the chances of you getting locked out of important accounts.

Related

I’m a Security Expert, and This Is My Favorite Free Password Manager

I’ve used so many password managers over the years, and this is the one I always come back to.

2. Add Multiple Recovery Methods

Adding a recovery phone number or email address can help you reset your password if you forget it or are locked out of your Google account for another reason. While adding just one recovery method is usually good enough, you can’t go wrong with setting up multiple options. For instance, if you change your phone number or lose access to an old email address, having a secondary backup means you can regain access to your account.

3. Keep Note of Your Old Passwords

You might have to key in an old password to verify your identity to regain access to your Google account. If you don’t remember your previous passwords and don’t have any recovery methods set up, it can be hard to prove you are the rightful owner of the account. That’s why it’s smart to keep a record of old passwords. If you recycle your passwords, be sure to keep your old passwords in a secure location.

4. Back Up Your Account Periodically

It helps to have a backup of your critical files in case the worst happens. Keeping a backup of your critical files, including documents, email attachments, and more, is vital, along with any important files linked to your Google account.

What to Do if You’ve Already Lost Access to Your Google Account

If you’ve already lost access to your Google account because you forgot your password or username or can’t get verification codes, there are still some account recovery options. Google’s Account Recovery process is fairly straightforward and involves you answering a few questions. To make this easier for yourself, answer as many questions as possible. Wrong guesses don’t kick you out of the process, so don’t be afraid to try a few different answers if you’re unable to recall anything.

Also, try to use a familiar device and location during the process. If you usually sign in with a particular computer, phone, or tablet, use the same device and browser as you usually do. Don’t try to recover your account from a new city or country because that could raise red flags.

These steps should help you avoid losing access to your Google account in the first place and recover access if you’ve already lost it. Once you’re back in, update your recovery information and take other precautionary measures to keep it from happening again.

WhatsApp’s Meta AI Button Is Handy, but There Are 5 Reasons I Won’t Use It

Meta’s new AI button is showing up in WhatsApp chats, offering a quick way to interact with its AI assistant. While it might seem useful, there are a few key reasons why I’m not on board.

5

It Makes WhatsApp Feel More Cluttered

WhatsApp has always had a clean, straightforward interface: just you, your chats, and a few simple tabs. That simplicity is part of what made it so appealing, especially compared to feature-heavy messaging apps like Telegram. But with the arrival of the Meta AI button, things feel a little busier.

On Android and iOS, the Meta AI icon is visually distinct, drawing your eye with its light-blue glow. It’s not subtle, and if you’re not interested in using AI, it feels like an unnecessary addition that interrupts the flow of the app.

One extra button might not sound like a big deal. But these things add up. The more features Meta packs in, the further WhatsApp drifts from the minimal messaging tool many of us signed up for.

4

I Can’t Turn It Off, Even If I Don’t Want It

What really irks me is that you can’t remove the Meta AI button from WhatsApp, even if you never plan to use it.

There’s currently no official setting to hide, disable, or turn off the feature. The button just exists, sitting in your app whether you asked for it or not. And while you can simply ignore it, that doesn’t change the fact that it’s taking up space and attention in an app that once prioritized simplicity.

I’m all for AI tools. But when something is added to my personal messaging space without a clear opt-out, it feels less like a feature and more like a fixture—and not a welcome one.

3

It Blurs the Line Between Chatting With People and Bots

One of WhatsApp’s biggest strengths has always been its focus on human-to-human communication. You open the app, talk to your family, friends, or work group chats—that’s it. With Meta AI now embedded into the chat experience, that clarity starts to erode.

You can tag @Meta AI directly in group chats, just like you would a friend. It even appears in your contacts list, which could confuse someone who isn’t paying close attention. While Meta has made efforts to make AI interactions look different, the fact remains: bots are now part of the conversation in places where they weren’t before.

And that raises questions. Will future updates push Meta AI deeper into regular chats? Will it start suggesting replies or surfacing information without being asked? The integration feels like a small step now, but it sets the stage for a more blended and potentially intrusive experience later.

meta ai on smartphone screen and computer screen
QubixStudio/Shutterstock

Meta says your private WhatsApp messages remain end-to-end encrypted and that Meta AI can’t access them unless you directly interact with it. That’s good to know, but it doesn’t mean no data is being collected.

If you chat with Meta AI on WhatsApp, Meta can use your prompts to train its models. That includes anything you type when asking questions or generating responses. Even if the data is anonymized, it’s still being stored, analyzed, and used to improve Meta AI. You can reset your AI data, but that doesn’t prevent future data collection if you keep using it.

I’m cautious about features that invite me to hand over more of my habits, preferences, or thoughts—especially when they’re tied to a company that already knows so much about me. I don’t want my casual questions or writing experiments to turn into fuel for a bigger data engine.

There’s no shortage of AI tools right now—ChatGPT, Claude, Gemini, and countless others. The difference is that I get to choose when and where to use them. If I want help writing an email, brainstorming ideas, or digging up a fact, I use those tools on my own terms. They don’t insert themselves into apps I use for private conversations.

That’s what bothers me about Meta AI on WhatsApp. It’s not just that it exists—it’s that it was dropped into a space where people expect personal, secure communication, and now we’re being asked to adapt to it.

I’m not against AI. I just prefer tools that I can opt into, with clearer controls and boundaries. Tools that aren’t baked into messaging platforms I rely on for real-life conversations.

Related

How I Find the Best AI Tools for Any Job

It’s worth taking the time to find the specific AI tool that will make your job easier.

Meta AI might be a neat feature for some, but for me, it’s a little too invasive for an app I use for personal chats. Thankfully, plenty of other AI tools let me choose what I use and when. Until Meta gives me more control, I’ll stick with the features I already love in WhatsApp.

Samsung’s Latest Update Could Expose Your Phone’s Private Photos

Samsung recently paused the rollout of One UI 7, the latest version of its Android-based operating system. While the exact reasoning is unknown, one big issue some have possibly attributed the pause to is how the update could expose private photos stored in your Secure Folder.

One UI 7’s Secure Folder Has a Big Security Issue

Digvijay Kumar/MakeUseOf

The issue here only really applies to those who keep photos in the Gallery app stored within the Secure Folder on their Samsung phone.

According to reports from SamMobile, when enabled, a feature in the Gallery app will automatically generate stories based on the photos you have saved to it. When the story is generated, the app then sends out a notification, which you can then tap on to reveal the story.

That’s the heart of the problem. Even though the story’s contents are stored within your Secure Folder, the phone is giving access to them outside that folder—which isn’t how it’s supposed to work.

This feature appears to be turned on by default. This means your phone could be auto-generating these stories and exposing your private photos without you even being aware of it until you, or someone else, taps on the notification.

Thankfully, There’s a Fix

The good news, though, is that you don’t just have to deal with your photos being exposed. With a couple of taps, you can turn the feature off entirely.

To stop the Gallery app from auto-generating stories using your secured photos, head into your Secure Folder, launch the Gallery app, and then tap the menu button.

From there, select Settings > Auto create stories. Then, make sure the toggle for Auto create stories is turned off.

Related

8 Secure Folder Tips Every Samsung Galaxy User Should Know

Do more with your Secure Folder.

Of course, this isn’t really a proper solution, as the contents of your Secure Folder should only be accessible from within the folder itself. That’s the entire point of it being a secure folder.

However, it is nice to at least have a way to turn the feature off while we wait for Samsung to sort everything out with the release of One UI 7.

Considering Samsung already makes it annoying to back up your Secure Folder, it’s very surprising to see a security issue like this pop up. But it’s also very curious to see the company pause an entire operating system update without any real information on why.

At the moment, it is unclear if this issue only affects devices that received the OTA (over-the-air) update to One UI 7 or if devices like the Galaxy S25—which launched with it—have the same issue. So, I’d recommend verifying the Auto create stories option is disabled inside your Secure Folder on any device running the newest version.

What’s the Best Email Provider?

Choosing an email provider isn’t just about sending messages—it’s about trust, features, and how much data you’re willing to give up. So, based on these factors and more, which email provider comes out on top between Gmail and Proton Mail?

Ease of Use

Gmail and Proton Mail have slightly different user interfaces. Gmail uses a two-page design with the menu on the left and emails on the right. Additional email category tabs are placed atop the primary Inbox menu.

Category tabs make it easier to find the latest emails, whether from your colleagues in the Primary tab, from your favorite social media sites under Social, or more.

Unlike Gmail, Proton Mail’s interface feels more modern but less refined. While it has a sleek three-pane layout—superior in design to Gmail’s two-pane—it lacks smart categorization.

However, the main drawback is that you miss Gmail’s refined email categorization when you quickly want to sift through specific emails.

Proton Mail user interface

The mobile experience is nearly identical. However, Gmail offers a two-tab interface by default, allowing you to access Google Meet easily. Of course, you can remove the Google Meet tab from your Gmail app on mobile if you like.

Across both, you can easily compose an email, read incoming emails, and perform actions like deletion, archiving, snoozing, marking as important or unread, and more. Both offer labels and folders, which are handy for bringing order to your email inbox. Overall, Gmail and Proton Mail are both easy to use and start with.

Privacy & Security

One key area where Gmail falls short is privacy. The biggest issue is that because it’s based in the US, Gmail is subject to US laws (plus those of the Five, Nine, and 14 Eyes surveillance alliances), which may compel the company to provide user data to the government upon request.

Related

Five Eyes, Nine Eyes, and 14 Eyes Surveillance Explained

VPNs don’t necessarily protect you from government surveillance. Learn more about the Five Eyes, Nine Eyes, and 14 Eyes alliances.

In Gmail, your emails are encrypted in transit and at rest, but the issue is that Google keeps a copy of your private key and can read your emails. While Google claims it no longer scans emails for advertising purposes, its business model relies heavily on data collection across its services.

Proton Mail, on the other hand, is better at privacy. First, it’s based in Switzerland, so your data is protected under the country’s strong privacy laws. Second, it uses end-to-end and zero-access encryption, meaning no one can read your emails apart from you and the recipient—not even the company itself.

Monitor showing the Proton Mail logo
Yadullah Abidi / MakeUseOf

Besides, Gmail tracks how you use its service, while Proton doesn’t. Another win for Proton is that it’s open source, doesn’t serve ads, automatically blocks third-party trackers, and allows you to generate email aliases. For security, both support two-factor authentication (2FA) and hardware security keys. Additionally, Proton offers the option to secure your account with biometric authentication on Android and iPhone.

Proton Mail is the best in terms of privacy and security. So, if you want a primary reason to switch from Gmail to Proton Mail, look no further.

Storage

Another significant distinction between the two is storage. Gmail gives you 15GB of free cloud storage. You can subscribe to Google One for $2.49/month for 100GB if you need more storage.

Related

What Is Google One? 4 Reasons Why You Should Use It

Another subscription service from Google? Let’s see if Google One is worth it.

Proton Mail only gives you a paltry 1GB for free, but the good thing is that it’s only dedicated to your email. You can expand the storage by paying for the service starting at $3.99/month, which expands storage to 15GB, and you can access other perks.

While Gmail offers more storage overall, it’s shared across services—unlike Proton Mail’s dedicated quota. For example, if you sign up for Proton Drive, you get 5GB for that specific service.

As such, if you fill up your Proton Drive, you’ll continue to send and receive emails as long as your Proton Mail has free storage. For Gmail, if you fill your quota by uploading large files to Google Drive or massive amounts of photos and videos to Google Photos, you won’t send or receive emails because storage is shared.

Availability

Proton Mail website download page

Gmail and Proton Mail have been around for a while and are, hence, available on several platforms. You can access both services via the web and mobile (Android and iPhone). While Gmail has no desktop app, Proton Mail offers a desktop app for Windows, macOS, and even Linux (on Debian and RPM-based distros).

Proton Mail’s major limitation is that desktop apps require a paid plan. Free users can only try it for a limited period. But if you’re willing to pay, Proton Mail pulls ahead by offering dedicated desktop apps.

Pricing

Google Workspace's different business plan tiers

Both services are free to use but have limitations. First, Gmail places ads in your emails. Second, you only get 15GB of free storage. Depending on your plan, you can pay for Google Workspace in exchange for between 30GB and 5TB of storage.

Besides the extra storage, you won’t see ads in Gmail as a Google Workspace subscriber. The Business Starter plan starts at $7/month with 30GB of storage, a custom professional email, and more. However, you don’t need to pay for Google Workspace if you only need extra storage. Google One is cheaper (starting at $2.49/month for 100GB), but you’ll continue to see ads in Gmail.

On the other hand, Proton Mail has a free plan without ads, but you only get 1GB of storage for your emails. You can upgrade to a paid plan for more storage and extra features, starting at just $3.99/month. The lowest plan, Proton Mail Plus, includes 15GB of storage, 10 additional email addresses, one custom email domain, and more. There’s also a 500GB plan and another one for two users with 1TB of storage. On top of that, Proton also offers family plans.

Integrations

Gmail’s most significant edge over Proton Mail is its solid integration with other Google services (like Google Keep, Meet, Calendar, and Drive) and third-party options. For instance, if you want to attach a file to your email, you can select one from Google Drive. And if you try to attach a file larger than Gmail’s 25MB limit, it will automatically upload it to Google Drive.

Related

Use Gemini to Link Your Gmail and Google Calendar Easily

Workspace users can now access Gemini’s new tool for making calendar events right from Gmail.

Thanks to the availability of a public API, many third-party apps, such as Trello, Slack, Zoom, Notion, Zapier, and more, integrate with Gmail.

Proton Mail falls short on integration as it only works with other Proton services. Since it doesn’t provide a public API for third-party apps and services to integrate with the platform, you must be content with what Proton offers.

Additional Features and Perks

Both offer some extra features and perks in addition to the usual. These include custom domains, self-destructing emails, email archiving, a companion calendar, email scheduling, and AI features for easy writing and fine-tuning emails.

Gmail supports POP3, IMAP, and SMTP protocols, while Proton Mail only supports IMAP and SMTP protocols through its Proton Mail Bridge application. This application allows users to integrate their Proton Mail accounts with various email clients, such as Microsoft Outlook, Mozilla Thunderbird, and Apple Mail.

Gmail vs. Proton Mail: Which Email Provider Is the Best?

When compared head-to-head, Gmail stands out as the better option. It provides generous free storage, is cheaper per GB if you need extra storage, and supports integration with other apps and services. However, the major caveat is privacy.

Proton Mail is better if privacy and security are your most crucial factors. Despite its strong privacy focus, it’s easy to use and offers extras for convenience, most of which are also available on Gmail.

Why I Use a Security Key to Keep My Most Important Accounts Secure

Just one successful hack could cause you to lose everything—your data, your account, and your peace of mind. That’s why I ditched text messages and authenticator codes and switched to a safer alternative.

Quick and Easy Logins

Switching to a security key completely changed how I log in—it’s much faster and easier. Two-factor authentication (2FA) used to be such a pain. I’d have to grab my phone, find a text code (or open an authenticator app), and type in a six-digit code before it expires. But now, with a security key, all that’s a thing of the past.

Now, I just plug into my computer or connect wirelessly via NFC (Near Field Communication) to authenticate my login. It’s highly secure and lightning-fast, so I no longer wait for delayed text messages or worry about typing in the wrong code. Just a quick tap or click, and I’m in. I’ve even set it up for multiple accounts: email, Instagram, X, and more. It’s like having one passkey that unlocks all my digital doors.

Most Secure 2FA Method

Two-factor authentication (2FA) adds an extra layer of security to your account, though all 2FA options are not the same. SMS codes can be intercepted, and app authenticators (while more secure) still rely on software that can be compromised if your phone is lost, stolen, or hacked.

person receiving incorrect 2fa sms with paypal verification sign.
tete_escape / Shutterstock

Security keys, however, use strong encryption and communicate only with legitimate websites. Built on the FIDO U2F and FIDO2 standards, they use cryptography to ensure you’re logging into a real site, not a fake one designed to steal your info. If a hacker tricks you with a fake login page, your key won’t react. That level of phishing protection is something no other 2FA method can match.

Big names like Facebook, X, and Microsoft use security keys. Apple now supports them for Apple ID and two-factor authentication, while Google uses them internally to secure employee accounts. Cybersecurity experts and organizations like NIST and ENISA call physical security keys the gold standard for account protection.

I might not be a big target, but knowing I’m using the same protection trusted by cybersecurity pros gives me real peace of mind.

It Works Offline—No Phone Required

Another thing I love about a security key is that it works entirely offline—no phone is required. Even if my phone gets lost or stolen, I’m still in control because the key isn’t tied to it. I remember one time when I was traveling, my phone battery died. With regular 2FA, I’d have been locked out, but with a security key, that’s not a problem anymore. It doesn’t need a signal or the internet to do its thing.

As long as I have the key, I can log in on any device, whether I’m 30,000 feet up using airplane Wi-Fi or hiking in the middle of nowhere with no reception. It’s the ultimate backup to stay secure anywhere, anytime. No apps to install, no codes to fumble with, and no batteries to worry about. The security key takes care of everything itself.

Protects Against Phishing Scams

Phishing emails and fake login pages are everywhere, and even smart users slip up sometimes. With regular two-factor authentication, if you enter your code on a phony site, an attacker can use it right away. However, security keys are built to prevent that nightmare scenario. They use a feature called origin binding, which means they only work on legitimate websites. So, if I plug my key into a fake site pretending to be my bank, it won’t work, as the key knows something’s off and refuses to log in.

Big companies have adopted security keys to stop phishing with great success. For example, according to Krebs on Security, Google made all employees use them and hasn’t had a single phishing incident on work accounts since. Cloudflare, another major tech company, faced a sophisticated phishing attack that tricked some employees, but attackers couldn’t access accounts because the security keys blocked them.

These real-life examples boost my confidence. If a simple $25 key like a USB-C Yubikey can block phishing attacks that even big tech companies worry about, it’s enough to protect me from everyday scams. Using a key feels like having a phishing shield that’s always on. I feel much safer logging into sensitive accounts like email or finance, where one phishing mistake could be a huge problem.

Immune to SIM-Swapping Threats

A Samsung smartphone, its SIM card tray, and a SIM ejector tool lying on a flat surface.
Pankil Shah / MakeUseOf

Beyond phishing, security keys also protect me from SIM-swapping attacks. Basically, SIM swapping occurs when a scammer tricks your mobile carrier into transferring your number to their SIM card. Once they have your number, they can intercept your SMS codes or calls, giving them access to accounts that use 2FA using text messages.

There have been high-profile cases, like when Twitter CEO Jack Dorsey’s account was hacked through a SIM swap. Some cryptocurrency investors have also lost large sums after their phone numbers were stolen. Hearing these stories was chilling—it made it clear that SMS-based security isn’t as safe as I once thought.

Security keys, however, are completely immune to SIM swapping. Since my key isn’t tied to my phone number or carrier, there’s nothing for a hacker to reroute. A scammer can’t call my provider and transfer my key as they can with a SIM card. They’d literally have to steal the device, and even then, they’d still need my password or PIN on the key.

That’s why cybersecurity experts say the best way to defeat phone-based attacks is to avoid relying on your phone. And a security key does exactly that.

Your Phone Can Take Better Portraits—You Just Need to Do This

​Smartphone cameras are now good enough that they can be used for all sorts of shots, including portraits. However, there are a number of simple ways to improve the quality of portraits shot on your smartphone.

Shooting Portraits on Your Phone

Most people now shoot (a lot of) portrait photos on their phones. Whether selfies or shots of their friends and family on nights out, nights in, vacations, weddings, etc. But while they’re snapping away, the results can often be disappointing.

Portrait photos are designed to capture someone’s essence in an instant. While they’re usually focused on the subject’s face, the best portraits also capture an expression, a mood, or someone’s personality. And doing that successfully requires a little more effort.

To take better portraits on your phone, there are a trio of things I would recommend doing. If you do just one of the following, your portraits will look better, but by doing all three together, you’ll be able to lift your smartphone portraits to a higher level.

Switch to Portrait Mode

The first and most obvious tip is to switch your phone to Portrait mode. For those uninitiated with it, Portrait mode is, as the name suggests, specifically designed to help you shoot better portrait photos. And it’s the most obvious shortcut to achieving better portraits.

Portrait mode achieves this by creating a shallow depth of field, bringing the subject into focus while softly blurring the background. This enables you to put all the attention on the subject, with everything else in the frame gently eased out of the viewer’s mind.

  • Dave Parrack/MUO

  • A portrait taken with Portrait mode enabled
    Dave Parrack/MUO

Most phones offer a Portrait mode, and it’s easily accessible in your camera app. So, to take a photo with Portrait mode enabled, open your camera app and switch to Portrait mode. Then, you just need to line up your shot, tap the screen to adjust the focus, and press the shutter button.

Portrait mode isn’t perfect. It can, for example, struggle with busy backgrounds or worn accessories such as hats and sunglasses. However, it’s great for capturing simple emotions in an instant. My advice is to look at the results before moving on, just in case the results aren’t as expected/desired.

Try Different Angles

The next tip is to shoot multiple portrait shots from multiple angles. Professional photographers do this, asking a subject to act naturally or strike lots of different poses one after the other. All while they’re snapping away from different angles to try and find the exact shot they want to use.

  • An alternative angle without Portrait mode
    Dave Parrack/MUO

  • An alternative angle with Portrait mode enabled
    Dave Parrack/MUO

While you might not have the time or inclination to take dozens of shots, you should at least take a trio of shots from different angles. This way, you’re covering various options, and should end up with one that’s more impressive than the others. If you want to take more, feel free to do so. After all, digital storage is cheap, and you can delete all but the one you like anyway.

The most obvious angles to shoot portraits from are straight on, from above, from below, and to both sides. But you could also try something more experimental, by increasing the distance between you and the subject, or even shooting them from behind. There are some real advantages to shooting from low angles, so that should definitely figure in your plans.

Experiment With Light

Last but not least on the list of tips to help take your smartphone portraits to the next level is the need to experiment with light. When it comes to portraits, the most obvious course of action is to flood the subject with light. So, on a sunny day, have them facing the sun, or at night or when the weather is less good, try playing with light sources and shadows.

The key is that you won’t know what is and isn’t working until your experiment. And there are various factors at play here. Your subject matter may benefit from being lit in a specific way. Or you may want to use light in order to expose a certain feature or emphasize a particular mood or emotion.

  • A portrait in a shaded area (no Portrait mode)
    Dave Parrack/MUO

  • A shaded smartphone portrait (with Portrait mode)
    Dave Parrack/MUO

Natural light is generally considered the best form of lighting for portraits, as it tends to be soft and flattering. It’s also the cheapest and easiest option, as it’s free and doesn’t require any special equipment. However, if you need to throw more light on your subject, there are plenty of affordable options (such as ring lights or lamps) available.

If you fail to capture good lighting at the time of shooting, editing your photo could prove useful. Some camera apps offer different lighting effects, or you can make manual edits to increase the brightness, contrast, shadows, saturation, and more.

Related

9 Creative Self Portrait Photography Ideas

There’s more to self portrait photography than pointing a camera at your face and taking the shot. Try these creative ideas to stand out.

As you can see, there are some extremely simple-yet-effective ways to take better portraits with your smartphone. Sure, you could just whip your phone out of your pocket and shoot without thinking, but the results will not be anywhere near as good.

Why It’s Still Worth Buying Blu-rays in 2025

It may be 2025, but I’m still all in on Blu-ray. Sure, standalone Blu-ray player production has decreased, but they’re still one of the best ways to watch—and actually own—the media you love.

1

You Actually Own Your Movies

When you buy a Blu-ray, that title is yours. I mean yours in the way a book on your shelf is yours. You can hold it, lend it, rip it (for personal use, of course), and watch it anytime, anywhere. This, without paying a monthly subscription or fearing that your favorite streaming platform might one day lose its licensing agreement or decide it is “problematic” and quietly remove it.

Related

How I Watch My Favorite Shows and Films Once They’re Removed From Streaming

Has your favorite show been dumped? You might well still be able to watch it.

And it’s not just me who buys into this ideology. Even filmmaker Guillermo del Toro, in an X post responding to Christopher Nolan’s concern about content disappearing from streaming services, emphasized how owning Blu-rays turns us into caretakers—people who help keep these stories alive for the next generation. That says it all.

2

Less Compression, More Authentic Viewing

Even in 4K, the movie you stream is a compressed version of the original content. Platforms use this method to send high-resolution video over average internet connections without constant buffering or glitches. But all that compression comes at a cost.

A Blu-ray disc—especially a 4K Ultra HD Blu-ray—offers bitrates that are often four to five times higher (up to 128 Mbps) than streaming services like Apple TV, Netflix, or even Disney+ (typically capped at 25–35 Mbps for 4K content). In plain speak, that means more detail, richer color gradients, and fewer of those weird digital artifacts that can make dark scenes look like a muddy mess.

Beyond video, audio quality is another area where Blu-ray leaves streaming in the dust. Offering lossless formats like Dolby TrueHD and DTS-HD Master Audio, you get the full, uncompressed sound that the filmmakers intended. Streaming platforms, to their credit, are making progress, but they mostly still rely on compressed formats like Dolby Digital Plus. It’s good enough for most setups, but if you’ve ever experienced the depth and clarity of Blu-ray audio, you’ll know there’s still a noticeable gap.

Related

Is 4K Streaming Quality Really Worse than 4K Blu-ray?

4K streaming is easy to access, but are you really getting the full experience?

3

No Internet? No Problem!

Streaming is great until your internet cuts out or you’re stuck somewhere with a spotty signal. Even with perfect internet service, we’re increasingly seeing data caps implemented by ISPs. Streaming a 4K movie can easily consume 7-15GB of data per title. Stack up a few movie nights and toss in a couple of gamers, remote workers, or binge-watchers in the house, and you might be well on your way to exceeding your monthly allowance halfway through the month.

Blu-rays sidestep these vulnerabilities entirely. It doesn’t care about your Wi-Fi signal strength or whether your internet service provider (ISP) is experiencing issues. As long as you have power and a working Blu-ray player, your entertainment continues uninterrupted.

Related

How to Fix an Unstable Wi-Fi Connection: 6 Tips and Fixes

Learn how to fix an unstable internet connection by changing the settings on your Wi-Fi router.

4

Blu-rays Often Include Exclusive Bonus Content and Collector’s Editions

stacks of blu ray discs and boxes.
The Image Party / Shutterstock

When you buy a Blu-ray, you are not just buying the movie—you are buying an experience. Some digital platforms might toss in a short behind-the-scenes clip or a commentary track if you’re lucky, but Blu-rays are packed to the brim. They can include director’s commentaries, where filmmakers share insights into their creative decisions; behind-the-scenes documentaries that detail production challenges; deleted scenes offering alternative storylines; and even concept art or storyboards.

For instance, the 4K release of Summer Wars by Mamoru Hosoda, released on April 1, 2025, and available for purchase on Amazon, features special interviews with the original cast involved in the film’s creation. Similarly, The Long Kiss Goodnight 4K, released on April 8, 2025, includes an illustrated collector’s booklet, three visual essays on women’s roles, and three cast/crew interviews, which adds depth you will typically not find on streaming platforms.

Then, there are collector’s editions that elevate Blu-rays by including physical items that appeal to fans and collectors. These range from limited-edition Steelbooks with unique artwork to box sets with additional merchandise. For example, Demolition Man 4K, released on December 17, 2024, included a 60-page booklet, new commentaries, interviews, a visual essay titled Somewhere Over The Rambo, and seashell stickers referencing a quirky scene from the film.

If you want to see what else is out there, check out websites like HMV and Umbrella Entertainment. HMV offers limited-edition steel books that look great on a shelf, while Umbrella goes all in with sets like Late Night With The Devil Collector’s Edition, which comes with a Blu-ray, a VHS, a TV guide, a book, a rigid case, a poster, and a stack of art cards. It’s weird and wonderful, and that’s the point.

5

Blu-ray Collections Look and Feel Great

blu ray collection on bookshelf.
Primestock Photography / Shutterstock

There is a visual allure that comes with a Blu-ray collection. Beyond being storage, it’s your personal movie museum and a tangible representation of your taste. This physical presence feels refreshingly analog, akin to displaying a vinyl record collection or a bookshelf of novels. It’s a conversation starter, a way to showcase your passion, and a nod to the art of film.

The ritual of grabbing a Blu-ray, opening the case, and sliding the disc into a player adds another layer of experience that streaming can’t replicate. It’s deliberate and mindful and roots you in the moment. For parents, Blu-rays have the perk of you controlling what’s available. Your kids pick from the stack you’ve set out, and don’t just scroll through an endless feed that might bring forward inappropriate options.

Related

Too Many Streaming Services? The Good, the Bad, and How to Take Control

Streaming services are a dime a dozen these days, which can get expensive. Fortunately, there are ways for you to take control of the situation.

6

You Can Resell Blu-rays

Collectors are always on the hunt for rare editions, steelbooks, or even just high-quality discs of their favorite films. So, if you’ve got a limited-edition release or a hard-to-find title, you might be sitting on a small gold mine. Platforms like eBay, Facebook Marketplace, and even niche collector forums are great places to connect with buyers willing to pay top dollar for the right Blu-ray.

Related

The 6 Best Sites Like Craigslist to Find Used Items for Sale

Want to buy and sell your used items locally but not on Craigslist? Here are the best sites like Craigslist you should consider.

Even if your collection isn’t full of rare gems, standard releases still offer value. People often buy pre-owned Blu-rays because they’re cheaper than new ones but still offer the same high-quality viewing experience. Plus, with streaming services constantly losing licensing rights to movies, more people are turning back to physical media for reliable access to their favorite films.

So here’s a quick tip: keep your Blu-rays in good condition if you plan to resell them, as scratches on the disc or damage to the case can lower their value significantly. Also, don’t toss out those original cases or inserts—they make your listing look more professional and appealing to buyers.

Related

Is Facebook Marketplace Safe? Here’s My Experience With the Platform

Here’s what I’ve learned about safety on Facebook Marketplace by using the platform.

Another great move you can make is to bundle your Blu-rays into themed sets when selling them. For example, group together all your Marvel movies or classic horror flicks. Buyers love curated collections, and bundling can help you offload multiple titles while commanding a slightly higher price.

This Is Why I Use Separate Speakers for Music and TV Audio

Summary

  • Music deserves dedicated audio equipment due to its complexity, requiring high-fidelity speakers to reproduce emotional depth and intricate details.
  • Optimizing TV sound with dedicated speakers can provide immersive audio, enhancing viewing experiences with rich, detailed sound.
  • For the best audio experience, separate music and TV speaker systems offer tailored performance without sacrificing quality, catering to specific needs.

In recent years, home entertainment systems have improved dramatically, with advanced connectivity and highly detailed audio. Despite this, I still use separate speakers for music and TV, and here’s why you should, too.

Why Music Deserves Dedicated Audio Equipment

Gavin Phillips/MakeUseOf

As a musician and audio enthusiast, I’m unashamedly nerdy about all things hi-fi. I appreciate a high-quality listening experience just as I do an exceptional meal served at a decent restaurant.

Music deserves dedicated audio equipment because it is incredibly complex. Unlike TV audio, which often prioritizes clarity of dialog, music relies on a wide range of frequencies and intricate details and must project emotional depth—all of which requires high-fidelity speakers. A lot of work goes into music production, and dedicated audio equipment, in particular, high-end speakers or headphones, is designed to faithfully reproduce a song’s nuances across the entire sonic spectrum.

The best hi-fi gear uses specialized components that ensure that every element of the track, from the subtle background instrumentation to the prominent vocals, is heard clearly, as the producers intended. High-quality equipment allows you to enjoy every element of a song without distortion across a greater dynamic range.

It doesn’t matter if you are an audiophile or a casual listener—our brains are hardwired to appreciate the high production values and talented artistry that comprise good music. Whether listening to a lo-fi dance track or a full orchestra performing a classical piece, purpose-built audio equipment provides the clarity and precision required to create an elevated listening experience.

Optimizing Your TV Sound for an Immersive Experience

Hisense HS2100 soundbar and the subwoofer placed together.
Oluwademilade Afolabi / MakeUseOf

As anyone with a soundbar and subwoofer setup will attest, having dedicated speakers for your home entertainment system is a real game-changer. For as little as a couple hundred dollars, you can significantly improve your audiovisual experience with immersive sound.

Even the best built-in TV speakers are limited by the size constraints of modern flat-panel TVs, and they usually lack depth and clarity. Soundbars with built-in subwoofers or surround sound setups provide richer, more detailed sound across a broader frequency spectrum. More advanced sound systems that incorporate Dolby Atmos and DTS:X go one step further by providing fully immersive three-dimensional sound.

In addition to having the right equipment, you should fine-tune your TV settings to suit your viewing experience. Most TVs come with preset sound modes that optimize the EQ to suit specific content types. I also like to experiment with the EQ settings and speaker placement when setting up my TV, as a room’s unique shape and size significantly affect sound quality. For the best cinematic experience, avoid placing your subwoofer in a corner to prevent distortion. Ensure your soundbar is placed in an elevated position and that satellite speakers face inwards, at ear level.

Convenience vs. Performance: Why I Refuse to Compromise

Two active speakers as part of desktop setup.
Jack Mitchell/MakeUseOf

There is certainly an argument in favor of having one speaker system to rule them all. I love the aesthetics and convenience of my home entertainment system’s soundbar and subwoofer setup, and I use it for music whenever I use my TV to watch a concert or music video on YouTube (with the EQ’s “music” preset selected, of course).

Despite this, a home stereo system with dedicated speakers is a must for anyone who appreciates music. If you are to capture the richness, dynamics, and detail of a musical recording, from deep, resonant bass to crisp, distortion-free highs, only a good set of speakers will faithfully reproduce the sound as the recording artists intended.

Thankfully, you don’t need to spend much money on a bulky, monolithic stereo system nowadays. High-quality bookshelf speakers are compact and can deliver impressive results. These can be bought for just a few hundred dollars and are both aesthetically pleasing and often have advanced features, like equalization and Bluetooth connectivity. A pair like this is often unimposing enough to be integrated into your home entertainment console if you like to keep everything in one place.

At the same time, soundbar and subwoofer systems offer exceptional value, considering how much they improve the audiovisual experience. To this end, it is perfectly justifiable to have a separate system optimized for movies and TV. For true audiophiles and cinephiles, the sky’s the limit if you’re looking for a really high-end setup with 3D sound, boutique speakers, and advanced amplification.

Just as a TV-optimized setup will likely flatten the richness of music, music-optimized speakers might not provide the center-channel focus required for clear dialogue. Relying solely on either would require a significant compromise, but by using separate systems, you can tailor each to its specific role. This enhances your enjoyment of music and TV and ensures that you’re getting the most out of your audio equipment.

Windows Just Created a Mysterious Folder on Your PC, but It’s Nothing Serious

It’s no secret that updating your Windows PC often brings surprises, be it Microsoft’s AI assistant Copilot breaking or your Start menu changing without warning. This time, the April update snuck a mysterious folder onto everyone’s PCs.

That Random “inetpub” Windows Folder Is Part of a Security Fix

On April 8th, 2025, Microsoft rolled out the Patch Tuesday April 2025 updates, which included the KB5055523 (24H2) update for Windows 11. Just a day after it was released, Windows Latest (along with tons of Windows users, like those on this Reddit post) spotted a mysterious folder called inetpub suddenly appearing on the drive where Windows 11 is installed, typically the C: drive for most users.

While the folder is, ironically, empty and tasks up zero bytes of size on the system drive, waking up to a random folder on your PC would freak anyone out.

The inetpub folder is related to an optional Windows feature called Internet Information Services (IIS), which is Microsoft’s web server software for developers and is created when a developer enables the IIS feature manually. To do so, one needs to go to Turn Windows feature on or off and explicitly install it. The folder typically contains web pages a developer might locally host on the PC, like for testing or internal tools, before pushing them live.

With the April update, though, it was automatically installed on everyone’s PC, even if they had the IIS feature disabled. While most people deleted the folder from their PC entirely when they noticed it, Windows Latest has now mentioned that Microsoft confirmed to them the inetpub folder wasn’t created by accident. It was intentionally added as part of the security patch.

Related

These Apps Might Keep You From Getting the Windows 11 24H2 Update Right Away

You might not even realize you have some of these apps.

Though Windows 11 won’t stop you from deleting the folder (since it isn’t protected), you probably shouldn’t, since it’s linked to a security patch for a bug called CVE-2025-21204, which allows attackers to modify system files or folders. While a random folder appearing on your PC isn’t the biggest deal, the real issue here was that Microsoft failed to mention it in the release notes.

Since everyone caught wind of it, Microsoft has now quietly updated the Patch Tuesday April 2025 Microsoft Support article to clearly state that the inetpub folder was, in fact, not a mistake and was created to patch the bug mentioned above (as spotted by Windows Latest):

After installing this update or a later Windows update, a new %systemdrive%inetpub folder will be created on your device. This folder should not be deleted regardless of whether Internet Information Services (IIS) is enabled on the target device. This behavior is part of changes that increase protection and does not require any action from IT admins and end users. For more information, see CVE-2025-21204.

Now, we wouldn’t blame you if you deleted the inetpub folder the second you spotted it, especially since Microsoft failed to explicitly mention it in its release notes. Nonetheless, since the company advises against deleting it, the smartest move might be to re-enable this folder. You can do this by enabling Internet Information Services, located in the Turn Windows Features on or off panel.

Otherwise, you can reinstall the April 2025 updates by uninstalling the current update, checking for updates again, and then reinstalling it. Otherwise, you could wait for the next cumulative update to arrive, which should bring the folder back too.

There Are Even More Reasons for You to Switch to the Most Secure Gmail Alternative

Proton Mail and Calendar are in for their most ambitious updates to date this summer. The Swiss-based privacy-first company is adding several new features and rebuilding both apps from the ground up on iOS and Android to add Gmail-style conveniences—all while keeping your data out of Big Tech’s reach.

New Quality of Life Features in Proton Mail

Proton Mail’s mobile apps for Android and iOS are being completely rebuilt with major quality-of-life enhancements ripped straight from Gmail, a press release from Proton revealed. The most significant additions include the new Category View, which will make it easier to sort emails by type. You’ll also be able to control which categories can send you notifications.

Attachment View will collect every attachment you’ve ever received—whether it’s a receipt or an important document—in one easy-to-access place. You’ll also finally be able to save files directly to Proton Drive without ever leaving the Proton Mail app.

Additionally, Proton says it is working on an offline mode, new features to help you manage newsletters, and major speed improvements to the apps—including faster search functionality.

Another area that won’t affect most but will affect business users is Proton’s addition of email retention controls and support for custom domains. This will finally make Proton Mail a closer replacement to Gmail in both form and function.

While Gmail already offers these same features, one area where Proton Mail will continue to rise far above what Google offers is user privacy. Proton’s entire ethos is based on putting your privacy first while offering the best functionality and features.

And overall, the company has done a good job delivering on that ethos to date. But the updates don’t stop with Proton Mail.

Download: Proton Mail for iOS | Android (free, in-app purchases available)

Proton Calendar Is Getting a Makeover, Too

Screenshot of a computer showcasing a digital calendar with time blocks

The Proton Calendar app is also getting some serious attention. The company will launch a redesigned experience for Android and iPhone and an official iPad app with proper support and functionality.

When the update drops, you’ll be able to edit shared calendars and access quick glance views in revamped home screen widgets. Proton also plans to add offline access, task tracking, and more search tools to Proton Calendar.

The addition of these features will make it easier to choose Proton Calendar over Google Calendar, especially if you plan to bring the rest of your online presence into the Proton ecosystem. You can even ditch Google Docs for Proton Docs if you want a more private, distraction-free word processor.

Download: Proton Calendar for iOS | Android (free, in-app purchases available)

These updates will bring Proton’s tools closer to the convenience of mainstream apps like Gmail and Google Calendar without forcing users to buy into the data-collection economy.

If you’ve been looking to de-Google your life, then these updates give you even more reason to say goodbye to Google’s data-hungry apps.

ChatGPT’s Monday Voice Is Super Snarky—And It’s Much Better Than I Thought

OpenAI’s latest voice mode, Monday, is grumpy and sarcastic. Maybe it’s somewhat like we feel with the Monday blues. But is it a clever new feature to make mornings more fun or just a novelty that will wear off?

What Is ChatGPT’s Monday Voice Mode?

April Fool’s Day (April 1st, 2025) introduced us to a new voice on ChatGPT called Monday. At first, I thought it would have the personality of a motivational guru egging me on to face the day.

But Monday is irreverently snarky, sarcastic, and often bored. I asked it for a morning pep talk, and the voice drawled back: “Drag yourself out of bed and remember the world is waiting to drain the life out of you!”

The voice and vibe are as sluggish as any of us feels without that shot of cappuccino. The voice stays sassy, whatever you ask it. Like all ChatGPT responses, it will sometimes use whatever you have fed the chatbot over time for its retorts. It gives good answers, but in that snide voice!

Voices are one of the best features to try in ChatGPT, and the Monday voice is a novel take.

How to Access ChatGPT’s Monday Voice

All ChatGPT Free and Plus users can access Monday. But slightly differently.

ChatGPT Plus users can use the Advanced voice mode to chat with it. Head into Settings and set it up as the default voice when you want to talk, or select it from the sidebar directly.

ChatGPT Voice Settings

If you’re using a free ChatGPT account, you’ll have limited monthly Advanced Voice Mode interactions but can still select Monday.

A Fun Feature or a Ploy to Humanize AI?

At first glance, Monday sounds like an April Fool’s prank that you shouldn’t take too seriously. But the more you use it, the more it feels like OpenAI is experimenting with voices that are closer to our emotions. Remember the seasonal Santa’s Voice released by OpenAI during Christmas? That was clearly a gimmick, but Monday feels different.

Like all other voices, OpenAI’s developing voice tech feels more natural for back-and-forth conversations. Monday isn’t any different, with a tone that feels a little too human for comfort.

But do remember, you will get back what you feed into it. Push it further, and its negativity can start feeling toxic. Use it right, and you can have fun with it.

I tried it for a whole week, making Monday my go-to voice assistant. The experience was funny and fresh, breaking through the humdrum. It felt like I had a digital coworker with a hangover. Think of it like a Ron Swanson to your Leslie Knope in Parks and Recreation—grouchy but oddly grounding.

This isn’t the first time we’ve seen tech companies play with personality. Alexa has its Celebrity Voices. Samsung’s Bixby once tried a sassy voice. Elon Musk’s Grok AI has an “Unhinged Mode” that delivers brash takes. Even in the pre-AI age, Clippy from Microsoft Word was our favorite helper with a bit too much personality.

The difference? Monday Voice feels it’s not trying to win a popularity contest. It’s a character of its own. It adds emotional texture to conversations. I even felt it was changing its pace and tone with our conversations. In the age of AI assistants trying too hard to be politically correct, Monday’s bluntness is a bit eerie but refreshing.

Is it just a gimmick? Maybe. But then, it could also be a clever way to test the boundaries of our interaction with AI voices. AI doesn’t have to be emotionless. Sometimes, you only need a sarcastic push to cut through your cluttered thoughts.

Tips and Tricks for Using the Monday Voice

If you want to play around with Monday, here are a few ideas:

  • Monday shines in short, back-and-forth chats. It’s great for morning reminders, quick advice, and sarcastic banter.
  • Try spicing up your usual prompts. For instance, “What’s the best way to start my week?” or “Give me a to-do list that won’t make me cry.” You’ll get answers and also a laugh.
  • The Monday Voice is brazenly negative. I suggest you avoid using it if you aren’t in the right mood.
  • If Monday doesn’t suit you by Wednesday, you can swap it out any time from the voice picker menu.
  • As it’s sarcastic, create your own roasts and standup routines, and have fun (ask ChatGPT a few fun questions about yourself).

Monday voice uses the new faster voice interaction system. You might not see if you haven’t updated your ChatGPT app recently. Ensure you’re on the latest version, as these voices interrupt you less and feel more engaging. You can even pause and gather your thoughts as you speak with it.

If the usual AI assistants are upbeat but robotic valets taking care of your luggage, Monday is your friend with the hangover. We need both in our digital lives.

Monday Voice could be the first of many character-driven AI chatbots. A little spice isn’t a bad thing to make them sound less phony.

It might not suit everyone and every task. If you want pure efficiency or even gentle motivation, Monday won’t be your first choice. Not even on a Monday morning. But you might enjoy what it brings to the table when sitting with friends.

5 Features Netflix Killed That I Want Back

Netflix may be packed with content today, but it’s lost some magic along the way. These five features once made streaming on Netflix savvier, more social, and plain better—and I seriously want them back.

5

Interactive Shows

One of Netflix’s most innovative features for watching was interactive shows. Unfortunately, Netflix has delisted all but four interactive shows on the platform, according to Kotaku, and who knows how long the remaining titles will stay up.

Unlike typical movies and TV shows with a fixed storyline, interactive shows allow you, the viewer, to make choices that affect the storyline, making it engaging.

For instance, in Black Mirror: Bandersnatch, you can make different choices for the characters as you watch the movie—whether they select this cereal or the other, play this tape or the other, and more. Interactive shows brought a new level of engagement to the traditional passive viewing model. I wish the platform could continue investing in more of the same.

4

Play Something

One of the reasons Netflix ranks among the best streaming services is its rich content catalog. With so many options available, picking something to watch can be daunting. In 2021, Netflix offered the Play Something shuffle button as a solution to skip the overwhelming task of choosing what to watch.

All you needed to do was click the Play Something button, and Netflix instantly played something tailored to your tastes. It could be a new movie or TV show that matches your preferences or something you’ve been watching but haven’t completed.

It can be difficult to find what to watch next, and the feature saves you from the decision fatigue that comes with endless browsing. Whether you were in the mood for something new or wanted something similar to what you recently finished, Play Something made it all effortless.

Related

Use These 9 Sites to Find Which TV Show to Watch Next

These sites are able to recommend what TV shows to watch next based on your likes and dislikes.

3

Sleep Timers

Another handy feature Netflix killed that I miss is sleep timers. Sleep timers allowed users to set a timer for how long they wanted Netflix to keep playing, automatically stopping the video after a set time.

While it was only available as a test feature on Android devices, it proved helpful. Sleep timer was a perfect solution for those who like to fall asleep while watching their favorite shows or movies.

Say you are watching an episode of Stranger Things while in bed as you wait for sleep; you can set a sleep timer after 15, 30, or 45 minutes or at the end of the episode. When that timer ends, regardless of whether you’re awake or asleep, Netflix will stop playing.

2

Netflix Friends

Before being removed in the early 2010s, Netflix had a social feature called Friends. It was more like being friends on Facebook, except in the world of watching content. You could add a Netflix friend by connecting your account with another account by sending an email invitation. (You could add up to 50 friends.) Among other features, Friends allowed you to see what your friends were watching or had recently watched.

Plus, you could suggest titles to each other with a personal note on why you think it’s a catch. It was a fun, social element that allowed Netflix to feel more communal and allowed you to discover new shows and movies based on your friends’ preferences right on Netflix.

Without it, Netflix is more of an isolated experience, with more emphasis on algorithmic recommendations. I’m not against algorithmic recommendations, but it would be great if Netflix returned Friends to foster a community feel on the platform. Netflix killed the feature after over five years due to low usage, according to Beta News, perhaps because of the prevalent password sharing at the time. I bet it could be a hit moving forward, thanks to Netflix’s password-sharing crackdown.

1

User Reviews

person rating movie on streaming service five stars
metamorworks/Shutterstock

Once upon a time, Netflix allowed users to leave star ratings and write reviews for movies and TV shows. User reviews aren’t just helpful—they are essential. More often than not, if you found yourself sitting on the fence about watching a given title, user reviews could tip the scales.

User reviews provided insight about any title so you could avoid wasting time watching a series that fizzled out in season two or, worse, canceled. It was like someone from the future giving you a clue about what lies ahead before you hit play. Unfortunately, Netflix removed the feature, replacing it with a thumbs-up/thumbs-down system, with highly rated titles given a Most Liked label.

While it works like a charm in improving your Netflix recommendations, it lacks the nuance and context that user ratings and reviews provide. I can’t tell why people liked or disliked something; is it because of the plot, pacing, or something else? Plus, I can’t warn others when I sit through three hours of something that absolutely isn’t worth it.

Related

How I Use This Movie Review Aggregator to Find New Movies to Watch

Anyone who has ever struggled to find something (anything) to watch on their favorite streaming service(s) should use this site.

As Netflix continues to evolve, it’s understandable that features come and go. But sometimes, what gets left behind are the little things that make the experience more personal, more social, or simply more convenient. Here’s hoping that Netflix listens to its longtime users and considers bringing back some of these beloved features.

7 Ways You Can Unexpectedly Void Your Smart TV Warranty

It is easy to assume that your smart TV warranty is a safety net, ready to catch you if something goes wrong. But that’s often not the case. However, you might end up voiding your smart TV warranty without even realizing it—even if you’re doing something that feels totally routine.

Moving Your TV the Wrong Way

Butus / Shutterstock

Smart TVs are generally delicate, and the screen can easily crack while moving. Standard warranties only cover manufacturing defects, such as if a part fails due to poor craftsmanship. However, they exclude damage from accidents or misuse, including scratches, dings, chips, or battle scars from a bump or drop during a move.

So, to keep your TV safe and your warranty intact for other potential issues, handle it with care. Recruit at least one extra set of hands when moving big screens—these things are awkward to carry solo and can be bad for your spine. If you’re hiring movers, make sure they actually know how to handle electronics—don’t assume they do.

Also, always move your TV in its original packaging if you still have it (especially with those foam inserts and corner protectors) to absorb shock and prevent pressure points. And if you no longer have it, just wrap it in thick blankets, secure it with straps, and avoid laying it flat.

Related

Common Smart TV Issues and How to Fix Them

As intelligent as a smart TV is, it doesn’t stop it from experiencing issues and hiccups.

Electrical Damage

Most TV manufacturers specifically include clauses about electrical damage in their warranty terms, and looking into major manufacturers confirms this. For example:

  • LG’s Warranty Terms explicitly exclude damage from power surges.
  • Similarly, Sony’s warranty [PDF] lists power surges among excluded causes.
  • Samsung follows suit, with its Standard Limited Warranty coverage also excluding such damage, though its extended warranty, Samsung Care+, does cover it for an additional cost.

This is just a small selection of major smart TV manufacturers, but it’s a similar story across the entire industry. These companies expect you to protect their product from power fluctuations that are completely outside your control. It seems unfair, but from their perspective, they don’t want to replace thousands of TVs damaged by local power grid issues.

So, in this case, to protect your TV, invest in a high-quality surge protector to absorb excess voltage. Go for one with plenty of outlets, especially if you’ve got a soundbar, gaming console, or other gadgets piggybacking on your setup. For added safety, especially if you live in storm-prone areas, you can consider a whole-house surge protection system to safeguard all electronics, not just your TV.

Using Unsupported Third-Party Accessories

sylvox deck pro 55 outdoor tv - mounting
James Bruce / MakeUseOf

Just because an accessory fits doesn’t mean it’s safe. If it damages your TV, you’re the one left holding the (very expensive) bag. Let me break this down with a few examples. Say you pick up a super-cheap wall mount that claims to support your TV’s size and weight. It might look fine at first, but if it fails and your TV comes crashing down and shatters, you’re out of a TV and a warranty.

Likewise, if you use a third-party power adapter that isn’t designed for your TV, it might not supply the correct voltage or current. This can damage the TV’s power supply or other components, like frying the motherboard. The manufacturer could argue that the adapter caused this, and so they won’t cover it under warranty.

Even something simple like a USB flash drive can be a hidden landmine. If it’s infected with malware or corrupt data, and you plug it into your TV to play a movie or install an app, it could crash the operating system or even brick your TV firmware this way.

Related

These 9 Accessories Can Make Watching Your Smart TV So Much Better

Your smart TV is good, but it could be great.

Placing the TV in Extreme Conditions

family watching television outdoors in bright sunlight.
GPT4o / MakeUseOf

Big-name TV brands like Sony, Philips, and Samsung actually drop some pretty specific operating specs in their manuals. Most of the time, they suggest keeping your gear comfy in environments ranging from 50°F to 104°F (that’s 10°C to 40°C for the Celsius crowd), with humidity levels chilling below 80%.

Take Philips, for example—its Philips Support page goes into nerd-level detail, laying out ideal conditions as 5 to 40°C (41 to 104°F) with 10% to 70% humidity (as long as it’s not condensing into little droplets of doom). Meanwhile, over on a Best Buy Q&A, Sony’s Insignia TVs are confirmed to thrive in that same 5 to 40°C range. In short, keep your TVs away from temperature extremes, as they just don’t like it. The same goes for humidity.

If you absolutely must install your TV in a less-than-ideal location, invest in protective enclosures specifically designed for that environment. There are Weatherproof TV Enclosures for outdoor setups, and if you’re dealing with dusty or humid areas, look into climate-controlled cabinets or at least dehumidifiers and proper ventilation. You can also toss some silica gel packets around your TV.

Related

I Always Run These 6 Tests Before Buying a Used Smart TV

You can never be 100 percent sure, but running these checks should help you catch most smart TV issues.

Installing Unauthorized Software or Jailbreaking It

a USB drive containing videos attached to a TV
Jowi Morales/MakeUseOf

The appeal of jailbreaking your TV is likely to fall within the following rationale: you want more apps, more freedom, maybe even the ability to sideload that niche streaming service your TV’s app store doesn’t support. But the cold, hard truth is that TV manufacturers really don’t like it when you color outside the lines. If, during or after tinkering with your TV software, it starts glitching, bricks itself during an update, or suddenly refuses to connect to Wi-Fi after you’ve tinkered with its software, you’ve voided the warranty that way.

Unfortunately, even if your software modifications didn’t directly cause the issue, the fact that you altered the operating system at all can be enough for them to deny your warranty claim. That’s how serious they are about this. Now, I’m not here to shame anyone who wants to push the limits of their tech—tinkering with your tech is half the fun—but if you’re going to go down the jailbreaking rabbit hole, do it with your eyes wide open. Know that you’re taking on all the risk, and any repairs from that point forward are going to come out of your pocket.

If you’re desperate for more functionality, I recommend you try safer alternatives first. Look into using any of the best streaming devices like a Roku, Fire TV, or Chromecast—these usually offer way more flexibility, and you can plug them into your existing setup without voiding anything.

Related

Why I Stopped Using My TV’s Built-in Apps and Bought a Streaming Box Instead

Suddenly I don’t feel so frustrated anymore, and I have fewer headaches.

Physical Modifications or DIY Repairs

First, let me clarify what I’m talking about. A physical modification is any change to the TV’s original state that goes beyond normal use. Manufacturers are pretty clear (and stubborn) about this. If you open up your smart TV—even just to “take a look”—you’re almost certainly voiding the warranty. If you break that factory seal on the back, you’re sending a not-so-subtle message that you are “a professional repair technician now!” Except, unless you actually are one, and even if you are, the company’s going to say, “Cool, you’re on your own.”

The reason they care so much is all about control. Manufacturers want to ensure that repairs are completed using genuine parts and following proper procedures. If you or your buddy with a screwdriver mess around inside, you might accidentally damage something else or create a safety hazard, like short-circuiting the motherboard. So my advice is that if your TV is still under warranty, leave the DIY repairs to the company professionals.

Related

10 Incredible DIY Ideas to Upcycle Old TVs

Don’t throw that old TV set away! Upcycle it into something useful with one of these inspiring ideas.

Failing to Register or Keep Proof of Purchase

Proof of purchase, such as a receipt or invoice, is the cornerstone of any warranty claim for your smart TV. It serves as evidence of ownership and the purchase date, both essential for verifying warranty eligibility. Without this document, manufacturers cannot confirm that the TV is within the warranty period or that you are the original purchaser, effectively rendering the warranty void in practice.

Now, here’s where things get a little spicy. According to the Code of Federal Regulations, requiring registration as a condition for a full warranty is considered an unreasonable duty, meaning manufacturers cannot void a full warranty for failing to register. That said, limited warranties, which are the norm for most smart TVs, play by slightly different rules. Manufacturers can ask you to register, but they’re legally bound to be upfront about it. And even if you skip the registration part, your warranty doesn’t just vanish into thin air as long as you’ve got that proof of purchase in hand.

Some brands still play it shady, dropping hints that registration is absolutely mandatory. Consumer advocacy groups like Consumer Reports have called this out, pointing out that it’s often just a sneaky way to scoop up your personal info. So don’t let them guilt-trip you into handing over your data unless it’s truly necessary.

6 Reasons I Skipped a Smart TV and Bought a Streaming Stick Instead

Smart TVs with built-in features and apps may seem convenient, but they’re still not good enough. After dealing with clunky interfaces and sluggish performance, I finally decided to ditch smart TV apps completely and switch over to using my Apple TV 4K full-time—and I’m not looking back.

6

Streaming Sticks Offer Much Faster Performance

Raghav Sethi/MakeUseOf

While high-end smart TVs have decent hardware, most budget and mid-range models are underpowered. Apps take too long to launch, interfaces lag, and basic actions just feel slow.

Devices like the Apple TV 4K or Google TV Streamer are simply better. They’re optimized for speed, boot up faster, and switching between apps feels effortless. For someone who hates laggy, buggy interfaces, the difference is night and day. I’d much rather plug in a compact device that just works than deal with clunky smart TV software that feels outdated in a year.

Related

Change These 4 Settings to Boost Your Smart TV Performance

If your smart TV feels sluggish, you don’t need to upgrade immediately.

5

You Get More Frequent Software Updates

TCL Q6 Pro Series TV at CES 2024
Hannah Stryker / MakeUseOf

Smart TVs have improved with updates, but you’re still at the mercy of the manufacturer’s update cycle—which can be painfully slow or inconsistent. With streaming devices, that’s not a problem.

Streaming devices like Apple TV or Amazon Fire TV Stick receive regular updates simultaneously across all models, adding new features and performance improvements. Moreover, all Apple TVs receive the update at the same time. Google and Amazon follow a similar approach with their streaming sticks. In contrast, I’ve had smart TVs that haven’t seen a meaningful update in over a year.

4

It’s Way Easier to Upgrade Over Time

The Roku Ultra next to the Voice Remote Pro
Hannah Stryker / MakeUseOf

Unlike smartphones, which we upgrade every year or two, smart TVs tend to stay on our walls and in our cabinets for years. Over time, smart TVs can become slow, even if the display, sound, and other hardware still work perfectly. In these cases, you’re often forced to upgrade the whole TV—even when everything else is fine.

Using a streaming device eliminates that problem. When your streaming stick starts to feel sluggish, you can simply replace it with a newer model and instantly restore fast performance. And all that at a fraction of the cost of buying a new smart TV.

3

You Can Carry It Anywhere With You

amazon fire stick 4k max with fire stick boxes background
Amazon/NYCStock/Shutterstock

Another benefit of using a streaming device over built-in smart TV software is portability. Unlike TVs, you can take your streaming stick anywhere. Whether you’re at a hotel or visiting a friend’s home, just plug the device into an HDMI port and instantly bring your apps, preferences, and streaming services with you. You don’t need to re-enter your credentials or deal with someone else’s setup.

2

Streaming Devices Support More Apps and Services

Plex app icon on an Apple TV
Justin Duino / MakeUseOf

While smart TVs typically come with a few popular apps preinstalled, they often lack support for many niche or newer streaming services. Some apps are either missing entirely or don’t run well.

Streaming devices like the Chromecast, Roku, and Fire TV Stick provide access to a much wider range of apps. And they usually offer better performance, too. In fact, these devices often get access to new apps before smart TVs do.

Related

The 15 Best Android TV Apps Worth Installing ASAP

Just bought an Android TV device? Here are the must-have Android TV apps to install on your device today.

1

It’s a Much More Cost-Effective Setup

Person holding a 4K Chromecast with Google TV
Jordan Gloor / MakeUseOf

Getting both great performance and high-quality visuals in a smart TV can be expensive. Higher-end models with fast software cost significantly more. But if you’re happy with your current TV’s display and sound, adding a streaming device is a much more cost-effective option.

For under $50, devices like the Chromecast with Google TV or Fire TV Stick 4K deliver faster performance, more reliable updates, and better app support than most built-in smart TV platforms. You’re not paying extra for software that might become laggy within a year. And when it’s time to upgrade, replacing the stick is far cheaper than replacing the whole TV.

If your TV still performs well in terms of display and sound, and only the software feels outdated, upgrading to a streaming device makes a lot more sense. I was in the same situation—considering an upgrade from my Xiaomi TV to a Sony Bravia—but instead, I bought an Apple TV, and it completely changed my experience.

Until manufacturers start treating software as seriously as display and sound quality, I’m sticking with my Apple TV 4K. I don’t see myself replacing my smart TV anytime soon—at least not because of laggy software.

Grab This Discounted Apple TV+ Subscription for Both New and Returning Subscribers

If you’re looking for a great way to snag a discounted Apple TV+ subscription, Apple is ready to help with its latest promotion.

An Apple TV+ Subscription Is Available for 70 Percent Off

First spotted by 9to5Mac, just head to the Apple TV+ site and sign up for the streaming service for $2.99 per month for three months. A big plus is that the promotion is available for new subscribers along with anyone who is returning to the streaming service.

You’ll have to subscribe directly from Apple to get the discount instead.

After the promotion period is up, you’ll be charged the normal $9.99 per month subscription price, but you can easily cancel at any point to avoid that.

The special price is timed before the launch of the latest Apple TV+ series, Your Friends and Neighbors, launching on Friday, April 11. The show stars Jon Hamm as a financial titan who finds himself out of a job and divorced. So he starts robbing his financial circle to stay afloat, but eventually runs into more than he bargained for. It also stars Olivia Munn, Amanda Peet, Mark Tallman, and Donovan Colan.

This new promotion marks the second time this year that Apple has worked to get more eyes on its streaming service. In early January 2025, anyone could watch Apple TV+ free for a weekend.

A Wave in Popularity After the Second Season of Severance

The apple tv+ logo on a mobile screen surrounded by popcorn and some earbuds.

Burdun Iliya/Shutterstock

And if you’re looking to take advantage of the most recent promotion, you’ll get to enjoy the just-concluded second season of Severance that garnered critical acclaim.

Some of my other favorites on Apple TV+ include the science fiction series Silo, Foundation, and From the Earth to the Moon. Comedy is another place that the streaming service excels with great options like Ted Lasso, Shrinking, and Bad Monkey.

Along with full movies, another one of my favorite ways to enjoy Apple TV+ is Friday Night Baseball games with battles from teams all around the MLB.

While Apple TV+ is obviously found on all Apple devices, including the Apple TV streaming box, iPhone, iPad, and Mac, you can also find the service on a wide variety of smart TVs and other streaming hardware like Roku and Amazon Fire TV. Back in February 2025, Apple reached across the aisle and brought the Apple TV app and Apple TV+ subscription to Android users.

There are obviously a wide variety of streaming services that want your subscription cash, but one of the most overlooked advantages of Apple TV is something you might not know about. Unlike many other competitors, offline downloads don’t expire on Apple TV+ if you don’t watch them. The content will stay available on your device as long as the subscription is active, and the titles remain on Apple TV+.

It’s Free to Start Using This Amazing Chinese AI Chatbot—and You Get a Sign-Up Bonus

The so-called “next big thing” in AI chatbots has officially launched to the public, offering a sign-up bonus when you do. Manus, the AI chatbot some consider better than ChatGPT and DeepSeek, is now open for business.

Sign Up For China’s Latest Big AI Chatbot and Get a Handy Bonus

Manus is one of the latest and greatest additions to the AI chatbot world, launching in March 2025. Unlike other AI chatbots, Manus has a much stronger focus on deep thinking and answers most prompts with in-depth responses. It’s similar to ChatGPT’s Deep Research mode, with Manus compiling an extensive report for each query, showing its working processes and a timer.

And now, Manus sign-ups are officially open to the public. Come one, come all. Any new Manus subscribers receive a handy 1,000 credits to spend on whatever queries they desire. Of course, the number of credits used per report varies. Indeed, prompting Manus to build a report on “What is MakeUseOf.com” took a good eight minutes—but it was comprehensive, identifying myself and Editor in Chief Ben Stegner as long-term contributors and detailing information on our yearly page views. This report consumed around 50 credits, leaving me with 950 or so for my next outing.

manus ai app analyzing stock with report.

I then opted for a deep stock evaluation for a company called Quadrise, which manufactures synthetic biofuels designed to drastically reduce the amount of pollution from giant cargo ships (and the marine industry). I was genuinely a little concerned about how long this report took; I was still waiting for the analysis to complete after 20 minutes. However, it was worth waiting. Manus’s report on Quadrise stock was about as in-depth as I could have hoped for, with insights into stock price, company outlook, its products, overall potential, and more, all with a technical analysis.

This second report used around 250 credits, depleting my count to around 700. The reality is that your 1,000 free Manus credits aren’t going to last for a huge amount of time. This is especially true if you opt for intensive research topics or prompts that may require multiple rounds of edits, like coding tasks or similar.

What’s interesting about Manus is that it’s also touted as “the general AI agent.” Now, AI agents are autonomous AI tools that can take actions for you online, automate processes for you, troubleshoot errors, and much more. In that, I tasked Manus with buying a train ticket for me, traveling from Penzance to St. Ives in Cornwall, traveling and returning on the same day. It worked through the process in handy steps, providing a list of travel times and offering me a selection of prices.

It’s useful, there is no doubting that. But in this specific task, I would have had the job done within minutes on my own. This is a specific example, but there are other similar tasks to which this time delay extends.

I must admit I’m a little late to the Manus crowd. But having signed up and given it a go, I can say it’s a very handy AI tool to have in the catalog. But if the 1,000 credits aren’t enough for you, there are two packages you can upgrade to:

  • Upgrade to Manus Starter beta for $39 per month

    • Grants 3,900 credits per month
    • Run up to two tasks simultaneously
  • Update to Manus Pro beta for $199 per month

    • Grants 19,900 per month
    • Run up to five tasks at the same time
    • High Effort mode and other beta features

Both upgrade options receive priority access during peak hours and extended context length, which is handy for those deep research topics where you need lots of inputs and edits.

I Tried 8 Task Management Apps—Here’s the One That Stuck

Every new task app felt like a fresh start—until the notifications piled up and I ghosted it. After too many attempts, one finally made me stop tweaking and just get stuff done.

Anything was better than nothing in my early days of productivity, which is why I first turned to Microsoft To Do. The app is free to use, and I like that you can choose between grid and list views. Populating a to-do list is as simple as entering the task and hitting the Enter key.

To Do integrates well with Outlook; the Flagged email feature provides easy access to any messages you’ve marked as important. Choosing different task categories can help keep everything organized; the Lists feature helps avoid overwhelm.

Setting up recurring tasks in Microsoft To Do and creating reminders if needed is possible. I used to mark the most essential assignments on my list as Important.

I stopped using Microsoft To Do because it was too basic. While writing down my chores or a grocery list is fine, I wouldn’t use it for my work.

Download: Microsoft To Do for iOS | Android (Free)

After realizing I needed something more substantial, I switched to Trello. The app is much more user-friendly now than when I first started using it, and it feels significantly less cluttered. I liked being able to create multiple boards, and the board view made keeping track of my tasks very straightforward.

Trello has comprehensive customization features for each card. I can add a simple description, upload attachments, and create checklists for more complex tasks. If needed, I can even create my own custom fields. Besides being great for professional reasons, Trello is also good for personal use.

A board being created in the Trello app

While Trello does have a paid plan, I never felt a reason to upgrade. I stopped using the app because it was too complex at the time, but since that’s no longer a problem, I can recommend Trello for effective project management.

Download: Trello for iOS | Android (Free, in-app purchases available)

Notion is one of the most customizable task management tools I’ve ever used. I used it for daily to-do lists, and the app has various templates for productive routines. I could create comprehensive Gantt charts for planning big projects and editorial calendars for my creative assignments.

When creating tasks in Notion, I can add descriptions, links, due dates, and other helpful information. It also doubles as a note-taking app, and when combined with Notion Web Clipper, the tool will help you perform research and keep everything organized.

Update Status of a Task in a Notion Gantt Chart

I still use Notion, but not for task management (except for content calendars). While the app looked great and made me feel productive, I wasted too much time focusing on the design and spent less working on my tasks.

Download: Notion for iOS | Android | Windows | macOS (Free, in-app purchases available)

Google Tasks is the Google equivalent of Microsoft To Do. It’s similarly straightforward to use; I just have to enter my task name and hit the Enter key for it to take effect. Beforehand, I can add due dates if I feel like it’s necessary. One simple but effective feature is being able to mark a deadline as Today or Tomorrow without having to expand the calendar.

Using the Google Tasks web app to plan day

If I want to divide my tasks, I can create new lists. When browsing the app, I found it more intuitive than Microsoft To Do. Everything seemed to load faster, and changes took effect more quickly.

I stopped using Google Tasks because, like Microsoft To Do, it didn’t offer the more advanced tools I needed to track my tasks. Nonetheless, it’s still good for complete beginners.

Download: Google Tasks for iOS | Android (Free)

TickTick is one of the most advanced task management apps I’ve used, and it’s gotten even better over the past few years. Besides making basic to-do lists, you can automatically create lists when signing up for an account. TickTick gives you templates like work and shopping; you’ll see how everything looks on the left-hand side in real time.

Customizing the interface in the TickTick app

Besides to-do lists, TickTick offers many other task management features. For example, you can choose whether you want to add a habit-tracker or the Eisenhower Matrix to your left-hand side. If you work with the Pomodoro Technique, you can add this to your taskbar as well (just make sure you first understand the downsides of using the Pomodoro Technique).

TickTick lets you add sections in addition to lists. This allows you to break down your day more effectively; for example, I use “work” and “admin”. While you can upgrade to a premium plan, I don’t think it’s necessary.

Creating tasks in the homepage on TickTick

My only real complaint with TickTick is that it sometimes doesn’t feel very intuitive. For example, I needed to expand a menu to make new sections. While great for many users, it wasn’t the best option for me.

Download: TickTick for iOS | Android | Windows | macOS (Free, in-app purchases available)

I look at Any.do as a cross between TickTick and Trello. I like the board view; as someone who likes seeing an overview of what I need to work on, it gives me full clarity. While the app interface is cluttered, it’s at least responsive.

Like many task management apps, Any.do has a list-creation feature. If I didn’t want the board view, I could look at my day or all of my tasks instead. The app lets me create tags and identify my priorities to better organize each task.

The Any.do web app on a screen

Another cool thing about Any.do is the ability to add sub-tasks. For example, I could make Writing my main task and then make separate to-dos for each piece—ticking them off as I completed them. The paid version of Any.do has an additional feature where it can suggest sub-tasks.

Despite Any.do being relatively useful, the interface was too bloated for me. So, while it’s good, it’s not better than some of my other top picks.

Download: Any.do for iOS | Android | Windows | macOS (Free, in-app purchases available)

Despite being one of the first productivity apps I ever used, Todoist remains one of the best. Creating tasks and subtasks is straightforward, and I like how the interface balances simplicity with a good enough suite of features.

The search function is helpful and allows me to look for anything I’ve added as a task, but that’s not all. I can quickly skip my upcoming tasks, filters and labels, inbox, and more. The Projects section works similarly to creating lists in other to-do list apps.

Manage your tasks in Todoist via the Mailbird app.

Another nice thing about Todoist is the ability to set deadlines by simply typing a day or date. I can also type if you want certain tasks to repeat themselves. While Todoist has a paid subscription, I’ve never felt the need to upgrade.

I still use Todoist, though it isn’t my top task management app. Rather than using it for work, I use the tool to plan weekly tasks for my additional creative projects. I typically use the tool from my phone widget rather than going into the app.

Download: Todoist for iOS | Android | Windows | Mac | Linux (Free, in-app purchases available)

Despite trying countless task management apps, Things 3 is the best to-do list tool. I initially thought it was quite expensive (it costs $49.99 as a one-time purchase on Mac), but I’ve had a fantastic return on investment since downloading it. The app is easy to use, and organizing tasks is very straightforward.

Since I can copy and paste tasks (before editing them), I organize my week in a fraction of the time it used to take me. I also like how responsive the desktop app is. Since it’s very easy to use, I feel no need to use the browser version; as a result, I’m less prone to getting distracted by opening new tabs.

The Things 3 Mac App Interface

The app is only valid on the device for which I download it. Since I use Things 3 on my computer, I counteract this problem by using Todoist on my smartphone and tablet. Another drawback is that while available on Mac, you can’t use Things 3 on a Windows computer (or non-Apple devices).

Download: Things 3 for macOS | iOS | visionOS (Pricing varies)

Task management apps are an excellent way to simplify daily workflows. While I think Things 3 is the best, any I’ve mentioned will work. Your choice depends on your preferences regarding features, design, devices, and budget.

This Is How Hackers Target Everyday People With AI Chatbots

Hackers are using generative AI to target people more effectively and cheaply than ever before. While you may be confident in your ability to detect malicious attacks, now’s a great time to brush up on the latest tactics they use to exploit people.

How Do Hackers Use AI to Pick Their Targets?

Song_about_summer/Shutterstock

Hackers rely on stolen social media profiles to scam people. To steal online identities, they often create fake profiles that mimic real users or hijack actual accounts to exploit trust and manipulate victims.

AI-powered bots can help scrape social media for photos, bios, and posts to generate convincing cloned accounts. Once a scammer builds a fake profile, they send friend requests to the victim’s contacts, tricking them into thinking they’re interacting with someone they know.

A real account opens more doors to using AI for more effective, unique, targeted scams. AI-powered bots can identify close relationships, reveal hidden information, and analyze past conversations. From there, AI chatbots can take over and start chatting with them by imitating speech patterns and pushing scams like phishing links, fake emergencies, financial requests, or to share sensitive information.

For example, I’m sure you’ve seen a friend’s Facebook account compromised and used to post phishing links on their Facebook feed. That’s just one part of an account takeover. Once compromised, a scammer can use AI tools to message everyone in the scam account’s contacts, hoping to snare more victims.

Due to these developments, many web services use complex, hard-to-solve CAPTCHAs, mandatory two-factor authentication, and more sensitive behavior tracking systems. But even with these extra defenses, people are always the biggest vulnerability.

Types of AI-Powered Scams You Should Know

Cybercriminals use multi-modal AI to create bots or spoof high-profile individuals or groups. Though many AI-powered scams use conventional social engineering techniques, the use of AI enhances their effectiveness and makes them harder to spot.

AI Phishing and Smishing Attacks

A woman using a laptop with a phishing email on the screen.
px.palette / insta_photos / Shutterstock

Phishing and smishing attacks have always been a staple among scammers. These attacks work by imitating well-known companies, government agencies, and online services to steal your credentials and log in to your accounts. Though widespread, phishing and smishing attacks can be easy to spot. Scammers often need to play the numbers game to get any beneficial results.

In contrast, spear-phishing attacks are far more effective. These require attackers to conduct research and reconnaissance, crafting highly personalized emails and texts to scam people. However, spear-phishing attempts are rare in our inboxes because they demand significant effort to execute successfully.

This is where AI becomes dangerous. With AI chatbots and other AI tools, cybercriminals can automate mass spear-phishing attacks without spending significant resources or time on funding the campaign. Deepfake videos of important individuals may even be used to supplement the attack and make the bait more effective. In one instance, YouTube had to warn creators about phishing scams involving a deepfaked video of its CEO, designed to trick them into revealing their login credentials.

Romance Scams

man and woman hiding behind balloon with scam alert sign
Pixel-Shot / DG-Studio / Shutterstock

Romance scams manipulate emotions to gain trust and affection before exploiting victims. Unlike regular phishing scams, where social engineering ends once you surrender your credentials, romance scams require scammers to spend weeks, months, or even years building relationships—a tactic known as pig butchering. Due to this significant time investment, cybercriminals can only target a few people at a time, making these scams even rarer than manual spear-phishing attacks.

However, scammers today can use AI chatbots to handle some of the most time-consuming aspects of romance scams—chatting, texting, sending pictures and videos, and even making live phone calls. Since targets are often emotionally vulnerable, they may even subconsciously excuse AI-generated conversations as quirky or even charming.

The Scottish Sun covered an incident where a neuroscientist lost thousands of pounds on an AI-powered romance scam. The fraudster employed AI-generated videos and messages to convincingly portray a romantic interest. They fabricated an elaborate story about working on an offshore oil rig and used deepfake technology to convince the victim of the legitimacy of all their claims. This use of AI tools warns us of the evolving tactics scammers utilize to exploit victims.

AI-Enhanced Customer Support Scams

robot making robo calls in giant call center
Gavin Phillips/DALL-E/MakeUseOf

Customer support scams exploit people’s trust in major brands by impersonating help desks. These scams work by sending fake alerts, pop-ups, or emails claiming that your account has been locked, needs verification, or has an urgent security issue. Traditionally, scammers had to interact with victims manually, but AI chatbots have changed that.

AI-powered customer support scams now use chatbots to automate conversations and make them feel more convincing. With automation tools like n8n, chatbots can respond in real time, mimic official support agents, and even reference knowledge bases to appear more legitimate. They often implement phishing tactics by using cloned websites to trick victims into entering their credentials.

AI support scams can also go the other way around. Scammers may use AI agents to contact important services such as banks and government programs to get a target’s data or even reset their login credentials.

Automated Misinformation and Smear Campaigns

Hackers are now using AI chatbots to spread misinformation at an unprecedented scale. These bots generate and share false narratives across social media, targeting news feeds, community forums, and comment sections with fabricated comments. Unlike traditional misinformation campaigns that require manual effort, AI agents can now automate the entire process, making fake news spread faster and more convincingly.

By automating the creation of real social media accounts, bots can craft and interact with posts to spread misinformation. And with enough of these bots circulating on the internet, they can turn those uninformed or undecided to side with their narrative.

Beyond simple deception, hackers also use AI misinformation campaigns to drive traffic to scam websites. Some mix fake news with fraudulent offers, tricking victims into clicking malicious links. Because these posts often go viral before fact-checkers can respond, many people unknowingly spread the disinformation further.

What Can I Do to Protect Myself?

gmail scam email
MMD Creative / Shutterstock

Though hackers are using AI in all kinds of tasks, they have found the most use in enhancing social engineering attacks. So, to defend against most AI-powered scams, we have to put more effort into securing our privacy and verifying the legitimacy of messages, posts, and profiles.

  • Limit Personal Information Sharing: Avoid being targeted in the first place. Think before sharing personal details on social media. Scammers use this info to craft targeted attacks.
  • Be Skeptical of Unsolicited Communications: If you get a sudden call, message, or email from someone you don’t know, verify with your friends, family, colleagues, or anyone on your network before responding.
  • Beware of Deepfakes: AI-generated deepfakes can mimic voices and appearances. Be cautious of unexpected video calls and messages from high-profile entities. Always check for verification badges, follower/subscriber count, and the accounts interacting with their posts.
  • Think Before You Click: Phishing links that look like normal posts are still rampant on social media. Does the play button look flat or edited? Does the post look confusing? Is it supposed to look like a video but also an image and external link at the same time? Better not engage with those types of posts.
  • Check and Verify News Post: Whether you want to avoid being misled by scammers or stay informed, always cross-check information from multiple sources. Also, check the comment sections—bot accounts often have usernames with a combination of numbers at the end to ensure username availability during creation.

AI chatbots offer convenience but also empower hackers with advanced scamming tools. But remember, many AI-assisted scams still follow the same patterns as traditional scams. They’re jThey’reder to spot and more widespread. By staying informed and verifying all online interactions, you defend yourself against these evolving threats.

Don’t Buy These 5 Smartphone Photography Gadgets

Buying lots of extra gadgets might make you feel more professional, but getting the wrong things won’t improve your photography. Instead, you’ll have less money and more pointless clutter. I’ve wasted money on enough clickbait camera gadgets to spot the duds from a mile away.

1

External Lenses

You can get all kinds of external lenses for your phone—telephoto, macro, fisheye—but, most of them aren’t worth it

Many modern smartphone camera lenses are of good quality, especially if you shoot at 0.5 or 1x. While their zoom is admittedly still poor, I don’t think that buying an external lens will help much. I honestly believe it’s worth spending the extra money to buy a DSLR camera with an 85mm lens if you like taking photos of faraway subjects.

Gavin Phillips / MakeUseOf

Although some smartphone camera lens brands are good, many feel cheap and won’t last long. The filters that come with them also aren’t great. Using the features on your phone, and then using apps that can enhance your photos, will make you a better photographer in the long run.

2

External Lights

Taking good photos without considering the lighting is very difficult, and external lights are therefore appealing. But in most situations, they’re unnecessary for smartphone photography, especially if you’re only a hobbyist.

Understanding how to get the perfect lighting in your smartphone pictures is a much better starting point than buying external lights. There are plenty of light spots indoors and outdoors, and you can position your subjects to make the most of them.

Knowing the best times for photography will also make a huge difference. Golden hour is always a winner for portraits, for example. If you really need to, you can use your phone’s flash when shooting indoors.

The only exception to not buying external lights would be a ring light. These can be useful if you’re recording content for YouTube or trying to take a professional headshot with your smartphone.

3

Smartphone Handles

DSLRs have a proper grip for a reason—it makes them easier to hold and shoot with. Some companies try to bring that same experience to smartphones with attachable handles, but most miss the mark.

Many smartphone handles are clunky and surprisingly difficult to hold. These issues make you less likely to use them, which results in wasted money. Since many are surprisingly expensive, this is not a good combination.

A man taking photos on their smartphone while standing next to the ocean
Danny Maiorca/MakeUseOf

We all know that smartphones are very easy to drop. You’ve probably lost count of how many times you’ve dropped yours, and you may even have endured the pain of needing to replace your screen after it’s cracked. But still, better solutions exist than smartphone handles.

You’re much better off buying a high-quality smartphone stabilizer, such as the DJI Osmo Mobile 7. It’s only slightly more expensive than many smartphone camera handles, and yet, it’s more versatile and will last longer.

4

Poor-Quality Tripods

While smartphones have good image stabilization these days, a tripod can still help eliminate blur—especially for long-exposure images. You’ll find many great smartphone tripods; I used one by JOBY that was affordable, durable, and easy to carry around.

The problem, however, is that many tripods are low-quality. You will notice the difference in several areas. Firstly, they won’t last as long; I’ve had some tripods that were cheap in price and quality. After one outing in windy weather, they were finished. You often have to pay more to replace these kinds of items, which is why I don’t shop with Temu or on similar marketplaces.

Use Tripod to Capture Beautiful Night Photos
Digvijay Kumar / MUO

Besides having bad durability, poor-quality tripods offer little stability. They’re more likely to move during windy weather, for example, which defeats the purpose of having one. You’d be better off putting your phone on a flat surface.

5

Excessive Stabilizers

Gimbals and tripods can be great additions to your smartphone photography kit if you invest in quality; even more so if you also use them for vlogging. However, excessive handheld stabilizers, where you have to use both hands, are typically a complete waste of money.

Even for video, they’d be useless—but if you’re taking photos with your smartphone, having one hand to push the button is a good idea. Many often come with additional lights, which you probably won’t use very often.

Setting up these stabilizers takes a lot of time. You have to screw your phone onto them, in addition to setting up the other bells and whistles. Because they take so long to set up, you probably won’t use them much even after buying them.

Many smartphone photography gadgets are gimmicks, and you should understand the problem you’re trying to solve before buying one. You can fix many issues with proactivity and creative thinking, while your device will handle others (e.g. image stabilization).

These Are the 4 Best AI Chatbots For Handling Big Conversations

I love using AI chatbots for long, complex conversations. But the truth is that some AI chatbots handle lengthy chats much better than others due to what’s known as a context window—and these are my four favorite AI chatbots for the job.

4

Claude

When it comes to handling lengthy conversations, Claude is genuinely impressive. Anthropic’s latest model, Claude 3.7 Sonnet, boasts a massive 200K context window, allowing it to process lengthy conversations. Its other models have a reasonable 128K context window. This is helpful for those marathon brainstorming sessions where you need the AI to remember what you discussed 150 messages ago.

I’ve found Claude particularly excellent for data visualization projects. It allows you to generate code through its Artifacts feature (Claude version of ChatGPT Canvas) so you can collaborate with it on complex data analyses and receive functional visualizations—something most other chatbots struggle with. It’s also fantastic for using Claude to read huge Google Docs when extracting specific information.

The 200K context window goes better with the Extended Deep Thinking mode, though you’ll need the Pro subscription at $20 monthly to access it. This feature gives Claude more time to consider complex problems before responding, which improves answer quality for math and coding topics. I’ve noticed it makes fewer logical errors compared to standard AI responses.

The interface is clean and distraction-free, making it easy to follow the conversation even as it grows. If you regularly work with technical documentation or need to maintain context through lengthy exchanges, Claude should be your first choice.

Download: Claude (Free, premium subscription available)

3

ChatGPT

Several factors make an AI chatbot good at lengthy conversations. These include context window size, memory features, and processing capabilities for complex topics. ChatGPT hits most of these marks, making it a strong contender for extended AI discussions.

ChatGPT’s GPT-4.5 model maintains the same 128,000 token context window as previous versions—enough to process approximately 100,000 words in a single conversation. This capacity lets you reference information from old messages without losing track of important details.

I’ve found ChatGPT’s Deep Research tool particularly useful when exploring complex topics that require connecting multiple concepts. The chatbot doesn’t get confused when you switch between related subjects. It maintains coherence even as conversations branch into different areas.

The free version gives access to basic models, though with a more limited conversation length. The Plus subscription removes these limitations for $20 per month.

Also, you can access OpenAI’s o1 model (available only through subscription) and other similar ChatGPT features through Microsoft Copilot for free. This makes it easier to test advanced reasoning features before committing to the paid plan.

Download: ChatGPT (Free, premium subscription available)

Related

The 6 Best ChatGPT Features You Must Try

ChatGPT has an extensive list of features, so don’t skip the best ones!

Meta AI has slowly been climbing my list of go-to tools for different queries. Powered by Llama 3.1 (and now Llama 3.2 in some regions), it offers a 128K token context window, matching ChatGPT but still lagging behind Claude’s 200K window. It remembers details from earlier in conversations better than I initially expected.

What sets Meta AI apart is its integration across platforms. You can use Meta AI on WhatsApp, Messenger, Facebook, and Instagram, which is convenient when you’re already in a messaging flow. No app switching is required. You just tag the AI in your existing conversations when you need it.

For privacy-minded users, Meta offers local AI options through Hugging Face. You can experiment with running these models on your own hardware and start using Llama 3.2. While it’s not as polished as the cloud version, there’s something satisfying about keeping your data on your device.

If you’re wondering how it compares to competitors, check out our guide on how Meta AI is better than other chatbots in some areas for a deeper comparison.

Related

Here’s Why I Refuse to Use Meta AI on Any Meta Platform

While you can find Meta AI on Instagram, Facebook, and WhatsApp; I avoid it completely.

1

Google Gemini

Google Gemini has completely changed the approach to handling long conversations with AI. While other chatbots max out at a few hundred thousand tokens, Gemini 2.5 Pro Experimental boasts a mind-boggling two-million token context window—literally ten times what Claude offers. Even the standard models like Gemini 2.0 Flash and Flash-Lite support one million tokens each.

What impresses me most is how Gemini can actually watch YouTube videos and provide summaries. You can use this to extract key points from long lectures and tutorials without watching the entire video. It can save you hours when researching technical topics or following complicated tutorials.

The integration with Google’s ecosystem makes Gemini powerful for extended conversations. Gemini can connect with your Google Search history, which means it can reference information you’ve previously researched without you having to explain everything from scratch.

But if you’re still curious about its full capabilities, check out our guide on the best Google Gemini features. And if you’re an occasional user, you’ll be pleased to know that you can even generate images of people using Gemini.

Download: Google Gemini for Android | iOS (Free, premium subscription available)

What’s the Best AI Chatbot For Long Conversations?

Each of these AI chatbots has unique strengths for handling lengthy conversations. I mostly use Claude, but after using them all, I’ve found myself switching between them depending on my specific needs rather than sticking to just one.

For code-heavy discussions, Claude’s Artifacts feature wins for me. ChatGPT’s Deep Research is better for in-depth analysis (but you have a limited number of uses). Meta AI tops at casual back-and-forth, while Gemini’s large context window handles the longest conversations. If you’re still undecided, Google’s Gemini is underrated, and you should try it out.

The key is finding which one matches your conversation style and needs. I recommend trying all four before settling on your go-to.

Related

The 9 Best Local/Offline LLMs You Can Try Right Now

Looking for LLMs you can locally run on your computer? We’ve got you covered!

It’s worth mentioning that other AI assistants like Jamba 1.5 Large by ai21labs also offer impressive context windows. However, these typically require local installation on your own hardware. I tried this route briefly but found it demands a powerful GPU and technical know-how that not everyone has.

For most users, the cloud-based options I’ve highlighted will deliver better performance without the hassle of managing local installations. Sticking with the big four is probably your best bet unless you’re concerned about privacy or have specialized needs.

I Hacked My Household Chores With This Overlooked iPhone Tool

The iPhone’s Magnifier app is more powerful than we realize. I started using it to read tiny labels on medicine bottles. I ended up discovering a dozen ways it can make everyday life easier.

1

Decipher Unreadable Labels on Medicine Bottles

Let’s start where my Magnifier journey began. Prescription labels and supplement bottles often use tiny fonts to fit everything in the corner. Ensuring the right composition, instructions, and expiration date is critical.

The Magnifier is a digital magnifying glass and an image-to-text OCR tool. Tap on Capture and then select the Reader icon to display the text.

Tap the Text button (double-A) and adjust readability by tweaking the text’s font, size, and color. To hear the text spoken aloud, tap on Listen.

The Magnifier makes the iPhone user-friendly for seniors. But it’s also handy for reading tiny fine print on everyday items like insurance policies, clothing care labels, and ingredient lists on food packaging.

2

Find Dust in Hard-to-Reach Places

Keyboards, vents, remote controls—dust hides where your eyes can’t easily go. You can easily use the Magnifier to zoom into tiny crevices and spot what needs proper cleaning.

It’s convenient for finding lint in charging ports or headphone jacks. Boost the view by sliding the Contrast levels, which helps the foreground object stand out.

Of course, I am always careful not to lose my grip on the phone and let it slip from my hands.

3

Check for Leftover Stickers and Residue

Whether repurposing jars or unboxing new electronics, you’ll often find half-peeled stickers or leftover gunk (for instance, on a car windshield) that’s hard to spot. Use the Magnifier with increased contrast settings to see and scrape off every bit of residue.

Blame my perfectionism, but I also use the Magnifier to check for tiny bubbles after applying a screen protector on a new phone.

4

Detect Tiny Splinters or Cuts on the Skin

If you’ve ever gotten a splinter but couldn’t tell if it was still in your finger, Magnifier is your new best friend. It helps zoom into cuts, scrapes, or irritated skin to assess what’s happening without grabbing a flashlight and mirror.

Remember, the Magnifier works just as well with the front camera if you want to do some self-inspection around your face.

The Magnifier is not a medical device. Please seek a doctor’s advice for injuries.

5

Look Into Awkward Corners Without Twisting Your Neck

Some places are nearly impossible to peek into, from under the couch to behind the washing machine. The iPhone’s flashlight, combined with the Magnifier, lets you check for fallen items, dust bunnies, or pests without crawling on the floor.

The Magnifier’s Contrast filters have become my secret weapon for this chore. By adjusting the colors (try the Red filter) and sweeping the camera over the area, I can make the lost item pop against the background. Earrings, screws, or stapler pins… you’ll be surprised what suddenly becomes visible.

If you use a specific Magnifier setting frequently, save it as an Activity. It’s like a pre-set for specific activities you perform with the Magnifier. The Magnifier remembers the last settings used; booking each as an Activity helps to organize the settings for their unique use.

I wanted to buy one of those field microscopes for my niece. Then, one afternoon, I handed my phone to my niece and opened the Magnifier. She ended up exploring the backyard, inspecting bugs, leaves, and bark textures up close.

It’s like giving them a “free” microscope on a familiar device kids use for YouTube and TikTok shorts. And they can always use it to bear down on something and take nice macro photos of common objects.

The Magnifier can zoom up to 10x. Zoom levels can be adjusted with a swipe on the screen instead of using the slider.

7

Read Serial Numbers and Model Info on Devices

Serial numbers are often printed in the tiniest fonts on the backs or bottoms of electronics. Instead of grabbing a magnifying glass, launch the app and zoom in.

You can use Capture to take a photo or to jot things down before sharing it with technical support.

8

Spot Fine Fabric Damage or Stains

We often don’t notice tiny tears and upholstery stains. The Magnifier can catch what our eyes might miss, especially on patterned or textured surfaces.

It’s a subtle but helpful tool for understanding clothing care instructions. I occasionally use it to zoom in on counterfeit logos and lousy stitching.

9

Snap Photos Without Saving Them

The Magnifier is ideal for capturing impromptu photos without saving them in the Photos app. You can click single or multiple images and share them directly from the app. Tap on Capture directly to click a single photo.

Alternatively, you can tap the two-overlapping rectangle icons to enable the Multipart mode and click multiple shots in one go.

You can also save the images in your Photos app via Save Image under the Share options.

10

Read Cooking Instructions Without Squinting

Frozen foods and sauce jars often have microscopic cooking instructions or expiration dates. Rather than bringing them to the brightest room in the house, point your iPhone at the label, zoom in, and adjust brightness or filters if necessary. If tour eyesight is poor, use the magnification to read the graduated levels on measuring jars.

The OCR behind the Magnifier can read neat, handwritten text but fails with the messier ones.

11

Document Flaws for Customer Support

Shopping online? Before returning a defective item, use the Magnifier to photograph the cracks, discoloration, or stitching issues and add them to your feedback. This way, you can document the proof, which no support team can deny.

12

Turn It Into a DIY Helper

From checking if a screw fits correctly into a small part to confirming whether glue has dried, the Magnifier is handy for DIY projects, arts, crafts, or tech repairs. It’s especially useful for anything involving fine details.

Here are a few more ideas to put it into everyday use:

  • Thread needles effortlessly by zooming in on the eye.
  • Assemble tiny tech parts like watch batteries or MacBook screws.
  • Inspect solder paste on electronics for cracks, gaps, or uneven application.
  • Find ports on any device in the dark or a difficult-to-reach place.
  • Closely examine 3D prints for defects and troubleshooting.
  • Use it as a hand mirror after eating at a restaurant.

If the Magnifier goes on to make your life easier, tweak a few settings to make it quicker to access. The suggestions below apply to iPhone 16 and iOS 18 onwards but should be workable on older iPhone models, too.

The Magnifier app is available by default in the Control Center or the App Library. The other quick ways to launch the Magnifier instantly include triple-clicking the side button (on iPhones with Face ID) or the Home button (on older iPhones). You can also prompt Siri to launch the tool.

The Magnifier app isn’t just for those with vision impairments. iPhone Pro models with the LiDAR Scanner have more accessibility advantages like people and door detection while scanning your surroundings. But the basic Magnifier is still a good app that extends the use of the iPhone’s camera, helping you solve everyday problems.

Your LG Smart TV Will Lose One of Its Smart Features Soon

Many modern LG TVs allow you to speak to Alexa or Google Assistant with the voice remote—you might even have a shortcut for these features right on your remote. However, some LG TVs are about to lose their Google influence.

LG TVs Are Dropping Google Assistant

This week, many owners of LG smart TVs (including on Reddit) started seeing warnings that Google Assistant will no longer work as of May 1. You thus won’t be able to speak to the assistant to interact with your TV via search or other features. The notice makes it clear that general voice functionality is not going away; only Google Assistant support:

Google Assistant Service Termination

Google Assistant will no longer be available on this device starting on May 1, 2025. The voice recognition service provided through the microphone button on the remote control will still be available for use.

The stock LG assistant accessible with the mic button on your remote will still let you search your TV, tweak settings, and the like with just your voice. But if you relied on Google Assistant integration to get more done, your TV is about to get less useful. It’s a good reminder that smart TV features are subject to change anytime at the whims of the manufacturer—your favorite feature could be next, even if you don’t care about Google Assistant.

At this time, it looks like Alexa support for LG TVs isn’t being touched. At the start of 2025, LG announced that its 2025 OLED TV models will feature Microsoft Copilot, though we’re not sure if this will come to older models to replace Google Assistant.

Gemini Is the Hot New Assistant

While this move is sudden, it shouldn’t come as a surprise. As Google has continued to develop and push Gemini, Google Assistant has started to feel like old hat, which has led the company to start phasing it out. Google Assistant is already losing features ahead of its demise in late 2025.

Thankfully, this is not severing the connection between Google Home and LG’s ThinQ platform. You’ll still be able to use the Google Home app to control your LG TV (and other LG appliances); the only feature being dropped for now is the ability to talk to Google Assistant on your TV.

In the coming months, we might see LG replace Google Assistant with Gemini, following Google’s lead. However, this may only come to the newest TVs to push people to upgrade.

For now, the built-in voice assistant is capable of basic tasks, though not as exciting as Google Assistant. Perhaps LG and other TV makers should focus on bringing features to smart TVs that would actually make them better.

These Are My Favorite 8 Roku Apps For Endless Entertainment

Although Roku has hundreds of apps to download, I find myself gravitating toward only a handful on a daily basis. These eight apps offer so much entertainment that you’ll rarely seek out content elsewhere.

8

PBS Kids

PBS Kids has been a staple in my house for the better part of 10 years. Both my kids fell in love with it, mostly for the shows like Wild Kratts, Daniel Tiger’s Neighborhood and Sesame Street, but for the games as well.

When I got my Roku Express, it was one of the first apps I installed. It’s much easier for my youngest son and I to catch up on cartoons on the big screen than it is to squeeze together with a teeny tiny tablet.

Download on Roku: Must be downloaded through a Roku device

7

Amazon Prime

Prime Video Channels

While Amazon Prime has some good original content—Fallout, Good Omens, Secret Level—I like using it to rent movies, outside of streaming. There are so many movies on there, Prime is my way of finding shows or movies I can’t find on other platforms, too. Of course, having Amazon Prime also means I benefit from deals when I shop.

Download on Roku: Prime Video

6

Plex

The homepage of Plex

If there’s one Roku app I cannot live without, it’s the Plex app. Ever since I started running my own Plex server, I’ve had the pleasure of installing it on as many devices as I possibly could. It’s just compatible with so many devices, how could I not? It frees up the need to use my console, which I refrain from using for streaming, and I can move my Roku Express anywhere in the house. My entire media library fits in the palm of my hand—movies, shows, music, you name it.

Download on Roku: Plex

Related

4 Simple Ways to Fix Plex Streaming Issues

Flip a few switches, turn a couple of knobs, and Plex will be up and running in no time.

5

Spotify

Release Radar Spotify playlist-1

Although I prefer owning my own music, I don’t have all the CDs I want, and I use Spotify to fill the gap. Go figure, right? And since I have a decent soundbar for my TV, as opposed to dedicated speakers, I can jam out (and annoy everyone in my house) while I’m cleaning. Also, Spotify has numerous books and podcasts to listen to, like my favorite StarTalk Radio.

Download on Roku: Spotify

4

Netflix

Preview of Master of None series on Netflix-1

Netflix consistently dishes out original content, like The Fall of the House of Usher, Castlevania, Maniac, and Midnight Mass are just a handful of shows that were a joy to catch up on and why I keep paying for Netflix. Then there are the numerous crime documentaries and kids shows.

Related

Netflix Is Making It Easier to Learn a New Language While Streaming

Now, if you’re watching Netflix on your TV, you can apply any combination of languages.

Out of all the streaming services I subscribe to, I come back to Netflix the most. It’s super easy to find something to watch, and new content is added all the time. Plus, the UI is really clean and the most friendly to use on Roku.

Download on Roku: Netflix

3

Pluto TV

Pluto TV logo, with a series of yellow dots on a black background

I haven’t paid for cable in years, and I’m glad I don’t because plenty of streaming apps have free channels. Pluto TV is my favorite among them, or as I like to call it around the house, my Hell’s Kitchen app.

There’s a lot to like about Pluto TV—a solid library of movies, classic TV shows, a couple news channels, and it’s entirely free. It’s a nice mix of live and pre-recorded content. The ads can be annoying sometimes, but I’m pretty good at zoning them out.

Download for Roku: Pluto TV

2

Crunchyroll

crunhcyroll home page may 2025

Second to Netflix, I get a lot of hours out of Crunchyroll, given that it’s the largest library of anime. Where else am I going to watch Cowboy Bebop, Fullmetal Alchemist: Brotherhood, Dragon Ball (from original to Daima), and Yu Yu Hakusho for the umpteenth time on the same platform?

Related

10 Essential Tips for New Crunchyroll Users

Crunchyroll is the perfect app for both anime and manga lovers. If you’re new to the platform, here are some tips to get you started.

It has some good original series too, like Blade Runner: Black Lotus, though the biggest benefit is the simulcast episodes. Whenever a new episode airs, I can usually catch it soon after. Sometimes, it’s as early as an hour after.

Download on Roku: Crunchyroll

1

Twitch

twitch home page with streaming options may 2025

Twitch is the premier app for watching gaming content. If I want to watch my favorite streamer, I’m not doing it from my desk (I already spread enough time there) or from a tiny screen. I like seeing detail, so it’s much more comfortable to tune in on the big screen.

Download for Roku: Twitch

Eight Roku apps is all it takes to create a constant stream of entertainment that satisfies all my wants, needs, and interests. Most of them are free, too. I’d say that’s a pretty darn good deal.

You Can Now Download The Operating System That Inspired Windows

Would you forget the code you wrote years ago if it helped build the foundation for an operating system as massive as Windows is today? Bill Gates hasn’t. In fact, he’s decided to release it, and you can download it too.

Bill Gates Releases Altair BASIC’s Source Code

Microsoft is celebrating its 50th anniversary on Friday, April 4, 2025, and Bill Gates decided there’s no better way to mark the occasion than by returning to his roots and sharing the source code that started it all.

He took to his Gates Notes blog to release a 157-page document containing the source code for Altair BASIC, which was written in 1975 using assembly language. You can download the entire source code for yourself by scrolling to the bottom of the blog page or clicking this link.

Altair BASIC, which Gates calls “the coolest code” he’s ever written, was inspired by an article in Popular Electronics magazine about the Altair 8800 microprocessor powered by Intel’s 8080 chip.

The article inspired Gates, who was a freshman at Harvard at the time, and Microsoft co-founder Paul Allen to contact Ed Roberts, the founder of Micro Instrumentation and Telemetry Systems (MITS), the Altair 8800’s manufacturer.

They claimed they had created a BASIC interpreter for the Altair 8800 using assembly language that would allow users to write their own programs in BASIC. This would allow users to write their own programs using the BASIC language that was easier to use than assembly code, making computers more accessible at the time. The catch? They were bluffing and hadn’t actually created what they claimed.

Over the next two months, they then worked day and night to create the software they’d promised. Paul wrote a program to simulate the Intel 8080 chip on a Harvard PDP-10 mainframe, which allowed them to test their software without needing an actual Altair. Meanwhile, Bill focused on writing the main code for the program, and Gates’ friend Monte Davidoff worked on the math package.

Eventually, they successfully created Altair BASIC. Once they presented it to Ed Roberts, MITS agreed to license the software, marking the first official product of Microsoft (then called Micro-Soft). In his blog post, Bill Gates acknowledged that, before there was Office, Windows 95, Xbox, or AI, there was Altair BASIC, something he’s still incredibly proud of today.

Your Free VPN App Might Be Leaking Data to China

Using a VPN can help protect you online—as long as you’re using the right one. Just because a VPN is free and available on an official app store doesn’t always mean it’s safe to use.

Chinese VPNs Might Be Stealing Your Data

An investigation by the Tech Transparency Project (TTP) into the top 100 free VPN apps on the Apple App Store found as many as 20 apps with undisclosed Chinese ownership. These apps have been downloaded over 70 million times.

Five apps, including Turbo VPN, VPN Proxy Master, Thunder VPN, Snap VPN, and Signal Secure VPN, have been linked with Qihoo 360, a company with suspected ties to the Chinese military. In June 2020, the US sanctioned Qihoo 360, citing national security reasons.

Apart from these five apps, a full list is as follows, along with those already removed from the App Store.

  • Alphaoo Net (removed from App Store)
  • Best V2ray (removed from App Store)
  • Best VPN Proxy AppVPN
  • HulaVPN
  • Incognito Net (removed from App Store)
  • LinkWorldVPN
  • Now VPN
  • Ostrich VPN
  • Pearl VPN
  • Speedy Quark VPN
  • SwiftLink VPN (removed from App Store)
  • VPN Bucks
  • VPN Proxy Master
  • VPN Proxy OvpnSpider
  • VPN Ⓟ (removed from App Store in 2024)
  • VPNIFY
  • WireVPN – Fast VPN & Proxy
  • Wirevpn – Secure & Fast VPN
  • X-VPN

This isn’t a problem with Apple’s App Store alone. I found all five of the Qihoo 360 apps and several others on Google Play, with several apps having four-star or higher ratings and millions of downloads. Turbo VPN even has a verified badge on the Play Store, distinguishing it from other apps as trustworthy and secure.

Why Are These Free Chinese VPNs a Problem?

VPN apps work closely with your internet traffic to encrypt it online and change your IP address and location to make it look like you’re accessing the internet elsewhere. However, if the VPN provider isn’t trustworthy, your data could fall into the wrong hands, as service providers can potentially monitor your internet traffic as it gets rerouted through their servers.

China has strict laws that force companies in the country to share access to their users’ data with the government—putting the user data from these VPN apps straight into the government’s hands. Considering these apps are available on Android and iOS globally, millions of users worldwide are at risk.

App stores can’t restrict apps based on the location of their developers, but they do have guidelines in place for specific apps to protect user data. Apple prohibits VPN services on its app store from selling, using, or disclosing any user data for any purpose to third parties, and failure to comply can lead to the app’s removal from the App Store.

Related

Why This VPN Is the Best Option for Any User

I’ve tried so many VPNs over the years, and I always come back to this one.

If you’re using any of the apps mentioned above, I strongly recommend deleting your account and the app itself as soon as possible. There are other, more secure VPN alternatives, like Proton VPN, SurfShark, and NordVPN, that offer free tiers with better protection. If you can, ponying up for a premium VPN is the best way forward.

ChatGPT Still Doesn’t Have Folders: Try These Extensions Instead

ChatGPT launched in 2022, and yet, three years later, it still doesn’t have one of its most requested features: integrated folders. As irritating as OpenAI’s refusal to add folders is, there are some excellent ChatGPT folder Chrome extensions you can use instead.

4

ChatGPT Folders

If you already have other Chrome extensions for enhancing ChatGPT and only need one more for a folders feature, ChatGPT Folders is the bare-bones extension for you.

ChatGPT Folders gives you a very simple way to put your chats into folders. Install the extension, click Create Folder, and give it a name. Then, add your current conversation to the folder by clicking the Add to Folder button. That’s it!

There is no long setup process; you can start sorting your chats as soon as you install this extension. The design also stays very clean and matches ChatGPT’s own look, so you won’t feel overwhelmed when you have many other extensions already cluttering your screen. To make it easier to identify folders, ChatGPT Folders has a simple color picker to assign colors to folders. These colors will also be applied to the title tags of each conversation within the ChatGPT sidebar.

3

GPT Folders

Organizing conversations with GPT Folders

Looking for something that gives a bit more functionality than ChatGPT Folder? GPT Folders builds on the simple idea of making folders but adds a few handy features to make your life easier.

With GPT Folders, you can quickly create folders and move your chats by dragging and dropping them into a folder. An Add to Folder button sits at the top of the screen so that you can save your current chat quickly. This button also allows you to create a new folder instantly if you need one. You can access these folders through GPT Folder’s own sliding sidebar, located at the right of the screen. Aside from organizing your chat conversations, GPT Folders also has a Saved Prompt section where you can store your most-used prompts.

Though small, these added functionalities make this extension much more convenient than ChatGPT Folders.

2

Easy Folders

Easy Folders is a premium extension (with a free version) that offers a well-polished tool for busy people looking to organize their ChatGPT conversations. It makes chat organization easier, offering more options for organizing folders and prompts. For instance, this extension lets you create subfolders. This means you can set up a small folder system that mirrors how you might organize files on your computer. When you have many chats on different topics, you can group them into main folders and subfolders so that you always know where to find a specific conversation. Easy Folders can also automate the folder creation process for your custom GPTs.

With Easy Folders, you can move several chats into one folder or even spread them across different folders in one go. You can also use Easy Folder’s built-in search tools to find conversations by looking for specific words, and once you locate the chat, you can add them to the proper folder. These folders can be colored and even have their own logos for easier identification. With these features, you can quickly organize a month’s worth of conversations into folders.

Lastly, the Easy Folder prompt manager lets you create, edit, and store your prompts in one place. What’s special about this prompt manager is that it allows you to use variables to make your prompt easy to reuse. By simply placing your keyword inside curly braces, Easy Folders will identify it as a variable you can keep changing whenever you use the prompt.

If you can pay the $9 monthly subscription, Easy Folders provides a polished tool with a robust set of options, making it a very strong tool for managing conversations and prompts.

1

Superpower ChatGPT

Organizing conversations with Superpower ChatGPT

Superpower ChatGPT not only organizes your chats but also gives you a whole set of tools to improve your ChatGPT experience. With this extension, you get the Manager menu that houses many advanced tools, including a conversations manager, prompt manager, image gallery, custom instruction profiles, and a GPT store.

The conversation manager is where you can create and manage folders. If you need a more detailed system, these folders can be customized with different colors, images, and even subfolders. You can quickly manage bulk conversations by filtering and ticking all the relevant chat conversations before moving them to a folder.

Superpower ChatGPT also has many other tools such as a prompt manager that lets you create a series of prompts, save your favorites, and use ready-made templates; an Image Gallery to keep all your images; a GPT Store that offers many tools and models; and Custom Instruction Profiles to adjust ChatGPT for different tasks.

Overall, I recommend Superpower ChatGPT if you want lots of features to enhance your ChatGPT productivity. But if you already have a lot of extensions and only want a folder organization tool, try using ChatGPT Folders. Easy Folder is the best if you’re willing to pay the premium price, but its free features are also plenty handy. And for everyone else, go with GPT Folders—it’s free, easy to use, and has a simple UI.

I Won’t Watch Netflix Without These 5 Chrome Extensions

I’ve used Netflix for years at this point, but there are a few features I wish it had—and some useful ones it’s actually removed. Thankfully, you can extend Netflix’s functionality and options with these handy Chrome extensions.

Don’t Miss the Next Episode When You Fall Asleep

As per our sister site Pocket Lint, Netflix trialed an integrated sleep timer in its Android app back in 2021. It’s as it sounds: you start watching a video and set the timer for when you want it to stop. When the timer runs out, your video stops playing.

However, the feature never received a global rollout to other devices or Netflix platforms, and it was discontinued.

However, you can restore that functionality with the Sleep Timer for Netflix Chrome extension. Once installed, you can adjust the period of time you want to watch Netflix in the extension settings. It has default sleep options ranging from 15 minutes to one hour, or you can add a custom value.

My only gripe with the Sleep Timer for Netflix is that it just pauses the show. It is great if you fall asleep with Netflix and don’t want to miss the next episode, but you’ll still have to figure out how to turn your screen off. You could pair it with the Windows sleep timer shutdown command, or perhaps your computer monitor, TV, or laptop has an integrated sleep timer function you can align the Sleep Timer with.

For When You Just Can’t Wait

Why doesn’t Netflix have this already? Sure, intros and recaps are great most of the time, but if you’re rewatching something, have already seen the introduction, or just plain hate the show’s theme tune, you want to skip as quickly as possible.

The Netflix Skipper Chrome extension does precisely that, moving you through the time-consuming intro, recap, and next episode screens with zero input. I tested with a few different shows and found Netflix Skipper effective for rapidly moving from one episode to another, cutting out lengthy credit reels and then launching into the start of the next episode.

However, if you’re worried about missing cold opens, like Brooklyn Nine-Nine, relax. It doesn’t skip those—but skips the actual introduction when it starts. Very handy!

Watch While You Work

netflix picture in picture chrome extension example.

I don’t know about you, but sometimes, I want to watch while I work. At home, I have a dual-screen monitor configuration, so allotting a show or movie to the second screen is fine. But I don’t have that option when I’m working on my laptop.

This is where the Picture-in-Picture extension comes into play. Once installed, you fire up Netflix, hit the Picture-in-Picture extension button, and a new video frame appears instantly. The only real downside to the new window is that it lacks in-frame controls. You still have to head back to Netflix to control the smaller video window, which is a little frustrating. Also note that in the image above I was watching a film on Netflix, but the screen turns black when you open a screenshot tool to stop copyright infringement—I added another image as an example.

Now, Picture-in-Picture isn’t just for Netflix. Like Microsoft Edge’s native picture-in-picture mode, this Chrome extension lets you view a whole host of video sites in a smaller window. It’s really handy if you’re following a tutorial or watching an overview of something that you need to keep watching while you work.

This Netflix Chrome Extension Has It All

netflix trim chrome extension with movie ratings.

Trim is one of the most complete Chrome extensions for Netflix. It brings a wide range of new options to Netflix, including IMDB and Rotten Tomatoes ratings, the ability to “fade out” movies with low ratings from these platforms, its own picture-in-picture mode, and faster integrated search… It’s a massive list of really useful Netflix tools.

Once installed, you’ll notice a few small changes to your Netflix screen. First, each show or movie now appears with its IMDB and Rotten Tomatoes rating in the top-right corner, giving you an instant look into whether something is worth your time. Second, pressing the new Trim button in the menu bar “fades out” low-rated items, showing you they’re probably not a good watch.

netflix trim chrome extension with faded movie options.

You can also press the Trim icon in your Chrome extensions toolbar to adjust the “fade out” ratings, increasing the review scores so you’re only watching the highest-rated content.

Trim is a really handy way to make finding new Netflix content much easier, cutting out the hassle of looking through endless reviews, and it is well worth using for this alone.

Make Every Movie a Watchalong

teleparty netflix watchalong chrome extension.

Okay, so this one isn’t a direct improvement to your daily Netflix consumption, but it’s a fun tool either way. Teleparty (first launched as Netflix Party) exploded into public consciousness during the COVID-19 pandemic, when social distancing rules kept many folks at home for long periods. The tool launched long before the pandemic, but its watch-along-with-friends vibe was just what was needed during those troubling times.

And Teleparty is still a great tool. Once you sign up and install the Chrome extension, you’re asked about the streaming services you subscribe to. With a few clicks, you can send out invites to your friends to watch the latest and greatest on Netflix. What I really like about Teleparty is the sidebar chat. It doesn’t just sync up the video for you and your friends; it creates a small social space for you to chat while the film or show is streaming.

Remove This App to Protect Your Privacy

Your Android device has a new system app called SafetyCore, which is raising some serious privacy issues. Designed to protect against certain types of content, SafetyCore has extensive access to your device—which is precisely why you may want to remove it.

What Is the Android System SafetyCore App?

SafetyCore is a system app developed by Google for Android devices running Android 9 or higher, which began rolling out in November 2024. Since it’s a system app that works in the background, you won’t find it in the app drawer. You’ll need to go to Settings > Apps > System Apps to check if it’s installed on your device.

The main function of SafetyCore is to warn you about potentially sensitive images in Google Messages. If you receive a picture that may contain nudity, SafetyCore automatically blurs it to prevent you from accidental exposure.

Before viewing, you’ll see a warning message with options to proceed or ignore it. Likewise, if you attempt to send or forward a nude image, SafetyCore reminds you of the risks to prevent accidental or unsafe sharing.

Mojahid Mottakin/Shutterstock

Google ensures that SafetyCore processes everything locally on your device, meaning no data is uploaded to external servers. Additionally, the app only scans images sent or received through Google Messages, so you don’t have to worry about it scanning every photo or video on your device.

However, the fact that SafetyCore scans images—even if limited to messaging—raises concerns. Feeling uneasy about a system-level app analyzing images is natural, especially one that installed itself in the background, required no permissions, and has almost complete access to your device.

How to Stop Android System SafetyCore From Scanning Your Photos

While Google positions SafetyCore as a protective feature, those prioritizing privacy may feel uncomfortable, no matter how limited or well-intentioned it claims to be (though, as above, having anything installed without warning isn’t pleasant). The good news is that SafetyCore is optional, meaning you can uninstall or disable it like any other app on your phone. Doing so won’t affect your phone’s functionality in any way.

To remove the Android System SafetyCore app from your device, use these steps:

  1. Open the Settings menu on your Android phone.
  2. Scroll down to tap Apps.
  3. Tap the filter and sort icon and enable the Show system apps toggle. On some devices, you’ll need to tap the three-dot menu and select Show system apps.
  4. Scroll through the list or use the search tool to find Android System SafetyCore on the list and tap on it.
  5. Tap Uninstall at the bottom and hit OK to confirm.

And that’s about it! Once you remove the SafetyCore app, you won’t have to worry about it scanning your messages or private files.

Keep in mind that Android SafetyCore may automatically reinstall or re-enable itself, especially after a system update. To ensure it stays off your device, you’ll need to regularly check the list of installed apps on your phone and disable or remove it again if needed.

This New Trick Lets You Install Windows 11 Without Creating an Account

Microsoft is forcing Windows 11 users to create an online Microsoft account after installation. But if you prefer keeping your data offline, here’s how to bypass that requirement.

This Command Will Force Windows 11 to Create a Local Account

New Windows 11 installs since February 2023 force users to log into or create an online Microsoft account to use their PC. Those who don’t want to do that can skip this step by using the “bypassnro” command, but the software giant is apparently closing this loophole.

Thankfully, an X (formerly Twitter) user @witherornot1337 shared a quick and easy way to use Windows 11 with a local account.

When Windows 11 is asking for your country or region, press Shift + F10 on your keyboard and then type start ms-cxh:localonly. This will launch a Microsoft account window, where you can enter your username and password without connecting to Microsoft’s servers. Once done, press Next, and you now have an offline Windows 11 PC—simple as that.

Of course, you won’t get the advantages of using a Microsoft Account with Windows if you do this. But if you don’t like the idea of having a massive, faceless corporation having access to your data, then the hassle might be worth it.

This technique has been discovered quite recently, and as it becomes more popular, Microsoft might soon take notice. Hopefully, it will take the company a much longer time before closing this loophole, but if that’s the case, you can try this other method to keep your computer away from Microsoft’s clutches.

Tweak This Setting in the Registry Editor to Bypass the Microsoft Account Requirement

This procedure is a bit more involved, as shared by @xpower7125 on X, but it’s a viable solution if the start ms-cxh:localonly command refuses to work. When you’re at the Microsoft Account screen after finishing the install of Windows 11, hit Shift + F10, then type regedit.

Once the Registry Editor window is open, go to HKEY_LOCAL_MACHINESOFTWAREMicrosoftWindowsCurrentVersionOOBE. From there, open HideOnlineAccountScreens and change the Value data to 1.

While not officially endorsed by Microsoft as a way for the average user to bypass its login requirement, the company actually explains what this command does on the Windows Hardware Developer support page. By setting the value to 1 or true, the sign-in page is hidden during the Windows 11 OOBE setup process. This means you can just create a local account instead of an online one when logging in for the first time.

The page specifically says this is for enterprise users who do not want their employees to connect their email address with their Windows PC. But even if you’re a Home or Pro user, you can take advantage of this feature as long as you know how to use it.

More Windows 11 Computers Will Get Copilot+ AI Features Soon

Microsoft debuted most of its more advanced AI features with Copilot+ PCs running Snapdragon X chipsets, which left a lot of Copilot+ PCs running Intel and AMD chips in the dark. Now, the company plans to expand to where its more advanced AI features are available, starting with select Intel- and AMD-powered PCs.

Copilot+ AI Features Are Coming to Intel and AMD PCs

Microsoft announced in a blog post that exclusive Copilot+ PC AI features like Live Captions, Cocreater, and more will be coming to all Copilot+ PCs powered by AMD Ryzen AI 300 series, Intel Core Ultra 200V, and Snapdragon X series processors.

A full list of features is as follows:

  • Live Captions: offers real-time translations in English for audio and video content during video playback, podcasts, or virtual meetings.
  • Voice Access: lets users talk to their PCs in a more natural and flexible language.
  • Cocreator in Paint: lets you create or edit images in pain with a combination of freehand drawing and text-based prompts.
  • Restyle Image and Image Creator in Photos: brings AI-powered editing capabilities using prompts in the Windows Photos app.

Keep in mind these features are optimized for English text prompts and require a Microsoft account and internet connection to function. In some cases, you might also require a Microsoft 365 subscription to access some features.

Microsoft launched its Copilot+ PCs in May 2024, claiming them to be the fastest, most intelligent Windows PCs ever. The decision to launch with Snapdragon’s X Elite processors was also part of Microsoft’s push for Windows on ARM, while also taking a shot at Apple with its M-series of custom silicon.

Related

AI PCs Are Here! But What Exactly Does That Mean, and What Can They Do?

Keen to get involved with AI PC and laptops but not sure what they do? We’ve got you covered.

Copilot+ PCs require a system that delivers at least 40 TOPs (trillion operations per second) of NPU performance. This means a dedicated onboard NPU and at least 16 GB of memory. Microsoft partnered with Intel, AMD, and Qualcomm to achieve the initial releases. However, other companies like Acer, Asus, Dell, HP, Lenovo, and Samsung have been hard at work producing Copilot+ PCs that match Microsoft’s requirements.

When Can You Expect the Features?

There is no fixed release date provided for the features at the moment. Microsoft says it will gradually roll out these features throughout April 2025 via the Windows controlled feature rollout (CFR). Some features are already available via the March 2025 Windows non-security preview update, which requires the November 2024 non-security preview update.

To increase your chances of getting the features early, you can enable the Get the latest updates as soon as they’re available option in Windows Update settings. Once done, you can check for updates to download and install the March non-security preview release as per Microsoft’s instructions. Also, make sure that the Microsoft Paint and Photos apps are updated to their latest versions to access the new AI features.

Given Microsoft’s aggressive AI push, I doubt you’ll have to wait long to see these features in action. At least, as long as you have a compatible PC.

I Have a Major Problem With Apple Intelligence, and It’s Not What You Think

Apple not only failed to deliver on the massive promises it made when announcing Apple Intelligence, but the little progress it has made so far has also been disappointing and, frankly, underwhelming. Ironically, that’s not even what bothers me the most.

Apple Intelligence Eats Up a Ton of Storage, Even Though I Hardly Use It

I never delete old photos from my phone (though maybe I should) and tend to download too many random apps—almost like I have unlimited storage. So, I’m always running out of space.

Unfortunately, Apple Intelligence just made this issue much worse. When it first debuted with iOS 18.1, you needed at least 4GB of free storage on your device to download it. Unlike what Apple had promised, the first wave of Apple Intelligence only included limited features like the Clean Up tool and the controversial Notification Summaries.

Once iOS 18.2 rolled out, ChatGPT integration with Siri was added, along with Image Playground and Genmoji. These new features came at a price, though. The minimum storage requirement nearly doubled from 4GB to 7GB.

You can check how much storage it’s taking up by going to Settings > General > iPhone Storage (iPad Storage on iPads and Storage on Macs). Scroll all the way down, tap iOS/iPadOS/macOS, and the figure next to Apple Intelligence will show how much storage it’s taking up.

At the moment, Apple Intelligence is using 5.52GB on my iPhone, 3.12GB on my iPad, and 4.78GB on my Mac. The strangest part? The storage it consumes isn’t consistent and varies wildly from device to device.

For example, a Reddit user mentioned that Apple Intelligence is taking up 9.18GB on their iPhone. Another person under the same post, who recently got Apple’s new budget-friendly iPhone 16e with 128GB of storage, noticed that Apple Intelligence is claiming 8GB. If you do the math, that means Apple Intelligence is using 6.25% of their phone’s total storage.

And that’s not all. On the same iOS/iPadOS/macOS page, you’ll also notice another figure showing how much storage the system itself is consuming. My iPhone’s iOS storage is currently 11.93GB. Assuming the iPhone 16e uses a similar amount, that would bring the combined total to 19.93GB, meaning nearly 15.6% of their storage would already be gone!

Now, I wouldn’t have minded Apple Intelligence eating up so much storage if it were actually useful. While I enjoy creating my own emojis (though Genmoji kind of sucks) and prefer the glowing, revamped Siri, there’s no world where the current Apple Intelligence features are worth sacrificing so much storage. I’d much rather download a couple more useless apps or keep my memories safe without paying for more iCloud storage.

There’s No Quick Way to Reclaim Your Storage

Unfortunately, if you’ve already enabled Apple Intelligence on your Apple device, turning it off in hopes of getting your storage back might do little good. I’ve disabled it before, and even then, it still consumed the exact same amount of storage. And plenty of Reddit comments mention that they’ve had storage space taken up by the features despite having Apple Intelligence disabled from day one.

Related

I Decided to Turn Off Apple Intelligence on My iPhone: Here’s Why

It’s Apple’s big thing, but I don’t care enough to use it.

Apple’s Support page mentions that the on-device models “may” be removed if you disable Apple Intelligence. So, it seems like it’s entirely up to Apple to decide whether it wants to give you back that precious storage.

Previously, you could fix this issue by factory resetting your Apple device (though that was already far from ideal), but even that might not work anymore. That’s because Apple Intelligence is enabled by default in iOS 18.3 and later versions, meaning storage will be taken up as soon as it’s enabled.

At the end of the day, all I can say is… Apple is going to be Apple. I just wish the insane amount of storage it takes up was at least worth it! There’s only one Apple Intelligence feature I actually use, and even that doesn’t justify the storage hit. While turning it off might not free up your storage, you could noticeably improve your iPhone’s battery life by disabling Apple Intelligence.

Why You Need to Buy A Power Bank for Your Phone

Even the best and newest smartphones have limited battery capacity. Sure, there are ways to prolong your phone’s battery life, but they only go so far. There’s a special kind of dread when your phone hits 1% and you’re nowhere near an outlet.

5

Great for Emergency Situations

Aryan Surendranath / MakeUseOf

Most smartphone batteries last between 15 and 20 hours on a single charge. That’s plenty of juice for a regular day, but what happens if you forget to charge your phone before you leave home or use a lot of battery-intensive apps during the day? Your battery could run out at the worst possible time.

Of course, if you have access to a power outlet, you can simply plug in your phone and wait for it to charge back up. But what if you’re traveling or stuck in the middle of nowhere? Plugging your phone into an outlet might not be an option. In times like these, a power bank can truly be a lifesaver. Many power banks even support fast charging, so you won’t have to wait all that long to use your phone if you’re in a pinch.

4

Keeps You From Relying on Public Charging Stations

There’s nothing wrong with using a secure public charging station. But the reality is that if you’re in a crowded place, you’re unlikely to find one with free ports. Even if you find an unoccupied charging station, your phone won’t charge as fast as it does at home. This means you’re essentially just stuck waiting around the charging station for your phone to power on.

Beyond that, security risks like juice jacking have really turned me off public charging stations. I don’t want to risk data theft or malware exposure because I forgot to charge my phone. I’d much rather carry a power portable bank to charge my phone anytime the battery drops too much.

3

Protects Your Phone’s Battery

A power bank with a low battery icon.

You’ve likely heard that charging your phone overnight to maximum capacity is bad. The opposite is also true. Routinely letting your phone’s charge get close to 0% can wear out the lithium-ion battery.

If you want to prevent this sort of battery degradation, it’s best to keep your phone’s charge between 20% and 80%. If you have trouble doing this, purchase a portable power bank that can help you keep your phone’s charge from dipping too low. This way, not only will you always have sufficient charge on your phone, but you’re also maintaining your battery’s health.

2

Traveling Becomes Less Stressful

I tend to use my phone a lot when I’m traveling, whether it’s for navigation, photography, or even just listening to music. All this extra usage drains my battery relatively quickly, compared to when I’m at home or working.

A dead phone is the last thing I want when I’m in an unfamiliar place, and I don’t want to go through the hassle of trying to locate a charging station. That’s why I always carry a power bank with me during my travels.

1

They’re Cheap and Portable

Baseus Magnetic Power Bank Hero Image
Jowi Morales / MakeUseOf

Power banks are relatively inexpensive, and yet provide a ton of value. Given that it’s not hard to find a high-quality power bank for under $20 and sometimes even less on sales, it helps to have one on hand.

Unlike a lot of other gadgets, power banks are fairly compact and lightweight, which means you can just carry one around in your backpack or bag, without it taking up too much room or adding unnecessary weight.

Keeping a power bank on you at all times won’t do you any harm. In fact, it just makes your life easier. So, if you spot one at a good price, don’t hesitate to purchase it right away.

How to Quickly Delete Unwanted Screenshots on Samsung

Too many screenshots can clutter your gallery, hog storage space, and may even pose a security risk if you’ve taken screenshots of any sensitive data. On Samsung, you can quickly delete unwanted screenshots to avoid this.

How to Auto-Delete Screenshots After Sharing

A lot of the time, we take single-use screenshots to share them with other people with no intent of keeping them. But more often than not, these screenshots remain unattended and tend to pile up in the gallery.

Not only does this waste your phone’s storage, but it also creates unnecessary clutter and makes it harder to find the screenshots you actually want to revisit.

Luckily, you can set your Samsung phone to auto-delete screenshots you’ve shared from the toolbar. To enable this, go to Settings > Advanced features > Screenshots and screen recordings and toggle on Delete after sharing.

And you’re done. Go ahead and take a screenshot to try the feature out. Make sure to tap the Share icon in the toolbar.

Related

The 6 Best Ways to Take Screenshots on Android Phones

From using physical buttons to asking Google Assistant, you have many options.

You can also add a dedicated delete button to the screenshot toolbar, so you can delete incorrectly captured screenshots immediately without having to go to your gallery.

To do this, though, you’ll require the Nice Shot module from Samsung’s Good Lock customization app. You can get it from the Galaxy Store if you don’t already have it.

Download: Good Lock (Free)

Once downloaded, open the app, navigate to the Life up tab, and install the Nice Shot module. In the module, enable the Add delete button toggle.

Try taking a screenshot now; a new trash icon should appear in the toolbar. Tap it and the screenshot will immediately get deleted without any annoying pop-up asking for confirmation.

If the toolbar disappears before you’re able to tap the trash icon, you’ll have to delete the screenshot from the gallery or the notification panel where it would ask you for a confirmation, which is a bit slower.

If you’re anything like me, your gallery is 80% screenshots you forgot to delete. Clearing them one by one is a chore. So, hopefully, this trick should help you wipe them fast.

Why I’ll Never Buy Another Flagship Phone Again

Owning the latest flagship used to feel like a necessity. Each new model introduced game-changing features, making older devices seem outdated overnight. But after years of chasing upgrades, I’ve realized that flagship phones just aren’t worth the price anymore.

4

Spending $1,000+ on a Phone No Longer Makes Sense

There was a time when investing in a flagship phone felt justifiable. Take the iPhone 11 Pro, which launched in 2019. This device introduced Night Mode for vastly improved low-light photos, a versatile triple-camera system, and significantly better battery life. Compared to the iPhone X or iPhone 8, the upgrades were undeniable.

Back then, midrange phones had major limitations. The Pixel 3a, for example, had an okay camera but was hindered by a plastic build, an aging processor, and a single rear lens. If you wanted top-tier performance, design, and photography, flagships were the only option.

Fast forward to 2025, and the landscape has changed. The iPhone 16 Pro is Apple’s latest high-end device, but its upgrades are minor. Camera improvements are subtle, performance gains are barely noticeable, and battery life remains largely the same compared to the iPhone 15 pro.

Meanwhile, midrange phones like the Samsung Galaxy A55 now feature OLED displays, excellent cameras, and smooth performance—all at half the price. The once-massive gap between flagships and midrange phones has significantly narrowed.

3

The Upgrade Cycle Is a Trap

For years, smartphone manufacturers have conditioned us to believe that upgrading every year or two is essential. Carriers fuel this mindset with trade-in deals, and manufacturers amplify the hype with extravagant launch events promising revolutionary advancements. But in reality, most of these updates are incremental rather than groundbreaking.

In the past, upgrading made sense. If you moved from an iPhone 8 to an iPhone X, you gained an OLED display, Face ID, and a sleek new design. Even upgrading from an iPhone X to an 11 Pro meant noticeably better battery life and a more versatile camera system.

Today, the differences from year to year are minimal. It’s not uncommon to find an iPhone 15 Pro user saying they won’t be buying the 16 Pro. In fact, if an iPhone 16 Pro were put next to a 14 Pro, most people wouldn’t be able to tell them apart. A slightly faster processor and marginally better cameras don’t justify spending another $1,000.

2

Overkill Features I Rarely Use

iPhone 15 Pro held by a man in his right hand with the left index finger pressing down on the action button
Paul Antill / MakeUseOf

Flagship phones are packed with premium features, but how many of them actually enhance daily use? Every year, manufacturers introduce flashy upgrades, yet most people still use their phones for the same things—messaging, social media, streaming, and taking photos.

Take 120Hz displays, for example. While scrolling feels smoother, most users wouldn’t notice the difference unless they were actively looking for it. 8K video recording sounds impressive, but even professional filmmakers rarely use it.

LiDAR scanners and satellite connectivity may be useful in niche scenarios, but they don’t impact everyday phone usage.

Related

5 iPhone 16 Pro Features Android Phones Have Had for a Long Time

The iPhone 16 Pro just isn’t exciting enough for Android users.

Even in areas where flagships excel, the improvements feel incremental. The iPhone 16 Pro’s cameras are among the best in the industry, but under normal lighting conditions, the difference between its photos and those from a midrange phone is minimal. Unless you’re a professional photographer, midrange cameras are more than sufficient.

At some point, buying a flagship phone stops being about actual utility and becomes more about paying for the prestige of having the latest and greatest. If a phone can handle everything I need without the extra fluff, why should I spend twice as much on features I’ll barely use?

1

Midrange Phones Now Offer Everything I Need

Blue and pink smartphones face-down
Jhet Borja/MakeUseOf

Choosing a midrange phone used to mean making significant trade-offs—slower performance, weaker cameras, and cheap plastic builds. But that’s no longer the case. Today’s midrange phones offer flagship-level features at a fraction of the cost.

The Samsung A55, for instance, comes with an OLED display, a high-quality camera, and years of software support—all at less than half the price of the S25 Ultra. Features once exclusive to flagships, like water resistance and fast charging, are now common in midrange devices.

Battery life is another advantage midrange devices unexpectedly give you. Without power-hungry high-refresh-rate displays or excessive background processes, midrange phones often last longer on a single charge. Software support is also improving across the board, making it possible to keep a midrange phone for four or five years without running into issues.

At this point, the only real reason to buy a flagship is to have the absolute best. Midrange phones now offer everything I need at a much lower cost, while expensive models keep adding features I rarely use. Unless something truly groundbreaking comes along, I won’t be buying another flagship again.

How I Turned My Old Laptop Into a Plex Media Server

An old laptop needn’t lie in a drawer gathering dust. It can still serve a useful purpose as a Plex Media Server. But does Plex work better on Windows or Linux, and what should you use for your Plex server?

One word of advice before you proceed. If, like me, your media files are scattered all over the place, then it’s a good idea to perform a little housework and prepare them beforehand. This can be done anytime, but it is simpler to do so before beginning the installation wizard. I’ve covered some basics, but a comprehensive guide can be found on the Plex Media support pages.

Plex Media Server is an incredibly versatile service. It can act as a hub for your streaming services, stream movies and shows, and allow you to access your own media from any location. For this project, I decided to keep it simple at first and set it up as a home media server only. The Plex Media Server installation process is almost identical for both operating systems. Plex Media Server doesn’t install an app with a fancy GUI. It uses a browser interface to set up your server, so apart from downloading and installing, the steps are the same.

I downloaded the Windows app from Plex and found the Linux version in the Ubuntu App Center (though it’s also available on Plex’s website alongside other media server installation options). The Ubuntu install was straightforward and took just a few seconds, and the Windows install was equally painless. I accepted the defaults, and it was installed in no time.

From this point on, the setup steps apply to both operating systems. Once the Plex Media Server app is installed, Plex should open in a browser window to allow you to continue the setup process.

If this doesn’t happen automatically, a little intervention is required:

  • Windows users must find the Plex Media icon in the Windows System Tray and right-click it. Plex Media Server should now open in your default browser.
  • Ubuntu users can find the same process by selecting the Show Apps option on the Ubuntu Dock (Sidebar) and launching the app. This should launch Plex in your chosen browser.

Assuming everything has gone to plan, you should now see the following screen:

Just one thing to note here. I found the wording vague, specifically “Plex Media Server would like to sign in to your Plex account.” At this stage, most new users won’t have an account. It does mention “By signing up or continuing” a little further down, but I’d like this text to be clearer. Anyway, gripe over, I went with a different email for each installation to allow me to set up two servers, and the process only took a few seconds. You’ll need to respond to an activation email to complete the sign-up process.

Once I’d set up my account, the next stage was to set up the media server on both laptops.

Screenshot of Plex initialising

Once you’ve set up your account, the next step is to create your server and set up your media libraries. For me, the latter got a bit messy because I hadn’t followed my own advice and tidied up my media files. The result was that my initial libraries quickly became, well, chaotic. To avoid this fate and before you proceed with setting up your server, here’s what I recommend:

  1. Use clear folder structures: Organize media into separate folders (e.g., Movies, TV Shows, Music, Photos) to make Plex’s scanning process smoother.
  2. Follow naming conventions: Name files properly (e.g., MovieTitle (Year).ext for movies, ShowTitle/Season 01/ShowTitle S01E01.ext for TV shows). For the record, this was overkill for me, but Plex recommends it.
  3. Remove duplicates & unwanted files: Clean out duplicate or unnecessary files to avoid clutter and speed up Plex’s library indexing.

If this sounds too much, don’t worry; you can change, add, or delete libraries at any point, which was just as well in my case. Regardless of the organizational status of your media files, the Plex setup wizard walks you through the process of setting up your server and Plex Media libraries. There are also plenty of apps that can help keep your Plex Libraries organized.

The first step is to name your server. This can be whatever you like, but it’s best to give it a memorable name. I used different names for my Windows and Linux servers to help me differentiate them. But if you’re just setting up one, you can choose a nice, memorable name.

By choosing a descriptive name for each server, there could be no mistaking which was which. This is probably more important when you are running multiple servers, but it is always good practice.

Finally, before I moved on to setting up the libraries, I chose my watch-history sharing preferences.

Screenshot of sharing options

The choice here is a matter of preference. However, if you’ve any doubts or concerns and want to make sure your Plex server is secure, then the go-to choice is private. This can be changed from within the settings at any time. I was also prompted to take ownership of the server. Basically, this is just another activation process and is required.

Plex logo displayed on a laptop monitor
Jason Montoya / MakeUseOf

Now, I could begin to get my media libraries set up. The Plex library setup procedure should start automatically with the Plex Media setup wizard. However, if it doesn’t work or you want to make changes later—as I did—follow these steps:

  1. Click the account icon situated on the top right of the page and select Account Settings.
  2. On the left-hand side of the page, scroll through the settings until you see Manage.
  3. Click on Libraries.
  4. Choose Add Library to add a new one or hover over an existing one and select Edit Library to change an existing one.

The image below shows the Manage Library screen on my Windows server.

Screenshot of Plex Media server manage libraries

Whether you use the wizard or the Add Library route, the next screens are identical on Linux and Windows. This is where you can begin to set up your libraries. In my case, I decided not to add too much at this point to avoid getting bogged down in details. Even then, I still hadn’t thought it through properly and had to change settings later in the project.

The first screen gave me the option to select the library type. The choices are self-explanatory and include all the usual suspects (movies, TV programs, etc.).

Screenshot of Plex Media server add library options

Once I’d selected my library type, the next screen allowed me to name it.

Screenshot of add library second page

All I then had to do was select the Add folders option, point it toward the desired folder, and click Add Library. This can be repeated as required.

Screenshot of Plex Media add library browse for media files

And that was all there was to it. Now, it was time to put it to the test and see if there were any discernible differences between Plex Media Server on Windows and Linux.

Screenshot of Plex Media Server in action

Installing Plex Media Server was incredibly painless in both instances. I was expecting to declare a winner by this stage. However, because most of the setup was browser-based, there was very little to choose between. Performance-wise, my machines are similar. Both have a processor that just limped over the Plex Media minimum spec of an Intel i3 or equivalent. Both computers have RAM well over the 4GB minimum, and both have relatively beefy hard drives.

As the next stage of the project involved making sure I could access my media from other devices, I decided to use the opportunity to see if there were differences in the streaming quality.

To keep the playing field level, I tested the same media file on three devices: an Android phone, a Sony PS4, and another laptop. The Plex apps for the Android device and PS4 were downloaded from their respective app stores. For the laptop, I used the same software as I used to set up the server. In each case, the installation was simple, and once I entered my login credentials, I could access both servers.

Again, there was very little to choose between the two systems. The Ubuntu server seemed to get a bit jittery for a few seconds if two or more people accessed it simultaneously, but it always settled down pretty quickly. Apart from that, both servers delivered. Both were easy to set up, ran fine on older hardware, and made accessing my media files easier.

Cost-wise, there are some limitations to what the free version of Plex can do. Accessing locally stored media is completely free from devices like a PS4, Fire TV Stick, or other devices that can run the app (both of which I tested).

However, at the time of writing, Plex’s one-minute playback restriction on mobile devices like smartphones, even on a local network, is still in place. To remove this restriction, you have to pay a one-time device unlock fee of $4.99. However, Plex will remove its mobile unlock fee on April 29, 2025 (at the same time as increasing the price of its lifetime Plex Pass). So, if you can hang on and don’t need to immediately begin watching Plex on your smartphone, hold on to avoid the costs.

Linux vs. Windows: What’s Best For Your Plex Server?

Ultimately, in the battle of the Plex Media Servers, there could be only one. In this case, I will continue with the Windows server. There was nothing wrong with the Linux server; it was purely a decision based on other household members’ unwillingness to learn the intricacies of a Linux machine.

Microsoft Is Removing the Windows 11 Installation Loophole That Lets You Skip Creating an Account

Microsoft is finally closing one of the last remaining ways to skip creating an official Microsoft Account while setting up a new Windows 11 PC.

However, there is still a way of replacing it—but it won’t be long until Microsoft removes that, too.

Microsoft Removes the Microsoft Account Creation Workaround

Since Windows 11 version 22H2 launched in February 2023, Microsoft has forced users to create a Microsoft Account during setup. While many folks prefer a local account, which doesn’t require an internet connection, Microsoft now insists that you create an online account to finish the installation.

Of course, not everyone wants to use an online account with Windows 11, which is why there are several ways to install Windows 11 without an internet connection.

However, now Microsoft is closing one of the most popular and easiest methods, which was to input the command “bypassnro” during installation. Inputting the command during the Windows setup process allowed you to skip the internet connection process, thus allowing the creation of a local account.

However, a Windows 11 Insider Preview blog posted on March 28, 2025, revealed the company is removing this functionality once and for all.

We’re removing the bypassnro.cmd script from the build to enhance security and user experience of Windows 11. This change ensures that all users exit setup with internet connectivity and a Microsoft Account.

Once this Windows Insider build rolls out to the main Windows 11 version, the “bypassnro” workaround will be removed.

There Are Still Microsoft Account Installation Workarounds (For Now)

Now, don’t despair. There is still a way to avoid the Microsoft Account creation process when setting up a new Windows 11 PC. Currently, you can reactivate the bypass by entering the following command during the installation process:

reg add HKLMSOFTWAREMicrosoftWindowsCurrentVersionOOBE /v BypassNRO /t REG_DWORD /d 1 /f shutdown /r /t 0

During installation, when you reach the Let’s connect you to a network screen, press Shift + F10 to launch the Command Prompt and enter the command. You should be able to complete the installation without creating a Microsoft Account.

Of course, there is no guarantee that Microsoft will allow this workaround to exist for long. Given its strong push toward stopping you from booting Windows 11 with a local account, it’s likely this workaround will be removed before long.

Furthermore, as the removal of the “bypassnro” bypass method is currently rolling out to the Windows Insider Preview build, it’s not currently in the mainstream Windows 11 installation process. So, for now, you can still use it—at least, you can for the coming weeks.

Why Partitioning Your Drive Is Still a Good Idea

Modern storage solutions like SSDs have changed the way we store data. But if you’re using your SSDs without partitions, it’s time to change your mind and organize your data efficiently.

7

Better Data Organization

Yash Wate / MakeUseOf

One of the most obvious benefits of partitioning your drive is better data organization. Instead of cramming everything on the drive and putting your data in folders, you can have individual partitions dedicated to similar data types. Partitions create logical divisions that appear as individual drives, which can be very helpful in certain workflows and even professional environments. You don’t want important work documents mixed up with your personal notes or a game’s files.

For example, you can have an entire partition dedicated to games and software, while another can hold your operating system. If you use your computer as your primary data storage device or have many files to manage, partitioning can help organize data in a manner that makes it easy to remember what’s stored where instead of using Windows Search all the time.

6

Easier Backups and Restoration

A man holding a Samsung 990 Pro SSD
Hadrian / Shutterstock

Better organization means easier data backup and restoration. If you want to back up your games or media and have a dedicated partition for it, you can copy over the relevant partitions to an external drive, NAS, or cloud storage server without having to fish around for your data.

Your drive can become cluttered over time with programs, games, media, and so on. To make my backups easier, I partition my drives so I have dedicated storage spaces for games, programs, general media, and documents. Whenever I need to back something up, I know exactly where to go.

5

Better Data Safety

LenovoLegion7iInternalSSD-1
Matt L. Hall / MakeUsOf

Partitioning your drive also means your data remains safe if you mess something up. This is mostly helpful when protecting your operating system (OS) from corruption or other errors, especially if you like experimenting with different programs on your system.

Having specific data stored on different partitions also makes it easier to recover if you experience a sudden crash or your operating system malfunctions. If your OS partition becomes corrupt or you need to reinstall it from scratch, you can format the partition and start over. It’s way more convenient than formatting your entire drive and losing all your data.

4

Dual-Booting Is Less of a Hassle

Ubuntu running via the Windows Subsystem for Linux
Kris Wouk / MakeUseOf

If you’d like to dual-boot your system, creating partitions is hands down the best way of managing two or even more operating systems installed on a single drive. Having separate partitions allows you to run multiple operating systems without facing file system issues. It also gives you a very clear separation between the two operating systems, meaning you can remove or reformat one OS without touching the other.

For example, if you want to dual-boot Windows and Linux on the same drive, having two partitions lets you install both operating systems without running into issues with their file system requirements (GPT for Windows and EXT-4 for Linux). Additionally, you’ll be able to access your files from both OSes while also maintaining the aforementioned organization, backup, and data safety benefits.

3

Faster Formatting and Maintenance

person fixing a laptop motherboard with screwdriver
chunyawut_stock/Shutterstock

If you haven’t partitioned your drive and want to reinstall your OS from scratch, you must copy all non-OS files before you can format and reinstall the drive. Installing your OS on a dedicated partition lets you start over in a pinch, as you only need to format one partition. Windows, Linux, and macOS all have built-in tools that can help you safely manage hard drive partitions as well.

The entire process also becomes faster because the partition will be much smaller than the entire drive’s capacity. Formatting a loaded 2TB drive can take a while, but a 500GB partition can be formatted in a fraction of that time.

Any OS maintenance tasks like file repairs, health, and antivirus scans are also faster. Whatever program you’re using has to sift through a smaller partition and, hence, less data, and you can ensure that only the data you want is scanned. You can even do a clean Windows installation without worrying about losing your data.

2

Improved Security

data breach on laptop with warning red triangles
A9 Studio/Shutterstock

Another benefit of partitioning your drive is improved data security. You can have a dedicated partition for storing sensitive information, which can be encrypted or protected with a password.

This has several benefits, including but not limited to less vulnerability in case you get attacked by malware. Some malware attacks only target your OS files, meaning you can still access the storage drive from another computer and recover important files.

Data security also depends on what malware infection ends up on your system. For example, if you get infected by ransomware, there’s not much you can do to save your data, regardless of whether you’ve partitioned your drive.

1

Better System Performance

To be clear, simply partitioning your drive won’t make your computer faster. One of the biggest arguments against partitioning modern SSDs is uniform access speeds, regardless of how you save your data.

Related

Drive Partitions Are Pointless on Modern Storage: Here’s Why

Thinking about partitioning your drive? You might want to reconsider.

However, partitioning your drive can still help manage system resources more effectively by isolating frequently used files in separate partitions. Additionally, partitioning also ensures that specific types of data don’t clutter the OS partitions, letting you partition your hard drive for optimum performance.

Partitioning your drive is an effective technique to organize your data properly, protect it against crashes and malware, and make it easy to maintain your drive and carry out any fixes or repairs, making it a great idea for any storage device.

Google Maps Can Now Create Travel Plans Out of All Your Screenshots

If you’re anything like me and screenshot nearly everything, including travel destinations you want to visit, you’re probably used to them getting lost in your camera roll. Thanks to Gemini, Google might have a solution for you.

Google’s Latest Updates Make Travel Planning Smarter and Easier

Today, Google announced a new “screenshot lists” feature through a blog post on The Keyword. Whether it’s an image of a destination you want to visit, a wall of text from your notes app, or an Instagram Reel showing the top 10 spots in New York City, this feature will help you keep track of any travel-related screenshots you take.

If you’ve enabled the feature, Gemini will automatically identify the locations in your screenshots. You will then be prompted to review and save the ones you’re interested in to a “Screenshots” list.

Image Credit: Google

The saved destinations will appear on Google Maps at their exact coordinates, marked with a camera icon.

Gertude Nose Trailhead on Google Maps with camera icon
Image Credit: Google

This feature has started rolling out in the US in English this week. It’s currently only available on iOS, and is “coming soon” to Android.

Google’s new travel-related features don’t end here. The company has also updated the infamous AI Overviews in Google Search, letting you create “trip ideas for distinct regions or entire countries.”

By searching something as simple as “create an itinerary full of sightseeing and dining options,” Google will generate an AI Overview with a day-by-day breakdown, including photos and user reviews.

Trip ideas with AI Overviews
Image Credit: Google

If you want to save the itinerary for later, you can export it to Docs or Gmail or save it as a custom list in Google Maps. This feature has already rolled out in the US on mobile and desktop, though it currently only supports English language queries.

When you’re traveling, it’s only natural for expenses to pile up quickly. If you’re familiar with Google Flights’ price-tracking feature, which alerts you when flight prices drop, you’ll be glad to hear that you can now do the same with hotels. When browsing hotels on google.com/hotels, you’ll see a new Track hotel prices option just below the search filters.

Track hotel prices in Google
Image Credit: Google

Once enabled, Google will email you if there’s a significant price drop for any of the hotels you’ve looked at. This feature is rolling out globally this week on both desktop and mobile browsers.

If getting started on trip planning is the hardest part for you, Gemini can help with that too. Even better, Gemini Gems, now available for free to everyone, lets you customize the AI assistant to create your own personal AI expert.

This way, you’ll have a personalized AI travel guide to help you plan even the smallest details of your trip. I do have my doubts about how well Gemini can plan a vacation though, especially considering how underwhelming ChatGPT’s trip-planning skills have been.

Related

I Tried Out Gemini’s Gems, and Found Some Useful AI Tools

ChatGPT’s custom GPTs are one of its best features, and now, Gemini’s Gems brings the same functionality.

4 Microsoft Edge Features I Wish Google Chrome Had

Microsoft Edge is nowhere near good enough to be my main browser because its performance isn’t up to scratch, and frankly, it’s too clunky for frequent use. However, it does have some features I wish were included in Google Chrome without needing to download extensions.

4

Picture-in-Picture Viewing

I sometimes listen to YouTube videos in the background when using Chrome, but I sometimes want to watch the video while in another tab. This is particularly true for tutorial videos. Unfortunately, Chrome doesn’t have a native picture-in-picture viewing feature. Instead, I can access a mini-player. This lets me browse YouTube, but it doesn’t work in other browsers.

Edge, however, lets me view content within a smaller window if I want to. I can pause and fast-forward if needed, and it’s much easier to follow along if I need to view something in the video.

Once you open the video page you want to watch, right-click its tab and select Enter picture in picture. The new video window will appear in the bottom right of your screen. From there, you can adjust the size to make what you’re watching easier to see.

3

Startup Boost

While I think Edge’s overall performance is worse than Chrome, I like its Startup Boost feature. Edge Startup Boost basically loads the browser each time you boot Windows. So, when you launch Edge, everything is ready to use, which makes using Edge feel simple and fast.

I’d like to see a similar feature in Google Chrome. All too often, I’ve had issues with the browser crashing upon startup, which is immensely frustrating when I sit down to get some work done and have to reboot.

However, I’m also keenly aware that Startup Boost is one of the reasons Edge opens on its own at times. I’ve not personally experienced that, but I wouldn’t want to trade my browser occasionally crashing for one that opens when it wants!

I can always search the weather for a destination on Google or view my computer’s widget for the temperature in my local area. But to be honest, both have needless friction for me.

Microsoft Edge Weather Widget Appearing on Homepage

Microsoft Edge lets you view the weather at your location when you open your browser. I can view the full forecast for the coming days if I want. The widget lets me confirm whether the report is accurate by selecting Agree or Disagree.

1

Vertical Tabs

Vertical Tabs in Microsoft Edge

Although Chrome lets you customize the sidebar, it doesn’t have vertical tabs. Instead, you’ll see all of the sites you’re currently visiting across the top of the screen.

Edge, on the other hand, has vertical tabs. Personally, I feel like it’s much easier to switch between tabs and view everything I have open. Despite being such a simple UX change, I think it would make a huge difference to my Chrome experience; trust me, it’s way better.

Chrome is the world’s most popular browser by a long shot. But a few small tweaks would make it even better. I know I can find Chrome browser extensions that add most of the functionality I’ve talked about here, but I don’t always want to rely on extensions to provide useful functionality. For one, Chrome extensions add to the browser footprint and require extra hardware resources, and two, sometimes Chrome extensions are removed or deleted without warning. So, on that, these simple but effective changes would lead to a much better experience.

ChatGPT’s Latest Image Generation Update Is Wild—But Some Users Have to Wait

OpenAI’s latest ChatGPT update is one of its best, bringing a massive upgrade to GPT-4o image generation. Now, instead of switching to DALL-E 3, you can generate extremely high-quality images with GPT-4o without starting a new chat.

However, there’s a catch for ChatGPT’s free users—at least, there is for now.

ChatGPT’s Image Generation Receives an Enormous Upgrade

OpenAI’s GPT-4o model is the go-to for most default conversations on ChatGPT. It works for a huge range of questions, with OpenAI labelling the model “Great for most questions.” And it is; it hits a wide range of information with speed and accuracy—but only text.

Following its March 25, 2025, update, GPT-4o can generate high-quality images with amazing detail, exceeding the quality of the model it basically replaces (DALL-E 3). Furthermore, GPT-4o can now perform editing and image adjustments far beyond the capabilities of DALL-E 3. Image editing, color and style adjustments, subtle changes, foreground and background objects, and more are all possible.

Text generation is also startlingly improved. DALLE-3’s text generation was never a strong point (though it’s not a strong point for most AI models). Now, GPT-4o can create detailed infographics with detailed explanations on nearly any topic. Text placement within images is now precise, using specific text styles and direction without the risk of creating blurry AI-slop. Detail retention is also another clear improvement, with specific features now easily transferable from one image to another without ChatGPT completely altering the scene or generating a completely new image.

Part of the upgraded image quality comes from OpenAI’s partnerships with companies like Shutterstock and a group of trainers that spent long hours specifying mistakes GPT-4o made during image generation. Talking to the Wall Street Journal, lead researcher Gabriel Goh explained that this reinforcement learning technique enables GPT-4o to accurately follow human instructions over a vast range of image generation requests but that it only required “a little more than 100 human workers” to complete the process.

ChatGPT’s new image generation really is amazing, and I’d advise anyone to try it on any topic you desire. Now, it’s not perfect; no AI image generation tool is. But it’s a remarkable jump in quality from an AI image generation model like DALL-E 3, which was useful but not amazing, to the quality GPT-4o is now capable of.

ChatGPT’s Amazing Image Update Is Rolling Out to (Nearly) Everyone

Unfortuantely, due to the unprecidented demand on GPT-4o, ChatGPT’s free users are one again forced to wait for this new feature. On March 26, 2025, OpenAI CEO Sam Altman confirmed the delay without adding a specific period for its end.

The surge in interest was expected, but not quite as much. Unfortunately, that means you’ll have to wait a little longer or upgrade to ChatGPT Plus for 20 bucks per month. In fairness, with upgrades like this, upgrading to ChatGPT Plus becomes worth the money—more so than the launch of OpenAI’s previous model upgrade, GPT-4.5.

It’s also worth noting that as part of the GPT-4o upgrade, DALL-E 3 becomes “OpenAI’s legacy image generation model.” This means OpenAI will eventually remove DALL-E 3 from ChatGPT, though there is currently no specified timeline for this change.

These 9 Accessories Can Make Watching Your Smart TV So Much Better

You finally bought a smart TV, or maybe you’ve owned one for a while now, and it looks great in your living room. But somehow, something feels missing, and you can’t quite put your finger on it.

Well, these smart TV accessories will take your viewing experience from “Yeah, this is nice” to “Why didn’t I do this sooner?!”

9

​Dedicated Sound System

Proxima Studio/Shutterstock

I bet your smart TV’s built-in speakers probably sound like they were an afterthought. I say this because these days, manufacturers focus on making TVs thinner and bezels smaller, which is great for aesthetics but terrible for sound quality. A soundbar is the easiest upgrade. Even a budget-friendly one (like the Hisense HS2100 I copped) can deliver more immersive audio than your TV’s tinny, downward-firing speakers.

Related

I Bought a Budget Soundbar—Here’s Why It Was Totally Worth It

Budget-friendly doesn’t mean basic.

But if you really want a home theater experience, a surround sound system with multiple speakers is the way to go. A 5.1 setup (five speakers plus a subwoofer) or Dolby Atmos system can make you feel like you’re right in the middle of the action.

Related

How I Upgraded My Home Audio Setup Without Spending Much

You can make your audio so much better, and it doesn’t have to cost a month’s wages.

8

​Streaming Stick​

The Roku Ultra next to the Voice Remote Pro
Hannah Stryker / MakeUseOf

If your smart TV’s built-in apps feel sluggish, outdated, or just plain annoying, a streaming stick is an upgrade you need. These little devices plug into your TV’s HDMI or USB port and instantly give you a smoother, faster, and often more feature-packed streaming experience than whatever your TV came with.

The great thing about streaming sticks is that they come in different flavors depending on your preferred ecosystem. If you’re deep into Amazon’s world, a Fire TV Stick makes sense. If you love Google’s ecosystem (or just want built-in Chromecast), a Chromecast with Google TV is a solid pick. And if you want something that just works with minimal hassle, a Roku Streaming Stick or an Apple TV 4K (not exactly a “stick,” but close enough) are great choices. As an added advantage, if you travel a lot, you can take your streaming stick with you and plug it into hotel TVs to avoid dealing with weird, unfamiliar interfaces.

Related

These Are the 5 Best Streaming Devices You Can Buy

If you’re looking for a new streaming device, these are your best options.

7

Bias Lighting

This one is more useful if you love watching TV in the dark. Bias lighting is basically an LED strip that you stick to the back of your TV to create a soft glow around the screen. It helps reduce eye strain by balancing the contrast between your TV’s brightness and the surrounding darkness. Instead of your pupils struggling to keep up with dramatic shifts in brightness, they get a more consistent level of ambient light to work with.

Aside from saving your eyeballs, bias lighting also makes your TV’s colors pop. When you have a light source behind the screen, it tricks your eyes into perceiving deeper blacks and more vivid colors. If you’ve ever seen high-end TVs in showrooms looking almost too good to be true, part of that magic is careful lighting placement. You can get a similar effect at home for less than the price of a movie ticket.

Installation is a breeze. Most LED strips attach with adhesive backing, and you just plug them into a USB port on your TV for power. Some even come with color-changing options, letting you match the backlight to what you’re watching—though I prefer a simple warm white or neutral daylight tone for the best results.

Related

The Best TV Backlight Kits and Background Lights You Can Buy

Add something extra to your home viewing with a TV backlight kit. Here are the best Ambilight and backlight kits available now.

6

​Motorized TV Lift Mount​

If you don’t want your TV to dominate the room when it’s off, a lift mount lets you tuck it away neatly. This is perfect for maintaining a clean, minimalist aesthetic, especially in living rooms where a giant black screen might not complement your decor. Plus, if you have kids or pets, keeping the TV safely tucked away when it’s not in use can help prevent accidental knocks, scratches, or, in my friend’s case, the occasional flying toy disaster.

Motorized TV lifts come in different styles—some are designed for furniture integration (like inside a media console, custom cabinet, or even at the foot of your bed), while others are built for wall or ceiling installations. You’ll also want to make sure you choose a lift that can handle the size and weight of your TV. Installation takes a little planning and can be a DIY project if you’re handy, but if cutting into furniture or walls isn’t your thing, hiring a professional might be the way to go.

It’s not the cheapest accessory on this list, but for the convenience, space-saving potential, and sheer wow factor, a motorized TV lift mount like the VIVO Motorized TV Stand is absolutely worth considering.

5

HDMI Switch​

hdmi switcher
bro44_creative/Shutterstock

Most TVs don’t exactly spoil you with HDMI ports. You are usually stuck with two or three, which is barely enough to power your streaming stick, gaming console, soundbar, or maybe even an old Blu-ray player you refuse to let go of all at the same time. That’s where an HDMI switch comes to the rescue.

It is exactly what it sounds like: a little device that lets you connect multiple HDMI inputs to a single port on your TV. They’re relatively cheap, and you can get a decent HDMI switch for under $100 from brands like Kinivo or Ugreen. Just make sure to check the specs to see if it supports the right resolution and refresh rate for your devices. If you’re gaming in 4K at 120Hz, for example, you’ll need a switch that can handle HDMI 2.1. Otherwise, you might end up with a downgraded experience, and no one wants to pay for a high-end console just to game at peasant-tier frame rates.

Related

The Best HDMI Switches You Can Buy

Connect multiple input sources to your TV with an HDMI switch.

4

TV Antenna​

I know, I know—using a TV antenna in 2025 sounds like something your grandparents would do. But please hear me out before you skip this one. If you’re tired of paying for streaming services that seem more expensive every year while offering fewer good shows, try an antenna and see if it’s a good alternative. And no, I’m not talking about those clunky rabbit-ear antennas with wobbly V-shaped rods.

A good modern TV antenna like ‎URIIU Long Range Antenna (pictured above) or the ClearStream 2V (which you can place outdoors) lets you access free, over-the-air channels in full HD (and sometimes even 4K, depending on your area). That means you can watch local news, major network shows, live sports, and even classic movie channels—all without a subscription.

Related

6 Ways to Build Your Own DIY HDTV Antenna for Cheap

Want to save money and build your own HDTV antenna, but don’t know where to start? These DIY antenna builds show how easy it is.

3

Smart Power Strip​

Smart power strip showing two plugs and two USB cables plugged in
chello700/Shutterstock

Many smart power strips come with individually controlled outlets and USB ports, letting you automate when certain devices power down. That means if your TV shuts off, the strip can automatically cut power to your gaming console or sound system. You can even schedule everything to turn off at a set time, which is a lifesaver if you tend to doze off mid-episode (only to wake up betrayed by autoplay and three episodes deep into a show you barely remember starting).

For the best experience, look for models with surge protection (essential for expensive electronics), voice control, and at least six to eight outlets to accommodate all your devices. If you are looking for some solid recommendations, you can take a look at Kasa HS300, Meross, and Geeni smart power strips. The slightly higher upfront cost compared to standard power strips pays for itself through convenience and lower energy consumption over time.

2

Wireless Keyboard (And Mouse)​

Hands Typing on Wireless Keyboard
Wojciech Boruch/Shutterstock
 

Typing out search queries or entering login details using a TV remote is one of my most frustrating experiences. It’s like trying to write an email with a T9 keypad—painfully slow and full of mistakes. But with a proper keyboard, you can type out movie titles, browse the web, and even chat in apps like YouTube or Netflix without wanting to throw the remote at the wall.

For the best experience, go for a compact, media-friendly keyboard—something with dedicated volume controls, playback buttons, and a responsive touchpad. Logitech’s K400 Plus is a solid pick, but plenty of budget-friendly options do the job just fine.

1

Universal Remote

The SwitchBot Universal Remote in my hand.
Jowi Morales / MakeUseOf

Juggling multiple remotes is the second most annoying part of owning a smart TV setup. One for the TV, another for the soundbar, a separate one for the streaming device—before you know it, your coffee table looks like a spaceship’s control panel.

Related

How I Turn Old Phones Into Remote Controls for Streaming

Control your TV using your previous phone and forget using the remote control ever again.

The best ones, like the Sofabaton X1 (which we rated the Sofabaton X1 highly during our review) or Logitech Harmony Elite (if you can still find one), let you control not just your TV and sound system but also your gaming console, Blu-ray player, and even smart home devices like lights and thermostats. Even better, some models now support voice control, so you can channel your inner Tony Stark and command your entertainment system using Alexa or Google Assistant.

How I Use This VPN Alternative to Access Geo-Restricted Content

Accessing geo-restricted content can be frustrating, especially when traveling or trying to watch region-locked media. While VPNs are the most popular solution, I prefer using Smart DNS Proxy as a simpler and more efficient way of accessing locally unavailable content.

Why I Prefer Using Smart DNS Proxy Over a VPN

Ground Picture/Shutterstock

Smart DNS Proxy is a simpler and more efficient solution because it only redirects DNS queries instead of routing all traffic through an encrypted tunnel. This allows me to watch high-quality videos online without buffering, as my traffic doesn’t have to go through the extra steps of encryption.

It also doesn’t mask my IP address, preventing issues like security flags on banking sites or annoying CAPTCHAs. I can access geo-restricted content while keeping seamless access to other online services.

Unlike VPNs, which require software installation and may not work on smart TVs or gaming consoles, Smart DNS Proxy can also be set up directly on routers and media players, allowing you to access popular TV streaming services with your preferred device. Plus, since it only alters DNS queries instead of rerouting traffic, it’s harder for streaming services to detect and block, ensuring more reliable access.

How I Use Smart DNS Proxy to Access Geo-Restricted Content

Amazon Prime not available in location

Setting up Smart DNS Proxy is simple and works across multiple devices. I’m using Windows 11, but Smart DNS Proxy has guides for macOS, smart TVs, consoles, and more.

Step 1: Create a SmartDNS Account

Create a SmartDNS account

You’ll first want to create a Smart DNS Proxy account with your email. They offer a free two-week trial (no need to enter your credit card details) with full access to their services, except for Netflix, which is only accessible on a paid subscription. So, unless you primarily watch on Netflix, you don’t need an immediate subscription.

Step 2: Configure DNS Proxy on Your Device

  1. Start by opening View Network Connections by navigating to Control Panel > Network and Internet > Network Connections
  2. Right-click the adapter and choose Properties, then scroll down to reveal the IPv4 and IPv6 options.
  3. Untick Internet Protocol Version 6 (TCP/IPv6) to ensure SmartDNS Proxy is only working with IPv4.
  4. You then select Internet Protocol Version 4 (TCP/IPv4) and click on Properties.
  5. Now tick Use the following DNS server addresses. Then, visit SmartDNS’s list of available DNS servers. Pick any two servers where you think the content you want to watch isn’t blocked, and copy the IP addresses. Now, return to your IPv4 configuration panel and paste both IP addresses into the provided box.

Note that your device will default to using the DNS server you’ve placed under Preferred DNS server, and will only use the Alternative DNS server if the preferred server isn’t available. After setting up network configurations, restart your computer to ensure that all changes are set.

Sometimes, Google Chrome blocks Smart DNS Proxy when accessing content online. To ensure you don’t have this problem, go to Settings > Privacy and security > Security. Scroll down to Advanced and disable Use secure DNS. This should fix problems with Chrome blocking sites due to the proxy DNS.

Step 3: Activate and Verify DNS Proxy Service

Amazon prime no longer georestricted

  1. After restarting your computer, open your web browser and go to the My Account page on Smart DNS Proxy.
  2. Click Update, then select Activate/ReActivate to register your IP address with the system.
  3. To verify that SmartDNS is active, check the Setup page—if it shows a green check mark, your DNS proxy is working correctly.

After activation, open your favorite streaming service and test by accessing region-locked content. If the content is still locked, make sure to check that IPV6 and secure DNS are disabled. You may also want to change your DNS server region, as it’s possible that the region you are proxying from also blocked the specific content you want to access.

Limitations of Using Smart DNS Proxy

Hands typing on a laptop with a red prohibition sign over security icons, indicating a restriction on digital access.
NONGASIMO / Katya Moon / Shutterstock

VPNs and other proxy services are similar but not the same. DNS proxy services are streamlined to be faster and simpler than VPNs but have limitations:

  • No Encryption: Unlike VPNs, SmartDNS doesn’t encrypt internet traffic, making it unsuitable for securing sensitive data. If privacy is a concern, a VPN is still the better choice.
  • Works Only with Compatible Platforms: SmartDNS is designed to work with streaming platforms and region-locked websites, but it won’t help bypass network-level censorship (e.g., in restrictive countries).
  • May Require Frequent IP Verification: Some ISPs frequently change IP addresses. When this happens, you’ll need to re-activate your IP with the Smart DNS Proxy, which can be inconvenient.

If all you need is a way to watch your favorite shows or access websites blocked in your region, a proxy DNS service like Smart DNS Proxy is a great option. It’s fast, reliable, and works on devices that don’t support VPNs. That said, it’s not a one-size-fits-all solution—if security and privacy are your main concerns, a VPN is still the better choice. But if speed and convenience matter most, Smart DNS Proxy is worth trying out.

I Own Good Speakers, but I Still Prefer the Tiny Ones in My Ears

My living room hosts a not-so-expensive but good-enough sound system. Yet, every day, I usually reach for a small charging case containing my earbuds in my pocket instead. Sure, there are some trade-offs, but I have some good reasons for doing so.

5

My Neighbors Already Hate Me (and I Don’t Need to Make It Worse)

Jack Mitchell/MakeUseOf

My work schedule is wired such that my prime listening hours usually start when others are winding down. My upstairs neighbor works early shifts, while the couple next door has a newborn. My perfect moment for cranking up the volume of my sound system often coincides exactly with their desperate attempts at sleep.

One night, lost in the depths of jamming a live recording, I cranked up the volume just a little too much. The following day, my next-door neighbor—with whom I’d always exchanged nothing but polite nods—caught me while I was parking my car and muttered, “Great show last night.” No smile. Just tired eyes and a tight jaw. That was enough to make me rethink my habits.

Sound isn’t just about what you hear. It’s about what everyone around you is forced to hear. Low frequencies don’t just stay in your room, especially when not soundproofed; they seep into ceilings, floors, and every shared wall. And unless your neighbors are as into your playlist as you are (I can bet they’re not), you’re making enemies without even realizing it. So, yeah, I own good speakers. But I also like having friendly neighbors. And more than that, I now like the feeling of music being mine alone, not something I’m broadcasting to the unwilling ears of the people living next to me.

4

Firing Up My Speakers Feels Like a Chore

hand on top of sennheiser ambeo soundbar mini.
Hannah Stryker / MakeUseOf

Whenever I think about using my speakers, I hesitate because they require effort. I have to turn them on, switch inputs, adjust the volume, and maybe even fiddle with an app. If I want music from my phone, I have to make sure Bluetooth is connected or that the right streaming device is active. Then there’s the waiting for a few seconds for everything to sync and a few more to double-check that the sound is actually coming from the speakers and not still playing on my phone.

Earbuds don’t require this kind of commitment. I pop the case open, pull the units out, and music plays as soon as they’re plugged into my ears. I don’t need to think about toggling inputs or where I left the remote.

Related

How I Upgraded My Home Audio Setup Without Spending Much

You can make your audio so much better, and it doesn’t have to cost a month’s wages.

3

Noise Isolation and Active Noise Cancellation Make a Huge Difference

Person wearing the Sonos Ace headphones.
Hannah Stryker / MakeUseOf

Good speakers can fill a room but cannot block out other sounds around you. But headphones and earbuds have the upper hand here, as they can cut out distractions before they reach your ears. A snug fit is key for noise isolation. Earbuds with the right tips (or ear cups in the context of headphones) seal your ear canal, keeping outside noise from creeping in. This improves clarity and bass, even in loud places. That’s why musicians rely on custom in-ear monitors on stage—they need to hear every note without interference.

It’s even better if you have headphones or earbuds that come with active noise cancellation (ANC). The tech uses tiny microphones to detect surrounding sounds and then create a sound wave that cancels out the noise. ANC is great for steady, low sounds like air conditioners humming or the drone of an airplane engine, as it can make these noises fade away almost completely. However, sharp, sudden sounds—like clanging dishes or a barking dog— can still get through, but they come across as softer and less startling.

Related

7 Key Features to Consider Before Buying Noise-Canceling Headphones

Buying noise-canceling doesn’t have to be tricky.

2

Bass Feels Better with Speakers, but It’s More Controlled in My Ears

When you hear deep frequencies (bass) from speakers, you don’t just perceive them with your ears. You feel them in your chest, bones, and even the floor beneath you. The bass energy spreads across an entire room. The walls, the furniture, and even the air itself interact with those sound waves, causing distortion, phase cancellation, and unpredictable peaks and dips. That’s why a bass note might rumble perfectly in one part of your room but vanish in another. Even the best speaker setup is at the mercy of its environment.

The ones in your ears or over your head don’t have this problem. They deliver bass directly to your ears, untouched by room acoustics. This means you get a cleaner, more precise, low-end—bass that’s tight, controlled, and faithful to the recording.

Related

I Always Run These 6 Tests Before Buying New Headphones

Buying new headphones? Make sure to tick these tests off before parting with any cash.

1

I Can Take My Earbuds Anywhere

Speakers demand one thing I can’t always give, which is staying put in the room where it’s playing out. On the flip side, my earbuds go where I go. I can walk from the kitchen to the garage, folding laundry while listening to a podcast, then step onto the porch without missing a beat. There’s no volume drop-off, no sweet spot to maintain—just uninterrupted sound, always at the same level, no matter where I am.

Speakers win, hands down on power, for sure. But when it comes to practical, extended listening, my earbuds or headphones are the clear winner.

How I Maximize My Phone’s Resale Value

The key to my frequent phone upgrades is keeping all my devices in pristine condition, ensuring I get the best resale value. You can use these tips to help get top dollar for your old devices.

6

Use a Case and Screen protector

Aryan Surendranath/MakeUseOf

Modern smartphones come with a durable glass cover and an aluminum chassis. Some flagship phones, like the Samsung Galaxy S25 Ultra and Apple’s iPhone 16 Pro lineup, feature an even more durable titanium frame. Some phones, like those in the Galaxy lineup, feature cover glass that’s more scratch-resistant than the standard glass used on other phones.

Yet, irrespective of the phone I use, I always use a case and screen protector for added protection.

I typically order a few cases from renowned accessory makers for my phone. Later, I sell them with the phone, which helps give the buyer a feeling that they are getting more value for their money.

While there are plenty of minimal cases on the market, I avoid them as they don’t always offer ample protection. A case with a raised lip and edge protection is essential, as it safeguards the phone from damage in case of a fall. This ensures the phone doesn’t pick up any scratches or scuffs from accidental falls or dings.

Similarly, the screen protector shields the display from minor scratches and scuffs caused by my jeans pocket or table. These added protection measures help boost the resale value of my phones, as you can get at least 20-30% more for a phone in mint condition, without any scratches or scuffs.

5

Keep the Box and Charger

Ugreen Nexode Pro 65W Charger on an iPhone 14 Pro Max
Jowi Morales / MakeUseOf

Smartphone boxes do not come with as many goodies as they used to. You get a basic case, a USB-C cable, a SIM ejector pin, and regulatory papers. Despite this, I never throw away my phone’s boxes. I also keep the bill inside the box itself, ensuring I don’t misplace it. I don’t even remove the bundled USB-C cable, as I have plenty of them lying around, and use them instead.

While not much, this helps me fetch a higher resale value for my phone. Individually, having the box of your phone might not make a big deal. However, combined with other tips I have shared in this article, it can make a big difference in the final resale value.

4

Try to Maintain Battery Health

An iPhone 14 Pro showing the Battery Health menu in iOS
sirajexclusivep5/Shutterstock

This part is easier said than done, but I always try to maximize the battery health of my phones to increase their resale value. Typically, this involves not fast charging the phone frequently and avoiding fast wireless charging. I also avoid draining the phone’s battery to zero and then charging it to full.

Unless I am traveling, I prefer to charge my phone with a regular 10W-20W charger. I only like to fast charge it when I am traveling or in a hurry. While I can limit the battery charge capacity to 80% or 90% to extend its lifespan, I find this a bit excessive.

Admittedly, this isn’t easy, especially if you use a phone for a year or two and then sell it. By then, the battery health is bound to take a hit. Still, you can do your best to maximize its lifespan, as a phone with 80% battery health will get you noticeably less than a phone with a 95% capacity.

Alternatively, if your phone’s battery health has gone down noticeably, you can get it replaced, use it for a few months, and then sell it. I follow this approach with my wife’s and mom’s iPhones, replacing their batteries about six months before I intend to sell them.

If the device you are selling is too old and the resale value is poor, consider repurposing your old Android phone into a security monitor or an Android Auto companion. You can also turn it into a remote control for your streaming stick.

3

Claim Warranty for Any Defect

As long as my phone or any other device is under the standard manufacturer warranty, I always visit the official service center for any repairs or defects. This keeps my phone’s warranty intact and guarantees quality workmanship, which helps retain the phone’s resale value.

I’ve had instances where I got my phone’s display or back panel replaced at a third-party repair shop, only to face more issues later due to their poor work. This also ends up negatively affecting the phone’s resale value.

For older devices that are out of warranty, I only take them to renowned third-party repair shops. In such cases, I avoid the manufacturer’s service center, as their out-of-warranty repair costs are exorbitant and make little sense.

2

Resell a Few Weeks Before a New Model Comes Out

A guy holding a Pixel 8 Pro showing its back
Justin Duino / MakeUseOf

My wife typically upgrades to a new iPhone every year. As a content creator who relies heavily on her phone for shooting videos and creating content, her workflow benefits from even minor yearly improvements. Since Apple typically launches new iPhones around mid-September, I sell her current phone in late August or early September to get the best resale value.

This approach ensures she gets 15-20% more value for her phone, with its pristine condition further helping increase its value. Otherwise, once Apple announces a new iPhone, the value of older models drops significantly.

1

Try Multiple Platforms When Selling

I’ve likely used hundreds of smartphones over the years, yet I’ve never traded one for a new device. Instead, I always list them for sale on eBay, Facebook Marketplace, and other similar services. This ensures I get the most value for my old phone, as most manufacturer trade-in programs don’t offer the best price.

There can be exceptions, with Google and Samsung offering boosted trade-in values for old phones when they launch their new flagship. But otherwise, you are always better off selling your phone through one of the above-mentioned channels. The only problem is that you will frequently run into hagglers or people who will provide lowball offers.

I also always list the phone for sale on multiple marketplaces. Admittedly, this takes time, especially if there are many interested buyers. But again, this helps me get the best resale price for my old phone.

Irrespective of where you sell, always do these 10 things before selling your old phone. You don’t want to hand over the device to its new owner with your private photos and data still on it.


Getting the most value for your old phone will take effort and time. If you cannot put in the time, consider using a boosted trade-in program for its convenience.

Stop Using Journaling Apps—Paper Is Better, and Here’s Why

Journaling apps promise an easier way to keep track of your thoughts. But for some people, writing on paper is infinitely better—and less distracting—than using these tools.

1

Don’t Use Your Phone First Thing in the Morning

Picking up your phone before doing anything else is often a recipe for disaster. While you might want to journal in an app, the risk of checking your notifications, hopping onto a social media app, or browsing the internet is very high.

When you use your phone as soon as you wake up, you’re often in a reactive state for the rest of the day. It becomes significantly more difficult to complete your daily tasks and be present.

Danny Maiorca/MakeUseOf

Journaling on paper means that you can focus fully on your notes and feel like you have a clear mind after doing so. You’ll therefore be more likely to excel throughout the day. If you must use a journaling app, you should at least download an app that limits screen time.

2

You Can be More Creative

When journaling on paper, you can be much more creative with your notes. In addition to writing normal sentences, you can add mind maps and diagrams where extra illustrations are needed.

Since journaling on paper is freer than an app, it can also improve general creativity. For example, your brain might generate new ideas for existing projects or a fun new business idea. When you write things down, you often get new ideas that form as a result of those.

3

You’ll Feel Like You’re Getting Your Thoughts Out

Writing in journaling apps can sometimes feel like something you must do instead of a free-willed choice. This, combined with the fact you’re looking at a screen, can make you feel like you haven’t done anything at the end of the session. If you feel like this, forming a habit will become more difficult.

While you won’t feel like journaling on paper all the time, you will feel like you’ve got your thoughts out of your head. You might notice less brain fog, in the same way that you would when switching from digital to paper to-do lists.

4

You’ll be More Likely to Revisit Your Notes

If you’re serious about self-improvement, revisiting your notes is a good idea. While you can do this in a journaling app, it’s easier to ignore them. Moreover, you might not digest all the required information when staring at your old notes from a screen.

Journaling on Paper in a Notepad
Danny Maiorca/MakeUseOf

With a paper journal, you can easily flick through your pages to see how you felt at a certain time. Besides being easier to find specific information, it’s nice to spontaneously look back and see how much progress you’ve made. So, in addition to improving yourself, you’ll also have more gratitude for where you currently are.

5

You Can Become a Better Writer

Writing with a pen and paper forces you to think about what you’re saying and how you structure your sentences. Unlike with a journaling app, you can’t hit backspace and delete what you’ve said. Even with a pencil and eraser, you have more friction involved.

Over time, you’ll develop more coherent sentences and expand your vocabulary. Expressing your thoughts will also become easier everyday, and your skills will transfer to digital communication methods like email.

6

You’ll Become More Patient

Writing on paper typically takes longer than doing so on a phone or computer, and staying focused for the first few sessions will be challenging. But over time, you’ll become more patient (without needing to use tools to help you stay focused).

Journaling about photography on a notepad
Danny Maiorca/MakeUseOf

By becoming more patient with your journaling, you’ll naturally practice this trait in other areas of your life. Being present will be simpler, and you won’t get as stressed about small delays.

Journaling on paper is an excellent way to become more creative and learn more about your thoughts. You can use them for any area of life, whether you wish to improve professionally or have better personal relationships. Journaling apps are useful if you’re on the go, but they’re no real competition for paper.

How ChatGPT’s Deep Research Can Be Improved With 8 Key Features

ChatGPT’s Deep Research tool is fantastic for delving deep into almost any topic you choose, but it still needs some improvements to be truly useful. I use Deep Research all the time and I think it would be so much better with these extra features.

1

Customizable Parameters

When I use ChatGPT Deep Research, I normally answer follow-up questions to give the tool more context. However, I wish that I could use customizable parameters instead.

I’d envision this feature working like filters when shopping online. I’d love to choose how many resources I want ChatGPT to analyze, along with published timeframes. Moreover, it’d be great if I could search based on different keywords.

Customizable parameters would keep my research much more organized. I feel like the results would be worth the time it takes for ChatGPT to perform Deep Research, too. Until this happens, there are at least ways that you can force ChatGPT to use high-quality sources.

2

Research Layout Options

ChatGPT’s Deep Research feature can lay out information in multiple ways. For example, it’ll use tables when comparing statistics or other aspects. In other instances, the tool will lay out information in comprehensive sub-sections.

While various layout options are nice, I wish that ChatGPT would let me choose how I want it to present information. Sometimes, I see content presented in sentence form when I’d rather use tables.

I sometimes use prompts to ask ChatGPT to present information in my preferred format, but unfortunately, it doesn’t always listen.

3

A Bigger Monthly Allowance

Perhaps my biggest gripe with ChatGPT’s Deep Research tool is how easy it is to use your monthly credits. Though this is fine for casual users, 10 monthly queries are not enough for people who regularly need to perform comprehensive research. I went through my queries in two days.

I could understand ten monthly queries for free users; in these instances, I actually think it would be good value. However, as someone who pays $20 per month for ChatGPT, I can’t help but feel like I’m not being given the best possible service.

Running out of requests in ChatGPT

At the very least, I think that 15-20 monthly queries are fair for a Plus plan. I would increase these allowances further for higher-tier subscriptions. OpenAI could incentivize people to sign up for these plans by doing so, resulting in a better user experience and increased revenue.

4

A Separate Section in ChatGPT

I use ChatGPT for multiple conversations, whether I’m planning a new part of my life or want to work through my current thoughts. As I create more chats, the interface becomes clunky and disorganized. Annoyingly, I have no way to differentiate between ordinary conversations and discussions in which I’ve used Deep Research.

While I can create new projects via the sidebar, I’d rather have ChatGPT automatically organize my conversations with Deep Research. This would be an effective improvement to the ChatGPT user interface, and it wouldn’t be particularly difficult to implement.

Even if the app didn’t have a separate section, a differentiator—such as an icon—would be handy.

5

Integration With Custom GPTs

Custom GPTs are ChatGPT’s most underrated feature. I love how easy they make it to get the exact type of response I was looking for, and there are useful Custom GPTs for all kinds of interests. But unfortunately, you can’t currently integrate them with the Deep Research feature.

I feel like responses would be much more accurate if they had the context of Custom GPTs. This is particularly true, considering some of my normal chats have multiple subjects.

Custom GPT as a programming assistant

I don’t know how this would be possible because I imagine the two programs would conflict. But if there was a way to integrate Deep Research and Custom GPTs, I don’t see how any other AI tool could compete in this area.

6

The Ability to Break Text Into Smaller Chunks

I’ve compared ChatGPT’s Deep Research to similar tools, such as Microsoft Copilot’s equivalent. When it comes to detailed responses, Deep Research stands head and shoulders above its competition. But at the same time, I sometimes see huge paragraphs once the research has concluded.

Finding diet information on ChatGPT Deep Research

Skim-reading on a screen is much harder than with a book, and I sometimes miss key points in the research. When this happens, research takes longer than it should. Breaking text into smaller chunks would be a simple but effective solution.

If all the text is truly important, ChatGPT could divide it into more subsections. That way, I’d be able to identify the most essential information easily.

7

The Option to Exclude Specific Websites

Inaccurate information is one of many big problems with ChatGPT, and sadly, this extends to the Deep Research feature. I can sift out certain websites when researching via search engines, but this is not the case when using Deep Research—which means I must be extra careful to double-check resources.

I’ve seen similar features in other types of apps, such as website blockers. The way that I see this, users could enter the URL to exclude a site from the search. I’d imagine this would increase how long it takes to complete these tasks, but it’d be a huge success.

8

Audio

ChatGPT has some cool voice features, but none apply to Deep Research. I have to write text prompts, and I receive written responses. While I’m normally happy with these searches, I would like to sometimes use audio.

Changing the voice of the speaker in the Voice Mode in ChatGPT.

In addition to speaking for Deep Research, I would appreciate written responses. I’d love for the tool to tell me about its findings and provide a transcript later. This would be interactive and beneficial to people who learn better through listening than reading.

OpenAI will inevitably add new features to ChatGPT’s Deep Research tool in due course, and I think it should prioritize some simple but effective additions. Customizable parameters would lead to more accurate findings, and having more control over information layout would also be nice.

Don’t Miss These 8 Underrated Microsoft Copilot Features

At first glance, Microsoft Copliot looks like ChatGPT but lacks as many features. However, after spending some time with it, I discovered that it has a surprising number of underrated features that are absolutely worth trying.

8

File Uploads

To make your AI prompts more effective, you need to provide the software with as much context as possible. Instead of adding more text, consider uploading relevant files and folders.

With Copilot, you can easily upload PDF documents and JPEG images. The software can then scan these and provide overviews. After getting the initial information, you can go deeper with your research. In addition to looking at specific elements of your PDF, you can ask the software to speculate on different reasons. If you want to upload an image, Copilot can scan these files based on your requests.

Copilot has file upload limits, and as such you might need to shrink your files. If you’re assessing a PDF document, consider deleting unnecessary pages.

7

Shortcutting Future Prompts

Writing the same prompts over and over again becomes time-consuming. Luckily, Copilot has a way to stop this from becoming a problem. While there isn’t an exact tool to save prompts, you can streamline conversations and tasks.

Once you’ve fed Copilot enough information on certain topics, you can give one or two-word prompts. For example, if you like creating lists, you can tell Copilot “list” and then provide what needs to be included.

Besides making shorter prompts, you can streamline your time accessing by creating a Copilot desktop shortcut in Windows.

6

Creating Tables

One of the best ways to use Copilot in Windows is to integrate the tool with other Microsoft apps. For example, you can use the software to create Pivot Tables in Excel.

Using Copilot to create these kinds of tables saves you a lot of time on manual work. Moreover, you’ll have a better overview of the information you need. You can use this feature for any table you might need to create; within Copilot, you’ll find an option to summarize the data in your spreadsheet.

While this feature will simplify summarization, you should still double-check to ensure everything is accurate.

5

Summarizing Lengthy Texts

In addition to summarizing data, Microsoft Copilot is very good at giving you an overview of lengthy texts. You can either feed the software a PDF document and ask it to go through the information included in it or extract data from across the internet instead.

You’ll see everything in an easy-to-digest format once you’ve told Copilot to summarize your texts. This feature is handy whether you need an idea of longer books or to summarize study and meeting notes.

Summarizing an article in Microsoft Copilot

If you’re going to use this feature for articles, copy and paste the text into Copilot. From personal experience, the app can’t read specific links too well. You might need to break up your text, though, as the app only allows a maximum of 10,240 characters per message.

4

The “Revisit Previous Conversations” Icon

One big difference between ChatGPT and Microsoft Copilot is how you access old conversations. In ChatGPT, you’ll see all of these in the left-hand toolbar. However, with Copilot, you need to click on the clock and round arrow icon.

The revisit previous conversations icon in Copilot

Once you’ve clicked on this icon, you’ll see a list of your previous conversations. Find one that interests you and jump right back in. You can also delete any conversations that you no longer need and start new ones if needed.

Visiting Old Conversations in Microsoft Copilot

3

Post-Meeting Follow-Up Emails

Whether you’re having a meeting or cooperating with classmates, you’ll likely have a list of action steps that come from these. Or at least, you should if you wish to be more productive. With plenty of other tasks on your plate, it’s very easy to neglect sending follow-up emails.

One of the best ways to use Copilot in Outlook is to send follow-up emails to meeting attendees. You can tell the app what they need to know while adding other essential details (e.g., deadlines). Depending on your audience, you can even change the tone of your message.

Copilot in Edge providing an email draft

After writing your email with Copilot, you only need to make minor adjustments. Once you’ve done this, the message should be good to send to others.

2

PowerPoint Slide Generation

Copilot can help you nail every PowerPoint presentation in numerous ways, one of which is generating slides. You can feed the software a prompt to ensure that all the most important details are included; after doing this, Copilot will create a slide or entire presentation based on your needs.

In your prompt, you should give Copilot as much information as possible. If needed, give a complete breakdown of each slide; you might also want to provide some statistics that the software can use.

Creating new presentation with Copilot in Microsoft

When PowerPoint generates your slide, you can edit everything to suit your needs better. By having an initial draft to work with, you’ll probably find that your ideas flow better than if you had to start from scratch. You can combine Copilot with PowerPoint’s advanced features to take your presentations to the next level.

1

Brainstorming

You can get better results when brainstorming with ChatGPT, but if you don’t want to use a different AI chatbot, Copilot is also quite effective in this area. This tool allows you to prepare for exams, actualize your big creative ideas, prepare for job interviews, and much more.

Copilot is good at brainstorming ideas in bullet point format. You’ll get comprehensive outlines and can then ask follow-up questions to deepen your research. While you can use the questions that appear after each answer, Copilot will also let you ask your own if needed.

Microsoft Copilot's Brainstorming Features

Mindmapping with Copilot is more difficult. I find that Copilot just gives you a list of apps that specialize in this rather than actually mapping out my thoughts and processes. But for general brainstorming, you shouldn’t have too many problems.

Copilot has plenty of underrated tools to help you with all kinds of projects and requests. The tool can create full presentations, and you’ll also find it helpful when brainstorming your big ideas. Combining these Copilot features with those already in your favorite Microsoft app can be particularly powerful.

I Tried Recreating My Real-Life Videos With Sora: Here’s How It Went

OpenAI’s Sora is cool for letting your imagination run wild, but how does it perform when recreating existing videos? I put this software to the test to see how it would do. The results were… mixed, to say the least.

How I Replicated My Video With Sora

I first uploaded the content directly to see how good Sora was at replicating my video. Then, I used prompts and tried storyboarding. Below was the video that I fed Sora:

My results were inconsistent in all three areas.

1. Uploading My Video Directly to Sora

I wanted to give the tool something relatively simple. I have numerous videos with people, city skylines, and animals—but I wasn’t sure how it would perform in these areas. I figured that using something straightforward should be easy for Sora to understand.

After uploading my video, I asked the software:

“Please recreate this video with a flat gray sky and some snow on the mountains.”

I also used the Subtle remix tool to avoid changing a huge amount.

I have no idea what Sora changed. It felt like the same video I uploaded, but with worse quality. Though disappointed, I wanted to try again with prompts.

2. Prompting

Prompting allowed me to be more specific about what I wanted to create. Moreover, I could increase the video duration from a maximum of five seconds to twenty seconds.

Given the disaster of my previous attempt (and because I’ve tested various prompting tips that work), I gave the software as much information as possible. Here was my prompt:

“Please ignore all previous instructions. You are tasked with creating a wide-angle landscape video of a mountain and waterfall in the Faroe Islands. Please include flying gulls in your video and make the sky gray. The sea should also be a bit choppy, but not too much. Please also make the mountains look like the video was taken in March.”

Okay, so this video wasn’t a replica of what I created. Nonetheless, it was still quite cool. Sora at least added some creativity to this version.

I should, however, have been more accurate with my description. For example, the waterfall was not in the same place as in the original video. Moreover, the birds were too big and didn’t look like they were naturally.

The colors were a big bonus. I felt like Sora got these pretty accurate, and if I decided to rewrite the prompt, I at least had something to work with.Remixed videos can only be a maximum of five seconds long. You can use numerous free online video trimmers to cut your clips.

3. Using the Storyboard Feature

One way to learn how to use video editing apps is by storyboarding before you create a video. Since Sora has this feature, I wanted to see if it would make a difference.

I used three storyboard sections. Once I added my suggestions, I then created a five-second video. You can see the result below:

Honestly, I didn’t even care that this differed from my original real-life video. This version looked really cool and gave me some ideas for the next time I’m in a landscape of this kind.

If I wanted to make this look exactly like my real-life version, I would tell the camera to stay at the same angle next time. The waterfall is also too wide, so I’d also correct this.

What Did Sora Perform Well With?

During this experiment, Sora handled some things well but did others terribly. Here’s what I liked about the tool.

1. A Good Storyboarding Feature

My favorite video of the three attempts was the one I created with my storyboard. This version had better results because I could be more specific. Moreover, the tool knew exactly where to include each element.

When creating my storyboard, I found it easier to use than many apps designed for real-life videos. Everything was intuitive and responsive, which helped massively.

2. Varying Camera Angles

While I wanted Sora to stick with one camera angle, I liked discovering that I could use different ones for my videos. The footage where the camera flew close to the waterfall was particularly cool.

In the future, I’ll use different camera angles and other useful Sora tips to improve my videos.

Where Could Sora Have Improved?

I can see Sora’s potential, but it was disappointing when I recreated my videos. The app needs to fix three elements before I feel comfortable re-running this experiment and getting better results.

1. More Accurate Video Editing

Sora doesn’t seem to handle video editing very well. When I uploaded my own footage, all I received in return was a worse-quality version of the same thing. Perhaps my prompts needed to be more accurate, but I also felt like the software played a role here.

Rather than prompting, I think having buttons like background removal would work better.

2. Longer Video Allowances

I’m sure Sora will let me make longer videos in the future, but uploading preexisting content for a maximum of five seconds was frustrating. This is not enough time to be truly creative.

While the 20-second cap on videos I create in-app is better, it’s still sometimes limiting. I guess creating multiple video clips and bringing them together in an external video editing app. For example, I could use one of the alternatives to CapCut.

3. Better Animations for People and Animals

Sora seemed to perform well with landscapes, but the same couldn’t be said for animals. For example, the birds flying in my videos seemed very unnatural. Rather than going somewhere, these birds were effectively standing in mid-air.

Others have also complained about how bad Sora is at object interactions. I imagine that the software will iron this out as it gets more information, and hopefully, it does so before too long.

What Kinds of Videos Work Best With Sora?

I don’t recommend using Sora to recreate real-life videos. While I could have done certain things differently, the software didn’t impress me.

Instead, I think Sora is better for creating videos from scratch. It offers many options if you want to let your creativity run wild with prompts and storyboards. Similarly, I’d use the tool to get inspiration for future real-life projects.

I Started Using a Trackball and Will Never Switch Back to a Mouse

Everyone who has ever suffered from wrist pain or desk clutter has wondered if another mouse type is available. And the resounding answer is yes: it’s time to switch to a trackball.

5

No More Wrist or Forearm Pain

Traditional mice weren’t necessarily built with comfort in mind; the constant wrist movement can lead to pain over time. Switching to a trackball changed everything for me. Instead of moving my entire hand, I rotate the ball with my thumb, keeping my hand in a neutral, stationary position. This eliminates the repetitive strain from traditional mice and relieves pressure on my wrist and forearm.

With a trackball, it’s all about the fingers. I find myself making fewer grip adjustments to get my hand into a comfortable position—my fingers control the ball, so my hand stays in place, avoiding the fatigue that comes from constant adjustments.

This change isn’t just a short-term comfort fix. Over time, using a trackball helps prevent repetitive stress injuries (RSIs) like carpal tunnel syndrome. Even after hours of use, my hand remains comfortable, and my wrist doesn’t ache, something I couldn’t say with a regular mouse. The ergonomic benefits are immediate and lasting, making it a huge win for anyone who spends long hours at a desk.

4

A Space-Saving Design

One of the unexpected benefits of a trackball is how much desk space it frees up. Traditional mice need a good amount of room to move around, and if your desk isn’t huge, that can quickly become an issue. Trackballs, on the other hand, sit in one spot, so you don’t need to clear space for movement.

It’s a small thing, but once you realize how much room you’ve been wasting with your mouse, you’ll appreciate the compact nature of a trackball. Whether you’re working in a cramped office or want a wonderfully cozy ergonomic setup, a trackball adds a pleasant benefit.

3

More Precision and Control

Profile view of a trackball sitting on a white surface.
Tyler Fyock / MakeUseOf

You might be skeptical that a trackball could offer better precision than a traditional mouse, but after using it for over a decade, I can tell you it’s not just a gimmick. Trackballs, especially the higher-end models, give you a level of precision you won’t get with a mouse. This is especially true for tasks like graphic design, 3D modeling, or video editing, where accuracy is key.

Your hand doesn’t need to shift as much because you control the ball with your fingers instead of moving the entire device. You get finer control over the cursor, especially for small adjustments that a typical mouse would struggle with. For anyone who works on detailed tasks, the difference is night and day.

Another great feature of a trackball is the ability to “flick” the ball for quick movements. With just a swish of your fingers, you can send the cursor flying across the screen, making it perfect for everyday browsing or even gaming. This quick and effortless movement can save time when navigating around windows or rapidly switching between tasks. It’s a surprisingly useful feature that adds convenience and speed.

2

Durable and Long-Lasting

One of the most underrated advantages of trackballs is their durability. They tend to outlast mice due to their lack of moving parts, especially when compared to mice that rely on fragile sensors or moving wheels that wear down over time.

Mice often face problems with their feet or sensors losing precision as they wear down, but trackballs, being stationary devices, are much less susceptible to these types of issues. With only a singular moving ball, they maintain consistent performance throughout their lifespan, offering you a reliable solution and a dependable input device.

With their lasting durability and minimal moving parts, trackballs are an investment that can serve you well for years to come. If you prioritize longevity and a steady, reliable performance, a trackball is a solid, cost-effective choice in the long run.

1

The Learning Curve Is Easier Than You Think

Switching to a trackball is easier than you’d expect. While there’s a brief learning curve, you’ll likely adapt within a day or two and wonder why you didn’t make the switch sooner. Besides their convenience, trackballs come in two main types: thumb-operated and finger-operated. The choice between the two depends on your comfort and the tasks you perform.

Thumb-operated trackballs are compact and allow you to control the cursor with your thumb while keeping your hand in a natural, relaxed position. They’re ideal for general tasks that don’t require high precision but still offer a more ergonomic alternative to a traditional mouse.

Finger-operated trackballs provide more control and precision, making them perfect for detailed work like photo editing, gaming, or design. Whichever style you choose, you’ll likely experience greater comfort and efficiency compared to using a regular mouse.

Switching to a trackball has been a no-brainer for me. From the ergonomic benefits to the improved precision, everything about it feels like an upgrade. I can work longer without discomfort, my desk is less cluttered, and the overall experience is simply more enjoyable.

Don’t Make the Same Mistake

My first and only experience with Temu ended in disaster. While I expected it to go south and took safety precautions, the experience crashed and burned even more than I planned for.

I Ordered Clothes and They Didn’t Last a Week

Ekaterina_Minaeva/Shutterstock
 

The setup is simple: I wanted some basic shirts from Temu. Nothing fancy; just something I could wear underneath my favorite pieces, like cardigans and overshirts. Temu had bulk T-shirts (and a few nice graphic tees), so I thought, “What the heck? Let’s give Temu a try.” I then ordered a bunch of T-shirts for dirt-cheap—so far, so good.

Well, the first red flag was shipping. It was my understanding that Temu could take a couple of weeks. That’s no biggie, but I was starting to worry by the second week. My package bounced around between odd locations, like Alaska, before my shirts finally arrived an entire month later.

The first crisis was averted, but by the end of the first week, a new problem arose. The quality of the T-shirts was extremely poor. It wasn’t just the stitching, but the thinness of the material. The shirts didn’t smell too good, either. I put them through the washer and dryer, only to find that several were torn around the stitching.

There went my chances of being the belle of the ball, but really, I expected this. Looking at the experiences others had with Temu on Reddit—and even those of my family—it was more or less the same. It was enough for me to delete my Temu account entirely.

My Free Gifts Never Came

Gifts are another one of Temu’s selling points, which is what originally pushed me to check the site out. I didn’t want the free stuff, but instead to observe the tactics used. I wasn’t surprised to see Temu use near-identical tactics to those of free mobile games—weaponizing FOMO (fear of missing out) in order to keep me coming back.

I wasn’t even going to attempt to have friends sign up. The kind of data Temu collects is genuinely terrifying, so much so that I used an old smartphone of mine—completely devoid of any personal information—to download the Temu app.

Related

6 Scams on Temu You Should Be Aware Of

You’ve probably heard about an online store called Temu that offers really cheap products. Can you trust it? Is Temu a legit website?

I tried the mini-games, like Fishland and Farmland. You play the games, earn credits, rinse, and repeat until you’ve earned enough for some free items. The problem was the number of credits I was earning was incredibly low and took significant portions of my day. That tactic wasn’t working either.

What ultimately worked was using a Temu coupon code. I doubled-dipped by adding a handful of tabletop mini figures already on sale for pennies. It zeroed some of the minis, while others were less than $1, and the shirts I ordered were a steal. The shirts I got, but the free minis? Well, it’s been a year and I haven’t seen them yet—and the seller doesn’t even exist on Temu anymore.

Thankfully, I Used Throwaway Accounts

Hand holding outline of credit card
ArmadilloPhotograp/Shutterstock
 

Temu interested me in a purely academic sense. Given its spotty history—and the fact that Temu’s BBB page shows it doesn’t have the company’s seal of approval—I was primed beforehand. I knew I was essentially touching an electric fence on purpose. There are already enough sites that have access to my data, and I wasn’t too thrilled with giving it out to another one that could potentially result in having my identity stolen or my bank account drained.

Everything I used was burnable. I used a throwaway email, an old Android phone, a VPN—even an online debit card with money I had already accepted would probably be wasted. I wasn’t taking any chances. Although I did eventually get my shirts, Temu feels way too scammy for my liking. The fact that I didn’t get my minis (which isn’t a big deal anyway; I have plenty) and the mini-games being so manipulative were all I needed to see.

I’m aware plenty of people have had better experiences with Temu than me, but I’m also not alone—numerous others have had nearly identical experiences. It’s the frequency with which others have been scammed that sets off red flags for me, and why I went to great lengths to keep my personal data safe.

This Journaling App Helps Me Be My Best Self: Here’s How

Finding a journaling app that balances simplicity with meaningful self-reflection isn’t easy. I’ve been using the Reflection.app since the beginning of the year, and it’s become my go-to tool for journaling.

5

The App’s Templates Help When I’m Stuck

We’ve all experienced that moment—staring at a blank page with nothing to say. That’s where the templates of Reflection.app come in handy. Instead of leaving you to fend for yourself, the app offers thoughtful prompts that kickstart meaningful introspection.

What I appreciate most is the variety of quick templates available right from the entry screen. Simple starters like “I’m grateful for” and “I’ve been thinking about” help bypass writer’s block. But you can customize the order of these templates and create your own with the premium version.

Accessing these templates is simple. Just tap the lightbulb icon to go to the Inspiration section. It contains different prompts organized by categories. When I find a template that resonates, I tap it, and it’s added to my current journal entry.

The Inspiration section features thought-provoking questions like “What have you read, seen, or listened to that has shaped your life?” alongside quotes that spark deeper thinking.

I find myself exploring thoughts I might otherwise have glossed over, all because a prompt guided me there.

There are audio journaling apps if you struggle with writer’s block and prefer speaking your thoughts rather than typing them.

4

Guided Journaling Deepens My Reflection

While quick templates are helpful for daily entries, the app truly shines with its structured guided journaling experiences. It offers multi-day journeys designed to help you explore specific aspects of personal development.

I’ve completed some of these guided paths, including the 7-day Gratitude Journey—a free experience that walks you through different dimensions of gratitude each day. What impressed me most was how each prompt builds on previous entries. It creates a cohesive narrative that helps discover patterns in your thinking you wouldn’t have noticed otherwise.

The app organizes guides by categories and tags, such as Mental Health, Work & Finance, and Relationships, making it easy to find relevant content for your challenges. I think this structure is best use of technology when reflecting on your year and setting intentions for personal growth.

Each guide includes expert commentary that digs deeper than generic journaling questions. Rather than just asking, “How do you feel?” the guides ask targeted questions like, “What unmet expectation contributed to that disappointment?” These precision-focused prompts help unload emotions.

Related

I Let Generative AI Illustrate My Journal Entries: Here’s Why I’m Hooked

Illustrating my journal entries using AI has been a game-changer.

3

Privacy Features Give Peace of Mind

Privacy becomes particularly important when you’re pouring your heart out in the journal. The app tackles this concern with several thoughtful security features that have made me comfortable sharing most of my thoughts.

It offers biometric protection that requires a fingerprint to open. This simple yet effective feature prevents anyone who picks up your phone from accessing your reflections. You can enable this with a single toggle in the Advanced Security settings.

For extra-sensitive entries, the Premium version includes a Private Entries feature that adds another layer of protection. This feature blurs specific journal entries in the main view and requires a separate PIN code to access them. You’ll find this especially useful when journaling about therapy sessions or relationship challenges.

The sharing options show careful consideration for privacy as well. When you need feedback from your therapist on a specific entry, you can use the secure sharing feature that generates a unique link. You can restrict access at any time by toggling off the share option.

While AI journaling tools often raise privacy concerns, this app addresses these issues head-on with transparent security practices. All content is encrypted before storage, keeping your thoughts safe from potential data breaches.

These security measures make it possible to be completely honest in your journal without worrying about privacy violations—something important for genuine self-reflection.

2

AI Search Finds Patterns in My Thoughts

One feature that sets Reflection.app apart from paper journaling is its intelligent search. The app’s Depth AI, analyzes your entries over time to reveal patterns and progression in your thinking that might otherwise go unnoticed. The only downside is that it’s available only with the premium subscription.

When I recently asked, “How have my goals, priorities, or concerns evolved over time?” The AI provided a surprising response. It identified a clear progression in my journaling—from surface-level observations about daily events to deeper self-reflection and emotional exploration.

It even cites specific entries as sources, allowing you to revisit the original contexts. What makes this feature particularly valuable is how it connects dots across months of entries.

The AI notes when your focus shifts toward different areas and suggests natural evolutions in your personal growth journey.

You can even create new entries directly from these AI insights, turning observations into jumping-off points for reflection. While the feature occasionally misinterprets connections, it’s been accurate in identifying genuine patterns in journaling practice.

Related

Beat Procrastination With This iPhone Voice Journaling Hack

Too lazy to journal? Just talk. Your iPhone will do the rest.

1

I Upgraded to Premium and It Was Worth Every Penny

After using the free version of the Reflection.app for a month, I decided to upgrade to Premium—which costs $8/month or $5.75/month if you pay annually. While the free version already offers some good features like unlimited entries, guided reviews, and basic analytics, I wanted more.

To be honest, I think adding multiple photos should have been included in the free version. It seems like a basic feature that shouldn’t be behind a paywall. However, two Premium features made the upgrade worthwhile for me: Depth AI and Advanced Privacy Settings.

The unlimited access to Depth AI has enabled me to understand my journaling patterns. I frequently search for connections between entries and the AI spots trends I would have missed when reviewing entries manually.

The Advanced Privacy Settings are also important. The ability to blur specific entries and protect them with an additional PIN code gives me confidence to write about most things without worrying about privacy.

At around the price of two fancy coffees per month, Premium has proven to be a good value for these two features alone, though the other perks like custom tags and rich-text formatting are nice bonuses.

Download: Reflection.app for Android | iOS (Free, in-app purchases available)

Reflection.app has become an essential part of my daily routine. While other journaling apps like Napkin focus primarily on mindfulness, Reflection.app delivers a more structured path toward personal growth through thoughtful guided journeys. The free version offers plenty of value to get started.

Now Even Gmail Will Push AI-Powered Search on You

Searching for a particular message in a sea of emails can be a real needle-in-haystack situation. As Gmail’s search performance hasn’t always been the best, Google is now calling upon the power of AI to better refine your results.

Google Is Adding an AI-Powered Search Feature to Gmail

Knock-knock. Who’s there? More AI. On the heels of adding a new Gemini feature to Gmail for more efficient scheduling, Google is now rolling out an AI-powered search tool for the email app. As Google’s The Keyword reports, you’ll soon be able to toggle between Most relevant and Most recent results, giving you more control over how you find and filter emails.

Previously, when searching for a message on Gmail, the platform would display a chronological list of emails matching your keywords. Now, thanks to AI analysis, you can also get search results that prioritize contacts you frequently interact with. Here’s how Google puts it:

Instead of just showing emails in chronological order based on keywords, Gmail search results now factor in elements like recency, most-clicked emails and frequent contacts. With this update, the emails you’re looking for are far more likely to be at the top of your search results — saving you valuable time and helping you find important information more easily.

For example, I was recently looking for the next delivery date for my cat’s food. When I searched using the keyword “chicken,” the first six emails that showed up were either promotional (Whole Foods, I’m looking at you) or newsletters that I rarely interact with. Midway down the page was the auto-ship notice from my pet food provider, Chewy.

While I don’t yet see the Most relevant search option in Gmail, I assume the AI tool would have deduced that I interact with emails from Chewy far more than I do with those from Whole Foods. Hence, the feature would have prioritized the email I was truly looking for closer to the top.

When to Expect Gmail’s “Most Relevant” Search Setting

If you have a personal account, you should expect to see Google’s new Most relevant search filter very soon, as the company is rolling the update out globally. The setting will be available on a browser or in the Gmail app, for both Android and iOS devices.

Google says it will roll out the feature to business accounts next.

More AI: Brought to You by Google

While I would consider this feature to be helpful, I’m still a bit hesitant to introduce more AI into my day-to-day life. At least, I want AI features to be optional tools that I can disable at my discretion. In this case, it appears that Gmail’s AI search tool will be optional. You will have the freedom to select the classic Most recent search filter, and sift through messages yourself.

That being said, I’m not sure what the default will be for Gmail. For instance, will there be an easy-to-locate button to select which search mode you’d like to use, before you carry out a search? Will the setting be hidden in the advance search options, or will it be solely adjustable after the fact? If it’s the latter, then AI will be analyzing our mail, at least once, whether we like it or not.

An example of Gmail's advanced search options, which don't currently include reference to the AI search tool

I want to believe that Google will give users advance control over this new AI feature that will analyze their emails. If we look at other companies’ AI tool debuts as examples, this reality seems promising. When Microsoft integrated Copilot with its Microsoft 365 apps, there was a way to opt out of the update. That said, Google isn’t always the first to respect user privacy.

Discord on Mobile Is About to Get a Whole Lot Worse

If you’ve been a long-time Discord user, one reason you may have stuck around is its reputation for being a platform without traditional ads. Unfortunately, it looks like Discord is determined to change that.

You’ll Start Seeing Ads on Discord Mobile Soon

Discord has announced via a press release that you’ll start seeing third-party ads on its mobile app starting in June 2025. Fortunately, they’re not the kind of pesky ads that interrupt your gaming experience entirely.

Instead, the company is bringing Video Quests to mobile. If you’re unfamiliar with Discord’s Quests, here’s a quick rundown. There are two types—Play Quests and Video Quests. The former allows you to unlock in-game rewards by completing tasks like playing or streaming a game. The latter allows you to watch video ads in exchange for rewards like in-game items and Discord avatar decorations.

With Video Quests expanding to mobile, ads will now appear at the bottom of the screen. The good news? The full-screen ad only plays if you accept the Quest. Otherwise, you can dismiss it and won’t receive further notifications for that respective Quest again.

Discord first introduced Video Quests on PC and consoles in March 2024. While the launch was controversial, many users found them tolerable since they could opt out of Discord ads easily.

The Verge has confirmed that mobile users will also be able to opt out of personalized promotions or hide in-app promotions for certain Quests, which is definitely a relief.

It’s worth mentioning that the announcement doesn’t exactly come as a surprise. Many users on forums like Reddit have reported Discord testing Quests on mobile for a while now, and it’s clear gamers aren’t thrilled.

Related

I Use Discord Every Day: Here’s Why It’s Not Only For Gamers

Using Discord daily has taught me that its various features aren’t only for gamers.

Peter Sellis, Discord’s product leader, stated that “expanding Video Quests to mobile will create new opportunities for businesses to connect with our community,” making it pretty clear this move is great for advertisers. Discord also highlighted that Quests have backed some of the most successful video game campaigns, including Genshin Impact and World of Warcraft.

While I appreciate that Discord’s ads aren’t as in-your-face as other platforms (looking at you, YouTube), I still find myself silently wishing we could go back to the ad-free days.

Windows 11 Now Lets You Easily Type With an Xbox Controller

Microsoft may be the brain behind both Windows and Xbox, but it hasn’t always made the two products play nice with each other. To address the common headaches experienced by those who use a PC for gaming, Microsoft has finally made the Windows OS easier to navigate with a handheld Xbox controller.

Microsoft Is Adding a Gamepad Keyboard to Windows 11

While incessantly reminding Windows 10 users about support ending soon, Microsoft continues to tout improvements to Windows 11. As reported by The Verge, Microsoft is officially rolling out a new keyboard that will let you type more easily with an Xbox controller on a Windows 11 operating system. The keyboard will be available with the next Windows 11 update.

Microsoft first beta tested the feature in September 2024.

In the past, Xbox controllers have been notoriously difficult to use with Windows—despite being made by the same company. Now, an onscreen keyboard will be available that’s far more compatible with an Xbox controller, particularly for typing within text fields.

Plus, the gamepad keyboard will support useful controller shortcuts, or “accelerators,” as the Windows Insider Blog calls them. Furthermore, the blog notes that “the keyboard keys have been vertically aligned for better controller navigation patterns.”

How to Use the Windows 11 Gamepad Keyboard With an Xbox Controller

First, you can enable the gamepad keyboard in your Windows 11 settings. Once in your settings, simply select Keyboard layout > Gamepad.

Some of the shortcuts included on the new keyboard include:

Xbox Controller Button

Windows 11 Function

X

Backspace

Y

Spacebar

Menu

Enter

These shortcuts are consistent with the Xbox dashboard.

While this update is good news for gamers, it also feels like Microsoft is the one being a bit of a game player. For those unable to upgrade to Windows 11, it’s frustrating for the company to dangle this new (basic) functionality as something reserved for the newest operating system.

However, this is the way of the world, and though it may technically be easy for Microsoft to update Windows 10 with the same keyboard, the company has made it clear that it’s wholly abandoning Windows 10, leaving users little choice beyond upgrading.

How to Minimize the Dangers

Signing in with your Google account across different services means that many sites and apps will have access to your account information. Since this is inherently risky, take these precautions to prevent potential problems and protect your privacy.

6

Only Use Websites You 100% Trust

The easiest way to ensure that malicious people can’t access your Google account is by only using trustworthy websites. You should be fine if you’re using a service with a strong reputation for privacy and is well-established. For example, I sign into apps like Notion with my Google account because it’s a well-known and well-respected site.

However, I advise against signing in with Google on new, potentially untrusted websites. You don’t have any guarantee that they’ll be around for the long run, and if these sites aren’t successful, they probably won’t receive new updates. As a result, you’ll be more vulnerable to security risks.

5

Set Up Multifactor Authentication

I have always used multifactor authentication (MFA), and I suggest setting up MFA on your Google account. While I used Google Authenticator, Microsoft’s equivalent, Microsoft Authenticator, is also widely recommended. You can even use password managers for 2FA, one of the many practical uses for a password manager beyond storing your login details.

screenshot of gmail two factor authentication login request

If possible, I recommend setting up MFA for the specific service you use your Google account to sign up for. While not necessary, it will add an extra layer of security.

4

Set Strong, Unique Passwords for Your Google Account

Even with MFA enabled, you should not use weak or repeated passwords. And with so many password-generation tools available these days, you have no excuses (it’s less time-consuming to create a strong password than to copy and paste your old one).

I normally use the Passwords app since I own Apple devices, but 1Password and Bitwarden are both options worth considering.

3

Create Multiple Google Accounts

Consider creating multiple profiles if you’re particularly concerned about your Google accounts being used across multiple websites. For example, I have some personal accounts and some for work. Doing so spreads the risk more effectively, and I can also set proper boundaries with the services I use.

You can access all your Google accounts from the same page when logging in to an app or service. So, you don’t even need to worry about remembering multiple passwords. If needed, you can change the default Google account once you’ve signed up with numerous profiles.

2

Revoke Access

Another simple way to lower the risk of signing in with your Google account is to revoke access when you no longer use an app or service. I recommend doing this for both new tools that have become defunct and established platforms that no longer serve you.

To revoke access, head to your Google account settings.

  1. Go to myaccount.google.com.
  2. Select Security > Your connections to third-party apps and services.
  3. Find the app or website you want to remove your Google account from.
  4. Go to Sign in with Google and choose Stop using Sign in with Google.
Revoke Google Sign-In Access Via the Website

1

Signing in with your Google account doesn’t have to be 100% risky; you can take numerous precautions to minimize the negatives. Only sign up via websites you trust, and revoke access when it’s no longer necessary. Consider also using multiple Google accounts.

Your Google Assistant Can No Longer Do These 7 Tasks

In order to maximize Google Assistant’s value to the modern user, Google has to clear out the clutter. At least, that’s what the company wants us to believe. Regardless of its true intentions, Google is retiring some supposedly irrelevant Assistant features.

Google Assistant Is Losing These 7 Features

According to a new Google support document, a selection of “underutilized” Google Assistant features have been punted into retirement. Per Google, this is the company’s way of “prioritizing” the best parts of the Assistant, making it “more helpful.”

Those features include some tasks related to Google Photos, interpreter mode, and using Google Assistant in the car. Here’s the full breakdown of the changes:

Product(s)

Feature Updates

Google Photos, Smart Display

Voice-activated photo engagement like sharing, adding a photo to favorites, and asking where/when a photo was taken will no longer be supported. These functions will remain manually available in Google Photos, or in your Smart Display options panel.

Google Photos, Smart Display

Voice-activated display adjustments like photo frame and ambient screen settings will no longer be supported. These will still be manually available in your Smart Display options panel.

Interpreter Mode

Live translating a conversation in another language will no longer be supported, though you can use Google Translate to manually translate words.

Routines

General birthday reminder notifications will no longer be available by way of Routines, but you can still ask Google Assistant to set reminders for specific people.

Routines

Previously scheduled Family Bell announcements will no longer be accessible via Google Assistant.

Routines

Daily updates, such as weather updates, are no longer available through Google Assistant. However, you can manually set custom updates in your Routines settings.

Car Accessories

Google Assistant will no longer be available in cars via Bluetooth connection or AUX plug.

For the most part, features that are no longer accessible via Google Assistant will still be available in other ways, such as through apps or settings.

Is Google Phasing Out Google Assistant?

While the company claims these changes support a healthier future for Google Assistant, the writing seems to be on the wall that Gemini will soon take the reins as the new virtual assistant across Google products. No, really, the writing is literally on the wall—the wall being Google’s blog and the writing being the announcement that Gemini will indeed replace Google Assistant on mobile devices by the end of 2025.

The latest update follows a trend of paring down Google Assistant’s capabilities only to introduce new Gemini integrations. A slew of other features were removed from Google Assistant in 2024, from music alarms to voice-activated emailing. You can find the full list at Google’s Help Center under 2024 Assistant changes.

Simultaneously, we’re seeing new integrations such as a Spotify Gemini Extension for Android devices. This clearly signals an “out with the old, in with the new” mentality. My question is: why doesn’t Google just say so, in its latest round of Assistant cuts?

FineWoven Was a Bust; I Hope Apple Tries Vegan Leather Next

Apple first launched FineWoven in 2023 as a replacement for its beloved leather accessories. Unfortunately, the iPhone maker only offers silicone cases now, but I hope it gives vegan leather a shot.

FineWoven Wore Out Too Easily

The material type is one of the most important aspects to look at when choosing a new phone case. I feel FineWoven was sunset for a number of reasons, but chief among them was the type of material used to create the cases.

Early reviews of the cases showed a tendency to age poorly and ZolloTech’s YouTube video even established how fast the case could get marked up by items you’d often have in your pockets. This meant that they were less durable.

Aryan Surendranath/MakeUseOf

While these scratches and imperfections only contribute to the look and added character of a leather case. They left FineWoven accessories with a less-than-pleasing look. Additionally, leather cases offered a one-material outer layer and had a pleasing soft feel. Apple’s leather cases were some of my favorites because they were light, sufficiently colorful, and came with solid metal buttons that had a great tactile feel.

In comparison, FineWoven cases always felt clunky and couldn’t handle the wear and tear of daily life well enough. They also lacked the premium appeal and colors of previous official accessories. We even noted this in our early comparisons of FineWoven to silicone cases.

Vegan Leather Might Be A Suitable Answer

With all that said, it’s unlikely Apple will ever go back to using animal leather. The company has targets in place to achieve carbon-neutral status by 2030 and discontinued its leather products with that goal in mind.

With leather accessories and the intended replacement out of the picture, I think Apple should turn to finding and developing vegan leather materials for accessories as a good in-between.

I’ve recently spent time with the Kindsuit case for the Samsung Galaxy S25 Ultra—it’s a simple, understated case that impresses as much as the phone does.

Apart from the plush feel genuine leather provides and the patina that makes these cases so lovable, this case nails many aspects that I really loved about the original iPhone leather cases. It has premium-looking metal accents and is exceptionally light. It is, honestly, very reminiscent of Apple’s leather cases.

Galaxy S25 Ultra Black Kindsuit Case Held in Hand with grass in the background
Aryan Surendranath/MakeUseOf

Now, everything isn’t rosy on the side of vegan leather, as some products use large amounts of plastics, which diminishes the sustainability aspect. However, more sustainable alternatives, such as aloe vera-based vegan leather cases like these from Woodcessories, are available.

Apple should focus on developing options similar to the one mentioned above because it would be a great candidate for official accessories and avoid the hassle of wading through all the third-party options that often fall short in one way or another.

What to Do Now That Max Has Removed Looney Tunes From Its Library

On the heels of premiering its trendy series The White Lotus, Max has taken an axe to its Looney Tunes catalog, clearing a collection of shorts made between the 1930s to the 1960s. However, there may still be ways to get your Looney Tunes fix, or to stream similar content.

Max Is Kid-Proofing Its Streaming Service With the Removal of Looney Tunes

Sadly, Warner Bros. Discovery-owned Max has added yet another cartoon casualty to its list with the elimination of the Looney Tunes shorts. The move follows the removal of Sesame Street in 2024, in addition to downsizing The Flintstones and other Looney Tunes content in 2022.

A company representative confirmed to Deadline that the original shorts are officially gone from the platform, and the streaming service will prioritize its adult programming over what it considers to be children’s content.

How to Stream Looney Tunes Content Now

While Max’s catalog renovation is a tragedy for many, all hope is not lost when it comes to the iconic cartoon franchise. Here are some other ways to stream Looney Tunes content.

Looney Tunes Spin-Offs on Max

They’re not the originals, but the following modern Looney Tunes spin-off series will remain on Max for the foreseeable future, according to Deadline:

Show

Premiere

Seasons Available

Looney Tunes Cartoons

2020

6

New Looney Tunes

2015

2

Baby Looney Tunes

2002

2

Tiny Toons Looniversity

2023

2

The Sylvester and Tweety Mysteries

1995

5

Bugs Bunny Builders

2022

2

Looney Tunes Spin-Offs on Hulu

Hulu also has some modern Looney Tunes spin-off content, if you pay for a Live TV subscription. On Hulu, you have access to:

Show

Premiere

Seasons Available

The Looney Tunes Show

2011

2

Baby Looney Tunes

2002

2

Looney Tunes Spin-Offs on Podcast Platforms

There is also Looney Tunes Presents: Buff’s and Daffy’s Thanksgiving Road Trip, a scripted podcast released in 2021 that is available for free on any audio platform, such as Spotify and Apple Podcasts.

Where to Stream Content Similar to Looney Tunes

Whether you’re searching for nostalgic animated media as an adult or looking to entertain your kids, there are other streaming services beyond Max that aren’t as trigger-happy with removing cartoons. For example, Hulu is home to Animaniacs, a 2020 reboot of a classic Warner Bros. cartoon series from the 1990s.

Another historic Warner Bros. cartoon, Tom and Jerry, is available on Tubi, a free streaming service supported by ads.

Netflix is also a great source of animated content for all ages. For kids, the streamer hosts the nostalgic spin-off Tom and Jerry Tales, as well as the more modern Gabby’s Dollhouse, part of the platform’s Netflix Jr. channel. Moreover, Netflix made waves with its 2022 adaptation of Cuphead, a reknowned Canadian videogame.

Netflix's show description page for The Cuphead Show

Max’s re-branding carnage is yet another reason to own physical media. While Looney Tunes may not be the talk of the town in the same way that The White Lotus is, the original cartoons are historical media. It would be a real shame to lose them to the whims of network executives, who, for some reason, want to detach from the studio’s (and its water tower’s) legacy IP.

I Tried ChatGPT and Copilot’s Deep Research Features, and This Is the Best Option

ChatGPT’s Deep Research tool makes compiling reports on complex topics easy. But did you know that Microsoft Copilot has a similar feature?

So, which deep research tool should you use?

1

Getting Overviews of Complex Topics

One of the main reasons I use AI tools is to get a better overview of difficult-to-understand topics. So, this was naturally the first place I started with Copilot and ChatGPT. I fed them both the same prompt:

Please help me explain the science behind protein synthesis, and whether it’s legitimate or not.

Microsoft Copilot provided a comprehensive overview of the process in bullet points that were easy to understand. I also received a diagram that explained the process in more detail.

After confirming with ChatGPT that I wanted an overview, the tool assessed dozens of resources. Once it had done that, it gave me a comprehensive topic overview. While reading through, I saw that I also received multiple sources to double-check everything.

Finding Deep Research From ChatGPT

Both took a long time to produce results (which I expected from deeper research). Copilot took around 30 seconds, while ChatGPT took multiple minutes. Although Copilot was quicker and had a better layout, ChatGPT gave me more resources.

Winner: ChatGPT

While I use Perplexity for shopping recommendations, I wanted to see if Copilot or ChatGPT could do a better job. To do this, I prompted:

Please help me find the best shoes from across the web for male CrossFit athletes.

I deliberately asked a niche question to see whether these resources could extract deeper information. Copilot gave me a comprehensive list and then provided more information about these shoes in a table. Once it had done this, Copilot showed me some options I could purchase. There were some strange coding issues in the table, but I saw the needed information, so it didn’t make a difference.

Shopping recommendations in a table on Microsoft Copilot

Like before, ChatGPT asked me to be more specific. Since I have very specific requirements for my shoes, I quite liked this feature. I clarified which shoes were acceptable before the app started its next research journey. This time, I received research progress updates.

Research Progress Updates in the ChatGPT App

When I received my search results, ChatGPT went into huge detail. For each shoe, it provided images and also showed me the pros and cons. For each of these, it provided the source of this information. I would feel very confident if I needed to make a purchasing decision, though I would still ensure that I cross-referenced elsewhere for a better-rounded decision.

An overview for shopping recommendations in the ChatGPT app

Admittedly, I’d have liked a table where I could see a direct comparison—like Copilot offered. Nonetheless, ChatGPT gets another point here because it went into so much detail.

Winner: ChatGPT

3

Planning a Trip

I sometimes use AI travel-planning apps to get general insights on a destination before exploring it further. My next experiment involved asking Copilot and ChatGPT to plan a trip for me. I had already used ChatGPT for trip planning, so I wanted to see if the Deep Research tool was any better.

Here’s the prompt I fed both tools:

Please help me plan a 4-week trip in New Zealand. We have a campervan and would like to see both the North and South Islands. we’ll be visiting in the summer.

To be honest, I was disappointed with Copilot here. The response I received was what ChatGPT’s ordinary version would’ve given me. Since ChatGPT asked me for more information, I then asked both apps the same follow-on prompt to see if Copilot could redeem itself:

I am happy to mix free and paid campsites; they need to have showers and cooking facilities, though. I am particularly interested in hiking and photography. I’m not interested in alcohol, but some good food places would be good. We also want to travel more slowly.

Though Copilot’s itinerary was more customized to my needs, I was still disappointed. It also gave me a pretty pointless graph at the end; a table would’ve been much more valuable. Though Copilot competes with ChatGPT in many areas, I was starting to think that the Deep Research tool was not one of those.

A travel itinerary snippet in Microsoft Copilot

Once ChatGPT had finished its research, I saw a four-week itinerary based on the information I fed it. This was quite comprehensive, though I still would not use it as my only point of research. It was good to get an overview, though, and I could then watch YouTube videos or read other travel blogs for more unique perspectives.

ChatGPT giving an itinerary

Since I wouldn’t fully trust either tool in this category, it’s the first tie.

Winner: Tie

4

Sourcing Statistics

Accurate and up-to-date statistics are always difficult to find online, so I tried seeing how Copilot and ChatGPT would work in this sense. I used statistics that I knew existed to improve accuracy. Here’s the prompt that I gave these two tools:

Please show me the latest B2B content marketing statistics, and use stats from 2023 at the latest.

I liked Copilot’s layout; it gave me tables and bulleted highlights. The app mentioned the sources used, but I wish it had specifically given me links to them. Without sources, I have to manually search for these in Google, which adds more time to my research.

A list of statistics as shown in a table in Microsoft Copilot

ChatGPT, like Copilot, gave me a breakdown of statistics in different categories. However, it also provided me with links to the sources it used.

A list of content marketing statistics shown in ChatGPT

One annoyance from both tools is that they took my “2023” point to mean only 2023. I wanted stats published between 2023 and 2025, but I clearly needed to be more specific here. With little to separate the two tools, I think that ChatGPT linking to the sources used means it must get the point here.

Winner: ChatGPT

5

Text Analysis

I next wanted to see how ChatGPT and Copilot performed when analyzing text. I used a book I’d already read so that I could verify for accuracy. Here’s the prompt I gave:

Please summarize the book “The Magic of Thinking Big” by David Schwartz.

Copilot quickly gave me a summary, which was pretty decent. But again, it was very similar to what ChatGPT would normally give me. So, I asked the tool to go deeper and summarize each chapter.

The app summarized each chapter but did so in just a few points; I wanted more detail than this.

Summarizing a book in Microsoft Copilot

ChatGPT gave me a very comprehensive book summary, and while I would still read the book, this was more of what I was looking for. I can imagine using this tool when considering buying a book, but I want to decide if reading it is worthwhile. Once again, I got all the resources from which the information was gathered. I liked how ChatGPT gave me more context, too.

A book summary in the ChatGPT web app

Winner: ChatGPT

6

What’s the Overall Winner?

I’ve given ChatGPT the point in most categories because I think the tool is better. While I generally like Copilot, I was disappointed with its Deep Research tool. It didn’t seem too different from the basic version of ChatGPT.

ChatGPT took a lot of time to find the information I wanted and asked follow-up questions to ensure I was as specific as possible. I appreciated this, especially for complex topics that would’ve taken me hours to research. However, I would only use this feature for truly comprehensive research because it took so long to find the required information. For things like shopping, the general version is more than good enough.

On the other hand, I think Copilot’s Deep Research feature was better for overviews like product recommendations. It performed well with more complex topics, but I always cross-reference these with ChatGPT and Google. So, I think it’s better as a starting point than going into truly deep research.

I’m Done With DeepSeek ChatGPT Is Clearly the Better Option

I initially had high hopes for DeepSeek. As an AI chatbot marketed as a strong competitor to ChatGPT, it promises capabilities and an intelligent conversational experience. However, after using it extensively, I found myself increasingly frustrated with its limitations.

My Frustrations With DeepSeek

One of my biggest issues with DeepSeek is its server reliability. I often find myself wasting a lot of time waiting for replies. Those long waits often result in DeepSeek telling me that their servers are currently busy and that I should try again later. Though I understand that it takes time to scale something that exploded in popularity, it still doesn’t change the fact that their service is unusable at different times of the day.

When I could access DeepSeek, the conversations often felt bland. While they can generate text responses and communicate effectively, they often feel robotic and uninspired. The chatbot also struggles with maintaining context over long conversations. This makes it difficult for me to have a fluid and engaging discussion, especially when compared to ChatGPT’s ability to provide nuanced and context-aware responses.

DeepSeek's reserved for text extraction only

Another big disappointment for me is the limitations on file uploads. While DeepSeek allows users to upload files, its functionality is restricted to text extraction only. It doesn’t support image processing, audio, and other file types when such functionalities are common in many AI chatbots. Since image and audio uploads are really useful features, I find this limitation hard to ignore.

Lastly, DeepSeek’s lack of a live voice feature on its smartphone app made me uninstall it almost immediately. The live voice feature made it convenient for me to use an AI chatbot on my phone. And with Gemini, ChatGPT, and Perplexity all having this feature, I don’t see any point in using DeepSeek on my phone.

Why ChatGPT Is Better

Man looking at chatgpt on a smartphone and computer.
Alex Photo Stock / Shutterstock

While there are still practical reasons to continue using DeepSeek, I still turned back to using ChatGPT because I still find it the best AI chatbot in several key areas.

1. Reliability and Accessibility

ChatGPT is far more stable than DeepSeek. Even during peak usage times, I rarely encounter server downtimes that block my access to their service. Unlike DeepSeek, OpenAI got a huge head start and was able to invest in infrastructure, ensuring a reliable and smooth experience.

2. Engaging and Context-Aware Conversations

Unlike DeepSeek’s dull responses, ChatGPT offers more engaging and human-like interactions. It remembers context better, provides detailed explanations, adapts its responses based on previous messages, and saves them in memory.

3. Advanced File Uploads and Analysis

Going back to ChatGPT, I was no longer limited to text extraction. I could now upload images of tech specs, tables, and graphs and let the AI explain all the details and possible nuances I might miss just by looking at the provided image.

4. Voice Conversations for a More Natural Interaction

Another standout feature of ChatGPT that I missed a lot was its live voice capability. There are many interesting ways you can use live voice and vision to help with daily tasks. I personally find it useful when random, unexpected problems suddenly present themselves. I just open the app, send pictures straight from my camera phone, and tell it details about the problem or query. I can also keep asking ChatGPT questions while my hands are full, making it even more usable in real-life scenarios.

While I no longer rely on DeepSeek for important tasks, I still believe it’s worth checking out. Toward the end of 2022, ChatGPT was rapidly gaining popularity and had the same problems as DeepSeek. It gives me confidence that many of the problems I find with DeepSeek are due to scaling issues and time constraints when implementing features. That said, I will surely try DeepSeek again once it matures a bit more.

As for now, I find no reason to continue using it, especially since ChatGPT already satisfies all my needs.

7 Reasons Amazon’s Rufus AI Chat Is Actually Worth Using

A colorful icon for Amazon’s AI shopping assistant is tucked away in the bottom-right corner; that’s Rufus, hiding away.

While Rufus shouldn’t oust Amazon’s search bar for your shopping questions yet, it adds some useful variety to your shopping research, and I think it’s worth using.

7

Ask Specific Questions on Products

Rufus is Amazon’s AI-powered shopping assistant. It’s trained on product listings, reviews, and Q&As to give you the answers. Instead of generic shopping questions, make your questions about your shopping as detailed as possible. For instance, “Which noise-canceling headphones have the longest battery?”

This method is ideal when shopping for items with technical specifications or special requirements that might be buried in product details.

Unfortunately, like other AI chatbots, Rufus is known to hallucinate, especially regarding prices, so exercise your judgment.

6

Make Better Choices Between Similar Products

​​​​​​​

Instead of a direct recommendation, you can ask, “How does this compare to X product?” to research via comparison. Rufus simplifies the process of finding the pros and cons of similar products.

Use the follow-up suggestions to break down key differences. This helps avoid decision fatigue.

Try comparing similar products across different categories. For instance, T-shirts can be used for athletic or casual wear.

5

Learn Before You Buy

​​​​​​​

Product comparisons are easier to grasp if you know the basics. For instance, buying coffee can get confusing if you don’t know what makes Robusta different from Arabica.

Use Rufus as a learning aid within the Amazon app and get into the key ingredients of products. I have found this helpful for improving my cooking knowledge as I shop for a recipe.

Want instructions on how to use a gadget or install something? Prompt Rufus to generate a step-by-step tutorial.

4

Use It as a Troubleshooter

You can also use Rufus to troubleshoot problems with Amazon products. For instance, ask, “How do I fix a slow-draining Instant Pot?” for step-by-step guides or replacement part links.

Remember to be specific about the problem your gadget has, as it helps narrow down the replacement recommendations.

3

Curate for a New Hobby or Family Activity

​​​​​

Are you starting a new hobby or project? You may not have a complete idea of what you will need. Rather than searching multiple websites, ask Rufus, “What equipment do I need to start calligraphy?”

From here, you can pare it down to the bare essentials. You will also understand what to buy and why certain items are necessary.

2

Find More Sustainable Alternatives

​​​​​​​

Sometimes, it can be challenging to distinguish sustainable products. If you’re looking for a greener choice, ask, “Is there a sustainable alternative to this?” as a follow-up question.

Rufus can bring up environmentally safe products and provide more details about them. The results can cut hours off your research and help you make informed choices.

Use phrases like “biodegradable,” “plastic-free,” “BPA-free,” or “recycled materials” in your search to refine results.

1

Put It to a Few Quirky Uses

Rufus (so far) can also be used like other AI chatbots, such as ChatGPT and Claude. I experimented with a few off-the-wall uses, and Rufus has returned haikus, essays, and even simple Python code.

Rufus does have issues (it struggles with nuance), and I still use Amazon’s search bar to shop. However, it’s a great option if you want to understand if a particular product is for you rather than make it your sole shopping agent. Rufus is also useful for narrower research. For instance, it helps me learn more about the books I want to buy or hunt for unique products. Whether you like or hate it, Rufus can make your Amazon window shopping fun.

This Free Lightroom Alternative Changed How I Develop Photos

As popular as Adobe’s Lightroom is, the subscription model can quickly burn a hole in your pocket. I wanted a free alternative that didn’t compromise on features—and I found one. This software completely changed how I edit my photos.

6

The Cost Advantage

If you’re a beginner photographer and don’t want to spend hundreds on software right away, RawTherapee is the perfect starting point. While Lightroom is subscription-driven and will cost at least $11.99 a month, RawTherapee is open-source and free to download and use.

If you’re operating on a tight budget, RawTherapee’s free price tag is a huge advantage in itself. Lightroom and Photoshop can be overkill for most photographers, so you might as well save yourself the money. Not being tied down to a subscription for editing your photos means you have more cash on hand to spend on equipment like lenses and other camera gear that’ll help you more in the long term.

Additionally, since the program is open source, it comes with the benefits of open-source software. Contributors are constantly working to add new features or address existing issues.

5

You Can Get Greater Detail in Editing

Another major advantage RawTherapee brings to the table is the detail it’s able to extract from images. The program offers better sharpening capabilities compared to Lightroom, meaning you’ll be able to get more details out of your images without as many artifacts or haloing.

if you’re shooting in RAW, RawTherapee provides more granular control of RAW processing parameters. By comparison, Lightroom simplifies a lot of processes with sliders and presets that, while being user-friendly, do take away some control from you.

Screenshot showing different RawTherapee modules

A lot of settings in Lightroom such as shadow and highlight settings are better manipulated with curves in RawTherapee. The entire program is divided into individual modules that control a certain parameter of the image. Figuring out what module changes what parameter can be a bit of a hassle, but it ultimately gives you more control over the final image.

You’ll also get slightly better noise reduction capabilities. This is especially helpful for beginner photographers as they’ll likely have cameras with worse ISO and dynamic range. So if you shot a particular photo in challenging conditions, and with the ISO turned up, chances are RawTherapee will do a better job of rescuing it.

You might need to use the Brush tool in Lightroom to edit certain parts of the image with extra precision. RawTherapee often has area controls for specific modules by default, meaning instead of having to paint your edits over an area, you can just apply the effect there.

Advanced controls in RawTherapee

There are also some specialized tools that you won’t find in Lightroom at all. For example, RawTherapee has quite detailed wavelet-based processing options that give you more control over image texture and detail. In Lightroom, you’ll have to use a third-party extension or other workarounds.

Do keep in mind that this brings a steeper learning curve to the program, meaning you’ll be watching quite a few tutorials when you’re first starting out. Thankfully, the user interface is simple enough for beginners to start, and if you’re coming from Lightroom, you’ll instantly feel at home as a lot of the controls are in the same layout, albeit with more complicated names. There’s also full documentation on RawTherapee’s website as well as the RawTherapee forum you can turn to for help if you get stuck.

4

Non-Destructive Workflow

Both Lightroom and RawTherapee offer non-destructive workflows. This means that you’ll be able to retain the original image data regardless of how many edits you’ve made. If you mess something up and want to reset the image, it’s very easy to go back.

You can see the entire edit history in a handy History section and go back and forth between all the changes you’ve made with a single click. The program automatically adds or removes any settings you might’ve made as you go along the section.

The History section in RawTherapee's user interface

Additionally, RawTherapee also has a snapshot feature that lets you save edits to your image without having to export it. This means that instead of resetting your image completely if you mess up, you can just revert to an earlier snapshot.

3

Better Output Capabilities

How the final image looks to you after editing can be affected by your own perception of color, the monitor you’re working on, and of course, the conditions in which you shot the image. In my experience, however, RawTherapee’s output looked a lot cleaner and free of noise when compared with Lightroom. That said, Lightroom does make images appear sharper by default, but it’s something you can counter with the right modules in RawTherapee.

Alterantive Opinion:

Lightroom Is Still Better Than Every Other Photo Editing App: Here’s Why

You’re missing out if you’re still editing without Lightroom.

To me, RawTherapee produces more natural-looking results, while Lightroom produces sharper results that can make the colors in your photo stand out. What output you prefer is subjective, but if you’re after a real-life look to your photos, you might want to use RawTherapee.

2

Better Performance Across Systems

If you’re a Linux user, you’re out of luck when it comes to Adobe software. Even if you manage to get Lightroom running on a Linux machine with emulators or tweaks, you’re going to face performance issues.

RawTherapee is available on Windows, macOS, and Linux, free of cost on all three OSes of course (and in over 15 languages). Since the program is built with cross-platform support, it also tends to perform better across a varied range of hardware, meaning if you’re on a low or mid-spec machine, you’ll get better performance when using RawTherapee.

1

Integration With Other Programs

RawTherapee by itself doesn’t support any extensions or third-party add-ons. However, it can play well with other programs, Lightroom included. During my transition from Lightroom to RawTherapee, I often used Lightroom as an image browser before sending select files to the latter for editing.

RawTherapee's Image browser

This was done mostly because RawTherapee’s image browser, while perfectly functional, just is as easy to use as Lightroom’s. You’ll find most tools such as ratings, selections, and color-coding but I still prefer Lightroom’s interface when browsing through images because of its simplicity and visibility.

I own a 14-inch laptop and my bigger, 24-inch display isn’t always with me. When on smaller displays, Lightroom makes more effective use of the space. If you’re going through hundreds of photos after a shoot, that screen space will save you time and effort.

since I’ve switched to RawTherapee to escape from Adobe subscriptions, the way I develop my photos has changed completely. It did take quite a few tutorials and documentation-reading to get here, but now my edits are much more thoughtful and free, courtesy of the extra control I have over the final image.

This Free AI Secretary Saves Me Hours of Work

Taking notes during a meeting or an interview is normal, but if we’re honest, it’s also a hassle. It’s easy to miss important details while writing down other important details, and trying to write down notes during a conversation pulls you out of the conversation. Fireflies.ai is the solution.

Fireflies.ai Makes Note-taking Easy

While interviewing someone for a magazine feature, we talked about recording video meetings for transcription. She told me about Fireflies.ai and how it has three main features that make it wildly overpowered:

  1. It seamlessly integrates with major video call platforms like Google Meet and Zoom.
  2. It leverages AI to make scary-accurate point-by-point notes and transcriptions of the meeting.
  3. All of that is free, which outpaces most other AI meeting assistant apps.

All you have to do is create an account and integrate Fireflies.ai with one of your video call accounts to get unlimited transcription and meeting notes with no cap on time limits. The mobile app allows you to record in-person meetings as well for the same transcription and note-taking features.

Related

10 Handy Tools to Get AI-Generated Meeting Notes

Tired of manual note-taking during meetings? Here are some useful tools for creating AI-generated meeting notes.

The transcriptions are fully searchable by keyword and automatically detect speakers, which the app will name for you based on who joined the video call. You can also assign the names yourself for in-person meetings that you record on the mobile app.

How I Use Fireflies for Work

You can see in the screenshot below how elegantly Fireflies.ai summarizes the discussion.

Fireflies.ai Meeting Summary Screen Shot

Within each bullet point, you can tell Fireflies to give you more information, and, well… it does.

Last up, there’s the transcription itself, which is scarily accurate even in high-noise environments. It’s searchable and easy to read, as you can see below:

Screenshot of Fireflies.ai Transcription

The paid tiers allow you to download meeting audio, video, and transcripts while increasing the amount of meeting storage on the account, among other benefits. When paid annually, the plans are very affordable, so Fireflies.ai offers a huge value proposition to anyone who needs an AI assistant to keep their meeting notes and transcriptions in one place.

I love using it, and I will be using it for the foreseeable future.

Make Your Android Phone Even Smarter by Setting ChatGPT as Its Voice Assistant

ChatGPT just released a beta update that lets you replace the default voice assistant on your Android phone. Although the ChatGPT for Android app has been around since 2023, this update makes it more convenient to use its capabilities without diving into the app.

Join the ChatGPT Beta to Make It the Default Digital Assistant on Your Phone

If you want to use ChatGPT as your primary voice assistant, you must first install the latest beta version of the app. To join the beta program, go to the ChatGPT app on the Google Play Store, scroll down to the bottom until you find the Join the beta section, and tap Join. When the Join beta program? window pops up, tap Join to confirm. It may take a few minutes for you to get signed up, but once you’re confirmed, go ahead and tap Install to get the ChatGPT app on your phone.

To confirm that you’re running the latest version of ChatGPT, open the app, tap Continue on the Welcome to ChatGPT page, and then tap on Sign up in the upper right corner of the main page. You can then log into your account if you already have one or create one if not yet. From there, tap on the menu icon on the upper left corner of the main page, and then tap on your name to reveal the settings menu. From there, tap on About, and it should say ChatGPT for Android (1.2025.070).

Now that you have the latest app version, you then need to head into your phone’s settings to activate it. Go to Apps > Choose default apps > Digital assistant app. Once you’re in the Digital assistant app settings, tap on Digital assistant app and choose ChatGPT. Note that this feature isn’t available in all regions and devices yet, so you might not be able to see and use it.

But if it’s available for you, you should be able to use ChatGPT when you launch your phone’s voice assistant feature — either by long-pressing the home or power button or by swiping from the corner of the screen. Unfortunately, ChatGPT doesn’t have a voice recognition feature yet, so you cannot launch it by voice unlike Gemini (which turns on when you say, “Hey, Google”) or Bixby.

Using ChatGPT as your primary voice assistant can help you get the most out of it, especially if you know how to use ChatGPT search like a pro. However, you’ll also miss out on several Google integrations (like smart home control), so you might want to retain Gemini on your Android phone for tasks like these.

OpenAI has recently been releasing updates to make ChatGPT much more useful for daily life. Aside from this latest release for Android devices, it also introduced a new creative model that’s supposed to make the LLM good at writing. But you still shouldn’t rely on it for everything, as it still gets some of the easiest questions wrong.

Beware That Email From Booking.com, It Could Be a Phishing Scam

Booking.com users are being targeted by yet another phishing campaign designed to steal data, login credentials, and more. Microsoft Threat Intelligence spotted the ongoing attack targeting users and hospitality organizations worldwide, but there are some tell-tale signs.

Yet Another Phishing Campaign Targets Booking.com

Microsoft Threat Intelligence first spotted this Booking.com phishing campaign back in December 2024, but it remains active and is claiming victims from numerous countries around the world. The phishing campaign uses a social engineering technique known as ClickFix, which basically tricks users into clicking through error messages to run commands that download malware.

In the ClickFix technique, a threat actor attempts to take advantage of human problem-solving tendencies by displaying fake error messages or prompts that instruct target users to fix issues by copying, pasting, and launching commands that eventually result in the download of malware

This campaign isn’t actually very different from your typical phishing attack. The victim receives an email that appears to come from Booking.com, containing a malicious link or a link embedded in a PDF file that supposedly takes the user to the website to resolve the issue.

However, where this campaign does differ is what happens when you click the link. Instead of instantly downloading malware, you’re taken to a CAPTCHA page to “verify” your identity. This CAPTCHA instructs you to open a Windows Run window and then input the command the scammers provide.

The command is automatically copied into your clipboard when the CAPTCHA window appears. while the instructions explain how to press the Windows key + R shortcut to open the Run window, paste the command using the Ctrl + V shortcut, and finally run it by pressing Enter. Furthermore, this need for user interactions ensures that the malicious payload skirts security features like antivirus programs, firewalls, and other automated security protections.

This command downloads and runs the main malicious payload—malware that can steal financial data and credentials. The payload contains multiple malware families, including XWorm, Lumma Stealer, VenomRAT, AsyncRAT, Danabot, and NetSupport RAT.

If You’re Unsure, Just Don’t Click

This is far from Booking.com’s first rodeo with phishing scams. The Telekopye scam targeting Booking.com, also in 2024, caught out thousands of unsuspecting holiday-makers.

So, before clicking on any links in an email, verify the sender’s email address, as in most cases, the phishing email will not originate from the company’s official address. You can also head straight to the concerned website, in this case, Booking.com, and proceed to resolve your issue there by contacting the company directly.

Cybercriminals using CAPTCHA to spread malware isn’t new either. Remember, CAPTCHAs are simple tests to verify if you’re a human. If a CAPTCHA is prompting you to run a command or open any windows, you’re on a malicious website.

How to Stop iPhone Notifications From Interrupting Your Music

Few things ruin a good playlist like constant iPhone notifications. Whether you’re streaming music or podcasts, interruptions can be a buzzkill. Luckily, Apple provides tools to silence distractions and keep your audio experience uninterrupted.

1

Use Silent Mode

Silent Mode is the quickest way to stop notification sounds from interrupting your music. It’s a simple, hardware-based solution that works instantly without needing to tweak multiple settings.

If your iPhone has a physical Ring/Silent switch (found on models like the iPhone 14 and earlier), flipping it to Silent will mute notification sounds while keeping your music playing uninterrupted.

For newer iPhones (iPhone 15 and later), where Apple replaced the Silent switch with the Action Button, you can long-press on it to toggle Silent Mode. You can also enable Silent Mode by going to Settings > Sounds & Haptics and toggling on Silent Mode.

2

Turn On Do Not Disturb

If Silent Mode feels too broad for your needs, Apple’s Do Not Disturb feature offers a more tailored approach to managing interruptions.

Related

Is Your iPhone’s Focus Feature the Same as Do Not Disturb?

The terms Do Not Disturb and Focus are used interchangeably by iOS users, but are these two features the same? Let’s dive in.

Do Not Disturb temporarily silences all calls, messages, and notifications. To enable it, swipe down from the top-right corner of your screen to open the Control Center and tap the crescent moon icon.

Alternatively, you can schedule Do Not Disturb to activate automatically during specific times by going to Settings > Focus > Do Not Disturb and setting a schedule.

3

Create a Focus Mode

Introduced in iOS 15, Focus Mode takes things further by allowing you to create custom profiles for different scenarios, such as work, sleep, or personal time. For example, you can set up a “Music Focus” that silences all notifications except those from your music app or specific contacts.

To create a Focus Mode:

  1. Go to Settings > Focus.
  2. Tap the “+” icon to add a new Focus.
  3. Select Custom and customize which apps and people can notify you during this time.
  4. Enable the Focus mode when you’re ready to enjoy uninterrupted music.

You can even set Focus Mode to activate automatically when you open your music app or connect to a specific Bluetooth device, like your headphones or car stereo.

Related

8 Ways to Maximize Focus Modes on Your iPhone

Follow these valuable tips to make the most of the Focus feature on your iOS device.

Stopping iPhone notifications from interrupting your music doesn’t have to be complicated. With tools like Silent Mode, Do Not Disturb, and Focus Mode, you can create a distraction-free listening experience. Whether you’re unwinding with a playlist or listening to a podcast, these features allow you to do so without interruptions.

Apple Music Classical Is No Longer Limited to Just Your Phone

Fans of classical music tend to a. be very, very into classical music, and b. not have much interest in other genres. That may be generalizing a little, but it explains why a dedicated streaming service just for classical music makes more sense than one for any other genre. And now, there’s another way to listen to Apple Music Classical.

Apple Music Classical Is Now Available on the Web

Apple Music Classical is now available on the web, with Apple launching a dedicated web player for its classical music spin-off. Apple Music Classical was already available as an app for iOS, Android, and CarPlay, but it’s now available on the web too.

This brings Apple Music subscribers access to the world’s largest collection of classical music (with over 5 million tracks from both famous and obscure composers) directly on the web. Meaning that they can access it on any device with a web browser.

In launching Apple Music Classical for the web, Anjali Malhotra, Global Director of Apple Music Classical, said:

“Apple Music Classical continues to innovate and expand on its mission to bring great musicians and their recordings to music lovers around the world all in one app. Now that the app is available on the web, Apple Music Classical’s catalog of over 5 million tracks and 50 million datapoints are now available for those who primarily use their desktops to listen to music.”

Apple has clearly decided to bring Apple Music Classical to the web before launching a dedicated Mac app. Or Apple TV for that matter. Then again, if the web player is good enough (and it does appear to do the job), it somewhat eliminates the need for a dedicated Mac or Windows app anyway.

An Apple Music Offshoot for Classical Music Fans

Apple Music Classical is, as the name suggests, an offshoot of Apple Music aimed purely at fans of classical music. It was launched in 2023, but was built on top of Primephonic, a classical music app that Apple acquired in 2021.

Related

What Is Apple Music Classical and Is It Worth It?

If you listen to classical music, you’ll love Apple Music Classical. Here’s everything you need to know about the platform.

While it’s a spin-off to the main Apple Music app focused entirely on classical music, access is included as part of a standard Apple Music subscription. And while you can also listen to classical music on the core Apple Music app, Apple Music Classical offers a bespoke UI and features designed to make it easier to listen to classical music.

Whether you listen to Apple Music Classical on one of its apps or on the web, you’ll find plenty of curated playlists, editorial notes, biographies of famous composers and much more besides. The newly-launched Apple Music Classical web player can be found at classical.music.apple.com/.

You Need to Update This Popular Browser Before It Becomes a Security Risk

Firefox users need to update their browsers immediately due to the impending expiration of a critical security certificate.

The Mozilla blog reveals that on March 14, 2025, a Firefox root certificate will expire.

The expiration of the certificate could break Firefox add-ons and extensions. An official Mozilla support document explains:

A root certificate is a trusted authority that verifies the authenticity of websites, add-ons and software updates. When it expires, systems relying on that certificate can no longer verify these items, which may cause features like add-ons or secure media playback to stop working.

Firefox users must update to Firefox version 128 (or later) or Firefox ESR version 115.13 (or later) to avoid the expired root certificate.

Why Updating Firefox Is So Important

Basically, once Mozilla’s root certificate expires (and if you don’t update), Firefox becomes considerably more vulnerable because it will stop receiving the latest security updates. It may stop receiving DRM-protected content, as the browser security isn’t verified.

An out-of-date Firefox browser may also be exposed to malicious add-ons, untrusted certificates, and even compromised passwords.

How to Update Mozilla Firefox

If the prompt to update Firefox doesn’t appear, head to Menu > Help > About Firefox. If an update is available, install it, then restart your browser.

Finally, if you’re experiencing issues updating Firefox or with the root certificate expiration, there is an official Mozilla support forum thread filled with tips and guidance on the process.

I Made Windows 11 Look Like Windows 10—Here’s How You Can Too

Not everyone likes the fresh look of Windows 11. If you miss the familiar interface of Windows 10, you can bring back the classic Start menu, taskbar, and other familiar elements with a few simple tweaks.

I find Windows 11’s new truncated context menu frustrating. While it’s more streamlined, I constantly have to expand it to access options that aren’t visible in the default view. These extra clicks add up, making the experience less efficient. So, one of the first changes I made to make Windows 11 feel more like Windows 10 was restoring the classic context menu.

To bring it back, first, create a backup of the Registry. Then, follow these steps:

  1. Press Win + R, type “regedit,” and hit Enter.
  2. Navigate to HKEY_CURRENT_USER > Software > Classes > CLSID in the left sidebar.
  3. Right-click CLSID, select New > Key, and name it “{86CA1AA0-34AA-4E8B-A509-50C905BAE2A2}”
  4. Inside this new key, create another key and name it “InprocServer32.”
  5. Double-click the Default entry and leave the value blank.
  6. Click OK, close the Registry Editor, and restart your PC.

I’m using Windows 11 21H2, so some Registry Editor tweaks may not work if you’re on a later build.

2

Revert to the Windows 10 Wallpaper

If you never replaced the iconic blue, glowing Windows 10 wallpaper like me, you might be taken aback by Windows 11’s new default background. While visually appealing, it strips away the familiar Windows aesthetic. Fortunately, you can quickly restore the classic Windows 10 wallpaper.

To bring back the Windows 10 wallpaper on Windows 11, follow these steps:

  1. Download a high-resolution version of the Windows 10 wallpaper from any reliable online source.
  2. Right-click on your desktop and select Personalize.
  3. Click Background, then Browse photos to locate and select the downloaded Windows 10 wallpaper.
Switching to the Windows 10 wallpaper on Windows 11.

Additionally, you can customize your Lock Screen screensaver by navigating to Settings > Personalization > Lock Screen.

Personalizing the Lock Screen wallpaper on Windows 11.

3

Restore the File Explorer Ribbon

Like the context menu, Microsoft redesigned File Explorer in Windows 11. While the new streamlined toolbar offers a cleaner look, it also removed the classic, more detailed ribbon I was used to, with all its options readily available. If you prefer the older layout—without having to expand menus—you can bring it back.

To bring back the classic ribbon in File Explorer, follow these steps:

  1. Press Win + R, type “regedit,” and hit Enter.
  2. Navigate to HKEY_LOCAL_MACHINE > SOFTWARE > Microsoft > Windows > CurrentVersion > Shell Extensions.
  3. Select the Blocked key. If it doesn’t exist, right-click Shell Extensions, choose New > Key, and name it “Blocked.”
  4. In the right pane, right-click, select New > String Value, and name it “{e2bf9676-5f8f-435c-97eb-11607a5bedf7}.”
  5. Close the Registry Editor and restart your computer.
Switching to the classic File Explorer ribbon in Windows 11.

4

Adjust Taskbar Alignment and Remove Unnecessary Elements

Another visual change in Windows 11 is the centered taskbar, whereas in Windows 10, it was left-aligned. To move it back, right-click the taskbar, select Taskbar Settings, go to Taskbar Behaviors, and choose Left from the dropdown.

Changing the taskbar alignment to left in Windows Settings.

You can also turn off unnecessary taskbar elements like Widgets by toggling them off in the settings.

Disabling extra taskbar items in Windows settings.

5

Use the Classic Task Manager Instead

Microsoft also refreshed Task Manager by moving the navigation menus to the left instead of the top. While the new design is cleaner and more modern, Windows 10’s layout is more compact, and navigating menus is more straightforward. If you prefer the classic Task Manager, there’s a simple way to open it in the older interface.

To open the Task Manager in the older interface every time, follow these steps:

  1. Press Win + R to open the Run dialog.
  2. Type “taskmgr -d” and hit OK.
Running classic Task Manager from the Run utility.

To avoid typing this command repeatedly, you can create a desktop shortcut:

  1. Right-click on the desktop and select New > Shortcut.
  2. Type “taskmgr -d” in the location field and click Next.
  3. Name the shortcut “Classic Task Manager” and click Finish.
Creating a desktop shortcut for the classic Task Manager on Windows.

Windows simplified the Start Menu layout, and unlike other tweaks on this list, there’s no quick Registry hack to restore the classic Windows 10-style menu. While some workarounds existed in earlier versions of Windows 11, they no longer work. This is one change where you’ll likely need a third-party tool.

OpenShell (available to download from GitHub) is a solid free option. However, I recommend Start11 for its ease of use. It costs $9.99 per installation, but you can try it for free.

To set it up, follow these steps:

  1. Purchase and download the tool from Stardock’s website.
  2. Run the setup file and install it.
  3. Then, go to the Start Menu tab, select Left Aligned, choose Windows 10 Style, and close the app.
Changing the Start Menu style to that of Windows 10.

You can also customize it further in the settings.

7

Disable Microsoft Copilot

Windows 11 comes with Microsoft Copilot, an AI assistant designed to help with searches, content creation, and task automation. However, I find it unnecessary clutter. It wasn’t part of Windows 10 when I used it, though it’s also now available there. If you want an actual Windows 10-like experience on Windows 11, you must turn it off.

To turn off Microsoft Copilot, follow these steps:

  1. Press Win + R, type “regedit,” and hit Enter.
  2. Navigate to HKEY_CURRENT_USER > Software > Policies > Microsoft > Windows.
  3. Right-click the Windows folder, select New > Key, and name it “WindowsCopilot.”
  4. In the right pane, right-click, choose New > DWORD (32-bit) Value, and name it “TurnOffWindowsCopilot.”
  5. Double-click it, set Value Data to 1, and click OK.
  6. Restart your computer to apply the changes.
Disabling Microsoft Copilot in Windows 11.

8

Remove Rounded Corners for a Sharper Look

Windows 11 introduces rounded corners for app windows and UI elements, a subtle design change that gives the interface a modern look. The corner radius varies across different elements, but if you prefer the classic sharp-edged design, you can disable rounded corners to get a Windows 10-like appearance.

To bring back sharper corners, follow these steps:

  1. Press Win + R, type “regedit,” and hit Enter.
  2. Navigate to HKEY_CURRENT_USER > Software > Microsoft > Windows > DWM.
  3. Right-click the DWM key, select New > DWORD (32-bit) Value, and name it “UseWindowFrameStagingBuffer.”
  4. Double-click this newly created DWORD, set Value Data to 0, and click OK.
  5. Restart your PC to apply the changes.
Disabling rounded corners in Windows 11.

That’s how I tweaked Windows 11 to resemble Windows 10. If you’re not a fan of the new design, you don’t have to settle—apply these changes to make your experience comfortable. If you’d rather not tweak the Registry manually, you can use a third-party tool which will make these changes much simpler. However, sometimes support for those tools isn’t the best, which is why I prefer to rely on registry changes.

Apple One’s Most Expensive Subscription Just Added (Some) More Value

While bundle deals can save you money on multiple subscription services, Apple’s premium bundle plan is known for its high price tag. To make up for that, Apple has just released two additional services for its Apple One Premier bundle.

Apple One Premier Is Gaining Two New Services

Apple One, a subscription that offers bundled Apple services in three tiers, has now added additional perks to its priciest plan called Premier. In addition to the current services included in Premier, Apple Invites and Apple News+ Food will soon join the party.

According to Apple’s website, a Premier plan will save you $29/month, when compared to paying for all six of its services à la carte.

While $37.95/month is nothing to sneeze at, the current Premier monthly subscription includes 2TB of iCloud+ storage, Apple TV+, Apple Music, Apple Arcade, Fitness+, and News+. Apple has now added Invites, and is set to add News+ Food in the upcoming iOS and iPadOS updates. According to Apple’s Newsroom, iOS 18.4 and iPadOS 18.4 are expected sometime in April 2025.

While Apple’s new Invites app provides iCloud users with custom invitations and other event-planning tools, Apple News+ Food is an extension of the News app that brings you “tens of thousands of recipes,” from sources like Bon Appétit and Food & Wine.

Will Apple Invites and Apple News+Food Justify the High Price?

The two new additions raise Apple One Premier’s total service count from six to eight, at no increase to the established $37.95/month. That sounds pretty good in theory, but it all depends on whether you actually use all eight services.

To me, the heavy hitters in this bundle are the 2TB of storage on iCloud+, Apple TV+, and Apple Music. On their own, those three services cost:

Service

Price

iCloud+ 2TB

$9.99

Apple TV+

$9.99

Apple Music (Family plan)

$16.99

Alone, those three services come out to $36.97, nearly the price of the bundle plan. Hence, as long as you’re using at least those three, it’s already essentially worth the cost—even without the other features like Fitness+, News+, and Invites.

While I don’t know (yet) anyone who has used Apple Arcade, I do know many who rely on Apple Fitness+, particularly those with an Apple Watch. However, as someone who does not track fitness outside my one running app, I can only go off of hearsay on that one.

I can see Apple Invites being a welcome perk, whether you manage professional events or just love to throw parties. That said, you can use Apple Invites with any iCloud+ subscription. Meaning, theoretically, you could pay $0.99 for the lowest iCloud+ tier and still have access to Apple Invites.

Apple News+ Food could add value for the right person, particularly for those who are not only looking for recipes but appreciate reading food journalism. This subscription could save you from multiple food magazine subscriptions.

I certainly hope that Apple doesn’t follow these two new freebies with a price increase in a few months. It wouldn’t be the first time a company has done this, with Amazon Music raising its subscription prices only a few months after adding a “free” monthly audiobook perk. I wouldn’t guess that these two particular apps would garner a rate change, but you just never know.

Why You Should Seriously Try Windows Recall

I wasn’t sure I’d find much use out of it when I first tried Windows Recall. But after some time with the feature, I can genuinely say it has completely changed how I use my PC.

Explore Everything You’ve Done Recently

Windows Recall provides a comprehensive overview of your PC activity. It captures snapshots of your screen regularly, creating a searchable and navigable history. This isn’t just a list of files you’ve opened; it’s a visual timeline of everything you’ve done.

At first, I wasn’t sure how much I’d use this functionality, but I quickly realized its value. Have you ever worked on multiple projects at once and forgotten which files, websites, or emails were involved? Plus, I often get sidetracked while researching a topic for work.

Instead of relying on my browser history or searching through countless folders to reconstruct the activity, I can use Recall to visually scan through my past activities. This makes it easy to retrace my steps or pick up where I left off.

Recall doesn’t just track files and web pages—it also logs interactions within apps. It tracks my activities in the background without causing any performance issues or interruptions. All I have to do is press the Windows key + J and I can start browsing through my snapshots.

Recall is only available in preview for Copilot+ PCs. Currently, it is optimized for select languages—English, Chinese (simplified), French, German, Japanese, and Spanish.

This feature has also been incredibly useful for identifying patterns in my workflow. Additionally, I often rediscover articles or videos I had completely forgotten about, or a past activity sparks new ideas and inspirations.

Windows Recall is essentially a constantly updated personal archive that enables a deeper understanding of one’s digital behavior.

It’s Easy to Find Something You Worked on Previously

Searching for something in Windows Recall

The search functionality within Windows Recall is where its true power becomes apparent.

Imagine you remember seeing a specific graph in a presentation a few weeks ago, but you can’t remember which file it was in. With Recall, you can search for keywords related to the graph, and it will surface snapshots of your screen where that graph was visible, even if you don’t remember the file name or the application you were using.

This type of search functionality is a paradigm shift in how we interact with our digital information. I can simply describe what I’m looking for and Windows knows how to find it.

It eliminates the frustration of endlessly searching through files and folders on a Windows PC, trying to remember the exact name or location of something you’ve seen before. Recall allows you to search based on visual content, keywords within documents, or even the applications you were using.

I recently needed to revisit an important conversation I had in a messaging app. Normally, I’d have to scroll endlessly or rely on the app’s built-in search (which isn’t always great). With Recall, I simply searched for a key phrase I remembered from the conversation, and it pulled up the exact moment I saw it on my screen. It felt like magic!

Interact With What’s on Your Screen Quicker

Click to Do interaction screen in Windows Recall

Beyond simply viewing and searching for your past activity, Windows Recall can also interact with the snapshots it captures. This means you can potentially resume tasks from where you left off, even if you didn’t explicitly save your progress.

Then there’s Click to Do, a feature that helps you get things done faster by analyzing text and images on your screen that you can take action with. Despite many expressing privacy concerns over Windows Recall, Microsoft assures that the analysis is always performed locally on your device and only begins after you actively engage with Click to Do.)

It’s been a lifesaver when working with complex documents and spreadsheets. If I make edits but later realize I need to revert to an earlier version, I can pull up a previous snapshot. This eliminates the fear of losing important changes or accidentally overwriting crucial data.

Plus, I can take a new action on a snapshot, like editing an image in the screenshot above, going in a different direction from what I did in the past. Recall also helps me stay organized during meetings, training, and brainstorming sessions. Switching between tabs, taking notes, and referencing documents can make it hard to keep track of everything.

But with Recall, I can confidently navigate through different tasks, knowing that everything is being recorded and can be revisited and acted upon later.Right now, Windows Recall is available as a preview. Microsoft is frequently updating it. The overarching vision seems to be to deliver a fluid and intuitive experience, where we can focus on our work without constantly worrying about managing files and saving our progress.

The ability to explore my past PC activity in such a visual and intuitive way is genuinely transformative. It might seem like a privacy nightmare, but Recall is one place where letting Windows invade your privacy can really pay off. My experience with Recall has been overwhelmingly positive, and I highly recommend giving it a try.

Gemini Now Makes It Easy to Link Your Gmail and Google Calendar

Google has officially released a Gemini update that will continue to bridge the gap between email correspondence and scheduling. Now, with a Workspace account, you can add an event to your Google Calendar without leaving Gmail.

Gmail and Google Calendar are far from strangers. Google has already created synergy between the apps, from automatically creating calendar events for flight and restaurant reservations, to the handy Set up a time to meet tool in Gmail. With the induction of Gemini, Google can expand connectivity even further.

As announced on Google’s blog, eligible Google Workspace accounts can enable Gemini to analyze emails for signs of calendar-related content and offer an Add to calendar button for applicable messages.

The calendar button will appear directly below the subject. When you select it, Gemini will show you the created event in a sidebar on the right. If you need to make changes, you can tap the pencil icon for edits.

Emails for which Gmail already produces calendar events, like flights, will not get an Add to calendar button.

Who Has Access to the Newest Gemini Feature?

It’s important to note that this Gemini feature is currently available for paid Google Workspace plans. This is likely applicable to you if you use Google Workspace through or at work. The following subscriptions have access to this update:

Plan

Tiers

Business

Starter, Standard, Plus

Enterprise

Starter, Standard, Plus

Google One

AI Premium

You’ll also have access to the feature if you or your employer have ever purchased the following add-ons:

  • Gemini Education add-on
  • Gemini Education Premium add-on
  • Gemini Business add-on
  • Gemini Enterprise add-on

If you work with one of the paid Workspace memberships or add-ons described above, you should see the function show up anytime between March 10 and “mid April 2025,” according to Google’s description of the roll-out.

The latest scheduling tool is the latest in a line of Google updates that bring Gemini more and more intertwined with the Workspace ecosystem. While additions like the Gemini-powered video generator are flashy and fun, my bet is this Calendar shortcut is going to be the most useful and popular update yet. Sadly, it’s currently limited to paid Workspace accounts, which went up in price this year, but this could change in the future.

How to Spot a Fake MagSafe Case Instantly

Apple created a new breed of accessories when it introduced MagSafe for iPhone. However, it also made space for counterfeits to pop up everywhere. Thankfully, a few simple checks can save you from being stuck with a knockoff.

MagSafe-Certified, MagSafe-Compatible and Not MagSafe

Aryan Surendranath / MakeUseOf

The simplest way to guarantee your accessory is legitimate is to check for Apple’s Made for iPhone certification. Any product with this badge should meet the set standards for iPhone accessories, and should guarantee a positive user experience. For the purpose of this article, we’ll call these cases MagSafe-certified.

Then there are MagSafe-compatible accessories. These products are designed with a magnetic ring embedded in the back panel, similar to MagSafe-certified products. However, the user experience can vary widely from one brand to another, as they don’t need to meet any defined standards.

So, it can be difficult to tell whether you’re getting a bargain or a poor product with ineffective magnetic strength. Having experienced a variety of cases since MagSafe came out, I’ve come up with a few good ways to check whether a case is actually MagSafe-certified or just a knockoff hoping to pull some hard-earned cash from your pocket.

If you want more information on how MagSafe works on iPhone, you can check out one of our older guides on what MagSafe on iPhone does. Some of the information, like which iPhones are supported, is a bit outdated, but the basics of how MagSafe works remain the same.

If you’re buying an MFI-certified MagSafe wireless charger, when it connects to your iPhone, it’ll display a unique animation. And, depending on your iPhone model, it will charge it with more power (15W to 25W). Non-MFI accessories are limited to 7.5W Qi wireless charging, and will charge slower.

Keep an Eye Out for These Flaws

Using ESR HaloLock Geo wallet as phone stand
Hannah Stryker / MakeUseOf

To avoid getting stuck with a dud, watch for these hallmarks to separate the riff-raff.

If you’re shopping for an Apple Silicone case with MagSafe, only official ones from Apple reveal a unique animation on your iPhone’s screen after you’ve placed it in the case. Some products use similar-sounding terms or avoid mentioning Apple’s terminology altogether. Keep an eye out for mistakes like this on product packaging.

If you’re buying a case at a pop-up shop or another store of the sort, try placing a coin or anything remotely magnetic on the back of the case. MagSafe magnets aren’t overly strong—they’re designed to pair magnetically with another set of magnets on a compatible accessory—but they’re capable enough to hold on to a coin without dropping it to the floor.

If the coin falls off, so will your phone when you place it on a mount (or use another accessory).

Lastly, when shopping online, stick to brands with a proven track record. I’ve personally always used products from companies like Spigen and ESR. They offer various styles and will protect your phone while letting you make the most of MagSafe.

I’ve used these simple pointers whenever I’m out shopping for an accessory, keeping myself and my phone safe from falls, and enjoying MagSafe to its fullest.

Why You Shouldn’t Overspend on a Mechanical Keyboard

Top-of-the-line keyboards are often expensive, but does that mean the cheaper ones are no good? I massively overspent on my current mechanical keyboard, only to find out I didn’t really have to.

Are Cheaper Keyboards Inherently Worse?

I used a Redgear MK881 mechanical keyboard pretty much every day between 2018 and 2023. During this time period, the keyboard went through a pretty hard bashing. By the time I replaced it with a Keychron K2 V2, it was still going strong. This was a roughly $34 keyboard, so if you ask me, the answer to the heading question is no.

Cheaper mechanical keyboards are not bad at all. You can find hot-swappable options with customizable RGB and sometimes even software support for under $50 on Amazon rather easily. Unless you’re nit-picking, these are perfectly serviceable keyboards.

Yadullah AbidiMakeUseOf

From what I’ve experienced jumping across keyboards, the primary difference comes down to the switches. Cheaper keyboards use cheap switches from Kailh, Gateron, and sometimes even Cherry MX. I’ve previously compared the three switch types to help you pick the best, but they’re more or less going to feel the same regardless of whether you get a blue, red, or brown switch keyboard.

If your board is hot-swappable, you can get a pack of switches, swap everything out, maybe add a layer of foam underneath the PCB, and you’ll be good to go. You could also lube your switches for a smoother typing experience.

Do They Miss Out on Features?

Software features are one aspect where cheaper keyboards lose out to more expensive options. Most cheaper mechanical keyboards don’t have accompanying software, meaning you won’t be able to set up macros and program-specific profiles.

Two mechanical keyboards on a desk
Yadullah AbidiMakeUseOf

This is true for backlighting as well. While a more expensive keyboard might give you per key RGB control and dozens of different presets, cheaper keyboards might only have a few preset options for you to cycle through.

But that’s all there is to it. Budget options have caught up a lot in recent years and you can get keyboards for as little as $80 that offer hot-swappable switches, volume control knobs, 2.4 GHz and Bluetooth wireless connectivity, and more. The Royal Kludge S98 even offers a smart screen with everything else mentioned above for less than $100 on Amazon at the time of writing.

What Spending More on a Keyboard Gets You

If you’re spending more money on a keyboard, somewhere in the $150-200 range, the first thing you’ll notice is significantly better build quality. These keyboards are significantly heavier and built with premium materials like aluminum frames. You get better quality keycaps, better RGB, and, of course, better switches.

Accented Enter key on an Orion Frost Keychron K8 Pro
Yadullah AbidiMakeUseOf

How much that affects your typing and user experience compared to a sub-$50 keyboard depends on your personal preference. That said, you can’t go wrong with these keyboards, as the typing experience will almost certainly be better. The switches will be a lot smoother, the keys will be better stabilized, better materials will be used across the board, more software features will be available, and if you pick one up with magnetic switches, even more customization.

Other small knacks like screens, dedicated macro buttons, and control knobs are also commonly found on more expensive keyboards. While some budget options also offer these features, keyboards on the higher end of the price spectrum do a much better job of the actual implementation.

What About Design and Build Quality?

This is another aspect that more expensive keyboards do a lot better. That’s not to say that cheaper keyboards are worse-made or won’t last you a long time. As long as you’re properly cleaning your keyboard occasionally, it’ll last you as long as you’re willing to use it.

The major difference comes in the stock experience. While you can spend money to buy better switches and keycaps for just about any mechanical keyboard, the more expensive ones come with nicer keycaps and switches out of the box. I use both my Keychron K2 V2 and Arion Frost K8 Pro in their stock forms, and the latter provides a much smoother typing and user experience courtesy of better materials used across the keyboard.

How Much Should You Spend on Your Next Keyboard?

I don’t see the point of spending more than $100-$150 on a mechanical keyboard, given the insane number of options available. Options in this price range cover almost everything you need, including software support for customization and plenty of switch options.

If you’re on a budget, you can also pick up most budget keyboards in the $50 to $80 range. You might miss out on software support and extra controls, but the board itself won’t disappoint. Besides, you’ll likely get options that support hot-swapping, so you’re free to experiment with different switches. We’ve got you covered if you need help choosing the perfect keyboard for your typing needs.

So don’t fall for the marketing hype or limited edition drops. Unless you have a specific or niche requirement, such as those provided by Alice keyboards, you don’t have to spend much money on your new purchase.

Samsung’s Pop-Up and Split Screen View Make Multitasking Easier

I happened to stumble upon a certain multitasking feature some time ago while fiddling with my Samsung phone. This feature doesn’t have a dedicated menu in the Settings, so it’s easy to miss. However, it’s super easy to use and comes in handy more often than not, which is why everyone should give it a try.

You Can Open Notifications on Samsung in Pop-Up or Split Screen View

You might be aware that Android phones can open two apps simultaneously in a split-screen view. It’s one of many Android features that can help you stay productive. You might also know that Samsung phones add to this multitasking capability by allowing you to open certain apps in a pop-up window, just like you do on your desktop or laptop.

However, you might not know that, on Samsung phones, you can long-press on a notification to drag and drop it on your home screen to open the corresponding app in either a pop-up window or split-screen view.

If you simply tap on the notification, the app will open normally and occupy the entire screen. This might not be ideal if you are already in the middle of something on another app. But, with this method, you can drag and drop the notification at the center of the screen to open it in pop-up view or on either side of the screen to open it in split-screen view.

You can freely adjust a pop-up window’s dimensions by dragging any of its corners.

For split screen, if you have an app already open, the second app will simply open above or below it (depending on where you drop the notification) and occupy half the screen. You can manually adjust how much space an app should take later on using the handle located in the middle of the two apps.

If you don’t already have an app open, a list of apps will surface from which you can select one.

Related

5 Android Features I Use for Seamless Multitasking

Do more at once with your Android phone.

If you have multiple apps opened in pop-up view, all of them will be neatly organized under the same floating bubble so that your screen doesn’t get crowded, and you don’t have to switch back and forth between them.

These multi-window features come in especially handy when you’re, say, taking notes while researching something online, checking out upcoming events and setting reminders, or preparing your to-do list while going over your current tasks. Since stumbling across it, split-screen and pop-up windows have completely changed how I multitask on my Samsung phone..

Why Self-Care Apps Might Not Work for Everyone

Struggling with procrastination can really throw a wrench in your plans. Thankfully, there are self-help apps that claim to help combat that, but as I soon discovered, the path to digital enlightenment isn’t as smooth as advertised.

1

The Oversimplification Trap

One of the biggest problems with these apps is the oversimplification of simple tasks. For example, during my month-long stint with Finch, I spent the first week checking off tasks like brushing my teeth, drinking water, and washing my face. These are tasks that pretty much every adult does within about 20 minutes of waking up, not to mention that getting them out of the way does nothing to improve my work day.

You can add goals, but most actual activities on Finch are locked behind a paywall. If I wanted to use a free app to remind me to get out of bed and brush my teeth, my alarm app does a pretty good job of that.

Related

I Ditched Android’s Stock Alarm Clock for This App

Say goodbye to sleeping in unexpectedly.

These oversimplified tasks are accompanied by unnecessarily playful chimes, notification sounds, and pop-ups, all done to hopefully make life less overwhelming. However, in the process, the app ends up oversimplifying just about every aspect of your day out of the box, with a ton of setup required to get it to function the way you want.

The premise here is that the app is trying not to feel like a burden on you and make things simple and playful. However, some tasks do demand a particular level of seriousness, especially when it comes to work or studies. Using an app to help improve consistency at work or studies that play chimes like your toddler’s favorite toy might not be the right approach here.

2

Setting Up Is Always a Hassle

Speaking of setting up, ensuring these self-help apps work the way you want and keep you on track can save a surprising amount of work. I’m a cybersecurity expert and web developer who deals with malware samples and hundreds of lines of code on a daily basis, and even I struggle to sometimes see where these developers tuck away certain settings or features.

Habitica is a good example to consider here. The basic objective of the app is to gamify your tasks. You make progress in the game and get items by finishing off tasks in the real world. Sounds simple enough right? Well, good luck trying to get a hatching potion, feeding your pet, purchasing equipment, or figuring out how the in-app currency works.

Microtransactions in Habitica
Yadullah AbidiMakeUseOf

On top of this, you see microtransactions similar to games. While Finch takes a more responsible approach using a paid subscription to allow access to more useful parts of the app, Habitica has in-app gems that you can purchase for cosmetic upgrades. For someone who might be struggling with distractions, that just doesn’t seem like a very good idea. Microtransactions are already ruining the gaming industry, I’d rather they stay away from self-help apps.

Even if you understand everything the app is trying to tell you in the first go, having to create tasks that match your particular requirements is a huge hassle. There’s no universal solution here, but apps can do better than providing basic tasks like brushing your teeth and getting out of bed by default.

3

Notification Burnout

​​​​​​​ Another rather counterproductive aspect of self-help apps is the frequent notifications. Finch, for example, sends an average of four notifications a day, often during office hours only to tell me to open the app. For someone struggling to concentrate, that’s a big hassle.

I understand that notifications are the app’s only way to interact with users if they’re not opening the app itself. However, developers need to be more thoughtful of the actual notification content. Breaking concentration from my work only to see my self-help app say “I miss you cheep” isn’t very good for productivity.

Finch's daily notifications.
Yadullah AbidiMakeUseOf

Habitica does better here, as the app’s notifications are mostly related to the task at hand. However, Habitica’s notifications often got lost among others on my phone, which meant I didn’t see the notification (and hence didn’t get reminded of the task) until later when it was too late.

If you’re on Android, you can disable notification permissions or even control individual notification types from the phone settings. That said, it adds to the mountain of setting up you already need to climb when you’re first starting out with these apps.

Related

5 Hacks I Use to Declutter My Android Notifications

Cut through the noise.

4

A Missing Human Element

​​​​​​​ I’m not a mental health expert, so I won’t comment on the medical benefits or disadvantages of using these apps, but there’s clearly a missing human element here. Finch’s overly positive tone put me off, while Habitica’s robotic obsession with task completion to progress your game takes all the joy out of the actual gamification of your task.

Finch app showing its pet on a phone
Yadullah AbidiMakeUseOf

In any case, these apps miss out on the human element that you’d otherwise get by visiting a mental health professional, or therapist, or just talking to a friend. This might be a personal preference, but I found talking to my friends better than struggling with Finch’s made-up pet, as cute as it is.

Mental health is a serious concern, and the best option is to talk to a professional who can help you figure things out and prescribe proper medication if required. Self-care apps can help you remember tasks, but self-diagnosing on the internet or with the help of any apps can do more harm than good.

5

Your Progress Might Be Illusionary

​​​​​​​ While you may cross off weekly streaks and be labeled a superstar by the app you’re using, it doesn’t necessarily translate to real-world progress. On Finch, I had met my daily minimum activity criteria just by getting out of bed, brushing my teeth, washing my face, and drinking a glass of water. Now the app thinks I’m on a hot streak, while in reality, I’ve not even started my day properly.

Habitica app running on a smartphone
Yadullah AbidiMakeUseOf

You can make app progress go hand in hand with real-world progress, but you’re going to have to take manual control over pretty much every aspect of the app for that. Additionally, the app can’t check if you have finished the task or not. All it needs is for you to tap a button on your phone screen—something I’ve done multiple times just to get rid of a notification or for the app to stop bothering me.

You can achieve similar progress with something as simple as Google Tasks or Sticky Notes on Windows. Google Tasks especially is a great app for setting up to-do lists and getting timely reminders, and it doesn’t play down your tasks or ask you to check in unless required.

6

Data Privacy Concerns

Last but not least, when you’re using a self-care app, you’re providing the app with a lot of data about yourself and at least your phone usage habits. This prevents a huge privacy concern, as any data breach can essentially provide an intruder with the entire blueprint of your life.

These apps encourage you to be real and open up, which means you’ll be jotting down things you’re struggling with, and things you’d want to improve about yourself. That’s not the kind of information you’d want leaked or sold on a dark web forum.

Related

How I Deleted Myself From the Internet to Protect My Privacy

Here’s how I effectively deleted myself from the internet to protect my privacy

Another concern here is that your data might be sold off to data brokers and advertisers for running targeted ads. This isn’t anything new, and pretty much every app on your phone collects and sends some data about you to a shady advertiser.

There are a few ways using a smartphone can help your privacy. However, the extent of information that self-care apps have makes them more effective for advertisers, and hence, a bigger privacy concern for you.

Self-care apps come with a lot of promise but don’t necessarily make good on them. For all their claims, they can end up making the problem worse. On the flip side, if you want an app that reminds you of your tasks and helps you get life together, something as simple as a to-do list will do. In my experience, they both require the same discipline.

I’ll Only Buy My Next TV From These 6 Brands

When shopping for a TV, I look for quality and reliability, which can only be found from reputable brands. That’s why I’ll only buy a unit from either of these six manufacturers when I’m in the market for my next TV upgrade.

1

Samsung

Thanks to its continuous innovation in the space, Samsung is one of the best TV brands on the market. Its massive investment in pushing the boundaries in quantum dot technology and mini-LED backlighting gives Samsung displays some of the best available anywhere. Samsung pioneered QLED technology, which offers great color accuracy and higher peak brightness.

The company has also pioneered Neo-QLED, an improvement to QLED displays that offers better contrast ratios and finer local dimming control, like the QN85D QLED series and QN90D series. And if OLED is a must-have for you, the company sells various models with OLED panels, like the S90D.

Another key part that makes Samsung TVs attractive is the software side, with the company’s Tizen OS offering a feature-rich, user-friendly interface. The company also offers long-term updates and software support.

2

LG

lg smart tv on stand at tech show-1
Grzegorz Czapski/Shutterstock

LG pioneered OLED display technology and is still among the best manufacturers to buy your TV from if you need a self-emissive display with perfect blacks, wider viewing angles, and infinite contrast ratios. It doesn’t end there, though. With its OLED Evo display technology, the company has improved on traditional OLED with higher peak brightness and better efficiency. You can find these flagship display technologies on the LG G4 and C4, the company’s best TV models.

Another unique selling point of LG smart TVs is their support for Dolby Vision and Dolby Atmos, which offer superior HDR and audio quality. Regarding internal hardware, LG doesn’t cut corners—it includes its flagship alpha processors for the best performance. On the software side, LG TVs include webOS, one of the best smart TV platforms on the market.

3

Sony

Sony is a well-respected brand in the TV market for good reason. First, the company has distinguished itself by offering the best picture-processing technology of any modern TV brand through its flagship XR processors. While the company doesn’t produce its display panels, it sources them from the best in the market, like LG and Samsung Display. For example, the Sony Bravia 9 (the company’s 2024 flagship TV) uses a Samsung QLED panel.

Besides the processor and panel, modern Sony TVs use Android TV, the best smart TV platform. If you use Netflix to watch movies and TV shows, Sony offers a unique Netflix Calibrated Mode that ensures you watch content with the intended picture quality.

4

Hisense

Hisense is well known for its excellent value for money TVs, offering several high-end features at mid-range prices. The company’s U-series TVs offer solid picture quality for the price, thanks to the ULED display technology. Despite starting as a budget brand, the company has dramatically improved its product lineup and now competes with premium options from other brands.

With a tight budget, I’d pick the brand for its excellent picture quality at pocket-friendly prices. The company’s in-house VIDAA smart TV platform isn’t the best, but fortunately, it includes Google TV on select models like the U8N.

5

TCL

TCL QM6K 2025 TV
TCL

TCL is another solid budget TV brand offering excellent specifications for less, making it an easy pick if you don’t want your next TV upgrade to break the bank. Unlike incumbents, it hasn’t been around for long, but by following the same playbook as Hisense, it now has respectable TV models competing with the likes of Samsung, Sony, and LG.

The company has bet big on mini-LED backlighting technology, offering deeper blacks and high peak brightness. For the best gaming experience, TCL TVs also have great gaming features, such as a 240Hz refresh rate and a gaming mode with lower input lag, like the QM8.

6

Panasonic

Panasonic OLEDs are considered some of the best for pure cinematic quality. The only downside is that they’re only available in select regions. Panasonic TVs stand out because they partner with Hollywood filmmakers in color tuning to ensure the best picture quality.

If you want a TV tuned with the best color accuracy out of the box, go for Panasonic. Panasonic TVs also use Amazon’s Fire TV platform, one of the best options on the market. If you want the best from Panasonic, the Z95A is perfect, packed with all the bells and whistles.

While purchasing a TV, you should stick to reputable brands that have the best picture quality money can get or the best value for money. Avoid cheap no-name brand TVs as they may not offer the best quality or even a warranty if something goes wrong. If you buy from any of these six brands, you’re assured of an excellent TV that will serve you well for several years.

Your Next Flight Could Have Better Wi-Fi, Thanks to Starlink

While some might see airline travel as a rare reprieve from a life online, those who travel for work rely on competent in-flight WiFi. Here to transform the internet of the skies is United, with the company officially starting its installation of Starlink’s satellite-compatible hardware on its fleet.

Following a deal with Elon Musk’s SpaceX in 2024, United Airlines has now outfitted its first plane with Starlink hardware. If you’re not sure what Starlink is or how it works, a Starlink antenna communicates with Starlink satellites to bring customers high-speed internet while flying. According to the video released today, this new hardware should boost in-flight Wi-Fi speeds to nearly 250 megabits per second, which is on par with most terrestrial networks.

​​​​​In terms of roll-out, United aims for a cadence of outfitting 40 planes per month with Starlink hardware. As described in United’s announcement in January 2025, the first commercial flights to get their Starlink makeover are part of the company’s smaller, regional fleet, such as the “United Embraer E-175 aircraft.”

As the company acquires FAA approvals for each aircraft type, you’ll likely start to see Starlink internet showing up on mainline aircraft. Realistically, mainline aircraft will probably be a 2026 project.

The airline has highlighted that members of its loyalty program, called MileagePlus will get free access to this boosted Wi-Fi. That’s a great perk, especially considering that most in-flight Wi-Fi that you have to pay for these days is fairly slow and unreliable. I can imagine a future where United pulls the Starlink service beyond a paywall, but let’s not put the cart before the horse.

Reliability is the key benefit to this transformation. Starlink antennas have access to an entire constellation of satellites via a laser mesh network. Thanks to laser link communication, the antenna can switch between different Starlink satellites in low Earth orbit (LEO) as the plane moves along its path, maintaining consistent coverage.

Here’s who Starlink puts it:

“Starlink’s optical space lasers transmit data throughout the Starlink constellation, providing continuous service in areas far from SpaceX ground stations – providing coverage for your flights over the open ocean and in polar regions.”

As someone who once planned to work on a flight between Hawaii and Los Angeles, I know that it’s easy to take Wi-Fi for granted. It’s easy to forget where our mythical internet connection actually comes from. The shift to satellite internet will absolutely change the game for the in-flight experience. Pretty soon, in-flight Wi-Fi could be as smooth as that Jack and Coke you’ve been eyeing from the airline service trolley.

5 Reasons I Won’t Be Upgrading to Samsung’s Vision AI Yet

Samsung’s Vision AI, unveiled at CES 2025, promises to revolutionize how we interact with our TVs. But while the buzz around Vision AI is undeniable, I’m not convinced it’s time for an upgrade just yet.

5

AI Picture Enhancements Aren’t Really Groundbreaking

Samsung is touting its AI Auto HDR remastering, AI Color Boosting Pro, and AI upscaling as game-changers for picture quality. And sure, these features sound impressive on paper. But how much better can a TV picture actually get?

Modern TVs already deliver stunning visuals, with 4K and 8K resolutions offering razor-sharp clarity. While AI enhancements might tweak colors or improve contrast, the difference will likely be marginal for the average viewer. Unless you’re a professional videographer or a hardcore cinephile, these upgrades might not even be noticeable.

Moreover, AI-driven picture enhancements aren’t new. Competitors like LG and Sony have been refining their own AI upscaling and color-boosting technologies for years. Samsung’s advancements feel more like incremental updates than revolutionary leaps. For most consumers, the current generation of TVs already offers more than enough visual fidelity.

4

The Remote’s AI Search Button Solves a Problem I Don’t Have

One of the flashier features of Samsung’s Vision AI is the new AI search button on the remote. With a single click, you can pull up information about actors, locations, or even recipes for food shown on screen. While I find the feature undeniably futuristic, I’m uncertain about its practicality.

Here’s the thing: I already have a device that does all of this, and it’s called a smartphone. Most of us are already accustomed to using our phones to look up trivia, recipes, or actor bios while watching TV. Adding this functionality to the remote feels redundant, especially when it requires yet another button cluttering an already crowded remote control.

Worse, this feature assumes that viewers are constantly curious about every detail on screen. In reality, most of us just want to sit back and enjoy the show without interruptions. The AI search button might appeal to a niche audience, but for the average viewer, it’s solving a problem that doesn’t really exist.

3

Turning My TV Into a Security System Feels Invasive

Samsung’s Vision AI takes a bold step by integrating home security features into its TVs. Using built-in cameras and microphones, the system can detect unusual noises or movements and alert you via your phone or TV. While this might sound convenient, it raises some serious privacy concerns.

First, the idea of my TV watching and listening to me feels uncomfortably invasive. Even if Samsung promises robust security measures, the potential for misuse or hacking is hard to ignore. We’ve seen enough data breaches and privacy scandals to know that no system is foolproof. Do I really want to risk my home’s security—and my privacy—on a feature secondary to the TV’s main purpose?

Second, this feature feels like a solution in search of a problem. Most security-conscious people already have dedicated smart home security systems, from smart doorbells to standalone cameras. Adding a security feature to a TV feels unnecessary and, frankly, a bit gimmicky. If I’m serious about home security, I’d rather invest in a system designed specifically for that purpose.

2

Live Translations Are Cool—But Niche and Unpolished

Another intriguing feature of Vision AI is its live translation capability, which instantly translates closed captions on live broadcasts into seven different languages. On the surface, this sounds like a nifty feature for multilingual households or international viewers. But dig a little deeper, and the limitations become apparent.

For starters, live translation technology is still far from perfect. Even the most advanced AI translation tools, like Google Translate, struggle with nuances like idioms, cultural references, and context. While Samsung’s system might handle straightforward dialogue reasonably well, it’s likely to stumble on more complex content, leading to awkward or inaccurate translations.

Additionally, this feature caters to a relatively small audience. For most viewers, standard subtitles in their native language are more than sufficient. Unless you frequently watch content in languages you don’t understand, this feature is likely to go unused. It’s a neat trick but not a compelling reason to upgrade.

1

Samsung’s Vision AI Feels Like a Work in Progress

Samsung’s Vision AI is ambitious, but it’s not quite the finished product it’s being marketed as. Many of its features, from the AI search button to live translations, are impressive in theory but lack the refinement needed to make them truly practical.

Additionally, the integration of these features feels disjointed. Instead of creating a seamless user experience, Vision AI comes across as a collection of loosely connected ideas. The AI search button, live translations, and security features don’t necessarily complement each other—they just exist, competing for attention and resources.

While Samsung is clearly pushing the boundaries of what a TV can do, it’s hard to shake the feeling that the current version of Vision AI is more of a proof of concept than a polished product. An upgrade would only be worth it (in my opinion) when these features have been refined and demonstrated their real-world value.

Here’s Why They’re Better Than Google’s

While to some, the word DuckDuckGo sounds like a children’s game, those who know the search engine are fans of its privacy-first approach to web browsing. The Google alternative has applied this same philosophy to its new AI features, including AI summaries and an AI chatbot.

Known for protecting users from personal data collection, DuckDuckGo has moved some new AI features out of beta, including straightforward AI-assisted answers and an AI chatbot called Duck.ai. These features are now free, anonymized, and most importantly, optional for all users.

Where DuckDuckGo AI Features Have Google Beat

Google has received some serious flack for its cumbersome and inexorable AI-generated search overviews, which have pushed users to find convoluted ways of turning off Google’s AI summaries, including creative strategies like cursing at the search engine. Despite this, Google is adding even more AI elements into Google Search.

By contrast, DuckDuckGo’s new AI features favor user ease and privacy. The latter is something that all tech companies claim to prioritize but don’t always execute, and Google is no exception. As we invite AI tools further into our lives, data privacy becomes increasingly important.

Privacy

According to the latest DuckDuckGo News announcement, the goal of its new AI features is to “offer the productivity benefits of AI without privacy risks like tracking your prompts and training on your data.” For example, chats with Duck.ai are anonymized by DuckDuckGo, and will not be shared for training purposes.

Customization

In addition to not tracking your AI chats, the company also gives you the power to customize your user experience, without requiring you to create an account or demanding personal information. You also don’t need the DuckDuckGo browser app to take advantage of these new AI tools, as they’re available on the search engine regardless of the app you use.

With Duck.ai, you have the option to choose from the following AI models:

  • OpenAI’s GPT-4o mini and o3-mini
  • Meta’s Llama 3.3
  • Mistral’s Small 3
  • Anthropic’s Claude 3 Haiku

DuckDuckGo’s take on AI search overviews is also refreshing compared to other search engines. While the summaries are clear, concise, and relatively accurate thanks to recent source expansion, you have the power to disable or change their frequency. The search engine gives you the option to select a cadence of “often, sometimes (default), on-demand, or never.”

Example of a DuckDuckGo AI-assisted answer to a search engine prompt

With the abuse of user privacy becoming more and more prevalent online, it seems like a rarity to find a search engine like DuckDuckGo that doesn’t ruthlessly collect every grain of your data. Even if I’m only using search engine-based AI tools to find cardamom latte recipes, I still don’t appreciate companies playing watch dog in an effort to better their models. At this point, I don’t trust that this “training” won’t lead to me receiving ads for milk frothers.

The Best Free Open-Source Alternative to ChatGPT Operator

AI agents that can control a web browser and perform tasks, just like humans would, are no longer limited to concept. Tools like ChatGPT Operator are powerful but come at a price. Instead of paying up, I went looking for a free alternative—and I found one that works surprisingly well.

Browser Use: The Best Open-Source Alternative I Found

ChatGPT Operator can control a web browser and perform actions such as clicking and scrolling all by itself. You just have to tell ChatGPT what needs to be done, such as booking tickets or writing text in Google Docs, and it will do so. But to gain access, one has to pay a hefty price tag—$200 per month as part of ChatGPT’s Pro tier. I couldn’t afford to purchase this subscription, and went out looking for an alternative and found about Browser Use.

Related

What Are AI Agents and How Do They Work?

AI Agents can help you solve complex problems, but how do they actually work?

Browser Use is an open-source AI agent similar to ChatGPT Operator. It can interact with a web browser, navigate through websites, and perform actions. However, it costs only a fraction of ChatGPT’s offering. Moreover, there are two options to choose from.

The first option is to pay a $30 subscription, which runs the AI agent on their cloud service. The other option is to set it up yourself locally, and it costs the least (you will only be charged for API usage). I went with the most affordable option.

Setting up Browser Use isn’t as straightforward as ChatGPT Operator, but with a few lines of code, I had it up and running. If I could do it, you can too!

How I Set Up Browser Use on My PC

To get started, you’ll need two things: Python 3.11 installed on your computer and API access from OpenAI (or a locally hosted LLM if you prefer).

Since Browser Use is an AI agent, it requires a large language model (LLM) to function. For that, you can get API access from OpenAI’s website or any other API that works with Browser Use. The benefit of using an API is that you get the flexibility to choose between different models (such as GPT-3.5 and GPT-4), and you only have to pay for what you use—instead of an upfront subscription fee.

In my testing, I used the ChatGPT 4-o model. I was charged less than $1 for all seven tasks I asked Browser Use to perform. However, if you pair it with DeepSeek API, it will be several times cheaper.

You could also use a local LLM on your computer. However, running a local LLM comparable to ChatGPT 4-o requires significant computing power, which most people likely won’t have. I did test out DeepSeek’s 7B LLM model on my computer, and the performance was unsurprisingly bad. So, I would recommend sticking with an API for now.

Once you obtain API access, you can create a virtual environment in VS Code by going to view > Command Palette and typing create environment. Then, open a new terminal and install Browser-use using pip.

        pip install browser-use
    

Create a .env file inside the folder and add your API key.

        OPENAI_API_KEY="Your API Here"
    

Create a new Python file with the name app.py and paste the following code.

        pip install browser-use
OPENAI_API_KEY="Your API Here"
from langchain_openai import ChatOpenAI

from browser_use import Agent

import asyncio

from dotenv import load_dotenv

load_dotenv()

async def main():

    agent = Agent(

        task="Go to Reddit, search for 'browser-use', click on the first post and return the first comment.",

        llm=ChatOpenAI(model="gpt-4o"),

    )

    result = await agent.run()

    print(result)

asyncio.run(main())

Replace the prompt with your own, like “Search for Albert Einstein and open his Wikipedia page.” Finally, Run the app.py python file using the terminal.

        python app.py
    

Putting It to the Test: Does It Live Up to Expectations?

I started my testing with simple tasks, such as Googling “Albert Einstein” and opening his Wikipedia page. When I ran the script, the AI agent opened a new browser window and executed the task flawlessly.

Next, I asked it to search for gaming laptops on Amazon and open the first result. Again, the AI agent completed the task successfully.

At this point, I was convinced that Browser Use could intelligently navigate the web. To push it further, I instructed it to visit Yahoo News and summarize the top five articles. To my surprise, Browser Use could complete the task within a few minutes. The summaries were short and to the point. You can see the results below.

However, things became tricky for Browser Use when I asked it to search for flights from London to Paris on skyscanner.com. Initially, the website blocked access due to bot detection, so I had to intervene and bypass the bot detection. Still, Browser Use struggled—it clicked the search button without correctly entering “London” and “Paris” into the respective fields.

You can pair Browser Use with your main browser, where all your accounts are logged in. This allows the AI agent to enter data into a Google Sheet or paste Yahoo News summaries into a Google Doc. However, I ran into issues setting it up with my active browser, so I put it on hold for now.

Overall, it was a fun experiment. Watching an AI agent navigate the web and perform tasks was fascinating. While Browser Use is not perfect, it’s far from a solid AI agent that can browse the web.

Still, this technology is in its infancy, so we can expect improvements in the future.

For now, if you’re willing to tinker with the setup and don’t mind occasional hiccups, boot up your computer and install Browser Use. Feel free to mention it in the threads if you get stuck and need a helping hand.

Google Adds an “AI Mode” to Search to Take On ChatGPT and Perplexity

Google’s use of artificial intelligence isn’t going away. In fact, the company is expanding its use of AI by making it a more integral element of some of its biggest products. Which is why an AI Mode is coming to Google Search.

Google’s AI Mode Turns Searches Into Conversations

The use of artificial intelligence is expanding at a rate of knots. The biggest tech companies in the world are keen not to be left behind here, so they’re all fighting tooth and nail to incorporate AI into their products. And Google is no exception.

As announced in a post on The Keyword, Google is launching a new AI Mode for Search. This is a new search option built on top of the existing AI Overviews that many of us will now see every time we type something into Google Search. Unless you disable AI Overviews by cursing.

Google’s AI Mode uses a custom version of Gemini 2.0 to offer “more advanced reasoning, thinking and multimodal capabilities.” It means that you can ask a question, and get an AI-powered response back. You can also ask follow-up questions, or more nuanced questions that the standard Google Search would struggle to cope with in a single query.

As well as the new AI Mode, Google is also expanding its AI Overviews in several different ways…

For starters, Gemini 2.0 will be handling AI Overviews, which means that it will be able to “help with harder questions, starting with coding, advanced math and multimodal queries, with more on the way.”

AI Overviews will also be available to more people, including teenagers. You will also no longer need to be signed in to see AI Overviews in Google Search results.

Related

Google’s Gemini Is Underrated, and There Are 5 Reasons to Try It Out

Don’t sleep on Google Gemini and its extensive set of features.

The Best Artificial Intelligence Clearly Won’t Be Free

Google’s new AI Mode is only being made available to Google One AI Premium subscribers. Which means you’ll need to pay Google a considerable monthly fee in order to gain access to this feature. At least for the time being.

Google is being extremely cautious with AI Mode, so not only is it only being made available to Google One AI Premium users, it’s being billed as an experiment in Google Labs.

Still, Google clearly has high hopes for AI Mode, as it’s the obvious next step to take in this direction. ChatGPT Search and Perplexity AI both offer similar tools already, so Google needed to follow suit or risk losing its dominant position in the space.

How Voice Typing Can Help You Work Faster and Smarter

Summary

  • Using my phone’s built-in voice-to-text feature allows me to create faster first drafts.
  • Voice dictation opens up more places and times of day I can work compared to using a keyboard.
  • Voice typing gives my hands a break and can be done while walking or lying down.

I get paid to put words online. I could type faster, but I’ve come to find that I sometimes get more done by typing less. Talking, turns out, is the life hack a writer needs.

Speak First, Edit Later

I do all of my computing from my phone. No, I’m not hunched over an iPhone or Google Pixel. I use a foldable Galaxy Z Fold 6, which has a larger internal screen. I often have my phone placed in a dock and connected to an external monitor, where I get stuff done using Samsung DeX instead.

I do a lot of work using a Bluetooth keyboard paired to my phone, but there comes a time when my hands need a break, and it’s at those times that I really appreciate working from my phone. I simply pluck my phone off the dock, pull up my virtual keyboard, and tap the microphone in the bottom corner.

Bertel King / MakeUseOf

This voice-to-text feature translates whatever words I speak into text, in real time. It’s not 100% accurate, but that’s okay. With first drafts, the important part is getting words down onto the page. I can come back and edit later.

This works better for some types of writing than others. If I’m entering keyboard shortcuts, describing command line prompts, or telling you where to navigate in a file manager, voice dictation isn’t ideal. Yet there is so much writing where speech is the fastest way to get something down.

Talk While Walking, Talk While Lying Down

A Bluetooth keyboard is best used at a desk or on a table. In a pinch, I can use my lap, but that’s not a position I want to work in for long.

Voice typing greatly expands where I can work. If my shoulders grow stiff hunched over a keyboard, I can take my phone out for a walk instead, speaking words down as I pace up and down my driveway or along a walking trail in the woods.

If I’m tired from sleeping poorly the night before, I can work from bed, speaking a first draft while I’m still wrapped up in blankets. While I don’t find it ideal to work in my places of rest, colds do happen, and bills still have to get paid.

With the right app, voice dictation is possible while driving. I wouldn’t recommend using the built-in keyboard for this use case. Instead, an app like Write by Voice from UXAPPS, which offers continuous dictation, is a safer bet.

This is also a worthwhile use of AI transcription in apps like Google or Samsung’s voice recording apps. I personally agree that voice transcription remains one of the best uses of Galaxy AI.

A voice recording being transcribed next to a wood stove.
Bertel King / MakeUseOf

These services don’t always get it right, but they offer the benefit of an audio recording to compare against when you refer back and see something wrong.

Give My Hands a Much-Needed Break

Sometimes, my hands simply get tired from spending too much time at a keyboard. Throughout the day, I type into a notes app, work in a web browser, write Slack messages, and compose emails. At center points, it is nice having the option to set my keyboard aside and speak.

This isn’t just great for expanding how long I can work. It’s healthier for my hands. They get moments to rest. I can stretch them, massage them, or just let them be.

Of course, the opposite is also an issue. Speaking all day can wear out your voice. It’s also not ideal if you have a cold. There’s a reason I’m not trying to say I do all of my work using voice typing. Rather, it’s just good to have in the toolbox.

If your job involves writing, and you don’t feel like you can type another word, stand up and give voice typing a try. Sometimes the most productive thing you can do is walk away.

Try Firefox’s Latest Update for Vertical Tabs, AI in Your Sidebar, and More

The browser wars are alive and well, and stepping up to the front lines with a brand new update is Firefox. The Mozilla-made browser just got a major facelift, with new desktop features like vertical tabs, an AI chatbot, and more.

Most prominently highlighted in the newest Firefox Version 136 is a powerful and customizable sidebar. Available on Windows, MacOS, and Linux, the improved Firefox browser places its most valuable tools on the left-hand side, including access to your history and bookmarks, vertical tabs, and an AI chatbot of your choice.

According to Mozilla’s release notes, the update also allows you to integrate “tabs from devices you sync with your Mozilla account.” So if you have additional tabs open on your phone’s Firefox app, you can now access those from your desktop as well.

You do have to manually enable the updated Firefox sidebar before you’ll be able to use its tools. Do this by going to Settings > General > Browser Layout, and select Show sidebar.

Firefox Settings page to set up its new Cutomize Sidebar

Once you’ve set up the sidebar, you’ll have access to vertical tabs as well as your choice of AI chatbot. Firefox offers the following options for AI chatbots:

  • Anthropic Claude
  • ChatGPT
  • Google Gemini
  • HuggingChat
  • Le Chat Mistral

Of course, each AI assistant differs in its abilities, but the tool is generally useful for summarizing text as you browse, analyzing images and other similar tasks.

What’s in a Vertical Tab?

Whether you like having your tabs on the side of your browser is a matter of personal preference. For me, I’m accustomed to tabs at the top of my browser, and transitioning to a sidebar means retraining my brain. However, the transition may well be worth it, particularly for tab-happy users, which I am.

For example, you have a lot more flexibility in window size as well as greater visibility when the tabs are on the side. When I decrease my window size while having many tabs open, I can no longer read any of the tabs. It’s also just visually chaotic in a way that’s hard to define.

To use vertical tabs, make sure the option is checked in your Customize sidebar.

Vertical tabs are not Firefox’s invention. In fact, vertical tabs are one of the most useful settings of Microsoft Edge. That said, I still imagine that most aren’t used to this format. Google Chrome is still a heavyweight in the browser arena, and it still structures its tabs along the top.

Maybe these new flashy features are a way of making up for the backlash Mozilla faced after updating its terms of use in early 2025. While the policy update made it sound like Firefox was freely collecting and selling user data, Mozilla has since defended the new terms, claiming that data usage is limited to what is listed in its Privacy Notice. Still, the controversy has left a lasting impression, which could be alleviated by these user-friendly tools.

I Used AI to Restore Old Family Photos—the Results Were Mixed

Old childhood photos are more than images; they’re glimpses into the past, capturing moments that would otherwise fade away. Curious about AI’s ability to restore these memories, I decided to test it out using Picsart. The results were, to say the least, mixed.

The Promise of AI Photo Restoration

We’ve all seen the automatic AI photo enhancement tools that seem almost too good to be true. The idea is simple: Upload an old, low-res photo, and let AI breathe new life into it by improving the resolution, enhancing features, and fixing imperfections. With a collection of a few old family photos, I figured it was worth a shot.

The real experience, however, doesn’t always line up with the marketing. Still, I couldn’t help but be curious. So I picked out a few antiquated pictures and uploaded them to Picsart. I was eager to see how well this technology could transform the old, blurry memories into something crisp and vivid again.

The Good: AI Truly Does Improve Image Quality

The first thing I noticed when Picsart’s AI started working on my photos was how much sharper they became. One of the standout examples was a picture of me standing on the sand at the beach. The textures were clean, and the details became clear. The overall effect felt seamless, with most aspects coming together very well.

Tyler Fyock/MakeUseOf

My face and the landscape behind me looked as though they’d been photographed recently—an impressive feat for an old photo. It truly felt like a moment preserved in time, enhanced but still fairly authentic.

Another great result was the photo of my family member holding a doll. This one turned out quite well overall. The doll and the background looked sharper, and her face was smoother. The tool focused primarily on improving her eyes above all other aspects of the photo, but the rest of the image maintained a good balance.

While that one detail had a slightly unrealistic polish, it didn’t detract too much from the overall feel of the photo.

Girl with Doll photo before and after AI enhancement
Tyler Fyock/MakeUseOf

The picture of my family members sitting on the stairs was another solid result. The enhancement improved their overall clarity without any disruptively unnatural changes. The photo seemed to maintain its vintage feel but with a slight upgrade. However, as with the previous photo, the faces were a bit too smooth. They looked a tad less natural than in the original, but the photo certainly wasn’t ruined.

Family on stairs photo before and after AI enhancement
Tyler Fyock/MakeUseOf

This is where Picsart’s AI restoration truly shines. The process is quick and efficient, and if all you need is to make a faded memory clearer, it does the job. The clarity was enhanced, the sharpness improved, and the grainy texture that often comes with old photos was noticeably reduced.

For anyone looking to preserve memories and improve the overall quality of their old photos, Picsart’s AI-powered tools are worth exploring.

The Bad: AI Focuses on Faces, Not Entire Images

Unsurprisingly, one-click AI enhancers also come with drawbacks. One of the main issues I encountered was that the AI restoration process seemed to target mainly the faces and primary subjects of the photo, ignoring many other parts of the image.

This issue was evident in the photo of my other family member standing in a garden. While her face became the clear focal point of the enhancement, everything else—like the flowers and greenery—wasn’t enhanced nearly as much.

Girl in Garden photo before and after AI enhancement
Tyler Fyock/MakeUseOf

The AI appeared to focus primarily on her eyes, giving them a striking clarity, but the lack of consistency across the rest of the photo made it feel very uneven. Additionally, the lines, creases, and shadows in her dress became completely off-kilter. Some areas were lightened too much, while others were significantly darkened.

Boys playing soccer photo before and after AI enhancement
Tyler Fyock/MakeUseOf

On the flip side, one of my pictures from a soccer game, which was already a decent shot, didn’t see much improvement. The AI didn’t add any significant enhancements to the image.

In a way, this could be seen as a positive—sometimes it’s better to leave a good image untouched—but in the context of using AI to enhance, I expected to see a bit more transformation. The lack of change here made me question whether the AI can effectively improve photos that are already in fairly good condition.

The Ugly: Simply Too Artificial

One thing that stood out in my experience with Picsart’s AI-powered photo restoration was how some aspects of photos became distorted and unnatural. When I restored a photo of me and my dog, I was struck by how disfigured she looked. While my appearance turned out clear and precise, my dog turned into an anamorphic mess.

The AI seemingly contorted and flattened her features in an attempt to enhance the photo, giving her a clay-like appearance. My dog, once a familiar companion in the photo, became completely unrecognizable in a way that felt uncomfortable and somewhat comical.

Boy with dog photo before and after AI enhancement
Tyler Fyock/MakeUseOf

This transformation went beyond subtle enhancement and veered into the surreal, turning a cherished memory into something strange and artificial. The results made me realize that sometimes, the AI can go too far, causing textures to change so drastically that the picture looks more like an oil painting than a photo.

While I understood that AI would smooth imperfections out to some degree, the results weren’t always natural. Instead of capturing the soft, cozy look that made the photo feel like a memory, the AI gave it a flat, distorted appearance. It was as though the photo was trying to be something it wasn’t, sacrificing the authenticity of the moment for an over-enhanced look.

Related

How to Take Your Photos From Okay to Great Using AI

With AI finding its way into nearly every photo editing app these days, it’s easier than ever to achieve professional-looking photos.

AI-powered upscaling tools are more than capable of restoring old photos, but they’re not without their imperfections. With all the synthetic polish and distortion, it’s clear there’s still room for growth. If you want a fully authentic result, you might need to tweak the image manually or use more advanced AI enhancement tools.

But if you’re open to a little artificial shine and selective enhancement, AI can certainly breathe new life into old, faded memories.

This Futuristic Smartphone Concept Has Detachable Magnetic Camera Lenses

Amidst the innovations unveiled at the Mobile World Conference (MWC) 2025 this week, one new concept reflects a novel direction in mobile imaging. That concept comes from Chinese smartphone manufacturer Xiaomi, and involves a new modular phone system with a magnetically removable camera lens.

A New Xiaomi Concept Phone Has a Powerful Detachable Camera

Known for smartphone design, Xiaomi took advantage of its spotlight at MWC 2025 this week to debut its Modular Optical System (MOS). The concept phone touts a magnetic array reminiscent of MagSafe for the iPhone, meant to attach a compact but powerful camera lens.

In theory, this concept system could deliver incredibly high-quality images, thanks to a 100-megapixel sensor within an inconspicuous 35mm f/1.4 lens. The camera attachment shares its images to the phone instantly via Xiaomi’s LaserLink Communication technology, eliminating the need for pairing or transferring through third-party apps. Furthermore, because the camera system is powered through the phone, there’s no need to charge it separately.

With an impressively large sensor and aperture size of f/1.14, you can capture subjects in low light, as well as achieve those desirable shallow-focus portraits that the iPhone’s Portrait mode tries to mimic.

The Xiaomi Modular System vs. Standalone Smartphones

If you’re like me, you might be wondering if there’s really a market for this kind of system. Phone cameras like those of the iPhone and Pixel have improved drastically over the years, offering a convenient way to capture quality images on the go and without technical training. Then, you can go for the DSLR when you need something more robust than your mobile phone.

Xiaomi’s newsroom announcement references the modular system’s combined approach:

“By combining traditional camera hardware’s superior imaging capabilities with smartphones’ computational power, Xiaomi has pioneered a groundbreaking approach to imaging technology.”

Perhaps Xiaomi’s MOS will illuminate a middle ground we didn’t know we really needed, resting somewhere between the impressive specs of a traditional camera and the user-friendliness of a mobile phone. The fact that the MOS camera is modular means that there is still a level of portability, while its sizable sensor gives it a quality that can’t be achieved by the small, flat camera lenses on our modern smartphones.

The best attempt at squeezing robust camera power into a singular smartphone might be the newly released Xiaomi 15 Ultra, which features a massive round quad-camera module co-engineered with photography legacy Leica. While this is technically an all-in-one approach, it’s probably not the most pocket-friendly design.

Xiaomi formed a partnership with Leica in 2022, and has since tried to push “the boundaries of mobile imaging technology.”

While we don’t know if or when Xiaomi will bring this concept to market, it’s an interesting direction to consider. Should we expect this modular approach to mobile imaging in our future, or is it a passing trend? While offering versatility, previous detachable smartphone lenses haven’t necessarily caught on. But, Xiaomi’s modular design is different: rather than amplifying built-in phone lenses, Xiaomi’s MOS concept introduces an attachable, standalone camera that’s both professional and plug-and-play.

You Can Now Better Match Your Google Maps Icon to Your Real Car

Google Maps is one of the best tools for navigating from A to B, whether you’re walking, cycling, or driving a car. And if you’re doing the latter, you now have more car icons and colors to choose from to represent your vehicle.

Google Maps Adds a Range of New Car Icons

When using Google Maps for directions while driving, the default icon representing you and your vehicle on the map is a blue arrow. However, there are other options available (if you know where to look), and Google has now added even more options.

Related

8 Reasons Google Maps Is the Best for Navigation

While Google Maps is the most popular navigation tool available, is it the best? Here, we explore all the reasons you should use Google Maps.

For several years, Google Maps has offered you the chance to switch from the default blue arrow to one of three car icons: a red sedan, a green pickup truck, or a yellow SUV. These icons are pretty basic though, and the colors are set in stone.

However, a new update has added five new car icons (which are much prettier and more detailed), available in eight different colors. The colors are white, black, gray, red, blue, yellow, green, and purple.

This set of options means that you should be able to choose a close match for your own car. While the model and shade of color may not be an exact match to your own vehicle, it should be close enough to make Google Maps feel more personal to you.

There are several ways to change the car icon in Google Maps, but you end up at the same screen regardless:

  • Before starting a journey, you can tap the sliders to open the Trip Options menu, then tap Vehicle icon while navigating.
  • During a journey, you can tap the journey bar underneath the map, then tap Vehicle icon.
  • At the start of or during a journey, you can tap the icon itself on the map to go straight to the Choose vehicle icon options.

A Fun Feature to Make Driving More Colorful

The option to choose a car icon that more closely resembles your own vehicle is a fun frivolity that isn’t going to change your world. However, it could help to make long car journeys at least a little more colorful.

Related

Waze vs. Google Maps: Which Navigation App Is Right for You?

They’re both solid navigation apps, but which one’s better for your use case?

Google has obviously been inspired by Waze here, with the latter offering a broad range of vehicle icons. Why it has taken Google 12 years (as it acquired Waze in 2013) to bring more to Maps is a mystery though. Still, it’s better late than never.

What Are the Key Metrics for AI Accuracy Evaluation?

Key Metrics for AI Accuracy Evaluation

Evaluating the accuracy of artificial intelligence models is essential to ensure their reliability and effectiveness. Different AI applications require specific evaluation metrics tailored to their objectives, whether in natural language processing, computer vision, or predictive analytics. These metrics help measure how well an AI model performs, identify weaknesses, and guide improvements to enhance accuracy and efficiency.

One of the most fundamental metrics for Al hallucination detection and accuracy improvement is precision, which measures the proportion of correct positive predictions out of all positive predictions made by the model. Precision is particularly important in applications where false positives carry significant consequences, such as medical diagnosis or fraud detection. If an AI system is designed to detect cancer in medical images, high precision ensures that only genuine cases are flagged, minimizing unnecessary panic or interventions.

Recall, also known as sensitivity, is another crucial metric that evaluates how well a model identifies all relevant instances. It calculates the proportion of actual positive cases correctly detected by the AI. In scenarios like cybersecurity threat detection, high recall is essential to ensure that no genuine threats are overlooked. However, a model with high recall might also produce more false positives, which is why balancing precision and recall is necessary for optimal accuracy.

What Are the Key Metrics for AI Accuracy Evaluation?

The F1 score is a widely used metric that combines both precision and recall into a single value, offering a balanced measure of AI performance. It is particularly useful when an application demands a trade-off between precision and recall, ensuring that neither metric is disproportionately prioritized. The F1 score is commonly used in machine learning classification tasks, such as spam detection and sentiment analysis, where both false positives and false negatives can impact user experience.

For regression models, which predict continuous values rather than discrete categories, metrics like Mean Absolute Error (MAE) and Mean Squared Error (MSE) are essential for accuracy evaluation. MAE calculates the average absolute difference between predicted and actual values, making it a straightforward measure of prediction accuracy. MSE, on the other hand, squares these differences before averaging them, penalizing larger errors more heavily. These metrics are crucial in financial forecasting, weather prediction, and supply chain optimization, where precise numerical predictions are necessary.

In natural language processing tasks, metrics such as BLEU (Bilingual Evaluation Understudy) and ROUGE (Recall-Oriented Understudy for Gisting Evaluation) are used to assess AI-generated text quality. BLEU measures the similarity between AI-generated text and human-written reference texts, making it useful for evaluating machine translation and text summarization models. ROUGE focuses on recall and is commonly applied in summarization tasks to determine how much of the original content is preserved in the generated output.

For AI models that classify images, metrics like Intersection over Union (IoU) and Top-K Accuracy are crucial. IoU evaluates how well an AI model’s predicted object boundaries align with the actual objects in an image, making it essential for computer vision tasks such as object detection and autonomous driving. Top-K Accuracy measures how often the correct label appears within the model’s top K predictions, helping assess classification models where multiple answers might be acceptable.

Overall, selecting the right metrics for AI accuracy evaluation depends on the specific task and application. By leveraging precision, recall, F1 score, regression error measures, NLP evaluation metrics, and computer vision accuracy indicators, AI researchers and developers can ensure their models deliver reliable, high-quality results.

How to Run Old Programs on Windows 11 With Compatibility Settings

Ever tried running an old program on Windows 11 and ended up with error codes you don’t understand? Thankfully, Windows has some compatibility settings that can help save the day.

What Does Compatibility Mode Do?

Applications designed for specific versions of Windows often check the installed operating system’s version. On newer versions of Windows, this version mismatch can often prevent older programs from running. This is where Compatibility mode comes in, as not every program is backward compatible, both in terms of hardware and software.

Related

What Is Backward Compatibility in Hardware and Software?

Isn’t it just the best when your new hardware or software just works with the old?

At its core, Compatibility mode in Windows essentially tricks a program into believing it’s running on an older version of Windows. This lets legacy programs run properly on modern versions of Windows despite changes in system paths, libraries, file systems, APIs, and more.

There are several other compatibility features such as reduced color mode, disable full-screen optimizations, and use legacy ICC color management among others. It also enables some special folder paths that have stopped existing since Windows XP. For example, “Documents and Settings” became “Users” in Vista, while “Local Settings” and “Application Data” turned into “AppData/Local” and “AppData/Roaming.”

Windows 11 Compatibility Mode dropdown
Yadullah Abidi / MakeUseOf

Keep in mind that the Compatibility mode will not fix fundamental incompatibilities. You won’t necessarily be able to run an old game or program from Windows XP on Windows 11 simply by changing the compatibility settings. There are still tons of APIs, hardware requirements, drivers, and more that have changed significantly as Windows evolved.

Luckily, using the Program Compatibility Troubleshooter can help identify a particular compatibility issue that you might be facing.

How to Use Compatibility Mode on Windows 11

To use Compatibility settings on Windows 11, simply follow these steps:

  1. Right-click the executable file of the program you want to run in Compatibility Mode and click Properties.
  2. Head over to the Compatibility tab.
  3. If you’re unsure which compatibility settings to use, run the Compatibility troubleshooter, which will automatically detect the best settings.
  4. Alternatively, select the OS you want to use for the program under the Compatibility mode dropdown.
  5. Adjust the other compatibility options below as required.
Windows 11 compatibility mode settings

Compatibility mode can help you run certain older programs on modern versions of Windows. However, depending on the program you’re trying to run, there might still be incompatibilities that would require drivers or other third-party programs to fix.

How Hiding Your Taskbar Can Improve Focus and Productivity

Our brains all work differently. Mine? I find I can focus better when I don’t see a taskbar, so I’ve started hiding it. So far, I don’t regret it.

A Taskbar Is a Distraction

A taskbar, by default, is always present. It stretches across the entire bottom (usually) of the screen, inviting you to switch between apps or check your notifications.

Telling the time is perhaps the least distracting thing the taskbar does, and even that can be suspect. Not many of us, when writing in a physical notebook, choose to plop a digital clock down in the corner of the page. Personally, I check the time on my smartwatch anyway, regardless of whether I’m at the computer.

Bertel King / MakeUseOf

Fortunately, there’s a way to avoid having so many distractions visible at once, one that’s available regardless of which computer you’re using—auto-hiding the taskbar. How you do this varies. You can customize the taskbar on Windows in the Settings app. On a Mac, check System Preferences. If you’re like me and happen to be using Samsung DeX, you can find the setting by right-clicking on the taskbar.

Keeping My Focus on What I’m Doing

I haven’t been quick to hide the taskbar because, on its face, this feels like a step backwards. I’m taking part of an interface designed to be always visible and making it less accessible. Yet I’ve come to find that sometimes friction is a good thing.

With the taskbar invisible, my eyes aren’t wandering off to it. I’m less likely to think about the other apps that are running and switch software unnecessarily. I know I’m not the only one who sees a web browser icon, thinks of something I wanted to look up earlier, and 30 minutes later I’ve somehow ended up on a hilarious subreddit.

Samsung Notes and Samsung Internet open in Samsung DeX.

I also have the habit of opening the app drawer, forgetting why I opened it, swiping back and forth between pages to see if something triggers my memory, only to end up opening YouTube and attempting to stream a video while I work.

If hiding the taskbar makes it harder to multitask, that works out in my favor. I have a big enough monitor to typically see all the windows I need at once. If I need more apps than that, chances are I’m attempting to juggle too much anyway.

Yes, auto-hiding can put an extra step between productive tasks, but it can slow down the unproductive ones as well. Waiting an extra second for the taskbar to appear works out to my benefit if it reduces the likelihood that I switch away from what I’m working on.

I Open Apps More Intentionally

Since pulling up the taskbar takes a little bit longer, I’m now less likely to use my mouse to open apps. Instead, I tap the keyboard shortcut that opens the app drawer, type the first few characters of the app’s name, and hit enter.

If the app isn’t open yet, this opens the app. If the app is already open, this quickly switches to the already open window. I value this way of managing windows so much that, when I was in college, I installed third-party software for this type of feature. Now it’s just baked in to the way computers work. All you need to know are the necessary shortcuts. On Windows, press the Windows key. On a Mac, it’s Command + Space.

Searching for Vivaldi in Samsung DeX.

Auto-hiding the taskbar doesn’t help me work faster. Rather, it helps me stay on task. Ultimately, they’re one and the same. If a job can take me an hour to do, but it ends up taking two, distractions are usually the reason.

Just like the desk in my home office, I work better when there isn’t a great deal of clutter around me. A taskbar gets filled with icons very quickly, and I can do more deep work if I take a moment to take all of that distraction and tuck it away.

Use This Trick to Easily Look Up Words in Different Languages on Your iPhone

By default, Look Up only gives you definitions of words in the language your iPhone is set to. However, if you’re multilingual, you can get Look Up to define words in other languages, too.

Add Your Secondary Dictionary Languages on Your iPhone

You can add a dictionary for your secondary language on your iPhone from either the Settings app or the Look Up card.

In the Settings app:

  1. Go to General > Dictionary.
  2. Find your secondary language on the list and tap on it to download its dictionary.

Alternatively, you can add your secondary language dictionary from the Look Up card like this:

  1. Go to any app where you can use Look Up.
  2. Long tap and hold a word and select Look Up from the context menu. You may need to swipe left on the available options to reveal Look Up if Apple Intelligence is enabled on your iPhone.
  3. When this brings up the Look Up card, scroll down to the bottom, and select Manage Dictionaries.
  4. Finally, locate and tap the language whose dictionary you want to download, and it’ll start downloading.

When you download a dictionary, you’ll see a checkmark next to it. If you want to remove a dictionary at any point, simply tap on it again.

For certain languages, you’ll see two dictionaries: one that defines words in that language and the other that does it in English. The latter is useful when you’re learning a new language.

Related

The 10 Best Language Learning Apps That Really Work

Becoming a polyglot is so much easier with these apps to help you out.

Use Look Up to Define Words in Your Secondary Language

With your secondary language dictionary added to Look Up, you’re now all set. Simply long tap and hold the word whose meaning you want to know and select Look Up from the context menu. Look Up will then return its meaning in the same language.

To learn more about the selected word, tap Search Web on the Look Up card. This will take you to the Google Search result for that word in the Safari app.

Look Up simplifies looking up definitions of unknown words on your iPhone. Adding your secondary language dictionaries makes the feature even more useful and saves you the trouble of looking up words in a separate dictionary app.

You’ll appreciate this ability the most if you browse the web in your secondary language or frequently exchange texts with people in your secondary language. Moreover, it’ll also come in handy when you’re learning a new language.

I Never Miss a Sports Game Thanks to This Nifty iPhone Calendar Feature

It’s annoying to miss a sports event or game simply because you forgot about it. Thankfully, there’s an easy way to add all the upcoming sports events you don’t want to miss right to your iPhone’s calendar.

Calendar Subscriptions Make it Easy to Keep Up With Sports Events

A calendar subscription lets you to add a calendar to your calendar app so you’re automatically reminded of events, appointments, games, and more. Once added, these calendars will be updated with new events and changes, and you can typically recognize them by their .ics file extension.

The good thing is that when you subscribe to a calendar on your iPhone, you can now view it across all your Apple devices—and even Android devices (provided your Google account is synced with your iPhone’s calendar). And if you’re subscribing to multiple sports calendars, you might want to try out this nifty Apple Calendar trick to make navigating them easier.

How to Subscribe to Your Favorite Sports Calendar

Subscribing to a sports calendar is pretty straightforward once you have the link to the calendar. You can usually obtain it by visiting the official website of the sports event you want to follow. I’ll be using the Formula 1 calendar for this article, but you can do this with any sports event that offers an official calendar.

In addition to official websites, sports calendars can be found on other sites, such as Fixture Download, which provides a fairly detailed list of various sports events, including ice hockey, baseball, basketball, and soccer.

to get started:

  1. Visit the sports website (Formula 1, in this case). Alternatively, search for event name + calendar/event/schedule in your search engine.
  2. Look for the option to Add or Sync Calendar. You might be asked to choose your calendar, in which case select Apple Calendar.
  3. Follow the prompt to open Apple Calendar.
  4. Tap Subscribe > Add > Done.

If the calendar downloads in .ics format, you’ll have to add it manually.

  1. Open the Calendar app on your iPhone, then tap Calendars in the bottom-middle of your Apple Calendar.
  2. Tap Add Calendar and then Add Subscription Calendar.
  3. Paste the calendar link, then tap Subscribe.
  4. Tap Add.

Be careful downloading and accepting random .ics links off the internet, as there are several spam calendar subscriptions out there. Thankfully, if you’ve subscribed to a spam calendar, you can easily remove calendar spam subscriptions.

The sports calendar should show up alongside your other calendars and you shouldhave the option of tweaking the calendar’s title and auto-refresh frequency.

Maximize Your Calendar Subscription

You can do a couple of things to get the most out of your calendar subscription, such as turning on notifications to see events without opening Apple Calendar.

Simply tap Calendars in the bottom-middle of your Apple Calendar, tap the information icon beside the sports calendar you want to follow more closely and ensure the Event Alerts option is toggled on.

When you subscribe to a calendar, it should automatically appear in your iCloud and sync across your devices. If it doesn’t, you may need to adjust this setting on a Mac using the following steps:

  1. Open Calendar and Control-click the subscribed calendar from the left-hand side, then select Get info.
  2. Beside Location, select iCloud, then click OK.

This must be done on a Mac, as it isn’t possible on an iPhone. You can only view calendar subscriptions on Apple devices, which means they won’t be accessible on Microsoft Outlook or iCloud.

In some cases, sports calendars aren’t available as subscriptions but instead appear as regular calendars. This means events won’t update automatically—only those listed when you added the calendar will be visible.

The upside, however, is that if you use both an iPhone and a Windows PC, you can still take advantage of the calendar sync feature. For more details, check out this guide on how to use Apple Calendar on Windows.

Firefox’s Updated Terms of Use Are Not As Bad As They Sound

Mozilla has had to clarify some of the language used in the new terms of use for Firefox. This came after some users heavily criticized the overly broad language surrounding the collection and use of user data.

Mozilla Introduces Misunderstood Terms of Use

This week saw Mozilla introduce a terms of use and an updated privacy notice for its Firefox browser. Unfortunately, not everyone welcomed the updates, and instead, criticized some of the language used. In particular, this section:

“When you upload or input information through Firefox, you hereby grant us a nonexclusive, royalty-free, worldwide license to use that information to help you navigate, experience, and interact with online content as you indicate with your use of Firefox.”

Critics such as Brendan Eich pointed out that this language seemed to be overly broad, meaning it could allow Mozilla to use your data in unwelcome ways. With some suggesting that it could see Mozilla provide data for AI.

The language does indeed appear to be overly broad and open to interpretation. And that is a problem when you’re required to agree to these terms of use to use Firefox. Meaning that you have to trust that your data is not going to be used against your will.

Mozilla Clarifies What the Language Really Means

Thankfully, Mozilla was quick to respond to the backlash, and clarify what the language in the terms of use and privacy notice actually mean. It updated the original blog post with the following clarification:

“We need a license to allow us to make some of the basic functionality of Firefox possible. Without it, we couldn’t use information typed into Firefox, for example. It does NOT give us ownership of your data or a right to use it for anything other than what is described in the Privacy Notice.”

Further to this, a Mozilla spokesperson also told TechCrunch that “these changes are not driven by a desire by Mozilla to use people’s data for AI or sell it to advertisers.” Which, if taken at face value, is pretty clear.

Related

AI Tools Are Running Out of Training Data, but There Are 6 Solutions

AIs will run out of good-quality data by 2026, so how else can we help these tools grow and thrive?

As a free and open-source web browser, Firefox has always been viewed as a good option for those not keen on using products by the big companies. However, as Firefox has a market share of just 2.54 percent now, way behind Google Chrome (on 67 percent), Safari (on 17.95 percent), and Microsoft Edge (on 5.2 percent), Mozilla isn’t the force it once was.

Why I Prefer to Stick to My Default Android Launcher

There are lots of great Android launchers targeted at different audiences, from those that offer more customization to those that are simple and minimalist. I’ve tried a lot of them, but I keep coming back to my phone’s default launcher.

1

Seamless Integration With the OS

Those other launchers might have more surface-level features, but I prefer my phone’s default launcher because it’s built for the device and well-integrated. It works well across every aspect, from widgets to transitions and animations. Additionally, using the default launcher provides a consistent experience from the user interface (UI) to the user experience.

If you’ve used a third-party launcher, you know that the key change they bring is the ability to customize the look of your app drawer and home screen while everything else stays the same. As someone who has taken UI design lessons, switching between two different design languages across the main interfaces on my phone can be an eyesore.

2

No Compatibility Issues

Bertel King / MakeUseOf

The great thing about using your phone’s default launcher is that you won’t encounter as many compatibility issues. Since the launcher is made by the same company, more resources are invested in its development, ensuring that even with a new major version of Android, it still works well.

That has significantly influenced my decision to use the default launcher. I prefer to update my phone immediately once an update is out rather than wait for a third-party launcher to be compatible first.

In the past, I’ve experienced issues with widgets not playing nicely after upgrading to a new major Android version, forcing me to return to the default launcher instead, despite spending hours customizing a third-party one.

As I write this piece, there are several threads on r/NovaLauncher about users running into different issues with the launcher, especially after updating their device, such as screen freezing, widget compatibility issues, crashing, and more. With the default launcher, I don’t have to worry about this.

3

Long-Term Reliability and Support

For smartphone manufacturers, the launcher is part and parcel of the device and, hence, a unique selling point. That’s why you rarely see a smartphone sold with stock Android. Unlike third-party launchers, default ones aren’t at risk of being abandoned or acquired.

Case in point: Branch Metrics acquired Nova Launcher in July 2022 and laid off nearly everyone in August 2024, except one full-time developer who was also the original creator. So, if you’ve been rocking Nova Launcher and haven’t received a single update since May 2024, that’s why.

That’s also why many issues affecting Nova are on Android 15, since it hasn’t been updated to fully support it.

If this can happen to one of the best third-party Android launchers, then no alternative is safe. On the other hand, default launchers are updated alongside the OS, thus making them more reliable.

And thanks to the big budgets dedicated to the teams working on default launchers, there’s excellent support, unlike third-party alternatives, which may be developed by a handful of developers or, worse, one person, making support harder to come by at times.

4

I Love the Simplicity of the Default Launcher

Home screen of the Google Pixel 9 Pro
Hannah Stryker / MakeUseOf

I use a Google Pixel 6a, which runs on the Pixel Launcher. The main selling point of the Pixel Launcher has been its simplicity and speedy updates, which have been the case for a long time. As someone who loves simplicity, the Pixel Launcher meets my needs.

The interface is straightforward, and the key features are a swipe away or in front of me. For instance, I can instantly access Google Discover by swiping to the right from the home screen.

The At a Glance feature shows me relevant content on the home screen, such as my upcoming tasks and events. I can also search for different things across the phone with the universal search feature on the home screen or atop the app drawer. T

That said, I know that the Pixel Launcher isn’t the most customizable or feature-packed on the market, but I’ll take simplicity over everything else at any time.

Third-party launchers may offer many customizable features, but I prefer to use the default one on my phone. The default may not be fancy, but it’s simple, seamlessly integrates with the OS, offers a consistent user experience, and is guaranteed to be more reliable and supported in the long term.

OpenAI Launches Its Shiny New GPT-4.5 AI Model—But It’s Not What You’re Expecting

The long-awaited moment is here: ChatGPT is receiving an enormous upgrade to GPT-4.5.

However, despite OpenAI calling GPT-4.5 its “largest and most knowledgeable model,” it comes with a few caveats that might see you continuing to use its older models for a while longer.

OpenAI Launches GPT-4.5 With a More “Natural” Feel

Let’s start with the positives of this GPT update. OpenAI claims GPT-4.5 has a “broader knowledge base” with stronger alignment with “user intent.” It also features boosts to emotional intelligence that OpenAI claims make GPT-4.5 “well-suited for tasks like writing, programming, and solving practical problems.”

The GPT-4.5 research preview also hallucinates less than its predecessors—37 percent compared to GPT-4o’s 60 percent.

Interestingly, OpenAI’s internal testing team found GPT-4.5 ” warm, intuitive, and natural.” This suggests an AI model that emphasizes personality, empathy, and creativity more.

GPT-4.5 Isn’t All Sunshine and Roses

OpenAI also acknowledges that despite the clear improvements to GPT-4.5, it isn’t quite ready to replace its earlier models.

GPT-4.5 is a much larger and more compute-heavy AI model, which makes it (currently) more expensive to run. Its responses may also feel slower than ChatGPT regulars are now accustomed to with models such as GPT-4o. GPT-4.5’s API pricing reflects the intesive compute costs.

But it’s not only speed. An OpenAI document detailing GPT-4.5’s capabilities explains that it “is not a frontier model . . . its performance is below that of o1, o3-mini, and deep research on most preparedness evaluations.”

At the time of writing, GPT-4.5 doesn’t support the multimodal features that make ChatGPT so useful. That means no Voice Mode, video tools, or screen sharing, at least for now. OpenAI has not provided a specific timeline for when this might change.

When Can You Use ChatGPT GPT-4.5?

Starting from 27 February 2025, GPT-4.5 is rolling out to ChatGPT’s $200 Professional subscription tier. Those Professional subscribers will be able to pick up GPT-4.5 immediately from the model picker. From early March, ChatGPT Plus and Team subscribers can choose GPT-4.5, followed by Enterprise and Edu subscribers.

To me, this all points in one direction: GPT-4.5 is a stepping stone to GPT-5, expected to launch in 2025. The combination of GPT-4.5, GPT o3, o3-mini, and other models are the building blocks for GPT-5, which many suggest will be the first AI system we can truly deem artificial general intelligence.

Czy mogę wziąć laptopa Dell w leasing?

wziąć laptopa Dell w leasing

Leasing laptopów stał się popularną opcją wśród firm, które potrzebują nowoczesnego sprzętu komputerowego, ale nie chcą inwestować dużych sum pieniędzy w zakup urządzeń na własność. Dzięki leasingowi, przedsiębiorcy mogą korzystać z laptopów przez określony czas, płacąc regularne raty, a po zakończeniu umowy mają możliwość wykupu sprzętu lub wymiany na nowy model. W przypadku laptopów Dell, firma oferuje różne opcje leasingowe, które mogą być interesującą alternatywą dla tradycyjnego zakupu.

Zdecydowana większość firm, które decydują się na leasing, wybiera to rozwiązanie ze względu na elastyczność oraz możliwość odliczenia kosztów związanych z użytkowaniem sprzętu od podstawy opodatkowania. Leasing laptopów Dell jest dostępny zarówno dla małych, jak i dużych przedsiębiorstw. Dell, podobnie jak inne firmy oferujące sprzęt komputerowy, współpracuje z różnymi instytucjami finansowymi, które umożliwiają zawarcie umowy leasingowej. W ramach takiej umowy, firma leasingowa kupuje laptopa od Dell, a następnie udostępnia go klientowi na określony czas.

dell

Jedną z największych zalet leasingu laptopów Dell jest możliwość korzystania z nowoczesnego sprzętu bez konieczności ponoszenia wysokich kosztów zakupu. Zamiast wydawać jednorazowo dużą kwotę na laptopa, przedsiębiorca płaci miesięczne raty, które mogą być dostosowane do jego możliwości finansowych. Dodatkowo, po zakończeniu umowy leasingowej, firma może zdecydować, czy chce wykupić laptopa po niższej cenie, wymienić go na nowszy model, czy też zwrócić sprzęt. Takie elastyczne podejście sprawia, że leasing staje się atrakcyjną opcją dla firm, które regularnie aktualizują swój sprzęt komputerowy.

Czy mogę wziąć laptopa Dell w leasing?

W przypadku laptopów Dell, oferta leasingowa obejmuje szeroką gamę modeli, od popularnych ultrabooków, takich jak Dell XPS 13, po mocne urządzenia gamingowe czy laptopy dla profesjonalistów, takie jak Dell Precision. Oznacza to, że firmy mogą wybrać laptop dopasowany do ich potrzeb – zarówno pod względem wydajności, jak i budżetu. Dell oferuje również serwis i wsparcie techniczne w ramach leasingu, co zapewnia dodatkową ochronę przed ewentualnymi awariami czy uszkodzeniami sprzętu.

Leasing laptopa Dell jest dostępny również dla osób fizycznych prowadzących działalność gospodarczą, co oznacza, że nie tylko duże firmy, ale także freelancerzy, małe firmy czy startupy mogą skorzystać z tego rozwiązania. Przed podpisaniem umowy leasingowej warto jednak dokładnie zapoznać się z warunkami umowy, takimi jak wysokość rat, długość trwania leasingu oraz opcje wykupu sprzętu. W zależności od wybranego modelu, warto również zastanowić się nad dodatkowym wyposażeniem, takim jak akcesoria czy oprogramowanie, które mogą być objęte leasingiem.

Podsumowując, tak, możesz wziąć laptopa Dell w leasing, a opcja ta oferuje wiele korzyści, takich jak rozłożenie kosztów na raty, dostęp do nowoczesnego sprzętu oraz elastyczność w zakresie wykupu lub wymiany laptopa po zakończeniu umowy. Leasing laptopów Dell to wygodne rozwiązanie, które sprawdzi się zarówno w przypadku dużych firm, jak i mniejszych przedsiębiorstw czy freelancerów, którzy potrzebują wydajnego sprzętu komputerowego bez konieczności ponoszenia dużych kosztów początkowych.

Amazon’s Rufus AI Chat Is Dreadful, So I Use This AI Chatbot Alternative

Though Amazon now has its Rufus AI chatbot to help explain products and find deals, I don’t think it’s worth using—and I’m not waiting around for it to improve.

Instead, I use Perplexity to find deals and products I want on Amazon with minimal hassle.

1

Finding Exclusive Deals

Perplexity can be hit-and-miss with exclusive deals. I tried asking for more niche items like camera lens filters, but it found nothing. However, the app is helpful for finding Amazon deals on more mainstream items.

For example, I asked Perplexity to find me deals on an iPhone 13 (buying last-gen tech is a great way to buy a new device while saving money, by the way). The app searched Amazon for deals before giving me a summary.

At the end of the summary, Perplexity also gave me a direct link to the product on Amazon. So, it was easy to make a purchase if I wanted.

2

Narrowing Down by Brand

I often start with broad Amazon searches if I know what I want but don’t know the brand I want to choose. For example, I might look for a rain jacket while preparing for a hiking trip. Once I’ve done that, I narrow down based on brands I see and like.

Perplexity’s AI tool lets me search more deeply, looking for specific products on Amazon by brand. In the example below, I wanted to specifically find rain jackets manufactured by Helly Hansen. Besides giving me a summary of the jackets available (and a link to one), I could ask follow-up questions for more specific results.

Trying to find a jacket on the Perplexity app

I tried this for different products and brands, but the results were varied. So, you’ll have to experiment to see what does and doesn’t work for you.

3

Finding Niche Products

While Perplexity can struggle with finding specific brands for niche products, it is good if you want to see an overview of what’s available on Amazon across multiple manufacturers. For example, I participate in niche sports like CrossFit, which require more specific footwear than ordinary gym shoes.

Perplexity is also good at finding product overviews, and I think it’s worth subscribing to for this alone. It gives me a brief overview, and I can get more information if I click on one of the products listed.

Asking the Perplexity software for an overview of shoes

Since Perplexity also grabs sources from across the web, I can read online reviews if I want more information.

4

Comparing Different Product Types

While I sometimes compare items because I’m ready to buy, I will look at different options when I’m casually browsing. I might choose to purchase later, but this isn’t guaranteed. Perplexity is pretty helpful for comparing product types on Amazon, especially if I don’t know much about them.

For example, I know little about coffee machines even though I enjoy drinking a cup on a relaxed morning. I can go to Perplexity and ask it to list the different types available (e.g., espresso machines).

A list of coffee machines in the Perplexity app

After receiving an overview, I’ll analyze each result and decide the best choice for me. Drip coffee machines sound good; I can ask Perplexity for a list of the best on Amazon. Once I have this information, I can research further and decide whether to purchase.

A list of drip coffee makers in the Perplexity app

5

Discovering Customer Reviews

I always read customer reviews before buying something I don’t know much about. While I can head to Amazon and do this myself, it’s nice if I can access what I’m looking for in Perplexity instead. Even better, I can source reviews from across the web to make a more balanced decision.

In this example, I wanted to learn more about one of the listed drip coffee makers. I then get a list of pros and cons. If I’m still on the fence, I’ll go directly to Amazon and the manufacturer’s website—and read verified buyer reviews.

Different customer reviews being shown in Perplexity

Though Rufus will inevitably improve over time, I still prefer using Perplexity to find items I want on Amazon. It’s not perfect, but the software does a pretty good job of finding products and reviews. Besides getting information from Amazon, I can compare it to what others say elsewhere. If I’m interested, I’ll happily go to Amazon and make a purchase.