If you’re looking for quick, ready-to-post AI video, YouTube might have just launched the perfect solution. While YouTube’s Shorts section hasn’t gained too much traction in its quest to compete with TikTok as the go-to short-form video platform, its new AI background generator might actually be worth checking out.
YouTube Launched an AI Green Screen Feature for Easy Video Generation
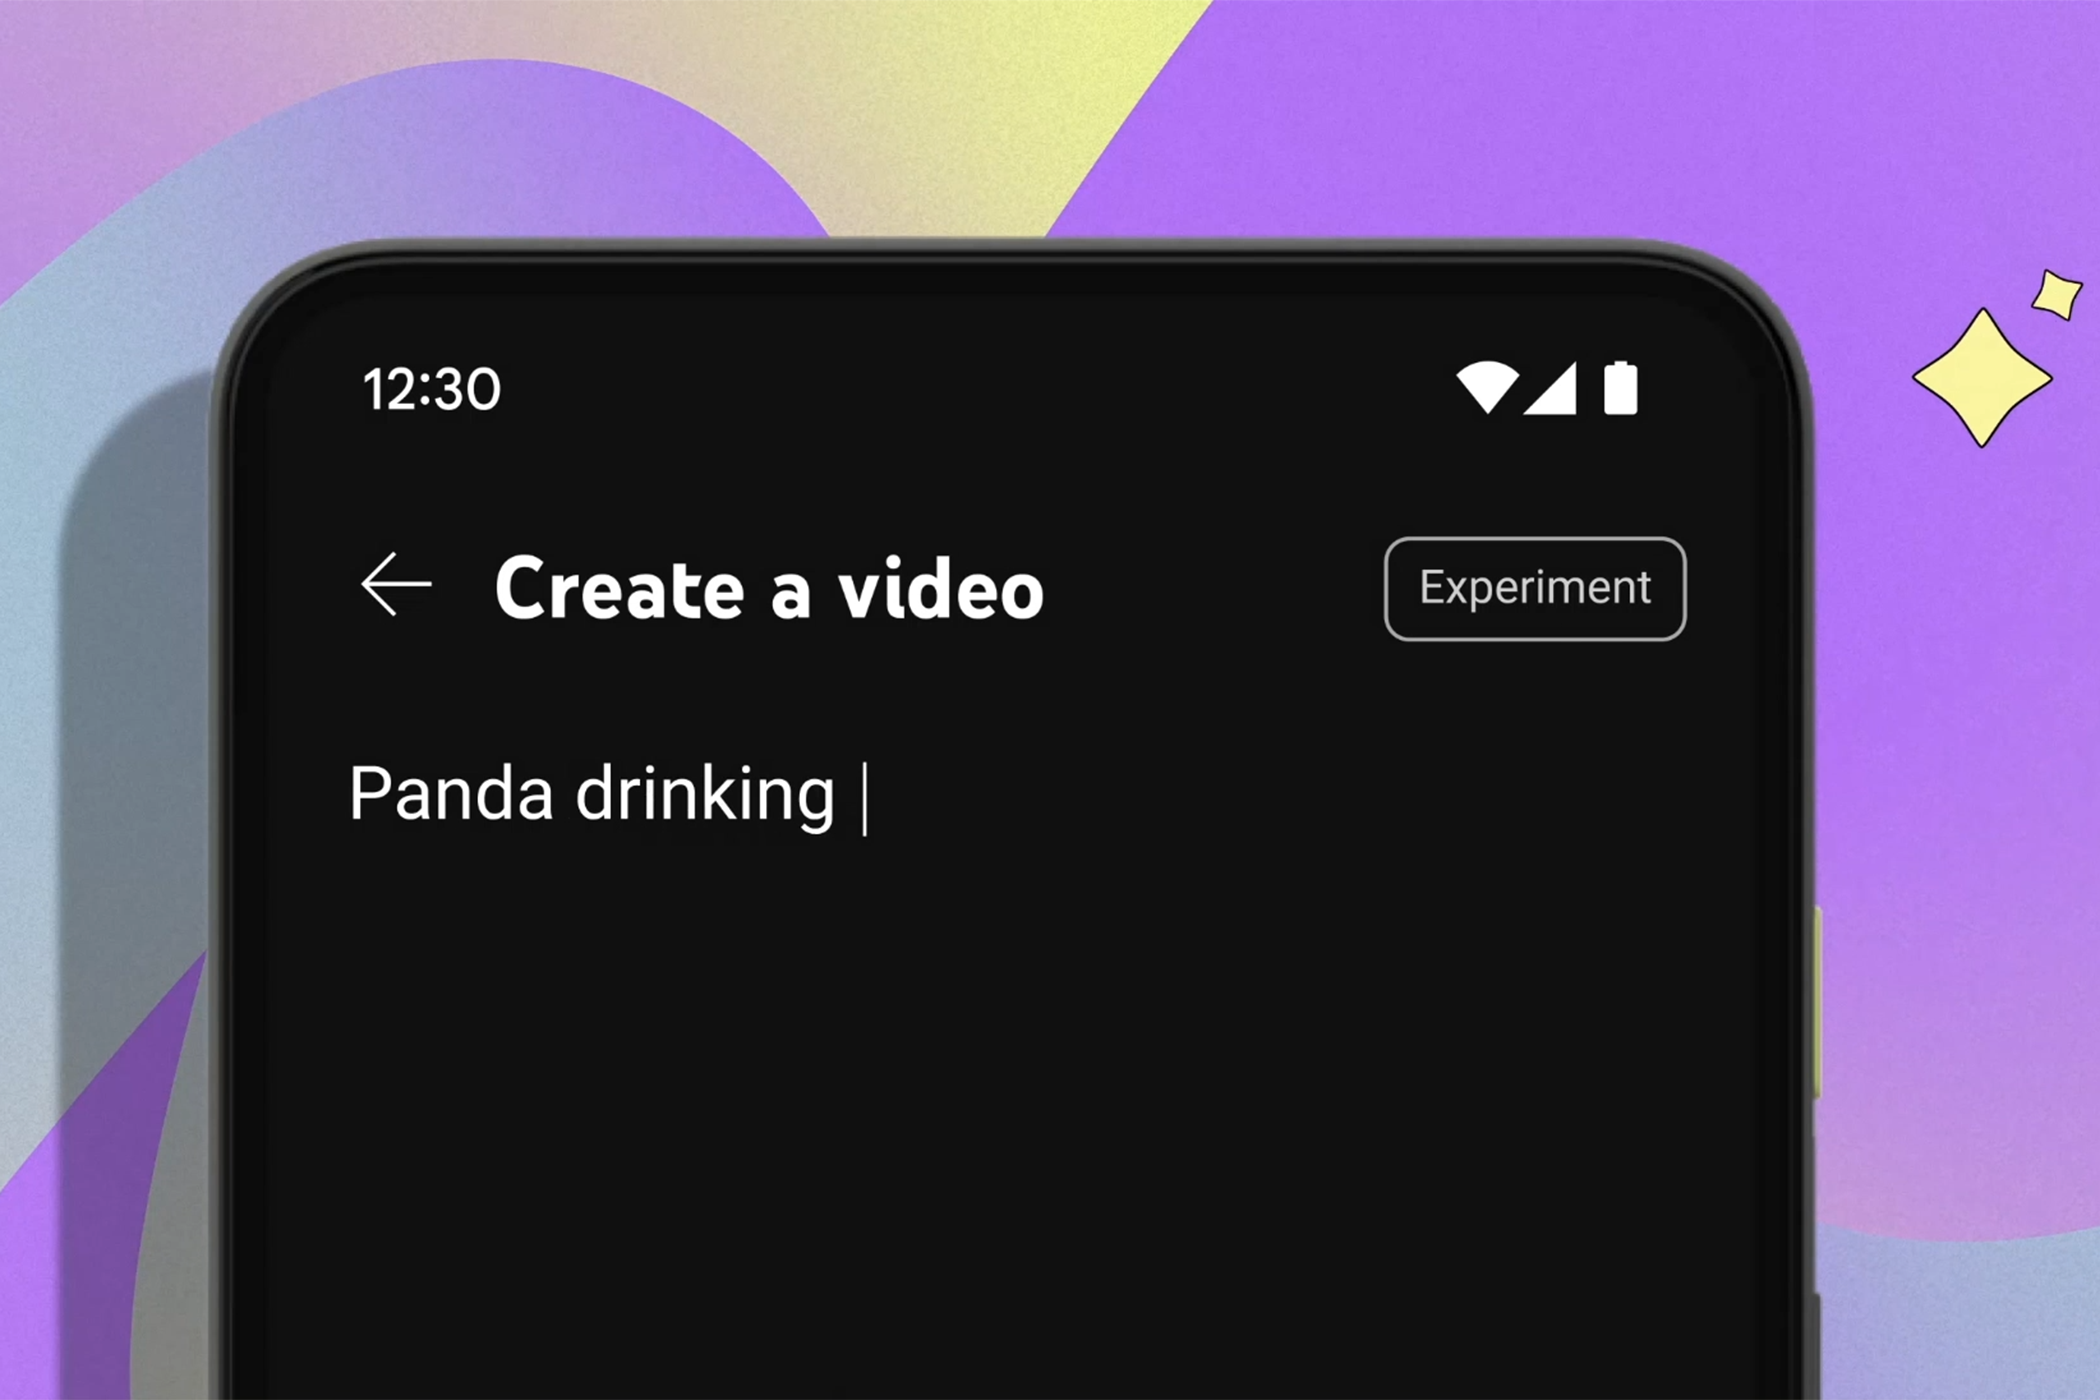
As announced by YouTube on X, AI backgrounds are coming to YouTube, allowing you to easily create quick videos with AI-generated visuals behind you. The feature is called Dream Screen, and it supports text-to-image prompts, similar to the TikTok effect known as AI Greenscreen.
You might be thinking that this is yet another example of YouTube chasing TikTok’s tail, and being behind the curve in doing so. To some extent, you’d be right. However, this feature does come out on top of TikTok’s in a couple of areas.
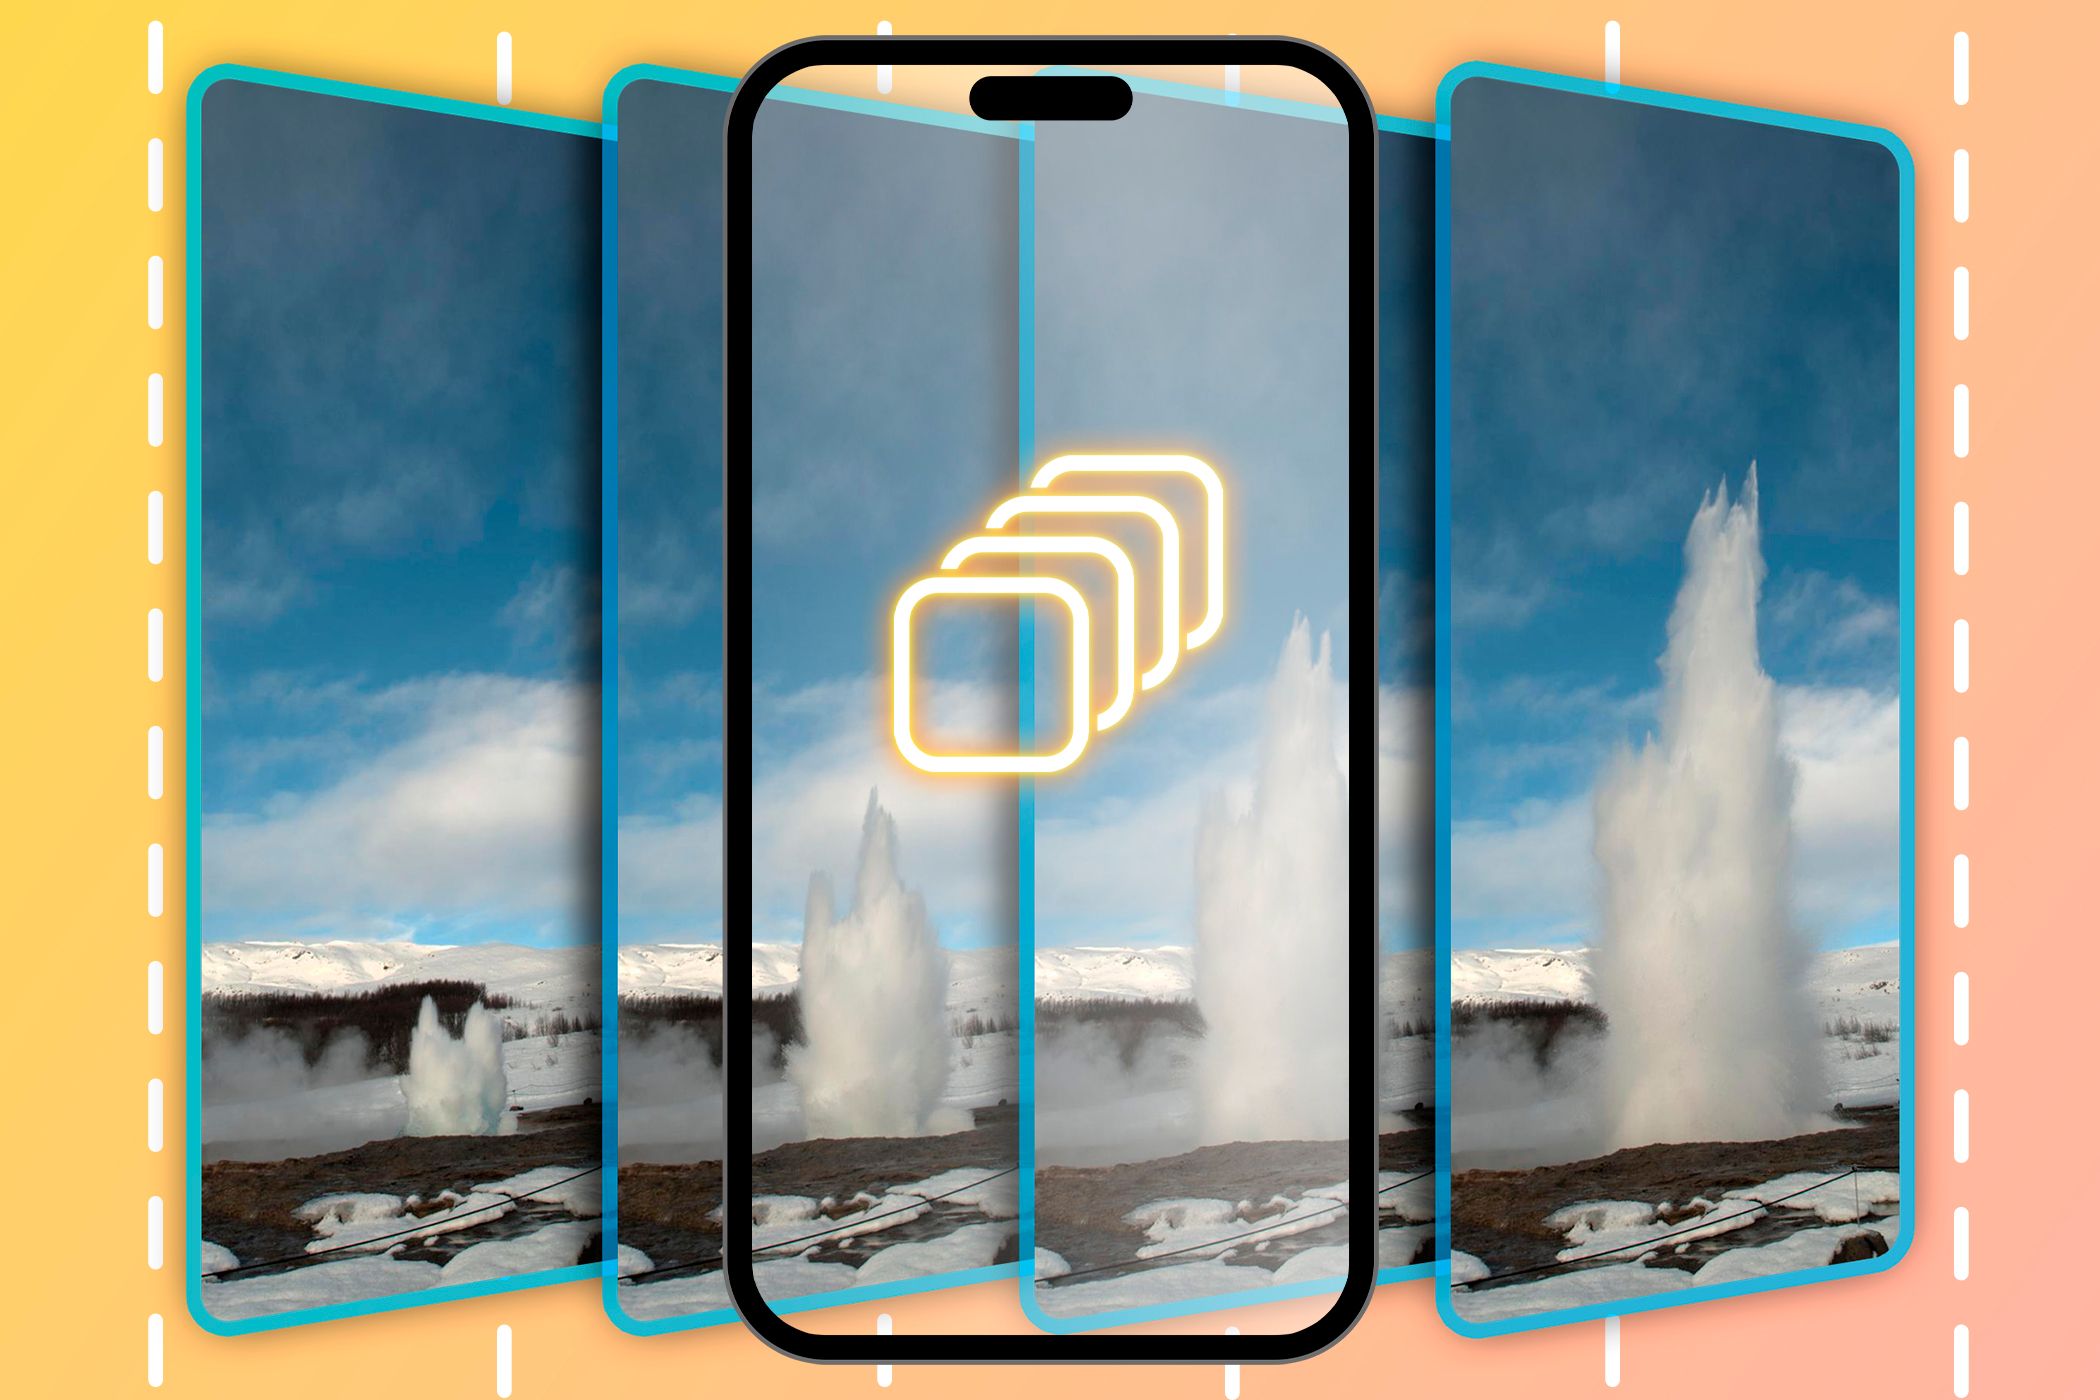
Dream Screen can apply motion to its AI-generated visuals. So, in addition to being able to produce a still background, you can have a generated video playing behind you. And, these visuals don’t come in just one look, like the classic AI magical realism-type art you see with TikTok’s existing greenscreen feature. Dream Screen has an option to Choose style, including but not limited to “Vintage,” made to look like retro photographs, and “Clay,” designed to give that claymation appearance.
How to Use Dream Screen on YouTube Shorts
Upon release, YouTube’s Dream Screen feature is available to users in the US, Canada, New Zealand, and Australia. And, it’s actually a little easier to access compared to using TikTok’s AI Greenscreen feature, which requires you to search for the feature in the app’s effects.
When you open the YouTube app, simply navigate to the Shorts tab and hit the + icon to add a post. From there, select the Greenscreen icon on the right-hand panel, and the Dream Screen icon will be first on the list. Type in what you want to create, and once the platform generates images in the style of your choosing, you’ll have the option to make it a still or video background.
As always, make sure the YouTube app is updated.
For now, Dream Screen will have the term “Experiment” visible throughout the process to remind you to forgive its mistakes. That said, I was fairly impressed by its motion generation. I asked it to create a simple video of coffee being poured into a mug. The image it generated had a warm, vintage film look to it and appeared very realistic, without the ubiquitous weird hands or other common AI identifiers. The motion was nearly perfect—until the very end, when the stream of coffee appeared to defy physics.
Still, the tool seems useful, especially for someone who might lack resources—like the ability to design and film a teaser for a startup coffee brand. As a film nerd, I’ll always say that AI generation doesn’t (and probably never will) compare to actual filmmaking. But, I can see its merit for entrepreneurs or creatives who need to create a concept video with little time, money, or amateur video skills. Plus, with YouTube extending its Shorts duration cap to three minutes, you have more room to play with your AI world.
Scammers are targeting you right now with fake Black Friday deals. But with almost every online retailer offering discounts before the holidays, how can you spot when something is a scam, and what about when products are real but the offer isn’t as good as it appears?
Scammers Ask for Personal Info for Free Gifts
Nothing is ever really free. By falling for a simple phishing scam, you may end up handing over your private data to scammers and maybe downloading malware, too.
Phishing often takes the form of fraudulent emails. You can frequently tell these from the genuine ones, as some elements, including logos, will be pixelated. However, scammers are smart, and the telltale signs of a phishing scam are becoming harder to spot. Instead, check the email address to see whether it looks real, comparing it to previous messages from the real company in question.
Don’t submit personal details or click on links you’re not 100 percent sure about. You can normally verify a message on a retailer’s real site or ask customer services for confirmation.
Fake Shipping Companies Send Scam Links to Arrange Delivery
Black Friday is the busiest time of year for delivery companies. Think of the huge number of parcels being sent out ready for Christmas. It’s an obvious thing for scammers to exploit.
That’s why you get messages from fraudsters purporting to be DHL, FedEx, or similar. These can tell you that you’ve missed a delivery and need to click on a link to reschedule.
Don’t click on links in emails, SMS, WhatsApp, iMessage, or otherwise. You can’t trust them. You’ll not only be giving them your personally identifiable information (PII), but you could also allow them access to your device. Reputable businesses like FedEx, DPD, or UPS won’t use WhatsApp or iMessage anyway, and in most cases, these firms will simply try redelivering later.
If you’re unsure, contact the company independently via official sources.
Scammers Ask You to Wait Longer for Products That’ll Never Arrive
Sometimes, parcels just won’t turn up. Around the festivities, that’s particularly troubling as you might not get your presents in time. If you’ve fallen for a scam, those gifts won’t turn up at all.
In such a case, you’ll try to contact the sellers. Some will simply blame delivery services and ask you to wait longer. Ultimately, it’s up to the retailer to ensure you get what you’ve bought; otherwise, you’ll need advice from the platform you used to pay, i.e., PayPal or your credit card company.
Trust your gut. If the seller is being evasive or difficult to contact, that’s a red flag.
Watch Out for Dubious Returns Policies
Before you buy, look at returns policies. Many retailers will extend theirs or give gift receipts to accommodate the holidays, but other shops make things purposely difficult.
Let’s say you’ve bought something from eBay. Many sellers are genuine and want to do right by their customers. Others, however, might not even accept returns at all.
That’s why you need to stay vigilant. Sometimes, if you’re buying from a third party but via a reputable name like Amazon, you can turn to the parent company for help if something arrives damaged, faulty, or not as advertised. Money-back guarantees from card companies and similar payment platforms can help. Your best bet, however, is to check a store’s returns before paying for your shopping basket.
Retailers Bump Prices Up to Make Black Friday Deals Look Better
Scammers don’t use this tactic, but it is a classic way for retailers to tempt customers into purchasing items.
You know how this works: a shop advertises a discounted rate, and you quickly buy a product before the offer ends. But actually, the shop rarely charges RRP, so this isn’t the best rate they’ve had. Shops increase prices for a short time (or appear to) and then lower them again around Black Friday and Cyber Monday, so the price difference looks greater.
How can you tell? Try using a price-tracking website like Keepa or CamelCamelCamel. These specialize in Amazon items, but sometimes track pricing across other sites too. Give it a go by copying a URL into one or both of them.
Deals That Are Too Good to Be True
Here’s what it all boils down to: if an offer looks too good to be true, it is.
Be skeptical and vigilant. Retailers want your money, yes, but the really good shops also want to please customers, so they become returning ones. That means striking a balance between profit and quality. It’s why you won’t find the deal of the century on Black Friday. Nonetheless, you will find some decent offers. The key is to keep a cool head. It’s the main way you can avoid a scammer ruining your Christmas.
Extracting audio from video on your smartphone is quick and free with the right tools.
You can use third-party apps on iOS and Android like MP3 Converter or Video to MP3 to extract audio from videos.
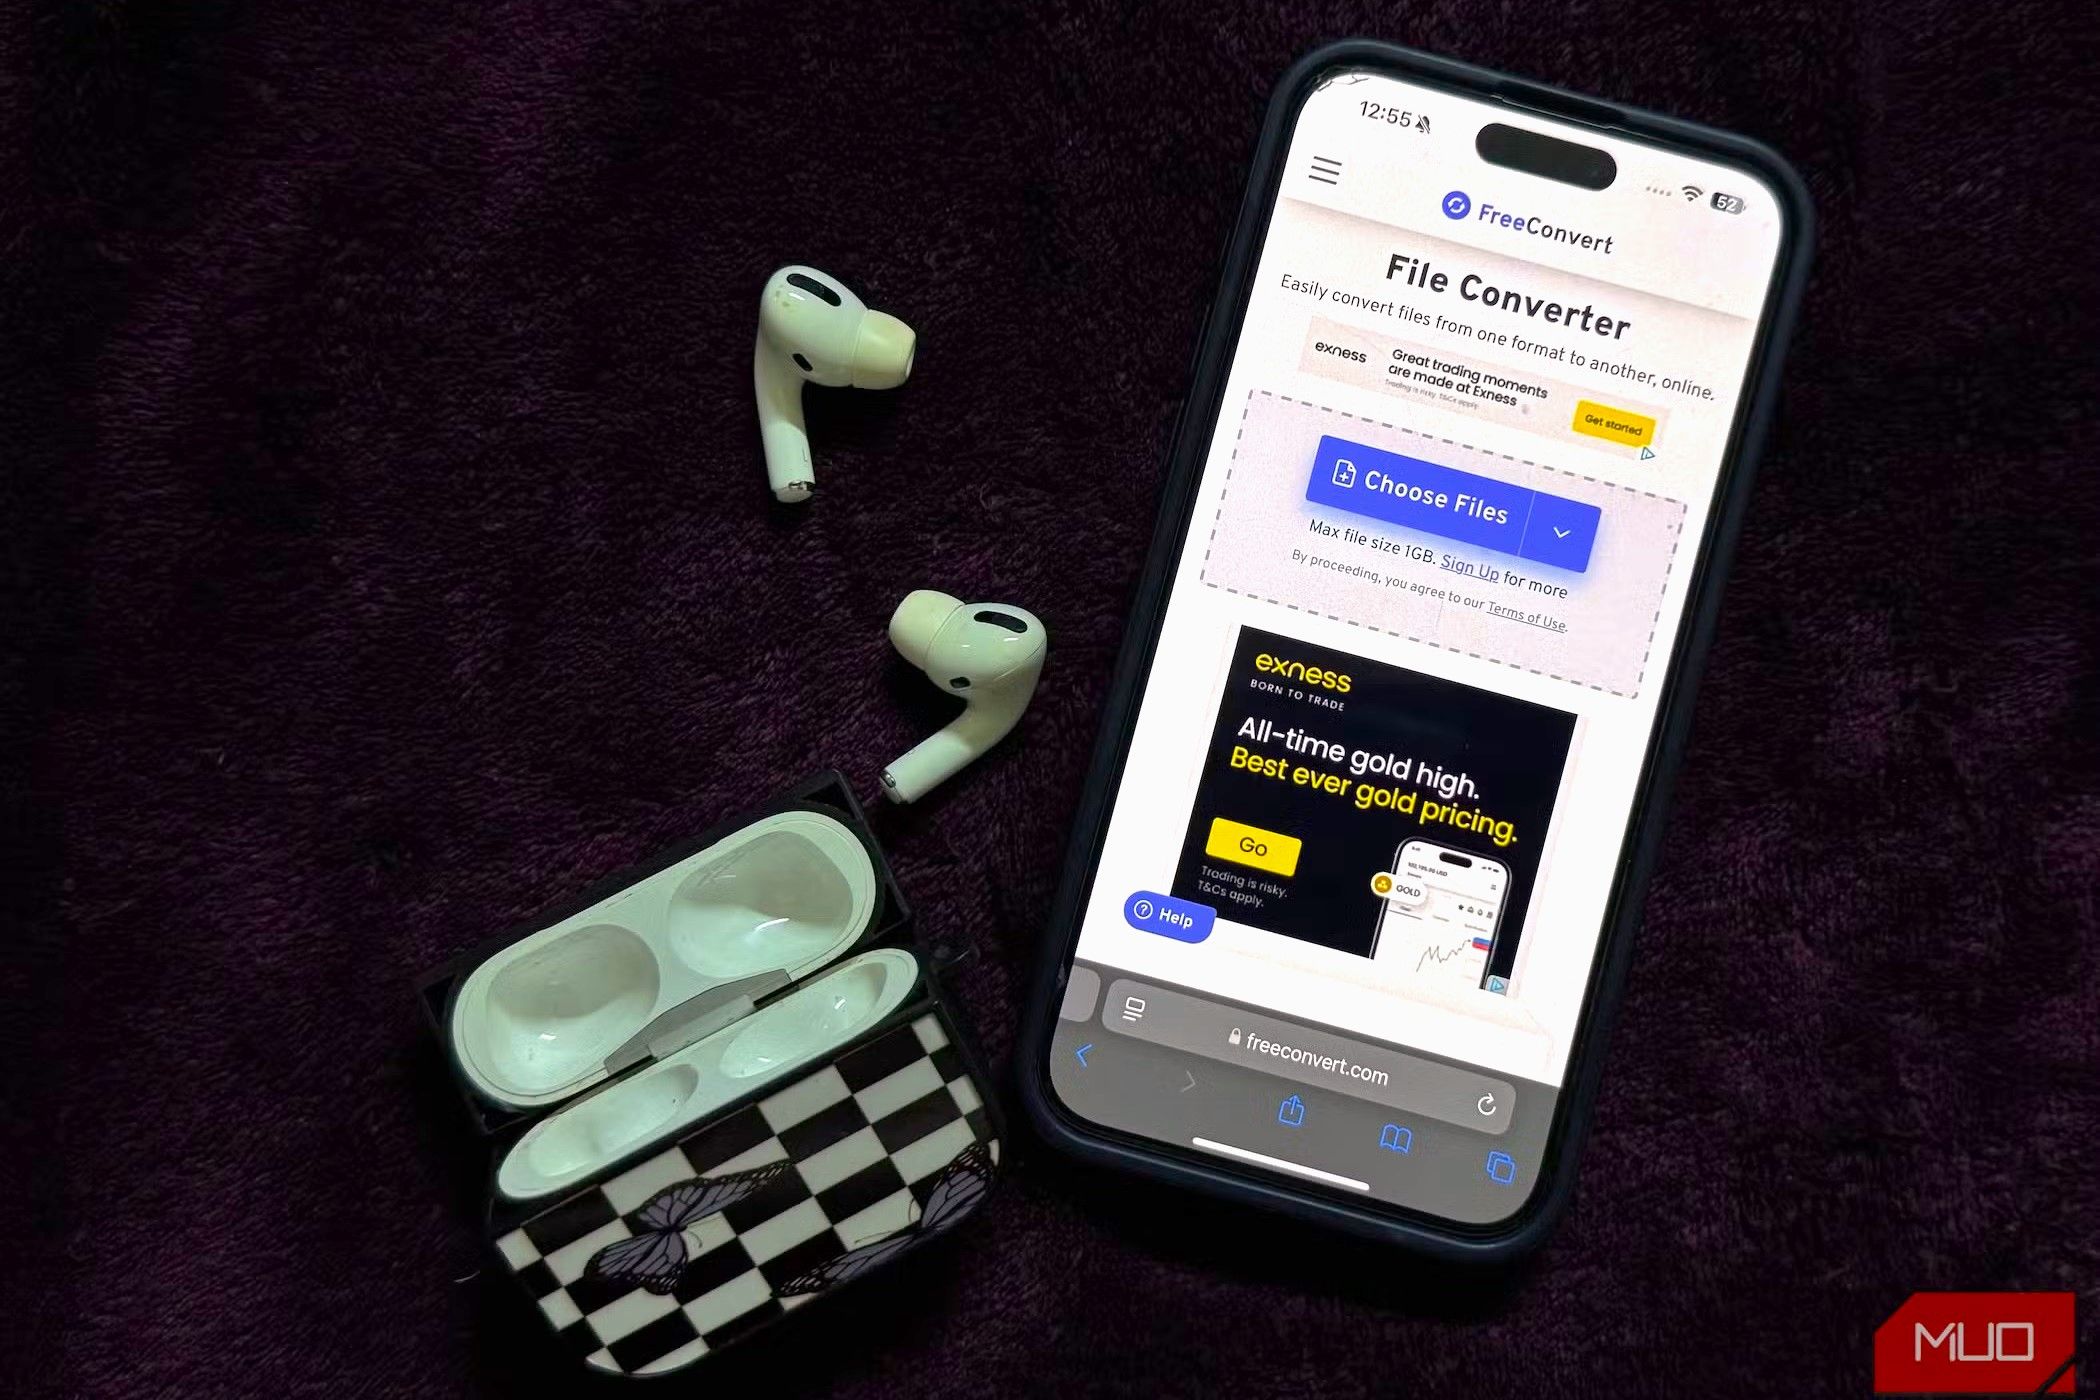
Alternatively, you can use online converters like FreeConvert for a one-time audio extraction from a video.
Came across a video with a song you’d love to use for your Instagram Reel? Whatever the reason may be, there are plenty of times when you might want just the audio from a video file. Here’s how to extract audio from videos on your smartphone.
One of the simplest ways to extract audio from a video on your smartphone is by using a third-party app. There are plenty of free options on both the App Store and Play Store, but I’ll walk you through using one of the highest-rated apps for both Android and iPhone.
For iOS users, MP3 Converter is a great choice. Here’s how to use it:
Open MP3 Converter and tap the plus (+) icon located at the bottom of the screen.
Choose where you’d like to import the video from: WiFi Transfer, Camera Roll, iCloud, or Import From Other. I’ve imported a video from my camera roll. If you do so, you’ll need to grant the app permission to access to your camera roll. Simply tap Allow Full Access when prompted.
Once the video is added, tap it and select Convert from the menu.
Choose Default Mode (MP3) to convert the video into an MP3 file.
Your video will be converted to an MP3 file within seconds. You may need to watch an ad during this process. After the conversion, you’ll find your file in the Converted Media tab. Tap it, then select Export. From there, you can either save it to the Files app on your iPhone or export it to a third-party app of your choice.
To convert videos to audio on an Android device, you can use the Video to MP3 app by InShot Inc. Here’s how to do so:
Open the Video to MP3 app, tap Video to Audio, and grant the app permission to access your device’s music, audio, photos, and videos. Just tap Allow when prompted.
Select the file you’d like to extract audio from.
You’ll now see two different dropdowns: Format and Bitrate. Under Format, you can pick from options like MP3, AAC, WMA, FLAC, WAV, AC3, and OGG. While they’re all different audio formats, MP3 is the most widely recognized and universally compatible audio format.
Finally, hit the Convert button.
Your video will now be converted into your chosen audio format. From there, you can tap Open with to play it in a media player, Share to export it to Google Drive, Gmail, or another app, or Set as to use it as a ringtone.
Use an Online Video to MP3 Converter
You might not want to download an entire app, especially if extracting audio from a video is just a one-time thing. While I’ll walk you through a specific converter for this example, the steps are generally the same for most. Here’s what you need to do:
Head to a converter of your choice, like FreeConvert.
Tap Choose Files.
Choose where you’d like to import the video from: From Device, From Dropbox, From Google Drive, From OneDrive, or From URL.
Once you’ve uploaded your file, hit Convert and wait a few seconds for the process to complete.
After the conversion is done, tap Download to save your MP3.
As simple as that! Whether you want to extract audio from a video to set a custom alarm or turn one of your favorite movie scenes into an audio file, you can use either of the methods above to get it done in seconds. If you want to do the same on devices other than iOS or Android, make sure to check out our detailed guide on how to extract audio from videos across all platforms!
Google Drive is packed with features that make organizing, sharing, and accessing your files easier than ever. Yet, some of its best tools often go unnoticed. From bookmarking important files to accessing them offline, here are 9 essential Google Drive tips that will enhance your workflow.
1 Star Important Files and Folders
Finding a specific file in Google Drive can sometimes be overwhelming, especially if there are numerous files and folders. However, if you need to access certain files or folders more frequently, you can “star” them for quick access. This will save you the hassle of searching for the same files repeatedly.
To star a file or folder in Google Drive, simply right-click on it, and choose Organize > Add to Starred. Once starred, these items will appear in the Starred section, located in the left sidebar of Google Drive. This feature is quite useful for keeping priority documents, frequently used files, or active project files organized and at your fingertips.
2 Use Advanced Search to Locate Your Files
You may already use the search function in Google Drive to find your files and folders. However, for faster and more precise results, you can use the Advanced search option next to the search box.
This will allow you to filter results by file type, owner, location, or even the date modified. This option is especially useful when you have a large number of documents and need to find something specific.
Additionally, Google Drive also supports Boolean operators, similar to Gmail. You can use commands like to:, from:, type:, AND, OR, owner:, before:, title:, and more, to refine your search and find files more quickly. For example, typing type:pdf owner:me before:2023 in Google Drive search will allow you to locate all the PDF files created before 2023.
3 Setup Offline Access for Your Files
If you don’t always have access to the internet, setting up offline access for your Google Drive files can be a lifesaver. This lets you view and edit your documents, spreadsheets, and presentations without an internet connection. The best part? Any changes you make are synced automatically once you’re back online.
To enable offline access, go to Google Drive’s settings menu and check the box under the Offline section. This will make your recent Google Docs, Sheets, and Slides files available offline. You can also make an old file available for offline editing by clicking the three-dot icon next to it and selecting Make available offline.
The Activity sidebar in Google Drive is a handy feature for staying on top of your files, especially in collaborative settings. It helps you monitor edits and quickly review a file’s revision history.
Simply select a file or folder in Google Drive, click the info icon in the top right corner, and switch to the Activity tab. This will display a timeline of activities, such as comments, edits, and sharing events, making it easy to stay informed about all changes and interactions with a file or folder.
5 Get the Save to Google Drive Extension
If you frequently download files from the internet only to re-upload them to Google Drive, you’ll find the Save to Google Drive browser extension helpful. This simple tool lets you save documents, images, videos, and even entire web pages directly to your Google Drive. When you come across a file or webpage you want to save, all you need to do is right-click it and select Save to Google Drive.
This extension is free and a must-have tool for anyone who wants to quickly save online content without the extra hassle.
6 Access Google Drive via File Explorer
You don’t need to open a browser every time you want to access your Google Drive files. By adding Google Drive to Windows File Explorer, you can seamlessly access and upload files directly from your desktop. Doing so will create a folder on your computer that acts as a virtual drive. You can then interact with Google Drive just like any other folder.
If you prefer having offline access, you can enable the Mirror files option. This will store your Google Drive files on your computer, ensuring they are always available, even when you’re not connected to the internet.
7 Use Keyboard Shortcuts
Like any other service, Google Drive supports keyboard shortcuts to enhance your experience and improve efficiency. While you may already use common shortcuts like Ctrl + A to select all or Ctrl + Z to undo, there are others that can boost your productivity. For example, pressing the / (forward slash) key brings you directly to the search bar, and Alt + N opens the New menu.
You can press Ctrl + / to view all the keyboard shortcuts Google Drive supports. Memorizing some, if not all, of these can help you navigate faster and save time.
8 Share Google Drive Files With Non-Gmail Accounts
Sharing Google Drive files with Gmail users is straightforward, but did you know you can also share them with people who don’t have a Google account?
To do this, right-click the file or folder you want to share and select Share > Share. In the following menu, change the access from Restricted to Anyone with the link. Finally, click the Copy link button. You can then share this link with anyone, and they will be able to access the file without needing a Google account.
9 Block Spammers on Drive
Spam isn’t just a problem in Gmail. Scammers often exploit Google Drive’s sharing feature to send malicious files that may appear in your Drive. While dealing with such scammers can be frustrating, blocking them is a quick and effective solution.
So, if someone shares files or folders with you that you don’t want, you can block them on Google Drive to prevent future disruptions. Simply locate the file shared by the user you want to block. Right-click on the file and select Report or block > Block [email/username].
Blocking someone not only prevents them from sharing anything with you in the future but also removes any files they’ve already shared with you.
Integrating these tips into your daily routine should help you make the most of what Google Drive has to offer. So, make sure you try them out for yourself. Remember, the more you explore, the more you’ll discover to make Google Drive work smarter for you.
If you’re using an older version of D-Link’s VPN router, you may want to think twice before keeping it connected to the internet. The manufacturer has confirmed that a severe exploit has been found in several devices that are no longer officially supported. As such, if you own one, you’ll want to change it ASAP.
D-Link Sends Out a Warning to Owners of Its VPN Routers
As reported by The Register, D-Link has detected a serious flaw in its routers. This exploit allows hackers to perform remote code execution, one of the more devastating cybersecurity flaws a device can have.
Usually, D-Link would publish a patch for the affected devices and everything would be fine. However, all of the routers suffering from this problem have passed their end-of-life date, which means D-Link cannot publish a fix. As such, your best bet is to stop using the router altogether and replace it with a supported one.
Here’s a list of all the routers D-Link sent out a warning over, plus the date they lost support:
DSR-150 (EOL May 2024)
DSR-150N (EOL May 2024)
DSR-250 (EOL May 2024)
DSR-250N (EOL May 2024)
DSR-500N (EOL September 2015)
DSR-1000N (EOL October 2015)
The exploit is so severe that D-Link refuses to give details as to what it does or what part of the router it affects, in fear that malicious agents will use the knowledge to attack people’s devices.
Fortunately, D-Link is offering affected US users a 20 percent discount on a new, unaffected DSR-250v2 router, which should make the upgrade a lot more palatable. You can read about how to claim the discount on the D-Link security announcement concerning the flaw. On the other hand, if you feel that this is the right time to shop around, check out the best Wi-Fi routers of 2024.
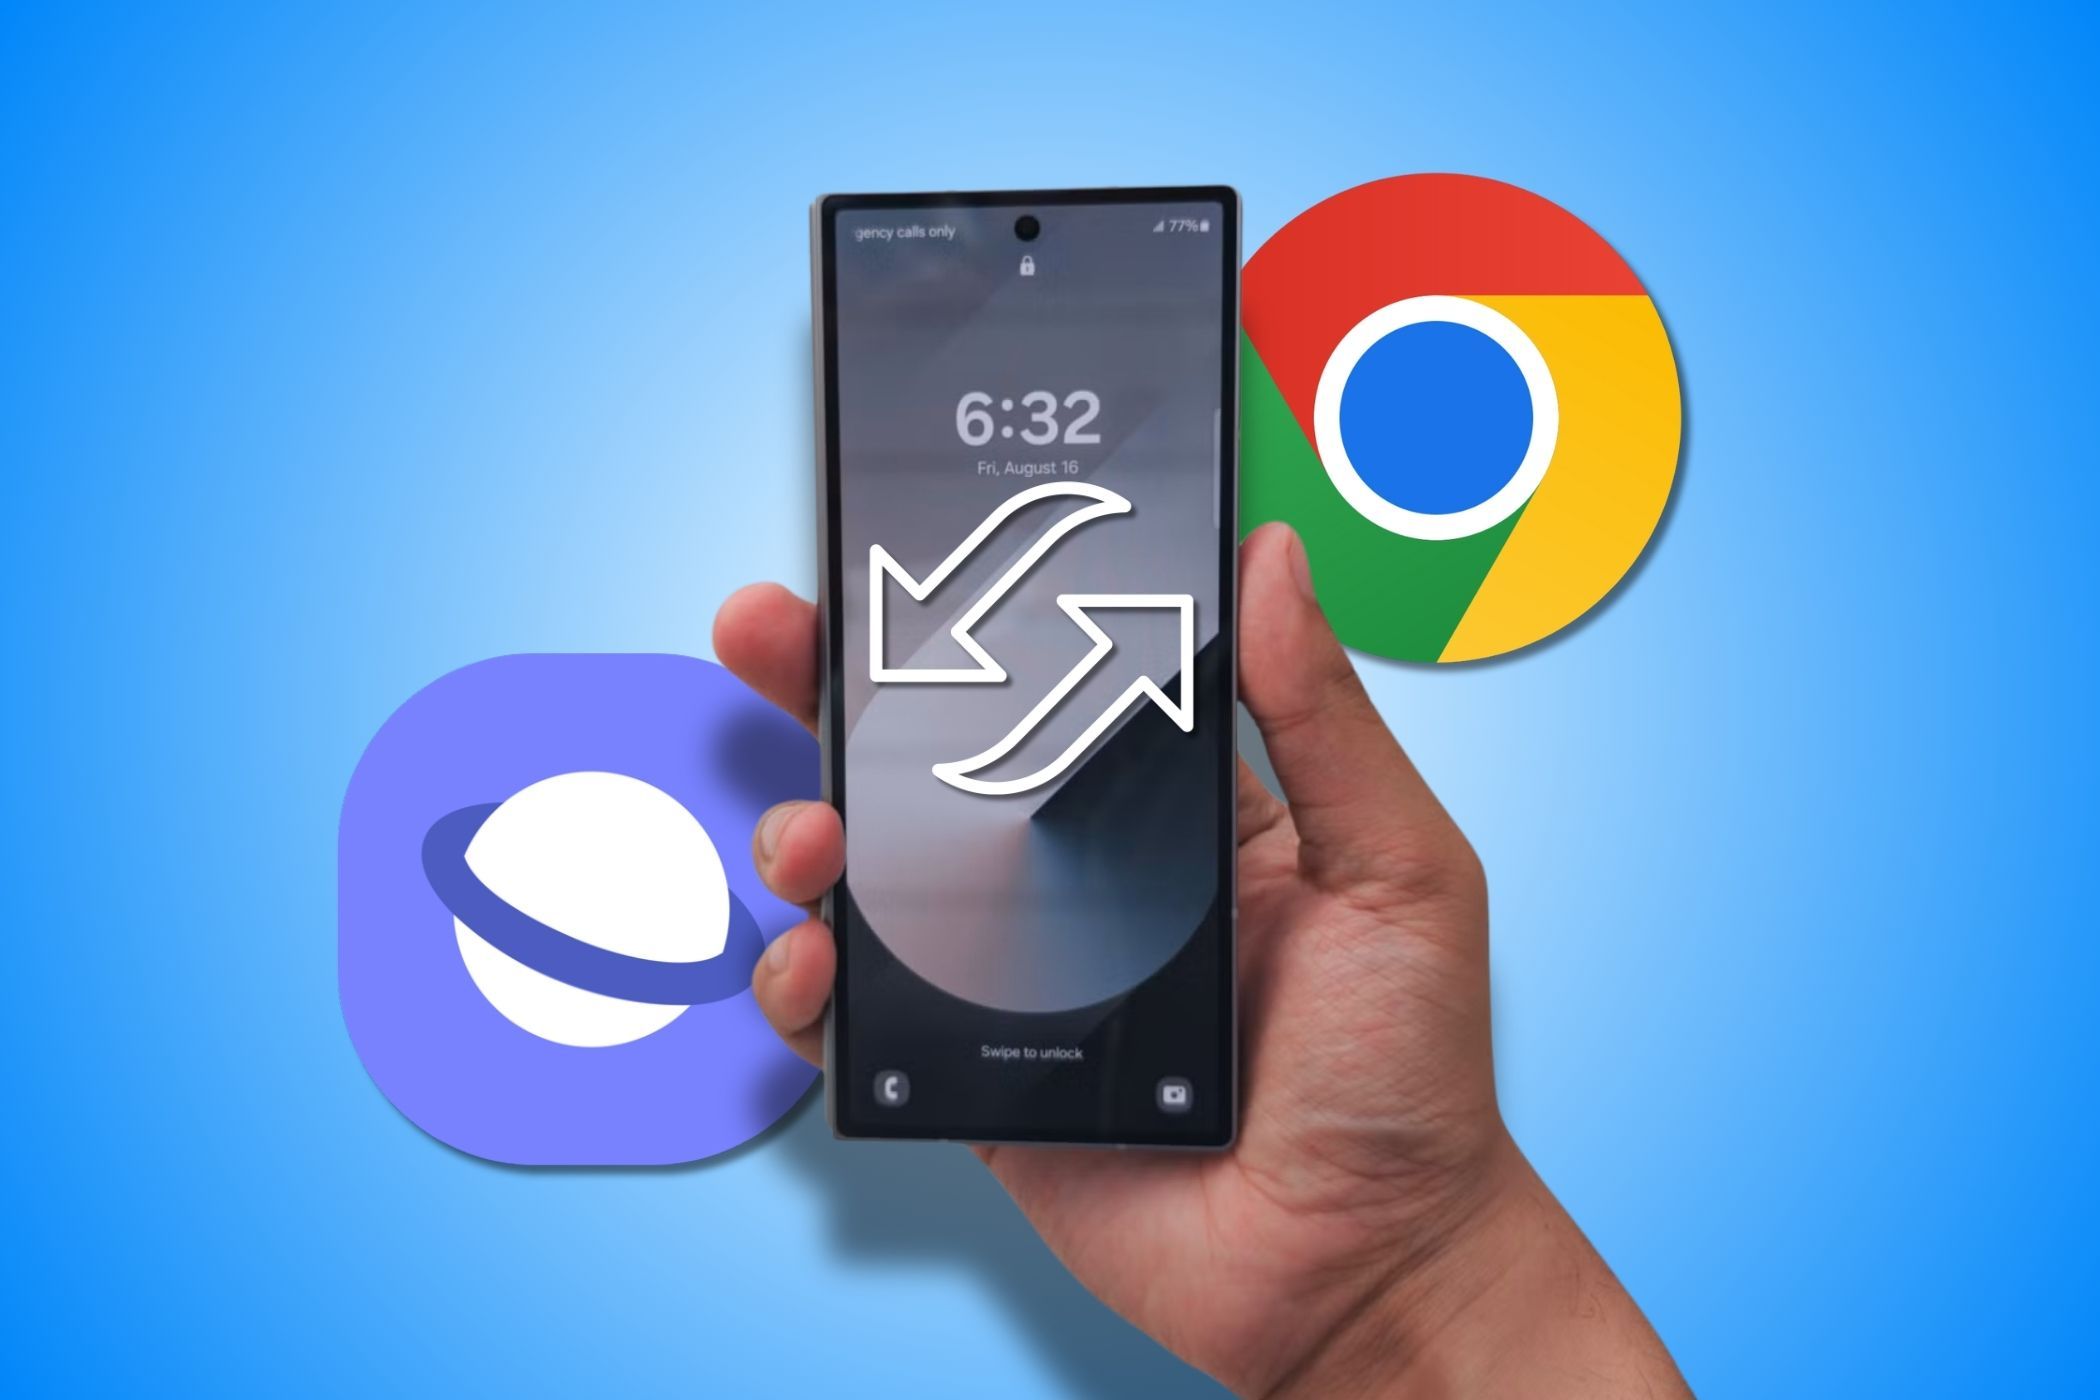
Using Google Chrome on my Galaxy phone allows me to seamlessly sync my browsing data across all my devices, whether it’s an iPhone, tablet, or computer.
Compared to Samsung Internet, Chrome offers better integration with Google apps and enhanced search capabilities.
Chrome also integrates Google Lens and can translate webpages with minimal hassle.
Unlike other Android devices, Galaxy phones come with Samsung’s own Internet browser as the default option. While it offers a reliable experience and some unique features, I replaced it with Google Chrome for the reasons below.
1 Cross-Platform Syncing
One of the main reasons I switched from Samsung Internet was the seamless cross-platform syncing that Chrome offers. Since I use Chrome on my PC and tablet, using the same browser on my Galaxy phone allows me to effortlessly sync my bookmarks, browsing history, passwords, and open tabs in real time. This means I can always pick up right where I left off, regardless of the device I’m on.
This level of integration is incredibly convenient, especially since I frequently switch between my phone and computer for both work and personal tasks. Such seamless syncing isn’t possible when using Samsung Internet on my Galaxy phone.
2 Enhanced Search and Better Integration With Google Apps
Another thing that made me prefer Chrome on my Galaxy phone is its enhanced search capabilities and seamless integration with other Google apps. For example, when I search for a restaurant, Chrome provides convenient shortcuts directly in the search results, enabling me to call, get directions, or read reviews with a single tap.
Similarly, when I copy an email, phone number, or address, Chrome automatically offers the option to open them in relevant apps like Gmail, Phone, or Google Maps. This is incredibly convenient, as it eliminates the need to copy and paste information repeatedly. While Samsung Internet offers a similar feature, it’s often hit or miss. This makes Chrome the clear winner for me.
3 Google Lens Integration
While browsing on my phone, I often rely on Google Lens to quickly identify products, discover where to buy something I see, or even translate text within an image. All I have to do is long-press on the image and select Search with Google Lens. It’s fast, intuitive, and incredibly useful.
On Samsung Internet, though, the process isn’t as smooth. To use Google Lens, I have to manually open the Google Lens page and upload the picture, which feels much less efficient. The direct Google Lens integration in Chrome makes my browsing experience far more convenient.
4 Superior Performance and Browsing Speed
When I first tried Google Chrome on my Galaxy phone, the difference in performance was immediately noticeable. Chrome’s browsing speed is faster, especially when loading heavy websites or complex pages. The smoothness of scrolling and quicker rendering made a huge impact on my overall experience.
Samsung’s Internet browser, while competent, often felt sluggish in comparison. We’ve also previously compared Google Chrome and Samsung Internet in terms of browsing speed and performance using benchmarks, and Google Chrome consistently came out on top—so you don’t just have to take my word for it.
5 I Can Translate Webpages Seamlessly
From time to time, I need to translate web pages on my phone. In Chrome, I can do this effortlessly by tapping the three-dot menu, selecting Translate, and choosing my preferred language. It’s quick, and the translation is immediate.
Samsung Internet, on the other hand, offers translation but with an added hassle. It requires me to download a separate language pack to translate pages. For instance, when I tried to translate a page into Hindi, it forced me to download a 400MB language pack, which was not only inconvenient but also consumed my precious cellular data while traveling.
All in all, switching to Google Chrome on my Galaxy phone is a decision I don’t regret. While Samsung Internet has its strengths, Chrome offers the reliability and convenience I need in a mobile browser. If you haven’t already made the switch, I highly recommend giving it a try—it might just become your preferred mobile browser too!
When you’re watching for digital scams, the last place you’d expect them is in your physical mail. However, some crafty scammers have found a way to trick people into installing malicious apps that steal their bank details, and it all begins with a hand-delivered letter. But how are they doing it, and how can you stay safe?
Scammers Are Impersonating Official Bodies to Spread Bank-Stealing Malware
As reported by The Register, Switzerland is under attack by malware that “spreads” through physical mail. The attack starts with a fake letter claiming to be from the Federal Office of Meteorology and Climatology, which asks the recipient to download an app. The app is a malicious clone of Alertswiss, a legitimate app that warns people of extreme weather patterns.
The letter provides the victim with a QR code, through which they can download the fake app. Once the code is scanned, it won’t open Google Play to download the app; instead, it will take the user to a third-party website. If the target proceeds to download the app, it will begin intercepting two-factor authentication codes and attempt to break into the victim’s bank account via their banking app. From here, the scammer can then move money into their account.
Fortunately, it’s very easy to keep yourself safe from this scam. First of all, remember that there are plenty of security risks when scanning a QR code. Only scan one if you’re certain it’s from an official, trusted source.
Also, the best way to stay safe when downloading Android apps is to use the Google Play Store. Trusted companies will often publish their apps through official channels, so if one asks you to download it via a third-party website, treat it with caution. And if you do download and install the malicious app, factory reset your Android phone.
IPTV allows you to watch live TV and on-demand content over the internet. With a few simple steps, you can stream the channels using a smart device or over your PC. However, choosing the right IPTV provider and software is important for a smooth experience.
What Is IPTV?
IPTV stands for Internet Protocol Television and is a modern way of streaming television content over the internet. Unlike traditional cable or satellite television, which relies on broadcast signals and has a fixed schedule, IPTV uses your internet connection to deliver content. It also differs from some regular streaming sites and video on demand (VOD) sites, like Netflix, in that it uses a private network to broadcast shows rather than streaming them over the public internet.
You can watch channels in real-time, similar to live television, or choose from an extensive on-demand library. IPTV can also include features like pause, rewind, and fast-forward on live TV, and catch-up TV.
This technology allows you to access a wide range of channels, movies, and shows, with more flexibility than conventional methods. IPTV services typically come with a user-friendly interface that allows for easy navigation and searching, and can be accessed via set-top boxes, smart TVs, or devices like Roku or Apple TV. However, it’s also possible to access IPTV on your PC with a few simple steps.
Choosing an IPTV Provider
With so many IPTV providers available, it can be a little overwhelming making a choice. First, be aware of the legal considerations surrounding IPTV services in your region. It’s wise to stick to a legal and safe streaming service, since these companies comply with copyright laws and avoid potential legal issues. If a provider is free or has a very low subscription fee, it’s likely that they don’t possess the correct licensing.
While there are literally thousands of channels to choose from, it’s important to think about the channel selection offered by different providers. I found that some services focus on specific regions or genres, so it’s important to choose one that suits your viewing preferences. If you have specific channels you want to watch, ensure the provider includes them.
Next, consider content quality. Look for providers that offer high-definition (HD) and 4K content, as streaming quality can vary significantly. In addition, reliability and stability are also essential, so be sure to read reviews. Some IPTV providers offer a free trial period, so you can test the service before committing.
Finally, pricing and customer support are vital as well. IPTV services vary in cost, with some offering monthly subscriptions while others provide yearly plans or pay-per-view options. Moreover, look for providers with accessible support options, including live chat, email, and phone support.
Setting Up IPTV on Your PC
I found setting up IPTV on my PC to be a straightforward process. First, you’ll need to download a compatible, free media player. I used VLC Media Player, which is an open-source multimedia player that supports a variety of formats and protocols, making it a good choice for accessing most IPTV services.
After downloading your chosen media player, you’ll need to obtain your IPTV subscription by signing up with an IPTV provider. You’ll receive the necessary information via email, typically including a URL for the M3U playlist, shortly after setting up your subscription.
In VLC Media Player, start by opening the application. Click on Media in the top menu, then select Open Network Stream. In the URL field, enter the M3U playlist link provided by your IPTV provider. Finally, click on Play, and you should be able to explore different channels and stream them through the media player. I found the playback to be high quality and without any noticeable lag.
Watching IPTV on your PC is an excellent way to enjoy a diverse range of content. By choosing the right provider and following the setup steps, you’ll be well on your way to enjoying your favorite shows and channels from the comfort of your computer.
Legally sourcing music for your YouTube videos doesn’t have to be a minefield of copyrights and licenses. If you stick to these websites, you’re free to use any of these music tracks, so long as you attribute the creator.
Navigating Copyright
Don’t post a video on YouTube with background music from a copyrighted source, it’s probably going to be taken down. It doesn’t matter if you’re hoping to be a viral sensation or just posting something for family and friends to see.
If it’s free for the public to see, the copyright owner of that music can make a claim and remove your video. And yes, YouTube is notorious for making your favorite videos disappear because of this.
A better option is to use copyright-free or royalty-free music. It saves you from violating copyright restrictions. These free music download sites will give you great music choices. You just need to add a link to the source in your description.
There’s always a place for classical music today, whether it’s used to underscore a serious topic or in a comedy skit. MusOpen targets this genre especially well, giving you the ability to download up to five tracks a day under the free plan.
A nice addition to the site is the option to save tracks for later. You can explore the categories by mood using tags like Romantic, Tragic, Celebratory and more, with famous composers such as Bach, Beethoven, and Mozart readily available.
As many tracks are well past their copyright period, they’re available royalty-free and can be used however you like.
What seems like a rare gem from the old days of the internet, Audionautix is a site run entirely by one guy in the spirit of open sharing. His name is Jason Shaw, and we can all thank him for the incredible number of hours he has put into creating royalty-free music that anyone can use.
You can search by mood, genre, tempo or keyword, and simply hit the download button on something you like. No sign-up required. All he asks is that you attribute him where appropriate. This is a fantastic resource for free music. If you see fit, consider donating!
Since you’re looking for free copyright-safe music for your YouTube video, the YouTube Audio Library is one of the best places to start. You just need to have a YouTube account to access the library, which stores more than 1,000 tracks and 300 sound effects.
All music from the Audio Library can be used for non-commercial YouTube videos as well as monetized ones. Some music requires attribution, while others do not.
Thematic is the service that most YouTube creators should be looking at for free songs from established artists and musicians. To get access, you’ll need to become a member of Thematic, but you don’t even need a credit card to sign up.
After you’ve become a member, you’ll get to see the full Thematic music catalog, which includes music from several unique artists. It also provides access to tracks from some fairly popular musicians.
Of course, there are some rules for the platform. Thematic members have to follow a particular attribution link and style to use the songs on YouTube and other platforms. Also, take note that as a free user, you’re only allowed a maximum of five downloads per month.
Unminus is another website for free music downloads. This site is different from all the others here because the tracks come with a Creative Commons Zero (CC0) license.
In case you don’t know about Creative Commons licenses, the CC0 license lets you use any work for free, for personal or commercial causes, edit it as you see fit, and without attribution. This means you can do whatever you want with the music on Unminus, and you don’t have to add a link for it in the YouTube description or include it in any credits roll.
New tracks are added to Unminus only once in a while. If you want to know the next time new material is available, subscribe to the newsletter for alerts. You can also check out sites to download free music legally to find a track that suits your taste.
Icons8 is a well-known resource for free stock icons and photos, and it also offers a great selection of royalty-free music and audio tracks. Each track can be downloaded as a free MP3. However, you can only use the free music for non-commercial projects.
The music collection is divided into two sections: categories and genres. Each section has its sub-categories to further refine your choices and quickly find what you’re looking for. You can stream any song in full before downloading it, and get information like runtime, visualizer, and so on.
Of course, there’s a search function as well. But you’re probably better off using the large number of tags on the site to browse and find free music to download for your YouTube video.
For many years now, musician and YouTuber TeknoAXE has been making songs and scores, becoming a great source to download free music because anyone on the internet can use it for free. The majority of these tracks are electronic dance music, rock, and metal, but there are plenty of thematic compositions too.
The CC 4.0 license means you need to attribute the original link, and note if you made any changes. In exchange, you get a collection of almost 1,500 songs spread across several genres, and even moods like comedy, drama, horror, and so on.
Listen to a few tracks, and you might think, “Hey, I’ve heard this before”. That’s because TeknoAXE’s music has been used widely on YouTube already. For his latest music, you can follow TeknoAXE’s YouTube channel. He usually uploads a new track every week, and this is a good way to find a new sound for your video before it becomes popular.
Pixabay is a popular site for free stock photos, but you can get free royalty-free music here as well. Pixabay Music launched in 2020, making the site a convenient one-stop place for you to source material you need for your YouTube video project.
Search by genre, mood, and tag to get the perfect background music for free for your YouTube video. Besides free royalty-free music, you can find stock video and sound effects here too.
Under the Pixabay License, you can download free, copyright-free music for commercial and non-commercial use as well as modify it. According to the site, attribution isn’t a requirement, but doing so is a nice expression of appreciation to the artist who created the free music you’re using.
Bensound has a variety of royalty-free music you can download. The categories are given vivid names, such as Acoustic, Cinematic, Urban, and so on. This way, you already have a feel of how each category of music will suit your style.
Bensound allows you to use its royalty-free music for free on YouTube videos. However, you’re limited to the list of free music on the site, and remember that you need to attribute. To have access to all tracks, you’ll need to subscribe to a paid plan, which starts from $9.99 per month.
dig.ccMixter is subsite of ccMixter, an online community where you can download a variety of remixes and samples for free. On dig.ccMixter, you can search for music for your YouTube video using the three tag categories: genre, instrument, and style. There are more than 5,000 tracks on the site.
The licenses of the tracks might differ, but overall the majority of them can be used in either commercial or non-commercial video projects, as long as you provide the correct attribution. Licensing information about each track will be provided before you actually download it.
Finding the right music and using it legally will ensure that your video stays up for as long as you want. Sticking to these sites will offer you a massive choice of music tracks without giving you a copyright headache.
The unfortunate truth is that getting scammed on eBay is just as easy as actually selling something. As easy as selling on eBay is, you can learn some of the most common scams that sellers specifically encounter to avoid losing money when selling.
1 Accepting Payment Outside of eBay
Scammers love to ask you to take payment outside of eBay in a DM about the item, or they will otherwise try to move the transaction away from eBay. They do this to avoid all of eBay’s built-in protection for sellers. You have no recourse with Venmo or Zelle; once the money is gone, it’s gone. If a scammer does any of those things, block and report immediately.
You sell an item, and the buyer receives it, but they claim to be displeased and demand a direct refund outside of eBay’s official refund process. They’ll ask you to use Venmo, Paypal, Zelle, or maybe send a check, and if you don’t, they’ll give you a bad review or otherwise make your eBay life difficult, not unlike the mob extorting small shop owners for “protection.”
This works by scaring you, the seller, into giving them money. It’s a classic shakedown, but the simple answer is, “No, go through eBay’s refund process.” A bad review is no big deal, and you can appeal it. You’ll have the scammer’s communication with you as proof, and then they’re on the hook for trying to shake you down. Chances are, they’ll take the loss here and move on to bother someone else.
3 The Switch-Up
Joseph Cottle / MakeUseOf / Canva Dream Lab
This scam is similar to the previous one but more devious. After making a legitimate purchase, the scammer will go through the proper refund process on eBay—they might even provide photos of damaged goods to you and eBay to prove their point—and ship an item back to you that is indeed damaged.
The trick is that what they return is not the item you shipped them. Smarter thieves will send back a damaged identical model item they bought for cheap; however, lesser thieves will simply send back a box with a brick in it. Either way, they get their money, at least at first.
The seller, in this case, is not without recourse, though. If you have documentation or evidence to prove that you didn’t receive the original item you sold, eBay will give you your money back, and the scammer will be permanently banned.
4 The Alternate Address
This scam is less devious than the previous one but more clever. Once the scammer pays, they DM you and ask you to ship the item to a different address than the one they listed in the official transaction. You play along to be nice, ship the item to the new address, get paid, and then go on with your life.
A week or so later, you get an email from eBay with a complaint from the buyer that they never received the item and want their money back. You will quickly discover when you appeal with your tracking information that you’re, uh… hosed. If the item wasn’t shipped to the transaction address, you’re out of your money, and the scammer got a free item.
You have no recourse in this case, as I learned a few years ago when I fell prey to this scam.
5 How to Avoid Getting Scammed as an eBay Seller
Thankfully, there are a few ways eBay sellers can protect themselves.
Photograph Everything, Including Serial Numbers
Before you ship the item, take several photographs of it next to the shipping label, preferably with the serial number in view. This way, if you get hit with the Switch-Up Return & Refund scam, you can prove that you sent the item and that it was indeed received by the buyer as described. If they return a different but damaged identical item to you, you have proof that the serial numbers are different.
Check the Buyer’s History
If a buyer is messaging you, but the situation feels scammy, look at their eBay profile. How old is it, and what kind of feedback do they have? If the account was recently created or they don’t have much feedback (you won’t see bad feedback because eBay doesn’t display bad reviews), block and report them immediately. Certainly, don’t sell anything to them.
Track All of Your Shipping With Delivery Confirmation
Do yourself a favor and make sure you buy tracking for the item, and use postage that requires a signature for high-priced items. This will protect you and ensure you did everything you were supposed to regarding shipping.
Only Complete Transactions Through eBay
This is listed last because it’s the most important, and we remember most of what we read last. If a buyer asks you to circumvent any part of the official eBay process, block and report them ASAP. While eBay weights its protections towards buyers, its system provides many protections to sellers, and those protections are voided if you do anything outside of eBay’s official processes.
Do you want to find out exactly when you joined Facebook or how old your Facebook account is? Here’s a look at how to find out when you created your Facebook account.
How to Find the Exact Date That You Joined Facebook
The easiest way to find out when you joined Facebook is to use the Personal information section on the Facebook website or app.
This section is buried in your Facebook settings and Account Centre. The easiest way to get to it is to open the Facebook website and type “your information” in the search bar. Facebook will then provide a search result that says Access your information. Click on this.
In the left panel of the page that opens, select Personal information. This opens a new page with a variety of information. You can find the day you joined Facebook under Your account creation date.
The steps for finding out your Facebook account creation date on mobile are slightly different.
To find out when you joined Facebook on the mobile app, follow these steps:
Tap your profile picture to open a dropdown menu and then select the cog icon.
On the Settings & privacy menu, scroll down to Your information and select Access your information.
Select Continue. On the Access your information page select Personal information.
Under Profile information, you will see Your account creation date.
Doing this on the Facebook website or app is the best way to find out your account creation date. But what if you don’t have access to your account?
Using Facebook’s Welcome Email to Find Your Join Date
Another way to check how many years you’ve had Facebook is by using your welcome email.
When you sign up for an account on Facebook, the site sends you a confirmation email, as well as a welcome email. If you have access to the email account you used to make the Facebook account, you can find the welcome email and that should tell you your join date.
To use this method, open your email account’s inbox. Search for keywords like ” Welcome to Facebook”, “Facebook Registration Confirmation”, and so on.
When you find the Facebook email that either asks you to confirm your email address or offers instructions on getting started with Facebook, that email’s date should be your Facebook account creation date.
This is the best method if you no longer have access to your Facebook account or you recently created your account—meaning the welcome email is easily accessible. But if you regularly delete your emails, you won’t be able to check your Facebook account creation date via this method.
Find Out How Old Your Facebook Account Is Using a Profile Picture
Facebook usually asks you to upload a profile picture as soon as you’ve finished creating an account. This means the upload date of your first profile picture should be your Facebook account creation date.
This isn’t always the case, though. Some people prefer not to upload a profile picture, so this method won’t work for them. However, if you’re still interested in getting a rough idea of when you made your Facebook account, you can open your profile page and select Photos.
On the Photos screen, find and click the Albums option. This lets you view your Facebook photo albums.
Click Profile pictures on the album screen to open your profile photos album. Find the oldest profile picture in this album. Unless you’ve uploaded loads of profile pictures, you shouldn’t have any issues getting to the oldest picture.
When your oldest profile picture opens in full-screen, check the date of the upload on the right of the photo.
That date should be the day you made your Facebook profile or very close to that date. In my case, my account creation date was 24 July 2007 while my first profile picture was 25 July 2007.
You could also technically try using your old posts to try to figure out when you created your Facebook account, but that’s not a very accurate way to figure out the right date. When I tried that method, there were no posts in the first month that I created my account.
These methods can help you easily figure out when you created your Facebook account. Of course, if you end up deleting your Facebook account, only the email method will work. If you have a habit of cleaning up your Facebook account, the account creation date on your personal information page will still give an accurate date.
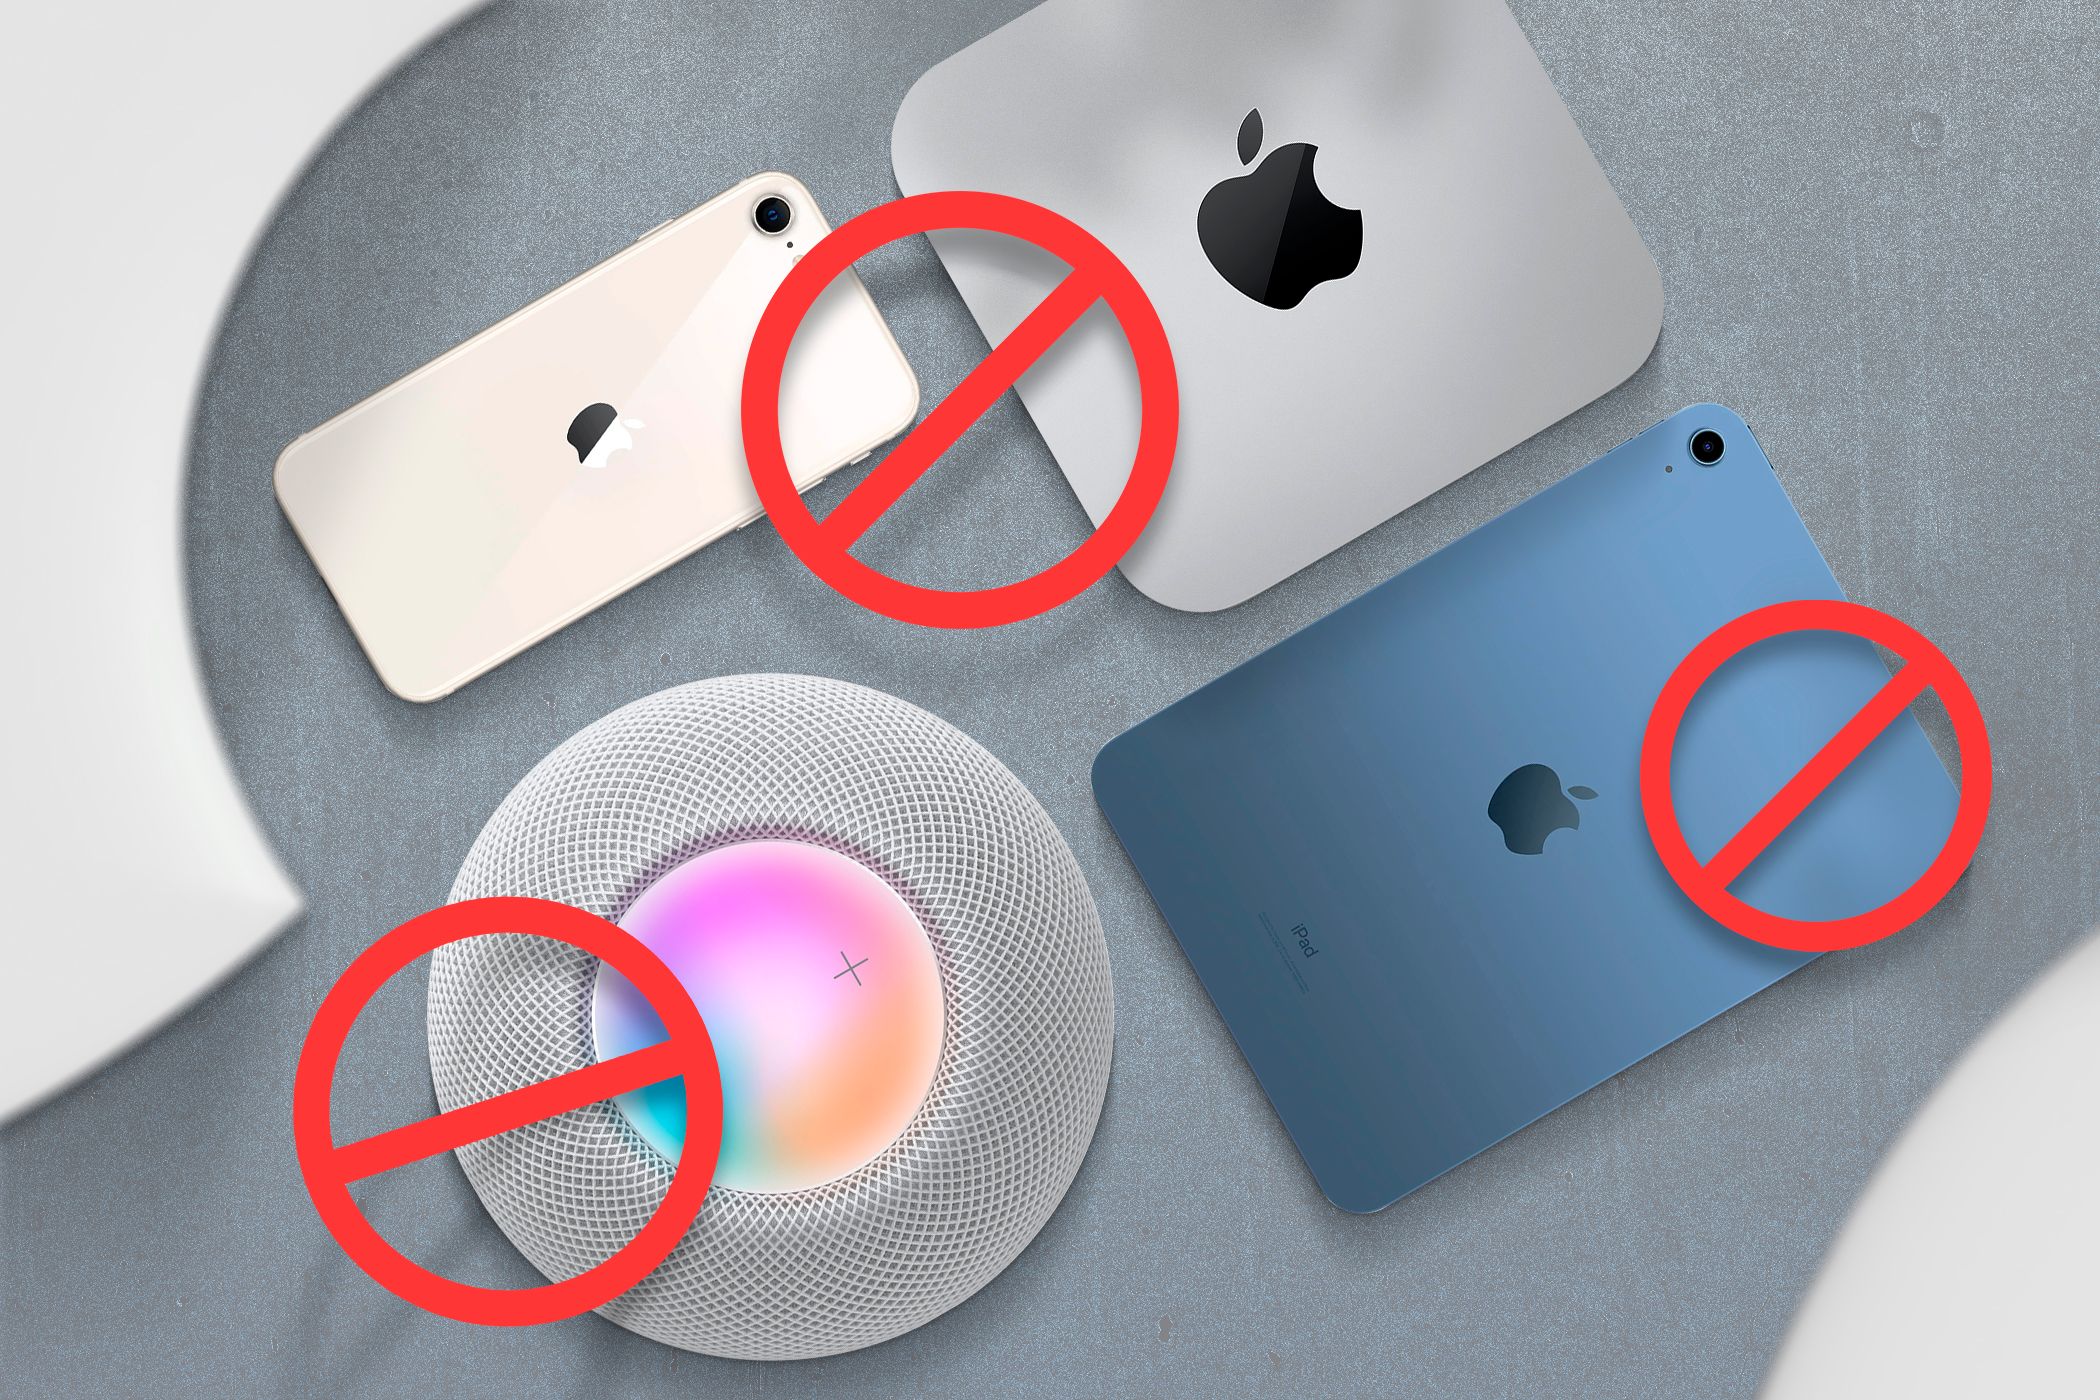
With the holiday shopping season here, you may be excited to add some Apple products to your shopping or gifting list. However, there are some Apple products I wouldn’t recommend buying since Apple will likely refresh them in the near future.
The iPhone SE is by far the most cost-effective way to enjoy everything an iPhone has to offer. However, Apple last updated in early 2022, and the device features a small 4.7-inch screen and Touch ID. Compared to modern iPhone models, it’s very outdated. But that’s set to change soon.
According to recent reports, the next-generation iPhone SE should launch as early as March 2025, and it’s expected to pack some significant upgrades. Besides a larger screen, expect the new iPhone model to feature Face ID with a body similar to the iPhone 14. The phone should also have a much faster chip and more RAM to support Apple Intelligence features.
Like the iPhone SE, the iPad (10th generation) is the least expensive way to jump into Apple’s iconic tablet lineup. However, Apple introduced this model in late 2022 with a Touch ID power button and a 10.9-inch display. As of 2024, Apple dropped the starting price from $449 to $349.
We’re expecting to see an updated model arrive as soon as spring 2025. While the tablet should keep the same design and other features, expect a big speed boost with an A17 chip or later. That will help it run Apple Intelligence features like the latest iPad mini, which is actually worth buying right now. Currently, it’s the only iPad Apple sells that doesn’t support Apple Intelligence.
The Mac Studio is a high-end desktop Mac designed for professionals and other Apple power users. Starting at $1,999, you can select from a model that packs the fast M2 Max or M2 Ultra chip. The base model also starts with 32GB of memory. A new version of the Mac will likely arrive in 2025 with faster M4 Max and Ultra chips.
If you can’t wait until then, consider the recently updated Mac mini. The higher-end models pack the M4 Pro chip and feature Thunderbolt 5 ports. It also offers an HDMI port and comes with 16GB of RAM. A built-in SD card slot is the only thing missing compared to the Mac Studio.
It might be hard to believe, but Apple released the HomePod mini four years ago in 2020 to bring a lower-cost version of the HomePod to Apple fans. It’s still a great way to enjoy Siri and boasts strong audio quality in a small form factor. But there have been no real reports of a second-generation model in the pipeline anytime soon.
If you can wait, the HomePod mini could likely be replaced by the reported Apple smart home controller and home hub. Recent reports say the device could arrive as early as March 2025. It will apparently look like a square iPad and focus on smart home control and security.
Apple will also offer attachments for the device, including a base with speakers that can be placed in the kitchen or nightstand. If you aren’t interested in waiting and want to spend a bit more for a bigger audio punch, the larger, second-generation HomePod is also an excellent choice.
5 AirPods Pro 2
Aryan Surendranath/MakeUseOf
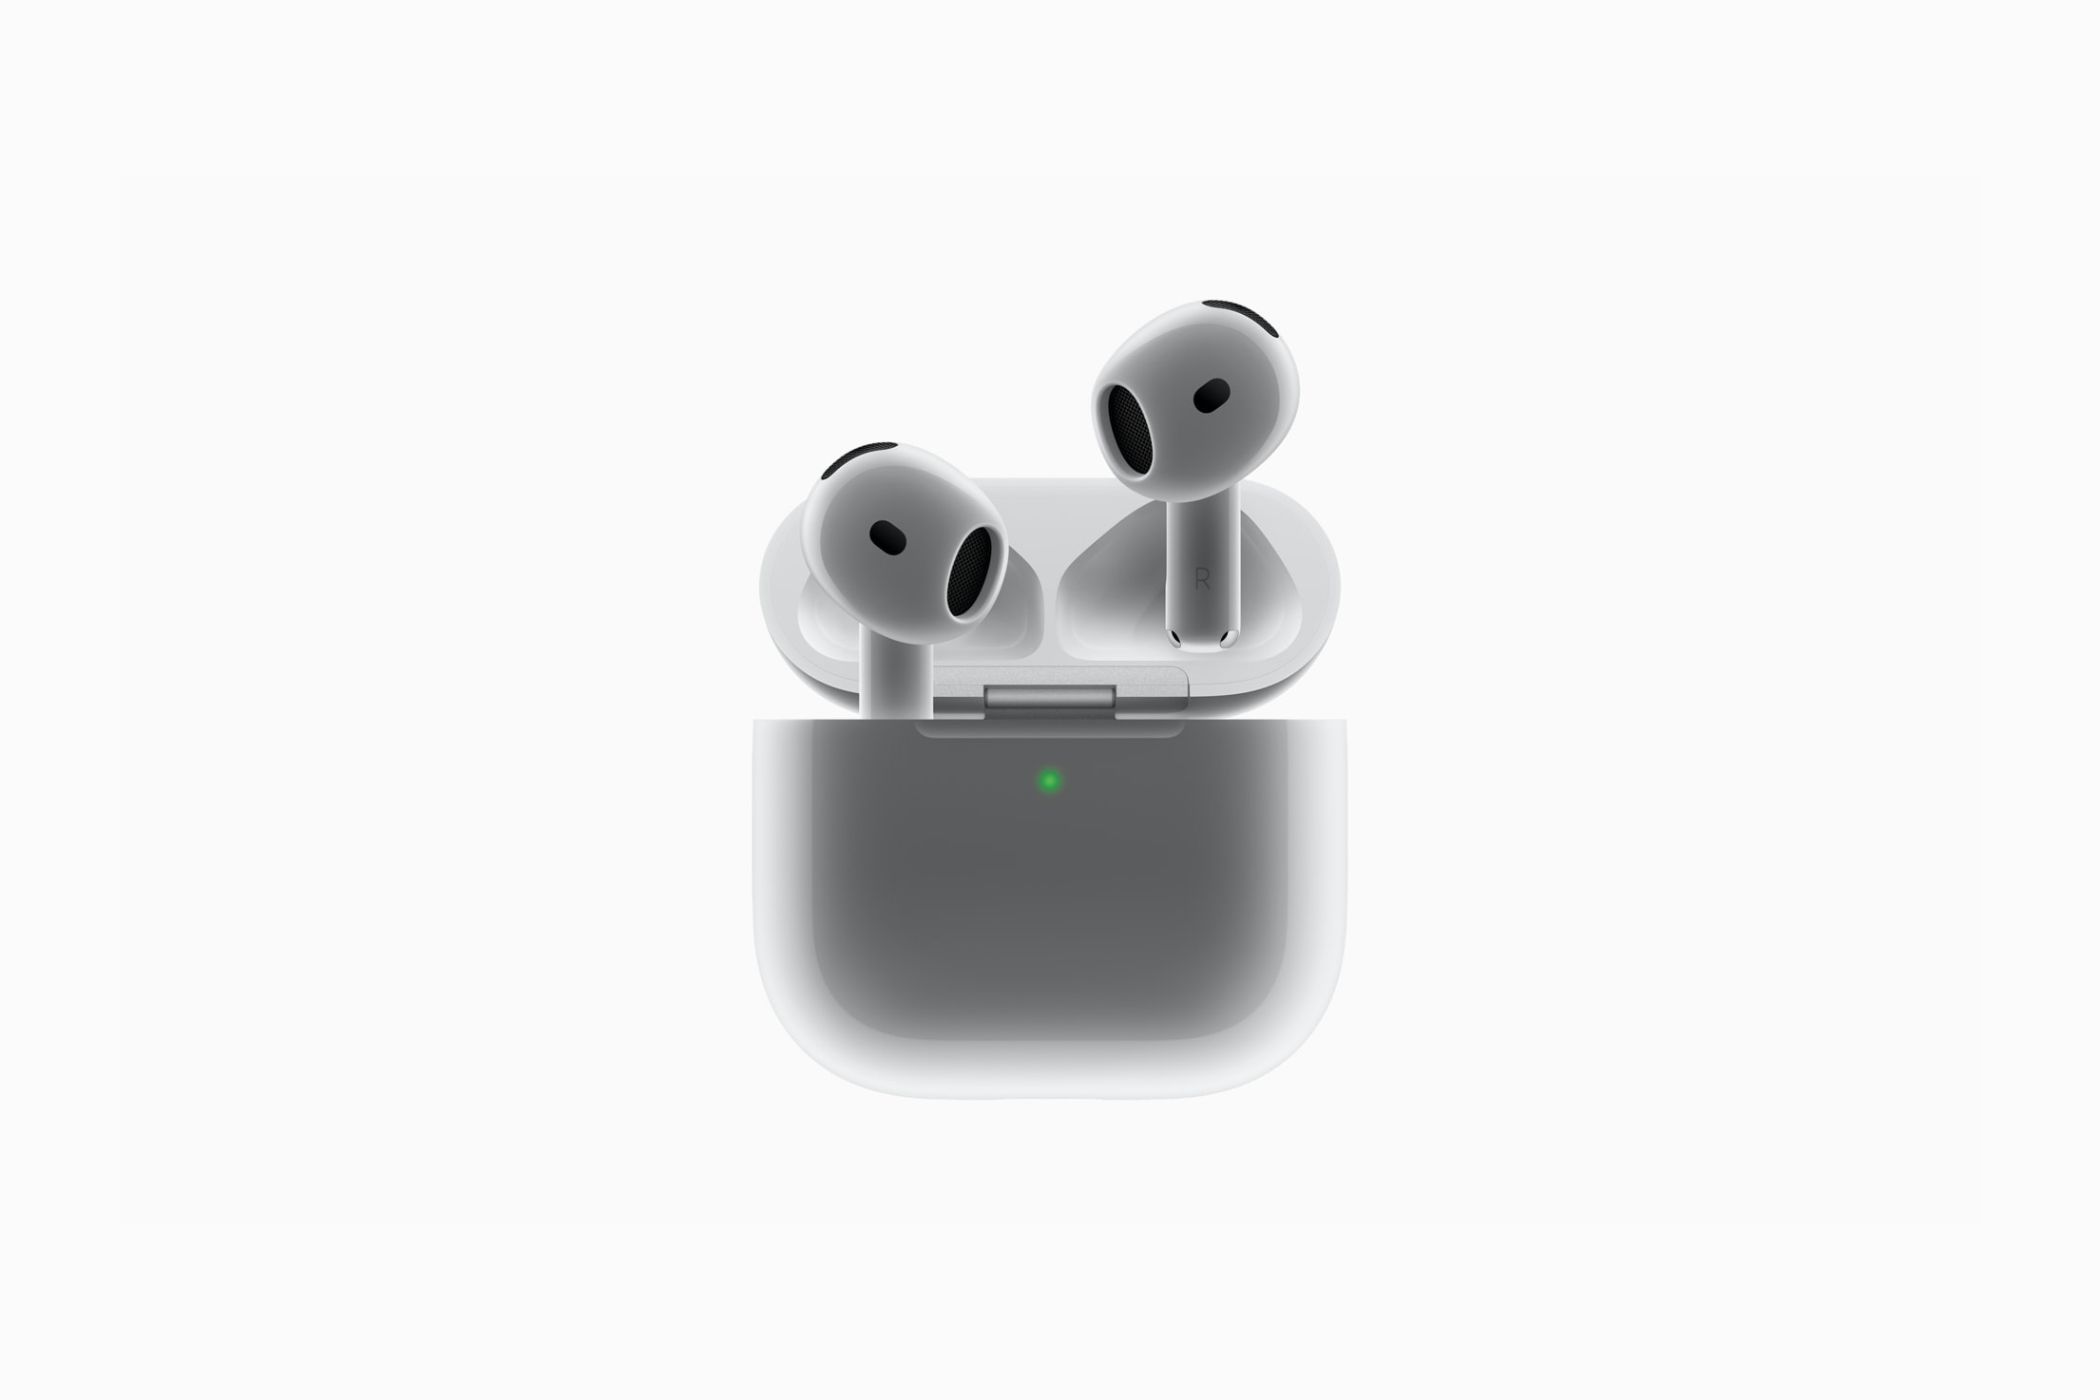
The AirPods Pro 2 remain one of the most popular AirPods models available thanks to active noise cancellation and tons of great features, including the recently added suite of hearing health features and the ability to act as hearing aids.
If you’re willing to wait, 2025 will likely usher in the next generation of earbuds. Reports say the new earbuds will offer additional health-tracking features, like heart rate monitoring. Both the charging case and earbuds might also get a new design.
In a sea of low-cost streaming devices, the Apple TV 4K stands out from the crowd, and not in a good way. It starts at $129 for a Wi-Fi-only version or $149 for a 128GB with Ethernet. That’s easily twice as much as many competitors on the market.
Apple last updated it in 2022, and it features the aging A15 processor. There are no strong rumors about the next model, but it’s widely expected to feature a faster processor and even a drop in price to make it more competitive. If you can’t wait, consider choosing another great streaming box for your home.
While these Apple products are still great to use, you’re better off saving your cash and waiting for the updated models that offer the latest and greatest features. After all, nobody wants to waste money on an aging Apple device that’s due for a hardware refresh.
Facebook Marketplace has become a go-to platform for buying and selling locally. It offers easy access and a large audience of potential buyers and sellers. But is it the right platform for you?
The Pros of Using Facebook Marketplace
Not sure about using Facebook Marketplace? There are plenty of reasons why this is a Facebook feature you might want to use.
Ease of Use
Facebook Marketplace is incredibly easy to navigate. It’s built into the existing Facebook app, so there’s no need to download anything extra. The user interface is intuitive, making it easy to post items, browse listings, and message buyers or sellers directly. I personally had no problem picking it up and selling on it, even when I had never done so before.
It is even easy to add multiple listings on a single screen—no having to open up multiple tabs here! This was especially helpful when I had to sell a lot of baby stuff. Instead of going one by one, I was able to upload all twenty items and get them sold in no time.
Location Flexibility
Facebook Marketplace allows you to target specific locations without needing to join local community groups, though I would recommend you do so as a way to help boost your chance at selling your items. This makes it simple to find or list items for sale in various regions, whether nearby or in a specific city.
No Fees
One of the biggest advantages of Facebook Marketplace is that there are no fees to post an item, buy something, or sell something. This makes it a budget-friendly option if you compare it to other platforms that take a percentage of your sale or require listing fees. In fact, I prefer it to selling on Ebay, which does take a portion of your sale.
Wide Audience Reach
With Facebook’s massive global user base, your items are exposed to a pretty big audience. Better yet, you can “aim” where you want that content to be sold, be it your local community or to those from further away.
Whether you’re selling a piece of furniture or searching for second-hand electronics, the platform’s large user base can help connect you with the right buyer or seller quickly.
Boost Ability
Want your item to appear to more people? Are you willing to pay for the privilege? Marketplace has the ability to “boost” your ad with campaigns of various lengths to help make sure your item sells.
I’ve never personally boosted sales, as my local area is small enough to get seen easily, but I can see where it would be helpful in larger cities.
The Cons of Facebook Marketplace
Like any other app, Facebook Marketplace also has its fair share of limitations that might cause some individuals to decide to skip it in favor of other apps.
Limited Protections
Unlike platforms like Amazon and eBay, Facebook Marketplace doesn’t offer much in the way of buyer or seller protection. This means if something goes wrong, like a bad payment or an item not being as described, there’s no official way for you to get your money or item back. There is also no way to verify the condition of items being sold.
Items that are purchased face-to-face, vehicles, and gemstones are just some of the items not covered under their purchase protection, and even those that are covered are still subject to Facebook deciding whether you get your money back or not.
I was once buying a laptop from someone in my city on Facebook Marketplace. We met up in person, but the seller seemed in a rush. I should have known something was wrong then, but by the time I got home and tested it, guess what—it didn’t so much as turn on. I learned a valuable lesson that day, including the above fact that face-to-face purchases aren’t covered and that people will often make profiles for the Marketplace only, which they’ll delete after they get your money.
Because of the limited protection mentioned above, Facebook Marketplace is a breeding ground for scammers. It’s important to be cautious of deals that seem too good to be true or sellers asking for unusual payment methods.
If it feels too good to be true, it probably is.
It Lacks Advanced Features
Facebook Marketplace doesn’t offer the sophisticated features you might find on other e-commerce platforms. There’s no built-in analytics for sellers to track performance, and seller profiles are minimal, making it harder for you to assess credibility.
No Anonymity
Since Facebook Marketplace is connected to your personal Facebook profile, buyers and sellers can view your name and potentially message you outside of the platform. This can raise privacy concerns for those who don’t want their personal profiles exposed.
Limited Categories
While Facebook Marketplace covers a wide range of categories, some niche categories may be underrepresented. This limits your options if you’re trying to buy or sell something in a less common category.
No Customer Support
If you run into any issues on Facebook Marketplace, there’s no dedicated customer service to help resolve disputes or problems with transactions. While this isn’t a problem if your transaction goes smoothly, the lack of support becomes apparent as soon as there’s a problem.
Buy and Sell on Facebook Marketplace Safely
To make the most out of the platform, your best bet to keep yourself safe when using Facebook Marketplace and get the most out of your experience is to implement the following tips:
Meet in public, well-lit places, preferably during day time.
Verify profiles independently before committing to transactions.
Use secure payment methods and avoid upfront payments via untraceable means. Try accepting cash only or a system like PayPal, which offers fraud protection.
Trust your intuition; if something feels off, walk away.
Document your purchase with photos and messages for reference in disputes.
Communicate quickly and clearly with potential buyers/sellers.
Ultimately, while Facebook Marketplace presents an accessible and no-cost option to buy and sell, being aware of its limitations and using it safely and smartly makes for a more positive experience!
Gamma simplifies presentations with AI, flexible templates, and media embedding.
Use ChatGPT to search and create the presentation outline, and finalize it Google Docs or Gamma.
Create cohesive presentations in Gamma with AI cards, themes, and easy-sharing options.
Creating a presentation from scratch can be a time-consuming challenge, especially when you’re starting with a detailed document full of notes, research, or data. But what if there was an AI trick that could take any document and transform it into a polished presentation in just a few clicks?
Why Use AI for Presentations
Creating presentations can be a tedious and time-consuming task. Designing slides, organizing content, and ensuring a professional appearance often eat up hours that could be better spent refining ideas and practicing delivery. This is where AI comes in.
Gamma simplifies presentation creation by using AI to turn your ideas into polished slides in seconds, without requiring design skills. Its AI-driven platform generates outlines, offers flexible presentation templates, and lets you edit effortlessly.
Gamma’s unique card-based system keeps your content organized by allowing sections to expand or collapse, so slides remain visually appealing and uncluttered even with complex information. You can also embed interactive media like GIFs and videos to keep your audience engaged.
Gamma offers flexible pricing: the Free plan includes 400 AI credits and basic analytics, which I found to be more than sufficient for my use cases. You can export to PowerPoint or Google Slides or share your presentation directly.
Preparing Your Document With ChatGPT and Google Docs
I’ve been really enjoying the search feature integrated into ChatGPT, it’s made research easier than ever. Now, I can type in a prompt and have a polished presentation template ready in seconds, saving tons of time on prep.
You are an expert in presentations, create an in-depth training course on color theory, this course will be delivered in a 10-slide PowerPoint presentation, therefore should have clear headers outlining the sections in a note format, I do not want a table.
Once I have a solid outline, I transfer it over to Google Docs for a more thorough, hands-on review and final edits. While I personally like going over the document manually, ChatGPT can also export it as a PDF if you want to skip that step and go straight to the final version.
Gamma further enhances this workflow by allowing you to import your Google Docs directly, making it easy to edit and perfect your content all in one place.
Creating a Presentation With Gamma
Creating a presentation in Gamma is straightforward. Start by uploading your document or PDF, and Gamma’s AI will automatically arrange your content into flexible cards. You can easily split, edit, and rearrange these cards to ensure everything flows smoothly.
Once you’re happy with the structure, select a theme that fits your style or brand, and Gamma will apply it across your slides. In moments, you’ll have a cohesive, professional-looking presentation that’s ready to go. I went from idea creation in ChatGPT to a presentation being created in Gamma in less than five minutes. That kind of time savings is invaluable.
Finalizing and Sharing Your Presentation
Once your presentation is ready, Gamma makes it easy to share and present. You can export your slides in formats compatible with PowerPoint or Google Slides if you need additional customization.
For a more seamless experience, you can also share your presentation directly through Gamma by sending a link, allowing your audience to view it online without needing any extra software. This flexibility lets you choose between in-app presenting, sharing online, or further editing on other platforms, whatever best suits your needs.
The workflow from using ChatGPT for research to creating and exporting presentations in Gamma has transformed how I approach presentation tasks. Breaking down complex topics and turning them into a slide deck used to be a time-consuming chore. Now, with the help of AI, I can be more efficient and productive without sacrificing creativity.
Did you know that WhatsApp for mobile didn’t have a drafts feature for all this time? If you’re now wondering where on earth the feature has been all this time, don’t fret; Meta has now added drafts to its messenger app, allowing you to create texts to send later.
WhatsApp Finally Remembers to Send That Draft About Adding Drafts
As announced on WhatsApp’s Threads account, you can now save a message for later. To do this, start typing to someone, then back out to the contacts list before you send the message. When you do, the preview that usually shows the last sent message in the conversation will instead say “Draft” in green text, followed by the message you were typing. It’ll also bump that conversation to the top of the contacts list.
Other than that, the new feature seems to work just as you’d expect it to. You can type a message to someone, close out the conversation for whatever reason, and then come back later and finish your thoughts.
As reported by Engadget, it appears the feature is already rolling out to everyone worldwide, so there’s no need to sign up for a beta or enroll in anything to get it. Just make sure you update your WhatsApp app on Android or iOS before you start wondering where the drafts are.
One of the most heart-stopping moments is watching your smartphone tumble to the ground. You quickly flip it over, praying it hasn’t cracked. However, besides accidental drops, there are other reasons why you should never use your phone without a case.
1 Accidental Damage Coverage Doesn’t Cover Everyday Wear and Tear
No matter how careful you are with your phone, you never know when bad luck strikes. Accidental damage coverage, like AppleCare+ or Samsung Care+, protects your device against unexpected incidents like drops, spills, or cracked screens. However, it doesn’t cover cosmetic damage, such as minor scratches, scuffs, or wear and tear, like battery degradation, that naturally occurs from regular use.
While accidental damage coverage will come in handy if you crack your device’s screen after it slips from your hands, it will be of no help if the screen gets scratched by your keys or if there are scuff marks on your phone. So, the best way to protect your device against everyday wear and tear is to never use it without a case.
2 Cases Shield Your Phone From Accidental Water Exposure
One thing tech giants haven’t quite nailed is creating fully waterproof devices. At the time of writing, most high-end smartphones feature an IP68 rating, but that doesn’t make them waterproof.
As per the Ingress Protection code, these phones can survive being submerged in 1.5 meters of fresh water for up to 30 minutes. But, that’s just how water-resistant these devices are—not waterproof. This means that unexpected spills or exposure to other liquids, like coffee or soda, could still cause damage.
There are waterproof cases designed for swimming and other water-based activities, but they’re typically not designed for everyday use. While a regular silicone or hard shell case can’t make your phone waterproof, it provides a solid layer of protection against accidental splashes, spills, and even light rain. They keep water from immediately reaching your device’s openings, like the charging or the SIM card slot.
3 Your Phone’s Resale Value Could Take a Hit
Whether you upgrade your phone every year or you prefer to hold onto it longer, you typically have two options when it’s time to part with your old phone: sell it or trade it in to save money on your new phone.
While you may not care too much about slight scratches and scuffs on your device’s front and back screens, it may impact your device’s resale value. Buyers typically expect devices to be in near-mint condition, and minor cosmetic damage or even the fact that you got your phone repaired could potentially affect its resale value.
For instance, I tried using Apple’s Trade In tool to get an estimate, and after selecting my iPhone model, I was asked if it was in good condition. When I clicked No, a follow-up question appeared: “Is the body of your iPhone in good shape?” After selecting No again, Apple informed me that my device didn’t qualify for a gift card but could instead be recycled. Essentially, this meant that my trade-in value would be $0!
While Apple may accept your device if you had it repaired at an official store, it’s clear that cosmetic damage can potentially affect your phone’s trade-in potential. In some cases, it could even disqualify your phone from certain buyback programs, leaving you with even fewer options to cash in on your device.
4 A Case Provides a Better Grip
Mahnoor Faisal/MakeUseOf
I’ve lost count of how many times my iPhone slipped right out of my hands and onto the floor. While the front screen has survived many of those falls, the internal components haven’t been as lucky. For example, after a fall, my iPhone X’s antenna was damaged, and it refused to connect to Wi-Fi unless I was sitting right next to the router.
Take my experience as a lesson: one of the top reasons you should never use your phone without a case is the enhanced grip it provides. With how sleek smartphones are nowadays, a firmer grip makes it much less likely to slip out of your hand and feel more secure during everyday use. This can be especially helpful when you’re texting while walking or taking a selfie with one hand.
While tech companies are consistently directing their efforts toward improving the durability of their devices, a drop from the right angle or even a small bump can still cause serious damage. So, it’s always better to be safe than sorry!
Prime Video is getting over 150 free channels with its partnership with the Public Broadcasting Service (PBS). PBS is known for its high-quality and educational programs, and you can now watch its shows and channels on Prime Video under its ‘Watch for Free’ section. This is also the first time that PBS has partnered with a major streaming service, extending its reach to more users and devices across the country.
PBS Is Now Available on Prime Video for Free
As long as you have an Amazon account, you can enjoy PBS’ over 150 local stations by streaming it to your device via the Prime Video app. Aside from those local PBS channels, the PBS KIDS Channel will also be available for free — no Prime Video subscription needed. All these channels will slowly become available in the coming months, so you can soon watch your favorite PBS shows like Sesame Street, Frontline, and Masterpiece anywhere as long as you have a smartphone or compatible device and an internet connection.
Prime Video also gets two new PBS channels that will initially be only available on the platform — PBS Drama and PBS Documentaries. These will be available starting November 26, alongside a “pop-up” channel that runs classic PBS shows starting with Reading Rainbow.
“PBS member stations will be able to tap into a leading streaming service to offer quality local programming viewers know and love for free,” say PBS Chief Digital and Marketing Officer Ira Rubenstein. “It’s part of the PBS commitment to make trusted content available to all households across as many platforms as possible. We thank Amazon for giving PBS Member Stations a new and exciting way to grow their digital footprint while engaging with audiences old and new.”
Aside from getting access to your PBS favorite, it also adds several more channels to Amazon’s free offerings. This comes at a crucial time, especially as Amazon is closing down Freevee, it’s free streaming service. Meaning you’ll still get a lot of value out of Prime Video even if you don’t pay a dime to Amazon for the privilege.
Other Ways to Watch PBS
Aside from streaming PBS on Prime Video, there are several ways you can enjoy its content for free on your smartphone, tablet, smart TV, and other smart devices. You could visit its website, pbs.org and pbskids.org, to stream its shows to your device. This makes it one of the free internet TV channels you can watch online. Alternatively, you can download the PBS app and PBS Kids app on Android or iPhone to make it easier to catch your favorite shows.
PBS also recently launched a free channel on Roku called PBS Retro, which features shows from the 80s and 90s for those looking for some nostalgia. So, if you’re looking for quality content to watch when you’re relaxing, PBS should be one of the free channels you should look for.
Streaming platforms were initially seen as a revolutionary alternative to cable TV, but in my opinion, they’ve gotten progressively worse over the past five years or so. Paid plans with ads, declining show quality, and in-app experiences are some of the many reasons why.
Many apps and websites use ad-supported free tiers, and I have no problem with this whatsoever. Businesses ultimately need to make money, and I also think that a lot of people don’t understand how expensive content that’s free for them is to make.
However, if you pay for a premium subscription, you can often get rid of these ads. Streaming services still let you do this but at a higher price than before. When Netflix introduced a paid ad-supported tier in November 2022, many people were unhappy about this.
I think those people have every reason to be upset, too. Besides having ads, the cheapest Netflix subscription also doesn’t give you access to every TV show and movie. While I can understand why Netflix introduced an ad-supported tier, I also think it has worsened the experience.
Max and Disney+ are other streaming services with ad-supported subscriptions.
2 Declining Quality in Shows Available
I’ll happily pay for any subscription that adds value to my life, but I’m also quick to cancel anything that doesn’t. One reason why I no longer watch most streaming services is because the quality of shows has declined.
Some shows and movies are picked up by other streaming services. For example, Rick and Morty is now on Max rather than Netflix. However, this isn’t always the case.
I’d be happy to consider signing up for a streaming service if the show quality was anywhere near the same as in the late 2010s, but until then, I’m happy without them.
Password-sharing crackdowns have been one of the most talked about topics in recent years. Disney+ has started to take password-sharing more seriously, for example, and Netflix has also gotten stricter with sharing passwords.
I understand why streaming services are cracking down on passwords; theoretically, it results in lost revenue from those people signing up for accounts. However, while some people watch streaming services consistently, I believe that many are only interested in a small selection of shows.
Rather than getting a subscription, it makes sense for them to borrow someone else’s password. For the casual user, who doesn’t want to watch lots of shows, I’d argue that these crackdowns are more harmful than good. I think that Max charging more for shared subscriptions is the right alternative approach.
4 Price Increases
I think that people can’t expect subscription prices to remain the same forever. Inflation is a reality for businesses and not just ordinary users. But beyond inflation and operating costs, I do think that greed sometimes falls into the picture.
In 2023, for example, Netflix increased its prices twice. This is one of many reasons that some users think you should avoid subscribing to Netflix. Disney+, meanwhile, raised the cost of its ad-free and ad-supported tiers.
Again, I don’t have a problem with price increases if the product quality increases. But from what I’ve seen when browsing these apps, that is not the case. I also think that constantly raising prices gets exhausting for users, especially those who want to budget their month accordingly.
5 Focusing on Quantity Over Quality
I honestly think that the “more = better” equation is flawed in many cases, especially when it comes to products and offerings. Right now, it feels like many streaming services are focusing on quantity over quality—and if you ask me, it’s leading to a worse overall product.
Sure, users want some diversity in what they can watch. However, I think almost everyone would agree that we also want high-quality content. This is the same way I look at independent creators; I’d rather watch (and produce) one high-quality video per month than multiple low-quality posts per week.
All of these productions cost money, so the budget is clearly there. I would rather that these streaming services didn’t spread themselves so thin and instead invested more in a handful of high-quality projects.
6 A Worse In-App Experience
More often than not, I’ll choose an intuitive and user-friendly app over something that’s difficult to navigate. This is the precise reason why I switched from Spotify to Apple Music. So, unsurprisingly, I’ve stopped using a lot of streaming services because their in-app experience has gotten worse.
Many users have complained about the search filtering on different streaming services, for example. With so much content out there now, it’s vital that users can easily navigate to what they need. While you can improve your Netflix searches with secret codes (likewise on other platforms), but paying customers should have easier access without these.
I’ve also noticed that many apps encounter bugs far more frequently than they used to. There are only so many times you can endure your app crashing mid-show before it starts to get tiresome. Moreover, some streaming services have changed their user interfaces to the detriment of users.
7 Being Too Fast With Show Cancelations
Streaming services are absolutely right to pull shows that nobody watches; keeping them on there is pointless. However, I also think that some show cancelations have been far too quick.
My Lady Jane, Dead Boy Detectives, and Archive 81 are just three examples of canceled programs. I understand being experimental and think it’s a good thing for innovation, but it’s a bit tiresome when programs you start watching are canceled.
It’d be nice if streaming platforms gave programs more of a chance; perhaps keeping them up for a certain timescale would be a good idea.
Competition is good, but I also think that the number of streaming services has become exhausting. This is especially true for people who sign up for certain platforms because they have a show they like and then switch to another. I also think that shows and movies are spread too thin across multiple services now.
I don’t think there’s any reasonable solution at this point other than to consider streaming bundles. Luckily, some streaming bundles will actually save you money.
Streaming platforms are far from dead, but I do think they’ve declined significantly since around 2020. Unfortunately, some services have focused too much on quantity instead of quality. I also believe that many prices aren’t entirely justified. These, combined with worse in-app experiences, make it difficult to deem paying a subscription as worthwhile.
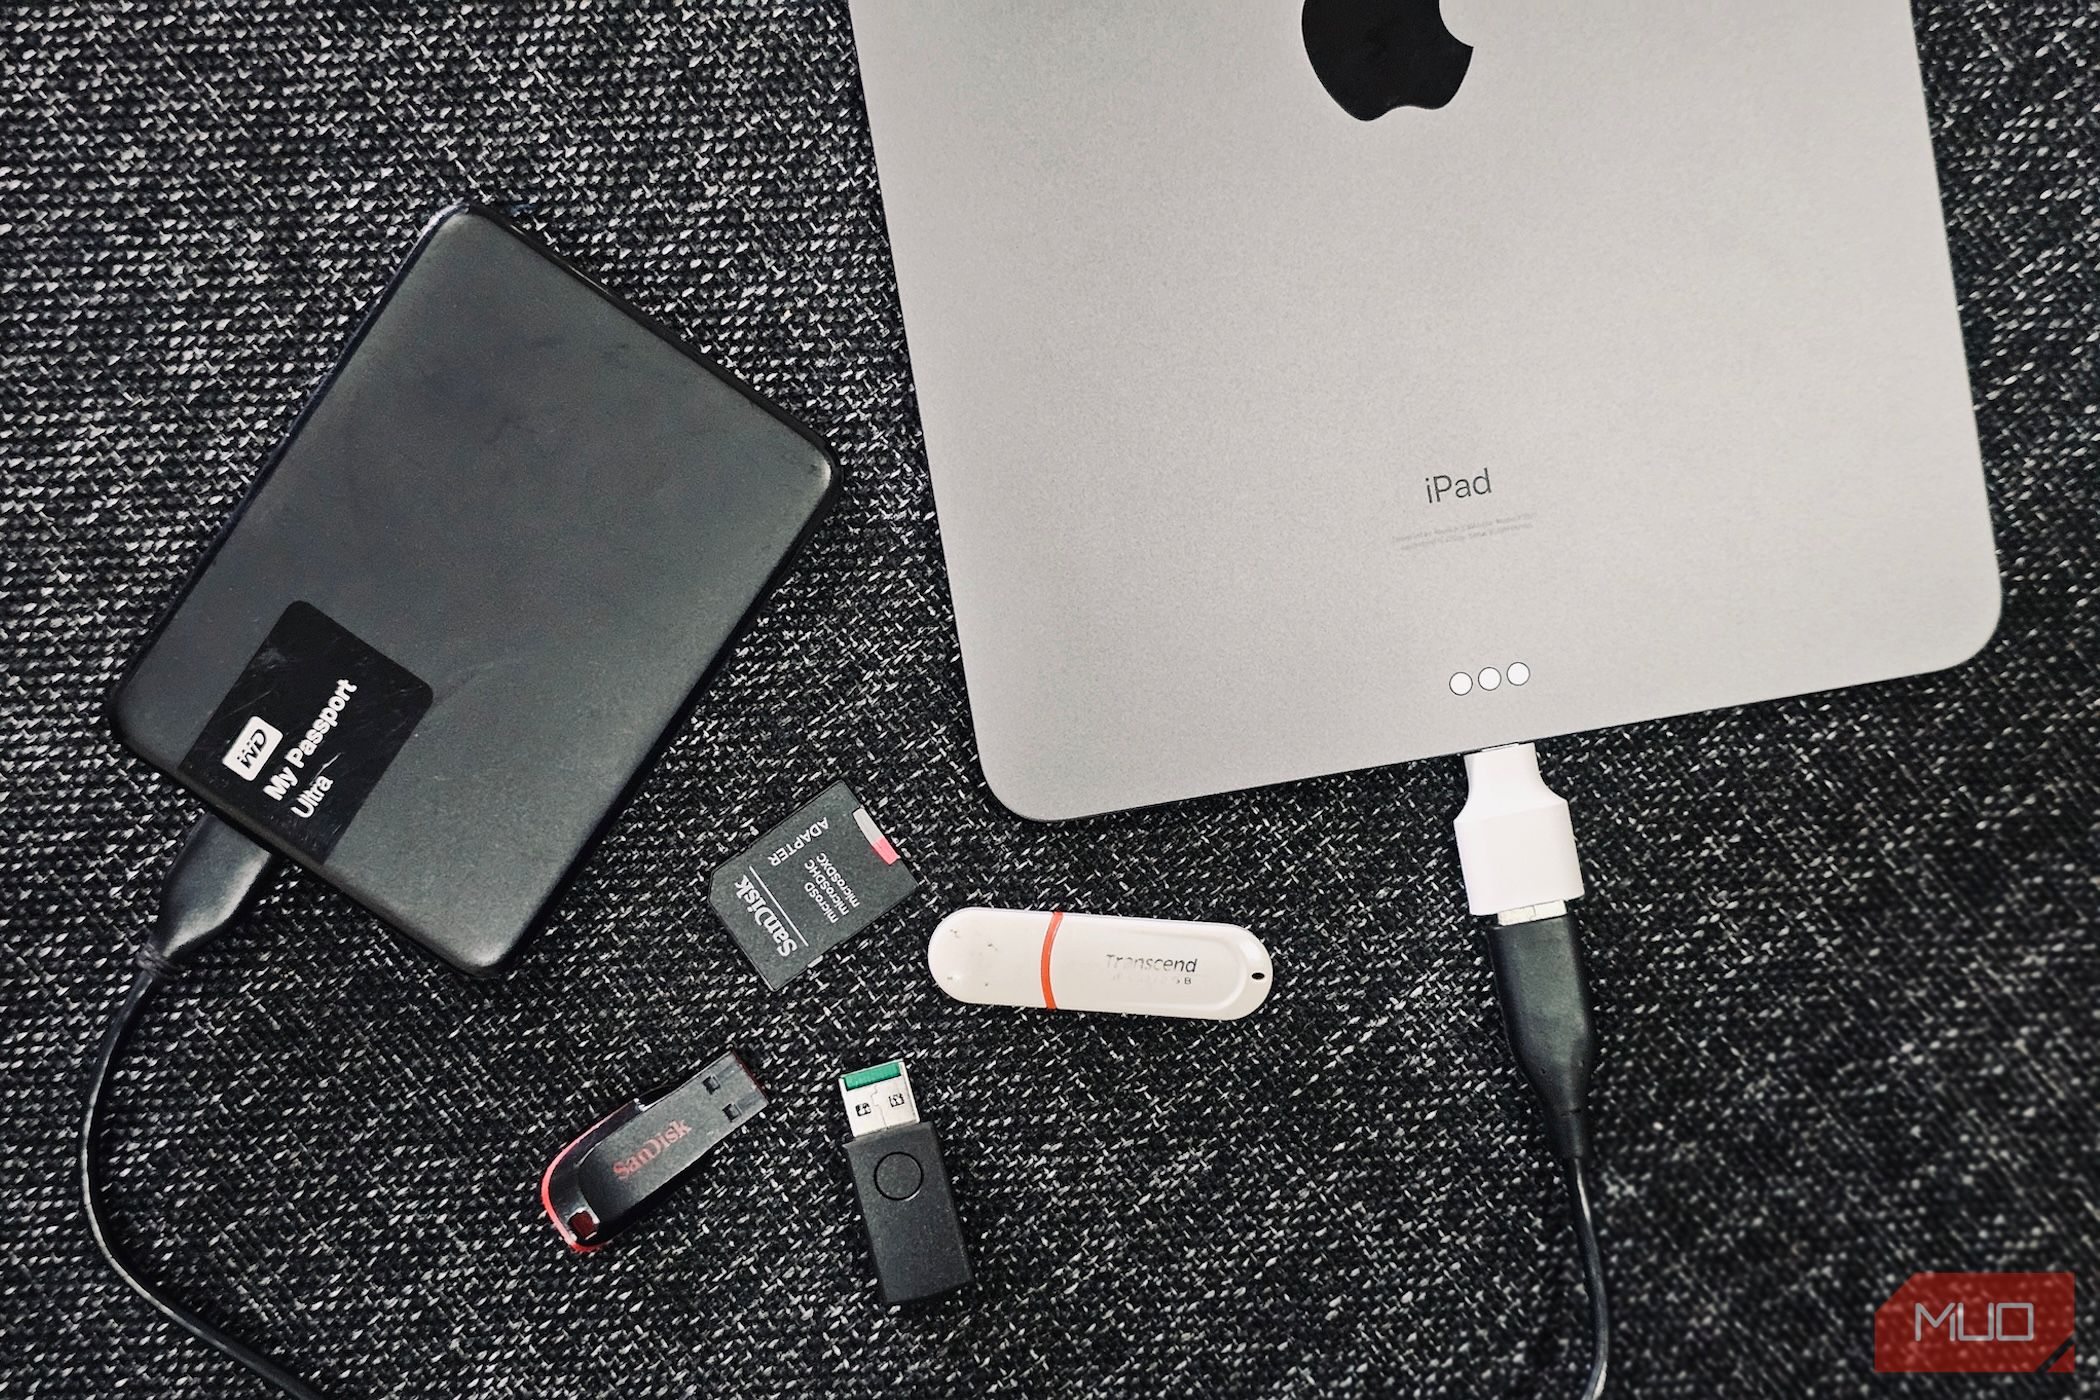
Formatting external drives has never been possible on an iPhone or iPad. However, this changes with iOS 18 and iPadOS 18, which introduce the ability to erase and format external drives using your iPhone or iPad. I’ll show you how to use this feature.
Using the Files App to Format Drives on Your iPhone or iPad
Apple has added a new Erase feature to the built-in Files app. It’s pretty to use, and all you need is an adapter or a USB hub, depending on your iPhone or iPad model and preference. Here’s what you need to do to format an external drive:
Plug in the external drive you want to format using an adapter or a USB hub.
Open the Files app, and you’ll see the drive name under Locations in the left sidebar.
Tap and hold the drive and select Erase.
According to your requirements, choose an appropriate format for the drive between APFS, ExFAT, and MS-DOS (FAT).
If you want to rename the drive, tap the NAME text field at the top and type a new name.
Finally, hit Erase in the top-right corner and tap Erase in the confirmation prompt to begin erasing and formatting the drive.
You’ll now see a loading icon next to the drive, indicating the formatting is underway. Once finished, it’ll turn into a checkmark. You can then proceed to access and use the drive. When you’re done, simply unplug it from your iPhone or iPad.
Choosing the Correct Format for Your External Drive
Choosing the correct file system for your external drive is crucial and boils down to what devices you plan to use it with. Here’s a quick rundown to help you decide:
APFS (Apple File System): Apple’s proprietary file system, APFS, is ideal if you want to use the drive exclusively with Apple devices, like an iPhone, iPad, Mac, or Apple TV. Additional options like Case Sensitive and Encrypted are available with this format. While the latter secures data on the drive, the former treats uppercase and lowercase letters in file names differently to avoid naming conflicts.
ExFAT: This is a great choice if you want the freedom to use the drive or SD card on various devices, including Apple devices, Windows and Linux computers, TVs, Android phones, and digital cameras.
MS-DOS (FAT): It offers great compatibility with older systems. However, it’s a relatively older format and ideal only for smaller storage needs due to its 4GB file size limit.
Having the ability to format drives in the Files app is incredibly useful and eliminates the need for a Mac or PC. However, that’s not all the built-in file manager in iOS and iPadOS is capable of. Thanks to recent iOS and iPadOS updates, you can perform various other tasks with the Files app on an iPhone or iPad.
As great as WhatsApp is for keeping in touch with people, you shouldn’t get complacent when using the app. Keeping yourself safe is also paramount, and you can tweak multiple in-app settings to achieve this. Avoid these WhatsApp mistakes to improve your experience.
1 Letting Anyone Add You to a Group
WhatsApp group chats are a fantastic place to keep up with friends and family members, but it’s vital that you know how to stay safe in WhatsApp groups. One of the best ways to do this is by controlling who can add you to one in the first place.
Follow these steps to control who can add you to a WhatsApp group:
Open WhatsApp and go to Settings > Privacy.
Select the Groups tab.
Choose My contacts or My contacts except… to control who adds you to a group. If you pick the latter, you can tick everyone you want to stop from adding you to a group.
2 Responding to People and Numbers You Don’t Recognize
One of the easiest ways that I avoid phishing scams and other cybersecurity threats is by not responding to any people I don’t know. I do this not only on WhatsApp, but also in my other instant messaging apps. With so many WhatsApp scams, threats, and security risks about, you need to take extra precautions to keep yourself safe.
Each time I receive a message from someone I don’t know, I simply delete the message. If the person persists, and they haven’t made it clear who they are, I block them. Unknown numbers can’t contact me because I’ve stopped them from having the option to do this.
When you receive scam messages on WhatsApp, it’s also important that you don’t click on any links. These are often malicious and can lead to bigger problems, such as identity theft.
3 Forwarding Scams and Unverified Messages
You might forward messages within WhatsApp, but before doing so, you should make sure that they’re safe. This is essential for people that you don’t know, but it’s also a good idea to verify whether someone you know has sent a legitimate message. You never know whether they accidentally clicked on some kind of suspicious link.
I’ve received multiple forwarded messages on WhatsApp that weren’t legitimate, and while I knew this, someone else might not have been so lucky. For this reason, I suggest taking a step back and confirming whether the message is safe. Don’t forward anything from strangers full stop. If it’s a loved one, double-check that they meant to send you the text.
4 Making Profile Information Public
While it’s not the same level of social media as Facebook or Instagram, knowing how to make WhatsApp more secure and private will help keep your identity safe. Not many people know that you don’t have to make your profile information public, but changing your privacy settings in this respect is an excellent idea.
You can adjust each of the following:
Your profile picture visibility.
Your About section.
Who can see when you’re online.
With each of these, you can pick whether you want all contacts to see this information or just a small selection. Some settings, such as your profile picture visibility, let you turn this off for everyone. You’ll find all of these tabs within the Settings > Privacy section.
When you first sign up for WhatsApp, your device will automatically save any media you receive. It took me around two weeks before I found this annoying and I sought to stop this from happening. Thankfully, WhatsApp lets you stop photos and videos from automatically saving.
To verify that everything is working as it should, get a friend to send you something and see if it saves to your camera roll. This is especially handy when you’re part of groups that send lots of media and memes that can hog your phone’s storage.
6 Not Silencing Unknown Calls
While you can ignore unknown calls, I think that silencing them on WhatsApp is a much better alternative. You stop the issue from constantly bugging you by turning on this feature, which will instantly limit the number of scams you can potentially fall victim to.
WhatsApp lets you automatically silence unknown callers to avoid spam callers. The main drawback is that you may miss calls from delivery drivers if you order items or groceries online often. Besides silencing unknown callers, you might want to do other things to keep annoying WhatsApp notifications under control.
7 Not Enabling Backups
You can’t control what happens to your phone beyond a certain point. It might break, you might lose it, or you might simply want to upgrade your device. Backing up your conversations is important, but you also want to ensure that everything is encrypted.
By default, your WhatsApp backups are not encrypted. However, you can change this setting by following the steps below.
Go to Settings > Chats.
Select the Chat backup tab.
Tap End-to-end encrypted backup.
Select Turn on.
WhatsApp will then ask you to create a password. Select Create password to do this. Alternatively, you can tap Use 64-digit encryption key instead (I recommend setting up the password).
Besides encrypting your chat backups, you can also create encrypted lists, reminders, and files in WhatsApp.
Adjusting your privacy settings, improving your WhatsApp quality of life features, and encrypting your chat backups mean nothing if a hacker can still get into your account. For this reason, I suggest adding extra verification to your account.
I recommend adding two forms of verification. The first is some kind of biometric identification (i.e. Touch ID or Face ID).
You should also set up a PIN code to access your account. This works in the same way to accessing your phone in the first place. Here’s how to do it:
Go to Privacy > Account and select Two-step verification.
Press Turn on to begin the process of creating your WhatsApp PIN.
Enter your PIN code.
Making your WhatsApp experience better is very straightforward, and a couple of simple adjustments will help you do this. Fine-tuning your privacy is essential, and switching on your PIN code is a good idea. However, you should also think about how to restrict what information strangers can see about you. Meanwhile, switching off automatic content downloads is ideal for saving space and keeping your camera roll organized.
Google’s Gemini AI model is great to use as a chatbot, but the company aims to roll it out to other devices to perform different jobs. Now, the tech giant is rolling out its powerful AI tool to Google Home, where the assistant can help you get even more out of your devices.
Beforehand, Google Home cameras could only identify people, motion, and packages left on doorsteps. While this was pretty impressive by itself, the new Gemini integration allows your cameras to understand better what it’s seeing. Google gives an example where it can tell “whether your dog is napping peacefully or digging up your prize-winning petunias.”
Because Gemini understands what’s going on, you can ask it questions about what happened during the day. The given examples include “Did the kids play in the backyard this afternoon?” and “Was a delivery truck here today?” Google Gemini’s LLM can understand what you’re saying, get the context, then search its database for anything that matches your query.
If setting up smart devices puts your head in a spin, Google wants to use the power of Gemini to make it a lot easier. Using “Help Me Create,” you can ask Google Gemini to build a smart home automation by describing what you want it to do using natural language. Google Gemini will then parse your request and create something to match it.
Here are some examples Google gave as Help Me Create commands:
Security:
Remember to lock up at night
Make it seem like someone’s home
Health and Wellness:
Help me sleep better
Set up morning workouts
Convenience at Home:
Announce dinner time
Getting Things Done:
Remind me to take out the trash
Help me remember to pick up packages
If you want to give these new AI features a spin, sign up for the Google Home Public Preview and download the latest update.
I’ve owned quite a few tablets but never an iPad. I’ve seen the reviews, and I won’t argue that Android tablets are better (though, in some ways, they are). However, I have other reasons for exclusively buying Android tablets. So, let’s take a look.
1 Android Tablets Are (Usually) Cheaper
Justin Duino / MakeUseOf
Not all Android tablets are cheap. The Samsung Galaxy Tab S10 Ultra, which has a gorgeous 14.6-inch screen, costs over $1,000, and that’s well in the iPad Pro territory. But on the opposite end of the spectrum, you can buy an Android tablet for under $100.
I don’t recommend getting a bottom-of-the-barrel tablet. They’re often slow and janky on day one (and only go downhill from there). But if you extend your budget slightly, you’ll find plenty of tablets for around $200 that are more than adequate.
Consider the Lenovo P11, for example, which has a place on our list of the best tablets for note-taking. Your money can snag you an 11-inch screen with solid storage and a stylus. For comparison, the cheapest iPad starts at $349, and an Apple Pencil sets you back another $79.
2 I Just Want a Bigger Screen for Watching Videos
When I was in college, I bought a Toshiba Thrive tablet and used it as a laptop replacement. By the time I got my hands on a Nexus 7, I knew I would instead use a tablet primarily for entertainment (even though there are far more creative ways to use a tablet). Tablets are great for watching YouTube videos while cooking or cuddling up in bed to watch Disney+.
I don’t need a powerful tablet stacked with RAM to watch videos. I don’t need much storage space either, especially if I use streaming services. All I want is a large screen. Would I prefer that display to be high-resolution and super bright? Sure, but that’s not motivation enough to skip the cheaper model.
3 Android Tablets Are Better for My Kids
Bertel King / MakeUseOf
The most recent tablets I purchased weren’t for me but for my kids. Cheap Android tablets are something I can slap a case on and hand to my kids without worrying too much as they bumble throughout the house, leaving the tablet on the floor to be stepped on or hanging off the edge of a table to be knocked over.
Android tablets don’t have the broad range of tablet-specific apps that iPads have, but that isn’t a big deal for my kids. I can install the streaming apps they want and a handful of games, and that’s enough. I can get two new Android tablets, cases for both, and some spare chargers for the price of an iPad.
4 I’m Invested in the Android Ecosystem
I have never owned an iPhone, iPad, or MacBook. My last Apple product was the adorable candy-colored iMac G3 from the Mac OS X days. In other words, I am not at all keen on Apple’s ecosystem.
I primarily use an Android phone, but that’s not because it’s cheap. I could’ve purchased an iPhone for the amount of money I dropped on the foldable phone I now use as my daily driver. I’m familiar with Android the way most people are familiar with Windows, macOS, or ChromeOS. Plus, I heavily rely on Samsung DeX, which lets me use my Android phone as a PC.
As a result, it’s beneficial for me to stick with Android tablets. I know which apps are available. I can manage my kids’ screen time from my Google account. My family can share our purchased apps and books. I don’t need to create a new Apple account to buy apps or make in-app purchases for them.
On the flip side, if I were an Apple user, the convenience factor alone would be a reason to regret buying an Android tablet instead of an iPad.
Still, even if I can’t recommend an Android tablet as the best option for everyone, I find them more interesting to follow. New Android tablets come out all the time, with options as wildly different as the E-Ink Boox Tab Ultra C Pro we reviewed and the gaming-oriented Razer Edge handheld. An iPad may be the best option for most people most of the time, but that doesn’t mean it’s the best choice for you.
Plenty of apps claim to protect your identity online, but rarely do they put their money where their mouth is. NordVPN aims to change that with its new NordProtect service, which claims to offer up to $1 million in compensation for damages if it fails to do its job properly.
NordVPN’s NordProtect Service Will Reimburse Lost Wages and Legal Fees
A NordVPN blog details how NordProtect works. It comes with two flagship features: the first is a dark web monitor that keeps an eye on personal data leaks and alerts you if your details appear in one. The second keeps tabs on your credit score and reports when it notices strange activity, like someone taking out a card in your name.
NordVPN seems so confident in its ability to protect you with NordProtect that it’s willing to compensate you if it fails:
It’ll take time and financial resources to deal with the consequences of identity theft. You might even have to take time off work. With NordProtect, you can apply for reimbursement of eligible expenses up to $1M. These expenses may include credit bureau reports, replacement of documents, application fees, legal fees, lost wages, and mental health counseling.
NordVPN states that it will also assign you an identity restoration case manager if it accepts your case. The manager will then do all of the work required to get your identity back and prevent any further damage.
If you want to use NordProtect, you’ll need to perform a few steps. First, you must be in the US to take advantage of this service. Second, you need to subscribe to NordVPN Prime, which is the highest subscription tier. Third, visit NordProtect and get yourself set up. This will enroll you with NordProtect and enable all of its alerts.
While some might prefer smartphones with razor-thin bezels for their sleek and modern aesthetic, such devices are not without compromise. Bezels serve different purposes, and with this in mind, I wouldn’t buy any smartphone with razor-thin bezels. Let me explain why.
1 Increased Risk of Damage
One of the biggest drawbacks of razor-thin bezels is that they leave the screen’s edges more exposed, making the phone more vulnerable to damage. Although bezels make your phone less aesthetic, they serve an important purpose: protecting the screen. They can absorb impact when you accidentally drop your device, reducing the likelihood of screen damage.
With razor-thin bezels, your phone’s display has less protective material; therefore, even a minor drop can mess it up. Mind you, smartphone screens are expensive to replace. For instance, according to Samsung, replacing a damaged Galaxy S24 Ultra screen will cost you $259. It gets worse if you own an iPhone 16 Pro Max, as that’ll cost you about $379, according to Apple.
These high repair costs are one of the major reasons to purchase a premium warranty for your phone. And that’s a premium you’ll have to be willing to pay upfront or on a monthly basis.
Another downside that makes phones with razor-thin bezels a no for me is the increased likelihood of accidental touches. If a phone has sizeable bezels around it, there’s ample space for holding the device. Consequently, it’s much less likely that you’ll accidentally touch the screen.
However, if the bezels are thin, you’ll experience the opposite. With narrow bezels, you get less surface area for holding the device. Therefore, it’s highly likely that you’ll unintentionally touch the screen’s edges.
That will happen anytime you interact with the device. For instance, while typing, your palms may occasionally touch the screen, adding or removing characters from your messages. And if you’re into gaming, it will be hard to avoid accidental touches.
Samsung encountered this issue when making phones with curved displays (like the Galaxy Note Edge and S6 Edge+). To fix it, the company had to allow users to adjust the sensitivity of the edges around the display with a dedicated app called EdgeTouch.
3 Limited Hand Grip
Bezels provide a buffer area around a phone’s screen that can be used to comfortably hold the device for a firm grip without touching the display. It’s why the size of screen bezels matters. A phone with narrow bezels offers limited space to grip, which can make the device feel slippery and fragile overall.
I much prefer a phone with slightly larger bezels, as they provide enough room for a comfortable hand grip. Considering how smartphones have grown in size because of the general consumer preference for large phones, having enough bezels gives you a more secure hold.
Smartphone makers have to make the device’s internal design complex and compact to achieve razor-thin bezels. This makes the device much harder and often more expensive to repair.
With a compact design, there’s less space for working on the device, which leaves little room for maneuvering without risking further damage. This is especially true for screen replacements, which is one of the most common phone repairs.
I’m not a DIY enthusiast by any means, but if you’re one, you probably already know that compact electronic designs make it hard to self-repair any device.
5 You’ll Notice More Glare and Reflections
Razor-thin bezels can also lead to more glare and reflections. This is because bezels on phones help reduce glare, especially while using the phone outdoors. They achieve this by blocking external light, thus minimizing reflections. Light can easily hit and reflect off the screen’s edges without sufficient bezels around the display, resulting in poor screen visibility, especially in bright environments.
Phones with razor-thin bezels are more impressive aesthetically. However, this aesthetic has practical drawbacks that make it a no-go for me. From limited hand grip to increased risk of accidental touches and damage, repairability concerns, and a high risk of glare and reflections, I don’t see myself buying a phone with razor-thin bezels.
Excel makes managing complex data easier, but a few common mistakes can turn that ease into frustration. These mistakes can lead to inaccurate results, make debugging errors difficult, or even cost you hours of work. So, what are some of these pitfalls you must avoid when working in Excel?
1 Relying on Hard-Coded Values
As a beginner, one common mistake I made was using hard-coded values in formulas, which means directly typing numbers or values into a formula instead of referencing cells. This practice makes spreadsheets less flexible and harder to update because each instance has to be manually adjusted if you change the data.
Updating formulas manually can be tedious and increases the chances of errors. Instead, you must reference cells in your formulas. This way, you only need to update a value in one location, and all related formulas will automatically adjust, making the spreadsheet much easier to manage and maintain.
2 Making Formulas Too Complex
I avoid using overly complex formulas to keep my spreadsheets easy to manage, debug, and modify. While Excel lets us use nested functions, I avoid stacking too much into a single cell. This makes my spreadsheets easier to understand and simplifies things for others who may need to work with them.
I create a few extra columns for intermediate calculations that I can reference in my main formula later. Breaking down complex logic this way makes my formulas less error-prone. Also, I can update data or formulas with minimal effort whenever adjustments are needed. So, always keep your formulas simple from the beginning to avoid future frustration.
3 Printing Without a Preview Check
When I first started using Excel, I used to print spreadsheets without previewing them, resulting in cut-off data, blank pages, or misaligned content. Since Excel doesn’t automatically format data perfectly for printing, I had to reprint multiple times, wasting ink, time, and money—not to mention the frustration.
Now, I always preview my spreadsheet before printing, which allows me to catch formatting issues and adjust margins, orientation, and scaling to get a perfect print. This way, I ensure all essential data fits on the page and is easy to read. If your printouts often turn out poorly, take a moment to preview them first—it’ll save you time, effort, and resources.
4 Creating Too Many Worksheets
I used to create too many worksheets in a single workbook, making it difficult to locate data or calculations for myself and others. This habit also complicated referencing data across multiple sheets in formulas and made auditing a challenge. Plus, each additional sheet increased the file size, slowing down performance.
To avoid these issues, I always consolidate related data into a single sheet and organize it with tables. Instead of creating separate sheets, I use filters or pivot tables for specific subsets and keep worksheet names clear and consistent. If my workbook grows, I add a summary or index sheet with hyperlinks for easy navigation.
5 Missing Out on Time-Saving Excel Formulas
Many users, unfamiliar with advanced Excel functions and formulas, handle tasks manually that could easily be automated. This slows down data processing and increases the chances of mistakes. Also, it makes it difficult to maintain consistency, with manual updates becoming a hassle later on.
I always check if Excel has a function to automate repetitive tasks that would otherwise take time. You can explore free resources or consult Excel forums. Microsoft Copilot is also a helpful tool for finding the right formula. If you’re hesitant about using a formula to avoid disrupting your data, try it on a sample set first to build confidence.
6 Forgetting to Enable Auto-Save
I used to lose hours of work whenever Excel crashed unexpectedly or when I accidentally closed a file without saving it. Because of this, I had to start over from scratch, miss deadlines, and deal with unnecessary stress. To prevent this, I now rely on Excel’s Auto-Save and AutoRecover features.
Auto-Save saves my data in real-time; if connected to OneDrive, it also creates a backup copy. Auto-Recover saves my files at regular intervals so I can recover unsaved files in case of a crash. Knowing my work is safe, I no longer worry about power outages, crashes, or forgetting to save. It’s good to have peace of mind!
7 Not Securing Sensitive Information
Like many Excel users, I used to overlook basic security practices and shared my spreadsheets without password protection. This increased the risk of unauthorized access to my files, whether on my device or the recipient’s. When using public Wi-Fi, my sensitive documents could have easily been intercepted by cybercriminals, though it never happened.
Now, I always password-protect my Excel files before sharing them and only provide the password to specific recipients. This ensures that even if someone intercepts my documents, they won’t be able to access the content. I also use Excel’s feature to lock specific cells, keeping certain data hidden from others without locking the entire file.
8 Ignoring Proper Data Formatting
I underestimated the importance of proper data formatting in my early days of using Excel. This used to make my spreadsheets hard to read, analyze, and update. When shared, they often confuse recipients, leading to misinterpretation of data. Also, the poor formatting used to make my spreadsheets look unprofessional.
Now, I use the correct formats for currencies, percentages, dates, and more. I choose simple fonts, highlight important data with eye-friendly colors, and align numbers to the right, text to the left, and headings to the center. To ensure sorting and filtering work correctly, I avoid merging cells and instead use alignment options to manage wider data.
9 Skipping Regular File Backups
While Excel features like Auto-Save and Auto-Recover help protect against accidental data loss in a crash or power outage, there’s always the risk of original file corruption, losing the device that contains it, or accidentally deleting it. Without a backup, you could end up recreating lost work, which used to be very frustrating for me.
I always back up my documents in multiple locations to avoid the hassle and missing deadlines. I’ve connected OneDrive to automatically save a copy of my data and the version history, which is extremely helpful when referencing different versions of my file. Also, I back up my files to an external drive to ensure my data is safe and accessible from multiple places.
The upfront—or recurring—cost of a premium warranty plan for smartphones can feel excessive. However, if you look at the larger picture, they make a lot of sense. Here are the top reasons why I recommend purchasing a premium warranty plan.
1 Your Device Will Be Covered for More Than a Year
Most smartphone manufacturers cover hardware defects in phones for 12 months under a limited warranty plan. However, problems that arise beyond this period almost always require a paid service. And with how fragile electronic devices can be, in my opinion, this one-year guarantee just isn’t enough.
Purchasing a premium warranty plan—which often provides extended coverage—means you’re guaranteed to be covered against problems like a malfunctioning motherboard, green lines on your smartphone’s display, or a significantly degraded battery at no cost or a minor service charge.
2 Guaranteed Cost-Effective Repairs Against Accidental or Water Damage
Circling back to the limited warranty that comes with your device, a big limiting factor here is that it’s restricted to manufacturing or component failures, particularly those that don’t involve physical or water damage.
So, if you have a broken screen—or back glass—or dropped your phone in a pool, you’ll have to pay a hefty sum to get it fixed. However, if you have a premium warranty plan, these damages are covered for a nominal fee.
For example, look at the repair estimates for an iPhone 16 Pro—Apple’s 2024 flagship. According to Apple, if you have an AppleCare+ plan—which costs $10 a month or a lump sum of $199 for two years of cover (from the time of purchase)—a screen replacement will only cost $29. Otherwise, it’ll cost you $329. That’s $300 more, almost a third of the phone’s cost for just fixing a broken screen.
It only gets worse if there’s water damage. In this case, the standard repair fee is $649, but only $99 with an AppleCare+ plan. Google and Samsung also offer premium warranty plans, and their pricing is similar to Apple’s for the most part.
3 Priority Access to Support Teams
Calls with support teams are a significant part of the repair experience, and premium warranty plans often come in handy here, too. In the age of automated responses (or IVRs), you can get through to a person on the other side of the line or a more experienced representative who can respond to your queries quickly.
I have an AppleCare+ plan, and when I wanted to get my iPad Pro with a failed Face ID module replaced, I was directly put in touch with a senior escalation team member and was able to get a new unit within a week.
Your preferred warranty plan can also include perks like 24/7 access to technical experts, so if you have a software-related problem, you can expect to quickly find a resolution.
4 Onsite Services or Express Replacements to Save Time
Lastly, premium warranty plans can come with time-saving perks like onsite services or express replacements. These are especially useful if you’ve found it difficult to visit a local service center or need a replacement device in your hands before you ship your current one for repairs. However, remember that customer services vary from region to region.
Onsite services can range from repairs and diagnostics at your doorstep to pick-up and drop-off services via couriers. On the other hand, express replacements can have you up and running quickly with a new device, skipping the wait for a repaired phone to come back to you.
With these advantages, I think premium warranties make a lot of sense. Be it the ease of setting up repairs, the lower cost of getting fixes, or reduced timelines, especially for expensive flagship phones that you may keep for at least three years.
The iPhone 16 models come with a new button—the Camera Control. As the name implies, it revolves around the camera and aims to improve the user experience while allowing for new features. I’ll show you how you can make the most of it.
Open Apps With Camera Control
Out of the box, a single press of the Camera Control button will launch the Camera app on your iPhone. But like with the customizable Action button on your iPhone, there are a couple of ways to personalize this new button.
To do this, head into Settings > Camera > Camera Control. Here, you can choose between Single Click and Double Click to launch the camera and pick which app works with the button.
Remember that apps like Instagram and Snapchat directly launch the in-app camera when accessed with the Camera Control button. So, it’s a great way to quickly snap an image or video and post it if you’re active on those platforms.
Master the Gestures for Camera Control
Aryan Surendranath / MakeUseOf
If you’re sticking with using the Camera Control button to launch your iPhone’s camera, the next thing to do would be to master its control scheme (or gestures) for the Camera app.
You can use four actions: a single light-press, a double light-press, a swipe action, and a physical press (as you do for the Power button). Plus, there are six settings that you can adjust: Exposure, Depth, Zoom, Cameras, Style, and Tone.
As of iOS 18.1, here’s what each action will do:
Single light-press: Bring up controls to adjust the last selected setting.
Double light-press: Bring up a carousel to choose from the six settings.
Swipe: Scroll between the six settings or adjust values that will impact the image.
Physical press: Capture a photo or start a video recording.
If you head into Accessibility > Camera Control
, you can also change which controls are available and how much pressure is required to activate the light-press actions.
Experiment With Third-Party Camera Apps
Aryan Surendranath / MakeUseOf
Lastly, Apple has opened up the Camera Control button to third-party app developers. This means many of the best third-party camera apps can incorporate new tools, ways to control the camera, and more to improve the user experience.
During the “It’s Glowtime” iPhone event, Apple showcased Camera Control’s capabilities with Kino. This pro video camera app allows you to control the grid on-screen during recording, letting you frame your content to match a specific recording format, social media app, or even your own creative aesthetic.
The Camera Control button can be useful if you’re a video creator like me. I’m still figuring out the finer details of using this new button in my workflow, but it has been useful when I need to capture a photo or get a clip quickly. Not to forget, Visual Intelligence—a significant AI feature coming to supported iPhones—revolves around this button. You’ll be the first to know if it changes how I use the Camera Control.
Google Sheets is great for analyzing data, but sometimes you need to include charts in a Google Docs document. Luckily, there are easy ways to import charts from Google Sheets.
How to Import a Google Sheets Chart Into Google Docs
Using Google Sheets as your data source comes with a significant benefit—the ability to update charts across multiple documents easily. By linking your charts to a single spreadsheet, any changes you make to the data can be reflected in all linked charts, saving you time and effort.
Importing charts from Google Sheets into your Google Docs is a straightforward process. You can either copy the chart directly from the spreadsheet or use the built-in Import feature in Google Docs.
Import a Chart by Copying from Google Sheets
To add a chart from Google Sheets to your Google Docs document by copying it, follow these steps.
Open the Google Sheets spreadsheet containing the chart you want to import.
Click on the chart to select it. If the chart is in edit mode, you may need to double-click.
Use the three-dot menu in the upper-right corner of the chart and select Copy chart.
Navigate to your Google Docs document where you want to insert the chart.
Click where you want to place the chart and press Ctrl+V (Windows) or Cmd+V (Mac) to paste the chart.
A dialog box will appear asking if you want to link the chart to the spreadsheet. Linking allows for updates in the document when the source data changes.
Insert a Chart Directly from Google Sheets
You can also use the following alternative method to insert charts from Google Sheets into your Google Docs document.
Open your Google Docs document where you want to insert the chart.
Go to the Insert menu in the toolbar and hover over the Chart.
In the sub-menu that appears, click From Sheets.
A new window will open, displaying your Google Sheets spreadsheets. Select the spreadsheet containing the chart you want to insert.
Select the desired chart from the list of available charts and click Import.
This method is convenient when you want to insert a chart without leaving your Google Docs document.
Updating and Synchronizing the Chart
When you import a chart from Google Sheets into your Google Docs document, you have the option to link it to the source spreadsheet. This allows the chart to be updated whenever changes are made to the data in the linked spreadsheet.
To update a linked chart, click on it and select Update from the menu that appears. But if you want to unlink the chart from its source data, click on the three dots and select Unlink instead.
Customizing the Imported Chart in Google Docs
Once you’ve imported a chart from Google Sheets into your Google Docs document, you may want to customize its appearance to better fit your document’s style and layout. While there are basic options to edit images in Google Docs, most of the changes need to be made to the original Google Sheets spreadsheet.
To resize the chart within your document, simply click on it and drag the handles that appear on the corners. This allows you to make the chart larger or smaller to suit your needs without affecting the chart’s proportions or data.
If you want to try other different chart types—for example, from a bar chart to a line chart—you’ll need to make this change in the original Google Sheets spreadsheet. Open the spreadsheet, click the chart > three dots > Edit chart and use the Chart editor sidebar to modify the chart type and other settings.
In Google Sheets, you can edit the chart title and add an axis and legend to better describe your data. However, keep in mind that these customizations will only affect the chart in the spreadsheet. You’ll need to manually update the linked chart as described earlier to see these changes reflected in your Google Docs document.
VPNs encrypt data for privacy, while firewalls actively monitor and block harmful traffic.
VPNs cannot protect against all threats like malware, phishing, or tracking.
Using both a VPN and firewall provides better security by combining privacy with active threat monitoring.
Using a VPN alone won’t fully protect you online. Understanding how VPNs and firewalls differ and why using them together offers better security will help keep you safe.
What’s the Difference Between a VPN and a Firewall?
VPNs and firewalls both enhance security, but they do so in different ways. A VPN encrypts your internet connection, masking your IP address and shielding your online activity from prying eyes like Internet Service Providers (ISPs). Think of it as adding a layer of privacy, especially when using public Wi-Fi.
In contrast, a firewall acts as a gatekeeper for incoming and outgoing traffic on your network, deciding what gets in and out. While VPNs protect data in transit, firewalls actively monitor and block potentially harmful traffic, defending your device from malware, phishing attacks, and other threats that VPNs alone can’t address.
Why a VPN Alone Isn’t Enough for Complete Security
DALL-E/MakeUseOf
Think a VPN alone makes you invisible? Think again. Although VPNs provide valuable protection by encrypting your data, they don’t offer complete anonymity or guard against all threats. Websites can still track you through cookies, browser fingerprinting, and other methods, even if your IP is hidden. And if your VPN provider logs any of your activity, that data could still be at risk if accessed or subpoenaed.
VPNs also cannot protect against malware or phishing attacks, among the most common cybersecurity threats. While a VPN can secure data on a public network, it lacks the functionality to identify or block malicious links and downloads.
How Firewalls Protect You Where VPNs Can’t
Ever wonder how firewalls keep you safe online? While a VPN is all about privacy, a firewall takes a more active role; it’s constantly on the lookout for any suspicious data trying to get through. By blocking unauthorized access, a firewall can keep malware, phishing attempts, and other cyber threats at bay before they even reach your system.
Personally, I use Norton 360, which includes both a VPN and a Smart Firewall. The VPN encrypts my internet connection, keeping my data private, while Norton’s Smart Firewall actively monitors and blocks any unwanted or suspicious traffic. Together, they create a stronger shield, protecting my online activity from prying eyes and defending against potential cyber threats. For most users, this combination offers a convenient and effective way to enhance privacy and security.
Why You Need Both a VPN and a Firewall
The truth is, for the best security, it’s smart to use both a VPN and a firewall. A VPN hides your online activity and protects data as it’s transmitted, while a firewall actively filters what enters and exits your network. Together, they cover more ground, giving you a stronger shield against a range of threats.
I can often easily spot phishing scams, but around a month before penning this piece, I very nearly fell victim to one. It was one of the most legitimate-looking emails I’ve received, which made it even scarier. Fortunately, I acted fast to reduce the damage.
What Did the Scam Look Like?
One afternoon, I was innocently checking my Gmail inbox. Most of the messages weren’t anything to shout home about, but one in particular.
Its subject line?
“Your Invoice for $999” from an account claiming to be PayPal. According to this email, I had purchased something from eBay. For context, I’m based in Denmark, and we don’t have eBay here. I haven’t used the website for over four years when I was living in the UK.
While I’ve heard of common eBay scams, this was the first time I thought someone had used my account. So, as anyone would, alarm bells started ringing in my head. Had someone stolen my payment details? If so, how did they get them?
Why Did I Almost Fall for the Scam?
While I know the most common phishing attacks, this scam initially felt legitimate for several reasons. First, Gmail didn’t mark it as dangerous, and it ended up in my main inbox folder. Gmail is often very good at determining when someone’s trying to scam you. Usually, I see a message like this:
Another reason why this scam attempt initially looked legitimate is because it used the same formatting as you’d expect from a PayPal invoice. I use PayPal quite frequently, and its branding is pretty familiar. To their credit (I guess), the scammer did a good job of mimicking a PayPal invoice. Clearly, someone had spent a lot of time learning how to use design software.
Thirdly, the email featured good spelling and grammar. One of the easiest ways to spot phishing emails is poor use of English, but that wasn’t the case this time.
Why I Realized I Was Being Scammed
I always adopt a zero-trust policy with my emails if I know I haven’t bought a product or service. Since I was on high alert, I started looking for signs of being scammed; I usually receive a notification when money goes out of my PayPal account, so I initially checked my phone. But I saw nothing, so I started digging deeper.
Secondly, I noticed no verified tick next to the email. Every PayPal email address I’ve noticed in Gmail has a blue checkmark, but that wasn’t the case with this scam email. For example, when I contacted PayPal about the issue, you can see the verified tick next to their official account:
I also realized that the email address wasn’t associated with PayPal. Although quite similar, it didn’t use an official PayPal domain.
How I Minimized the Damage
Unfortunately, there are numerous PayPal scams, and while prevention is the best option, you’ll sometimes need to enter damage limitation mode. I took some essential actions to minimize the potential impact, which I’ve listed them below.
1. I Did Not Reply to the Email
It was vital to take a step back and not do anything I may have regretted, such as responding to the email. A scammer isn’t going to admit that they’re trying to take money from you, and I would have gotten nothing from doing so.
Instead of responding to the email I received, I later sought official customer support. While I initially deleted the message, I reversed it so I could forward it to the authorities.
2. I Didn’t Hand Over Any Important Details
You’ll sometimes receive scam attempt emails that ask for sensitive information, such as your bank details. Under no circumstances should you ever give these details. No company will ask you to submit such information via email, so you’re putting yourself in needless danger.
I made sure that the scammer didn’t have access to anything important. They clearly knew my PayPal email address because otherwise, they wouldn’t have been able to send me a message. So, I changed my password. This experience also reminded me that it’s so important to enable two-factor authentication (2FA) for your PayPal account.
3. I Checked My Bank Statements to See if Money Had Gone Out
Besides securing my PayPal account, I also wanted to confirm that someone couldn’t access my account. My next step was to check my linked bank accounts and statements to ensure there weren’t any strange invoices. Thankfully, there weren’t.
I’ve been scammed once before, and when this happened, I immediately canceled my bank cards. Because I acted fast, the bank could also cancel the transaction. So, I adopted the same principles this time.
4. I Reported the Fake Invoice to PayPal
It would’ve been very easy to sit back and relax after confirming that I hadn’t fallen victim to a phishing scam. However, I also did not want others to experience what I had. PayPal has an email address that deals with phishing attempts, and I forwarded the fake invoice to this.
I don’t know if that did anything, but I at least did everything that I could. You can do several other things to determine if a PayPal email is genuine or phishing before sending it to the company.
5. I Deleted the Email and Didn’t Click on Any Links
You should never click on links from emails that you don’t recognize, and I applied the same logic in this situation. Even if these links looked like they were from PayPal or eBay, I didn’t want to risk infecting my computer with malware.
Once I sent the invoice to PayPal, I deleted the email and blocked the sender’s address. At the very most, any future scam attempts should appear in my Spam folder rather than the main inbox.
My Advice for Anyone Who Might Fall Victim to This Scam
If you receive a phishing email, I suggest doing everything I did here. Always look for intricate details that could be red flags, such as illegitimate email addresses and no verification checkmark. Never reply to the message or click on any links, either.
You should also check your bank account and contact them so they know what’s happened. If you use eBay, I suggest contacting its customer support team to ensure nobody has bought something from your account. Moreover, you should check your purchase history.
It’s also vital that you don’t give any sensitive information to the scammer. If you want to go a step further, your email client should let you report a message as phishing.
Rigid flex boards combine the best of both worlds, combining the stability and rigidity of a hard circuit board with the flexibility and adaptability of a soft one. This hybrid design has multiple benefits, including reducing costs, cutting down on space requirements and eliminating the need for connectors in many applications. Rigid flex boards are often used in products that require extensive bending, vibration or movement, such as medical or military equipment.
Flex PCBs are able to bend and twist without cracking, which can be an important factor in these types of environments. They also have improved reliability in harsh environments because they can withstand high levels of vibration, shock and temperature fluctuations. Rigid flex boards are also more versatile, with the ability to be bent into various shapes and sizes, making them useful in a wide range of applications.
Using pcb flex rigid for your project can save space, eliminate the need for costly connectors, and reduce the overall weight of your device. However, the flexible properties of these boards can present challenges if not properly planned and executed. Taking the time to communicate with your ECM’s engineering team throughout the process can help ensure that your rigid flex design is successful.
How do PCB flex rigid boards save space?
When designing a pcb flex rigid, consider the effects of flexing on the metal plating. Thicker metals are less likely to flex and break, while thinner metals are more susceptible to buckling. To avoid buckling and other metal failures, it’s important to keep track of the thickness of your metals and to plan for the maximum bending radius that will be possible for the design.
Also, be sure to take into account the potential stress that will be placed on the flexible part of your design during the forming process. Mechanical stress in the bend area can weaken the copper circuits and cause premature failure. To prevent this, it’s important to route traces perpendicularly to the bend line and use dummy traces for support when necessary.
Additionally, be sure to plan for thermal expansion and contraction in your flex circuits. The flex area should have a hatched polygon for the ground plane instead of solid copper to improve heat dissipation and flex life.
Rigid flex circuit boards are an excellent option for many applications, especially those with complex designs and a need for high reliability. By working with an experienced ECM, you can ensure that your rigid flex circuits are ready for the challenges of the manufacturing process. Levison Enterprises offers a full range of turnkey PCB services, from design to fabrication to assembly, and we can manufacture rigid flex boards that meet your specific specifications. Contact us today for more information, and we’ll work with you to bring your design to life. We offer both commercial and military-grade circuit boards, with quality certifications to prove our expertise. Our goal is to help you take your product from concept to production with ease and efficiency.
For a while, Google has been telling Pixel owners that they’ll be getting an energy feature that extends the total lifespan of their batteries. If you’ve been looking forward to it, today’s your lucky day; Google has begun rolling out this handy feature in the newest update, albeit you may not see it immediately.
The Google Pixel November Update Introduces a Battery Saving Feature… for Some People
As reported by Phone Arena, the Android 15 November update has begun its big rollout. People have been checking out all of the new features, but one that has stood out was a new battery saver feature. When enabled, it only charges your Android phone to 80% each cycle.
It may seem weird that people have been getting excited over a feature that reduces their battery charge, but it’s a good idea to enable it if you want to maximize your Google Pixel phone’s lifespan. Lithium-ion batteries prefer to stop charging at 80%; going to 100% every time will eventually erode the battery’s capacity.
Some phones limit battery charging by themselves (for instance, iPhones can automatically stop charging at 80%), but otherwise, you need a third-party app or good timing when unplugging your phone. Fortunately, people who want to take care of their Pixel batteries now have an official way to do so.
There’s just one thing: not everyone is getting this feature. Some people are reporting that they can find it in their settings, while others can’t. It’s likely that Google is doing a phased rollout of this feature, so if you can’t seem to find it on your own Pixel, it’s worth waiting a few days before assuming it’s an error.
Pinning windows is one of the most useful ways to keep the things you’re working on front and center so you never lose focus. Luckily, you can easily pin windows two different ways in Windows 11.
Pin Windows With a Keyboard Shortcut
Kris Wouk / MakeUseOf
While not the most effective, the easiest way to pin a window in Windows 11 is to select the app you want to pin and then press Ctrl + F11 on your keyboard.
This activates the built-in “always on top” feature for that app. You can unpin a window anytime by pressing Ctrl + F12. It’s handy, but unfortunately, it doesn’t always work as intended.
Some apps won’t become pinned at all. Others, like File Explorer, tend to get wonky, with bits of the window displaying off the screen. This makes it almost impossible to use the app, requiring you to unpin and repin it.
I’ve also noticed using this method tends to sometimes send the window into fullscreen mode. While that can be handy, it doesn’t always help your workflow. Thankfully, there’s another method.
Use PowerToys Always On Top for More Precise Pinning
The best way to take advantage of window pinning in Windows 11 is by downloading PowerToys. This suite of handy Windows tools is provided free by Microsoft, and is one of the best ways to be more productive in Windows.
The tool you want to take advantage of here is called Always On Top. When enabled, all you have to do is press Ctrl + Win + T to pin any window to the front of your desktop. This activates a glowing outline around the window, showing you it has been pinned.
With a window pinned, you can quickly move other windows around without worrying about losing the one you need to focus on. This makes it exceptionally easy to keep your work focused while also giving you the freedom to move through other apps.
There are a multitude of reasons you may want to take advantage of Windows 11 window pinning. Students will find it handy for writing research papers or working on homework. You can pin important documents that have data you need to refer to often so you never lose them.
Others may find it useful for pinning applications like the calculator, a to-do list, or even sticky notes you don’t want to lose track of. PowerToys also comes with other useful tools, like Peek, which lets you quickly preview files in File Explorer. You can combine multiple of these tools together can help you improve your workflow significantly.
certifications should a flex circuit manufacturer have
When selecting a flex circuit manufacturer, it’s essential to consider the certifications they hold, as these certifications provide an indication of their commitment to quality, reliability, and adherence to industry standards. A well-certified manufacturer ensures that their products meet or exceed the necessary performance and regulatory requirements, which is particularly important in industries like medical devices, aerospace, automotive, and consumer electronics. Certifications help establish trust between manufacturers and clients, demonstrating that the manufacturer can deliver high-quality, reliable, and safe flex circuits. Here are some of the key certifications that a flex circuit manufacturer should have.
One of the most widely recognized certifications in the manufacturing industry is ISO 9001, which outlines the requirements for a quality management system. This certification demonstrates that the manufacturer has a systematic approach to quality management, including processes for continuous improvement, customer satisfaction, and consistent product quality. For flex circuit manufacturers, ISO 9001 ensures that all aspects of the production process—from design and raw material procurement to manufacturing and delivery—are controlled and standardized, minimizing the risk of defects and ensuring reliable outcomes.
For flex circuit manufacturer used in the medical field, an important certification to look for is ISO 13485. This standard focuses on quality management systems specific to medical devices, ensuring that the manufacturer adheres to strict regulatory requirements. ISO 13485 certification confirms that the manufacturer follows best practices in producing medical-grade flex circuits, which may need to meet additional specifications for biocompatibility, sterilization, and overall safety. This certification is essential for manufacturers that are involved in the production of medical equipment, wearables, or implantable devices, where quality and reliability are paramount.
What certifications should a flex circuit manufacturer have?
Another critical certification is IPC-2223, which defines the design and fabrication standards for printed circuit boards (PCBs) and flex circuits. This certification is issued by the IPC, an international association that sets standards for the electronics industry. IPC-2223 ensures that the manufacturer complies with the industry’s best practices regarding flex circuit design, materials, and manufacturing processes. Manufacturers who hold this certification are committed to producing circuits that meet rigorous electrical and mechanical performance standards. Additionally, IPC-610, which addresses the acceptability of electronic assemblies, is another relevant certification for ensuring that flex circuit assemblies meet high standards of craftsmanship.
For manufacturers involved in automotive electronics, IATF 16949 certification is an important quality management standard. This certification focuses on the production of automotive-related products and ensures that manufacturers adhere to strict standards for quality, safety, and efficiency in automotive production. Flex circuits used in automotive applications, such as in infotainment systems, sensors, and safety features, need to meet specific reliability and performance standards. IATF 16949 ensures that the manufacturer maintains processes that are capable of producing circuits that can withstand the harsh environments typical in automotive settings.
UL Certification is another important consideration, particularly for manufacturers of flex circuits that will be used in electrical applications. The Underwriters Laboratories (UL) certification ensures that the materials used in the flex circuit are safe for use in electrical systems and that the final product meets safety standards for fire resistance and electrical performance. UL certification is particularly critical for applications where fire safety is a concern, such as in consumer electronics or industrial applications.
RoHS (Restriction of Hazardous Substances) certification is also important for manufacturers producing flex circuits that comply with environmental regulations. RoHS certification ensures that the circuits are free from harmful substances like lead, mercury, and cadmium, which is particularly important in markets like Europe and North America, where regulations regarding hazardous materials are stringent. Manufacturers who hold this certification demonstrate their commitment to producing environmentally friendly products that meet global standards.
Finally, for manufacturers involved in the production of flexible circuits for military or aerospace applications, AS9100 certification may be required. AS9100 is a quality management standard specific to the aerospace industry, ensuring that manufacturers comply with the rigorous requirements for safety, reliability, and performance in aerospace systems. Flex circuits used in spacecraft, satellites, and avionics must meet these demanding standards to ensure their functionality in extreme conditions.
In conclusion, certifications are crucial indicators of a flex circuit manufacturer’s capability to meet the highest standards of quality, safety, and regulatory compliance. Key certifications such as ISO 9001, ISO 13485, IPC-2223, IATF 16949, UL, RoHS, and AS9100 are all important in ensuring that the manufacturer can deliver products that are reliable, safe, and suitable for their intended applications. By selecting a certified manufacturer, companies can have confidence that their flex circuits will perform to the highest standards, reducing the risk of defects and ensuring long-term reliability.
Like many people who write for a living, I’m notoriously anti-AI. However, a new tool from Perplexity is forcing me to reconsider the benefits of using AI as part of my productivity workflow.
What Is Perplexity AI?
Perplexity AI is billed as the “Swiss Army Knife of information discovery and curiosity.” Really, that’s a fancy way of saying you can ask it questions, and, using its magic artificial intelligence superpowers, it will scour a seemingly infinite database to help you find the answers.
Perplexity offers a two-tiered service, with both a paid and a free version. If you’ve used something like OpenAI’s ChatGPT, you’re likely familiar with this type of interface. On the other hand, if you’re not familiar, we’ve put together a guide to help you better understand how artificial intelligence works.
The free tier of Perplexity AI allows for basic questioning, email and article summaries, and code creation. Perplexity also provides up-to-date source information so you can avoid the dreaded AI hallucination issue.
However, when you subscribe to the $20/month or $200/year Pro tier, things get more interesting. For example, a pro subscription means you can switch AI models from Perplexity’s default to something like Claude 3.5 Sonnet, Sonar Large, GPT-4o, or Grok-2.
Pro Searches are also more detailed and precise than the free Quick Searches. Pro also entitles you to upgraded support, an exclusive Discord, and the ability to upload unlimited documents for analysis.
How Perplexity Is Different from Other Desktop AI
There are heaps of generative AI chatbots, all with different pros and cons. However, a few things set Perplexity AI apart from some other desktop AI assistants—at least for me. First is its built-in citation functionality.
Perplexity lists several references at the top of each query when it provides an answer for you. As someone who does extensive research, I appreciate the ability to keep track of any source material Perplexity finds so I can vet it before using it.
Second, Perplexity also updates its information in real time, which means you’ll get relevant answers to your questions and answers populated with the most up-to-date information.
Finally, there’s the Copilot feature—an interactive search assistant that asks clarifying questions to help personalize the answers to your search queries. It’s like having someone personally invested in finding the right answer for you.
Overall, the feature set is pretty rich. However, these few features are just the most prominent. Honestly, the quickest way to learn everything Perplexity can do is to try it for yourself.
How Do I Use Perplexity AI?
I use Perplexity in a few ways that might offer you some insight.
Product Research
Recently, I was looking for a new harness for one of my dogs. Instead of trying to comb through several sites, I asked Perplexity to recommend the best dog harness in the US at the time. Perplexity not only found a great harness backed by various publications, but it also suggested a harness that I probably wouldn’t have purchased had I just searched Amazon.
Distilling Evidence-Based Information
Last week, I asked Perplexity to help design a science-backed, evidence-based workout program. It came back with a pretty comprehensive list of suggestions. Could I have compiled all the science and eventually found best practices myself? Maybe. No doubt that would have taken me a significant chunk of time, though.
I asked Perplexity to assist, instead focusing on the information I needed and giving me a targeted list of credible sources I could review. By doing so, I saved myself countless hours I might have wasted just reading and analyzing extraneous information that didn’t fit my science-backed criterion.
A desktop AI assistant will not replace the advice of a board-certified physician. Before you embark on any AI-generated fitness program, you should always consult your doctor.
Website Analysis
Because Perplexity is primarily a predictive tool, it’s great for textual analysis. This means it can find all manner of commonalities on the web if you ask it the right questions. I frequently ask Perplexity to generate a list of common SEO keywords on a topic, for example. Doing so helps me optimize my content to reach readers like you a bit more easily.
Other Ways to Use Perplexity
Ideally, Perplexity is best at sorting and organizing information in a way that allows for easy digestion. If you need to buy a new couch or do academic research on the best breakfast foods, the tool is an impeccable help. It doesn’t do the work for you, per se, but it does cut some fluff and some of the time it takes to sort through information.
If you’re going to use it, I’d suggest you replace your standard Google search with the tool for a week and see if the answers you get are more or less helpful. Moreover, Perplexity works better when you provide specific qualifiers in your queries.
Qualifiers such as “You’re an AKC certified dog trainer” or “Help me find evidence-based research” are exceptionally useful. We’ve previously compiled a list of effective generative AI prompting techniques to maximize tools like Perplexity.
Why Perplexity Has Me Changing My Mind About AI
So we’re clear: Perplexity isn’t sponsoring this post. I just really like its AI tool. I’ve even purchased a year of the Pro subscription because I like it so much. You may not feel the same way I do.
Before encountering this AI assistant, I was horrified at the prospect of installing AI into my workflows. This is mainly because, as someone who writes for the web, I get a little bristly when it’s suggested that AI will eventually replace me and the craft I’ve spent decades honing.
However, in holding to that bias against AI tools, I failed to see I’m not making myself more obsolete by using them. Instead, I’ve found Perplexity AI makes me more efficient and better informed. That means I get to do more of the work I want while avoiding some of the more time-consuming tasks I don’t.
Many music streaming services are currently available, from the most popular ones like Spotify, YouTube Music, and Apple Music to the less well-known options like Qobuz and Deezer. If you don’t know which one to pick, here are key factors to consider the best option for your needs.
1 Regional Availability
Despite the vast number of services on the market, not all of them are available in all regions. Similar to video-on-demand services like Netflix, this is due to licensing restrictions. So before you settle for a given service, make sure it’s available in your region. If your region is supported, you can access the service without any hiccups and won’t need to hide behind VPNs.
Mainstream music streaming services are typically available in more regions, so they’re likely to be accessible in your region as well. Spotify, for example, is available in over 180 countries, according to Spotify’s About page. In comparison, according to a Qobuz support page, Qobuz is only available in 26 countries.
However, the number of countries supported shouldn’t be an issue. The key consideration is whether the service is available in your region. Visiting a service’s website is enough to let you know whether the platform is available in your current region.
Music quality is one of the key factors you need to look out for when selecting a music streaming service. While it would be best if all services offered the highest quality as a standard, that’s unfortunately not the case. Different music streaming services offer different audio playback qualities.
If we take Spotify as an example, the service allows you to stream audio at a maximum bitrate of 320kbit/s on its desktop and mobile apps, but only up to 256kbit/s using its web player. Apple Music, on the other hand, has its lossless audio compression technology called Apple Lossless Audio Codec (ALAC), which allows users to stream audio at different resolutions, ranging from 16-bit/44.1 kHz (CD Quality) up to 24-bit/192 kHz.
Audio quality is just one of the many differences between Spotify and Apple Music. So, if you care about streaming quality, pick a service that offers higher quality. You can also look at high-resolution music streaming services that prioritize audio quality.
3 Pricing Tiers and Bundling Options
Most music streaming services have a monthly subscription price, which allows users to access and play millions of songs. Most paid music streaming services have plans around or slightly above $10. Apple Music, Tidal, and Amazon Music Unlimited cost $10.99 a month, while Spotify and Deezer cost a dollar more. With most priced are priced similarly, you should consider whether they are bundling options that could make one service cheaper than the other.
For example, Amazon Music Unlimited costs $10.99 per month, but Amazon has a separate plan called Amazon Music Prime, which is free if you have an Amazon Prime subscription. Subscribing to YouTube Premium also unlocks YouTube Music for free.
If you don’t want to pay for music, you should check whether the service in question offers a free tier. Spotify and Deezer do offer free plans, although Deezer only offers the free tier in certain regions. Alternatively, instead of hunting for services with free tiers, you can check out free music streaming services.
4 Catalog Size and Exclusivity
This is another area that sets music streaming services apart, and you should consider it when picking one. You may want to pick a service with a bigger catalog as a larger catalog size means a broader selection of songs, albums, and genres.
If you enjoy discovering new music or listening to diverse styles, opting for a service with a vast library is essential. Spotify, for example, boasts a library of over 100 million tracks while Tidal says it has over 110 million tracks.
While exclusivity is no longer standard in the music streaming industry, there are some songs and artists you won’t find on certain platforms. You should therefore check the availability of your favorite artists, albums, or songs on the given platform before committing. A free trial or free tier should help you figure this out.
5 Ease of Music Discovery
Another critical factor to consider when choosing a music streaming service is the ease of music discovery. Music streaming services have tens of millions of songs in their catalog. With countless tracks available at your fingertips, having an intuitive and effective way to find new music can significantly enhance the listening experience. Using the service will be tedious without a proper system for music discovery.
There are different aspects to consider as far as music discovery is concerned. The first aspect is the availability of personalized recommendations. Thankfully, most music streaming services have machine-learning algorithms in place for this purpose.
Secondly, the service should have a user-friendly interface to make searching and navigation easier. Finally, the service should have curated playlists based on different aspects, like genres, mood, activity, season, and more. All three play a key role in making music discovery easier. Additionally, you can still use music discovery apps to find new songs.
To gauge a platform’s user-friendliness and ease of music discovery, you should try the free tier if it’s available, or if not, use the free trial option.
6 Cross Platform Support
Before selecting a given service, ensure it’s available across multiple platforms. You probably have more than just a smartphone, so it’s important to evaluate the devices you use and check if the service is available across those platforms. For example, if you have an Android smartphone, a Google TV, and an iPad, ensure that you can access and stream music across these devices.
By prioritizing cross-platform compatibility, you’ll ensure your music is always within reach, no matter where you are or what device you use.
7 Availability of Other Content
Some music streaming services offer more than just music, so considering the availability of other content, such as podcasts and audiobooks, is crucial for convenience. If a platform offers podcasts, you won’t need a separate app, enabling seamless transitions between music and podcasts.
Spotify, Pandora, and Deezer offer podcasts, some of which are exclusive. Additionally, Spotify also offers audiobooks in certain regions.
However, if you don’t want your music streaming app to include more than music, you can trim down your options by only considering platforms that offer music.
Choosing the right music streaming service comes down to your preferences and availability. These factors are essential when selecting a music streaming platform, no matter where you are. By considering these factors, you can make an informed decision and pick a service that suits your needs.
As an audiophile, I’m super picky about headphones. I usually don’t want to drop cash on them unless I know they can deliver. Over the years, I’ve refined a checklist of quick tests you can do in-store or even at home that help me get a true sense of what a pair of headphones can do. These tests also apply to other audio devices like earbuds or earphones.
Most human ears can hear between 20 Hz and 20,000 Hz. In simple terms, the lower the number, the deeper the bass; the higher the number, the clearer the treble. I’m more interested in how well the headphones handle the frequencies in between because I believe that’s where most music lives.
To test this, I usually fire up a few of my favorite tracks from different genres. I’ll start with something bass-heavy, like funk or dubstep, to see if the headphones can deliver those low-end thumps without drowning out everything else. If the bass overwhelms the mids and highs, I will likely drop it. I don’t want the vocals or instruments to sound like a subwoofer is suffocating them.
Next, I’ll switch to something more balanced to check how the headphones deal with mids and highs. One trick I always use is playing a classical piece with a full orchestra. There’s no better way to see how headphones handle a broad range of frequencies than listening to all those instruments working together. If I can pick out the violins, drums, horns, and the subtle low hum of the cellos without any one part dominating, that’s a good sign the sound is well-balanced.
Of course, everyone’s taste in sound is different. Some people love bass-heavy headphones, while others prefer a more neutral, studio-quality sound. That’s why I recommend testing with the music you listen to.
If you want to dive deeper into sound quality, use Audiocheck’s
cool headphone tests. These mapped-out step-by-step guides give you a true sense of what your new headphones are capable of.
2 Comfort and Fit
Hannah Stryker / MakeUseOf
Everyone’s head is shaped differently, and what might feel fine for one person can be a total nightmare for someone else. That’s why I always test my headphones out for 10 minutes or more to see how my head and ears feel afterward. This is especially important with over-ear and on-ear styles, where clamping force can make or break comfort. I want them snug enough to stay in place but not so tight that I feel like my skull’s in a vice. If I start feeling pain around my temples or the top of my head, it’s not good for me.
A good pair of headphones should disappear on your head and not make you constantly aware of their presence. They should also have some adjustability. I like it when the ear cups swivel, and the headband has a decent range of extensions. That way, I can fine-tune the fit to avoid any awkward pressure points.
I also pay attention to the ear cushions. Are they soft, plush, and breathable, or do they feel like someone glued cardboard to the ear cups? The material and thickness of the padding can make a big difference, especially if you wear glasses. If the cushions are too stiff, your frames will dig into the sides of your head, making you want to rip them off after a few minutes. If you don’t wear glasses, you can still test this by wearing thick sunglasses or anything that sits on your ears just to simulate the effect.
3 Noise Isolation and Cancellation
Justin Duino / MakeUseOf
Before we dive into testing, know that noise isolation and noise cancellation are not the same thing. For noise isolation, I prefer to keep it simple. I pop on the headphones and play some music or a podcast at a comfortable volume. Then, I simulate the real world. I’ll walk into a louder area or stand by a window with traffic going by. If I can still focus on my audio without cranking the volume, the isolation is doing its job.
A word of advice: if you’re testing in-ear headphones and the ear tips don’t create a proper seal, even the best isolating headphones will feel like they’re letting in half the noise around you. Don’t be afraid to try different sizes or materials.
Now for the fun part—testing the noise cancellation. This is where I get a little creative. One of my favorite tricks is going near something loud and obnoxious, like a running vacuum. I’ll switch the cancellation feature on and off while standing near it to compare how much noise is reduced. If the roar fades into a dull hum or disappears altogether, that’s a solid pass for me.
I also make a point of testing noise cancellation in different environments. For example, I’ll take the headphones outside where there’s a mix of noises, like cars driving by or people chatting. If it can tone down the chaos without making the audio sound weird or muffled, I’m impressed.
4 Control Buttons Accessibility
Justin Duino / MakeUseOf
If I’m out for a run or commuting on a crowded train, I need my headphones’ buttons or touch controls to be intuitive and responsive, which is why I check their placement. Are they in a spot that’s easy to reach? Some headphones have the buttons tucked away in places that are impossible to find without taking them off entirely.
Ideally, the buttons should be positioned in a way that feels natural when you’re wearing the headphones. If you can’t find them without looking, that’s a red flag. I’ve also encountered headphones whose buttons are too close together, making it too easy to hit the wrong one accidentally. I don’t want to crank up the volume when I mean to pause my podcast.
Next, I check for tactile feedback. Some headphones have buttons that feel mushy, such that pressing them doesn’t give you any indication that you’ve done something. On the flip side, others give a satisfying click that lets you know you’ve pressed the right thing. I always prefer the latter. It’s especially important if you’re planning to use your headphones while exercising or multitasking. You want to control your music without thinking about it, and that’s only possible if the buttons are responsive and give clear feedback.
5 Microphone Quality
I always pay close attention to the microphone quality on headphones—especially if I plan on using them for calls, gaming, or recording voice notes. The first thing I do is make a call to a trusted friend. I ask for feedback on how I sound compared to my usual setup. If they say I sound muffled or like I’m standing in a wind tunnel, that’s a big no. A good microphone should pick up your voice clearly without too much background noise or distortion. If you’re hearing complaints about echoes or weird metallic sounds, that’s another dealbreaker.
Next, I make a quick voice recording on my phone or computer. Most devices have built-in apps for this (like Voice Memos), and it’s an easy way to hear how you’ll sound to others. I listen for clarity—can I hear every word distinctly? Or do I sound like I’m speaking through a layer of cotton? I also check for background noise. If the mic is picking up every little sound in the room—my keyboard clacking, the fan whirring, or my neighbor’s dog barking two houses down—they’re not the right headphones for me.
6 Connection Options
Jerome Thomas / MakeUseOf
Whether you’re Team Wireless or prefer the simplicity of a wired headphone, each connection type has its unique strengths (and potential headaches).
Wired headphones are the classic option, and I prefer them over wireless headphones for many reasons. One thing I always test here is the cable itself. Do they use a standard 3.5mm jack, or is it some proprietary plug that’ll drive me bonkers trying to replace it if it breaks? Also, is the cable detachable? Because if it is, you can swap it out easily if it gets damaged over time, which is a huge bonus.
Now, for wireless, I usually want to see how the headphones handle pairing. I test how easy it is to switch between devices—say, from my phone to my laptop. If I have to dig through settings whenever I want to swap devices, I won’t buy those headphones.
There’s also latency to check out. Wired headphones have no latency, whereas some wireless ones have a noticeable lag, which can be unbelievably frustrating. I’ll usually test this by watching a movie scene with a lot of dialogue or action. If the sound doesn’t line up with the visuals, it’s a no-go for me.
Some headphones give you the best of both worlds, offering both wired and wireless options. If you’re the kind of person who likes the flexibility of switching between the two, this is something to look out for. One thing I test with hybrid headphones is how they sound in wired versus wireless mode. Sometimes, there’s a noticeable difference in audio quality, and you’ll want to know before you commit.
Also, I double-check how they handle using the mic during calls. Some headphones will only let you use the mic in wireless mode, and this can be frustrating if you need to take a call while plugged in.
I’ve been using Windows 11 since its beta release. While it’s a solid operating system on its own, I almost can’t use it without installing three apps that give me better customization and features.
1 Rainmeter
One of the best things about Rainmeter is the amount of freedom you get to customize your Windows 11 desktop. You only get a few simple skins to start. However, the community has thousands of free skins available across sources like Deviant Art and the Rainmeter website.
If you want to get extra fancy, you can also create your own custom desktop icons or skins from scratch. This process is a bit more involved and requires coding, as Rainmeter skins are made in a text editor like Notepad++.
But you don’t have to create your own skins to get plenty of use out of Rainmeter. There are thousands of free skins out there, and you can mix and match elements from them to make your perfect desktop.
Rainmeter is free to download, though some creators may charge for their skins.
The second must-have app I always turn to is Startallback. There are a lot of great Start menu replacements out there, but Startallback has become my go-to in recent years.
The main reason for this is the extensive customization it offers. You can configure the Start Menu, Taskbar, and Tray Icons. This app is a great way to get more out of Windows 11’s Start Menu.
Another great thing about Startallback is that you can customize File Explorer to change its user interface and bring back classic context menus. There are other ways to customize File Explorer, including some directly in Windows 11.
However, those options don’t offer as many options as Startallback. The only downside to this app is you only get 100 days of free use before you have to purchase a license to continue using it.
The final app I can’t use Windows 11 without is less of an overhaul and more a quality of life addition. But, it’s still an important addition.
MiniBin is exactly what it sounds like: a mini Recycle Bin for your taskbar. I spend a lot of time on my computer with multiple windows open, so reaching the Recycle Bin isn’t always easy.
Luckily, MiniBin makes it easy, as all I have to do is interact with an icon on the taskbar to clean up old trash files. The icon also updates as the bin fills, which is handy for keeping an eye on things and cleaning up after a big project.
Once installed, you can clean out your Recycle Bin anytime by double-clicking on the icon. You can also customize the icon if you want to add a little more flair.
None of these apps fundamentally change how Windows 11 works, which is a big part of why I love them. You still get to customize a lot about the operating system. However, it never stops feeling like the Windows you already know.
Use MagSafe stickers on Android for wireless charging with MagSafe chargers and accessories.
These stickers work with any phone supporting wireless charging.
Ensure proper sticker placement, the thickness of your case, and chargers for optimal functioning.
Using MagSafe on Android might seem impossible since the technology is exclusive to Apple devices. However, I’ll share a workaround that involves using stickers to get your Android devices working with MagSafe chargers and accessories in no time.
What Are “MagSafe Stickers”?
MagSafe is essentially a combination of a wireless charging coil and some magnets. iPhones come with these magnets built in, but if you buy an Android device, you’re only getting half the package, assuming your phone supports wireless charging.
So, while your Android phone might be able to use MagSafe chargers to charge wirelessly, it’ll definitely not snap into place like an iPhone does. This is where “MagSafe stickers” come into play.
Yadullah Abidi / MakeUseOf
These stickers are made of small magnetic rings with adhesive on the back. All you have to do is line them up with your phone’s wireless charging coil and stick them either to the back of your phone or case, and that’s it. The magnets in the sticker keep your phone stuck to the MagSafe charger you’re using, and wireless charging works as expected.
I’m using the PopSockets Adapter Ring for MagSafe, which costs around $7 on Amazon. You can find cheaper alternatives from other sellers, and some MagSafe chargers even bundle these as extras. In theory, all such stickers should work fine, but I’d recommend sticking to reputed sellers. The PopSockets ring has quite a lot of magnetic strength and doesn’t seem to affect the charging speed of my Pixel 7a.
The stickers work with just about any phone that supports wireless charging, including older iPhones that don’t support MagSafe. In case your phone doesn’t support wireless charging, you can use these stickers to use the many MagSafe accessories, like phone mounts for desks, cars, and everything else.
What Phones Do These Stickers Work With?
The good thing about using these stickers is that they’ll work with any phone that supports wireless charging. Additionally, you can also stick them directly on the back of your phone if you don’t like putting on a case. Even if your phone doesn’t support wireless charging, these stickers allow you to use the hundreds of MagSafe-compatible phone mounts on the market.
For example, if the phone mount in your car is a headache to get your phone hooked up to (which it generally is), these stickers allow you to upgrade to a magnetic one where you pretty much snap your phone onto the mount.
You can also use a magnetic case, but unless you have an iPhone or a flagship Android, you have limited case options. These stickers, on the other hand, let you use any phone, and pretty much any case, with MagSafe-compatible chargers and stands without having to spend an unreasonable amount. MagSafe cases also cost more than these stickers.
Some case considerations must be made when using stickers, though. The stickers I bought aren’t officially compatible with silicone, textured, or anti-fingerprint-coated cases. From my experience, they should work on most cases as long as they’re not too thick or made of fabric. The adhesive strip on the back of the stickers I got is strong enough to stick on a silicone case so I wouldn’t worry too much about that.
Are MagSafe Stickers Safe to Use?
These stickers are totally safe to use, but since they’re an aftermarket solution, there are a few things you should be mindful of.
Sticker placement is the most important thing here. While you don’t have to get the alignment perfectly right, it’s best to be as close as possible, as a misaligned sticker may not charge your device properly or cause overheating issues.
I placed mine slightly off-axis, and my phone sometimes sits on the charger and fluctuates between charging and non-charging states. Most of these stickers aren’t reusable either, so if you end up sticking them in the wrong spot, you’ll have to use a fresh one.
Hannah Stryker / MakeUseOf
You also need to keep an eye out for the charger you use. This isn’t a big issue because most MagSafe-compatible chargers work fine, but I still recommend getting a charger that matches your phone’s wireless charging speed. In case you’re confused, we have a list of the best MagSafe chargers you can pick from.
With a few careful considerations, you can use these stickers to make any phone MagSafe compatible and enjoy all the benefits. Wireless charging is great, but it’s even better when your phone snaps into place instead of you having to fiddle around to find the right spot.
WhatsApp isn’t just about connecting with others—sometimes, the most valuable conversation is with yourself. While the platform excels at bringing people together, here are some tips on how I use the Message Yourself feature to stay organized.
Why My Phone’s Most Important Chat Is With Myself
Like many other messaging apps, you can send yourself a message on WhatsApp. That’s why one of the most valuable conversations on my WhatsApp is with myself. It’s not about being self-absorbed—it’s about staying organized.
Just like jotting down a quick note or setting a reminder, messaging myself on WhatsApp has become an easy way to keep track of important thoughts and tasks. And the best part? It’s always with me, right in my pocket.
My Online Sticky Notes That Never Get Lost
We all have those bright, colorful sticky notes that always seem to vanish when we need them most. Well, using WhatsApp’s Message Yourself feature as my personal information hub puts an end to lost notes.
Just like how I’d write down a quick reminder or an idea, I now send myself text messages or voice notes on WhatsApp. The difference? These notes never get lost in the shuffle of papers on my desk. And by pinning my chat to the top of WhatsApp, I can refer back to my notes with just a tap.
I’ve created a repository for all my important information by using WhatsApp as my go-to note-taking tool. Everything, from work-related tasks, shopping lists, interesting articles, and funny memes I want to save for later, is just a few taps away.
The best part about this is the convenience factor. WhatsApp is already my most-used messaging app, so incorporating it into my note-taking workflow was a snap. Plus, with its powerful search function, I can easily find specific notes or links whenever needed.
Temporarily Holding Files Until I Need Them
Sometimes, we come across a file or document we know we’ll need later, but we don’t want to clutter up our phone’s storage. WhatsApp’s self-chat feature is perfect for this—it temporarily holds all your digital stuff.
Whether it’s a PDF, a screenshot, or a funny meme, I send it to myself on WhatsApp. WhatsApp stores all media files on its servers, so I can access them whenever needed without bogging down my device. And when I’m done with a file, I can simply delete it from the chat.
However, it’s important to note that WhatsApp automatically deletes files from its servers after a certain period. Media within a message is stored for up to 30 days in encrypted form on WhatsApp’s servers. You should download your files before they get deleted.
While WhatsApp’s self-chat is great for temporary file storage, it’s not a permanent solution. For files I need to keep long-term, I save them to my phone or a free cloud storage service.
You can also use this chat as a way to highlight important files for easy access. For example, if you have a flight boarding pass that isn’t supported by Google Wallet, you can save the PDF in your WhatsApp chat for easy access.
Using It for Cross-Device Accessibility
WhatsApp has multi-device support. So it allows me to access all my messages and files with just a few taps or clicks on my phone, tablet, or computer. I can start typing a note on my phone and finish it on my laptop without missing a beat.
So, if I need to access a file I sent myself earlier, I don’t have to worry about which device I used to send it. All my chat history is available on any device linked to my WhatsApp account.
WhatsApp’s Message Yourself feature is handy for staying organized and productive. However, it’s important to be mindful of what information you store there. With the rise of WhatsApp scams, it’s best to keep sensitive data, like passwords or financial details, in a secure, private space.
Most news stories are overwhelmingly negative, and constantly exposing yourself to all the world’s problems can harm your mental health over time. I’ve cut down my consumption to the point that I almost never watch normal news, and instead, I recommend sites that focus specifically on good stories.
One of the most prominent good news websites is Positive News. Founded in 1993, the organization aims to produce independent positive news stories. Positive News is a quarterly magazine and an online publication.
In 2015, the company launched a crowdfunding campaign titled #OwnTheMedia. This turned Positive News into a cooperative, essentially making each of the 1,500 backers a co-owner of Positive News. This is an unusual model for journalism, and it keeps the publication accountable for its vision.
The site publishes stories on a wide range of topics, including society, the environment, lifestyle, science, and economics. Positive News is a UK-based organization, so some stories have a more British slant, but it also covers the US and other countries. You can support Positive News by making a donation.
A common theme among positive news websites is their longevity, which in itself, is good news. The Good News Network has been operational since 1997 and has amassed an archive of over 21,000 positive news stories.
The so-called Good News Guru, Geri Weis-Corbley, has been at the helm since founding the site. Like Positive News, which primarily covers good news in the UK, Good News Network has its own regional slant, covering some of the best positive news in the US.
If you want to support the site, you can become a member by donating. Good News Network is also an excellent choice for those on the go, thanks to the site’s mobile apps for Android and iOS. So, if you want to stop doomscrolling, open the Good News Network app in place of your regular news provider or social network.
For those who prefer their news in podcast form, it also produces the Good News Gurus Podcast. It acknowledges that good news doesn’t end at the US border, so the site has an entire section dedicated to positive world news. There’s even a Spanish-language section of the site.
Unlike some positive news websites, Good News Network is not a non-profit organization. This is because it wants to show that it is possible to be profitable while still focusing on the positive things in life.
While other positive news websites tend to take a slower approach to journalism, The Optimist Daily is focused on the here and now. The site aims “to accelerate the shift in human consciousness by catalyzing 100 million people to start each day with a positive solutions mindset”.
The site doesn’t aim to be an alternative to mainstream news. Rather, it wants to be a positive outlet for happy news, where people can get the good news of the day.
Some of the phrases used to describe the site sound like they were taken from a new-age self-help guide. But beneath the flowery language, its mission is the same as that of other positive news websites: to spread good news today and minimize negativity.
The Optimist Daily doesn’t just focus on good news or positive news, though. It also has a substantial archive of personal development tips and techniques.
Reddit isn’t a website that people normally associate with good news or happy news. The site is more commonly linked with controversy for its more infamous Subreddits. However, the Uplifting News subreddit is “a place to read and share positive and uplifting feel-good news stories.” Since launching in 2012, the community has now grown to 18 million+ strong.
The moderators do an excellent job of keeping the discussion focused and, for the most part, good-natured. When things do veer off into less desirable territory, other users encourage each other to stay focused on the positive and not descend into squabbling.
However, if you want to read only good news, you can ignore the discussions and use the subreddit to discover positive news stories instead. With such a diverse membership, the site is also a great resource for positive news worldwide.
If you’re new to the site, you may want to check out the best Reddit sites and apps for beginners as well. And despite its negativity, some think that Reddit is the best social media platform around.
The Happy Newspaper is a quarterly newspaper by British writer and illustrator Emily Coxhead; it launched in 2015 after a successful Kickstarter campaign. The magazine is available on a subscription basis and provides an offline good news alternative for when you want to switch off from your screens.
News items are arranged chronologically by month, and each issue is centered around a specific happy news theme. There is even a section called Everyday Heroes, which looks at some of the most inspirational people and organizations, as nominated by The Happy Newspaper readers.
The newspaper is available as a subscription or gift subscription and can be shipped worldwide to lovers of positive news.
Upworthy can sometimes take a more negative approach than the other websites listed so far, but these are intended to be thought-provoking rather than bad. The overwhelming majority of articles speculate on how we can change societal issues, such as teenagers’ mental health, and they take a hopeful and pragmatic approach.
Upworthy also identifies funny stories but from a place of legitimate amusement and being wholesome, instead of putting others down. You can find a list of trending stories on the right-hand side.
Today.com’s Good News section features positive news stories from everyday life, and I felt better just by scrolling down the homepage and skimming its headlines. You’ll find wholesome stories about couples revisiting their first date spot, along with plenty of articles about people doing good things in the world.
If you’re looking for positive news stories with less of a political tinge and you want some relief from worrying about everyday issues, Today.com is an excellent source. Coupling this website with podcasts for positivity and inspiration could make a significant positive impact.
Do you have an interest in science and a passion for learning how the world works? Happy Daze is the website for you. Here, you’ll find plenty of non-conventional stories about a broad range of topics. For example, you can learn how plants get calcium.
The website is updated less frequently than many others on this list; nonetheless, it’s worth checking every few weeks to see if anything new has been uploaded.
While some of the posts on r/goodnews are also published on r/UpliftingNews, you’ll find several other fresh stories that weren’t covered. These stories are a mixture of articles from mainstream outlets and more niche websites, and the subreddit is typically updated daily.
Besides finding stories covered online, others will share their own success stories. It’s an ideal place to get inspiration, and you might want to couple what you see with online communities for personal growth.
Only Good News Daily is a mixture of stories and fun articles that’ll undoubtedly make your day better. The website has daily good news roundups, meaning you can get an idea of what’s going well in the world before doing your usual tasks.
I particularly like Only Good News Daily when I’m short on time; it’s very easy to digest. You’ll also find plenty of videos, many of which showcase the wonders of our planet.
While the world has problems, it’s also much more positive than you think. For all the bad stories you see each day, plenty of things go well. Unfortunately, these often aren’t covered by big publications because they don’t sell as well. So, if you’re ready to change your information diet, these websites are a great starting point.
Many third-party iPhone apps don’t have a Dark Mode-compatible icon.
While iOS 18 tries to override such app icons with dark versions, it doesn’t always work.
You can use the built-in Shortcuts app to easily create Dark Mode icons for apps that don’t have one.
iOS 18 tries to override app icons with dark versions if they don’t have Dark Mode-compatible icons. However, it doesn’t always work. Hence, I use a workaround to create dark icons for apps on my iPhone that don’t have one.
This workaround comes from the Reddit user Straight_Random_2211
. It involves obtaining the assets (the original app icon and iOS 18’s dark icon background) and creating a new app icon using them that you then add to the Home Screen to replace the existing one for launching the app.
Get the Shortcut to Obtain the Dark App Icon
First, you need the original icon for the app that isn’t Dark Mode-compatible. It’s easy to get this icon with the Get App Icon shortcut, which pulls app icons for a slew of iPhone apps.
Go to the Get App Icon shortcut page and tap Get Shortcut. Then, tap Open to open it in the built-in Shortcuts app and hit Add Shortcut to add it to your library.
Tap the Get App Icon shortcut to run it. Now, type the name of the unsupported app in the input prompt and hit Done to look it up. Then, tap the matching app, and the shortcut will save the app’s original icon to your Photos app.
Save the iOS 18 Dark Icon Background to Your iPhone
Next, you need a dark background. This is what we’ll replace the original background of our unsupported app icon with. Since we want all the dark app icons on the Home Screen to have the same tone, it’s best to use the iOS dark icon background.
Simply access the dark icon background page, long-tap the image, and select Save to Photos to save it to the Photos app.
Create the Dark Mode Icon for the App
Now that we have the original app icon and the dark background, creating the Dark Mode icon for your app is easy. We’ll use Remove.bg’s Change Image Background tool to do this, which lets us remove the white background from the original app icon and replace it with our dark background image.
Head to Remove.bg’s Change Image Background tool on your iPhone. Tap Upload Image, choose Photo Library, and select the original app icon you saved to the Photos app above.
Similarly, tap the Select File button under Background Image and select Photo Library. Then, choose the dark icon background you saved previously.
As soon as you do this, the tool will generate a new app icon with a dark background. Tap Download and hit View on the confirmation prompt. This will open the icon in a new tab. Long-press the image and select Save to Photos to save it to your Photos app library.
You may tap the Download
option in the prompt, too, but that’ll save the image to the Files app.
Create an App Shortcut to Open the App
With everything done, the final step is to create an app shortcut for the Home Screen that uses the dark icon you just createdd as its icon.
Open the Shortcuts app and tap the + button in the top-right corner to create a new shortcut.
Next, tap the Search Actions bar, look up Open App, and tap the matching action to add it to the shortcut. Tap the App text on this action and select the app whose dark icon you just created on the following screen.
Now, tap the Open App text at the top and select Rename. Type the name of the app for which you’ve created the dark icon here and hit Done.
Hit the name again and select Add to Home Screen. On the following screen, tap the photo icon and select Choose Photo. Now, locate and select the dark app icon in your Photos library, and hit Choose to use it.
Finally, tap Add in the top-right corner to save the shortcut to your iPhone’s Home Screen.
After you do this, you can remove the original app from the Home Screen. Tap and hold the app’s icon on the Home Screen, then select Remove App, followed by Remove from Home Screen on the confirmation prompt.
Using the workaround above, you can easily create a dark icon for any iPhone app that doesn’t natively offer a dark app icon to match. Besides making app icons dark, you can customize your iPhone’s Home Screen to make them large and label-free or apply a custom color tint to match the wallpaper.
I love Google Chrome for its intuitive UI and versatility. However, it’s a notorious memory hog, and you might notice that it becomes sluggish after extended use. Thankfully, there are several simple ways to enhance Chrome’s performance.
Update Your Chrome Browser
One of the first things I check when Chrome’s performance is lagging is whether my browser is updated. Google regularly releases updates that introduce new features, fix bugs, and enhance security. Chrome should update automatically by default, but it’s worth checking, as an outdated version of Chrome can lead to slow performance and cause compatibility and security issues.
How to Update Chrome
Launch the browser on your device.
Click on the three vertical dots in the upper right corner to open the Chrome menu.
Hover over Help, then click About Google Chrome.
Chrome will automatically check for updates and install any available ones.
If an update is installed, restart Chrome to complete the process.
Close All Unused Tabs and Extensions
I am terrible at closing unused browser tabs while I work. Each open tab consumes memory and resources, leading to sluggish performance. The same goes for browser extensions. While they do enhance functionality, too many can strain Chrome’s efficiency.
Tips for Managing Tabs and Extensions
Review your open tabs regularly and close any that you no longer need. You can also use bookmarks to save important pages to access later.
Chrome allows you to group tabs, which can help you organize your workflow without having dozens of tabs cluttering your interface.
Go to the Chrome menu in the upper right corner, hover over Extensions, then select Manage Extensions. Disable or remove any extensions you don’t frequently use.
You might also consider using lightweight alternatives for a faster browsing experience.
Activate the Memory Saver Function
As an automated assistant for tab management, Chrome offers a Memory Saver function that improves its performance by reducing the memory usage of inactive tabs. When enabled, this feature automatically frees up memory from tabs you’re not currently using, allowing your active tabs to run more smoothly.
How to Activate Memory Saver
Open the Chrome menu and select Settings.
Scroll down to find the Performance section.
Toggle the Memory Saver option to switch it on.
I have mine set to Balanced, which deactivates my tabs after an optimal period.
Configure Your Preload Settings
Chrome uses a preloading feature that anticipates browsing behavior and preloads pages you might visit next. By optimizing your preload settings, you can speed up Chrome for a better browsing experience.
It’s worth experimenting with preload to see what works best for you. Turning it off can sometimes improve performance, especially if your browsing habits don’t align with the preloading predictions.
Attend to Unwanted Processes
Chrome is notorious for using a significant amount of memory and CPU. This is often due to unwanted processes running in the background, leading to sluggish performance. Regularly checking and managing these processes can noticeably increase your browser’s speed.
Managing Processes in Chrome
Open the Chrome menu and hover over More Tools.
Select Task Manager to display all active processes.
Look for processes that are using excessive CPU or memory.
If you identify any unwanted or unnecessary processes, select them and click End Process to close them.
Start Again From Scratch
If you’ve tried all the previous methods and your Chrome browser is still dragging its heels, it might be time for a more drastic measure—resetting Chrome. This will restore your browser to its original settings while removing any custom configurations that may be causing issues. Remember that resetting Chrome will remove pinned tabs, startup pages, and other personalized settings. However, bookmarks and saved passwords will remain intact.
How to Reset Chrome
Open the Chrome menu and click on Settings.
Scroll down and click on Reset settings.
Select Restore settings to their original defaults.
A confirmation window will appear. Click Reset settings to proceed.
Chrome is quite deservedly the most popular browser by some margin, with well over 60% of the global market share. As with most of Google’s lifestyle and productivity tools, I am a big fan of Chrome, although it’s not without its faults and can be very CPU-heavy.
Ensuring I run through this list of simple fixes whenever Chrome starts to lag significantly enhances my browsing experience, improving productivity and making my sessions more enjoyable. Each fix can be performed from within Chrome and takes seconds, potentially saving hours of frustration in the long run.
You can finally select from multiple window layouts on macOS without having to use a third-party program. But Windows 11 still does it better.
1 Windows Offers More Layouts to Choose From
Window Tiling in macOS is a game-changer. There’s no doubt about it. However, one thing Apple hasn’t done is give you as many ways to snap your windows into different positions.
macOS lets you put windows side by side, stack them on top of each other, and place one in each corner—for a total of four. You can also set one vertical window next to two smaller windows, giving you three windows on the screen at the same time.
Windows gives you all those options, plus a few more. You can set up three windows side-by-side in equal columns or take two windows and make one take up 75% of the screen while the other only takes up 25%.
There’s also an option to place one smaller column on either side of a larger center window, which I’ve found helpful while working on research-heavy projects. However, the number of options you have can change based on your display size and resolution.
Where Windows really shines is in its ability to create custom Windows Snap layouts using Fancy Zones. This feature is found in PowerToys, a free suite of tools Microsoft offers all Windows users.
Another place Windows Snap Layouts excels over Window Tiling in macOS is in its popup selector. Both Windows and macOS offer a popup that appears when you hover over the maximize button for a window. While handy, the popup can also take a moment to appear.
However, Windows has a much faster popup you can take advantage of. This one appears anytime you drag a window to the top center of your screen. It allows you to drop the window into any of the configurations Windows Snap Layouts offers for quicker snapping, and it’s how I use Snap Layouts the most.
This should be turned on by default. If you’ve somehow disabled it, here’s how to turn it back on:
Open Settings > System > Multitasking to find the Snap windows options. Press the downward-facing arrow to see all the different options. Click the checkbox beside Show snap layouts when I drag a window to the top of my screen.
3 Snap windows with fewer keypresses in Windows
Another handy way to use Windows Snap Layouts and Window Tiling is through keyboard shortcuts. These are also easier to use on Windows, as you don’t have to press as many buttons to move your windows around.
On macOS you need to interact with three different keys to move windows into different snapping positions: Fn + Control + an arrow key. With Windows 11, you only have to press the Windows key and then an arrow key.
The keyboard shortcuts offer fewer snapping positions, but they are an excellent option if you’re trying to stack windows side-by-side quickly.
I’m happy Apple finally brought Window Tiling to macOS, and I no longer have to install a third-party app to take advantage of this great feature. However, Windows still offers more functionality, especially when you consider the customized layouts you can make with Fancy Zones. I hope Apple continues to expand Window Tiling in macOS with more layouts and customization. Until then, Windows gets my vote.
Smart homes have gotten more intelligent over the years, but we still haven’t quite reached the same level as old sci-fi movies where people could talk directly to a house AI. Fortunately, if Google plays its cards right, this technology may come sooner than you think. The company is working on letting Gemini interact with your smart home devices and tweak their settings based on your natural language prompts.
Google Gemini’s Home Integration Is Currently in the Testing Phase
Jowi Morales / MakeUseOf
As announced on Google Nest Help, the newest Public Preview build for the Google Home app features a new extension for Gemini:
With the Google Home extension, you can control your smart home devices with your Gemini mobile app.
For example, you can write or say:
‘Turn on/off all of the lights.’
‘Help me clean up the kitchen’ (to start the vacuum cleaner).
‘Turn the thermostat to heat-cool mode.’
At first glance, this may sound like commands you’d give a regular Google Home device. However, because Gemini runs off of an LLM, it can understand natural language prompts. This means it can take context from what you’re saying and figure out the best course of action.
For example, in Google’s guide on controlling your smart home with Gemini, the company states that you can say “The sun is too bright in the living room” and Gemini will know to close the window coverings. Or you can say “Set the dining room for a romantic date night” and Gemini will do its best to set the scene.
There are a few caveats with this new feature. For the time being, Gemini can only process English prompts, and it’s not allowed to influence any smart security devices. If that sounds alright with you, check out how to join the Google Home Preview Program if you want to give this feature a try early.
The Snapdragon X Elite and X Plus processors intrigued me as I rely on a Windows laptop for most of my daily tasks. However, after weighing the pros and cons, I won’t be making the switch—at least not yet. Here’s why.
1 Limited Gaming Capabilities
While the Snapdragon X Elite and X Plus chips excel in productivity tasks, gaming performance leaves much to be desired. Many popular titles fail to launch on these ARM processors, leaving gamers unable to enjoy their favorite games on the go.
Even when games manage to start, they often suffer from crashes and poor performance, as showcased in the video above. Demonstrations of certain games running smoothly on this processor are likely due to game-specific optimizations rather than the processor’s inherent capabilities.
The compatibility issues and subpar performance of the Snapdragon X Elite and X Plus processors plague most gaming experiences on laptops. Tweaking settings does little to improve frame rates, as the underlying problem lies in the chip’s functionality.
These limitations are concerning for someone who values gaming on the go. Not everyone prioritizes PC gaming on the go, but those who do may want to consider alternative CPUs with better integrated graphics performance for games.
2 Slow Emulation Hinders Productivity With Non-Native Apps
These CPUs handle native ARM applications with ease, but the story changes when it comes to non-native apps. Microsoft’s Prism emulator, built into Windows on ARM machines, attempts to bridge the gap. However, the results are mixed at best.
When installing traditional x64 programs, Prism works in the background to enable compatibility, but emulation comes at a cost: performance. Therefore, you should always check the compatibility of the software you wish to install—the site Windows 11 on ARM is a great resource.
Apps running through Prism, including productivity tools such as Asana and media players like Plex, often suffer noticeable slowdowns compared to their performance on x64 CPUs. The sluggish UI navigation and delayed response times can be frustrating, especially for someone like me who relies on these applications for daily work.
Both Snapdragon X Elite and X Plus struggle with non-native apps, which is a major red flag, making me hesitant about having these chips in my primary work machine. The performance hit is not just a minor inconvenience; it can significantly hinder productivity.
3 Performance and Compatibility Issues With Specialized Software
I often rely on specialized software for my projects. Unfortunately, the Snapdragon X Elite (as well as the X Plus) struggles to keep up with these applications’ demands, making it a less-than-ideal choice for professionals.
CAD software like SolidWorks runs on this CPU, but only through emulation. Performance is usable for occasional on-the-go adjustments to parts, but it falls short of the smooth desktop experience I’ve grown accustomed to. Other CAD software faces similar emulation-related performance issues.
It’s no better when it comes to video editing. Adobe Premiere Pro is plagued by crashes and poor performance on Snapdragon’s X Elite and X Plus chips. When it does work, the experience is far from enjoyable. Qualcomm’s promise of support for the Adobe Creative Suite seems limited to Photoshop and graphic design applications, leaving video editors in the lurch, as programs like Adobe After Effects aren’t even available on the processor yet.
While the Snapdragon’s ARM processors may be suitable for basic tasks, their performance and compatibility issues with specialized software make them a tough sell for professionals.
4 Future-Proofing Concerns Due to Uncertain Ecosystem Development
When investing in a new laptop, I want to ensure it will remain relevant and capable for the next few years. However, Qualcomm’s ARM-based ecosystem leaves me with doubts about its long-term viability.
While these chips show promise, the limited number of native ARM applications and the reliance on emulation for x64 programs raise concerns about future support. As developers focus on x64 and Apple’s M-series chips, the Snapdragon X Elite and X Plus chips may struggle to keep pace.
The Snapdragon X Elite and X Plus processors show promise in certain areas, but their limitations in gaming, emulation, and specialized software make it a hard sell for power users seeking the best Windows laptops for their needs.
Have you noticed how some devices get Android version updates sooner than others? If you’re not a fan of seeing other people get the patch before you, don’t fret. Google has confirmed when Android 16 will come out, and by the sounds of it, most compatible devices will get the update around the same time.
On the Android Developers Blog, Google revealed its upcoming plans for 2025. There’s a lot of good information here if you’re an Android developer, but if you’re not, this paragraph holds some intriguing information:
Next year, we’ll have a major release in Q2 and a minor release in Q4, both of which will include new developer APIs. The Q2 major release will be the only release in 2025 to include behavior changes that can affect apps. We’re planning the major release for Q2 rather than Q3 to better align with the schedule of device launches across our ecosystem, so more devices can get the major release of Android sooner.
The main focus here is the “major release”—that’s Android 16. Not only does this confirm that Android 16 will be released in Q2 (that’s sometime in April, May, or June), but it seems that people won’t have to wait as long to receive it on their phones.
If you’re interested in getting Android 16, there’s a chance you won’t need to purchase a new phone for it. If you’ve already grabbed one of the best Android phones of this year, there’s a high chance that it’s compatible with Android 16 and you should receive a firmware update from your device’s manufacturer.
When deciding to step back from Facebook, it’s important to understand the difference between deactivating and deleting your account. Both options allow you to remove your online presence, but they cater to different needs and circumstances. Let’s delve into the differences between the two.
Deactivating vs. Deleting Your Facebook Account: Key Differences
Deactivating and deleting your Facebook account mainly differ in terms of what happens to your data and whether you can reverse your decision. Here are some key differences you need to be aware of.
Account Accessibility
Deactivating your Facebook account is a temporary action that allows you to take a break from the platform without permanently losing access. Think of it as pausing your account; you can reactivate it at any time.
Conversely, deleting your Facebook account is a permanent decision. Once you do this, all data associated with your profile, including messages, photos, and connections, is scheduled for deletion after a 30-day grace period. Once this period is over, your account and all associated data are permanently deleted and cannot be recovered.
When you deactivate your Facebook account, you retain access to Facebook Messenger, which means you can still chat with friends even without an active Facebook profile. Your name will still appear in your friends’ Messenger contacts.
Unlike deactivation, deleting your account fully removes your access to Messenger. All your chat history on Messenger is erased, and friends can no longer reach you through the platform. Messages you previously sent will appear as coming from “Facebook User”, and your account will be inaccessible for any future messages or replies.
Data Retention
Whether you choose to deactivate your account or delete it, Facebook hides your profile, posts, and content from other users, meaning others can’t search for your profile or interact with your posts as they will be invisible.
However, when you deactivate your account, Facebook retains all your data for easy reactivation. If you decide to return, your posts, photos, and connections will be restored exactly as they were.
On the other hand, deleting your account is a more permanent measure. Facebook begins deleting your data completely after the 30-day grace period, and the deletion process may take up to 90 days to complete. After the 30-day period, your information becomes inaccessible and you cannot recover it.
Deactivating vs. Deleting Your Facebook Account: Which One Should You Use?
Now that you understand the implications of deactivating or deleting your Facebook account, let’s discuss which option is best for you.
Deactivating your account is the better choice if you want to step back temporarily—perhaps to achieve a digital detox—or if you’re unsure about leaving Facebook for good. Deactivation is also useful if you don’t want to use Facebook but still wish to connect with your friends through Messenger.
If you are determined to leave Facebook and want no connection to the platform, deleting your account is the appropriate course of action. Additionally, deleting your account guarantees that most of your data is permanently removed from Facebook’s servers, freeing you from any lingering digital footprint or privacy issues associated with Facebook.
How to Reactivate Your Facebook Account After Deactivation or Deletion
If you have only deactivated your Facebook account, the process for reactivating it is straightforward. All you need to do is visit Facebook’s login page on any device and enter your login details (email or phone number and password).
If you opted to delete your Facebook account, you must log in to your Facebook account within 30 days of deleting your account. Once done, click the Cancel Deletion button that appears to confirm the decision.
Deciding between deactivating and deleting your Facebook account largely depends on what you want to achieve. If you’re unsure, deactivating first gives you the time and space to consider whether leaving Facebook is the right decision for you. If you decide it is, you can make your choice permanent by deleting your account.
With how far payment technology has come in the past few years, parents want it easier for their children to ask permission to purchase something. Fortunately, it seems that Google has something in the works. In 2025, the company is planning to allow kids to add their parents’ cards to Google Wallet, allowing them to use contactless payments with added parental controls.
Google Is Adding Wallet Support to Family Link in 2025
As reported by 9to5Google, Google is working on a way for kids to download the Wallet app through Family Link. Once it’s downloaded, the child can normally use the app to make contactless payments with a card.
There are a few limitations in place to help parents control their kids’ spending. For one, children cannot add a card to their wallet without parental permission first. Once the card is added, the guardian can keep tabs on how their child uses it and can remove it if they’re worried about what they see. Also, the cards in Google Wallet cannot be used to make online purchases, so they’re restricted to contactless transitions only.
The technology already appeared on the Fitbit Ace LTE, and Google noted that it got positive reviews from parents. However, the company will need a little more time to get the same features working on Google Wallet. As such, you’ll likely see this feature arrive sometime in 2025. Until then, if the idea of giving your kids a card keeps you up at night, check out these interactive financial websites that teach kids money management skills so they don’t blow through their allowance on day one.
Weekly reviews help analyze your progress and identify patterns for better decision-making.
Consistent weekly reviews improve productivity by identifying bottlenecks in your workflow.
Choosing a specific day and time and sticking to it helps create a routine for your weekly review.
Your productivity system needs regular review to ensure you are on track and progressing towards your goals. Implementing weekly reviews can help you crush your to-do list and stay organized.
What Is a Weekly Review and Why Should You Do It
A weekly review is an effective productivity habit designed to help you look back on the previous week, reflect on your progress, and use the insights you’ve gained to plan for the upcoming week. It entails setting aside a specific length of time each week to review your goals, tasks, and priorities and improve your workflow. Although popularized by David Allen’s Getting Things Done (GTD) method, a weekly review can fit seamlessly into any productivity system.
Here are some of the benefits of adopting weekly reviews as part of your routine:
Weekly reviews help you analyze your week and spot recurring patterns.
Weekly reviews help you recognize and celebrate accomplishments.
Weekly reviews provide an objective view of the upcoming week, allowing you to make better decisions on prioritizing tasks and addressing potential conflicts early.
Identifying bottlenecks or inefficient practices can help you improve your workflow, making each week smoother than the last.
Weekly reviews are highly customizable, as you can adapt them to suit your productivity system as well as your personal and professional goals. Here’s my step-by-step weekly review process:
Choose a Consistent Day and Time
Consistency is key when it comes to successfully implementing weekly reviews. Choosing a specific day and time ensures that it becomes a habit and a seamless part of your routine. However, what matters more is that it fits your schedule, allowing you to maintain consistency. Here are some suggestions to help you decide which day may work best for you:
Over the Weekend: Sunday Night
I do my weekly review every Sunday at 6 PM. Sunday offers a natural transition between rest from the previous week and preparation for the upcoming week. In addition, with the week behind me, I have all the information I need to approach Monday with clarity.
End of the Work Week: Friday Afternoon
Friday afternoon can be ideal if your weekly review primarily revolves around work-related tasks or goals. Wrapping up the work week with a review lets you reflect on what’s been accomplished and look forward to what’s next, effectively closing out the week. Plus, it provides a psychological end to the workweek, allowing you to fully disconnect over the weekend, knowing you’ve already planned ahead.
Whatever your preference, make it a priority to perform your weekly review on the same day and time each week. You can set a recurring reminder for your weekly review on your preferred task management app. I organize my to-do lists and set up my review process in the Reminders app.
Tidy Up Your Digital Workspaces
Digital workspaces (or inboxes) can quickly become chaotic without a regular review process, and one of the most valuable parts of my weekly review is tidying up these areas. My weekly review lets me sweep through all my digital workspaces and organize them to start the week with a clear mind.
Here’s how I review my digital workspaces:
Emails
I start with my email inbox. I go through my messages from the past week to see if any can be turned into actionable tasks. This also includes responding to emails I may have missed during the week. In addition, if you use internal communication tools like Slack, you can apply this same process to your messages there.
Calendar
Next, I review my calendar, paying attention to follow-up actions for past events, rescheduling where necessary, and scanning upcoming appointments to ensure I’m prepared. Having a bird’s-eye view of my schedule helps me anticipate what’s ahead and leaves fewer surprises during the week.
Notes
My note-taking app holds everything from meeting notes to article highlights. I’m often in a rush when I create these notes, so they can end up unorganized. My weekly review may include sorting action items from meeting agendas, organizing quotes from articles and books, and reviewing notes I created through interstitial journaling.
Review Project Lists, Backlogs, and Long-Term Goals
A project is a set of related subtasks that work toward a specific goal. For example, a marketing campaign for a new product typically includes several subtasks, such as creating social media posts, designing graphics, and scheduling email campaigns.
During this part of my weekly review, I confirm that each project has at least one immediate next action, so there’s always a clear path forward. If a project is stalled—perhaps because a task depends on someone else—I’ll set a reminder to follow up at a specific time. This exercise ensures that my current projects support my long-term goals.
A Someday/Maybe list or backlog is where I capture ideas, projects, or goals that I’d like to pursue but I’m not yet ready to commit to. This includes any aspirations, interests, or potential projects that don’t require immediate action, for example, visiting a specific location or learning a new language.
During my weekly review, I scan my Someday/Maybe list to see if anything feels relevant enough to move into active status. On the other hand, some items may no longer be relevant. Deleting them helps me focus on what’s actionable now while ensuring I don’t lose track of potential future opportunities.
Process Your Task Inbox or Task List
By this stage, my task inbox (my trusted space where I capture all my tasks before organizing them) is filled with to-dos gathered from various digital spaces—email, calendar, Slack, and more. This step in my weekly review process helps me organize and schedule these tasks effectively.
What’s the Next Action?
I make sure each task is clear and actionable. If the task is vague, I clarify what the next specific step is to avoid confusion. If the task is large or complex, I break it down into smaller, manageable tasks.
What’s the Priority Level?
I use priority tags in the Reminders app to distinguish between urgent, important, and non-urgent tasks. This helps me prioritize my workload and ensure I am focusing on the most critical tasks first.
Which Project or Area Does This Task Belong To?
I move each task into the most relevant project or area of responsibility, so everything is organized by context and purpose. For example, my school assignments would go into the Education project, while any work-related tasks would go into the Work project
What’s the Due Date?
I add due dates and set reminders for each task, ensuring I don’t miss any deadlines. If a task is better suited for someone else, I delegate it and set a reminder to follow up.
Once I’ve sorted everything, I use Smart Lists in the Reminders app to create Today and This Week lists for filtering tasks for that specific day and week, respectively.
This part of the weekly review is flexible. You can use a similar process or your preferred productivity system to organize your tasks.
Reflect on What When Wrong or Right
A core part of my weekly review is reflecting on what went well and what didn’t. This step allows me to assess my productivity and find ways to improve.
I start by asking myself: What worked well? This reflection helps me celebrate my accomplishments during the previous week and recognize any productive habits I can keep using. Next, I look at what didn’t work—tasks I couldn’t complete or projects that stalled. What can I do differently next week to improve?
One potential solution is to schedule the specific task for a different period of the day when I’m more focused or energized. This is why finding your sleep chronotype and using it to your advantage is critical. Another option is to delegate the task to someone else if possible. Sometimes, the task itself may not be the issue. Trying a different approach can help me complete it more efficiently.
A weekly review process is an excellent way to improve your productivity and stay organized. By taking the time to review you r tasks, goals, and processes, you gain valuable insights that you can use to improve and streamline your workflow.
Google Chrome has a long and well-deserved reputation for hogging resources. However, its new and improved performance controls should help you keep Chrome under more control.
That is as long as you’re not determined to keep hundreds of tabs open at once and then wonder why Chrome is hogging so many system resources.
Google Launches New and Improved Performance Controls
As outlined in an announcement post on The Keyword, Google is rolling out new performance controls to help users manage the way Chrome uses system resources. There are three main elements involved here…
First, there’s a new Performance Detection tool which “identifies potential performance and offers solutions”. This could include deactivating any tabs that are using extra resources, helping you speed up the tab you’re currently using.
If enabled, you’ll see a performance issue alert notification identifying the problem and suggesting a solution. If you agree with the suggested action, you just need to click Fix Now to have Google resolve the issue.
Google
Secondly, Google has improved the existing Memory Saver feature first introduced in 2022. This frees up memory from inactive tabs, allowing you to use the resources where they’re actually needed. You can now choose between Moderate, Balanced, and Maximum modes, depending on your preferences.
Last but not least, Google has added more ways to customize Chrome’s performance controls so that they suit your specific needs. This includes specifying sites which should always remain active, and the option to change the appearance of inactive tabs and tab hover preview cards. Which are both minor ways to personalize Chrome.
Helping You Make Google Chrome Work Better for You
With two-thirds of internet users now using Chrome, it’s crucial that Google keeps improving the way it uses resources. And these new and improved performance controls are a very welcome addition to the world’s most popular web browser.
Google hasn’t announced exactly when these new and improved performance controls will be available, but once live, they’ll be accessible under Settings > Performance from the three dot menu in the upper-right corner. Performance issue alerts can be toggled on or off under General, while the updated Memory Saver options will be available under Memory.
Have you noticed that your VPN is detected more than it once was? Unfortunately for VPN users, websites, companies, and governments have more techniques than ever to uncover VPN use, so they’re no longer as invisible as they once were.
One of the common ways websites detect VPN usage is by tracking user login locations. If a single user logs in from wildly different locations within a short period using the same device, websites may recognize this as an indication of VPN use to mask location. For example, if you log in from the U.S. one moment and from Australia shortly afterward, that could raise red flags.
Also, if multiple users connect to the same website or service through a shared IP address from a VPN server, this pattern can signal VPN use. To minimize detection, connect to VPN servers close to your location and consider using dedicated IPs, which provide a unique address just for you, avoiding noticeable location shifts.
2 Connecting With a Blacklisted IP Address
Companies often keep lists of blacklisted IP addresses associated with VPNs and proxies, which allows them to block unwanted traffic. If you’re using a free VPN with shared IP addresses among numerous users, there’s a chance you may connect via one of these blacklisted IPs, letting the website detect and flag your session as a VPN connection.
To avoid this issue, consider using a dedicated IP unique to one user that is less likely to be flagged. If you can’t spend on a dedicated IP address and prefer a free VPN connection, I recommend opting for a service with a large, regularly updated pool of IP addresses to minimize detection.
Avoid using VPN servers in countries like China, Russia, Syria, Iran, and so on, as your traffic is likely to be blocked by default.
3 Advanced Detection Technologies
Miker Rivero/DALL-E/MakeUseOf
Companies use advanced technologies like artificial intelligence and machine learning to detect VPN traffic. Tools like Deep Packet Inspection (DPI) analyze metadata in transmitted data packets, which helps identify typical VPN parameters such as encrypted headers or unusual protocols. This makes it easier to spot VPN traffic patterns.
While complete anonymity may not be possible, VPNs with features like “stealth mode” or “obfuscation” can help disguise VPN traffic as regular internet data, reducing the chance of detection. However, this is not foolproof as AI technology and machine learning techniques rapidly evolve.
4 Device and TLS Fingerprinting
Similar to deep packet inspection, device and TLS (Transport Layer Security) fingerprinting are techniques websites use to detect VPN usage. Device fingerprinting creates a unique “fingerprint” by collecting specific device details, so connecting from varying locations with the same fingerprint often signals that you’re using a VPN.
VPN providers often use unique TLS configurations, and websites can block connections if a TLS fingerprint matches known VPN profiles. While you can’t fully bypass such detection, using the same server and a dedicated IP can help. You can also use VPN providers that don’t frequently reuse TLS profiles across users to reduce the chance of detection.
Content licensing agreements often limit where media can be accessed legally. To enforce these restrictions, platforms must use robust VPN detection to ensure viewers can only access content from approved regions. Companies invest heavily in VPN detection tools to avoid violating agreements with content creators and distributors.
If a service detects your VPN and restricts your access, there’s generally little you can do. You can use a VPN connection with premium servers in the best regions to bypass detection. Still, you must avoid doing so to access content that the streaming platform or service doesn’t have permission to show in your region.
This is why websites and services are now much more capable of detecting VPN usage than they used to be. If a service or platform disallows VPNs, respect that rule to avoid account suspension, especially for financial services. One of my friends had his Australian bank account temporarily blocked after accessing it through a VPN while overseas.
When browsing Amazon, it’s easy to jump straight to the five-star praise or the one-star warnings. But what if I told you you’re skipping over the most valuable insights in three-star reviews?
Why 5-Star Reviews Are Often Overly Positive
While it may seem natural to focus on five-star reviews first, it’s important to understand that they don’t necessarily depict a product in the most realistic light. These extreme reviews are often influenced by the user’s emotions and biased opinions—feelings like joy and excitement about a product.
For example, in a state of excitement, a user only writes about features that impressed them while ignoring its flaws, and most of these reviews are written shortly after receiving a product based on first impressions instead of providing a more neutral long-term experience. You must have come across several reviews like these on Amazon: “I just unboxed the product, and it looks great!”. Also, emotions are subjective and vary significantly from person to person. One person might give the product five stars, while another could give it one star, although the product is the same.
Additionally, individual experiences with specific types of products also differ. For instance, someone purchasing a mechanical keyboard for the first time might be amazed by its tactile feel and RGB lighting because they are experiencing these things for the first time and write an overly positive review filled with praise. In contrast, a person who has owned several mechanical keyboards may not find these features as impressive and expect more from the keyboard.
Biased reviews also arise from loyalty to a particular brand or company. This is commonly observed among Android and iPhone users. For instance, a long-time iPhone user might be biased in evaluating a new iPhone just because it’s from Apple.
One final problem with five-star reviews is that many are often fake, written solely to boost sales, with companies or manufacturers giving incentives to users in exchange for a positive review.
The Problem With 1-Star Reviews
When a product doesn’t live up to buyers’ expectations, they tend to be emotionally driven and write excessively negative reviews. Such reviews don’t mention any pros the product might have and depict the product in a more negative light than it deserves to be.
Often, these low-star reviews are outliers related to uncommon issues such as slow shipping or damaged packaging. Although these are real problems, they are less likely to occur and don’t directly relate to the product.
Also, we can’t ignore that a one-star review can be an attempt to tarnish a company or product’s image.
Why 3-Star Reviews Lead to Better Buying Decisions
To start, fewer people rate a product with two, three, or four stars compared to the more common five and one-star reviews. And since five-star ratings are often overly optimistic or fake, and one-star reviews frequently focus on issues unrelated to the product and don’t mention any pros, three-star reviews are the sweet spot for a balanced perspective.
Also, you will find three-star reviews are in-depth, highlighting both the pros and cons of the product, with phrases like “I’m taking a star off for XYZ reason,” that provide a more neutral and realistic evaluation of the product and explain what issues a user faced while using the product and things they liked about it. This comparison is what helps with making a better buying decision. You can read about the product’s downsides while also making sure it has the features you are looking for.
Finally, three-star reviews are the least likely to be fake. If someone wants to manipulate a product’s rating, five and one-star reviews are the most obvious choices, as they have the greatest impact on the overall score. For these reasons, it’s important not to be carried away by star ratings. A product always has good and bad sides, and a neutral review should mention both.
You can see this idea implemented on services such as YouTube and Netflix, where they have moved to a thumbs up and thumbs down button from star-based ratings, with YouTube going further and hiding the dislike count. With star ratings, people’s interpretations of what each star means to them vary, often leading to extreme ratings. With likes and dislikes, skewed ratings are reduced, and it’s outright straightforward. Either you like the product, or you don’t.
Footnotes are a handy way to provide extra information or cite sources without cluttering up the main body of your text. Whether you’re working on a research paper, an academic essay, or want to add additional context to your document, Google Docs makes it easy to insert and manage footnotes.
If you’ve used word processors like Microsoft Word, adding footnotes in Google Docs follows a similar process. Here’s how to add them in just a few steps:
Place your cursor where you want the footnote number to appear in the text.
Go to the Insert menu at the top of the screen.
Scroll down and select Footnote from the dropdown.
A number will appear where your cursor is, and a corresponding space will open at the bottom of the page for you to type your footnote.
Type in your footnote.
Once you’ve added your footnote text, Google Docs automatically numbers it and positions it correctly, saving you from formatting headaches.
If you need to change the content of a footnote, scroll to the bottom of the page where the footnotes are listed and click on the text. You can edit it just like any other part of your document.
To remove a footnote, delete the superscript number in the main text. Google Docs will automatically remove the footnote from the bottom of the page and renumber the remaining ones to keep everything in order.
Google Docs automatically updates footnote numbering if you add, remove, or move sections around, so you don’t need to worry about manually renumbering them.
Tips for Consistent Document Styling
Consistency is key to keeping your document looking polished. Use the same font for footnotes as your main text but consider a slightly smaller size, like 10 pt, to avoid distracting from the content.
Stick to single-spacing for footnotes unless a specific style guide requires otherwise. If you use bold or italics in the main text, applying the same style to footnotes keeps everything cohesive.
Finally, if you’re writing for a professional or academic audience, follow a citation style guide like APA or Chicago to ensure your footnotes are formatted correctly. If your document contains numerous citations, it’s better to create a references page instead of using footnotes.
Footnotes are a useful tool for adding extra information or citations to your document without disrupting the flow of your main content. With Google Docs, inserting and managing them is straightforward, and with a few simple styling tips, you can ensure they blend seamlessly into your document.
A PC build kit lets you build a computer with training wheels on. These kits ship with all the components included, as well as the tools and support you’ll need, making building a custom PC simple for first-timers.
Price: $999 to $3,699
Build Tools: Video instructions and toolkit included
Support: FAQ, Web chat
Ships to: USA, Canada, Europe
Warranty: 2-year parts
If you’re looking for something in between buying a pre-built PC or speccing a fully custom PC yourself, check out Corsair’s build kits.
Corsair nailed making decisions easy for first-time builders. Five kits are available across different budget ranges; each build comes with pre-chosen parts. That way, you don’t have to check if your PC parts are compatible and won’t make a mistake like choosing the wrong cooler.
I love their simple chart showing each build’s performance at different resolutions. Whether you need frame rates for competitive first-person shooters or expansive 4K for a flight sim, it’s a simple way to compare what you want and what you’re getting.
There are a few things to be aware of before you buy. The site removes the Add to Cart button if a kit is sold out without telling you why. The case, CPU cooler, memory, storage, and power supply are all Corsair branded, but that does help keep prices reasonable. Lastly, it wasn’t immediately clear what level of build support the company provides if you get stuck.
When all is said and done, Corsair’s build kits provide simple choices with only powerful components—it’s the right approach for gamers building their first PC.
Price: $770 to $4,400
Build Tools: Field manual with videos and toolkit included
Support: Build-day chat, Phone and video support, Discord server
Ships to: USA only
Warranty: 2-year parts
PC CRATE specializes in build kits, and it’s primarily what the company sells.
Other build kits make it easy by selling prepackaged components, but what’s neat about PC CRATE is that you can swap out components to your liking. It’s a great option for those who know a little bit more about building and have specific components in mind for their kit.
I like how customizing takes place on one simple page of drop-down menus. It was a smart decision to make the motherboard fixed, so you don’t have to worry about choosing a new motherboard—a decision that’s often intimidating for first-time builders. There’s even a discreet shipping option if you intend to give the kit as a gift.
The site’s kit builder does have a few oddities. The current default choices are budget-oriented to a fault (e.g., no GPU), so you might want to up the specs. And if you opt for a more powerful GPU like the RTX 4080, the builder doesn’t automatically switch your power supply to the proper recommendation.
Minor complaints aside, PC CRATE is generous with build-day support for beginners. If you want to pick and choose your parts, PC CRATE has a kit for you.
Price: $1,100 to $2,800
Build Tools: Step-by-step instructions and PC Build Tool Kit included
Support: Phone and email support
Ships to: USA, Canada, Europe (select countries only)
Warranty: 2-year parts
Sirius Power PC is worth checking out for options you can’t get from other PC build kits.
For one, the kit offerings are diverse: the company offers packages with Intel or AMD processors paired with Nvidia or Radeon graphics cards. Each package already has the parts chosen for you, so you can be sure you’re buying a well-rounded PC. Every kit also comes with a generous box of tools every PC Builder needs.
The kits from Sirius Power PC also stand out in terms of aesthetics. They come with full-window cases resembling the venerable O11 Dynamic, with many extra RGB fans included.
That being said, the site is rough around the edges. I had trouble finding the build kit section, and the site loading behaved a little wonky. The only other thing I’d watch out for is their lowest-budget kit, which I feel needs a processor update to make more sense. Nevertheless, the components chosen for all of their other kits seem like solid values to me.
If aesthetics and having more brand selection matter to you, Sirius Power PC sells some great kits.
If you’re not yet ready to build your own PC, you can always turn to the best custom PC builder websites to ship you one pre-assembled. But if you’re a tinkerer or love DIY, a PC build kit removes the stress of shopping and lets you get straight to the fun of working on your build.
Another day, another social media fad. Facebook, TikTok, Instagram, and their ilk are full of social media challenges and trends, but I won’t take part in any of them. And there are so many reasons you should avoid them too.
1 Challenges Can Be Dangerous
A cursory glance at news items will tell you how dangerous some of these social media challenges can be. Yes, some purport solely to be fun or even raising money for charity, but the actual consequences of these trends can be serious.
The sunburn challenge saw people creating “body art” on their bodies by drawing an image using suntan lotion and leaving the rest of their bodies to burn in the sun. Obviously, repeated exposure to the sun in such a way can lead to skin cancer.
Other challenges, however, seem harmless at first. These challenges often involve eating something to either prank someone or even induce effects similar to taking drugs. Notable examples include the salt trend and nutmeg challenge, both of which show the consumption of these food stuffs. When consumed in large quantities, though, they can cause nausea, diarrhea, seizures, and, in extreme cases, death.
That’s not to mention the corn on the cob, dragon’s breath, TidePod, and so many other challenges. These risks simply aren’t worth taking.
2 They Can Hinder Future Employment
What you share online stays online. You can delete content, but nothing is completely gone. We’ve all seen posts coming back to haunt people years later. The everyday person might not be likely to get cancelled, but what we share online can still stop future employment.
Take, as an example, the trend of people putting videos of them getting fired on TikTok. This trend saw those being laid off by employers via video calls then streaming their being let go from a company.
That might seem like a revolt against authority, but it’s a bad move. If any future employers see that you’ve done that, they might get a bad impression of you. What’s more, by sharing these videos, you might be in contravention of privacy clauses. It’s just one example of TikTok challenges that go too far.
3 Trends Can Affect Other People
I hate people being inconsiderate and that’s what a lot of these challenges involve. There’s the trend of people sharing videos of themselves working out at the gym only to be interrupted when someone else dares to walk in front of the camera or wants to use the same equipment.
Then there are pointless videos you think don’t affect anyone but actually have unseen consequences. The toilet roll challenge involved emptying a full roll into an airplane toilet while flushing: the effect is admittedly cool to see as the suction continues until the roll is finished.
Nonetheless, this ignores the lack of provisions on flights, impacting anyone going in afterwards. Similarly, at the end of each flight, the airplane’s waste tanks have to be emptied. On LinkedIn, aeronautical professional, Renish C., warns that “flushing rolls and rolls of toilet paper does cause serious blockages and an external force may be required to release the contents into the dump truck. This can cause a serious risk to the health of the employee as the contents can dump right over them.”
4 They Can Result In Getting Scammed
We’re all so attuned to sharing private details online that it becomes second nature. I do it too. But if you think you’re unlikely to get scammed, guess again. Everyone is a potential victim of cybercrime.
Trends can lead to getting tricked by a fraudster. These can include simple quizzes and personality tests. Because everyone seems to be doing them, you’ll think you’re safe to do so too. What’s the harm, right? But some of these quizzes will ask for access to your profile simply so you can take part.
That might seem straightforward, but scammers can learn a lot from your profile. Granting them access can mean they skip past your privacy settings, and can see exactly who you are, who you’re friends with, and what you’re interested in. Such information can lead to pyramid schemes, phishing attempts, and even identity theft.
5 You Might Reveal Too Much About Yourself
Giving away even basic Personally Identifiable Information (PII) can have a serious impact on you. I often see posts on X, aka Twitter, that solely exist to find out answers to security questions. This might be through your “drag queen name” or similar, which scammers posing as normal users say is “your mother’s maiden name and the name of your first pet combined”.
If any of your private information has ever ended up on the dark web, replying to these posts can give cybercriminals enough information to pass security questions and reset your online accounts.
6 They’re Largely Driven by Consumerism
Social media trends have been hijacked by big brands. Simply taking part means you’re either wasting money and time on a passing fad or acting as an unknowing publicist for a massive company.
TikTok is a perfect place to find trends pushed by consumerism. While some are somewhat altruistic, like those encouraging people to buy books, others are purely to drive sales to specific products you don’t really need.
The popularity of Stanley cups is a prime example of this. They’re simply tumblers with straws and massive handles. Once made for construction workers, social media rebranded them as for women solely based on interest on TikTok and Instagram. It’s a canny move, but one which leaves me feeling hollow and cynical about how trends can be created just for marketing purposes.
Stanley cups might be useful sometimes, but they’re only popular because social media tells people they’re the latest cool product you have to own to fit in.
7 They Lack Creativity and Originality
Ultimately these challenges and trends are pedestrian and boring. They’re a complete waste of time.
I’m all for creativity, but things like the gallon challenge—which involves drinking that amount of milk without throwing up—are both dumb and unoriginal. They’re not adding anything significant or thought-provoking to the world. They’re just content for content’s sake.
There are influencers who entertain their fans by doing something productive or by informing them of something interesting. These don’t tend to become trends, however. The stuff that generally becomes social media phenomenons are things that people can replicate. Typically, that’s not something mentally stimulating. It’s something nonsensical, like filming yourself committing a crime, as with the “kia boyz” trend that made headlines.
Challenges on Facebook, X, TikTok, Instagram, and the like simply aren’t worth taking part in.
If you need a productivity device with an all-day battery life and solid performance, MacBooks are a popular choice. But if you prefer Windows to macOS, these Snapdragon X Elite laptops offer the performance and portability to rival Apple’s lineup.
All listed prices are for the base device featuring a Qualcomm Snapdragon X Elite SoC and at least 16GB of soldered RAM.
At just 12.8mm thick and weighing 2.8 pounds, the Lenovo Yoga Slim 7x is as light and thin as a 13-inch MacBook Air. However, the beautiful 14.5″ 3K (2944×1840) OLED touch display offers more screen real estate and a faster 90Hz refresh rate. With its powerful Snapdragon X Elite 12-core (X1E-78-100) processor, the 70Wh battery pack can last a full day while remaining cool and quiet under regular use. The Lenovo Yoga Slim 7x starts at $999 for the cheapest model, though that price can change greatly depending on the configuration you choose.
Like other Copilot+ PCs, the Yoga Slim 7x also gets the standard 16GB LPDDR5X onboard memory and an upgradable 512GB of Gen4 SSD storage. However, you can opt for a higher-capacity 32GB and 1TB variant if you need more RAM and storage.
Lenovo offers some of the best laptop keyboards, and the Yoga Slim 7x is no different. The spacious keyboard deck features a large, smooth touchpad and tactile keys, making for an excellent typing experience. It also gets an IR camera for biometric sign-in with Windows Hello, three USB-C ports, and all the usual connectivity features, except for a headphone jack.
The 7th edition of the Microsoft Surface Laptop retains most of the things that Surface laptops are known for: a premium build, an unconventional squarish design, and a stunning 13.8” 120Hz IPS touchscreen display with a 3:2 aspect ratio. If you need more real estate, you can also opt for the 15” model. The 13.8″ model typically starts at $999, but you can also find an assortment of 10-core and 12-core models on third-party websites like Amazon.
The real upgrade, however, comes in its performance and efficiency. Powered by a more powerful Snapdragon X Elite (X1E-80-100) 12-core CPU, 16GB LPDDR5X onboard memory, and a swappable 512GB SSD, the new Surface Laptop offers stellar performance and lasts a long time on a single charge at 15 hours of mixed usage. These specs are more than enough for your entertainment and work needs, including some gaming on the go, especially when using Microsoft Auto Super Resolution. It also consistently scores well on benchmarking sites like Geekbench 6 and Cinebench, inching closer to the M3 MacBook Air’s performance.
Along with an excellent haptic touchpad and a good keyboard, it also features all the usual connectivity features, including two USB-4 and one USB-A port, Windows Hello-compatible biometric hardware, and a headphone jack.
Buy: Microsoft Surface Laptop 7th Edition (from $999)
The ASUS Vivobook S15 is a conventional laptop with a big display, excellent port selection, and a premium Harman-Kardon-certified audio setup. But the highlight of the laptop is its gorgeous 15.6″ 3K OLED 120Hz color-accurate display with a peak brightness of 600 nits. It typically starts at $1,299.99, though you can also sometimes buy some models on Amazon for a discount.
Under the hood, it’s powered by a standard Snapdragon X Elite (X1E-78-100) processor. ASUS has paired it with 16GB LPDDR5X RAM and a generous 1TB of storage that can chew through most productivity tasks without a sweat.
Despite its slim 0.58-inch unibody design, it features a full-sized HDMI 2.1, two USB 3.2 Type-A, and two USB-C 4 ports. It also ships with a microSD card reader and headphone jack. While ASUS claims 18 hours of usage from its 70Wh battery pack, it can typically last up to 14 hours with mixed usage in real-life scenarios.
The Microsoft Surface Pro 11th Edition is essentially a 13″ tablet that runs a full-blown version of Windows 11. The Surface Pro’s greater flexibility makes it better than the M4 iPad Pro as you can use it as a tablet to take notes with the Surface Slim Pen or turn it into a laptop using the optional Flex Keyboard, which now works wirelessly via Bluetooth.
The 13″ OLED PixelSense 120Hz touchscreen display, which reaches a peak brightness level of 900 nits, and the premium speakers make it a great option for media consumption and productivity alike. The Snapdragon X Elite (X1E-80-100) variant can be customized with 16GB or 32GB of LPDDR5x memory and a 512GB or 1TB Gen 4 SSD.
Another distinct feature of the 11th Edition of the Surface Pro is the optional 5G support for cellular connectivity on the go. The two USB-C 4 ports on the device support data transfer, charging, and connections for up to three 4K displays at 60Hz for a full-fledged desktop experience. The 52Wh battery pack is also impressive and will net you up to 12 hours of usage on the recommended power plan.
Buy: Microsoft Surface Pro 11th Edition (from $999)
If you want the thinnest and lightest Windows laptop, the Dell XPS 13 might be the answer. This nimble 13.4″ device offers multiple display options. You can choose from an FHD+ 120Hz non-touch or a stunning 3K OLED 120Hz color-accurate touchscreen screen.
Powered by the Snapdragon X Elite (X1E-80-100), the base variant offers 16GB of LPDDR5X integrated memory and 512GB of swappable SSD storage for snappy performance. With a 55Wh battery pack, it can last up to 15 hours of mixed usage, including photo editing, video streaming, and browsing.
While the XPS 13 is highly portable at just 2.6 lbs and measuring 0.6″ thick, it suffers from some of the same issues we noted in our review of the Dell XPS 16 9640. This lightweight chassis comes at the cost of a shabby keyboard and poor port selection, with only two USB-C 4 ports for charging, data transfer, and display output.
The HP OmniBook X is a no-nonsense productivity device with an excellent keyboard, impressive all-day battery life, and a fairly colorful 14″ 2.2K touchscreen LCD, all packed in a relatively light 2.9 lbs chassis. Unfortunately, the peak brightness of 400 nits may make it difficult to use outdoors, and the 60Hz refresh rate can detract from the overall experience. Still, for a laptop that starts at $1,089.99, which can often be found cheaper on Amazon, it holds up pretty well during everyday use.
It comes equipped with a Snapdragon X Elite processor (X1E-78-100), 16GB LPDDR5X onboard memory, and a 512GB swappable SSD, which are more than strong enough to get you through the day. While the speakers and trackpad leave plenty to be desired the OmniBook X stands out as one of the most affordable Snapdragon X Elite laptops currently available when it’s available at a discount.
Buy: HP OmniBook X(from $1,089.99)
These are the best Snapdragon X Elite laptops you can buy today. If you prefer full-fledged Windows computers with flexibility and portability, I recommend the Microsoft Surface Pro 11th Edition since it can function as both a tablet and a laptop. Because Copilot+ computers use a different architecture than standard Windows 11 PCs, there have been reports that Copilot+ PCs are a bit of a disaster for average users, but as more developers start to support the Windows on Arm system, those issues will be ironed out.
If you’re still uncertain about whether to stick with conventional x86 chips or transition to the new-generation ARM-powered devices from Apple and Qualcomm, I recommend checking out our comparison guide on the Snapdragon X Elite, Apple M3, and Intel Core Ultra. It provides an in-depth look at what each of these SoCs offers.
Buying a phone for your child can be daunting, especially when you’re on a budget. But don’t worry, we’ve got you covered. We’ve scoured the market to find the best affordable phones that are perfect for kids and packed with features.
1 Google Pixel 7A
Justin Duino / MakeUseOf
If you’re looking for a phone that offers the perfect blend of affordability and performance, the Google Pixel 7A is a top contender at $329 on Amazon. The Pixel 7A shares many similarities with its pricier sibling, the Pixel 7, including Google’s Tensor G2 chip.
The Pixel 7A boasts a vibrant display with a smooth 90Hz refresh rate. It means your child can enjoy a smooth performance while scrolling through social media or playing games.
If your child likes to take selfies often, the 13MP front camera on the Pixel 7A should be more than adequate. The rear camera setup is also pretty solid for its price, and the 64MP wide and 13MP ultrawide cameras should exceed your child’s expectations.
The Pixel 7A shines in its parental controls. Setting up age-appropriate boundaries is easy with Google’s Family Link app. You can manage screen time, restrict content access, and keep tabs on your child’s digital activities without hassle.
The Pinwheel Slim 6 is something you should consider, as it puts parental control at the forefront. This sleek Motorola device, priced at $199 on Amazon, is designed with your child’s safety and your peace of mind as top priorities.
The phone features a vibrant 6.5″ HD+ display, which is big enough for your child’s favorite apps and games. The 50MP rear camera with Quad Pixel technology ensures your child can capture great photos, day or night. And with up to 46 hours of rated battery life, you won’t have to worry about constant recharging.
The Pinwheel Caregiver app gives you complete remote access to your child’s phone. Want to restrict social media access? No problem. Need to set time limits on apps? That’s easy too. You can even track your child’s location and review their text messages and call history.
The Pinwheel subscription starts at just $14.99 monthly, with additional phones costing only $4.99 monthly. This makes it an affordable option for families with multiple children. Moreover, the Pinwheel Slim 6 comes with a curated selection of apps that have been vetted by child wellness experts. You can add more apps as you see fit, but you’ll always have the final say on what your child can access.
The Bark Phone is built on the reliable Samsung Galaxy A14 model and costs $199 on Amazon. It comes with Bark’s comprehensive parental control software, which is pre-installed.
What sets the Bark Phone apart is its advanced monitoring features. The software runs in the background, constantly scanning your child’s activities for potential dangers. This includes analyzing texts, social media posts, app usage, and even the photos and videos your child saves. Bark alerts you immediately if anything concerning is detected, such as signs of bullying or mental health issues.
Bark offers two service tiers tailored to different age groups. For younger children, the $29/month plan includes unlimited talk and text, location tracking, contact management, and text and photo monitoring. It also disables apps, browsers, and voicemails, creating a walled garden for your little one.
For teens, Bark offers more granular control. Plans range from $49/month for Wi-Fi only to $89/month for unlimited data. In addition to the basic features, you can block specific websites and apps, remotely lock the device, and prevent text deletion without your permission. You also get 24/7 GPS location tracking, giving you peace of mind about your child’s whereabouts.
One potential drawback of the Bark Phone is the level of surveillance involved. All of your child’s communications are stored and monitored on Bark’s servers. While Bark promises to delete this data after 30 days, some parents may find it a bit too intrusive. However, the Bark Phone is a good choice for those who prioritize digital safety above all else.
If your family is firmly in the Apple ecosystem, the iPhone SE (2022) is a fantastic choice for your child. Starting at $198 on Amazon, this compact powerhouse packs the same A15 Bionic chip in the iPhone 13 for smooth performance in apps, games, and more.
The 4.7-inch Retina HD display may be on the smaller side, but it’s bright, colorful, and sharp. Plus, its compact size makes it perfect for smaller hands. While not as advanced as the pricier iPhones Apple sells today, the camera still takes great photos, thanks to Smart HDR.
One of the standout features for parents is the iPhone SE’s parental controls. With the native Screen Time feature on iOS, you can set app limits, restrict content, and monitor your child’s usage. Just keep in mind that you’ll need an iPhone yourself to make the most of these features.
The iPhone SE also boasts an IP67 rating for water and dust resistance, making it a durable device for kids. With Touch ID built into the Home button, your child can securely unlock their phone, sign into apps, and even use Apple Pay.
Looking for a phone that keeps your child connected without internet distractions? The Gabb Phone 4, available on Amazon at $149, might be just what you need. It boasts a durable 6.1-inch display protected by Corning Gorilla Glass Victus 2, 3GB RAM, and 32GB internal storage.
With the Gabb Phone 4, your child can enjoy essential features like texting, calling, music, and photos without the risks that come with unrestricted internet access. Gabb offers a list of safe apps that you can choose to add to your child’s phone.
You can use the MyGabb and Gabb Messenger Parent apps to monitor your child’s communications, manage their contact list, and even track their location with GPS and geofencing. Need to manage multiple Gabb devices? No problem–the MyGabb app has you covered.
Gabb offers three subscription plans. The starter plan, which includes unlimited messaging and calls, essential apps, and cloud backup, costs $24.99 monthly. Higher-tier plans add features like Gabb Music, group texting, and optional mobile data.
While the multi-app approach to parental controls may not be as streamlined as some other options, the Gabb Phone 4 remains a strong contender for parents seeking a safe, feature-rich device for their kids.
If you’re looking for a budget-friendly phone for your child that doesn’t skimp on the essentials, the HMD Vibe is definitely worth considering. At just $119 on Amazon, this phone offers a lot of value for its price point.
Don’t let the plastic build fool you–the textured back provides a good grip and can handle the occasional drop. However, if your child is particularly accident-prone, you may want to invest in a case. Under the hood, the Vibe packs 6GB of RAM and 128GB of storage. While this isn’t top-of-the-line hardware, it’s sufficient for everyday tasks and even some light gaming.
The Vibe’s display is a pleasant surprise, with a 90Hz refresh rate that makes scrolling and animations feel smooth. The screen is also quite bright, making it easy to use outdoors. And with a battery that can last up to two days, your child won’t be constantly tethered to a charger.
Remember that the Vibe is a general-purpose phone, not a device specifically designed for kids. It doesn’t come with built-in parental controls like some other options on this list. However, you can easily set up Google’s Family Link app to manage your child’s usage and access.
You have to balance affordability, features, and safety when choosing the right phone for your kids. Whether you opt for the feature-rich Pixel 7A, the parental control powerhouse Bark Phone, or the budget-friendly HMD Vibe, make sure you protect your kids from cyberbullying.
When you need your photos sized to a specific aspect ratio, cropping them down to fit it is easy, but cleanly expanding an image beyond its original borders is a lot harder. Fortunately, we have AI tools that can “imagine” what lies beyond an image’s edges and fill it in with a believable scene to expand it. Now, Instagram is rolling out a new feature that will let you do the same with your photos.
As spotted by Sam Sheffer on X (formerly Twitter), Instagram is adding a new AI expander tool for Stories. If you like a photo you took but wish it featured a little more around the edges, you can use artificial intelligence to generate more context for your image.
The main draw for this feature seems to be making existing images fit Instagram’s desired 4:5 aspect ratio better. When you take a photo with your phone, you usually need to crop it down to fit the app’s desired dimensions. By using the AI expander tool, you can fill out the rest of the photo without needing to crop the image or upload it with black borders.
By the looks of things, not everyone has access to this new feature just yet. There’s a good chance that Instagram is slowly rolling this feature out to its users in waves, so if you boot up the app and cannot find the AI expander tool, you may need to wait a little for it to arrive. In the meantime, there are plenty of ways to make your photos unique for Instagram without using AI tools.
Choosing the right presentation tool can be crucial for how effectively you deliver your message. With so many opinions surrounding Microsoft PowerPoint and Google Slides, it’s easy to feel torn between the two. But once you’ve considered the strengths and limitations of each, you’ll have a clearer picture of which one aligns with your needs.
1 Availability
In terms of accessibility across different devices, both PowerPoint and Google Slides offer flexible options. You can access Google Slides through a web browser on any computer regardless of its operating system. Plus, with dedicated mobile apps for iOS and Android, you can edit and view presentations on the go.
PowerPoint matches this level of accessibility but with a heavier reliance on its desktop application, available for both Windows and macOS. While you can also use PowerPoint in a browser, most users prefer the desktop app for its fuller feature set. Mobile apps are available too, but PowerPoint doesn’t perform natively on Linux, except via browser, or if you install Microsoft Office on Linux via PlayOnLinux or an alternative.
Although Google Slides may seem more versatile because of its entirely browser-based functionality, its lack of desktop apps is a significant disadvantage. So, PowerPoint gets an early lead here.
Winner: PowerPoint
2 Customization
The best way to deliver an excellent presentation is by customizing it exactly how you want. Here, PowerPoint shines. With a vast selection of templates, it accommodates nearly every type of presentation, from corporate updates to academic theses.
PowerPoint has a comprehensive selection of templates, and you’ll find some for almost every type of presentation. When you go to the in-app homepage, you can search for templates related to all kinds of themes.
You can also use different styles—go full minimalistic or use loud and brave colors. Besides templates, PowerPoint’s array of infographics helps you visually communicate complex ideas more effectively. However, if infographics are a priority, you should try dedicated tools to create infographics online.
Google Slides offers a modest collection of 26 templates, and while they are customizable, the options feel limited when compared to PowerPoint’s extensive library. However, Google Slides does include a theme builder, making it easier to manage multiple elements at once. You can also import custom themes, but the overall experience still leaves PowerPoint ahead in terms of variety and depth.
Winner: PowerPoint
3 Special Effects
When it comes to adding flair and making a presentation visually captivating, PowerPoint is a clear winner. PowerPoint has hundreds of fonts, including the ones you’ve installed locally. You’ll find many of these in Microsoft Word, too, meaning that you can keep branding consistent across all of your documents.
While you can choose from 26 fonts in Google Slides to begin with, it’s also possible to add more if you select More fonts and browse through the catalog.
Beyond fonts, PowerPoint also provides an arsenal of special effects for your slides. You can customize your slides with a wide array of transitions, animations, and sounds. I used some of these when presenting my thesis at university, and in my opinion, it helped keep my lecturers engaged (and helped me get a good grade!).
Google Slides, by contrast, is more limited in this area. It offers basic transitions and a handful of animations like fade and zoom, but it doesn’t provide the same range of effects that PowerPoint does. For anyone needing advanced visual effects, PowerPoint is the better choice.
Winner: PowerPoint
4 AI Features
Both Google Slides and PowerPoint have embraced AI integration, but in different ways. Microsoft’s Copilot, available to those with a premium Microsoft 365 subscription, can assist with creating presentations through text prompts and can even suggest edits and insert slides into existing presentations. However, it’s a premium feature, and you’ll have to decide whether Microsoft 365 is worth the additional cost.
Google Slides uses Gemini, and in my opinion, it’s much better than Copilot for presentations. You can use Gemini to create slides and insert AI-generated images within your slides. The tool can also help you brainstorm ideas and celebrate with your team; just some of the many things you can do with Google Slides.
Winner: Google Slides
5 Collaboration
Collaborating with others in Google Slides is very easy; you can either invite users via email or grant them access. The integration with other Google Workspace tools makes it easy to collaborate, comment, and assign tasks within the presentation itself.
PowerPoint also lets you collaborate in real-time—you can chat, comment, assign tasks, and resolve conflicts directly within the app. While it offers more comprehensive features than Google Slides, PowerPoint is less intuitive—you’ll need a quick search or two to figure out its collaborative functions. If the file is on your device, you’ll need to wait for it to upload first, which can slow things down—especially with image-heavy presentations.
Google Slides is better if you want to collaborate more quickly; it’s my preferred option if I’m going to share a presentation on any computer that isn’t my own.
Winner: Google Slides
6 Presentation Performance
PowerPoint truly comes into its own during live presentations. The ability to rehearse timings, control the slideshow setup, and hide or reveal slides at will make it an ideal tool for delivering professional presentations. PowerPoint also provides options for kiosk-style presentations and lets you add spontaneous notes or adjust content on the fly.
Google Slides gives you the essential presentation tools—you can use speaker notes and track the progress of your presentation—but it lacks the depth of customization and control that PowerPoint provides.
Winner: PowerPoint
7 Offline Accessibility
Google Slides might seem like an online-only tool, but you can actually make files available for offline use—just like any Google Drive file. To do this, you’ll need to enable offline access while you’re still connected to the internet. It’s a great option if you plan ahead and know you’ll be without a connection. However, if you forget to set it up in advance, you’re out of luck—you won’t be able to access or edit your slides.
This is where PowerPoint has a clear advantage. With files stored locally on your device, PowerPoint is ready to go even if your internet goes down unexpectedly. So, while Google Slides offers offline capabilities with a bit of prep, PowerPoint’s always-available nature gives it an easy win here for uninterrupted access.
Winner: PowerPoint
8 Pricing
Google Slides is completely free. PowerPoint’s pricing is more complex. While you can use the web-based version of PowerPoint for free, the desktop app requires a subscription to Microsoft 365, which ranges from $6.99 per month for personal use to $9.99 per month for family plans.
Though PowerPoint offers more advanced features, Google Slides is the more affordable option unless you need the full Microsoft 365 suite.
Winner: Google Slides
While PowerPoint takes the win in most categories, Google Slides is best for versatility and collaboration, with seamless, real-time editing and integration with Google Workspace. PowerPoint, however, excels in professional presentations, offering advanced customization and reliable offline access.
TikTok is packed to the gills with short videos of all kinds, and if you go looking, you can find something that interests you. However, a feed that’s newly being opened up to everyone is much more worthy of your time and attention than the usual garbage you’ll find on the app.
TikTok Turns Its STEM Feed On for Adults
TikTok initially launched the STEM feed in March 2023 as “a dedicated space to explore a wide range of inspiring, entertaining, and enriching videos related to science, technology, engineering, and math.” However, it was only turned on by default for users under 18. Adults had to go looking for STEM content with hashtags.
Now, all TikTok users, regardless of age, will see the STEM feed unless they actively choose to turn it off. This only applies in the United States, the United Kingdom, and Ireland. However, earlier this month, the feed was also opened up to everyone in Canada.
TikTok
As you probably already know, STEM stands for Science, Technology, Engineering, and Math, and it’s seen as an increasingly important set of fields for children (and adults) to be educated in. Thankfully, there are plenty of STEM-focused websites worth exploring.
While there have always been STEM-related videos available on TikTok, this dedicated feed makes it a lot easier to find. It also helps that before appearing on the STEM feed, the videos are all vetted for their suitability and accuracy by Common Sense Networks and Poynter.
A dedicated STEM feed is a welcome addition to an app more renowned for dumb comedy skits, even dumber cats just being cats, and “influencers” producing unnecessary and unfulfilling content that is very likely to be rotting our brains. Which is why it exists in the first place.
Alongside other social media companies, TikTok has been accused of being harmful to your mental health and wellbeing. So, having a dedicated feed full of actually useful content is one way to counter those accusations.
To find the STEM feed, scroll across to the left, past the Explore feed. If you want to carry on watching pointless videos rather than spend at least a little time getting educated, tap Profile > Menu > Settings and Privacy > Content Preferences > STEM Feed, and toggle it off.
We’ve all been there—settling down to work on an important document, only to find out the Wi-Fi is down. Or maybe you’re on a plane, and suddenly realize you need to make a quick edit. Google Docs claims to have an offline mode for moments like these, but how reliable is it? Can you really work on your documents without a hitch when there’s no internet?
How Google Docs Offline Mode Really Works
Brenna Miles/MakeUseOf/Smart Mockups
Google Docs’ offline mode essentially allows you to access and edit documents without an internet connection. This feature works by syncing your Google Drive files to your device and storing them locally, so you can view, edit, and create documents even offline.
When you revisit Google Docs without internet access, Google Chrome intercepts the request and serves the locally cached version of the page. This gives the impression of loading the Google Docs interface and previously synced documents, even when the network is unavailable. Once you’re back online, the changes you’ve made are automatically synced to the cloud, ensuring that your documents are up-to-date.
To use offline mode, you need to set it up ahead of time in your Google Drive settings. To do so, go to Settings (the gear icon) in your Google Drive, scroll, and then select the checkbox below Offline. This will sync your recent and frequently accessed files so they are available when you’re offline.
If you’d rather enable Offline mode for a single document instead of all your recent files, you can do so as well. When you’re in the document, click on the File menu and select the Make available offline option from the dropdown.
When working offline, Google Docs provides a robust set of features that mirror much of its online functionality. You’ll have access to any documents you’ve previously opened while connected to the internet, assuming they were saved for offline access.
It allows you to continue your work seamlessly, whether you’re editing existing documents or creating new ones from scratch. You can make all the usual changes to your documents—from basic edits to formatting adjustments and even adding comments.
However, there is one obvious limitation: you won’t be able to see real-time changes from your collaborators or update shared documents until you reconnect to the internet. While this might not affect solo work, it does impact collaborative projects. All your modifications stay on your local device until you’re back online, at which point they’ll sync with the cloud version.
So, Is Google Docs Offline Mode Really Offline?
Mostly, yes. Google Docs offline mode works well for editing and creating documents, and the experience is similar to working online. However, there are some limitations.
First, you need to enable offline access while online. Forget to do so, and you’ll be stuck until you’re reconnected. Second, you can only access files that were previously synced for offline use. Other files in Google Drive will remain inaccessible.
Lastly, while offline mode is most reliable on Chrome (even though it’s supported on most other Chromium-based browsers), other browsers or mobile devices may not support it as well. The Google Docs app for Android and iOS supports offline mode, but it isn’t as seamless as the desktop experience.
Google Docs’ offline mode is a reliable tool for individual work when internet access is unpredictable. But it’s not a true “offline-first” solution, especially when you compare Google Docs to Microsoft Word.
While it’s fine to write down all the places you plan to visit on your next trip, plotting your itinerary on a map can help you optimize your routes, coordinate with your travel buddies, and navigate in real time.
Fortunately, mapping your itinerary is now easier than ever with these travel planning apps.
1. Scout (Web): Best Travel Planner for Cities With Detailed Map
When you’re planning a trip to a new city, either alone or as a group, you will usually list many places you want to visit. With Scout, you can add these in different sections and see them on a live map, thus making it easier to figure out which places are within close distance and create an itinerary.
When you start a new trip in Scout, you’ll first have to pick a city you’re visiting and set your arrival and departure dates. By default, you get sections for attractions, food, and accommodations. But you can always add more custom sections. Each section gets its colored pin marker (for example, all food places will show as blue pins). You can add a place by searching for it or typing the full address. It’s powered by Google Maps, so it’ll be easy to find any place.
Once you’ve added the points of interest, open the itinerary view to see your dates. Drag-and-drop places from the first bar to any day’s itinerary. Once you add multiple places to a day, the map will automatically create a route for that day, linking all the places. You can rearrange them to find the best route to take.
You can also share your Scout trip with others so that they can add their own points of interest and update the itinerary to create a group plan. It’s also a helpful way to get tips from locals, as they’ll be able to add recommendations directly to your map.
Scout also lets you publish your map or itinerary to its directory so others can discover your helpful recommendations. And, of course, you can browse the directory to find what others have recommended.
Wanderlog is a feature-rich app for creating detailed itineraries. You can start planning a trip by selecting a destination, choosing dates, and inviting friends.
Once you’ve created a trip, Wanderlog will show you various places to visit in your selected city. You can add these to your trip or search for more places. Likewise, you can add a section for restaurants or other activities and color code all these places.
If you want to note down any details, Wanderlog provides an option to create notes and checklists, so you won’t need a separate note-taking app for your trip.
Wanderlog lets you create a day-wise itinerary as well. You can add places manually or let Wanderlog autofill your day. There’s a separate travel-planning chatbot within Wanderlog to help you plan a perfect trip.
The map on the right side of the screen shows all the places you’ve added to your trip, along with route lines/directions. If you’ve subscribed to Wanderlog Pro, it can even optimize your route and export the map to Google Maps.
Moreover, Wanderlog has an expense tracker that keeps a log of all your expenditures and can split the costs between your travel partners. Within Wanderlog, you can save details about your flights, lodgings, rental cars, or other reservations.
Download: Wanderlog for iOS | Android (Free, Paid)
3. Sygic Maps (Web, iOS, Android): Maps Made for Travelers
Made specifically for travelers, Sygic Maps can help you plan your perfect trip. Powered by OpenStreetMap, it highlights restaurants, markets, parks, cinemas, and other tourist attractions around you.
To create a trip, you’ll have to create an account and sign in. Click the profile icon in the top right corner and select My Trips > Plan a new trip. Select the destination, dates, and your trip name.
Once you’ve created your trip, you can add places to your itinerary. Either search for the sites you want to visit and add them to your trip, or explore Sygic Maps to find and save tourist spots. Based on your selected destinations, Sygic Maps will show a route and traveling time. You can rearrange places to optimize your route and set the time you’ll spend at each place.
Sygic Maps also lets you invite participants and share the trip itinerary. If you are willing to pay for Sygic Premium, you can download offline maps on the mobile app and export your trips.
Though it doesn’t offer as many features as Wanderlog, Sygic Maps is a great option if you’re looking for a simple, intuitive app to plot your itinerary on a map.
Download: Sygic Maps for iOS | Android (Free, Paid)
4. Travel Mapper (Web): Google Sheets Travel Itinerary With Live Map
When planning the itinerary for your next trip, you usually want to visualize it on Google Maps, too. Travel Mapper is a custom Google Sheets template that lets you create your travel itinerary, share it with friends, and instantly add the locations to Google Maps.
Travel Mapper is simple to use. Once you download the add-on, open a new Google Sheet and go to Extensions > Travel Mapper > Start Here > Generate Template. Add the date, time, activity, location, links, costs, and any additional notes in the sheet. The sidebar shows the Google Map for your itinerary, which you can update when you make any changes.
The map is customizable. You can add color codes for different elements and filter activities to see your map differently. The Google Maps in the sidebar can also be used to discover other places of interest near any location. It’s one of the best Google Maps hacks for travel trips.
Travel Mapper also includes a to-do list, a packing checklist, and a favorites list to ensure you don’t forget anything. You can also share your newly created sheet with friends, who can add their own locations to the map.
Plip is a mobile-first travel planning app that you can use to plan your entire trip on your phone or tablet. It also has a web app for use on your laptop.
Register for an account once you create a new trip; otherwise, your travels won’t be saved. You can keep the trip private or share it with a group by adding others’ emails.
When you want to add a new entry, there are eight types of plans to choose from: plan (generic), flight, reservation, lodging, restaurant, event, vehicle rental, and transit. The default details to fill for any entry are the title, the location, the start and end date and time, and any notes if necessary. Certain plans have additional entries, like “Provider” in events or “Confirmation number” in lodgings.
You can quickly filter your entries by the type of plan to view them in a list. Otherwise, switch to the Map view to view all your places of interest marked on the map and scroll through a pane at the bottom.
These apps will help you plan your entire trip, giving you a clear idea of when and where you will be. But don’t rush to book everything.
The travel and hospitality industry offers many last-minute deals on flights, hotels, and tourist attractions. You should try to check different travel apps to save money and take advantage of the deals where you can.
One of the highlighting features of the iPhone 16 Pro models is their ability to shoot 4K videos at 120FPS. However, they only shoot at 60FPS out of the box. I’ll show you how to switch to the higher frame rate mode below, but know that comes with a catch.
How to Shoot at 4K/120FPS on iPhone 16 Pro
It’s pretty easy to start using the 120FPS recording mode in Apple’s Camera app. While you can tap the frame rate toggle in the top-right corner of the Camera app to quickly switch to 120FPS, the app reverts to 60FPS every time you relaunch it.
Therefore, if you always want to make sure the Camera app defaults to the 120FPS mode, follow these steps:
Open the Settings app on your iPhone.
Scroll down and tap Camera.
Tap Record Video and select 4K at 120fps.
Likewise, you can tap Record Slo-mo setting in the Camera settings menu and select the 4k at 120fps option because it’s set to 1080p at 120fps by default.
From now on, whenever you launch the Camera app and switch to the Video mode, you’ll see the 4K 120 in the top-right corner of the screen.
Shooting at 4K/120FPS will quickly
eat up your iPhone’s storage space
. I recommend only using this mode whenever necessary, especially if you have a 128GB or 256GB storage variant.
Only the Main Camera Supports 4K/120FPS
Here’s the catch: The upgraded 48MP ultrawide camera and the fancy 5x 12MP periscope camera on the iPhone 16 Pro are still limited to 4K/60FPS. It’s just the 48MP main “Fusion” camera that supports 4K/120FPS due to its faster sensor readout speed. However, you can still use 2x digital zoom in the Camera app and shoot at this higher frame rate.
Likewise, you can’t shoot at 4K/120FPS in Cinematic mode; that still caps out at 60FPS like before. You’ll also be limited to 60FPS when using the QuickTake feature to record videos without leaving the Photo mode in the Camera app.
Despite these minor quirks, I’m still a huge fan of the new 4K/120FPS mode in the iPhone 16 Pro because now, I can turn any footage into a slow-motion video using the built-in editor in the Photos app.
Long gone is the tradition of storing contacts in a Rolodex; we now expect our contacts to be accessible on any of our personal devices with the help of the cloud. Finally rising to this expectation is WhatsApp, with the introduction of a feature to save contacts in the messenger’s cloud storage.
Announced today on WhatsApp’s blog, the messaging platform will now let you save and manage contacts directly in the app. Previously, to find someone on WhatsApp, you had to access data from your device’s integrated contact list, type in a number manually, or scan a QR code. When adding a connection to WhatsApp that did not already exist in your device’s contacts, you had to save that contact locally.
Of course, saving contacts locally is not ideal when you lose your device, voluntarily upgrade your phone, or need to access contact information on your computer instead of your phone, or vice versa.
To accompany this update with security assurances, WhatsApp is pointing to its Identity Proof Linked Storage, an encrypted system to keep your contacts safe.
While it doesn’t seem like a huge upgrade, there are a few scenarios where WhatsApp’s cloud-based contact storage could be really useful.
Contacts Linked to Separate Accounts
When you combine this feature with an update from last year, allowing you to set up multiple WhatsApp accounts on a single device, you get the capability of separating contacts per profile. For example, if you have a work account and a personal account, you can save contacts separately to each account.
So, in off-work hours, you can easily ensure you’re reaching out to your friend Dan, instead of the chatty Dan that works in the mail room.
A Stepping Stone to Greater Privacy
In addition to its current benefits, the technology required to offer this feature will also support a future upgrade. The company’s blog announcement claims that WhatsApp will soon have the option to share contacts by username only, without a visible phone number. WhatsApp notes that this adds “an extra degree of privacy” in cases where you don’t want to share your phone number.
In my opinion, the latest update feels like an overdue feature, considering that cloud-based contact storage is the norm for most mobile devices. Plus, the fact that the messenger is only now teasing a username-only privacy feature puts it behind a competitor like Signal, which already offers this capability. This isn’t too surprising, as when comparing Signal to WhatsApp, the former is known for being more privacy-minded. It looks like WhatsApp could be following that lead, but with an owner like Meta, I’ll believe it when I see it.
Whether you’re a casual or hardcore gamer, modern smartphones are well-equipped to meet your expectations. With powerful processors, stunning displays, and advanced cooling systems, there’s an option for everyone. So, let’s explore the best phones for mobile gaming.
The ROG Phone 8 Pro is specifically designed for gaming. With it, you get a Snapdragon 8 Gen 3 processor, up to 16GB of RAM and 512GB of storage. These specs are strong enough to run any latest mobile game. Also, the phone has a 6.78-inch 165Hz refresh rate AMOLED display for punchy colors.
More importantly, the ROG Phone 8 Pro fully charges in under an hour, and its 5,500mAh battery is ample for several hours of gameplay on a single charge.
You also get two customizable air triggers placed on the side of the phone, which you can configure for in-game controls. If that isn’t enough, you can buy a plug-in ROG Tessen controller to turn your phone into a handheld gaming console.
Overheating and thermal throttling are common concerns when gaming on smartphones. The ROG Phone 8 Pro offers two cooling solutions to help manage temperatures. By default, the phone is passively cooled with a large vapor chamber and a graphite sheet to dissipate heat.
However, the phone may still become warm during extended gaming sessions. For those looking to further minimize thermal throttling, you have the option to actively cool it with AeroActive Cooler X, which attaches to the back of the phone. The ROG Phone 8 Pro launched at $1,199, but you can find a better deal on Amazon.
The RedMagic 9S Pro is an excellent budget-friendly alternative to the ROG Phone 8 Pro, featuring the same Snapdragon 8 Gen 3 processor but clocked at 3.4GHz. According to your budget, you can choose between 12GB and 16GB RAM options. The display is a 6.8-inch AMOLED with a 120Hz refresh rate and minimal bezels, and you also get trigger buttons on the side of the phone.
The phone comes with a vapor chamber cooling plate and a built-in fan that spins at 22,000 RPM. Despite this, the phone may still get warm during extended gaming sessions, and if you prefer to further cool the device, you could get a dedicated external fan that attaches to the back of the device. The phone costs $649 on RedMagic’s site.
Overall, the phone offers solid specs for its price. However, the block-like design structure of Redmagic 9S Pro might not suit everyone’s taste, as the phone’s sharper edges could be less comfortable to hold during extended gaming sessions.
The phones we’ve discussed so far are designed specifically for gaming. However, if you’re looking for an incredible all-around smartphone that also excels at gaming, the iPhone 16 Pro Max is an excellent choice. The phone has a 6.9-inch 120Hz OLED display and is powered by the A18 Pro, the fastest chip you’ll find in a flagship smartphone in 2024. You can run any game on max graphics settings, provided the phone remains cool.
However, it’s important to note that while the iPhone 16 Pro Max offers plenty of raw power, it may not be the best choice for hardcore gaming. The phone typically warms up after a few minutes of intense gaming, and the processor starts throttling, after which the screen dims until it cools down. If this isn’t a concern, and you’re seeking a phone for casual gaming, then you’re in for a treat.
4 Samsung Galaxy S24 Ultra
Zarif Ali/MakeUseOf
The Galaxy S24 Ultra we reviewed features high-end specs and a stunning design, all while offering the ability to enjoy gaming sessions on the go. The 6.8-inch AMOLED display with minimal bezels and a 120Hz refresh rate makes everything on the screen immersive and fluid.
Thanks to the custom Snapdragon 8 Gen 3 chip and 12GB of RAM, this phone is more than capable of handling anything you throw at it, whether that’s PUBG Mobile or Call of Duty: Warzone Mobile.
However, like the iPhone 16 Pro Max, you might notice that the phone becomes warm to hold during extended use. You could get one of the best smartphone controllers to hold the device so you don’t feel the heat. Although it launched with a starting price of $1,299, you can grab it for a lot less on Amazon.
If mobile gaming is your top priority, these are your best options as of 2024. The ROG Phone 8 Pro and the RedMagic 9S Pro have better cooling systems than the iPhone 16 Pro Max and Galaxy S24 Ultra for extended gaming sessions. However, they fall short in other departments, such as camera quality and software.
A company called Throne wants to take pictures of your poop, before having a combination of artificial intelligence and human physicians analyze it. While this may seem to be a combination of gross, creepy, and unnecessary, there is some serious science behind the idea.
Throne Wants to Use AI to Analyze Your Poop
Throne is selling a camera that attaches to your toilet seat in order to take pictures of your poop. Those images are then sent via Bluetooth to an app, as well as to Throne’s servers for analysis.
First, what Throne calls “artificial gut intelligence” will take a look. This has been “trained by physicians to help you understand what your waste is trying to tell you about your health.” Then, Throne’s “team of physicians manually review anonymized images to classify poop as healthy or unhealthy, spot the nuances in urine color for hydration levels, and identify other health indicators in your waste.”
There are some obvious privacy and security concerns here, and Throne only added a page addressing these issues after TechCrunch inquired about them. However, the company promises to “only capture images of the contents of your toilet bowl.” So, that’s OK then.
Currently in beta, the toilet attachment costs $299, though the version to follow has an MSRP of $499. Upon general release, the app will cost $96/year, but anyone pre-ordering Throne gets access throughout the beta, plus one year free.
Gut Health Is Important, But Questions Remain
The fact is, gut health is important, and there is currently a lot of research being done to determine quite how important it is to your overall health. Humans inherently know that the state of their stools can indicate other issues, which is why many of us take a look before flushing.
However, regardless of all that, how many of us will want someone else looking at our waste products anywhere other than in a lab? And how many people will be comfortable having a camera sitting inside their toilet bowl?
If Throne can convince enough people that this is all fine, then it may be onto something. But I suspect that, regardless of how involved AI is getting in healthcare, most of us will continue to peer inside the bowl as and when necessary, and consult a doctor when something seems off.
The redesigned Photos app has undeniably been one of the most controversial changes Apple introduced with iOS18. I can’t get the hang of the redesigned interface despite using it for a while. These are the flaws that stand out.
1 Cluttered Interface
While Apple typically rolls out subtle updates to the Photos app, iOS 18 completely overhauled the app’s interface. Previously, the app’s main screen was divided into the following tabs: Library, For You, Albums, and Search.
With iOS 18, Apple ditched the tabbed layout, and the Photos app has now been unified into a single view separated into two different parts—the main photo grid and Collections. The latter includes categories like People & Pets and Recent Days, straight out of the old For You tab.
To access either section, you’ll need to swipe up or down, depending on which section you’re currently in.
While this change is intended to reduce the time you spend searching for a picture or video in your gallery, I feel like the Photos app has become more cumbersome. The tabbed layout was much simpler to navigate.
For example, I used to easily switch between a photo in my library and one in an album without having to scroll up and down. Now, if I switch to a specific album and then return to my library, I lose my spot and have to scroll all the way back to where I was. The new single-page layout means that your scroll resets every time you change contexts.
While some may be a fan of the all-in-one screen organizational structure, it’s too chaotic for my liking. While you can declutter the Photos app by customizing the layout to suit your preferences, the unified one-page view is here to stay.
2 Images and Videos Are Sorted By Date Captured
Before iOS 18, photos and videos appeared in your library based on when you saved them to the Photos app. When my friends sent images to me via AirDrop, I noticed that the images I received weren’t showing up at the end of my timeline like they used to. Instead, they were scattered throughout my older photos, based on when they were originally taken, making them much harder to find.
For days, I couldn’t figure out what was going on until I realized that the Photos app now sorts images by date captured by default. Fortunately, this is easy to fix, but it was one of the main reasons I wanted to downgrade to iOS 17 for days and why I grew to dislike the redesigned Photos app.
If you haven’t figured out how to fix this yet, all you need to do is scroll through your library, tap the sorting icon once it appears, and select Sort by Recently Added from the context menu.
3 Video Playback Is Far From Perfect
Previously, when you navigated through videos by dragging your finger across the timeline, a preview of the frames would appear, giving you a visual indication of where you were in the video. It was a neat way to find specific moments in longer videos without having to watch the whole thing.
Strangely, Apple removed the preview scrubbing feature in the redesigned Photos app.
Now, the only way to scrub frame by frame is by using the trim tools. Additionally, when you open a video in your gallery, it doesn’t play in full screen by default. So, you have to tap it to view it in full screen. Annoyingly, you can’t scrub through a video when it’s in full screen, which I find quite inconvenient.
Videos also play on a loop now, and there have been times when I’ve watched a short video multiple times without even realizing it. While these may seem like minor annoyances, they can be really frustrating for anyone who spends a lot of time watching and managing videos in the Photos app.
4 Some Albums Are Difficult to Locate
As someone with tens of thousands of images and videos and a habit of not deleting old photos, I filter images I want to access quickly later or post on social media into my Favorites album.
Before iOS 18, you could find the Favorites album by switching to the Albums tab. However, after updating to iOS 18, I couldn’t find the Favorites album right away. The same happened when I tried to locate a screenshot I took but couldn’t find the Screenshots album either.
I gave up on finding it for a while and used the Search icon at the top to locate it. I then realized that a few albums that used to appear in the Albums tab are now under Pinned Collections.
While you can modify your Pinned Collections, the bottom line is that some albums are still difficult to locate in the redesigned layout.
In my opinion, the Photos app redesign is a prime example of change for the sake of change. I can only hope that Apple makes the interface easier to navigate in future iOS updates.
My iPad is easily the best investment I’ve made for my studies. If you have one, it’s important to set it up to match your academic goals. Otherwise, you’ll end up procrastinating when you shouldn’t. Here’s how I’ve fine-tuned my setup to get the most out of my iPad academically.
Setting Up My iPad Physically
After spending such a hefty amount on purchasing your iPad, the last thing you want is to spend hundreds of dollars on repairs. This is why it’s important to set up your iPad physically with the right protective accessories.
The first thing I did when I got my iPad was purchase a secure case for it. A sturdy case will not only protect your iPad from drops and bumps but also provide a tight grip, reducing the chances of it slipping right out of your hands.
Since I use my iPad primarily for note-taking with an Apple Pencil, I chose a case that lets me prop it up at different angles for comfortable writing. The Apple Pencil is also extremely easy to misplace, and while you can find a lost Apple Pencil Pro since it has Find My support, I’d still recommend getting a case with an Apple Pencil holder.
If your Apple Pencil charges magnetically, make sure the slot is positioned in a way that allows it to charge while securely holding the pencil in place. This keeps your pencil safe and fully charged when you need it.
After getting a protective case, I invested in a high-quality screen protector to protect it from scratches. While there are several types of iPad protectors available, tempered glass and matte finish protectors are the most common choices for students. Between the two, it ultimately comes down to personal preference.
While matte protectors reduce glare and provide a paper-like feel for stylus use, I opted for a tempered glass protector because matte finishes, due to their rougher texture, can wear down the Apple Pencil’s tips more quickly.
In addition to these accessories, I also got a keyboard for my iPad and would recommend getting one if you want to use your iPad as a laptop replacement or prefer taking typed notes over handwritten ones.
Mahnoor Faisal/MakeUseOf
Fortunately, you’re not limited to Apple’s expensive keyboards, as many affordable alternatives are available. For instance, I skipped Apple’s iPad keyboards and opted for the Logitech Pebble Keys 2 K380 keyboard instead.
Settings I Tweaked for Everyday Use
Once your iPad is all set physically, I recommend taking advantage of a few built-in features to optimize it for productivity and focus.
Location-Activated Focus Mode
The last thing anyone wants when they’re in the midst of an intense study session is to constantly receive pings and notifications. To combat this, I’ve created Focus modes that sync across my iPad, Mac, and iPhone.
Since I tend to use my iPad the most at college, I’ve created a Focus mode that automatically activates when I get there. You can set it up by going to Settings > Focus and tapping the plus (+) icon. Then, tap Custom, and then name your Focus mode, and choose an icon and color. Since mine is dedicated to studying, I named it “Studying” and used the icon with multiple books.
Tap Customize Focus on the prompt that appears. On the next page, tap Add Schedule > Location and add your desired location. In my custom Focus mode, I’ve allowed notifications only from the apps I use for studying, like YouTube, Classroom, Calendar, Goodnotes, etc., to avoid getting distracted.
Split View for Multitasking
I use Split View on my iPad when I want to understand a topic from a YouTube video and take notes simultaneously. This feature lets you place two windows side by side on your iPad and helps immensely when you need to multitask. All you need to do to use Split View is open an app, tap the three dots at the top, and choose Split View.
Dark Mode for Late-Night Use
Chugging multiple cups of coffee and staying awake past midnight to cram for a midterm is a universal student experience. In my case, this isn’t an occasional occurrence, and late-night study sessions have become the norm.
To make these long hours more comfortable and reduce eye strain and fatigue, I’ve switched my iPad to Dark Mode. You can do so by heading to Settings > Display & Brightness and toggling on Dark Mode.
iPad Apps I Use Daily
While there are hundreds of apps on the App Store to help students enhance their iPads, there are a few I can’t imagine living without and would recommend every student to explore.
For note-taking and annotating PDFs, I decided to get a lifetime subscription to Goodnotes. It’s easily one of the best note-taking apps to use with a stylus. It also doubles as a digital planner for iPads, which is essential for a student.
While I use Goodnotes for most of my courses, I’ve turned to Apple Notes for math-based subjects, thanks to Math Notes introduced with iPadOS 18. I also use Photomath to help with math questions.
Planning and scheduling my tasks in advance is extremely important to me. I use Google Calendar to time-block all my study sessions and Notion to track deadlines. For memorization-based courses, I rely on flashcards to help retain information, and Quizlet is my app of choice.
Given my short attention span, I struggle to focus on tasks for extended periods. To combat this, I use the Pomodoro technique to stay on top of my studies and avoid burnout. While there are many Pomodoro apps available, Flora has been my go-to for years.
The Tasks I Rely on My iPad for as a Student
Mahnoor Faisal/MakeUseOf
The primary reason I purchased my iPad was to ditch my bulky backpack and go paperless. So, before a semester begins, I download all the coursebooks I’ll need onto it. This way, my iPad comprises all my study materials for every course I’m taking, which allows me to study no matter where I am.
Since I’ve gone completely digital, I use my iPad for note-taking. Although I’ve created separate notebooks for each course, my professors usually teach using slides, presentations, and PDFs. So, I use my iPad to annotate them during lectures.
I also use my iPad to keep my schedule organized and ensure I hit deadlines. While I don’t typically use my iPad for coding assignments, I complete all my other assignments on it.
As midterms and finals approach, I also use my iPad to tackle practice exams, which saves me the hassle of printing out papers. Finally, I rely on my iPad to attend online classes and watch recorded lectures.
Whether you just purchased an iPad and aren’t sure how to set it up for school or are looking to optimize your existing setup, I’m confident the tips above will help you on your college journey!
The Raspberry Pi is small and low-powered, so wouldn’t it be great if you could also make it portable? Well, you can! I’ve found nine ways you can turn your Raspberry Pi into a homemade laptop.
The CrowView Note is an amazing all-in-one laptop featuring the latest Raspberry Pi models. There are many reasons to upgrade to a Raspberry Pi 5, but taking full advantage of the CrowView Note is high on my list.
This laptop is the newest release from the makers of the CrowPi and CrowPi2, and it’s their thinnest and lightest design yet. In many ways, the CrowView Note matches the experience of using a full-fledged laptop—except that you can dock and undock your Pi at a moment’s notice.
The screen is a full 14-inch IPS display at 1080p resolution, and the large 5000mAh battery will let you stay on the go for longer. This laptop even sports USB-C and USB-A ports on the side so you can connect your smartphone or other peripherals.
Supported Models: Raspberry Pi 5, Pi 4B, Pi Zero 2W
(As with all the options on this list, you should check which Raspberry Pi model you have to make sure that everything is compatible.)
A portable Raspberry Pi kit that focuses on electronics and programming, the Piper comes with a self-assembly wooden case. There’s a non-touch display, loudspeaker, and compartment for the Raspberry Pi and a breadboard. All the wires, LEDs, and switches you could need are also included. The kit also includes a rechargeable power supply, making it truly portable.
While the addition of a compact keyboard lets you use the Piper for standard Raspberry Pi-based productivity tasks, it’s the dedicated version of Minecraft-Pi that sets this kit apart.
Not a standard Raspberry Pi laptop, the Piper is a useful educational tool that can go anywhere.
Supported Models: Raspberry Pi 4B, Pi 3B+
With a full keyboard, DIY trackpad, and 7-inch display, this DIY build will result in your own Raspberry Pi laptop. This project uses a Raspberry Pi 3, but you could easily swap this with a Raspberry Pi Model 3B+.
A detailed video (above) accompanies this build. You’ll learn how to build the battery pack, connect a charger and boost converter, and even extend a USB port to improve accessibility.
The Arduino component, meanwhile, displays a status for the battery charge and provides connectivity for sensor modules. It’s a useful all-in-one approach!
With a keyboard from a 7-inch tablet case, this Raspberry Pi laptop is built from reinforced cardboard.
Supported Models: Raspberry Pi 3
A chunky laptop chassis with space for a Raspberry Pi 4 (a 4GB model is included), the CrowPi 2 is a superb kit. Shipping with a power supply, dual game controllers, an integrated electronics workshop board, and a bunch of components for STEM development, the CrowPi 2 is a bit of a hobbyist’s dream.
The integrated electronics workshop board alone is enough to keep you going, while the “loose” components—many of which can be breadboarded in the workshop—can help you push your learning further.
Overall, this is a great Raspberry Pi laptop kit with a heavy focus on learning, and we thought it was great in our hands-on CrowPi 2 review.
Related: CrowPi 2 Raspberry Pi Workshop Review
Supported Models: Raspberry Pi 4B
5. DIY Raspberry Pi Pocket Laptop
Using a keyboard, IPS display, portable battery recharger, and a Raspberry Pi 3, this laptop seems simpler than it is. A switch is attached to the battery, enabling easy switch on.
Perhaps the most interesting thing about this build, however, is the plastic chassis. While it doesn’t have space for the chosen Bluetooth keyboard (others may be more suitable), it’s a surprisingly perfect fit.
What’s particularly interesting about this project is that it is pretty barebones. Only the absolute basics are included here, which allows you to customize the rest by adding your own twist.
There’s no link for this Raspberry Pi laptop project—everything you need is in the video.
Supported Models: Raspberry Pi 3
A DIY acrylic laptop for the Raspberry Pi, the LapPi 2.0 comes with a 7-inch capacitive touchscreen. Furthermore, you can buy the kit unassembled or pre-assembled, although you’ll have to supply the Raspberry Pi yourself.
Luckily, the LapPi is compatible with any consumer model of Raspberry Pi you can think of. There’s also a keyboard, camera, Li-Ion rechargeable power bank, and speakers. Five colors are available: red, blue, yellow, black, and clear.
As the kit is particularly small, the LapPi isn’t a typical productivity laptop. It is, however, designed to help you turn your Raspberry Pi into a great mini laptop.
Supported Models: Raspberry Pi 5, Pi 4B, Pi 3, Pi 2, Pi 1, Pi Zero 2W, Pi Zero
What could be more DIY than a 3D-printed laptop powered by a Raspberry Pi?
Featuring a Raspberry Pi 2 and a 3.5-inch TFT display, this build employs a miniature Bluetooth keyboard. There’s also a Li-Ion battery, and Wi-Fi dongle, but with more recent Raspberry Pi models, this wouldn’t be required. Everything about this build is small, resulting in a pocket-sized Raspberry Pi laptop.
While closer in size to a smartphone than a netbook, the choice of keyboard makes this build easy to use. A 3D-printed frame houses the keyboard, screen, and Raspberry Pi, while 3D-printed hinges hold the two halves together.
Need to make your Raspberry Pi portable? If you want to 3D print your solution, this is the way to go. Find the full instructions in the project’s Instructables page.
Supported Models: Raspberry Pi 2B
Are you looking for a DIY Raspberry Pi laptop that you can slip into your pocket? This minicomputer combines a Raspberry Pi 2, display, keyboard, Adafruit Powerboost 1000, a battery, and 3D printing to achieve the smallest Raspberry Pi-powered system yet.
Once assembled, the Pi 2 lives under the keyboard, and the whole unit folds up, just like a full-sized keyboard. While the 4-inch LCD is compact, if you need a Pi in your pocket for easy access, this is ideal.
It’s a great DIY project idea for putting an old Raspberry Pi to use. All the details and 3D printing templates you need can be found on the Nano Pi2’s Thingiverse project page.
Finally, a Raspberry Pi laptop project that anyone can build—providing you’ve plenty of plastic bricks from Lego.
Developed by Peter Howkins, the Lego Raspberry PiBook has USB port access, and a door to change the microSD card. It consists of standard bricks and Technic pieces and is built on two 16×24 stud Lego baseplates.
Head over to Peter’s website to learn more and start building your own.
Supported Models: Raspberry Pi 1B
With a Raspberry Pi-powered laptop, not only do you have a portable computer you can use for productivity, but you can use it for coding projects, too. Just imagine the possibilities.
When I switched from Windows to Mac, I was frustrated by the lack of basic features I had gotten used to. But after months of testing, I found these apps that filled those gaps perfectly, and now my Mac works exactly how I want it to.
1 AltTab
Instead of using the Dock, I prefer switching between apps on macOS by pressing Command + Tab, which feels much more convenient since I don’t have to take my hands off the keyboard. However, if you’ve ever used the Windows equivalent by pressing Alt + Tab, you’ve probably noticed how much more limited Apple’s implementation is.
For one, macOS only shows the app icons without any preview of what’s happening in each app. Another major annoyance is that if I have two separate windows of the same app open, I can’t choose which specific window I want to switch to.
AltTab fixes all of these issues on macOS by introducing an app switcher that closely resembles the one on Windows but with even more customization options. You can adjust the size of the thumbnails and tweak other settings to suit your workflow perfectly.
It even lets you assign a custom shortcut to trigger AltTab. My favorite feature, though, is the ability to drag and drop files onto the window thumbnails—a small but incredibly convenient addition that I now can’t imagine working without.
One of the most frustrating aspects of both macOS and iOS is the lack of a built-in clipboard manager. Fortunately, you can use Maccy to get this functionality on your Mac. You can access it either from the menu bar or by pressing Command + Shift + C, which opens a pop-up window that shows a history of everything you copied recently.
Maccy doesn’t just handle text—it works for files as well, displaying the file paths of any copied items. You can even pin frequently used items for quick access, and Maccy allows you to search through your entire clipboard history simply by typing what you’re looking for.
Best of all, Maccy operates entirely on-device, so it doesn’t send any data to third-party servers. This ensures everything you copy stays on your Mac, so you don’t have to worry about your privacy.
On Windows, I like using Task Manager to monitor important system metrics like CPU and GPU usage, how much RAM I’m using, or even the system temperatures. Now, if you’re using a Mac, you can check similar stats with Activity Monitor, but it’s just not as robust.
That’s why I use iStat Menus. It gives me a detailed breakdown of everything—CPU, GPU, memory, battery usage—and even shows me the temperature of each component.
One thing I love about iStat Menus is how it lets me see which apps are hogging resources, and it puts all that information right in the menu bar. It’s perfect for a quick glance when I don’t want to open another app just to monitor my system.
That said, I do have one gripe. Sometimes, it feels a bit bloated because of extra features like calendar integration and weather info that don’t really fit the app’s main purpose. While you can disable those features, I wish they weren’t enabled by default.
For years, Windows has allowed users to adjust the volume of individual apps, so I’m always baffled when I use my Mac and find that it lacks this basic feature. On macOS, you can only control the overall system volume, which can be frustrating, especially since I often listen to music while gaming.
That’s where Background Music comes in. This handy app adds the ability to manage the volume of each application individually on macOS. You can easily adjust the volume for different apps and even control the balance between your left and right speakers directly from the menu bar.
The app even lets you switch your audio output device and even enables an auto-pause feature for your music-streaming app. This means your music will automatically pause when it detects audio from another app.
Gaming on a Mac is certainly not on par with Windows, but that doesn’t mean you’re completely out of options if a game isn’t available on macOS. One great solution is to use CrossOver, which allows you to install and play Windows games on your Mac.
The best part? Unlike running a virtual machine to access Windows, CrossOver takes full advantage of your Mac’s hardware. This means you don’t have to dedicate a portion of your system resources to it, allowing for better performance overall.
While CrossOver’s performance is great, it’s important to note that game compatibility can be a bit hit or miss. Most single-player titles that don’t have invasive DRM work well. However, multiplayer games like Valorant are a different story. These games often come with strict anti-cheat that CrossOver can’t bypass, so you’ll be unable to play them on your Mac.
Still, if you’re primarily into single-player games, CrossOver can be a great way to expand your gaming library on macOS.
It’s definitely frustrating that I need to install so many apps just to get basic features that have been on Windows PCs for years. However, macOS has its own advantages, which makes switching to Windows hard for me. Fortunately, these third-party apps allow me to tailor the experience to my needs.
The rise of generative AI is here, for better or worse. Sadly, among the biggest winners here are scammers and peddlers of misinformation. AI video generation is far from perfect, but has become good enough to make impersonating another person possible.
The premise is simple: use deepfake technology to impersonate someone and then use that to obtain something from you, usually sensitive financial information.
These are often subsets of romance scams designed to target people looking for love on dating websites and take advantage of them. But they can sometimes be used in other ways, like impersonating a well-known celebrity or political figure or occasionally even someone you might actually know (like your boss at work). In the latter case, they often use a spoofed phone number to sell the illusion better.
What Is a Deepfake?
Deepfakes are a shorthand for any AI-created image or video designed to mimic an existing figure, usually for the purposes of deception. Deepfake technology is used for non-nefarious purposes—mostly memes and entertainment—but now, it is the medium for these video call scams.
What Is the Scammer’s Goal?
In a nutshell? Information. This can take several forms, but at the end of the day, most AI scams want the same, even if the consequences vary.
At the low end of the spectrum, the scammer may attempt to deceive you into giving them sensitive information related to, say, the company you work for. You might have client details or contracts that could be sold to a rival business. This is probably your best-case scenario, but it could devastate your company.
In the worst cases, they could coax your bank information or social security number, often in the guise of a lover needing financial aid or even an interviewer for a promising new job you may or may not have applied to.
In either case, once the scammer gathers the information and the damage is essentially done, it becomes a factor of how quickly you figure out the deception and mitigate the damage.
How to Spot an AI Video Call Scam
Currently, deepfakes used in most AI video call scams are inconsistent. They often have visual glitches and oddities that make the video or voice appear fake.
Look for things like facial expressions that don’t quite match, the background of the video shifting oddly, the voice sounding somewhat flat, and so on. Current technologies often have difficulties tracking the target if they stand up or raise their hands above their head (being mostly trained on headshots and “shoulder-up” videos).
However, AI technology is rapidly improving. While it is good to recognize the flaws in current AI, relying on these skills in the grand scheme of things is potentially dangerous. These deepfakes are already many times better than last year, and we are rapidly approaching when they might become almost completely indistinguishable from real video or audio. And while there are AI deepfake video detection tools, you can’t rely on them as the tech moves so fast.
How to Protect Again Deepfake Scams
Rather than trying to spot AI-generated material, try to take a more proactive approach to security. Most methods of information security that worked in the past will work now.
Rather than trying to clock somebody based on their face or voice, use features that are harder to fake.
Make sure the call is coming from the correct phone number or account name. For apps like Teams or Zoom, check the email that sent the room code to see if it matches the callers credentials.
If you’re still apprehensive, ask them to verify their identity by other means. For example, try texting them, “Are you on this Zoom call with me right now?” or something similar.
You could even try to engage in small talk. Scammers often get flustered when forced to go “off-script,” and if they’re impersonating someone you actually know, they’ll likely have trouble answering questions like “How’s Jimmy doing? I haven’t seen him since we went on that fishing trip a while ago.”, especially if you mix false details into it to trip them up.
Finally, if it’s someone you talk to a lot, consider falling back on childhood “stranger danger” protection by setting up a password; if both of you know to say “Marzipan” at the start of the conversation or something, that’s difficult to fake.
Don’t Give Them Sensitive Information
Of course, the best protection is keeping all important information close to your vest. Nobody should ask for your bank information or social security number out loud over a call (and you should never share it online). And if they rush or pressure you to do so, that’s all the more reason to shut down.
That information should only be provided using official documentation or a method that allows you more time to verify the source’s legitimacy.
If somebody tries to redirect you to a Google doc or PDF by linking it in a Zoom or Teams call’s text chat, ask them to send it from their work email instead. Then, take some time to look at it and verify that this is a legitimate email address before even clicking the link, much less inputting the information.
The best protection against scammers is always to arrange things so you aren’t rushed and can take the time to really think through what’s going on before responding.
Popular desktop browsers like Mozilla Firefox and Chrome won’t do much good when you have an abysmal internet connection. While text-based browsers like w3m are not very visually appealing, they are your best bet when your internet speeds harken back to the days of dial-up.
What Is w3m?
w3m is a free and open-source text-based browser that allows users to surf the web from a terminal emulator window. Like other text-based browsers, w3m renders the web in plain text without styling and scripts. However, it stands out from other text-based browsers due to its support for tables, cookies, frames, inline images, and authentication.
By ignoring CSS and JavaScript, w3m can load pages faster than graphical web browsers, making it suitable for low bandwidth connections. It offers tabbed browsing and in-depth customization options.
Apart from being the best choice for a poor network connection, the w3m browser is perfect for developers who want to keep their workflow completely in the terminal and people using less powerful hardware like Raspberry Pis to surf the internet.
The original w3m project began in 1995 as a lightweight, fast-loading alternative to Netscape. The developer has since abandoned it, but Tatsuya Kinoshita maintains a fork of the original version. The name “w3m” is short for “WWW-wo-miru” which means to see the WWW.
Besides being an internet browser, w3m also works as a Linux pager for browsing local documents on your computer.
How to Install w3m on Windows and Linux
w3m is easy to install and doesn’t take up much storage space (about 3MB). It is compatible with Linux, Windows (with Cygwin), and macOS (with Homebrew).
Windows Installation
To use w3m on Windows, you must first install the Cygwin emulator. Cygwin is a free and open-source Unix-like environment and terminal interface for Microsoft Windows.
To install Cygwin and w3m, follow these steps:
Download the Cygwin installer. Run the installer and select the Install from Internet option. Leave the other options as default.
In the Select Packages window, use the Search box to find the w3m package. In the New column, choose the latest version using the dropdown icon. Click Next to continue the installation. After installation, you can add desktop and Start Menu icons.
Once the installation is complete, open the Cygwin terminal and enter w3m to check if the browser has been installed.
Linux Installation
w3m comes pre-installed on some Linux distributions, but it can also be installed via apt install. To install w3m on Linux, open the terminal and enter:
sudo apt-get install w3m
Enter your password if prompted, and type Y to continue. The installation won’t take long to complete. You should now be able to browse the web using the w3m web browser.
How to Use w3m
To open Google.com with the w3m browser, enter the following command in the terminal:
w3mgoogle.com
w3m will then open a bare-bones version of the Google webpage interface with text and clickable links. You can use a keyboard or mouse to navigate on w3m. Googler is another terminal-based tool that allows you to run Google searches from your Linux terminal.
Pressing Tab and Shift + Tab allows you to move between clickable links, buttons, and text boxes on the page. You can also use the cursor to select elements on the webpage. Press Enter to open a hyperlink or input text into a highlighted textbox.
I entered makeuseof.com in the text box and clicked the Google Search button next to the text box (Tab, then Enter).
The Google Search Results page in plain text looks unfamiliar and a little daunting. However, it is not so complicated when you get the hang of it. Text excerpts from the web pages are white, while links are blue by default. At the bottom of the window, there is a Back button (<<) and up and down arrows for scrolling web pages.
W3m offers two display modes: color and monochrome. The color mode is on by default, and you can switch to a monochrome interface in the options. Press O to open the Option Setting Panel, a long list of options that you can change to customize your w3m experience.
Most of the navigation options are available by pressing the right-click mouse button. You can find other w3m key commands with H (Shift + H). When you are done, use Shift + Q or Ctrl + Z to quit the program.
Alternatives to w3m
w3m is not the only text-based browser out there. There are several other alternatives, such as Lynx and Elinks. Launched in 1992, Lynx is the oldest browser still being maintained and has considerably more documentation than w3m. However, it does not offer tabbed browsing and cannot render images without external software. Elinks is a more recent text-based browser and supports much the same functionality as w3m, but it can be slower to load.
w3m browser won’t stream YouTube videos or open X (Twitter), just to name a few. So, it is not a complete replacement for a modern desktop browser with a graphic user interface. However, it works extremely well when looking up a document or reading a blog post with a weak network connection.
ChatGPT is the most popular AI chatbot service out there, but there has been a strange absence of an official Windows app over the past year or two. If you’ve been waiting on an app for your desktop, today is your lucky day, as OpenAI has released a test build of its ChatGPT Windows app—with a minor catch.
OpenAI Releases the ChatGPT Windows App for Paid Members
As announced by OpenAI on X (formerly Twitter), the Windows app is now ready for testing. Once you’ve installed the app, you can invoke ChatGPT by pressing Alt + Space. This makes it a lot easier to talk to an AI model than going to OpenAI’s website every time you want to write a prompt.
There’s just one catch—you must be a paying customer to log in and use the app. Fortunately, it doesn’t matter what kind of paid account you have; OpenAI lists “ChatGPT Plus, Enterprise, Team, and Edu users” as valid options for using it. Plus, once OpenAI has ironed out all the bugs, it plans to open up the Windows app to free users too.
Because the app is still in testing, you’ll notice that some of ChatGPT’s more complex features are missing. For instance, you can’t use it to use the advanced voice mode to hold a vocal conversation with the AI. However, there’s a good chance that OpenAI will add these missing features in future updates, so it’s worth keeping an eye on the project at the very least.
If you match all the requirements and want to give it a try, visit the ChatGPT page on the Microsoft Store and download it. And if you’re stuck on what to ask the AI, now’s a good time to test out its newest feature where ChatGPT reasons with you.
Want to switch to Apple’s Passwords app? You’ll need to move passwords manually unless you already use iCloud Keychain on your Apple devices. More importantly, you can import passwords only in the macOS version of the Passwords app. I’ll show you how.
Export Passwords From a Third-Party Password Manager
First, you need to export all your passwords from your current password manager. The Apple Passwords app supports importing passwords via a CSV file, so be sure to choose it as the export format.
I’ll demonstrate exporting passwords from Bitwarden since that’s what I use. However, the process should be pretty similar for other password managers. So, follow these instructions:
Launch Bitwarden on your Mac. Then, click File in the menu bar and select Export vault from the dropdown.
Click the File Format dropdown, choose .csv from the available options, and click Export vault.
Enter your master password when prompted and click Export vault again.
Finally, choose the folder on your Mac where you want to save the exported passwords and hit Save.
Now that you have the CSV file, you can start setting up Apple Passwords.
Import Passwords Into Apple Passwords on a Mac
With your exported password CSV file downloaded, importing it into Apple Passwords is straightforward.
Launch the Passwords app on your Mac. You may need to authenticate yourself using Touch ID or password.
Click File in the menu bar and select Import Passwords.
Click Choose File in the pop-up menu.
Navigate to the folder where you saved the exported passwords CSV file, select it, and click Import.
Authenticate yourself again, and wait for the import process to finish.
Once it does, you should see all your login credentials from the previous password manager in the All tile on the Passwords app. Mind you, the imported passwords won’t replace your existing passwords in the app.
Sync Passwords Across All Your Apple Devices
After you’ve imported passwords into the Passwords app on your Mac, they should start appearing in the Passwords app on your iPhone and iPad. However, if they don’t, be sure iCloud syncing is enabled for the Passwords app on all your devices.
On a Mac, go to System Settings > Apple Account name and click Passwords under Saved to iCloud. Then, simply make sure the toggle next to Sync this Mac is enabled and click Done.
On an iPhone, go to Settings > Apple Account name > iCloud and tap Passwords under Saved to iCloud. Then, toggle on Sync this iPhone, and you’re all set!
With the login details of all your online accounts on board, check the entries to ensure no login information is missing. If all the entries are fine, head to the folder where you downloaded the CSV file and permanently delete it from your Mac.
You may want to switch to Apple Passwords because, besides storing passwords, it can serve as an authenticator app. So go ahead, set it up along with other features like autofill, and log in to websites and apps on your Apple devices seamlessly.
Google Chrome is rolling out its long-awaited Manifest V3 update and removing several of your favorite browser extensions with it.
The writing’s on the wall: It’s time to leave Google Chrome.
Why Google Chrome Is Removing Browser Extensions
Google is officially moving to Manifest V3, its updated Chrome extension specification. Manifest V2 extensions used an API feature called Web Request to monitor traffic, allowing them to block certain web requests. This functionality is central to how certain browser extensions operate, like ad blockers.
Now, Manifest V3 alters the Web Request API, moving that functionality to a new API called Declarative Net Request. It also restricts some of the old API’s previous functionality, which means browser extensions can no longer function as before.
According to Google, Manifest V3 will help to bolster the “security, privacy, performance and trustworthiness of the extension ecosystem as a whole.” But what that means in practical terms is that the leading ad-blocking extension, uBlock Origin, among others, will stop working on Google Chrome.
Check Which Chrome Extensions Are Being Removed From Chrome
uBlock Origin is the largest affected app—and one of the reasons many folks are jumping ship from Google Chrome. But there are numerous other apps set for removal.
To check the list, head to chrome://extensions in your address bar, then scroll down—you’ll see which of your installed Chrome extensions are set for removal.
It’s Time to Leave Google Chrome Behind
The Manifest V3 update has been on the cards since early 2024, with Google first announcing it on its Chromium Blog. Many folks have already jumped ship to other browsers, like Mozilla Firefox—which still supports the Web Request API and the associated apps.
Interestingly, a Google spokesperson told The Verge that some 93 percent of Chrome extensions are already Manifest V3-compliant. In addition, there is a Manifest V3-compliant version of uBlock Origin—that’s uBlock Origin Lite—but it isn’t as powerful as the original.
In addition, some Chromium-based browsers have said they’ll continue to support V2 Manifest apps for as long as possible. For example, Brave Browser CEO Brendan Eich previously tweeted about support, but that was back in 2022.
Whether Brave and other Chromium-based browsers manage to keep Manifest V2 extensions up and running remains to be seen.
As both iOS and Android evolve, Apple consistently nails certain aspects of the smartphone experience that leave Android manufacturers playing catch-up. From my years of use, here are the key areas where Apple excels—and what its competitors could learn to up their game.
One of the biggest differences I noticed when switching to an Android device is the gap in app quality. This applies not only to apps available on both platforms but also to platform-exclusive apps. This disparity is largely due to Apple’s stricter guidelines for developers who wish to publish on the App Store.
Many popular apps feel more polished and refined on iOS compared to their Android counterparts. For example, the camera quality in most social media apps tends to be noticeably worse on Android devices.
While companies like Samsung have tried to address this by working with social media platforms to allow apps to use the camera’s full capabilities, adoption by other manufacturers has been mediocre at best.
Another key distinction lies in the exclusive apps each platform offers. The App Store has some incredible exclusive apps, like Halide, a must-have for photography enthusiasts, and GarageBand, which is hands down the best digital audio workstation I’ve used on a mobile device. Unfortunately, these apps are not available on Android.
Since Apple controls both the hardware and software on iPhones, iOS tends to be more secure. As I mentioned above, the App Store’s strict review process also makes it unlikely you’ll download an app containing malware, which isn’t always the case with the Play Store.
Additionally, Android allows apps to be downloaded from third-party sources, increasing the risk of accidentally installing malware if you’re not careful.
While sideloading apps on iPhones is only available to EU users, and it’s a feature I’d love to see worldwide, I understand why Apple is so restrictive, as many users wouldn’t know if the app they’re installing outside the App Store is safe.
The same goes for privacy. Apple collects as little data as possible and performs most actions directly on the device. With AI becoming a huge trend in smartphones, Google and Samsung often process these tasks on powerful off-device servers.
In contrast, Apple handles most of its Apple Intelligence features on-device. Tasks that need extra processing power are sent to Apple’s Private Cloud Compute, which deletes your data after processing the request.
3 Ecosystem Integration
Jhet Borja/MakeUseOf
If you use other Apple devices alongside your iPhone, you’ve probably experienced how seamlessly everything works together. The Apple ecosystem is packed with amazing features that make life so much easier.
One of my favorite Apple ecosystem features is being able to start working on my Mac and instantly pick up right where I left off on my iPhone—it’s a convenience I just can’t live without.
That said, perhaps the best feature for me is iPhone Mirroring in macOS Sequoia. It lets me mirror and control my iPhone right from my Mac, which is incredibly useful when my iPhone is out of reach, and I need quick access in a pinch.
Accessibility has always been a major focus for Apple across all its devices, and many of those features are useful even if you don’t have a disability. Take AssistiveTouch, for example—it lets you perform actions like taking screenshots, adjusting the volume, and more without needing to fiddle with physical buttons.
While AssistiveTouch is a simple feature, Apple offers other accessibility options that are truly mind-blowing. One standout is Personal Voice, which uses machine learning to create a synthetic version of your voice. You can use this voice during FaceTime by typing what you want to say. It’s especially beneficial for people with conditions like ALS, who may lose their ability to speak over time.
Another incredible feature is Eye Tracking. For individuals with motor disabilities who can’t interact with the screen using touch, this allows them to control their iPhones just by moving their eyes.
These examples highlight how much Apple prioritizes making its devices accessible to everyone. I’ve yet to see any other Android manufacturer offering the same depth of accessibility options.
Although Apple’s official repairs aren’t cheap, the process is usually pretty smooth. Simple repairs, like battery or display replacements for iPhones, often take just a few hours, with your device typically ready the same day. Unfortunately, I can’t say the same for Samsung phones. Even a screen replacement took a full week before I had my phone back in my hands.
If you have an AppleCare+ warranty, Apple also offers a loaner iPhone while your device is being repaired, which is an underrated perk I wish more Android manufacturers would adopt.
While iPhones have their flaws, there are several areas where Apple clearly excels, and Android manufacturers could learn a thing or two. Android may not always match the level of polish and seamless experience that Apple consistently delivers, but its biggest advantage is the freedom and customization it offers—giving you a level of control that Apple just doesn’t provide.
When it comes to dynamic flex PCB fabrication, there are certain key specifications that every designer should be aware of. These include design considerations like trace widths, spacing and lengths, regulated impedance, and more. In addition, quality and reliability requirements such as plating standards and test protocols must be met. These specifications allow designers to build reliable flex circuits that can meet the demanding physical and electrical demands of portable electronic devices that rigid boards cannot.
flexible pcb fabrication are primarily composed of an ultra-thin, semi-rigid dielectric substrate with copper foil conductor layers. They are then patterned using lithographic processes to produce the desired conductive paths or traces. Most flex circuits are constructed with polyimide, but other types of dielectrics can be used.
The conductors are then plated with copper, either with standard panel plating or pad-only plating (button plating). While standard panel plating allows for more versatility, button plating is often preferred by flex manufacturers as it provides a more consistent layer thickness and increased etch yields in complex etch patterns. It also reduces copper weight tolerances and increases a PCB’s overall reliability.
What are the key specifications for flexible PCB fabrication?
To maximize a PCB’s structural integrity against shear force and vibration, it is important to keep the area around the flex circuit free of discontinuities such as vias, cutouts and slits. These can cause stress concentration spots during bending which could lead to failures or malfunctions. For flex circuits that utilize a rigid-flex or flex-rigid interface, it is best to maintain at least 50 mil distance between the via and stiffener’s edge to prevent cracking or detachment.
Another crucial specification for a dependable flex circuit is the bend radius. This is the minimum radius up to which a circuit can be bent without damaging the conductors or pads. This varies between different flex circuit constructions, but is most commonly determined by layer count. For example, a 6-12 layer circuit typically has a bend radius of 10-20 mils.
The materials used in flexible PCB fabrication are different from those in rigid PCBs due to the need for flexibility and resilience. The base material is typically a thin film of polyimide, which has excellent heat resistance and flexibility. This polyimide film serves as the substrate onto which the copper foil, used for creating conductive pathways, is laminated. Polyimide offers a high degree of flexibility and can withstand temperatures up to 400°C, making it suitable for a wide range of applications. Other materials, such as polyester, can also be used, though they are generally less heat-resistant.
It is essential for designers to choose the right manufacturer for their flex circuits. This process requires rigorous vetting and comparison across multiple criteria including technical capabilities, quality systems, materials expertise and pricing. It is also crucial to communicate effectively with the supplier to understand their design process and provide any special requests for fabrication or assembly. This includes sharing all required CAD files, requirements checklists and volumes to receive technical feedback, DFM analysis and quotations. By evaluating and selecting the right manufacturer, you can be sure to get the highest quality, reliability, and cost-effectiveness from your flex circuit fabrication project.
If you use Instagram to advertise your business, or you just want to share your profile in a special way, there’s nothing better than making a card with your handle on it. If you want to make your own profile card but have no idea where to start, you’re in luck; you can now easily create one on Instagram and share it on your socials to help advertise your content.
What Are Instagram Profile Cards?
In an update to the Instagram app, the social media giant has added a digital profile card feature. This tool lets you create a unique card you can share on social media or post on your website. You can add your Instagram handle and a QR code that people can scan to see your profile, alongside additional links for your website, store, or anything else you want to show off.
Once your links are set up, you can customize your card with an image to help give a good first impression. This image can be something related to your business, or just something that tells people what kind of person you are.
How to Make an Instagram Profile Card
If you’re interested in making a card for yourself, open Instagram and select “Share Profile.” Tap the pencil icon on the top right, and you’ll be given the reins to edit your Instagram card to your heart’s content.
There are two sides to your card; one has a QR code that people can scan, and the other lets you add links, images, and a song to design your card just the way you like it. And if you’re just starting out, be sure to check out the top tips for Instagram newbies and get yourself set up properly.
The update brings One UI to Samsung smart TVs running Tizen OS, which will be bundled with the upcoming Tizen 8.0 update. One UI brings Samsung’s smartphone interface to smart TVs and delivers some new features to boot.
For example, One UI will bring a new For You tab featuring personalized recommendations, along with Live and Apps tabs to help you find more content. The Apps tab should help unify your apps across devices, too.
I’m also interested to see Samsung Daily+, which Samsung is billing as “a lifestyle service hub that provides useful daily life experiences.” It’ll live on your smart TV Home screen after the update, and I imagine it’ll use your searches and other interactions to provide a content stream.
That could be handy, but the phrasing also conjures up visions of Samsung and Bixby doling out useful life quotes and inspirational phrases in your living room.
Elsewhere, there’s a new Multi Control tool to connect multiple Samsung hardware devices to a single mouse and keyboard, plus deeper integration for Samsung SmartThings IoT devices.
When Is the Samsung One UI Update Landing on Tizen Smart TVs?
The Samsung One UI update is rolling out, though there is no specific timeline for it to land on your TV. Samsung advises you to “keep your device up to date and regulary check for software updates.”
However, there is one potential drawback to note: “Once you install this version of the OS, you cannot uninstall or revert back to the previous version.” In other words, you’re locked into One UI whether you like it or not, so consider whether you want the permanent upgrade before hitting update.
Smartphone photography has come a long way, giving almost everyone the ability to capture stunning images with a device they carry daily. But even with all the technological advances, there are still common mistakes that can prevent you from getting the best possible shots.
1 Relying Too Much on Auto Mode
While the automatic settings on your smartphone camera are convenient, relying solely on auto mode can limit your control over the final image. Auto mode adjusts everything for you, which can be helpful in some cases, but it also means you’re leaving important decisions—like exposure, white balance, and focus—to your phone’s algorithms.
For example, if you’re shooting in tricky lighting conditions, your camera may not expose the scene as you’d like, resulting in washed-out highlights or overly dark shadows. Switching to manual controls enables you to adjust settings like ISO and shutter speed to handle difficult lighting more effectively and get a shot that looks how you want it to.
Not every native smartphone camera app allows you to shoot in manual mode, which is where third-party camera apps come in. Third-party camera apps like ReLens and Pro Camera give you access to the exposure triangle—ISO, shutter speed, and aperture—allowing you to fine-tune your photos and capture scenes the way you see them, rather than how your phone interprets them.
2 Zooming Instead of Moving Closer
One of the biggest mistakes people make with smartphone photography is relying on digital zoom to get closer to their subject. Unlike optical zoom, which uses the camera’s lens to magnify the image, digital zoom simply crops and enlarges the image, leading to a noticeable loss in quality and sharpness.
Instead of zooming in, physically move closer to your subject whenever possible. This ensures you’re using the full resolution of your camera and retaining maximum detail. If getting closer isn’t an option, it’s better to take the shot and crop it later during editing to maintain higher image quality.
3 Forgetting to Clean Your Lens
Smartphone lenses are constantly exposed to dust, fingerprints, and smudges since we carry our phones everywhere. A dirty lens can cause your photos to look blurry, hazy, or lacking in contrast, and many people don’t realize this until they compare their shots to cleaner, crisper ones.
Before taking any photo, make it a habit to quickly wipe the lens with a soft, clean cloth or even your shirt (as long as it’s not rough). This small step can dramatically improve the clarity of your images and prevent that soft, foggy look that can occur from lens grime.
4 Taking Too Few Shots
One of the best things about digital photography is that you can take as many photos as you want without worrying about running out of film. Yet, many still take just one or two shots and hope for the best. This approach can lead to missed opportunities or subpar photos, especially when capturing a fleeting moment or in difficult lighting.
Instead, take multiple shots from slightly different angles or with varied settings. This gives you more options to choose from when reviewing your photos later. Don’t be afraid to experiment—sometimes the best shot is the one you didn’t expect.
5 Not Paying Attention to Lighting
Lighting can make or break a photo, yet it’s one of the most overlooked aspects of smartphone photography. Many people shoot without considering where the light is from or how it affects their subject. Poor lighting can cause unwanted shadows, overexposure, or dullness in your photos.
Danny Maiorca/MakeUseOf
To improve your shots, always be mindful of the light. Natural light is usually the most flattering, so try to shoot during the “golden hour” when the light is soft and warm. If you’re shooting indoors, position yourself near a window for more even lighting. Avoid harsh overhead lighting unless you’re going for a dramatic effect, and experiment with different angles to see how light interacts with your subject.
6 Using Flash for Every Low-Light Situation
Many smartphone users instinctively reach for the flash when shooting in low-light conditions. While flash can be useful, overusing it often leads to harsh, unflattering lighting that can wash out colors and create unappealing shadows. Instead of relying on the flash, explore alternative methods to enhance your low-light photography.
Try increasing your ISO setting, if your camera app allows it, which can help brighten your images without the need for flash. Additionally, look for available light sources, like lamps or streetlights, to illuminate your subject more naturally.
Jowi Morales/MakeUseOf
If possible, use a tripod or rest your phone on a stable surface to prevent camera shaking during longer exposures. This will allow you to capture more detail without the harshness of a built-in flash.
7 Overusing HDR
High Dynamic Range (HDR) is a fantastic feature that helps capture a wider range of tones in your photos, especially in challenging lighting situations. However, using HDR too frequently or inappropriately can lead to unnatural, overly processed images. It often results in a “fake” look, where the colors appear oversaturated, and the details in shadows and highlights become exaggerated.
Instead of defaulting to HDR for every shot, consider when it’s truly necessary. HDR works best in scenes with high contrast—like landscapes with bright skies and dark foregrounds—but can be overkill for simpler scenes. Use it selectively, and review the results to ensure that your images retain a natural look while still benefiting from the HDR effect.
8 Skipping Composition Rules
Danny Maiorca/MakeUseOf
Good composition is key to creating engaging and visually appealing photographs, yet many smartphone users overlook it. Relying solely on instinct often results in poorly framed shots that lack impact. Familiarizing yourself with basic composition rules, such as the rule of thirds, leading lines, and framing, can significantly enhance your photography.
For instance, the rule of thirds suggests dividing your frame into a grid of nine equal parts and placing your subject along these lines or at their intersections for a more balanced composition. Similarly, leading lines—like roads or fences—can guide the viewer’s eye to the main subject. Don’t hesitate to experiment with different angles and perspectives to discover compositions that best highlight your subject.
9 Not Using Burst Mode for Action Shots
Capturing action shots can be tricky, especially if your subject is moving quickly. It’s easy to make the mistake of taking just one photo, hoping for a perfect shot, but this method often leads to missed opportunities. To increase your chances of capturing that ideal moment, take advantage of your phone’s burst mode.
Burst mode allows you to take a rapid series of photos in quick succession, giving you a greater chance of freezing the action at the right moment. This is especially useful for sports, pets, or children in motion. Once you’ve captured the burst, you can sift through the images to find the one with the best composition and clarity.
Smartphone photography may seem straightforward, but avoiding these common mistakes can significantly enhance your skills and improve the quality of your images. These tips can help you make the most of your smartphone’s capabilities and bring your creative vision to life.
If you’re not fond of replacing your hardware or you don’t want to pay the high cost of having an item repaired or replaced, you may want to take matters into your own hands—these sites help you do exactly that.
iFixit is the most well-known site of its type. The US-based company started in 2003 after co-founder Kyle Wiens couldn’t find a repair manual for his Apple iBook. iFixit has since grown into a global community.
The site offers video teardowns so you can see what goes into a product and how to put it back together. Users from all over submit their own guides to fix consumer electronics of all types. You can also buy the parts you need to finish the job.
Many of us find it easier to follow along with a video than with text or photos. Fortunately, YouTube is packed with tutorials and clips of people fixing their own PCs. Most of the sites above even upload videos to YouTube.
Lots of the tutorials come from channels that don’t specialize in computer repair. These are often from individuals who at some point need to fix their own devices and decide to share their experience with the internet. Their instructions may be the best you can find when working with less common hardware.
Anyone can upload content to YouTube, so keep that in mind when considering whether to take a video’s advice. You may come across instructions that aren’t reliable, increasing the chance you will break your machine.
wikiHow provides step-by-step instructions on how to do seemingly anything. One task it doesn’t do is tell you how to fix exactly the component that’s broken on your computer or mobile device. Still, that doesn’t mean it’s useless for addressing your electronic woes.
Here, you can find general guides that may work regardless of your model, such as how to revive a cell phone battery or how to fix an iPod jack. This general know-how may serve you well not only with your current tech headache but also with future ones.
As the name suggests, PowerbookMedic has been around since before Apple called its laptops MacBooks or even iBooks. That doesn’t mean the site is filled with stagnant, outdated information. It remains a valuable tool for fixing Apple hardware, including iPhones and iPads.
Don’t have an Apple product? PowerbookMedic isn’t entirely irrelevant to you. The site also has guides for Amazon Kindle devices. So, if your Fire tablet or Kindle e-reader has fallen on hard times, this resource could help you out.
PowerbookMedic doesn’t only sell parts—it offers to buy your current PC. The company will repair your machine and then sell it refurbished. If the folks at PowerbookMedic can’t use a part, they try to recycle what they can.
Rather Have Someone Else Do the Work?
Fixing a device takes time. You also risk damaging the hardware further, and if anything goes wrong, you’re out of luck. So, it makes sense not to take that task on yourself.
Many shops exist for precisely this kind of work. One of the sites listed above will take your gadget and fix it if you’re willing to mail it in. PowerbookMedic will repair your Apple device, claiming an average turnaround time of four business days (though Amazon hardware is not supported).
Other shops offer brick-and-mortar locations in the US. CPR (Cell Phone Repair) stores, despite the name, will also fix computers and game consoles at its hundreds of locations. uBreakiFix is another large chain, and so is iFixandRepair, which both have stores nationwide. A smaller, local option is also bound to be found in your nearest metropolitan area.
If you live in the US and consider fixing your own hardware a right, check out the Repair Association. You may also want to check out iFixit’s page on Right to Repair, which provides plenty of relevant links and other resources.
Magnetic USB-C connectors are great MagSafe alternatives for easy plugging and unplugging.
Third-party magnetic cables for micro USB, iOS devices, HDMI, and more are also available for added convenience.
Before buying, ensure connectors match USB-C specs and be mindful of weaker magnetic strength and port accessibility issues.
MagSafe is one of my favorite features on Apple devices. It’s very convenient to run a charging cable to your laptop and pop it off whenever you want.
If you’re using a Windows PC, though, you don’t need to miss out on the convenience. There are magnetic USB-C and even HDMI connectors that bring MagSafe’s convenience to just about any device you own.
Magnetic USB-C Connectors Are Good MagSafe Alternatives
For as little as $13 on Amazon, you can find Magnetic USB-C Connectors. These connectors divide the USB-C plug into two parts: the connector and the shell. They snap together magnetically, and the connector stays plugged into the USB-C port when you break off the cable.
They also come in different shapes and sizes. For example, you can choose between right-angle or straight connectors. I picked the angled connectors because I prefer my cables to run along the length of my laptop instead of jutting straight out of the sides. With USB-C becoming the universal connector, these adaptors can add magnetic capabilities to any USB-C device.
Other than making plugging in a cable extremely easy, these connectors can help reduce the wear on your USB-C ports, as you don’t need to plug and unplug the cable every time you want to disconnect a peripheral or your charger.
Yadullah Abidi / MakeUseOf
The connectors I’m using support 40Gbps data transfer and 140W power delivery. I’m using one to charge my HP Omen Transcend 14 laptop which uses 140W over USB-C PD (Power Delivery), while the other plugs in my USB-C hub (buying a USB-C hub can be a nightmare in itself) that handles all of my peripherals, memory cards, and ethernet connection.
In my testing, charging and data transfer speeds weren’t affected. The connectors also have a metal casing, which helps with heat dissipation. You just have to ensure you get the connector matching the specs you need.
You’re Not Limited to USB-C
The good thing about using third-party products is that they’re often adapted to different standards. You can easily find similar magnetic cables for micro USB, iOS devices, and even HDMI and DisplayPort cables. Even magnetic USB-C to 3.5mm adaptors are available on Amazon, albeit for a high price.
Keep in mind that your best chances of finding a magnetic adaptor for a particular connector depend on its popularity. Magnetic USB-C connectors are in plenty of supply, meaning you’ll get better pricing.
Other connectors, such as micro USB, HDMI, or the aforementioned USB-C to 3.5mm adaptor, can cost as much as $20. While they offer a lot of convenience, that price might be a bit too high for a simple connector.
Magnetic USB-C Connector Buying Tips
As is the case with everything tech, these magnetic connectors also have several drawbacks. First, don’t expect their magnetic strength to be as good as Apple’s MagSafe connectors. They have pretty good magnets, and you won’t have any problems snapping your cables in place. But I won’t pick up my laptop with the cable connected via these connectors.
Secondly, they leave the actual USB-C connector plugged into your laptop. Now, that’s not a problem for me, but it might be for you, as the port can’t be used for anything else until you squeeze the connector out.
It’s easier said than done, as there’s little space to hold on to the connection when pulling it out. It takes a little while to get used to, but eventually, you’ll be able to get them out by squeezing your nails in between the port and the connector. Just be careful when doing so.
Yadullah Abidi / MakeUseOf
Finally, just because it’s a connector and not a cable doesn’t mean you don’t need to worry about USB-C specs. For example, if you use a power-only connector in a Thunderbolt 4 port, you won’t be able to use any of its data transfer or display capabilities.
This is where one of the biggest issues with these adaptors comes into play: they aren’t necessarily compatible with the USB spec, and there are reports of users damaging their devices just because they yanked the cable the wrong way. I haven’t had any issues using them and haven’t taken any special precautions, but a warning post on the USB-C Hardware subreddit delves deeper into these potential issues.
Generally speaking, your best bet is to look for connectors with a 24-pin connection that supports up to 240W power and 40Gpbs data transfer. These connectors are the most common and sell around the $15 to $20 price range. 140W and lower-powered connectors are also available for about the same price, so be sure to look at the connector’s specs before purchasing.
So, if you hate plugging/unplugging cables every time you need to move your laptop or want a solution that doesn’t rip your laptop away if someone trips over your charging cable, these magnetic adaptors are a great way to add MagSafe-like capabilities to any USB-C device.
Having your phone stolen puts all your personal data at risk. Google is taking steps to address this issue by rolling out new theft protection features for Android, designed to safeguard personal information if someone snatches your device.
What Are Android’s Theft Protection Features, and How Do They Work?
Sanuj Bhatia / MakeUseOf
Until now, Google hasn’t provided robust built-in protection for lost or stolen devices. While Find My Device allows you to locate, lock, and erase your Android device remotely, Android hasn’t offered native features specifically designed to protect against theft. Google is addressing this gap by introducing a trio of on-device safety features to secure your data if your device falls into the wrong hands.
The first new feature is called Theft Detection Lock. If your device detects sudden, suspicious movement while it’s in use and unlocked—such as someone grabbing your phone and running away—it will automatically lock the screen. Google explains that this feature triggers when “common motion associated with theft” is detected, using data from the device’s sensors, Wi-Fi, and connected devices to determine if your phone has been stolen.
Next, we have Offline Device Lock, which automatically locks your phone even when it’s not connected to the internet. This is useful if someone steals your device and turns it off to disable location tracking. It also kicks in when someone repeatedly enters the wrong password. However, your phone must be actively used while it’s unlocked.
Sanuj Bhatia / MakeUseOf
Rounding out the trio is the Remote Lock feature. Once enabled, you can lock your device’s screen remotely by visiting android.com/lock and entering your phone number. To use Remote Lock, users must pass a security challenge and enter the same phone number that was active on the device.
Remote Lock requires a working SIM card to function properly.
Once you activate Remote Lock, you can only unlock the device using the original screen lock method. Google says this feature gives you extra time to recover your account details and access Find My Device, such as sending a factory reset command to wipe the device completely.
How to Set Up Theft Protection on Android
Google is gradually rolling out these new features to all devices running Android 10 or later. We’ve noticed the feature appearing on our Pixel 8a but not yet on our Pixel 9 Pro XL or Xiaomi 14, suggesting a phased rollout. However, all devices should eventually receive the update. Some features may also appear at different times—I only had access to Theft Detection Lock and Offline Device Lock initially, but Remote Lock showed up a few days later.
Setting up the theft protection features is straightforward. Simply open the Settings app and search for “theft protection.” Alternatively, you can navigate to Google services and select Theft protection. Here, you’ll see a list of safety features. I recommend enabling all the options for maximum security. Just toggle each feature on, and you’re good to go.
While these features aren’t foolproof, they can significantly reduce the damage if someone steals your device. Google hopes these safety features will eventually deter thieves and decrease smartphone theft altogether. For now, these tools can help safeguard your data and provide some peace of mind, even if your device ends up in the wrong hands.
When working with large datasets, navigating between different sheets or windows can be time-consuming and inefficient. Fortunately, Excel’s split screen view offers a convenient solution for comparing data side by side. Here’s how to use it.
Viewing Worksheets in Split View
Excel’s split screen feature allows you to divide the window into two or four panes, making it easier to view different sections of the same worksheet or even multiple worksheets simultaneously.
Splitting the Window in a Single Worksheet
In Excel, you can split a worksheet into four parts by using the Split option. To do this, go to the View tab in your Excel workbook and click the Split button. This will divide your current worksheet into four sections, seperating them with thick gray lines.
You can then scroll each pane independently—both vertically and horizontally—allowing you to view different parts of the worksheet at the same time. If you prefer to split only horizontally, you can drag the vertical gray bar all the way to the left. For a vertical split, drag the horizontal bar to the top.
Comparing Different Sheets From the Same Workbook
To view two different worksheets side by side, go to the View tab, and click New Window to open a second window of the same workbook. Then, go to the View tab again and click the View Side by Side button.
Excel will arrange the two windows, one above the other. By default, both windows will scroll simultaneously, which makes it easier to spot differences between the worksheets. If you prefer to scroll independently, simply click the Synchronous Scrolling button in the View tab to deactivate it.
Comparing Worksheets From Different Workbooks
If you need to compare worksheets from two different workbooks, first open both workbooks. Then, navigate to the View tab and select Compare Side by Side. If multiple files are open, a dialog box will appear, prompting you to choose which workbook you want to compare with the active one.
Once in side-by-side view, you can scroll through each workbook independently or use Synchronous Scrolling for simultaneous navigation. Additionally, if you want to adjust the layout, click the Arrange All button to switch between horizontal and vertical arrangements.
Once you are done comparing your data side by side in Excel’s split screen view, you may want to remove the split to return to your original view. To do so, all you have to do is go to the View tab again and click the Split button again.
Tips for Using Split Screen Effectively
If you need to use Excel’s split screen feature regularly, it’s a good idea to familiarize yourself with these tips to maximize your efficiency.
Use Keyboard Shortcuts
Keyboard shortcuts in Excel can save you time when using the split screen feature. For instance, you can press Alt + W + S to quickly enable or disable the Split feature in Excel.
Reset Excel’s Split View
After resizing workbook windows or rearranging your split view, you may find that your layout is not as effective as it once was. To restore the default settings, simply click the Reset Window Position button in the View tab.
Save Your Split Screen Presets
Excel’s Custom Views feature is a powerful tool for saving your preferred layouts, including any split screen settings. To create a preset, navigate to the View tab, select Custom Views, and then click Add to name and save your current layout.
Once saved, you can click the Custom Views option, select your desired view, and hit Show to apply it instantly.
The ability to view multiple sections of your spreadsheet simultaneously provides the clarity and organization needed for effective data comparison. This is especially useful for tasks that require attention to detail, such as analyzing financial reports, comparing sales figures, or reviewing project timelines. The best part is that using Excel’s split screen feature isn’t complicated once you get the hang of it.
The Steam Deck is a great way to play games on the go, but it doesn’t natively support titles purchased outside of Valve’s platform. Fortunately, there are plenty of third-party apps you can install that let you play games from other platforms. Now, one of those tools is planning a release on Steam itself, and if everything goes well, you can use it to play Epic Store and Galaxy of Games (GoG) titles.
As spotted by GamingOnLinux, Junk Store lets you play games from other storefronts on your Steam Deck. In an interesting move, the app has appeared on Steam itself, albeit it’s not actually released yet. The developer is holding back for now to gauge interest via user wishlists, and it admits that there’s a good chance that Valve will stop it during the game release process.
If the devs do manage to get the app onto the Steam store, you can boot up Junk Store natively on your Steam Deck. That way, you won’t need to install any third-party plugins—just run it like a regular game. The store page describes it like this:
Junk Store is now on Steam. This is a standalone version rewritten from the ground up to remove the dependency on Decky loader. Now you can install your favourite games from the Epic Games Store and the Gog Store right within game mode.
No need to mess with external launchers, go native! This is as easy as it can get, no need to enter desktop mode!
We don’t know all the details just yet, but as the developers confirmed on the subreddit dedicated to Junk Store, the app will not be free or open source due to the logistics of getting it working on Steam. However, if it’s allowed on, it should become an excellent tool for those who have games strewn across multiple launchers. And if you want to get more out of your portable device, check out how to optimize your Steam Deck.
A phone’s battery health is a good indicator of determining whether you need to replace the battery or not.
You can quickly check an iPhone’s battery condition from the Settings app.
If you have an Android phone, you can use a third-party app like AccuBattery or enter a secret dialer code to check the battery status.
Is your phone dying faster than usual? It might be time for a battery replacement. But how do you know when it’s officially time to say goodbye to your old battery and hello to a new one? Here’s the easiest way to check.
Checking if Your iPhone’s Battery Needs Replacing
iPhones have a built-in battery health feature that offers valuable insights into the battery’s performance and capacity. This feature compares your iPhone battery’s current health to its original state, making it easier to determine when it’s time for a replacement.
To check the battery health on your iPhone:
Open the Settings app and scroll down to tap on Battery.
Tap on Battery Health & Charging.
Check the percentage value next to Maximum Capacity.
If your iPhone’s maximum battery capacity is below 80 percent, you should consider replacing the battery, especially if it doesn’t last nearly as long as it once did. In this case, your iPhone will also display a message at the top of the Battery Health page suggesting a replacement.
If you paid for an AppleCare+ warranty, you’ll be eligible for a free battery replacement. If not, you’ll need to resort to other options for replacing your iPhone’s battery.
Checking if Your Android Phone’s Battery Needs Replacing
Unlike iPhones, Android phones do not offer a native option to check battery health. However, there are multiple methods you can use to assess the condition of your Android phone’s battery.
1. Using a Third-Party App
One of the easiest and most popular methods for checking battery health on Android is by using a third-party app called AccuBattery. This app provides detailed information about your battery’s capacity, usage, and health over time.
Download and install the AccuBattery app from the Play Store. The app will measure your charge cycles to estimate the battery’s health. However, keep in mind that AccuBattery won’t show battery health information immediately; it requires time to monitor and gather data.
After a few charging cycles, check the battery capacity reading. If the capacity is significantly lower than the original (usually around 80 percent or less), it might be time to consider replacing your phone’s battery.
Download:AccuBattery (Free, premium version available)
If you have a Samsung Galaxy phone, you don’t need to use third-party apps to check the battery health. Instead, you can use the Phone Diagnostics option in the Samsung Members app to determine if the battery needs replacing. Here’s how:
Download and install the Samsung Members app from the Play Store if you don’t have it already.
Go to the Support tab and tap Phone diagnostics.
Tap on Battery status to run the diagnosis.
If the app shows a “Normal” status and indicates that the battery life is in “Good” condition, you don’t need to do anything. However, if it displays battery life as “Bad” or “Weak,” you should consider getting the battery replaced.
3. Dial the *#*#4636#*#* Code
If you have an older Android phone, you can access a hidden diagnostics menu using an Android secret code. This method may not work on all devices, but it’s worth trying for a quick check.
Open your phone’s dialer and enter *#*#4636#*#*. This will bring up a testing menu. Then, tap the Battery Information option to view details about the battery’s health. If it reads Bad, replacing the battery may be necessary.
Over time, your phone’s battery will naturally degrade, impacting its performance and overall functionality. While there are signs that indicate it’s time to replace your phone’s battery, checking the battery’s health is the most reliable way to make an informed decision.
If the battery health is good but the phone is still draining quickly, replacing the battery won’t help. Check the common reasons for fast battery drain and take the necessary steps to address it.
While video games have become more cinematic over the years, we’ve yet to see someone’s gameplay make it onto the big screen. However, that’s set to change, as a company has picked up the rights to distribute a re-enactment of a Shakespearean play in GTA 5.
Mubi Picks Up the Rights to Show “Grand Theft Hamlet” in Cinemas
As spotted by Hollywood Reporter, the movie distributor Mubi has acquired the US rights and “exclusive global SVOD rights” to a title called Grand Theft Hamlet. The movie features two actors who were bored during the 2021 COVID lockdown and decided to take to the stage in the online mode of GTA 5. There, the pair attempt to act out all of Shakespeare’s Hamlet, while the usual multiplayer chaos plays out around them.
As the trailer shows, the movie is by no means a high-budget professional film. Performing a play in an online sandbox game goes as well as you may expect, with the audience consistently taking out their aggression on the actors, passers-by, and each other. Still, the pair have a blast trying to recreate Hamlet on the digital stage; you can hear an actor stifling their laughter as they deliver the line “Not a mouse stirring” while a police helicopter hovers overhead and sirens blare in the distance.
The following trailer contains instances of strong language. Viewer discretion is advised.
If you want to see the movie before everybody else, you can catch it next week at the BFI London Film Festival in the UK. Failing that, Mubi states that they’re eager to release it sometime in early 2025. And if you think you can make a better in-game movie than these two, check out these free tools for creating your own machinima.
Adobe released Photoshop Elements 2025 with new features like the Object Removal Brush and Depth Blur Filter.
A 3-year license for $99.99 makes Photoshop Elements more affordable than other Creative Cloud subscriptions.
The new Motion Graphics, Quick Recolor Tool, and Combine Photos Tool are stand-out features in the 2025 update.
Adobe Photoshop Elements updated to its 2025 edition in October 2024, bringing with it a host of new features designed to streamline workflows and boost creativity. Here are my favorite ones…
Photoshop Elements doesn’t follow Adobe’s typical subscription route. Instead, you can purchase a 3-year license for Photoshop Elements, Premiere Elements, or a bundle with both. While you don’t own the product outright, like in the old days of Adobe, having a 3-year license at $99.99 is a great alternative to the more costly Creative Cloud subscriptions.
Photoshop Elements’ tools are similar to many found in Photoshop. There are selection tools, color edits, AI features, layer palettes, and much more. And the 2025 update brings some great new features to complement the existing tools.
Adobe Announces Photoshop Elements 2025
Adobe announced Photoshop Elements 2025 at the beginning of October 2024, continuing its annual tradition of releasing an updated version.
New users can purchase a 3-year license from $99.99—starting with a 7-day free trial. The pricing is affordable compared to other Creative Cloud subscriptions, which quickly add up and are difficult to get out of. Previous licensees of Photoshop Elements can upgrade the license for only $79.99.
You can get the bundle including Photoshop Elements and Premiere Elements—for video and photo editing—from $149.99 or upgrade from a previous bundle for $119.99. There are discounted options for students and teachers.
Photoshop Elements’ 2025 update brings a large number of new features and tools, along with M3 support for Apple users. But these are my top picks…
1. Object Removal Brush
The Object Removal Brush, as well as the Removal Brush, use Adobe Firefly’s AI technology and work similarly to Photoshop’s Generative Fill tool.
The difference is that there’s no text prompt to replace what you remove; the tool uses information from your image to fill in the gaps. While it works successfully most of the time, it still has its moments of failure.
Overall, it’s a handy tool for quick removal of pesky background people or objects.
2. Depth Blur Filter
The Depth Blur filter is a fun way to add some aperture depth to your image in post-production. While this can be best achieved when taking a photo by using a shallow depth of field, sometimes the moment passes without thought.
Using AI, this tool lets you select an area of the image to keep in sharp focus while sending the rest of it into a soft blur. It uses depth perception rather than choosing an area of the flat photo, and you can choose a spot within a distance from the camera.
I’m impressed with this filter—it works more realistically than the iPhone Portrait lens.
The Quick Recolor tool is my favorite feature in the 2025 update. You can find it in the Advanced tools by selecting Smart Brushes and choosing a preset from the thumbnails. It works similarly to Photoshop’s Quick Selection tool, but as the selection appears, your preset recolors the selection.
The results vary in success, but if your image has a stark contrast between colored areas, and you experiment with the blend modes after selection, you can create realistic recolored results.
Found under the Guided tools section is the new Combine Photos tool. This isn’t anything complex: it’s a tool that helps you collage images together.
This tool has a lot of potential. It cuts out subjects from backgrounds or backgrounds from subjects, and it allows you to merge the colors of two images to fit together as one. There are a lot of effects you can explore by combining your images together.
The Guided edits have built-in tutorials for the tools they represent. Selecting any guided edit lets you follow the steps while applying the tool to your own images. There are plenty of mobile apps for background removal, if you don’t wish to invest in Photoshop Elements
5. New Motion Graphics
Despite being a photo editing tool, there are animated graphics in Photoshop Elements—with music. The update added four animated graphics:
Sparkles Overlay
Blinking Heart Graphic
Pink Frame
Zoom In-Out
These motion graphics add a little pizzazz to your photos with basic editing features. My favorite of the four is the Zoom In-Out tool; applied to a waterscape image, it makes the water appear to move.
6. Web and Mobile App
The web and mobile apps are available in beta mode from the 2025 update. Users with access to Photoshop Elements can access these beta versions.
Firstly is Photoshop Elements on the Web—this works similarly to Adobe Express or Photoshop on the Web—available from your browser. This allows you to access the tool when away from your home computer if you log in and have internet connectivity.
Secondly is the beta mobile app, which is similar to the Photoshop Express Premium mobile app. At the time of writing, users can only download it via TestFlight from Adobe. The app allows for offline editing, which is a great feature. I’m looking forward to seeing this become a live app.
Adobe Photoshop Elements is a great option for anyone who wishes to utilize Adobe’s editing power but doesn’t want to shell out thousands of dollars to access it. While Photoshop Elements isn’t as powerful or accommodating as Photoshop, it has some truly great features that can transform your images in surprising ways.
You’ll have to learn a very different interface if you switch from Photoshop, as PS Elements uses an entirely different layout and label structure. But for the price, Photoshop Elements is certainly worth using if you aren’t a Creative Cloud subscriber.
Ever since the Switch 2 was confirmed, fans have been chomping at the bit for any crumb of information about the console’s release. Fortunately, Nintendo has broken the silence surrounding its new hardware, albeit it’s not the device you’re thinking of. The company has revealed the “Nintendo Sound Clock: Alarmo,” and while it’s not a portable console, it’s still a fun setpiece for anyone who’s a fan of plumbers in iconic red suits.
You Can Now Buy the Nintendo Sound Clock: Alarmo and Wake Up in Style
The Nintendo Sound Clock: Alarmo is an alarm clock with a twist. It has five themes based on the best Nintendo Switch games available: Super Mario Odyssey, The Legend of Zelda: Breath of the Wild, Splatoon 3, Pikmin 4, and Ring Fit Adventure. If you connect it to your Nintendo account, the alarm clock will grab new themes as they arrive, with Mario Kart 8 Deluxe and Animal Crossing themes already available to download. Each theme plays a track from the selected game when the alarm sounds; for example, the Super Mario Odyssey theme plays Jump Up, Super Star to energize you in the morning.
Fortunately, the Alarmo is more than a fancy clock. It uses sensors to detect movement and encourages you to get out of bed with some fun theming. For instance, setting the alarm to the Super Mario Odyssey theme will play coin noises every time you move, while Splatoon 3 will re-create the soundscape of a tough Splatfest match. Once you’re up, the alarm automatically turns itself off, complete with a special fanfare.
While the Alarmo can tell when you’re getting out of bed, it can also tell when you’re not. It’s programmed to ramp up the alarms the longer you stay in bed, meaning that Mario’s cheerful tunes will morph into Bowser’s theme if you decide to sleep in. Plus, the alarm can play peaceful sounds when it’s bedtime, which makes it a lovely bedside companion for the Nintendo fan.
If you want one for yourself, head over to the Nintendo Store and grab it for $99.99.
As if social media ads weren’t already phony enough, new AI editing tools are coming to Meta’s Ads Manager. These tools give advertisers the ability to create and alter video ads delivered to your Facebook and Instagram feeds. The rollout has already begun, and Meta indicates the tools should be available globally to advertisers as early as next year.
The New Tools Are Focused on Video Content
There are two main AI capabilities that Meta highlights in its official announcement. First, Video Expansion, which creates “unseen pixels” in a video to expand its aspect ratio. And Image Animation, which lets advertisers generate video from static images to repurpose them for services like Reels.
These new entries increase Meta’s repertoire of AI advertising tools, which currently includes Background Generation, Image Expansion, and Text Variations. Those tools are mainly for images. The new offerings are more focused on video content. That’s because, according to Meta, users spend around 60% of their time engaging with videos.
There are already numerous ways to shortcut the social media video creation process via AI. However, Meta’s announcement implies that it intends to remove some creative heavy lifting, so advertisers can mitigate the roadblocks that occur when marketers eventually sink into burnout.
You’ll Probably See More Ads
Overall, what this means for you is that those obnoxious targeted ads on Facebook and Instagram will likely become even more targeted, and you’ll likely see a lot more of them. And rightfully so. Because why else would anyone want to engage with their news feed if not to constantly expose themselves to corporations vying for their hard-earned dollars?
The announcement follows in the footsteps of companies like Amazon and TikTok, which are already testing AI to enhance advertisements. It’s a concerning new trend that reinforces the rising dominance of generative AI while continually blurring the lines between authenticity and artifice. But the bigger concern is one of consumer trust.
Despite our previous excitement over certain aspects of AI, the negative potential of generative AI is already well established. And while its adoption into the world of advertising seems natural, it’s also rife with potential downsides. Specifically, use in the advertising space means AI will rely on the ethics and morals of companies that have sometimes proven to be immoral and unethical.
That’s a frightening prospect, ultimately raising questions about the need to impose limits on the capabilities of generative AI, both in the world of advertising and on the internet.
You can type a simple command in Windows PowerShell to quickly wipe a second storage drive or external drive.
If you want to wipe your C: drive, you’ll need to use a free tool like DBAN.
You can consider using Windows Reset to wipe your C: drive, but it will reinstall Windows on the drive.
If you plan to sell or donate your hard drive, you must wipe it completely to remove personal data. This might also be necessary if you wish to use a second-hand drive or remove malware. I’ll share two easy methods to help you permanently purge a drive in Windows.
The Easy Way to Wipe a Hard Drive in Windows
Before trying out third-party tools, you can utilize the Format command in Windows to delete the hard drive data permanently. This method is helpful if you want to wipe a second storage drive (on which Windows isn’t installed) or an external hard drive.
It won’t help you completely wipe the system drive (C drive) because it contains the core files. DBAN and other third-party tools can help you with it, which I’ll explain after this method.
Before proceeding, find the correct letter for the drive you wish to erase using Windows File Explorer or Disk Management. Otherwise, you’ll delete something you didn’t intend to.
You’ll need to launch and use Windows PowerShell, a command line tool to input text-based instructions. You can search for PowerShell using Windows Search. The command you’re going to use follows this syntax:
Format volume /P:passes
In the above command, replace volume with the drive letter and passes with the number of times you want Windows to overwrite each sector of the drive.
So, if your drive letter is X: and you wanted five passes of formatting, you would need to enter the following command:
Format X: /P:5
It’s as simple as that. This process will take longer (even multiple hours) to complete, depending on the size of the drive.
How to Totally Wipe a Hard Drive With DBAN
What if you want to destroy the data on your C: drive? Windows’ built-in formatting tool cannot help you with that. While several third-party tools are available, I recommend Darik’s Boot and Nuke (DBAN).
DBAN is excellent for deleting all data in one go. The tool runs in your computer’s memory, much like a recovery drive or a Linux live disk, and removes all data traces.
DBAN’s free version is fully capable of deleting your HDD. So, you can ignore the premium version on its site and follow the instructions below.
1. Identify Your Hard Drive
To avoid accidental erasure, start by ensuring you can identify your HDD. The easy way to do this is to open File Explorer and check the C: drive. As long the device is labeled something like Local Disk (C:) or Windows (C:), you’re in the right area.
However, problems can arise if the C: drive is one of several, and they’re all partitions on the same physical drive. This could result in inadvertently overwriting data on all partitions, not just the C: drive.
Right-click the drive letter and select Properties > Hardware to find the hardware name of the device. Note its name because you’ll need it while using DBAN.
2. Download DBAN and Create a Bootable USB Drive
DBAN is available for download as an ISO file. So, you’ll need to create a bootable USB drive from an ISO with a tool like Rufus. Follow these steps:
Connect a USB drive to your PC and launch Rufus. It will automatically select the drive.
Click Select. Browse your PC for the DBAN ISO file and double-click on it to select it.
Click Start and then follow the on-screen instructions to create the bootable drive.
3. Boot Into DBAN
The DBAN free version only works with legacy BIOS and doesn’t play nicely with Secure Boot. So, you must enable legacy support in BIOS settings and disable Secure Boot.
After that, restart your PC and press the designated F-key or Esc key to open the boot devices selection menu. Select the DBAN USB drive and press Enter.
4. Wipe Your Hard Drive With DBAN
You’ll find several options on the DBAN screen, but you just need to follow these steps to wipe your drive:
Press Enter to start guided mode.
Use the arrow keys to select the device you wish to wipe.
Press Space to flag the drive with the [wipe] flag.
When ready, press F10 to commence the wipe process.
You’ll find some keyboard shortcuts at the bottom of the screen that let you make changes to the wipe process.
Use P to change which random number generator is used to destroy your data.
R changes the number of passes for each disk sector. This multiplies the default passes for each available wipe method. For example, the default DoD Short has three passes by default, so using R lets you change this to nine passes by specifying a value of 3.
M, meanwhile, gives you a choice of six erasure methods, including DoD Short, DoD 5220.22-M, and Gutmann Wipe.
A verification mode (V) can also be enabled, although this lengthens the wipe process.
A timer in the top-right pane of the DBAN tool displays the duration of the wipe process. Eventually, a new screen should appear with “pass” highlighted in green next to the disk drive name. At this point, you’re free to reuse the drive.
If the word “fail” appears instead, try using DBAN again. If this happens repeatedly, consider physical destruction.
While other tools (including some built-in options like Windows Reset) can remove the data on your hard drive, the safest option is to wipe with DBAN or a similar tool. Note that DBAN’s free version only works on hard disk drives; use the manufacturer’s official tool or a free utility if you want to wipe an SSD.
Google changed the game with its traffic estimates, allowing you to better predict when you will actually arrive somewhere. However, the onus is still on you to factor in time to find parking. If you’re not one to tempt parking fate, you’re in luck: a popular parking reservation app has now integrated with Google Maps and Google Search, so you can easily pay for a parking spot in advance or on the go.
Google Maps and Google Search Get SpotHero Integration
A prominent parking reservation app, known as SpotHero, has announced that it’s officially integrating with Google Maps and Google Search. This integration means that you can access SpotHero’s digital parking solutions directly from Google, as you search for locations. So, the next time you’re heading to that concert downtown, you can more easily access alternatives beyond paying the premium for the venue’s official lot.
According to SpotHero’s announcement, you’ll be able to use Google Maps to locate parking around you once you are in the city, easily find a parking lot, and select BOOK ONLINE. This action button will take you to SpotHero’s secure site to complete the reservation. Alternatively, you can find a parking spot in advance, as long as you specify a date and time.
Similar to how Google already characterizes restaurants, SpotHero’s technology tags facilities with their specific offerings, such as wheelchair accessibility, EV charging, and valet services.
The Digitized Parking Revolution Is Here
There’s no doubt that Google Maps has made it easier to travel, whether you’re planning a one-night outing or a family vacation. Now, that planning convenience is extended to parking. Like Uber and Lyft have done for taxi transportation, digital parking reservations apps have made parking cashless. Connecting a leading parking reservation app with Google streamlines the process even further.
I don’t always mind playing the street parking game, and these days, many meters can be paid through digital apps. I am curious to see if this new collaboration will lead to parking lots charging premiums in exchange for convenience. I get it: assuming you’ll find parking is not the same as knowing you have a spot on lock. It’s easy to understand the appeal of trading those fifteen minutes you would have spent driving manically around the block with fifteen minutes spent catching up with friends.
The Google Play Store has rules against developers promoting their apps outside of the Android store or using payment methods other than Play Billing. However, that’s about to change. A long legal battle has finally come to an end, with the US court ruling that Google has held an illegal monopoly on Android apps.
Google Has an Illegal Monopoly on App Stores, Says the US Court
Gavin Phillips/MakeUseOf
As spotted by The Verge, the ruling came after a four-year-long court battle with Epic vs. Google. The lawsuit began when Epic accused Google’s Play Store practices of being unlawful after the former tried to get the hit videogame Fortnite onto Android devices.
Epic’s main issue with the Google Play Store was the 30% cut that Google took from each sale. Epic began selling digital Fortnite currency (called “V-bucks”) using in-app third-party payment methods to combat this. This violated Google’s terms, which ended in Fortnite being booted off the Play Store in retaliation, which triggered the lawsuit.
Fast forward to today, and Epic has won its fight against Google after the US Court ruled that the latter had established an illegal monopoly. From November 1st, 2024 to November 1st, 2027, Google now has to abide by these rules:
Stop requiring Google Play Billing for apps distributed on the Google Play Store (the jury found that Google had illegally tied its payment system to its app store)
Let Android developers tell users about other ways to pay from within the Play Store
Let Android developers link to ways to download their apps outside of the Play Store
Let Android developers set their own prices for apps irrespective of Play Billing
The ruling also prevented Google from incentivizing developers to use the Play Store over others. For example, Google cannot offer money or perks to developers to launch their apps on the Play Store first, and neither can it pay phone makers to pre-install the Play Store app on their phones.
For now, you shouldn’t notice any difference with the Play Store. The new rules come into effect on November 1st, so there’s a good chance Google will enforce its current rules to the bitter end.
Once November 1st hits, you’ll likely see a wave of changes across the Play Store. Not only will third-party Android app stores be allowed in, but your favorite apps may begin offering you payment methods outside of Google Pay. It’ll be a good change for consumers, so keep an eye on your apps when November 1st arrives and see how they change.
LPDDR5X memory provides faster speeds, better reliability, and enhanced laptop power efficiency.
Embedded LPDDR5X memory is non-upgradable, requiring you to decide on the memory amount at purchase.
Although LPDDR5X laptops are pricier, the increased speed and battery efficiency justify the added cost.
As laptops get thinner, lighter, and faster, manufacturers have resorted to soldering more and more components to the motherboard, leading us to embedded memory. However, what embedded memory takes away in upgradability, it makes up for in speed.
With the race for the perfect thin and light performance machine heating up, embedded memory looks like the future we’re headed toward—you should consider switching.
If you’re looking at high-performance laptops, the memory type will likely be LPDDR5X. The standard came out in 2021 and is the latest in the LPDDR (Low Power Double Data Rate) memory standard. It brings several improvements to the DDR4, LPDDR4, and DDR5 standards, including speed, reliability, and power efficiency.
LPDDR5X was specifically built for mobile phones, thin and light laptops, and practically anything that requires fast memory without adding bulk. Since it’s faster than existing RAM standards in laptops, you can do more with less RAM while also extending your laptop’s battery life.
Non-Upgradable, Costs More
One major disadvantage of LPDDR5X and, by extension, embedded memory is that it’s non-upgradeable. If you buy a laptop with LPDDR5X memory, you’ll have to decide the amount of memory you want at purchase. Since the memory chips are soldered to the motherboard, there’s no option to increase or upgrade memory later by adding or replacing existing modules. However, the upcoming LPCAMM2 memory might change that.
Another downside is cost. LPDDR5X laptops tend to cost higher than their LPDDR5 or DDR5 counterparts. However, this is an understandable downside, considering you’re getting significantly higher speeds and better power efficiency.
LPDDR5X vs. LPDDR5
As mentioned before, LPDDR5X brings several improvements compared to LPDDR5.
A speed increase from 6.5Gbps to 8.5Gbps using the same 1.1V core voltage. Performance numbers vary by manufacturer, with Samsung claiming an industry-best data transfer rate of 10.4Gbps
Greater reliability thanks to the new adaptive refresh management feature.
Up to 20 percent better battery efficiency.
Better signal integrity.
This means you’ll get up to 2Gbps faster memory performance for the same power consumption. Your system’s RAM is one of the most accessed parts, and every data transfer consumes power. That 20 percent better battery efficiency might not seem like a lot on paper, but spread out between hundreds, if not thousands, of back-and-forth data transfers, it can do wonders for battery life without giving up performance.
If you’re using LPDDR5 or even DDR5 memory in your laptop, you might not notice the performance difference unless you’re using programs that tax your system, like games or editing software. However, the battery efficiency will come in handy as you’ll not only get better overall battery life without needing a bigger (and bulkier) battery in your laptop, but you’ll also be able to sustain that snappy performance when you’re on battery power or a lower wattage charger.
Why I Use LPDDR5X (And You Should, Too)
Despite being non-upgradable, I prefer LPDDR5X to other memory variants for two major reasons: speed and power efficiency.
If you need the fastest memory possible in your laptop, LPDDR5X is the way to go. Depending on the rest of your laptop’s configuration, the speed difference between the memory types can make a big difference. If you juggle multiple programs side by side, have a lot of browser tabs open, or use resource-intensive programs like Photoshop or Premiere Pro, that additional speed will make your life much easier.
You get all this additional performance while getting more out of your laptop battery. One of the biggest advantages of having power-efficient components in your mobile device, whether your laptop, phone, or portable gaming console, is that you get better battery life without needing a bigger battery. This directly affects how thin and light your device can get.
LPDDR5X is a one-time expense. It might cost you a little more, but the performance and battery life improvements are well worth the extra money. Additionally, with the increased performance, your laptop will last longer.
Smartphones come at various prices, and it’s not apparent how much you should actually spend on a new one. What features can you expect at each price point? And most importantly, which price is right for you? Let’s find out.
Under $100: Fit for Kids or Elders
I don’t recommend buying a new smartphone for under $100 unless it’s for kids or elderly people. At this price, manufacturers don’t have an incentive to innovate, so the best you can get is a phone that can barely get you through the day with medium use.
Expect poor performance, bad camera, bad build quality, bad display, decent battery, and mediocre storage. Instead of buying a new phone at this price, you’re better off buying a used phone that works at least somewhat reliably and is not too big an inconvenience.
Expected Features:
Rear dual-camera setup; 8MP main and front camera; 1080p video at 30FPS
Things improve quite dramatically when you jump from under $100 to up to $200. People who buy at this price are looking for basic functionalities, especially good battery life and decent storage. However, cameras, build quality, and performance remain poor. This price point is reasonable if your use case is limited to web browsing, social media, light gaming, and light photography.
Expected Features:
Rear triple-camera setup; 48MP main camera; 12MP front camera; 1080p video at 30FPS
The $200–$300 bracket is where you’ll find the best value. Most of the bestselling phones in this segment come from Chinese phone makers. Unfortunately, if you’re in the US, your options here will be much more limited than elsewhere in the world.
Wherever you are, you can also find some solid deals from Samsung. Phones at this price point are not only packed with all the essential features but can also have quirky designs to differentiate them from other options.
Expected Features:
Rear quad-camera setup; 48MP main camera; 16MP front camera; 4K video at 30FPS
6GB RAM; 128GB storage with microSD card slot
FHD+ AMOLED screen; 90Hz refresh rate; punch-hole front camera
5000mAh battery; 25W fast wired charging
All plastic body; headphone jack
Rear or side-mounted capacitive fingerprint sensor
USB-C 2.0 charging port
$300–$500: Flagship Killers
Kris Wouk / MakeUseOf
The $300–$500 bracket is a very exciting one; it’s where the flagship killers are born. The goal here is simple: offer flagship specs at an affordable price. OnePlus popularized this trend, but as more brands entered the market with their flagship killers, this price bracket has become more competitive than ever.
Phones in this price range target a more tech-savvy audience that understands specs and a bit of jargon; they can run most high-end mobile games well but not flawlessly.
Expected Features:
Rear triple-camera setup; 64MP main camera; 13MP front camera; 4K video at 30FPS
6GB RAM; up to 256GB storage; no microSD card slot
FHD+ AMOLED screen; 120Hz refresh rate; punch-hole front camera
5000mAh battery; 25W fast wired charging
Aluminum and plastic body; no headphone jack; IP67 rating
In the $500–$700 price bracket, you’re paying a premium price for a premium product. As good as flagship killers are for the value they offer, they tend to focus more on the core specs and less on the features that aren’t shown on spec sheets.
So, aside from amazing performance, you can also expect great build quality, an IP68 rating (for protection against dust and water), louder and cleaner speakers, better software optimization, amazing cameras, and better haptic feedback.
Expected Features:
Rear triple-camera setup; 50MP main camera; 32MP front camera; 4K video @ 60fps
8GB RAM; up to 256GB storage; no microSD card slot
FHD+ AMOLED screen; 120Hz refresh rate; punch-hole front camera
5000mAh battery; 25W fast wired charging; wireless charging
Aluminum and plastic body; no headphone jack; IP68 rating
Although you can probably find them under $700, most modern flagships live in the $700–$1000 price bracket. This is also where the competition between Android devices and iPhones really heats up.
Here, you are paying not just for the amazing specs and hardware but also for special features such as 8K video support, QHD resolution, LTPO display, and more cutting-edge tech. Phones in this segment are very reliable, come with premium features, and take additional measures for privacy and security.
Expected Features:
Rear triple-camera setup; 50MP main camera; 12MP front camera; 8K video at 24FPS
12GB RAM; up to 512GB storage; no microSD card slot
LTPO QHD AMOLED screen; 120Hz refresh rate; punch-hole front camera
For over $1000, you’ll get the best of the best; you can expect features that no other price point can replicate. This means stunning cameras, unique designs, maxed-out performance, tighter integration with the ecosystem, and specialized features.
The goal here is to maximize convenience and eliminate the need for other tech gadgets. For instance, computational photography replaces point-and-shoot cameras, 1TB storage replaces external hard drives, and tough build quality replaces the need for back covers and screen protectors.
Expected Features:
Rear quad-camera setup; 108MP main camera; 12MP front camera; 8K video at 24FPS
12GB RAM; up to 1TB storage; no microSD card slot
LTPO 2.0 QHD AMOLED screen; 120Hz refresh rate; punch-hole front camera
For over $1500, you’re almost exclusively looking at book-style foldable phones such as the Galaxy Z Fold 6 or OnePlus Open, which offer a wide main screen and a cover screen that resembles a normal smartphone screen.
Granted, you can get a flip phone for under $1000, but flip phones are more about fashion than practicality. Book-style foldables unlock a whole new level of productivity and entertainment thanks to their huge tablet-like main screen that allows for enhanced multitasking and immersion.
That said, the foldable form factor is relatively new, which means they do come with some drawbacks, such as reduced durability due to the fragile main screen, high repair cost, and worse battery life than flagships. These are just some reasons why foldables aren’t mainstream yet.
Expected Features:
Rear triple-camera setup; 50MP main camera; 12MP front camera; cover screen camera; 8K video @ 24fps
12GB RAM; up to 1TB storage; no microSD card slot
LTPO 2.0 QHD AMOLED main screen; cover screen, 120Hz refresh rate; punch-hole front camera
The increase in specs offered is not perfectly linear in smartphones; some high-end features are easier to replicate in cheaper phones, while others are exclusive to premium models. Also, don’t assume that having good specs is enough. It takes a lot more than mere numbers to deliver a consistently smooth experience.
My recommendation? If you’re a casual user, skip the flagships. After all, you don’t need an iPhone 16 Pro just to watch YouTube all day. Anything around $300-$500 will fetch the most value. If you’re a power user or gamer, prioritize performance. You’ll find the best price-to-performance ratio for around $500.
If you want a premium experience with no compromises, look at flagships at around $800. I would advise going for flagships only if you’re not planning to upgrade for at least three years since these devices are made to last. You should only go beyond this price if you’re eyeing a foldable phone and will actually benefit from all that extra screen estate.
Photoshop Express by Adobe provides free editing, including lens flare features; premium upgrades are available for more in-depth editing.
Picsart is a freemium app that offers a specific Lens Flare tool; customization options are available for realistic lens flares.
Hypic offers lens flare options within the Light category and some direct lens flare results such as Rainbow or Halo.
Adding lens flares to your smartphone photos can be done on purpose or as a happy accident. If you miss the mark while taking the shot, there are many free apps that let you add realistic lens flare effects afterward.
1 Photoshop Express
Adobe’s Photoshop Express app provides a free way to add lens flare and light leaks to your smartphone photos. Although it’s free to download, and you can access the lens flare feature from the free version, you do need an Adobe account to use the app.
For more in-depth editing, you can upgrade to Premium from $4.99 per month. Adobe Photoshop Express is one of a handful of free Adobe apps and tools you don’t need to pay to access.
Open your photo in Photoshop Express and scroll to Overlays at the bottom. You can choose from a few different options, with Light Leaks, Bokeh, and Flares being the best choices to create realistic lens flares in your image. You might also find some luck in the Nature, Sky, Sparkles, or Celestial overlay categories.
The overlays can be edited in strength and blend modes; you can also choose how big or where they appear on your image by dragging the layer around.
Picsart is a freemium photo editing app. The free version has ads, but you can upgrade for $13 or $15 per month to remove ads and access further tools, such as the background removal tool for smartphone editing.
Although you can achieve a lens flare effect using a mix of editing tools, Picsart has a specific Lens Flare tool, found if you scroll in the horizontal menu at the bottom. The lens flare options range from plain white orbs to firework-style flashes of color, and much in between.
Selecting a lens flare option applies it to your image while keeping it as separate elements and layers for total customization—you can place each orb of light or flare and change its size, opacity, and hue for the best results. There’s also a blend option so it fits realistically over your photo.
The Lens Flare tool and ability to fully customize and edit it makes Picsart one of the best smartphone editing apps.
Download: Picsart for iOS | Android (Free, in-app purchases available)
3 Hypic
This free photo editing app is from the creators of CapCut and TikTok, and it offers a bunch of innovative image editing tools. Most of them are available in the free plan, including being able to add realistic lens flare to your smartphone photos.
Open your photo and scroll to Effects > Light. Some of the other effects options also provide similar lens flare results, but the best options are within the Light category. You’ll find options such as window sunset shadows and the Orton effect style, but also some direct lens flare results, such as Rainbow or Halo.
While you can’t move the placement of the lens flare by dragging it anywhere, you can rotate it in the edit settings, so it suits the angle of the light source. The edit settings also let you choose the intensity and, using the filter slider, the hue of the flare.
Download: Hypic for iOS | Android (Free, in-app purchases available)
If you don’t want to take the time to edit false lens flare effects in to your photos, you can learn techniques to take lens flare photos with your smartphone so you get a true lens flare.
4 VVD
VVD is a free image editing app that offer premium upgrades with great lens flare and light leak options. There are free lens flare overlays, but you’ll have more options if you upgrade to Pro.
After uploading your image, tap the Overlays icon at the bottom and scroll to Light. While many of the Light overlay filters are Pro only, there are enough free options to choose from.
After applying your chosen flare, select it again to open the editing panel. From there, you can use the sliders for light intensity, hue, contrast, and more options. You can also drag and move the filter or flip it, so it fits in your image realistically.
Download: VVD for iOS (Free, in-app purchases available)
5 Lightfilm
Lightrilm is a free app. It’s simple and doesn’t offer many options to edit the applied lens flare or light leak in your image; however, the available options are really fun.
After uploading your image, select the arrow on the top right of the screen to access the Light Leaks. While slightly different from lens flare, light leaks are a common anomaly in film photography and using this app is a fun way to edit your digital photos to look like they’re film.
Choose any of the light leaks, some of which appear more similar to lens flares. There are no further editing tools, so you cannot change the placement or intensity of the flare. Select the download button at the top to save your image and share it.
Upload your image from Canva Mobile and select Use in New Design to open it as a project. There isn’t a native lens flare effect in Canva, but with a small workaround, you can easily apply one.
Select the Elements tab—or upload your own image—and search for light flare, lens flare, or light effect. Different search terms will yield different results; the same is true for choosing to search for Photos or Graphics in the Elements search function.
Find an element with a transparent background or a black background; these are the easiest to overlay since there aren’t specific blending tools in Canva. Once you find your favorite lens flare graphic or photo, don’t forget to favorite it to save it in your Canva account for later.
Apply your lens flare image over your photo and resize and reposition it to customize where the light flare should appear. Use the Transparency slider to bring the opacity down so it blends more naturally into your photo. You can apply filters or other edits if you wish to change the color, but there isn’t much more Canva offers for lens flare editing.
Download: Canva for iOS | Android (Free, in-app purchases available)
Some free apps provide really fun and realistic lens flare effects for your smartphone photos. Many of the apps have premium functions to allow more customization for the lens flare, but from the free versions of all the above apps, you can achieve great results.
My personal favorite is Picsart, but VVD is a close second. Using Canva is the most frustrating option, as there are fewer native tools to make realistic lens flares with the app’s free offerings.
Private IP addresses help routers route data to specific devices on a network.
Private IP is like the address of your home inside a gated colony, while public IP is of the colony.
Finding your private IP is crucial for networking, and it can be easily done on any device.
An IP address is one of the most important aspects of your digital identity. It’s how websites and servers can tell you apart from the millions of requests they serve every day. Despite that, they only get to see your public IP address. Your private IP address stays restricted within your home or office network, but that doesn’t mean it doesn’t do anything.
What Is a Private IP Address?
IP addresses work a lot like traditional addresses. If you were to receive a letter, it’d be posted to your physical address. Similarly, if you were to receive a message over the internet, be it an email, a webpage, or a web request from a server, they’re all sent to your IP address.
However, modern-day networks go through routers. For example, if you’ve got two laptops connected to the internet via the same router, they’ll have the same public IP address, as the internet gateway for both devices is the same. However, the router still needs to determine what data to send to which laptop. This is where private IP addresses come in.
Yadullah Abidi / MakeUseOf
When you connect to the internet, your router automatically assigns your PC, laptop, console, smartphone, or whatever device you’re using a private IP address so it can keep track of the web requests that a particular device is sending and receiving. These IP addresses, also known as reserved IP addresses, are generally assigned from the following IP pools:
192.168.0.0 – 192.168.255.255 (65,536 IP addresses)
172.16.0.0 – 172.31.255.255 (1,048,576 IP addresses)
10.0.0.0 – 10.255.255.255 (16,777,216 IP addresses)
In the example above, there are three devices on the network—the router itself and the two laptops. This means the private IP assignments will look something like this, provided the router is using the 192.168.0.0 – 192.168.255.255 IP address range.
Router: 192.168.0.1
Laptop 1: 192.168.0.2
Laptop 2: 192.168.0.3
Now whether you’re accessing the internet from Laptop 1 or Laptop 2, the router can keep track of data flowing in and out and route data packets to the correct device.
Private IP vs Public IP
Private IP and public IP can be confusing terms. After all, how can one IP address be public or private?
Think of it as a gated colony. Your private IP address is the address of your house inside the gated colony, while your public IP address is the address of the colony itself. This allows your address to be split into two parts—a public-facing “colony” address that’s easy to locate for anyone and a private “home” address only you and the other people in the colony know.
Your router does this conversion using a method called NAT or Network Address Translation. Anything from your device that needs to go to the internet goes through your router’s NAT layer which converts your private IP address to a public one keeping track of any changes it made. When the information comes back, your router reverses this change and forwards relevant information back to your device.
For this reason, the public IP address of multiple devices connected to a single router is the same, as that’s the IP address assigned to the router itself. Private IP addresses, however, are different and used by the router to determine what information goes where, which is also why they’re called local IP addresses. This also helps protect you online, as hackers can do bad things if they find out your IP address as they can’t access your private IP address from outside the network.
How to Find Your Private IP Address
Knowing your private IP address is important if you’re setting up devices, communications, or any other services within your local network. You might also want to set up a static IP address for a particular device so it doesn’t change everything it reconnects to the router.
There are tons of ways to find all IP addresses on a network. In any case, finding your private or local IP address is a matter of typing in a few commands whether you’re on your Windows machine or iPhone.
Windows
Finding your private IP address on Windows is rather simple.
Right-click the Start menu icon and click on Windows PowerShell or Terminal. Either of the two options should appear based on your Windows settings.
When the window opens, type ipconfig and hit Enter.
Scroll down to find your private IP address.
There are multiple ways of checking your IP address on Windows. Whether you’re using Command Prompt (also called Windows Terminal now) or Windows PowerShell to check your IP or MAC address, you’ll get results in just one command.
Linux
There are dozens of commands that you can use to find your IP address in Linux. As long as you’re on a Unix-based Linux distro, the ifconfig command will tell you plenty. But there alternatives like hostname -I and ip -4 addr among others that can fetch the private IP address of a Linux machine.
macOS
We’ve also covered how you can find or even change your IP address on macOS. While the address is visible both in systems settings and via the ipconfig terminal command, using the latter is generally faster as you don’t have to click through multiple system windows.
Android
if you’re on an Android device, follow these steps to find your private IP address:
Head over to the device settings and tap Network and internet.
Tap Internet.
Locate the Wi-Fi network you’re connected to and tap the settings gear icon next to it.
Scroll down to the bottom to find your IP address and other network information.
iOS
If you’re using iOS, follow these steps to find your private IP address:
Head over to your phone settings and tap Settings.
Tap Wi-Fi.
Tap the information icon next to the Wi-Fi network’s name.
Scroll down and your private IP will be listed in the IPv4 section.
Your Private IP address isn’t something you’ll need every day. However, it is handy to know in case you’re making network changes, setting up your private servers, or interacting with any services that operate inside a closed network.
UFS offers faster data transfer speeds due to its full-duplex interface, which is almost on par with SSDs.
UFS 4.0 can provide up to 4,200 MB/s read speed and 2,800 MB/s write speed, almost doubling UFS 3.1’s capabilities.
UFS cards are faster and more power efficient than microSD, but their high cost and limited compatibility hinder mainstream adoption.
If you want to look at the pace at which technology evolves, storage devices are one of the best examples. Floppy drives, CDs, flash drives, SD, and microSD cards are all storage solutions that have improved significantly over the years. However, the next iteration is here and as you can probably guess, it’s even faster.
What Is UFS and Why Is It Faster?
UFS (Universal Flash Storage) is a high-performance interface built exclusively for smartphones and other systems requiring low power but delivering high-speed data transfers. It isn’t a new technology, either, with the first UFS cards appearing as early as 2016.
It functions very similarly to eMMC and SSD, except that it’s faster than eMMC and can, at times, be at par with SSD data transfer speeds. One of the major reasons why UFS is fast is that it’s a full duplex interface, meaning data can be read and written at the same time, which saves latency and allows for faster data transfer.
UFS 4.0 is the latest iteration of the standard. It can provide up to 4,200 MB/s read speed and 2,800 MB/s write speed—almost doubling UFS 3.1’s capabilities. It’s also as much as 46 percent more efficient than UFS 3.1.
microSD vs. UFS Cards
If you’re using a memory card, chances are it’s either SD or microSD. Since UFS cards are faster and more power efficient, you’ll get faster data transfer rates on your device and better battery life.
For example, if you’re using a UFS card in a camera, the faster data transfer speed means you’ll be able to take more photos when holding down the shutter button and taking burst photos. In the case of video recording, a UFS card will allow you to shoot at a higher resolution and frame rate without running out compared to an SD or microSD card.
As far as battery life is concerned, the difference won’t be as big as the one you’d see in data transfer speeds, but you can make your batteries last a tad bit longer. That said, it’s hard to give a specific number, considering there are many devices in which a microSD or UFS card can go.
Marcus Mears III / MakeUseOf
Another thing to keep in mind is that while all microSD cards might look the same, they can vary wildly in performance. This can lead to mistakes when buying microSD cards, meaning you might leave performance on the table. UFS doesn’t face any such problems at the moment.
Drawbacks You Need to Be Aware Of
If switching to a UFS card sounds like a great idea, there are some limitations you need to be aware of. Two to be precise:
Cost: UFS cards can be significantly more expensive than their SD or microSD counterparts.
Compatibility: UFS cards require a specialized slot, one that has yet to be adopted by many devices.
Because of these two reasons, SD/microSD cards are still more popular. Almost every device with expandable or removable storage will support an SD or microSD card slot. And since they’re relatively cheaper, you can find a good, high-speed card for a fraction of what a similar capacity UFS card will cost.
The cost and compatibility run in a vicious cycle keeping UFS from being mainstream, especially in smartphones. Most modern smartphones already use UFS for their internal storage, and don’t include expandable storage anyways.
As for the phones which do have options for expanding their storage, using an unpopular card slot for a more expensive UFS card is just going to drive up costs. With pricing being more competitive than ever, manufacturers resort to cheaper, more popular storage solutions — which is also a reason why you might not want to use SD cards with your Android phone.
Should You Dump microSD for UFS?
If your device supports a UFS card, you should use one. UFS offers much better speeds and power efficiency, especially over eMMC, SD, or microSD. However, microSD still enjoys the benefits of mass adoption and a cheaper price tag, keeping UFS from becoming mainstream despite its advantages.
Accessibility tools are a blessing for those who are less able, but they need to be carefully designed so as to not give away any of the user’s secrets. Unfortunately, those using Apple’s VoiceOver feature have stumbled upon a nasty bug where it will begin reading out the user’s saved passwords. Fortunately, if you use VoiceOver, there’s already an update that fixes this nasty flaw.
Apple Fixes a Password-Exposing Bug in VoiceOver
Hamlin Rozario/MakeUseOf
As reported by The Register, a bug was found in iOS 18.0.1 and iPadOS 18.0.1. When users use the VoiceOver feature to read out what’s on the screen, it won’t take into account that the user probably doesn’t want it to read out all of their saved passwords while they’re viewing them. This was soon after Apple released its own Password app, which inspired people to begin saving their passwords on their devices.
The Register lists the following devices as affected by this bug:
iPhone XS and later
iPad Pro 13-inch
iPad Pro 12.9-inch third generation and later
iPad Pro 11-inch first generation and later
iPad Air third generation and later
iPad seventh generation and later
iPad mini fifth generation and later
The update also has a handy fix for an annoying bug for all iPhone 16 models. This bug affected audio messages in the iMessage app which caused the microphone to record a few seconds of extra audio before the visual indicator turned on.
How to Fix the VoiceOver Password Bug
Fortunately, because the bug has already been fixed, all you need to do is apply the latest update. Once applied, VoiceOver should identify what parts it should and shouldn’t read out better and leave your passwords alone.
If you need some help with that, check out our guide on how to update your iPhone or iPad. If you’re getting tired of listening to the same old voice every day, you can try customizing Apple VoiceOver for something more palatable. And if you need more assistance tools to help yourself or a loved one, check out these iOS and iPadOS accessibility tools you can try.
Although Microsoft Edge is the second most popular desktop browser after Chrome, it has its share of glitches. One annoying error message is: “Hmm, we can’t reach this page.” While a simple relaunch may fix the issue, there are a bunch of other options to try if it doesn’t.
Basic Troubleshooting Tips
Before implementing any fixes, try these basic troubleshooting tips first.
1. Fix Edge’s High RAM Usage Issue
Microsoft Edge has been known to use a lot of RAM at times. If possible, check and fix the high memory usage on Edge.
2. Clear Cache and Browsing Data
Sometimes, clearing the cache and deleting browsing data can improve the browser’s performance.
3. Check With an InPrivate Window
Try running the website in an InPrivate window. To do this, click on thethree-dot menuat the top right of Edge and choose New InPrivate Window.
4. Troubleshoot Other Technical Issues
Another thing you can do is determine whether the issue is with a particular web page. Confirm this by running other websites in Edge and then loading the same website in another browser or Edge on another device.
If the issue concerns a particular website, one of the following may be true: the website currently faces technical difficulties, its server is down, or the website owner has blocked your IP address or region.
If it is a technical issue with the site—and you’ll know this because the website will not load on any device or browser—you’ll just have to wait until it is resolved. To rule out the latter case, use a VPN or contact the website owner to get your IP address unblocked.
If the issue occurs on multiple pages on a particular computer, it requires more investigation.
2. Check Your Internet Connection
If you frequently encounter Edge’s “can’t reach this page” error, it may be your internet connection. Make sure you are connected to the internet properly.
One way to do this is to disconnect and reconnect to your Wi-Fi, although it may be best to use a wired connection.
You can also determine whether the problem is your internet by performing an internet speed test. There are several ways to do this, the easiest of which is typing “speed test” in a search engine. Some engines, such as Google and Bing, allow you to run a test right there in the engine without visiting a particular website.
If it’s not your internet connection, a network connectivity issue could prevent Edge from working properly. Run a troubleshooter to fix Wi-Fi issues on Windows. Apple users whose macOS devices fail to connect to Wi-Fi have options at their disposal too.
3. Change Your DNS Server
Another cause of Microsoft Edge’s “can’t reach this page” error could be how your DNS server is set up. Changing your DNS server might fix the problem.
You probably use a DNS server set up by your internet service provider (ISP). Changing it to one run by Google or Cloudflare may help, and it may also increase your browsing speed.
While you can use any DNS server you like, we’ve demonstrated below how to replace your existing DNS with Cloudflare’s.
Windows 10
If you’re on Windows 10, follow these steps to change your DNS:
Scroll to find and click on Network and Sharing Center.
In the left-sidebar, click on Change adapter settings.
Right-click on your preferred network connection and go to its Properties.
In the Networking tab, look for Internet Protocol Version 4 (TCP/IPv4) and double-click on it.
Check the circle for the Use the following DNS server addresses.
Enter “1.1.1.1” and “1.0.0.1” in the Preferred DNS and Alternate DNS fields, respectively.
Windows 11
If you’re on Windows 11, here’s how to change your DNS:
Click on Hardware properties.
Look for the DNS option and click Edit button associated with it.
Turn on IPv4 and enter “1.1.1.1” and “1.0.0.1” in the Preferred DNS and Alternate DNS fields.
Here are the primary and alternate DNS settings from Cloudflare, Google, and OpenDNS that you can use for your new DNS server:
Cloudflare: 1.1.1.1 and 1.0.0.1
Google: 8.8.8.8 and 8.8.4.4
OpenDNS: 208.67.222.222 and 208.67.220.220
Check whether these DNS settings help with the Edge error.
4. Disable IPv6
IPv4 (32-bit) and IPv6 (128-bit) are the two main types of IP addresses available. When connecting to a website, your browser first searches for IPV6 addresses. If this type is unavailable, it will use IPv4 addresses. Even though IPv6 is faster than IPv4 when IPv6 is unavailable, it can lead to delays and cause your Edge browser to crash, so the debate on whether you should use IPv4 or IPv6 continues.
To disable IPv6 on Windows 11, follow these steps:
Press Windows + I to open the Windows Settings app.
Click on Network & Internet.
On the left pane, click on Wi-Fi (if connected wirelessly) or Ethernet (if plugged in).
Select Hardware properties.
Now, alongside IP Assignment, select Edit > Manual, then toggle IPv6 off.
On Windows 10, follow steps 1 to 3 above before doing the following:
Click on Network and Sharing Center.
On left-sidebar, click on Change adapter settings.
Right-click on your network connection and go to Properties.
In the Networking tab, uncheck thebox for Internet Protocol Version 6 (TCP/IPV6).
With IPv6 disabled, restart Edge and connect to the offending page to verify whether the problem has been resolved.
5. Disable Microsoft Edge Extensions
Try disabling all your browser extensions, also called Microsoft Edge Add-ons, especially ad-blockers or any extensions that interfere directly with your browser’s script.
Here’s how to disable add-ons on Edge:
In Microsoft’s Edge browser, click on the three-dot menu button.
Click on Extensions and select Manage extensions.
Toggle off any or all extensions you want turned off.
Browser extensions use computing resources and may even eat into network bandwidth, affecting internet connectivity and browser performance.
5. Reset Microsoft Edge
As a last resort, reset Microsoft Edge to return all its settings to default. Here’s how to do that:
Open Microsoft Edge and click on the three-dot menuin the top right.
Click on Settings in the dropdown menu.
On the sidebar, select Reset Settings.
Click on Restore settings to their default values.
Click Reset in the popup window.
Restoring your browser settings to default usually resolves most issues. Restart Edge to see if you can now access the page. However, if you still get the Edge “can’t reach this page” error, it’s best to switch to another browser.
It may be difficult to switch away from Microsoft’s browser if you are a passionate Edge user, but there are other options you may find useful. Firefox offers privacy-minded support, as do DuckDuckGo and Tor, while Opera and Chrome are also good choices. And there is a whole host of AI-powered web browsers now.
The European Commission is forcing Apple to make big changes to how its devices function in the EU, such as implementing support for third-party app stores and alternative payment options. Here are a few monumental changes in Apple’s operating systems in the EU.
The Apple App Store has long been the only place from which you can get software for Apple devices—apart from sideloading apps onto an iPhone.
But that’s all changing for EU users anyway. Apple now allows app developers and other third parties to offer iOS and iPadOS apps on alternative marketplaces, even their own websites.
Apple says this would amount to increased risk, so the company introduced additional safety measures, like notarization for iOS/iPadOS apps and authorization for marketplace developers.
This could lead to two things: one, you pay less for your software (an often-touted but rarely-seen benefit), and two, more variation in software from developers otherwise put off by Apple’s limitations.
The European Commission also wanted Apple to offer developers more options for their web browsing applications. To that effect, Apple now allows developers to use browser engines other than WebKit.
This could lead to more varied browsing experiences within apps that offer it. While this is still in its early stages, things could ramp up quickly. As 9to5Google pointed out, Google even has official instructions on building a Chromium-based iPhone browser prototype for yourself.
Developers in the EU are getting more payment options for their digital goods—yes, there are drawbacks to using Apple Pay. They can offer alternative payment methods for their apps and services, which means smaller commissions to Apple, in turn, deeper discounts and more savings passed on to consumers.
EU users will have a number of new ways to pay, either within an app itself or with a link to an external payment option. On the flip side, getting in touch with support may be more confusing and a bigger hassle to chase down refunds if you encounter a road bump.
Will Apple Bring These Changes to the US?
Apple doesn’t seem very keen on these “interoperability” changes, so it’s highly unlikely that the company will open up its operating systems similarly in the US and other markets globally.
All in all, don’t expect to be able to download apps from alternative app stores or pay using different methods outside of the EU any time soon. I don’t see that happening unless the US government makes similar demands from the tech giant.
If you don’t want people tracking you through your Android phone, it can be pretty tricky to find the option to turn it off. Fortunately, Google is now making it a lot easier to find and disable the Location Sharing option by adding a toggle to the base Android settings. It’ll also add a list of all users that are currently tracking your location, so you’re always on top of who you’re sharing your data with.
Google Makes It Easier to See Who You’re Sharing Your Location With
As spotted by Android Headlines, Google is adding the Location Sharing toggle into the main Android settings. Location Sharing lets you share where you are with a list of trusted people, which is great if you’re meeting up with a stranger.
Unfortunately, it’s not inherently obvious where you need to go to adjust your Location Sharing settings. Right now, the easiest way to set it up is to go through Google Maps. Fortunately, with this new update, you can access the options straight from the stock Settings app on your phone.
This change will also give you a glance at everyone who has access to your location. If you enable the feature, Location Sharing will give you a link you can give to friends or family so they can track you. As such, whether you like sharing your location with others or not, this new feature is bound to be a huge help.
Keep in mind that this only disables the Location Sharing feature, which specifically handles your contacts tracking your location. Check out how to control which apps can see your location on Android if that’s more of your concern.
How to Use the New Location Settings on Android
Once this feature arrives on your phone, you should see it pop up when you visit Settings > Google > All Services. It’ll appear in the list of services with the name Google Location Sharing. Tap on that, and you’ll have access to your location settings.
Do remember that if you disable location sharing, it does not notify anyone who is tracking your location. It will instead show them your last known location until you turn it back on. As such, if you plan on disabling your location sharing, be sure to warn everyone before they assume the worst has happened to you.
While we’re probably past the peak of video calling, with the COVID-19 pandemic forcing people to use the medium, it’s still an important way to communicate with others. So, in its infinite wisdom, WhatsApp has decided to add filters and backgrounds to video calls.
WhatsApp Adds Filters and Backgrounds for Video Calls
In a post on the WhatsApp Blog, WhatsApp has announced that filters and backgrounds are coming to video calls. Filters will change the way people see you on the call, while backgrounds will, as the name suggests, change the background to something other than your own reality.
At launch, there are 10 filters and 10 backgrounds to choose from. The filters are Warm, Cool, Black & White, Light Leak, Dreamy, Prism Light, Fisheye, Vintage TV, Frosted Glass, and Duo Tone. The backgrounds are Living room, Office, Café, Pebbles, Foodie, Smoosh, Beach, Sunset, Celebration, and Forest.
WhatsApp
In addition to the filters and backgrounds, WhatsApp is adding Touch Up and Low Light options. These can be used to enhance your environment, changing what other people on the call can see. The idea being to make you feel more confident and comfortable about being on video.
These effects will become available to everyone using WhatsApp over the next few weeks, so, if you’re interested, be sure to keep WhatsApp updated. Once they arrive, just look for the effects icons in the top-right of the screen while on a call to access the new filters and backgrounds.
These May Sound Good, but You Shouldn’t Use Them
WhatsApp suggests that it has added these filters and backgrounds as conversations on the platform should always be “fun and expressive”. The company also claims that they add “a more personal touch” and create “a more playful atmosphere”. But I question whether that’s an accurate assessment.
Maybe it’s because I’m old and crotchety, but I tend to find the use of filters and backgrounds in video calls rather annoying. We know you’re not sitting behind frosted glass or calling from the past when everything was black and white. And we know you’re sitting in your drab office rather than on a beach or in a café. So, just stop already.
In addition to the above, WhatsApp feels a little late to the party here. Most video calling platforms, such as Zoom and Google Meet, have allowed you to change your background or add a filter for several years, with most racing to add features at the height of the COVID pandemic. But WhatsApp has, rather bizarrely, waited until 2024 to do the same thing with WhatsApp video calling.
Chromebooks are a great affordable way to get stuff done. However, that doesn’t mean they’re bereft of cool features you can check out. In fact, you should find a brand new key on your keyboard the next time you pick up a Chromebook, and it may just help you save time when getting your work done.
In an announcement on Google’s official blog The Keyword, where the company goes into detail as to what this new key does. It’s called the “Quick Insert” key, and by its description and diagrams, it lives on the same key as the Caps Lock key:
The new Quick Insert key delivers instant help where you need it. With a tap of the dedicated keyboard button, a menu instantly gives you access to everything you might need from editing what you’re writing, instantly adding a URL link or quickly finding the perfect emoji or GIF.
So, if it’s on the Caps Lock key, and tapping it invokes Quick Insert, how do you invoke Caps Lock? Unfortunately, Google doesn’t go into detail as to how you toggle Caps Lock, but it’s likely now activated by holding down a key (likely the Function key) and pressing Caps Lock.
So, what does this new Quick Access menu do? There are several features in this menu, such as easy access to Gemini’s “Help me write” feature. This lets you ask Gemini to generate some text based on a prompt, which can be useful when you’re not sure what to say.
The menu also adds some emojis and GIFs for quick access, a list of your recently visited websites, uploading files to your Google Drive, and some handy math tools to complete simple tasks. This special key will make its debut on the Samsung Galaxy Chromebook Plus, but if you don’t have one, you can still open the Quick Access menu by pressing the Launcher key + F.
Other Cool AI Features Coming to Chromebooks
Quick Access isn’t the only thing getting added to Chromebooks. Chromebook Plus models get access to some handy AI tools to help with productivity. For example, “Help me read” can break down really long documents into brief summaries to make them easier to digest, and Live Translate uses AI to automatically translate any text or audio in a different language. As such, there are plenty of reasons why your next laptop should be a Chromebook.
We don’t actually have to be on social media, even if society makes it seem that way. I’ve been living without any social media accounts for around ten years and it has been fine. Let me tell you how my experience has gone.
Why I Deleted My Accounts
Much of what we know now about social media’s impact on our mental health and society at large, we already knew ten years ago. I experienced it first-hand.
Joy-Sucking Comparisons
I could be having a perfectly good morning but suddenly feel sad all because I signed in to Facebook and saw what exciting thing someone else was up to. My pleasant morning at home reading a book suddenly felt mundane.
But here’s the thing—I love to read, and if you ask me to define my definition of the good life, it would involve a lot of reading. Checking a social media feed made me feel sad about doing what I love.
I could be out with friends, exploring a new city, and having a blast, but that was not enough to counteract the envy that comes from comparison. I’d glance at my feed and see that someone else was exploring an even more exotic place. There’s no winning.
Insults and Arguments
As a writer for the web, I have a professional incentive to have a social media presence. I was brought on board at MakeUseOf because someone reached out to me via Twitter. Yet I found the act of promoting myself online anxiety inducing. I spent so much time deliberating over what to put in 140 characters. The stakes felt high when anyone in the world, at any time, could leave a comment saying something cruel in response to what I said.
I also grew tired of having arguments with high school friends that I frankly would have lost touch with had we not been friends on Facebook. I could have entire weeks ruined by an unnecessary argument over our opinions, politics, or whatever else. These arguments sting even deeper than cuts from strangers, because the person on the other end, at least at one point in time, knew who I was. We may have become strangers, but that hasn’t always been the case.
My Mind Is Now Much More At Ease
Bertel King / MakeUseOf
I noticed an immediate improvement once I deleted my Facebook and Twitter accounts. Without Twitter, rather than thinking about how to promote my work, I could focus on the work itself.
That has worked out fine for me. I’m not an independent content creator. For the sites I write for, it’s someone else’s job to promote what we write. I just focus on them having articles worth promoting. I’m not the only writer here who, at minimum, has seen a productivity boost from not having social media apps on their phone.
Without Facebook, I have lost touch with those people from high school that I wouldn’t have kept in touch with anyway. That’s okay. Part of living a good life requires the ability to forget, to grow and expand beyond the people we were before we became adults.
Part of what makes families difficult is the comparison between who we are today and who we were in our adolescence. Part of what makes friendship so endearing is that our friends know and like us for who we are right now.
I now feel less envy towards others. When I wake up and go spend time in the garden, I don’t have a feed showing me that someone else has an even more beautiful one. When I buy a car, I’m not immediately shown that someone I know bought the one I would have gotten, had I been able to afford it. When I decide I like my wardrobe, I’m not surrounded by the most glamorous people I know, showing me how mine could still be better.
I Don’t Feel Uninformed
Bertel King/ MakeUseOf
FOMO is a big part of what keeps people on social media. It’s how many people get their news. It’s how they find out about events. Yes, if you delete your social media accounts, you will miss out on some of the things you only see on social media. The inverse is also true.
By prioritizing social media, you’re likely missing out on the alternative ways of finding out what’s going on in the world. Time spent browsing a social media feed is time not spent reading a higher-quality magazine. Finding out what neighbors are doing online can make you feel connected enough that you don’t bother going to the local library and finding out what events are going on a few minutes away. Social media can make it hard to separate group think and perceived truth from the reality of how things are.
Rather than getting my news from social media accounts, I’ve signed up for newsletters. Plus, we are living in the golden age of podcasts. Anything you would experience through your own social media accounts, you can find out by listening to podcasts for news. Considering how it seems X has gone downhill, you might say they’re doing you a public service.
I Still Have a Thriving Social Life
Bertel King / MakeUseOf
My social life is better now than at any other point in my life. I have a set of friends that I regularly see every few weeks to play board games. I have people that I sometimes meet up for hikes or the occasional kayaking trip. I have people I meditate with, logging hundreds of hours on the cushion. For years, I practiced karate, sparring with people who felt like a second family.
I didn’t discover any of these groups through social media. I meet many friends through existing friends. Other friends I meet by venturing out into the world and engaging in activities that I enjoy, being delighted to find people who love the same thing.
I’m a parent. I have a wife and kids. I have parents of my own that I have a good relationship with. Life is good. I’m glad that I can focus on this without feeling compelled to post it online, only to walk away depressed that my social media profile may only have a few hundred followers or that I’m not getting enough likes and shares. I know there are people with thousands of followers whose actual day-to-day social life is smaller than my own.
I’ve Managed to Continue My Career
You’re reading these words. I’m still writing them. I haven’t lost my job since deleting my accounts. While it’s true that having a social media account makes you easily accessible for job offers, it’s also the case that quality work speaks for itself and deeper connections still matter more. Only a minority of us get jobs through social media anyway.
Social media platforms are just that, media platforms. They’re a way to get your own creations in front of others. They are spaces that make sense for influencers and artists. Professional use is arguably the type of social media use that makes the most sense.
Yet, you still have to weigh the pros and cons of the impact on your mental health. If you’re too depressed to love your art or to do your work, if the anxiety from doomscrolling is bringing down the quality of your overall health, then it’s worth taking a step back and finding another way to be. I won’t deny that there are probably opportunities I have missed out on, but I’m also happy with my life as it is.
Making any kind of big change comes with its upsides and its downsides. Social media absolutely has its bright spots, but many of us have looked at social media’s impact on our childhoods, families, and communities; and decided the net benefits just don’t outweigh the costs. Nor do we want our words being used to train the platform’s AI. Even if you don’t opt out entirely, you can benefit from limiting which social media platforms you use.
Google Pixel phones offer the best Android experience thanks to their clean interface, powerful AI features, and fast updates. However, many of its useful features aren’t enabled out of the box. So, I’ll share some settings you should change to get the most out of your Pixel.
1 Turn On Smooth Display
Most Google Pixel phones today support high refresh rate displays. However, unless you have a larger model like the Pixel 8 Pro or Pixel 9 Pro XL, this feature is disabled by default. Thankfully, you can easily turn on Smooth Display on your Pixel from the Settings app. Here’s how to do it:
Open Settings and go to Display.
Scroll down and toggle on Smooth display.
Note that Smooth Display doesn’t keep the refresh rate at the maximum value. Instead, it dynamically adjusts the refresh rate depending on what’s happening on the screen. This conserves energy while still providing a much smoother experience than the default setting.
2 Show Battery Percentage in the Status Bar
One thing you’ll notice when setting up your Google Pixel is that the battery percentage isn’t shown by default—only a battery icon appears in the status bar. While the icon gives a general idea, it’s not the best indicator of how much battery is left.
Thankfully, Google lets you enable the battery percentage to display in the status bar. Simply go to the Settings app, select Battery, and toggle on Battery percentage. The percentage will now start showing next to the battery icon in the status bar.
3 Enable Notification History
In today’s world, our phones are constantly buzzing with notifications, and it’s easy to miss something important amidst the flood of alerts. If you’re like me, you’ve probably hit that Clear all button in haste a lot of times, accidentally swiping away crucial notifications—or missed a notification about a message that someone deleted.
Thankfully, Pixel phones have a Notification History feature that maintains a record of all notifications received in the past 24 hours. To enable it, go to Settings > Notifications > Notification history and toggle on Use notification history. and select Notification history.From now on, your Pixel will log notifications and display them in order by time under the toggle.
4 Customize Gestures
Google Pixel phones have a range of exclusive features that make switching to a non-Pixel device challenging. One such key feature is the built-in quick gestures, which make everyday tasks faster and easier. However, you can accidentally trigger these gestures sometimes, which can be annoying. Fortunately enough, Google allows you to customize which gestures you want to use on your Pixel device.
To do this, go to Settings > System > Gestures. Then, choose which gestures to keep and which to disable. Personally, I find Flip to Shhh great for silencing calls in public, and Tap to check phone is perfect for quickly peeking at notifications.
5 Turn On Clear Calling
One of the best parts of owning a Google Pixel is having access to advanced AI features. While popular tools like Pixel Studio and the Reimagine feature in Magic Editor are great, I appreciate the smaller, practical AI features the most. One such standout feature for me is Clear Calling.
While the iPhone’s Voice Isolation feature is impressive, Google’s Clear Calling goes a step further by canceling background noise for both parties on a call. It not only removes background noise on your end but also filters out disturbances from the other caller. Here’s how to enable it:
Open the Settings app and select Sound & vibration.
Scroll down and tap Clear Calling.
Toggle on Use Clear Calling.
6 Change Lock Screen Shortcuts
The next setting to tweak is how your lock screen looks and functions. By default, Pixel phones only offer a single Google Home shortcut on the lock screen. While useful in some situations, it’s not always necessary, especially since it’s also accessible through the Quick Settings panel.
To customize the shortcuts on your Pixel’s lock screen in just a few taps, go to Settings > Wallpaper & style and tap Shortcuts to choose the ones you prefer. Personally, I rely on the good-old Camera shortcut, which is especially handy, given that I’ve disabled the camera gesture.
7 Enable Hidden Quick Settings
Like most Android devices, Google allows Pixel users to personalize their Quick Settings tiles. However, some useful tiles are hidden deeper within the Quick Settings menu. For example, Quick Setting for the Live Transcribe, which enables real-time transcription of spoken words, is hidden towards the bottom of the Quick Settings. Similarly, you can activate tiles for features like the Calculator, One-handed mode, Live Caption, and more.
8 Identify Songs Around You With Now Playing
Now Playing is easily one of the best features on Google Pixel phones. It’s like having Shazam built-in, constantly identifying music playing around you without any effort on your part. It even creates a list of songs you’ve heard so you can check them out later.
Despite how useful this feature is, many Pixel users don’t take advantage of it. While Google does offer the option to enable Now Playing during setup, it’s easy to miss in the excitement of setting up a new device.
To enable it, go to Settings > Display > Lock screen > Now Playing and toggle on Identify songs playing nearby. You can even customize the feature by adding a dedicated search button to the lock screen.
9 Rotate Screen Based on Your Face Orientation
If you’re like me, you probably toggle auto-rotate on and off throughout the day. We’ve all experienced the frustration of lying down with our phone, only for it to auto-rotate to landscape mode, forcing us to disable it just to get back to portrait mode.
Google Pixel phones have a feature that rotates the screen based on your face’s orientation, rather than relying solely on the phone’s accelerometer. Using the front-facing camera, the device detects your face’s position and adjusts the screen rotation accordingly. Here’s how to enable it:
Open the Settings app and select Display.
Scroll down and tap Auto-rotate screen.
Now toggle on Use auto-rotate and Face Detection.
While Google Pixel phones may not match the raw performance of the competition, like the Samsung Galaxy S24 Ultra or OnePlus 12, they come packed with useful features that make them worth the investment. The Pixel 9’s AI features take it even further, such as Add Me in the Camera app and Pixel Weather for easy weather updates.
However, the settings mentioned above are available on all Pixel devices, so you can enjoy these features without upgrading to the newest model.
Microsoft 365 offers full access to Office apps on the desktop and mobile with guaranteed updates.
You also get 1TB of OneDrive storage and stronger security with unlimited access to the Personal Vault.
Microsoft Defender, free VPN, and ad-free Outlook email are included, plus there are extra features on Teams.
I use Office apps like Word, Editor, and OneNote daily for work. While a standalone Office 2021 or the upcoming Office 2024 license may seem like a better option, I prefer the Microsoft 365 subscription for its added benefits. Here are the five reasons why I think an Office 365 subscription justifies the price.
1 Access to Full Microsoft Office Apps on Desktop and Mobile
A Microsoft 365 subscription offers full, offline and online access to its new Office apps, including Word, OneNote, Editor, Excel, and more on desktop and mobile. While you can use the limited free version online and on mobile devices, I prefer the performance of desktop apps, offline access, OneDrive cloud integration, and guaranteed security updates and enhancements.
Where the standalone Office app is limited to one device per license, Microsoft 365 offers multi-device support, allowing you to install office apps on up to five devices with a Personal plan. If you opt for the Family plan, you can share the account with up to six members, each with up to five device support and 1TB storage. Additionally, apps like Editor, Publisher and Access are now part of Microsoft 365.
The Office 365 Suite also tends to receive the latest earlier than the standalone versions.
2 1TB of OneDrive Storage and Stronger Security
One key factor that influenced my decision to choose Microsoft 365 over the standalone Office 2021 app was the need for more OneDrive storage. By default, free OneDrive accounts offer a meager 5GB storage shared across Outlook, Windows Backup, and OneDrive. Once the drive is full, one must frequently free up OneDrive storage space to even receive Outlook emails with attachments.
With Microsoft 365, the Personal plan includes 1TB of storage—plenty enough for all the backups, Outlook emails, and Microsoft Teams attachments. For an additional cost, you can add up to 1TB of extra storage to increase your total storage to 2TB.
On the security front, Microsoft 365 for OneDrive supports ransomware protection and notifies the user when an attack is detected. It also guides you through the recovery process to restore your files. However, without a subscription, you get only one free notification and recovery.
What’s more, it also offers unlimited access to Personal Vault, otherwise limited to three documents in the free plan. Personal Vault is a protected vault (folder) where you can store your documents, such as your passport copy, driver’s license, birth certificate, tax records, automotive insurance, work ID, and other valuable digital assets protected with encryption, even on a local drive.
3 Microsoft Defender
One lesser-known, but handy app in the Microsoft 365 ecosystem is Microsoft Defender. It’s a standalone security app that offers a different set of functionalities depending on the platform and region. That said, it’s important to note that Microsoft Defender shouldn’t be confused with the built-in Windows Security app on Windows computers.
For Android, it works as an antivirus solution with scanning and threat detection. In contrast, on Mac and iOS devices, it works as an extension of your existing antivirus software, offering protection against phishing and unsafe network connections from websites and emails. On a Windows computer, it complements the built-in Windows Security or any third-party antivirus software you might have installed.
What I like most about the app is its central dashboard, allowing you to manage and monitor security across all your devices. You can also view alerts and notifications from any device and even the past 30 days of device activity history.
But it’s not just the security perks. Microsoft Defender also offers VPN access for private browsing, capped at 50GB usage per month for subscribers in the U.S., Canada, the UK, and Germany. If you are in the U.S., it provides additional benefits like identity theft monitoring and identity theft insurance features. Unfortunately, not all features are available to everyone, which is a bit disappointing.
4 Ad Free Outlook Email with Advanced Security
Microsoft has discontinued its Outlook ad-free add-on and now includes the ad-free experience as part of the Microsoft 365 subscription. Additionally, it also offers enhanced security features, including advanced screening of email attachments for viruses and malware and Safelinks, which scans URLs to detect phishing and other threats.
Microsoft 365 Outlook also supports multiple options for email encryption. When sending an email, you can choose Do Not Forward as the encryption type to prevent the email from being copied or forwarded. If you set it to Encrypt, the recipient will need to enter a private key to read the email, otherwise, they’ll see a wall of indecipherable text.
5 Microsoft Teams Benefits
In addition to its core features, Microsoft 365 sweetens the deal for Microsoft Teams (Personal) users with some extras, including 30 hours of calling, more room for attachments with OneDrive, and unlimited chats. Personally, I use Teams for one-on-one calls, remote troubleshooting, and occasionally to organize family and social events, so these extended limits have come in handy.
If you use Skype, there’s something for you too. All Personal and Family users get 60 minutes of free Skye calling to landline and mobile phones each month. However, to access this benefit, you need to claim these free minutes by signing in to your Skype account on the web.
As for the pricing, the Microsoft 365 subscription costs $69.99/year for the Personal plan and $99.99/year for the Family plan. If you don’t want to commit a year of payment, the monthly Personal and Family plans cost $6.99 and $9.99, respectively. While these prices are already appealing, with a bit of planning, you can get the subscription at a deep discount during sales on e-commerce websites like Newegg, eBay, and Amazon.
Overall, Microsoft 365 as a bundle is a great value-for-money proposition, especially for those who extensively use Office apps and have increasing cloud storage needs. What’s more, with 365 Family, a six-way split works out to be $16.67 each per year. That said, if you want a competent productivity suite without the bells and whistles of Microsoft 365, there’s no dearth of free Microsoft Office 365 alternatives offering limited but essential features.
While you can scroll through the Photos app to find photos like everyone else, you’ll have an easier time if you use the search feature. Below, I’ll share some search tips to help you find photos quickly in your iPhone’s native Photos app.
1 Look Up Photos Using Keywords
Using keywords is the fastest way to find a photo in the Photos app. A keyword can be anything, from people and places to events and objects. However, you need to tag people’s faces in the Photos app to be able to find them by their names.
To find photos using a keyword, tap the search icon at the top of the Photos app and type your keyword. As you do this, you’ll see suggestions for items, if available. These suggestions will have an icon to their left, denoting their type. For instance, you may see a Live Text icon or a screenshot icon in some cases, whereas a regular search icon in others.
Besides, you’ll also see a number to the right of these keyword suggestions indicating the number of photos available for that keyword. You can then tap a suggestion, per your preference, to view all the relevant results.
If a search term shows several photos, you can append more keywords to your search query to narrow down the results. For instance, you can combine the keyword “watch” with “Citizen” to find all the photos of watches from the Citizen brand in your library.
2 Look Up Photos by Date
For times when you want to view all the photos you took on a particular day in a specific month of a year, the Photos app lets you filter the results using the date.
Simply access the search. Then, type the date, month, and year like this: “18th April 2024,” and the Photos app will show all the photos from that date.
Likewise, you can find photos from a specific month of the year. Just type the month name and select it from the suggestions, then do the same for the year.
3 Search for Photos Using Captions
Another way to quickly find a photo in the Photos app on your iPhone is by looking up its caption. A caption is a text label you add to a photo to make it easier to find it later. So, if you’ve previously added captions to your photos, you can look them up by typing the caption in the search and selecting the suggestion with the Aa text.
On the other hand, if you’re hearing about captions for the first time, you’ll need to add captions to your photos first to be able to use them to find photos in the app. You can use a unique caption for each photo or the same one to tag similar photos.
4 Filter Photos Using App Names
The Photos app library shows photos from various sources. Although it creates albums for certain apps, like WhatsApp, it isn’t the case for all apps.
Thankfully, you can search for photos using app names to get to them quickly. Just type the name of the app in the search. Then, select the suggestion with the App Store icon next to it. You’ll now see all the photos you saved from that app in your library.
5 Look Up Photos by Device Names
Just like using an app name, Apple’s Photos app also lets you find photos captured using a particular device. This is useful when you want to quickly find photos you took on your camera or some other smartphone.
If you remember taking some photos with another device and storing them in the Photos app, type the name of the device in the search bar. Photos will show you some suggestions. Select the relevant one to see all its photos.
Mind you, this works as long as your photos have EXIF data. If you’ve removed EXIF data from your photos previously, the Photos app won’t be able to identify the device that captured the images and return relevant results for your searches.
6 Filter Photos by Image Types
With iOS 18, Apple has switched to a single view for the Photos app, so all your photos, videos, and other media now appear on a single page. Since this can make finding photos a little difficult, Apple has added the Media Types collection under your library; it categorizes all items into different media types, such as portrait, long exposure, screenshots, RAW, and more.
To access these, scroll down until you reach the end of your library, and you’ll see several collections, including Media Types.
7 Find Duplicates, Imports, and More With Utilities
Utilities is another collection in the Photos app that lists albums like Hidden, Recently Deleted, Duplicates, Receipts, Recently Edited, and more. To find it, scroll to the bottom of the Photos app below your library; you’ll see it right beneath the Media Types collection. From here, select a category to view all the relevant photos.
The Utilities collection, just like Media Types, helps you find what you need quickly. My favorites are Handwriting, QR codes, Receipts, and Recently Saved.
These tips will help you save time and effort when finding photos in your massive image library. Sure, you may forget to incorporate them into your searches initially, but once you do it a few times, they’ll become second nature.
Paid software is sometimes better, but there are plenty of great free video editing alternatives.
CapCut is ideal for short-form video editing with flexibility, 4K export, and comprehensive editing tools, including sliders and filters.
DaVinici Resolve offers several advanced features for free, including various color-editing options.
Paid video editing software is often still seen as the industry benchmark, but compared to 20 years ago, the number of free tools available now is substantial. If you don’t know whether you should pay for Adobe’s software, I’ll help you decide today.
DaVinci Resolve
DaVinci Resolve is by far my favorite video editing tool, and I find it absurd how many advanced features you get without upgrading to a paid subscription. I’m very process-oriented, and one of the ways that DaVinci Resolve helps me in this respect is by letting you create nodes. This is one of the biggest reasons I initially switched from Premiere Pro.
Another great benefit of DaVinci Resolve is that you can use the software on your iPad. If you have one of the newer iPad Pro models, you can edit in 4K; if not, you’ll still edit 1080p without problems.
DaVinci Resolve also has better color editing tools than Premiere Pro, but there is a catch: learning to use these is significantly more difficult than color grading in Premiere Pro.
I use a Fujifilm camera and have noticed that it’s easier to edit LOG files for my device in Premiere Pro than in DaVinci Resolve. I had to import various LUTs to help me out with the latter (Premiere Rush isn’t the best software for editing like this due to its lack of features). Speaking of which, learning about LUTS and how they’re used for color grading is a good idea before jumping into any video editing tool.
Another thing I don’t like too much about DaVinci Resolve is that importing and exporting files on your iPad is sometimes needlessly complex.
CapCut is my go-to video editing software for short-form video editing, though I did previously create Instagram Reels in Premiere Pro. CapCut has even more flexibility than DaVinci Resolve because you can download it on your smartphone and not just on your tablet.
CapCut was developed by the same company that owns TikTok, and unsurprisingly, it’s designed perfectly for editing short-form content. You can edit both videos and photos, which is ideal if you wish to keep everything in the same place. Premiere Pro isn’t the best option for this; you should download Photoshop or Lightroom if you wish to edit photos.
You can export up to 4K and 60 frames per second on CapCut, even if you don’t have a newer iPad. However, you should ensure that your files will continue to function properly in these formats; if you’re just posting on your personal social media accounts, 1080p is more than enough.
Also worth considering in CapCut are the numerous sliders for editing hue, temperature, saturation, color, contrast, and more. I think these are more comprehensive than what you’ll find in Premiere Rush—the same goes for the number of filters available. You do, however, need to upgrade to CapCut Pro for color wheels and color correction.
CapCut and Premiere Rush both have music libraries to choose from; I think that these are both about the same in terms of quality.
iMovie is limited compared to other video editing tools because it’s only available on Apple devices. However, it is completely free to use and not too difficult to learn. You can quickly batch clips together, making it ideal if you just want to create a short movie without creating dramatic edits.
When using iMovie, you can choose whether to create a full movie or just a storyboard. Moreover, you can import both videos and photos. The app has a reasonable selection of filters, but I personally prefer Premiere Rush’s options.
Many of iMovie’s other editing tools are quite similar to Premiere Rush. You can adjust the volume in each clip, for example, and adjust the speed of your content while splitting where necessary.
iMovie also allows you to add text to your videos, with multiple styles available. Besides making videos, it’s possible to create a video thumbnail in iMovie.
While the three options I’ve discussed are viable alternatives to Adobe Premiere Pro and Premiere Rush, I think some users would benefit more from using Adobe. Below, I’ll outline when you should think about getting Adobe’s video editing software and when it might be wise to look elsewhere.
My Case For Adobe
If you’re already in the Adobe ecosystem, you may find it much easier to use Premiere Pro or Premiere Rush—especially if you already have a Creative Cloud All Apps subscription. The interfaces for both apps are easy to navigate if you’ve used any other Adobe tool before.
You should also use Premiere Rush to make basic adjustments. I would not recommend it for color grading and whatnot, but it is helpful for putting your clips together if you don’t have access to iMovie.
I would also suggest using Premiere Pro if you want to start doing more professional editing. In my opinion, it’s the best starter tool for professionals due to its complex features but (somewhat) intuitive layout.
My Case Against Adobe
If you have an iPad (especially one of the newer iPad Pros), DaVinci Resolve is a better alternative for high-level editing on the go. You can edit 4K videos from your home, on the bus, in the studio, and anywhere else.
DaVinci Resolve is also better if you want to follow a logical workflow; its nodes are great for doing things in order. Another benefit is that most of the features you’ll need in DaVinci Resolve are free; this isn’t the case with Premiere Pro. Even if you do pay, the full version is a one-time fee rather than an on-going subscription.
I also don’t think that Premiere Rush is better than CapCut. If you’re planning to edit short-form videos for social media, the latter has a more intuitive interface and better features (for the most part).
Adobe’s video software is still worth paying for in some cases, but you may find it more beneficial to use one of the free alternatives. DaVinci Resolve is my top recommendation for long-form content, whereas CapCut is better suited if you need to make short video edits.
If you’re anything like me, you always want your controllers to be wired up to your PC. Convenience be damned, but I need to ensure every input is read as quickly as possible. Fortunately, it seems that LG and Razer are teaming up to give latency curmudgeons like me a Bluetooth controller that works just as quickly as a wired one.
LG and Razer Announce a New 1ms Latency Bluetooth Controller
As revealed on the LG Newsroom, the company is collaborating with Razer and MediaTek to make what it calls “the world’s first Bluetooth Ultra-Low Latency (BT ULL) controller.” They showed off his new technology during this year’s LG webOS Summit, and its main selling point is its incredible latency.
In the demo, the controller could send over commands in the span of 1 ms, which is lightning-fast for a Bluetooth controller. The demonstration used an LG webOS smart TV, so we’re not sure if this technology will work on all devices or just on LG’s televisions.
Because it was based on a smart TV, the demo mainly focused on cloud gaming services, showing off how the BT ULL controller helped reduce input lag. Because cloud gaming services hosts the game on an external server, there’s always some delay between your PC and the cloud, and using a Bluetooth controller only adds to it. With this controller, you would theoretically cut down that delay as close as possible, which is great news for competitive cloud gamers.
LG and Razer Haven’t Revealed Much About the Controller
So, what is this controller called, when will it come out, and how much will it cost? Unfortunately, the announcement didn’t cover these elements. It’s likely that the companies are still ironing out the details, such as designing the shell and working out an affordable price point.
Fortunately, there’s a good chance we’ll see this controller on store shelves one day. If LG and Razer at at the point where they can confidently show off this technology to the general public, it’s likely not a throwaway prototype doomed to never see the light of day. We’ll just have to wait for more details about this amazing new controller to arrive. Until then, check out how to reduce Bluetooth latency to get more out of your current tech.
The macOS Sequoia update brings many new features, from iPhone Mirroring to a standalone Passwords app. But beyond the features that made the headlines, there are a bunch of lesser-known features that you’ll find useful as you use your Mac daily.
1 Safari Distraction Control
Everyone appreciates reading articles without distractions. However, doing so can be difficult when many web pages are saturated by ads and other content that distract you from the webpage. Fortunately, macOS Sequoia lets you remove distracting web page elements with the Distraction Control feature in Safari.
Safari doesn’t just let you remove ads but any piece of the webpage you find annoying. Safari will remember the parts of the webpage you removed so that the next time you visit it, you don’t have to repeat the steps all over again.
To start removing content from a webpage, click the Page Menu icon on the left side of the address bar. Then, choose Hide Distracting Items and click away the content you no longer wish to see. Distraction Control is also one of the several underrated features in iOS 18.
2 Rotate Your Wi-Fi Address
Trackers chase users all across the web in an attempt to gather as much information about them as possible. With the Rotate Wi-Fi Address feature in macOS Sequoia, users can put trackers off their scent by changing their Wi-Fi address as they browse the web. This prevents sites from collecting your online behavior to display personalized ads.
To set it up, open System Settings on your Mac and select Wi-Fi in the sidebar. Then, click Details next to the Wi-Fi network you’re connected to. In the subsequent menu, set the Private Wi-Fi address option to Rotating.
3 Highlight Text in Notes
I probably scribble down notes in the built-in Notes app a few times a day. But anyone who has used Apple’s Notes app knows that it’s not exactly the most aesthetically pleasing app to use. Fortunately, macOS Sequoia addresses this as the Notes app now supports highlighting.
Now, your notes can look just as colorful as the ones you used to take in history class. To access the feature, open a note and select the text you want to highlight. Then, click the Aa icon in the toolbar and select the color icon on the right of the context menu; you can choose from five different colors.
4 Record Audios in Notes
If the Highlighter feature we just discussed wasn’t impressive enough, you’d be happy to know that the Notes app can finally record audio. On top of that, Notes will also create a written transcript of the recorded conversation. You can even ask Notes to summarize the recording or organize it into bullet points.
After creating a new note or opening an existing note, click the soundwave icon; you’ll see a recording window pop up, allowing you to record an audio note.
5 Math Notes
macOS Sequoia also introduces a game-changing feature called Math Notes, which is hidden in Apple’s Notes app. Simply type out the equation in the app, and Notes will solve it for you.
If you’re more of a freehand mathematician, you can use the handwritten feature to scribble out an equation before letting Notes solve it. If you want to change the equation after it’s solved, simply make the change, and Notes will automatically update.
6 Unit Conversations in Calculator
Apple’s Calculator app has always been pretty basic, but thanks to the macOS Sequoia update, you can now convert currencies, distance, data, weight, speed, temperature, and more without turning to third-party calculator apps.
You can access the conversion feature by clicking the calculator icon in the app and choosing Convert from the context menu. Then, go through the various categories and choose your desired units for conversion.
7 Message Scheduling
Send Later is one of the handy features Apple’s Messages app offers in iOS 18 and macOS Sequoia. Users can now choose when they want to send out an important message.
To access this feature, open an iMessage conversation and click the plus (+) icon next to the text input field. Then, choose Send Later from the context menu. You can click the date or time to make adjustments as required.
I like responding to messages immediately, but I don’t like getting sucked into a conversation while I’m working. So, the ability to send a response hours later is a game-changer for me. You can schedule messages up to 14 days in advance. Unfortunately, you can’t schedule SMS or RCS texts in the Messages app.
I can’t remember the last time a major macOS update came with so many useful features, but I’m glad macOS Sequoia brings so much to the table. Don’t forget that these are just the hidden features; be sure to explore the standard features too—like mirroring your iPhone on your Mac.
With options like Claude, ChatGPT, and Gemini, choosing a chatbot can feel overwhelming. To help cut through the noise, I put all three to the test using an identical prompt to see which one delivers the best response.
Here’s what I found out.
Creating the Prompt
A well-crafted and detailed prompt plays a pivotal role in the quality of output any chatbot produces. As with all tools, the output is only as good as the skills of the person using it; AI chatbots are no different.
With this understanding, I instructed each model to create a basic guide focused on personal finance. This approach allowed me to evaluate multiple interconnected topics—specifically budgeting, saving, investing, and managing debt—within their responses. It also provided an opportunity to compare each language model’s proficiency in delivering clear and accurate information. To assess how each bot handles open-ended requests, I asked them to include practical advice and highlight common pitfalls to avoid.
The final prompt I used was:
Provide a beginner’s guide to understanding and managing personal finances. Cover budgeting, saving, investing, and dealing with debt. Include practical tips and common pitfalls to avoid.
ChatGPT vs. Claude vs. Gemini: Which Chatbot Is Best?
So, when given the same prompt, which AI chatbot delivers the best response?
ChatGPT’s response was comprehensive, well-structured, and exceptionally beginner-friendly, though there are multiple different ChatGPT models to choose from. It thoroughly covered all aspects of personal finance outlined in the prompt, dividing the guide into clear sections with headings and subheadings. The inclusion of practical tips and common pitfalls made the information actionable and relevant. The language used was accessible and free of jargon, which made the content engaging and easy to understand for readers new to personal finance.
However, the detailed nature of ChatGPT’s response might be a drawback for those seeking a quick overview. The extensive information provided could be overwhelming for someone looking for a concise summary. Readers pressed for time might find the length a bit cumbersome, as it requires a more extended reading session to digest all the material presented.
Claude delivered an organized response that covered all the key topics requested in the prompt. It included strategies for debt management and introduced investing concepts like diversification, adding valuable insights into complex subjects. The structured approach, using numbered lists and bullet points, made the information systematic and easy to follow for those comfortable with technical details.
On the downside, Claude’s use of more technical language could be challenging for beginners unfamiliar with financial terminology. The lack of practical examples and tools meant that readers did not receive specific guidance on how to implement the advice. This absence of real-world applications might make it harder for novices to translate the concepts into actionable steps, potentially limiting the guide’s overall effectiveness.
Gemini’s strength lay in its concise and easy-to-read response. It provided a quick summary of personal finance basics, making it suitable for readers who wanted a brief overview without delving into too much detail. The straightforward language ensured that the information was accessible to a broad audience, which is ideal for those new to the topic or short on time.
Nevertheless, Gemini’s response lacked depth and practical tips, which limited its usefulness for someone seeking comprehensive guidance. It did not offer detailed explanations or discuss common pitfalls, leaving readers without the critical insights needed to fully understand and manage their personal finances. This brevity might leave beginners with more questions than answers, making it less effective as a standalone resource for financial education.
Better still, you can use Gemini Pro for free for extra AI chatbot response quality.
What’s the Best AI Chatbot?
ChatGPT emerged as the clear winner with the most comprehensive and accessible guide. The inclusion of practical tips, common mistakes to avoid, and real-world examples set it apart from the others.
While ChatGPT stands out for its user-friendly approach, the choice of AI chatbot should align with your individual requirements and learning style. If you value in-depth explanations and practical guidance, ChatGPT offers a wealth of information. If you prefer a more technical and structured presentation, Claude provides that rigor. And if you’re seeking brevity and simplicity, Gemini delivers a straightforward summary. Consider what aspects are most important to you, but also don’t be hesitant to experiment.
There’s no wrong way to familiarize yourself with these tools, and if you have any questions, they all have useful answers.
AI music falls short of human music quality despite impressive advancements in generation technology.
AI music lacks the high-fidelity and warm sound of human-produced music due to white noise.
AI music has not produced a hit song and struggles with legal issues due to sampling copyrighted music without permission.
AI music has come far in recent years, but it still pales in comparison to the music humans make. When you listen past the surface-level shine, it just doesn’t sound as good as what real musicians and producers can create.
How Exactly Is AI Music Generated?
Before AI came along, you created music by sitting down and playing an instrument, like a guitar or synthesizer, or singing. You have to physically move your body to make music, and then, on top of that, spend hours and hours of work to put all the pieces together into a song.
How AI systems create music is entirely different.
AI uses machine learning algorithms to process a dataset of recorded music and learn things about music like melody, chords, instruments and music genres. In order to recreate the music that skilled musicians and producers can make, an AI system needs to break music down into its fundamental building blocks.
Once they’ve learned how to adequately recreate music, generative music tools like Suno, or earlier attempts like Meta’s MusicGen, then allow you to interact with their AI music generator through prompts. You can use them to produce music by simply describing the music you want to create in a few words or sentences.
Compared to how we’ve been making music for thousands of years, it’s a bizarre way to create something that’s meant to be filled with meaning and emotion. You can try an AI music generator to see how it works for yourself.
AI Music Is Low-Fi, but Not the Cool Kind
Nailing the basic structure of a pop song was a big stumbling block in the early days. Just take Meta’s MusicGen as an example. But now we have sites like Suno that, on a technical front, create seriously impressive full music tracks.
In saying that, don’t be fooled into thinking the results stack up against the high-fidelity music that you might not have realized you’re used to. It’s like how watching videos at a minimum of 1080p is normal now, but in the past our screens or bandwidth limits meant not everyone could get that quality.
The tell-tale sign of low-fi audio quality is hearing a lot of white noise in the track. Think of an old record player, vinyl, or even a cassette tape. Remember listening to the hiss and crackle? You can hear something similar in AI music tracks, as if you’re hearing the music being played through an old radio.
Although it’s not as bad as it once was, this background noise is in just about every AI music track that I have listened to on Suno.
Here’s one example from Suno. This track is called ‘Strongest Duo’ and the noise is all throughout the vocals.
If I was producing this track myself, I wouldn’t be trying to add distortion to this voice because it sounds more punchy and tight if the vocals are crisp and clean.
Here’s another track on Suno, this time featuring a classical violin. Show this track to a trained violin player, or an audio engineer, and they will easily tell you the strings don’t sound anywhere near as good as they should.
There’s a whole genre of music called low-fi music which has this characteristic warm sound, but in modern music production it’s usually done on purpose. Clearly, with AI music, it’s not meant to be there, but AI companies have yet to figure out how to get rid of it.
AI Still Hasn’t Produced a Hit Song
AI-generated music has yet to hit the big time and land a spot in the music charts, which is a good indicator that AI music isn’t as good as you think.
Instead, examples such as the rap diss track “BBL Drizzy”, which sampled a portion of an AI-generated track, have caused massive copyright lawsuits to erupt. Brought by the world’s biggest record labels (Universal Music Group, Sony, and Warner Records), the Verge reports that Suno is under legal fire, as is another AI music company called Udio.
The uncomfortable fact about AI music generators is they wouldn’t exist if they hadn’t sucked up vast amounts of copyrighted music catalogs without permission. Creating useful AI music plugins for production is arguably a much more positive and better use of AI, instead of creating music tracks wholesale and bypassing music production altogether.
In any case, there is more to music than just how it sounds. The reason so many people adore Taylor Swift or Billie Eilish is because there’s a great story behind how they made it to where they are. We don’t just want to listen to their music, we want to hear their personal story, copy how they dress, and glimpse behind the curtain to witness their glamorous life.
Can AI music produce the same kind of intrigue? Not at all.
Music Is Far Too Complex for AI to Replicate
Taking an idea for a song and recording and releasing it to the world can take weeks, months, or years. Unlike AI music, which takes barely a few minutes to produce with a handful of words fed into a prompt, real music takes an incredible amount of skill, imagination, and emotion to create.
No matter how complex AI music algorithms are, human music-making is far more complex. Even if AI companies overcome the quality problem, there is no way that AI can produce music that truly sounds great, because at the end of the day, we’re interested in so much more than the basic structure of a song. We’re interested in the human behind the music.
I always write a clear group description to set the purpose for the group and pin important updates and messages to keep crucial information easily accessible.
Using invite links along with approval for new members helps me add a large number of people while preventing potential spam or unwanted members.
In large WhatsApp groups, I appoint multiple co-admins to help manage the group and restrict members from editing settings to prevent unintended changes.
WhatsApp groups are a great way to connect families, friends, colleagues, and communities. However, managing these groups—especially the larger and more active ones—can be challenging. Here are some tips and features I rely on to manage my WhatsApp groups effectively.
1 Define a Clear Purpose in the Group Description
One of the first things I do when setting up a WhatsApp group is defining a clear purpose in the group description. While this may seem like a minor detail, it establishes the tone and sets expectations for everyone who joins. I ensure that the description briefly outlines the group’s purpose, the types of discussions that are encouraged, and any basic guidelines that members should follow.
For instance, if it’s a work-related group, I’d write down the types of updates and messages that are appropriate, such as sharing project deadlines, documents, and task details. This straightforward approach helps prevent irrelevant conversations and keeps everyone focused.
2 Pin Important Messages
In a large WhatsApp group, where messages can quickly overwhelm the chat, crucial information can sometimes get lost. That’s why I always pin important announcements, event details, and instructions, making them easily accessible to everyone. It’s a simple yet powerful way to keep everyone in the loop, even when conversations become fast-paced or cluttered.
To pin a message, all I have to do is long-press it and tap Pin. This has saved me from having to constantly repeat myself or re-send important details, especially when managing larger groups where not everyone is active at the same time or where new members might join later.
Initially, I used to add every new participant as a contact on my phone in order to add them to a group. Not only was this time-consuming, but it also cluttered my contact list with numbers I didn’t necessarily need.
To avoid this, I now prefer generating a direct invite link to the WhatsApp group. I can easily share it with anyone who needs to join the group—whether via email, a different messaging app, or even by generating a QR code. This makes it easy for me to add a large number of members while also allowing participants to decide whether or not to join the group.
Moreover, I can reset or disable the invite link at any time, giving me the necessary control. This is especially useful for managing access when the group is no longer open to new members.
4 Enable Approval for New Group Participants
While I create group invite links to make it easy for people to join, I don’t allow just anyone to enter without my consent. By enabling the “Approve New Members” setting in WhatsApp, I can review each join request before someone becomes a part of the group.
Whenever someone clicks on the invite link, I receive an alert and can decide whether to approve or disapprove. This helps me maintain control over who joins the group and keeps the group free from potential spam or unwanted members. It’s particularly useful for managing groups with a specific purpose or dealing with sensitive topics where privacy is crucial.
5 Prevent Members From Editing Group Settings
By default, WhatsApp allows group members to change the group name, icon, and description, as well as add new members. This can lead to unintended (or intentional) modifications of the group settings, which can affect the overall group experience. To keep things organized and ensure the group remains as intended, I always restrict members from editing these settings.
To do this, I access the group details page, tap on Group Permissions, and disable the toggles for Edit Group Settings and Add Other Members. This simple change goes a long way in maintaining control and avoiding unnecessary conflicts or misunderstandings.
6 Appoint Co-Admins
When I am the only admin of my WhatsApp group, I often find myself juggling multiple responsibilities—whether it’s moderating conversations, addressing member concerns, or keeping the group engaged. It can be overwhelming, especially during busy periods when I can’t dedicate as much time to the group.
To ease my stress, I usually appoint multiple co-admins who help me manage the group. This way, I know that even when I’m not around, the group will be well-managed and that any issues can be promptly addressed. All I need to do is locate the person in the members list, long-press their name, and select Make Group Admin.
7 Control Who Can Post Messages
In large WhatsApp groups, especially when the primary purpose is to share important information, I find it essential to control who can send messages. By restricting messaging to admins only, I create a more organized environment where information is communicated clearly, free from the distractions of unrelated chatter.
To set this up, I go into the group details page, tap on Group permissions, and disable the Send messages toggle under the “Members Can” section. This approach not only helps maintain focus but also makes the group less overwhelming for members. Without constant notifications from multiple participants, everyone can concentrate on key updates without distraction.
8 Regularly Review to Add or Remove Members
In groups with hundreds of members, I make it a habit to review the members list every few weeks. During these reviews, I look for members who may no longer be active or who might have accidentally left the group.
At the same time, these reviews provide an opportunity to add new members who should be part of the conversation. Whether they’re friends, colleagues, or acquaintances with shared interests, inviting the right people can bring fresh perspectives and energy to the group.
This practice not only helps maintain a positive and interactive environment but also ensures that everyone feels connected and relevant within the group.
Managing WhatsApp groups doesn’t necessarily have to be a tedious task. The tips and features I’ve shared make it easier for me to manage both small and large groups. If you’re managing one as well, I encourage you to try these tips to enhance your WhatsApp experience.
Blocking people on social media is usually pretty straightforward; once someone is blocked, they can no longer see what you’re posting or interact with your posts. However, it seems that X (formerly Twitter) is getting an update to its block feature that changes how things work. Now, when you block people on your account, they are free to read everything you post publically, albeit they still cannot interact.
X Has Changed How Blocking People Works
In a post made on X, Elon Musk explains how blocking people on X will now work. Usually, when you block someone, they can no longer see your feed; instead, it’s replaced with a message stating that they’re blocked. Now, they can freely browse your feed; they’re just not allowed to interact or comment on your posts.
Replies to this announcement have been mixed. Some say that anyone you blocked could still use incognito mode or an alt account to see your posts, so allowing blocked users to see public posts is not that big of a deal. Others lamented that X’s blocking tools have become some of the weakest out of all the social media platforms, and feel concerned about keeping their posts and data safe from bad actors.
How to Handle X’s Block Feature Change
It seems that this update to blocking also retroactively applies to anyone you have blocked. As such, if you used your block list to prevent specific people from viewing your posts, they can now see everything unabated. Keep this in mind when making future posts on X.
If you want to continue using X, but you’re concerned that a bad actor is spying on your posts, consider making your X account private. This setting only allows your followers to view your posts, and anyone who wishes to follow you must first ask for permission. Even before X changed how the block function worked, private accounts were a great way for people to protect themselves from people who could easily get around the block feature with an alt account.
The Withings ScanWatch Light offers smartwatch features in an analog timepiece with health insights and great battery life.
The well-designed app allows deeper data analysis for heart rate, steps, sleep tracking, and more on the watch screen.
With comfortable bands, long battery life, and various color options, it’s a great option for a fitness-focused smartwatch.
It’s not hard to find a smartwatch that provides a wealth of information at a glance. But sometimes, simple is better. If you’re looking for a hybrid smartwatch that looks like an analog timepiece but can provide a wealth of health insights, the Withings ScanWatch Light fits the bill. Along with an inexpensive price tag, the watch provides wonderful battery life and ties into a great health-focused ecosystem.
Withings ScanWatch Light
The Withings ScanWatch Light provides many advantages of a smartwatch in an analog timepiece. It can track a number of fitness metrics including heart rate, steps taken, respirator rate, and sleep. A small screen on top of the watch can give you a quick peek at important information. With the well-designed Withings app, you can take a deeper look the data. The watch itself looks great and available in a number of color combinations.
Pros
Beautifully designed analog timepiece
Can capture a wide assortment of health data
Withings app help you better understand the data
Up to 30 days of battery life on a single charge
Wide variety of case colors and strap options
Cons
Might not look great an a larger wrist
Most information needs the smartphone app
Pricing and Availability
The Withings ScanWatch Light is available for $249.95 at Amazon, Withings, Best Buy, and several other retailers. I reviewed the Pearl White model with a silver casing, but you can also choose from Black and Green, or Sand and Blue with a gold frame.
Specifications
Brand
Withings
Heart Rate Monitor
Yes
Color Screen
No
Battery Life
Up to 30 days
Onboard GPS
No
Offline Media Storage
No
Customizable Strap
Yes
Lens Material
Gorilla Glass
Case Material
Stainless steel
Connectivity
Bluetooth LE
Dimensions
37mm
Weight
27.1g without strap
A Smartwatch That Doesn’t Look Like One
Jerome Thomas / MakeUseOf
When taking a quick glance, you’d be hard-pressed to think the Withings ScanWatch Light has any smarts. The round watch looks like a classic analog timepiece.
Along with a 37mm stainless steel case, the watch is topped with Gorilla Glass, which looks great and should withstand everyday wear and tear. On top of the watch display is a small OLED screen that can show health data and provide a way to interact with different watch settings using the watch crown. On the back of the watch are the health sensors and charger pins. I tried out a white case and light gray strap made for activity and swimming. Withings offers four other case colors, each with a color-coordinated sport band. As a big plus, you can also purchase additional leather or stainless bands that provide a more upscale look.
Swapping out bands is one of the best parts of the Apple Watch experience, and it’s nice to see Withings offer a similar approach. When you want to swap out a band, you’ll push a small pin on the back of the band to release it. It’s easy to swap a new one in.
The band included with the watch is comfortable, easily adjustable, and has small ridges on the back to help keep air circulating around your wrist.
While the watch is marketed as unisex, men with larger wrists might want to take a closer look before purchasing. I usually wear the large, 49mm Apple Watch Ultra on my wrist. The Withings ScanWatch Light might look odd or out of place on a larger wrist thanks to its much smaller case. It didn’t bother me, but it might be an issue for some potential buyers.
I tested the watch for around two weeks and was definitely pleased with its fit and comfort. Coming from a much larger model, the Withings option felt great on my wrist. It didn’t shift around, even while working out.
You Won’t Be Tied to a Charger
Jerome Thomas / MakeUseOf
Getting the watch set up takes just a few minutes. If you don’t have the Withings Health Mate app for iPhone or Android installed, you’ll need to download it on your smartphone. After connecting the watch to your handset, there are a few steps to finish on-screen.
In the My Devices tab of the app, you can customize the watch further. One of my favorite options is Quicklook, which automatically wakes up the screen by turning your wrist. The default view on the screen shows the day, date, digital time, and a small graph showing how close you are to reaching a daily steps goal.
Another great option to customize in the settings is the long-press shortcut. This allows you to start something specific, like a workout, with a long press of the crown.
As a big plus, if you forget to start a workout manually, the watch will automatically detect activities like walking, running, or cycling. That feature worked well and always detected when I started a run or walk. Plus, I wore both my Apple Watch Ultra and the Withings ScanWatch Light for a few workouts, and the data was similar on both.
During the day, after turning your wrist, you can rotate the crown to take a heart rate reading, show a daily step count, start a workout, and more. You can also customize the screens you see in settings.
While the Withings ScanWatch Light is designed to not overwhelm you with information, you can choose to see notifications from a limited number of apps, such as Messages, Phone, Facebook, Instagram, Outlook, and others.
When a notification is received, the watch gently vibrates, and the information scrolls across the small screen. I didn’t find the notifications useful, though, on such a small screen, so I turned them off completely. But it is a nice option if you don’t want to completely detach from what’s happening on your phone.
Battery life is a huge plus of the watch compared to many other wearables. Withings says you can go for up to 30 days on a single charge. In around two weeks of use, my battery was a little less than 50%, putting that number well within reach.
It’s a nice benefit not to worry about nightly charging, especially since the watch can be used as a sleep tracker. There’s no need to worry about doing anything before bed; your sleep information will automatically be tracked and ready for you in the morning.
In the morning, you can head to the app to see a Sleep Quality Score. That includes other data like duration, depth, interruptions, and more. Most importantly, it shows insights and tips on what you need to work on to sleep better. While it’s not hard to find technology that can help track your sleep, I definitely liked that Withings tells you what you can do to actually improve in that important area.
A Great App to Help View and Understand Data
Jerome Thomas / MakeUseOf
While the watch’s fitness and exercise data can be imported into Apple Health and Google Fit, the Withings app is another big plus. It’s well-designed and easy to use, especially if you have another product from the company.
I also use the Withings Body Smart Scale that I reviewed, and the app gives me everything I ever wanted to know about my health and fitness.
The app has two major parts. In the Home section, you can see a rundown of all the latest measurements, such as daily step count, average heart rate, and more. Select the specific area to see more information. You can also see important trends, like how many workouts you did last week. The Measure tab provides all of the captured health data.
An optional Withings+ subscription service, available through the app, provides more features, such as a complete health assessment score, workout videos, recipes, and more.
Should You Buy the Withings ScanWatch Light?
In the world of the Apple Watch, the Withings ScanWatch Light provides a great alternative for anyone looking for an undercover smartwatch. It provides a wealth of accessible health and fitness information, including sleep tracking, from the Withings app.
Instead of needing to be tied to a charger every night, battery life is almost an afterthought when you can go for up to 30 days on a single charge. And with a wide variety of colors available, it’s perfect for enjoying the perks of a fitness-focused smartwatch in a beautiful package, all for the same price as the Apple Watch SE.
Withings ScanWatch Light
The Withings ScanWatch Light provides many advantages of a smartwatch in an analog timepiece. It can track a number of fitness metrics including heart rate, steps taken, respirator rate, and sleep. A small screen on top of the watch can give you a quick peek at important information. With the well-designed Withings app, you can take a deeper look the data. The watch itself looks great and available in a number of color combinations.
Tab Merge extension quickly saves open tabs as a merged PDF for easy reading offline.
Print All Open Tabs extension captures scrolling screenshots to create PDFs of individual or all tabs.
Both extensions are free and provide convenient options to save web pages for later viewing offline.
If you ever want to save multiple web pages for offline viewing, these two Chrome extensions can come in handy.
Both these extensions save all open tabs in PDF format, so you can read stuff later, perhaps during your flight or commute.
1 Tab Merge
Tab Merge is a no-fuss extension that saves all open tabs in no time. After downloading the extension, click the extension icon and select Tab Merge. This opens a new tab with all other open tabs merged into it. In the top right corner, click on Print.
Then, from the Print dialog box, you can save the tabs as a PDF in your desired folder.
Though the extension works great, it doesn’t have a decent rating on the Chrome Web Store. Looking at the reviews, it is probably because it didn’t work properly in the past, but the latest reviews show that other users find it useful.
Print All Open Tabs is a simple extension with a pretty self-explanatory name.
Open all tabs you want to save for later, click the extension icon, and select Print All Open Tabs. The extension asks whether you want to save tabs as a single PDF or multiple PDFs (a separate PDF for each tab).
Once you choose an option, Print All Open Tabs automatically starts capturing scrolling screenshots of the open tabs, converts them to a PDF, and saves them to your default download folder.
Though a useful extension, the process takes a little time, as it captures screenshots. However, this retains the original layout of the web page, making it easier to read.
Shutting down your computer is a routine task, but navigating through the Start menu each time can be cumbersome. If you’re looking for a quicker method, here’s how to add a dedicated shutdown shortcut to your Windows 11 desktop or taskbar.
Add a Shutdown Button to the Desktop
Creating a “Shutdown” shortcut on your Windows 11 desktop doesn’t require any third-party software. It’s as simple as adding any other icon to the Windows 11 desktop. Instead of specifying a location, you simply enter a command for the shortcut.
To create a shortcut for the Shutdown command on Windows, follow these steps:
Right-click anywhere on an empty spot on the desktop.
Click New and select Shortcut from the submenu.
Type shutdown /s /t 0 in the location text box and click Next.
Enter a suitable name for the shortcut, such as Shutdown in the name text box.
Click Finish to confirm.
And that’s it! You can now double-click the newly created Shutdown shortcut to power off your computer quickly. By default, the Shutdown button will look like any other desktop shortcut, but you can customize it to reduce the risk of accidentally clicking it. Here are steps for the same.
Right-click the Shutdown shortcut and select Properties.
Under the Shortcut tab, click the Change Icon button.
In the Change Icon dialog box, choose the icon you like and click OK.
Click Apply followed by OK to save your changes.
You can also download and apply custom icons from websites like IconArchive if the available icons aren’t quite right for you. You’ll first need to download your preferred icon, though. Once done, repeat the above steps and click the Browse option in the “Change Icon” dialog box to select and apply it.
Likewise, you can set up the Restart and Sleep buttons on your Windows 11 desktop. However, you’ll need to use different commands for them in the location text box in the Create Shortcut window. Here are the commands you’ll need to enter for the Restart and Sleep functions:
Do you prefer to have a “Shutdown” button on the taskbar? If so, you can also pin your Shutdown button to the taskbar. To do so, right-click that button, select Show more options, and choose Pin to taskbar.
Once done, you can remove the desktop shortcut if you want. To do so, right-click the Shutdown shortcut on the desktop and select Delete (trash icon).
Create a Keyboard Shortcut for the Shutdown Button
If you’re someone who prefers using keyboard shortcuts, you can also quickly shut down your Windows 11 PC with a hotkey. To do this, you will need to assign a keyboard shortcut to the desktop Shutdown button. Here’s how to do it.
Right-click the Shutdown button on the desktop to select Properties.
Head to the Shortcut tab and select the Shortcut key field.
Press the key combination you want to use.
Select Apply followed by OK.
Once you complete the above steps, you can simply press the assigned hotkey to shut down your Windows PC. It’s best to avoid assigning a hotkey that you might accidentally press. Also, keep in mind that the shortcut must remain on the desktop for the hotkey to work, so be sure not to delete the desktop Shutdown button.
Although shutting down Windows 11 via the Start menu is straightforward, adding a shutdown shortcut to your desktop or taskbar can make the process even more convenient. Additionally, for times when you want to shut down your PC without using your mouse, setting up a keyboard shortcut for the Shutdown button can be helpful.
If your Windows 10 or 11 PC is refusing to open JPG files, several issues could be at play, such as corrupted files or problems with the default photo viewer. Try these troubleshooting tips to fix the problem and get your JPG files back in view.
1 Rule Out Issues With Your JPG File
Your Windows 10 or 11 PC may have trouble opening a JPG file if it has an excessively long file name or an incorrect file extension. In such cases, renaming the file with a shorter name and ensuring it has a “.jpg” extension should fix the problem.
Another thing you should do is check the size of the JPG file you’re trying to open. If it’s too large, use a photo editor or a web app to reduce the image file size and try again.
However, if you’re only experiencing issues with a select few JPG files, they may be corrupted. You can check for this possibility by opening a different JPG file from the web to see if it works properly.
2 Update, Repair, or Reset the Photos App
On both Windows 10 and 11 PCs, Microsoft Photos is the default app for opening JPG files. So, if there’s a problem with this app, it may fail to open any JPG files. To fix this, open the Microsoft Store and search for the Photos app. If a newer version of the app is available, click Update to install it.
Updating the app should help fix issues caused by a buggy or outdated app build. However, if the issue persists, you can use the built-in app repair feature in Windows to fix problems with the app. Here’s how:
Right-click the Start menu icon on the taskbar and select Installed apps.
Scroll through the list or use the search bar to locate the Photos app.
Click the three-dot menu next to it and select Advanced options.
Scroll down to the Reset section and click the Repair button.
You should see a checkmark next to the Repair button once the process is complete. If you can’t open JPG files even after that, consider resetting the app from the same menu. Doing so will remove all app data, effectively fixing issues caused by corrupt data.
3 Open the JPG File With Another App
Another thing you can do is try opening JPG files with a different photo viewer app. There are many excellent alternatives to the Photos app. Download and install any reliable photo viewer app you like. Once installed, right-click on the JPG file and select Open with > [Photo Viewer App].
If this resolves the issue, you can set the new app as the default photo viewer on your Windows computer. If you need help with that, check out our guide on changing default apps on Windows.
4 Run an SFC Scan
Corrupt or missing system files on your Windows PC can also cause such issues. Fortunately, Windows includes a useful tool called SFC (System File Checker) that can automatically scan your system for corrupt files and replace them with their cached versions. Here’s how to run it.
Press Win + S to open the search menu.
Type cmd in the box and select Run as administrator.
Select Yes when the User Account Control (UAC) prompt appears.
Type sfc/ scannow and hit Enter.
Wait for the scan to complete, and then restart your PC. Following that, you should be able to open JPG files as expected.
Encountering issues while opening a simple photo on your Windows computer can be frustrating. Hopefully, one or more of the solutions I listed above worked for you, and you’re now able to open JPG files on your PC without any issues.
Many apps can create checklists, but do you need yet another app? If you’re already using spreadsheets, you can easily make a checklist in Microsoft Excel.
Even if you don’t want to use it as a simple to-do list app, a checklist is an excellent way to track what you still need to do in your spreadsheet directly in the spreadsheet itself.
How to Make a Checklist in Excel
With the latest updates, you can easily
add checkboxes in Excel
without the need to enable the Developer tab. However, if you’re working with an older version of Excel or don’t have access to the latest updates, the traditional method covered in this article is still a reliable way to add checkboxes and customize your spreadsheet.
We’ll show you how to create an Excel checklist with checkboxes you can tick off as you complete the items. It will indicate when you’ve checked off all the items so you can tell at a glance.
Here’s a quick breakdown of the steps: you’ll need to enable the Developer tab, input your list, and finally, add checkboxes with some optional advanced formatting to spice things up.
1. Enable the Developer Tab
You must enable the Developer tab on the ribbon to create a checklist. To do this, right-click on the ribbon and select Customize the Ribbon.
In the list of Main Tabs on the right side of the Excel Options dialog box, check the Developer box and click OK.
2. Enter the Checklist Items Into Your Spreadsheet
Enter your to-do list, one item per cell. In our example, we have a cell with the Total Items, and one with the total Items Packed, or how many items are checked off on our list.
The Am I good to go? cell will be red with NO if all the items are not checked off.
Once you check off all the items, the Am I good to go? cell turns green and will read YES.
Click the Developer tab. Then, click Insert in the Controls section and click the Check Box (Form Control).
3. Add the Checkboxes
Select the cell in which you want to insert the checkbox. You’ll see that there’s text to the right of the checkbox. We only want the text box, not the text. While the checkbox control is selected, highlight the text next to the checkbox, and delete it.
The checkbox control does not automatically resize once you’ve deleted the text. If you want to resize it, right-click on the cell to select the checkbox and then left-click on it (to make the context menu disappear). It will be selected with circles at the corners (as shown above).
Drag one of the circles on the right side towards the checkbox to resize the outline to just the size of the checkbox. Then, you can move the checkbox to the center of the cell with the four-headed cursor.
We want to copy that checkbox to the rest of our to-do list items.
To select the cell containing the checkbox, select any cell around it without a checkbox. Then, use one of the arrow keys on your keyboard to move to the cell with the checkbox.
To copy the checkbox to the other cells, move your cursor over the bottom-right corner of the selected cell with the checkbox until it turns into a plus sign. Make sure the cursor is NOT a hand. That will check the box.
Drag the plus sign down over the cells into which you want to copy the checkbox and release the mouse button. The checkbox is copied to all those cells.
Advanced Checklist Formatting
Depending on what you want to use your checklist for, you can add additional formatting elements to validate your list and display its status.
Create a True/False Column
For this step, we need to use the column to the right of the checkboxes to store the TRUE and FALSE values for the checkboxes. That allows us to use those values to test whether all the boxes are checked.
Right-click on the first checkbox (not the cell with the checkbox) and select Format Control.
On the Control tab on the Format Object dialog box, click the cell selection button on the right side of the Cell link box.
Select the cell to the right of the checkbox cell. An absolute reference to the selected cell is inserted in the Cell link box on the compact version of the Format Control dialog box.
Click the cell selection button again to expand the dialog box. Finally, click OK on the dialog box to close it.
Repeat the procedure for each checkbox in your list.
Enter Total Items and Calculate Items Checked
Next, enter the total number of checkboxes in your list into the cell to the right of the Total Items cell.
Let’s use a special function that calculates how many checkboxes have been checked.
Enter the following text into the cell to the right of the cell labeled Items Packed (or whatever you called it) and press Enter.
=COUNTIF(C2:C9,TRUE)
This counts the number of cells in the C column (from cell C2 through C9) that have the value TRUE.
In your sheet, you can replace “C2:C9” with the column letter and row numbers corresponding to the column to the right of your checkboxes.
Hide the True/False Column
We don’t need the column with the TRUE and FALSE values showing, so let’s hide it. First, click on the lettered column heading to select the whole column. Then, right-click on the column heading and select Hide.
The lettered column headings now skip C, but a double line indicates a hidden column.
Check If All Checkboxes Are Checked
We’ll use the IF function for Am I good to go? (or whatever you call it) to see if all the checkboxes are checked. Select the cell to the right of Am I good to go? and enter the following text.
=IF(B11=B12,"YES","NO")
This means that if the number in cell B10 is equal to the number calculated from the checked boxes in B11, YES will be automatically entered in the cell. Otherwise, NO will be entered.
Apply Conditional Formatting
You can also color code the cell based on whether the values in cells B10 and B11 are equal. This is called Conditional Formatting.
Let’s see how to turn the cell red if not all the checkboxes are checked and green if they are. See our article about Conditional Formatting for information on how to create rules.
Select the cell next to “Am I good to go?”. It’s B14 in this example spreadsheet.
Create a rule for this cell with the Conditional Formatting Rules Manager dialog box. Go to Home > Conditional Formatting > New Rules. Then, select the Use a formula to determine which cells to format rule.
Enter the following text in the Format values where this formula is true box.
Replace B11 and B12 with the cell references for your Total Items and Items Packed (or whatever you named these cells) values if they’re not the same. (See our guide to the Excel name box if you need more info on that.)
=$B11<>$B12
Then, click Format and select a red Fill color and click OK.
Create another new rule of the same type, but enter the following text in the Format values where this formula is true box. Again, replace the cell references to match your checklist.
=$B11=$B12
Then, click Format and select a green Fill color and click OK.
On the Conditional Formatting Rules Manager dialog box, enter an absolute reference for the cell you want to color green or red in the Applies to box.
Enter the same cell reference for both rules. In our example, we entered =$B$13.
Click OK.
The Am I good to go? cell in the B column turns green and reads YES when all the checkboxes are checked. If you uncheck any item, it will turn red and read NO.
You can create a checklist in Excel easily enough. But it is just one type of list. You can also make dropdown lists in Excel with your custom items.
Customizing your iPhone’s Home Screen, especially app icons, used to be a hassle, requiring complicated workarounds. However, with iOS 18, you can now easily change app icon colors right from the Home Screen. I’ll show you how below.
How to Change the Color of iPhone App Icons
Before you begin, make sure to update your iPhone to iOS 18. Once that’s done, long-press on a blank area of your Home Screen to enter jiggle mode. Now, tap Edit in the top-left corner and choose Customize.
This will open the menu where you can personalize your app icons. You’ll see four options: Light, Dark, Automatic, and Tint. Here’s what each option does:
Light: This option keeps your app icons in Light Mode, just like they were before you updated your phone to iOS 18.
Dark: This new option switches your app icons to Dark Mode, giving most of them a darker background. However, note that it may not apply to some third-party app icons.
Automatic: This option automatically switches between light or dark icons based on your iPhone’s current theme. When you switch between Dark Mode and Light Mode, your app icons also follow suit.
Tint: This option allows you to tint your app icons to any color of your choice. Simply select it and drag the two sliders to any color and intensity you like. Your experience might be very hit or miss, though, as it doesn’t look good on some app icons.
This isn’t the only thing you can do to further customize your Home Screen. You can choose larger app icons by selecting the Large option in the Customize menu, which also hides the app labels for a minimal, clean look. Additionally, you can darken your background for better contrast by tapping the sun icon in the top-left corner of the Customize menu.
If you’re not satisfied with the results, you can also try adding custom widgets and app icons using third-party apps for even more flexibility. Plus, now that your iPhone’s software is up-to-date, you can explore some of the best new iOS 18 features as well!
People are often torn between Android flagships and iPhones when they’re in the market for a new phone, but I always pick the latter. And that’s mostly because of these five iPhone features that I’d miss if I ever switched.
The allure of Apple devices has always been about how things work. At the backbone of this impression is Continuity, a set of features that leverage iCloud to enable seamless sync across Apple devices and let you enjoy the Apple ecosystem to the fullest.
You can start an action on your Mac and pick it up—right where you left off—on your iPhone or iPad. You can pair your AirPods with your iPhone only to find it ready to work with your Mac as well. Additionally, features like AirPlay, Universal Control, iPhone Mirroring, and more make it easy to work, play, or relax.
In my case, apart from the features I’ve mentioned above, the ability to answer and make calls or send messages without being limited to my iPhone and nifty add-ons like Universal Clipboard have made it challenging to switch to Android devices.
2 The Shortcuts App for Automation
Aryan Surendranath / MakeUseOf
Having a set routine helps me keep on top of tasks and takes away some of the headaches that come with planning activities. Not to forget, following a routine is one of my favorite things. With automation—enabled by the Shortcuts app—my iPhone makes things much simpler for me.
To pick an example from my day-to-day, I frequent the gym and use a stopwatch to track the length of my sets. While my Apple Watch is normally responsible for this, I also use my iPhone occasionally.
However, accessing the stopwatch wasn’t straightforward; I have the Control Center disabled when my iPhone is locked, and the Clock app sometimes needs a touch too much. To solve this, I set up a customized Lock Screen with a stopwatch shortcut, so as soon as I’m near my gym, the automation I’ve set up runs and changes my Lock Screen.
This is just one simple example: there’s a lot more the Shortcuts app can do, and while it’s possible to do this on a Samsung phone, not every Android device offers this capability.
3 The Dynamic Island
Aryan Surendranath / MakeUseOf
The Dynamic Island is a hardware feature on modern iPhones that makes information available at a glance. And you can interact with it if required. Many apps that support Live Activities take advantage of this hardware implementation.
In my case, Dynamic Island acts as an informative yet easy-to-access button for live timers, match scores, and food deliveries. During my recent trip to Japan, it even showed helpful information like the number of stops I needed to ride on the subway before getting off or looking for a transfer.
It saves the hassle of swiping between apps or pulling down the Notification Center for information, and a simple, quick tap on it takes me directly into the full-blown app to make any required changes. Overall, it’s a non-intrusive and valuable way to use the top portion of my iPhone’s display and keep tabs on activities.
4 Apple CarPlay’s Reliability
Driving to a faraway location you’ve never visited can be a task because you need to figure out navigation and ensure you have the right music for the drive. Apple CarPlay makes this part of the commute a very simple affair.
Simply connecting my iPhone to the car brings up all my compatible apps and settings. I don’t need to set up anything from scratch; I can plug in and go. This reliable design of Apple CarPlay, which mimics my iPhone and makes my most used apps easy to access, is a great value add.
And while Siri isn’t the smartest assistant around, I do think it’s the most reliable when it comes to completing straightforward tasks like media control, calling people, and sending messages. I’ve faced a lot of difficulty using Android Auto, with Google Assistant just choosing to ignore commands or being extremely unresponsive.
5 Apple’s Siri Implementation
Aryan Surendranath / MakeUseOf
Using a keyword to access a smart assistant isn’t unique to Apple, but what makes it stand out is the accuracy with which it works. “Hey Siri” or just “Siri” are the default prompts on Apple devices to access the voice assistant, and my experience with using this has been stellar.
The prompts work over the sound of tap water, loud music playing on the iPhone, you name it. I’ve never been able to replicate this on an Android device, and with how frequently I turn to Siri—and how much more this may increase with the introduction of Apple Intelligence—I can’t leave it behind.
The Apple ecosystem is full of nifty little features like this that make life a bit easier. However, competition leads to progress, and many Android device makers are catching up with their implementations. While I’m sticking with my iPhone for now, I can’t wait to see what shows up on the other end of the smartphone realm in the coming years.
I’ve been a fan of iMacs ever since I bought the iMac G4 in 2002. However, having owned three generations of Apple’s all-in-one desktops, I’ve decided against upgrading to the 24-inch iMac because it made more sense to repurpose my MacBook Pro instead.
A MacBook Pro Offers Easy Convertibility
Jack Mitchell/MakeUseOf
While an iMac is an excellent machine that works seamlessly as a comprehensive unit, it has limitations when it comes to customization. If you add a separate screen, it looks out of place and ruins the aesthetics that are such a large part of the iMac’s appeal.
Another issue is longevity. Once an iMac becomes outdated, you’ll need to replace the whole expensive unit. While a new model will last you several years, an upgrade would feel necessary long before it stops getting software updates. So, instead of buying another iMac, I repurposed my MacBook Pro with a desktop stand and dual monitors.
As someone who often works remotely, I have greater flexibility because I can disconnect my laptop as required while working away from home. When I’m engaged in creative work like editing movies in Final Cut Pro or writing music in Logic Pro, the MacBook Pro is assigned to desktop duties and connected to outboard equipment such as a MIDI controller, audio interface, and active desktop speakers.
Using a MacBook Pro Helped Me Save Money
My main reason for repurposing the MacBook Pro for desktop use was to save money. It made little sense to continue owning both a high-performance laptop and a desktop computer when their specs are fairly similar.
Instead of buying a new iMac, I opted to buy a new pair of KRK Rokit 5 active speakers, monitors, and an iPad with a Magic Keyboard, and I still have cash left to put toward my next MacBook Pro upgrade.
The iPad purchase means I can leave my MacBook Pro on my desktop and use my iPad exclusively for work duties. I only carry my MacBook with me on longer trips and travels abroad. I also repurposed the Magic Mouse and Magic Keyboard from my old iMac for use on my desktop with my MacBook Pro.
Having the same peripherals as before helped me save money, and the transition between setups felt familiar and less of a shock to the system.
While repurposing your MacBook Pro as a desktop computer sounds great, I’ve had to make some compromises. Starting up after shutdown is a pain, as I must remove the laptop from its stand while it’s still connected to outboard devices, open it up, log in, and replace it each time. It’s a minor gripe but can be annoying when performed regularly or if a restart is required at a busy time.
I also miss my iMac’s big Retina display. To keep the new desktop configuration financially viable, I had to settle for LCD monitors, which lack the sharpness and clarity of the iMac’s superb built-in screen. That said, I still have a Retina display when using my MacBook Pro as a laptop, so I’m not entirely missing out here.
Now that I’ve replaced my iMac with a MacBook Pro, I can safely say the difference is primarily aesthetic. My desktop is nowhere near as pretty, but I believe the benefits outweigh the drawbacks.
If you’re not sure whether to buy the iMac or MacBook Pro, it’s worth noting that MacBook Pros are now available with the superior M3 Pro and M3 Max chips. Apple only sells the 24-inch iMac with the base M3 chip. This might be enough reason to make you lean toward the MacBook Pro, but it’s mostly a matter of practicality and flexibility for me.
After using the original AirPods Pro for over four years, I’m ready for an upgrade. While the AirPods Pro models are still superior to standard AirPods, Apple has now bridged the gap. Here’s why I’m choosing the AirPods 4 over the AirPods Pro 2.
1 AirPods 4 Are Cheaper
While I’m generally okay with paying a bit more for premium features that come with Pro models, like paying more for the iPhone 16 Pro models, that doesn’t mean I wouldn’t try to save a bit of money when I get the opportunity to do so.
The standard AirPods 4 retails for $129, while the higher-tier model with Active Noise Cancellation (ANC) is slightly pricier, at $179. On the other hand, the AirPods Pro 2 we reviewed has an MSRP of $249. While you can purchase the AirPods Pro 2 for much less on third-party websites like Amazon and BestBuy, the price disparity still exists.
I’ve always been the kind of person who can’t focus on a task unless there’s pin-drop silence. Of course, finding a place that’s always quiet is realistically impossible. That’s why Active Noise Cancellation on my AirPods Pro has always been a lifesaver, and I can’t imagine buying a pair of earbuds without them.
So far, standard AirPods models lacked noise cancellation, but Apple finally offers ANC as an option for the AirPods 4. While it costs $50 more than the standard AirPods 4, it’s a price I’m willing to pay.
Although Apple claims that the AirPods Pro 2 can remove twice the noise compared to the AirPods 4 with ANC, I believe that’s mostly due to the silicone ear tips. Since I’m not a fan of those tips, I’m not too concerned about the difference. I typically use ANC with music playing in the background regardless, so it shouldn’t affect me much.
While I’m a big fan of the AirPods Pro, I’m not the biggest fan of silicone ear tips. Even though I’ve never had to worry about my AirPods falling from my ears, I’ve often experienced severe migraines after using them for extended periods. While I can use them comfortably for an hour or two, discomfort starts to set in once I pass the three-hour mark.
I’ve considered switching to the standard AirPods several times since they don’t have silicone ear tips, but the lack of Active Noise Cancellation (as mentioned above) is one of the few reasons why I’ve stuck with the AirPods Pro all this time. With Apple now offering the best of both worlds in the AirPods 4 with ANC, I can finally make the upgrade I’ve wanted for years without losing one of my favorite features.
Ultimately, what matters most when you’re purchasing new headphones or earbuds is the audio performance. Thankfully, both versions of the AirPods 4 pack the same H2 chip that Apple introduced alongside the AirPods Pro 2.
The H2 chip brings many features that previous iterations of the standard AirPods lacked, such as Personalized Spatial Audio, Dynamic Head Tracking, Voice Isolation, and a hands-free way to interact with Siri. Additionally, the AirPods Pro 2 and the AirPods 4 with ANC feature Adaptive Audio, Conversation Awareness, and Transparency mode.
Like the original AirPods Pro, both AirPods 4 variants feature a force sensor, allowing you to control playback simply by pressing the stem of your AirPod. On the other hand, the AirPods Pro 2 features Touch control instead, which allows you to turn the volume up or down with a light swipe up or down. Although Touch control is a neat addition, I wouldn’t pay extra for it since I’m used to the force sensor on my original AirPods Pro.
Thanks to the H2 chip, both AirPods 4 models get all the advanced audio features of AirPods Pro 2. Ultimately, that means the only two noteworthy differences between the AirPods Pro 2 and the AirPods 4 with ANC are the silicone ear tips and lack of Touch control. If you’re like me and aren’t a fan of those ear tips, the AirPods 4 with ANC offers far better value than the AirPods Pro 2.
Browsers can sometimes freeze when loading a specific image or playing a video. A common error message you might see is, “The media could not be loaded, either because the server or network failed or because the format is not supported.” If you’re facing this issue, we’ve compiled a list of solutions to help you resolve it.
1 Rule Out Internet Issues
First, rule out internet issues. Try playing anything else in the same browser to see if it works. If the internet is to blame, restarting the router and reconnecting the internet will resolve the issue. If that doesn’t work, you can also apply some OS-specific solutions to fix internet issues on Windows and macOS. Should nothing else work, contact your ISP.
Start implementing the below fixes when it is not an internet issue and only occurs on one web page.
2 Rule Out Server Issues
The error could be caused by a problem with the server where the video you’re playing is hosted. Open a different browser on your device and play the video there. If the video fails to play, you can try playing it on another device (if you have one) instead. If you encounter the same error on other browsers and devices, it is most likely a server-side issue.
Unfortunately, there is nothing you can do about server-related issues; you’ll have to wait until the problem is resolved.
3 Hard Refresh the Browser
Do a hard refresh in Chrome to clear any cached data that might cause the error. This will force Chrome to clear the cache and reload all resources from the server, ensuring you have the most up-to-date information. If the problem continues after the hard refresh, proceed with the other troubleshooting steps.
4 Update Chrome
An outdated browser can often lead to the issue in question. Consequently, if you keep the Chrome auto-update setting disabled, it might be time to activate it and update your browser manually.
If you are unsure if your browser is updated, click on the three vertical dots in Chrome’s top-right corner.
Navigate to Help > About Google Chrome.
If the browser isn’t updated and auto-updates are not turned off, it will automatically search for available updates and update itself to the latest version.
If Chrome is already on the latest version, you will see a message saying, “Chrome is up to date.”
The message ensures that outdated Chrome wasn’t causing the trouble. The next step would be to check whether you’re accessing the video on the webpage using a VPN.
5 Disable (or Enable) Your VPN
Even though VPNs protect your privacy, they can sometimes impede your browsing experience. So, if you’re accessing the video while the VPN is enabled on your browser, disable it. This fix also works the other way around, so you can access the video using a VPN.
Sometimes, access to specific media embeds is restricted from certain locations. Using a VPN connection will eliminate this possibility. When disabling or enabling the VPN fails to resolve the problem, it’s time to clear the browser’s cache.
6 Clear Your Browser Cache
Cache data speeds up webpage loading by storing on-site elements from the previous visit. It speeds up the browsing experience. However, having a massive cache could negatively impact browsing on low-power devices. The flip side is that refilling the cache once its contents are removed will also take time and could also make web pages feel slower.
To clear Chrome’s cache and history, follow these steps:
Click on three vertical dots in the top-right corner and select Delete Browsing Data.
Check the boxes for Cookies and other site data, and Cached images and files.
Hit the Delete data button.
7 Check for Profile-Specific Issues
In some cases, the issue can be specific to your browser profile. To rule it out, try playing the video in an Incognito window.
To open an Incognito window, click on the three vertical dots in the top-right corner of Chrome, then click New Incognito Window. Afterward, visit the same website and play the video.
If the video plays successfully this time, this suggests that the problem is profile-specific. So, log in with another profile on your browser and play the video again.
If you do not encounter any errors on the new profile, you should abandon your old profile and switch permanently to the new one. However, if switching profiles or using an Incognito window does not help, try applying the next fix.
8 Disable Ad-Blocker Extensions
Ad-blocker extensions block the advertisements on websites by directly interfering with the site’s script. Such interference can also result in some site content not loading correctly or preventing HTML tags such as <video> tag from running, resulting in the error we’re discussing. Temporarily disabling such extensions may help resolve the problem.
To disable an ad-blocker extension, follow these steps:
Click on the three vertical dots in the top-right corner.
Go to Extensions > Manage Extensions.
Find the ad-blocker extensions in the installed extensions.
Use the toggle to disable the extension, or hit Remove to uninstall it from Chrome.
If disabling ad-blocker extensions fails to resolve the issue, there are a few more things that you can try.
9 Change Your DNS Server
You may also encounter the “the media could not be loaded” error because of restrictions from your ISP. This is more likely to happen if you’re using Wi-Fi in a library or college, where administrators might have imposed restrictions.
You need to change your DNS server to eliminate this possibility. If you’re using a device running Windows, it’s easy to change DNS servers on Windows 11. And those on macOS are able to change their DNS settings on a Mac just as easily.
10 Reset Chrome
If none of the above fixes work, it’s best to reset Chrome. It will revert all the changes you’ve made to the settings so far, eliminating the possibility that customizing them is causing the problem. It will, however, revert all customizations, so you’ll have to start setting up the browser from scratch. Be aware of that risk before you reset it.
To reset Chrome, follow these steps:
Click on the three vertical dots in the top-right corner.
Go to Settings.
On the left sidebar, click the Reset Settings button.
Click on Restore settings to their original defaults.
Then click on Reset settings.
If resetting the browser doesn’t work, consider reinstalling the browser from scratch as a last resort.
11 Reinstall Chrome
Even though resetting the browser will give it a fresh start, reinstalling it will nullify the possibility of restrictions on both the browser and the OS side. But before you do that, uninstall it properly.
Follow these steps to uninstall Chrome in Windows:
Open the Windows Settings app.
Navigate to the Apps section.
In the Apps & features settings, type Chrome in the search box.
Click on it and hit Uninstall.
Similarly, you can easily uninstall Chrome on Windows 11. Uninstalling Chrome in macOS requires slightly different steps but is just as easy.
After you uninstall Chrome, grab a fresh copy of the browser and install it again. A fresh reinstall will likely resolve the issue and improve your browser’s performance.
Intel’s Lunar Lake processors have stirred excitement with promises of great efficiency and performance for thin-and-light laptops. However, there’s a limitation that is a major turnoff for many users: these laptops max out at 32GB of RAM. Let’s break down why this limitation exists and why it matters.
Why Are Intel’s Lunar Lake Laptops Limited to 32GB Memory?
The 32GB RAM cap on Lunar Lake laptops is directly tied to Intel’s design choices. Instead of traditional upgradeable memory slots, Intel has directly embedded the RAM into the system-on-chip (SoC). The integration of RAM within the SoC reduces the processor’s power consumption and lowers its thermals. Although this makes the LPDDR5X memory faster and even more efficient when compared to more traditional designs, it also physically limits the maximum amount of RAM they can embed within the SoC.
Intel claims that Lunar Lake delivers up to 20 hours of battery life due to these optimizations. However, this move leaves no flexibility for users who might need more than 32GB in the future. Furthermore, other limitations come with using SoC-embedded memory in x86 processors. These are:
No Upgradability: Unlike traditional laptops, which allow you to add more RAM as needed, this device only has the RAM configured for it. This becomes a problem if your needs grow over time.
It’s Still an x86 Processor: Apple’s Unified Memory architecture makes its ARM processors significantly more power efficient. However, Intel’s version of this design doesn’t scale as well since it’s still an x86 processor running on CISC and not RISC like a Mac. This makes the trade-off between power efficiency and performance less appetizing than Apple’s solution.
Power Users Excluded: High-end users, such as video editors, AAA gamers, DevOps, and 3D designers, often require more RAM. Even with the fast LPDDR5X memory, the 32GB cap restricts performance when handling large datasets or multitasking with memory-hungry applications.
Additionally, Lunar Lake processors have disabled hyperthreading, further limiting the overall capacity of the processor.
Many people are interested in buying these new and upcoming AI CPUs to future-proof their setup. However, Intel’s upcoming Lunar Lake CPUs are not upgradable and provide no option for higher memory configurations above 32GB. Although 32GB is perfectly fine for our current standards, as a person who runs multiple virtual machines and likes to try quantized LLMs on my laptop, it does make it harder for me to view Lunar Lake laptops as something I would buy and feel confident that I wouldn’t have to upgrade for the next few years.
What makes this a major deal-breaker for meis that Intel didn’t have to follow something like Apple’s Unified Memory architecture. The change to TSMC’s N3B process node, disabling hyperthreading on both Intel’s P and E cores, and integrating a newer and more power-efficient GPU and NPU would have been enough to deliver substantial power efficiency improvements without compromising RAM capacity.
Laptop users who invest in premium devices want them to last years. With trends in software development pushing for more resource-heavy applications, having the option for higher RAM ensures that your machine can handle future software updates and continue performing optimally. Being capped at 32GB puts Lunar Lake laptops at a disadvantage compared to systems like AMD’s upcoming Strix Point processors that can expand to 64GB or more.
Intel’s decision to cap Lunar Lake laptops at 32GB of RAM reflects its focus on making these machines more power-efficient. For general consumers or office workers, this might not be a problem. However, for power users, developers, gamers, and content creators, this limit is something many cannot overlook.
After using digital to-do lists for multiple years, I experimented with going back to paper versions.
Handwritten to-do lists prevent over-inflating tasks, leading to better focus.
Paper to-do lists complement journaling and work well for focused work tasks.
I’ve tried every productivity trick under the sun, and that includes switching from a paper to-do list to a digital one. However, I was intrigued to see what would happen if I went back to a paper list. Here’s why I’m sticking with it.
1 It’s Harder to Inflate a Handwritten To-Do List
I love digital to-do lists because typing every task you need to complete is very easy; I’ve even mentioned in the past that Things 3 is the best to-do list I have ever used. But at the same time, I’ve noticed one huge problem with digital to-do lists: I always over-inflate my list.
These are purely my observations, but I do feel like you’re more conscious of what you’re writing when you use a pen and paper. This may be because it’s more time-consuming, but I am much less likely to fill my to-do list with tasks that aren’t urgent or could be completed another day.
This has led to two key benefits. The first is that I spread out my work over a longer period; as a result, it’s easier to meet my monthly financial goals as a freelancer. Secondly, and directly correlated to the first point, is that I focus more on the essential tasks. This means that I’m more likely to choose interesting projects, and I am less likely to burn myself out by doing too much at once.
To be totally frank with you, this hasn’t been an easy shift to make. In my first few days of using a paper to-do list, I felt guilty for not taking on more than I could reasonably complete. However, it has become easier over time.
2 I Feel Less Overwhelmed
Every time I use digital to-do lists, I eventually reach a point where I start to feel overwhelmed. Undoubtedly, this feeling at least somewhat emerges from over-inflating my list.
You can do several things to build a more effective to-do list, but I sometimes find that the easiest thing for me to do is simply write out what I need to on paper. Not everyone will have these same feelings, but if you do, it might be time to revert to a paper to-do list.
3 I Focus Better When I Use a Handwritten To-Do List
Another big problem I identified with digital to-do lists is that I am much more prone to procrastination when I use them. Part of me perhaps doesn’t take the tasks as seriously, and I also think that being more conscious about what you’re handwriting—as I mentioned earlier—helps to some extent.
For whatever reason, I find it much easier to focus when I handwrite. It’s the same reason that I prefer to read paper books instead of listening to an audiobook or reading it on a Kindle. Ditto for paper journaling vs. digital journaling. While technology can undoubtedly help us streamline areas of our lives, analog is sometimes the best option.
4 There’s Less App Switching
I have become a lot more conscious about app-switching and multitasking since reading Deep Work by Cal Newport (and on that note, here are some of my tried and tested tips to get deep work done). I’ve tried downloading desktop apps, using the web version, and using apps on my iPad—and each time, I’ve eventually resented having to check yet another app.
One of the best findings from my paper to-do list experiment is not having to endure app-switching on the same level as before. Instead, I have my notepad open and can just tick off the most recent task I’ve completed. I’d be lying if I said that my brain fog was completely gone at the end of each day, but it’s certainly less than before.
Even if you use all-in-one productivity apps, I still encourage you to try a paper to-do list and see if it makes a difference.
5 I Cross-Reference Paper To-Do Lists With My Journal
For the most part, I’ve been journaling regularly since late 2019; of all the self-improvement habits I’ve added to my life, none have had a greater impact. I like journaling mainly because I can see what I was thinking and feeling at a specific point in time and understand why that was the case.
I didn’t expect this to happen, but paper to-do lists indirectly benefited my journaling habits. When you use a digital to-do list, you can often see your completed tasks in an archive—but to be completely honest, I never checked them. So, when they were off my screen, I stopped caring about them.
This was an issue for two reasons. The first is that I couldn’t figure out whether I was actually being effective. But the second is that it makes checking items much easier, even if you didn’t complete them. You can do this on paper as well, but the fact that you’ve lied to yourself is staring you in the face.
Now, I can use my to-do lists to look at what else was happening in my life at any given time. Moreover, it allows me to work more effectively based on the goals that I set for myself.
6 Is There a Case for Digital To-Do Lists?
It’s pretty clear if you’ve read this far that paper to-do lists just seem to work better for me (in most cases). However, please don’t take this as me dunking on to-do list apps; I actually think digital to-do lists have their place in many people’s lives. Here are the three main scenarios in which I think you should use digital to-do lists.
1. When You Want to Create To-Dos for All Areas of Your Life
One of the reasons I rate Things 3 so highly is because you can organize each area of your life. This was a game-changer compared to many alternatives I had tried, where categorization wasn’t so simple.
If your to-do list isn’t solely related to work or studying tasks, a digital to-do list might be a good idea. Alternatively, you can use a digital to-do list for your personal life and a paper to-do list for your work-related tasks. Organizing tasks in TickTick is one way to do this.
2. If You’re Forgetful
When it comes to running errands, I can be incredibly forgetful. In the past, I’ve just told myself the “this is just who I am” story. But at some point, I started to get really annoyed about this and look for a solution. While I absolutely don’t want to use a digital to-do list for my work-related tasks, it is actually quite useful for running errands.
If I have a lot of things to do on a Saturday (e.g., getting a haircut and doing my shopping), putting these in a digital to-do list on my phone is the best way to ensure I don’t forget them. I normally put them in Todoist and add the widget to my screen. You can even set up recurring tasks in Todoist for weekly errands.
Similarly, I don’t use paper shopping lists. Instead, I outline what I need to get in Apple Notes.
3. If You Want to Add Multiple Sub-Tasks
Another limitation of paper to-do lists is that it’s more difficult to add multiple sub-tasks. So, if you’re working on a big project, you might want to use a digital to-do list.
To use my own life as an example, I’d recommend using a tool like Things 3 to outline what you need to do over the course of a month or in the longer term. Then, you can break these down further each day with paper to-do lists. This should give you a better overview.
While digital to-do lists have their place, I am much happier and more productive when I use paper to-do lists for my work tasks. This experiment led me to several conclusions that I already knew, and it’s something I recommend doing yourself. It might not work for you, but it certainly did for me.
If “Tile” doesn’t ring a bell, don’t fret. For the past few years, it’s been crickets from the Bluetooth tracking technology company. While AirTags have stolen the lost-item-tracking thunder, Tile is coming back swinging with four renewed devices which double as personal safety devices.
In addition to helping you find lost items, Tile’s upgraded trackers will also incorporate an SOS alert feature. This is courtesy of Life360, a location safety app that acquired Tile in 2021. According to Tile’s press release, clicking your Tile device three times will trigger a silent alert to your emergency contacts. Of course, it’s easy to see how this could be vital in dangerous situations where you might not be able to make a call.
Tile announced that its four new trackers are now available for purchase. Their price tags depend on features like Bluetooth range and size:
While the Mate and Pro models are designed to attach to keys, backpacks and other bulkier items, the Slim and Sticker can slide into wallets and adhere to “loseables,” respectively. All are water-resistant and produce a ringing sound to help you locate your lost items when in range. Tile trackers are all integrated with the Life360 app, which operates like Apple’s Find My Friends, so you can spot your missing stuff on a digital map. The Tile Pro also boasts the longest Bluetooth range at 500 feet. That’s a 100-foot jump from its older version, earning it the highest dollar amount on the menu.
Additional Safety Comes at a Price?
While all new Tile models feature the SOS alert capable of reaching your friends and family, you can also pay for a subscription with Life360 for that alert to go to a third-party dispatcher. This dispatcher will then coordinate with local medical and law enforcement personnel to get you efficient help. That subscription is tiered:
So, if you’re a Platinum member, do you receive your emergency care faster than a Gold member? It’s not quite as simple as that. According to Life360’s website, a Platinum subscription may offer higher reimbursements for stolen assets, but the same emergency dispatch services appear to be included in both tiers.
The Future of Tracking and Safety Services
Putting a price tag on emergency care seems a little dystopian to me, but perhaps I’m overthinking. It is, after all, a specialty service to supplement existing national or regional emergency systems. Still, you’d hope everyone would have equal access to emergency care regardless of income. But this is not necessarily Tile’s societal problem to solve.
Despite the capitalism rant, the release does deliver wider access to location tracking technology. When comparing Apple’s AirTag with Tile, a key difference is that the latter is compatible with both iOS and Android devices, democratizing location and SOS services. Maybe, the release will even inspire some evolution to Apple’s AirTags in the future. Tile’s discreet safety feature could be a truly life-changing upgrade—as long as you don’t lose your tile that’s attached to, you know, that thing you always lose.
CapCut’s AI tools make video editing easy, including text-to-speech and long video to short-form converter.
Many of CapCut’s AI tools are available for free users, such as Smart Templates and Smart Ads generator.
Smart Ads and Smart Templates in CapCut save time in the video creation process, especially for advertising and trending audio videos.
CapCut is the best short-form video editing tool around. But with the addition of its AI editing tools, it’s my go-to video editor, and it should be yours too.
CapCut is my go-to video editing app, especially when creating short-form videos on my iPhone. I prefer the app over its desktop version, as more tools are available on the mobile app. The AI tools are harder to access—and sometimes not available—on the desktop app, but they are on CapCut’s browser version.
CapCut has lots of AI tools and features to make your video editing easy. There’s the text-to-speech tool which lets you choose voices and even languages for narration. You can edit using your video’s transcript which allows for more precision. And the long video to short-form video converter is another great way to create short-form videos with CapCut’s AI.
The AI tools in CapCut’s platform are helpful, not gimmicky, and save time in the video editing process. There are some fun features like image editors that allow you to add stickers or text effects to your videos, too, but overall, CapCut’s AI video tools make sense to use and lots of them are free.
Download: CapCut for iOS | Android (Free, in-app purchases available)
Ruby Helyer/MakeUseOf
CapCut is a freemium tool which has loads available for free users to make you wonder if CapCut Pro is even worth subscribing to. Many of CapCut’s AI tools are available on the free plan, something not many creative programs offer.
The huge number of AI tools makes it hard to decide which ones are actually good, but the good ones are AI tools worthy of using in real-world situations. CapCut’s Smart Templates and Smart Ads generator are two of the best free tools, especially for creating short-form videos.
While there are some AI tools only available on the Pro plan, here are some of the great free AI tools:
Script to video
Smart Ads
Transcript-based editing tool
Text-to-image
AI poster maker
AI model
The Pro AI tools are worth considering investing in CapCut Pro. With the Pro plan you can use the CapCut teleprompter when filming, have access to more AI effects for your images, and translate videos. Another great Pro AI tool is the Relight feature, letting you add dynamic lighting to your video—for relighting images, you can use the Relight feature in ClipDrop for free.
Many CapCut Pro features let you utilize the free AI tools to their fullest, such as detecting all filler words in your speech—which is free—but then using the Pro feature to delete them all in one fell swoop. The same can be said for using AI to create captions from your transcript—free—but you need the Pro version to make the captions look fun and interesting.
Depending on your region, you may see some different Pro or Free features than other regions. And sometimes tools are not always available on the desktop app compared to the browser or phone app.
How I Use CapCut’s Smart Ads Generator
CapCut’s Smart Ads generator is a feature to create adverts quickly, without spending a day filming, or needing to write a script. Strictly speaking, you don’t have to use this for commerce adverts, but that’s the intention. The Smart Ads generator is great for advertising your TikTok Shop products; it integrates directly with Amazon, Shopify, and TikTok Shop.
You can access this tool from the phone app via Smart Ads and from the browser version under the Magic Tools section, named One-Click Video Creation. The feature works the same on both the phone app and browser version, despite the different names.
Create a Smart Ad
Once the tool is selected, add the product information for your advert, such as the URL, so viewers can access the link to buy the advertised product. Add your media of videos and images. Then add the product information, including the product’s name and any features it has. CapCut’s AI can suggest features if you’re unsure.
Then you can add information about the brand selling the product: the brand name and target audience. Finally, add the price of the product, any promotional details you want the video to focus on—like a 50% discount—and choose the duration of your video.
Select Confirm and Generate, and after a few seconds, you’ll have a variety of videos to choose from based on your prompt information.
You can easily change text (and the AI model’s narration), switch out video or images, change the duration, and more. The Smart Ads function saves a bunch of time in the creation process, and allows you to focus on fine-tuning your perfect video ad.
How I Use CapCut’s Smart Templates
I use CapCut’s Smart Templates all the time when creating short-form videos for my social media. It works great when creating videos with trending audio when I don’t want to spend the time splitting, cutting, and editing my video sections.
The Smart Templates are like regular Templates, but they use AI to analyze your video input and create the best-timed video output with the audio in the template. You can either search “smart templates” in the search bar of the Templates page, or you can scroll through any of the templates and look for the Smart Templates sparkly diamond icon in the top left corner.
Create a Smart Template Video
Once you’ve found the Smart Template you want to use, select it to preview the template video, and then select Use Smart Template. Choose all the video clips you want to apply to the template and write a description of your video under the selected clips. You can also select the duration or use the default duration CapCut creates. Once all that is chosen, select Preview.
Once the preview is complete, you can edit things manually. The media, audio, or text can all be edited individually, or you can head to the Go to Edit button to edit everything in one place.
The text can be edited in multiple ways. You can change the wording—the AI may not have generated fitting text—the timing, how often and where the text displays throughout your video, and, of course, you can change the font, style, and color of the text.
The video clips are set to the audio, but they can both be edited. Whether you want to replace, remove, or lengthen the clips, you can. If you change the timing of the clips, it may no longer match the audio CapCut’s AI set your video to. This warning goes for changing the audio too; if you want the clips to transition to the beat, it’s best to leave the audio and clip length as they are.
Once you’re happy with the video, select Export. Depending on your export choice, you may have the CapCut logo watermarked on the top corner. If you export as a TikTok video saved to your device, you can avoid the watermark—and you don’t have to upload it to TikTok.
As someone who isn’t heavily into the short-form video trend, I do occasionally create these videos for my personal and professional social channels. CapCut is always my go-to video editing tool and using its AI video features saves me so much time and stress, whether the videos are just for fun or professional purposes.
Laptop batteries degrade over time and lose their capacity, resulting in less uptime. I faced the same situation with my ASUS laptop, but after tweaking some deeper Windows 11 settings, I witnessed a massive improvement in battery life. I’ll share them below.
1 Tweak Power Mode
Power mode in Windows 11 indicates your device’s use of the available resources. Ideally, you must set it to Balanced or Maximum performance (if you have an AC adapter connected).
But these two modes won’t help improve battery life. Navigate to Settings > Power & battery > Power mode. Select Best power efficiency from the dropdown to conserve your laptop’s battery life.
2 Enable Battery Saver or Energy Saver
Battery Saver will force your Windows PC to stop background activities, updates, sync, and other OS elements that consume system resources and aggressively drain the battery.
Press Win + A to open the Quick settings. Then click the Battery Saver icon to enable the feature. However, you can access more granular controls by following these steps:
Go to Settings > System > Power & battery > Battery saver.
Choose a battery percentage level option (10, 20, 30, 40, 50 percent, or Always) when the battery saver should auto-enable.
Select the Lower screen brightness when using battery saver option to reduce the screen brightness to 20 percent.
The 20 percent brightness level isn’t applicable in every scenario (like outdoors). You can skip this option and set the brightness manually.
Microsoft rebranded Battery Saver to Energy Saver in Windows 11 24H2.
3 Lower the Display’s Refresh Rate
High-refresh rate displays that are available on mid and high-end laptops consume more power. When battery life is a priority, you don’t need the best visual experience the display can offer. It’s better to lower the refresh rate by following these steps:
Open the Start menu, type advanced display settings, and hit Enter.
Click the dropdown next to Choose a refresh rate and select 60Hz.
This small compromise in visual fidelity will help your Windows 11 laptop last longer.
Some OEMs bundle an app—for example, Armoury Crate on my Asus TUF laptop—which automatically lowers the refresh rate when using battery power. In such cases, you don’t need to reduce the refresh rate manuallly.
4 Change Screen and Sleep Settings
Screen and sleep settings can help you save battery when you’re not using your laptop (even briefly). You can define an interval after which the display powers off or the computer enters sleep mode by following these steps:
Press Win + I to open the Settings app and head to System > Power & battery > Screen and sleep section.
Pick an appropriate duration (3 or 5 minutes) for the On battery power, and turn off my screen after option.
Select a time limit (5 minutes or more) for the On battery power, put my device to sleep after option.
5 Disable Startup and Background Apps
Startup apps reduce battery life because they start running the moment you log in to your PC. To disable them, visit Settings > Apps > Startup section. Turn off the toggle next to apps that you don’t need.
For example, you can disable game clients and collaboration apps like Microsoft Teams, third-party apps, etc. Don’t turn off the touchpad or display apps.
While Battery Saver takes care of background apps to some extent, Microsoft states that some apps or their features (notifications or updates) continue to run in the background. To turn these off, you must first identify the power hogs.
Remember that only some apps have an Advanced Options page that lets you change the background permissions. You can follow these steps for those apsp:
Type Power & battery in the taskbar search box and press Enter.
Click the View detailed report option.
Then, click the ellipsis icon and select Manage background activity.
Go to the Background apps permissions section and select the Never option.
Now, the app won’t run in the background, and you won’t get any notifications.
6 Modify Video Playback Settings
You can lower video playback settings in Windows 11 to boost battery life. Go to Settings > Apps > Video playback and set Battery options to Optimize for battery life.
If your laptop has an HDR display, Windows will turn the feature off on battery power. However, if it doesn’t have an HDR display and you use the HDR streaming option, you must configure it. Here’s how:
Open the Settings app and navigate to System > Display > HDR.
Set Battery options to Optimize for battery life.
Disable the HDR video streaming option for maximum savings if you don’t need it.
7 Configure Graphics Settings for Apps
If your laptop has a dedicated GPU, you can force the apps to use the integrated GPU (part of the CPU) to save power. Here’s how:
Search for graphics settings in the taskbar search box and press Enter.
Click on any app on the page to reveal the additional settings.
Click Options, select Power saving, and hit Save.
You might have to restart the app to apply the changes.
8 Adjust Windows Search Indexing Settings
Windows builds a search index in the background to help you find items faster. But you can force the Indexing feature to take a backseat while using battery power. Here’s what you need to do:
Press Win + S, type Windows Search settings, and hit Enter.
Enable the toggle next to Respect power settings when indexing.
9 Use Power Saving Mode in Browsers
Browsers are indispensable tools for most productivity tasks you do online. Be it reading or editing documents, researching, conducting virtual meetings, etc. But browsers consume a lot of power and memory while doing so.
However, Edge and other popular browsers have power-saving features that can extend your laptop’s battery life. Edge is a fantastic choice for saving power on Windows laptops due to its efficiency mode and sleeping tabs feature.
Similarly, Chrome has a built-in Energy Saver mode that lowers the background activity and visual effects. All these features will force the browser to gulp less battery.
10 Experiment With a Custom Power Plan
You can create a custom power plan in Windows 11 that adheres to your battery-saving requirements. By doing so, you can control the processor power management, display and sleep settings, wireless adapter settings, and more. However, you’ll have to do a lot of tinkering to understand what settings work for your use case.
It’s a bit complex to set up and is useful only if you want to leave no stone unturned to maximize battery life on your laptop. You can also check the battery report on Windows to understand your laptop’s battery capacity and whether it needs replacement.
Overall, with these settings tweaks, you should be able to get your Windows laptop to last much longer on battery power. But if none of these tips made a noticeable impact, it’s probably time to replace the battery or upgrade your laptop altogether.
Google has made immense progress in establishing the Pixel as a mainstream phone and setting itself apart with its novel software features and design. However, every time I’m tempted to switch to a Pixel, some of these vital features on my Samsung phone make me reconsider.
1 Modes and Routines Help Me Automate Everything
I’ve come to use Modes and Routines so often that I don’t think I can switch to a phone that doesn’t offer at least an equivalent feature. I use it when I go to bed, head out for my walk, stream video, during work, and automate phone functions that are annoying to turn on every time.
Here’s a short glimpse of the routines I’ve set on my phone and what they do:
Bedtime: Starts manually; reduces brightness to 5%; turns the display to Grayscale; enables Extra dim, Eye comfort shield, Power saving, and DND.
Going out: Starts manually; disables Wi-Fi and Dark mode; enables Mobile data, Bluetooth, Location, and Dolby Atmos; plays my Spotify playlist.
Bluetooth: Starts automatically; enables Bluetooth when opening apps like YouTube, Netflix, Disney+, Spotify, Google Meet, and Zoom.
Location: Starts automatically; enables Location when opening apps like Google Maps, Uber, Weather, and Play Store.
Wi-Fi strength: Starts automatically; enables Mobile data when Wi-Fi strength drops to two bars or lower.
To be fair, Pixel phones have their own automation feature called Rules, but its functionality is so basic and limited that I doubt if Pixel users actually use it.
Similarly, there are automation capabilities integrated within Google Assistant as well, but when I compared Modes and Routines with Google Assistant Routines, the latter fell short.
2 Edge Panels Allow Me to Multitask Like a Pro
Much like Modes and Routines, I use Edge panels almost constantly. If you’re not aware, Edge panels are customizable app drawers you can pull out from the side of the screen. Their most common use is reaching your favorite apps faster via the “Apps” panel.
You can even add app pairs to launch them simultaneously in a split-screen view; for instance, you can open Google Sheets and Calculator together to do quick calculations while planning your monthly budget.
I’ve customized Edge panels to do a lot more. My phone has a panel for apps, weather, reminders, and a third-party calculator. I also have a panel for app shortcuts that I use to set timers, add new text notes in Google Keep, start voice recordings, and view my recent files.
All of this can seem a bit excessive, but once you get the hang of it, it becomes second nature and makes getting stuff done on your phone much faster. Pixel phones don’t have this feature, so you have no choice but to exit the app you’re currently in every single time to perform another action.
3 I Can Create a Custom Sound Profile Fit for My Ears
I’m a tiny bit hard of hearing in one of my ears, which makes listening to music and watching movies less enjoyable. On non-Samsung phones, I often find myself having to go to the accessibility settings and adjust the sound balance to my liking, and I have to do this every single time. It’s annoying.
Samsung phones have a feature called Adapt Sound, which allows you to create a personalized sound profile by taking a short hearing test. Your phone calibrates itself based on these test results, adjusting the sound balance and boosting certain frequencies to fit your ears.
4 Samsung Good Lock Is a Customization Powerhouse
Customization is a big deal for me, and I think Samsung’s implementation on Galaxy devices is simply unparalleled, thanks to Good Lock. It’s a customization app containing downloadable modules that allow you to modify different parts of the user interface and provide additional utility.
On my phone, I use three Good Lock modules for the following uses:
Home Up: remove app icon labels, change the grid layout of the app drawer, and change the layout of the Recents screen (aka Task Change in One UI)
Theme Park: apply a third-party icon pack without downloading a third-party launcher
Nice Shot: add a delete button to the screenshot toolbar to instantly delete unwanted screenshots
If you’re curious, you can learn how to use Good Lock on Samsung phones and download the app from the Galaxy Store.
5 Fingerprint Scanner Works Even When the Display Is Off
I’ve set my phone to always keep the fingerprint print scanner active, even when the display is off. This way, I don’t have to first press the power button to go to the Lock screen and then tap the scanner to unlock my phone and see the Home screen; I can unlock my phone directly and skip past the Lock screen.
This might seem trivial, but think of the number of times in a day you lock and unlock your phone. If you’re like me, it’s probably close to a hundred times or more. Knowing that, the few extra seconds you save with every unlock are totally worth it.
Many popular apps aren’t designed for any orientation other than full-screen. This isn’t a big deal most of the time, but it hinders multitasking nonetheless. However, Samsung phones can force any app to open in a split-screen or pop-up view. You can even access pop-up view while having apps opened in split-screen mode. I do this mainly when I’m studying and need to switch quickly between different apps.
On Pixel, this feature is called floating windows, which you have to enable via Android developer options. From what I gathered from Pixel users complaining on subreddits and forums, its implementation simply isn’t good enough to be actually reliable.
Unless Googled replicates at least some of these features on its Pixel phones, I can safely say I won’t be switching anytime soon. I love what Google is doing with the Pixel, but for me, utility surpasses “nice-to-have” AI features.
I’m really excited about the release of Apple Intelligence, but I believe there’s plenty of room for improvement. Apple could add several features to make it even better. Here are my ideas on what could take Apple’s suite of AI features to the next level.
Apple Intelligence offers just one major image-editing feature called Clean Up, which is similar to Google’s Magic Eraser, allowing you to remove unwanted objects from photos. While it’s a welcome addition, it doesn’t feel groundbreaking, especially since Google and Samsung have offered similar tools for quite a while now.
Beyond Clean Up, Apple Intelligence offers very little in terms of photo editing tools. In contrast, the Google Pixel 9 has many amazing AI features, like Add Me, which ensures everyone is included in group photos, or Reimagine, which lets you replace parts of an image just by describing it with a text prompt. It would be great if Apple could take inspiration from Google and introduce similar features.
As someone who isn’t very skilled at editing photos, I’d love a feature that lets me generate filters based on a text prompt. I could describe which colors I want to stand out more or the kind of vibe I’m aiming for, and the AI model would create a filter to match that description.
Apple also introduced a new app called Image Playground as part of Apple Intelligence, allowing users to generate images from a text prompt in three different art styles: Animation, Illustration, and Sketch. It integrates smoothly with apps like Messages and even third-party platforms. While the implementation is well done, I’m not a fan of the results.
The art styles feel too cartoonish for my taste, and I can’t see myself using Image Playground to create images and send them to friends or family. Although the model works well for Genmojis, which lets you create completely new personalized emojis via a text prompt, there should be more realistic art styles available.
One possible reason for this is that the image diffusion model runs on-device for better privacy. However, I wouldn’t mind a more realistic image generation model that runs on Apple’s Private Cloud Compute to handle the higher computational demands, which also deletes all your data after processing your requests.
3 Call Screening
One of my favorite features on the Google Pixel is call screening, where Google Assistant answers calls for you and provides a live transcript, helping you decide whether to take the call. It can even pick up calls from unknown numbers for you, and if it detects that it’s a robocall or a spam call, Google Assistant will automatically hang up the call without ever bothering you.
It would be great if Siri could do something similar and generate automatic replies based on context. For example, if your iPhone knows you’re out, Siri could automatically ask a delivery person to leave the package at your door.
Unfortunately, Apple Intelligence is currently limited to generating a transcript and providing a summary of a phone call, but this is an area Apple should consider expanding into.
4 Better Live Translation Features
Zarif Ali/MakeUseOf
While you can use the built-in Translate app for basic tasks, like typing text and having it read aloud in another language, I can’t help but feel Apple Intelligence could contribute much more.
What I’d really like to see are real-time translation tools that work system-wide. A great example is Samsung’s Live Translate, which can transcribe and translate conversations in real time during phone calls. Google also offers similar features that work seamlessly across multiple apps, with all the processing happening on-device.
Since both Samsung and Google have already implemented this, and their models run efficiently on-device, I don’t see why Apple hasn’t focused on translation features with Apple Intelligence.
Although Siri is getting a major upgrade with features like on-screen awareness, it still might not handle every request. To fill those gaps, it uses ChatGPT as a fallback to generate responses or answer questions about photos or documents.
While ChatGPT is great, I wish I could choose which third-party LLM I want to use, similar to how you can change your default search engine. We’ve already seen ChatGPT alternatives that excel at specific tasks. It would be even better if users could set preferences for different tasks; for example, automatically using Claude for image-related questions but switching to Gemini or ChatGPT for text generation.
So, these are the features I’d love to see on Apple Intelligence. That said, there’s still plenty to look forward to as we see how Apple’s AI suite stacks up against Google’s and Samsung’s offerings. Although not publicly available, you can try Apple Intelligence in the iOS 18.1 and macOS 15.1 betas. Just remember that your experience may not be entirely stable, as these are still early experimental builds.
Samsung makes some of the best Android phones on the market, thanks to the polished One UI experience and excellent software support. As a long-time Galaxy phone user, though, I now change some settings and set up several features before I start using it.
1 Enable Navigation Gestures
Google moved away from the three-button navigation bar with the release of Android 10 in September 2019. For reasons best known to Samsung, the company continues shipping its phones with the navigation bar enabled by default. Worse, you don’t even get the option to switch to navigation gestures during the initial setup process.
Typically, the first thing I do after setting up a new Samsung Galaxy phone is to switch to navigation gestures. Follow the steps below to learn how:
Open the Settings app on your Galaxy phone and navigate to Display.
Scroll down and tap Navigation bar. From the page that opens, select Swipe gestures.
To tweak the gesture sensitivity, select More options, and then, depending on your preference, drag the Gesture sensitivity slider to the left or right.
You can also enable or disable the Circle to Search and Assistant app gestures from the Navigation bar settings page.
2 Display More Information on the Screen
Despite packing big, beautiful, and high-resolution displays, the on-screen information density on Samsung phones is woefully low. For example, compared to a Pixel 8 Pro, the Galaxy S23 Ultra shows less content on-screen despite packing a slightly bigger and higher resolution screen. Thankfully, changing the Screen Zoom level helps alleviate this problem to a large extent.
Navigate to Settings > Display on your Galaxy phone.
Select the Screen zoom option and then move the slider to the extreme left. This will reduce the size of the on-screen content, allowing the display to fit more content than before.
If the minimum option is still not good enough for you, enable the hidden Developer options menu on your Galaxy phone. Then, go to Settings > Developer options and scroll down to Minimum width. The default value should be 411. A higher value will allow your Galaxy phone to display more information on-screen. Typically, I enter a width between 435 and 449 on most Galaxy phones. Don’t go higher, as it can cause UI scaling issues.
3 Use Good Lock for Additional Customization
Samsung’s One UI skin offers plenty of customization options. However, the Good Lock app allows you to take things to the next level by unlocking experimental features and options. The app itself doesn’t do much; you must download relevant Good Lock modules for this.
Using modules, you can customize the lock screen and the navigation bar, add new triggers to Modes and Routines, and unlock new multitasking features. Check out the best Good Lock modules for customizing your Samsung phone.
Given how powerful Good Lock is, it’s among the first apps I download on a new Galaxy phone to unlock additional features and customization options. There are several other ways to customize a Galaxy phone, but Good Lock stands out with its powerful options.
4 Reduce Shutter Lag Using Camera Assistant
Zarif Ali / MakeUseOf
A major problem with all Samsung phones launched in the last few years is the shutter lag in the Camera app. There’s a noticeable delay in the phone taking a picture after you press the shutter button. One reason for this is that the phone takes a picture when you lift your finger off the shutter button, not when you press it.
This is why Camera Assistant is among the first apps I download and set up on a new Galaxy phone. It allows you to shoot better photos on a compatible Galaxy phone. Available as a Good Lock module, it features an option to reduce the shutter lag.
While Camera Assistant won’t entirely eliminate the shutter lag and slow shutter problems on Samsung phones, it will reduce them to a large extent.
Open the Good Lock app on your Galaxy phone and select Camera Assistant. Download the module if you haven’t already done so.
Enable the toggle next to Quick tap shutter. If your phone takes a lot of blurry and out-of-focus images after enabling this option, enable the Prioritize focus over speed option too.
The next time you open the Camera app on your Galaxy phone and press the shutter button, it will take a picture almost instantly.
5 Enable Notification Categories
Zarif Ali / MakeUseOf
Notification channels are one of the best parts of Android. Also known as notification categories, they allow you to restrict specific types of notifications from apps. For example, you can use them to block unwanted marketing notifications from an app while still receiving other notifications.
For some strange reason, though, Samsung ships newer Galaxy phones with notification categories disabled by default.
Given how useful notification categories are, it’s among the first features I enable on a new Galaxy phone. Here’s how:
Open Settings > Notifications > Advanced settings on your Galaxy phone.
Enable the Manage notification categories for each app toggle.
After this, you can manage an app’s notification channels by long-pressing on its notification, tapping Settings, and selecting Notification categories. From the page that opens, turn off notifications for unwanted categories.
6 Switch to Adaptive Battery Protection
Starting with the Galaxy S24 series, Samsung promises up to seven years of OS and security updates for its flagship phones. This means you can use the phone for a long time. And so, it’s important to keep the battery in good condition as well.
Most Galaxy phones deliver great battery life, and since I charge my phone overnight while asleep, I switch the battery protection to Adaptive mode to extend the cell’s lifespan.
In this mode, my Galaxy phone will automatically stop charging once the battery level reaches 80% while I am asleep. Based on my sleep schedule, the phone will switch back to Basic mode, filling the battery to 100%. This ensures I start the day with a 100% battery while also extending its lifespan during overnight charging.
Follow the steps below to enable Adaptive Battery protection on your Galaxy phone:
Navigate to Settings > Battery > Battery protection.
Enable the feature’s toggle and select Adaptive mode.
Adaptive mode will help increase the lifespan of your Galaxy phone’s battery without compromising on its overall runtime.
Phone Link bridges the gap between Android phones and Windows PCs. The companion Link to Windows app comes preloaded on all Samsung Galaxy phones and mirrors your incoming notifications, photos, screen mirroring, and more to your Windows PC. High-end Galaxy models also get exclusive access to features like Instant Hotspot.
After logging into the Link to Windows app with your Microsoft account, check out these hidden Phone Link tricks for instant file sharing, copying text from photos, and cross-device copy and paste.
In addition to all the things mentioned above, I also change several settings on a new Galaxy phone for the best experience. This includes blocking ads, switching to Google Password Manager for autofill, and enabling floating notifications.
Normal speed saves phone battery by minimizing screen interactions.
Streaming at regular pace may prevent longer buffering on slow Wi-Fi.
Watching at normal speed enhances audio comprehension and avoids silliness.
I used to breeze through YouTube videos at 1.5x speed, thinking I was optimizing my time. But recently, I hit pause on the speed toggle. Slowing down to normal speed has changed the way I consume content—it’s not only personally rewarding, but it’s also given me some unexpected benefits to how I utilize my tech.
1 My Phone’s Battery Doesn’t Drain as Fast
You might think I’ve got it the wrong way around, that watching videos at normal speed (and therefore longer lengths) would use more battery power. But that’s not true.
At 1.5x speed, I sometimes missed things, forcing me to rewind by double-tapping multiple times throughout a video. That frequent interaction with the screen drained my iPhone’s battery faster than just letting it play at normal speed. I hardly need to touch the screen to rewind when watching at regular speed, and this hands-off approach makes my battery last a bit longer.
Tracking exactly how much longer proved to be difficult because the number of times I’d hit the screen varied depending on the content, and there were also other variables. But I’d say it averaged out to 3-5% extra battery drainage per hour of watch time at 1.5x speed. Perhaps this doesn’t sound like much, but it could be all it takes for your phone to die on you during an important call.
Keep in mind that my overall battery capacity is 79%, so I’m not working with the strongest equipment here. But that’s exactly why doing things that save my iPhone battery is worth it.
2 Smoother Streaming on Slow Wi-Fi
Like probably every household, our Wi-Fi gets a bit slow sometimes. Depending on the device you’re watching on, the quality you’re watching at, your Wi-Fi’s speed, and your server, among other factors, streaming YouTube videos at 1.5x speed may not be an issue for you at all—or it may even load faster.
I haven’t observed this happening on my iPhone or Android phones, but whenever the internet gets slow, streaming at faster speeds on my PC does result in longer buffering than streaming at normal speed. I couldn’t tell you why; not even Reddit could help me find an answer—I’m betting on buffer speed simply being unpredictable.
Whatever the cause, if streaming YouTube videos at the normal speed allows me to avoid long buffer times and interruptions when the Wi-Fi acts up, that’s a win.
3 Better Audio Quality and Comprehension
I’m not talking about the technical aspects of audio quality such as distortion or pitch. YouTube adjusts the pitch to differing playback speeds using a technique called time-stretching, so the pitch is unaffected anyway.
I’m talking about the value you’re getting from what you hear. As I mentioned, watching at 1.5x speed meant I sometimes missed important nuggets, but rewinding every single time was counterproductive—might as well watch at normal speed at that point.
So there’s no doubt that I misheard things, or just missed them entirely. Watching YouTube videos at normal speed allows for much better comprehension; the same is true when you stop listening to podcasts at 2x speed.
You get used to the appearance of a faster playback speed without even realizing it. It wasn’t until I streamed a movie (at normal speed) on Netflix and headed to YouTube right after that I realized just how ridiculous the 1.5x playback speed looks.
This contrast between fast-moving YouTube videos and normal-paced content elsewhere, or even watching real life move by at a normal pace, was starting to do my head in. I actually subconsciously started reaching for the playback button in real scenarios to speed things up, like when waiting for my food in the microwave. It was time to un-fry my brain by learning how to live in the moment.
Now, whenever I test out the 1.5x playback speed, or even faster, I can only laugh at myself for thinking it looked or felt good. Saving five minutes of watch time is not worth losing my perception of time.
Slowing down YouTube videos to the pace they’re meant to be watched has given me a new appreciation for the content I consume, plus I’m able to catch more nuances. Watching YouTube videos at any rate faster than 1x might be doing yourself a disservice.
Having been an active Instagram user, I decided to stop posting photos for a year.
In the process, I deleted my old account.
Several reasons led to this, such as burnout and a lack of creativity.
Instagram is the go-to place for photography, and you have to be on there as a photographer… right?
Well, I wanted to find this out for myself. Here’s why I stopped posting photos on Instagram for a year, which included permanently deleting my old account.
1 I Constantly Felt the Pressure to Post
This one is quite strange because I thought I had nixed this habit when taking my first lengthy break from Instagram in 2020. I was fine for a few years, but eventually, I started to play the “influencer” role (even though I had never previously enjoyed doing so). The primary reason why was because I started to take my photography more seriously, and—subsequently—post more frequently.
This started innocently enough, but eventually, it felt like I had to post a certain number of times each week. If not, the algorithm will forget about me… right? Blatantly ignoring that all of my posts got better engagement when I posted less frequently, but I digress.
The pressure to post was purely internal. I’m certain that most of my followers would not have cared if I didn’t post a photo for a few weeks or even a few months, and speaking from my perspective, I’d rather follow someone who posts higher-quality content less frequently (more on this later).
If you’re starting to feel like you have to be online, I strongly recommend quitting all social media for a while.
2 I Became Disillusioned With Instagram’s Changes at the Time
When I decided to stop posting my photos on Instagram for a year, it was around that time when the app was making major changes. Reels had become the priority, and I noticed a significant drop in engagement on my photos. This move disgruntled me because I mainly joined Instagram to post pictures. Heck, I even jumped on the short-lived “switching from Instagram to VERO” bandwagon.
I also class myself as the type of person whose actions should match their beliefs. The simple matter here is that if you don’t like what a social media platform is doing, you don’t have to use it. I was no longer enjoying the Instagram experience, so it felt like checking out was the best thing to do at that time.
3 I Was Wasting Time
When I first started thinking about not posting on Instagram, it mainly came from me wasting my time on the app. This wasn’t necessarily about scrolling, although that was part of it. More specifically, the strategic aspects of posting on Instagram consumed more of my bandwidth than they should have.
I take responsibility here, but it always felt like I had to post an interesting caption—even though the reality is that I’d rather have just posted my picture and then left the app. Copywriting took hours, and I would waste a lot of time thinking of captions just because I wanted to post something.
Soon after my decision to stop posting on Instagram (and delete my account), I instantly felt a surge of creativity. My photography skills have never accelerated as quickly as they did during that period; if you want to get better at taking pictures, spending all your time creating an Instagram strategy isn’t going to do that.
If you’re using Instagram for any other creative project, I can categorically tell you that you’re better off focusing on a higher-leverage task. For example, I run a travel blog. As you can see from my all-time statistics below, I get very little traffic from Instagram.
4 I Was Always Rushing My Edits
Many photographers hate editing, but I am not one of them. I love fine-tuning my pictures to look exactly how I want them to. If you look at my Instagram account these days, you’ll notice that I normally don’t upload my pictures until months after taking them.
I don’t edit immediately because a) I take so many pictures, and b) I want to create some distance to edit with a logical mind. While posting frequently on Instagram, I always rushed my edits. The results were sloppy, and I hated how they looked.
I actually caught myself doing this again after returning to the app, and I subsequently reduced my output workload to focus on quality. I suggest doing the same if you’re in this predicament, especially if you’re just doing your creative work as a hobby.
5 I Was Burnt Out From Using Instagram
In the same way that you can get burnt out if you don’t take a break from work or exercise, I think that you can also suffer burnout from using social media (and other forms of technology) for extended periods. I’ve been using Instagram for the best part of a decade, and when I opted to stop posting photos for a year, I had been back on the app for two years without a break.
Every six months or so, taking a complete social media break for a week or two is a good idea. You don’t have to delete your accounts, but you should at the very least remove the apps from your phone. Taking time off will make it easier for you to enjoy more of the benefits of social media.
6 I Was Taking Photos Solely for Instagram
A surefire sign that you need to stop posting photos on Instagram is if you’re taking photos solely for the app, and this is the exact situation I found myself in. Every picture was in portrait orientation, even if there was a landscape shot that I thought would look cool. When editing, I was also thinking about how the picture would look on my feed.
My creativity increased so much after choosing not to post because I was taking photos for the joy of capturing images. Photography is by far my biggest passion, and I initially fell in love with it because I was capturing whatever looked cool. If you’re taking pictures just for an app, you’ll lose that (and funnily enough, you’ll fail to stand out because your images won’t be unique).
There’s absolutely nothing wrong with posting your favorite pictures on Instagram, but I definitely should not have been taking photos just to potentially pop off on the algorithm.
7 I Wanted to Critically Assess My Instagram Usage as a Photographer
Since joining social media when I was young, I never stopped and critically assessed my usage before quitting. To me, it was just something that I always did (and that everyone else in society also did). From a photographer’s perspective, I wanted to stop and ask whether Instagram was truly serving me—which is why I stopped posting for a full year.
After stepping back, I started asking serious questions and analyzing my attitude towards the app. One revelation that sounds obvious now, but was a big revelation at the time, was this:
If a lack of likes and engagement alone stopped me from taking photos, it suggested that I didn’t actually like photography and instead wanted validation.
I also wanted to ask myself if Instagram was something I even wanted to use. In my opinion, the idea that you need any social media to succeed in a creative endeavor is simply not true. It can be a useful tool, but there are plenty of other ways to get your name out there. And as a hobbyist, you might prefer creating your own website to share what you make.
As you probably can gather from the fact I have my Instagram account in my bio, I ultimately returned to Instagram. Instead of trying to be an influencer, I decided to use the account to simply connect with like-minded people and casually share my pictures. The overwhelming majority of my photos are on my travel blog, and I’m happy with this balance.
Tired of glancing at the same old macOS Dock every day? While you’ll find multiple ways to customize your Mac’s Dock when you head to System Settings, there are certain hidden settings you can only activate using the Terminal app.
1 Tweaking the Dock Size
Before you can customize your Mac’s Dock, you’ll need to open the Terminal on your Mac. While there are many ways to open Terminal, my preferred method is using Spotlight Search. To do so, press both the Cmd and Space keys. Then, type “Terminal” and hit Return (or Enter).
While you can adjust the Dock’s size through System Settings using a slider, doing so with a Terminal command gives you a bit more flexibility.
Using the slider to adjust your Dock’s size doesn’t give you precision control. Let’s say you want the size of the Dock to be exactly 36 pixels for whatever reason.
While you’d have to estimate it using the slider, you can set it to the exact size without any guesswork using this command:
You can replace 36 in the command with any number of your choice.
2 Adding App Spacers for a Cleaner Look
If app icons look a little squished together, you can add some spacers to your Dock to space the items and get an overall clean look. I use spacers to keep my work and university apps organized and separate from the rest.
To add a spacer, simply paste the following into Terminal:
defaults write com.apple.dock persistent-apps -array-add '{"tile-type"="spacer-tile";}'; killall Dock
Each time you paste that command, a new blank spacer will be added, which you can drag into the desired position. To remove a spacer, simply click and drag it out of the dock or Control-click and choose Remove from Dock.
3 Viewing Hidden Apps on the Dock
Here’s one tweak you probably won’t be turning off once you’ve enabled it. You can hide an app on your Mac by Control-clicking its icon and choosing Hide from the options.
Strangely, there is no way of telling if an app is hidden on macOS by default, which can be confusing at times. For some reason, Apple has added the option to do so but neglected to add a toggle for it in System Settings.
Check out the screenshot above to see what the Slack and Spotify icons look like when these apps are hidden. To enable this effect, paste the following into Terminal:
To disable it, use the same command but change TRUE to FALSE.
4 Increasing the Magnification Level for Dock Icons
If you go to System Settings > Desktop & Dock, you can use the Magnification slider to increase the magnification level for Dock icons. However, the setting maxes out at 128 pixels.
You can use a Terminal command to increase the magnification level all the way up to 512 pixels.
Just replace 512 (which generates absurdly massive icons) with the numerical value you want before executing it:
For the command above to work, you must already have Magnification enabled. You can head to System Settings > Desktop & Dock and hold and drag the slider under Magnification to the right.
Alternatively, you can use this Terminal command to enable Magnification:
defaultswritecom.apple.dockmagnification-booltrue
5 Speeding Up the Dock Animation
While the Mac’s Dock is handy, it takes up a lot of screen space. Whether you’ve toggled on the switch next to Automatically hide and show the Dock in System Settings or not, the Dock still usually stays hidden when using certain apps until you move your cursor to the bottom of the screen.
You’ll notice that it takes quite a while for the Dock to reappear, and there’s no way to speed up the animation in the System Settings. Here’s where this Terminal command comes into play:
All you need to do is replace 0.5 with a lower number if you’d like to speed up the animation or a higher number to slow it down.
6 Resetting My Dock When I Need to Start Over
Sometimes, you may want to start afresh. I find it strange that you can’t perform basic tasks like resetting your Dock to its default settings directly from System Settings. Fortunately, you can use this simple command in Terminal:
defaultsdeletecom.apple.dock; killallDock
Once you hit Return, your Dock will revert to its default layout and settings; any apps you added or customizations you made will be removed.
Now that you know all these commands, customizing your Mac’s Dock should only take a few seconds. If you don’t like any of the changes you made, all you need to do is reset your Dock to its default settings.
Using AI tools for product photography can save time and money for sellers, especially in dropshipping.
Generative AI makes seamless object removal fast and successful, improving photo quality.
AI tools can help in creating coloring book illustrations, restoring old photos, and improving image quality.
AI allows anything from your wildest imagination to become reality. You can use AI tools for professional reasons or just for fun, but many AI features are gimmicks and not worth investing your time in. Here are my favorite real-world uses for creative AI tools that anyone can use.
1 Product Photography and Mockups
If you’re selling graphic t-shirts or other clothing apparel, then using AI to make clothing mockups can save you time and money, especially if you’re dropshipping or don’t have the means to pre-purchase the stock to photograph it. While AI cannot produce branded results, generic items often suffice for helpful mockups.
There are also tools that provide product photography backgrounds if you’re photographing products but don’t have suitable backgrounds. While styling product photography is easy in the right setting, you might not be able to access the setting you require. AI tools like Flair or Kittl let you curate a background to suit your product photo.
2 Seamless Object Removal
Using a clone tool in Photoshop or another software is a simple enough way to remove unwanted objects from your images, but it does take time and precision. Depending on the complexity of what you need to remove, sometimes it’s frustrating and impossible to get right.
Generative AI brought object removal to the next level, and it’s implemented in most software. Photoshop has Generative Fill, Canva has Magic Edit, and Luminar Neo has GenSwap—but there are countless other software with similar AI tools.
Using generative AI to remove and replace distractions is faster and usually more successful than doing it yourself using a selection tool or clone tools. Generative AI lets you remove distractions—like tourists in your vacation photos or your brother making a peace sign in a serious family photo—so you can proudly share and display your photos.
3 Coloring Book Illustrations
If you’re trying to entertain your child, or you’re a child at heart, coloring is a great way to pass the time and relax your brain. Maybe buying a coloring book might feel overwhelming with so many empty pages, or perhaps you just haven’t found a book that tickles your interests.
Using generative AI and text-to-image tools, you can create your own linework illustrations to print and color in at home.
While there are many pieces of software that you could use, I used Canva and its Magic Media tool. The style I chose was Doodle (found in Graphics), which provides an outline drawing of my generated prompt. I made some coloring pages for my seven-year-old niece, and the best part of doing this was being able to involve her in the process.
I told my niece she could color anything from her wildest imagination, so we came up with a hot dog prompt using Canva’s text-to-image tool. Then I added further text using Canva’s generic text feature, allowing us to have a completely personalized image to print at home and color in.
4 Idea Generation
AI chatbots—like ChatGPT—are built into almost all software these days. While I don’t condone using AI to write your professional or educational papers, it can be a great part of your idea generation workflow.
AI chatbots can help with brainstorming ideas, research topics, and trending data, or be a quick way to provide information before you independently fact-check. You can also use AI chatbots for idea generation for non-writing projects, such as design research, video topics, or learning new art techniques. You can use an AI chatbot similarly to how you might use Google’s search engine to yield fast results.
5 Wholesome Portraits and Illustrations
Although I often don’t like the gimmicky side of AI use, creating wholesome portraits or illustrations can be fun—even if it is a gimmick, really.
I don’t condone using AI image generators to entirely replace original art, but it can be fun to turn your dog into a cartoon, your parents into a clay 3D model, or even to see how you might look in your high school photos at your current age. Fotor is a great tool for creating fun avatars and illustrations of you and your friends or family.
6 Restoring Old Photos
Finding old family photos can be a lovely trip down memory lane, but sometimes they’re old, tattered, torn, and have seen better days. On top of that, any film photos from before the 70s are often in black and white or sepia tones which makes it hard to visualize the people in the frame as once-living family you may be related to.
With AI tools, you can restore those photos and help you turn tatty or discolored photos into modern-day family pictures, with eye colors you can match to your own and hair colors that make you realize familial connections lost over time.
7 AI Upscaling
Even with the technology our smartphones and cameras offer now, sometimes your photos just don’t come out high enough quality, especially when you resize them to be larger. Pixelation happens in raster images when they’re stretched bigger than their megapixels allow for.
Even though you can resize images easily in Photoshop, there’s still a limit to how the quality can hold up. Using AI upscaling tools offers fast and easy ways to increase your image’s quality when you need to resize your image.
You can find AI upscaling tools in many creative and AI-based software; however, most of them are locked behind paywalls or subscription packages. Pixlr is a browser-based tool that offers its AI Super Scale feature for free.
8 Short-Form Video Creation
Creating short-form videos for my social channels can feel overwhelming at times. Although I know my way around video editing software, when I’m just creating videos for fun, I don’t like to spend too long on them. I’ve found help from two places and their AI tools for short-form videos.
Adobe Express has a built-in TikTok Symphony Assistant—the same tool is found natively on TikTok—in which I can ask its AI to share trending topics or video ideas for my target keywords, and it provides example videos for me to be inspired by. The TikTok Symphony Assistant is trained on TikTok’s algorithm, and although I don’t use TikTok personally, the information is helpful for any type of short-form video.
CapCut is great for creating short-form videos, even without AI. Its built-in Smart Ads tool and Smart Templates have been my favorite tools when I don’t want to spend time and energy editing my footage to fit a beat, narrative, or storyline. It does it all for me, and still lets me edit the results if it’s not quite right.
I’m always excited to try out new AI features and tools, but usually I’m disappointed by the results or just can’t think of why I’d use the tools beyond fun experimentation. The list of tools above can and should be used by anyone who’s over the gimmicks and wants a real purpose for AI. It can be helpful, time-saving, and produce great results for things you may otherwise spend too much time or money producing yourself. AI can still be fun and wholesome, with real-world uses.
Since I love and enjoy using book-style folding phones, I thought I would love flip phones, too. Turns out there are quite a few quirks that, after getting my hands on one, I can’t wait to go back to my Galaxy Z Fold 5.
1 Flips Are Awkwardly Tall When Open
Bertel King / MakeUseOf
Modern smartphones are very tall devices. They’re typically over twice as tall as they are wide. Flip foldables tend to be even taller. When I unfolded a Motorola Razr 2024 next to a Google Pixel 9 Pro, it was half an inch taller. Surprisingly, it’s even taller than the Pixel 9 Pro XL!
Despite having long fingers, I find it uncomfortable to reach up to view notifications on most modern smartphones. I find it even more uncomfortable on a flip foldable. The same is true for any interaction that involves reaching up to the top half of the screen, like tapping the clock widget to set an alarm.
Having a large outer screen is a way to get around this issue since it feels like I’m using a small phone, but there are reasons to prefer flip phones without a big cover display.
2 Buttons Are Higher Up Than You’d Expect
Bertel King / MakeUseOf
Smartphone makers have agreed that buttons go on the side of the phone. More often than not, this is the right side. On the Galaxy Z Fold 5 I use as my daily driver, the power button that doubles as a fingerprint reader is halfway up the right side. The volume buttons are just above it.
On a flip, buttons can’t go halfway up the phone. There’s a hinge there. Since going below the hinge would be cramp-inducing, the buttons go above instead. To unlock or power on such a device, I have to reach higher than I expect. And to adjust the volume, I have to stretch even higher.
Can I get used to this? Yes and no. I’ve used tall phones before, and things do get easier with time. But I never reached a point where I stopped wishing my phone was shorter. I eventually just bought a shorter phone. A flip increases the number of things that make me wish I had a shorter phone.
3 Prepare to Use Two Hands, a Lot
Bertel King / MakeUseOf
The outer screen is one of the biggest distinctions between the Motorola Razr and Samsung’s Galaxy Z Flip 6 we reviewed. The former has a larger outer screen that can replicate much of the functionality of the inner one. Yet even on the Razr, most people will probably open their phones to use most apps.
Opening a modern flip isn’t as easy as flipping open a comparable dumbphone. While feature phones are easy to manage with one hand, opening a flip foldable requires two. Technically, yes, you can wedge the screen open with one hand by digging in your thumb and using part of your body as a wedge, but this is awkward and not exactly easier than just using both hands.
For tasks that require one hand with a slab phone, you’ll often have to use both with a flip foldable. Again, I’m well accustomed to opening my Z Fold 5 a ton throughout the day, but if my wife sends me a lengthy grocery list text while I’m at the store, viewing that entire text only takes one hand with my phone’s cover screen, which isn’t much smaller than that of a typical phone.
On the Razr, I’m more likely to use both to open the phone since the outer display doesn’t show the entire text. And once the phone is open, I’m still going to use my second hand more often to help me reach the top half of the screen.
4 The Aspect Ratio Isn’t Great for Video
Bertel King / MakeUseOf
Foldables of all types aren’t as ideal for streaming video as you may think. In theory, a foldable screen offers the promise of a larger screen, but there’s no getting around the physical constraints. If a book-style foldable opened to a landscape 16:9 aspect ratio, it wouldn’t be shaped like a phone when closed. The internal screen has to be closer to a square to keep these phones pocketable. This means videos on a book-style foldable appear only slightly larger than on regular phones.
On flip phones, videos are sometimes actually smaller than on regular phones. That’s because, with such tall, narrow aspect ratios, videos can’t fill the entire screen without cropping out part of the footage. That means a YouTube video on the Motorola Razr 2024 is ever-so-slightly smaller than the same video playing on a Pixel 6.
Unlike book-style foldables, being able to prop up a flip doesn’t help with watching videos. Yes, you can technically watch a video in the top half of the screen while the controls occupy the bottom half, but most of us won’t particularly want to settle for postage stamp-sized TV.
5 It Still Feels Chunky in My Pocket
Part of a flip phone’s appeal is how much less space I imagined it would take up in my pocket. And yes, it is in fact smaller than a regular slab phone. On average, a flip is half the height of the phone it is likely replacing.
But that comes with a trade-off. A flip-style foldable is roughly twice as thick, so instead of an awkwardly large rectangle in your pocket, you get an awkwardly bulky square instead. Is the flip still more pocketable? Maybe, but it’s not the clear choice I thought it would be.
Think of it this way: If you like minimalist phones like the Light Phone II or standard dumbphones because of how small they are in your pocket, flip foldables feel closer to smartphones than basic phones in size. They’re a tad bulkier than you might expect.
I don’t want to discourage anyone from buying a flip-style folding phone. While I may prefer book-style foldables over flips, I’d still more likely choose a flip than a conventional slab phone. I find them more fun and think their pros outweigh their cons. But these little quirks can get old pretty quickly. That’s something to keep in mind, considering that many flips still cost in the ballpark of $1,000.
While Excel’s auto-formatting feature helps tidy up your data, it can also unintentionally alter your intended formatting. If you’re annoyed with Excel constantly changing your numbers to percentages or dates or applying unwanted formatting, here are a couple of ways to disable the auto-formatting feature.
Disable Auto-Formatting for a Cell or Range
Formatting a cell or range as text is one of the easiest ways to prevent Excel from automatically altering your data. This ensures that the data stays exactly as typed, avoiding unwanted changes and saving you time in Excel.
This method can be especially useful if you prefer not to disable auto-formatting for the entire spreadsheet. To format a cell or range as text in your Excel spreadsheet:
Open your Excel spreadsheet.
Select the cell for which you want to disable auto-formatting.
To select multiple cells, click and drag your mouse over the desired range.
Right-click on your selection and choose Format Cells.
Under the Number tab, select Text and click OK.
And you’re done. Now, if you enter a number with leading zeros or special characters, for example, Excel will keep them intact. Similarly, if you input data that might be interpreted as a date, such as “05-11,” formatting the cell as text prevents it from being automatically changed to a date format.
Permanently Disable Auto-Formatting
If you’re looking for a more permanent solution, Microsoft Excel allows you to disable auto-formatting for all your spreadsheets at once. Here are the steps you need to follow.
Open Microsoft Excel and head to File > Options.
Select the Data tab in the left pane.
Scroll down to the Automatic Data Conversion section.
Uncheck the Enable all default data conversions below when entering, pasting, or loading text into Excel checkbox.
Hit OK to confirm.
If you don’t want to disable all types of auto-formatting, you can adjust specific settings under Automatic Data Conversion. This allows you to prevent the removal of leading zeros, disable the automatic conversion of numerical data containing the letter E, and avoid the conversion of continuous letters and numbers into dates.
Disabling Excel’s auto-formatting is useful when working with data that requires a specific format or coding, such as part numbers or zip codes. It’s also beneficial if you plan to use custom formatting in your Excel spreadsheet. Fortunately, achieving this isn’t too difficult with the methods outlined above.
While you can’t create a custom preset using the Photos app, you can copy and paste edits in iPhone’s Photos app to reuse edits.
Another option is to enable Preserve Camera Settings on your Phone for consistent photo quality.
You can also consider using a third-party editing app like Snapseed to create custom presets.
If you’re among one of the people who prefer maintaining a cohesive theme on their social media feeds, you’ve probably spent hours editing your images to make them look similar. One simple way to avoid manually editing your images and achieve consistency is to create custom photo filters on your iPhone.
Copy and Paste Edits Using the Photos App
Unfortunately, the native Photos app on your iPhone doesn’t have a built-in feature for creating custom presets. However, there’s a simple workaround. You’ll need an image in your camera roll that has already been edited with the effects you want to reuse.
If you can’t find one, it’s best to take some time to edit an image using the Photos app.
Keep in mind that you can’t reuse edits from an image if it was edited using a third-party app.
Here’s what you need to do:
Open the Photos app on your iPhone and locate an image you’ve edited already.
Tap Edit, and then hit the horizontal three dots in the top-right corner of the screen.
Choose Copy Edits from the options that appear.
Once you’ve copied edits from an edited image, here’s how you can paste the edits onto a new image:
Locate the image you’d like to edit.
Tap Edit, and then tap the three horizontal dots.
Now, choose Paste Edits.
While this doesn’t create a preset filter, it’s a quick way to reuse your favorite settings in the iOS Photos app. To save time, I’ve added my preferred edited image to my Favorites album for easy access.
Preserve Your iPhone’s Camera Settings
Similar to reusing edits in the Photos app, another way to achieve consistency across shots you take and ensure a more uniform look from the start is by preserving your iPhone’s camera settings. Doing so would allow you to lock in specific settings like the last iPhone camera filter you used, the aspect ratio, or lighting setting you used.
Ultimately, this means that you wouldn’t have to spend so much time setting up your camera prior to taking an image. You can turn this feature on by heading to Settings > Camera > Preserve Settings.
On the next screen, you’ll see different toggles, like Camera Mode, Creative Controls, Depth Control, Macro Control, Exposure Adjustment, and many more. The options you’ll see will vary depending on the iPhone model you own. While you can find brief descriptions of each option on the same page, I’d suggest toggling on Creative Controls and Exposure Adjustment.
Use a Third-Party App Like Snapseed
Unfortunately, the Photos app is quite limited when it comes to advanced editing features. Naturally, this means most of us turn to third-party iPhone photo editing apps. While most of these apps allow you to create custom presets, you often need to subscribe to the premium version to access this feature.
For example, VSCO allows you to save and reuse edits by creating a Recipe, but you can only create one Recipe in the free version. Google’s editing app, Snapseed, is an exception as it allows you to create unlimited custom presets.
Here’s how to create a custom preset using Snapseed:
Open the Snapseed app on your iPhone. Tap anywhere on your phone, and pick an image from your camera roll.
Edit the image as you normally would. Once you’re satisfied with the edits, head to the Looks tab at the bottom of the screen.
Scroll to the end and tap the plus (+) icon.
Name your custom preset and tap OK.
Now, whenever you want to apply the same effects to your image, just go to the Looks tab and select the filter you created.
All in all, the methods above will not only help you take social-media-worthy pictures, but will also help you save a ton of time in the long run.
Trends in Excel predict future values using the TREND function, revealing data insights.
TREND function utilizes known data to create a trend line for predictions.
You can visualize and calculate trend slopes accurately in Excel, leveraging TREND and SLOPE functions.
Trends show where a series is heading and how fast it’s moving in that direction. You can calculate and visualize a trend in Excel with the TREND function. Doing so will give you insights into your data and easily make projections.
What Is a Trend Line?
A trend is a straight line indicating whether data increases or decreases over time. It’s often applied to time series, where you can track a value over specific time intervals.
The trend line serves as a visual representation of this trend, showing the general direction of your data. It’s rarely a perfect fit for all values in a series unless they’re already aligned in a straight line. Instead, it’s the best possible approximation, giving you a clear sense of the overall movement.
One of the most practical uses for trend lines is prediction. By extending a trend, you can forecast future values. This is where the slope of the line becomes essential—it shows the speed and direction of the trend. However, calculating trends manually is tedious and, of course, prone to human error. That’s why Excel’s TREND function is invaluable.
What Is the TREND Function in Excel?
TREND is a statistical function that uses your known data (Xs and Ys) to create a trend line and predict future values. Its syntax is straightforward:
=TREND([known_Ys], [known_Xs], [new_Xs], [const])
The first two arguments, known_Ys and known_Xs, are the data you already have. new_Xs is the data you want to predict and calculate a trend for. The const argument defines whether to include the intercept (b) in the trend line equation (y = ax + b). If set to TRUE or omitted, Excel will calculate it; if set to FALSE, it assumes no intercept.
The TREND function analyzes past data and observes a series’ past performance. On the other hand, the FORECAST function predicts a series’ future performance. However, both use similar algorithms, meaning they yield identical results for time series. As a result, you can use both to
interpolate data in Excel
.
How to Use the TREND Function in Excel
To better understand TREND, let’s go through an example. Suppose you have eight known Y values (1 to 8) and corresponding X values (also 1 to 8). You’re missing values for times 9 and 10, and you want Excel to project them.
First, click the cell where you want to display your new Ys (C2 in this example). Then, type the formula below in the formula bar:
=TREND(B2:B9, A2:A9, A2:A11)
This formula summons the TREND function and feeds cells B2:B9 as the known Ys. Then, it feeds A2:A9 as the known Xs. Finally, the formula tells TREND that A2:A11 will be the new Ys. These new Ys are calculated off the trend line.
Once you press Enter, Excel will fill the cells with the trend values. Observe how the projected Ys in the trend, despite being linear, are close to the known Ys.
Visualizing the Trend With a Line Chart
Once the projections are ready, you can visualize the trend by creating a chart. Excel offers various chart types, but a line chart is the best choice.
Select the two columns containing the known Ys and the new Ys. In this spreadsheet, these will be columns B and C.
With the columns selected, go to Insert.
Click the line chart icon in the Charts section, and then select Line with Markers.
Right-click on the chart, and from the drop-down menu, click on Select Data.
Click Edit under Horizontal Axis Labels.
Select the known X values. That’ll be A2 to A11 in this example.
Click OK.
You now have a chart of your time series and their values based on the trend line calculated by the TREND function. The final chart will clearly display how the projected Ys continue from the known data based on the trend line.
The
Quick Analysis Tool
enables you to visualize your data using sparklines in a single cell, eliminating the need for a large chart range.
Calculating a Trend’s Slope in Excel
Now that you’ve created and visualized your trend, you may want to know its slope—the rate of change over time. Since the trend line is a straight y = ax + b line, you can calculate the slope (a) yourself. But this is Excel, so let Excel do the calculations.
Excel’s SLOPE function makes this simple:
=SLOPE(known_Ys, knownXs)
Let’s try to get the slope for the trend in the last section’s example. To achieve this, we’ll use the SLOPE function on the projected Ys from the TREND function. To calculate the slope, select the cell where you’d like the result to appear, and enter the formula below:
=SLOPE(C2:C11, A2:A11)
This formula will indicate cells C2:C11 as the known Ys and cells A2:A11 as the known Xs for the SLOPE function. Once you press Enter, Excel will display the slope, indicating the rate at which the trend is rising or falling.
TREND gives you actionable insights with just a few formulas. But TREND is only the beginning—Excel offers a wealth of statistical tools, such as FORECAST, LINEST, and LOGEST, that you can use to dig deeper into your data and make more informed decisions.
Apple announced the Apple Watch Series 10 at its “Glowtime” iPhone 16 event in September 2024. Unlike previous years, this model offers more than just a spec bump. Here are my favorite features that make this 10th-anniversary Apple Watch a must-buy.
The most important part of any Apple Watch is the screen, and the Series 10 sports the largest-ever display on an Apple Watch. It features 30 percent more active screen area than the Series 4, 5, and 6 and a little less than 10 percent more real estate than the Series 9.
In day-to-day use, a larger screen can improve almost every part of the Apple Watch experience. Whether you’re typing a message on the keyboard or reading an email, bigger is better.
Besides the larger screen size, the Apple Watch Series 10 features a wide-angle OLED display that’s up to 40 percent brighter when viewed from an angle, allowing you to more easily see what’s on the screen with a quick glance. The display is also more power efficient. So it will refresh once every second, instead of once every minute, when in always-on mode.
It will also include two new faces—Flux and Reflections—to take advantage of the larger display. And don’t forget that it’ll get all the great features watchOS 11 has to offer.
Even though the screen is larger, don’t expect a heavier case because the Apple Watch Series 10 is almost 10 percent thinner than the Series 9. The newest model also weighs less on your wrist.
The aluminum variants of the Series 10 weigh 10 percent less than the Series 9, and the new titanium case options are 20 percent lighter than the stainless steel Series 9 models.
The Apple Watch Series 10 introduces a new health feature to detect sleep apnea. Sleep apnea is a condition where breathing stops repeatedly during sleep, and Apple says it affects over 1 billion people globally. If left undiagnosed, it leads to an increased risk of hypertension, Type 2 diabetes, and cardiac issues.
When you wear the watch to sleep, it tracks small movements at the wrist that are associated with interruptions in normal breathing patterns. The algorithm will analyze that data and inform you of consistent signs of sleep apnea. Fortunately, this feature will also be available for the Apple Watch Series 9 by the end of September 2024.
Thanks to a metal back and larger, more efficient coil, the Apple Watch Series 10 is the fastest-charging Apple Watch you can buy. You can charge from zero to 80 percent in 30 minutes. And if you don’t have enough time for that, 15 minutes of charging can provide up to 8 hours of daily use.
5 Play Audio Through Built-In Speakers
You don’t need to grab your AirPods or other Bluetooth speakers if you want to listen to audio on the Apple Watch Series 10. You can play back a wide variety of audio through apps like Apple Music, Apple Podcasts, Apple Books, and other third-party apps directly from the speakers.
Apple also brought two of the standout features of the Apple Watch Ultra—a water temperature sensor and depth gauge—to the Apple Watch Series 10. This also means the 10th-anniversary Apple Watch gets the Depth app.
Using the same Depth app, you can gauge up to 6 meters below the water and see the time, water temperature, time underwater, and maximum depth. You can set the app to automatically activate when you submerge the Apple Watch in water. You can also view the water temperature measurement during Pool Swim and Open Water Swim workouts.
Like previous models, there are new Apple Watch colors to choose from. One of the best is the Jet Black aluminum model. As the first aluminum case in a polished finish, it brings back memories of the iconic Jet Black iPhone 7 variant. Joining that option is an updated Rose Gold aluminum and the usual Silver aluminum.
For a different look, you can also choose from a titanium option that replaces the stainless steel version from previous generations. It’s available in Natural, Gold, and Slate.
The Apple Watch Series 10 is already available for pre-order on Apple Store Online and will be available starting September 20. Pricing starts at $399 and $699 for the aluminum and titanium variants, respectively.
If you’re like me, nothing beats the thrill of discovering a book that’s a little off the beaten path. Whether it’s a rare edition, an obscure title, or a self-published chef-d’oeuvre, I’ve found that some of the most interesting reads come from places that aren’t your typical big-name bookstores.
AbeBooks is a marketplace for books, fine art, and collectibles, and it’s one of my favorite spots to find rare and out-of-print books. The site brings together independent booksellers worldwide, offering everything from first editions to signed copies. One of the things I love most about AbeBooks is the sense of discovery—I never know what I’ll find, but I always leave with something special. Plus, the prices are often reasonable, even for those hard-to-find titles.
If you’re after something specific, BookFinder is like having a literary detective on your side. It’s a search engine that scours both mainstream and independent bookstores, along with secondhand sellers, to find exactly what you’re looking for. The site pulls results from hundreds of online sellers, so it’s perfect for tracking down niche titles that might not show up in a regular bookstore search. I discovered BookFinder while searching Reddit for recommendations a while ago, and it’s now become one of my go-to sites.
Alibris is another excellent resource for finding niche books, especially if you’re interested in supporting independent sellers. The site specializes in secondhand and rare books, but it also offers new titles and textbooks. I love how easy it is to navigate the site and filter results by condition, price, and seller.
Better World Books isn’t just a great place to find secondhand books—it’s also a mission-driven company that donates books and funds literacy programs with every purchase. If you’re someone who loves books and cares about making a positive impact, this site is a must-visit. I’ve found some truly unique reads here, including several self-published titles that never made it to mainstream bookstores. Plus, knowing that my purchase is helping others makes the find even sweeter.
LibraryThing is like Goodreads but with a twist. It’s a book cataloging site with a community-driven focus on niche and lesser-known books. The “Groups” section is where the action is. You can join groups based on specific genres or interests, where members discuss and recommend obscure books.
I’ve joined a few groups on LibraryThing where people are constantly discussing and recommending books you won’t find on bestseller lists. If you’re into a niche genre, like vintage science fiction or obscure historical accounts, this is where you’ll find people who are just as passionate.
My first impression of ThriftBooks was that it was just a place for finding budget-friendly books, but I’ve since learned that it is more than that. ThriftBooks offers a massive inventory of used books, and while the prices are often a steal, the site is also a great place to find those niche or less common titles that might be overlooked elsewhere. They even have a rewards program—a nice bonus if you’re an avid reader.
Etsy might not be the first place you think of when it comes to books, but I’ve found some real treasures there. Many sellers on Etsy offer vintage and antique books, along with handmade and self-published works that you won’t find anywhere else. I especially love browsing through the curated collections of old poetry books, quirky zines, and beautifully bound journals.
8 Reddit’s Niche Subreddits
Sometimes, the best recommendations come straight from fellow book lovers who share your interests. That’s where Reddit’s niche subreddits come in. Whether you’re into obscure sci-fi, forgotten classic literature, or underground zines, there’s probably a subreddit for it.
r/SuggestMeABook is my personal favorite. I’ve found that the community here is incredibly helpful—just ask for a recommendation, and you’ll likely end up with a list of titles you’ve never heard of but will soon want to devour. Plus, it’s a great way to connect with others who love the same kind of books you do.
There’s something incredibly rewarding about tracking down a book that feels like it was meant just for you. These sites have helped me discover books I never knew existed. Whether you’re looking for something rare, self-published, or just off the beaten path, I hope these sites help you find your next great read.
Use HDR mode to balance light contrasts in harsh lighting situations.
Block out light with your hand or use third-party camera apps for exposure control.
Utilize natural diffusers, reflective surfaces, and varied angles for creative photo outcomes.
Harsh lighting can be a real headache when trying to capture the perfect shot with your smartphone. Unlike DSLRs, where you have all sorts of controls, smartphones can feel a bit limiting.
But here’s the thing: harsh lighting doesn’t have to ruin your photos. I’ve found a few tricks that help me make harsh lighting work in my favor. Here’s how I do it.
1 Using HDR Mode
My first go-to when shooting under harsh light is turning on my phone’s HDR mode. HDR mode gets a bad rap sometimes for producing overly processed-looking images. However, I’ve found it particularly helpful when shooting in uncontrollable light conditions.
HDR mode captures multiple images at different exposures and blends them to create a balanced shot. This can help reduce the intense contrasts that harsh lighting often creates, making the shadows less dark and the highlights less blown out. Just make sure to hold your phone steady, as HDR works best with minimal movement.
The beauty of HDR mode is its ability to bring out details that might otherwise be lost in the shadows or blown out by the highlights. For instance, if you’re shooting a landscape with a bright sky and dark foreground, HDR can help you capture both elements in a more balanced way. Instead of ending up with a washed-out sky or a nearly black foreground, you’ll get a shot that represents the scene more accurately.
That said, HDR isn’t perfect for every situation. It can sometimes introduce a slight delay between shots, which isn’t ideal for moving subjects. But for static scenes in harsh light, it’s a lifesaver.
2 Controlling the Exposure With Your Hand
One of the simplest tricks I use is to block out some of the light with my hand. When the sun is too bright, I place my hand just above the lens to create a bit of shade over the camera. This reduces the intensity of the light hitting the lens, helping to avoid overexposure and lens flare. It’s a quick fix that can make a big difference, especially when shooting outside without other tools.
3 Using Third-Party Camera Apps
While the built-in camera app on my phone does a decent job most of the time, there are situations where I need more control. That’s where third-party camera apps come in. Apps like ReLens and Pro Camera give you control over the exposure triangle—ISO, shutter speed, and aperture (or as close as you can get on a smartphone).
Controlling the exposure triangle on my smartphone is a photography rule that transformed my smartphone photos. In harsh light, I can tweak my camera settings to control how my camera handles the light. It takes some practice, but once you get the hang of it, the difference in your photos will be obvious.
4 Using Natural Diffusers
Sometimes, the best solution is to soften the light before it even hits your subject. I’ve learned to look for natural diffusers like trees, clouds, or even buildings that can break up the harshness of direct sunlight.
When I’m shooting outdoors and the light is too intense, I position myself so that my subject is in the shade of a tree or a cloud drifts in front of the sun. This creates a much softer, more flattering light that’s easier to work with.
Danny Maiorca/MUO
Natural diffusers can also add an interesting dynamic to your photos. The dappled light that filters through leaves can create beautiful patterns on your subject, adding depth and texture to the image. Or, shooting through a translucent object like a thin curtain can create a soft, ethereal effect.
If you’re in an urban setting, tall buildings can provide shade, while in nature, trees, rocks, or even the landscape itself can help diffuse the light. The key is to be aware of your surroundings and use what’s available.
5 Using Reflective Surfaces
Another technique I’ve found useful when shooting in harsh light is to use reflective surfaces to bounce light onto my subject. Reflective surfaces, like mirrors, white walls, or even a piece of aluminum foil, can help soften the light and reduce shadows.
If you’re shooting a portrait in harsh sunlight, you can use a reflector to bounce some of that light back onto your subject’s face, filling in the shadows and creating a more even exposure. Even something as simple as a white piece of paper can act as a makeshift reflector in a pinch.
When I don’t have a reflector on hand, I look for naturally occurring reflective surfaces, like water, glass buildings, or light-colored pavement. These can help redirect light in a way that makes for a better image.
6 Trying Multiple Angles and Compositions
Harsh lighting can create some interesting shadows and contrasts, which can actually work in your favor if you play around with different angles and compositions. Knowing how to get the perfect composition in your smartphone photos is key here. I’ve found that shooting from low angles or capturing the light from behind can produce dramatic effects.
Miker Rivero / Danny Maiorca / Kaspars Grinvalds /Shutterstock
Where possible, I like to experiment by moving around my subject, seeing how the light falls from different perspectives. Sometimes, what seems like a poorly lit scene from one angle can turn into a striking image from another.
7 Fine-Tuning the Image in Post-Processing
Even with all the best techniques, sometimes the photo still doesn’t come out exactly as I want it to. That’s where post-processing comes in. I use Lightroom Mobile and Snapseed to fine-tune my images after the fact.
Adjusting the highlights, shadows, and contrast can often rescue a shot that looked too harsh initially. I also like to play with the white balance and saturation to bring out the colors that the harsh lighting washed out.
Post-processing allows you to have the final say in how your image looks. If the image looks too warm or cool due to the lighting, you can adjust the white balance to bring it closer to what you envisioned. Similarly, tweaking the saturation can help bring out colors that might have been dulled by the harsh light.
Shooting in harsh lighting with a smartphone can be challenging, but with a few tricks, you can still make it work. Whether it’s using HDR mode, controlling the exposure, finding natural diffusers, experimenting with angles, or fine-tuning in post-processing, there are plenty of ways to make harsh light work for you.
If you are switching to Microsoft Edge from Chrome or Firefox, I highly recommend changing some default settings as the browser isn’t perfect out of the box. Here are the settings I changed to enhance my browsing experience with Edge.
1 Turn Off the News Feed
I find the Microsoft Edge news feed a nuisance and often outright distracting. Fortunately, you can easily turn it off from Page settings. To turn off the Edge news feed, click the Gear icon (Page settings) in the top-right corner. Then, scroll down and toggle off the Show feed switch to turn off the content.
If you don’t want to turn off the feed completely, select the Headings option, which minimizes the content to reduce distractions.
2 Hide the Favorites Bar
The favorites bar takes away from the minimalist experience I prefer with my browsers. Also, it appears in all of my screenshots, so I like to keep it hidden on new and active tabs. To turn off the favorites bar, follow these steps:
Click the three-dots menu in the top-right corner and choose Favorites. Alternatively, press Ctrl + Shift + O to open the same.
In the Favorites menu, click the three-dots menu, go to Show Favorites Bar, and choose Never. You can also set it to show only on new tabs if you prefer, but I like to keep it off.
For quicker access to your favorites, you can add the favorites button to the toolbar. To do this, open the Favorites menu, click the three-dots menu, and then click Show Favorites button in the toolbar.
3 Use Vertical Tabs
One of my absolute favorite features of Edge is vertical tabs. It offers more horizontal screen space, which I need almost all the time. Another advantage is it reduces tab clutter by allowing you to see and open them without having to scroll through a sea of open tabs. To turn on vertical tabs:
Right-click on any open tab and choose Turn on vertical tabs. Alternatively, click the Tab actions menu icon in the top-left corner, then select Turn on vertical tabs.
If you need more sidebar space, click Collapse pane (left arrow icon) in the toolbar to collapse the tabs to show icons only. When you hover over the icons, it’ll expand to reveal full tabs.
To restore horizontal tabs, click the Tab actions menu and choose Turn off vertical tabs.
Some websites auto-play videos without user consent, resulting in unintended data usage and an annoying browsing experience. On Edge, you can change the media autoplay setting to block video autoplay on all websites. Follow these steps:
Click the three-dots menu in the top right corner and select Settings. In the left pane, open the Cookies and site permissions tab. Scroll down and click the Media autoplay option.
Click the Control if audio and video play automatically on sites dropdown and choose Block to block autoplay on all websites.
Remember that blocking media autoplay can also block it on websites where you may use it, such as YouTube video previews. If that’s a concern, set Media autoplay to Limit and let Edge decide whether to allow or block autoplay based on your past interaction with the website.
5 Change the Default Search Engine
Bing is the default search engine in Edge. If you prefer an alternate search engine like the more popular Google search or privacy-focused DuckDuckGo, you can set them as default for Edge on your computer. To change your default search engine:
Head to Settings > Privacy, search, and services, then scroll down to the Services section.
Click Address bar and search, then click the Search engine used in the address bar dropdown and choose your preferred search engine.
Also, make sure to set Search on new tabs uses search box or address bar to Address bar.
6 Block Website Notifications
Almost all websites I visit ask for permission to show notifications. While I can click Block to stop these notifications on the web page, I don’t remember ever needing a website to show any notifications, except in the case of a few odd social sites.
If you’re bothered by consistent notification permission pop-ups, you can block them entirely by configuring your site permission settings in Edge. Follow these steps:
Click the three-dots menu, then choose Settings.
In the left pane, open the Cookies and site permissions. Under All Permissions, click Notifications.
Toggle off the Ask before sending switch to block websites from asking for permissions.
If you don’t want to block permissions completely, turn on the Quite notifications requests option to block the permission pop-up, but let Edge quietly show a notification icon in the address bar.
7 Auto-Open Favorites Tabs at Startup
My daily work routine begins with opening the same set of web pages. Instead of manually opening each website, I can configure Edge to automatically open these websites as soon as I launch the browser. To add startup pages in Edge:
Click the three-dots menu in the top right corner and choose Settings.
Next, open the Start, home, and new tab in the left pane. Under When Edge starts, select Open these pages. Then, click Add a new page, type the website URL, and click Add.
Alternatively, you can set all your currently open tabs as startup pages by clicking Use all open tabs. To remove a URL, simply click the three-dots menu next to a URL and choose Delete.
8 Enable and Configure Mouse Gestures
Microsoft Edge offers built-in mouse gestures that let you quickly open or close tabs, scroll to the top or bottom, enable full-screen, or open an incognito tab. This feature is handy for those who use their laptop’s touchpad as the primary input device. To enable mouse gestures in Edge, here’s what you need to do:
Go to Settings > Appearance.
Scroll down to Customize browser, then toggle on the Enable Mouse Gesture switch.
Now, click to expand Configure Mouse Gestures to explore all the mouse gestures available on Edge.
9 Enable Microsoft Autofill to Fill Forms Faster
The autofill feature in Edge can help you fill out forms faster with your name, contact number, address, and other information saved in the browser. Autofill is part of Microsoft Wallet, which is also where the browser stores your passwords, payment information, and more. To enable autofill in Edge, follow these instructions:
Go to Settings > Profiles, then click Open Wallet next to Microsoft Wallet.
Now, click the Settings tab in the left pane and scroll down to Personal info. Toggle on both the options below it.
In the left pane, open the Personal Info tab. Then click Add address, add all your personal information, and click Save.
You can also add multiple addresses to the list and choose from them when filling out a form.
10 Enable Dark Mode in Edge
I prefer dark mode for its aesthetic appeal, but it also reduces eye strain in dark environments and lowers power consumption to extend your laptop’s battery life if it has an OLED display.
By default, Edge adapts to your system’s default theme. However, if you prefer a dark theme just for your browser, you can manually enable it in Settings. To do this, go to Settings > Appearance, then under Customize appearance, choose the Dark option.
Edge will apply the dark theme to new tabs, menus, dialogs, and pages, but some websites may still use a light theme, ignoring your preferences. To prevent that, you can force dark mode for all websites by enabling the experimental Auto Dark Mode feature. Here’s what you need to do:
Type edge://flags in your address bar and press Enter. In the search bar, type auto dark mode to locate the option.
Click the Auto Dark Mode for Web Contents dropdown and choose Enabled.
Restart your browser to apply the changes. After the restart, Edge will use the dark mode on all websites irrespective of their preferences. That said, occasionally, I have encountered image color inversion issues, so be aware of them.
These are all the small changes I made since switching from Chrome to Edge to enhance my browsing experience. Of course, you can tweak many other settings to fine-tune the browser further to suit your needs. But with these tweaks, I no longer have to consider a third-party browser.
I was searching for directions one moment and the next for the thief who stole my phone. Yes—I’m now one of the thousands of tourists whose phones are stolen every year.
So, here’s what I did immediately after my phone was stolen.
1 Marked iPhone as Lost on iCloud
It’s possible the thief took my phone in an unlocked state, giving them full access to all my data. Even if my phone wasn’t unlocked, the thief who stole it may have the technical know-how to unlock it without my PIN.
Either way, I wasn’t taking any chances.
The very first thing I did after my phone was stolen was log into iCloud and mark the phone as lost. Doing so locked my phone and suspended Apple Pay.
2 Tried to Find My iPhone
At first, I thought I had lost my phone instead of it being stolen.
I logged into iCloud Find Devices, hoping to see my phone in the hotel I was staying in or a restaurant I had recently visited. When I saw it on its way out of the city, I concluded that there was no chance of recovering it.
When you don’t know if your phone has been stolen or simply lost I recommend the utmost caution if you choose to track it down in person.
3 Remote Wiped My Device
Now that I had determined I wouldn’t ever get my phone back, it was time to erase its data. To do so, I again logged onto iCloud Find Devices and clicked Erase This Device.
I wasn’t worried about erasing priceless images or videos of my trip, as everything I needed was already in the cloud. Erasing all sensitive data on my phone allowed me to rest easy, knowing that the thief wouldn’t have access to my personal and financial information.
I didn’t contact the police so that they could launch a massive investigation into getting my phone back. I knew that once it was out of the city, there was no chance I’d ever see it again.
However, I contacted the police because petty thievery is rarely reported. I was hoping that the police might beef up their presence in the area where my phone was stolen so that future tourists like myself would be better protected.
My phone carrier at the time was AT&T. After the theft I called them to let them know my phone was stolen. I did this for two reasons.
For one, I wanted to know if a stolen phone was covered under my plan. I decided to file a claim with AT&T and found out that my phone was, in fact, insured and that they’d provide me with a new phone. Had my phone not been insured, I would have purchased a new phone immediately.
The second reason I contacted them was to disable my account so that my phone could not make calls, texts, or use any data. Disabling an account would also prevent cybercriminals from using SMS for two-factor verification and gaining access to financial accounts.
6 I Changed My Apple ID Password Among Others
At this point, I was just about certain that my most important accounts had been protected. To go one step further in shoring up the security of my data, I decided to change my Apple ID password and passwords used for financial accounts. Luckily, I use a password manager, so logging onto my accounts and making the changes from my friend’s computer was relatively easy.
Now that I had protected myself, it was time to protect my loved ones and friends. I messaged those close to me and posted on IG that I had recently lost my phone and that if anyone had been contacted by me in the past few hours with an odd request or a message containing a link, they should disregard the message.
Getting your phone stolen feels like getting your arm chopped off. You feel paralyzed and lost without your device; I’ve been there. However, having a plan of attack if your device is stolen is crucial. I hope your device is never stolen, but if it is, just follow the aforementioned steps.
Feature phones are still popular due to their affordability, battery life, and ability to act as a backup device.
Buying a feature phone will give you a hit of nostalgia and allow you to partake in regular digital detoxes.
While I never thought I would buy a feature phone after I had switched to smartphones, I’m now in the market for one.
Feature phones, also known as dumb phones, given their relationship to smartphones, are making a comeback. Through a combination of nostalgia, people desiring a simpler life free of distractions, and the increasing cost of buying and owning a smartphone, these supposedly dumb devices are back.
And I must admit, my head has been turned, too.
Feature Phones Are Still Going Strong
Feature phones are increasingly popular, with more Millennials and Zoomers choosing to buy one. Given that feature phones are, in their purest form, old technology completely superseded by smartphones, I never thought these devices would even be available now, let alone doing rather well. But here we are.
To be honest, feature phones never actually went away. There has always been a market for them despite the rise of smartphones. My dad never made the switch from a feature phone to a smartphone, and he was absolutely fine with that. He wanted to be contactable by phone call or message but not be encumbered by all the other stuff that smartphones come with.
5 Reasons Why Feature Phones Are Still Popular
There are multiple reasons why feature phones are still popular and even growing in popularity. Let’s take a look at some of the biggest reasons…
The most obvious reason for feature phones’ enduring (and growing) appeal is their sheer affordability. Top-range smartphones can set you back thousands of dollars—and that’s just for the handset, not taking into account the price of a decent data plan.
And sure, while the best smartphones are extremely powerful and capable of doing so much, is that price point just too much to ask? For many people, it is. For example, older folks who don’t necessarily need the latest and greatest smartphones to get by, or people in developing countries for whom the price of a smartphone can be several years’ wages.
The biggest technological advantage of feature phones over smartphones is their battery life. Smartphones are essentially mini computers and, therefore, burn through battery life at a rate of knots. Feature phones, by comparison, are relatively easy to power.
Anyone over a certain age who owned a phone before iOS and Android will be aware of how long a feature phone can last on a single charge. Old Nokias used to be able to sit for 30 days on a single charge (while on standby). And even modern feature phones can last a week or more on a single charge.
A clear reason why people over a certain age will be drawn to feature phones in the age of smartphones is pure nostalgia. As the history of cellphones teaches us, what we now call feature phones, or dumb phones, were, at one point, just phones. Years before Steve Jobs stood on stage and presented the original iPhone to the world, these pocket devices were the height of mobile technology.
Therefore, nostalgia for a simpler time before we were all connected 24/7 via these mini-computers in our pockets is compelling. Sure, dumb phones connected you via calls and SMS text messages, but it was a passive experience. Now, with so much to see and do on a smartphone, it’s an active experience that means you’re likely to reach for your phone regardless.
While the above reason may explain the popularity of feature phones to people of a certain vintage, what about younger generations? For them, a feature phone represents a chance to digitally detox and get away from the stresses of social media and a society that demands we’re always online and available.
If you see someone sitting somewhere, they will likely be staring at their phone for one reason or another. It’s as though we have lost the ability to just “be” without the need to “do,” and smartphones are part of the problem. Feature phones, therefore, offer a means of taking a break from that always-on, always-busy mentality.
For all age groups, a feature phone can represent the perfect backup device, and there are plenty of reasons to buy a burner phone. Whether you’re afraid of breaking your precious smartphone, don’t want to be left stranded when it runs out of battery, or are seeking a stand-in when you go on vacation, the humble dumb phone is a great option.
Feature phones are relatively cheap to buy, certainly compared to a smartphone, so you can purchase one as a backup without breaking the bank. Even if none of the above applies to you, doing so gives you the option to take a break whenever you see fit. Fancy a week off from being glued to your smartphone? Then switch to your dumb phone and essentially go off the grid for a while.
The Above (and More) Are Why I’m Buying a Feature Phone
So, we come to the crux of the matter. Given all of the above, I’ve been sitting here wondering why I don’t personally own a feature phone. And, as long and as hard as I think about it, I cannot come up with a legitimate reason not to buy one. So, I am going to do so.
Given the price point of even the best feature phones, the battery life one offers, the nostalgic hit I’ll feel (being a person of a certain age), the ability it will give me to digitally detox once in a while, and the backup device it will offer me if I ever need one, it’s a total no-brainer.
I now just need to decide what feature phone to buy, and I’m tempted to buy HMD’s Barbie Phone, and truly embark on a nostalgia trip (with some bright pink added to the mix).
When working with multiple sheets in an Excel workbook, you may need to reference data from one sheet to another for calculations, analysis, or to keep your workbook organized. Here are a couple of easy methods to do that in Excel.
Pull Data From Another Sheet in Excel Using Cell References
One of the simplest ways to pull data from another sheet in Excel is by using cell references. This allows you to link cells from different sheets to view or import data in Excel without duplicating it. Here are the steps you need to follow.
Open the Excel workbook that contains both the source and destination sheets.
Go to the sheet where you want the data to appear and select the cell where you want to insert the reference.
Type = and then enter the name of the sheet from which you want to pull data, enclosed in single quotes.
Type ! followed by the cell reference of the cell you want to pull.
Hit Enter to confirm.
For instance, to pull data from cell H2 on a sheet named Monthly Sales, you would enter this formula:
='Monthly Sales'!H2
A major benefit of using cell references is that Excel will automatically update the data in your target sheet if the data in the source sheet changes. This ensures that your information remains current without requiring manual updates.
Pull Data From Another Sheet in Excel by Manually Selecting Cells
You can also reference data from another sheet without needing complex formulas in Excel. Here’s how to do that.
In your Excel workbook, select the cell in the destination sheet where you want the data to appear.
Type = to begin the formula.
Switch to the source sheet and select the cell you want to pull data from.
Press Enter to confirm.
And you’re all set! This method is highly efficient for pulling multiple cells from different sheets. Note that these methods allow you to import data from different sheets in the same Excel workbook. You can also reference cells from different Excel workbooks.
Gemini in Google Sheets transforms tedious spreadsheet tasks into efficient, sometimes enjoyable processes.
To access Gemini, join Google Workspace Labs, and you’ll find the Gemini icon in your Google Sheets interface.
While Gemini is great for organizing activities and analyzing data in Sheets, you should remain aware of its limitations.
Data entry, validation, analysis, and every other task you perform in Sheets aren’t always fun—sometimes they take great time and effort. However, with Gemini in Google Sheets, it’s easy—and even fun—to carry out these functions.
How to Access and Enable Gemini in Google Sheets
To make use of Gemini in Google Sheets, you have to join Google Workspace Labs first.
To join, visit the Google Workspace Labs website. If you’re not using a web browser that already has you signed in to your Google account, you’ll be asked to enter your Google login credentials. After signing in, you’ll be directed to the Labs sign-up page, where you’ll indicate interest.
After ticking all the relevant boxes at the bottom of the page, click Submit. You’ll receive confirmation that you can now access Google’s Workspace Lab.
With access to Workspace Labs, you’ll be able to access Gemini in Google Sheets. To check if you have access, navigate to Google Sheets and open a spreadsheet—new or existing. You should find the Gemini icon—it resembles a star, although it only has four points—in the top right corner.
Click the Gemini icon, and the Gemini tab will pop up on the right side of the page.
Now, you can insert any prompt or use Gemini’s suggested prompts to improve your Google Sheets experience.
How Gemini for Google Sheets Can Improve Your Productivity
Here are two ways you can benefit from accessing Gemini in Google Sheets.
1. Great Head Start for Organizing Activities
With Gemini for Google Sheets, you can create a spreadsheet solely based on your prompts. You don’t need to format any cells or input data for the AI chatbot to generate a custom plan for your activities.
Whether you want to create a data entry form, plans for managing your budget, or a goal-tracking system, all you have to do is describe what you want to achieve, and Gemini will generate a plan to help you get started. Of course, you can edit the columns to suit you better after inserting the generated table.
2. Classify and Analyze Data
Gemini for Sheets can help you with data classification and analysis. The chatbot can understand the context of your data and assign labels to relevant cells. It can also suggest autofill options, detect duplicates, and validate your data types in Google Sheets, reducing the burden of data entry.
With its analytical tools, Gemini can suggest relevant formulas, filters, functions, and pivot tables. This would help you analyze user feedback, survey input, and test results. In fact, Gemini’s formula suggestions are so helpful that you can quit writing formulas in Google Sheets altogether and leave it to Gemini.
Limitations of Gemini for Google Sheets
In the Gemini tab in Sheets, there’s a disclaimer that Gemini for Workspace “may display inaccurate information.” This could result from how you phrase your prompts or the AI assistant’s lack of a template similar to what you have requested.
A good way to get the most out of Gemini for Google Sheets is to ensure that your prompts are always well-worded, with just the right descriptions and keywords. Still, as Gemini is an AI tool, it’ll occasionally produce unexpected or unrelated outputs, commonly referred to as AI hallucinating. There’ll always be a chance that the content it generates is inappropriate, inaccurate, or irrelevant.
Gemini for Google Sheets is only a tool to assist you, so don’t rely solely on the information it provides. Always carefully review all generated content before inserting them into your spreadsheet. Also, you should consider providing feedback so that Google can improve the AI assistant.
Chromebooks and tablets serve different needs; you must think about which fits your daily tasks the best.
Tablets are better for portability, and the highest-end ones are great for demanding tasks and projects.
For general browsing at home, you should consider getting a Chromebook instead.
Whether you’re looking for a Chromebook vs. Android tablet comparison, or you’re thinking about buying an iPad, here are my recommendations on when you should use a tablet or Chromebook. All of these observations are based on personal experience.
When You Should Use a Tablet
Before we look at when you should use a Chromebook, let’s look at the reasons why you might want to consider using a tablet. Here are the top scenarios where I think a tablet would be a better purchasing decision.
1. When You Want to Perform Demanding Tasks
To be totally honest with you, I’ve disliked using any computer that isn’t a Mac to perform demanding tasks like photo editing. Even then, I’ve already stated that I would never buy a MacBook with 8GB of RAM again. When looking at choosing between a tablet or Chromebook for high-performance tasks, I can’t see any reason not to buy a tablet.
The disclaimer here is, however, that you do need to look at the higher-performing tablets. Apple’s silicon chip iPads are the best for this job; if you have a bigger budget, you should strongly consider getting the M4 iPad Pro. A device with an M2 chip will also perform pretty well for editing with tools like Lightroom and DaVinci Resolve.
If photo editing or graphic design is your priority over video editing, you can broaden your horizons. The S9 is a solid choice, for example. Even my 9th-gen iPad did a pretty good job with editing RAW files (one Lightroom mobile trick is to upload RAW files to your computer and then continue editing from your tablet).
2. You Need Portability
A tablet will typically provide more portability than any computer, Chromebook or not. So, if carrying your device around is a big priority, you’re much better off buying a tablet.
Tablets consume less real estate in your bag, and you’ll also find it easier to use them on the go (such as when you’re commuting on a train). You could always buy an external keyboard, but even if you don’t, it’s easy to do basic things like responding to emails or browsing social media via your touchscreen.
I also recommend a tablet if you’re going to travel by air a lot; it doesn’t matter if it’s Apple, Android, or something else. I can remember trying to work on my laptop while flying from Stockholm to Helsinki in December 2019 (which, for a start, was pointless as the flight is only an hour long). Beyond that, though, it felt very uncomfortable. Now, I just use my iPad if needed.
3. You Want to Use Your Tablet for Smart Home Purposes
Another strong reason to buy a tablet is if your main aim is to use a device for Smart Home purposes. It’s simply much easier to control all of your appliances from a tablet, and you can turn any old tablet into a Smart Home hub when you upgrade later.
You can control your home from a handful of apps, and unlike your Chromebook, you can keep it on all the time. To maximize your effectiveness, it’s also important to consider various other devices when building a Smart Home.
When You Should Use a Chromebook
While I’ve identified several reasons to buy a tablet over a Chromebook, you will encounter numerous scenarios in which you should consider using a Chromebook instead. Here are three of the main situations where I’d suggest buying a Chromebook over a tablet.
1. For Studying (in Most Cases)
If your studying mainly involves researching on the web and writing essays, you’re much better off buying a Chromebook instead of a tablet. It’s much nicer to write on a laptop in general, and you can keep everything more organized than you would be able to on a tablet. I used a Chromebook when studying to get into university with no problems whatsoever.
You could always buy both and use your tablet as a defacto external monitor; it’s possible to do this with an iPad if you use Windows or macOS, and you can also use an Android tablet as a second screen. However, it’s by no means necessary; switching apps is much easier on a Chromebook, and so are most other things for studying.
The only exception is if you study music production, videography, or another creative field. In these instances, I’d recommend buying a more powerful tablet.
2. You Just Want to Do Basic Browsing at Home
If you don’t care too much about portability, and your primary objective is to do some basic web browsing from your home, a Chromebook is—in my opinion—a better choice than a tablet. You don’t need any bells and whistles; you can simply put your computer on a desk somewhere and turn it on/off whenever you need to use it.
Even if you want to move around the house, a Chromebook will be portable enough for this purpose; the same is true if you’re only going from your home to a library or café to work from. For anything beyond this, though, a tablet will probably be what you’re looking for.
3. You Want a Keyboard
This one is perhaps obvious (though less so since you can now connect keyboards with tablets), but I 100% recommend buying a Chromebook instead of a tablet if you want a keyboard. I’m not the biggest fan of tablet keyboards, which is probably because both they and the screen I’m typing on are smaller.
You’ll almost certainly find it easier to type on a Chromebook, especially if you need a keyboard for long-form articles, essays, or other assignments. There are also plenty of Chromebook keyboard shortcuts for quicker workflows.
Chromebook vs. Tablet: My Recommendation
Whether a tablet or Chromebook is better for you depends entirely on what you plan to use your device(s) for. Tablets are better if you value portability, and I also suggest buying one for performing more complex tasks on software like DaVinci Resolve. Controlling your Smart Home devices is another good reason to get a tablet, especially if you want to keep apps for your various appliances off your phone.
However, Chromebooks are better if you need simple browsing and research functionality. Both of these are why I suggest buying one if you’re a student, as is using the keyboard to type out your assignments (coupled with a bigger screen).
Switching out phone cases keeps your device feeling fresh and reduces bacteria buildup for better hygiene.
Different cases suit various activities and environments, such as prioritizing drop protection and specific functionality.
Multiple cases can extend lifespan, enhance resale value, and attract more buyers on the market.
I love my phone and it’s basically an extension of my hand these days. When it comes to protecting that precious device, I’m not messing around. That’s why, over the years, I’ve amassed a whole collection of phone cases. And there are good reasons for that.
1 Changing Phone Cases Can Keep Your Device Feeling New
I’ve always found that switching up my phone case every so often leaves my device feeling fresh and brand new. It’s kind of like rearranging the furniture—making some simple changes to what you see every day can make things feel more interesting.
As humans, we’re naturally drawn to novelty and new experiences. But once we get used to something, that initial excitement wears off quickly. By swapping cases on a regular basis, I create little moments of variety that fight against getting bored of my phone.
I’ve also found that better hygiene is another bonus of regularly changing phone covers. Phones are total germ magnets, so swapping cases encourages me to clean my device more often.
As a bit of a clean freak, whenever I take off an old case, I always use rubbing alcohol to wipe down both the case and my phone itself (it has a screen protector, so I don’t worry about the oleophobic coating on the screen) before putting on a fresh case. This helps ensure bacteria doesn’t build up over time and keeps my phone feeling sanitized.
2 One Phone Case Cannot Meet All Your Needs
Georgie Peru / MakeUseOf
My daily life is full of different activities that require switching up the case on my phone. I might start the day at a professional meeting where I want a slim, minimalist case that looks nice with my work clothes and easily slips into my pocket. But after that, I head to the gym for an intense workout or some outdoor activity. So I’ll want something with better drop protection since who knows what might happen while I’m rock climbing.
If I’m running to the store quickly, a case with a built-in cardholder would be perfect. But when I’m using my phone for a long period, a pop socket or ring holder case helps with ergonomics. However, those types might not work as well if I need to mount my phone in the car.
The environments I take my phone into also vary a lot. Obviously, a waterproof case is a must for beach days or water sports. But that would be overkill for everyday use since it’s bigger and bulkier than I need. The same goes for cases made to keep phones cooler, like the PHOOZY. They are great if I live somewhere hot or use apps that really heat the phone a lot, but not as important somewhere cooler.
3 Rotating Phone Cases Can Extend the Lifespan of Each Individual Case
If you use the same phone case all the time, it starts showing signs of wear in the same spots. The corners get scuffed, the back develops little scratches from being placed on surfaces, and the edges may fray or start peeling away from continuous use. I’ve noticed my silicone cases tend to stretch out a bit if I use them for too long.
But if you rotate through a few different cases, it can slow this process down and help them keep fitting tightly for longer. By switching it up, the wear is spread out across multiple cases instead of always affecting the same one.
Another benefit of rotating phone cases is that each case is limited in its exposure to environmental elements. Your phone case is out and about dealing with sunlight, humidity changes, and temperature swings. By switching cases, no individual case has to constantly face these elements, which can potentially cause color fading from UV rays or material breakdown from moisture over time.
4 Multiple Cases Can Enhance Your Phone’s Resale Value
Whenever I have to sell a phone of mine, I like to show that I took good care of it. One way I do this is by including a few different case options that I used. From a seller’s perspective, offering multiple case options with the phone makes my listing stand out compared to others. Buyers can see that I cared about keeping the phone safe from scratches or drops.
Not only does this give a sense that the device was carefully looked after, but it also provides a bonus for whoever buys it. They’re not just getting a used phone; they’ll have some style options right away to customize the device to their taste. In addition to that, including some cases could help my listing attract more interest than others.
From improving my phone’s lifespan to enhancing its retail value, there are a variety of reasons I switch out my phone cases regularly. And with so many on the market, I can find ones that meet the needs of different scenarios and environments.
Hardware-wise, Google’s Pixel phones are just starting to catch up to the premium experience you get from Apple or Samsung.
Pixel phones use Google’s Tensor chip, which is inferior to Qualcomm’s flagship Snapdragon chips. They often have performance issues that lead to an inconsistent experience.
Compared to Samsung phones, Pixels offers a pretty limited Android experience. Google focuses heavily on the cloud instead of offering hardware-specific features.
Google’s Nexus phones once offered the best taste of pure Android. Today’s Pixel phones are not—at least in my honest opinion. If you’re not all in on Google’s ecosystem, you’re left with a phone that doesn’t quite match the competition.
1 Pixel Hardware Hasn’t Been as Refined
Rajesh Pandey/MakeUseOf
From the beginning, Pixel phones weren’t intended to be quite as nice as the best from Samsung and Apple. Pixel phones didn’t cost as much and were made with cheaper materials.
The gap has narrowed over time; you could say it has disappeared entirely with the Pixel 9 series. The screens are now both as bright and as pixel-dense. The way Google put together the Pixel’s metal and glass frame leads to a similar premium feel. The use of an ultrasonic fingerprint sensor means the phone can now unlock just as fast as a Samsung phone.
It’s these little details that didn’t translate to a spec sheet that you missed out on when choosing a Pixel in the past. Still, it’s too soon to take this attention to detail for granted.
The Pixel Watch still doesn’t use Gorilla Glass and is far more prone to scratches than the Apple Watch or other comparably priced Android Wear watches. The Pixel Tablet remains a plasticky, mid-range slate. Google remains a software-first company that is still figuring out how to put out top-notch hardware.
2 You’re Sacrificing Power
Apple’s in-house mobile processors are no slouch, and most flagship Android phones compete by using Qualcomm’s Snapdragon chips. These fall slightly below Apple on benchmarks, but that’s a difference few people actually perceive in day-to-day use.
Instead of using a Snapdragon CPU, Pixels use Google’s Tensor chip. This CPU is really a modified Samsung Exynos chip. Samsung ships Exynos in many of its international phones, but it sticks to Snapdragon in the US since its CPU doesn’t quite match Qualcomm’s in performance.
As a result, while Pixel phones can still play just about any game available for Android, they’re more likely to drop frames or overheat. They have unpredictable battery life and are more prone to getting buggy over time.
The experience is inconsistent, with many Pixel users having a great experience for years while others are left baffled as to why their device has become a hot mess in only a couple of years. I’d rather have the more reliable Snapdragon chip, as it has served me well in all of my recent phones.
3 I Ignore Most of Google’s Ecosystem (Including Gemini)
Kris Wouk / MakeUseOf
I love Android, but I don’t love the Google ecosystem. On any Android device I get, I decline most Google features during setup and uninstall Google’s pre-installed apps. On Pixels, this means I’m left with pages of Google apps to uninstall, and there are few quality pre-installed apps left behind when I’m done.
Of the twenty pre-installed apps visible in the photo above, there are only seven that I wouldn’t get rid of, and only four of them are Google apps (Google Maps, Google Messages, YouTube, and the Play Store). I went years as an Android user without using any Google apps at all.
I’m even less interested in Gemini. Google refers to the Pixel 9 series as Gemini phones, flashing the Gemini logo as these phones boot rather than the Android one. That, for me, isn’t a reason to buy Google’s 2024 flagships. Instead, it repels me away from what is otherwise Google’s best hardware yet.
4 Stock Android Has Fewer Features
Some people have a hard time switching away from Pixel phones because of the features they might have to give up. Yet, more often than not, these aren’t features built into stock Android. They’re Google features that you wouldn’t get access to if you were to set up a Pixel phone without signing in to a Google account. The stock Android version that ships with Pixel phones is actually pretty basic.
In contrast, Samsung offers the most powerful Android implementation. You can configure more things out of the box and tweak just about anything else using Samsung’s Good Lock app. S Pen features also significantly impact how productive I am on my phone. Many of Samsung’s apps are so well-thought-out and feature-rich that I don’t seek alternatives.
For example, if my wife and I want to watch a video on my phone without disturbing the kids, we can connect two Bluetooth headphones to my phone and listen together. You need to buy adapters to manage something similar on a Pixel. And as important to me as all of these features are, I still haven’t gotten to my biggest deal-breaker.
5 Google Has No Samsung DeX Alternative
Bertel King / MakeUseOf
Samsung DeX is the one feature that convinced me to buy a Samsung phone. It is the ability to connect a monitor, TV, or any type of external display and have a desktop setup with a Samsung phone.
This means I don’t need to reach for a computer when my phone’s screen is too small for a task. This way, I have not only been able to use my phone as a PC but also connect my phone to AR glasses to enjoy games and movies in my own private theater. I can plug my phone into a projector for family movie nights, giving a presentation, or sharing photos.
Samsung phones have had DeX for the better part of a decade. High-end Motorola phones now offer something similar in a feature currently called Smart Connect (previously Motorola Ready For). Yet before the Pixel 8, connecting a Pixel phone to an external display did nothing at all. Even with the Pixel 8 and Pixel 9, you can only mirror the built-in display to the external one—well, at least until Google rolls out its experimental desktop mode.
6 Pixels Have the Worst Foldable Experience
Zarif Ali / MakeUseOf
While I thought I would use Samsung DeX a great deal, I actually don’t fire it up nearly as much as I expected. Even though I work remotely entirely off my phone, I still primarily use my phone’s screen. That’s because a folding phone like the Galaxy Z Fold 5 is far more capable of a productivity device than I expected.
It’s not just the size of the interior screen that makes foldables great, it’s the software. On a Samsung foldable, I can multitask using split-screen with up to three apps, access a built-in taskbar, pop any app into a floating window, shrink any app into a floating app bubble, or minimize any app into a window that I tuck away into the corner of the screen.
Samsung has done the work to force any app to stretch to the desired size, regardless of whether the app developer supports tablet formats or app windows.
The Pixel 9 Pro Fold’s split-screen view is limited to two apps at once. There’s no support for floating windows at all. You’ll likely see black bars if an app doesn’t have a tablet version. So, while I can juggle between five apps easily on my Z Fold 5, I would have to stop at two on a Pixel.
There’s nothing innovative like the Open Canvas feature on the OnePlus Open, though, which is arguably an even more seamless way to manage multiple apps on a small tablet-sized screen.
My Android phone workflow may be far from mainstream phone usage, but a Pixel simply can’t do what I expect it to do. It’s a shame that what is often thought of as the best representation of Android can’t better showcase everything the operating system is capable of. This gives even long-time Pixel users a reason to ditch their Pixel phones for Samsung’s offerings.
There is nothing like finding a great new TV series to binge-watch for hours or days. But like many, I sometimes hit a point where I don’t know what to watch next, and my friends don’t have any recommendations. That’s when I use these TV show finder sites.
Entertainment site Vulture has a special section dedicated to streaming. And more than a fair bit of that is dedicated to TV series. It covers all the biggest and best streaming services, like Netflix, Disney+, Hulu, Amazon Prime Video, and Max (formerly HBO Max).
The site lists the streaming service, followed by a section of the best titles available across categories. This makes it easy to see the best shows you can stream on each service. At the top is a Jump to section with quick links to the various services. At the bottom, the Best of the Rest section shows you the best titles on less popular streaming sites.
This is the perfect beginner’s guide to finding the most popular and critically acclaimed shows on whatever you subscribed to. The shows talked about here are obvious if you’re a TV junkie. But if you’re new to binge-watching like me, you’ll find some gems in this.
Like many, I use Metacritic to check whether a TV show or movie is worth watching. Additionally, I also use it to find new TV shows to watch. Metacritic is perfect if you’re unaware of TV shows that received good reviews. You can go to the website and check out the list of the top-rated TV shows.
Furthermore, Metacritic also offers a nifty feature that allows you to track the most recent TV shows added to popular streaming services. Just hover over the TV Shows tab at the top of the Metacritic website, and under Explore TV, choose your streaming platform.
So whether I’m looking for the best TV shows on Netflix, Apple TV+, Hulu, or other supported services, it has my back. I can also view all the new TV shows by hovering over the TV Shows tab and selecting the See All button below the New TV Shows column.
Decider does exactly what its name implies; it helps you decide what TV show or movie to watch next in an easy-to-use interface. You can click the What to Watch link on the website and filter TV shows by genre, streaming platform, and mood.
In addition to this, Decider regularly releases listicles that show the best TV shows or movies streaming on different platforms. The website is updated daily, so I don’t miss out on any new releases. Plus, I can find the site’s compilation of the best TV shows and movies at the bottom of the What to Watch page.
CableTV’s What to Watch recommendation list helps me find must-see shows for the week both on streaming platforms and good old cable television. The site lists some of the most exciting upcoming season premieres and television debuts that are worth watching.
The site includes the latest title to watch on different platforms, a short description, and a link to the trailer. You can also check the best shows and those that have recently been released on a given platform by hovering over What to Watch at the top and selecting one of the available streaming platforms. Dedicated pages include the best titles overall and in various categories, so you can’t miss anything new to watch.
Flixable originally started as a Netflix recommendation site, but it has now added several popular streaming services to its arsenal, including Disney+, Hulu, and Max.
The website is easy to use and doesn’t bombard you with questions about what you like to watch. Simply visit the website and choose from an array of filters such as genre, release year, rating, and even language.
With Flixable, you can also find out what shows and films are leaving Netflix so that you can quickly watch anything that interests you. Although I use the site without an account, you can sign up to create a personal list of TV shows and movies that you’d like to watch.
There is nothing more frustrating than finding a new show you’d love to watch, only to find it’s not available on the service you subscribe to. That’s why Reelgood first asks you to choose the services you subscribe to, like Netflix, Amazon, Hulu, and others.
Once you do that, Reelgood will start recommending relevant shows. You can browse through popular TV series on the sources you have selected (one way to find what’s popular on streaming services) or new TV series added to them. Each series displays its IMDb rating and Reelgood rating when you hover over it. Click it to find a trailer or sometimes even the first episode if it’s available on a free source.
Reelgood also lets you browse by genre and has a fun TV show finder called “Roulette” at the bottom of its homepage. You can enter the streaming service of your choice and input an IMDb and Reelgood rating. Press Spin and Reelgood will provide a suggestion of what to watch next.
Artificial intelligence (AI) isn’t as intelligent as we’d like it to be. While I discover some new shows through the discussed services, nothing beats asking a human who will tell you about an obscure series.
Reddit’s strong niche communities make it the best social media platform. In fact, I use Reddit daily for this and many other cases where human input offers the best solutions. That’s why you should try out Reddit’s IfYouLikeBlank community.
As the name suggests, this entire subreddit was created to give recommendations based on what you like. It’s among the kinder Reddit communities out there, but be a good person and search for your question first. Chances are, someone else has already asked it.
If not, feel free to ask for recommendations and add the [TV] tag, so people know what you are looking for. You should use our effective techniques to search Reddit for the best outcome.
The good part about this is that you can be specific about what you are looking for. For example, just saying, “I’m looking for a show like Game of Thrones,” might not be enough. But saying that you want a similar show with politics and gore might get you the right show to watch after Game of Thrones.
Taste.io is a unique TV show recommender, as it uses both AI and real humans to suggest shows to watch. To use Taste.io, you’ll need to take a quiz that makes you rate certain films and TV shows.
Next, the app will ask you about the streaming services that you currently use. Based on how you rate these TV series and the services that you have access to, the website will come up with a list of recommended shows and movies.
It also displays the percentage match, IMDb ratings, and user ratings and reviews by other Taste.io users for a better experience. Taste.io is ideal if you’re looking for a more personal recommendation engine instead of just browsing through a list of the most popular shows.
Another great place I find what to watch next from other people is Reddit’s r/TelevisionSuggestions subreddit. Unlike r/IfYouLikeBlank, which is dedicated to a wide range of items, including music, games, books, and podcasts, r/TelevisionSuggestions is dedicated to TV shows.
In this community, you can share your favorite TV shows and ask the community to suggest similar titles. You can also scroll through the subreddit to see what others have liked or personal reviews of some of the latest TV shows.
Whenever I’m struggling to find something new to watch, these sites come to the rescue. Using them, you should also be able to find exactly what to watch next based on your likes and dislikes. The best thing about the websites on this list is that they’re not limited to TV series. You can also use them to find new movies to watch and, on some, even new video games to play.
I play several New York Times games every single day, and I’m desperate to do well at them. Whether just to judge my own brain power, or to judge my own performance against others. Which is why I’m so happy that the NYT has added the capacity to see your Connections stats.
The New York Times Brings Stats to Connections
As announced in a press release, The New York Times has heard the cries of Connections players the world over, and added stats for them to nerd out over. From today (September 3), registered users can see a bunch of statistics about their performance in the game.
Your Connections stats will be viewable in the New York Times Games app on Android and iOS, the News app on Android and iOS, plus on both the mobile web and desktop. Essentially, whatever platform you use to play Connections, you should be able to see your stats.
In a statement, Jonathan Knight, head of Games at The New York Times, said:
We know how eager our players are to dive into their Connections stats. By giving them the tools to track, analyze, and reflect on their gameplay, we’re not just meeting that need—we’re elevating the entire experience.
You’ll Have to Register an Account to See Your Stats
The only caveat here is the need to register for a New York Times account in order to view your stats. This is just the basic free account, and not the optional subscription required to play The Crossword (full-sized rather than The Mini), for example.
The need to sign up for an account in order for The New York Times to track your performance and feed it back to you in the form of stats makes absolute sense. Without an account, the publication cannot track how many Connections puzzles you’ve completed, your win percentage, or your streak.
Signing up for an account is extremely easy. You can either head to this URL, or choose the option to sign up when playing the game. I just defaulted to signing up with my Google account, and I was given an account within seconds.
Once you have signed up, you will be able to see your Connections stats in two different ways:
After you have completed a Connections puzzle, your stats will appear automatically on the same page you use to share your results.
Clicking the bar graph icon in the toolbar at the top of the screen allows you to view your Connections stats manually at any time.
The Problem With Seeing Your Connections Streak
While the option to see your Connections statistics growing as you play is nice, it does add a little more pressure. As you can see from the screenshots above, my current streak is 0, so I’m under absolutely zero pressure to complete Connections successfully. But in a few weeks’ time, when I’m (hopefully) on a streak of double digits, I’ll be much less keen to fail now.
If you have read this whole article wondering what I’m talking about, here’s how to play the NYT’s Connections game. And if you’re an experienced player looking to improve your performance, here are some tips to help you beat Connections.
I enjoy my daily scrolling on TikTok, but recently I’ve seen a surge of Live videos being recommended in my feed. These are the reasons this particular type of content is ruining the app experience for me.
1 They’re Irrelevant
I’m not sure what criteria TikTok uses to suggest Live videos to you besides location, because all of mine are irrelevant and simply located in South Africa. My TikTok feed is filled with animal content and funny songs, as well as the occasional post about technology.
But for some reason, when it comes to Live videos, I’ve been recommended tarot readings, astrology readings, car auctions, random vlogs from people I don’t know, and a whole lot of other content I would never willingly interact with.
If a TikTok Live video showed me a live camera of animals at a rescue center, or a live recording of a tech event, the feature would be much less insufferable. But now when I scroll through my FYP, I’m greeted by ads and low-quality Live videos in between the actual content I want to see.
2 They’re Frequently in My Feed
For a while, I wouldn’t see any TikTok Live videos in my feed at all. Besides the frequent ads, my TikTok feed was bliss. However, towards the end of August 2024, Live videos made a resurgence on my feed and interrupted an otherwise enjoyable experience.
I spend about 15 minutes per day on TikTok because I aim to prevent wasting too much time on social media. During this limited time, I’m now greeted by several live videos, which greatly decrease my enjoyment. I quickly scroll past them so that TikTok gets the message, but they still appear in my feed—especially around noon.
If TikTok’s algorithm doesn’t get the message soon, I might stop interacting with the app altogether.
3 There’s No Way to Exclude Them
TikTok allows you to exclude certain content using keywords. This allows you to filter out content with that keyword from your feed. But Live videos are a category of content, not a keyword that appears in the description or title.
If TikTok had a way to filter out certain categories of content, like reposts and Live videos, I’d use it to improve my TikTok FYP.
Swiping quickly past the videos seems to be the only way to curb them. But even just taking screenshots for this article and immediately swiping past a video have been enough to increase the number of Live videos showing up in my recommendations between days.
I’m going to spend the next few days vigorously skipping Live videos in hopes that it improves my feed. But if TikTok keeps force-feeding me this irrelevant, low-quality content, it might be time to take a break from the app.
I’ve been using the same Apple Watch since 2021, and while it looks as good as day one, it’s time for an upgrade. Whenever I shop for a new electronic device, I ensure it has all the features I need. For a smartwatch in 2024, these features are non-negotiable.
1 Fast Charging
Aryan Surendranath / MakeUseOf
Wearables should be compact and always ready to go. If your smartwatch is overly bulky or has poor battery life, it can get in the way more than you’d imagine. The solution to this is support for fast charging.
Being able to top up your smartwatch’s battery in an hour or so gives you the perfect window to get ready for your day or give your wrist a breather from having a watch strapped on it all day.
The Apple Watch Series 7 was the first smartwatch Apple shipped with support for fast charging. Despite using the Series 7 since 2021, it’s still on my wrist from one morning to the next when I take it off for about an hour, where I spend time getting ready.
When I switched to the Galaxy Watch 4 briefly, its slow charging immediately became a dealbreaker, as each session needed at least an hour and a half to go from 20 to 100 percent.
2 24×7 Sleep Tracking
All-day sleep tracking is something that some manufacturers figured out from the get-go. Unfortunately, Apple Watch users have had to set up a Sleep Focus schedule to capture sleep data. However, this changed when Apple unveiled watchOS 11 and its features at WWDC 2024.
It’s a feature I sorely missed while I didn’t have it because it’s great to keep tabs on when I’ve had a short, unplanned snooze. And I’ve often backtracked to see if it was long working hours the night before or just a poor night of sleep.
I function better on a routine, and from general observation and the data my smartwatches have provided, I know that being a night owl doesn’t work for me. A value add like this makes all-day sleep tracking a must.
3 Always-On Display
Brent Dirks / MakeUseOf
While many may write off an always-on display as a battery hog or unnecessary on a smartwatch, for somebody who wants to keep track of their workout time at the gym and keep tabs on a productive work session, having the ability to glance over at my wrist and seeing data is vital.
I try to maximize the impact of a workout by spending more time under tension during any exercise; for this, I look at my watch to see how many seconds I spend during a set. Not having an always-on display would mean looking for a clock or my spotter to keep track. Minor things like these make always-on displays a staple on smartwatches in my eyes.
4 Auto-Detect for Workouts
Aryan Surendranath / MakeUseOf
Continuing on this track of wellness-related features, the ability to auto-detect workouts is another must-have on smartwatches.
There are times I’ve found myself starting a run when listening to a podcast or a YouTube video. On days when I forget to start and customize my running workout, auto-detect for workouts comes in clutch. It ensures I track my run and don’t miss out on any metrics.
And not to forget, if you’re trying to keep yourself accountable, even if it’s for a daily walk, auto-detect is a great way to ensure it is tracked and recorded without fail.
5 Interactive Notifications
Next on the list is interactive notifications. For many users, a smartwatch serves as an extension of their smartphone. I fall into this bucket, too.
While I don’t have the widest range of notifications activated, for the ones I’ve kept around, I like being able to respond via my watch in full detail—or at least the ability to acknowledge them. A fleshed-out interaction system for notifications makes things simpler.
6 Bands That Are Easy to Change
Paul Antill / MakeUseOf
Last on the list is a system that allows you to swap watch straps or bands easily. A smartwatch needs to be comfortable to wear, and the simplest way to change how it feels on your wrist is to try a different band—not to forget the right band can also act as a style piece to tie together an outfit. The Apple Watch excels in this aspect, and it’s hard to leave that behind when I purchase my next smartwatch.
Smartwatches are here to stay, and they’re only getting better year after year. But if I want to buy a smartwatch today or in the near future, it should have all the features I listed above; otherwise, it’s a dealbreaker as the experience won’t feel complete.
Given how RSS has declined over the years, it looks like it will eventually join the list of obsolete internet tools. However, I’m not planning on giving it up anytime soon.
It’s still a while before RSS dies off completely. Until that happens, there are still plenty of reasons why I won’t stop using it.
1 Ease of Use
One of the best things about RSS is its ease of use. If you’re using an RSS feed reader like Feedly or Inoreader, all you have to do is look up feeds from your favorite news site or source and just add them to your list of feeds. If you need help picking one, here’s our list of the top free RSS readers to help you choose.
If you’re willing to play around a little with URLs, you can also get RSS feeds for articles with specific tags, categories, and even authors to make sure you only see the content you want. Granted, this requires some knowledge of how URLs are written and parsed in different backends like WordPress and so on, but once you get the hang of it, it’s really not that difficult.
There really isn’t anything else to RSS either. It’s a simple feed of content from your favorite sources that comes with the option of further filtering if you want. Even a complete newcomer to the concept can set up their personalized news feed in a matter of minutes, for free, and call it a day.
RSS feeds are also much easier to read compared to websites and blogs. Instead of having to deal with different color schemes, fonts, and text sizes, your RSS feed reader will present all your feeds in the same color, font, and font size—dramatically enhancing readability.
Most RSS readers allow you to change the font as well, so you can have an easier time reading your news. Additionally, since the feed doesn’t contain anything other than the article body and any in-line images, all you see is the article as written by the author without any ads or other distractions that might exist on the source site.
2 I Get All My Content in One Place
If you’ve ever looked up something on the internet, then you’ve experienced the information overload that it brings. There are thousands of articles, videos, news sources, and every other form of content imaginable covering anything you want across various sites on the internet. Unless you enjoy drowning in browser tabs, I don’t see how that’s an efficient way of collecting information.
RSS solves this problem by combining all your content feeds in one place. For example, my Feedly feeds show me the latest cybersecurity and tech news from every website I frequently read in a single click. I can further sort through the list using filters or search for something specific.
This saves you from having to visit multiple sites to cross-check information or just to look up another perspective. Not to mention that having all your content in one place is a massive time-saver and provides a much more cohesive reading experience than having to juggle between different sites and their interfaces.
There’s also a fair amount of customization on offer that helps make your reading experience consistent. In addition to the changes mentioned above, you can check out these novel RSS reading apps that can change the way you get news feeds and updates.
Email newsletters are one of the biggest competitors to RSS feeds. Having a list of a publication’s best articles delivered straight to your inbox sounds like a good idea until you realize that you read dozens of them.
Before you know it, your inbox will be full of random newsletter emails you don’t even remember signing up for. Even if you want to legitimately subscribe to a newsletter, chances are you’ll miss it in the sea of spam our email accounts get. Some email providers like Gmail also sort different kinds of emails, including newsletters, into different folders, meaning you’ll have to do some digging before you find the newsletter you want.
RSS feeds take that hassle away by creating a separation between your inbox and the content you like to read. That way, you can find your emails without having to fight a sea of spam and get all the benefits of finding your content through an RSS feed as you usually would.
4 Updated Information When I Want It
If you go looking for something on the internet with search engines like Google, you’ll find it for sure—but there’s no guarantee that it’ll be the most updated information. One way you can counter this is by manually going to each website or information source and checking to see if there’s an update. Or you can just use RSS.
RSS feeds get updated with new articles or content the moment it becomes available. Additionally, you can always set up push notifications to be delivered to you every time something covering a specific topic you’re interested in pops up.
In a world where behind-the-scenes algorithms control everything we see and interact with on the internet, finding unbiased news or information in general can be difficult. Even something as simple as a Google search might bring up different results based on your geographical location and other factors. There’s a good chance that a good, unbiased report might get buried in the hundreds of sites Google ranks on its search page.
RSS feeds make it easier to find the news you want as you skip any search engines in the middle and go straight to the source. It’s important to consider that all RSS does is deliver a piece of content to you as it gets published on the source website, so there’s no scope for any algorithms interfering in between to control what you see. That’s exactly what you want when looking for news.
RSS readers like Inoreader also allow you to look up other users’ feeds or what feeds are trending on the platform so you can get a sense of what’s going on around the world.
There are obvious benefits to using RSS, but it does require the initial setup and some know-how of how things work before you can make the most out of it. That’s one of the biggest reasons it was never widely adopted by the masses, along with widespread social media adoption. However, for those who still want to use it, RSS feeds are still around for the foreseeable future.
Nearly every major browser has a built-in password manager. They’re convenient and have so little friction that you wouldn’t even think about them. But I always avoid using my browser’s password manager. Here are five reasons why you should avoid them as well.
Storing passwords in your browser, even with all the encryption, is not the best idea. If you, for example, share your device with someone or your device falls into the wrong hands, they can access these credentials. The simple fact is that most browsers don’t have security mechanisms like multi-factor authentication to protect your stored credentials. As long as someone has access to the device, they may be able to see stored credentials.
Additionally, although browsers safely store your credentials, they are more susceptive to malware attacks via JavaScript, according to cybersecurity company Avira. And if you prefer to self-host your passwords, browser-based password managers don’t allow you to do so.
In contrast, standalone password managers offer more security, such as multi-factor authentication and the ability to lock your vault automatically, immediately, or after a certain period. Some also give you the freedom to self-host your credentials (For example, you can self-host your Bitwarden password manager).
2 Don’t Provide Auto-Fill Outside the Browser
Another significant limitation of browser-based password managers is that they don’t work outside the browser. You can only get auto-fill while accessing your favorite services within the browser.
If you need to log in to an app like Instagram or Facebook, you must first access your credentials in your browser and then copy and paste them to the app’s login page. It’s inconvenient.
Even worse, copying your login credentials isn’t a good idea since some apps on your device can access clipboard content. If there’s a malicious app on your device, it might steal your credentials.
To give credit where it’s due, some browsers like Google Chrome and Firefox offer dedicated password management apps to provide auto-fill outside the browser.
3 Can Only Store Passwords
Browser-based password managers limit you to store only passwords, which has been limiting for my use case. In contrast, the best password managers allow you to store any kind of confidential data. I use Bitwarden as my primary password manager because it offers more than just a vault for storing passwords. It allows me to store credit cards and identity details (personal information like your name, address, and more) to quickly fill out online forms.
A password manager like Bitwarden also allows me to store secure notes, which has been handy for storing credentials that aren’t passwords—like API keys, recovery codes, etc. Plus, I can add a custom note (like two-factor authentication recovery codes), attachments, and custom fields for every password saved.
Some browsers allow you to store your address and payment cards. Still, you won’t get the full suite of features that a dedicated password manager provides.
Browser password managers tie you to that specific browser. If you switch to a different browser, you must import all your passwords or go through the hassle of copying and pasting.
I use Chrome, Firefox, and Safari, so I can’t use any of them to store my passwords. If I save passwords on one browser, I’ll need to update passwords in all three every time I change a password.
Another limitation is that although you can access your passwords by logging into your account (e.g., Google account for Chrome passwords) on any browser, you’ll lose the convenience of auto-fill. This can make switching browsers challenging
Finally, I avoid my browser’s password manager because it has limited features. Whether you use Firefox, Safari, Chrome, or any other browser with a password manager, the available functionality is very limited relative to what you get in standalone password managers.
First, some standalone password managers allow you to share your passwords securely using a built-in sharing feature or by having a shared vault. Since several streaming services still allow password sharing, this is a handy feature. Standalone password managers also have family plans, allowing all members to have private password vaults and shared vaults for family services.
Some password managers like Proton Pass have a built-in email alias feature that allows you to hide your actual email while signing up for online accounts. These are just examples; different password managers have various additional features like an integrated authenticator, customization of generated passwords, and more.
While my favorite browser has a password manager, I don’t use it for the reasons mentioned above. Bitwarden is my preferred password manager, but there are other reliable alternatives that you can use instead of the one in your browser. Most of them are free, so switching shouldn’t be a problem.
Inoreader is a free RSS feed reader app that consolidates articles from multiple sources for easy access.
Customize your feed with up to 150 sources and monitor it through a customizable dashboard.
Pro users gain access to advanced features such as rules, filters, article translation, and monitoring feeds, which enhance control.
If you want to read up on your favorite online news site or any other source of information, you can either take the time to look up what you want on a specific website or go through the newsletters that clog your inbox. A more efficient way is to use an RSS (Really Simple Syndication) feed reader.
RSS readers collect articles from multiple sources into one app, making it extremely easy to find what you need without fighting search algorithms and the general mess that the internet is. And the best part? You don’t need to pay for this feature—Inoreader lets you create a personalized news feed for free.
What Is Inoreader?
Inoreader is one of the best and most well-reviewed RSS feed-reading apps you can find online. If you don’t know what RSS is and what you can do with it, we’ve got you covered, but in a nutshell, RSS is a simple format that allows websites to share updates directly with you. RSS is a great alternative to newsletters and social media, as it puts you in control of what appears in your feed, free from the influence of algorithms.
There are a lot of ways you can find popular content on the internet, but RSS readers like Inoreader allow you to build your own feeds. It’s a little bit of work setting it up, but once you’re done, you’ll have all your news sources coming up in one feed and in one app, exactly how you prefer.
Inoreader’s free version is rather limited in terms of the features you get, but you can still get your news feed and a personalized dashboard up and running in no time. However, more advanced features like filters, automation, and translation are reserved for paying users.
1. Setting Up a Feed
The first thing you’ll see when you log into Inoreader is your dashboard with three options to get you started. You can search for your preferred sources like news websites, explore Inoreader’s featured feed collections, or import feeds from another RSS reader.
Inoreader’s featured collections are a good starting point for beginners, but to create a truly personalized feed, it’s best to search for the websites and sources you frequently read. This approach helps you avoid clutter and focus on what matters most to you.
Inoreader offers extensive control over what you can add to your feed. You can follow websites, Facebook pages, Twitter accounts, Google News, Reddit, Telegram channels, and even other Inoreader users. You can also track keywords, brands, names, subreddits, or specific phrases.
While Facebook Pages are restricted to Pro users, all other sources are accessible on the free tier.
The free version of Inoreader lets you select up to 150 feeds (or sources), so you can look up all your sources and add them to Inoreader. As you add sources, Inoreader will suggest similar ones to expand your feed further.
2. Monitoring Your Feed
Once you’ve added your desired feeds, you’ll likely return to the app frequently to stay updated. This is where Inoreader’s dashboard comes in handy.
When you first load the reader, it defaults to a basic yet functional dashboard. However, if you want more control, you can create a totally custom dashboard. Just click the Create custom dashboard in the top bar, select the widgets you want, and you’re off to the races.
These dashboard widgets show everything from the latest articles coming in across your feeds to the total number of unread articles you have, article reading statistics, trending articles on Inoreader, and even recommended sources.
There’s not a lot you can customize here, though. It would’ve been nice if Inoreader had let me resize the widgets so I could truly make the dashboard look how I wanted it, but the fact that I can deck it out with the information I want to see is valuable.
Once you’ve set up everything to your liking, chances are you’ll find what you need on the dashboard itself, without having to scroll through your sources. And if you do need to take a deeper look, you can create folders to group similar feeds together for another layer of organization.
Another powerful feature is Monitoring Feeds. This feature allows you to search for a specific term and create a feed for it. As articles containing the search terms appear, they’ll populate this monitoring feed, ensuring you catch what you’re looking for as soon as it arrives. Unfortunately, this feature is behind a paywall and is only accessible to Pro subscribers.
Another feature you can use to spot words and phrases in articles quickly is Highlighters. Add your term, select a color, and you’ll see the word or phrase highlighted in that color as you read articles in your feed. This is by far one of the best features I’ve come across in an RSS feed app, and it makes it incredibly easy to find what you’re looking for without reading entire articles.
3. Using Filters and Automation
Two of the coolest Inoreader features, Rules and Filters, are only available to Pro users, which is a bit of a bummer. As the name suggests, rules allow you to act based on article properties. For example, you can send push notifications if an article from a specific site, author, or keyword gets published.
Filters enable you to exclude articles from your feed or connected apps based on keywords in their title or body. Since filtered feeds only cover the last 30 days, filters help ensure you see only the content that interests you, while irrelevant content is filtered out.
4. Translating Articles
Inoreader also offers translation features for those reading articles in different languages. This feature, available only to Pro subscribers, eliminates the need to rely on browser-based or third-party translation tools, saving you time and effort when accessing foreign-language content.
While Inoreader’s Pro version offers many additional features, the free version is sufficient for building a simple, clutter-free news feed that delivers what you want, when you want it.
Adobe Express offers Animate From Audio for character animation using voice in real-time.
Choose from 200 characters, 100 backgrounds, and 6 aspect ratios for unique animations.
Record or upload an audio file, preview, trim, and download your character animation easily.
Have you ever wished you could bring a drawing to life, but don’t have a degree in animation? Thanks to this nifty Adobe tool, you can animate characters using just your voice—no experience required. Let me show you how.
How I Create Character Animations Using Adobe Express
Animating your graphics, text, and images in the Adobe Express editor is pretty simple thanks to the Animation feature. But this isn’t the only animation tool that Adobe Express has to offer.
Enter Animate From Audio, a free Adobe Express tool that lets you animate pre-drawn characters in real-time using just your voice—or any audio really. Every time the program picks up an audio signal, it animates the character along one of the pre-drawn paths.
There are over 200 characters you can choose from, and all of them move a bit differently. You can also choose from over 100 different backgrounds, and select one of six different aspect ratios. So make your selections and get ready to record.
Make sure you have a mic plugged in and hit Record. I also recommend turning on Enhance Speach for better-sounding audio. Click Done once you’re happy with your recording.
If you don’t want to record audio, you can upload any audio file via Browse, which is is the option I went for. It will take a few minutes for Adobe to generate your results.
Once the results are ready, Adobe will load a preview that you can play through and also trim using the handlebars on the sides. You can go ahead and Download the video straight to your device, or you can Open in Adobe Express to continue editing your results.
Here’s what mine ended up looking like:
And that’s all there is to it! Who knew character animation would require this little time or skill? Visit the Animate From Audio tool, select your character and background, record your audio, and await a fun creation.
Mobile gaming makes playing more accessible, offering diverse game options.
Online gaming connects you with like-minded individuals, fostering friendships.
Gaming aids in socializing from home, relaxing, expanding knowledge, and providing escapism.
Gaming is one of my favorite pastimes and I think that gaming has benefits for a range of people. Here’s why I recommend gaming to almost everyone I know.
While in the past people recommended powerful PCs or dedicated consoles for gaming, the rise of mobile gaming means that it’s easier than ever to get started with games.
Mobile gaming is often associated with match-3 titles and simple word games. But increasingly complex games, including RPGs and MOBAs, have made their way to mobiles. The rise of gacha games has also resulted in some pretty impressive titles appearing on mobile. You can even try out some of the best two-player mobile games if you want to play with friends.
This means that gaming no longer requires as much of a investment, so it doesn’t hurt to try out a few free titles to see if you like it.
2 Games Can Help You Meet People
The rise of online games means that you can find people with shared interests. I’ve met quite a few of my friends through online games. In fact, two of my friends got married after meeting in Guild Wars 2.
Online gaming is a great way to meet people if you’re shy. You can join guilds, which create a sense of community, or team up regularly with fellow players in games like Valorant.
Video games are a great way to socialize — especially if you’re at home a lot. Many of us have busy work schedules and chores that mean we don’t go out as much as we used to. In my case, my disability makes it more difficult to socialize outside my home as my chronic pain and fatigue make it difficult to spend time with others in outdoor settings.
But I’d still say I’m pretty social. I game most nights with my friends on Discord. Even if we aren’t playing the same game, we stream our single-player games and comment on them with each other.
I’ve also made my gaming setup more comfortable, so that I can enjoy chatting with my friends while playing games.
Even when I’m not in the mood to socialize, gaming is a great outlet for stress at the end of the day. I find cozy games especially relaxing and can easily sink hours into them.
I think that there is a game genre for everyone that can help people relax. Whether it’s blowing off steam in an FPS game, whiling away the hours in a simulator game, or simply unwinding while playing a word game or other relaxing mobile games.
In fact, for a while I was too burnt out to really escape into games, so I spent my time listening to lo-fi playlists while playing Jigsaw Puzzle Dreams on Steam.
5 You Can Expand Your World With Games
Games with immersive and detailed stories can help open up your world. It’s one of the reasons that RPGs with rich lore are my favorite genre.
Whether it’s battling aliens in a game like Mass Effect 3 or enjoying the whimsy of a game like Stardew Valley, the tales and details of these games opens you up to interesting stories. Often, a game will feel like an interesting novel that completely absorbs me into its mythos and world.
6 Gaming Can Teach You New Things
While there are educational games that are specifically made to teach you things, you’ll be surprised just how much you learn from playing ordinary video games. My time in Divinity: Original Sin 2 taught me that the poisonous toadstool I often see depicted in fairy tales is called fly agaric.
Games like Sim City taught me about the importance of rescue services and road management. And it’s actually in Red Dead Redemption 2 that I first tried my hand at poker. There are even animals I have never seen in real life that I recognize from video games.
Gaming is a hobby that’s more accessible than ever, with a variety of genres that can help you meet people, socialize, learn new things, and provide escape and relaxation. It’s why I recommend gaming to almost everyone I know—because it has so many potential benefits to those who give it a try.
Don’t buy an expensive distraction-free writing device—repurpose an old iOS device.
Use Apple Configurator to limit your iOS apps to a single one.
Experience increased productivity and focus using your repurposed distraction-free writing tool.
Distraction-free writing devices are exceptionally useful. However, they’re pricey. The good news is you don’t need to go buy a new device if you have an old iPad or iPhone lying around. With a little ingenuity, you can turn that device into an awesome distraction-free writing tool.
Why Would Anyone Want to Do This?
Matt L. Hall / MakeUseOf
As someone who writes on the internet for a living, I deal with distraction regularly. X, Instagram, TikTok, YouTube, you name it, and I’ve probably spent hours wasting time doomscrolling through it. Because social media is such a big part of my workday, I typically find myself unintentionally losing hours in the abyss of the algorithm.
To prevent these distractions, I needed a nuclear option that kept me from accessing the social media time sucks that appeal to my lizard brain. A distraction-free writing device was the solution. But I didn’t want to splurge on dedicated hardware.
Instead, I found a way to repurpose an unused iPad I already had. And after a week of test-driving the setup, I’ve discovered it makes me much more productive. If that sounds interesting to you, you’re in luck. Today, I’m going to show you how I did it, and how you can do the same.
What You’ll Need
To take the plunge with this project, here’s what you’ll need:
An old or unused iOS device (I used a 2022 iPad Pro, but any old iOS device should work)
Apple Configurator
A USB cable
A computer running macOS
Make sure you’ve backed up your iOS device before we begin. This process will require a complete factory reset, which means you’ll lose all data and apps on the sacrificial device.
It also goes without saying that you shouldn’t use your primary iPad or iPhone here. Even though the process is reversible, the reversal isn’t frictionless.
Why Apple Configurator?
Matt L. Hall / MakeUseOf
Apple Configurator is designed to manage iOS devices in a school or workplace setting. Essentially, the program acts like the iOS police, and only allows access to certain functions on the managed device. It works like Guided Access on steroids.
We’ll be leveraging Configurator’s built-in features to lock ourselves out of every app on the iPad, save for our writing app of choice. I use Obsidian, but you’re free to use whatever distraction-free writing app you prefer. I’ve tested Ulysses, Drafts, Simplenote, and even Apple Notes. All work spectacularly.
The one thing you’ll want, however, is some sort of cloud-based syncing to keep everything accessible for editing purposes.
Download: Obsidian for iOS | macOS (Free, Subscription available)
How to Go Distraction Free on iPad or iPhone
Matt L. Hall / MakeUseOf
Once you’ve downloaded and launched Apple Configurator, you’ll attach your iPad to your macOS computer using a USB cable. Configurator should recognize your device and show it on screen. Highlight the device and right-click to bring up a context menu. Then, choose the Prepare option. Configurator will then ask you for some additional setup information.
Matt L. Hall / MakeUseOf
Select Manual Configuration and make sure Supervise devices and Allow devices to pair with other computers are selected. These options will activate supervised mode and enable you to connect the device to any computer, just in case you need to unlock it. Click Next.
Matt L. Hall / MakeUseOf
Select Do not enroll in MDM and click Next. Then select New organization… and type in whatever you’d like. I called my organization “Matt,” but the name doesn’t really matter. Click Next.
Matt L. Hall / MakeUseOf
Using the drop-down menu, select Don’t show any of these steps, and click Prepare. After a quick verification, Configurator will erase and restore your device to its factory settings.
Matt L. Hall / MakeUseOf
If you get an error message here, don’t worry. Configurator is a bit quirky. As long as the iOS device factory resets, everything should work just fine.
Adjust iOS Settings
Once the device is reset, you’ll need to adjust a few settings before putting it into Single-App mode. Otherwise, you won’t be able to access these. So, using the device itself, open the iOS Settings App, and change the following according to your preferences.
Bluetooth and Wi-Fi (turn on and pair any devices)
Tap to click (turn on)
Apple ID (enable)
Text sizing and brightness
Any other accessibility features in use
Make sure you also download your preferred writing app from the App Store as well. Be sure not to enable Face ID or a passcode, as these can cause your device to exhibit some weird behaviors.
Enabling Single App Mode
Matt L. Hall / MakeUseOf
After you’ve adjusted your settings, and downloaded your writing app, it’s time to lock down your iOS device. From the Apple Configurator main screen, right-click the device, and highlight Advanced, then select Start Single App Mode.
You’ll be presented with a selection screen where you can choose any app that is currently installed on your iOS device. Here, I’ve selected Obsidian. Once you’ve highlighted your app, click Select App. A short progress bar will appear on-screen, and the device will be placed into Single App Mode.
Congratulations! You’ve now turned your iOS device into a 100% distraction-free writing tool. When unlocked, you’ll be presented with the single app you’ve selected and nothing else. No Home Screen, no Settings. Nada. Now you’re ready to write.
If, for some reason, you need to disable this mode, you’ll have to plug your device into your macOS computer and disable the same way you enabled it: Right-click on the device > Advanced > Stop Single App Mode.
As an aside, if you’re wondering if this process might work with apps besides writing apps—say, note-taking apps, or e-book readers, or streaming music or video apps—then you’d be correct. So, feel free to experiment if distraction-free writing isn’t your forte.
Troubleshooting and Limitations
Matt L. Hall / MakeUseOf
Something I want to mention here is, even though this process is relatively easy to accomplish, it isn’t without risks. Sometimes Configurator glitches or acts strangely, and you’ll need to put your device into Recovery or DFU mode to restore it. This shouldn’t dissuade you from trying this process. But it does happen occasionally.
As I was experimenting with this setup, for example, I somehow managed to disable the touch screen on my iPad. It wouldn’t accept a passcode, or Face ID input, essentially bricking the device. Recovery mode didn’t help either, as the iPad disconnected any time I tried to recover it. Frustrated, I reached out to Apple for help, but technical support wasn’t able to assist. Only after several hours of trial and error was I able to find a solution.
If something like that happens to you, don’t panic. To fix it, you’ll just need to connect the iOS device to your macOS computer, place the iPad into DFU (not Recovery) mode, and do a full restore.
How I Use My New Distraction-Free iPad
Matt L. Hall / MakeUseOf
The best part about this approach to distraction-free writing, for me, is that it retains the iPad’s portability and its giant 11″ display. If you compare it to a distraction-free tool like the Freewrite Traveler or the Pomera DM250, it’s a much more pleasant writing experience. When combined with a Bluetooth keyboard or the Apple Magic Keyboard, it’s like carrying around a cordless typewriter.
I’ve used the iPad to write articles on the train, on the couch, and at the coffee shop down the street. The iPad goes everywhere with me now, so I’m ready to write at a moment’s notice. And since the conversion isn’t permanent, I can take the device out of Single App Mode whenever I’m near my computer.
While it might not be the perfect solution for everyone, it has been a boon to my productivity and my focus. It even helped me write the article you’re currently reading. So, give it a shot and leave me a comment here if you try it. I’d love to hear about your experience.
Select a camera that meets your needs and consider professional installation if you’re not confident doing it yourself to maximize effectiveness.
Proper placement and strong Wi-Fi are crucial. You’ll also want to regularly review the footage to ensure you don’t miss any important activity.
Additionally, update your camera’s firmware, use strong passwords, and enable additional security features to keep it functional and secure.
Having a smart camera on your property can give you a sense of security and peace of mind. But just installing a solid model seldom does the job. Certain oversights can significantly undermine your camera’s effectiveness and features. To truly get your money’s worth from the device, avoid making these mistakes.
1 Buying the Wrong Camera
Smart cameras are no longer few and far between. A quick search on Amazon or Best Buy will reveal just how many options you have. The thing is, though, not all cameras are created equal. For instance, a particular model might work great during the day but poorly in low-light conditions. If you require nighttime surveillance, it’s easy to see how such a camera might not be of much use to you.
As with most devices, there are various features and things to consider before you purchase a home security camera. I recommend doing your research and spending at least a few days comparing and, perhaps, even testing a couple of models before you pick one for your home’s security.
You can purchase the best smart home camera, but unless you place it just right, it’s not going to offer the coverage you need. This may sound pretty obvious, but I’ve seen a lot of people install their smart cameras in the wrong spots.
Especially when installing a smart camera outdoors, you want to make sure you’ve not placed it in plain sight since it could be stolen, but you’ll also want to avoid placing it too far away from the action. Additionally, you’ve got to be mindful of decorations obstructing your view.
Seasonal changes like growing foliage can also create obstructions that weren’t there at the time of installing the camera. Unless you put sufficient thought into the location of your camera, you might find yourself moving it around constantly. Before setting up your device, be sure to check the best places to install smart cameras on your property and strategically position them so you get the best coverage.
3 Installing a Smart Camera Beyond the Wi-Fi Range
Sammy Ekaran / MakeUseOf
If you have a fairly large home or are trying to secure areas outside your home with a smart camera, an issue you might run into is maintaining Wi-Fi connectivity. If your camera is too far away from the router, it might struggle to record high-quality video, experience delays, or may even disconnect entirely.
This happened to me, but I was able to fix the issue by investing in a Wi-Fi extender. There are various ways to boost your Wi-Fi signal and extend the range, so pick one that’s most feasible for your setup. You’ll also want to check whether your internet itself is fast enough to support multiple devices. If the overall bandwidth is what’s causing an issue, consider upgrading your internet plan and router.
4 Ignoring Updates
Like other smart devices, your smart camera needs to be kept up-to-date with the latest firmware and software updates. Timely updates are necessary if you want to take advantage of security patches and new features that can improve your user experience.
With my security camera, I was surprised to find that auto-updates were turned off. I was able to enable this setting and haven’t had to manually install any updates since, so I highly recommend checking the update settings on your camera.
If the camera doesn’t have an auto-update option, set a reminder to manually update the camera. It’s easy to forget, but ignoring updates can leave you and your home prone to security vulnerabilities.
If your smart camera came with a default username and password, be sure to change it as soon as you set it up, even if you think the default password is secure enough. You don’t know who has access to it, and not setting up a unique, complex password can leave your device open to hacking.
I also recommend changing your password at least twice a year to further reduce the chance of unauthorized access or hacking. If the device has any additional features, like two-factor authentication or encryption, enable them as well.
Think you’ll set too complex a password that you won’t remember yourself? There are various ways to create unforgettable passwords that you won’t forget, from including characters from your favorite nursery rhyme to using a keyboard pattern.
I know, I know, once a smart camera is set up in a corner of the living room or outside the home, it’s all too easy to forget about it and go on with your life as usual. But setting up a smart camera is only half the battle. You’ll also want to make time to review the footage it captures.
Now, I’m guilty of this myself. I rely on the camera’s alerts and notifications for the most part. But if I see something unusual, I’ll go back and review the feed.
I’m not saying you need to watch every second of the captured footage, but it helps to periodically scan through the recordings to spot problems that may have gone unnoticed and catch any unfamiliar activity that wasn’t detected.
7 Relying on a DIY Installation
I get it, a DIY installation is far more affordable than contracting a professional to do it for you. And with the wealth of information that’s available on YouTube, it’s tempting to do it yourself.
If you have the skills for it, don’t think twice about installing a smart camera on your own. But if you’re not entirely confident, it might be worth investing in a professional installation. A professional is going to know the best places to install the camera and what settings to configure so you get the most out of the system. The peace of mind that comes from knowing your camera was properly installed outweighs the savings of going the DIY route.
If you’re trying to take your security up a notch, a smart camera is a great place to begin. Avoiding these pitfalls can make your camera all the more effective and secure.
You have probably played through at least one of the later Fallout games, but have you ever played the original? Or the two games that come next in the series? Well, now you can, for free, thanks to the Epic Games Store. But only if you’re quick.
The Fallout Classic Collection Is Free (If You’re Quick)
From August 29 to September 5, Fallout Classic Collection is available to download from the Epic Games Store for free. Fallout Classic Collection comprises the original Fallout, Fallout 2, and Fallout Tactics: Brotherhood of Steel.
Once you claim the free download, the games will be permanently added to your library. It will then be on you to find the time to actually play the darn things as well as the countless other games you no doubt already own.
As you can see from the tweet above, alongside Fallout Classic Collection, Epic is also giving Wild Card Football away for free (until September 5). However, while that game has some decent reviews (alongside some terrible ones), it hasn’t got the same gravitas as Fallout.
Find Out How the Fallout Series Started
You have probably played Fallout 3, Fallout 4, and/or Fallout: New Vegas. After all, these games sold millions of copies apiece. However, the Fallout series has been around since 1997, and back then, sales of the games were counted in the hundreds of thousands.
This, therefore, is your opportunity to play the game that started the whole series off (as well as the sequel and its first spin-off). As is to be expected with games this old, some aspects haven’t aged well. But this collection is still a must-play for any fans of the Fallout games series.
You Have Until September 5 to Claim the Freebies
While it’s well worth downloading Fallout Classic Collection for the low, low price of free, you really do need to get your skates on if you want to secure these three classics entirely gratis.
Come September 5, 2024, Fallout Classic Collection will once again cost money to buy. So we recommend you go to the Epic Games Store without delay and put them in your cart. And if you’re reading this after September 5, then, bad luck.
And if you’re completely new to the Fallout series by way of the TV show, these are the Fallout titles we recommend you play.
Burst mode takes rapid successive photos for action shots like sports events or wildlife.
The iPhone 15 has a high 10 FPS burst rate, while Android phones vary, some allowing FPS adjustment.
After taking burst photos, select, store, and share your favorites manually or use apps to create more engaging content.
Most modern smartphones support some kind of burst-mode photography. Depending on the make and type of phone you own, the process of activating this feature varies, so I’ve broken down the steps for both modern and older Android and iPhones.
Burst mode is a feature that takes multiple photographs in rapid succession. It is also known as continuous mode, burst shot, or sports mode. As the latter name suggests, it is highly useful for taking action shots of fast-moving subjects, such as sports events or wildlife.
Rather than trying to anticipate the movement of the subject and press the shutter at the exact right moment, photographers can use burst mode to take multiple shots and then select the images they want to keep from the group or sequence the images to highlight the transitions.
The maximum number of photos taken in one shot is measured in frames per second (FPS) and the higher your phone’s processing speed, the more FPS it can capture. Most Android phones take 20–30 images with an FPS rate of 2–4 per second, while some phones have an adjustable burst mode that allows you to select the frame rate speed and how many photos are taken.
The iPhone 15, on the other hand, shoots at 10 FPS, which is higher than some professional DSLR cameras.
How to Take Dynamic Burst Photos on an iPhone
The burst mode feature is available on all iPhones running on iOS 7 or later. Depending on the model of iPhone you own, accessing and activating the burst mode is done in different ways.
For the latest iPhones and going back to the iPhone 11, it isn’t necessary to adjust any settings. Rather, when the Camera app is open, simply tap the shutter button, hold, and slide left. The phone will continue taking photos until you remove your finger from the shutter button, and a counter on the side will tell you how many images are being taken.
If you want to change the method for activating burst mode on a modern iPhone, you can go to Settings, and scroll down to Camera. In the list of options, you will see a button called Use Volume Up for Burst. Selecting this option allows you to long-press the volume button on the side of the phone to take burst photos, rather than using the shutter button.
Older iPhones
If you have an older iPhone that was released prior to 2019 (iPhone 11 and earlier), activating burst mode is slightly different. Rather than swiping left on the shutter button, you only need to press and hold it. It’s also worth noting that on older iPhones, if you use the timer, Zoom, or HDR settings, the burst mode function will be automatically disabled.
How to Take Dynamic Burst Photos on an Android Phone
Those with an Android phone may need to activate the burst mode manually in the camera settings. If your device is running on the latest Android operating system, burst mode should be permanently available and is activated by swiping the shutter button to the left or the right.
You can adjust how many images are captured by pressing the small arrow at the top of the screen and selecting the Timed Burst icon. This option allows you to choose from 10 to 600 images at intervals of 1 to 60 seconds.
Samsung Phones
To use the burst setting on a Samsung phone, you will likely need to activate it first. Open your Camera app and go to Settings. Scroll down and tap Swipe Shutter Button to Take Burst Shot.
On the next screen, select Take Burst Shot, then return to your camera app. Now to use the burst function, simply hold the shutter button and slide it down. The camera will continue to shoot up to 100 images until you lift your finger off the button.
Although it’s a useful feature, using the burst mode alone won’t ensure that your action shots are well-framed and perfectly focused.
Regardless of the type of phone you own, there are a few additional steps if you want your images to come out looking professional. Foremost, as with any type of photography, you want to think about lighting. If you are indoors, make sure there is a light source bright enough to illuminate the subject. If you are outdoors, think about your position and avoid shooting directly into the sun.
Before you begin to shoot, check your zoom levels, exposure, and focus, so that you are ready when the right moment comes. As you take your burst shots, remember that the shutter is opening and closing multiple times per second, so try to hold your phone in the same position and as steady as possible, until you lift your finger off the shutter.
If your phone has an image stabilization mode, you can activate it with burst mode to achieve even higher quality images and less blur, which is ideal for rapid-moving action shots. Alternatively, a floor or table-mounted phone stand will ensure that the camera is completely stable as the shots are taken.
Selecting and Sharing Your Favorite Burst Images
Once you have taken a series of burst photos, you can access them in your gallery. On Android devices, burst images are identified by a small, gray file icon in the bottom left corner. Tapping on the image and then on the file icon will open the full selection of captured images, so you can see which are blurred or repeated. Select the ones you want to keep, and the rest will be automatically deleted.
To access your burst images on an iPhone, you will need to go to your photo album, click on Media Types, and select Bursts. This option will open up a screen with all your available burst images tiered on top of one another, and you can choose to keep them all or just the ones you select.
If you want to share images from a burst reel with friends, you will first need to manually select each image you want to keep, save them to your photo album, and then select and share them individually. However, for a more unique option, you can download an app such as Gif Toaster or ImgPlay, which can convert your photo sequence into a slideshow or a GIF. You can also add fun elements like text and filters to further customize your GIFs.
So, the next time you’re at a ball game, or out walking the dog, remember to activate the burst mode on your smartphone and then impress your friends with clean, crisp action shots, rather than blurred images or ones that just miss the highlight by a fraction of a second.
Getting outside to soak up some sun rays and fresh air is such a nice change of pace from being cooped up inside. But if you’re planning to park yourself in the park with your laptop to get some work done, there’s something you’ll want to keep in mind first—how the sunshine might impact your computer.
1 Your Laptop Overheats Faster in Direct Sunlight
It’s generally ideal if laptops stay somewhere between 10–35°C (50–95°F) to operate comfortably. But leaving your laptop out in the hot sun is just asking for an overheating problem. First, the sun dumps a ton of heat onto your laptop. Infrared radiation from the sun really bombards it with thermal energy, which can cause your laptop’s surface temperature to skyrocket to around 80–90°C within an hour.
As the internal temperature rises, your laptop’s CPU may slow down (known as thermal throttling), experience performance issues, or even shut itself off completely to avoid permanent hardware damage from overheating.
That said, how badly your laptop overheats depends on several different factors, such as how old it is, how good its cooling system is, the ambient temperature around it, and just how intense the sunlight is. Newer laptops with more advanced cooling may be able to tolerate direct sunlight a bit longer before having major performance issues or shutting down from the heat.
2 Sunlight Can Significantly Decrease Your Laptop’s Battery Health
Christian Cawley/MakeUseOf
Laptop batteries, usually lithium-ion, are really sensitive to heat. High temperatures can speed up the chemical reactions inside the battery, leading to quicker degradation. This not only reduces how long the battery can power your laptop before needing a charge, but it also increases the risk of the battery swelling up or, in worse cases, thermal runaway. This happens when the battery gets too hot and starts releasing energy uncontrollably, in a dangerous chain reaction. In extreme situations, this can cause the battery to explode or even catch fire.
The downstream effects of sunlight degrading your battery like this are significant. As the battery’s capacity goes down over time, your laptop will charge less and less off a single charge. This means you’ll have to rely more on being plugged into a power outlet. If you need your laptop on the go for work or productivity, you might end up tethered to a power source a lot and lose some of the mobility your device provides.
3 UV Radiation May Accelerate the Degradation of the Laptop’s Plastic Components
Gavin Phillips/MakeUseOf
While it’s easy to think about UV rays harming your skin, the sun’s damage can also significantly impact your laptop, especially if it is made of hard-shell plastics like polycarbonate and ABS. These are lightweight and durable but also very vulnerable to UV light.
When hit with those high-energy UV beams, the plastic molecules start to break down through a process called photodegradation. The bonds between polymer chains snap apart over time, making the material progressively weaker and more brittle. If left unchecked, this degradation can cause visible cracks, discoloration, or outright shell failure down the line.
Not only that, but a degrading casing has broader repercussions for a laptop’s health, too. A more fragile shell is more prone to issues from regular bumps and bends. Connections might loosen, components may fail, and you could lose data or have corruption issues.
4 Sudden Temperature Changes Can Cause Condensation Inside Your Laptop
One of the biggest threats to how long your laptop lasts and runs well is getting moisture inside it. This is especially a problem if you quickly take your laptop from a well-aerated (or air-conditioned) place into hot, humid weather.
The science behind what happens is that when warm, damp air gets into your laptop and touches its cooler insides, the water vapor in the air can turn into little droplets of liquid water. This extra moisture can build up on delicate electronic parts and potentially cause short circuits, corrosion, or other damage over time that could lead to system crashes, glitchy behavior, and a laptop that does not last as long as it should.
What’s sneaky about this process is that the condensation might not be visible to the naked eye right away. The water droplets can form in hard-to-reach nooks and crannies inside and spread out around in a way that might not seem obvious until bigger problems start happening. So be careful not to whiplash your laptop between very different climates if you want it to keep chugging along for years.
5 Your Laptop Screen Might Be Harder to See Due to Glare
Gavin Phillips/MakeUseOf
Glare on laptop screens happens when light bounces off the surface. Glossy screens are most affected since they reflect more light than matte finishes. When sunshine hits your display, it creates a mirror effect that scatters light back into your eyes, washing out what’s on the screen.
The position of the sun outside also plays a big role. As the sun moves through the sky, the angle at which it hits your laptop changes, shifting the glare around the screen. This means you’re constantly readjusting your laptop to deal with the glare.
Staring at a glare-filled screen for too long isn’t great for your health, either. It can give you headaches from straining your eyes. Over time, it may even cause blurry vision or other eye issues. The discomfort of glare may also lead to bad posture as you awkwardly crane your neck trying to see, which could result in a sore back or neck.
Laptop makers realize glare is a pain, so they’re starting to offer some solutions. Matte screens don’t reflect as much light as glossy ones. Brighter screens and screens that adjust based on lighting are other ideas. But these features often cost more. Even the most high-tech displays still have trouble beating direct sunlight, though.
Converting a Microsoft Word file to an Excel spreadsheet or vice versa is straightforward.
You can achieve this with the good old copy-and-paste method, which is the easiest option available.
There are other methods available as well that you should try if you face an issue with the copy/paste feature.
If you’re dealing with data-heavy reports or handling information in various formats, you may need to convert a Word document to an Excel spreadsheet or vice versa. Fortunately, there are straightforward methods to accomplish this conversion, making it easy to switch between Word and Excel as needed.
How to Convert Word to Excel
It’s not uncommon to receive a Word document containing a table you want to analyze more deeply in Excel. Thankfully, two easy ways to convert your Word table into an Excel spreadsheet exist. The first is to copy and paste your data, and the other is to use an online converter.
1. The Copy/Paste Method
The copy-and-paste method is so straightforward that it’s easy to overlook, thinking it might be too simple to be effective. But it works seamlessly! To convert your Word document to Excel, just follow these steps:
Open your Word document and an empty or existing Excel document.
Select all the information that you want to copy from your Word document.
Copy the information by pressing Cmd + C (macOS) or Ctrl + C (Windows).
Go to your Excel spreadsheet, tap the location where you’d like to place the data and press Cmd + V or Ctrl + V to paste the information.
If you’d like the table to appear in an Excel-like style, tap the Paste options icon in the bottom right of the table and select Match destination formatting.
The data from Word will now be in your Excel spreadsheet and ready for further analysis. You can format the numbers in Excel to make them easier to work with.
2. Using an Online Converter
An online converter like Online2pdf lets you easily convert any Word document to Excel. Here’s how:
Go to Online2pdf.com and choose Select Files. Navigate to where your Word document is and select it. After that, you’ll be taken back to the website.
Tap or press the button adjacent to Convert to and select Excel 2007–2021.
After that, you can rename the output file if you need. Otherwise, select Convert to start the conversion.
The site will immediately start the conversion, and once it’s done, an Excel file will be downloaded automatically.
How to Convert Excel to Word
In another scenario, you might need to include a data table from Excel in a Word report. You can use the copy-and-paste method or an online converter, just as with Word to Excel. Additionally, Microsoft Word’s object insertion feature offers another convenient option. Let’s explore all three methods.
1. The Copy/Paste Method
This is the simplest way to convert an Excel spreadsheet into a Word document, much like Word to Excel. Here’s how to do it:
Open your Excel spreadsheet and an empty or existing Word document.
Select the data you want to copy and press Cmd + C (macOS) or Ctrl + C (Windows).
In your Word document, tap where you’d like to insert the data and press Cmd + V or Ctrl + V to paste.
Next, tap the Paste options icon in the bottom right of the table to customize it.
Select Match Destination Table Style to make your table look like a Word table.
2. Using Object Insertion
Microsoft Word offers a special feature that allows you to insert an Excel spreadsheet quickly. Using the object insertion feature, you can also embed PowerPoint slides in a Word document. Here’s how to use this feature:
Open your Word document and click the Insert tab in the top menu.
Click Object from the top menu. You may need to select Object again to see the dialog box.
On Windows, go to Create from File and click Browse.
On macOS, select Microsoft Excel Worksheet from the object selection dialog and click From File.
Navigate your file system and select your Excel file.
Once you select an Excel file, the data will be immediately inserted into your Word document.
3. Using an Online Converter
Like converting Word to Excel, an online converter is a straightforward third-party alternative for this task. The same website, Online2pdf, allows you to convert Excel files to Word documents. Here’s how:
Go to Online2pdf.com, click Select Files, and select the Excel file you want to convert to Word.
Tap the selection button adjacent to Convert to: and select Word 2007–2021.
Tap Convert to start the conversion.
The site will automatically download the Word document after the conversion is finished.
Converting Word documents to Excel spreadsheets or vice versa is easier than you might think. While the copy-and-paste method is often the simplest approach, you now have alternative methods at your disposal if copy-and-paste doesn’t work out for you.
The old adage suggests that a picture paints a thousand words. So, why then, would you want to add words on top of a picture? I personally don’t know, but Instagram seems to think it’s a good option to offer.
Instagram Launches New Text Tools for Everyone
As outlined in a post on the Instagram Creators Blog, Instagram has launched several new text tools designed to help creators stand out.
The headline feature is the ability to add text and stickers to your photos. This means that your fantastic smartphone shots can be obscured by some inane writing or another shot layered on top of the original one.
Instagram is also adding new fonts, animations, and effects that you can use in Reels and Stories. These can be mixed and matched in order for you to at least feel like you’re unique and able to stand out from the crowd.
Lastly, you can now create Carousels containing up to 20 photos or videos. And if you apply these text tools while doing so, you can truly create a wonderful mess.
How to Use Instagram’s New Text Tools
Instagram
As you would expect, using Instagram’s new text tools is self-explanatory and user-friendly.
To add text to a photo, simply tap the Text button after selecting the photo you want to post to your feed. And to layer another photo on top in the form of a sticker, tap the Gallery button in the top-right of the screen. You can then change the shape of the sticker by tapping on it.
To see the new fonts, open the Text tool and tap on the Text button. Once you have found one you like, you can animate it or add an effect.
To create a longer Carousel, tap Post and add as many photos or videos as you want (up to a maximum of 20).
I’m an Instagram Purist, But You Do You
To be clear, you could already ruin your photos with text and stickers, but only if you used a third-party app such as Canva before uploading your shot to Instagram. Now, thanks to these new text tools for creators, you can ruin your photos from right within the Instagram app.
I must admit, I’m something of an Instagram purist, only using it to upload carefully chosen and edited shots. So I’m not about to ruin one of my smartphone photos by writing all over it. But if this sounds like your kind of thing, have fun with it.
And why not add a song to your Instagram profile to really hammer home the MySpace-ification factor.
Ah, doomscrolling, the phenomenon of consuming too much negative social media content. It’s tricky to avoid, but by combining a few tactics, your social media interactions can be filled with positivity and optimism. Here’s how I avoid doomscrolling.
1 I Have A Morning and Night Ritual
Most times when I wake up, I sit quietly for about 30 minutes before engaging with my phone. That way, I am not immediately bombarded with social media notifications that can lead to doomscrolling. It lets me think about what I want to achieve during that day so that I start on a positive note.
When my doomscrolling is at its worst, I also put my phone in Do Not Disturb mode (a feature that can help you spend less time on social media) and put it away an hour before I sleep. That way, I am not sucked in, causing me to stay up late scrolling through social media and exposing myself to negative content.
2 I Set A Timer
Setting a timer helps me avoid doomscrolling by limiting my time on social media at any given time, reducing the amount of negative content I see. Also, knowing my time is short helps me focus on important and meaningful content and interactions. Furthermore, the alarm snaps me out of it when I unintentionally start doomscrolling.
The timer is useful when I have work but still want to check my social feed between breaks. I usually set the timer on my iPhone or use an online timer (when I don’t want to touch my phone).
Some social media platforms tend to attract more negative discourse than others, leading to extended and unhealthy scrolling. For example, I found that most of my negative interactions were on X (formerly Twitter), Facebook, and Reddit. You would have to audit the ones you visit to find this out for yourself.
I now prefer platforms with the most positive-to-neutral content to avoid negative or heated interactions. For me, these are places like YouTube, LinkedIn, and Pinterest. These platforms make it less likely for me to start anxiously scrolling.
4 I Avoid Negative Accounts
One thing I started noticing when I was getting a handle on my doomscrolling is that many accounts I followed didn’t focus on positive messages. So, if I saw a post from someone who shared triggering content constantly, I unfollowed them.
This greatly improved the quality of my feed by making it more balanced and skewed toward positivity instead of things that made me anxious.
It used to be that when I saw a controversial post, I would jump to the comments section after reading it. I thought that was where the “fun” was.
The sheer amount of comments that these types of posts can attract made me invested in the many replies, debates, and conflicts. The continuous scrolling made it hard to stop, and I often spent an unhealthy amount of time going through everything due to the FOMO effect. I even joined in from time to time.
Now when I see a controversial post, I avoid the comments section. This has made me more mindful of my scrolling habits and broke the cycle of getting lost in emotional conversations.
6 I Do Things That Make Me Happy
Another great tactic I use to avoid doomscrolling is to shift my focus. If it’s not work, then it’s something I enjoy, such as playing video games, spending time with my family, drawing on my Android tablet, or taking a walk.
There is nothing fulfilling about doomscrolling. The longer I am away from my device doing things that make me happy, the more my mood is lifted, and I feel less stressed and anxious. Doing this often helps me build up positive habits that keep me away from doomscrolling.
7 I Disconnect Completely
Hamlin Rozario / MakeUseOf
Despite all these tactics, I can sometimes fall back into the routine of doomscrolling, especially on extremely busy and stressful days. To break the cycle, I usually disconnect to reduce temptation and mentally reset. This helps me find the time to refocus and reinstate my good habits.
Disconnecting will be different for you than it is for me since we probably have different lifestyles and needs. However, here are some steps I take to disconnect:
I put my devices in Airplane Mode for a set period.
I intentionally leave my phone behind when I’m going into another room or leaving the house.
I do a social media digital detox over the weekend.
Before I got a handle on my situation, I started noticing signs that doomscrolling was affecting my mental health. If you’re feeling any of them, such as sleep disruption, anxiety, stress, and losing yourself in the doom and gloom of the world, it’s time to take a step back and do something.
September is synonymous with Apple launching its iPhone lineup alongside other products. While most of us won’t be attending the “It’s Glowtime” event in person, here’s how you can virtually attend and catch all the action from home.
Where Can You Watch Apple’s “It’s Glowtime” iPhone 16 Event?
Apple has sent out invites for its fall event, “It’s Glowtime,” scheduled for September 9, 2024, at 10 AM PT / 1 PM EST. As usual, the event will take place at the Steve Jobs Theater, Apple Park. Interestingly, this is Apple’s first time releasing an iPhone on a Monday.
Like every year, you can watch Apple’s “It’s Glowtime” event live on Apple’s Event page or via the Apple TV app. The event will also be streamed live on Apple’s YouTube channel.
Apple has already scheduled the event on its channel. So, to ensure you don’t miss it, you can hit the Notify me button, and you’ll receive a notification before the keynote begins.
What to Expect From Apple’s “It’s Glowtime” Event
Of course, you can expect Apple to announce the iPhone 16 and iPhone 16 Pro lineup at its event if previous years are any indicator. Like last year, we expect Apple to release four different models: the iPhone 16, iPhone 16 Pro, iPhone 16 Plus, and the iPhone 16 Pro Max.
Rumors suggest that the iPhone 16 and iPhone 16 Plus may switch to a vertically aligned camera system, replacing the current diagonal design. Bloomberg’s Mark Gurman expects the iPhone 16 Pro and Pro Max models to feature larger 6.3-inch and 6.9-inch displays, respectively.
All iPhone 16 models are expected to include the Action button introduced with the iPhone 15 Pro and Pro Max. However, the Pro models may get a new dedicated camera button this time. Other expected changes include improved battery life, camera upgrades, and support for Apple Intelligence.
Although Apple’s September events focus on iPhones, the company usually releases more products. Although we can’t say for sure what the company will release in September 2024, there have been rumors about AirPods 4 and a redesigned Apple Watch Series 10. According to Bloomberg, this year’s Apple Watch models may include blood pressure monitoring and sleep apnea detection.
We’ll have to wait until September 9 to see what Apple has in store. Given the expected updates, it seems the iPhone 16 series is getting a significant refresh or “glow up,” which aligns with this year’s event tagline. If you’re anything like me and are excited to try the new iOS 18 features, including the AI features Apple announced at WWDC 2024, keep an eye out for this event!
There are mani AI tools that can help you enhance your smartphone photos.
Photoroom offers effective object removal tools and AI backgrounds for smartphone photos.
Canva, Photoshop Express, and Pixomatic provide a variety of AI tools to enhance and simplify smartphone photography editing.
You can use AI to save time editing your photos in several ways, such as removing backgrounds and quickly making color-based adjustments. This guide will show you our list of the best AI tools to improve your smartphone photography.
1 Pixlr
Pixlr is one of my favorite tools for resizing images online, and it also has a handful of AI tools that can help your smartphone images stand out. The Generative Fill tool, for example, lets you choose an area of the picture and replace it with whatever you want. To replace part of your image (or generate something new), you have to enter a text prompt.
You can use Pixlr to remove the background if you’d like to replace it with a block color. However, I must admit that I had mixed results here; it sometimes took out too much of the image. And if you’ve taken a photo with other people, you can use the Face Swap tool to create a fun image for social media.
If you want to use Generative Fill, you’ll get 50 credits. Each prompt costs one. For more advanced image editing, consider learning how to combine two photos using Generative Fill in Photoshop.
Download: Pixlr for iOS | Android (Free, in-app purchases available)
2 Adobe Express
Adobe Express is another superb tool for improving your smartphone photos; in addition to AI adjustments, I’d also recommend it for basic manual photo editing. With Adobe Express, you can remove objects by brushing an entire area and choosing your brush size. This is a great option if you want to remove unwanted blemishes and intrusive items like trash cans.
If you want to take things further, Adobe Express also lets you remove the entire background. Furthermore, you can insert new objects with Generative Fill. This works similarly to Pixlr; you’ll have to enter a text prompt to explain what you want to appear in your picture.
When using Adobe Express, you can also use text prompts to create templates for your smartphone photos. This is one of many cool things you can do with Adobe Express.
Photoroom will automatically remove your photo’s background when you upload it, but you can skip this. I would recommend skipping it unless you were already planning to remove the background, but note that you have to do this quickly because the removal doesn’t take a long time.
You have an impressive suite of AI tools available in Photoroom, such as a retouching tool that lets you brush different parts of your image to remove unwanted objects. I tried this myself, and compared to many other options out there, it’s one of the most effective object-removal tools in my opinion.
The app also has an AI background tool that allows you to choose from several preset options, such as mountain, beach, and street. Since Photoroom also has plenty of manual editing tools you can use (e.g. saturation, shadows, and hue), it’s an ideal tool if you want to combine AI and manual photo editing.
Download: Photoroom for iOS | Android (Free, in-app purchases available)
4 Photoshop Express
Photoshop Express is another fantastic smartphone photo editing tool in general, and it has a handful of AI tools if you want to speed up your adjustments. One of its most helpful is the Generative Expand feature, which allows you to stretch your picture across a bigger area. You can choose between square, portrait, widescreen, and landscape.
To be honest, I think that the Generative Expand tool does need a bit of work. When trying to convert a portrait picture to landscape, it made parts of my picture look strange. So, if you’re going to use it, I recommend picking something with just one subject or using it for the same aspect ratio.
Photoshop Express also has a Generative Fill tool that lets you change the background and add different things to your picture.
You can create several things in Canva with minimal effort, and its AI photo editor is another way to simplify your workflow. You will need a Canva Pro subscription to use the majority of Canva‘s AI photo editing tools, but you can get a free trial if you want to try them first.
To be honest, I recommend using this tool in your web browser because it crashed when I tried it on my mobile device. Nonetheless, you will have access to numerous editing tools regardless where you access the app. These include a Magic Edit feature that lets you brush over parts of your image and add a text prompt to determine what you should do next.
Other Canva AI tools to consider using include its background remover, along with a Magic Expander and Magic Grab feature.
Download: Canva for iOS | Android (Free, in-app purchases available)
6 Pixomatic
Pixomatic has a handful of AI tools to enhance your smartphone pictures, such as the Cut feature that will remove areas outside of what you select. You can also select the parts of your picture that you’d like to blur, making it a handy option if you want to go for more of a bokeh effect with a camera that doesn’t have Portrait Mode.
You’ll also find a Magic Cut feature in Pixomatic, which will remove your background without you having to do much. These features sit alongside others such as shape cutting, clone stamps, filters, cropping, and more.
Download: Pixomatic for iOS | Android (Free, in-app purchases available)
7 Magic Eraser Background Editor
Magic Eraser is a simple AI editing tool with just a couple of features. You can easily remove your background, and it’s also possible to get rid of specific objects. Both tools will let you draw over the areas you’d like to delete.
With the Object Removal feature, you can choose whether you’d like to select an area of your picture with the Lasso or Line. Moreover, you can clone specfic parts if you wish. If you have a free plan, you can use up to three daily erases.
Download: Magic Eraser for iOS (Free, in-app purchases available)
Whether you want to remove objects, delete your background, or change different aspects within your image, you’ll find plenty of AI editing tools to do it. Some of these will complement manual editing options, and I believe that these are the ones worth trying as you get the best of both worlds.
It can be hard for average listeners on average equipment to distinguish between regular and high-res audio files.
Even on basic equipment, higher-quality audio formats can make a noticeable difference.
Higher-quality streaming plans on services like Spotify may be worth the investment for music enthusiasts.
All music sounds the same, right? It’s not quite that simple.
I recently found an online test to see if I could distinguish high-res audio files from regular ones. Streaming services are offering higher-quality audio, and charging more for the privilege. Are they worth the money? Here’s what I learned.
What I’m Listening On
The equipment that I’m listening on is fairly modest. It’s an ordinary Dell laptop and a pair of inexpensive wired Sony headphones. I’ve always preferred wired headphones because they just work. All I need is to plug them in, and they won’t break the bank. This is my main audio rig when I’m working or surfing the web. Even though I’m a huge fan of vinyl, my main source of music is Spotify. This may not be audiophile quality, but this is what gets me through the day.
The Blind Audio Test
I came across this test from NPR that plays snippets from songs in several genres, from pop to classical. The songs appear to be randomized for each visit. You’re asked to click the song that sounds best to you, and it will reveal if you’re correct or not. The three audio formats are a 128 kbps MP3, a 320 kbps MP3, and an uncompressed WAV.
This is a blind test. You don’t know which type of file you’re listening to until you make a choice, to make the comparisons fair.
The Results of the Audio Test
A song I did manage to distinguish the uncompressed WAV was Suzanne Vega’s a cappela song, Tom’s Diner, the opening track of her 1987 Solitude Standing album. This was significant because this song was what the original MP3 algorithm was based around to highlight the warmth of Vega’s voice.
This might have been because Suzanne Vega was closer to my taste than the others. I’m not as big of a fan of hip-hop, pop, or classical music, which were also represented.
The Jay-Z song Tom Ford was one I missed, though I did pick the high-bitrate MP3. Hip-hop may be more about bass than subtle nuances in sound quality. NPR did mention that Jay-Z is an investor in Tidal, an audiophile-grade streaming service.
One song I did manage to get right was Coldplay’s Speed of Sound, but that might have been a lucky guess. I had to strain to hear the difference between uncompressed Wavs and 320 kbps MP3s.
Neil Young also marketed his own audiophile portable audio player through Pono, and he was also represented in this quiz through the track There’s A World, from his Harvest album. This track is a deviation from Young’s folk-rock style as he’s backed by an orchestra. This song also came preinstalled on Pono players. Alas, I missed this one as well. I suppose Young would be disappointed in me, given how critical he’s been of digital audio in the past. Sorry, Neil!
One thing that struck me about the test was that while it was easy for me to eliminate the lower-bit-rate MP3 files, I found it harder to choose between the higher-bit-rate MP3s and the uncompressed WAVs. Maybe I would be able to tell the difference more easily if I was using a real stereo amplifier, possibly using vacuum tubes, rather than some cheapish wired headphones plugged into a laptop.
On the other hand, this might be a testament to how well modern audio compression algorithms, even lossy ones like MP3, are engineered. I would have to pay close attention to tell the difference between a well-recorded, well-mastered piece of music on Ogg Vorbis or MP3 from a CD, as long as the bit rate was high enough.
Is High-Res Audio Worth It?
The lesson is that if you’re an average listener on average equipment, you may be unable to hear the differences in regular audio from audiophile-grade high-res digital audio. Still, higher-quality streaming Spotify plans or hi-res audio streaming services like Tidal or Qobuz seem worth investing in, especially if you’re someone like me who really enjoys listening to music.
Even on more basic equipment, higher-quality, higher-bitrate audio consistently differed from lower-bit-rate MP3 files.
Dropdown lists are the secret weapon against data inconsistency and typos, making data entry easier and more accurate. Despite their power, they’re often overlooked in Excel’s UI, leaving many users missing out on their benefits. Ready to make your spreadsheets smarter? Here’s how you can use dropdown lists in Excel
How to Create Dropdown Lists in Excel
Excel’s dropdown lists are rightly categorized under the Data Validation tab, as they not only streamline data entry but also enhance the reliability of your formulas.
For this example, we’ll use a task tracker with a Status column that provides dropdown lists for each task. The list items will include Not Started, In Progress, Completed, and Blocked.
Unlike Google Sheets, Excel requires the list values to exist somewhere in your workbook. To avoid cluttering your task tracker, it’s best to create a separate sheet to store these values. Once the dropdown lists are created, you can hide the cells or the entire sheet to keep your tracker tidy.
Here’s how to set up the dropdown list:
Prepare your list values by entering the list items (e.g., Not Started, In Progress, Completed, Blocked) in a column on a separate sheet.
Highlight the cells where you want the dropdown lists to appear (e.g., B2:B5).
Go to the Data tab on the ribbon, then click Data Validation in the Data Tools section.
In the Data Validation window, select List under the Allow dropdown.
Click the upward arrow in the Source field, and select the range containing your list items.
Click OK to apply the dropdown list to the selected cells.
The selected cells should now display a dropdown arrow, allowing you to choose from the predefined items.
How to Customize Excel Dropdown Lists
While your dropdown list is functional, it may not look as visually appealing as you’d like, especially if you’re used to the colorful dropdowns in Google Sheets. Fortunately, with a touch of Excel’s conditional formatting, you can enhance the appearance of your dropdown list in Excel.
To apply conditional formatting to your dropdown list, follow these steps:
Highlight the cells with dropdown lists (e.g., B2:B5).
Go to the Home tab, click Conditional Formatting, and select New Rule.
In the New Formatting Rule window, choose Format only cells that contain.
In the rule description, set the first dropdown to Specific Text and leave the second field as is.
Enter the text you want to format (e.g., Completed).
Click Format next to the preview. In the Format Cells window, set the Font color to white, go to the Fill tab, and choose a deep green color for the background.
Click OK twice to apply the rule.
Now, any task marked as Completed will have a green background, making it easy to identify at a glance. Repeat these steps for the other list items and assign each a unique color. This will significantly improve visual clarity.
Dropdown lists eliminate the risk of typos and variations—no more Complete vs. Finished vs. Done. This consistency is crucial when analyzing data with formulas; for instance, if a formula tracks Completed tasks, it will miss tasks marked as Finished.
Now with your dropdown lists in place, your Excel sheet is not only easier to use but also primed for advanced data analysis. You can filter tasks by status, such as showing only In Progress tasks, or use the COUNTIF function to count how many tasks are Blocked.
You can download and install UTM SE on your iPhone to set up a FreeDOS virtual machine, which allows you to run various games from the DOS era.
You’ll need the ISO file of your game ready on your iPhone before getting started.
I strongly recommend connecting an external keyboard to your iPhone, as you won’t have access to dedicated touch controls.
Mobile games have surely gotten better over the years, but what if you want to play all the retro PC games from your childhood on your iPhone? Fret not, as I’ll show you exactly how to do that using a PC emulator!
Before You Begin
Before you get started with running all your favorite retro games on your iPhone, you’ll need a few things ready:
Download and install UTM SE on your iPhone from the App Store.
To run your games on a virtual machine, you’ll need an operating system, for which I recommend using FreeDOS. Just visit FreeDOS’ downloads page and click LiveCD to download it.
Make sure to save a copy of your game’s ISO file on your iPhone using the Files app, as you’ll need it later.
While optional, I strongly recommend connecting an external keyboard to your iPhone. You can use the on-screen keyboard instead, but remember it will cover half the screen while you’re playing games.
Using FreeDOS to play games is within legal bounds; however, it’s crucial to note that downloading ISOs for games you don’t own is strictly illegal.
Setting Up FreeDOS on Your iPhone
Now that you have everything ready, you can finally start creating a FreeDOS virtual machine. Here’s how you can do so:
Open UTM SE on your iPhone, and tap the plus (+) icon in the top-left corner.
Tap New Machine, and then select Browse under Boot ISO Image. Navigate to the folder where you downloaded FreeDOS and select the FD13LIVE.iso file.
Next, you’ll need to allocate hardware resources to your virtual machine. Set the memory slider to 512MB, and use the plus (+) icon under CPU to assign one core. If you encounter performance issues later, you can always increase the memory and CPU cores.
Finally, just enter the amount of storage you want to allocate to the VM. In most cases, 1-2 GB should be plenty.
You’ll now see a summary of your virtual machine. Just tap Save in the top-right corner to continue.
After creating your virtual machine, UTM SE will show all the details about the VM, including the option to boot into it. But before you do that, you’ll need to mount your games as an external drive. Here’s how:
Tap the settings icon in the bottom-right corner.
Hit the plus (+) icon in the top-left corner and tap Import Drive.
Go to the folder where you saved your game, tap the ISO file to import it into your virtual machine, and then tap Save.
Once you’ve done that, simply tap the play icon to boot into FreeDOS. Now, it’s time to finally run your games!
Running Your Retro PC Games
If you’ve ever used a DOS system in your childhood, the next steps will make you feel right at home. If not, don’t worry; I’ll guide you through every step!
After booting into FreeDOS, press Enter to choose the Use FreeDOS 1.3 in Live Environment mode option. If you’re not using an external keyboard, tap the keyboard icon at the top to bring up the on-screen keyboard.
Your games will be assigned a drive letter that you’ll need to navigate to. Usually, the first game will be assigned to drive E: and additional games will be assigned subsequent letters. For example, if you want to access drive E:, simply type in E: and press Enter.
Next, find the name of your game’s executable file by typing DIR. This will list all the files on the drive. Look for a file with a .EXE extension and note its exact name.
Now, type the name of the executable file followed by its extension. For example, if the file is named DOOM, type DOOM.EXE, press Enter, and your game will finally start running!
Now, you can enjoy all your childhood classics right on your iPhone. If the screen feels a bit small, consider connecting your iPhone to a TV for a more immersive experience. Once you’ve explored your collection of retro PC games, you may want to check out some of the best console emulators available for your iPhone for an even bigger library of games!
Silencing notifications from social media apps during work hours helps maintain focus and prevents me from being constantly drawn back into the apps.
Setting a schedule for browsing social media curbs my urge to check it every few minutes during work.
Using the web version of social media apps and engaging in other activities during my free time has also helped to reduce distractions.
While social media offers connection and entertainment, it can also be a major time-suck, hindering productivity and focus. To avoid this, I’ve come up with a few strategies to ensure that social media serves as a tool rather than a distraction.
Most social media apps are designed to constantly grab our attention with notifications—whether it’s a new comment, a like, or a friend request. Since these alerts can quickly derail my focus, I have chosen to snooze or silence notifications for social media apps during my working hours.
Most platforms, like Facebook and Instagram, offer built-in features to pause notifications for a set period. I have also completely disabled Android notifications for some of these apps.
This way, I’m not cutting myself off from social media entirely, but rather choosing when to engage. By proactively managing notifications, I ensure that my focus remains on work instead of being pulled into the never-ending stream of social media updates.
Another strategy I use to prevent social media from becoming a distraction is establishing a clear schedule for when and how I engage with these platforms. I have allocated dedicated time slots for catching up on my feeds, usually during breaks or after completing a task. For instance, I might set aside 15 minutes in the morning and another 15 minutes after lunch to browse through social media.
This approach helps me stay focused during work hours and curbs the urge to check my phone every few minutes. By sticking to a schedule, I ensure I won’t miss anything important and can engage with content without feeling guilty about wasting time.
One challenge with using social media is that once you open it, it’s easy to lose track of time. To avoid falling into this trap, I regularly curate my feed to ensure I’m only seeing posts that are relevant and beneficial to me.
Social media apps like Instagram, X (formerly Twitter), and Facebook offer various options for cleaning up the feed. By unfollowing or muting accounts that don’t contribute positively to my experience, I keep my feed focused and engaging. This not only reduces the likelihood of falling into mindless scrolling but also helps me stick to the schedule I’ve created for using social media.
It’s no secret that social media apps are meticulously designed to keep you scrolling and engaged for as long as possible. However, the web versions of these apps often lack the same level of engagement hooks as their mobile counterparts. Navigating a social media site on a browser requires more effort than simply tapping on a mobile app, which reduces the likelihood of spontaneous, mindless checking.
Choosing to use the web version of social media on a computer also makes the experience less portable and convenient compared to using a phone. This added inconvenience acts as a subtle deterrent, helping me stay focused on my tasks.
5 Engaging in Alternative Activities
It’s one thing to set a schedule, disable notifications, and force myself to use the web version of social media apps, but these measures are of little use if I can’t stick to them. To effectively curb social media distractions in my free time, I also engage in alternative activities on my phone that are both productive and enjoyable—whether it’s picking up a new skill, diving into a book, or learning a new language.
By immersing myself in hobbies, exercise, or reading, I find it easier to redirect my focus away from social media. Over time, this approach has significantly reduced my temptation to use social media.
Managing social media distractions isn’t just about willpower; it’s also about setting clear boundaries and creating an environment that promotes focus and intentionality. By implementing these strategies, you can also regain control over your time and prevent social media from becoming a distraction.
Proton Mail prioritizes user privacy by encrypting messages and blocking data trackers effectively.
Proton’s open-source code and location in Switzerland uphold strong privacy standards.
Upgrading to Proton’s paid plans can provide better value for money compared to Google’s offerings.
Gmail isn’t the only email provider out there. That’s especially true if you’re looking for a more secure experience that does a better job of filtering out spam and keeping malicious mail out of your inbox. I’m talking about Proton Mail.
Proton’s email offering has come a long way since its launch in 2014. Ten years and many updates later, there are many reasons why I’m glad I ditched Gmail for Proton Mail.
Protonmail vs. Gmail
From a bird’s eye perspective, Proton Mail and Gmail aren’t that far apart. Both are excellent email services with plenty of features and good security measures to protect users. However, the biggest difference is how both services treat their users. For Proton, you’re the customer. For Google, you’re the product.
A simple look at the data collection practices between the two will explain what you just read. Unlike Proton, Google’s business model relies on its ad business, meaning Gmail scans your emails and lets third-party trackers inside your inbox to serve you more personalized ads. Proton encrypts your messages and blocks all third-party trackers to give you that clean inbox you’ve been dreaming of.
Outside of Proton providing better security and privacy, both email services are actually neck and neck. But even on top of that, there are more reasons that made me ditch Gmail eventually.
The 6 Reasons I Switched to Proton Mail
Better Security and Privacy
As mentioned before, Proton Mail is the clear winner when it comes to protecting user data and offers better privacy protection. For starters, Proton is based in Geneva, Switzerland—a country with some of the world’s strongest privacy laws. Google, on the other hand, is based in the US, which doesn’t have robust privacy laws, to say the least.
The next thing to keep in mind is the business model of the two companies. Both email services have free and paid tiers, but you’ll be giving up your data when using Google’s services regardless. On Proton Mail, the free tier is supported by the company with the help of subscribed users.
Proton Mail uses end-to-end encryption by default, meaning only you and the email’s recipient can read what’s in your messages. Google keeps its own key to your inbox instead, scanning your messages as they come in. When using Proton Mail, you don’t get any ads, no third-party trackers get access to your email, and your data remains safe.
Another privacy-focused feature that Proton Mail provides is the ability to generate dynamic email aliases. These are temporary email addresses linked to your Proton Mail account, allowing you to receive emails or sign up for services without exposing your actual email address.
When it comes to user security, though, both services are nearly on par. Both Proton Mail and Gmail offer multi-factor authentication and support for hardware keys to protect your inbox. However, Proton Mail also allows you to use biometric authentication to secure your inbox.
Proton Is Open Source
Another thing that’ll likely bolster your confidence in Proton’s commitment towards privacy and security is the fact that all of their services (and corresponding apps) are open source. In fact, you can check out Proton Mail’s GitHub repository right now to review the code. Proton Mail’s code has also been independently reviewed by third-party auditors, with a full report [PDF] publicly available.
When it comes to Google, we don’t have any clue what’s going on behind the scenes, except that your data is likely being scraped and sold to advertisers. That said, Google does have an army of security engineers and developers working around the clock to keep the platform secure, but you’ve got to take their word for it.
Cleaner UI
I find Gmail’s user interface rather clunky. There’s nothing wrong with it per se, and once you get used to it, it’s actually a breeze to navigate. However, there’s just too much information on the screen at any given time, so you’ll be missing a few emails from time to time.
There are ways to see only important emails on Gmail, but it does require extra steps like setting up your priority inbox. Proton Mail, however, maintains a clean, simple user interface, which, despite not being as feature-rich as Gmail, makes it a breeze to get through your daily emails.
You see a list of folders, your inbox, and the email you’re reading, and that’s it. It’s far less overwhelming than Gmail’s UI, which constantly changes colors, alerts, and other information.
Both email providers offer features that let you customize your inbox and bring important information to the front. These include the ability to create folders, labels, and filters as well as download and use other email clients. However, if you just want something simple and functional, you’ll like how your Proton Mail inbox looks from the start.
Better Spam Filtering
To Google’s credit, it has been working to stop bulk senders from spamming your inbox. However, spam and sometimes even malicious phishing emails do slip its safeguards and end up in your inbox. While Proton Mail isn’t perfect either, I’ve found that the volume of spam and malicious messages is far lower.
Do keep in mind that this will vary from person to person. The amount of spam you get largely depends on how many sites you give your email address to. This is where Proton Mail’s email alias feature comes in handy, though. Avoiding giving out your actual email to seemingly shady sites can massively reduce the number of spam emails you get.
Both Gmail and Proton Mail alert you about potential phishing links in emails. However, Proton goes a step ahead and includes a warning for emails that fail their domain’s authentication requirements, indicating that they may be spoofed or improperly forwarded.
Access to Other Proton Services
When it comes to additional services, Google is ahead of Proton, but the gap is narrowing. At the time of writing, you get access to Proton’s VPN, cloud drive, password manager, calendar, and even a crypto wallet with just one account.
Sure, Google has more, and arguably better, offerings, but the search giant’s business model makes the difference once again. All of Google’s products collect your data to some extent. All of Proton’s products are focused on security and privacy, so you’re better protected across their services.
Better Value for Money When Upgrading
As long as you don’t care about cloud storage capacity, upgrading to a paid plan from Proton Mail can provide better value for money compared to Google One subscriptions.
Google One subscriptions start at $2 a month and include 100GB of cloud storage shared across Gmail, Photos, and Drive. By the time you get to the $10 per month subscription, you’ll have 2TB of cloud storage to share with up to five people.
Proton Mail is quite different. At the time of writing, its cheapest plan is $4 per month and includes 15GB of cloud storage, something you get in Google’s free tier. It also includes up to 10 extra email addresses and aliases, support for one custom email domain, and unlimited folders and labels.
However, the Proton Unlimited subscription, which costs $10 a month, offers much more. You get 500 GB storage, 15 extra email addresses, unlimited aliases, support for three custom email domains, advanced account protection, dedicated customer support, and premium access to all of Proton’s other services.
In the real world, you’ll unlikely be able to avoid using a Gmail account. However, if you’re looking for a more private and secure alternative, Proton Mail will definitely scratch that itch for you. Combined with other Proton services, it makes for a handy package that makes sure you stay protected across the internet.
Avoid interacting with content you don’t like to keep your TikTok feed tailored to your preferences.
Be cautious viewing profiles you don’t like, as it affects your feed. Choose who you follow carefully.
Watch content that you like fully to influence your For You Page, and check your language preference.
While TikTok can be a great resource when the algorithm matches your current interests, your For You Page may not always mirror content you’re actually interested in or want to see. Try to avoid making these mistakes when scrolling on TikTok to keep your page matched to your interests.
1 Interacting With Content You Don’t Like
Firstly, try not to interact with content you don’t like. Liking, commenting, sharing, and watching content you’re not interested in tells the algorithm that you want to see more of this content. Instead, the best practice is to swipe away from a video or photo carousel that doesn’t match what you like to see when scrolling through TikTok.
If you are seeing content that doesn’t match your interests regularly, you can change your TikTok For You Page to fit your preferences.
2 Viewing Profiles You Know But That You Don’t Like
Building off of the first tip, it’s also important not to view profiles of people or brands you don’t want to interact with. If you want to check out a TikTok from a celebrity that’s been generating buzz, clicking on their profile will tell the algorithm that you want to see more content from that celebrity’s profile.
If you’re just trying to casually view something as a once-off, you can search for the video on YouTube or view TikTok on a web browser while logged out.
3 Following Accounts You’re Not Actually Interested In
If you decide to follow people you know in real life, TikTok’s algorithm may take this as a sign that you’d like to see content from other people you may know. If you’re looking to stay incognito on TikTok, or keep your profile separate from your personal life, avoid following people you know.
4 Switching Between Devices
Switching between the TikTok app and the browser version of TikTok may change what your For You Page shows you, as well. For instance, when I switch from my account on my phone to the same account on the browser version, my For You Page goes from curated content I want to see to generic comedy and music content I’ve never interacted with on my account.
If you have more than one smartphone, your TikTok feed may also be different on each device despite being signed into the same account.
5 Searching Keywords When Signed In
Sometimes a TikTok search may be helpful for a specific problem. Just because you search for a specific phrase once, however, doesn’t mean you continually want to see that content.
For example, if you’re searching for a makeup tutorial, but mainly use your TikTok account for book-related content, you should make sure to sign out of your account before searching for the makeup keyword. If you don’t, you’ll slowly see more makeup content in your feed.
6 Not Using a Different Account for Work
Researching for different work-related tasks may mean browsing TikTok for recent trending styles, music, challenges, and more. I personally made this mistake, looking for different beauty content while logged into my personal TikTok account. Now, instead of the feed I curated for myself, I receive lifestyle and beauty videos that don’t pertain to my personal life.
To avoid this, you can create a separate account solely for research that will have a different For You Page pertaining to work and may save you the hassle of more research later on.
You can also completely reset your TikTok For You Page if your feed is serving content you don’t want to see.
If you come across content that you enjoy, you should try to watch that video in full or swipe through all the pictures in the carousel. The more time you spend watching content that actually matches your interests, the more likely it is that you’ll see the same type of content on your For You Page in the future.
Time spent watching a video or swiping through photos directly counts toward the way TikTok suggests content for you.
8 Not Checking Your Language Preference
While this may sound obvious, switching a language preference on TikTok can help if you’re learning a new language and want to see TikToks spoken or written in the language you’re learning.
For example, instead of searching for Japanese TikToks while using the English version of the app, your page will naturally show more TikToks in Japanese if you switch your language preference to Japanese. Make sure you know how to switch the preferences back to your preferred language, too, in case you want to change them again.
It’s easy to accidentally interact with content you don’t like and change your TikTok For You Page for the worse. These reminders can help ensure your For You Page stays consistent with your interests.
In the world of electronic products, flex circuit is an extremely versatile technology. Designed to bend, fold and conform to any shape or thickness, it allows designers to create compact, lightweight, and exceptionally functional electronic packages. By combining rigid and flexible PCBs into one unit, it also cuts assembly costs by eliminating wire cables and board-to-board connectors. But how exactly does flex circuit enable high-density interconnects?
A flex circuit is typically constructed with unreinforced substrates made up of polyimide dielectric film cladded with rolled copper. The rolled copper is much thinner than the copper foil used in traditional rigid PCBs, allowing flex circuits to be produced at lower temperatures. Additionally, flex circuit can incorporate bondply, a layer of insulating material similar to prepreg found in rigid boards that is used to isolate the conducting layers.
Copper is the preferred metal for flex circuits because it offers the ideal balance of cost, physical performance, and electrical characteristics. The conductive paths of a flex circuit are etched into the copper foil. The layers are then laminated together using epoxy, creating a finished flex circuit. Depending on the application and design requirements, flex circuits can be fabricated with or without plated through holes, though a plated through hole version is most common.
How does flex circuit enable high-density interconnects?
Unlike traditional rigid circuits, a flex circuit can be rolled or bent into tight spaces, making it perfect for applications that require the ability to bend or flex during normal operation. It can even be folded or twisted to adapt to the size of an object, a feature that is not supported by standard rigid PCBs. Additionally, a flex circuit is very durable, which means it can be used for long periods of time without suffering from any damage.
Because of their versatility, flex circuits are ideal for use in the Internet of Things (IoT). They can provide connectivity between devices while reducing weight and space, especially in devices such as smart phones that can be folded. They can also be incorporated into medical and wearable electronics. The flexibility of a flex circuit makes it possible for it to adjust to the human body and adapt to its shape.
While flex circuits have many advantages over rigid boards, they do have some drawbacks that should be considered. One is that they are more expensive to manufacture. This is because a flex circuit has to be designed specifically to withstand the bending and folding that it will encounter during its lifetime. The other drawback is that a flex circuit has to be handled carefully. Excessive flexing or twisting can cause the circuit to break down, which can be costly for the manufacturer.
To avoid these issues, it is important to work with a reputable supplier that understands the unique challenges of producing a flex circuit. A reputable supplier will be able to help the designer to find the right design to meet the project’s needs. They will also be able to recommend a suitable materials and assembly process. By doing this, they will be able to minimize the cost of production and assembly while maintaining quality and reliability.
Job scams, which surged 118% last year, can lure you in with high pay for little work.
Scammers may ask you to buy equipment upfront or pay fees to continue working.
Recovering funds lost in job offer scams often leads to recovery scams, doubling the loss.
In the post-pandemic world, jobs can be hard to come by, and a text from a recruiter might feel like salvation. Unfortunately, a job offer text could be part of what’s known as a “pig butchering” scam. Here’s what you should watch out for.
What Is a Pig Butchering Scam?
Faux-job offer messages seem to be a new breed of texting scheme, “piggy”-backing off the wrong number “pig butchering” scam that’s been around for years. This type of scam is designed to work over time, during which manipulative organizations communicate with you and earn your trust, before ultimately running off with your money. The term “pig butchering” comes from the idea of fattening a pig only to slaughter it in the end.
Job scams are perfect long-term schemes, as initial payments lull you into a false sense of security. Then, when you’re comfortable, the whole process ends, and they take your money.
Receiving Text Message Job Offers
According to CNBC, job scams surged 118% in 2023, so if you’ve received a text containing an out-of-the-blue job offer, you’re certainly not alone. Often sent via WhatsApp or Telegram, these messages have picked up steam post-pandemic, as more people are strapped for cash and remote work is commonplace.
As a freelance writer who has applied for jobs on various platforms, I have received my fair share of these “offers.” Luckily, I can share what I know about spotting the fine line between what’s real and what’s fake.
These texts often tout a remote job with an unrealistic work-to-pay ratio. For example, you might be offered $800 for only 30 minutes of work per day. The “recruiters” will typically be unconcerned with your experience level. If it sounds too good to be true, well, it probably is.
While it’s easy to suss out a scam when “recruiters” reach out from a company that doesn’t exist; scammers do also use the names of real companies.
The Dangers of Job Offer Scams
You might wonder how an offer of paid work could turn into a money grab, and the reality is that job offer scams evolve in various ways.
Task Scams
Some “recruiters” use the sunk cost fallacy with what’s known as a task scam. Essentially, the scammer will assign you some simple tasks—the same “easy” work touted in the initial offer. Somewhere down the line, the supervisor will put up a blocker, requiring you to pay a nominal fee to continue working on tasks or get to the next level. Because you’ve already invested time in the tasks, you’ll be more apt to pay and continue.
Advanced Fee Scams
Closely related to and often coinciding with task scams are advanced fee scams. As referenced in the above example, a scammer might impose some arbitrary toll or account minimum for you to continue work. For instance, if your task earnings at the end of level one amount to $84, you need to pay $16 to bring your balance to $100 to begin level two. With the promise of making much more money at higher levels, $16 doesn’t feel like a big deal—until you never see any of that money back.
Another common advance fee situation related to job scams is a work-from-home equipment purchase. The fake job will offer you something like $2,000 to buy a work-from-home setup. The representative will send you a check as an advance or reimbursement for those purchases, but you better believe the check will bounce.
Many of these job scams pay their victims—or “employees”—in cryptocurrency. This is usually written off as a result of the companies being international, where cryptocurrency is simply the easiest way to convert payment. The reality is that crypto is ripe for scams. Some cryptocurrencies, like Monero, are completely anonymous, making them a perfect payment method for criminal activity.
As a new employee, a recruiter will have you sign up for a crypto wallet like Trust Wallet or Binance, where you’ll manage your payments. You’ll be instructed to send Bitcoin to level up, as described above. Unfortunately, there is no way to recover crypto payments once you have sent them.
Recovery Scams
This brings us to recovery scams. Unfortunately, a job offer scam can easily lead to a recovery scam. Should you lose money to a fraudulent business, particularly in the form of cryptocurrency, you might feel desperate to get it back. A recovery scam operation will reach out to you and offer a way for you to recover your funds. They charge a fee for their services and run away with the cash.
What to Do if You’re Not Sure About a Job Offer Text
If you are on the fence about a job offer, here’s are the key issues you need to watch out for.
Potential Red Flags
Although these characteristics on their own don’t necessarily denote a scam, more than one of these qualities should push you to look the other way.
You receive an unsolicited job offer via a messaging app like WhatsApp or Telegram.
When you select the phone number from which you received the offer, it appears to have been bought on Fragment, a platform that sells messaging usernames.
There are noticeable grammar, spelling, or punctuation mistakes in the text exchange.
The profile image attached to the number is inappropriate for a work setting.
Text responses come in a barrage of messages, sent faster than a real person could type. This usually implies script copying or bot behavior.
The recruiter requests you purchase work-from-home equipment from a specific supplier, for which the “company” will cover via a check.
Questions To Ask
You can also ask follow-up questions to a recruiter or Google to feel more confident about a job opportunity.
How am I paid? If there’s mention of converting currency to USTD, this is a cryptocurrency, and you should be wary.
The US Federal Trade Commission suggests calling the company to confirm its legitimacy. This means calling the number you find in a Google search for the company, not a number given to you by the recruiter.
While job offers can be a beacon of hope, it’s worth the effort to ensure you’re not going to put yourself in a risky position. If the job is legitimate, the company will be able to answer your questions. And if it doesn’t feel right, even if you’ve already invested time, it’s best to cut your losses. It’s easy to block and report spam numbers on WhatsApp and Telegram. Another opportunity will come along.
Apple offers a range of Macs, from MacBooks starting at $999 to high-end desktops going all the way up to $5999.
You can choose between the M2 and M3 series of processors across various Mac models to match your specific needs.
Carefully decide on your unified memory and storage needs, as they’re not user-upgradeable.
My friends and family frequently ask me which Mac is best for them, but configuring one isn’t as simple as picking a model from Apple’s website. Let’s explore how to build the perfect Mac for various needs.
Set Your Budget and Pick Your Desired Mac
Before configuring a Mac, head over to the Apple Store’s Mac page and start by deciding your budget and preferred form factor. For something portable, you might want to choose a MacBook, which comes in four different sizes.
If you’re looking for a budget-friendly and portable laptop, the MacBook Air is a great choice. It starts at $999 for the 13-inch model and $1,299 for the 15-inch model. Meanwhile, if you need more power and ports for tasks like editing videos, the MacBook Pro is a better option, which starts at $1,599 for the 14-inch model and $2,499 for the 16-inch model.
If you’re considering choosing a desktop Mac, you have four options: the iMac, Mac Mini, Mac Studio, and Mac Pro. The iMac is the best choice for those who aren’t very tech-savvy, starting at $1299. It’s an all-in-one computer, so you don’t need to buy a separate display. Just plug it in, connect the included keyboard and mouse, and you’re ready to go.
If you already have an external display and want a more budget-friendly option, the Mac Mini, starting at $599, is an excellent choice. Lastly, if you’re a creative professional, you may want to consider the Mac Studio or Mac Pro, which start at $1,999 and $6,999, respectively.
Modern Macs use M series Apple silicon chips, where the number after the “M” indicates the generation. The chips come in different tiers: the standard chip, Pro, Max, and Ultra. For example, an “M3 Pro” chip is part of the third-generation family, and the “Pro” tier offers better performance than the standard M3 with more CPU and GPU cores.
When choosing a Mac, you’ll find options with both M2 and M3 series chips. The table right below will tell you which processors are available for each Mac.
Mac
Processor
13-inch MacBook Air
M2 and M3
15-inch MacBook Air
M3
14-inch MacBook Pro
M3, M3 Pro, and M3 Max
16-inch MacBook Pro
M3 Pro and M3 Max
iMac
M3
Mac Mini
M2 and M2 Pro
Mac Studio
M2 Max and M2 Ultra
Mac Pro
M2 Ultra
The M2 and M3 chips are both powerful enough for everyday tasks like working on documents, media consumption, and web browsing. If you’re considering a 13-inch MacBook Air, I suggest opting for the M2 over the M3, as the performance difference is minimal for most tasks. It’s better to invest the extra money in more storage or unified memory.
For demanding tasks like compiling large codebases or video editing, you should choose a Pro series chip or higher. For most creative work, such as editing 4K videos, an M2 Pro or M3 Pro will be more than sufficient.
However, for highly demanding workflows, like editing 8K videos or developing machine learning models, you’ll need a Max or Ultra series processor. Given the $2,000 price difference between the M2 Max and M2 Ultra, I recommend the M2 Max unless you absolutely require the highest level of performance.
Once you’ve decided on a processor, you’ll notice that you also have the option to choose the same processor with different CPU and GPU core counts. A higher core count will be beneficial for tasks like running virtual machines or video encoding. However, if you want a significant performance boost, moving up to the next processor tier will make a more noticeable difference.
Choosing the Right Amount of Unified Memory
Apple silicon Macs use unified memory instead of traditional RAM, and it’s important to choose the right amount of memory from the start, as you can’t upgrade it later. The memory options depend on the processor you select, with higher-tier chips offering more memory.
For basic tasks like browsing, document editing, or light multitasking, 8GB might be sufficient. However, I’d still recommend a minimum of 16GB, as it’s ideal for most people who plan to use their Macs long-term.
If you’ll be working with high-resolution photo or video editing, 32GB is optimal. For tasks like training machine learning models, rendering 3D graphics, or other intensive work, you’ll definitely need 64GB or more.
Deciding on Your Storage Needs
Like unified memory, you can’t upgrade the storage on your Mac down the line. Apple charges a hefty $200 for an additional 256GB of storage on most models. If your work is mainly browser-based, involves creating documents, and you only plan to install a few apps, 256GB might suffice. However, I’d still recommend 512GB as a minimum since you never know when you might need more space.
If you plan to store a lot of files, photos, and videos, consider at least 1TB of storage, especially since photos and videos from modern smartphones take up significant space. And if you plan to edit 4K videos or do other creative work like rendering, you may need even more storage, in which case Apple offers up to 8TB on higher-end Macs.
For a more affordable option, you can also consider an external drive. I personally use a Samsung T7 Shield, which offers nearly the same speed as my Mac’s internal drive, with minimal performance impact. Once you’ve decided on your specs, you can place your order, prepare for the switch, and enjoy your new Mac once it arrives!
PCBs are essential to enabling innovation in electronics and products, especially as they provide the underlying infrastructure to connect and control devices. However, identifying and working with the right flexible PCB manufacturer is a critical step to fully harnessing their benefits in product development. This article provides a step-by-step guide for evaluating and selecting an optimal flexible PCB maker based on various factors, including capabilities, production capacity, materials, pricing, and more. By approaching the partner selection process systematically, you can effectively and efficiently find an ideal match for your unique product.
PCB Design: The engineering team prepares the flexible pcb supplier design using standard industry software, specifying such things as circuitry layout and layer stack-up, routing and traces, and component placement locations. The resulting files are sent to the PCB assembly house, which transforms them into bare circuit boards ready for component assembly.
Pre-Assembly: The bare circuit boards are inspected to ensure quality and accuracy. This includes checking for dimensional compliance, signal integrity, and solderability. Then, the PCBs are drilled with the appropriate hole and pad sizes to facilitate component mounting. For flex PCBs, the flexing radius and bending angle requirements are also considered in order to optimize the flexing ability of the circuit board.
How does a flexible PCB supplier handle urgent orders?
The pcb house will also determine the most effective assembly and handling methods for your components. For instance, SMT (Surface Mount Technology) components will be oriented and aligned in the same orientation to streamline assembly and minimize errors due to misalignment between the chip and the board. The polarity of similar components will also be aligned to make it easier for the automated SMT and THT machines to place them on the circuit boards.
The final stage of the PCB manufacturing is to apply a layer of protective material, called coverlay, over the circuit patterns and to laminate or bond it in place. This is done to protect the underlying layers of the circuit board from damage and environmental contaminants, such as moisture and dust. The type of coverlay used depends on the flex PCB’s bending requirements, with thinner coverlay required to meet stringent bending radius requirements.
In addition to material selection, the supplier’s expertise in advanced manufacturing techniques is crucial. Flexible PCBs often involve complex manufacturing processes, such as the integration of stiffeners, coverlays, and solder masks. Suppliers that offer advanced capabilities, such as high-density interconnect (HDI) technology, fine-line circuitry, and rigid-flex combinations, can provide greater design flexibility and allow for more sophisticated electronic designs.
Material selection is particularly important in the production of flexible PCBs. The choice of substrate material, for example, can greatly influence the flexibility, durability, and thermal performance of the circuit. Common materials used in flexible PCB manufacturing include polyimide, polyester, and liquid crystal polymer (LCP), each with its own set of properties and applications. A knowledgeable supplier will help customers select the most appropriate material based on the specific needs of their application, ensuring that the final product can withstand the mechanical stresses and environmental conditions it will encounter.
A recent Instagram bug caused some archived Stories to be deleted. Meta has fixed the issue but is unable to restore the lost Stories.
All impacted Stories will be removed by July 2025.
It’s a good idea to back up your Instagram content using various methods to avoid losing important memories in the future.
For years now, Instagram Archives and Highlights have been my go-to for preserving memories. Unfortunately, a technical bug from Meta’s end affected several of my archived Stories—which is why I’ve decided to back up all my Stories moving forward.
What Exactly Was the Instagram Bug and Did It Affect All Users?
Instagram Stories are one of the best ways of saving your memories. After 24 hours, any Story you post is automatically stored in the Archive section.
You can either leave them in your Archive or add them to your Highlights, so your followers can view them after the initial 24 hours. While there are workarounds you can use to add images and videos to your Instagram Highlights, using the Stories archive is the simplest method.
Unfortunately, a technical glitch affected some images and videos saved in the Stories archive section, resulting in permanent deletion. While the company stated in the notification that they’ve now fixed the bug, it does ultimately mean that the lost Stories can’t be restored.
CNN reports that Meta declined to disclose exactly how many users were affected by this bug. However, it does appear to be quite widespread, particularly among those who post frequently and have many Highlights.
To check if your stories have been permanently deleted, go to your Instagram profile, tap the three-lined icon, and tap Archive under the How you use Instagram header. If you’re greeted with a notification titled “A technical issue affected some of your archived stories”, some of your Stories have been deleted permanently.
Another way to check is by going to your Instagram profile and checking your existing Highlights. If a Highlight’s cover has been replaced by a warning icon, it means the technical glitch affected those Stories as well.
When you tap a Highlight with a warning icon, you’ll yet again see a notification stating, “This story is no longer available.”
All affected Stories will be removed from your Archives automatically by July 2025.
Don’t Rely on Instagram Alone, Back Your Stuff Up
If your Stories have been affected by the glitch, there’s nothing you can do now. While you’ll see an option to Remove affected stories at once, you can’t manually save them to your device or view the deleted Stories.
The best course of action is to learn from this experience and back up your content going forward. When you’re uploading a Story, simply tap the three horizontal dots in the top-right corner and select Save from the dropdown menu to save it to your camera roll.
If you aren’t a fan of saving every image or video you post to your Story manually, you can enable an option to automatically save every Story you post to your camera roll.
To do so, switch to the Home tab and swipe left to reveal the camera. Then, tap the Settings icon in the top-right corner of the screen and tap Story. Finally, toggle on the switch next to Save story to camera roll.
Sure, if you’re sharing a funny meme or Reel you saw, you don’t necessarily need to save it elsewhere, since losing it would do no harm. However, if you’re posting an image of you and your friends hanging out or a video of your pet that you wouldn’t want to lose, backing up is always a good idea.
This way, you can recover your data in case a glitch like this occurs again. You have various backup options, such as different cloud storage services like iCloud or Google Drive, or physical storage like USB drives, memory cards, or external hard drives.
Regardless of the method you choose to back up your data, after this glitch, I’d recommend not trusting a single company with your data, even if it’s a major one like Meta. Having lost many memories saved on Instagram, I also took the time to back up all my images and videos I had saved on Snapchat. After all, you never know when you’ll need to recover your data.
Once your OneDrive storage is full, your files will stop syncing, and Outlook might miss emails with attachments. To avoid that, you’ll need to quickly free up some OneDrive storage to make way for new files and emails. We’ll show you how.
1. Clear OneDrive’s Recycle Bin
When you delete a file from your OneDrive account, it sends it to the recycle bin. Since files in the recycle bin count toward your OneDrive storage, it’s essential to clean it up frequently. While OneDrive keeps the deleted files in the recycle bin for 30 days, you can manually delete them to free up some space immediately.
To empty the recycle bin, right-click the OneDrive icon in the Windows taskbar (bottom-right corner), then select Recycle bin. If you don’t have a desktop app, log into OneDrive web, then click the Recycle bin icon in the left navigation pane.
Scroll through the items in your recycle bin once to make sure you don’t delete anything important. To delete all the items, click the Empty recycle bin option below the search bar at the top. If not, you can select the individual items and then click Delete to remove them permanently.
You can also do this using the OneDrive app on your phone. In the Android version of the app, head to the Me tab from the bottom and tap Recycle Bin. Then, choose Delete ALL to empty the recycle bin. On iOS, tap the profile icon in the top-left corner, choose Recycle Bin, select all the files you want to delete, and then tap Delete.
2. Delete Large and Unnecessary Files
With the recycle bin emptied, let’s find out what’s taking up most space using the Manage storage option in OneDrive. To identify the space hogs, right-click the OneDrive icon in the taskbar and choose Settings. In the bottom-left corner, click Manage Storage. This will open your OneDrive account on the web.
If you don’t have the desktop app, log into OneDrive web, click Settings (gear icon) in the top-right corner, and choose Options under OneDrive settings.
The Storage summary page shows how much of your OneDrive storage is used by files and Outlook attachments. Click the OneDrive link and wait for it to populate your screen with your files and folders.
By default, OneDrive sorts the list by the largest files in your account. The idea is to find large but less important files you can delete or move elsewhere.
Back Up Files to Your Local Drive
Deleting a file from your OneDrive account on the web will also delete it from your OneDrive folder on your computer or smartphone, and vice versa. So, if you have a file or folder in OneDrive that you no longer want to store on the cloud but keep a copy on the computer, you’ll need to move it out of the OneDrive folder before deleting it.
To create a backup, double-click the OneDrive icon in the taskbar to open the OneDrive folder. Browse through the files and folders, select any file you want to back up, press Ctrl + C to copy it, and then move it to a different folder on your drive.
Now, in OneDrive web, select all the files you want to remove and click Delete in the top-left corner. Click Delete once again to confirm the action. After deleting the files, empty your recycle bin again to permanently delete them and reclaim the storage space. If you can’t delete some files, refer to our guide to fix problems with deleting files in OneDrive.
Remember that photos can also hog your OneDrive storage space. To clean up your photo library, open the Photos option in the left pane, select all the images you don’t want to keep, and hit Delete.
3. Optimize Your OneDrive Sync Settings
By default, OneDrive backs up the standard folders on your computer, including Documents, Desktop, and Pictures. By optimizing your OneDrive sync settings, you can ensure that only the important items are stored on the cloud. To enable selective sync, follow these steps:
Right-click the OneDrive icon in the taskbar and choose Settings.
Head to the Sync and Backup tab and click Manage Backup on the right.
Toggle off all the switches for the folders you no longer wish to back up.
Click Stop backup when you get the Are you sure you want to stop folder backup? dialog. Then, click Close.
Avoid saving any non-critical and large files in the Documents folder for ease of access. OneDrive will sync all the files in these folders, eventually filling up your cloud storage space in no time. Disciplined file management is the key to efficiently managing limited cloud storage space.
4. Optimize Email Attachments
Outlook email attachments count toward OneDrive storage now instead of Outlook email storage. For a working professional, the email attachments can add up quickly, hogging the measly 5GB of free storage offered by OneDrive. Eventually, emails with attachments will stop coming as there’s no space to store them.
A solution to this is to delete large attachments from Outlook. Unfortunately, you can’t delete an attachment without deleting the email itself. So, save any critical information and attachments to your local drive or another cloud storage service before cleaning up your attachments.
To delete email attachments, open OneDrive on the web, click Settings in the upper-right corner, and choose Options. Under Manage storage, click the Outlook (Attachments) link.
This will open your Outlook account and show all the emails with attachments. Review and select the emails with attachments you deem safe to remove and click Delete.
Now, open the Deleted Items tab in the left pane, choose all the items, and click Delete to empty the recycle bin.
5. Move Files to External Storage or Another Cloud Service
If your OneDrive storage is about to run out, you should back up your data to an external storage drive. External hard drives or USB flash drives are reliable ways to back up large amounts of data locally.
Another solution is to migrate your files to another cloud storage service, like Google Drive, which offers a generous 15GB of free storage. If you need more storage, you can subscribe to Google One, which starts at $1.99 per month for 100 GB of storage space along with other benefits.
6. Consider Upgrading Your Storage Plan
If you stick to OneDrive, consider upgrading your storage plan. Microsoft doesn’t offer any premium OneDrive plans but bundles extra storage with its Microsoft 365 plans.
For example, the basic Microsoft 365 plan offers 100GB of storage for $19.99 a year on top of other benefits like ad-free Outlook access, Office apps access on the web and mobile, OneDrive ransomware protection for files and photos, and access to Microsoft support.
If you need more storage, the Microsoft 365 Personal plan will set you back $6.99 per month for 1TB of storage and access to premium desktop apps, including Office, Clipchamp, Teams, Microsoft Defender, and more.
Hopefully, with the tips we recommended, you don’t have to upgrade your OneDrive storage. With the best storage management practices you can prevent your OneDrive storage from filling up quickly.
Rigid flex boards are used in a wide range of electronic products, from consumer electronics to advanced military and aerospace systems. They can withstand extreme vibrations and shocks, even when they’re continuously flexed for hundreds of thousands of cycles. However, the reliability of a rigid-flex board depends on the design, construction, and materials used to manufacture it. Choosing the right manufacturer can ensure that your product will be able to handle these demands.
Rigid-flex PCBs are constructed using different materials than traditional rigid PCBs, including polyimide and FR-4. They also feature a mix of flexible and rigid sections that are joined together through plated through holes (PTH). The materials used in the rigid and flexible sections must be able to withstand varying operating conditions, such as temperature changes, moisture, and chemical exposure. Depending on the application, the rigid and flexible sections may also be exposed to mechanical stress.
To avoid fractures caused by conductor stress points, make sure your Rigid flex boards is designed with enough flexibility. The flex and bendable portions of the PCB should have a minimum bend radius that’s at least six times the thickness of the corresponding layer. This will prevent any unnecessary stress on copper traces. It’s also important to follow proper design guidelines and ensure that the rigid and flex sections are made from high-quality materials.
How do rigid flex boards handle vibrations and shocks?
Another potential source of fractures in rigid-flex circuits is stacked traces. This occurs when a rigid-flex PCB has circuits directly on top of each other in the flex and bendable sections. This can cause a strain on the outermost trace when it’s subjected to a sudden shock or vibration.
Stacked traces can also lead to electrical shorts, which can damage or break the PCB. This problem can be avoided by designing the traces with adequate width and spacing, minimizing their height, and making sure that the layers are properly laminated to each other.
Adding stiffeners to the flexible and flex sections of your rigid-flex PCB can also help reduce bending stresses on the circuits. This is especially important for applications that are exposed to dynamic flexing, as these stressors can cause the PCB to fail over time.
In addition to using a rigid-flex PCB that’s built with the right materials, it’s also important to choose a manufacturer with experience and expertise in designing and manufacturing these complex devices. A reputable manufacturer should have a solid track record, strong customer support, and certifications such as ISO 9001 to show that they meet international quality standards. They should also have a robust quality control process and extensive manufacturing capabilities. This will give you confidence that your product will be able to withstand vibrations, shocks, and other environmental factors. Contact us today to learn more about our rigid-flex circuit board fabrication services and to request a quote. We look forward to partnering with you!
Multipoint connectivity in headphones allows for seamless connection to multiple devices.
Switching between audio sources can be done automatically without hassle.
A valuable quality-of-life feature that eliminates the need to constantly re-pair headphones.
Headphones have come a long way from being clunky cans on your head. They’re now packed with features like noise cancellation and handy connectivity tricks that can quickly make themselves indispensable.
When buying a new pair of headphones, your specific requirements will vary from others. However, there is one vital feature you shouldn’t skip.
What Is Multipoint Connectivity in Headphones?
Multipoint connectivity in Bluetooth headphones is exactly what it sounds like. Using this feature, you can connect your headphones, earbuds, speaker, or any supported device to at least two source devices.
Gavin Phillips / MakeUseOf
For example, if you’re using headphones with multipoint connectivity with your laptop, you can pair them to your phone simultaneously. When you switch audio sources on the device, like going from watching YouTube on your laptop to listening to music on your phone, the headphones will automatically switch over.
Multiple variants and implementations of this technology vary from manufacturer to manufacturer, but the core concept remains the same. If you want more information, we’ve covered multipoint connectivity and how it works in depth. It’s not perfect and does have some limitations, like only being able to listen to one audio source despite being connected to multiple, but it does its job well overall.
How Does Multipoint Connectivity Help Daily Usage?
Wondering what makes this tech so invaluable? Just try remembering the last time you were trying to unpair your headphones from one device to connect them to another.
Unlike the good old 3.5mm headphone cables, which could be plugged or unplugged at a moment’s notice, Bluetooth takes a few seconds to connect or disconnect, even in its best implementations.
If you’ve got your Bluetooth headphones hooked up to your laptop and you get a phone call, you’ll either have to spend a couple of minutes fumbling around trying to switch devices or take a call on your phone. Depending on how often you need to switch between devices, this can be a bit of a bothersome thing to do.
In my case, I would need to switch my Sony WF-1000XM3s between my laptop and phone every time I walked away from my dorm room desk, or I got a call. Doing this multiple times was too much of a hassle. Since I upgraded to my Sony WH-CH720N (Sony’s usual terrible naming scheme) with multipoint connectivity, pairing my headphones to my devices has become a thing of the past.
Most Bluetooth devices will automatically connect to the previous device they were paired with. In the case of multipoint connectivity, my headphones connect to both my PC and laptop at the same time, so fumbling between devices is no longer a concern. If I get calls on my phone, the headphones automatically switch over and then switch back once the call is disconnected.
Overall, multipoint connectivity is a quality-of-life feature that you’ll really appreciate if you want to use one pair of headphones for everything. Depending on how much you’re willing to spend on your headphones, I recommend shelling out extra if you can.
When facing a PowerPoint content error, adjust your security settings to ensure the program’s file access.
Content errors can also be caused by corrupt files, which can be repaired on Windows and Mac.
Restoring previous versions or changing the file’s location may be other solutions if the error persists.
Have you encountered the “PowerPoint found a problem with the content” error when opening a .ppt or .pptx file? If restarting your device didn’t work, try these tips to help you get back to work in no time.
1 Review Security Settings
If you’re using Windows, a feature known as Protected Views may have mischaracterized your content as a potential security threat, prompting the content error. If you are uncertain about the file’s risk level, first scan the file with Microsoft Defender. If there’s nothing wrong with the file, you can temporarily turn off protected views.
Open PowerPoint.
On the application’s home screen, select Options from the left-hand panel.
Select Trust Center > Trust Center Settings.
Click on Protected View.
Uncheck the Enable Protected View for files originating from the Internet and Enable Protected View for files located in potentially unsafe locations options.
Click OK to save the new changes and try to open the .ppt file.
There is always some degree of risk when disabling features like Protected View. Once you’ve fixed your issue, always re-enable those security settings.
Alternatively, Windows users can add the .ppt file to PowerPoint’s Trusted Locations. Again, this method should be reserved for .ppt files coming from a reliable source. From Trust Center Settings:
Click on Trusted Locations in the left pane.
Click Add new location > Browse and select the .ppt file’s location.
Click Add > Save.
If you are on a Mac operating system, you won’t find PowerPoint features like Trusted Locations or Protected View. Instead, you can manage PowerPoint’s file access in your Mac’s Privacy & Security settings:
Open Settings > Privacy & Security > Full Disk Access.
Select the + icon. Because this is a security setting, you may be prompted to enter your password.
Select Microsoft PowerPoint from your applications and click Open.
A dialogue will prompt you to Quit & Reopen the application in order to give it full disk access.
Lastly, make sure the PowerPoint file isn’t locked. Right-click on the file in Finder and select Get Info. Under General, review the Locked checkbox.
2 Repair the Presentation
You can also assess whether a corrupt file is causing the content error by trying to open the PowerPoint presentation from another device. If you still face the same issue, you can attempt to repair the file.
Windows users can do this using PowerPoint’s built-in tools. Just launch PowerPoint and click Open. There, browse to the presentation location, extend the Open menu, and select Open and repair.
If you’re on a Mac, you can potentially repair a corrupt file if you know how to use Disk Utility. Find this tool in your Applications > Utilities > Disk Utility, andrun the First Aid function on the disk where your file is located. The utility will flag if any disk errors might have caused your file to become corrupt, and offer solutions to repair the file system.
When running disk repair functions, we recommend backing up your disk first.
3 Restore an Older Version
If PowerPoint or Disk Utility tools weren’t able to fix the corrupted file, you can look for a previous version of the presentation. Even if you didn’t explicitly save an older version, Windows and Mac devices might have an automatic backup on file for you.
Windows’ backup tool is fittingly called File History. There are many ways to access the File History feature on Windows 11. From File History, simply locate your file and restore a previous version.
To use File History, you need to have it enabled beforehand. Otherwise, you won’t be able to restore an older version of the PowerPoint file. However, now’s a good time to enable File History to prevent future mishaps.
Alternatively, locate the troublesome presentation directly from your File Explorer window. Right-click the file and select Show more options > Restore previous versions. If there is an older version listed, go ahead and restore it.
The Time Machine feature can be your best friend if you’re using a Mac. Apple’s support page recommends first opening the folder containing the file you’d like to restore in Finder. Then you can use Launchpad to open Time Machine andselect the presentation. If there is a backup, there will be an option to Restore it.
4 Download or Move the File Location
A PowerPoint presentation stored in a synchronized, cloud-based folder or a temporary file system could also cause content errors. If you received the presentation by email, for instance, try to download the file again. Ensure it’s in your local Downloads folder, on your Desktop, or in a specified folder related to your project.
If you work with a synchronized folder system like Google’s Drive for Desktop, you can try copying the .ppt or .pptx file from that cloud folder to your local drive. Then, try opening the presentation again.
5 Open and Export From Another Program
Sometimes, if a .ppt or .pptx file does not open in PowerPoint, it will open in another similar program. Because apps like Keynote and Google Slides are equipped to import PowerPoint files, try to open your finicky presentation in one of those programs.
Here is how to open a PowerPoint file in Google Slides, a browser platform available on any operating system:
Log in to Google Drive and select New>Google Slides.
Select File > Open and navigate to the Upload tab.
Browse to or drag in your PowerPoint file, and Google will convert and open it as a Google Slides presentation.
From here, feel free to continue your work in Google Slides. Otherwise, re-export it for use in PowerPoint by selecting File > Download > Microsoft PowerPoint (.pptx).
If you use a Mac, you can also use the Keynote app to open a PowerPoint file, and the steps are very similar.
6 Update Microsoft 365
Lastly, Microsoft 365 apps don’t always work properly if you haven’t updated them in a while. In this case, you should update Microsoft 365 to the latest version available. Depending on your operating system, there are a couple of different ways to do this.
On Windows, launch any Microsoft 365 app and select Account from the left-side panel. There, click on Microsoft 365 and Office Updates menu and select Update now.
If something goes wrong during the update process, see how to fix Microsoft 365 error code 30015-26.
On Mac, it’s just as easy. Again, open a Microsoft 365 app and click on Help > Check for Updates. This will launch an update if there is one available. To save time later, you may also choose to check the box to Automatically keep Microsoft apps up to date.
Hopefully, the solutions above helped you fix the “PowerPoint found a problem with the content” error. Most of the time, you have to move the file out of a synchronized folder or fix a corrupted file. Now, the hard work begins in making an engaging PowerPoint presentation for your peers!
Device Manager is your go-to Windows utility when you need to update system drivers, disable malfunctioning devices, or check the status of your PC hardware. Here, we’ll walk you through the quickest ways to access this essential tool.
1. Use Windows Search
Windows Search offers one of the best ways to open programs on your Windows device. It can be particularly useful if you prefer not to navigate through multiple menus.
Here’s how you can quickly launch Device Manager using Windows Search:
Press Win + S or click the Start menu search icon in the taskbar.
Type Device Manager in the search field.
Select Device Manager from the results.
The Quick Access Menu (also known as the Power User Menu) provides easy access to essential system tools like Device Manager, Task Manager, and more. Much like the search bar, this tool helps you open system apps without having to go through multiple windows.
Below are the steps to access Device Manager using the Quick Access Menu:
Press Win + X or right-click on the Windows icon in the taskbar to open the Quick Access Menu.
Select Device Manager from the options that appear.
3. Use the Control Panel
The Control Panel is a traditional way to access various system settings, including Device Manager. While it might not be as immediately accessible as the other methods, it’s still a reliable option, especially if you’re accustomed to opening the Control Panel for other tasks.
Here’s how to access Device Manager via the Control Panel:
Type Control Panel in the Start menu search bar and select the Best match result.
Click the View by dropdown menu and select Large icons.
Select Device Manager from the menu items.
With these various methods at your disposal, accessing Device Manager is a breeze whether your PC is running Windows 10 or 11. Choose the one that suits you best so that you can manage your hardware settings effortlessly.
Use tools like Twin Strangers and StarByFace to find online doppelgängers and potential celebrity lookalikes.
Explore Lookaliker, ILookLikeYou, Celebs, Google Arts, & FamilySearch for more fun finding people who resemble you.
Use Twinlets, Face++, and Reverse Image Search for additional options for finding your lookalike.
You may have heard that each one of us has six doppelgängers in this world. While this may not be entirely true, there’s no doubt that many people have lookalikes. To be honest, we’d all like to discover who our twin is.
If you, too, are curious, this guide will show you some online tools for finding your doppelgänger.
Twin Strangers is a free website that uses its algorithm to find your doppelgänger. Finding your twin stranger here is quite simple. You upload your photo and make an account on its website, adding a few necessary details.
Then, the Twin Strangers algorithm finds your matches and shows an AI match score. It allows five free searches for every account, so you can upload multiple pictures to have a better chance of finding a match.
While browsing through your potential lookalikes, you can add them to the My Twins list. Best of all, the platform allows you to chat and plan a meet-up with your doppelgänger.
Twin Strangers can only find your lookalike among users who have registered there. In other words, if you want to find your doppelgänger on the site, they must also be looking for you there.
Currently, Twin Strangers has over 12 million users worldwide. As its users increase, so do your chances of finding a lookalike.
Even if you don’t look like your favorite celebrity, chances are you might resemble another famous personality. To find which celebrity you look like, you can use StarByFace—a website that finds your celebrity lookalike.
To find your match, you don’t need to enter your personal details. Just upload a picture in which your facial features are visible and let the algorithm find your celebrity lookalike. With the gradient option, you can create an image morph of you and your match.
It’s unlikely that you’ll find your exact doppelgänger here, but it’s still exciting (and you never know). StarByFace has a website as well as a mobile application.
Another famous website that uses facial recognition technology to find your celebrity doppelgängers is Lookaliker. To find your lookalike, you’ll first have to log into the site using your Google account. Then, upload a clear headshot from your device.
Lookaliker searches its database to find your celebrity twins. The good thing is that it shows multiple possible matches, along with a similarity score and a link to the Wikipedia page of the matched celebrity.
Although it searches for your doppelgängers only from renowned people, its database isn’t just limited to only a few popular actors or sportspeople. It has an Android app too.
According to ILookLikeYou, we all have as many as six doppelgängers in the world—and they’ll help you find them. You can get started in your search by signing up and clicking on Find Your Match. A pop-up window will appear prompting you to upload a good-quality image of yourself.
After you upload your image, ILookLikeYou will process it and determine what profiles have features that most closely match yours. You may need to reupload your image if the website determines that the first photo was unusable.
Eventually, you’ll be shown a list of your best matches—including the percentage at which they’re calculated to match you. You may find yourself shocked by the resemblance!
5 Celebs
Celebs is another mobile application that finds your celebrity twins. Like StarByFace, it has an algorithm that finds the resemblance between your face and that of celebrities.
For finding your doppelgänger here, you don’t have to create an account or add your information. Just upload a photo and wait for the results. This app also shows a morphed image of you and the celebrity and lets you share the results on Snapchat or Instagram.
If the app finds a very close match, it will ask you to upgrade to Celebs+ to show your lookalike. Its weekly subscription costs $5.
Download: Celebs for Android | iOS (Free, subscription available)
6 Google Arts and Culture
Among the number of amazing things you can do in Google’s Arts and Culture app, there’s a feature called ArtSelfie. This feature compares your selfie with thousands of artworks and shows some portraits that match your face.
The Art and Culture app also tells you the location of the paintings that look like you, so you can visit that museum and see your portrait lookalike.
Google Arts and Culture App can’t help you find a living doppelgänger. But, it can tell if you resemble any of the historical figures or imaginary portraits. Nonetheless, it’s fun to play with your friends and family.
Download: Google Arts and Culture for Android | iOS (Free)
FamilySearch is an organization that maintains a record of people and their ancestors. Mainly, this website can help you trace your ancestors and their story, but has a feature for finding doppelgängers too.
You generally look more like your relatives than a complete stranger. Using this concept, FamilySearch’s Compare a Face feature helps you find your doppelgänger. To find your lookalike, upload your and your relatives’ photos. If you already have a family tree on the FamilySearch website, you can simply select the relatives there.
Using its software, this website will tell you how much you resemble your family members. The person who resembles you the most in your family is your family doppelgänger. You can also compare your face with a few historical figures like Queen Victoria, Charles Darwin, and Abraham Lincoln.
As far as having a comprehensive database of faces goes, Twinlets is one of the best. This website has over 150 million faces in the global database their doppelgänger locator uses, practically guaranteeing that you’ll at least find a similar face during your search.
You can find your twin with Twinlets by selecting your gender and uploading a quality picture of yourself to the website. If one of your twin strangers is found, you’ll be shown the image that the website located. Otherwise, you’ll be shown a funny image to mitigate any disappointment.
Find My Celebrity Look Alike is a custom GPT to help you find your celebrity twins. To access custom GPTs like this one, you’ll need to sign up for ChatGPT. Then, upload your image and ask it to find your celebrity lookalike. Not only does this GPT identify your doppelgänger, but also briefly describes what makes you similar. If you don’t like the results, you can ask it to find another celebrity lookalike.
If you’re a free ChatGPT user, the GPT will allow quite limited usage (the limit resets after 24 hours). So if you want to upload multiple photos, it’s best to upgrade to ChatGPT Plus.
Face++ offers different computer vision technologies. Among these is Face Searching, which searches its collection for faces similar to yours.
Though it mainly focuses on providing API access to its technologies, it has a free demo that you can use to find your lookalike.
After completing a CAPTCHA, you can upload your image or paste a URL. Almost instantly, Face++ shows the faces that resemble yours the most. However, it neither shows the name of your lookalike nor provides any way to contact them.
11 Reverse Image Search
The problem with all of these websites is that your search is limited to registered users only. Even if there are millions of users registered, odds are your doppelgänger isn’t one of them. So, a better way to find your lookalike is to use reverse image search.
To reverse image search, you can either use Google Lens or other face recognition search engines. With Google way ahead of others in terms of image recognition, it’s better to stick to Google Lens. All you have to do is to add your clear headshot and browse through the Visually Similar Images to find possible matches.
This means that if your doppelgänger has uploaded their image on the web, you can find them. With over half of the world’s population using the internet, this is perhaps the best way to find your doppelgänger online.
These websites have a database of millions of users and celebrities, so you can find your doppelgänger–whether it’s a celebrity, a stranger, or your relative. But if you can’t find a decent lookalike after trying all these websites, don’t lose hope. You can still morph your face into your favorite celebrity and watch yourself transform.
Listening to white noise can help reduce distractions or aid sleep, and your iPhone has a built-in tool for this. Apple calls it the Background Sounds feature, and we’ll teach you how to use it to generate a variety of calming noises.
How to Turn On Background Sounds on Your iPhone
First, you need to add the Hearing option to your Control Center. To do this, open the Settings app and select Control Center. Then, scroll down and tap the Plus (+) icon next to Hearing.
To access the built-in ambient soundscapes on your iPhone, follow these steps:
Open the Control Center on your iPhone.
Tap the Hearing icon, and then select the Background Sounds option.
Now, choose from a variety of sounds, including Balanced Noise, Bright Noise, Dark Noise, Ocean, Rain, and Stream. To select your preferred sound, just tap the corresponding option and adjust the volume by dragging the slider.
Finally, tap the Background Sounds icon, and your preferred sound will start playing.
When enabled, the Background Sounds icon is colored with a white background. Simply tap the icon again to turn it off.
Use an Accessibility Shortcut to Play Background Sounds
To quickly enable Background Sounds without having to open the Control Center every time, you can set up an Accessibility Shortcut. This allows you to activate the feature by simply triple-clicking the side (or Home) button.
To do this, open the Settings app on your iPhone, navigate to Accessibility > Accessibility Shortcut,and choose the Background Sounds option from the list.
Now, when you next activate Background Sounds using this shortcut, it will automatically play the last sound you used.
I find this method especially helpful while trying to sleep, as I can turn on the feature without even looking at the screen; it feels quicker and much more convenient. If you still find the options limited, you may want to try some third-party white noise iPhone apps or ambient noise generators that offer more customization.
Access your TikTok watch history in settings to see all videos watched and easily clear them out if needed.
Utilize TikTok’s search feature with filters to narrow down videos from your watch history by entering details you remember.
You can request all data TikTok has about you to access your watch history and other activity for a comprehensive look.
Need to find a video you watched on TikTok but can’t remember who posted it? No problem; with a few simple steps, you can locate any video you’ve watched in the past, even if you don’t remember what it was called.
We’ll cover how to find TikTok videos you have watched, even if you don’t remember anything about them. Let’s get started.
How to See Your Watch History on TikTok
Ever had that moment where you’re trying to show your friend a hilarious TikTok, but you just can’t seem to find it? We’ve all been there. Luckily, TikTok keeps track of your watch history. Knowing how to find your watch history is a useful tip for TikTok beginners as well as pros.
Here’s how to access your TikTok watch history:
Open TikTok and head to the Profile tab in the bottom-right corner of your screen.
Press the three-line hamburger menu in the top-right corner.
Select Settings and privacy.
Under Content & Display, tap Activity center.
Press Watch history.
From here, you can see everything you’ve watched on TikTok. You can filter your watch history by date to find videos from a specific time period.
You can also clear your watch history from here. Simply tap Select in the top-right corner of your screen, and select all the videos you want to get rid of. After you select the video(s) you want to get rid of, tap Delete in the bottom right and tap Delete once again to confirm your decision.
How to Find a TikTok Video You Watched
If you can remember some details about the video you’re looking for, you wouldn’t need to scroll through your entire (and likely very long) watch history to find it. You can use TikTok’s search feature with its filters to narrow the pool of videos you have to look through. All you need to do is enter the details you can remember into the search bar and apply the relevant filters.
Here’s a step-by-step guide on how to do it:
Open the TikTok app.
Go to the Discover tab.
Type in your query in the search bar above.
Tap the Filters icon on the search bar’s right-hand side.
Toggle on Watched.
Press Apply.
Now you’ll see a list of videos from your watch history that match your search. This search option is great for those times when you’re trying to find that makeup tutorial you loved or a funny video from your favorite creator. You can get even more specific by using filters for Liked Videos or setting date ranges. This way, you can narrow down your search and find exactly what you’re looking for.
You can also request all the data TikTok has about you, which will include your watch history as well as other activity.
Whether you want to remember something from the past or keep tabs on what you’re watching, your TikTok watch history can be invaluable. Now that you know how to access and use it, you can make the most of the feature to improve your TikTok experience.
Before bypassing Chrome’s “Insecure Download Blocked” warning, verify the file’s legitimacy by checking the official source and site details.
Temporarily disable Chrome’s “Safe Browsing” feature to bypass the warning, but remember to re-enable the feature afterwards.
To avoid issues caused by browser extensions, download files in Incognito Mode with Safe Browsing turned off.
Chrome’s “Insecure Download Blocked” warning is meant to protect you, but it can also disrupt legitimate downloads. In this guide, we help you safely bypass this feature and access the files you need without compromising your online security.
Temporarily Disable the Chrome “Safe Browsing” Feature
Before bypassing Chrome’s “Insecure Download Blocked” warning, check a few things before downloading your files, such as the official source, the site’s domain age, and more.
If you’re confident the file is legitimate, you can temporarily disable Chrome’s “Safe Browsing” feature to bypass the warning.
Here are the steps to disable Safe Browsing:
Open Chrome and click the menu icon (the three dots in the upper right corner).
Navigate to Settings > Privacy and security, and then select Security in the middle pane.
Select No protection from the Safe Browsing options and click the Turn off button on the pop-up screen.
Remember to make your browsing safer by turning “Safe Browsing” back on after your download is complete.
Download via Incognito Mode (With Safe Browsing Turned Off)
Sometimes, the “Insecure Download Blocked” warning may be caused by extensions, particularly security plugins. To tackle this issue, download your files in Incognito Mode. That’s because extensions are disabled in this mode, unless explicitly allowed.
Here’s how to download your files via Incognito Mode:
Open Google Chrome and click the menu icon (the three dots).
Select New Incognito Window.
From there, navigate to the target link and attempt the download. While you’re at it, remember that you still need to turn off Safe Browsing while in Incognito Mode.
Now, you might be wondering why Chrome blocks your downloads in the first place. In the past, this was somewhat unclear. But according to a report from The Verge, Chrome’s recent updates provide more detailed warnings for suspicious downloads, which can help you make informed decisions.
When you encounter these warnings, Chrome offers clearer explanations and may ask to scan password-protected files for malware. If you enable Enhanced Protection, your files will be scanned in the cloud. This significantly increases the likelihood of detecting threats.
For more information on why your downloads might be blocked, refer to this Chrome support article. But if you’re confident the file is safe, you can prevent its download from being blocked by using one of these two methods.
Use your browser’s translation tool to view any web page in your preferred language instantly.
Install browser add-ons for more language options or advanced translation capabilities.
Alternatively, you can use standalone translation websites or apps to translate text or entire web pages.
As you browse the internet, you’ll come across web pages in languages other than your first language. Chances are you won’t understand most.
Thankfully, there are more feasible solutions than learning every language in the world. Here are three ways to swiftly translate the language on any web page you visit.
Translate Any Web Page Using Your Browser’s Built-In Translation Tool
Many popular web browsers, including Google Chrome, Microsoft Edge, Safari, Opera, and Firefox, have built-in translation tools that can instantly translate the content of any page you’re viewing. These translators detect the language of the page and offer to translate it into your preferred language.
For many web browsers, accessing these translation tools is automatic. You don’t need to install anything. All you need to do is toggle on the translation tool in your browser’s Language Settings bar and set a preferred language.
Some browsers may have specific settings, but the process is generally straightforward. For instance, Edge automatically translates pages that aren’t in a language among your preferred languages. Meanwhile, you’ll have to add languages you’d like to be automatically translated into Chrome.
Once the translation tool is up and running, you only have to visit the web pages you’d like to view. Imagine you have English Language set as your preferred language, and you visit a German news site. When you open a page, your browser will detect the foreign language and offer to translate the page into English.
This might not be the case for every browser, but for most, you only need to visit the website in question. Alternatively, you should be able to right-click anywhere on the page and select Translate or use the translation icon (it usually has two characters, each one from a different language, placed side by side) in the address bar.
Want more details on using the translation tools in specific browsers? Check out our guides for translating web pages in Google Chrome, using Firefox translations, and translating web pages in Microsoft Edge.
Install Browser Add-ons or Extensions to Translate Web Pages
While in-built browser translation tools are great, many of them don’t offer a great number of languages. For instance, Firefox Translations supports only ten languages at the time of writing.
If your browser’s in-built translation tool isn’t up to par, or if your browser doesn’t have an in-built tool, you can install a translation extension or add-on. These tools can provide more advanced translation capabilities, allowing you to customize settings, translate entire websites, and more.
Some popular browser translation extensions include Google Translate, Mate Translate, and ImTranslator.net. Each browser add-on or extension has its perks. For instance, Google Translate supports over 240 languages, which is one of the highest offerings available.
Because ImTranslator.net is an aggregator of several translation services, it allows you to compare translations from different services. Mate Translate is great if you’re learning a language because it speaks the translations accurately and allows you to save phrases you pick up along the way.
For a more in-depth look at browser translation extensions, check out our guide on the top browser tools to translate web pages.
Use External Translation Websites or Applications
If you don’t want to rely on your browser’s built-in translation features or install any extensions, you can also use standalone translation websites or apps. These tools typically allow you to translate some text or entire web pages into an external page.
Tools like DeepL allow you to copy and paste text into a text box. This means you can copy some parts of a web page that you’d like to translate. Alternatively, you can upload files or even use the microphone to upload audio recordings or speeches.
Other translation websites, like Google Translate and TranslatePress, allow you to input the URL of the web page you want to translate, as well as the language you’d want it translated into.
After the web page has been translated, it’ll be displayed in a new tab in your preferred language.
It’s worth noting that translations by these tools aren’t always accurate and may not always translate text to its exact meaning. For the most part, you should be able to work out any mistakes but don’t solely rely on one translation tool.
Picsart is the best mobile unblurring tool with AI enhancements available.
Apple Photos offers a native tool using Definition and Sharpness for fixing blurry images.
PineTools and Artguru provide customizable unblurring features, but Artguru lacks the grain effect.
Whether you’re an aspiring photographer, Instagrammer, or just someone who hoards photos in their gallery, knowing how to fix blurry pictures is a skill you’ll be thankful to have.
Realistically, if a photo is blurred to the point where it’s hard to make out the details, you won’t be able to fully recover it, and even AI might not be able to save it. If a picture simply needs a little touch-up, a simple unblurring tool should do the trick.
Picsart is my favorite mobile photo editing app thanks to its massive collection of tools and uses, and it has a browser version too. I’ll show you how to use both.
On your browser, head to Picsart’s Unblur Image tool and upload your photo from your device. It will take a while to upload since Picsart is doing its unblurring magic at the same time.
Once it’s done, you’ll immediately see the results which you can download or open in the editor to continue editing. Free users can only download at 2x quality, while pro users can enjoy 4x enhancement. You could always download the 2x version and run it through the upscaler one or two more times. The photo will download without a watermark.
The AI Enhance tool on the Picsart mobile app does a better job at unblurring pictures than the browser version, but you’ll need to buy a subscription to use it and download the results.
After opening your photo, head to Tools in the bottom panel, select AI Enhance, and give the app some time to do its thing. You can change the enhancement intensity and also see the before and after for a direct comparison. Hit Apply and download or share your photo via the arrow icon at the top.
Download: Picsart for iOS | Android (Free, in-app purchases available)
Apple Photos – No Need to Download a Third-Party App
You don’t need to download an image editing app, the native image editor on your iPhone can do just the trick. Although Apple Photos doesn’t have a dedicated unblurring feature, it has a handful of features that, when combined, produces fantastic results for blurred images.
Locate your photo in your camera roll and hit Edit. In the editor, make sure you’re on the Adjust tab, and scroll all the way left.
First, I adjusted the Definition. Look at the difference between the first and second screenshots with Definition turned all the way up—the blurriness is definitely improved. Then I turned Sharpness all the way up. Again, you can see the difference between the third and fourth screenshots.
While not a conventional unblurring tool, the Definition and Sharpness features in Apple Photos do wonders for blurry shots. You can also use the Sharpen tool in Google Photos if you don’t have an Apple device.
PinTools is an online hub of free tools for creative, coding, and mathematical needs. It has dozens of image-specific tools, but all we need is Sharpen Image. No need to create an account, just head to the link and choose your file from your device.
What I like about PineTools is the customization it gives you when enhancing a blurry shot. You can choose between a 3×3 or 5×5 convolution mask, and there’s also a strength slider that lets you choose the intensity of the sharpening effect. Another thing I like about this tool is that it doesn’t use AI, which is a breath of fresh air amid the oversaturation of AI photo tools.
Hit Sharpen at the bottom once you’re happy with your settings, and the results won’t take long to load.
Here, I went for the 5×5 convolution mask and set the slider to around 90%. Upon first glance, this is the most unblurred my image looks compared to all the other tools here. However, it seems to have added some grain to my photo, but I’m not phased by this because it improved the overall look of my photo regardless.
I played around with the settings and noticed that the 3×3 convolution mask doesn’t add that grain, but it also doesn’t sharpen the image as much, so it’s a win-lose situation either way. To download the image, simply right-click and select Save Image As.
If you’re not a fan of the grain that PineTools leaves on your unblurred photo, then Artguru might be a better option. Just head to the link, upload your photo, and await the results.
You can drag the slider to see a direct comparison of the before and after. If you’re happy with the results, hit Download, and it will save to your files.
The blur in my photo is definitely improved, and it doesn’t have any grain. Instead, it almost smoothed out some parts, which is a contrast to my results from PineTools, yet both enhanced the image, just in their own way.
It might be worth running the results through Artguru for a second time to get the enhancement you want.
Avoid Blurry Images in the First Place
My best advice is to avoid taking blurry photos to begin with. Make a habit of the following:
Hold your phone still when taking a picture
Prop your phone on a tripod
Avoid shooting in low light
Download a third-party camera app to control the ISO and shutter speed
And whenever you’re attempting to unblur a picture using photo editing software, turn up the contrast—and turn down the highlights and shadows while you’re at it. This doesn’t fix the blur, but it does make the image pop a little more, giving the illusion that it’s been enhanced. Play around with all the basic adjustment settings to see what you can come up with.
You now have several methods at your disposal for fixing blurry images. Refer back to this guide next time you end up with a blurry shot.
HEVC and HEIF are codecs that use similar compression techniques to improve the quality of videos and images across devices. If you can’t open these files, here’s how you can install support for them on your Windows 11 PC.
Why You Don’t Need to Pay for HEVC/HEIF Support on Windows
The names of these standards can be a bit confusing, so let me clarify. HEVC (High-Efficiency Video Coding)—also known as H.265—is for videos, but the videos themselves can come in different file formats. The HEIC (High-Efficiency Image Container) codec is used for images, but you’ll commonly see them in the wild as HEIF files.
In many cases, the codecs necessary to view HEVC/HEIF content will already be installed on Windows 11. But if they aren’t on your machine yet, you’ll have to install them manually.
You can install support for these formats from the Microsoft Store. However, if you’re from the US or certain countries, you might be surprised to find that you’ll have to pay for them.
That’s because these codecs have royalty fees associated with them, and Microsoft charges you for them. Fear not, though, because there are a couple of ways to get support for these formats for free, which we’ll cover next.
Alternative Options for HEVC/HEIF Support (Free)
If you don’t want to pay to open HEVC/HEIF files on Windows, you can use programs that include these codecs for free or install a codec pack. Your first option is to install media players that already support these codecs.
VLC is a fantastic media player that bundles HEVC/HEIF support with its software. Download and install VLC, and you should be able to watch H.265 videos from the app. Other media players, such as DivX and mpv, also include free support for these formats.
If you want support for HEVC/HEIF files native to Windows, installing the K-Lite Codec Pack might be a good idea. Multiple downloads are available, but most users will want the Standard pack.
You must be vigilant during installation to make sure it doesn’t automatically include unwanted programs. That’s why I highly recommend installing the K-Lite Codec Pack via Ninite, which installs Windows software without the bundled junk.
If you’ve tried all the methods above and still can’t open HEVC/HEIF media, consider converting these files to a different format. You can use CloudConvert to quickly convert your HEIF images online or install any of the best video converters for Windows for HEVC content.
HEIF/HEVC codecs are essential for saving storage space on your PC without compromising the quality of your images and videos. Adding support for these files on Windows 11 will help you get the most out of your device’s hardware capabilities.
Smartphones come with multiple wallpapers available to use. However, many are extremely uninspiring, which, given that we all spend far too many hours a day staring at our phones, just won’t do. Luckily, you can make your own phone wallpapers from abstract photos. And not only do they look good, they’re fun to create too.
Goodreads integration on Kindle allows automatic book updates but can cause confusion.
Slow load times & incorrect book markings led to frustration with Goodreads on Kindle.
Unlinking Goodreads from Kindle is simple, preventing double work & incorrect updates.
I’ve had my Kindle Paperwhite for nearly a decade and love it. When Amazon announced Kindle integration, I was so excited at the time. I used Goodreads to track my reading, so having my ebooks and reading tracker all on one platform seemed like a dream.
However, I recently disconnected Goodreads from my Kindle because, over time, I’ve begun to find the functions more annoying than productive, and it’s just not as useful as it once was.
What Features Does Kindle’s Goodreads Integration Offer?
Goodreads is available on most Kindles and takes you to a simplified web version of the site.
On a Kindle, you can choose to have Goodreads automatically mark books as “currently reading” or “read” as you open and read through your ebooks. This means you don’t have to manually open the website or app version of Goodreads to update your reading list.
Additionally, the home screen of the Kindle will show books on your “to read” list available on Kindle, and you can access the web version on Kindle to add or remove books from your lists, add ratings, and further catalog your shelved books.
Why I Stopped Using Goodreads on My Kindle
I’ve gone through phases of reading physical books exclusively, then jumping back into ebooks only. I recently started reusing Goodreads on my Kindle.
My first gripe with the integration is it would mark books as finished when I hadn’t finished reading them. This created a lot of confusion when I’d check my yearly reading challenge and see it claim I finished some books twice or mark that I finished a book I was only 25% done with.
Additionally, if I opened a book I had finished reading, Goodreads would automatically mark it as “reading.” This was especially frustrating when I would misclick a book I’d finished and have it crop up on my “currently reading” shelf.
These nuisances required me to open the Goodreads website or app on my laptop or phone, creating more work to properly log and shelve my books. Instead of having a seamless reading experience with Goodreads on my Kindle, this integration ended up creating double the work for me. At times when I didn’t have an internet connection, Goodreads would not log my books, either, so I would occasionally forget to update my reading status.
Also, the load times to access Goodreads on Kindle were painfully slow. Sometimes, the limited website wouldn’t load correctly, or I flat out wouldn’t be able to access my Goodreads account on my Kindle. This got incredibly frustrating.
With a plethora of other issues I had with Goodreads, I ended up leaving Goodreads and switching to this superior alternative. Now, I don’t have to worry about what books may or may not be logged correctly and instead trust myself to manually log all my reading updates.
How to Unlink Your Goodreads Account from Your Kindle
If you’d like to unlink your Goodreads account from your Kindle, it only takes a few simple steps.
First, go to your web browser and log in to your Goodreads account.
From there, go to Account Settings > Apps > Disconnect Amazon Account.
It’s important to note that if you unlink your Amazon account from Goodreads, you will no longer be able to log into Goodreads with your Amazon information. If you choose to unlink, your Kindle progress will no longer transfer to Goodreads.
You can also learn more about how to get Goodreads on Kindle and if it’s right for you.
While I was an avid Goodreads user back in the day and was initially excited about using it on my Kindle Paperwhite, the service caused more headaches than help. Now I’ve disconnected my Goodreads account from my Kindle, I can enjoy basic reading without incorrect reading status updates.
Nintendo Switch Online has an extensive game library with classics from various consoles, which is a major draw.
The portability of the Switch, coupled with optimized gameplay, beats out PC and smartphone emulators.
You can enjoy retro games with a variety of controllers and legal access to a vast library for just $50 a year.
There are plenty of ways to dive into retro games nowadays, but nothing beats playing them on the Nintendo Switch. Thanks to Nintendo Switch Online, checking out hundreds of classics across NES, SNES, N64, Game Boy, and Sega Genesis has never been easier. Here’s why I ditched my smartphone and PC in favor of the Switch as my go-to retro gaming machine.
The List of Available Games Is Impressive
Part of what makes Nintendo Switch Online so appealing to me is its library of ready-to-play games. Nintendo has built up quite an impressive roster of titles that span all genres and numerous consoles. From The Legend of Zelda: Majora’s Mask on N64 to Streets of Rage 2 on Sega Genesis, there’s never a shortage of content to explore.
The catalog is always changing, but you can check out a sample of what’s available on Nintendo’s official website.
I’m also a big fan of the interface for sifting through these titles. Instead of a simple list, Nintendo opted for a gigantic wall filled with the games’ original box art. It’s not the most practical solution, but it evokes a memory of scouring the shelves of my local game store as a kid. Once you do find a game you like, the Switch makes it easy to move these to the top of your list for easy access.
There’s no denying you’ll get more functionality when running emulators on PC (Turbo Mode is a notable standout), but more often than not, I find myself itching to play retro titles while out of the house. And while some smartphone emulators might offer more functionality than the Switch, its gorgeous screen makes it a better option (this is especially true for the OLED model).
Tablets are a nice alternative to gaming on a mobile phone, but all the retro games on Switch are already optimized to run smoothly. Depending on what game you’re trying to play and what tablet you’re using, you might experience stuttering or an un-optimized experience. Toss in the convenience of not having to mess with key bindings and the ease of playing with a connected Joy-Con and the portable simplicity of Switch is hard to beat.
You Can Pick Your Retro Controller
Speaking of controllers, the Switch makes it easy to enjoy all my favorite classics with a wide variety of gamepads. I typically use the standard Joy-Con while traveling, but having access to updated NES controllers from Nintendo and a wealth of retro gamepads from 8BitDo helps replicate the old-school experience.
The Switch Pro controller is also great for N64 games that require more complex inputs.
Nintendo Switch Online doesn’t have a built-in way to remap buttons, though you can remap buttons for your entire console back in the Settings menu. It’s a clunky workaround, but it gets the job done.
The option to play with a wealth of controllers while in handheld mode, tabletop mode, or docked gives me more flexibility than emulators on PC or mobile.
Legal and Ready-to-Play Games
If you’re worried about the legality of downloading emulators and running ROMs, all your worries can be put to rest with Nintendo Switch Online. For an annual fee of just $50, you’ll get legal access to over a thousand games from NES, SNES, Game Boy, N64, GBA, and Sega Genesis. Once you’ve downloaded their respective apps from the Switch eShop, you can dive into them whenever you’d like.
You’ll need to reconnect to the internet once a week to verify your membership is still active, but beyond that, you can take your games offline and play to your heart’s content.
Nintendo Switch Online isn’t perfect, but (at least in my case) the advantages it offers far outweigh its limitations. I’m hopeful additional functionality like Turbo Mode or button mapping will be added in the future, but for now I’m happy to have a convenient way to check out all my favorite classics.
Apple has relented on one aspect of its App Store rules, meaning that Spotify can show prices in the EU.
This change was made after Apple was fined by the EU for breaching its antitrust laws.
iPhone users in the US still can’t see Spotify prices in-app due to regional restrictions.
It doesn’t sound like it should be big news that an app developer can list prices for their own service within their own app. But that’s the exact situation we find ourselves in while Apple continues its fight to exert total control over what happens inside the App Store.
Spotify Can Now Display Its Prices to Customers
Spotify can finally show iPhone users pricing information inside its own app, after Apple relented on one part of its fight against app developers. Unfortunately, this only applies in the European Union, with other markets unaffected (for now).
This is happening thanks to Spotify opting into Apple’s “Music Streaming Services Entitlement” that lets music streaming apps on the Apple App Store display pricing information.
In an updated blog post, Spotify revealed the news, citing “progress” in its battle with Apple over what it can and can’t do with its own iOS app.
Spotify
While Spotify has opted into the entitlement, it’s choosing not to link to external payment options. This is due to Apple demanding a 20 percent cut of payments made outside the App Store in its updated developer agreement. Spotify has condemned these as “illegal and predatory taxes”.
So, in the EU at least, Spotify will now display the price of its subscription plans and notify users that they can pay on the Spotify website. However, there won’t be a link for users to click, as that would trigger Apple’s demand for a cut of the profit.
Why Has Apple Given Up Some Control of iPhone Apps?
Apple has publicly relented on this specific point after the European Commission found the company to be in breach of the EU’s antitrust laws by “abusing its dominant position”. The EC fined Apple €1.8 billion ($2 billion) as a result, and that hurts even for a company as rich as Apple.
So, months on from the fine being levied, Apple is taking steps to level the playing field ever so slightly in order to prevent more decisions going against it. And more fines as a result. However, this is unlikely to be the end of the fight.
Will This Decision Impact Other Markets Such as the US?
Unfortunately, Apple’s “Music Streaming Services Entitlement” only applies to the EEA (European Economic Area). So, for now at least, Spotify still cannot show iPhone users in the US its subscription prices within the app. It would need regulators in the United States to act to bring the same basic allowance to that market. And that isn’t likely to happen anytime soon despite the US boasting strong antitrust laws.
AI chatbots like ChatGPT, Chatsonic, Perplexity, Copilot, and Gemini offer varying responses when delivering news updates.
AI chatbots can struggle with providing accurate, consistent, and nuanced news updates due to limitations in prompt interpretation.
While AI offers advantages, it simultaneously poses challenges and ethical considerations, especially in daily news gathering. AI bots like ChatGPT, Chatsonic, Perplexity, Copilot, and Gemini reveal inconsistencies when fetching daily news updates.
Can You Use Generative AI for Your Daily News? 5 Services Compared
I tested the top-performing generative AI bots for daily news, receiving a diverse range of responses. AI chatbots like ChatGPT, Chatsonic, Perplexity, Copilot, and Gemini offer varying responses when delivering news updates due to differences in prompt interpretation, real-time limitations, and contextual background.
Here’s how they stacked up.
ChatGPT (Free)
The free version of ChatGPT now features GPT-4o, OpenAI’s upgraded AI model. While the free version of GPT-4o can connect to the internet, it has a limit of 16 questions within a 24-hour period, after which it reverts to the older GPT-3.5 model.
Typically, checking for the daily news with GPT-4o is useful. As you’re only asking one question, such as, “Please give me today’s news headlines” or similar, you don’t use much of the free allocation for the more powerful model. Of course, you can probe for specific information, but it will eat into your daily limits. It’s also worth noting that if you’ve used your daily allocation of GPT-4o messages, asking GPT-3.5 for a daily news update is basically pointless, as it doesn’t have an active internet connection, and its training data cut-off is April 2023.
Asking ChatGPT for the daily news or some of the day’s leading headlines was mostly useful, though there are some clear limitations when it comes to choosing sources, accurately detailing those sources, and providing a range of differing sources. For example, ChatGPT would quickly provide some of the leading headlines, which is great, but the URL provided as a source never links to any specific page, even if it is referencing a specific event.
It also suggests old news, and that’s not a limitation of the data cut-off point. A prime example can be found in the image above, where ChatGPT suggests that “Cybersecurity in the age of AI remains a critical topic, with industry experts like Amazon’s Chief Security Officer Steve Schmidt discussing challenges and strategies to safeguard data,” citing GeekWire as a source. Closer inspection revealed that, yes, GeekWire ran this story—on June 15, 2024, nearly a month previous.
Chatsonic
Like ChatGPT, Chatsonic responded decently to requests for news headlines and daily news updates. It covered a good range of topics, too, such as current events, politics, business, technology, and entertainment. I also liked that it provided a short summary of the news story, which is handy for figuring out what you want to read.
However, Chatsonic’s range of sources was a little iffy. For example, one search used the Hindustan Times (a generally center-leaning daily newspaper based in Delhi, India). While this is located on the other side of the world, it’s a long-standing publication. Its second source was the Dryden Wire, “Northwest Wisconsin’s #1 Digital News Outlet.” Needless to say, this is somewhat more niche.
Now, I can see why this may have happened. On this particular day, one of the news headlines related to Wisconsin’s primary election, held August 13, 2024. Chatsonic ran with a headline from this event, despite it being relatively small in terms of effect on the US Presidential election (scheduled for November 2024).
Perplexity
Perplexity’s daily news offering was also somewhat useful; each time I asked for daily news, it provided a range of headlines from the past few weeks, some of which were literally breaking news.
For example, asking specifically, “Could you give me today’s news headlines from the USA?” delivered a top headline referring to the shooting event at a Donald Trump campaign event that took place on July 13, 2024—a full month before my search. Conversely, the next headline covered The United Auto Workers union filing charges against Donald Trump and Elon Musk, which happened hours before my prompt (on August 13, 2024).
A search for the UK news headlines delivered similar, mixed results. Headlines included a tragic attack and the sentencing of a controversial figure, both of which happened weeks before.
With Perplexity, it seems that you may have to try a couple of different prompts to get the most accurate news reporting. When I found the right combination, despite the erroneous headline story, the rest of the headlines were accurate and related to events of the day or the previous 24-48 hour period.
Microsoft Copilot
I was impressed with Copilot’s choice of headlines and sources, although its range of topics and number of headlines was lacking compared to Perplexity. Each of the headlines, though, was current, covering either news from the day or the previous 24-48 hours.
On the other hand, its descriptions were incredibly short and to the point, which isn’t useful as a straight-up way to read the news. Sure, it’s useful as a jumping off point, but a single-line summary of a likely complex news story isn’t really doing it justice.
It fared slightly worse when checking out tech news headlines, covering stories from the past week, and, interestingly, taking a headline from a podcast. So, not completely pointless, but definitely not “breaking news” on the day.
Gemini
Out of all of the AI chatbots tested for daily news, Gemini is perhaps the best—though, as with the other options, it really depends on your prompt.
A general prompt for the day’s news headlines doesn’t provide much information, with typically returning four or five headlines with almost zero analysis. But when prompted to provide more information or provide news with a little more of an outline, it duly does. Similarly, asking Gemini for the general tech headlines gave old news, stretching back weeks. But switching up the prompt to specifically ask, “What are the tech news headlines from today, please?” gave the most accurate list of recent and breaking news across any of the chatbots I tested.
The only downside is Gemini’s general approach to sources. Instead of providing an individual link to each news story source, it throws a list of sources out at the end of its response, leaving you to search for the specific URL you need.
4 Reasons Why You Shouldn’t Rely on AI Chatbots for Your News
While AI can provide a decent starting point for news information, AI chatbots also encounter significant limitations to be aware of. Here are six reasons why you shouldn’t depend solely on AI chatbots for your daily news updates.
Lack of Nuance: AI may struggle to provide comprehensive and accurate summaries of news events. Daily news updates lack context, missing the emotional weight of stories, while AI has difficulty capturing human emotions such as grief, joy, or anger.
Inconsistency: Although improving, you can’t expect the same output from the same prompt, even using the same AI tool. You’re likely to miss headlines, see incorrect headlines, and so on.
Limited Coverage: As seen above, the range of news an AI chatbot provides is limited, even with an internet connection. The AI chatbot may use questionable sources, too. By extension, you’re likely to miss out on niche topics (though, in fairness, this may be overcome with prompting).
Hallucination: One of the biggest issues is AI hallucination, where the AI model effectively makes up information and presents it as fact. As generative AI models improve, hallucination is becoming slightly less of an issue, but when it comes to news, you want to know the information you’re reading is accurate.
Following the final point, I didn’t notice any AI hallucinations during my testing. While each of the five generative AI chatbots struggled to provide recent news, none of the news provided was a hallucination.
Overall, using AI to get my daily news was a mixed bag. Sure, the outputs were okay once I’d tweaked the prompts, but by that point, I could have just opened up my preferred news website, read the news, and got on with my day.