
The Best Samsung Galaxy S24 Ultra Cases of 2024

The Samsung Galaxy S24 Ultra comes with a pretty hefty asking price, and it’s also a big and comparatively unwieldy smartphone. You’re going to want to make sure you equip yours with a quality case to protect it from harm.


Best Samsung Galaxy S24 Ultra Case Overall: Spigen Cryo Armor

Spigen Cryo Armor S24 Ultra
Spigen

Spigen makes fantastic cases for Samsung’s flagships, and the Galaxy S24 Ultra-exclusive Spigen Cryo Armor is no exception. It features a combo of TPU, PC, graphite, and silicone sheets, making it both durable and effective for heat reduction.

It has a cool geometric pattern across its back which is ventilated to increase the airflow to your phone. Spigen’s ArcticFlow Technology uses thermo-silicone and graphite sheets to keep your device cooler while the ventilated casing absorbs and releases heat, making this one of the few smartphone cases that comes with an integrated cooling system of sorts.

With Military-Grade drop protection, compatibility with wireless charging and PowerShare, plus a precision cutout for the S-Pen, you’d be hard-pressed to find a more practical (or better-looking) case for your S24 Ultra than this.

Spigen Cryo Armor S24 Ultra Tag

Spigen Cryo Armor For Galaxy S24 Ultra

Best Overall

Spigen’s ArcticFlow Technology helps to keep the Spigen Cryo Armor Case and your Galaxy S24 Ultra cooler for longer with a ventilated AirCube design that’s visually stunning and highly efficient.

Pros

  • ArcticFlow Technology
  • Military-grade drop-tested
  • Wireless charging and PowerShare compatible
  • Ventilated design to increase airflow
  • AirCube pattern looks very cool
Cons

  • Not MagSafe compatible
  • Only available in blue or red

Best Budget Samsung Galaxy S24 Ultra Case: Oterkin Case

Oterkin S24 Ultra
Oterkin

If you’re looking for the best case for your S24 Ultra for the least amount of money, this Oterkin Case is well worth considering. Well below the $20 mark and available in a variety of color tones, this budget case has plenty to offer.

It has been Military-Grade drop-tested to 15 feet, so it’s no slouch when it comes to protection. It’s compatible with MagSafe, so snapping on your favorite accessories is no problem, either. Plus, its Nappa textured soft rubber casing is anti-fingerprint, anti-scratch, and anti-slip as well, so it performs when it comes to durability, too.

Oterkin S24 Ultra Tag

Oterkin Magnetic Case for Galaxy S24 Ultra

Best Budget

$16 $17 Save $1

For budget buyers, the Oterkin Magnetic Case for Galaxy S24 Ultra is one of the best ways to keep your phone protected, offering Military-grade drop protection as well as the convenience of MagSafe compatibility.

Pros

  • Affordable
  • MagSafe compatible
  • 15 feet Mil-grade drop-tested
  • Anti-fingerprint
  • Anti-scratch
Cons

  • The finish isn’t quite as polished as it is with more premium options

Best Rugged Samsung Galaxy S24 Ultra Case: UAG Monarch

UAG Monarch S24 Ultra
Urban Armor Gear 

Urban Armor Gear is one of the best when it comes to rugged cases, and the UAG Monarch for the S24 Ultra continues that winning streak. The equivalent of wrapping a bulletproof vest around your S24 Ultra, the Monarch is layered with DuPont Kevlar to give your smartphone some serious reinforcement.

Military-grade drop tested at heights of 25 feet, this is one of the most shock-resistant cases on the market. And UAG’s signature tactical grip is present, too. Oversized tactile buttons, a precision cutout for the S-Pen, integrated lanyard anchor points, and compatibility with MagSafe and wireless charging round off this impressive package.

UAG Monarch S24 Ultra Tag

UAG Monarch Pro for Galaxy S24 Ultra

Best Rugged

The UAG Monarch offers best-in-class rugged protection for your S24 Ultra. Reinforced with industry-leading Kevlar and with Mil-grade drop protection up to 25 feet, there’s no better way to protect your smartphone.

Pros

  • Reinforced with DuPont Kevlar
  • Mil-grade drop-tested top 25 feet
  • Compatible with MagSafe
  • Compatible with wireless charging
  • Non-slip tactical grip
Cons

  • Expensive
  • Adds some bulk to an already large phone

Spigen Liquid Crystal S24 Ultra
Spigen

If you’re after a clear case to show off your S24 Ultra’s sleek style, the Spigen Liquid Crystal Case is an ideal choice. Not only does it preserve the Ultra’s aesthetic, but it also doesn’t add any unwanted bulk to it, either.

This transparent case is made from durable TPU and provides Military-grade drop protection, courtesy of its built-in Air Cushion Technology. As with most other Spigen S24 series cases, it offers compatibility with wireless charging and PowerShare and features a precise cutout for the S-Pen. Anti-yellowing agents in this case’s composition help to maintain lasting transparency.

Spigen Liquid Crystal S24 Ultra Tag

Spigen Liquid Crystal for Galaxy S24 Ultra

Best Clear Case

Showcase your S24 Ultra with the crystal-clear elegance of the Spigen Liquid Crystal Case. With its anti-yellowing design, you can enjoy lasting transparency that enhances the look of your phone without adding any unwanted bulk to its frame.

Pros

  • Affordable
  • Anti-yellowing
  • Air Cushion drop protection
  • Wireless charging and PowerShare compatible
  • Slim-style
Cons

  • Provides basic protection only

Best Slim Samsung Galaxy S24 Ultra Case: Pitaka MagEZ Case

A textured blue Pitaka Galaxy S24 Ultra case
Jerome Thomas / MakeUseOf

If slim is your thing, then the Pitaka MagEZ Case ought to be on your radar. This MagSafe-compatible case is made from aerospace-grade aramid fiber, which gives it one of the most unique looks we’ve seen in an S24 series case.

The woven aramid fiber is highly resistant to wear and tear and corrosion. It also lends a nice, anti-slip texture to the case, as well as a satisfying tactile quality. The case itself supports wireless charging, and it’s refreshing to see recycled materials used in the manufacture of smartphone peripherals.

However, the protection that the Pitaka MagEZ offers is rather minimal, making this suitable for anyone who favors the style and the feel of their phone case above its effectiveness at protecting against damage.

Pikata MagEZ Case S24 Ultra Tag

Pitaka MagEZ Case 4 for S24 Ultra

Best Slim Case

Fashioned from recycled aerospace-grade aramid fiber, the Pitaka MagEZ Case for the S24 Ultra combines a unique visual style with a satisfying tactile experience. It comes in three different color tones, so you can pick the look that’s right for you.

Pros

  • Unique design
  • MagSafe compatible
  • Anti-slip
  • Corrosion resistant
  • Made from recycled materials
Cons

  • Very expensive
  • Not as protective

FAQ

Q: What are the differences between the different Galaxy S24 models?

Each model in the S24 series has a different screen size. The standard S24 provides a 6.2-inch screen, with the Plus providing a slightly larger 6.7-inch display. The Ultra has the largest display from the S24 series, with its 6.8-inch display, and comes with square, not curved, edges.

Additionally, the S24 has an FHD+ resolution, while the Plus and Ultra have QHD+ screens.

The S24 comes with 8GB of RAM, while the Plus and the Ultra both have 12GB of RAM. The S24 comes with 128 or 256GB of storage, while the Plus has 256GB and 512GB versions. The Ultra comes in three different sizes: 256GB, 512GB, and 1TB.

Q: Can I use my Galaxy S23 Ultra case on my S24 Ultra?

If you have a Galaxy S23 Ultra case, you won’t be able to use it on your S24 Ultra. The S24 Ultra’s unique dimensions mean your old case won’t fit, and you will need to purchase a new one.

Q: How do I transfer my data from one Android phone to another?

One of the easiest ways to transfer data between Android phones is to use the SmartSwitch function. You can find this under the Settings menu.

Launch SmartSwitch on both phones and then select the option to ‘bring data from old device’. Once launched, you simply need to follow the on-screen instructions to select which data you wish to transfer.

Q: How do I clean my S24 Ultra case?

Once removed, you can clean your S24 Ultra case easily by just using a bowl of warm water with some mild soap.

Soak your case in the water for a few minutes to let the soap do its thing, and then gently scrub away any remaining dirt with a toothbrush or a soft-bristled brush. If you need a bit of extra cleaning power, you can use some baking soda with the brush.
The Difference Between Excel Rows and Columns (and How to Use Both)

Quick Links

Key Takeaways

  • Rows are horizontal divisions labeled with numbers, while columns are vertical divisions labeled with letters.
  • Use the Transpose feature to quickly switch rows to columns in Excel, saving time and improving data presentation.
  • Freeze panes, sort, and filter options in Excel help with data management, ensuring clear visibility and efficient data analysis.


Rows and columns are the most prominent elements in an Excel datasheet. Understanding the difference is crucial for efficient data management. So let’s explore Excel rows and columns, and discover strategies for better utilizing both.


Excel Rows vs. Columns: What Is the Difference?

Rows and columns are the building blocks of an Excel spreadsheet, forming a grid that allows you to organize and analyze data systematically. Rows are horizontal divisions labeled with numbers, while columns are vertical divisions labeled with letters.

The intersection of a row and a column is known as a cell, where each cell holds a specific piece of data. A cell is addressed by its intersecting row and column: for example, G7 is the cell at the intersection of column G and row 7.

The differentiation between rows and columns is more than just labeling; it’s about the logical arrangement of data. Rows typically represent individual records or entries, while columns categorize information into different attributes or variables.

For example, in a sales spreadsheet, each row might represent a different customer or product. Columns might include information such as price, quantities sold, and total revenue. Understanding this fundamental distinction is essential for creating properly structured and comprehensible spreadsheets.

How to Effectively Use Rows and Columns in Excel

Maximizing the potential of rows and columns in Excel goes beyond their basic structure. Excel has useful functionalities that let you get the most out of the rows and columns in your spreadsheet.

When and How to Switch Rows and Columns in Excel

You can lay out a data table either vertically or horizontally, but the decision relies on more than just your personal preference. Vertical tables are good for readability and long lists, and they fit well in portrait orientation. Horizontal tables are good for comparing values across categories, accommodating broad datasets, and aligning with graphical representations.

Vertical and horizontal data tables in Excel

The best way to decide between vertical and horizontal data tables is to prototype both versions to get a visualization and see which one suits you best.

Take the spreadsheet above as an example. If the goal was to give a rundown of the items and their attributes, then the vertical data table would be the best choice. However, if you wanted to compare the attributes of each item with another, then the horizontal data table would be a better fit.

Transposing data in Excel

The transpose feature is a handy tool to quickly switch rows to columns and save time when using Excel. Select the data range you want to switch between and right-click on it. Choose Copy, select the destination cell, right-click again, and choose Transpose under the Paste Special options.

How to Freeze Rows and Columns in Excel

In large datasets, it’s common to lose sight of column or row headers as you scroll. Excel’s freeze pane feature helps by allowing you to lock specific rows or columns in place while scrolling through the rest of the spreadsheet.

Freezing rows and columns in Excel

To freeze rows or columns in Excel, select the cells you want to freeze and navigate to the View tab. In the Window section, click on Freeze Panes, and select Freeze Panes. This ensures that the chosen rows or columns remain visible, providing context as you navigate through extensive datasets.

How to Sort Rows and Columns in Excel

Sorting is a fundamental aspect of data analysis, and Excel provides powerful tools for sorting both rows and columns.

Sorting rows in Excel

To sort rows based on specific criteria, select the entire dataset, navigate to the Data tab, and click Sort. Choose the column by which you want to sort the data, and specify the sorting order (ascending or descending). Choosing Cell values under Sort on will sort the data alphabetically in Excel.

Sorting columns in Excel

Aside from a minor tweak, the process is the same for sorting columns. Once you’re in the sort dialog, click Options and check Sort left to right to sort columns.

How to Filter Rows and Columns in Excel

Excel’s filtering options allow you to narrow down your data set based on certain criteria, making it easier to find the information you need.

Using fitlers in Excel

To apply filters, select your data table and go to the Data tab. Then, in the Sort & Filter section, select Filter. Excel will automatically add filter dropdowns to each column header, allowing you to select and display only the desired data.

A solid understanding of the distinction between rows and columns in Excel is fundamental for effective data management and analysis.

Now that you understand the logic behind and differences between rows and columns, you can use features like transposing, freezing panes, sorting, and filtering to optimize your Excel experience and harness the full potential of this powerful spreadsheet tool.

The Best Samsung Galaxy S24 Screen Protectors of 2024

How many people can really say they’ve never dropped their phone? Once is all it takes for your fancy new Samsung Galaxy S24 to fall flat on the screen. To avoid a sudden trip to the repair shop and expensive bills, having a screen protector is a must.


Best Galaxy S24 Screen Protector Overall: Temdan Clear Case

Temdan Clear Case Designed for Samsung Galaxy S24
Temdan

The Temdan Case is the perfect choice if you’re looking for full protection and not just the screen. As a 2-in-1 screen protector and case, the face of your brand-new Samsung Galaxy S24 is protected from scratches, while the rest has military-grade drop protection. The sides have thick bumpers and airbags at the corners to further prevent damage.

The Temdan Case doesn’t stop at excellent protection; it’s equally strong against weather. Seeing as it encases your Samsung Galaxy S24 thoroughly, it also has an IP68 dust and water-resistant rating to complement the phone’s rating as well.

Temdan 2-in-1 Case with screen protector Designed for Samsung Galaxy S24

Temdan Case for Samsung Galaxy S24

Best Overall

$23 $30 Save $7

The Temdan Case is like a full-body experience for your Samsung Galaxy S24, offering more than a screen protector but also a waterproof case. It’s rather slim as well, with chunky covers for the side buttons too.

Pros

  • Full body protection, including a screen protector
  • IP68 water and dust resistant rating
  • Chunky side buttons
Cons

  • Clear case model isn’t waterproof

Natbok screen protector for samsung galaxy s24 with camera lens protector
Natbok

In the event you need a quick and easy pick, the Natbook Screen Protector hits all the right notes and does so at a stellar price. Having a 9H hardness rating, the tempered glass screen protector is incredibly hard to damage, and common scratches and scuffs aren’t going to break the surface. You even get the same protection on the camera lens!

The Natbook Screen Protector won’t hinder the day-to-day, either. For starters, you can combine the strength of the screen protector with the toughness of a phone case. And you won’t have issues with touch response or the fingerprint scanner.

Natbok screen protector for samsung galaxy s24

Natbook Screen Protector for Samsung Galaxy S24

Best Budget

The Natbook Screen Protector is an affordable but protective screen protector for the Galaxy S24. The tempered glass protects against day-to-day scuffs, falls, and scratches while still being case-friendly.

Pros

  • You get two screen and camera lens protectors
  • Strong, 9H hardness rating
  • Can still use the fingerprint scanner
  • Case-friendly
Cons

  • Does not include an installation frame

Ferilinso 4 Pack Screen Protector for Samsung Galaxy S24
Ferilinso

The Ferilinso Screen Protector comes in a pack of four, which not only means it’s great for families, but it’s a killer deal. What makes it even more enticing is Ferilinso’s use of aerospace-grade glass and nano-ceramics, creating an incredibly tough shield for your phone screen. To sweeten the deal, you get that same kind of protection with the included camera lens protectors, too.

You’ll also appreciate the little features, like the included mounting frame that makes applying the Ferilinso Screen Protector a breeze. Additionally, there’s an oleophobic coating, which drastically reduces the build-up of fingerprints and oil and makes it quite easy to clean.

ferilinso tempered glass screen protector for samsung galaxy s24

Ferilinso 4-Pack Screen Protectors

Best Multi-pack

Being a pack of four Ferilinso Screen Protectors, you can soup up four Samsung Galaxy S24s with excellent protection against scratches, scuffs, and even drops, or keep spares on hand if required. You’ll also find a mounting frame, cleaning kit, and camera lens protectors to match.

Pros

  • Comes in a pack of four
  • Includes a camera protector
  • Case-friendly
  • Includes a mounting frame and cleaning kit
Cons

  • Not quite edge-to-edge protection

Milomdoi 4 Pack Privacy Screen Protector for Samsung Galaxy S24
Milomdoi

In this day and age, our smartphones are gateways to our social media, emails, and bank accounts. That’s all the more reason to want privacy, and for that, you’ll want to turn to the Milomdoi Privacy Screen Protector. By narrowing the field of vision to 25 degrees, no one’s going to see what you see unless they’re looking straight on.

Equally important is the Milomdoi Privacy Screen Protector’s 9H+ tempered glass material. On top of having top-tier privacy, your screen can withstand day-to-day accidents like drops, scratches, and scrapes, even from hard objects like keys. As a bonus, there’s also a mounting frame and camera screen protector!

milomdoi privacy screen protector for samsung galaxy s24

Milomdoi Privacy Screen Protector for Samsung Galaxy S24

Best Privacy Screen Protector

$8 $10 Save $2

The Milomdoi Privacy Screen Protector is a master class in privacy, thanks to its much narrower viewing angle, which makes it increasingly more difficult for others to snoop. It also doubles as a top-tier screen protector, with a 9H-rated tempered glass, and it also comes with a camera protector.

Pros

  • Incredibly difficult for others to see your screen
  • Equally useful for scratch, scuff, and drop protection
  • Comes in a pack of four
  • Case-friendly

DEERLAMN tempered glass camera lens protector for samsung galaxy s24
DEERLAMN

Some lower-quality screen protectors tend to skip over one important aspect: shielding the camera lens from damage. It deserves the same level of protection, which is why the Deerlamn Camera Lens Protector takes center stage. You aren’t just applying a 9H-rated tempered glass layer to your camera, but it’s specially designed to prevent image quality from tanking.

The Deerlamn Camera Lens Protector is perfectly cut to fit the cameras, making it a cinch to install and, surprisingly, won’t prevent you from using a case. More importantly, it has both AR reflection and optical AR technology, which in practice means you won’t have to worry about glares ruining your photos, nor will it blur your shot.

DEERLAMN 3 pack camera lens protector for samsung galaxy s24

Deerlamn Camera Lens Protector

Best Camera Lens Protector

Being perfectly cut for the Samsung Galaxy S24, the Deerlamn Camera Lens Protector is the perfect companion to an equally strong screen protector. It’s also thin enough that you’ll have no problem slipping on a case.

Pros

  • Really easy to install, and the adhesive won’t bubble
  • Comes in a pack of three
  • Strong, 9H tempered glass
  • Won’t tank image quality
Cons

  • No installation instructions

FAQ

Q: Do I need a screen protector for my Galaxy S24?

Considering the Samsung Galaxy S24 is expensive, and there’s a chance you’ll drop your phone at some point, it would be wise to have one. On top of acting as a buffer against scratches and scuffs, most have an oleophobic coating to prevent fingerprint build-up.

Q: Can I use a case with my screen protector on?

Most of the time, yes. Be sure to double-check, though. If it doesn’t say it’s case-friendly, then more than likely, you won’t be able to use a case at the same time. Every screen protector on our list is case-friendly.

Q: What is thermoplastic polyurethane (TPU)?

TPU is simply a type of plastic. The reason you see it so frequently in cases and screen protectors is that it’s really hard to smudge and quite resilient. It’s also rather malleable, which is also why thermoplastic polyurethane cases are very easy to bend while simultaneously being soft to the touch.

Q: Will any screen protector fit on any Galaxy S24 model?

No. One of the key differences between each model—the Galaxy S24, S24 Plus, and S24 Ultra—is screen size. Naturally, a screen protector for the S24 will be too small for the S24 Plus and S24 Ultra.

Q: How do I apply a screen protector without getting bubbles?

The process is definitely tedious, but with a few tricks, you can avoid bubbles altogether. What is arguably the easiest way is to:

  1. Thoroughly clean the screen, then wipe it down with a microfiber cloth. The cloth material is important as you don’t want to leave behind any residue.
  2. Apply the screen protector. Try to keep it centered and avoid as many bubbles as possible. If you see a few, don’t sweat it!
  3. Grab a card, like your license or credit card. Use the flat edge of the card to push the air bubbles out.

That’s all it takes! If you want to try other methods, we have a guide that focuses on ways to apply a screen protector.

How to Use BCC in Outlook (and What Happens When You Do)

Key Takeaways

  • BCC in Outlook hides recipients’ email addresses, making it useful for sending personalized mass emails.
  • You can enable the BCC feature in Outlook settings and easily add BCC recipients to new emails.
  • When using BCC, recipients receive the email normally but cannot see other BCC’d recipients or include them in their replies.


Learn how to use the BCC feature in Outlook. We’ll walk you through the steps to add BCC in Outlook for both mobile and desktop. You will also learn what happens when you use BCC in Outlook.


What Does BCC in Email Mean?

BCC stands for “Blind Carbon Copy”. The main difference, compared to carbon copy (CC) emails, is that while other recipients can see a CC’d person’s email address, they cannot see the email addresses of BCC’d users.

BCC is a useful feature to use if you want to email multiple people but still make it look personalized. For example, you may wish to send a company-wide email at your job but do not want dozens (or hundreds) of recipients to appear in the list of CC’d recipients.

You may also want to add BCC in Outlook (and any other email providers you use) if you’d like other people’s email addresses to remain private. This situation may arise if you’re sending messages to multiple friends who aren’t part of the same friendship group, for example.

Another possible scenario when this could occur is if you want to make a big announcement (e.g., an engagement party). If you mainly use Outlook for work, make sure that you don’t make these common mistakes to avoid in your work emails.

How to Use BCC in Outlook on Your Computer

When learning how to BCC in Outlook on your computer, it’s worth looking at how to do so on both the desktop and web apps. In the following subsections, you can find the specific steps required for each of these.

How to Use BCC in Outlook on the Web App

Before using BCC in Outlook, it’s a good idea to ensure that the feature is always visible. You can change this in your settings:

  1. Click on the settings icon in the top right-hand corner, which resembles a cog wheel.

  2. Select Email > Compose and reply. Under Message format, tick the box next to Always show Bcc.
    Select the Always Show BCC Box in Outlook Web App Settings

  3. Click the X button to close the window and save your changes.

Once your settings have been saved, follow these instructions to use the BCC feature in your messages.

  1. Select New email.
    Select the New Email Tab in the Outlook Web App

  2. Add the contacts you want to BCC in the Bcc section, before adding the other recipients and email content/subject.
    Enter BCC for Email and Compose the Rest of the Message in Outlook

  3. When you’re ready to share your email with others, tap Send.

How to Use BCC in the Outlook Desktop App

To add BCC in Outlook on your desktop, the steps to show BCC are slightly different on Windows and macOS. Let’s start with the steps for your Mac:

  1. Go to Outlook > Settings.
    Select Your Outlook Settings on macOS by Going to Outlook > Settings

  2. Select Composing, which is in the Email section.
    The Email Section and Composing Icon in Outlook

  3. Tick the box next to Show BCC field by default.
    The Option to Show Your BCC Field by Default in Microsoft Outlook

  4. Hit the x button when you’ve finished.

On Windows:

  1. Go to Settings > Mail > Compose and reply.
  2. Tick the box next to Always show Bcc.

In some versions of Outlook on Windows, you may be able to go to Options > Bcc instead.

The steps for adding BCC email addresses are identical regardless of whether you use Windows or macOS. Here are the instructions you should follow.

  1. Select New Email.
    Select the New Email Tab in Outlook

  2. In the Bcc tab, type your email addresses.
    Send an Email in Microsoft Outlook App for Mac

  3. Fill out the rest of your email and press Send when you’re done.

How to Use BCC in Outlook on Mobile

You can easily add a BCC in Outlook on your smartphone or tablet as well. Follow these instructions to do that.

  1. Tap New Email on your screen.
  2. Expand the arrow next to the To: tab.
  3. Enter the recipients you want to BCC in the Bcc: tab before filling in the other sections.
  4. Tap the Send (arrow icon) button in the bottom right-hand corner when you’re ready to send your email.

In addition to manually adding BCC email addresses, you can also automatically CC or BCC yourself in Outlook.

What Happens When You Use BCC in Outlook?

When you use BCC in Outlook, all recipients will receive your email. Each recipient will receive the specific message content exactly how someone who’s either a main recipient or CC’d would. Recipients will also be able to reply to you, but unlike emails where you use CC, they will not be able to include all of the other BCC’d recipients in their message.

How to Fix the “iMessage is Signed Out” Error on iPhone

Key Takeaways

  • The “iMessage is Signed Out” alert is a sign of misconfigured iMessage settings.
  • Most people get this error because they accidentally disabled the service, signed out of their Apple ID, or haven’t linked their phone number yet.
  • Server-side issues and software bugs can also sometimes cause this pop-up.


Do you get the “iMessage is Signed Out” pop-up whenever you open a thread in your iPhone’s Messages app? If so, you won’t be able to send or receive blue text bubbles unless you fix it. We’ll walk you through some troubleshooting steps.


Make Sure iMessage Is Enabled

Often, the reason you get the “iMessage is Signed Out” error is pretty simple: you may have accidentally disabled iMessage on your iPhone. To check this, go to Settings > Messages on your iPhone and make sure iMessage is toggled on.

If it’s already enabled: toggle it off, wait a few seconds, and toggle it back on again to force your iPhone to reactivate the service and sign back into iMessage.

You can also access this menu by simply tapping the Settings option in the “iMessage is Signed Out” alert.

Check Your iMessage Addresses

The next step is to review your iMessage addresses and make sure that either your phone number or Apple ID email address is selected, which is needed for iMessage to work properly. You can run into this issue if you swap SIMs often or sign out of your Apple ID on your iPhone.

Head to Settings > Messages and look for the Send & Receive option below the iMessage toggle. If you see “No Addresses” next to it, that’s exactly why you’re getting the “iMessage is Signed Out” error on your iPhone.

Tap Send & Receive and select Use your Apple ID for iMessage. When you get a pop-up, tap Sign In to log in with the Apple ID linked to your iPhone. However, if you want to use another account, select Use Other Apple ID instead.

If your phone number appears in this menu, make sure that’s selected too. Your carrier will send an SMS to activate iMessage. By default, iMessage will start new conversations using your phone number, but you can change this to your Apple ID email address from the same menu.

Check Apple’s Server Status for iMessage

If you’re still getting the “iMessage is Signed Out” pop-up when you open a thread in Messages, it’s possible that Apple’s iMessage servers are temporarily down. You can quickly check this by heading to Apple’s System Status page.

Apple System Status page

If you notice a yellow indicator (instead of green) next to iMessage on this page, it means Apple’s servers are down. You’ll have to patiently wait until Apple fixes it to send and receive iMessage texts again.

General Fixes: Restart, Update, and More

The above troubleshooting steps should help you get rid of the “iMessage is Signed Out” alert on your iPhone in most cases. However, you can try some generic fixes for iMessage if you’re still having problems.

Try restarting your iPhone, as it can help resolve minor software glitches like this. Consider updating your iPhone if a new iOS version is available, as firmware bugs can also cause the “iMessage is Signed Out” error.

If none of the fixes we suggested worked, it’s time to contact Apple Support for expert assistance. It’s easy to get tech support for your iPhone with the Apple Support app, but you can also visit Apple’s Contact Support page if you want to talk to an agent quickly.

From my experience, the “iMessage is Signed Out” pop-up appeared the moment I signed out of my Apple ID and unchecked my phone number for the service. As mentioned earlier, this error can also occur if you swapped the SIM card or switched to a new eSIM. However, if iMessage is affected due to other factors like connectivity, server issues, and software bugs, the general fixes above can prove to be valuable.

How to Stop Apps From Running in the Background on Android

Quick Links

Key Takeaways

  • Background apps are often the reason why your Android phone lags or runs out of battery quickly.
  • Visiting Developer Options gives you more control over the Android apps running in the background.
  • You can force-stop apps, restrict an app’s battery usage, or enable Adaptive Battery to reduce the number of background apps.


Not all apps on your Android device need to run in the background. If you’re experiencing lag or excessive battery drain, you can conserve resources by preventing unnecessary apps from running in the background on your phone.


How to Check Which Apps Are Running in the Background on Android

The Developer Options menu on Android provides access to various useful features and insights into your device’s functionality. A notable option within this menu is Running services, which provides a list of apps operating in the background along with their corresponding RAM usage. Here’s how to access it:

  1. Open the Settings app, scroll down, and tap About phone.
  2. Go to Software information and tap the Build number seven times to enable Developer options.
  3. Enter your PIN (device passcode), and you should see a You’re now a developer message.
  4. Return to the main Settings menu and tap Developer options at the bottom.
  5. Scroll down and find Running services. Tap this to see a list of apps and services, along with their memory usage.

You can also navigate to the battery usage menu in Android to find out which apps are consuming the most battery. This information can help you make informed decisions about which apps should be stopped to extend your Android phone’s battery life.

To check the battery usage of apps, open the Settings menu and head to Battery. Apps using the most battery should appear at the top. Go through the list to find non-essential apps, noting them for the next steps.

How to Stop Android Apps From Running in the Background

There’s more than one way to stop apps from running in the background on your Android, depending on whether you prefer immediate intervention or more automated, adaptive solutions. We’ll go over a few distinct approaches to explore.

1. Force Stop Apps

If you want a specific app to stop working in the background until you open it, you can force-stop it using these steps:

  1. Open the Settings menu and go to Apps.
  2. Scroll through the list, or use the search tool, to locate the app you want to stop and tap it.
  3. Tap the Force stop option.
  4. Hit OK to confirm.

Note that this option isn’t perfect, as some apps can start themselves automatically.

2. Restrict Battery Usage for Apps

On Android, you can restrict the battery usage of specific apps, preventing them from running unnecessarily in the background. To restrict battery usage for an app on your Android, follow these steps:

  1. Open the Settings app and scroll down to choose Apps.
  2. Locate and select the app you don’t want running in the background.
  3. Scroll down and tap the Battery option under the Usage section.
  4. Select the Restricted option.

As noted in this menu, restricting apps can cause notifications not to show. Be careful to only use this for apps that don’t send you time-sensitive information.

3. Enable the Adaptive Battery Feature

The Adaptive Battery feature on Android uses Google’s DeepMind AI to understand your usage patterns over time and restricts background activity for apps you don’t frequently use. This option is ideal if you don’t want to force-stop apps manually all the time or configure battery usage settings for each app individually. To enable it:

  1. Open the Settings app and go to Battery.
  2. Tap Background usage limits.
  3. Tap the three-dot menu in the top-right corner and select Adaptive battery.
  4. Turn on the toggle for the Adaptive battery.

If this utility doesn’t do enough for you, you might consider a third-party app like Greenify to hibernate apps and prevent them from running in the background. However, note that many of these apps are no longer in active development, so you’re best off with Android’s built-in options.

While preventing apps from running in the background offers certain benefits, doing so has its fair share of downsides. One of the key drawbacks is the potential impact on real-time notifications. Additionally, apps that require constant syncing or refreshing of content may not function as effectively.

Furthermore, closing frequently used apps can lead to slower loading times and higher CPU power consumption. This is why we don’t recommend constantly closing apps on Android.

How to Open and Manage the Clipboard on Windows 10

Key Takeaways

  • Open the Windows 10 clipboard history by pressing the Windows key + V. Click “Turn on” if necessary.
  • Use Windows 10 clipboard history to paste recent items by pressing Ctrl + V or selecting a previously copied entry.
  • Sync clipboard items between devices by signing in with your Microsoft account and enabling syncing in the settings.


Windows 10’s clipboard history feature lets you save and retrieve multiple copied items without losing earlier ones. While it’s a handy feature, you need to enable it manually, and it requires a special hotkey to bring up. We’ll explore how to use Windows 10’s clipboard to your advantage.


How to Enable Windows 10 Clipboard History

The Windows 10 clipboard history feature isn’t enabled by default, but turning it on is easy. Just press the Windows key + V hotkey, and the clipboard history will open at the bottom-right corner of your screen.

If the window says Your clipboard is empty or shows items you’ve copied in the past, clipboard history is already enabled. If it says Can’t show history, click Turn on and Windows will activate it.

Wondering where the clipboard files are located in Windows 10? These items are stored as individual files in a hidden folder located at C:Users[username]AppDataLocalMicrosoftWindowsClip. You can’t directly browse this folder, but you can view and manage past items through the Clipboard History feature.

How to Add Items to Your Clipboard History

Now that clipboard history is active, it’s time to understand how it works. To start, try copying text and images to put onto the clipboard. The methods for copying an item on the old clipboard work for the new one, so either copy items using Ctrl + C or right-click them and choose Copy.

Now press Windows key + V to open the clipboard history. You’ll see all the items you copied on the list, with the most recent item at the top.

If you press Ctrl + V, you’ll paste the most recent item copied. You can also bring up the clipboard history and click on a previously copied entry to paste it. Once you do this, Ctrl + V will paste the item you selected instead of the most recent item.

We’ve looked at how to fix copying and pasting in Windows if something seems wrong.

Showing what CTRL + V pastes depending on what's clicked on the clipboard history

How to Pin an Item to the Windows Clipboard History

When you restart your PC, items stored in the clipboard are automatically deleted. But you can force items to stay in the clipboard by pinning them.

Press the Windows key + V to open the clipboard history. Click the three-dot icon on the item you want to keep and click Pin. Now, the item will stay on your clipboard even if you turn off your PC.

Pinning an item on the clipboard history

To delete a pinned item, click the three dots again and click Unpin.

How to Sync Your Windows Clipboard History Across All Your Devices

If you use multiple Windows 10 devices, you can sync clipboard items between them. To sync the clipboard between devices, you must be signed into Windows with your Microsoft account, not a local account.

Once you sign in to Windows using your Microsoft account, go to Settings > System > Clipboard and click the toggle under Sync across devices.

Toggling on the clipboard history sync

Below this toggle are two options: Automatically sync text that I copy and Never automatically sync text that I copy. The first option will sync anything you copy to your other devices, which is handy if you’re the only person using either device.

The second method won’t sync your items the moment you copy them. Instead, you need to open clipboard history, click on the three dots beside the item you want to transfer over, and click Sync. This option is best if you work with sensitive data and want control over what gets sent where.

Manually syncing an item on the clipboard history

How to Delete or Clear Items From the Clipboard History

You can clear the clipboard history at any time.

Press the Windows key + V to open the clipboard history and click the three dots on an item. Then, click Clear all at the bottom of the window. All items except for pinned items are deleted.

Clearing the clipboard history

You can also use the above process to delete a single item; just click Delete instead of Clear all.

How to Disable Windows 10 Clipboard History

If you don’t want Windows to store the clipboard history, you can turn it off.

Go to Settings > System > Clipboard and click the slider button under Clipboard history to Off. Remember that when you do this the entire clipboard history (including pinned items) will be deleted.

Turning off the clipboard historyu

Limitations and Security Considerations of Windows Clipboard History

Syncing clipboard items between devices is a great feature, but there are some security issues and limitations to be aware of.

First, the Windows clipboard history is not infinite. You can only store up to 25 items on it. Once you copy the 26th item, the oldest one is bumped off the list.

You can use the Windows clipboard history to copy images across PCs. However, anything above 4MB won’t show up on the clipboard, so you can’t use it to transfer large files.

As we mentioned earlier, copying sensitive data with the clipboard history turned on syncs through Microsoft servers in plain text. As such, if you’re handling sensitive data, it’s always a good idea to enable manual syncing so you don’t risk exposing your data.

Other Ways to Enhance the Clipboard on Windows

If you want more from Windows’ clipboard, you’re in luck. There are plenty of third-party clipboard managers you can try that replace Windows’s own and come with special features you won’t find on the native clipboard.

If you want to take matters into your own hands, you can extend the Windows clipboard with Ditto. This enhances the default clipboard with extra features, such as sharing it with others and performing “special pastes,” like pasting without capital letters.

Regardless of your choice, you don’t have to be stuck with the basic Ctrl + C and Ctrl + V functions. The Windows clipboard history lets you recall previous items, sync them across all your Windows devices, and save snippets across shutdowns. Best of all, enabling and getting accustomed to is very easy.

SD Card Reader Won’t Show in File Explorer? Here’s How to Fix It

Key Takeaways

  • Poor contact, driver issues, data corruption, and malware infections can cause an SD card to not appear in File Explorer.
  • To troubleshoot, clean the SD card and adapter, turn off write protection, assign a drive letter, check for errors with CHKDSK, and update SD card drivers.
  • If the SD card still doesn’t show up, check the card reader for hardware issues and consider using a USB adapter. Keep Windows updated for potential fixes.


SD cards are convenient to use with your computer to transfer photos or as extra storage. But if you can’t access yours, we’ll guide you through troubleshooting tips to make Windows detect your card again.


Reasons Why Your SD Card Reader Is Not Working on Windows 10/11

Storage devices like SD cards may not appear in your File Explorer due to temporary glitches. But if reconnecting the SD card reader doesn’t fix the issue, there are other common reasons the issue can persist:

  • Your SD card reader is not firmly connected to your computer.
  • The SD card file system is corrupted.
  • You’re using an outdated device driver.
  • The SD card is infected with malware.
  • The SD card is missing a drive letter.

Before you start troubleshooting, ensure that the SD card is compatible with your SD card reader. Some older readers may not support newer SD card formats.

1. Clean the SD Card and Adapter

If the SD card wasn’t used for an extended period, the contacts on the card and the adapter may have accumulated dust and debris. As a result, your computer may fail to recognize or detect the SD card.

Gently clean any dust you see on your SD card and the adapter. Then, connect the SD card reader firmly and wait for the computer to detect the device. Make sure the card is inserted firmly into the reader itself. Also, switch to a different USB port and see if that helps—you may have a dead USB port that won’t work with any device.

2. Assign a Drive Letter to Your SD Card

Each memory device connected to your system is assigned a drive letter by default. If these identifiers are missing, you cannot access files stored in the drive directly. Thankfully, you can assign a new drive letter in a few clicks.

To check if your SD card is missing the drive letter and assign one if needed:

  1. Press the Windows key + R to open Run.

  2. Type diskmgmt.msc and click OK. To open the utility, you can also search for Disk Management in the Windows search bar.
  3. In Disk Management, check if your SD card reader is detected under Volume and has a drive letter assigned, such as I, E, F, etc.
    Disk Management Utility Showing Change Drive Letter Path Option for SD card in Windows 11

  4. If a letter is missing, right-click on the SD card reader and choose Change Drive Letter and Paths.
    Disk Management Utility Showing Assign the Following Drive Letter option

  5. In the Add Driver or Path window, select Assign the following drive letter, then click Add. This will assign a new drive letter to your SD card reader.

You can also make a drive letter available for use in case drive letters are missing, or there is a drive letter conflict.

Once done, close the Disk Management tool. Disconnect and reconnect your SD card reader and check if it appears in File Explorer.

3. Turn Off Write Protection

It’s important to check if your SD card has write protection turned on. When write protection is enabled, your SD card is read-only, so you can’t add or delete any data on the storage device. This may also trigger the disk is write protected error, hinting at an obvious issue.

To turn off write protection on your SD Card:

  1. Eject the SD card from your computer and locate the lock switch on its side.
  2. Slide it in the upward direction to turn off write protection.
  3. Connect the storage device to see if your computer can detect the SD card now.

4. Check SD Card Errors With CHKDSK

Check Disk (CHKDSK) is a Windows command-line utility that scans your driver for errors. It can scan drives for file system errors and bad sectors and fix them automatically. Here’s how to use CHKDSK to check and fix SD card errors:

  1. Open the Disk Management utility.
  2. Right-click on your SD card under Volume and choose Properties.
    Disk Management Utility Showing Removable Storage Device Properties Option

  3. Open the Tools tab in the Properties window.
    Disk Management Utility Properties Tool Tab Showing Error Check Option

  4. Click the Check button under the Error checking section.
  5. Select Scan and repair drive.
    Disk Management Error Checking Utility Showing Scan and Repair Drive Option

  6. Windows will scan the drive for errors and fix them automatically.
  7. Click Close and restart your computer. After the restart, check for any improvements.

5. Check Your SD Card for Errors in Device Manager

Device Manager lists all the devices connected to your computer, including hardware with errors. See if you can locate the SD card in Device Manager to perform further troubleshooting steps:

  1. Press the Windows key + R to open Run.
    devmgmt.msc in Run

  2. Type devmgmt.msc and click OK to open Device Manager.
  3. In Device Manager, click Action and choose Scan for hardware changes.
    Windows 11 Device Manager Showing Action options

  4. Next, expand the Portable Devices category.
    Windows 11 Device Manager Portable Device Showing Device Properties Option

  5. Check if your SD card reader is listed with a yellow exclamation mark. If yes, right-click on the device and choose Properties.
    Windows 11 Device Manager Showing SD Card Reader Device Properties

  6. In the Properties window, open the General tab and check the Device status.

The device status shows if your device is enabled or disabled, followed by an error code or message. If disabled, click Enabled and check for any improvements. Any error messages present can help you troubleshoot your specific issue.

6. Update Your SD Card Drivers

Your computer may fail to recognize or detect the external storage device due to outdated or missing device drivers. Fortunately, you can easily update device drivers from Device Manager. Here’s how to do it:

  1. Open Device Manager.
  2. In Device Manager, expand the Disk drives section and locate your SD card.
  3. If it has a yellow exclamation mark, right-click and choose Update drivers.
    Update sd card driver

  4. Select Search automatically for drivers. Windows will scan for compatible drivers. If found, it will automatically download and install the required drivers.

After the drivers are installed, restart your PC. Connect your SD card reader again and check if it appears in File Explorer. If the problem persists, reinstall the drivers from scratch.

Reinstall the SD Card Driver

If updating the device driver did not help, try reinstalling the SD card driver. You can perform driver updates and reinstallation from Device Manager:

  1. Open Device Manager.
  2. Expand the Disk drives category.
  3. Right-click on your SD card device driver.
    Windows 11 Device Manager Showing Uninstall Storage Device Driver Option

  4. Choose Uninstall Device. Click Uninstall to confirm the action if a prompt appears.
  5. Once uninstalled, restart your PC and connect your SD card reader. It will automatically detect and reinstall the required drivers.

7. Format Your SD Card to Fix Data Corruption

A corrupted SD card may not show up in File Explorer. To make sure your SD card is not corrupted, connect it to another computer. You may have a file system corruption issue if it doesn’t work on other devices.

Thankfully, a quick format can fix any data corruption issues.

Formatting your SD card will erase all its data. Be sure to back up any files you need before proceeding.

To format your SD card:

  1. Press the Windows key + R.
  2. Type diskmgmt.msc and click OK to open the Disk Management utility.
  3. Locate your SD card in the Volume section.
  4. Disk Management Utility Showing the Format Option in Windows 11

    To format the storage drive, right-click on the device and choose Format.

    format corrupted sd card drive

  5. Choose the Volume label, and File system. Leave Allocation unit size as default.
  6. Click OK to format your SD card with a compatible file system.

Faulty memory card readers are a common cause for SD cards not showing up in Windows File Explorer. Opt for an external card reader that connects to a USB port. Otherwise, Windows automatically detects portable storage devices such as SD cards and shows them in File Explorer.

Windows 11 also resolves many hardware issues through Windows updates, which include the latest drivers and fixes, so do check if you have the latest updates installed on your PC.

How to Connect a Sonos Speaker to Wi-Fi

Key Takeaways

  • To connect a Sonos speaker to Wi-Fi, download the Sonos app on iOS or Android, log in, and follow the guided prompts.
  • You can customize your device, view network details, set up a stereo pair, and add voice control once you’ve connected your Sonos speaker to Wi-Fi.
  • Use the Sonos app or AirPlay 2 to stream music from compatible devices and allow others to control the speaker over Wi-Fi.


Sonos wireless speakers stream music over Wi-Fi from various apps, and also support AirPlay 2 for playback from compatible devices like iPhones. Learn how to connect Sonos speakers to Wi-Fi for the first time or move them to a new Wi-Fi network so that you can start listening to your favorite music.


How to Connect Your Sonos Speaker to Wi-Fi

To connect a Sonos speaker to Wi-Fi, set up its features, and log into your music and audio streaming services, you need to download the Sonos app for your iOS or Android device.

Download: Sonos for iOS | Android | Desktop (Free)

Although Sonos provides apps for Mac and Windows, these desktop applications cannot be used to connect a Sonos speaker to Wi-Fi.

After downloading the app, log in or create an account. Then, make sure your mobile device is connected to the Wi-Fi network you want to use, and follow these steps:

  1. Open the Settings tab. You’ll likely see the Account, System, and Services & Voice sections grayed out.
  2. Look for the warning or pop-up that prompts you to connect your Sonos device to Wi-Fi and tap Let’s fix it or Add to network.
  3. Then, tap the Add network button.
  4. If the Sonos app asks for permission to see your location, tap Continue to grant it.
  5. When prompted, type the password for the Wi-Fi network and tap Continue.

You’ll see an alert when your Sonos device is successfully connected to Wi-Fi.

Connect and Customize Your Sonos Speaker

Once you’ve connected your Sonos device to Wi-Fi, you can start personalizing the experience by adding your music streaming services, setting up a stereo pair, and more.

View Network Details in Sonos Settings

You can see details about the Wi-Fi network your Sonos device is connected to in the Sonos app. Navigate to Settings > System and select your device from the Products list. On the next screen, tap the name of your device (again under Products).

You’ll see the status of your device and relevant features, such as the battery, microphone, and network. Tap Network to view the Wi-Fi connection strength, network frequency, channel, and other details.

Set Your Sonos Speakers Up as a Stereo Pair

If you have two compatible Sonos speakers, you can set them up as a stereo pair. Go to Settings > System > [room name] and tap Set Up Stereo Pair. Then, follow the guided prompts to pair the two speakers together.

Add Voice Control to Your Sonos Speaker

Since 2017, many Sonos speakers have supported voice assistants, including Amazon Alexa, Google Assistant, and Sonos Voice Control. These use Wi-Fi to let you control the music, ask for information, and even control smart home devices.

To add a voice assistant to your Sonos speaker, go to Settings > System > [room name]. Then, find the Voice section and tap Add a Voice Assistant. Read our guide to adding voice control to your Sonos speaker for more details on the setup process.

Once your Sonos speaker is connected to Wi-Fi, you’re ready to play music. You can do so by using the Sonos app or by streaming from a compatible device using AirPlay 2. In the Sonos app, log in to Spotify, Apple Music, or one of the other available services to connect it to your account and start streaming.

Whether you’re using the app or AirPlay 2, the Sonos speaker uses Wi-Fi to play music, so you don’t have to worry about limited Bluetooth range or Bluetooth device switching.

Let Others Control the Music Over Wi-Fi

If you’re listening to music with friends, you can share control of the speaker with them by connecting their devices to your Wi-Fi network. Once everyone’s on the same Wi-Fi network, they can use the Sonos app or AirPlay 2 to play music and control the speaker.

How to Move Your Sonos Speaker to a New Wi-Fi Network

Whether you’re moving a Sonos Era 100 to a new home or traveling with a Sonos Roam, the process for connecting your speaker to a new Wi-Fi network is similar to setting it up on Wi-Fi for the first time.

In the Sonos app, go to the Settings tab and look for the alert that you need to update the network settings. Then, follow the guided prompts that show you how to connect Sonos to the new Wi-Fi network.

Even if your speaker supports Bluetooth, connecting Sonos to Wi-Fi unlocks its full capabilities, from music streaming and AirPlay 2 playback to voice assistants and multiroom audio. Making it well worth doing.

How to Connect a PS5 Controller to Your Phone

Key Takeaways

  • Connecting your PS5 (DualSense) Controller to your phone improves the mobile gaming experience, especially with Remote Play.
  • The DualSense Controller is compatible with devices running Android 12 or later and iOS 14.5 or later.
  • You can connect a PS5 controller by using your phone’s Bluetooth settings and putting the controller in pairing mode.


Connecting your DualSense Controller to your phone can vastly improve your mobile gaming experience, especially when using Remote Play. If you want to use your PS5 controller with your smartphone, we’ve got you covered with this quick tutorial.


Which Smartphones Are Compatible With the PS5 Controller?

The PlayStation website states that the DualSense Controller is compatible with devices running Android 12 or later and iOS 14.5 or later. However, we were able to test the method on a device running Android 11 with no issues.

Not all Android devices are compatible with the DualSense Controller, however. The PlayStation website suggests consulting your device’s manufacturer to see if your device is compatible with the controller or not.

You can find information about your device’s manufacturer in the About phone section of your device settings.

But if that’s too much effort, you can also follow the steps below to see if it works for you. If not, you may have to stick with another Bluetooth controller for your mobile gaming endeavors.

How to Connect Your PS5 Controller to an Android Device

You can connect your DualSense to an Android device running Android 11/12 or later. To check what operating software your device is running, head to your device’s settings by pressing the Settings app.

Scroll down to About phone, and select Software information. There, you will be able to see what Android version you are currently running, and update it if necessary.

To begin connecting your PS5 controller to your Android device, head back to your Settings and press Connections.

Ensure the Bluetooth toggle is on and press the Bluetooth tab to open the menu.

Turn your attention to your controller, making sure the controller is off. If not, hold the PS button down for around seven seconds or until the controller light turns off.

Put your controller in pairing mode by holding the Create and PS buttons down simultaneously. It should only take around three seconds before your controller light starts flashing to indicate it is in pairing mode.

If you’re unsure what the DualSense Create button is, it’s the small oval button on the left side of the touchpad.

a playstation 5 controller held in someone's hands
Hopix Art/Shutterstock

Now that your controller is searching for a Bluetooth device to connect to, check your phone. As long as your device is compatible, you will see an option labeled DualSense Wireless Controller in the Available devices section at the bottom of the screen.

Select DualSense Wireless Controller and press Pair to complete your connection. Once connected, you will see DualSense Wireless Controller under your Paired devices.

The flashing light around the touchpad of your controller will also become static when the pairing process is complete.

How to Connect Your PS5 Controller to an iPhone

Connecting your DualSense to your iOS device follows a similar process but can only be completed if your phone is running iOS 14.5 or later. You can check your device’s version by heading to your iOS device’s General Settings, pressing About, and checking the iOS Version tab.

If your operating software is compatible, press General in the top left corner to head back to your Settings and select Bluetooth. Ensure the toggle is switched on and put your PS5 controller into pairing mode.

Scroll down to Other Devices on your mobile and wait until you see the DualSense Wireless Controller option.

Once you do, select it, and your phone will connect to your controller.

Connecting your DualSense Controller to your Mac and other Apple devices is also possible, but connecting to your iPhone is by far the most convenient option, especially if you are looking for something portable.

How to Reconnect Your DualSense Controller to Your PS5

You won’t want to use your DualSense with your mobile device forever and there will come a time when you want to connect your controller back to your PS5. Thankfully, doing so is very easy and will take just a few minutes.

Begin by switching your PS5 console on. You can then reconnect your controller manually using a USB-A to USB-C cable. Plug the USB-A side into your console and the USB-C side into the slot at the top of your controller. The controller will reconnect automatically.

Bluetooth Accessories tab in General PS5 Settings

You can also reconnect wirelessly using Bluetooth if you have two controllers, as long as one is synced already.

Using your primary controller, head to your PS5 Settings and head to Accessories. Open Bluetooth Accessories from the General tab and place your controller back into pairing mode by holding the Create and PS buttons down. Once the second controller appears, select it to reconnect to your PS5.

Using touchscreen controls to game on your mobile device can be clunky and difficult, and your thumbs end up covering a large part of your display. Using any Bluetooth controller will vastly improve your mobile gaming experience. But since the DualSense is one of the best controllers on the market, it will massively level up the experience of gaming on your phone.

How to Create AI Selfies With Snapchat’s Dreams Feature

Quick Links

Key Takeaways

  • Snapchat Dreams is a generative AI feature that allows you to create AI selfies from within the app.
  • Upgrading to Snapchat+ gives paying users one free pack of Dreams, while free users must pay US$1 for a pack of eight Dreams.
  • The accuracy of the AI-generated images varies, but the more pictures you provide, the better the results.


Snapchat has a generative AI feature that lets you create AI selfies. Called Dreams, the feature lets you create a gallery of portraits of yourself which you can then share. Here’s how to use Snapchat Dreams to create your own AI selfies.


Is Snapchat Dreams Free?

Besides improving your Snapchat experience, Dreams is one of the reasons you should consider upgrading to Snapchat+. Snapchat’s paid users get one free pack to start, followed by a monthly pack of free Dreams.

However, it’s worth noting that your subsequent monthly AI pack is selected randomly, and you might get the same one again.

Free users, on the other hand, must pay, and won’t get any free packs. A pack of eight Dreams costs $1. This is despite the Snapchat website claiming that every user gets a free pack. We tested this on two different accounts and both required a payment to generate a pack.

How to Use Snapchat Dreams to Create AI Selfies

If you’ve never used the feature before, you may have noticed a prompt for it just after you open Snapchat. It usually appears as a banner above your active chats.

To use Dreams, you will first need to upload a set of selfies.

To do this, follow these steps:

  1. Open Snapchat and tap your profile photo (or Bitmoji) at the top left corner.
  2. Select the cogwheel icon in the top-right corner to open your settings.
  3. Scroll down the My Account section and tap AI selfies.
  4. Choose Create AI selfies.
  5. Read the terms and conditions first, and if you’re happy with them, click Agree and continue.
  6. Proceed to take photos. It will ask you for selfies from different angles.
  7. After the selfies stage, you can tap Add more photos to add photos from your camera roll.
  8. Tap Done, and you’ll get to a screen where you can pick a male- or female-looking outline. You can choose one or skip that part altogether.

Now that you have registered photos, you can go and generate your AI selfies with Dreams:

  1. Tap the camera icon like you’re about to make a Snap.
  2. Swipe up from there to access Memories. If you’re greeted with flashback Snaps, just swipe down to enter the Memories page.
  3. Select the Dreams tab and choose the glowing yellow Create Dreams button.
  4. You get one free random pack with eight photos. Select it, and wait for your pack to generate.

You might have to wait up to 30 minutes for your pack to be ready, and you’ll be notified once it is ready.

Is Snapchat Dreams Good at Creating AI Selfies?

The accuracy of the images generally varies according to what pack you pick, but the more pictures you give it to work with, the better the results. In our photos, the images were reasonably realistic and much better than most other “AI filter apps” out there.

You can use these images on Snapchat or share them on other platforms. Just go to Dreams in Memories, find the image you want to share, and tap Send To to share on Snapchat.

If you want to download the image, tap the pencil icon in the bottom-left corner, and it’ll change to a share icon. Tap the share icon and swipe left on the menu to see Download. Using that will save the image on your device.

And that’s all it takes to get your own AI selfies from Snapchat. If you’re not a fan of the Dreams feature but want to generate an AI selfie, you can also use Vana to generate AI portraits.

Why 16GB of RAM Is the New Standard for Windows PCs

Key Takeaways

  • Microsoft is pushing for 16GB of RAM as the minimum for new devices, possibly to support AI-based processes.
  • “AI PCs”, which could be powered by AI or have AI tools pre-installed, will require more memory to run properly.
  • The upcoming Windows 12 is expected to have a strong focus on AI, so having 16GB of RAM will likely be necessary to make the most of it.


As operating systems become more complex, the minimum specifications for new PCs rise to meet them. Recent reports claim that Microsoft is pushing to have 16GB of RAM become the minimum amount of memory for new devices. But why would it make that change, and is this good for you?


What Is RAM?

For anyone unsure what RAM is: it’s short for “random access memory.” You can imagine it like the size of your computer’s work table; the more room it has to work with, the more programs it can run simultaneously without encountering any problems.

Be sure to check out our explainer on RAM that everyone can understand.

What Is Happening With RAM in Windows Computers?

A TrendForce market research report says Microsoft is planning to bump up the minimum amount of RAM new devices have:

Microsoft has set the baseline for DRAM in AI PCs at 16GB. In the long term, TrendForce projects that AI PCs will catalyze an increase in annual demand for PC DRAM bits, with consumer upgrade trends further boosting this demand.

Right now, you can purchase a new PC with 8GB of RAM minimum. If this report is accurate, these models will eventually be phased out, and 16GB computers will take their place as the baseline.

Why Is Microsoft Setting a Baseline of 16GB of RAM?

You may have noticed an interesting term in TrendForce’s quote: “AI PCs.” While it may sound insignificant, this is why Microsoft is pushing for more RAM.

At the time of writing, we don’t know exactly what an “AI PC” is. We know that many companies are developing them, and as you would expect, they will feature artificial intelligence in some form.

An “AI PC” could be a machine where AI powers the operating system itself. It might also be a flashy marketing term for a regular PC with some simple AI tools pre-installed. Regardless of how AI PCs go, those special processing tools will need more memory to run properly.

The Potential Set Up for Windows 12

But why is Microsoft the one setting the baselines for AI PCs? The answer may lie within Microsoft’s upcoming “Windows 12” project.

We learned about the existence of Windows 12 in early 2023. It’s still unclear if Windows 12 will be a whole new operating system or if it will be a significant rework of Windows 11. However, sources claim that Windows 12 will focus heavily on AI.

We’re already seeing proof that Microsoft is making a massive shift toward AI-based systems. All you need to do is boot up a Windows product, and there’s a good chance you’ll see a Copilot button on it somewhere.

Copilot is Microsoft’s personal AI assistant, powered by ChatGPT. Right now, you can find a dedicated Copilot button on Windows 10 and 11, Microsoft Edge, and Office. The company has already released a standalone Copilot app for Android, too.

Windows 12 is currently believed to have a 2025 release date, which gives Microsoft a lot of time to work on implementing artificial intelligence into its operating system. And for people to make the most of Windows 12, Microsoft needs new PCs to have enough RAM to support it; hence the 16GB suggestion.

Is Setting 16GB RAM as the New Standard Good News for You?

While Microsoft has reasons for upping the minimum amount of RAM, it’s easy to be skeptical about its claims. Who’s to say this isn’t just a move to raise the demand for RAM and force hardware prices up? Is 16GB of RAM really necessary?

If we imagine an AI PC as a device constantly running artificial intelligence-based processes, then 16GB of RAM makes a lot of sense. We previously covered whether 4GB of RAM is enough for Windows 11, and in that piece, we deduced that using 8GB of RAM to run it is doable but not ideal.

If 8GB of RAM is already the “tipping point” for running Windows 11, then adding AI processes into the mix will likely be the factor that pushes the requirement higher. And while we don’t have any hard numbers on how an AI PC would perform with 8GB of RAM, it’s still a good idea to go into the new era with at least 16GB of memory.

As much as this may sound like Microsoft is making excuses to sell PCs with more RAM, its claims hold a lot of water. We’ll have to wait a while and see what it means by “AI PC” before rendering any further judgment.

How to Fix Amazon Echo Audio Issues: A Troubleshooting Guide

Key Takeaways

  • Try reestablishing the cable connection by unplugging and reconnecting the Echo from the power cable.
  • Update your Alexa app to resolve any software compatibility issues between the app and the speaker.
  • Check and adjust your Alexa audio settings to improve or modify the sound quality of your Echo speaker.


Like any speaker, an Amazon Echo can run into audio issues, be it from a faulty cable, an unstable connection, or your app’s settings. But when this happens, how can you fix it? This troubleshooting guide should help you resolve your Echo’s audio issues.


1. Reestablish the Echo’s Cable Connection

The classic troubleshooting step of turning a piece of hardware off and then back on again may resolve your Amazon Echo’s audio issues. So, before trying any of the other steps listed here, first try unplugging your Echo from the power cable and then reestablishing the connection.

While “turning it off and on again” may not work, there’s a reason this sentence has crossed over into popular culture.

2. Update Your Alexa App

If you haven’t updated the Alexa app (available on Android and iOS) in a while, there may be a software compatibility issue between the app and your speaker. Software updates can be irritating, but updating your Alexa app shouldn’t take more than a minute or two with a decent internet connection.

To check if your Alexa app needs updating, go to your device’s app store and search for the Alexa app. Or just follow the links above. If the Open option to the right of the app icon has been replaced with Update, then there’s a software update waiting to be installed.

Alternatively, if there are no updates available, you could try uninstalling and reinstalling the Alexa app.

3. Check Your Alexa Audio Settings

If your Alexa’s audio is working, but just doesn’t sound right, you’ll be able to access and alter your connected device(s)’ audio settings within the Alexa app. Within the audio settings, you can adjust the bass, mid-range, and treble of your speaker.

You can keep your Echo speaker’s audio active while playing with the settings, allowing you to instantly check how the changes are affecting the sound. Your Echo will flash with a white light for a few seconds, and after that, the new sound adjustment should be applied.

To access the audio settings, head to Devices and opt for the device you’re looking to adjust. Tap on the settings cog at the top-right of the screen, and then head to Audio Settings.

Note that your speaker’s equalizer settings may be set to a neutral (default) position initially, so if you’d rather have the audio you received upon first setting up your device, simply toggle each cursor to the middle of each scale, where it reads 0.

4. Reestablish the Wi-Fi or Bluetooth Connection

When setting up your Alexa device through the smartphone app, you need to connect your smartphone to the Alexa speaker’s Wi-Fi network. After this, you’ll also be able to quickly connect your speaker to your phone, laptop, or similar device using Bluetooth. If either of these wireless connections fail or aren’t strong enough, you can run into audio issues.

Starting with your Wi-Fi, try deactivating the Wi-Fi on the device to which your Echo speaker is connected. Then, turn the Wi-Fi back on, wait for your Alexa’s Wi-Fi network to appear, and connect to it.

Alternatively, you can try reestablishing the Bluetooth connection. To do this, forget your Echo speaker in your device’s Bluetooth settings.

Then, search for new devices, tap on your Echo speaker when it’s found, and agree to pair it with your smartphone.

5. Reset Your Amazon Echo Device

If all else fails, and you’re still dealing with audio issues after trying each of the methods above, it may be time to reset your Echo device.

Your Alexa app will remember and recognize your connected speaker unless you reset the speaker itself. To do this, press and hold the Volume down and Microphone off buttons for 15 to 20 seconds.

The ring light on your Echo will turn on and off again, which will indicate that it has been reset. Now, your app will treat the Echo speaker like a totally new device, allowing you to go through the setup process again.

When your speaker’s light turns purple, that means it is ready for setup.

Other Amazon Echo Audio Issue Troubleshooting Tips

If all the methods above don’t help, there are some other things you can try:

  • Move your Echo closer to your router or connected device.
  • Restart your Wi-Fi router.
  • Connect to your router’s 5GHz channel.
  • Change your Echo’s wake-up word (Devices > Settings > Wake Word).

If you’re still experiencing issues even after trying all of the above, the Echo hardware may be faulty or degraded. If you’ve had your Echo for a long time, it may be time to get a new model, depending on the severity of the issues you’re dealing with.

What Is Stolen Device Protection for iPhone? How to Enable It

Key Takeaways

  • Enable Stolen Device Protection on your iPhone to secure your data, payment info, and passwords if someone steals your device.
  • Stolen Device Protection requires biometric authentication for certain actions like accessing passwords and credit cards.
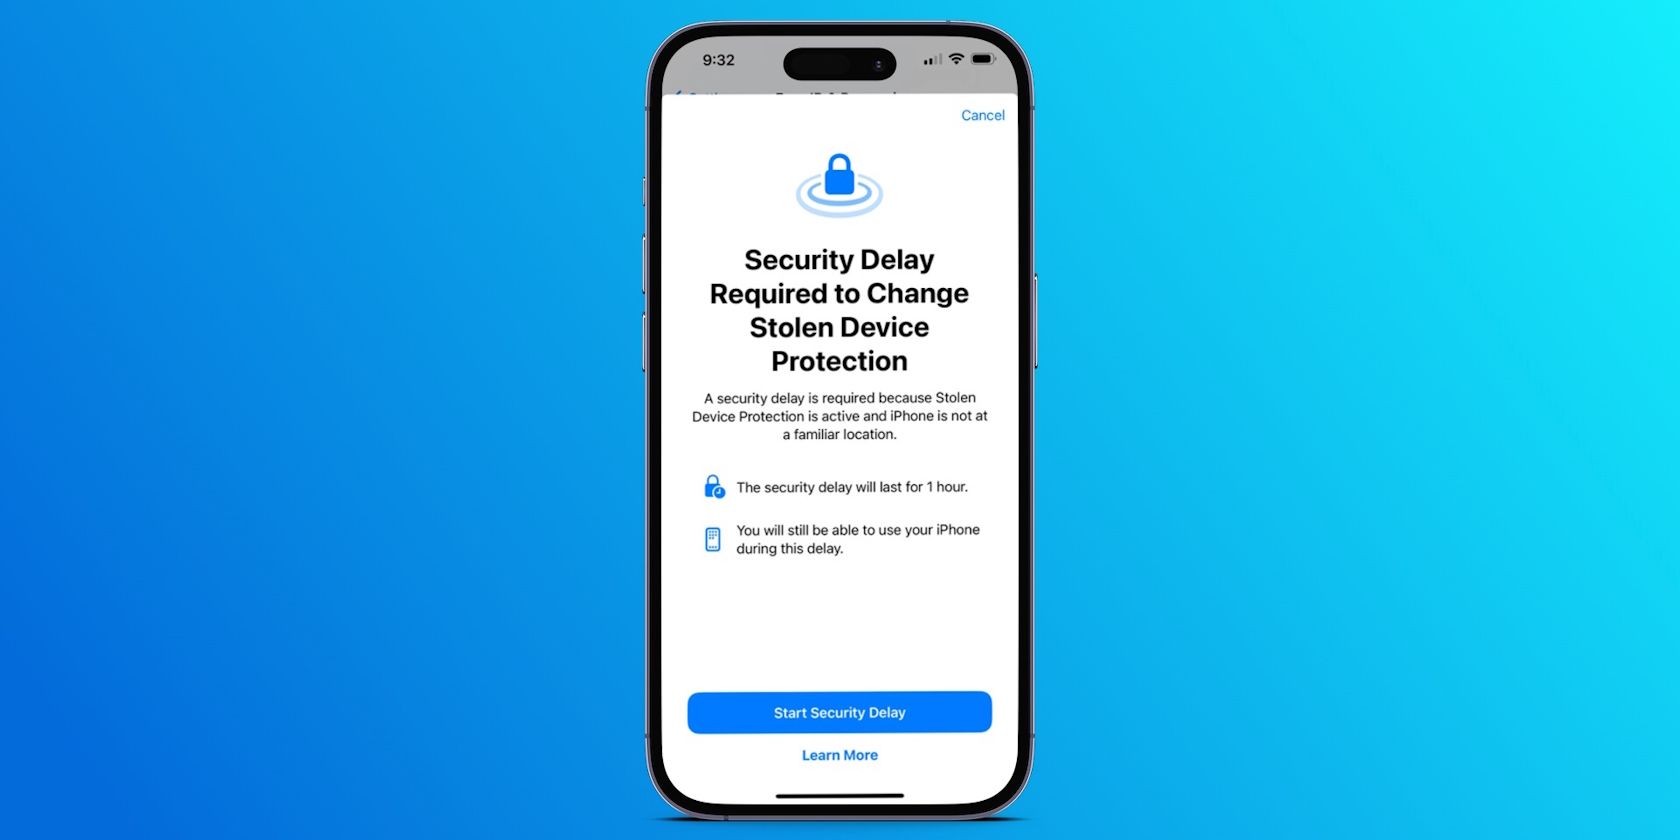
  • Stolen Device Protection also introduces a one-hour security delay for certain actions like changing your passcode or turning off Find My.


Stolen Device Protection is an important security feature in iOS that lets you protect your data, payment information, and saved passwords if your iPhone is ever stolen. Learn how to enable Stolen Device Protection on your iPhone to protect it in worst-case scenarios.


What Is Stolen Device Protection in iOS?

People store lots of sensitive information on their smartphones, from passwords and credit cards to health information and precious memories. Therefore, it’s risky if someone steals your iPhone’s passcode as they could change important security settings, view passwords, use credit cards, and more.

Stolen Device Protection, available in iOS 17.3 and later, protects against that. When Stolen Device Protection is turned on, certain actions require one of the two key extra security measures: biometric authentication and security delay.

Biometric Authentication

Ground Picture/Shutterstock

With Stolen Device Protection turned on, actions like accessing saved passwords on iCloud Keychain and viewing stored credit cards require Face ID or Touch ID authentication. That means a thief can’t use your iPhone’s passcode to access these features.

The actions that require a biometric check include:

  • Accessing synced iCloud Keychain passwords and passkeys
  • Autofilling debit and credit cards
  • Applying for an Apple Card or viewing your Apple Card number
  • Turning off Lost Mode on your iPhone
  • Erasing all content and settings
  • Transferring your Apple Cash balance

Security Delay

In addition to using Face ID or Touch ID, Stolen Device Protection also imposes a one-hour delay for performing certain actions, including the following:

  • Changing your Apple ID password or signing out
  • Changing your iPhone passcode
  • Turning Face ID or Touch ID on or off
  • Turning off Find My or Stolen Device Protection
  • Changing trusted devices, Recovery Contacts, or the Recovery Key for your Apple ID account

After the one-hour delay, you’ll have to authenticate again using Face ID or Touch ID. According to Apple Support, Stolen Device Protection goes into effect when your device is away from familiar locations, which your iPhone automatically recognizes as places where you frequently use it. So the added security delay will only apply when you’re away from these areas.

How to Enable or Disable Stolen Device Protection on Your iPhone

To enable Stolen Device Protection on your iPhone, make sure it’s running iOS 17.3 or later. After updating, you might see a prompt asking whether you’d like to turn on the feature. If you don’t see the prompt, you can turn on Stolen Device Protection on your iPhone manually.

You must have Face ID or Touch ID enabled to use Stolen Device Protection. Follow our guide to set up Face ID on your iPhone if you haven’t already.

Once your device is updated and Face ID or Touch ID is set up, enable Stolen Device Protection by following these steps:

  1. Go to Settings > Face ID & Passcode (or Touch ID & Passcode). You’ll be prompted to enter your passcode to access the menu.
  2. Next, scroll down to find Stolen Device Protection and tap Turn On Protection below it.
  3. Authenticate using Face ID or Touch ID when prompted to activate the feature.

You can disable the feature at any time by repeating the same steps. However, if you’re not at a familiar location, you’ll be prompted to start a one-hour security delay and wait for it to finish before you can change the setting for Stolen Device Protection.

You can continue using your iPhone while the timer counts down. And when the time is up, you’ll receive a notification to return to Settings for one more biometric check.

If you return to a familiar location while the Security Delay is counting down, your iPhone might end the delay early.

Is Stolen Device Protection Worth Using?

person trying to unlock an iPhone 14 Pro
Your Hand Please/Shutterstock

Stolen Device Protection is a significant iPhone security feature, and you should enable it to protect your most important data, financial information, and security settings in case your iPhone is ever stolen.

If you don’t enable Stolen Device Protection, a thief only needs to “shoulder surf” you entering your iPhone’s passcode to steal much more than your device. They can lock you out of your Apple ID and iCloud, cut off access to photos, email accounts, and contact information, steal passwords to your most important accounts, and use your credit card information.

Enabling Stolen Device Protection makes sure these actions are only possible when your face or fingerprint unlocks your iPhone. The one-hour security delay adds an extra layer of protection by giving you a crucial window to turn on Lost Mode before a thief can change Apple ID account information or security settings.

The best part is that you only have to enable Stolen Device Protection on your iPhone once (ideally right now!), and then you can forget about it. You’ll rarely even be bothered by the extra security checks. But if you ever lose your iPhone, you’ll be thankful that all your data is protected.

What Is Notion Calendar? How to Use It to Manage Your Time

Key Takeaways

  • Notion Calendar allows users to manage their time and schedule in detail, similar to Google Calendar and Apple Calendar.
  • The Notion Calendar app was developed by Notion and is a standalone tool from the main productivity app.
  • Notion Calendar is available for macOS, Windows, and iOS, and users can integrate Google Calendar into it.


Many users rely on Notion for its note-taking and workspace management features. And now, the much-loved productivity app has released a calendar service called Notion Calendar. So, what is Notion Calendar, and how can you use it to manage your time? Let’s find out.


What Is Notion Calendar?

Notion Calendar is an app released by Notion in January 2024. The tool is different from the Calendar template that exists within the main Notion app, as that focuses on daily overviews. Instead, Notion Calendar lets you go into full detail when it comes to blocking your time—making it very similar to Google Calendar and Apple Calendar.

Besides planning your day in Notion Calendar, you can also make others aware of your availability. Moreover, you can swiftly set up meetings with others via the Quick meeting tool. For these reasons, the app is great for students and employees alike; not just individual users.

Other useful features in Notion Calendar include:

  • Toggling whether you want to see which week of the year it is (this is useful if you live in a country where you count week numbers rather than saying “week commencing”).
  • Choosing how many days you want to see in your calendar view.
  • Toggle calendar visibility to customize your view.

How to Get Notion Calendar

The Notion Calendar app is available for macOS, Windows, and iOS. If you own a Mac, you can download the program on computers with both Intel and Silicon chips.

Getting Notion Calendar is a different process for computers and smartphones. Below, you’ll find the steps required for both.

How to Get Notion Calendar on Your Computer

To download Notion Calendar for Windows or macOS, follow these instructions.

  1. Navigate to the Notion Calendar website.
  2. Click on Downloads.

  3. Under the Desktop App section, choose from: Mac (Intel), Mac (Silicon), and Windows.
    The Download Section on the Notion Calendar Website

  4. Follow the remaining instructions on your respective device. You’ll need to drag and drop the Notion Calendar icon into the Applications folder if you use a Mac.

How to Download Notion Calendar for iOS

To download the Notion Calendar app for your iPhone:

  1. Go to the App Store.
  2. Tap on the Search tab.
  3. Type Notion Calendar and press Search.
  4. Download Notion Calendar when you see it.

If you’re thinking about bringing all of your workflows into one place, check out this guide on the types of productivity tools that Notion can replace.

How to Use Notion Calendar to Manage Your Time

After you’ve downloaded Notion Calendar, you’re ready to begin using it to effectively manage your time. Below, you’ll find step-by-step tutorials for the most essential productivity functions in Notion Calendar.

Connecting Your Existing Calendars to Notion Calendar

If you already plan your week in Google Calendar or a similar app, you might simply want to integrate everything within Notion Calendar rather than starting from scratch. At the time of writing in January 2024, you can’t incorporate other apps aside from Google Calendar—such as Apple Calendar—into Notion.

The good news is that if you use Google Calendar, integrating your existing schedule within Notion Calendar is very easy. Here are the steps you should follow on your computer.

  1. On the left-hand side, select + Add calendar account.
    Select the Add Calendars Tab on the Left-Hand Side of Notion Calendar

  2. Go to Integrations and tap Calendars.
    Connect Notion Calendar and Google Calendar Within the Notion Calendar App

  3. Under Calendar accounts, choose Connect.
  4. A new tab should open in your browser. Click on Continue to Google Permissions.
    Continue to Google Permissions in a Web Browser

  5. Choose and sign into the Google account you’d like to integrate within Notion Calendar.
  6. Select Continue.
    Sign Into Notion Calendar With Your Google Account

  7. Tick the boxes next to everything you want to grant Notion Calendar access to.
    Select the Different Access Permissions in the Notion Calendar App

  8. Scroll to the bottom and select Continue.
    Continue Signing in With Google to Integrate Calendar With Notion

  9. If a pop-up menu asks if you’d like your website to open Notion Calendar, give it permission. After a few seconds, your new calendar should have integrated within the app.
    A pop-up asking Notion Calendar to open via Google

On the Notion Calendar iOS app, integrating your calendar is a slightly different process.

  1. Open the Notion Calendar app and select the hamburger icon in the top left-hand corner.
  2. Select + Add calendar account.
  3. Press Connect next to Add Google Calendar. When you’re asked if you can allow Google to sign in, tap Continue.
  4. The following steps are the same as they would be if you integrate your calendar on a computer. Sign in to your Google account and grant access to the Notion Calendar app.

How to Add New Tasks to Notion Calendar

Adding new tasks and appointments to the Notion Calendar app is incredibly straightforward. On Windows or Mac:

  1. Double-tap on the place you’d like to add a new event.
  2. Give your event a name in the Title text box.
    The Option to Add a New Event in Notion Calendar

  3. Tap on the time and date boxes to customize these. Then, add participants, locations, and everything else you need.
  4. When you’ve finished, tap anywhere on your screen.

On your iPhone, follow these steps instead.

  1. Either tap the + button or press and hold on to your calendar screen to create a new event.
  2. Customize the title and other categories. Then, press Done in the top right-hand corner.

Changing the colors of your tasks in Notion Calendar can make it easier for you to organize everything. To do this, open your task and tap the color next to the calendar it’s associated with. Under Event color, pick your new color.

If you want some help managing your time more effectively, consider checking out our guide on how to plan your day in Notion.

How to Change Your Notion Calendar View

Toggling your calendar view can make it easier to manage your time by showing what’s upcoming for you in a smaller or larger period of time. Again, the process is different depending on whether you use Notion Calendar on iOS or your computer.

Follow these steps to change the calendar view in Notion Calendar on your computer:

  1. Tap the + icon next to the dates.
    Tap the + Icon to Change Days Display Notion Calendar

  2. Press + or , depending on how many days you want to be visible.
    Change the Number of Days in the Notion Calendar App

You can also type how many days you want to be visible in Notion Calendar (e.g. type the 3 button on your keyboard to only show three days). This only works from 1-9, though.

On your iPhone, you’ll need to do the following instead. Note that you can only see up to three days at a time.

  1. Tap the hamburger icon.
  2. Choose from 1 day, 2 days, or 3 days—depending on your preference.

Notion Calendar effectively helps you keep everything more organized in your Notion workspace, and it’s a perfect companion to the main Notion app. You can use the app both on your own and with others, and customizing your events is easy. You should now have all the information you need to effectively use the program’s most important features.

How to Create a Desktop Background Using AI

Key Takeaways

  • Choose an AI art generator that suits your needs and preferences.
  • Craft a prompt for your desktop background, adding an aspect ratio parameter to fit your screen.
  • Upscale your chosen image to the highest resolution possible and download it as your new desktop background.


To create a beautiful desktop background using an AI art generator, there are a few key settings to tweak, such as the aspect ratio and image resolution. Here’s what the process looks like from start to finish.


Step 1: Choose an AI Art Generator

You have plenty of AI art generators to choose from for this tutorial, whether you’re hoping to find something for free or one with advanced abilities. Some models, like Dream Studio by Stable Diffusion, have handy built-in sliders to change the aspect ratio, a feature that will prove useful for getting the image to fit the dimensions of your computer screen.

On the other hand, DALL-E by Open AI is one of the most simple and beginner-friendly AI image generation websites you can use. Choose this option if you want to avoid getting lost in detailed settings that might be confusing.

We have used DALL-E to create phone wallpapers in the past and the same method can be applied to creating desktop backgrounds. But for this guide, we’ll be opting for Midjourney, because it arguably produces the most stunning images of all the AI art generators.

Step 2: Craft an AI Prompt for Your Desktop Background

If you’ve never used Midjourney before, we’ve put together a quick start guide on how to use Midjourney to create AI art if you need help.

Head to the Midjourney server on Discord and click on one of the channels named #general or #newbies that appears in the navigation panel on the left.

In the message box, type the command /imagine, then press the spacebar on the keyboard to automatically add the prompt tag.

Now you can start typing a description of the image you want to create in the prompt field. Don’t hit Enter just yet, as we’re going to add a parameter to the end of the prompt in the following step.

Midjourney imagine command and prompt for a cottage by the seaside

Deciding what kind of image you should create can be a surprisingly hard task, so if you find inspiration lacking, browse our list of AI art prompt ideas.

Step 3: Change the Aspect Ratio of Your Background

Now, we want to add the –ar parameter to the end of our prompt. This will change the dimensions of the image to better fit our desktop.

The aspect ratio you use will depend on your screen size. Here are a few common aspect ratios you can try:

  • ar– 16:10 – Common for laptops
  • ar– 16:9 – Common for standalone computer monitors
  • ar– 21:9 – Aspect ratio used for some ultrawide curved monitors

Add one of these parameters to the end of your prompt, then press enter on the keyboard to start generating the image.

Midjourney prompt for a cottage by the seaside including the --ar paramter

Midjourney will generate four images based on the prompt, and you can select the one you like for the next step.

Midjourney AI image results for a cottage by the seaside

Before moving on, however, here are a couple more examples of different aspect ratios and the prompts that we used to create the images:

/imagine prompt many vegetables spread out on a long table, neutral background, oil painting --ar 16:9

Midjourney image of vegetables on a table

/imagine prompt luminescent mushroom in a dark overgrown forest, enchanting, beautiful, fairytale --ar 21:9

Midjourney image of glowing mushrooms in a forest

Step 5: Upscale Your AI Image

Once you have chosen an image you like, it’s time to upscale it to the highest possible resolution. The buttons underneath the set of four images, labeled U1 to U4, correspond to the four images from top left to right, and bottom left to right. Click the one that matches your image.

Midjourney upscale buttons close-up

After that, the image you have chosen will reappear in the channel on its own, and you will have some more options to alter the image. Now you can click Upscale (4x) to start the process.

Midjourney image of a cottage by the seaside showing the upscale buttons

It’s easy to lose sight of your image in the continuous flow of posts in the chat. So a quick tip for finding your lost image in Discord is to click the Inbox button located in the top-right corner of the window. Click the Jump button to get back to your image.

Discord inbox showing the latest Midjourney prompt

When you’re ready to upskill, check out our tips for writing better Midjourney prompts.

Step 6: Download Your AI-Generated Desktop Background

Once the image has finished upscaling, it will appear once more in the Discord channel with a few different buttons below it.

Midjourney options for opening an image in the web

Click on the image to preview it, then click Open in Browser to see the image in full resolution in your browser. Right-click on the image and hit Save Image As to download it to your computer.

Right click options on an image to save it to computer

All that’s left now is to locate the downloaded image on your computer and set it as your desktop background!

Example of desktop background on a mac created with Midjourney

Once you’re familiar with the process, creating new desktop backgrounds in Midjourney is a simple task, and a great way to put your AI art to good use. And creating your own backgrounds using AI means you’ll never have to settle for the same boring background as everyone else.

How to Reboot or Factory Reset Your Roomba

Key Takeaways

  • Even “smart” technology like a robot vacuum is not always smart, and can have problems that require troubleshooting.
  • Reboot your Roomba as a first troubleshooting step to clear any errors and refresh the device.
  • Resetting your Roomba is a more drastic step that reverts it to its factory settings. This is recommended to fix complex problems or to remove your account from the device.


Rebooting your Roomba can quickly resolve simple issues. Alternatively, resetting your Roomba can help with more complex issues and help you remove the device from your account. We’ll show you how to do both, using the app and buttons on the device itself.


Should You Reboot or Reset Your Roomba Vacuum?

As we all know, things may not go as expected with any type of technology, even “smart” technology. For example, here are some times “smart” technology wasn’t so smart.

Your iRobot Roomba is no exception when it comes to the possibility of things going wrong. So what can you do to fix a problem?

When to Reboot Your Roomba Device

When in doubt, reboot. This goes for just about any hardware device or software application. Here’s an example of how rebooting can fix even a complex router.

You might try rebooting your Roomba as a first troubleshooting step before resetting. Rebooting can clear common errors and give your device a good refresh, as though giving it a good night’s sleep.

Reboot your Roomba if, for instance, the iRobot app consistently displays errors during operation. Additionally, if your Wi-Fi network is down and you cannot use the app, rebooting the device manually is an effective alternative. Rebooting it from the hardware device will clear its clock and give it a good refresh, but keep your custom settings intact, such as your iRobot schedule.

When to Reset Your Roomba Device

Resetting is a more drastic step that can take longer. It will factory reset your device. This means your Roomba software will be like it was new when you first took it out of its box.

Resetting can solve lots of problems, but you’ll have to customize your Roomba preferences again, and you may need to spend time updating the software.

You might consider resetting your Roomba to clear its navigation map before selling it. Your Roomba uses a map of your house to navigate the various rooms and hallways, the same way you’d use a map to navigate roadways, towns, and cities. If you choose to reset, it will clear the map from the Roomba’s software.

How to Reboot a Roomba Vacuum

An iRobot device doesn’t have a simple on/off switch, but there are a few ways you can reboot. You can reboot the Roomba using buttons on the device, or you can use your iRobot app for iOS or Android.

How to Reboot a Roomba Device Using the App

Depending on your app version and iRobot model, these instructions may vary slightly.

  1. In the app home screen, scroll to the bottom.
  2. Tap Product Settings.
  3. In the Product Settings screen, tap Reboot Roomba.
  4. At the Reboot Roomba screen, tap Reboot Roomba.

How to Reboot a Roomba Vacuum Using the Device Buttons

For the Roomba s Series, i Series, j Series, and Braava jet:

  1. Hold the Clean button on your Roomba for 10 to 20 seconds.
  2. You’ll see a light ring swirling clockwise in white.
  3. Wait a few minutes for the Roomba to turn back on.
  4. You’ll know it’s back on when the light ring shuts off.

For Roomba models with Dock and Spot Buttons:

  1. Press and hold the HOME and SPOT Clean buttons for 10 seconds.
  2. When you release the button, you’ll hear a reboot tone.

Rebooting is a simple step, but fixing problems isn’t always so easy. If, after rebooting, your device is still having issues, try resetting it.

How to Reset a Roomba Vacuum

Ensure your Roomba and smartphone are on the same Wi-Fi network.

  1. Open your iRobot app and scroll to the bottom.
  2. Tap Product Settings.
  3. On the Product Settings menu, tap About Roomba.
  4. On the About menu, tap Remove Device from Account.
  5. In the Factory Reset menu, select Factory Reset Roomba.

Think twice before you tap the final Factory Reset Roomba button, because it means all your settings will be lost, and you’ll have to set up your device again before using it. If you need help with any of these steps, you can always try visiting iRobot Support page.

That’s it! Both rebooting and resetting your Roomba can be a pretty simple way to solve problems, though resetting is recommended only to solve more complex problems when all else has failed.

What Is htmx and How Can It Simplify My Website?

Quick Links

Key Takeaways

  • htmx is a JavaScript library that simplifies HTTP request handling by making common functionality available via HTML attributes.
  • You can easily add it to your web app with a link to the htmx script on a CDN.
  • You can use htmx for interactions like pagination, form validation, and inline editing, without writing any JavaScript.


The web development community has recently been abuzz with talk of htmx, but what is this exciting new technology? It turns out it’s a lot simpler than you might expect, but htmx’s usefulness may justify the hype.


What Is htmx?

htmx is a small JavaScript library with a narrow focus. It makes common JavaScript functionality available via HTML attributes. Here’s a simple example:

 <a href="/about" hx-get="/about">About</a> 

This code shows a custom HTML attribute, hx-get. If you click this link, the htmx library will send an AJAX request and load the target page without a full browser refresh.

htmx has additional functionality that lets you send requests:

  • From elements other than a and form.
  • On events other than click and submit.
  • Using HTTP methods other than GET and POST.
  • That replace any parts of a page rather than just the whole thing.

Although htmx has support for technologies like CSS animation and WebSockets, its core aim is to simplify HTTP request handling.

How You Can Use htmx in a Simple Web App

htmx addresses specific functionality within web apps or websites, rather than the behavior of an entire app.

One big advantage of the library is how easy it is to start using. You can download and install a copy if you want, but since it has no dependencies, all you need to do to get started is add a link to the script on a CDN:

 <script
  src="https://unpkg.com/[email protected]"
  integrity="sha384-D1Kt99CQMDuVetoL1lrYwg5t+9QdHe7NLX/SoJYkXDFfX37iInKRy5xLSi8nO7UC"
  crossorigin="anonymous"></script>

For local development and testing, you will need to set up a web server, like Apache, if you don’t already have one running. This is a requirement, even if you’re just experimenting with static files, because the file: protocol does not allow AJAX requests.

A Simple Example Using Infinite Scroll

Infinite scroll is a common technique that sites like Twitter use for their feed. When you reach the bottom of a list, infinite scroll loads more items for you to continue reading.

This feature naturally requires JavaScript to check the page scroll position and load the new items without refreshing the page. But htmx can do all this for you.

Take the following markup which represents a list of posts, using an image for each:

 <ol>
    <li><img src="http://placekitten.com/420/300" /></li>
    <li><img src="http://placekitten.com/400/320" /></li>
    <li><img src="http://placekitten.com/440/300" /></li>
    <li><img src="http://placekitten.com/420/340" /></li>
    <li><img src="http://placekitten.com/300/200" /></li>
</ol>

Imagine you have these items in a file, feed1.html, with more items in feed2.html, etc. Each page will then display one small subset of items that you can scroll within:

Now, you could use “next page” links to move from one page to another, but you can implement infinite scroll easily too. Just change the final item to:

 <li hx-trigger="revealed" hx-get="feed2.html" hx-select="li" hx-swap="afterend">
    <img src="http://placekitten.com/300/200" />
</li>

Adding these four attributes to the final list item implements infinite scroll. Here’s what each attribute means:

Attribute

Value

Meaning

hx-trigger

revealed

When this element first appears on screen…

hx-get

feed2.html

… send a GET request to feed2.html, …

hx-select

li

… select the li elements from the response, …

hx-swap

afterend

… and add them after this element.

As you scroll to the bottom of the list, notice how the page loads new content automatically. You can confirm this by observing the scrollbar and checking your browser’s developer tools:

A screenshot showing a list of images in a web browser with Chrome devtools showing a total of ten items in the list.

Note that, with this simple static page setup, the feed2.html page includes a final item with an hx-get attribute set to feed3.html, and so on. Also note how htmx has added a listener for the scroll event.

Other Potential Uses for htmx

You can use htmx for many other common interactions, including:

  • Pagination: load and replace items when the visitor clicks on a pagination link.
  • Form validation: on submission, replace a form with either a confirmation message or a subset of the form.
  • Progress bars: periodically update a progress bar’s value based on a ping response.
  • Inline editing: swap out an element for a textarea containing that element’s value.

It’s possible to build each of these examples using standard JavaScript, htmx just makes the process much easier.

The Benefits and Drawbacks of htmx

Benefits

htmx can vastly simplify common interactions that can benefit many web applications, and even many websites. It allows designers, and others working with front-end web pages, to add functionality without having to learn JavaScript.

By abstracting common behavior, htmx ensures consistency across your projects and between them. Infinite scroll will behave the same way from page to page, regardless of who implemented it.

Since it emphasizes a declarative (what) approach rather than an imperative (how) one, htmx functionality is typically easier to understand and reason about.

Drawbacks

Although htmx can let you forget about JavaScript in many contexts, it cannot solve every problem for you! You’ll still need to write code to handle specific business logic and more low-level functionality.

Because htmx does a lot of work for you, there’s less potential for customizing behavior. This will often be a positive trade-off, but you’ll need to be prepared to hand off control.

html may let you avoid writing JavaScript, but you should still be aware that JavaScript code is running in the background. You might be tempted to use the hx-get attribute on every link, in place of an href attribute. But this introduces a dependency on JavaScript; if the code fails to run for whatever reason, your users will be left with a link that does nothing. You should always practice progressive enhancement to prevent this.

How to Subscribe to a Twitch Channel With Prime Gaming

Quick Links

Key Takeaways

  • Amazon Prime subscribers get one free Twitch subscription per month, saving them from paying for it separately.
  • To use the free Twitch subscription, first activate Prime Gaming, then link your Twitch and Prime Gaming accounts.
  • Once the accounts are linked, go to a streamer’s channel and use the free subscription option.


Supporting your favorite Twitch streamers by subscribing to their channels can be an expensive hobby. But if you’re an Amazon Prime subscriber, you get one Twitch subscription for free every month. If you want to use your free Twitch sub but aren’t sure how to redeem it, here’s everything you need to know.


1. Enable Prime Gaming

To unlock the ability to use your one free Twitch channel subscription per month, you first have to subscribe to Amazon Prime. From there, you will have to head to the Prime Gaming website to activate Prime Gaming.

To activate Prime Gaming, sign in to the website using your Amazon Prime account details by clicking on the Sign In button at the top right of the page. Once signed in, press the Activate Prime Gaming button in the top right corner of the screen and select Add your mobile number.

You will then be taken to your main Amazon account page, where you will be prompted to enter your phone number.

Amazon will send a six-digit code to the number you entered. Type the code into the text box to confirm your phone number, and make sure to press Done at the bottom of the page before heading back to the Prime Gaming website.

Press Done to Confirm Amazon Account Changes

Below the link to change your phone number, you will see another link labeled Refresh this page. Press that to activate your Prime Gaming account.

Now that your Prime Gaming account has been activated, you are ready to move on to the next step, which is to link your Twitch and Prime Gaming accounts. To do so, head back to the Prime Gaming website.

Link Twitch Account to Prime Gaming

Select your account name in the top right corner of the screen and select Link Twitch account.

Link Accounts to Link Twitch Account to Prime Gaming

This will open a popup, so select Link accounts to get started. Enter your Twitch account details into the login box, and enter the six-digit code that will be sent to the email address associated with your Twitch account.

Press Confirm to link your Twitch account to your Prime Gaming account.

3. How to Use Your Free Twitch Sub With Amazon Prime

There are a few hoops to jump through to gain access to your monthly Twitch Subscription with Prime Gaming, but now that you’ve completed the above steps, you’re ready to claim it.

To finally use your free sub, head to the Twitch website and open your favorite streamer’s channel.

At the bottom right of the stream window, you will see a box labeled Subscribe. Select that to bring up the subscription window.

Subscribe Button Location on Twitch

A regular subscription to a Twitch channel costs $4.99/month, which you will see in the bottom right of the subscription window.

If you have a free Prime Gaming sub, however, a checkbox labeled Use Prime Sub will be present. Check that box to redeem your free monthly Twitch subscription and select Subscribe with Prime to confirm.

Use Prime Sub Button on Twitch

The checkbox will only be available if Twitch subscriptions are allowed in your country, you have already activated Prime Gaming, the channel you are trying to subscribe to is a Twitch Affiliate or Partner, and you haven’t used your free subscription for the month.

If any of these conditions aren’t met, the option won’t be available to you.

Once you have successfully used your Prime Gaming sub, you can view and manage your Twitch subscriptions on the website.

Free things are always hard to pass up, and since subscriptions are what keep Twitch, and its streamers going, your one free sub every month with Prime is easily one of the most important Twitch features that every user should know about.

An Amazon Prime subscription not only provides you with many shows and movies to watch but also gives you the chance to support your favorite creators for free.

Subscriptions build up, and you no doubt have a growing list of monthly payments to subscription services already. But at least with Amazon Prime, you can scratch one Twitch subscription fee off your list each month.

How to Change the Alarm Volume on Your iPhone

Want your alarm to be louder or quieter? You can tweak this on your iPhone.

Key Takeaways

  • You can change your alarm’s volume through your iPhone’s Settings or by using the volume buttons.
  • You’ll need to toggle on the “Change with Buttons” feature in the Settings app to use your iPhone’s volume buttons to adjust the alarm volume.
  • Changing the alarm volume will also affect the volume of texts and call alerts. Consider using third-party alarm clock apps for independent alarm volume control.


Tired of being late to school or work because your alarm’s volume isn’t loud enough? While you can’t change an alarm’s volume directly in your iPhone’s Clock app, there are two different ways to ensure you never miss an alarm again.


Change Your iPhone’s Alarm Volume via Settings

Here’s how you can change your iPhone’s alarm volume through the Settings app:

  1. Go to Settings > Sound & Haptics.
  2. You’ll see a slider under the Ringtone and Alerts header. To change your alarm’s volume, drag the slider to the left (quieter) or right (louder).
  3. You’ll hear how the volume changes as you drag the slider to either side. Once you’re happy with the volume, release your finger.

Change Your iPhone’s Alarm Volume Using the Volume Buttons

You can also change your alarm’s volume using your iPhone’s physical volume buttons. Although your iPhone or iPad’s volume buttons will increase or decrease the volume of ringtones and alerts by default, you may have accidentally disabled this option without realizing it.

To change your alarm’s volume using your iPhone’s volume buttons, head to Settings > Sound & Haptics and toggle on the switch next to Change with Buttons.

With this option enabled, note that your iPhone or iPad will only adjust the media volume if you press the volume buttons while listening to music or watching videos. Other times, pressing these buttons will adjust the ringer volume, which also changes your iPhone’s alarm volume.

So to avoid accidentally changing your iPhone’s media volume instead of the ringer volume, we recommend closing active apps on your iPhone first. Once you’re on the Home Screen, you can use your iPhone’s volume up and down buttons to conveniently adjust the ringer/alarm volume.

Since your iPhone’s alarm volume depends on its ringer volume, the same setting also affects how loud calls and text alerts are. Apple doesn’t let you change your iPhone’s alarm volume independently of those, so you’ll need third-party iPhone alarm clock apps to get that job done.

The Best Lighting Equipment of 2024

Lighting is a crucial part of any photo or video recording, giving photographers and vloggers a way to boost image quality and set a scene exactly how they like it. With many types on offer, from ring to panel lights, finding the right lighting equipment can be a bit of a minefield.


Best Lighting Equipment Overall: Elgato Key Light

Elgato

Our top pick is this versatile Key Light from Elgato. It can be used for various purposes, including live streaming, videography, online conferencing, and even basic studio photography. It is streamlined and portable, but if you need something even more compact, the Elgato Key Light Mini is actually slimmer and lighter for ultimate portability and can be mounted onto a camera.

The Elgato Key Light is bright with a maximum output of 2,800 lumens. But, the light is diffused, so it is soft and even, and you can adjust this brightness in-app. You can also adjust the color temperature, which ranges from a 2,900K Sunset Amber to a 7,000K Arctic Blue.

Elgato Key Light

Elgato Key Light

Best Overall

$160 $170 Save $10

The Elgato Key Light is a high-quality option for many different purposes, from Zoom meetings to vlogging. It’s bright, features adjustable luminosity and color temperature, and is about the size and weight of a 13-inch MacBook Air. On-the-go content creators can conveniently slip it into their luggage with little trouble, while when mounted on its clamped stand, it uses minimal desk space.   

Pros

  • Solid build quality
  • Master Mount L stand with sturdy desk clamp
  • Takes up less space than studio lights
  • 160 low-heat OSRAM LEDs
  • 360-degree ball head
Cons

  • No physical controls, in-app adjustments only

A Neewer CN-160 LED Light being used for gaming purposes
Neewer

The excellent Neewer CN-160 LED Light offers outstanding value, with the rock-bottom price not reflected in its quality. You can mount it on cameras, including most DSLRs, or video cameras and tripods, and it comes with a soft diffuser, a 3,200K warm-light filter, and a pink filter. The light intensity is also adjustable, so you can create different effects.

Its 660 lumens ensure ample brightness, while its 900 lux at one-meter illumination makes it ideal for close-up photography and videography. It’s small and lightweight, making it perfect for traveling, while its up-to-80-minute battery life ensures it’s good for outdoor use, too.

Neewer CN-160 LED Light

Neewer CN-160 LED Light

Best Budget

If you need a bright, affordable light for photography or videography that still offers good quality, the Neewer CN-160 may be the one for you. It features 160 LED lights generating 660 lumens with adjustable brightness. The frosting on the cake is amber and pink filters and a soft diffuser. 

Pros

  • Adjustable head angle
  • Lightweight and portable
  • Physical brightness control on light
  • Supports different battery types
Cons

  • No daisy-chain support
  • Battery powered only
  • Plastic build

Best Lighting Equipment for Vlogging: Aputure MC Pro

Several Aputure MC Pro lights built on top of each other and displaying different colors.
Apurture

Despite its pocket-sized dimensions, the Aputure MC Pro packs a punch. It’s a compact LED panel that throws out up to 563 lumens, ideal for close-range vlogging in addition to video calls and product photography.

With a 2,000 to 10,000K color-temperature range, RGBWW control, and a green-magenta adjustment for fine-tuning, you have a versatile and broad color-mixing system. Throw in the 15 built-in lighting effects, two diffusers (one domed and one flat), and a 30-degree light-control grid, and you can imagine how creative vloggers can get with this compact companion.

However, if you’re looking for something even more compact, the Aputure MC Mini is smaller and lighter, and is available at around half the price. Alternatively, if you need a bunch of MC Pros, you can invest in an eight-light kit.

Aputure MC Pro

Aputure MC Pro

Best for Vloggers

The Aputure MC Pro can beam plenty of lumens for vlogging, video calls, and even studio photography for such a compact LED panel. It has an excellent color temperature range with RGBWW control, and you can get creative with its fun effects.

Pros

  • Dustproof and weather-resistant
  • Fits easily into a pocket
  • Bluetooth app, DMX, or LumenRadio control
  • 4,200mAh LiPo battery is fully charged in 1.5 hours
  • Two-hour battery life at maximum brightness
Cons

  • Not waterproof, only water-resistant
  • Magnetic base is not very strong

A Elinchrom D-Lite RX 44 Studio Flash to Go Kit at use
Elinchrom

The Elinchrom D-Lite RX 4/4 to Go Kit is a superb choice for studio photography. The included pair of 400W flash heads, a 66cm square softbox, a 56cm octagonal softbox, a deflector, and a pair of light stands are sure to meet most of your needs.

With a range of up to 200m, the RF trigger allows photographers to adjust flash head settings from afar. Additionally, the push-button control panel is incredibly intuitive. So, even if you’re a novice, the Elinchrom D-Lite RX 4/4 Kit is easy to use.

You can adjust the power output via a five-stop range in 1/10th increments. And, just to add the cherry on top, the flash heads boast built-in auto-sensing cooling fans.

Elinchrom D-Lite RX 44 to Go Kit

Elinchrom D-Lite RX 4/4 To Go

Best for Studio Photography

The Elinchrom D-Lite RX 4/4 to Go is an excellent choice to balance value and quality. The kit includes two 400W flash heads with stands, a 66cm square softbox, a 56cm octagonal softbox, and a deflector for a comprehensive kit with enough features to satisfy pros and easy usability suitable for beginners.

Pros

  • Excellent build quality
  • Easy to use
  • Auto-sensing cooling fan
Cons

  • Trigger upgrade required for HSS flash

A man illuminating himself with the Razer Ring Light while playing video games
Razer

Whether you need a ring light for certain types of studio photography, videoconferencing, live streaming, or teaching online, the Razer Ring Light offers more than enough to satisfy every need.

It’s a 12-inch ring light with versatile mounting options, thanks to its ball head and smartphone mounts. It has three temperature settings: a warm 3K white, a balanced 4.5K, and a cool white at 6.5K. You can also adjust the brightness, which has a maximum output of 500 lumens.

Included is an adjustable tripod that allows you to teach or give presentations while standing, and you can shorten it down enough to use it on a desktop.

Razer Ring Light

Razer Ring Light

Best Ring Light

The Razer Ring Light is a 2-in-1 deal that gives you a great light source as well as a functional tripod. It has 192 LEDs with a balanced spread that expels all shadows. The 1/4-inch tripod ball mount can accommodate a variety of cameras, including DSLRs, as well as compatible webcams.

Pros

  • 192 LEDs with white diffuser
  • 10- to 100-percent brightness adjuster
  • Versatile mounting options
  • Three color temperatures

FAQ

Q: What type of light is best for photography?

This all depends on the type of photography. The best option is natural light. If the light on offer that day is suitable, it can be perfect for all kinds of photography. For studio lighting, artificial light reigns supreme. Fluorescent lamps, tungsten lights, and LEDs can all mimic natural light to varying degrees, while continuous lights, strobes, and flashes offer better control.

However, a mix of natural and artificial light can create dramatic effects and is often used by professionals. You can also experiment with warm light for a more inviting atmosphere or colored light to create specific moods. You can use a cool-color light to create a contemporary and polished feel for more specific photography genres, such as product or architectural photography.

Q: What type of light is best for streaming and vlogging?

There’s no one answer, as it depends on individual requirements. LED panels, ring lights, and softbox lighting kits are all popular and serve different purposes.

LED panels are often compact and portable and are ideal for on-the-go vlogging. Ring lights are preferable for live streaming from home and create soft, flattering light that helps vloggers look their best. Softbox lighting kits are the go-to for professionals and are ideal for both key and filler lighting.

However, natural light is always the best answer and should be used whenever possible.

Q: Do I need lighting when taking photos or videos outdoors?

First, you should consider the time of day. If it is nighttime, you will likely need lighting. This can be true even if your camera offers the best image stabilization, especially if your subject is moving.

However, the natural light during the so-called “golden hours,” just after sunrise or before the sun sets, is soft, colorful, and warm. At this time, you will likely want to capture the light in its natural form, so additional lighting is unnecessary.

When the sun is at its strongest in the early afternoon hours, you don’t need any additional light. However, you may want to expel shadows. In this case, you could consider diffusers or reflectors to soften the light.

When shooting portraits outdoors, you can use additional lighting to control shadows and create flattering highlights. You can also create dramatic effects this way, but natural light is the way to create a natural look.

Q: Why are ring lights used for streaming?

There are several reasons why ring lights are used for streaming. First, they give a soft, even illumination and remove shadows. This makes for more flattering features, accentuated by a sparkle in the eyes from the ring light, which adds a lively edge to appearances.

Ring lights also often have adjustable brightness, which can be very convenient when streaming and creating the right ambiance. Additionally, some have adjustable color temperatures, which can also be very effective when setting the mood.

They’re also versatile lights and easy to set up, while their multiple mounting options, such as desk clamps or tripod stands, give streamers more choice.

How to Restart Steam: 3 Different Ways

Key Takeaways

  • Restarting Steam is often the best first step to fixing bugs and quirks in the app.
  • Use the Steam client or taskbar icon to properly close and restart Steam.
  • Restarting Steam can help fix issues with game updates, verifying installations, Steam Cloud errors, and Steam Friends network errors.


Steam has been a PC gamer’s delight for decades, but it’s not perfect. Occasionally, you’ll come across a problem that could be fixed with a quick Steam restart. As such, if you want to restart Steam, here are some quick and easy ways to do that.


1. How to Restart the Steam PC App

If Steam is currently open, the quickest way to close it is to click Steam > Exit in the app’s top bar. Steam will automatically pause any active downloads and then shut itself down.

You may be tempted to click the X at the top-right to close Steam. However, clicking this doesn’t properly close Steam; it just minimizes the client to your taskbar. Closing Steam through the client menu will terminate the process entirely and allow you to restart properly.

2. How to Restart Steam Using the Windows Taskbar

If you can’t easily access the Steam client, you can restart it using the taskbar. Expand the taskbar if need be, right-click the Steam icon, and click Exit Steam.

Restarting Steam through the taskbar

3. How to Restart Steam With Your Task Manager

If Steam’s background processes persist even after you’ve fully closed the client, you can try stopping them via the Task Manager.

To do this on Windows, open the Task Manager with Ctrl + Shift + Esc and find the Steam process. Right-click it and select End Task.

You can also do this when the Steam desktop app freezes or won’t respond.

Ending the Steam process via the Task Manager

Why Should You Restart Steam?

Whenever you encounter a strange bug with Steam, restarting it is often the best first step you should take to fix it. As simple as it may seem, rebooting Steam can help fix a wide variety of quirks with the app.

Restarting Steam Can Help Trigger a Client Update

Sometimes Steam will receive an update with new features or bug fixes. Usually, Steam will automatically detect the update and ask you to restart the client so it can install it. If it can’t find the update, restarting Steam forces it to perform another check.

Restarting Steam Can Help Update Your Games

Steam is usually very good at keeping your games updated. Most of the time Steam automatically checks for any updates for your games and downloads any that it finds.

However, sometimes Steam needs prompting to patch a game. Verifying the integrity of the game on Steam can prompt it to realize your game is outdated. However, for larger games, verifying the files can take a long time.

As such, before you do anything substantial, it’s worth giving Steam a quick restart. When Steam reboots, it’ll perform a check for any game updates, and will hopefully find the patch you’re missing.

Restarting Steam Can Fix a Stuck “Verifying Installation” Cycle

When Steam boots up, it checks if any of your games have any pending updates. When Steam does this, it will show a message that reads “verifying installation.”

If Steam gets stuck during this process, it’s worth giving the client a restart. This is usually enough to fix whatever’s preventing Steam from finishing its process; if it’s not, there are plenty more fixes to try when Steam is stuck on verifying installation.

Restarting Steam Can Fix Steam Cloud Errors

The Steam Cloud stores copies of compatible save files and syncs them with your other devices. However, the sync process can sometimes throw error messages and won’t allow you to upload your latest save to the cloud.

Fortunately, there are plenty of ways to fix the Steam Cloud error, and restarting the client is one of the first tricks to try.

Restarting Steam Can Fix Errors With Steam Friends

Sometimes, Steam will have issues connecting with the friends network. When this happens, you can’t see which friends are online and you can’t use the friends list to join your friend’s games.

Usually, the error occurs due to Valve’s servers going down, and there’s nothing you can do to fix it. However, there are some ways to fix Steam’s “Steam friends network unreachable” error if it’s happening only on your device; restarting Steam is an easy first port of call.

Restarting Steam is a good starting point when diagnosing a strange issue you’re having with it. It’s easy to do and is sometimes all that’s needed to get Steam working again. Just remember to properly close Steam through the methods above instead of clicking the X at the top right of the app.

The 6 Best Alternatives to Authy’s Desktop App

Quick Links

With the discontinuation of Authy’s desktop app in January 2024, thousands of users are looking for a 2FA desktop replacement. Thankfully, there are heaps of excellent authenticator applications and browser extensions that you can use to replace Authy.


Desktop Alternatives to Authy

This table illustrates the apps that are aiming to fill the void left by Authy on the desktop:

Cost

Available as

Supports data export

Supports biometrics/passcodes

1Password

$2.99 per month

Desktop client, browser extension, web app, mobile app, command line interface

Yes

Yes

Authenticator.cc

Free

Browser extension

No

No

KeePassXC

Free

Desktop client, browser extension

Yes

Yes

2FAS

Free

Browser extension, mobile app

Yes

Yes

Bitwarden Authenticator

$10 billed annually

Desktop client, browser extension, web app, mobile app, command line interface tool

Yes

Yes

Let’s look at each in turn.

1. 1Password

1Password is one of the best applications you can use to replace Authy. While 1Password primarily serves as a password manager, it supports TOTP (Time-based One-Time Password) and is available as a desktop client on Windows, Linux, and MacOS.

1Password is best when used as a browser extension since you can scan a 2FA setup QR code and configure multi-factor authentication in just a few clicks. Since your one-time passcodes are shown side-by-side with websites, signing in with 1Password is fantastically simple.

Like Authy, 1Password restricts new device registrations to decrease the likelihood that a hacker could access your passwords and 2FA. Authy accomplishes this by allowing users to enable or disable multi-device access, while 1Password gives you a secret code to use with your password to register new devices.

The only real downside is the $2.99 per month subscription.

2. Authenticator.cc

viewing codes, settings, and backup options in authenticator cc

If you’d prefer a simple and free Authy alternative, Authenticator.cc might be the perfect browser extension for you. It’s available for download on Google Chrome, Firefox, and Microsoft Edge and supports syncing across multiple devices.

Much like Authy, Authenticator.cc supports backups in unencrypted and encrypted formats. Authenticator.cc generates backups in a standardized format, so despite the browser extension’s lack of support for proper exporting, you can transfer your data to alternatives like Aegis, FreeOTP+, and Authenticator (GNOME).

The main drawback to Authenticator.cc is that it’s only available as a browser extension. You can’t install a desktop client or access Authenticator.cc from a smartphone app. It’s less versatile, but you shouldn’t lose access to your data as long as you remember your browser login.

Authenticator.cc also doesn’t support sophisticated protection features like biometrics, though it does share a convenient master password feature with Authy. It isn’t a complex solution to 2FA, but if you’re looking for something simple and easy to use that gets the job done, Authenticator.cc is ideal.

3. KeePassXC

adding totp two factor authentication to an entry in keepassxc

One of the best Authy alternatives is KeePassXC. Like Authy, KeePassXC is available as a desktop client on Windows, Linux, and MacOS, as well as a browser extension. Once you’ve added accounts to KeePassXC, you can add TOTP to individual entries.

You can start by reading KeePassXC’s TOTP setup guide. Once you’ve configured your 2FA using secure QR codes or secret strings, you can log into any account using the codes generated in the KeePassXC desktop client. And just like Authy, KeePassXC is completely free to use.

The main drawback to KeePassXC is that it stores your passwords and 2FA information in the same place, which is sometimes considered unsafe. Despite that, you don’t actually have to store your username and password in KeePassXC—you can create entries for TOTP codes without including any other sensitive information.

4. 2FAS

managing device settings through the 2fas browser extension settings menu

2FAS is a browser-based alternative to Authy that enables you to securely access your accounts at home or on the go. 2FAS syncs across all your devices, making authentication a simple one-click procedure.

2FAS’s syncing gives it a few clear advantages over alternatives like Authenticator.cc, since you don’t have to use your desktop browser for authentication. Like Authy, you can view and manage all devices connected to your 2FAS account, so it’s easy to monitor for and deal with any unauthorized access issues.

One of the main drawbacks to 2FAS is that you can’t use the browser extension without pairing it with the 2FAS mobile app. It’s also somewhat unwieldy compared to other browser extensions since it communicates through desktop notifications and doesn’t provide an interface.

You can only add authentication tokens through the smartphone app. Once you’ve added a few accounts to 2FAS, you can quickly enter authentication codes by selecting the text field and clicking the 2FAS icon in your browser toolbar.

5. Bitwarden Authenticator

copying 2fa verification code from bitwarden web app

Last but not least of the Authy alternatives is Bitwarden Authenticator, a powerful password manager with a built-in TOTP feature. You’ll need to purchase the $10 annual plan to access Bitwarden Authenticator, but the compelling quality and convenience of Bitwarden make it worthwhile.

Beyond the Bitwarden Windows, MacOS, and Linux desktop client, you can use Bitwarden as a browser extension on practically any popular browser. Beyond Safari, Microsoft Edge, Chrome, and Firefox, niche favorites like DuckDuckGo and Vivaldi are readily supported. You can even self-host Bitwarden. And no matter how you use Bitwarden, your annual subscription will pay for access to priority customer support.

Bitwarden’s comprehensive security is immediately impressive. Your password database is secured with a master password, and while Bitwarden has been the subject of occasional research reports detailing vulnerabilities, the staff’s demonstrated dedication to dealing with potential vulnerabilities immediately makes it clear to many users that their data is in the right hands.

(* $10 subscription required for Bitwarden Authenticator)

6. Authy Smartphone App

If you aren’t pleased with any of the Authy desktop alternatives, it’s worth noting that Authy itself isn’t going away for good. You can still protect your accounts and authenticate your logins using the Authy app, available for Android and iOS. Unfortunately, because Authy lacks syncing and export features, you’ll need to re-enable 2FA and manually add your tokens to the Authy app to make the transition.

Galaxy S24 Ultra vs. iPhone 15 Pro Max: Which Should You Buy?

Quick Links

Key Takeaways

  • The Galaxy S24 Ultra and iPhone 15 Pro Max offer similar design and display features, with flat screens and durable titanium frames.
  • The S24 Ultra has a more versatile camera system with a higher megapixel count and better zoom capabilities, while the iPhone focuses on accuracy and natural appearance.
  • Both devices feature flagship processors that offer plenty of performance for even power users. Samsung also promises seven years of software updates for the S24 Ultra.


The Galaxy S24 Ultra is Samsung’s flagship smartphone for 2024, but does it have what it takes to outperform Apple’s most expensive offering? Let’s compare it to the iPhone 15 Pro Max and see which smartphone comes out on top.


Design and Display

  • Samsung Galaxy S24 Ultra: 162.3 x 79 x 8.6 mm; 233 grams
  • iPhone 15 Pro Max: 159.9 x 76.7 x 8.3 mm; 221 grams

Many users didn’t like the curved screen on the S23 Ultra. Luckily, the S24 Ultra, like the iPhone, now has a flat display. This not only looks more premium but also makes it easier to use with fewer accidental touches.

For this year’s model, Samsung opted for a titanium frame, similar to the iPhone 15 Pro models. Unlike Apple, Samsung didn’t use the material to make the phone lighter; instead, it focused more on durability. Although the iPhone is comparatively lighter, it’d be hard to tell the difference unless you have them both in your hands.

The S24 Ultra boasts a 6.8-inch 1440p Dynamic AMOLED screen with an adaptive refresh rate ranging from 1-120Hz. On the other hand, the iPhone 15 Pro Max comes with a 6.7-inch Super Retina XDR display, which is also capable of a 1-120Hz adaptive refresh rate.

Despite the iPhone’s slightly lower resolution at 1290p, the difference is virtually indiscernible at this screen size. Overall, both displays are excellent, and you won’t be disappointed by either of them.

However, the S24 Ultra boasts an impressive peak screen brightness of 2,600 nits, surpassing the iPhone 15 Pro Max’s 2,000 nits. Therefore, if you spend a lot of time outdoors, especially under direct sunlight, you should lean toward Samsung’s flagship for its brighter screen.

Camera Configuration

  • Samsung Galaxy S24 Ultra: 200 MP f/1.7 primary; 50 MP f/3.4 periscope telephoto with 5x optical zoom; 10 MP f/2.4 telephoto with 3x optical zoom; 12 MP f/2.2 ultra-wide; Front: 12 MP, f/2.2
  • iPhone 15 Pro Max: 48MP f/1.8 primary, dual-pixel PDAF, sensor-shift OIS; 12MP f/2.8 “tetraprism” telephoto with 5x optical zoom; 12MP f/2.2 ultra-wide camera; Front: 12MP f/1.9 camera

The S24 Ultra features four lenses and replaces the S23 Ultra’s 10 MP 10x telephoto zoom lens with a 50 MP 5x telephoto unit. Despite seeming like a downgrade, the 5x lens is more practical for everyday use as the higher megapixel count still allows for 10x digital zoom without image quality loss. Besides that, the S24 Ultra’s camera setup is nearly identical to the outgoing S23 Ultra.

On the other hand, the iPhone 15 Pro Max has three lenses and incorporates a similar 5x zoom for telephoto shots, along with the ability to adjust your main camera’s focal length between 24mm, 28mm, or 35mm.

Ultimately, both phones have their own image processing algorithms, leading to different styles and strengths. Pictures shot on iPhones are known for their accuracy and natural appearance, whereas Samsung’s processing can be more vibrant and punchy.

If you prioritize a better zoom lens and a more versatile camera system, the S24 Ultra is the better pick. But if you want something that can take excellent photos even while simply pointing and shooting without going through multiple settings, consider opting for the iPhone 15 Pro Max.

As for video recording, Samsung claims enhanced low-light video quality, wider optical image stabilization angles, and better hand-shake compensation. The iPhone 15 Pro Max offers similar capabilities, like Action mode, OIS, and autofocus 3D sensor-shift stabilization. However, the icing on the cake is its ability to shoot videos in Apple’s proprietary ProRAW format.

Processor Comparison

  • Samsung Galaxy S24 Ultra: Qualcomm Snapdragon 8 Gen 3 for Galaxy
  • iPhone 15 Pro Max: A17 Pro chip

The S24 Ultra is equipped with Qualcomm’s flagship chip for 2024: the Snapdragon 8 Gen 3 for Galaxy. Qualcomm claims the newer chip provides roughly 30 percent faster CPU performance and 25 percent improved GPU performance than the Snapdragon 8 Gen 2 that powered the S23 Ultra.

On the other hand, the iPhone 15 Pro Max boasts Apple’s cutting-edge A17 Pro chip. Both devices feature hardware-accelerated ray tracing, enhancing supported games with more realistic shadows and lighting for increased fidelity.

As each option excels in overall performance and efficiency, you’re unlikely to observe any significant differences in everyday use.

Software Support

Apple’s extended support for its products has been a significant factor influencing people’s preference for iPhones over Android devices. Typically, iPhones receive software updates for five to six years. However, Samsung now promises an impressive seven years of software upgrades for the S24 Ultra, meaning you will get OS and security updates till 2030.

AI took center stage among everything Samsung announced at its Galaxy Unpacked event. Galaxy AI, a suite of advanced AI features integrated into several stock apps, includes real-time call translation and transcription, note summarization, text translation, AI-assisted photo editing, and more.

The S24 Ultra also supports Google’s Circle to Search feature, allowing you to highlight any object on the screen and initiate a Google search for relevant information. For instance, if you come across an unfamiliar car in an image, you can easily circle it, prompting Google to provide similar images and relevant content.

Battery Life and Charging

Samsung Galaxy S24 Lineup with Battery Capacities Highlighted
Samsung/YouTube

  • Samsung Galaxy S24 Ultra: 5,000mAh; 45W wired, 65% in 30 min; 15W wireless, 4.5W reverse wireless
  • iPhone 15 Pro Max: 4,852mAh battery; 20W fast wired charging, 50% charge in 30 minutes; 15W MagSafe and Qi 2 wireless charging

Both devices can deliver excellent battery life, so you shouldn’t encounter any concerns in this aspect. While the S24 Ultra shares the same battery capacity as the S23 Ultra, Qualcomm’s claimed 20-25 percent improvement in power efficiency should allow it to last longer. In general, you can comfortably go beyond a day without having to charge your phone.

Although the S24 Ultra offers faster wired charging, it’s disappointing that it does not support Qi2 wireless charging like the iPhone 15 Pro Max. The second-generation universal wireless charging standard generates less heat while charging and uses magnets like MagSafe to support various accessories.

Pricing and Storage

Samsung Galaxy S24 Lineup Pricing
Samsung/YouTube

  • Samsung Galaxy S24 Ultra: $1,299 for 256GB; $1,419 for 512GB; $1,659 for 1TB
  • iPhone 15 Pro Max: $1,199 for 256GB; $1,399 for 512GB; $1,599 for 1TB

While both the Galaxy S24 Ultra and the iPhone 15 Pro Max offer a starting storage capacity of 256GB, the Galaxy S24 Ultra sees a price hike of $40-$100, depending on the storage option you choose. Although 256GB is generally sufficient for most users, it’s essential to consider your smartphone storage requirements, given that neither device supports a microSD slot.

As a limited-time offer, though, you can get double the storage for no extra cost if you order the phone from Samsung’s S24 Ultra purchase page.

Both the Galaxy S24 Ultra and the iPhone 15 Pro Max boast compelling features and are formidable contenders in the high-end smartphone market. Ultimately, the choice between the S24 Ultra and the iPhone 15 Pro Max depends on your individual priorities such as camera preferences, software, AI features, and pricing.

Is It Worth Paying Extra for the Galaxy S24 Ultra Over the S24?

Quick Links

The Galaxy S24 Ultra costs $500 more than the entry-level S24 and $300 more than the S24+, but what do you get for the extra money to justify purchasing it? Learn all the reasons why the S24 Ultra is better than the S24.


1. Bigger Screen With S Pen Support

The Galaxy S24 Ultra’s key advantage over the regular S24 is its 6.8-inch QHD+ display. This is significantly bigger than the S24’s 6.2-inch FHD+ panel. Samsung claims both panels support a 1-120Hz dynamic refresh rate and a peak brightness of 2,600 nits, so there’s no difference in panel quality besides the resolution.

The S24 Ultra’s display supports the S Pen, letting you use the Bluetooth stylus to doodle on the screen or quickly take notes. There’s no way to use the S Pen on the Galaxy S24’s 6.2-inch AMOLED screen, and it’s the same story with the S24+’s 6.7-inch QHD+ panel. If you’re a creator, this could be a dealbreaker.

Lastly, the Galaxy S24 Ultra’s display uses Corning’s Gorilla Glass Armor for protection, which, according to Samsung’s press release, reduces reflection by up to 75% for a better viewing experience. The Galaxy S24 and S24+ use the older-generation Gorilla Glass Victus.

2. Beefier Internals

On paper, the entire Galaxy S24 series uses the same Snapdragon 8 Gen 3 “for Galaxy” chip in the US. However, some internal differences make the S24 Ultra a better buy than the S24.

The Samsung Galaxy S24 Ultra has a 1.9x larger vapor chamber than last year’s model (our Galaxy S23 Ultra review), which allows for better heat dissipation. However, the S24 and S24+ don’t receive any such improvements. Samsung has also equipped the S24 Ultra with 12GB of RAM, while the S24 ships only with 8GB. Given the Galaxy AI features, the additional RAM should help with multitasking.

Lastly, while the Galaxy S24 is available in 128GB and 256GB storage variants, you can get the S24 Ultra with up to 1TB storage. Plus, the base variant of the S24 Ultra comes with 256GB of storage space. So if you don’t want to worry about running out of room for your data, the S24 Ultra is the better choice.

3. Premium Build Quality

Samsung used a titanium frame for the Galaxy S24 Ultra to give it a more premium in-hand feel. On the Galaxy S24 (and S24+), the company has stuck with “Armor Aluminum.” Titanium is stronger than aluminum and should better avoid scuffs and dings in daily use. If you prefer to use your phone without a case, the titanium edges of the S24 Ultra will feel a lot better.

Samsung’s sustainability efforts are also better with the S24 Ultra, as it uses more recycled components than its smaller siblings. Samsung claims the S24 Ultra uses 40 percent recycled steel in the speakers, with the battery using a minimum of 50 percent cobalt. On the Galaxy S24, the company has used recycled steel and TPU.

4. Superior Camera System

Samsung Galaxy S24 lineup of phones
Image Credit: Samsung

If you want a phone with the best camera system, the Galaxy S24 Ultra should be your preferred choice over the S24. Samsung’s Ultra flagship for 2024 features a 200MP primary camera, a 12MP f/2.2 ultrawide, a 10MP 3x telephoto, and a 5x 50MP periscope shooter.

The Galaxy S24 Ultra uses these lenses to provide an optical zoom range of 3x and 5x, and up to 100x digital zoom. Very few phones on the market can match this level of flexibility. Here’s hoping Samsung has also fixed the shutter lag, which ranks high in our list of the worst things about Galaxy phones.

The Galaxy S24 (and S24+) use a 50MP primary shooter, a 12MP ultrawide, and a 10MP 3x telephoto. While the smaller Galaxy phones can also take great pictures, the S24 Ultra is in a league of its own.

5. Better Battery Life

Despite featuring a bigger 6.8-inch QHD display, you can expect the Galaxy S24 Ultra to last longer than the S24. That’s because the S24 Ultra ships with a beefy 5,000mAh battery, compared to the S24’s 4,000mAh unit.

While the S24’s battery life should be good enough for most people, the S24 Ultra will stand out for its endurance. Even better, the phone can charge up at speeds of up to 45W, with Samsung claiming that a 0 to 65 percent top-up takes only 30 minutes.

The S24 is limited to 25W speeds and can charge up to 50 percent in 30 minutes. Although you can check out some tips and tricks to charge your Android phone faster, they won’t significantly reduce the charging time.

Buying the Galaxy S24 Ultra over the S24 makes much more sense if you have the money. You get a bigger display, better battery life, a cutting-edge camera system, more storage, and better build quality. Essentially, the phone is better than its cheaper siblings in all key areas.

How to Generate Images in Google Slides With Duet AI

Duet AI makes creating images in Google Slides a breeze.

Quick Links

Key Takeaways

  • You can use Duet AI to generate custom images in Google Slides using text prompts.
  • Specify specific details and use adjectives strategically to get the desired image from Duet AI.
  • It’s better to limit prompts to nature scenes, objects, animals, and abstract images, as Duet AI struggles with people-centered images.


A picture, they say, is worth a thousand words. And that is what Duet AI tries to help you achieve with your Google Slides presentations. It can help you create images that not just decorate your slides but reinforce your message and draw your audience in.


How to Generate an AI Image in Google Slides

Before using Duet AI to generate images in Google Slides, you must ensure you are signed in to your Google account and have access to Google Workspace Labs (which we’ve previously covered in our guide on how to use Google Duet AI in Google Sheets). Once done, you can create AI-powered images directly in your Google Slides presentations.

Duet AI’s image generation capabilities are only available through the Google Slides desktop web version at the time of writing, but not on the mobile app.

  1. Open a Slides presentation and click Insert > Image > Create image with Duet AI.

  2. Alternatively, you can simply click the Create image with Duet AI icon on the far-right side of the toolbar. This icon resembles a square with two triangular peaks inside it and a star in the top right corner.
    Create image with Duet AI icon on Google Slides

  3. A sidebar will open up where you can enter text prompts to describe the image you want it to generate. You’ll also see examples pop up periodically with ideas for images you can describe.
    Duet AI Inspiration examples on Google Slides

  4. In this case, we considered something adventurous and outside the box and entered a description—”An astronaut riding a horse on Mars.”
    A Duet AI prompt to generate images in Google Slides

  5. Afterward, you can select an art style from the drop-down menu, like Photography, Background, Vector Art, Sketch, Watercolor, or Cyberpunk.
    • If you leave it on No Style, Duet AI will automatically select what it deems best. However, choosing a style helps steer Duet AI’s image generation in a specific aesthetic direction. If unsure what style you want, select I’m Feeling Lucky and let the AI pick one randomly.
    Choosing Duet AI Style Settings on Google Slides

  6. Then click the blue Create button.
    Duet AI Create button on Google Slides

  7. Based on that prompt, Duet AI will take a few seconds to generate one to four sample images. Click any of the images to add them directly to the current slide.
    AI-generated images by Duet AI on Google Slides

  8. If you don’t like any of the initial images, click View More to generate additional options.
    Duet AI View More button on Google Slides

You should now have an AI-generated image that works for your presentation. Just note that it helps provide effective prompts for the best results.

Tips for Effective Image Prompting on Google Slides

While we have taken a general look at how to create better AI art, we’ll offer some practical tips to help you get the most out of using image prompts on Google Slides:

  1. Specify Details, Not Abstractions: When providing prompts, think concretely. For example, instead of “a pretty flower,” you could say “a red rose with water droplets on its petals.” The more sensory details you include—sights, textures, colors, shapes, etc.—the better your chances of getting that image you have in mind.
    Comparing images generated by Duet AI based on quality of prompts

    You can also use adjectives strategically to steer the output. “A powerful lion with a flowing mane” will likely yield a different image than “a lion with a mane.”

    Two pictures of lions generated by Duet AI based on different prompts

  2. Limit People in Prompts: At the time of writing, Duet AI struggles with generating people-centered images, evidenced by an error stating, “We’re still learning and can’t help with that. Try something else.” So, stick to nature scenes, objects, animals, and abstract images.
    Duet AI's error message to a people-centered prompt

  3. Test Prompt Variations: Tweak prompts systematically by changing adjectives, swapping nouns, adjusting tone, etc. For example, prompt with “a bright yellow daisy,” then try “a vibrant yellow gerbera daisy” to see what works best for you. You may also document prompts that yield high-quality images for reuse.

Duet AI makes creating images in Google Slides a breeze. You can generate unique artwork with just a text prompt to enhance your presentations. Feel free to get creative and experiment with descriptions.

If you need inspiration, see our article on AI art prompt ideas you should try. With good use of the integration of Duet AI in Google Slides, your slides will stand out like never before.

Everything Samsung Announced at Its Galaxy Unpacked 2024 Event

Quick Links

Key Takeaways

  • Samsung unveiled the flagship Galaxy S24 Ultra and its less expensive siblings, the S24 and S24+.
  • Besides high-end hardware, the S24 lineup packs cutting-edge software features like Galaxy AI and Google’s Circle to Search.
  • Samsung teased a health-focused smart ring before ending the Galaxy Unpacked event.


As expected, Samsung showcased its flagship smartphone lineup for 2024 at its Galaxy Unpacked event in January. On top of that, the company focused on AI during the event and teased a new product it’s working on. We’ll discuss them all below.


1. The Galaxy S24 Ultra

The Galaxy S24 Ultra is Samsung’s flagship smartphone for 2024 and will compete against the likes of the iPhone 15 Pro Max and Google Pixel 8 Pro with its cutting-edge hardware.

For starters, the Galaxy S24 Ultra sports an updated design with sharp corners and flat edges, ditching the curved sides of its predecessors. The side rails are made of titanium instead of aluminum, just like the iPhone 15 Pro models.

Camera-wise, Samsung has ditched the 10x 10MP telephoto lens from the S23 Ultra for a new 5x 50MP telephoto lens. This makes sense, as a 5x telephoto lens is more useful in real-life scenarios. The rest of the camera hardware is identical to its predecessor.

It’s powered by the 4nm Snapdragon 8 Gen 3, so even though it packs the same 5,000 mAh battery, Qualcomm’s claimed 20-25 percent efficiency gains could allow it to last a bit longer.

The S24 Ultra will be available in four standard colors from January 31, 2024: Titanium Gray, Titanium Black, Titanium Violet, and Titanium Yellow. Pricing starts at $1,299.99 for the 256GB model with 12GB of RAM. You can find more exclusive color options like Titanium Green, Titanium Blue, and Titanium Orange on Samsung’s S24 Ultra order page.

2. The Galaxy S24 and S24+

If you don’t want to splurge on the top-of-the-line Galaxy S24 Ultra or want a slightly more compact phone, the S24 and S24+ are excellent value-for-money options.

Compared to their predecessors, the S24 and S24+ feature slightly thinner bezels, resulting in screen sizes of 6.2 and 6.7 inches, respectively. The sides have been flattened out, which resembles modern iPhones.

The displays are better on both models, as they can go up to 2,600 nits, just like the S24 Ultra. The bigger S24+ also gets the same QHD screen as the top-of-the-line variant.

Nothing has changed on the camera side of things, as these models pack the same hardware as the last-generation models. However, it’s powered by the same Snapdragon 8 Gen 3 chip as the S24 Ultra, so you can expect up to 30% faster performance as Qualcomm claims.

Both models also pack a slightly bigger battery than the previous year’s counterparts, at 4,000mAh for the S24 and 4,900mAh for the S24+.

Like the S24 Ultra, the S24 and S24+ will also be available in four standard colors from January 31, 2024: Onyx Black, Marble Gray, Cobalt Violet, and Amber Yellow. Samsung’s S24 purchase page offers the exclusive color options Jade Green, Sapphire Blue, and Sandstone Orange. Pricing starts at $799.99 for the S24 and $999.99 for the S24+.

The S24 starts at 128GB of storage and comes with only 8GB of RAM, whereas the S24+ starts at 256GB of storage and gets 12GB of RAM like the S24 Ultra.

Samsung’s flagship smartphones for 2024 are powered by artificial intelligence. “Galaxy AI” is Samsung’s fancy term for this; you’ll notice its presence in stock apps like Voice Recorder, Notes, Photos, Messages, and Phone.

For instance, in the Phone app, Galaxy AI can translate and transcribe phone calls in real-time for both participants. Samsung is confident enough in this feature that you can mute the other person’s voice so you only hear the AI-translated audio.

In the Notes app, Galaxy AI can generate summaries of your notes, fix typos, translate the text, and automatically format the content into bullet points. Galaxy AI can also transcribe, translate, and summarize your recordings in the Voice Recorder app.

Galaxy AI is also neatly tucked away in the Gallery app. You can use it in the photo editor to move or remove objects from an image, similar to Google’s Magic Editor, which is one of the most underrated features of the Pixel 8. To access Galaxy AI, all you need to do is tap the sparkles icon in any of these apps.

The Galaxy S24 lineup also gets Google’s Circle to Search feature, which allows you to long-press the Home button and search for anything displayed on your screen. For example, you can tap or circle an object on the screen to quickly look it up on Google.

4. The Galaxy Ring

Galaxy Ring showcased at Samsung Galaxy Unpacked event
Samsung/YouTube

Towards the end of the Galaxy Unpacked event, Samsung announced that it is working on a smart ring, dubbed the Galaxy Ring. Although Samsung didn’t share any further details on this product, you can expect it to compete against popular smart rings like Oura and Ultrahuman.

In 2024, it seems that Samsung is heavily relying on AI to push its products forward, just as Google did with the Pixel 8 and Pixel 8 Pro in 2023. Regardless, the Galaxy S24, S24+, and S24 Ultra pack all the high-end hardware you’d expect from a smartphone in their price range.

How to Turn Link History On or Off on Instagram

Instagram makes it easy to view the sites you recently visited from the app. But you can disable the feature.

Key Takeaways

  • Instagram can store all the sites you visited in the last 30 days with its link history feature.
  • Enabling link history lets Instagram track your in-app browsing activities in order to show you relevant ads.
  • If this doesn’t interest you, you can disable the link history feature from Instagram’s in-app browser.


Instagram lets you view all the sites you recently visited in the app, which can be handy when you want to retrieve a product link you tapped while scrolling through the platform. To take advantage of this, you need to enable Instagram’s link history feature.


Instagram needs your permission to track all the links you tap and visit in the app. However, it’s possible that you have received a pop-up prompting you to turn the link history feature on as you used the platform. So, it’s worth checking to see if you have it enabled already.

Whether you use an iPhone or Android device, you can follow the steps below in the Instagram app to check if the link history feature is active:

  1. Launch Instagram and tap the profile icon in the bottom-right corner.
  2. Tap the three lines in the top-right corner and choose Your activity from the pop-up menu.
  3. Scroll down and select Link History.
  4. Here, if you see a list of links, it means the feature is active. However, if you’re prompted to enable it, you can tap the Allow link history option below the message. You may also see “No recent link history” in this menu, which means you haven’t tapped on any external links in the platform yet.
  5. Now, if you’d rather have this feature turned off, tap on any of the links in your history to bring up Instagram’s in-app browser.
  6. Next, tap the ellipsis (…) button in the top-right corner of the browser and choose Browser settings.
  7. Here, toggle off Allow link history to stop using this feature. When prompted to confirm, choose Don’t allow.

You’ll also find the option to clear your link history in the same menu. But disabling the feature will also clear all the links you’ve visited from Instagram recently.

Instagram only saves the links you visited for up to 30 days. Also, the links you visit from the web version of Instagram won’t be added to the link history page.

As handy as it can be, we don’t recommend enabling the link history feature on Facebook or Instagram if you’re concerned about your online privacy. That’s because Meta, the company which owns both Facebook and Instagram, will deliver targeted ads across its platforms based on the sites you visit. And as Meta is known for tracking its users, actively giving it permission to do so won’t be to everyone’s tastes.

On the positive side of things, enabling the link history feature in Instagram means that a. you’ll be able to quickly find a link you previously visited, and b. you’ll see more ads that are relevant to your interests. So, it ultimately boils down to the kind of experience you want from Instagram.

What’s the Difference, and Should You Upgrade?

Quick Links

Key Takeaways

  • Microsoft is rolling out Copilot Pro, a subscription-based update to Microsoft Copilot that offers deeper integration with Microsoft 365 and access to more advanced GPT models.
  • Copilot Pro costs $20 per month per user, similar to other AI models like ChatGPT Plus and Claude Pro.
  • While Copilot Pro offers more features and faster updates, the free version of Copilot still remains a valuable tool for those who want GPT-4 access without paying.


Microsoft Copilot has been the haven for those who want to use OpenAI’s ChatGPT Plus without forking out every month.

And you’ll be very pleased to hear that isn’t changing any time soon—but Microsoft is rolling out Copilot Pro, a new subscription model for its free AI companion, featuring new capabilities, custom GPT support, and deeper integration into its Microsoft 365 suite.


What Is Copilot Pro?

Copilot Pro is a new subscription-based update to Microsoft Copilot, the AI tool that allows you to use OpenAI’s premium GPT-4 model (and now GPT-4 Turbo, the latest model) for free.

Microsoft Copilot Pro isn’t so much about bulking out the performance of the tool but brings much deeper integration with Microsoft’s extensive range of products, including:

  • Copilot Pro brings Copliot into Microsoft 365, with integrations in Word, Excel, PowerPoint, Outlook, and OneNote on PC, Mac, and iPad.
  • Upgrading to Pro will give users priority to the latest GPT models. For example, Copilot Pro subscribers can now use GPT-4 Turbo, the latest upgrade to OpenAI’s AI model.
  • Copilot Pro users will gain access to more Image Creator from Designer boost credits, rising to 100 credits per day.
  • The Copilot Pro upgrade also allows users to create custom Copilot GPTs, which are custom Copilot models designed for specific uses (effectively OpenAI’s custom GPTs but now in Copilot).

All in all, Microsoft wants Copilot Pro to be “a single AI experience that runs across your devices,” providing a unified AI tool that’s familiar with every bit of software you use.

How Much Does Copilot Pro Cost?

Microsoft Copilot Pro will cost $20 per month per user, and officially launched on January 14, 2024.

Twenty bucks per month seems to have become the go-to pricing structure for all AI models; ChatGPT Plus and Claude Pro also cost $20 per month.

Given the deeper integration of Copilot Pro into Microsoft’s ecosystem, the $20 subscription could make Pro a valuable tool versus other tools that are useful in terms of AI but lack specific integrations with regularly used software, especially in business and productivity.

Should You Upgrade to Copilot Pro?

Users of Microsoft Copilot will note that Copilot Pro now integrates many of the features previously exclusive to ChatGPT Plus—but they still come at a cost. As artificial intelligence development costs money and energy (quite a large amount of both!), there was always going to come a point where the free version of Copilot would begin to miss out on features.

However, given the extensive number of free features Copilot has, I don’t expect many folks will be disappointed. Deeper integration with Microsoft 365 is great if you use those tools, but if you’re using Copilot as an enhanced internet search engine, these updates won’t mean much to you.

Furthermore, given the mixed results of OpenAI’s custom GPTs, custom Copilot models might not be a feature that gains much traction— at least, not initially. When custom GPTs first launched, there was a wave of excitement, but it took some time to find custom GPTs worth using.

That’s not to mention that Copilot will still receive feature updates. The Microsoft Blog revealing Copilot Pro also confirmed new Copilot features, including Copilot GPTs. Microsoft will add select custom Copilot GPTs to the free model, covering topics like fitness, cooking, etc, bringing the custom tool to the free version. There won’t be so much customization, but the specialized GPTs will be useful for a range of topics.

So, while Copilot Pro undoubtedly has more features and will receive updates faster than the free version, Copilot remains an extremely useful tool for those who want GPT-4 access without paying.

What Is a “Dual-Mode” Gaming Monitor, and Do You Need One?

Key Takeaways

  • Dual-mode monitors offer two refresh rates at different resolutions, allowing gamers to switch between a high resolution and a high refresh rate.
  • The advantage of a dual-mode monitor is the option to have a refresh rate as high as 480Hz, which is beneficial for competitive gamers.
  • Before purchasing a dual-mode monitor, consider if you can tell the difference between refresh rates and if your hardware can support the monitor’s capabilities. It is not necessary for all gamers.


In 2024, several manufacturers released “dual-mode” gaming monitors, allowing users to enjoy high refresh rates and resolutions on the same screen. But what exactly is a “dual-mode” monitor? And do you really need one for gaming and entertainment?


What Is a Dual-Mode Monitor?

A dual-mode monitor is a display that offers two refresh rates at different resolutions. For example, the 32-inch ROG Swift OLED, which Asus unveiled at CES 2024, allows users to switch between 4K@240Hz or 1080p@480Hz. LG also announced the UltraGear 32GS95UE around the same time, featuring the same technology.

Dual-mode monitors allow gamers to switch between an ultra-high resolution mode or an ultra-fast monitor refresh rate, allowing you to enjoy the best of both worlds if you’re a competitive gamer.

What Is the Advantage of a Dual-Mode Monitor?

LG

The most significant advantage of a dual-mode monitor is getting a screen with a refresh rate as high as 480Hz. This is great for competitive gamers and esports players, where monitor refresh rates matter every second of the match.

However, high-refresh rates are taxing to computer resources, especially if you don’t have a high-end graphics card. Furthermore, most monitors with a refresh rate greater than 300Hz only have resolutions of 1440p or lower. That’s why you only get a 1080p resolution at the maximum refresh rate setting with the current crop of dual-mode monitors.

But at 32 inches or greater, the 1920×1080 resolution used at 480Hz does not offer a sharp and crisp image. This means you will not get the optimal experience when using your computer for other tasks like watching a movie or playing less intensive, more relaxing games.

Pressing a button on the dual-mode monitor gives you a higher 3840×2160 pixel resolution, although at a much lower 240Hz. With this, you get the sharpness and crispness of a UHD display while still retaining a fast refresh rate.

Combining these two modes into a single display means you don’t need separate monitors for your daily and gaming needs, allowing you to save space on your desk.

Should You Buy a Dual-Mode Monitor?

While the dual-mode monitor is an exciting piece of technology, the question most gamers will ask is: do you really need it to be a better gamer?

Before pouring money into this likely expensive piece of equipment, you must determine if you can tell the difference between 240Hz and 480Hz. If you’re not going to use your computer for extensive gaming, the most likely answer is no, and you’re better off spending your money on other computer parts you will use more often.

But if you’re a competitive gamer, especially if you play first-person shooters and like to enjoy other content at higher resolutions, too, this might be a worthwhile investment.

However, you should also look at your available hardware. For example, my computer only has an RTX 3060 video card, so it’s struggling to run the 4K 144Hz Redmagic 4K Gaming Monitor.

If you want to maximize the 4K@240Hz or 1080p@480Hz feature of these dual-mode monitors, you should ensure that you’re running the latest, most powerful video cards, like the 7900 XTX or 7900 XT from AMD and RTX 4090 or RTX 4080 from NVIDIA.

Aside from that, you must consider that your other components, like your CPU or RAM, can support your GPU. Otherwise, you might run into PC bottlenecking issues and not get the most out of these dual-mode monitors.

Redmagic 4K Gaming Monitor setup with two laptops

If you have the cash to spend on these new displays and the hardware to match their capabilities, then you should absolutely buy one. They will give you an advantage over your opponents while giving you visual satisfaction when you’re not in a competitive match.

But having the best gear will not automatically mean better skills; you still have to practice and put in the hard work. The dual-mode monitor is just a tool to help you play better.

Is Amazon’s Alexa Spying on You?

Key Takeaways

  • Your Amazon Echo continuously listens for a wake-up word to activate and start processing voice commands.
  • Alexa records and collects enough data to improve device accuracy, but this does raise some privacy concerns.
  • You can protect your privacy by stopping Alexa from listening, deleting voice recordings, and choosing how long recordings are saved for.


Ever since Amazon released the first Echo, users have been wondering whether the device listens too much. No one wants their smart speaker infringing on their privacy by recording everything they say, but is this really what Amazon’s range of Echo speakers, and Alexa, do?


Is Alexa Always Listening?

Alexa-enabled smart speakers work by continuously listening out for a wake-up word that triggers Alexa to begin recording. The default trigger is “Alexa,” but there are other options to choose from. Currently, the Alexa app lets you choose from the following wake words:

  • “Alexa”
  • “Amazon”
  • “Computer”
  • “Echo”
  • “Ziggy”
  • “Hey Santa” (over the holidays)

Once Alexa hears the wake-up word, she’ll look for a command to complete. That might include playing music, opening an app, or providing information. But outside of some wake word activations, is Alexa still listening?

According to Amazon, a user can always tell if Alexa is listening to a request, as the Echo device’s ring light will turn on or the Echo will make a sound. But we likely say a lot more than a few Alexa requests every day, and much of the concern surrounds Alexa listening to users’ private conversations.

The quote below (taken from the previously mentioned Amazon help page) is what Amazon has to say about Alexa’s listening habits:

Alexa is a part of your life only when you ask Alexa to be. By default, Alexa begins listening after your Echo device detects the wake word, so Alexa does not listen to your personal conversations.

So, if what Amazon says is true, Alexa device users have nothing to worry about. Unfortunately, things aren’t as cut-and-dried as this.

A study conducted by Northeastern University found that Amazon smart speakers, along with other smart speaker brands, can be accidentally activated to respond up to 19 times per day to words similar to their wake-up words.

It might only take a moment for something to sound like “Alexa”, or your chosen wake word, but if Alexa hears enough of these similar words, she’s bound to be triggered by accident. Of course, this puts you at risk of being listened to by Alexa without having intentionally activated her.

Because your Echo device communicates your voice requests to Amazon’s cloud computers for processing, Alexa may send a non-request audio clip to be processed, putting your private conversations at risk. This is especially the case if you have a more commonly-used wake word, such as “Computer”.

Is Alexa Recording All of Your Conversations?

picture of amazon echo speaker on desk with sound wave icon to right

There’s a difference between Alexa listening to random conversations by accident and recording them. Alexa is always listening for the correct wake-up word, but recording the conversations being listened to would present a whole new privacy issue.

Even if Alexa doesn’t save everything you say, it does collect enough data to understand your voice. Amazon claims that it uses this information to make its devices better and more accurate. While it’s true that the more data a device has, the better it gets at understanding your requests, some people just want to be sure they are in control of their own privacy and security.

In 2016, The Information reported that Arkansas police had asked Amazon for data from an Echo device in order to help prosecute a suspect. While it is understandable that police need help in investigating certain cases, it does suggest that smart speakers—including Amazon Echo devices—gather large amounts of data.

In a similar incident from 2018, the Kiro 7 TV station reported that an Amazon Echo device had recorded a couple’s conversation and sent it to one of the husband’s employees. Amazon has since stated that this was an extremely unusual set of circumstances, and that nothing like this should ever happen again.

Things got more troubling in 2019 when it was reported that thousands of Amazon staff listen to users’ voice clips a day. In a Time article, it was stated that user voice recordings are “transcribed, annotated and then fed back into the software as part of an effort to eliminate gaps in Alexa’s understanding of human speech and help it better respond to commands.”

It was also stated that staff listen to “as many as 1,000 audio clips per shift,” which would mean that humans are accessing huge swathes of voice recordings. However, this is done to train Alexa’s software, developing it so that it can better understand human speech.

How to Protect Your Privacy Around Alexa

With all of this in mind, it’s understandable that some people may want to limit their exposure to smart speakers and other devices that are listening out for wake words. Luckily, there are several things you can do to stop your smart speakers from listening when they shouldn’t be.

1. Stop Alexa Listening Completely

The simplest way to prevent Alexa from recording anything is by pressing the Microphone button located on the top of your Echo device. This stops Alexa from listening for her wake-up words.

By pressing the Microphone button, you can still use Alexa’s various features, but it won’t listen to its surroundings until you unmute the device.

2. Delete Your Voice Recordings From Alexa’s History

To make Alexa delete your voice recordings, you can use three commands:

  • “Alexa, delete what I just said”
  • “Alexa, delete everything I said today”
  • “Alexa, delete everything I’ve ever said”

If you want to delete them manually or delete specific recordings, go to Settings > Alexa Privacy > Review Voice History. Then, you will tap All History > Delete All My Recordings.

You can view voice recordings from varying time periods, such as today, yesterday, and the last seven days, by filtering your search. You can also filter by devices and Alexa profiles to narrow things down a little.

3. Choose How Long to Save the Recordings For

Alexa keeps a temporary recording of what you say. If you do not want recordings to be stored in the cloud, you can choose to delete them once they are sent to your Alexa application on your smartphone.

You can set this feature up by going to Settings > Alexa Privacy > Manage Your Alexa Data > Choose how long to save voice recordings.

Alexa will give you the option to save voice recordings for three months, 18 months, or until you choose to delete them. You can also choose not to save any voice recordings at all from this menu.

4. Revoke Permissions From Alexa Skills

Alexa Skills are third-party apps that improve Alexa’s capabilities, whether it be interacting with different smart home devices or playing games.

However, after enabling these Alexa Skills, they often require access to personal information such as your address and mobile number in order for them to work properly.

If you change your mind after installing the Skill on your device, then you can remove their permissions easily by going into Settings within the app.

Go to the Alexa Privacy settings page, and select Manage Skill Permissions. From here, you can choose the data type you want to manage access to. Press the drop-down menu to the right of these, and then use the toggle to remove the permission.

Here, you can search for specific skills, or view which skills have access to various kinds of your personal data. You can also deactivate ads from third-party skills, or reset your advertising ID.

If you’re still concerned about Alexa listening to you despite making privacy changes to your app, consider unplugging your device completely when you aren’t using it.

JPEG, GIF, or PNG? Image File Types Explained and Tested

Key Takeaways

  • RAW files contain all the information captured by the camera and are great for editing, but they take up a lot of space.
  • JPEG is a common image format, but it uses lossy compression which can result in quality loss.
  • GIF is best for simple graphics and animations with a limited color palette, such as logos and icons with flat color areas.
  • PNG is good for preserving image details and works well with overlays and transparent backgrounds.
  • TIFF files are renowned for their versatility, high image quality, and lossless compression, making them great for printing.
  • SVG files operate on vector principles, making them infinitely scalable and suitable for graphic designers and illustrators.


Do you know the difference between JPEGs, GIFs, PNGs, and other image file types? Do you know when you should use one instead of the other? Or which is best for storing your photos? Here are the basics you need to know.


RAW – The Uncompressed Image Data

You get RAW files straight from your DSLR. The RAW file is exactly what it sounds like… the raw picture file with no compression applied.

Every piece of information that your camera captured is contained in the RAW file. For this reason, these files are huge; they can easily top 25MB each. And while that’s great for photo editing, it’s not so great for photo storage, which is why image compression exists.

A RAW file is not actually an image and RAW is not a standardized image file format. Camera manufacturers have their own RAW formats, such as Canon’s CRW, Sony’s ARW, and Nikon’s NEF.

There’s also the DNG RAW image format (Digital Negative). Adobe developed DNG, which serves as a universal RAW file format, in response to the compatibility issues across different camera manufacturers’ proprietary RAW formats. However, not all camera manufacturers support this format.

For this article, I’ll use a test photo to demonstrate the differences across multiple image formats and in different qualities. I can’t display a RAW image in the browser, so below is a screenshot of a RAW, uncompressed, unedited photo (note how massive the file size is).

DNG – 81.2MB – 7900×5925 px

JPEG – The File Type for Everyday Use

JPEG (or JPG) is the Joint Photographic Experts Group standard. It’s possibly the most common image format and is often used for posting photos or images of text online. This format supports 24 bits per pixel, eight each for red, green, and blue, making this a truecolor (RGB) format that can display over 16 million colors.

Although it can create very high-quality images, JPEG can be disadvantageous in that it’s a lossy compression format—a type of file compression that removes inessential parts of the image. When more compression is applied, the quality of the photo decreases. This is why you’ll often see low-quality, medium-quality, and high-quality options when you export an image as a JPEG.

Below is the DNG test photo converted to high-quality, medium-quality, and low-quality JPG formats, with their respective sizes.

JPG – High-Quality (100%) – 38.3MB – 7900×5925 px

JPG High-Quality Photo
Nolen Jonker

JPG – Medium-Quality (50%) – 1.95MB – 3950×2963 px

JPG Medium-Quality Photo
Nolen Jonker

JPG – Low-Quality (25%) – 259KB – 1975×1481 px

JPG Low-Quality Photo
Nolen Jonker

Let’s view all three versions close-up and side-by-side. You can easily spot the pixelation in the low-quality version on the left. The medium-quality version in the middle looks fine from a distance, but you can still see some pixelation. The high-quality version on the right has minimal visible pixelation.

JPG High vs. Medium vs. Low Quality
Nolen Jonker

In general, a high-quality and sometimes medium-quality JPEG is a good compromise between file size and quality. Once you get to low-quality, however, the quality will suffer significantly. JPEGs tend to be best for photos or drawings, which have fewer sharp transitions than text.

GIF – Not Just for Animations

The Graphics Interchange Format, introduced in 1987, allows for eight bits per pixel—three each for red and green, and two for blue. This makes 256 colors available for GIFs. Using lossless compression, GIFs can reproduce their limited color palettes perfectly over multiple decompressions and recompressions.

Converting the high-quality JPG version (38.3MB) of my test photo to a high-quality GIF file (33MB, 100%) did result in quality loss since GIF has color limitations that JPG doesn’t. However, converting the large GIF to a much smaller GIF file (4.3MB, 33%) didn’t result in quality loss due to lossless compression.

Here are the large and small GIF files close-up and side-by-side:

GIF Small vs. Big File Size
Nolen Jonker

Even though the image on the right is considerably smaller than the one on the left, there isn’t that massive quality drop as with the JPG compression. Also, notice how the smallest GIF file is still much larger than the smallest JPG file because it retains the image data.

Because of a GIF’s limited color palette, this format is best used for images that don’t require much depth, like logos and icons with flat color areas.

Another important thing to know is that GIFs can be animated, which has all sorts of cool uses. It does this by displaying a series of individual frames in a specific order, playing them in a loop, which creates the illusion of motion.

PNG – For Crisp and Sharp Images

PNG Demo Image
Ed g2s via POV-Ray/Wikimedia Commons

Designed as a replacement for GIF in 1995, the Portable Network Graphics file type is another lossless format. However, it includes significantly more information than its predecessor, containing either 24 or 32 bits per pixel.

The 24-bit version contains RGB information, while the 32-bit version uses the RGBA color space. The A in RGBA signifies the addition of an alpha channel, enabling varying levels of transparency in the image. When you see a PNG image with a checkered background, as shown above, it usually indicates transparency.

Because it contains so much more information, a PNG file will be larger than a JPEG or GIF. However, this increase in size comes with a boost in quality as well, making PNGs suitable for situations where preserving image details is essential.

Below is a 75.7MB PNG at 100% high-quality, converted from the RAW file. Converting that high-quality file to a low-quality (10.9MB, 33%) PNG shows no impact on the quality, thanks to lossless compression.

Here they are close-up and side-by-side:

PNG High-Quality vs. Low-Quality
Nolen Jonker

If you want to keep your designs looking crisp and your text sharp, PNG is your best bet. It’s also the ideal format if you want to work with overlays or want to make the background of an image transparent.

TIFF – Underused But Exceptional

Initially used for scanners, the Tagged Image File Format (TIFF or TIF) has evolved from binary to grayscale and eventually to full-color. It’s now a commonly used full-color file type, accommodating both RGB and CMYK color models.

Although you don’t see TIFFs online as much as other formats, they boast exceptional versatility, widespread usage, and compatibility with just about any image editing program.

TIFFs can be saved either compressed or uncompressed, and the compression used can be either lossy or lossless. Lossless compression is typically employed when compressing TIFF files, but if size is an important factor, lossy can be used.

TIFF functions as a file wrapper or container rather than a file type. This allows it to store images with varying bits per pixel, providing flexibility in color depth similar to JPEG or PNG files. Consequently, users have the option to achieve a broad spectrum of colors when working with TIFF files.

Because TIFF support isn’t universal in browsers, below are high-quality PNG screenshots of a TIFF file.

Uncompressed TIFF – 71.4MB

Uncompressed TIFF

Compressed TIFF Using Lossless – 36MB

Lossless Compressed TIFF File

Compressed TIFF Using Lossy – 2.5MB

Lossy Compressed TIFF File

TIFFs are particularly ideal for photography, graphic design, and printing. Their use extends beyond artistic pursuits; professionals in fields such as medical imaging and museum archiving often rely on TIFFs.

SVG – Infinitely Scalable to Any Size

SVG is a unique image file format that offers several advantages in certain contexts. As a vector-based format that utilizes XML, SVG images are resolution-independent, meaning they can be scaled to any size without loss of quality. All the other formats above are raster-based. If you’re unsure about the differences, see our guide to raster vs. vector images.

Below is a screenshot of a vector graphic, zoomed in to over 2,000%. The edges of the graphic will remain smooth no matter how much you scale the image up or down.

SVG File Viewed in Pixelied Online

Here is a PNG version of the same graphic. When zoomed in at the same point, it becomes very pixelated.

PNG Version of SVG Vector Graphic

SVG files are usually very small in comparison to raster formats like JPEG and PNG. The screenshots of the graphic above (in PNG format) are actually bigger than the SVG file of the graphic itself, which is only 28.7KB.

The SVG format is particularly well-suited for graphic designers and illustrators who create images from scratch, such as logos and icons. It is not optimized for handling the complexity and richness of photographic content of real-world scenes.

After all of these details, you still might be asking which file type is the best.

For most purposes, PNG is a safe bet, especially if you want to work with overlays and transparency. Opt for high or mid-quality JPEG for more compression. TIFF is ideal if you’re after lossless compression, high color depth, and versatility. GIF is suitable for simple graphics and animations, while SVG offers infinite scalability. And always keep the RAW files around so that you can edit your photos directly from the source.

How to Use Apple’s Journal App for Personalized Journaling

Key Takeaways

  • Apple’s Journal app is available on any iPhone running iOS 17.2 or later.
  • You can customize your Journal entries by adding images, videos, audio recordings, and more.
  • You can lock the Journal app with Face ID, Touch ID, or iPhone passcode to safeguard your entries.


Trying to get into the habit of journaling but lose motivation every time you try? Apple’s Journal app has simplified the process of jotting down your thoughts and preserving your memories. From creating your first entry to customizing it, here’s all you need to know.


How to Create a Journal Entry

One of the features that came with the iOS 17.2 update was the Journal app, which Apple designed to help you reflect and practice gratitude. Once you update your iPhone to iOS 17.2, the Journal app should appear on your Home Screen. In case you accidentally uninstalled it to free up space on your iPhone, you can download it again from the App Store.

Download: Journal (Free)

Once you’ve installed the app on your device, launch it and tap the plus (+) icon at the bottom of the screen to create your initial journal entry. If you’re using the Journal app for the first time, you’ll be asked if you’d like to enable Journaling Suggestions, which utilizes on-device machine learning to suggest journal entry prompts.

Tap Turn On Journaling Suggestions and then tap Allow if you’d like to enable it, or Not Now otherwise. You can also enable or disable it later from your device’s settings if you wish to.

If you’ve enabled journaling suggestions, you’ll see two tabs on the next screen: Recommended and Recent. The Recommended tab displays different highlights from your Photo Memories, songs you’ve played (on Apple Music), and numerous writing prompts you can use for inspiration. On the other hand, the Recent tab sorts the same information by date instead.

If you’d like to create a new entry based on a journaling suggestion, simply tap a suggestion you like to begin. However, if you’d like to write based on your own thoughts, tap New Entry at the top.

If you’re writing about something that happened in the past or is yet to happen, you can tap the ellipsis (…) button next to the current date and tap Custom Date. Once you’ve set a date for the entry, tap Done.

You can also bookmark your journal entry to come back to it later by tapping the bookmark icon. If you’re unhappy with your journal entry and would like to discard it entirely, tap the ellipsis (…) button next to the date and choose Delete.

How to Customize Your Journal Entry

The best aspect of using the Journal app to write about how you’re feeling is the numerous options you have to customize your journal entries. Your journal entries don’t have to resemble a wall of text; you can customize them by adding images, videos, audio recordings, music tracks, and more!

To view more journaling suggestions from your recent activities as you write, you can tap the magic wand icon in the toolbar above your keyboard and head to the Recent tab from the following menu. Now, you can attach the recent media you’ve played or contacts you’ve been in touch with.

Once you’ve written the content of your entry, you can tap the image icon to add photos and videos from your library to your journal entry. If you’d like to capture a new photo or video to include in your journal entry, tap the camera icon instead. Similarly, you can tap the audio icon to record an audio and attach it to your entry as well.

Journal App Settings You Can Tweak

Locking the Journal app enhances the privacy of your entries by requiring your iPhone’s passcode, Face ID, or Touch ID for access. To activate this feature, go to the Settings app, scroll to the Journal option, select Lock Journal, and enter your iPhone’s passcode. Finally, toggle on the switch next to Lock.

If maintaining a consistent journaling routine is a challenge for you, we recommend setting a journaling schedule. This feature sends reminders to write a new journal entry at a designated time every day (or on certain days of the week). To set this up, go to Settings > Journal, tap Journaling Schedule, and toggle it on. Choose the preferred notification time and the days you want to receive reminders.

If you’d like to stick to only writing when something is on your mind, you can also disable journaling suggestions. To do so, go to Settings > Journal and toggle off the switch next to Skip Journaling Suggestions.

While Apple’s Journal app undoubtedly stands out as an excellent tool to preserve memories and maintain a consistent journaling routine, it’s disappointing that its availability is currently limited to iPhone users. Therefore, if you own an iPad or Mac, you have to resort to third-party journaling apps for now.

The Best Accessories for PSVR2 in 2024

If you’ve taken the plunge into VR and bagged yourself a PSVR2, you’ll want to ensure you have the best accessories to go alongside it to keep it clean and polished, protected, fully charged, and ready for action.


TIMOVO Lens Protector & Controller Silicone Pads
TIMOVO

Protect your PSVR2 lenses and get a grip (or a better one, at least) with this TiMOVO PSVR2 Lens Protector and Controller Pads set. The lens protectors have been cut to match the PSVR2’s measurements and are made from soft silicone to ensure a scratch-free fit. A sponge cushion sits inside the lens protector to provide extra reinforcement.

Two sets of soft silicone pads are included to supply extra comfort and grip on your VR controllers, which have a nano glue coating on their backs. This keeps the pads firmly in place and allows for easy and mark-free removal that won’t damage the controllers. The pads themselves are anti-slip and anti-sweat, too.

This TiMOVO PSVR2 set is a handy way to keep lenses and surfaces clean and protected, and well worth considering for PSVR2 gamers.

TIMOVO Lens Protector & Controller Silicone Pads Tag

TiMOVO PS VR2 Lens Protector & Controller Silicone Pads

Best Accessories Kit

The TiMOVO PSVR2 Lens Protector & Controller Silicone Pads is the ideal accessories kit for keeping your PSVR2 looking and feeling good.

Pros

  • Two products in one
  • Keeps lenses clean and clear
  • Better controller grip with anti-sweat pads
  • Nano glue leaves no marks
Cons

  • If you’re not bothered about the controller pads, other protective lens covers are available for cheaper

Pulse 3D Wireless Headset-1
Sony

While the PSVR2 package will include a pair of earbuds, the design of the headset itself is such that it also supports the use of wireless headphones as well. Many gamers prefer wearing headphones rather than earbuds, as the audio experience they provide is arguably more immersive. Having been designed specifically for the PlayStation 5, Sony’s Pulse 3D Wireless Headset is the go-to headset for PS5 gamers.

Fine-tuned for 3D audio on the PS5, the Pulse 3D is equipped with dual noise-canceling microphones that provide crystal-clear voice capture. Soft and comfortable on the ears, this headset allows for easy switch-up between audio modes for solo gameplay and voice chat. And on a full charge, you can enjoy 12 hours of wireless play.

The Pulse 3D Wireless Headset is the perfect companion for the PSVR2 and the best way to enjoy the huge library of VR-compatible games that are heading to PS5.

sony pulse 3d

PlayStation 5 Pulse 3D Wireless Headset

Best PSVR2 Headset

Offering up to 12 hours of wireless gameplay and incredible 3D audio, the PlayStation 5 Pulse 3D Wireless Headset is the perfect companion for PSVR2 gaming.

Pros

  • Incredible 3D sound
  • Comfortable to wear
  • Great for voice chat
  • Decent battery life

Hastraith Carrying Case
Hastraith

Transport your PSVR2 in style with this Hastraith Carrying Case. Designed specifically for the PSVR2, it offers dedicated and secure storage for your PSVR2 headset, VR2 Sense Controllers, and charging station. The zippable mesh pocket on the opposite side of the interior is perfect for storing headphones, game discs, and additional accessories.

Made from hard shell EVA material, this case won’t buckle in transit, meaning your precious cargo stays protected and unharmed. The exterior has a handy splashproof coating, and the case itself stays nice and secure thanks to its sturdy zippers.

This durable case can be carried in one of two ways, either with the carry handle on the topside or with the adjustable shoulder strap, and is one of the best ways to carry your PSVR2.

Hastraith Carrying Case Tag

Hastraith Carrying Case For PSVR2

Best PSVR2 Case

Keep your PSVR2 and all its accessories safe and secure on the move with the Hastraith Carrying Case for PSVR2. Made from hard shell EVA material with weatherproof protection, it’s the best way to protect your kit while traveling.

Pros

  • Made specifically for PSVR2
  • Made from tough EVA material
  • Contains plenty of space for all the essentials
  • Reasonable price tag
Cons

  • Color scheme isn’t the most attractive

DEVASO Lens Protector
DEVASO

If you’ve splashed out on a shiny new PSVR2, you’ll want to make sure you look after your investment and keep those all-important lenses in sparkling condition. With the DEVASO Lens Protector Kit, you get a set of anti-scratch rings to protect your VR2 headset’s lenses, which also act as spacers for glasses, so you can comfortably wear both at the same time.

As well as offering dust and scratchproof protection for your lenses, you’ll find a pair of easily installable blue light-blocking lenses to keep your eyes shielded from harmful blue rays and UV glare. Magnetic suction means attaching and detaching these protective lenses is a breeze, meaning they can be regularly cleaned without any hassle using the included microfiber cloth.

This kit is a great way to protect your headset’s lenses while in and out of use and keep everything in tip-top condition.

DEVASO Lens Protector Tag

DEVASO Lens Protector Cover Kit for PSVR2

Best Lens Protection

Keep your PSVR2 lenses protected against scratch and dust damage with the DEVASO Lens Protector Cover Kit. Featuring glasses spacers, blue light lenses, and anti-scratch lens protection, this kit is ideal for keeping your VR lenses in mint condition.

Pros

  • Anti-scratch and dust protection
  • Includes blue light glasses
  • Easy magnetic installation
  • Easy to clean
Cons

  • Can cause pinching when worn with glasses

PlayStation VR2 Sense™ Controller Charging Station
Sony

Keep your PSVR2 Sense Controllers topped up between uses without the need to connect them to your PSVR2 with the official Sony PlayStation VR2 Sense Controller Charging Station. A simple click-in design lets you know your controllers are charging up properly, and both of them can be charged at the same time with this convenient charging station.

By freeing up your console’s USB ports, you can enjoy full use of your PS5 while you’re waiting for your VR2 controllers to charge up. And with rapid charging for both, you won’t be kept waiting for long, either, as a full charge for your controllers only takes around 1.5 hours.

PlayStation VR2 Sense™ Controller Charging Station Tag

Sony PlayStation VR2 Sense Controller Charging Station

Best for Fast Charging

Keep your PSVR2’s Sense controllers juiced up without using your PS5’s USB ports with the Sony PlayStation VR2 Sense Controller Charging Station. This handy peripheral is ideal for providing simultaneous fast charging for your controllers.

Pros

  • Fast charging
  • Charges both controllers simultaneously
  • Doesn’t require a PS5 connection
  • Simple click-in design

FAQ

Q: Do I need a PS5 to use the PSVR2?

Yes. The PSVR2 isn’t a self-contained VR headset, unlike some of the other alternatives on the market. This means it needs to be paired with a PS5 console for you to use it.

Q: Can I play PSVR1 games on the PSVR2?

Unfortunately, and as confirmed by Sony prior to the PSVR2’s launch, the PSVR2 isn’t backward compatible. This means that you won’t be able to use it to play any of your PSVR games.

Q: What kind of display does the PSVR2 have?

The PSVR2’s display consists of a dual OLED panel with a 4K display resolution of 2,000 x 2,040 pixels per eye. It has a refresh rate of 120Hz and also supports HDR.

Q: How do I prevent motion sickness with VR games?

Extended VR gameplay can tend to induce motion sickness for the user. This can be reduced by taking regular breaks and ensuring each gameplay session has a time limit on it.

The effects of motion sickness in VR can also be lessened by sitting instead of standing, ensuring that you’re using your headset in a well-ventilated area, and by adjusting the VR settings on your headset.

Q: Can I play VR games with glasses?

Yes, the PSVR2 has been designed to accommodate users who wear glasses as well as those who don’t. The headset itself is fully adjustable, so you should be able to find a comfortable fit while you’re immersed in VR.

There are also a variety of glasses inserts that you can buy for the PSVR2, which can provide additional comfort for glasses users, as well as an additional layer of protection for your lenses.

How to Remove Table Formatting in Excel

Key Takeaways

  • Removing table formatting in Excel clears text alignment, title cases, and text color.
  • The process to remove table formatting in Excel is different on desktop and mobile, but it’s still easy in both cases.
  • When you remove formatting in Excel, some graphs might still remain the same as they were before.


Learning how to remove table formatting in Excel is straightforward, and you can better organize your spreadsheet afterward. Keep reading to discover how to clear table formatting in Excel on your computer and mobile device.


What Gets Cleared When You Remove Table Formatting in Excel?

When you remove table formatting in Excel, the text alignment, as well as the color of your text and cell background, will all revert to the default settings.

It’s worth noting that removing table formatting does not affect graphs created from the table data, nor does it delete any data or formulas. We’ve got a guide on how to show formulas in Excel if you prefer to see the data in your cells.

How to Remove Table Formatting in Excel

The process to remove table formatting in Excel is slightly different depending on whether you use your computer or mobile device. Below, you’ll find the separate instructions that you need to follow for both of them.

How to Remove Table Formatting in Excel for Desktop

Follow these instructions to clear table formatting in Excel from your computer:

  1. Select the cells you want to remove formatting from.
  2. In the Home tab of the ribbon, look for an eraser icon labeled Clear in the right-hand corner. Click on this.

  3. A dropdown menu will appear, from which you should select Clear Formats.
    Clear your formatting in Microsoft Excel on a desktop device

After you clear your formats, the cell formatting will reset to the default settings. This includes alignments, fonts, and cell styles. When you use formatting again, it’s a good idea to check if two values are equal in Excel.

How to Remove Table Formatting in Excel on Mobile

You need to perform a few additional steps to clear formatting in Excel on your smartphone or tablet. However, the process is still quite easy. Here are the steps you need to follow:

  1. Highlight the areas you want to remove the formatting for.
  2. Tap the three-dot icon on the bottom toolbar.
  3. Scroll down to Clear and select this option to reveal your list of options.
  4. Tap Clear Formats. The content in your table should then revert to default.

Once you’ve removed your Excel table formatting, you can easily reorganize your spreadsheet as needed. And if you decide that you don’t want to remove your table formatting, you can always undo the process with ease.

How to Easily Achieve Smooth Lines in Adobe Illustrator

Quick Links

Key Takeaways

  • Use the Paintbrush, Pen, or Curvature tool to create lines in Illustrator. Then use the Smooth tool to make them sleek and neat.
  • Alternatively, use the Simplify option to smooth lines without the Smooth tool. Adjust manually or use the A icon for automatic simplification.
  • These techniques will help you achieve smooth lines in Illustrator, improving your illustration and design work.


Creating sleek and neat lines is a key technique for any graphic designer. This article will show you how to achieve perfect smooth lines using Adobe Illustrator, both with and without the Smooth tool.


To begin, open your document in Illustrator and locate the toolbar on the left of the screen. A variety of different tools will be displayed, but for creating smooth lines, opt for either the Paintbrush, Pen, or Curvature tool.

If you are new to the program and want to practice simple designs first, you can begin by creating simple shapes like triangles in Illustrator before moving on to more complex creations which might need more manual adjustments.

Click and drag while using the Paintbrush tool to create a line. Likewise, click separately in the direction you want your path to follow when using the Pen or Curvature tools.

Note that the first part of the drawn segment won’t appear until you create a second anchor point when using the Pen tool.

Two adobe Illustrator screenshots, showing a path before and after using the smooth tool. The before is jagged and the after is clear and smooth.

Once you have your line drawn, select it using the Selection tool at the top left of the toolbox. Then click on the Smooth tool, found by holding down the Shaper tool icon, if not already visible.

A screenshot of Adobe Illustrator, with the smoothing fidelity pop-up box highlighted

Click and drag over your line multiple times to smooth the path. If the tool is either too weak or too strong, double-click the Smooth tool icon and change the Fidelity option in the pop-up box to increase or decrease its strength.

Another way of achieving smooth lines in Illustrator without using the Smooth tool is by selecting your line and going to Object > Path > Simplify.

An adobe illustrator screenshot showing the options drop down in front of an unsteady line pathway, leading to the simplify tool.

The Simplify pop-up option will appear, which you can drag down to your liking to simplify your path. In the case of unsteady lines, simplifying the path will make them smoother and will account for the complexity of the different anchor points you used when originally making the line.

An adobe illustrator screenshot, showing a now smooth line behind the simplify tool box, with the option dragged down to the most extreme amount of simplifying.

You can adjust this option manually or click on the A icon displayed next to an arc shape in the pop-up box to simplify your path automatically. If this method of smoothing lines surprised you, there are many other hidden tools in Illustrator that might also prove unexpectedly useful for your next project.

Whether for illustration or graphic design work, these tools will rid your work of uneven and shaky lines. Enjoy smooth sailing in Adobe Illustrator from here on out, especially when it comes to line work.

How to Access and Use It Right Now

Key Takeaways

  • OpenAI has launched the GPT Store, where users can find custom GPTs created by the ChatGPT community.
  • Access to the GPT Store is available to users with premium ChatGPT subscriptions, but access is being rolled out gradually.
  • Users can browse and search for custom GPTs in the store by category or keywords, and save them for future access. Upgrading to ChatGPT Plus is worth it for the variety of custom GPTs available.


OpenAI has finally unveiled its highly anticipated GPT Store, offering users a selection of ChatGPT community-created custom GPTs featuring specialized chatbots ranging from writing and design to programming and productivity. The launch marks OpenAI’s latest move to capitalize on the runaway popularity of its AI creation ChatGPT, which took the world by storm after its launch in November 2022.

ChatGPT’s custom GPT Store is open right now, and this is how you can use it to find the pre-programmed AI tools you need.


How to Access the GPT Store

Access and use of the new GPT Store requires a ChatGPT subscription. Only users with ChatGPT Plus, ChatGPT Teams, or ChatGPT Enterprise accounts will be able to use the store’s catalog of custom GPTs. You also need a ChatGPT subscription if you want to create your own custom GPT.

However, even premium subscribers may not have immediate access. OpenAI is gradually enabling GPT Store functionality for millions of subscribed users in batches. So, while your premium ChatGPT membership is necessary, it alone does not guarantee you can currently use the store due to the phased rollout. Users without a premium subscription “can currently browse the GPTs catalog but won’t be able to use it.” Check your ChatGPT account periodically to see if your access has been granted as OpenAI continues expanding availability to additional batches of subscribers.

How do you know when you’ve been granted access?

On the left sidebar of the ChatGPT interface, you should see Explore GPTs instead of simply Explore. Once you see this, you can start using the GPT Store! Remember, the whole idea of the GPT Store is to help users browse and access a wide range of GPTs built by the community. So, how can you use it to find the right GPT for your tasks?

How to Find the Best Custom GPTs in the GPT Store

Using the GPT Store is quite straightforward. Here’s how you can browse and search for custom GPTs:

  1. Once you can access the GPT Store, click Explore GPTs on the left sidebar of the ChatGPT interface to open the store.
  2. At the top of the store page, you will see featured categories like Writing, Productivity, Programming, Research and Analysis, and DALL-E for image generation. Click on a category to view a list of the top-performing custom GPT models in that specific category.

  3. You can also use the search bar to find GPTs by keyword or related terms.
    GPT Store search screen

  4. When you find a GPT you want to try, click on it to open the individual GPT page.
  5. On the GPT page, you will see information about what that model offers.
  6. After testing a GPT that solves your problem well, take one important extra step—click on the GPT name in the top left corner of the page, then click Keep in sidebar. This saves that GPT to the sidebar along with your chat history for easy future access.
    Adding a GPT to sidebar

However, you should note that at the time of writing, the GPT Store isn’t reviewed, and there is no rating system or otherwise. We’re hoping that OpenAI will introduce some type of rating system in the near future, as currently, without any system in place, you’re effectively on your own when it comes to figuring out what works well. By extension, it seems likely that some form of rating or review system will be implemented once GPT Store revenue sharing is launched, but OpenAI hasn’t given any fixed timeline for this.

Is it Worth Upgrading to ChatGPT Plus to Use Custom GPTs?

Since you need a ChatGPT subscription to use custom GPTs, you’re probably wondering whether it’s worth paying the $20 subscription fee to access the feature.

The short answer is yes. Whether you’re a beginner or an advanced ChatGPT user, you’ll find many impressive custom GPTs in the store. Furthermore, if your AI prompting skills are not particularly strong, custom GPTs are quite useful because they simplify prompting. Basically, the GPT creator does most of the heavy lifting with regard to prompting, programming the custom GPT for a specific topic, and letting you reap the benefits with minimal work.

With millions of GPTs available, perhaps the biggest argument for subscribing is that someone might have listed a GPT that solves the exact problem you are currently struggling with. Also, remember, a subscription also gives you access to several other perks, most notably access to GPT-4 and the DALL-E text-to-image tool.

Which Streaming Service Is Better?

Key Takeaways

  • Max (formerly HBO Max) wins in the original shows and movies category thanks to its award-winning exclusive content.
  • Netflix has a larger overall selection of movies and shows, but Max offers the advantage of live sports streaming.
  • Max offers cheaper subscription prices than Netflix with an annual plan. But you may want to pay monthly in order to switch between the two services.


Is Max, formerly HBO Max, better than Netflix? Or is Netflix still #1 in the field of streaming services? If you’re trying to choose between these two streaming platforms, this comprehensive comparison will help you make a more informed decision.


1. Netflix vs. Max: Original Shows and Movies

Max, previously known as HBO Max, has original series and movies spanning multiple categories. Examples include Tokyo Vice and the rebooted version of Gossip Girl. Other examples include Friends: The Reunion and Zack Snyder’s Justice League.

Netflix itself has thousands of original series and movies, and these also go across numerous categories and languages. You’ll find plenty of documentaries, such as Beckham, which focuses on soccer legend and fashion icon David Beckham’s life. You can also find Miss Americana, a documentary about the singer Taylor Swift, on Netflix.

Netflix Original Programs Appearing on the App

When pitting Max and Netflix together in this category, Max is known for its prestige and award-winning exclusive content. Moreover, some users have become disillusioned with Netflix due to the company canceling many of its original series after one or two seasons.

Another common criticism of Netflix is that its originals aren’t as good as they used to be. While the platform has given international series like Squid Game significant recognition, we’re giving the point to Max in this category.

Winner: Max

2. Netflix vs. Max: Overall Movie and Show Selection

Max has more than 1,000 shows and over 2,000 movies, with hundreds added to its catalog each month. Besides a number of original series and films, you can also see content that has been featured elsewhere. For example, Rick and Morty was on Netflix until the summer of 2022, but now, you can find it on Max.

When looking at HBO Max vs. Netflix in terms of TV shows, Netflix wins in terms of quantity. You’ll find more than 3,000 movies on the platform, along with over 1,800 TV programs. Like Max, Netflix adds new content on a regular basis. On Netflix, you’ll find The Office and Brooklyn Nine-Nine—in addition to Breaking Bad and various other series.

A selection of TV shows as they appear on Netflix

One big advantage that Max has over Netflix is that you can watch live sports with your subscription. What you see depends on your specific region, but the platform streams the NBA and many other professional leagues. So, if you’re looking for one of the best live sports streaming sites, Max is a great choice.

A list of offerings available when you subscribe to Max

You can download shows from Netflix for up to 30 days, and programs remain available for streaming for as long as the platform renews them. Max lets you keep shows for up to 48 hours, while programs will also remain on the platform for an undefined period.

Winner: Tie

3. Netflix vs. Max: Subscription Prices

Another important consideration when choosing between (HBO) Max and Netflix is the subscription price. Both have different pricing for different regions, so we’ll look at the US for the sake of simplicity.

Below is a comparison of Max and Netflix’s pricing:

Subscription

Max

Netflix

Basic (with ads)

$9.99/mo; $99.99/yr

$6.99/mo

Ad-Free (Max)/Standard (Netflix)

$15.99/mo; $149.99/yr

$15.49/mo

Ultimate Ad-Free (Max)/Premium (Netflix)

$19.99/mo; $199.99/yr

$22.99/mo

Netflix does not offer annual subscriptions. If you can’t watch 4K content on Netflix despite using Premium, you can follow our separate guide for tips and advice.

Technically, Max is cheaper than Netflix beyond the basic subscription for both platforms. However, there is one big caveat here: you need to get an annual plan to save money.

Winner: Max

4. Netflix vs. Max: Video Resolution

Both Max and Netflix offer viewing in up to 4K. However, you can only view this image quality if you subscribe to the highest subscription plan on both platforms. Other than that, you’ll be able to watch content in 1080p.

Pretty much nothing separates Max and Netflix in this category, so it’s another tie.

Winner: Tie

5. Netflix vs. Max: Regions and Languages

As of January 2024, Netflix is available in more than 190 countries and territories. You can’t use the service in Russia, Crimea, North Korea, China, or Syria. But in most other places, you should be able to access it without too much difficulty. However, the content will differ based on regional licensing.

On the flip side, Max’s availability is nowhere near as widespread. The streaming platform is available in 61 territories, including the US and Latin America, plus parts of Europe. However, its sports offerings are not available in all territories.

Netflix has more than 60 languages to watch your content in, but you won’t find subtitles for all of these on every show. Max, on the other hand, has 24.

Winner: Netflix

6. Netflix vs. Max: User Interface and Design

Both Netflix and Max have similar interfaces when choosing which account is watching. But beyond that, their interfaces and design are very different.

Netflix has a homepage where you can browse movies, along with filters for different categories. On top of that, you have a My Netflix tab with all of your downloads and notifications. Here, you can also view episodes and movies that you’ve recently watched.

The App Interface on Netflix

Max has a slightly different color scheme compared to Netflix, and you can browse based on various segments. For example, you can search based on Cartoon Network programs, Max Originals, and more.

The HBO Max App Interface

Both interfaces are well-designed and user-friendly. If you’re having issues with Max, you can always check out our guide on how to solve common HBO Max issues.

Winner: Tie

7. Netflix vs. Max: Unique Features

Neither Netflix nor Max allow password sharing outside your household. The services are also both available across smartphones, desktop devices, and tablets.

One big advantage that Max has over Netflix is that you can watch several shows from Warner Bros. network, including Looney Tunes and DC Comics.

On Netflix, you can go behind the scenes of many popular shows (including Bridgerton) to see how they were made. Another big advantage the platform has is that you can download multiple mobile games from Netflix, with its mobile gaming catalog coming free with your subscription.

Winner: Netflix

Netflix vs. (HBO) Max: Which One Should You Choose?

You should choose between Max and Netflix based on what kind of content you want to watch.

Max is a better choice if you want access to prestige series, with exclusives like House of the Dragon and Raised by Wolves. On top of that, Max is a great choice for sports fans that want access to live games, as long as you live in regions where this content is available.

Netflix, on the other hand, is a better option if you love TV shows from across different genres. You can enjoy reality programs like Love Is Blind, for example. On top of that, Netflix is a better choice if you’d like to watch a higher volume of new content.

Although Max takes a slight lead in our comparison, the differences aren’t dramatic. You should remember that what you can watch is sometimes determined by regional restrictions, and you might also see something that you like on either platform.

To save money on your streaming subscriptions, you can always pay on a month-to-month basis and switch between each whenever new content that you’re interested in drops.

How to Save High-Quality Images in Photoshop

Key Takeaways

  • Choose JPEG 2000 or PNG formats for high-quality images in Photoshop. This minimizes compression and reduces pixelation.
  • Save images as PSD files in Lightroom before transferring to Photoshop. This gives you more flexibility in editing and higher-quality images.
  • Consider color mode and PPI when preparing images for print in Photoshop. And save them as TIFF files for preservation of quality.


You can save high-quality images in Photoshop for all kinds of use cases, whether that’s sharing your art on social media or preparing your content for print. In this easy-to-follow guide, you’ll learn how to save your pictures in Photoshop while ensuring that compression is minimal.


Which Formats Should I Use to Save High-Quality Images in Photoshop?

If you want to save the best-quality images in Photoshop, you need to choose file formats that minimize compression. Unfortunately, not all formats are equal in this respect. For example, JPEGs will compress more easily (though they do benefit from being easier to transfer across the web).

JPEG 2000 and PNG are the two files that are worth using if you need to save high-quality images in Photoshop. Both consume more space on your hard drives, but they’ll give you a better chance of less pixelation. We’ve got a full guide on what PNG files are, and what you should use them for, if you’d like to explore that topic further.

If you’re planning to use your images in print media (e.g. a magazine or book), you should use TIFF format instead.

Start by Saving Your Images as a PSD File in Lightroom

If you’re one of the many creators that use Lightroom and Photoshop together, you should save your pictures as PSD before transferring them to Photoshop. That way, you’ll have much more flexibility when editing in Photoshop. And as a result, you can also save higher-quality photos when you’ve finished editing.

Follow these steps to save your photos in PSD format before continuing to Photoshop:

  1. Go to File > Export in the toolbar at the top of your screen.

  2. Scroll down to File Settings and expand the toolbar next to Image Format. Here, choose PSD.
    Choose to Save Your Content as a PSD File in Adobe Lightroom

  3. Go back to the top of the window. Under Export Location, pick the folder you want to save your image in by selecting Choose. If you’re using both Lightroom and Photoshop, it’s a good idea to have a separate folder for Photoshop edits and then another for the finalized version.
    Choose Where to Save Your File in Adobe Lightroom

  4. When you’ve picked your file location, tap Export.

How to Save High-Quality Images in the Photoshop Desktop App

Once you’ve finished editing, and you’re ready to save high-quality images in Photoshop, the process is very simple. You can use the steps below to save both JPEG 2000 and PNG files in the desktop version.

  1. At the top of your screen, click on File and select Save As.
    Choose Save As when exporting your file in Adobe Photoshop

  2. Expand the dropdown menu next to Format at the bottom of the next window.
    Select Whether You Want to Save Your File as JPEG 2000 or PNG in Photoshop

  3. Select JPEG 2000 or PNG, depending on your preference. You can scroll down via the downward-facing arrow if you don’t immediately see either option on your screen.
  4. After doing the above and naming your file via Save As at the top, select Save.

How to Save High-Quality Images in Photoshop for the Web

To use Photoshop for the Web, you’ll need to open Google Chrome, Edge, or Firefox. The process of saving high-quality images is also slightly different from the desktop app, and you can either save your picture to Creative Cloud or on your device. Moreover, you can’t save your image as JPEG 2000, but PNG is available.

Let’s start by saving your picture to Creative Cloud:

  1. Tap the horizontal three-dots icon in the top left-hand corner of the app.
  2. Select Save as when the dropdown menu appears.
    Save a file to Adobe Creative Cloud via the Photoshop app for your computer

  3. Enter the name you want to save your image as. Then, select Save.
    Save Photoshop File to Adobe CC After Renaming

Once you’ve saved your photo in Creative Cloud via the web app, you can go to the Photoshop desktop app and save your picture as JPEG 2000 or PNG via the same instructions in the previous version.

If you’d rather download your image to a hard-drive instead, and you want PNG rather than JPEG 2000, the following steps are for you:

  1. Select Download.
  2. Expand Where and choose your desired file-saving location.
    Choose where to save your file when using Photoshop for web

  3. Go to Format and select PNG.
    The option to save a file as PNG when using Photoshop for the web

  4. Tap the Save button when everything looks as it should.

You can check out how Creative Cloud works if you want to learn more about the platform.

How to Prepare Images in Photoshop for Print

A common mistake in Photoshop is failing to take the Color mode and the PPI (pixels per inch) of the image into account. These Photoshop export settings make a huge difference when preparing media for print.

Using Color Mode in Photoshop

Photoshop supports a variety of color modes; you’ll find them all under Image > Mode. The default color mode is RGB (Red, Green, and Blue). This is the main color mode used in Photoshop.

The different image modes available in Adobe Photohshop

If you change the Color mode of your image, the switch from RGB to CMYK (Cyan, Magenta, Yellow, and Key) might not be immediately noticeable. The difference can be felt more in their use. RGB is an additive color mode, while CMYK is a subtractive color mode.

Additive colors are more useful when dealing with something like an image displayed on a screen. Subtractive colors are best for images that you intend to print later on.

Subtractive colors begin with a white surface, much like a piece of printer paper. Colors, in the form of ink, subtract from the brightness of the surface in layers. The more layers that you have overlapping one another, the darker the area of the image gets.

Once you’ve chosen the right image and color modes, you should save your pictures as TIFF. Here’s how to do that:

  1. Go to File > Save As.
    The Save As Option for Files in Photoshop

  2. Pick the place you want to save your image. Then, expand the dropdown menu next to Format.
    Choose TIFF when saving a file for print in Photoshop

  3. When your list of options appears, select TIFF.
  4. Once everything looks good to you, tap Save.

Saving your file with care will preserve the quality of the image. Why settle for a JPEG when there is so much more to choose from?

When saving high-quality images in Photoshop, think about the platforms you’ll use them on. For example, JPEG 2000 works if you upload pictures to social media from your smartphone, but PNG is better for client projects. It’s also a good idea to consider the different file size limits that different platforms have.

A Plastic-Free Future With No Sim Cards: Holafly’s iPhone eSIM Revolution

With the launch of the iPhone 15, Apple has taken considerable steps toward improving user experience. Chief among them is the removal of the traditional SIM card slot, which has been replaced with an advanced eSIM.


This modernization of the iPhone is further proof of Apple’s commitment to innovation. It also means your information is more secure than ever before. With improved security measures, you have better safeguards against potential threats, while the elimination of the risks associated with physical SIMs further fortifies your data.

By embracing this cutting-edge technology, Apple can build the iPhone 15 more streamlined than its predecessors. This makes the device sleeker and more portable, and therefore, the perfect travel companion.

It also brings a whole lot more convenience to globe-trotting Apple lovers, with the burden of getting a local SIM card removed when you get to your destination.

So, say goodbye to the inconvenience of a traditional SIM card and say hello to a more seamless, secure, and efficient travel experience with an iPhone eSIM.


What Is an eSIM Card?

An eSIM, or virtual SIM card, is a type of SIM that is embedded into many modern mobile devices, including iPhones. Some tablets, smartwatches, and even a few laptops also have built-in eSIMs. They differ from traditional SIM cards because they are soldered to the motherboard. This makes them difficult to damage and impossible to lose.

The Benefits and Drawbacks of an eSIM

eSIMs keep you connected wherever you are and offer you freedom, convenience, and flexibility. They are easy to register for, and all that is required is a digital download and a simple installation. You’ll get immediate access to your eSIM, and the need to buy a physical SIM card at your destination is eliminated, along with all the troubles that go with it.

The instant data connection you get with an eSIM makes arrivals all the easier. You’ll have access to airport information and be able to figure out how to get into the city with minimal frustration. You can also explore your new city straight away or find your hotel with little fuss by connecting to your favorite map app.

However, before buying an eSIM, you need to check for compatibility with your device. Not all tablets and smartphones have an integrated eSIM. However, if you have an iPhone from 2018 or later, it will be eSIM compatible.

Local eSIM vs International eSIM: Which Is the Best Choice?

A local eSIM is limited to the country or region where you purchased it. This means they are not particularly convenient for those who like to travel to multiple countries. They may also require a bit of effort to get you connected. You’ll likely need to visit a local store or contact the provider, which may take some time and introduce obstacles like language barriers and form-filling.

If you want to visit a neighboring country or region, you may also be subjected to data roaming charges or have no connectivity at all. Furthermore, you might want to consider local data limits and speed restrictions if you are a heavy data user.

These are problems travelers can do without and ones that can be solved by choosing an international eSIM plan. You can purchase a data plan at home before you travel and activate it as soon as you land at your destination. With a simple scan and easy installation, your travels abroad will be completely transformed.

With a Holafly international eSIM, you will also benefit from unlimited data plans. You won’t need to worry about running out of data – just install the eSIM and enjoy your travels. Simply select your destination, choose the number of days, and you’re good to go.

Essential Considerations When Switching to eSIM

Before transitioning to the world of eSIMs, there are a couple of crucial factors you need to consider.

The first of these is compatibility. As mentioned, you must check if your device is eSIM compatible. Many phones manufactured after 2017 are fine, including iPhones from the iPhone XS range and onward.

The second crucial factor is that your iPhone is unlocked. International eSIMs need to connect to various networks worldwide and won’t be able to do so on a locked phone. If you have paid for your iPhone in full, you can go through the unlocking process with your carrier.

eSIM iPhone Advancements in the US

In the US, Apple has implemented an eSIM-only system in their newer iPhones (iPhone 14 and 15). At first glance, this can seem like iPhone users are being deprived of choice.

However, you can store eight or more eSIM numbers on your iPhone and even use two at the same time. You can easily manage each eSIM profile while maintaining your home number and your number in the country you’re visiting.

While there is some initial adjustment, an eSIM-only system delivers undeniable convenience and flexibility to frequent travelers.

How Can I Install an eSIM on an iPhone?

Installing a Holafly eSIM onto your iPhone is quick and painless. You can install it before your trip for convenience or after arriving at your destination. There are several simple ways to do it:

Quick Transfer: Convert Sim to eSIM

If you have a model preceding the iPhone 14, you might want to convert your existing physical SIM card to an eSIM. The process is a breeze, but only if your carrier supports it.

  • On your iPhone, go to Settings and then Cellular.
  • Tap Convert to eSIM (if you don’t see this option, then your carrier does not support quick transfer).
  • Tap Cellular Plan, then Convert to eSIM.
  • Wait for the eSIM to activate, remove the physical SIM, then restart your iPhone.

Please note that your physical SIM is deactivated once your eSIM has been activated on your iPhone.

Activate Through a QR Code

If your carrier doesn’t support Quick Transfer, you can request a QR code instead.

If your iPhone is new and you’re just setting it up, tap “Use QR Code” when you reach the “Set-Up Cellular” screen, and then follow the on-screen instructions.

To activate an eSIM once your iPhone is already up and running, contact your carrier directly or through their app to get the QR and confirmation codes. Following this, you can:

  • Open your Camera app and scan the QR code.
  • Tap on the Cellular Plan Detected notification when it appears.
  • Tap Continue then Add Cellular Plan.
  • Follow the steps of installation.

Manual Installation

If, for some reason, you have to, or prefer to, do things manually, you can:

  • Contact your carrier to get the necessary eSIM details that you have to input.
  • Go to Settings.
  • Tap either Cellular Data or Mobile Data.
  • Tap Add Cellular Plan then Enter Details Manually.
  • Enter the details previously provided by your carrier.

Where Can I Get an eSIM for International Travel?

holafly stay connected banner

Holafly is a well-renowned and trusted online eSIM store with a 4.7 rating on Trustpilot from well over 30,000 reviews. The company offers a variety of eSIM international plans covering more than 180 countries, from Albania to Zambia, with unlimited data plans available in over half of those. You also get the convenience of purchasing directly on their website or app.

Travelers to Europe, North America, and Asia can particularly benefit from these unlimited data plans. This is because these regions are treated as single units, saving you more money and giving you much less hassle.

For example, an eSIM plan for Europe provides unlimited data in up to 35 countries, with the added bonus of phone call availability. Heavy data users who depend on vital apps such as maps, translation, and social media will be overjoyed with the advantages a Holafly eSIM can provide.

Furthermore, if you encounter any issues, no matter where you are, Holafly has a dedicated multilingual customer support team available 24/7.

Enhancing Connectivity: The Virtual SIM Card Experience on iPhone

There are undeniable advantages to iPhone users ditching their old physical SIM cards and making the switch to the eSIM wave. The most noticeable is the convenience and flexibility that extend beyond local use, transforming how travelers stay connected worldwide.

Arriving with a connected smartphone is a considerable advantage when you first get to an unfamiliar destination. You no longer have to navigate language barriers or trust information from unreliable airport services. You can access transport information and apps or even just look up the best place to get a coffee before navigating the transport system like a local.

The eSIM for iPhone seamlessly integrates security, eco-sustainability, and user-friendly experiences. Eliminating physical SIM cards enhances security through tamper-resistant activation processes and contributes to environmental conservation by reducing plastic waste.

This versatility extends beyond local use, providing a convenient and secure solution for travelers who can now access unlimited data plans worldwide with just a few taps on the Holafly eSIM app.

So, ride the wave of the new eSIM era, ensuring seamless worldwide connectivity without any hassles, and take full advantage of the features Apple has launched for your convenience.

This is a sponsored post. The product choices and opinions expressed in this article are from the sponsor and do not reflect the editorial direction of MakeUseOf or its staff.

Why You Shouldn’t Opt In to Facebook’s Link History Feature

Key Takeaways

  • Enabling Link History in the Facebook app will allow Meta to track your data.
  • You can turn the Link History feature on or off from the Settings & Privacy section of the Facebook app.


In January 2024, Meta introduced a Link History feature in the Facebook mobile app. This allows you to view a list of all the websites you’ve visited from the social network. However, enabling Link History comes at the cost of your privacy.


Every time you tap on a link within the Facebook app, which leads you to a webpage, the app logs it and stores it for 30 days, enabling you to revisit it later if you need to. Link History has its own dedicated section in the app, similar to how you can view your browsing history in web browsers like Chrome.

The feature isn’t enabled by default, and at the time of writing, you need to opt in to take advantage of it. But if you do opt in, you should be aware of what that means.

Enabling Link History allows Meta to track the sites you visited through the Facebook app in the last 30 days. And by doing so, it’s able to deliver targeted ads across its apps and services, including Instagram and Threads (both owned by Meta).

On the bright side, links visited from the Messenger app and the web version of Facebook aren’t logged, even with the feature enabled.

As mentioned earlier, the Link History feature is only available in the Facebook app for iOS and Android. So, you’ll need to use the app to check if you’ve opted in by following these simple steps:

  1. Launch the Facebook app and log in with your Facebook account details.
  2. Tap the three lines in the bottom-right corner (iOS), or upper-right corner (Android) to head to the Menu section of the app.
  3. Expand the Settings & privacy option and tap Link history.

If you see a screen prompting you to Allow link history, you haven’t opted in yet. However, if you see a list of links you’ve visited before, you have already opted into use Facebook’s Link History feature.

If you have opted into Link History and now want out, unfortunately, you won’t find the option to toggle it off in the same Link History menu. Instead, you’ll need to access Facebook’s browser settings by following these steps:

  1. Expand the Settings & Privacy category in the Menu section of the Facebook app.
  2. Tap Settings, then scroll down and tap Browser under the Preferences category.
  3. Under the Browsing data section, you’ll see a toggle for Allow link history. Toggle it off.
  4. When prompted for confirmation, tap Don’t allow.

In the same menu, you’ll also find the option to clear your link history if you don’t want to disable it altogether.

Meta is notorious for tracking its users, so if you don’t want the company to track the websites you visit while using Facebook, it’s best not to enable Link History. However, if you’d rather see ads relevant to you than completely unrelated ones that are of no value, then you should opt in. The key is knowing what the feature does and what implications that has for your privacy and security.

What Are Rapid Security Response Updates? (and How to Enable Them)

Key Takeaways

  • Rapid Security Response updates deliver critical security patches between typical iOS updates.
  • By default, a Rapid Security Response update will be installed automatically on your Apple device.
  • You can choose to remove a Rapid Security Response update after its installation, but it’s safer to keep it to protect your device.


Usually, you receive critical security fixes whenever you update your Apple device. However, this has changed slightly with the release of Rapid Security Response updates. Here, we’ll discuss how these differ from regular OS updates and show you how to enable them.


What Are Rapid Security Response Updates on Apple Devices?

A Rapid Security Response update is a minor security update Apple rolls out to patch vulnerabilities that crop up between standard iOS or macOS updates. Consider them as hotfixes to rectify security flaws. Apple denotes these updates with the iOS version followed by a letter in parentheses—for instance, iOS 16.5.1 (a).

How do they differ from regular iOS updates? These updates have a smaller file size, will install automatically, and most won’t require a device restart. This makes it even easier for Apple users to secure their devices without having to download a large update file.

How to Enable and Disable Rapid Security Response Updates

Rapid Security Response updates are available on all Apple devices running at least iOS/iPadOS 16.4.1 or macOS 13.3.1. By default, these updates are enabled on your device. If your device isn’t getting them, you can check if the feature is enabled.

On an iPhone or iPad, go to Settings > General > Software Update > Automatic Updates. Ensure that the Security Response & System Files option is toggled on.

On a Mac, go to System Settings > General > Software Update. Click the Info (i) button next to Automatic updates. Check that the Install Security Responses and system files option is toggled on.

Enable Rapid Security Response Updates from macOS System Settings

If the latest Rapid Security Response update is yet to be installed on your device for any reason, you can install it like how you usually update your iPhone or Mac. On iPhone, go to Settings > General > Software Update; if an update is available, tap Download and Install.

On a Mac, go to System Settings > General > Software Update and select Update Now if a new version is available.

To disable Rapid Security Response updates on any device, follow the same process above but set the Security Response & System Files setting off instead.

Is It Safe to Remove a Rapid Security Response Update?

You can remove Rapid Security Response updates if you suspect they’re causing issues right after installation. However, unless the effect is severe, it’s safer to keep the updates as they contain essential security fixes for your device.

For example, if you feel that your iPhone’s battery is draining faster after the update, it’s worth reviewing your usage habits and applying tips to make sure you’re maintaining your iPhone’s battery health properly first.

Still, if you wish to proceed and remove the Rapid Security Response update on your iPhone or iPad, go to Settings > General > About > iOS Version > Remove Security Response.

On a Mac, go to System Settings > General > About. Click on the Info (i) button next to the macOS version. Then, under the Last Security Response section, click Remove and Restart > Remove Response & Restart.

About page of System Settings

After removing the update, you can install it later again or wait for the next standard software update from Apple, which will then automatically include the Rapid Security Response update as well.

Rapid Security Response updates are just one of the security features from Apple that keep your devices safe. By having the latest security patches, you can better protect your device and personal data.

How Google’s Third-Party Cookie Phase-Out Will Improve Browsing

Key Takeaways

  • Google is phasing out third-party cookies to give users more control over their online advertising profiles and to protect their privacy.
  • The Google Privacy Sandbox replaces third-party cookies with a model that allows targeted advertising while maintaining better privacy.
  • Removing third-party cookies may lead to changes in targeted advertising, data collection, and disjointed browsing experiences.


The end of third-party cookies, as we know them, has finally arrived. At least, it has for Google Chrome users, as other browsers like Firefox and Safari have already made the switch and block third-party cookies by default.

But as the world’s most popular browser, Google Chrome finally ditching third-party cookies will significantly affect the overall browsing experience, as most websites scramble to comply with the new cookie rules.


Why Google Is Phasing Out Third-Party Cookies

Ever wondered how websites and adverts track you around the internet? You can thank third-party cookies, the small files that enable data collection and tracking across websites, social media, and anywhere else you might venture online. Over time, third-party cookies can build an impressive (or disturbing!) picture of you as a person: health, interests, job, family, and so on.

Understandably, many folks don’t want this information to be so easily discernible and readily available to marketers, social media companies, etc.

According to Google’s The Keyword blog, starting on January 4, 2024, Google will begin phasing out third-party cookies to allow users better control of their online profile using Google’s Privacy Sandbox, allowing individuals to manage their interests and restrict certain topics and content from appearing. The first feature, Tracking Protection, stops cross-site tracking by restricting website third-party cookie access. It’s a seismic shift for the advertising industry after many years of discussion and could affect the browsing habits of most people.

However, third-party cookies aren’t disappearing for every Chrome user immediately. As per the Google Developers portal, “Chrome plans to disable third-party cookies for 1% of users from January 4, 2024, to facilitate testing.” The initial phase is to gauge and test how the new system works, and just one percent of Chrome’s more than three billion users is still significant.

What Is Google’s Privacy Sandbox?

Google’s Privacy Sandbox aims to boost the privacy of internet users while attempting to protect advertisers’ income. It’s clearly a difficult line to walk, given most of the internet is funded by advertising or tracking. The core function of the Privacy Sandbox is the phase-out of third-party cookies, replacing them with a model based on the FLoC (Federated Learning of Cohorts), designed to allow targeted advertising while delivering better privacy.

  • User Browsing Data Stays On-Device: Unlike traditional methods where user data is sent to external servers, FLoC processes the user’s browsing history locally, on their own device. This ensures that personal browsing data is not shared with Google or advertisers.
  • Creation of Cohorts: FLoC uses algorithms to analyze the browsing history on the user’s device and, based on this analysis, groups the user into a “cohort” with thousands of other users. Each cohort consists of users who have shown similar browsing patterns or interests. The cohorts are also dynamic and periodically updated.
  • Sharing Cohort IDs, Not Individual Data: Instead of sharing individual browsing data, only the cohort ID—a unique identifier for each group of users with similar interests—is shared with websites and advertisers. This way, advertisers can target ads based on the cohort’s overall interests without knowing the individual browsing history of the users in that cohort.
  • Privacy Protection: Techniques like differential privacy ensure that cohorts cannot be used to identify individual users, which is crucial for preventing fingerprinting, a common technique used to track users across websites.

Whether the Privacy Sandbox works properly or not is part of why Google is moving just one percent of users to the new process initially. The Google Privacy Sandbox is also available on Android.

How Removing Third-Party Cookies Will Change Your Browsing Experience

There are a few different ways the phase-out of third-party cookies will alter your browsing experience.

One train of thought is that without the ability to closely track users, some advertisers may turn to more underhand or opaque tracking methods to make up the difference. In addition, there will be changes to targeted advertising, perhaps bringing more first-party data collection processes to a wider range of websites.

For example, you might have to create (yet more!) accounts to use a website to keep the data tracking in-house. During the transition phase, there may also be some disjointed experiences; where everything was seamless, the loss of third-party cookies could see websites and services adopt different data collection and advertising approaches, changing how websites are viewed, how services run, and so on.

Advertising revenue is another issue. Although many smaller websites rely on other income streams and typically don’t use many third-party cookies, an overall reduction in advertising revenue could see some sites fold.

However, most of these changes are speculation. Firefox and Safari have previously phased out third-party cookies, and websites still work in those browsers, though discounting the effect Chrome’s number of users will have on any changes would be shortsighted.

Still, the overall effect of removing third-party cookies should be a more private internet, which can only be a good move for regular folks.

As said, the initial third-party cookie phase-out in Chrome begins on January 4, 2024, but only applies to a tiny fraction of Chrome’s total users. If the initial testing phase is successful, Google will flip the switch and move all other users to the system at an undecided date in 2024.

What Is Google’s Imagen AI? How to Access Imagen 2

Key Takeaways

  • Imagen 2 is Google’s AI text-to-image diffusion model that can create artistic and photorealistic images.
  • Imagen 2 offers features like inpainting, outpainting, and the ability to use a reference image.
  • Individuals can try Imagen 2 by signing up for a free Google Cloud account and accessing it through the Vertex AI suite.


Google has its own text-to-image AI model called Imagen, with the current version being Imagen 2. It’s well worth checking out, and even if you aren’t a developer or a business, you can try Imagen 2 out for free using Google Cloud. Here’s what you need to know.


What Is Google’s Imagen 2?

Imagen 2 is an AI text-to-image diffusion model developed by Google and released on December 13, 2023. It adds to the growing list of AI text-to-image generators, such as DALL-E 2, Midjourney, and Stable Diffusion, all of which can instantly create amazing images from a text description.

Imagen 2 has made a huge leap forward from its predecessor (Imagen), and provides a fully functioning AI image generator that can create artistic and photorealistic outputs like any of its competitors. It’s hosted under Google’s Vertex AI suite of tools, which you can access with a Google Cloud account.

By comparison, the first version of Imagen, available from May 2022, had a limited beta release through an app called AI Test Kitchen. Users could only play around with generating cityscapes or monster characters that looked like something out of a Pixar animated film.

Imagen 2 boasts features such as inpainting and outpainting, which gives you the ability to add content to a generated image or extend the image beyond the borders. This is a feature that DALL-E 2 also has, but what sets Imagen apart is the option to use a reference image when creating an image.

If you’re seeking a text-to-image generator that can tackle the problem of AI-generated hands, it’s worth exploring Imagen 2’s capabilities. The results are still not perfect, but it is an area that Google has paid particular attention to when developing the tool.

How to Try Imagen 2 for Yourself

Imagen 2 is squarely aimed at developers and businesses, but if you’re an individual, you can still try it by signing up for a free Google Cloud account. Click the Start Free button in the top right corner of the page, then follow the instructions to set up a billing account.

You will need to add a credit card for billing, but you shouldn’t need to worry about future charges. Google clearly states that you will not be billed automatically after the free trial ends.

Once you’ve created an account, click the Console button on the Google Cloud home page, then click the hamburger menu (three horizontal lines) in the top-left corner. In the menu, click on Vertex AI Vision. Once on this page, click Studio from the left-hand panel or click the Open Studio button on the right.

How Did Google Train the Imagen AI Model?

Behind the scenes, Imagen was trained using the publicly available dataset called LAION-400M, in combination with internal datasets. Not all AI companies choose to make this information public; one example being DALL-E 2.

The use of datasets has also become a controversial topic, due in part to its practice of scraping millions of images from the internet. Artists in particular have criticized AI companies for not gaining consent from the owner of an image or artwork before using it to train its AI models.

If you’re concerned about your images, you can find out if your image was used to train an AI model and opt out.

Imagen 2 Is Fun to Play Around With

It wasn’t going to be long before heavyweight tech companies like Google started experimenting with AI models. Imagen 2 is yet another text-to-image AI generator that will no doubt be a lot of fun to play with.

Create a free Google Cloud account to give it a go, and make sure to register your interest and download Google’s AI Test Kitchen app to see more projects in development before anyone else.

Does Spotify Keep Pausing Randomly? Here’s How to Fix It

Spotify is a fantastic streaming service. That is, until it stops working properly, like pausing randomly when you’re trying to listen to your favorite songs. Spotify pausing randomly is immensely frustrating, but there are a few ways you can fix this Spotify error.


1. Check No One Is Attempting to Use Your Spotify Account

First up is the easiest check, and the Spotify pause issue that was tripping me up. If you’ve shared your account information or your Spotify is logged into another computer, and someone is using it, your account may pause as they attempt to use it.

If two people attempt to use the same Spotify account simultaneously, they’ll effectively cancel each other out, with Spotify pauses the main outcome.

2. Update Spotify to the Latest Version

If you’re sure you’re the only person using your Spotify account, Spotify pausing randomly could be a sign you need to update Spotify.

How to Update Spotify on Windows or macOS

Updating Spotify’s desktop app on Windows or macOS is a simple process. Open Spotify, then head to the profile icon in the top right corner and select Update Spotify now.

If you don’t see it, Spotify is already up-to-date.

How to Update Spotify on Android or iOS

Now, most apps on iOS and Android update automatically. You’re typically using the latest version of any app, but sometimes you need to update Spotify manually.

On Android

  1. Open the Play Store.
  2. Press the account icon in the top right corner.
  3. Select Manage Apps & Device > Manage > Updates available.
  4. Download and install the Spotify app update if available.

On iOS

  1. Open the App Store and tap your Apple ID icon in the top-right corner.
  2. Scroll to the list of Upcoming Automatic Updates.
  3. If you see Spotify here, it has a pending update. Press Update to begin the update process.

In both cases, the update process only takes a moment.

3. Delete the Spotify Cache to Remove Corrupt Data

The Spotify cache stores data relating to Spotify’s downloaded files, such as thumbnails of album covers, podcast logos, and so on. Unfortunately, the Spotify cache can become corrupted, and deleting it is the only way to fix the corrupt data.

If Spotify keeps pausing, it could be that your Spotify cache is corrupt, so you’ll have to delete it and start again.

Note that deleting the Spotify cache won’t delete your downloaded tracks or playlists. Spotify changed this in 2018, so you don’t have to redownload all your offline music to fix a corrupted cache error.

How to Delete the Spotify Cache on Windows and macOS

spotify delete cache setting windows app

The process is very similar on macOS and Windows:

  1. Open Spotify, head to the profile icon in the top right corner, and select Settings.
  2. Scroll down to the Storage section.
  3. Next to Cache, select Clear cache.

Confirm that you want to delete the Spotify cache, then wait for the process to complete. You may notice Spotify behaving a little slower than before; it will now repopulate the cache with frequently accessed images and data, which can take some time.

How to Delete the Spotify Cache on Android and iOS

Deleting the Spotify cache on Android and iOS is a similarly simple process. In both cases:

  1. Open the Spotify app.
  2. On the Spotify homepage, tap your name icon in the top-left.
  3. Open the Settings and privacy menu, then scroll down to Storage.
  4. Select Clear cache.

Again, confirm you want to delete the Spotify cache and let the process complete.

4. Check Your Internet Connection

It’s always worth checking your internet connection to make sure you can stream Spotify without any issues.

While Spotify’s streaming requirements aren’t particularly high (Spotify should work with as little as 0.32Mbps), Spotify may pause randomly if your internet connection isn’t up to scratch. Note that when I say internet connection, I’m considering wired Ethernet, Wi-Fi, and 4G/5G mobile connections.

If your Ethernet or Wi-Fi connection isn’t working properly, you might consider resetting or rebooting your router. Alternatively, on a smartphone, you may consider toggling airplane mode on and off to reset your network connection.

5. Check Bluetooth Connections to Your Devices

Similar to checking your internet connection, you should also check your Bluetooth connection to your headphones or earbuds.

It could be that your Bluetooth connection needs restarting or resetting, as a poor connection can cause issues with Spotify. There are ways to fix Bluetooth issues on Windows and fix Bluetooth issues on macOS, while you can also find fixes for Bluetooth problems on Android and fixes for Bluetooth issues on iOS.

It’s also worth checking if your Bluetooth headphones have enough battery. If they’re running low on charge, they might pause Spotify to preserve their final charge for other processes, such as phone calls and notifications.

6. Check App Permissions on Android and iOS

At times, Spotify will pause when you change focus on your smartphone. If Spotify pauses when you change to a different app, it could be that the app’s background permission is broken. That means that when you switch, Spotify doesn’t have permission to keep updating itself and running, which will cause your music to stop playing.

We’ve covered how to turn background app permissions on and off for Android and iOS in detail, but in brief:

On Android

  1. Head to Settings > Apps > All apps
  2. Scroll to the Spotify app, then select Mobile data & Wi-Fi
  3. Ensure the Background data toggle is turned on.
  4. Now, press the back button to return to the Spotify app permissions page.
  5. Select Battery (which may also appear as Battery usage).
  6. Ensure Spotify’s battery usage is set to Optimized or Unrestricted.

If Spotify cannot use the battery in the background, it will force the app to stop working when you change focus. Please note that some steps may work slightly differently across different Android versions, as manufacturers ship individual interfaces, which means some settings may be found elsewhere.

On iOS

  1. Head to Settings > General > Background App Refresh.
  2. From here, you’ll see a list of all apps installed on your iOS device.
  3. Scroll down to find Spotify and make sure the slider is turned on.

Like Android, if iOS’s background refresh is restricted, Spotify will fail to work when you change to another app. Thankfully, with iOS, the experience is uniform across all versions, making it easy to determine if this is the issue.

Another fix I’ve read about but haven’t replicated concerns apps taking control of the audio on a device. A post on the True Spotify subreddit details this issue, explaining that linking Discord to Spotify could cause audio issues, which is another potential way to stop Spotify from randomly pausing.

The Best microSD Cards of 2024

Navigating the maze of microSD card brands and specs can take time and effort. If you’re shooting in high-resolution, like 4K or 8K video, choosing one with fast read and write speeds is essential. For simply storing documents, you could settle for a more affordable option.


A SanDisk Extreme Pro UHS-I microSDXC plus adapter
SanDisk

With its reasonable price tag, you’d be forgiven for thinking that the SanDisk Extreme Pro microSDXC doesn’t live up to its name. However, with advertised read and write speeds of up to 200 MB/s and 140 MB/s, it’s plenty fast for the price point.

Additionally, it has a V30 video-speed classification, meaning you can record in 4K at lower frame rates. It can handle Full HD slow-motion videos with high frame rates or high-quality burst shooting without any trouble. It’s ideal for action cameras and drones, and you won’t need to feel too concerned about it on your grand adventures, as this card is water-, x-ray-, shock-, and temperature-proof.


A SanDisk Extreme Pro UHS-I microSDXC card

SanDisk Extreme Pro UHS-I microSDXC

Best Overall

In terms of checking all the boxes, the SanDisk Extreme Pro microSDXC hits a home run. It’s affordable, has decent read and write speeds, and is a durable little addition to your camera, drone, or smartphone. 
 

Pros

  • Fast A2 app-performance
  • Quickflow tech for fast transfers to your computer
  • Very durable
Cons

  • Need a faster video class for resolutions higher than 4K


A Samsung Evo Select UHS-I microSDXC card held in hand next to a smartphone.
Samsung

If you need a basic, no-frills microSD card, the Samsung Evo Select will please with its performance to price value. While it may not be suitable for high-frame 4K recording, its V10 video classification means you can record in Full HD without trouble.

The Evo Select is surprisingly durable, protecting against various hazards, including water, shocks, and X-rays. This 64GB card is U1-rated and can read data at speeds of up to 130 MB/s. There are also 128GB, 256GB, and 512GB cards if you need a larger storage capacity, all at bargain prices.


A Samsung Evo Select UHS-I microSDXC card

Samsung Evo Select UHS-I microSDXC

Best Budget

This UHS-I microSDXC card from Samsung will prove to be a bargain for anyone seeking a durable and reliable card at a budget-friendly price. While it’s not sufficient for professionals with powerful devices, it’s fast enough for most and is ideal for recording Full HD video and even 4K at lower frame rates. 
 

Pros

  • SD adapter included
  • 10-year warranty
  • IPX7 rating
  • Affordable
Cons

  • Not the fastest read and write speeds


A Delkin Devices Power UHS-II microSDXC card being inserted into the microSD card slot of a GoPro Hero.
Delkin

The Delkin Devices Power microSD card is a future-proof option for those who are shooting in 4K, 8K, and 360 degrees. It boasts a V90 video speed class and can achieve read speeds of up to 300MB/s and write speeds of up to 250MB/s, making it one of the fastest microSD cards available.

The Delkin Devices Power’s minimum sustained write speed is 90MB/s, suitable for simultaneous recording, including images, video streams, and more.

If you need to download your images from your device or camera quickly, this card will help you deliver efficient performance to your computer. For added protection, this microSD card is water-resistant, shockproof, and x-ray-proof.


A Delkin Devices Power UHS-II microSDXC card

Delkin Devices Power UHS-II microSDXC

Fastest MicroSD Card

If you need an ultra-speedy, future-proof microSD card, the Delkin Devices 64GB Power offers just that. With its V90 video speed class, you can shoot 8K videos without worry, even at high frame rates. This is one of the best cards for professionals using high-end equipment.  
 

Pros

  • Very fast read and write speeds
  • Minimum sustained write speed of 90MB/s
  • Durable
  • Suitable for 8K video


A dash cam capture using the Samsung Pro Endurance microSDXC card
Samsung

If you need a reliable, waterproof microSD card for outdoor use with devices like a dashcam or security camera, the Samsung Pro Endurance is a good choice. Not only is it built to last, but it is also very affordable and comes with storage capacities from 32GB up to 256GB.

With its IPX7 rating and extreme temperature protection, you can depend on it to record continuous footage throughout a harsh winter. The read and write speeds may not be the fastest you can find, but they are sufficient for the card’s purpose.

If you need more versatility, the higher-capacity 128GB and 256GB cards feature U3 and V30 speed classifications, allowing for 4K video shooting at lower frame rates.


A Samsung Pro Endurance microSDXC card

Samsung Pro Endurance microSDXC

Best Waterproof MicroSD Card

The Samsung Pro Endurance is an affordable choice if you seek a reliable microSD card that can stand up to the elements. It’s perfect for outdoor environments and specifically designed for continuous use with security,  dash, and body cams.
 

Pros

  • Higher capacity cards can handle 4K at high frame rates
  • Engineered for longevity
  • Includes SD adapter
  • Temperature proof down to -13 degrees Fahrenheit
  • Water-, temperature-, drop-, magnet-, wearout-, and X-ray-proof
Cons

  • Slow read and write speeds


A Lexar Play 1TB microSDXC UHS-I being inserted into a microSD card slot
Lexar

If storage is your primary concern, the Lexar Play microSD card has capacities all the way up to a whopping 1TB. However, that’s not all it offers. You also get fast read and write speeds of up to 160/100 MB/s, an A2-class app performance for fast app loading, and a V30 video-speed classification for 4K recording at lower frame rates.

Lexar markets this microSD more toward the portable gaming community, particularly the Nintendo Switch. However, it’s a suitable card for most consumer applications.

The Lexar Play is also available with smaller storage sizes, with options starting from 256GB with comparable read and write speeds. The 128GB card offers excellent value, but its all-around performance is slower.


A Lexar Play 1TB microSDXC UHS-I card

Lexar Play 1TB microSDXC UHS-I

Best 1TB MicroSD Card

$70 $130 Save
$60

The Lexar Play microSD card offers 1TB of storage to users who need it. With decent read and write speeds and fast app loading, it’s an excellent microSD suitable for most occasions. Its V30 video speed class means you can shoot in 4K, and there are various smaller sizes if 1TB is excessive for your needs.

Pros

  • Large storage capacity
  • Decent read/write speeds
  • Loads apps fast
Cons

  • Pricier than some 1TB competitors

FAQ

Q: What do microSD cards do?

The main function of a microSD card is to store digital data, such as photos, videos, music, apps, games, and documents, from small devices like smartphones.

However, they aren’t designed for archiving your data for life and should be thought of more as a tool for transferring files from small to larger devices.

Q: What is the difference between an SD card and a microSD card?

The difference is in the size. A microSD card is basically a miniaturized version of an SD card. An SD card is roughly the size of a postage stamp, while a microSD is around half that size. They both serve the primary function of storing digital data, and both come with various transfer speeds and storage capacities.

MicroSD cards tend to be slightly cheaper than SD cards with the same storage capacity. They are more commonly found in small devices like smartphones and action cameras.

However, microSD cards are usually limited to a 1TB storage capacity. So, devices like high-end DSLR cameras and professional drones will more likely have an SD card slot. But you can still use a microSD card with these devices if you use an adapter, but not vice-versa.

Q: How long does a microSD card last?

MicroSD cards are designed to last up to 10 years, but there are several factors that can shorten this lifespan.

The most common is overuse. Frequently writing and deleting data promotes wear and tear on the memory cells. Other factors, such as exposure to extreme temperatures or magnetic fields, can also affect the card’s longevity.

If you primarily use your card for storage, it will likely last longer than if you were to use the same card for continuously overwriting data. Frequent users should replace their microSD every few years, and it is important to regularly back up your data to avoid permanent loss.

Q: How important are the read and write speeds on my microSD card?

If you only need the microSD card for storage, then a basic card with slower read and write speeds is sufficient.

However, if you want to transfer large files quickly or take photos and videos with high resolutions, especially 4K or higher, you will benefit significantly from a microSD card with faster read and write speeds.

If you often use burst shooting when capturing action sequences, it’s beneficial to use a card with a minimum rating of UHS-II to avoid lag and ensure smooth playback. If you store apps and games on your card, you can enjoy a much better performance on a card as fast as this, too.

Q: Does a 2TB microSD card exist?

No, 2TB microSD cards are not yet commercially available. However, keep an eye out because the boundaries of flash memory are constantly being pushed. In fact, the Japanese company Kioxia did announce a 2TB prototype microSD card in late 2022, while there are a small number of cards with storage capacities of 1.5TB, such as the SanDisk 1.5TB Ultra microSDXC.

How to Change Your TikTok FYP to Fit Your Preferences

Key Takeaways

  • Reset your TikTok FYP to start from scratch and refine your content preferences.
  • Follow accounts you like to see more of their content and improve the recommendations you receive.
  • Like, share, and comment on videos you enjoy to signal your preferences to the TikTok algorithm.


TikTok has a reputation for showing you exactly what you want to see, which can keep you scrolling for hours. But what if your feed isn’t showing you the content you want to see? Here are some tips to change your TikTok FYP.


1. Reset Your TikTok FYP

If your TikTok For You Page (FYP) is completely irrelevant to your interests, you can reset it so that the algorithm starts from scratch.

To reset your TikTok FYP, follow these steps:

  1. Open TikTok and tap on the Profile icon.
  2. Tap the three-line icon in the top right of the app and select Settings & privacy.
  3. Scroll down to Content preferences and tap it. On the next page, select Refresh your For You feed.
  4. On the next page, select Continue and then Refresh.

You can opt to select a reason why you refreshed your feed and then choose Submit.

Once this process is completed, you will need to interact with the right content to refine your preferences. The rest of these tips will relate to improving the content the platform recommends to you.

2. Follow TikTok Accounts You Like

If you don’t already, follow accounts on TikTok that you find interesting. This will ensure you keep seeing those creators on your FYP, and it will also help the app recommend similar content.

To follow an account, you will need to tap on the account name while watching a video and then select the Follow button on the profile page.

You can also prune your following list if you think that the accounts you follow are resulting in irrelevant content.

To check your following list, go to your Profile tab and select the number with Following under it. You can unfollow an account by selecting the Following button next to an account to unfollow them.

3. Watch and Re-Watch Videos You Like on TikTok

According to TikTok’s Support website, “the time spent watching a specific video is generally weighted more heavily than other factors”.

So when the app recognizes that you’ve watched something all the way through, it understands that you most likely enjoyed it. An even better way to signal your enjoyment is to watch the same video several times.

4. Select “Not Interested” on TikTok Videos You Don’t Like

What happens if you watch something all the way through, only to find out it was clickbait? Just because you watch something until the end, doesn’t mean you have to resign yourself to more hours of the same content. You can tell the app that you didn’t like this and avoid similar trends and sounds in the future.

To signal to TikTok that you are not interested in a particular kind of post, long-press the video until a pop-up appears. Then press the broken heart icon that says Not interested. The same button also appears if you press the Share button.

If you want to go a step further and completely get rid of results from a certain creator, you can block an account on TikTok.

5. Like and Share the TikTok Content You Enjoy

Another great way to signal to the platform that you like a piece of content is to use the Like button on the right side of the screen. Every video that you like will enter a special library in your profile for later reference. You can choose to either keep this library private or make it public.

You can find your liked videos on TikTok by going to your profile and tapping the heart icon on the right. This will show you all the videos you’ve liked on TikTok.

The Share button is a natural companion of the Like button. If you enjoy something enough, you may want to send it to your favorite WhatsApp group or add it to your Instagram stories. You can do that with the Share button on the right of the screen.

If you really like a certain post, you can add it to your TikTok favorites. This lets you come back to the video later if you want to view it or share it again. You can add videos, sounds, effects, hashtags, and questions to your Favorites library, which appears on your profile, next to the Edit Profile button.

This lets you find and manage your TikTok favorites for easy referencing.

TikTok takes engagement into account to help build better recommendations, which is why comments play a key role. You might have noticed that many people comment with lines like “commenting to stay on this side of TikTok”.

If you want to see more of the same content, make sure to interact with it through comments.

Sometimes, even if you try to signal to TikTok that you’re not interested in a certain type of content, the app continues to show you the same type of videos. This is especially true when a certain hashtag or trend has gone viral.

One way to immediately block this type of content is to filter out certain video keywords.

You can do this by using the following steps:

  1. Open your TikTok profile and click the three-line icon at the top of your screen.
  2. Select Settings and privacy from the popup menu.
  3. Scroll down and select Content preferences and then Filter video keywords.
  4. Tap the Add keyword button and type in the word you want to filter in the Enter a keyword field. You can also select if you want to filter it from your For You or Following feeds.
  5. When you’re done, tap Save.

You can only filter a single word or hashtag at a time, so you may have to do this a few times to cover the different variations of keywords.

By following these tips, you will be able to get more content that aligns with your interests. The more you use the app and give feedback on recommended content, the better the TikTok algorithm will cater to your tastes.

How to Read Instagram Direct Messages Without Triggering Read Receipts

Although Instagram doesn’t currently have a built-in feature to turn off read receipts, there are a few workarounds to reading Instagram Direct Messages without the pesky “seen” label.


1. Restrict and Unrestrict the Sender’s Account

If you’ve received a message that you’d like to read without the sender knowing, you can enable restrict mode on Instagram temporarily and unrestrict them once you’ve read the message.

To restrict an account, go to their profile and tap the three horizontal dots located in the top right corner of the screen. Tap Restrict from the menu that appears.

Now, any new messages from the restricted account will appear in the Requests folder, and the pesky Seen label will no longer show up when you open the chat. Once you’ve read the message, follow the same steps as above, but this time, choose Unrestrict from the menu that appears.

2. Go Offline Before Opening the Message and Then Log Out

Another straightforward trick to reading Instagram Direct messages without setting off read receipts is to go offline before you open it.

To turn off Wi-Fi or cellular data on your iOS device, swipe down from the top-right corner of the screen to open the Control Center. Depending on what you’re using, tap the Wi-Fi and cellular data icons.

Similarly, on an Android device, swipe down from the top of the screen to access the notifications panel and tap the Wi-Fi and cellular data icons. It’s worth mentioning here that this method will only work if you disable Wi-Fi or cellular data after you’ve received the message you’re attempting to read.

After you’ve disabled your internet connection, simply launch Instagram and read the message.

One of the most crucial steps of this method is logging out of your Instagram account once you’ve read the message. You can do so by heading to your Instagram profile by tapping your profile picture in the bottom right corner of the screen. Tap the three-line icon in the top right corner of your screen and go to Settings and privacy > Log out.

Without doing this, Instagram may send the read receipt as soon as you restore your internet connection.

3. Read the Message From Your Notification Previews

A foolproof way to read an Instagram Direct Message without triggering read receipts is through notification previews. Before you tweak your device’s notification settings, it’s important to adjust Instagram’s notification settings and ensure you have the right settings enabled.

To do so, tap the three-lined icon on Instagram and tap Settings and privacy. Tap Notifications under the How you use Instagram header and then choose Messages. Finally, select On under the Messages from individual and group chats header.

To enable notification previews on an iOS device, go to Settings > Notifications and tap Show Previews. You can now choose between two options: Always or When Unlocked.

It’s worth mentioning that you should choose the first option for extra privacy. Otherwise, anyone who happens to glance at your device, even when it’s locked, could easily read your messages. If you’d like the notifications to appear on your lock screen without displaying any content unless you unlock it, choose the second option.

Now, keep scrolling until you find Instagram under Notification Style and toggle on the Allow Notifications switch.

To enable notification previews on an Android device, head to your device’s Settings and tap Apps. Keep scrolling and choose Instagram from the list of apps. Tap Notifications and switch the toggle on for Allow notifications. Depending on your preference, tap Lock screen or Pop-up.

Unless the message is exceptionally long, you should be able to read it without the sender knowing, since you don’t need to open the Instagram app. Just be careful not to accidentally tap on the message while reading it.

These methods will help you read messages without worrying about read receipts giving you away. Unfortunately, you will have to rely on workarounds until Instagram launches an official way to turn off read receipts.

How to Reverse a Video on Your iPhone

Want to reverse a video clip to present a flashback effect, create engaging visuals to sync with the music, or “undo” a handcrafted masterpiece to show how it was meticulously put together? Read on to learn how to reverse a video on your iPhone.


How to Reverse iPhone Videos Using CapCut

iOS doesn’t offer a built-in method to reverse a video on your iPhone (yet), so you’ll need to use a third-party app like CapCut. There are plenty of video editing apps for iPhone, but CapCut makes it so easy to reverse any video on your device. Use the link below to install the app and follow our instructions:

Download: CapCut (Free, subscription available)

  1. Launch the app and go to the Edit tab from the bottom menu.
  2. Tap the blue + New project button.
  3. Browse and select the video you want to reverse. Then tap Add.
  4. Tap Edit (scissor icon) from the bottom toolbar. Scroll horizontally along the list. Find and tap the Reverse effect.

Once the Reverse Applied message pops up, you can be sure that CapCut has successfully reversed your video. Tap the Export icon (an underlined arrow) at the top-right corner to save the reversed video to the Photos app on your iPhone.

Removing the Watermark From Your Reversed Video

You probably noticed that CapCut automatically adds a watermark to the end of your reversed video. Typically, you’d need to rely on free online video watermark removal tools to get rid of that. But CapCut lets you remove its watermark for free.

Before exporting your video, select the black clip in your video timeline. This black clip contains the CapCut watermark. Then, from the bottom toolbar, choose Delete to remove the watermark. You can then export your reversed video using the same steps above.

Besides CapCut, you can edit and reverse videos on similar apps like Splice. Although Apple also has its own video editing app called iMovie, the video reverse tool is only available in the macOS version of the app. So for now, the only way to reverse a video on your iPhone is by using third-party apps.

How to Use Terminal on a Mac: A Beginner’s Guide

Quick Links

Key Takeaways

  • The Terminal utility on a Mac lets you use powerful text-based commands for various tasks such as finding files and customizing settings.
  • Understanding the syntax of Terminal commands and the path of files will help you navigate and interact with your Mac more effectively.
  • Some useful Terminal commands include “find” for searching files, “du” for checking disk usage, “mv” for moving files, “ls” for listing files, “mkdir” for creating folders, and “rm” for deleting files.


While the Mac’s desktop GUI is easy to use and sufficient for most of your everyday needs, the Terminal utility lets you get under the hood and use some powerful text-based commands to accomplish all sorts of tasks.

There are faster ways to find out where that pesky 5GB file is hiding or the path of every file related to that app you thought you deleted. For these jobs and others, the Mac Terminal is your new best friend.


What Is the Terminal?

The Terminal is a utility that allows you to interact with your Mac through the command line. Linux operating systems include similar tools, since both Linux and macOS are Unix-like OSes. While the macOS Terminal formerly used Bash commands, ever since macOS Catalina it has been based on zsh (Z shell). The basic commands we’re using here should work with either, however.

There are various ways to open the Terminal on your Mac. Once you start using it, you can also customize the zsh prompt in the Mac Terminal to your preferences.

There are many more things you can do in the Terminal, too. By installing the Homebrew package manager, you can use it to install new programming languages, software repositories, and more.

General Mac Command Line Tips

First, let’s look at a few basic Terminal facts you should know.

General Syntax

A zsh (or Bash) command typically follows this pattern:

 [Command] [Options] [Input or Path to File or Directory] 

For example, in the command:

 ls -la Downloads 

…to list the contents of the Downloads folder:

  • ls is the command
  • -la is a compound of two individual options: -l (long listing format) and -a (all files and directories)
  • Downloads is the path to the directory (folder)

The Path

Understanding paths will help you understand how macOS actually sees your files. Essentially, the path of a file is the Russian dolls’ nest of folders in which it’s contained, followed by the name of the file itself.

For example, on a Mac, the full path of a file called My Secrets that lives on user John Doe’s Desktop is:

 /Users/jdoe/Desktop/"My Secrets" 

If you are already in that user’s home folder, however—check with the pwd command—you can just use a relative path:

 Desktop/"My Secrets" 

White Space

You must escape white space for the Terminal to process it properly. When zsh sees a space, it interprets it as the end of a command. So if you have a folder with spaces in its name, like Path Test, and you try to list its contents with:

 ls Documents/Path Test 

…you’ll get the error “No such file or directory”. What’s going on here? Well, zsh thinks that you called ls on Documents/Path. When it couldn’t find a file or directory with that name, it stopped.

If you want zsh to recognize the full name of your folder, you can either wrap the name in quotes:

 ls Documents/"Path Test" 

Or you can use a backslash before the space:

 ls Documents/Path Test 

The contents of the Path Test directory will then be listed.

Phil King/MakeUseOf

Sudo

Many of the commands below require administrator-level access. If you’re not currently signed into the administrator account, but you know the administrator’s password, you can place sudo (which stands for “superuser do”) in front of the command to temporarily give it administrator-level privileges.

Terminal Commands to Improve Your Workflow

Now that you know the basics, let’s take a look at some of the handiest Terminal commands. Note that you can pull up full information on these commands, including all their options and examples, by typing:

 man <command name> 

…into the Terminal.

find

Replaces: Spotlight

Why it’s better: It’s faster and searches system folders that Spotlight excludes, or has trouble indexing. Spotlight tends to skip macOS system files unless you tell it not to, and even then can have trouble indexing them. Conversely, the Terminal find command can search for anything, in any place, and will output the full path of what you’re looking for.

The syntax of find consists of four parts. In order, they are:

  1. find
  2. the path of the directory (folder) you want to search (Documents below)
  3. options (the example below has -d (directory depth level) and -name (match the name)
  4. the string to search (the below example has Google Chrome)

You should know that find uses regex (also called regular expressions). Here we’re using the asterisk (*), which acts as a wildcard character. Putting it at the end of the search string means that find will output results that have characters before and after the search term.

It all comes together to look like this:

 find Documents -d 1 -name "p*" 

This finds all files or directories with names starting with a lower-case “p” in the Documents directory (without looking in any of its subdirectories, due to the -d 1 depth level 1 option).

Mac Terminal find command
Phil King/MakeUseOf

du

Replaces: Cmd + I to show info.

Why it’s better: It can show you multiple folders at once, and typically takes less time to load. du stands for “disk usage,” and can quickly tell you the size of a file or folder, or even a list of files within a folder. The best options for du are:

  • -d (depth): When followed by a number, tells du to limit its search to a -d level of depth in the directory where it runs. For example, du -d 1 Documents will only show you the total size of the files and first level of subfolders in your Documents folder.
  • -h (human readable): Shows you the size of your files in K, M, or G, which stands for kilo, mega, or gigabytes.

Mac Terminal window running disk usage command
Phil King/MakeUseOf

mv

Replaces: Point-and-click moving of folders and files.

Why it’s better: It’s faster and requires no navigation. You can quickly move a file or folder into another folder using mv. It works by simply changing the name of the path.

The syntax is:

 mv <old file path> <new file path> 

For example:

 mv /Users/jdoe/Documents/file1.rtf /Users/jdoe/Desktop/file1.rtf 

…will move file1.rtf from the jdoe user’s Documents folder to the Desktop.

ls

Replaces: Cmd + I to show info.

Why it’s better: It’s faster, can show info on multiple files at once, and is highly customizable. ls is an incredibly powerful command for showing you exactly what’s in your folders. It also reveals who’s allowed to see them, if you have any hidden files or folders, and much more.

The best options for ls are:

  • -l (long): Shows the permissions for each file in the folder, the most recent modification time, the file owner, and filename.
  • -a (all): Shows you all the files in a folder, including the hidden files (great for showing the user library in macOS, which is hidden by default).

Here’s what an example output looks like:

Mac-Terminal-ls-list
Phil King/MakeUseOf

mkdir

Replaces: Finder > File > New Folder

Why it’s better: It’s faster, and you can set the name right in the command instead of double-clicking the new folder. Create new folders in an instant with this command.

For example, the command:

 mkdir /Users/jdoe/Desktop/cool_stuff 

…creates a new cool_stuff folder in Desktop.

rm

Replaces: Moving files to the Trash and emptying it.

Why it’s better: It’s faster and good for deleting pesky files that the Trash won’t get rid of. This command will delete, immediately and without prejudice, any file you put in its path. Obviously, use it with extreme caution. Unlike clicking Empty Trash, rm will not ask if you’re sure. It assumes you know what you’re doing.

One thing to note about rm is that by default, it will only delete files, not folders. To delete folders, you must use the -R option, which stands for “recursive”.

For example, the command:

 rm -R /Users/jdoe/Desktop/cool_stuff 

…will delete the cool_stuff folder in Desktop.

Now you know some essential Terminal commands, you can start integrating them into your daily Mac workflow. Once you get comfortable using zsh, you can go beyond simply replacing your everyday tasks and start exploring powers that only the command line can offer.

3 Types of HTML Lists and How to Use Them

Key Takeaways

  • HTML lists are essential for organizing and presenting data on a web page. There are three main types: ordered, unordered, and description lists.
  • Ordered lists use numbers or other characters to order the items. The type attribute allows customization, while start and reversed attributes change the starting position and order.
  • Unordered lists group related items without a specific order. The bullet style can be customized using CSS.


An HTML list is an essential structural element for any group of related data on a web page. Whether you’re creating a menu, organizing items on sale, or trying to present complex data in a more readable form, the following lists will help you get the job done.

There are three main types of HTML lists, each serving a specific structural purpose in web development.


1. Ordered List

The HTML ordered list allows you to group a list of related items in a specific order. To create a new ordered list, you’ll need to use the <ol> tag. The <ol> tag groups, and contains, <li> tags. Each list element (<li> tag) will contain a specific item in the list.

 
<ol>
  <li>Item 1</li>
  <li>Item 2</li>
  <li>Item 3</li>
  <li>Item 4</li>
</ol>

This code renders the following view:

You should note that the ordered list’s default ordering type is numbers, but you can change this using the type attribute. The type attribute gives you the power to decide what element will order your list. You have the option of using the alphabet (uppercase or lowercase), numbers, or Roman numerals (uppercase or lowercase).

 
<ol type="a">
  <li>Item 1</li>
  <li>Item 2</li>
  <li>Item 3</li>
  <li>Item 4</li>
</ol>

Adding the type attribute to the <ol> tag renders the following updated view:

Ordered list type attribute

In addition to the type attribute, there are two other attributes that you can use with the <ol> tag: start and reversed.

The start attribute allows you to start ordering from any position using an integer value. For example, if you add start=”3″ to the <ol> tag, without specifying a type, it will start ordering the list from the number three. If you assign a type=”a” or a type=”I”, it will start ordering from c or III, respectively.

 
<ol type="I" start="3">
  <li>Item 1</li>
  <li>Item 2</li>
  <li>Item 3</li>
  <li>Item 4</li>
</ol>

The code above renders the following view:

Ordered list start attribute

The reversed attribute allows you to reverse the order of the list. It accepts a boolean value, and its default value is false.

 
<ol reversed="true">
  <li>Item 1</li>
  <li>Item 2</li>
  <li>Item 3</li>
  <li>Item 4</li>
</ol>

This code produces the following output in the browser:

Ordered list reversed attribute

2. Unordered List

The unordered list lets you group related items whose order is not significant. By default, a browser uses a bullet point to label each item.

To create a new unordered list, you’ll need to use the <ul> tag as a parent element and the <li> tag for each list item:

 <ul>
  <li>Item 1</li>
  <li>Item 2</li>
  <li>Item 3</li>
  <li>Item 4</li>
</ul>

This code renders the following view:

Unordered list default output

The default bullet style for an unordered list is a disc. In the past, you could use a type attribute to set the bullet style of an unordered list. However, the unordered list type attribute is now a deprecated attribute. The recommended alternative for unordered list styling is the CSS list-style-type property.

 <style>
ul { list-style-type: square; }
</style>

The code above updates the view to the following:

Unordered list square bullets

The CSS list-style-type property lets you use a collection of different bullet styles, including circles, custom images, icons, or symbols. With CSS that changes the layout of list items, you can even use unordered lists to create navigation bars.

Nested Lists

A nested list is a list element that is part of another list. You can create a nested list using a combination of ordered and/or unordered list elements. These structures can represent more complex hierarchies.

 <H3>Chicken Pasta Insturctions</H3>
<ol>
  <li>Boil pasta.</li>
  <li>
   Season chicken breast.
    <ul>
      <li>salt and pepper</li>
      <li>paprika</li>
      <li>garlic powder</li>
      <li>Italian seasoning</li>
    </ul>
  </li>
  <li>Heat olive oil in pot over medium-high heat.</li>
  <li>Add chicken breast to pan and cook for 5 minutes.</li>
  <li>Add heavy cream and parmesan cheese to empty pot.</li>
  <li>Add pasta and slice chicken to cream sauce.</li>
</ol>

This code renders the following view:

Nested list

3. Description List

The description list element allows you to create a list of terms and their associated details. The <dl> tag enables you to create a new description list, which you should use with the <dt> (description term) and <dd> (description details) elements.

 <h3>Popular Laptops</h3>
<dl>
  <dt>MacBook Pro</dt>
  <dd>
    Provides up to 22 hours of battery life,
    has an advanced camera, and a magic keyboard with touch ID.
  </dd>

  <dt>MSI GS76 Stealth</dt>
  <dd>
    A powerful gaming laptop with supercharged graphics and customized keys.
  </dd>
</dl>

The code above renders the following view:

description list

Organize Your Content With the Right HTML List

The HTML list that you choose to use in your web development project should depend on the content that you want to present to your users. For example, if you want to create a sequential list such as the steps for preparing a meal or completing a task, then an ordered list is your best option.

However, if you want to group related information that doesn’t require a series of steps (such as a checklist), then an unordered list would be a more viable option. Furthermore, if you want to create a glossary or a list of frequently asked questions, then a description list is the better choice.

How to Cascade All Open Windows in Windows 11 and 10

Key Takeaways

  • Windows 11 does not have a built-in cascade windows feature like Windows 10 does.
  • Alternatives to organize open windows in Windows 11 include using Snap Layouts or PowerToys.
  • FancyWM is an open source tiling manager that can be used to cascade windows in Windows 11.


Navigating through too many open windows on your PC? One of the easiest ways to sort them out is to have Windows cascade them for you. You can use this feature on Windows 10. But does the function still work on Windows 11, or is there an alternative?


How to Cascade Open Windows in Windows 10

If you constantly have a lot of open Windows as part of your multitasking routine, it may take time to locate a specific window quickly. You can manually go through every open folder or app by pressing Alt + Tab, but there’s a quicker method.

On Windows 10, you can neatly arrange every window to see their title bars. Right-click on any empty space within your taskbar and select Cascade windows. Windows 10 will now rearrange every window that’s not minimized.

To return them to their original locations, right-click the taskbar again and select Undo to cascade all windows. If the option is unavailable on your computer, you’ve probably enabled Tablet mode. Launch the Action Center and click on the Tablet tile to turn it off.

Can You Cascade Open Windows in Windows 11?

We have bad news if you’ve upgraded from Windows 10 to Windows 11 and are looking for the Cascade windows option. Windows 11 has no built-in feature that allows you to cascade all open windows. So what are the alternatives?

You could use Windows 11 Snap Layouts to rearrange your windows. You can even move around minimized windows.

windows 11 snap layouts three windows

Alternatively, you can use PowerToys to make windows more manageable. However, you’ll have to use a different app to replicate the cascade option properly in Windows 11.

How to Cascade Windows on Windows 11

Fancy Wm app in Microsoft Store

In Windows 11, one of the best tools for this job is an open source tiling manager called FancyWM, available free from the Microsoft Store. Launch the Microsoft Store app and search for “fancywm,” or go to the FancyWM Microsoft Store page directly. Once installed, you can use FancyWM to create custom layouts, manage window groups, and take advantage of all your virtual desktops and monitors.

To cascade your windows, hover the cursor over the title bar so that FancyWM will display its floating menu. Then click and drag the Wrap in stack panel button on top of another window. Alternatively, press the Windows key + Shift, then S, to cascade your windows.

How to cascade windows in Windows 11

Cascading all open windows helps you to find what you’re looking for with a glance at your desktop. If you have a dual monitor setup, the windows will cascade on the monitor they are open on. If you still can’t find the window you’re looking for, chances are it’s off-screen.

How to Reset Your iPhone Passcode With Its Old Passcode

You don’t have to erase your iPhone or iPad if you forgot its new passcode—provided you act quickly.

Key Takeaways

  • iOS 17 allows you to temporarily use your old passcode to unlock your device if you forget the new one.
  • Enter the passcode incorrectly five times, select “Forgot Passcode?” and enter the previous passcode to set a new one and unlock your iPhone.


There’s no worse feeling than forgetting your iPhone’s passcode shortly after changing it. Apple understands this, which is why it gives users a brief period to reset a new passcode with the old one to avoid being locked out completely.


Using the Old Passcode to Reset Your iPhone’s Passcode

Before iOS 17, forgetting your iPhone’s passcode meant resetting iOS to its factory state and restoring your data from a backup made before the passcode change. Not only is this an extremely time-consuming process, but you could also lose some of your precious data unless you regularly back up your iPhone or iPad.

Fortunately, since the release of iOS 17, Apple lets you unlock your iPhone or iPad and reset your newly changed passcode using your old passcode.

Your device’s passcode must have been changed within the past 72 hours for you to be able to reset it with the old one.

Assuming you remember your previous passcode, and it hasn’t been 72 hours since you last changed your passcode, here’s what you need to do:

  1. Enter the passcode incorrectly five times until you see the iPhone Unavailable screen.
  2. Tap the Forgot Passcode? option at the bottom-right corner of the screen.
  3. Now, tap Enter Previous Passcode.
  4. On the next page, enter your old passcode. You’ll be prompted to change your passcode immediately. Type in your new passcode and unlock your device.

If you’re confident you won’t forget your newly created passcode or believe that someone else knows your previous passcode, you can choose to expire your previous passcode. To do so, go to Settings > Face ID & Passcode > Expire Previous Passcode Now > Expire Now.

Be aware that doing this means you won’t be able to use your previous passcode to unlock your iPhone or iPad anymore.

While this method allows you to access your device if you forgot your recently changed passcode, it’s of no use once the 72-hour grace period ends. Therefore, we recommend regularly backing up your iPhone or iPad in case you’re stuck in a situation where your only option is to reset your device to its factory settings.

Which One Should You Buy?

Key Takeaways

  • The base model 15-inch MacBook Air is cheaper but starts with less storage compared to the 14-inch M3 MacBook Pro.
  • The 14-inch M3 MacBook Pro has a better display, speakers, and microphones for improved video and audio quality.
  • The 14-inch M3 MacBook Pro outperforms the 15-inch MacBook Air in terms of processing power and cooling capabilities.


It’s hard to choose between the 15-inch M2 MacBook Air and the 14-inch M3 MacBook Pro, as they both offer great value for money. To help you decide, we’ll compare the two models so that you can figure out which laptop is better for you.


MacBook Pro and MacBook Air Price Difference

There’s a considerable price gap between the base configurations of these MacBooks. Like previous years, the MacBook Air starts at a lower price than the Pro models. The base configuration of the 15-inch MacBook Air with 8GB of unified memory and 256GB of storage costs $1,299.

On the other hand, the 14-inch M3 MacBook Pro starts at $1,599 for the same 8GB of memory but with 512GB of storage. While the 15-inch MacBook Air is cheaper than the MacBook Pro, you have to consider that the base model comes with half the SSD storage. You’ll need to pay another $200 to get the same amount of storage as the MacBook Pro, which brings the price gap to just $100.

Design and Display

Apple/YouTube

Both MacBooks feature a more modern and functional design compared to their previous Intel versions. However, there are distinct differences between the two in terms of thickness, given that they are from different laptop lines.

The 14-inch M3 MacBook Pro is considerably thicker than the 15-inch MacBook Air (0.61 inches versus 0.45 inches thin). The image below shows how thick the 14-inch MacBook Pro is compared to the 15-inch MacBook Air.

15-inch MacBook Air and 14-inch MacBook Pro thinness
Will Graf/MakeUseOf

But the story is different when it comes to weight. Apple’s comparison page confirms that the 14-inch M3 MacBook Pro is barely heavier: 3.4 pounds versus 3.3 pounds for the 15-inch MacBook Air.

As for the displays, both MacBooks feature a notch and thin bezels, but the M3 MacBook Pro uses a Liquid Retina XDR display. This means the MacBook Pro uses mini-LED backlighting instead of traditional LCD like on the MacBook Air. As a result, the display can reach higher brightness levels (1600 nits peak) and support HDR content for immersive viewing.

It also supports ProMotion display technology, which is Apple’s fancy word for adaptive high refresh rate displays. This ensures smoother animations and better responsiveness as you navigate around macOS. Even though the 15-inch MacBook Air has a solid 60Hz LCD display that can go up to 500 nits, the M3 MacBook Pro leaves it in the dust.

Lastly, both laptops feature six-speaker sound systems and three-mic arrays, but Apple notes that the 14-inch M3 MacBook Pro features a high-fidelity speaker system and “studio-quality” microphones. So, if you plan to do video calls and want your voice to be as crisp and clear as possible, the M3 MacBook Pro will deliver better results.

M2 MacBook Air vs. M3 MacBook Pro Performance Comparison

M3 MacBook Pro internals
Apple/YouTube

Of course, both MacBooks are powered by Apple silicon, but they pack chips from different generations. Although the 15-inch MacBook Air went on sale in the summer of 2023, it still features the standard M2 chip (8-core CPU and 10-core GPU) Apple first announced in 2022 alongside the 13-inch MacBook Air we reviewed. The Air also allows for up to 24GB of RAM and 2TB of SSD storage.

On the other hand, the 14-inch M3 MacBook Pro packs the newer M3 chip. While it features the same number of CPU and GPU cores, Apple claims the performance cores are roughly 15 percent faster, whereas the efficiency cores are roughly 30 percent faster than the M2 generation. The M3 chip also includes features such as hardware-accelerated ray tracing for games and Dynamic Caching, which M2 lacks.

Besides the difference in Apple silicon chips, the 15-inch MacBook Air and the 14-inch M3 MacBook Pro have different cooling setups. The 14-inch M3 MacBook Pro features a single fan, enabling active cooling for the system. However, Max Tech’s video shows that the M3 chip can still thermally throttle while under load.

The 15-inch MacBook Air features a fanless design. Therefore, nothing is actively cooling the M2 chip when it’s being pushed to its limits. So, you can expect it to throttle a lot more often when running demanding apps.

If you want the best laptop for CPU and GPU performance without breaking the bank on an M3 Pro MacBook Pro, the 14-inch M3 MacBook Pro is the better pick here. But the 15-inch MacBook Air is not a sluggish computer at all. It’s still more than adequate for day-to-day tasks like web browsing, word processing, basic photo editing, etc. Take a look at our 15-inch MacBook Air review to learn more.

Port Selection Differences

The MacBook Pro and MacBook Air lines have different port selections. With the 14-inch M3 MacBook Pro, you get MagSafe, a headphone jack, two Thunderbolt 3-enabled USB-C ports, an SDXC card slot, and HDMI.

The 15-inch MacBook Air misses out on HDMI and SDXC card slots, meaning you’ll need an adapter to hook it up to your 4K TV or connect an SD card to transfer photos from your camera.

MacBook Pro and MacBook Air Battery Life

Woman using M3 MacBook Pro
Apple/YouTube

Apple silicon MacBooks deliver exceptional battery life across the board due to their power efficiency. Regardless, the 14-inch M3 MacBook Pro has a slight edge over the 15-inch MacBook Air when it comes to battery performance, especially during video playback.

Apple’s biggest MacBook Air offering is rated for 18 hours of Apple TV movie playback and up to 15 hours of web browsing. The entry-level 14-inch M3 MacBook Pro can deliver up to 22 hours of video playback and 15 hours of web browsing. If we go by Apple’s claims, the M3 MacBook Pro may be the one to go with if you want the best battery life.

Both MacBooks have their positives and negatives. It ultimately boils down to what you value the most in your laptop. If you want a bigger screen and need your computer to be as thin and light as possible but don’t mind compromising some performance, the 15-inch MacBook Air is the right choice.

However, if you want the best display with a 120Hz refresh rate, the performance gains of the newer processor, and the flexibility offered by a wider selection of ports, you can’t go wrong with the 14-inch M3 MacBook Pro.

What Is the “$Windows.~BT” Folder, and Can You Delete It?

Deleting the hidden “$Windows.~BT” folder and recovering gigabytes of space on your hard drive is tempting. But what is this cryptically named folder for, and how critical is it to your Windows installation?


What Is the “$Windows.~BT” Folder, and Should You Delete It?

Windows creates the “$Windows.~BT” folder when you upgrade the operating system to a newer build. This folder contains all the essential files for the upgrade process, like temporary installation files and logs from the previous Windows installation.

Windows automatically removes the “$Windows.~BT” folder after 10 days. As manually deleting this folder will remove old Windows installation files, you won’t be able to roll back to the previous Windows build using the Go back option in the Recovery menu within that time (for example, to downgrade from Windows 11 to Windows 10). Hence, you should only get rid of this folder if you are satisfied with the current Windows build on your PC. You can also safely delete the massive folder if Windows fails to do it automatically after the grace period.

But you shouldn’t just delete this hidden folder like any other folder on the desktop. Instead, you should turn to the Disk Cleanup tool or the Command Prompt.

How to Find and Delete the “$Windows.~BT” Folder

As “$Windows.~BT” is a hidden folder, you need to configure Windows to show hidden files and folders to find it in File Explorer. Once you do, the C:$Windows.~BT directory will become visible.

You can’t delete the “$Windows.~BT” folder directly, though. To do so, you need to run the Disk Cleanup tool. Here’s how:

  1. Press Win + R to open the Run dialog box.
  2. Type cleanmgr in the box and press Enter.
  3. Use the dropdown menu to select the system drive (usually C:) and click OK.
  4. Click the Clean up system files button.
  5. Under Files to delete, use the checkboxes to select these options: Previous Windows Installations, Windows Update Cleanup, Windows upgrade log files, Temporary Windows installation files, and Temporary files.
  6. Click OK.
  7. Choose Delete Files to confirm.

If the “$Windows.~BT” folder shows up even after you run the Disk Cleanup tool, you’ll need to execute a few commands in Command Prompt. For that, open Command Prompt with administrative rights and then run the following commands one by one.

 takeown /F C:$Windows.~BT* /R /A 
icacls C:$Windows.~BT*.* /T /grant administrators:F
rmdir /S /Q C:$Windows.~BT

Once you run the above commands, the “$Windows.~BT” folder will be deleted for good.

Now that you understand the purpose of the “$Windows.~BT” folder, you can decide how to handle it. Beyond the “$Windows.~BT” folder, you may also come across folders like “Windows.old,” “$WinREAgent,” “$SysReset,” and others which can also be deleted safely using the Disk Cleanup tool.

What Is “Windows Audio Device Graph Isolation” and Is It a Problem?

Key Takeaways

  • “Windows Audio Device Graph Isolation” is a genuine Windows process that manages audio enhancements and isolates the audio processing.
  • High resource consumption by this process could be caused by corrupt audio drivers, excessive sound effects, or third-party audio enhancement apps.
  • Reduce resource consumption by updating drivers, tweaking effects, closing extras, and fine-tuning audio settings.


Have you noticed a “Windows Audio Device Graph Isolation” process consuming substantial system resources in the Windows Task Manager? It’s a genuine Windows process responsible for providing a stable audio experience. This guide explains what this process does, why you shouldn’t turn it off, and how you can reduce its resource consumption.


What Is the “Windows Audio Device Graph Isolation” Process?

The “Windows Audio Device Graph Isolation” process, referred to as audiodg.exe, is at the core of Windows 11’s audio system.

The process manages audio enhancements and effects applied to the audio output, including equalization, spatial sound, and other audio modifications. Under the hood, it processes sound data and manages the network of connected audio components, like your sound card, drivers, and playback device.

The service is kept isolated from the standard Windows audio service. This “sandboxing” allows third-party audio manufacturers to include their sound enhancement settings (for instance, equalizer effects) without affecting the Windows audio service. Any error doesn’t crash Windows if a particular audio application, driver, or process malfunctions.

Thus, the intentional “sandboxing” provides a more responsive and reliable audio experience. But why does audiodg.exe sometimes consume extensive system resources?

Why Does Audiodg.exe Show a High CPU Usage, and Can You Disable It?

The process typically uses a minimal percentage of the CPU and operates efficiently. Its resource usage can increase if you apply too many sound effects, a third-party audio software consumes resources to deliver high-quality sound, or the audio drivers get corrupted.

This leads to the question: can you turn off this process if the resource usage gets too high? No, this process is an integral part of Windows’ audio system. Disabling it causes audio problems and errors. We turned off this process, played a YouTube video afterward, and encountered the “Audio renderer error. Please restart your computer” error.

Encountering an audio renderer error when playing a youtube video

So, if you don’t want to run into audio problems, don’t turn off this process—you won’t hear any sound. Instead, adjust the audio settings to make it use fewer resources. As a core service, you should never terminate it like other vital Task Manager processes.

How to Reduce the Resource Consumption of Audiodg.exe

As this process is notorious for its high resource consumption, malicious programs can disguise themselves as audiodg.exe and exploit your system resources. So, you should first verify that the resource-consuming process in the Task Manager isn’t any malware. If the process turns out to be malicious, you should run a Windows Defender scan to remove it.

If it’s a genuine Windows process, here are some ways to reduce its resource usage:

  • Ensure you have the latest audio drivers installed. Download the latest audio driver from the manufacturer’s website. If it comes in an executable format, click on the file to install it automatically. If a manual installation is required, right-click the Start button and open Device Manager. Then, expand the Sound, video, and game controllers tab, right-click on the relevant driver, and select Update driver.
    Updating audio drivers in Device Manager on Windows

    Then, click Browse my computer for drivers, locate and select the downloaded driver, and Windows will install it.

  • Adjust the default audio format in the sound settings. Press Win+R, type “ms-settings:sound, and click OK. After that, scroll down and click More sound settings.
    Opening the sound settings in the Windows Settings app

    Then, go to the Playback tab, right-click your default audio output device, and select Properties. Then, go to the Advanced tab and select a different sample rate and bit depth from the dropdown menu.

    Changing the default audio format in sound settings on Windows

  • Disable audio enhancements. Head to the Playback tab, right-click on your audio output device, and select Properties. Then, go to the Advanced tab and uncheck the box beside Enable audio enhancements.
    Disabling audio enhancements from sound settings.

  • If you use a third-party app to apply advanced sound effects, stop using it temporarily or deactivate some of its features.
  • If the process uses too many resources only when playing audio through a particular app, that app could be the culprit. So, either update or re-install the app or switch to another one.
  • Check for pending Windows updates and install them if they are available. Also, check optional driver updates from your audio output device manufacturer and install them.
  • If resource usage spikes only when you connect a particular audio output device to your computer, the hardware could be faulty. So, examine it for defects.

In most cases, turning off some sound effects and updating the audio drivers reduces resource consumption of the “Windows Audio Device Graph Isolation” process. Still, it would be best to double-check the process’s authenticity to ensure your device isn’t infected.

Chromebook Stuck on Chrome Screen? Do This to Unfreeze It

Quick Links

Key Takeaways

  • Disconnect peripheral devices and turn off your Chromebook after pressing Esc + Refresh + Power to unfreeze it.
  • If a restart doesn’t work, try a hard reboot by holding the power button and the Refresh button.
  • If all else fails, recover your Chromebook using the Chromebook Recovery Menu or seek professional repairs.


A Chromebook stuck on the Chrome screen can be difficult to fix since there are so many possible causes. Use the following tips to unfreeze a wide range of Chromebook models using keyboard shortcuts and other techniques.


Why Chromebooks Get Stuck on the Chrome Screen

Chromebooks get stuck on the Chrome screen for a variety of reasons. In the simplest case, you can get past a temporary glitch with a hard reboot. In more serious cases, you may find that ChromeOS is damaged or some of your hardware is failing. These troubleshooting steps will help you identify the underlying issue and revive your frozen Chromebook.

How to Fix a Chromebook Stuck on the Chrome Screen

There are a few methods you can use to fix a Chromebook stuck on the Chrome screen, including restarting and even recovering the device. Here’s how to unfreeze a Chromebook.

Remove All Peripheral Devices

Bia Sousa / Pexels

Malfunctioning external devices can sometimes cause your Chromebook to misbehave. You should disconnect any peripheral devices—including USB devices, external monitors, and sound devices—before attempting the following troubleshooting steps.

Restart Your Chromebook

Once you’ve disconnected all external devices, you can start the troubleshooting process by restarting your Chromebook. Frozen Chromebooks often refuse to power off, but you can bypass this and shut your device down by using a quick keyboard shortcut.

chromebook keyboard with escape refresh and power keys highlighted
John Karakatsanis / Flickr under CC BY-SA 2.0

Simultaneously press Esc + Refresh + Power to enter Chromebook Recovery Mode. You don’t need to recover your Chromebook and sacrifice your files yet. Once you’ve entered this screen, you can power off your Chromebook normally and attempt to boot again.

Hard Reboot Your Chromebook

Hard rebooting your Chromebook may delete some of the files in your Downloads folder.

If your Chromebook is frozen after attempting to restart it, you can sometimes fix the issue by performing a hard reset. Hold the power button to turn off your Chromebook. While holding the Refresh button, power on your Chromebook and continue to hold the Refresh button until it starts up.

Some Chromebooks have alternative hard reboot methods. If holding the Refresh button down didn’t work, try using one of the following methods to hard reboot your Chromebook.

Chromebook model

Refresh method

Older Chromebook

Simultaneously hold Back + Refresh + Power for at least ten seconds until the Chromebook restarts.

Tablet Chromebook

Simultaneously hold Volume Up + Power for at least ten seconds, then release both buttons.

Acer Chromebox, LG Chromebase, ASUS Chromebit, Samsung Chromebox, ASUS Chromebox

Disconnect the power adapter from your powered-off Chromebook, wait several seconds, then plug it back in.

Acer AC700, Acer Cr-48

Remove the battery from your powered-off Chromebook, then reinsert it.

Lenovo Thinkpad X131e

Remove the battery and disconnect the power adapter from your powered-off Chromebook, then reinsert both.

Samsung Series 5 Chromebook, Samsung Series 5 550 Chromebook

Disconnect the power adapter from your powered-off Chromebook, then press a paperclip into the reset hole while simultaneously reconnecting the power adapter.

Recover Your Chromebook

Unfortunately, you can’t always fix the frozen Chrome screen error and preserve your data. If you notice that the frozen Chrome screen repeatedly comes back after it was “fixed” or you can’t find any troubleshooting methods that will let you get rid of the screen, you may need to recover your Chromebook.

The chrome os recovery tool prompting the user to insert a recovery usb

You can use the Esc + Refresh + Power shortcut while on the frozen Chrome screen to attempt to exit to the Chromebook Recovery Menu. This shortcut isn’t always successful, but if you’re able to reach the recovery menu, you can restore your Chromebook with a recovery CD or USB device.

You can also restore your Chromebook to factory settings by signing out and then simultaneously holding Ctrl + Alt + Shift + R. Once the actions menu appears, select Restart. Several moments later, another menu will appear. Select Powerwash > Continue, then follow the prompts to reset and reconfigure your Chromebook.

If the Chromebook frozen screen issue was occurring because of issues with your ChromeOS installation, recovering your Chromebook should restore it to as good as new.

Seek Professional Repairs

If all other attempts to fix your frozen Chromebook fail, the culprit may be a hardware issue. This is particularly likely if you hear the fan become louder when the Chromebook freezes. A fan malfunction indicates a component might be failing or that the Chromebook itself is too hot.

There are many options available for repairing your Chromebook. You can have your Chromebook officially serviced by contacting your Chromebook manufacturer or the business that you purchased a warranty from. You can also mail your Chromebook to a third-party repair service.

How to Watch Movies on Your PS5 With Sony Pictures Core

Key Takeaways

  • Sony Pictures Core, formerly known as Bravia Core, offers a movie streaming service with a library of up to 2,000 movies from Sony Pictures.
  • Subscribers to the Premium or Deluxe tiers of PS Plus can watch up to 100 movies for free on the service.
  • To use Sony Pictures Core, simply download the app on your PS4 or PS5 console, enable HDCP settings, create an account, and explore the movie catalog.


If gaming on your PlayStation 5 isn’t quite enough, you can also rent, buy, or stream up to 2,000 movies on your console using Sony Pictures Core.

If you want to know more about Sony Pictures Core and what you need to do to unlock up to 100 free movies on the platform, here is everything you need to get started.


What Is Sony Pictures Core?

Sony Pictures Core (previously known as Bravia Core) is a movie streaming service you can get on PS4 or PS5 consoles. Sony Pictures Core contains a massive library of up to 2,000 movies from Sony Pictures, providing early access to some titles, behind-the-scenes content, director’s commentaries, and other exclusive offers.

Sony Pictures Core also offers extra deals, such as discounts on seven movies for seven days or access to additional content from Crunchyroll. These deals are available for a limited time only and they can change. Head to the PlayStation website or the Sony Pictures Core homepage to see any deals currently on offer.

You don’t need a PS Plus membership to rent or buy movies on Sony Pictures Core, but there are exclusive benefits if you are subscribed to the Premium or Deluxe tiers.

What Do I Need to Watch Movies for Free on Sony Pictures Core?

You can watch a rotating catalog of up to 100 movies for free on Sony Pictures Core if you have a PS Plus Premium or Deluxe membership.

Image Credit: PlayStation Blog

These are the highest tiers available for PS Plus. But to rent or buy the average movie on Sony Pictures Core, you’re looking at paying around $3.99 to $15.99.

If you’re a movie buff, those 100 free movies could make deciding between the PS Plus Extra, Essential, and Premium/Deluxe tiers a little easier, and that’s not considering the other exclusive benefits.

How to Download and Use Sony Pictures Core on Your PS5

Sony Pictures Core is a free app available to download on PS4 and PS5 consoles. To access it, scroll to the Media tab on your PS5 by pressing R on your controller while on the home screen and select the magnifying glass icon in the top right corner to begin searching for Sony Pictures Core. Once it shows up, select the app and press Download.

the Media Tab on a PS5

Using Sony Pictures Core requires you to enable the HDCP settings on your PlayStation. HDCP is different to HDMI. It stands for High-Bandwidth Digital Copyright/Content Protection, and it prevents you from being able to stream or record content while you’re watching it on the app.

Go to HDMI option on Sony Pictures Core PS5

If your HDCP settings are enabled already, you will be able to launch and use Sony Pictures Core as normal. If not, an error screen will appear, prompting you to enable the settings before you can use the app. To enable HDCP, select Go to HDMI. Your PlayStation will direct you to the exact setting you need to change.

Once you launch Sony Pictures Core, you will be required to make an account to gain access to the massive catalog of epic Sony Pictures movies. Creating an account is also free. Press Get Started to set it up.

Start the Set Up for Sony Pictures Core

The app will ask you if you want to sign in with the PS Plus account of the profile you’re using. If the account linked isn’t yours, select the email address and change it to the correct one.

Link PS Plus Account on Sony Pictures Core

You will then be directed to the terms and conditions. Check all the boxes and press Next.

Terms and Conditions in Sony Pictures Core

Lastly, you will be asked once again if you would like to link your PS Plus account with Sony Pictures Core. This is essential if you want to access the 100 free movies that come with a PS Plus Premium or Deluxe subscription. Press Agree and Continue to confirm.

Account Linking in Sony Pictures Core

Once you have created your Sony Pictures Core account, you are free to roam the app. Scroll through the different categories by pressing down on your controller and left and right to scroll through the movies.

To find the free movies you get with a PS Plus Premium or Deluxe membership, scroll down until you find the Included with PlayStation Plus section.

Included with PlayStation Plus Section of Sony Pictures Core

Press the left arrow button to find the menu, where you can find things like the search bar, your Library, and Studio Access, which is where you can find bonus material, such as deleted scenes and director’s commentaries.

Once you find a movie you’re interested in, select it and press Rent or Buy depending on your preference. You can find any movies you purchase or rent in your Library.

And that’s all you need to do to be able to watch Sony movies on your PlayStation 5. Turning your console into a movie streaming device in addition to a gaming one.

How to Clear the System and Internet Caches on a Mac

Key Takeaways

  • Clearing your Mac’s system and browser caches can free up storage space. But that comes at a cost, as these temporary files help you navigate your Mac more quickly.
  • You can manually clear caches, or use third-party Mac cleaning apps like CleanMyMac X or OnyX to make the process easier.


Clearing the system and browser caches on your Mac can help you free up a lot of storage space for other important files. But how do you go about clearing the cache on your Mac, and should you? Read on to find out.


What Are Caches, and Why Delete Them?

Caches are temporary files created by the operating system and the applications you use. They include temporary internet files, such as images and HTML documents, created by a web browser like Safari or Chrome.

These cache files help you navigate your Mac faster. Since they store this data, your computer saves time because it doesn’t need to download it all again.

This brings us to an important point: you generally don’t need to delete caches. Unless you’re looking for a quick and easy way to regain some free space, it’s best to leave them be. Many applications run their own cleanup routines to prevent caches from ballooning to unmanageable sizes.

You should back up your Mac before clearing caches to avoid permanently deleting something important by accident!

How to Clear the Browser Cache on a Mac

macOS supports various browsers; the default one is Safari, which most people use. We’ll show you how to clear Safari’s cache files and where you’ll find the option in popular browsers. Follow these steps:

  1. Launch Safari, mouse up to the menu bar, and choose Settings.
  2. Head to the Advanced tab in the settings window.
  3. Check the Show features for web developers option at the bottom.
  4. Now, click Develop in the menu bar and select Empty Caches from the dropdown menu.

Google Chrome, for instance, holds this option in the Privacy & Security section of the browser’s settings. Some browsers, like Microsoft Edge, bundle the cache with cookies and other browsing data. But they have a toggle that lets you pick only cache files from the lot.

How to Clear Your Mac’s System Cache

To clear system cache files specific to your user account, here’s what you need to do:

  1. Launch Finder, then click Go > Go to Folder from the menu bar at the top.
  2. In the search box that appears, type ~/Library/Caches and click the first result.
    Clearing cache files with Finder on macOS

  3. Select all the Mac files and folders you want to delete and drag them to the Trash. Alternatively, you can Control-click and choose Move to Trash.
  4. Now, Control-click the Trash on your Dock and choose Empty Trash.

If you want to delete caches associated with another user account, you’ll need to head to that specific user’s cache directory. You can do this by changing the folder location in the second step to /Users/[username]/Library/Caches. Replace [username] with the user account in question.

To clear system cache files that are shared between user accounts, head to /System/Library/Caches instead.

Use Apps to Clear Your Mac’s Cache

CleanMyMac X scanning for cache files

While you can clear these caches manually, some Mac cleaning apps make the process faster. They are pretty handy for creating free space, so we recommend them if you want to add some automated control over your Mac’s storage.

Our favorite choice is CleanMyMac X because of its minimalistic interface and built-in antivirus. It’s not free, costing $39.95 per year, but you can take advantage of its 7-day free trial to clear your cache quickly.

Onyx app maintenance settings

If you want a free option, consider installing OnyX instead. Go to Maintenance, toggle on the caches you’d like to delete in the Cleaning section, and click Run Tasks. It also has some useful features, like scheduled startup and shutdown (which are missing in macOS Ventura and Sonoma).

No matter what app you use, you must give it storage access first by heading to System Settings > Privacy & Security > Full Disk Access and enabling the toggle for that app. Otherwise, you won’t be able to use it properly.

Download: CleanMyMac X ($39.95 per year, free trial available)

Download: OnyX (Free)

Unless you’re incredibly tight on space or looking to troubleshoot a specific app by deleting its cache, you should probably leave your Mac’s cache files alone. There are plenty of ways to create free space on macOS without ever touching your caches.

You can move your libraries and device backups elsewhere, delete unnecessary large files, or even hook up an external storage drive to your Mac to give you some room to breathe.

How to Rip a DVD to Your Mac

Quick Links

Key Takeaways

  • Ripping a DVD to your Mac allows for backup and digital playback without the need for the physical disc, whether it has DRM protection or not.
  • Use macOS’s Disk Utility to create a digital copy of unprotected DVDs by connecting an optical drive to your Mac and following a few simple steps.
  • For copy-protected DVDs, additional steps and apps like HandBrake and libdvdcss are needed to bypass DRM and successfully rip the DVD to your Mac.


Ripping a DVD to your Mac enables you to keep a backup copy. Find out how to convert a DVD to digital content that you can play on the computer without the disc, whether it has DRM protection or not.


How to Rip an Unprotected DVD to Your Mac

While most commercial DVDs have some kind of DRM (digital rights management) protection to prevent piracy, you may have a few self- or custom-created discs that don’t. In this case, you can use macOS’s Disk Utility to make a digital copy on the computer.

You will need an optical drive to read the disc. This could be an official Apple Superdrive or a third-party device. Connect it to your Mac via USB, using a USB-A to USB-C adapter if necessary.

  1. Upon inserting the disc in the attached drive, it should start spinning and will start playing in the DVD Player application on the Mac. Hit the stop button.
  2. To open Disk Utility, navigate to Applications > Utilities > Disk Utility in the Finder.
  3. The title of your DVD should show up under the “External” heading in the left panel. Select it, then go to File > New image > Image from [disc title], or use the Option + Cmd + N keyboard shortcut.

  4. A dialog will appear. Choose the title, where to save it, and leave the other options as is: Format as “read only” and Encryption as “none.” Click Save.
  5. Depending on the size, it will take a few minutes to create a digital copy of the disc, which will be a DMG file.
  6. When it’s done, navigate to the folder where you save it and double-click the DMG file. A new Finder window will open with a folder in it—ours was called “VIDEO_TS”.
  7. Open this folder to find the contents of the copied DVD, including VOB video files which can be played in VLC or another suitable media player.
    Playing a video file ripped from DVD

How to Rip a Copy-Protected DVD to Your Mac

While Disk Utility is fine for backing up unprotected DVDs, you’ll need an alternative method for copy-protected discs (most commercial ones).

Copying DRM-protected DVDs is illegal in many countries, even for backup purposes. For instance, certain uses may be illegal under US law unless they comply with the Fair Use doctrine. So make sure to check the legality of ripping copy-protected DVDs in your country.

Again, you’ll need a suitable optical drive attached to your Mac to read the DVD. You will also need a disc backup application to rip the DVD. Here, we are using the HandBrake video conversion app, which is free to download and use and has a bunch of other useful features.

Download: HandBrake

Given the legal gray area of copying commercial discs (see Warning above), no DVD ripping software can include the functionality natively. For HandBrake, you’ll need to download an extra library called libdvdcss.

Download: libdvdcss (BZIP2 file)

Are You Using an Apple Silicon Mac?

The steps below for installing libdvdcss and ripping a copy-protected DVD assume you are using an Intel-based Mac and not a newer Apple Silicon Mac such as an M1, M2, or M3. If you are using the latter, you will need to do this beforehand:

  1. Rename your HandBrake application as Handbrake-x64.app, then right-click it and Get Info. Tick the box for “Open with Rosetta.” Alternatively, you could download an earlier Intel-based version of HandBrake and use that.
  2. Duplicate your Terminal app (in the Utilities folder) and name the copy Terminal-x64.app, then right-click it and Get Info. Tick the box for “Open with Rosetta.” Use this to install libdvdcss so that it’s built with the correct x64 file architecture and not arm64.

Install the Libdvdcss Library

As mentioned, you will need the libdvdcss library installed on your Mac to bypass copy protection on DVDs. To install the BZIP file you downloaded, follow these steps.

  1. Open a Terminal window by going to Applications > Utilities > Terminal. (If using an M1/M2/M3 Mac, make sure it’s your x64 Terminal duplicate.)
  2. Navigate to the Downloads directory, unzip the file, and change to its directory:
     cd Downloads
    tar -xjf ./libdvdcss-1.4.3.tar.bz2
    cd libdvdcss-1.4.3
  3. Set the target directory and then compile and install the library:
     ././configure --prefix=/usr/local
    make
    sudo make install

The libdvdcss library files should now be installed in the /usr/local/lib folder, which is where they need to be.

Rip the Copy-Protected DVD

You are now ready to start ripping a DRM-protected DVD using HandBrake.

  1. Open the HandBrake app and select Open Source. Browse to your DVD and click Open.
  2. A warning dialog will appear. Click Attempt Scan Anyway.
  3. It will start scanning the disc for titles, chapters, audio, and other details. This may take a little while to complete.
  4. With the disc scanned, you should be able to select individual sections using the Title dropdown. Choose the main video from it, which is usually the longest.
  5. As an optional step, you can select Preview and then Live Preview to create a short preview video of a scene, just to make sure everything’s working fine.
  6. To start ripping the video from the DVD, select the Preset and Format you want.
  7. By default, the files will be saved in the Movies folder, but you can change this by clicking Browse.
  8. When you click the Start button, HandBrake will start scanning and recording the video, as shown by a progress bar along the bottom. This may take a long time. You can check what it’s doing by clicking Activity to open a window with all the details.
    HandBrake scanning DVD

Once it has finished, you should find the MP4 or MKV file in the Movies folder or the one you set. You should be able to play it in the TV app, QuickTime Player, VLC, or any other video player application.

Ripped DVD Video Playing

Note that some DVDs may have structural protection that prevents you from copying them with this method or at least makes it more difficult. For instance, some recent Disney discs have up to 99 fake titles to confuse things. So, you may need to find a workaround to rip these DVDs or use one of the many specialist DVD ripping tools available.

As we’ve explored, it is possible to rip many DVDs to your Mac with standard tools and a little know-how, even if you need to bypass DRM copy protection. You will then have a handy backup that you can play without the disc and even convert to a suitable format for your iPhone or iPad.

How to Remove the Background of an Image Using Paint or Paint 3D

Key Takeaways

  • Microsoft Paint and Paint 3D on Windows 11 have a built-in feature to remove the background of an image with a single click.
  • To use the background removal feature, update to the latest version of Windows 11 and Microsoft Paint or Paint 3D from the Microsoft Store.
  • While the AI-powered background removal may not be perfect, it is a convenient tool for quick edits, and saves you from needing to use more complex image editing tools.


You don’t have to use a third-party background-removing tool anymore, as the Microsoft Paint app on Windows can remove a background with just a single click. Similarly, in Paint 3D, you can use the Magic select feature to remove the background of an image.

In this article, we show you how to use Microsoft Paint or Paint 3D to remove a background from an image.


Update Microsoft Paint or Paint 3D App From the Microsoft Store

The Remove background feature in MS Paint was part of the Windows 11 Moment 4 update. To get started, make sure you have the latest Windows 11 updates installed. To do this, go to Settings > Windows Update and choose Check for updates. You should also update Microsoft Paint and Paint 3D from the Microsoft Store to receive new features.

After the update is installed, launch any of the apps, and you’ll see the Remove background or the Magic select option in the respective apps’ toolbar. Using them is straightforward, as you can see below.

How to Remove the Background of an Image Using Microsoft Paint

The background removal tool in the standard Paint app is powered by AI. You can import any images onto your Paint canvas and click the Remove background feature to clean up the background with a single click.

To remove an image background using the Paint app:

  1. Launch Paint and import the image you want to edit.
    Microsoft Paint App With a Bird Image and Remove Background Option Selected in Windows 11

  2. In the Command bar, click the Remove background option. Microsoft Paint uses AI to process and detect the image elements and remove the background.
    Microsoft Paint App Showing an Image Without Background

  3. You can also use the selection tool to specify only part of the image to remove and then click the Remove background option.
  4. To save the image, go to File > Save as, then choose the PNG or JPEG format. Enter a name for the file and click Save. The Paint app will save the file with a transparent background.

As with most AI tools, the remove background feature is not perfect, but more often than not, it does a decent enough job.

How to Remove the Background of an Image Using Paint 3D

You can use the Magic select feature in Paint 3D to remove the background of an image. While the process is not as straightforward as the Paint app, it offers greater control and multiple creative options.

To remove the background of an image using Paint 3D:

  1. Launch the Paint 3D app and import the image you want to edit.
    Paint 3D App With the Magic Select Option Selected In Windows 11

  2. Click the Magic select option in the toolbar.
    Paint 3D App With the Magic Select Cutout Selection In Windows 11

  3. Adjust the focus area to fit around the area of the image you want to retain. Even if you want to keep a large part of the image, a slight adjustment is necessary for the app to determine the background.
  4. Click Next.
    Paint 3D App Main Object Cutout Selection In Windows 11

  5. Preview the cutout to see if the image isolation is accurate. If not, use the Add or Remove option in the top-right corner to refine your selection further.
  6. Click Done.
    Paint 3D App Delete Background Canvas In Windows 11

  7. Now, select the cutout and drag it to the side of the canvas.
  8. Using the selection tool, click and drag over the canvas and press Delete to remove the background.
  9. Now select the Canvas option in the toolbar.
    Paint 3D App Showing a Deleted Bird Background Canvas In Windows 11

  10. In the right pane, toggle the Transparent canvas option.
  11. Now drag the cutout back to the canvas and adjust it to fit the image.
  12. To save the image, press Ctrl + S, click Image, and then Save. Give a name to the file and select Save.

The AI-powered Paint and Paint 3D app in Windows 11 may not produce perfect results. Especially if the image has a busy background. However, both do a nice job and produce consistent backgrounds. They also save you from the hassle of owning and using a more sophisticated image editing tool for quick edits.

How to Connect and Use PostgreSQL in Python

Key Takeaways

  • Download and install PostgreSQL for your OS, then use psycopg2 to connect to a PostgreSQL database from Python.
  • Use pgAdmin4 to fetch server credentials for connecting to a Postgres server from Python.
  • Use SQL commands in Python to create, check, or drop a PostgreSQL database.


If you’re writing a Python program that needs to access data from a Postgres database, you’ll need to know how to connect the two. Once you’ve established a connection, you can use it to run queries and fetch or save data.


Download and Install PostgreSQL

PostgreSQL is an excellent choice for your programming projects. You can download and install the required version of PostgreSQL according to your OS. Postgres is available for download on standard operating systems like Windows, macOS, and Ubuntu Linux.

The installation process will differ from OS to OS, so you should follow the installation steps to ensure a smooth setup experience.

Install the Required Library

You can use the psycopg2 library to connect to a PostgreSQL database from Python. Run this command in the Python interpreter to check if the library is installed:

 import psycopg2 

If you get an error message (for example, “No module named ‘psycopg2′”), install the library with this command:

 pip install psycopg2 

PIP is a Python package manager that you can install on Windows, Mac, or Linux. It eases the complexity of installing Python packages.

Fetch Credentials Using pgAdmin4

You can use the pgAdmin4 app to manage your Postgres databases in a GUI environment. You may have installed it at the same time as you installed Postgres, but you can download pgAdmin4 and install it separately if necessary.

Here’s how you can use pgAdmin4 to obtain your server credentials:

  1. From the application menu, open pgAdmin4.
  2. Click on the Servers menu on the left side of your application screen.
  3. Enter the Postgres password you entered during setup.

  4. Once you connect to the server, right-click on the PostgreSQL 16 item, then choose Properties.
    Postgres server drop down menu showing properties option

  5. Within the Properties dialog box, click on Connection.
  6. Make a note of the Host name, Port number, and Username.
    Connection details window within Postgres server

Connect to the Postgres Server

With your credentials in hand, you can use the psycopg2 library to establish a connection to your Postgres server. To do so, you need to use the connect function as follows:

 conn = psycopg2.connect(host='localhost', port= '5432', user='postgres', password='your password here') 

Next, you must use the cursor function to execute Postgres commands in a Python environment:

 cur = conn.cursor() 

Finally, you can set the auto-commit flag to ensure Python executes and commits each code statement. This way, you don’t need to pass separate commit statements after every line of code.

 conn.set_session(autocommit = True) 

You can run these statements in one go to connect to a local instance of your Postgres server.

How to Create a Postgres Database

A Postgres database plays a pivotal role in storing a collection of related tables. Create a new one with the CREATE DATABASE SQL command which you can pass to the cursor object’s execute method:

 try:
    cur.execute('''CREATE DATABASE DB_NAME''')
except psycopg2.Error as e:
    print(e)

You should always take care to handle any exceptions that may arise. This example simply prints any error that occurs but, in production code, you’ll want to take appropriate action.

Python code within Jupyter Notebook

Checking the Database in pgAdmin4

When you run the above query, you can check that it successfully created a database using pgAdmin4. Head over to the interface, refresh the existing list of databases, and look for the new database.

For example, if you create a sample database called music using the above query, it should show up in the list of databases below the Postgres16 > Databases category.

pgAdmin4 list of databases in application interface

How to Drop a Postgres Database

If you don’t want to keep a specific database, you can use the following command to delete (or “drop”) it:

 try:
    cur.execute('''DROP DATABASE MUSIC''')
except psycopg2.Error as e:
    print(e)
Python codes to drop a database in Postgres

Instead of the create command, you need to use the drop command. Post execution, you won’t see the database in question.

The 7 Best AI Writing Tools to Use Today

Whether you’re struggling with writer’s block or just hate writing, AI writing tools can come in handy. They can not only save you time in writing the first draft but also provide you with a ton of creative ideas. Here, we list the best AI writing tools you should check out right now.


1. Jasper (for Professional Marketers and Bloggers)

Powered by multiple language models (including GPT-4), Jasper is one of the most popular pieces of AI writing software. Whether you need to generate ad copies, blog posts, or social media captions, it has over 50 templates for you.

Designed for professionals in the marketing and content industry, Jasper makes it easy to create content for your entire campaign. Likewise, it has a long-form blog post writer with a focus on SEO. Before you begin writing, you can use the Jasper Chat to help you with the research phase.

To ensure a consistent tone across all your writings, Jasper learns and adopts your brand voice and saves the details about your project in its knowledge base.

Jasper has a great community and a quick support team, and it also provides free training on its website to help people make the most of the tool.

Arguably one of the best AI tools for content creation, Jasper has three paid plans, starting from $49 per month.

2. ClosersCopy (for Search Engine Optimized Content)

ClosersCopy is another awesome AI-powered writing tool with a focus on SEO-optimized writing. It has hundreds of pre-made marketing frameworks and workflows that can help you generate a killer copy.

What makes ClosersCopy a good choice for SEO writing is that it has built-in SEO audit and planner tools. The SEO audit feature compares your draft with top-ranking pages on Google and provides suggestions for improvement. Likewise, the SEO planner helps you create an outline for your blog posts using competitor analysis.

ClosersCopy has three different AI models: one for copywriting, another for articles, and the third for storytelling. Despite dozens of features, it has a clean, simple dashboard and text editor.

The price ranges from $49.99 per month to $99.99 per month. The Power plan (the cheapest one) allows you to generate content 300 times, while the other two plans offer unlimited writing.

If you’re looking for an inexpensive AI writing tool that does the job, try Rytr. Whether you want to write blog posts, song lyrics, marketing copies, captions, scripts, or product descriptions, Rytr has templates for almost everything. Better still, you can use it to generate AI images and talk to its chatbot.

Rytr has an easy-to-use interface and the ability to generate text in 30+ languages. However, creating the first draft takes little time, thanks to the variety of use cases. You can adjust the output and use its editing tools to refine your first draft.

The unlimited plan costs $29 per month, while the Saver account costs $9 per month (100,000 characters). Rytr even has a free plan with 10,000 characters and five images per month. It has a Chrome extension that works seamlessly, letting you write while you browse.

So, if you don’t want to splash out on AI writers, Rytr is perhaps your best bet. Though it doesn’t offer all the bells and whistles, it’s a decent, multipurpose tool that you can use for professional and personal writing.

4. Writesonic (for Generating Content in Different Formats)

writesonic screenshot

Powered by GPT, Writesonic is more than just an AI writer. It has image and voice generators, the ability to create custom AI bots, and a chatbot named Chatsonic.

Writesonic has hundreds of different templates that let you create various types of written content—from articles and essays to landing pages and YouTube descriptions.

What makes Writesonic a standout is that it offers a long-form article writer even on a free plan. Just by entering a topic, a reference article, and your preferred tone, you can create a complete article with a single click.

Likewise, Writesonic’s editor splits the screen into two sections, one for generating text and the other for editing and formatting it, making the writing process much easier.

Besides the free plan, Writesonic has three paid plans, starting from $19 per month.

5. Copy.ai (for Brands and Teams)

copyAI screenshot

If you want every copy to reflect your brand’s tone, Copy.ai is a great choice. Using your existing content, it identifies your brand voice. Likewise, there’s an Infobase where you can upload details about your project—the tool then uses the identified tone and knowledge in its writing, adding a personalized touch.

Copy.ai has a chatbot-like interface for generating text, which you can then add to the editor and format your content. Moreover, it has built-in workflows designed for SEO, content, and sales teams that enable you to collaborate with your colleagues.

Copy.ai has free training and a ton of other resources to educate you about its tool. The free plan gives you 2000 words, while the unlimited Pro plan costs $49 per month.

It also has around a dozen free tools for creating email subject lines, captions, meta descriptions, CTAs, product names, slogans, etc. Best of all, you can use these free tools without signing up.

6. Sudowrite (for Creative Writing and Storytelling)

sudowrite screenshot

If you’re a creative writer looking for a tool to help you in your writing journey, look no further. Powered by GPT-3 and GPT-4, Sudowrite’s Story Engine can help you write a complete novel.

Before the actual writing phase, you can use Sudowrite to brainstorm ideas, develop story characters, and think of plot points. Once you’ve written a couple of sentences, you can ask the tool to continue writing, either on its own or by following your instructions. Better still, the Describe feature uses metaphors and senses to illustrate the scene to your readers.

Once the first draft is ready, Sudowrite can rephrase, expand, or shorten sentences to polish your story. It can even provide feedback on your story, highlighting opportunities for improvement.

Sudowrite has three plans, with the cheapest one costing $19 per month and offering 30,000 words.

7. Smart Copy (for Copywriting)

sart copy writer screenshot

If you want to create manuscripts that reflect your brand image, try out Smart Copy. Part of the Unbounce family, this AI writing assistant can help you create engaging content for landing pages and copies.

It has a gallery of around 50 different templates, including templates for everyday things like email subject lines, thank you notes, and content expander.

The paid plan comes with a long-form editor called the Writer. This looks like a normal text editor, but after writing a few sentences (and setting the preferences), you can ask Smart Copy to continue writing for you. Once the tool has generated the initial draft, you can expand, remix, or add more sentences to your copy.

Other than blogs, landing pages, and product descriptions, Smart Copy can generate core values, taglines, and mission statements for your company. It supports dozens of languages and also has a free Chrome extension.

Smart Copy has a free and paid plan. The free plan provides 10 credits weekly, whereas the Essential plan provides 200 credits for $9 per month.

SoundCloud vs. Spotify: Which One Is Better?

Quick Links

Key Takeaways

  • SoundCloud is ideal for discovering undiscovered artists and unofficial remixes.
  • Spotify offers a well-rounded listening experience with a wide range of features and customization options.
  • Spotify has better audio quality, a more intuitive interface, and more affordable premium subscription options.


Curious whether you should choose SoundCloud or Spotify for an optimal music-streaming experience? Here’s a look at each platform’s strengths and which is best for uncovering new artists, organizing your playlists, and high-quality sound.


What Is SoundCloud?

SoundCloud is a music-streaming platform founded in August 2007. The service has become a popular place for up-and-coming artists to share their work with the world.

According to SoundCloud, more than 30 million artists use the platform.

What Is Spotify?

Spotify is a music and podcast-streaming service that focuses on a mixture of established artists and newcomers to the music scene. The platform was founded in 2006 and launched two years later. After beginning in Sweden, the platform has expanded to the UK, the US, and many other countries.

Besides showcasing a mixture of artists, you can also discover charts in different countries on Spotify. Moreover, the app lets you design your own playlists—in addition to sharing its own.

SoundCloud vs. Spotify: Is SoundCloud Better Than Spotify?

SoundCloud and Spotify excel in different areas. To determine which platform suits your preferences better, you need to judge both of them in line with your individual needs.

To help you settle the Spotify vs. SoundCloud debate for yourself, we’ve analyzed the most essential talking points.

SoundCloud vs. Spotify: Uncovering New Artists and Songs

Spotify has several features that help you discover new artists and songs. Discover Weekly, which delivers new tracks to you each Monday based on your listening history, is the best example.

When using Spotify to uncover new artists and songs, you can also use the Daily Mix playlists. Normally, these are broken down into different genres and moods. Similarly, you can access personalized mixes on Spotify that aren’t day-specific.

A Daily Mix Playlist on Spotify

Spotify also has a Release Radar for songs from artists you already follow or singles that it thinks you would like.

The Release Radar Playlist on Spotify

SoundCloud, like Spotify, also has Daily Mix playlists. Another similar feature is the artist station, which will play tracks similar to what you already like. The two apps also have playlists for different activities, such as studying and working out. In this category, there isn’t a huge difference between the two platforms.

A Mix Playlist on SoundCloud

Winner: Tie

SoundCloud vs. Spotify: Listening to Unofficial Remixes

SoundCloud is excellent for discovering unofficial music remixes and mashups. If you’ve ever been to a friend’s house and heard something that’s a combination of two popular songs, you’ll probably find it on SoundCloud or YouTube Music.

A Track Remix on SoundCloud

Spotify, on the other hand, isn’t the best platform for listening to unofficial tracks. This is largely because ordinary users can’t upload songs to Spotify in the same way that they can on SoundCloud. For this reason, you’ll often find underground classics on Spotify a long time after they were released, if at all. Nonetheless, you can still access a good selection of hidden gems.

Winner: SoundCloud

SoundCloud vs. Spotify: Audio Quality

Spotify’s AAC (advanced audio coding) depends on the plan you have. Spotify Premium lets you stream up to 320 kb/s on its official app, while you can get 256 kb/s on the web version. Meanwhile, Spotify Free lets you stream up to 160 kb/s (official app) and 128 kb/s (web browser).

SoundCloud Go+ users can stream up to 256 kb/s. However, SoundCloud does not specify the sound quality for free plans.

Winner: Spotify

SoundCloud vs. Spotify: Pricing

Spotify and SoundCloud both have ad-supported free plans, but you can get the premium versions if you want access to more features.

Spotify Premium starts at $10.99/month in the US ($5.99/month if you’re a student). You can also get Spotify Premium Duo (which allows for two accounts) for $14.99/month. Meanwhile, Premium Family—which lets you connect up to six accounts—costs $16.99/month.

If you’re unsure whether you should make a purchase, consider reading whether Spotify Premium is worth the price.

Premium Pricing Plans for the Spotify App
Image Credit: Spotify

SoundCloud Go costs $4.99/month, but unlike Spotify Premium, it doesn’t include high-quality audio listening, and you can’t access the complete catalog. SoundCloud Go+ costs $9.99/month and offers full catalog access, plus high-quality audio listening and some track mixing.

The different premium pricing plans on SoundCloud
Image Credit: SoundCloud

As of December 2023, no SoundCloud family plan exists.

Winner: SoundCloud for price, but Spotify Premium has better features

SoundCloud vs. Spotify: Playlists

Even without the best Spotify playlist tips and tricks, Spotify makes creating and sharing playlists very simple. Discovering playlists is also straightforward. Adding new tracks is perhaps the best feature; at the bottom of your playlist, you can choose new songs from the Recommended section.

A list of recommended songs for a playlist on Spotify

Spotify also has a feature called Smart Shuffle, which shuffles the songs in your playlist while adding new ones based on the playlist’s theme. You can add collaborators to each playlist, too, which is perfect if you want to create something with a friend or partner.

The Smart Shuffle Feature on a Spotify Playlist

SoundCloud lets you make playlists of your favorite songs, and you can also save other people’s playlists in your Library. However, the service lacks many of Spotify’s advanced features.

A list of playlists featuring in the SoundCloud app

Winner: Spotify

SoundCloud vs. Spotify: App Availability

Spotify has a desktop app and is also available on iOS and Android. You can download the Spotify desktop app from any browser, while the mobile apps are available in the App Store and Google Play Store.

Download: Spotify for iOS | Android | Desktop (Free, in-app purchases available)

SoundCloud also has iOS and Android apps. You can download the Spotify Desktop Player for your computer as well, but it’s only available in Chrome, Brave, and Edge. Spotify, on the other hand, is also available in Safari, so it secures a narrow victory here.

Download: SoundCloud for iOS | Android | Desktop (Free, in-app purchases available)

Winner: Spotify

SoundCloud vs. Spotify: Organizing Your Library

Spotify has a very intuitive interface, and you can access all of your liked songs and playlists from the Your Library section. Moreover, you can organize your content based on what you’ve downloaded.

Organize your library within the Spotify app

SoundCloud also lets you easily access your library via the Library section. However, the organizational features are limited compared to Spotify. For example, you can’t rearrange the order of your playlists.

The interface to organize a playlist in SoundCloud

Winner: Spotify

SoundCloud vs. Spotify: Social Features

SoundCloud has an excellent range of social sharing features. You can like and repost songs, and another advantage it has over Spotify is the ability to comment (though you can comment on Spotify podcasts).

The option to repost a playlist that you like in SoundCloud

When you find users that you like on SoundCloud, you can easily follow them. To keep up with the latest updates, go to the Feed section.

Meanwhile, Spotify lets you follow friends and artists. You can also, if you want, see what the people you follow are listening to. Moreover, you have the option to share what you’re listening to with others.

Following list and friends list side-by-side on Spotify

Spotify also lets you make your playlists public, and the app’s best social feature is Spotify Wrapped. Wrapped shows you your music-listening habits for the year and makes it easy to share them on social media.

SoundCloud excels in offering the chance to repost and comment, but Spotify Wrapped is a game-changer. For this reason, we’re giving the two platforms a tie in this section.

Winner: Tie

SoundCloud or Spotify: Which Platform Provides a Better Music Listening Experience?

If you’re looking for undiscovered artists and unofficial tracks, SoundCloud is the best place to look on the internet. You’ll also find a number of artists who’ve gone big and also exist on Spotify, but this is the main advantage of using SoundCloud.

Spotify, however, offers a more well-rounded listening experience if you want to listen to established artists. You also get better value for money on the monthly pricing plans. Moreover, the premium subscriptions available are more versatile than SoundCloud, and the platform also has better customization for your playlists.

Space-Saving Apple Device Charging Comes at a Cost

Key Takeaways

  • The Belkin BoostCharge Pro 2-in-1 is a compact and efficient charger for iPhone and Apple Watch, but its high price makes it less appealing.
  • Its size makes it perfect to use in smaller spaces, and it is excellent for StandBy mode on the iPhone.
  • The stand is available in two colors—lighter sand and darker charcoal.


At the end of the day, charging stations are a great option for Apple fans to juice up an iPhone and Apple Watch at the same time. While the Belkin BoostCharge Pro 2-in-1 does a great job doing just that, its high price makes it hard to recommend for most users.

Belkin BoostCharge Pro 2-in-1 Wireless Charging Dock with MagSafe 15W

The Belkin BoostCharge Pro 2-in-1 is designed to charge both an iPhone and Apple Watch simultaneously. The charger takes up less space than a HomePod mini and weighs under a pound. Soft-touch material covers the entire iPhone charger and on top is an adjustable stand that can rotate from 0 to 70 degrees. You can charge your iPhone in either portrait or landscape orientation. The charger is also compatible with StandBy mode for an iPhone. On the side, the Apple Watch charger is Fast Charging compatible. 

Brand
Belkin

Color
Sand or Charcoal

Speed
15W

Weight
15.87oz

Adapter included
Yes

Pros

  • Size makes it perfect to use in smaller spaces
  • Great for StandBy mode on the iPhone
  • Soft-touch material looks great
  • Power adapter included
  • Can also charge AirPods
Cons

  • Too expensive for what it provides
  • Can’t charge AirPods at the same time as your Apple Watch and iPhone
  • Cord is permanently attached to charger

A Small But Mighty Charger

Belkin BoostCharge Pro 2in1 top apple watch
Brent Dirks / MakeUseOf

I’ve used many multipurpose chargers, so the biggest surprise with the Belkin BoostCharge Pro 2-in-1 is its size. It’s very compact and much smaller than I thought. Even with the arm that sticks out for Apple Watch charging, the entire package is less than the size of a HomePod mini. That’s a great thing if you’re looking to charge your devices where space is at a premium.

The base of the charger is covered with a soft-touch fabric. There are two colors to select from—a darker charcoal and lighter sand. I tested the charcoal option, which looks great and doesn’t appear to accumulate dirt or dust—a common problem with darker electronics.

On the side, the Apple Watch charging arm is metal and can show fingerprints with enough use. I would have preferred the arm to better match the rest of the charger, but it’s not a huge issue, especially since it can’t be seen when the watch is being charged.

Belkin BoostCharge Pro 2in1 cord
Brent Dirks / MakeUseOf

While the charger is small and compact, it’s more than heavy enough and has a non-slip base so there’s no need to worry about it moving accidentally.

A 5-foot cable that ends in USB-C connects to the provided 30W power adapter. Likely to keep the charger’s small size, the cable is permanently attached. That’s disappointing, since if the cord ever frays or breaks, the charger itself is rendered useless.

Thankfully, the cable is braided and seems to be strong and sturdy. But since it’s permanently attached, I would have liked to have seen it a bit longer, maybe even by a foot or two, since you’ll likely need to snake the cable under a nightstand to a power outlet.

Perfect for iPhone StandBy Mode

belkin boostcharge pro 2in1 side
Brent Dirks / MakeUseOf

The MagSafe iPhone charger is the star of the show. It can charge at 15W, the maximum speed possible for wireless. The iPhone stand can also adjust from 0-70 degrees and charge in portrait or landscape orientation.

I found it more natural to use the landscape, so I could watch a video while charging. This also allows you to use StandBy mode. One of the best features introduced with iOS 17, it lets you view several widgets, ranging from the time to weather and more, while charging your iPhone.

And if you have an iPhone 14 Pro/Pro Max or iPhone 15 Pro/Pro Max, StandBy mode is even better with the always-on display. When the iPhone senses a dark room, the display will also dim and show a red tint to not disrupt your night vision. The Belkin BoostCharge Pro 2-in-1 has spent more than two weeks on my nightstand, and it has been great with StandBy. It’s nice to roll over in the middle of the night and see the time and more on the large iPhone screen.

You’ll drape an Apple Watch over the disc when ready to charge. If you have an Apple Watch Series 7 or later or any Apple Watch Ultra, it’s Fast Charging compatible. That will juice up a watch from 0 to 80 percent in around 45 minutes.

Because the Apple Watch charger is elevated, you can’t use the handy Apple Watch Nightstand Mode that will show the time and more when you touch the screen. It’s not a big loss when using this Belkin option, thanks to StandBy Mode.

belkin boostcharge pro 2 in 1 apple watch airpods
Brent Dirks / MakeUseOf

There is one missing piece of the equation—no dedicated spot to charge AirPods. You can still charge AirPods, just not at the same time as your iPhone or Apple Watch.

Any AirPods, as long as they have a wireless charging case, can use the iPhone charger while lying completely flat. With the AirPods Pro, the first-generation model (along with the third-generation AirPods) can use the MagSafe charger, so they won’t have to lie completely flat. The second-generation AirPods Pro can also use the Apple Watch charger.

My bedtime routine is to grab my Apple Watch, iPhone, and AirPods Pro and place them on a charger so I’ll know in the morning that everything is 100 percent ready to go. Using the Belkin BoostCharge Pro 2-in-1 has been an exercise in frustration. I’ll have to start charging my Apple Watch and iPhone and then remove one when complete to juice up the AirPods as well.

On the other hand, if you don’t have AirPods and find the current assortment of 3-in-1 chargers annoying because of the space taken up by an empty charging pad, the neatness of the Belkin BoostCharge Pro 2-in-1 is ideal.

Belkin BoostCharge Pro 2-in-1 Review: Great Function with a High Price

There is a lot to like about the Belkin BoostCharge Pro 2-in-1. It doesn’t take up a lot of room on your nightstand or desk, looks great, and can charge your popular Apple products.

But the $129.95 retail price makes the overall package a no-go for anyone without money to burn. Belkin has other options for around the same price with the ability to charge the AirPods, an Apple Watch, and an iPhone simultaneously. And you can find many other 2-in-1 options from great brands for half as much.

Belkin BoostCharge Pro 2-in-1 Wireless Charging Dock with MagSafe 15W

Belkin BoostCharge Pro 2-in-1 Wireless Charging Dock with MagSafe 15W

The Belkin BoostCharge Pro 2-in-1 is designed to charge both an iPhone and Apple Watch simultaneously. The charger takes up less space than a HomePod mini and weighs under a pound. Soft-touch material covers the entire iPhone charger and on top is an adjustable stand that can rotate from 0 to 70 degrees. You can charge your iPhone in either portrait or landscape orientation. The charger is also compatible with StandBy mode for an iPhone. On the side, the Apple Watch charger is Fast Charging compatible. 

Which Storage Device Connection Is Best?

Quick Links

Key Takeaways

  • SATA drives prioritize storage capacity, making them inexpensive and easily available for everyday use.
  • SAS drives are faster and more reliable than SATA drives, making them a better choice for enterprise-level applications and servers.
  • SATA drives are better for adding mass storage to a PC or local NAS, while SAS drives are better for servers and enterprise environments.


Interfaces like SATA and SAS allow motherboards to interface with HDDs and SSDs, allowing them to load operating systems, run programs, and do almost everything computers can.

However, with so many different uses and so much jargon, it’s easy to get lost in terms like “SATA” and “SAS.” What are they? How do they differ? Which one should you choose?


What Is SATA?

The SATA or Serial Advanced Technology Attachment connector uses the standard 15 power pins and seven data pins. SATA drives are more popular as they prioritize storage capacity over speed, resulting in inexpensive and easily available mass storage.

CyberVam/Shutterstock

However, just because SATA drives focus on storage capacity doesn’t mean they’re slow. Most consumer-based SATA drives start at 5400 RPM but can go as high as 7200 RPM. While SATA drives aren’t as fast as SAS drives, it is more than enough for most folks to run their computers.

SATA drives are also cheap, hence being the perfect storage solution for most situations, such as running a DIY NAS or taking regular data backups. Even with SSDs taking over, SATA HDDs are still popular for mass storage.

What Is SAS?

SAS stands for Serial Attached Small Computer System Interface. It uses a similar connector to SATA, also using 15 pins for power and seven for data transfer. However, the split in the SATA connector between the power and data transfer pins isn’t as prominent.

sas hard drive connector close up
Adamantios/Wikimedia

SAS drives are faster and more reliable than SATA drives in terms of data transfer. A SATA connector is fast at storing data, but outbound data isn’t transferred at the same speed. SAS remedies this issue by transferring data out as fast as it goes in.

They’re commonly used in enterprise-level applications and servers designed to run 24/7. According to Toshiba, one of the most popular HDD manufacturers in the world, the mean time between failures (MBTF) for SAS drives is between 1.4 to 2.5 million hours of use between 5 and 55 degrees Celsius. In contrast, the MTBF for general-purpose SATA drives is only about 600,000 hours of use at the same temperature. Comparison site Diffen puts this difference at 1.2 to 1.6 million hours of use at 45 degrees Celsius for SAS and 700,000 hours to 1.2 million hours at 25 degrees Celsius for SATA drives.

They consume more power, though, and it’s common practice to have a SAS drive load up the OS on a server and use SATA drives for storage. This is also done because SAS drives focus more on data transfer speeds than storage, meaning SAS drives over 500GB can be quite expensive.

SATA vs. SAS: What’s the Difference?

SATA and SAS drives have pros and cons, so here’s a handy table to compare the two.

SATA

SAS

Connector type

15-pin power, 7-pin data (split connector)

15-pin power, 7-pin data (merged connector)

Speed

5400 to 7200 RPM, data transfers up to 6Gb/s

7200 to 15000 RPM, data transfers up to 12Gb/s (with dual-port SAS)

Reliability

700,000 to 1.2 million hours at 25°C, may fail during or after prolonged use

1.2 million to 1.6 million hours at 45°C, designed to be used 24/7

Price

1TB drives start at ~ $25

Relatively more expensive. 1TB drives start at $35-$40.

Use Cases

Consumer PCs, laptops, and storage solutions

Enterprise environments such as servers and data centers.

Of course, there are several other connection types, especially if you’re talking about consumer PC use. SATA, compared to NVMe and M.2, falls short regarding reliability and speed. Even PCIe SSDs can be a good alternative compared to SATA.

Should You Use SATA or SAS?

As you can probably guess, both technologies have specific uses. If you want to add mass storage to your PC or local NAS, SATA is a better option overall. Not only do you get plenty of storage for relatively less cost, but you also get decent data transfer speeds in case you’re moving data over to your internal HDD or over the network to a NAS.

However, if you’re looking for storage for a server, processing-intense workstation, data center, or any other enterprise environment, SAS is the better choice. You get faster, more reliable storage designed to run constantly without failure. That said, it does come at a slight premium: cost. A 1TB SAS drive can be significantly more expensive than a 1TB SATA drive owing to the latter’s popularity. The exact cost can vary from manufacturer to manufacturer, but SAS drives are the more expensive option in most cases.

Overall, the choice comes down to what you’ll be using your drive for. If you just want to chuck it in your computer to act as mass storage, you’re better off with SATA. However, if you’re looking to upgrade storage on a server or need the drive to be constantly active, SAS is the way to go.

How to Create a Free AI Avatar on TikTok

Key Takeaways

  • TikTok now offers AI avatar generation within its app, allowing users to create realistic avatars based on their facial features.
  • Users can select up to 10 photos of themselves and choose from up to five different avatar styles.
  • However, there are limitations: users can only create one AI avatar per day and cannot edit or customize an avatar after creation.


TikTok has introduced AI avatar generation capabilities to its app, so you can easily create AI portraits of yourself. Here’s what you need to know about the feature, and how to use it.


How TikTok’s AI Avatar Generator Works

Chances are, if you’ve used an AI avatar generator before, you’ve had to download a dedicated app or visit a website. TikTok’s AI avatar generator brings these capabilities to its app. So, you can watch a video one minute and create an avatar the next.

Similar to the Vana AI portrait generator, TikTok asks for a maximum of 10 photos of yourself and then uses artificial intelligence to create realistic avatars based on your facial features. You can select up to five different styles for your avatar.

The AI avatar generator will produce up to 30 avatars for you to choose from. You can then use your favorite one as your profile picture or save it to your device. While TikTok’s AI avatar generator is a fun feature addition, it also has a limitation: you can only create one AI avatar a day.

Like most AI avatar generators, you may want to enhance your AI portrait with Luminar Neo.

How to Create Free AI Avatars on TikTok

To create free AI avatars on TikTok, follow these steps:

  1. Open the TikTok app and navigate to your Profile.
  2. Tap on your profile picture.
  3. Tap on Try avatar > Create.
  4. Select 3–10 photos that will be used to train the model and tap Create.
  5. Choose your preferred avatar style(s) and tap Continue.

You can choose between downloading your avatars to local storage or using them as your profile picture. To download your avatars, tap Download in the top-right corner, select the ones you want to download, then tap the Download button.

To use an avatar as your profile picture, tap on the avatar you’d like to use, then tap Use for profile.

The Limitations of TikTok’s AI Avatar Generator

While the TikTok AI avatar generator is a cool and innovative feature, it also has some limitations that you should be aware of. You can only create a new set of avatars once a day. If you want to create another, you will have to wait for 24 hours before you can access it again.

Similar to other AI art generators, you cannot edit or customize your avatar after you create it. You can only choose from the available options that the TikTok AI avatar generator provides.

TikTok’s AI avatar generator is a fun way to express yourself and create a unique profile picture for your account. You can now create realistic and personalized avatars based on your photos right on the TikTok app. You can choose from different styles and customize your avatar’s appearance.

How to Open the Task Manager on a Mac

Key Takeaways

  • You can open the macOS equivalent to Task Manager, called Activity Monitor, using Spotlight search, Launchpad, or the Applications folder in Finder.
  • Keep Activity Monitor in the Dock for easy access by Control-clicking the app icon and selecting “Keep in Dock” from the context menu.
  • Activity Monitor can force quit an unresponsive app or process: select it and click the “X” button at the top.


Since macOS is generally more stable than Windows, most people don’t feel the need to find a tool like the Task Manager. Nevertheless, there are times when you need it—especially if an app refuses to respond. We’ll teach you how to open the Mac equivalent of Task Manager.


How to Open Activity Monitor, Your Mac’s Task Manager

Using Spotlight search on your Mac is the easiest way to open almost anything on your system. It can find apps, files, and settings in just a few keystrokes. It’s much faster than browsing around manually to find what you need.

To open Spotlight, just press Command + Space on your Mac. Then, start typing Activity Monitor (the first few letters should bring it up) and press Return. In a moment, you’ll see the Activity Monitor window.

Don’t want to use Spotlight for some reason? You can also open the Mac equivalent of Task Manager by using Launchpad on your Mac. You’ll typically find the Launchpad icon on your Mac’s Dock, indicated by the grid of multi-colored icons.

Upon opening Launchpad, click the Other folder (you may have to scroll left or right to another page to see it) to find Activity Monitor located alongside other macOS utility apps.

Other folder in macOS Launchpad

Lastly, you can also find Activity Monitor in the Applications folder on your Mac. Open a new Finder window, select Applications from the sidebar, and click the Utilities folder to find and open it.

Keep Activity Monitor in the Dock for Easy Access

Once you open the Activity Monitor app using any of the above methods, it will appear in the Dock at the bottom of your screen. However, this shortcut disappears once you quit the app.

Keep in Dock option for Activity Monitor

If you use Activity Monitor often, you may want to keep it on the Dock. To do this, Control-click the Activity Monitor icon on the Dock and choose Options > Keep in Dock from the context menu. From now on, you can access Activity Monitor right from your desktop.

How to Force Quit Apps Using the Mac Task Manager

One of the most common reasons for opening the Windows Task Manager is to close apps when they stop responding. While this doesn’t happen as often on macOS, you may occasionally need to force quit an app when it’s unresponsive or exhibits abnormal behavior.

Force Quit Applications window in macOS

The easiest way to do this is to use the Force Quit Applications window on your Mac. To open it quickly, simultaneously press Command + Option + Escape. From there, select the unresponsive app and hit Force Quit. When prompted for confirmation, click Force Quit again. Alternatively, you can access this window by clicking Apple menu > Force Quit from the menu bar.

Besides the Force Quit Applications window, you can also close apps using Activity Monitor (like you would with the Task Manager). This is handy if you want to force quit a process rather than an app, since processes don’t appear in the Force Quit Applications window.

Stopping a process in Activity Monitor

Open Activity Monitor on your Mac, select the unresponsive app under the CPU tab, and click the Stop (X) button at the top. Click Force Quit when prompted to confirm, and the app will shut off.

This process is similar to closing apps using Task Manager, so it shouldn’t be difficult to force close apps on macOS if you recently switched from Windows.

What Does Your Mac’s Task Manager Do?

Unlike the Windows Task Manager, which shows your PC’s performance graphs in one window, the Activity Monitor has separate tabs for resources an app consumes, such as CPU, Memory, Energy, Disk, and Network usage.

Clicking a heading allows you to sort by that option, making it easy to see what processes are using the most resources. For example, sorting by % CPU shows any processes that are doing a lot of intensive tasks.

If you consistently see an app here that isn’t actually doing hard work, it may be misbehaving. For one popular example, we’ve explained how to fix the “kernel_task” high CPU usage bug if you encounter it.

Energy comes in handy if you’re using a MacBook and want to get as much battery life as possible. Sorting by Energy Impact lets you see which apps draw the most power. You can close them to make your MacBook last longer before needing a charge.

Mac Activity Monitor showing the CPU tab

To get more information about a process, select it and click the Info (i) button at the top of the Activity Monitor window for more details. As mentioned earlier, you can also click the Stop (X) button to kill any process, though you shouldn’t close something unless you’re sure you don’t need it.

Activity Monitor has a few handy options in the menu bar you should know about. The View tab lets you choose which processes to show. Instead of All Processes, you may want to see only Active Processes to filter out noise, for example. You can also use the Columns option to hide or show more info for each process.

Mac Activity Monitor secondary windows

And under the Window menu bar item, you’ll find a few options—like CPU Usage and GPU History—that open small windows. These let you monitor resource usage without keeping the full Activity Monitor window open. If you like these, try using View > Dock Icon to change the app’s icon from the default to a live graph of CPU, network, or other activity.

These views are great if you like to monitor the performance of your Mac, especially while gaming. For more on what the Mac equivalent of Task Manager can do, see our comprehensive guide to Activity Monitor on Mac.

It’s easy to open Activity Monitor and keep an eye on what’s happening on your Mac. We’ve shown you several ways to access it, so managing active processes on your Mac when needed shouldn’t be an issue. The more you know about your Mac, the more efficiently you can get work done on your computer.

Phone Storage Always Full? 6 Ways to Make Space

Nothing’s more frustrating than getting a full storage notification on your phone because you won’t be able to take photos or videos and install apps as you normally would. However, you can free up some phone storage with these tips.


1. Remove Old Songs, Podcasts, and Videos

If you use media apps and streaming services like Spotify and YouTube that let you download songs, podcasts, or videos, you might have old files that you no longer use but are taking up space. When you opt to download media from such apps, you are downloading a local, offline version of the media onto your phone, which takes up storage capacity.

Some podcasts and videos are hours long, and it’s easy to forget just how much storage it takes to keep them on your phone.

It’s important to check your downloads frequently to ensure you’re not holding onto large files. On Spotify, you can remove songs and podcasts from your downloads by heading into a playlist, clicking the three vertical dots under the playlist image, and selecting Remove Download. This will remove the entire playlist from your downloads.

On YouTube, simply head to your download playlist, tap on the three vertical dots next to the video you want to delete, and select Delete from downloads.

Many of us take photos and videos that we end up not wanting but forget to delete. Whether they’re old screenshots, blurred images, or duplicate media, you can free up a surprising amount of space by cleaning up your cluttered gallery.

You can do this most effectively by going through specific albums. On your phone, you likely have an album for screenshots, an album for Instagram media, and so on. You can delete these albums entirely if you don’t need them, which can open up a fair bit of storage. Alternatively, you can scroll down to your oldest photos and see if you can find any forgotten media you no longer want.

If your phone’s gallery app has a trash folder, you could also empty it to clear up some extra space. When an image or video goes to the trash folder, it usually remains there for 30 days before it is permanently deleted. If you don’t want to wait this long, you can manually clear the folder with a few taps.

3. Check Automatically Downloaded Content

You may not know this, but some social media apps tend to automatically download any media that a person sends you onto your phone’s internal storage. For example, if someone sends you a video on WhatsApp, your phone will automatically download it to your gallery if your settings allow it. To avoid this, turn off the Media visibility setting.

This setting may look different in other apps. For example, you’ll need to go to Settings > Photos & media > Save photos and videos and disable the toggle in Facebook Messenger to avoid automatically saving any photos you take using the app.

On Snapchat, you’ll need to go to Settings > Memories > Save Button to alter your automatic saving settings. You can choose to save your photos to just your Snapchat Memories, your phone’s internal storage, or both. Again, you’ll find the process similar for other social media apps.

4. Disable Unwanted Apps That Can’t Be Deleted

Ever looked at some of the pre-installed apps on your smartphone and thought, “I’m never going to use this, so why can’t I delete it?” While you may not be able to delete certain apps, there is a way you can minimize how much space they take up.

Most of the apps on your phone that can’t be outright uninstalled can be disabled. This applies to a lot of default apps that were already present when you first bought your phone, such as built-in gaming apps, step-tracking apps, and wallet apps.

Disabling an app stops it from running in the background and restricts the amount of storage its cache files can take up. Such apps also will no longer receive updates, which is another great way to save on storage. You can disable an app simply by holding your finger on it, as you would when uninstalling and clicking the Disable option.

5. Clear Your Cache

A cache can come in the form of hardware or software, and its function is to store data so that future requests for that data can be processed and provided more efficiently. But a cache can also harbor data you no longer need and take up storage space without you even realizing it.

To clear your browser cache, simply head to your browser’s settings and tap the Clear history or Clear browsing data option. Here, you can select the cache and clear it to free up space. For example, to delete the cache in Chrome, tap the three dots icon in the top-right corner of the app and go to Settings > Privacy and security > Clear browsing data.

Besides the browser cache, you can easily clear the app cache on an Android device to free up even more storage space.

6. Check for Miscellaneous Files

Miscellaneous files can come in all forms on your phone’s internal storage. Such files could relate to various aspects of your phone, including apps or the operating system. Because of this, you shouldn’t just clear all your miscellaneous files, as you may be removing crucial data that helps your phone function. Instead, look through these files and manually select those you no longer need.

Firstly, open your phone’s default files app. On a Samsung phone, this will be a yellow icon named “My Files”. Then, head to Internal Storage and take a look at the files you see there. You may see files from deleted apps, old voice notes, or unwanted ringtones. These files may be small, but they all add up.

Going years without clearing your miscellaneous files can cause a lot of data to build up, so deleting the files you don’t need can help free up more storage space than you’d think.

If you find yourself constantly frustrated at your phone’s full storage, take the time to follow the steps above and check any areas of your phone that might be harboring old or unwanted data. You never know, you could end up clearing gigabytes of unnecessary junk! And isn’t that every smartphone owner’s dream?

The 7 Best Shortcuts to Use With Your iPhone 15 Pro’s Action Button

To make the most of your iPhone 15 Pro’s Action button, you need to assign a custom iOS shortcut that helps you save time. This is easy if you use the Shortcuts app extensively, but if you aren’t familiar with it and are out of ideas, we’ve listed some great examples.


How to Assign a Shortcut to Your iPhone’s Action Button

Before you get started, it’s worth knowing how to assign a shortcut to your iPhone’s Action button in the first place. Go to Settings > Action Button and swipe left until you find the Shortcut option.

Select whichever shortcut you like; the next time you long-press the Action button, you’ll get a confirmation on your iPhone’s Dynamic Island that you’ve triggered the shortcut.

For each shortcut idea below, you’ll build it first in the Shortcuts app, then head into the Settings app as mentioned to program it to the Action button on your iPhone.

1. Jot Something Down in a Note

How great would it be to have a way to quickly jot something down on your iPhone without having to find the Notes app or swipe down from the Control Center? Well, thanks to the Shortcuts app, you can program your iPhone’s Action button to open a new note with one press, so you can start typing right away.

To create this shortcut, launch the Shortcuts app, tap the plus (+) button at the top-right corner, and select Add Action. Now, search for “note” and select the Create Note action from the results that appear. You can even set it to pre-populate with text each time or automatically save it to a folder of your choosing.

2. Turn Your Home Lights On and Off

If you have HomeKit-enabled smart lights, you can program your iPhone’s Action button to set a particular scene. To get started, search for “home” in the Add Action menu of the Shortcuts app and select the Control My Home action from the results. Then, choose the scene or accessory you want to use, and you’re pretty much set for basic use.

Additionally, if needed, you can add an If action to your shortcut to toggle everything off or on, depending on the current state. So, if you’re leaving the house and your lights are on, pressing the Action button will turn them off, and if you’re coming home and all the lights are off, a press will turn them back on. The If action shows up in the suggestions while you’re setting up this shortcut.

3. Add a New Calendar Event on the Fly

Maybe you don’t need to remember something specific in a note but rather remember an event coming up. If that’s the case, use Shortcuts to have the Action button trigger the New Event pane in Apple’s Calendar app.

Search for “calendar” after tapping Add Action in the shortcut creation menu, then select Add New Event from the results. Make sure for each field, you long-press and select Ask Each Time.

Some third-party calendar apps also support this, so if you use something other than Apple’s Calendar app, try searching for it in Shortcuts to see if the appropriate action is available.

4. Play Your Own Music Station

If you use Siri and Apple Music together, you may be familiar with the simple command “Play some music.” This draws from your personalized music station that Apple Music tailors based on your likes and listening history. The recommendations are usually on point, so whether you want to jam out or listen to music in the background, consider mapping your Action button to this station.

After tapping Add Action in the new shortcut menu, search for “music” and find the Play Music action. Then, tap the Music field and choose Listen Now or Radio to find your station. It should have your full name in the title. Alternatively, you can use this shortcut action to map your iPhone’s Action button to a playlist or artist from your library instead.

5. Invoke ChatGPT

ChatGPT is too useful to remain buried in an app somewhere on your Home Screen. As long as you have the ChatGPT app installed and set up on your iPhone, you can search for the ChatGPT actions in Shortcuts to have your iPhone 15 Pro’s Action button automatically start an AI conversation.

Find the Ask ChatGPT action, then long-press the Message field and select Ask Each Time. Once you choose this shortcut for your Action button, pressing it will start a pop-over conversation with ChatGPT. It doesn’t force you to leave what you’re currently doing and switch over to the app—it’s a brilliant way to ask a question or two and get right back to your activity.

6. Call or FaceTime Your Significant Other

A super simple but incredibly handy shortcut to set for your Action button is to automatically call or FaceTime your significant other, best friend, or family member. One button press can initiate the call if you use the Call or FaceTime action in a Shortcut. Then, select the contact you want to call each time, and you’re good to go.

Despite having widgets and contact favorites, this Action Button shortcut is the only thing that really comes close to replicating the speed dial function of decades past.

7. Identify Music With Shazam

A single button push to launch Shazam and quickly identify the music playing around you? Yes, please. I feel like the iPhone 15 Pro’s Action button was made for moments like this—it’s surprising Apple didn’t include it as one of the default options.

While Shazam often acts pretty fast, identifying a song can sometimes be timely if the song is almost over, or you’re leaving the area. If you’re the type of person who loves to discover new music, turn your Action button into a Shazam button.

The best part? You don’t even need the Shazam app installed on your iPhone. You can find the Shazam shortcut from the Gallery section of the Shortcuts app. Alternatively, you can search for the Recognize Music action, save your new shortcut, and map it to your iPhone’s Action button.

It’s incredible how creative people have gotten with Action button shortcuts; hopefully, these tips either inspire you to build something greater or introduce new functionality to your Action button you didn’t know you needed. And don’t forget that you can switch the function of your Action button at any time from the Settings app.

How to Use TikTok Without the App or an Account

Key Takeaways

  • You can use TikTok’s website or mobile browser to watch videos without creating an account.
  • You can also use a third-party viewer like Urlebird to explore TikTok content, but beware of poor-quality ads and site performance issues.
  • Using TikTok without an account limits interaction with the platform, including liking, commenting, and following.


There is so much content to see on TikTok that you’ll likely find videos that appeal to your unique interests. But if you would rather not create an account on another social media platform, here’s a look at how to use TikTok without the app or an account.


1. Use the TikTok Website on Your PC

You can use a desktop browser to open the TikTok website and watch videos without logging into an account. TikTok doesn’t place any restrictions on the number of videos you can watch without logging in.

A prompt to log in to TikTok will come up from time to time, but you can simply close it and continue watching.

2. Use TikTok’s Mobile Browser Website

Alternatively, you can watch videos on TikTok’s mobile website if you don’t want to use the app but still want to browse on your smartphone.

Opening TikTok on a mobile browser takes you to a For You page. A prompt should come up, asking you to download TikTok Lite or the main TikTok app. Select Not now and continue to watch videos. It will continue to pop up from time to time but you can dismiss it.

There is a limit to how far back you can go into a particular creator’s post history before you are cut off and asked to download TikTok (unlike the desktop site).

You can find trending songs and hashtags on the Discover tab on the mobile website. The mobile interface is closer to the TikTok app than the desktop website.

3. Use a Third-Party TikTok Viewer

Urlebird - Third-Party TikTok Viewer

If you don’t want TikTok tracking your viewing activity, you can use a third-party viewer website to explore TikTok content. Urlebird is a popular TikTok viewer that shows trending videos and allows you to search for users and hashtags.

The Music tab helps you keep track of trending songs on the platform, and you can download TikTok videos with Downloader. It does have some drawbacks though. For one, trending content is usually not what you want to see and you are not likely to find any useful recommendations.

The website includes a lot of poor-quality ads and the site’s performance is also not always reliable.

Can You Use the TikTok App Without an Account?

The TikTok app doesn’t require users to create and log in to an account and this applies to both TikTok Lite and TikTok. All you need to do is install the app and start watching. The non-lite version of the TikTok app even allows you to choose your preferences.

The Limitations of Using TikTok Without the App or an Account

There are certain merits to using TikTok without logging in. It allows you to browse the platform without sharing as much personal information, it helps you avoid notifications and messages, and it makes it easier to discover new, fresh content.

There are ways to view a person’s TikTok profile anonymously without logging out of your account, so you shouldn’t have to avoid using the app with an account if you don’t want people to see that you’ve viewed their profile. Using TikTok without logging in is not for everyone though, as it has a few key limitations:

  • You won’t be able to like and comment on videos, nor can you follow any accounts.
  • You also won’t have a watch history without an account, making it hard to re-watch videos you enjoyed.
  • You won’t be able to watch TikTok LIVE without creating an account or logging in. LIVE videos will only play for twenty seconds before TikTok asks you to log in.
  • You can’t customize your TikTok’s For You page to suit your preferences. However, when using the platform, it does try to personalize some of the recommendations.

It is also important to know that using the TikTok website or app without an account is not completely anonymous. TikTok tracks you even without an account. However, you can clear cookies or delete the app’s cache after each browsing session. You can also try watching on your browser in incognito mode.

Using TikTok without an account means you won’t be able to interact with any of the content you see on the platform. This might lead to a passive and somewhat isolated experience on the platform.

How to Use Split Screen on a Mac With Split View

Key Takeaways

  • Split View in macOS allows you to view two windows on your Mac simultaneously, making multitasking easier.
  • You can enter Split View on a Mac using the Enter Full Screen button or Mission Control.
  • While in Split View, you can adjust the window size, swap positions, and replace a tiled window to make the most of it.


Tired of switching back and forth between two app windows on your Mac? The Split View feature in macOS makes multitasking a lot easier. Read on to learn how to split the screen on your Mac and use two apps simultaneously.


What Is Split View in macOS?

Split View is one of the useful macOS features that makes your life easier. It allows you to view two windows on your Mac at the same time without them getting overlapped or jumbled with other opened windows.

If you don’t have an extra monitor, Split View is a great option when you need to use two apps side-by-side on your Mac. For example, with Split View, you can scroll through a document on one side of your Mac’s screen and type information into Numbers on the other side.

This feature is a lifesaver for people who often multitask on their computers. There’s one minor downside to it, though—you can’t use more than two apps in Split View at once.

How to Split the Screen on a Mac

You can split the screen on your Mac using the Enter Full Screen button or Mission Control. We’ll teach you both methods below.

Enter Split View on a Mac Using the Enter Full Screen Button

Most app windows on macOS have an Enter Full Screen button that lets you put them in full-screen view or tile them to the left or right half of the screen. You can use that to put an app in Split View with these steps:

  1. Open the two apps you want to use side by side.
  2. Hover the cursor over the green button in the top-left corner of either app’s window.

  3. Click the second or third option from the context menu according to your preference on snapping to the Left or Right.
  4. Once the app is tiled, click the second app window, which appears on the other half of the screen, to tile it.
    selecting second app window to put in Split View mode on a Mac.

Enter Split View on a Mac Using Mission Control

Mission Control is a macOS feature that shows you all open apps and spaces on your desktop to make them easily accessible. Here’s how to use it to put two apps side by side:

  1. Open the two apps you want to use in Split View.
  2. Bring up Missing Control. You can do this by hitting the Mission Control (F3) key on your keyboard. Alternatively, you can swipe up with three fingers on your trackpad or double-tap the Magic Mouse with two fingers.
  3. Click on an app window and hover it over the left or right of the active space at the top of the screen. When you see a window with a plus (+) button, drop the app window on top of it.
    dragging an app window onto a new space in Missing Control.

  4. Now, click and drag the second app window over the new space and drop it there to put it next to the other app in Split View.
    putting the second app to put into the new space in Mission Control.

How to Adjust the Windows in Split View

Once you’ve put two apps in Split View on your Mac, here are a few actions that can help you multitask more effectively.

Adjust the Split Screen Area

If you want the window on either side of the screen to be larger, click and drag the vertical separator between the two windows to the left or right, according to your liking. Remember that there’s a limit to how much you can adjust the size of the windows in Split View.

vertical separator for adjusting the screen area between two apps in Split View mode.

Switch Window Positions

For times when you feel it’d be more convenient to view one of the apps on the left side of the screen rather than on the right (or vice versa), you can easily switch the window’s position without exiting Split View.

To do this, move the cursor to the very top of the screen. This will expose the window’s title bar. Click the title bar of the app you want to move and drag it to the other side of your Mac’s screen.

switching positions of app windows in Split View on a Mac.

Also, don’t fret if you can’t see your Mac’s Dock—it’s temporarily hidden when you’re in Split View. If you want the Dock to show up, simply move your cursor to the bottom of the screen.

Replace a Tiled Window in Split View

Lastly, if you want to use a different app than the two currently open in Split View, you can replace a tiled app window with another.

For this, go back to the desktop space where you have the two apps open side by side. Hover your cursor over the green button on the app window you want to replace and select Replace Tiled Window.

Replacing tile in Split View

When macOS shows you all the open apps on your desktop, click on the one you want to use, and it’ll be stacked next to the existing one in split-screen mode.

selecting the other app window to replace one in the existing Split View.

How to Exit Split View in macOS

There are four ways to exit the Split View mode on a Mac. The fastest way is to press the esc key. This will take the app (on which you press the key) out of Split View and put the other app in full-screen mode. However, this method doesn’t work on apps that use the esc key for some other action.

Alternatively, you can exit Split View using the green button. With this method, you can choose what happens to the app windows when you exit Split View by hovering over the green button and selecting either Move Window to Desktop or Make Window Full Screen. If you can’t see the green button, move your cursor to the top edge of the screen.

Exiting Split View in macOS

If you’re done working with one of the apps from the Split View screen, click the X button at the top-left corner of its window to close it. When you do this, the other app will open in full-screen mode.

Finally, you can also exit Split View using Mission Control. To do this, press the Mission Control (F3) key on your keyboard or swipe up with three fingers on the trackpad. Then, hover the cursor over the desktop space showing the windows in Split View and click the inwards-facing arrows to separate them.

Exiting Split View from Mission Control in macOS

Other Ways to Split the Screen on a Mac

While Split View is a great and effective way to multitask on your Mac, another way to split the screen on your Mac is by using a third-party window management tool for macOS.

One such tool is Magnet. With it, you can view up to four windows simultaneously on a standard screen and up to six when using an ultrawide monitor. It’s effortless to activate; you choose how to view everything on your desktop by simply dragging the opened windows or using keyboard shortcuts. Magnet isn’t free, but it’s well worth the few dollars.

Download: Magnet ($4.99)

Rectangle app in macOS

If you don’t wish to spend money on a third-party app, consider using Rectangle instead. Its free offering packs all the essential window management features and supports different layouts. The app has different keyboard shortcuts for different layouts, which makes snapping apps super easy. Besides, it also gives you a few other useful features to help you multitask efficiently.

Download: Rectangle (Free, premium version available)

Split View is the easiest way to view and use two apps side by side on a Mac. Sure, it lacks some features, but not everyone needs more than the basics. For those who do, full-fledged window management tools are the better way to go.