3 Features I Wish Spotify Had for Podcasts (and How to Work Around Them)

Key Takeaways

  • Find in-progress podcast episodes more easily by saving them first.
  • Stop unwanted podcast recommendations by marking all episodes as finished in the show’s settings.
  • While there may not be an automatic equalizer, you can improve your podcast audio by manually applying an EQ in Spotify’s playback settings.


While I love Spotify for bringing me all of my audio in one place, there are certain aspects of its podcast functionality that I think could be improved. Here are the podcast-related bones I have to pick with Spotify as well as the best existing solutions I’ve found.


1 Sorting In-Progress Podcast Episodes

Some episodic podcasts have hundreds of standalone episodes, and you may not listen to these episodes linearly. When you have to pause in the middle of listening, it can be convoluted to find that episode again. Searching on a podcast’s show page, Spotify has filters to view All Episodes, Downloaded, or Unplayed, and an option to sort by Newest or Oldest. Personally, I’d love to see an In Progress filter on the show’s page. However, this feature is only accessible when you save episodes.


Here’s how to save episodes and access the In progress filter:

  1. Save or add an episode to Your Episodes by tapping the plus sign next to the description.
  2. Navigate to Your Library tab > Your Episodes. You’ll see a filter for In progress on this page.
  3. Similarly, downloading an episode will add it to Your Episodes. Just tap the down arrow near the episode’s description to move it to Your Episodes.

If sorting in-progress episodes is a priority for you, and you’re an iPhone user, you might also consider
Overcast
, which has an automated In Progress playlist on its home page.

2 Curbing Podcast Recommendations

Spotify will push podcasts you’ve interacted with, even if those interactions are not necessarily positive. If you try a new show and decide to bail after one episode, Spotify doesn’t read that as disinterest or offer an option like Netflix’s Thumbs Up and Thumbs Down ratings. While you can rate a title publicly on Spotify, this feels like overkill when you’re only trying to affect your own algorithm.


In lieu of a personal rating system, here is how to stop Spotify from recommending a podcast you’re not interested in:

  1. Go to the show page and open the Settings gear.
  2. Under Manage, tap Mark as finished. Select the first bubble to Mark all as finished.

Now, click Done, and you’re good to go.

3 Automatic EQ Settings

Spotify has impressive equalizer settings that can improve your audio depending on what you’re listening to. For example, I use the Spoken Word equalizer when listening to podcasts, particularly in the car, where street noise and wind drown out voices.


The dreamer in me would love to be able to automate those EQ settings, such as with a preference to apply a specific equalizer any time I play a podcast episode. Until that day, you can apply an EQ manually, even if it is deep in your playback settings:

  1. Click on your profile icon in the upper left corner of the app.
  2. Select Settings and privacy > Playback > Equalizer.
  3. Move the slider to the right to turn on your Equalizer, and Also apply to podcasts.
  4. Scroll down and tap Spoken Word to apply that equalizer.


These three perceived flaws aside, there is still plenty to love about using Spotify to listen to podcasts. As picky as I might be as a podcast producer and super-consumer, I’ll gladly put up with a few points of irksome UI for the rewards of having a comprehensive listening app and features like being able to listen to episodes offline. Ultimately, everyone will have their own unique preferences, and luckily, there are many free apps for podcasts to choose from.

The 5 Best Free Cloud Storage Providers

Key Takeaways

  • Google Drive offers 15GB free storage, perfect for collaboration and organization with colleagues, especially if you’re already using Google services.
  • pCloud provides easy access and can boost storage to 15GB+ through simple tasks or a one-time purchase, making it a cost-effective option.
  • MediaFire is great for sharing files with others and has a generous 10GB free storage, although batch downloading may require the premium service.


Cloud storage is a useful way to access your files from anywhere with an internet connection. If you’re short on money, there are free cloud storage websites on the internet that let you upload files at no extra cost. Let’s explore the best free cloud storage solutions for storing your files online.


If you use Google’s services often, you’ll get a lot of mileage out of Google Drive. Not only does it have a generous amount of space for no additional cost, but it plays well with other Google services. If you’ve used Google Docs in the past, you’re already using Google Drive!


Google Drive is a great way to organize your business and work files. When you use Google’s online office suite, all the files you create are stored in Google Drive for easy access. If you have an Android phone, you can download the Drive app and stay up-to-date while you’re on the move.

Google Drive is the best free cloud storage solution for collaborating with other workmates. You can use Drive to create a folder full of documents and spreadsheets to work on, then share a link to the folder with your colleagues. Anyone with the link can hop in and edit the documents within. As such, Google Drive is a great tool for those working remotely.

Do note that the 15GB space is shared among all of Google’s programs, including Gmail, Docs, and Photos.

2. pCloud (10+GB Free Storage)


pCloud is a simple, easy-to-use entry on this list. On the front page, you enter an email and password, and you’re ready to go. You then have 10GB to play with at no extra cost.

pCloud is generous with its bonus space. At the time of writing, verifying your email with pCloud nets you another 1GB to use, and uploading a file gets you another GB. You can get a total of 5GB for completing simple tasks and then 1GB from referring a friend.

This makes pCloud an easy way to get 15GB+ of storage without paying anything.

There’s a chance you’re looking for free cloud storage services because you dislike the idea of paying a subscription. It’s not great to have all your data stored on one service and then be “forced” to pay monthly to maintain that storage.


pCloud is unique as you can make a one-time purchase to get a permanent boost to your storage. The price is quite high, but if you plan to use online storage for a few years, it’s cheaper in the long run than maintaining a subscription.

The pCloud Crypto service is an additional security layer that’s also offered as a subscription.

From its generous storage space alone, MediaFire is an excellent service for storing data. However, using MediaFire purely as a file storage website doesn’t fully exploit its potential.

MediaFire’s sharing capabilities make it one of the best ways to share files for others to download. Hover over the item you want to share, click the arrow on the right, and click Share. You then get a link you can share for other people to download from.


MediaFire limits uploaded file size to 4GB per file.

Unfortunately, when you try this with a folder of files, MediaFire will prompt you to purchase their premium service to batch download files. Thankfully, you can skirt around this restriction by zipping up the folder you want to share on your desktop and then uploading it.

4. OneDrive (5GB Free Storage)

OneDrive isn’t too generous with its storage space, but it earns points for requiring the least amount of installation and setup than the other entries on this list. For instance, if you have a computer that runs Windows 10 or 11, you’re already fully equipped to use OneDrive.


When you open Explorer in Windows, you should see OneDrive on the left sidebar. Any files dragged into here will automatically upload and sync up with the OneDrive server. You need to have the OneDrive app running for it to sync up, so look for the OneDrive icon in your taskbar. If you don’t see it, click the start button and type “OneDrive” to start it up.

If you don’t use Windows 10, you can still use OneDrive to store your files. You do need to create a Microsoft account before you can use it, but once you do, you can use the website interface to upload and share files.

OneDrive also has a special Shared folder that keeps tabs on which files are being shared and to whom, so you can keep track of who can see your data.

If you’d like to learn more, check out our guide on what OneDrive is.

5. Dropbox (2GB+ Free Storage)

​​​​​​​


One of the older entries on this list, Dropbox, specializes in syncing your desktop files with the cloud. You can use Dropbox as a traditional cloud storage service, but its true power unlocks when you set up a special Dropbox folder on your desktop using the client.

When you drop files into this particular folder, Dropbox will automatically notice the addition and upload it to the cloud. This is also true if it notices a file has changed. As such, you can place a text document into the folder and edit it over time, and Dropbox will automatically update the cloud version of the file every time you save it.

You can also set up a shared folder and invite others to use it. When other people upload or edit files in said folder, Dropbox will update it on your end. If you have the Dropbox client, your friend’s edits will automatically update the folder on your PC.


If you’re disappointed at Dropbox’s 2GB offering, you can complete tasks and refer friends to get more room. Referring Dropbox to a friend gives you 500MB per referral to a maximum of 16GB, and completing tasks gives you 250MB up to around 1.5GB extra space.

If you really end up liking it, check out how you can access Dropbox (and Google Drive) from a Windows drive letter.

Why Not Make Your Own Cloud Server?

If you’re cost-conscious about your cloud storage, you can cut out the middleman and create your own. The upfront costs are high, as you need to purchase a server and set it up at home. However, once you’ve paid up, you have full rein over a considerable amount of storage without paying anything more.

There are plenty of reasons why you should make your own server. The next time you’re nervously watching your free cloud storage space fill up, consider putting down the cash for a more long-term solution.


If you’re looking for a free way to store your data on the cloud, there are plenty of great options—including making your own. While there are no free unlimited cloud storage services on our list, the top choices still give you plenty of room to upload images, documents, and videos.

An Impressive Phone, But Should You Buy It?

Key Takeaways

  • The Google Pixel 8a is a great mid-range smartphone that offers impressive performance, a snappy user experience, and a capable camera system. It runs on the same Tensor G3 chipset as the Pixel 8 and 8 Pro, with 8GB RAM, which ensures smooth and responsive performance. The camera is particularly impressive, producing bright, saturated, and crisp images.
  • The Pixel 8a ships with Android 14, which is quick and responsive, and offers seven years of support for security updates and Android updates. The AI features, such as Circle to Search and Gemini AI, add value to the user experience.
  • However, the Pixel 8a does have some downsides. The battery charging is slow, and the phone lacks Qi2 wireless charging capabilities. The design also has a budget-phone look, especially on the more colorful models.


Google’s Pixel lineup has long been one of the best ranges of Android phones available. While the top models aren’t cheap, the line is more affordable than many other brands. The Google Pixel 8a, in particular, has caught up to the Pixel 8 this year, but while it may be the better purchase at full price, it’s no easy decision.

Google Pixel 8a

The Google Pixel 8a features the same Tensor G3 chipset as the other Pixel phones, a battery that will easily last you all day, and a great camera. Combine that with smart AI features and seven years of updates, and that’s a bargain considering the price.

Pros

  • Powered by the same powerful chipset as the Pixel 8 and 8 Pro
  • Camera performance is impressive
  • Same AI features found on pricier Pixel models
  • Seven years of updates
Cons

  • Charging is slower than other Pixel 8 phones
  • Looks like a budget phone


Price and Availability

The Google Pixel 8a retails for $499 and is available directly from Google or other retailers. There are four different finish options: Aloe, Bay, Obsidian, and Porcelain. Oddly enough, not everything is the same across color options.

The Pixel 8a’s base model has 128GB of onboard storage. If you want 256GB, you must buy the phone in Obsidian, which costs $559 retail. Since the phone’s launch in May 2024, the Aloe, Bay, and Porcelain models are still only available with 128GB of storage.


It’s worth mentioning that if you’re put off by the price, it may be worth waiting a while. I’ll touch on this later in the review, but both the Pixel 8—the 8a’s older, slightly higher-spec’d sibling—and the Pixel 7a are frequently on sale. I’m not finding many deals at the time of this writing, but they’re likely just around the corner.

Familiar Design and a Good Feel

Person holding the Google Pixel 8a showing the home screen
Kris Wouk / MakeUseOf

I reviewed the Google Pixel 8 in 2023, and when I pulled it out of the box, it was a fairly familiar sight. It doesn’t look exactly the same, mainly thanks to the different color choices and the size of the bezels around the screen. That said, I was immediately aware that I was looking at a phone from the same series.


The brighter colors that manufacturers tend to favor for more affordable phones over their flagship models somewhat give away the Pixel 8a’s mid-range nature. The use of plastic in the build is also a culprit, but only in that the Pixel 8a doesn’t have the same feeling of heft as the Pixel 8.

On the other hand, the plastic on the back of the phone has a matte texture. This helps it match the metal frame and camera bar better, but it also has a nice feel. You likely won’t think you’re holding the latest flagship phone, but it certainly doesn’t feel like a budget phone.

Perhaps due to the plastic, the Pixel 8a isn’t quite as tough as its siblings. While the Pixel 8 and Pixel 8 Pro offer IP68 dust and water resistance, the Pixel 8a is only rated IP67. This means less protection against water specifically, so be aware it’s not as water-resistant as the other models.


Sharp Display With Smooth Motion

Google Pixel 8a outdoors showing the screen viewing angle
Kris Wouk / MakeUseOf

Like the 7a, the Pixel 8a has a 6.1-inch display, but this time around, the screen has seen some much-needed upgrades. The phone uses a new display, which features the same 1080 x 2400 resolution but brings 120Hz variable refresh rate support. This provides extra smoothness to motion, which you’ll notice more than any resolution increase if you’re upgrading from an older phone.

This new screen is also brighter than that found on the 7a, with a max average brightness of 1400 nits and a peak of 2000 nits. This is more than enough for indoor use but only seems to be about the bare minimum for using the phone outdoors on a sunny day. While taking photos, I occasionally had trouble seeing what I was capturing.


Much of this is due less to brightness and more to the limited viewing angles, as the Pixel 8 had the same brightness, and I had no issues. The Pixel 8a’s screen seemed more reflective, as even indoors, I noticed quite a bit of glare reflecting off the screen.

I didn’t notice this on the Google Pixel 8, and this could be because that phone uses Corning Gorilla Glass Victus, while the 8a uses Gorilla Glass 3.

Performance On Par With Other Pixels

Person holding the Google Pixel 8a showing the apps menu
Kris Wouk / MakeUseOf

The Pixel 8a is powered by the same Tensor G3 chipset that powers the other two models in its range, and like the Pixel 8, it features 8GB RAM. This should mean roughly equivalent performance. The phone certainly never felt slow during my testing.


Turning to 3DMark for testing, the phone performed respectably on the Wild Life benchmark, with an average score of 8,500 over multiple runs. The Wild Life Extreme test wasn’t as kind, with an average score of just 2,370 (the Samsung Galaxy S24+ scored 4,730 for comparison’s sake), but this isn’t a flagship.

When just using the phone, the performance feels just as snappy as the Pixel 8, and for good reason, considering the hardware. While it may not be a gaming powerhouse, it handled the few games I threw at it without a problem.

That said, like the Pixel 8, I did notice that the 8a would warm up after playing a game like Real Racing 3. It never felt hot enough that it was disconcerting, but I could definitely tell the phone was working. Fortunately, as with the Pixel 8, I never noticed any thermal throttling during my testing.


Great Software That Will (Hopefully) Age Gracefully

Person taking a photo with the Google Pixel 8a
Kris Wouk / MakeUseOf

Google’s Pixel phones provide the most bloat-free, stock Android experience you’ll find straight out of the box, which is a selling point for many. I found Android 14, which the Pixel 8a ships with, quick and responsive, with subtle animations that make it a joy to use. The keyboard also deserves high marks.

You aren’t stuck with Android 14 either, as in a move similar to Samsung with its flagships, the Pixel 8a offers seven years of support. That includes security updates and Android updates, though it’s likely that the Pixel 8a may not support every new feature that comes to future Android versions.


Of course, the Android version isn’t the star of the software show with the Pixel 8 lineup; it’s the AI features. Circle to Search is probably the most advertised, and it’s impressive how well it works. That said, I never found myself reaching for it unprompted, but instead, I tried it out just for testing purposes.

My time with the Google Pixel 8a came a short while after its release, but that ended up being a good thing, as I was able to try out some of the new Gemini AI features. Initially only available on the Pixel 8 Pro, these features are now coming to the entire line. How useful they are to you at the moment likely depends on how much you currently use large language models (LLMs) like ChatGPT or Google Gemini outside your phone.


I’m not much of an LLM user currently, so most of my testing was just that. Even so, moving more AI operations off of Google servers and onto the Tensor G3 directly benefits almost anyone, regardless of how consistent your data connection may be. While it’s still early days for these features, there’s promise, and it seems there is plenty more to come.

Google could have limited AI features on the Pixel 8 and 8a to position the Pixel 8 Pro as more of a premium device. While that was originally the plan, the company changed course, and that is for the better. That also means that as more AI features come to the other Pixel 8 series phones, you can expect to see them in the 8a.

Are You Sure This Camera Is From a Mid-Range Phone?

Camera bar and lenses on the Google Pixel 8a
Kris Wouk / MakeUseOf


The camera was one aspect of the Google Pixel 8 that impressed me, so I wanted to see if the Pixel 8a could hold its own. Looking at the specs on paper, the Pixel 8a looks impressive enough. Like the Pixel 8, it has a dual rear camera system with wide and ultrawide lenses.

On paper, it even looks like the Pixel 8a may have some better specs, with a 64MP main sensor to the 50MP option in the Pixel 8. That said, the Pixel 8a’s pixel width isn’t as large, so those extra megapixels aren’t doing you much good. The ultrawide and selfie cameras are 13MP, albeit with different focal lengths.

While the camera hardware may not be the same as that in the Pixel 8, the performance is very similar. After spending time with the Pixel 8a, I’m as impressed with this camera as I was with the camera on the Pixel 8. While the more expensive phone’s camera may capture some extra detail, the 8a remains impressive.


The colors are bright and saturated without being overly so—something that seems easy to encounter in smartphone cameras. As long as you’re shooting without zoom of any kind, images are sharp and crisp. Using the built-in zoom can add anywhere from subtle blurring to noticeable pixelation and is best left untouched.

It seems like Google has put plenty of work into making the camera easy to use without thinking. Especially compared to other phones in its price range, it’s easy to quickly pull the phone out of your pocket and take a quick shot with confidence that it will look good later on.


Google’s AI photo tools have already debuted in other Pixel phones, but seeing them all here is still nice. Magic Eraser and Magic Editor may not always be necessary, but they’re great to have when you need them, as is the Unblur tool.

Good Battery Life, but Charging Is a Letdown

USB-C port on the Google Pixel 8a
Kris Wouk / MakeUseOf

While the battery in the Pixel 8a is technically smaller than that in the Pixel 8, it’s not by a large margin. The Pixel 8a is equipped with a 4,492mAh battery, while the Pixel 8 boasts an ever-so-slightly larger 4,575mAh battery. Given the other hardware similarities, you’d expect the two phones to have largely similar battery life.


Google claims the same “24+ hour battery life” as the other two phones in this range. In my testing, the battery life of the Pixel 8a lined up pretty closely with my experience from testing the Pixel 8. Even when running benchmarks and pushing the hardware, I didn’t notice a sharp decline in battery life.

The differences between the Pixel 8a and the Pixel 8 are immediately apparent when it comes to charging. The Pixel 8a doesn’t charge nearly as quickly, and compared to other modern phones, wired charging feels needlessly slow.

Battery Share, the feature that lets you use your phone as a wireless charger for other devices, is also missing here. That isn’t nearly as big a deal as the lack of Qi2 wireless charging. Granted, this is also missing on the Pixel 8, but it still feels like a missed opportunity.

A Great Phone With Great Competition

The Google Pixel 8a screen showing dark mode outdoors
Kris Wouk / MakeUseOf


If you compare the Pixel 8a to other phones, starting with the Pixel 8 only makes sense. While, yes, the pricier phone does have a few more features, in many cases, they aren’t differentiating enough to make the Pixel 8 worth recommending over the 8a—at least, not when it comes to features alone.

While the retail price of the Pixel 8 is higher than the Pixel 8a, starting at $699, that’s only part of the story. As with many Google phones, the company has sold the Pixel 8 at a significant discount on multiple occasions. If you can buy the Pixel 8 for $549, the Pixel 8a doesn’t look as impressive by comparison.

Samsung’s Galaxy S23 FE costs slightly more, but could be worthwhile if you’re a bigger fan of that company’s software and designs. When the S23 FE is on sale, you can find it for just a little more than the retail price of the Pixel 8a.


Should You Buy the Google Pixel 8a?

Looking at the Google Pixel 8a by itself, it’s a great phone. The performance is snappy, battery life is plentiful, and the camera takes photos that you’ll rarely, if ever, find yourself disappointed with. The only problem with the Pixel 8a isn’t even competing with the Pixel 8—it’s competing with the Pixel 8’s price when it’s on sale, which is fairly often.

We’ve already discussed prices and the competition, so let’s examine the areas where the Pixel 8a might let you down. While the battery life is solid, it charges slowly. It also looks like a budget phone, though this is somewhat more the case with the more colorful models. This doesn’t matter to everyone, but it may matter to you.

The bottom line is that the Google Pixel 8a is a great phone for the asking price, but it will be even better if you get a deal on it. Just remember to keep the Pixel 8 in the back of your mind while you’re searching.


Google Pixel 8a

Google Pixel 8a

The Google Pixel 8a features the same Tensor G3 chipset as the other Pixel phones, a battery that will easily last you all day, and a great camera. Combine that with smart AI features and seven years of updates, and that’s a bargain considering the price.

Forgot Your Android Passcode? 5 Ways to Get Back In

It’s always a good idea to secure your Android phone with a passcode, but what if you forget it? Well, there’s no need to panic, as there are several things you can do to regain access to your phone.


1. Unlock With Smart Lock

Smart Lock (also labeled Extend Unlock on Samsung phones) is an Android feature that keeps your phone unlocked when you’re near a trusted location or connected to a trusted Bluetooth device, like your fitness tracker or car.

However, this only works if you’ve previously set up Smart Lock on your phone. You’ll find it under Settings > Security > Smart Lock on most phones or Settings > Lock Screen and AOD > Extend Lock on Samsung devices.

Smart Lock on Android gives you the following options for unlocking the phone without a password:


  • On-body detection: The phone senses that you’re carrying it and automatically stays unlocked when it’s in your hand or pocket.
  • Trusted places: Uses your location to unlock your phone when you’re near your selected address.
  • Trusted devices: Keeps your device unlocked when connected to a trusted Bluetooth device, like your fitness tracker or car.

If you’ve previously set up one or more Smart Lock options before forgetting your password, you can use them to regain access to your phone. This will allow you to back up any important data on your Android device.

It’s important to note that you can’t change Smart Lock settings without entering your current PIN. Also, this feature won’t unlock the device after a restart.

2. Use SmartThings Find on Samsung Devices

Have a Samsung device? If so, you don’t have to be concerned about forgetting your device’s screen lock code, as Samsung offers a simple way to reset the lock screen PIN.


The company offers a feature called SmartThings Find for all its phones, allowing you to remotely manage your device if it’s lost. To use this feature, you must be signed in with your Samsung account on your phone and have a Wi-Fi or mobile data connection.

To reset your phone’s passcode through SmartThings Find, follow these steps:

  1. On your computer, navigate to Samsung’s SmartThings Find website.
  2. Sign in with your Samsung account.
  3. Select your phone and click the Unlock option.
  4. Click the Unlock button and enter your account password to verify your identity.

Wait a few seconds, and your current PIN or password will be deleted. You can then set up a new lock screen security method from scratch.


3. Use the Forgot Password Prompt

Some phone manufacturers, such as Realme, make it easy to regain access to your device if you forget the PIN. When you enter an incorrect password multiple times, some phones may display a Forgot Password or Forgot PIN option on the lock screen. Tapping this option will guide you through a series of steps to verify your identity and reset the lock screen passcode.

The verification process may involve entering the email address associated with your device or answering security questions you set up in the device settings. Once verified, you’ll receive on-screen instructions on how to set a new passcode for your device.

4. Delete the PIN File Using ADB

Android generates a KEY file to store user credentials, such as fingerprints, patterns, or other passwords. This file allows the device to unlock when you enter the correct password and deny access when you input the wrong one. Using the Android Debug Bridge (ADB) tool, you can access this file through your computer and delete it.


However, this method will only work if:

  • USB debugging is enabled on your phone. If you’ve never dived into the Developer Options menu, it’s safe to assume you haven’t enabled it.
  • You’ve allowed your computer to connect to your phone via ADB. We have a guide on using ADB if you’re not familiar.
  • Your phone is not encrypted. With Android 6.0 Marshmallow, Google requires all Android phones to ship encrypted. Thus, this won’t work for newer devices.

This method only works for older Android versions. If you receive an error saying ”
rm: /data/system/gesture.key: No such file or directory
“, it means you can’t bypass the lock screen this way.

This method isn’t guaranteed to work, and if you’re not careful, it could damage your phone. So, make sure you follow the steps carefully.


  1. Connect your phone to your computer via a USB cable.
  2. Open a Command Prompt or Terminal window to your ADB installation directory.
  3. Type in adb shell rm /data/system/gesture.key and press Enter.
  4. Reboot your phone. Once you do, the secure lock screen should be gone.
  5. This is temporary, so reset your PIN or pattern lock before rebooting.

ADB Command in Terminal App

5. Perform a Factory Reset

If you’re still locked out of your Android phone, your last option is to perform a factory reset. This will erase all the data on your phone, returning it to its original state.

Since you’re locked out, you won’t be able to reset it through the Settings app. Instead, you will need to visit Google’s Find My Device website and log into your account. After that, select your phone and click Factory reset device from the left sidebar.


Factory Reset Option on Google Find My Device Page

If you can’t use this method, you can try factory resetting it via Recovery Mode. Here’s how:

  1. Power your device off.
  2. After the screen goes completely black, press and hold the volume down and power buttons simultaneously to enter Recovery Mode.
  3. Use the volume buttons to go to the Wipe data/Factory Reset option. Press the power button to select it.
  4. Use the volume buttons to highlight the Factory data reset option, and press the power button to select it.

A Samsung phone showing the Android Recovery screen
rukawajung/Shutterstock


Once the device reboots, you’ll need to set up your Android phone again. You’ll be prompted to log back into your Google account, which will restore any backed-up data.

One of the above methods should help you regain access to your Android phone, but it’s best to take precautions to avoid going through this process again.

If you frequently forget your passcode, consider keeping a physical copy of it in a secure place, like a safe or a password manager. Also, make sure you’re signed in with your Google account (and Samsung account, if applicable) and have enabled Smart Lock to unlock your phone with Wi-Fi.

How to Install and Set Up Windows 11 Without an Internet Connection

Key Takeaways

  • You can use Command Prompt to bypass network setup in Windows 11 when you don’t have an internet connection or want to create a local account.
  • Alternatively, you can open Task Manager during setup and end the Network Connection Flow process to skip the network setup in Windows 11.


Windows 11 requires you to sign in with a Microsoft account to finish setting up your new computer. However, if you don’t have an active internet connection or want to use a local user account, you can follow these methods to set up Windows 11.


1. Bypass Out-of-Box Experience (OOBE) Internet Requirement

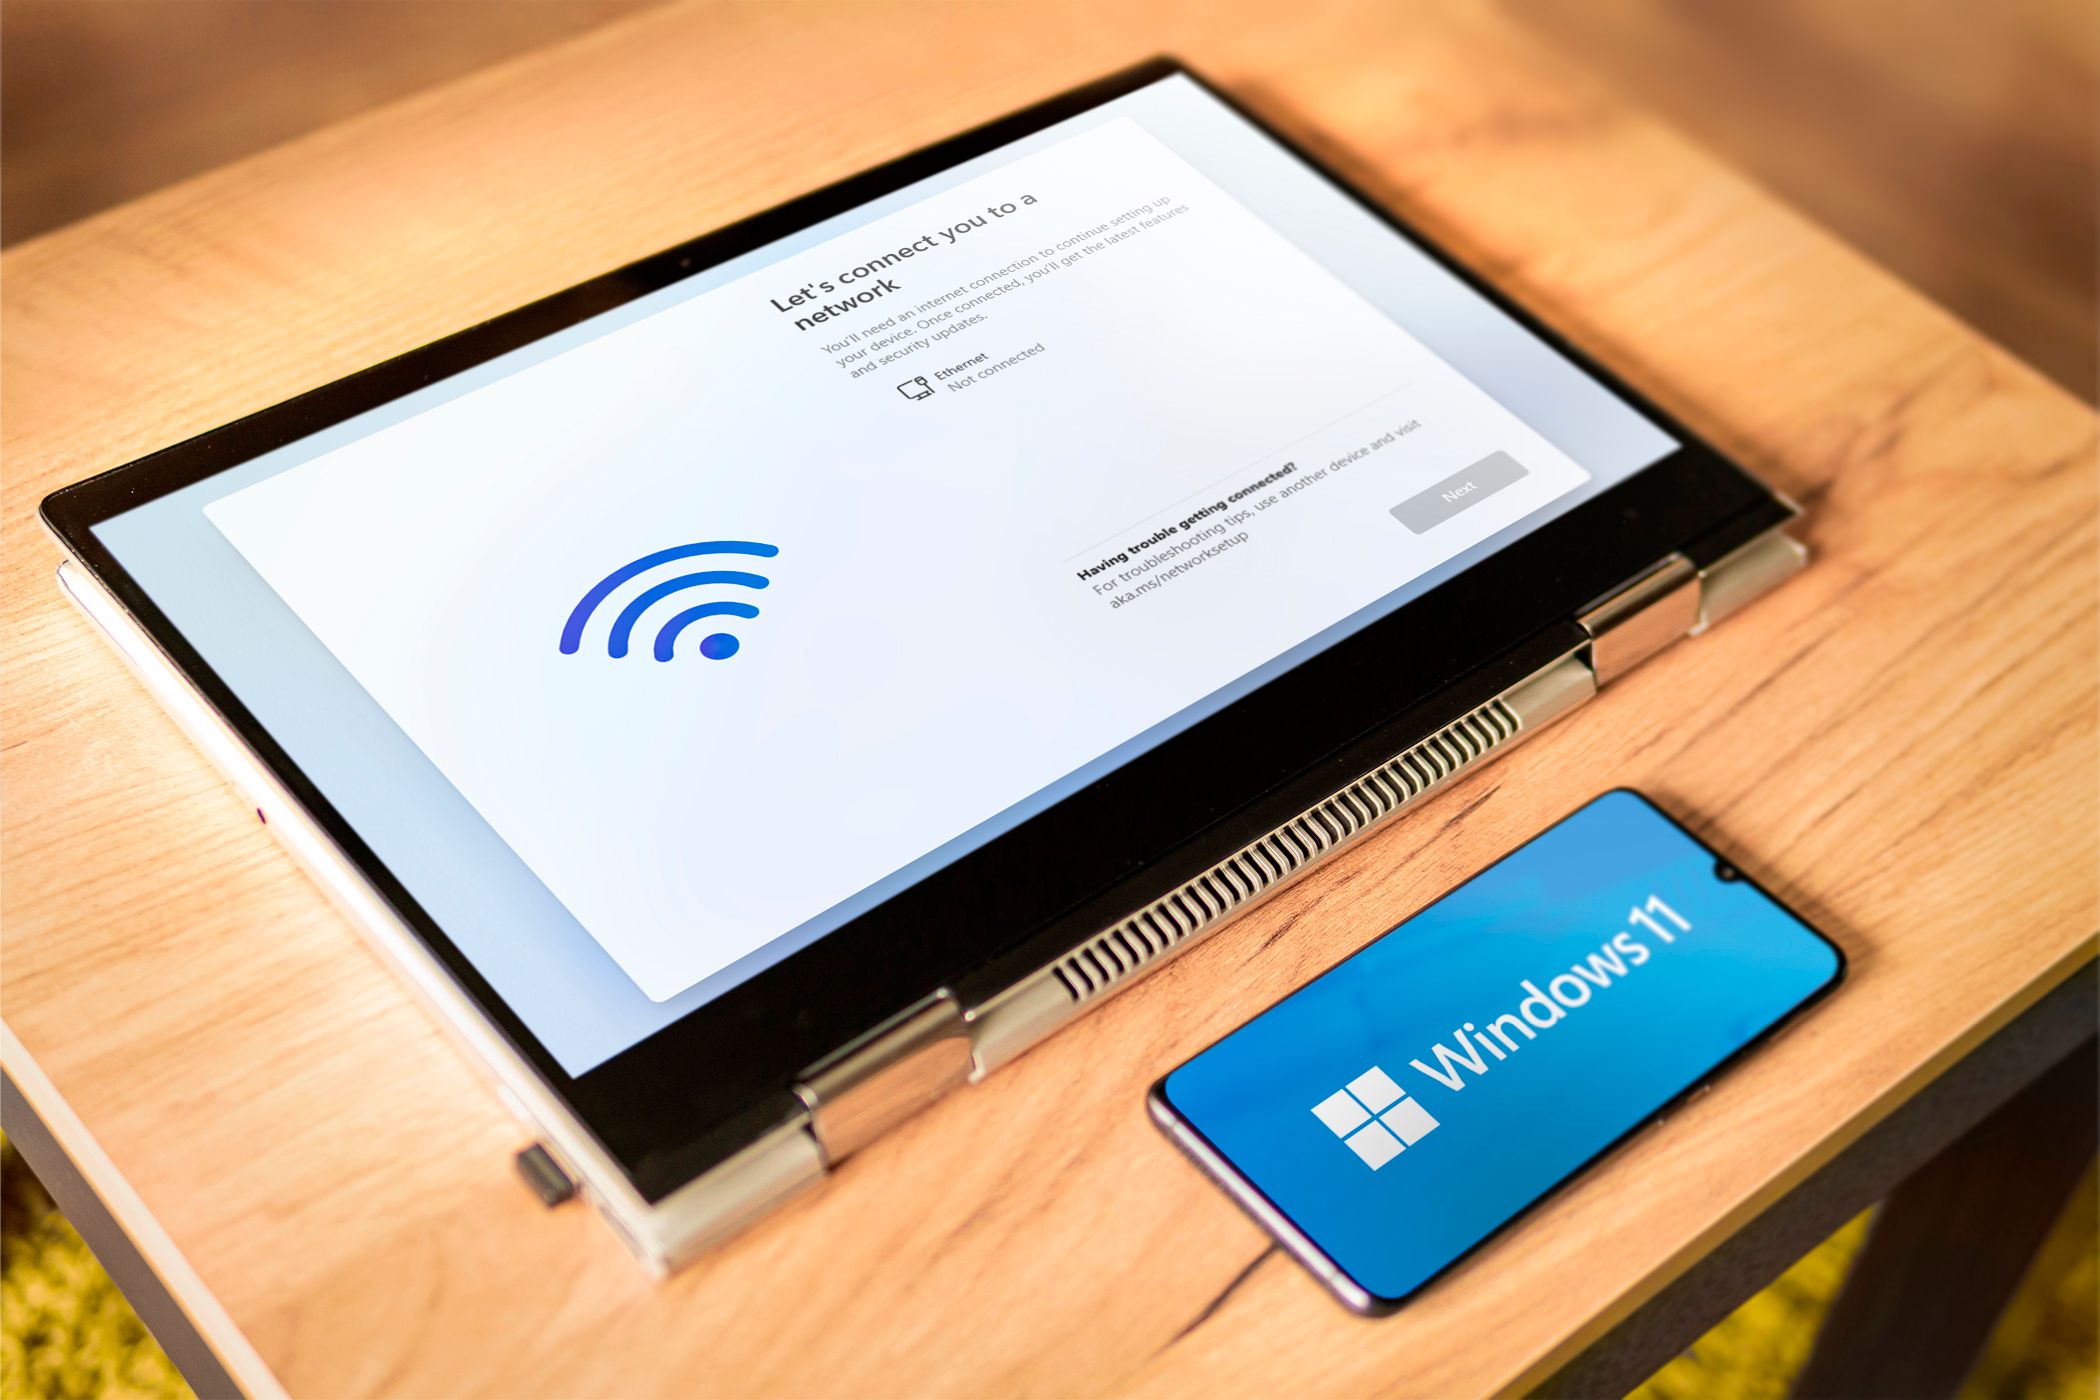
You can bypass the Let’s connect you to a network screen using the OOBE BYPASSNRO command in Command Prompt. When executed, it runs an existing CMD script, bypassnro.cmd, stored in the System32 folder to modify the Windows registry. This modification allows you to complete the Windows 11 setup without an internet connection. To do this:

  1. Boot your computer with the Windows installation media. Skip to Step 6 below if you are already on the Let’s connect you to a network screen.
  2. When the Windows Setup dialog appears, select your preferred language, time, and keyboard input layout and click Next. Then, click Install Now.

  3. Enter your product key to activate Windows 11. If you don’t have a product key, click the I don’t have a product key link in the bottom-right corner. If you’re upgrading from Windows 10 or an older version of Windows 11, the OS will automatically recognize and validate the Windows product key linked to your computer’s hardware.
    Windows 11 Setup screen to enter the product key

  4. Next, if prompted, select the edition of Windows 11 you want to install. Check the box to accept terms and click Next. Then, select Custom: Install Windows Only (Advanced).
  5. Select the installation drive and click Next. Wait for Windows to finish installation and restart your computer. In the setup screen, select your region and keyboard layout.
    Windows 11 setup screen to select the installation drive

  6. Once in the Let’s connect you to a network screen, press Shift + F10 to launch the Command Prompt.
    oobe bypass nro running in command prompt

  7. In the Command Prompt window, type the following command and press Enter:
    OOBEBYPASSNRO 
  8. Now, your system will restart and relaunch the OOBE dialog. Follow the on-screen instructions to complete the setup. When you reach the Let’s connect you to a network screen, click I don’t have Internet.
    Windows 11 Setup Let's connect you to a network screen with I don't have Internet option

  9. Next, click Continue with limited setup. Then, accept the license agreement and proceed to create your local user account.
    Windows 11 setup screen with select installation continue with limited setup option


Also, make sure to add security questions. This will help you recover your local user account in case you forget your password. Once done, follow the on-screen instructions to complete the setup.

2. End the Network Connection Flow Process Using Task Manager

You can bypass the “let’s connect you to a network” screen by ending the oobenetworkconnectionflow.exe process. Since you already have Windows 11 installed at this stage, you can launch the Task Manager on top of your setup wizard using Command Prompt and kill the process.

This method may not always work as new Windows updates often patch such workarounds.

To skip the Windows 11 network setup using Task Manager:

  1. Assuming you’re in the Let’s connect you to a network screen, press Shift + F10 to launch the Command Prompt.
  2. In the Command Prompt window, type taskmgr and hit Enter to launch Task Manager. Alternatively, you can press Ctrl + Shift + Esc to launch it.
    Command Prompt with Taskmgr Command Running

  3. Click More Details to open Task Manager in full view.
  4. Head to the Processes tab and use the search bar in Task Manager to find the Network Connection Flow process.
    Windows 11 Task Manager screen with Network Connection Flow process

  5. Select the Network Connection Flow process and then click the End task button. Wait for the process to end, and then close the Task Manager.
  6. Type exit in the Command Prompt and hit the Enter key.


The installation process will refresh, and you’ll be redirected to the setup wizard. It will show some loading animation and then proceed to the next step. Here, enter your name and password to create a local user account in Windows 11 and complete the setup.

Once you finish the setup, connect to the internet. Then, head to Settings > Windows Update and download all the critical security and feature updates. You may also notice a few missing icons after the initial setup. Windows will download these icons when you connect your PC to the internet.


How to Fix a Missing NVIDIA Control Panel in Windows 11 and 10

Key Takeaways

  • The NVIDIA Control Panel may go missing if NVIDIA services are disabled on your system, so ensure they are configured to run automatically.
  • Updating or reinstalling the NVIDIA graphics driver is an effective way to restore the missing NVIDIA Control Panel.
  • Consider accessing the NVIDIA Control Panel via File Explorer or reinstalling the app on your PC if nothing works.


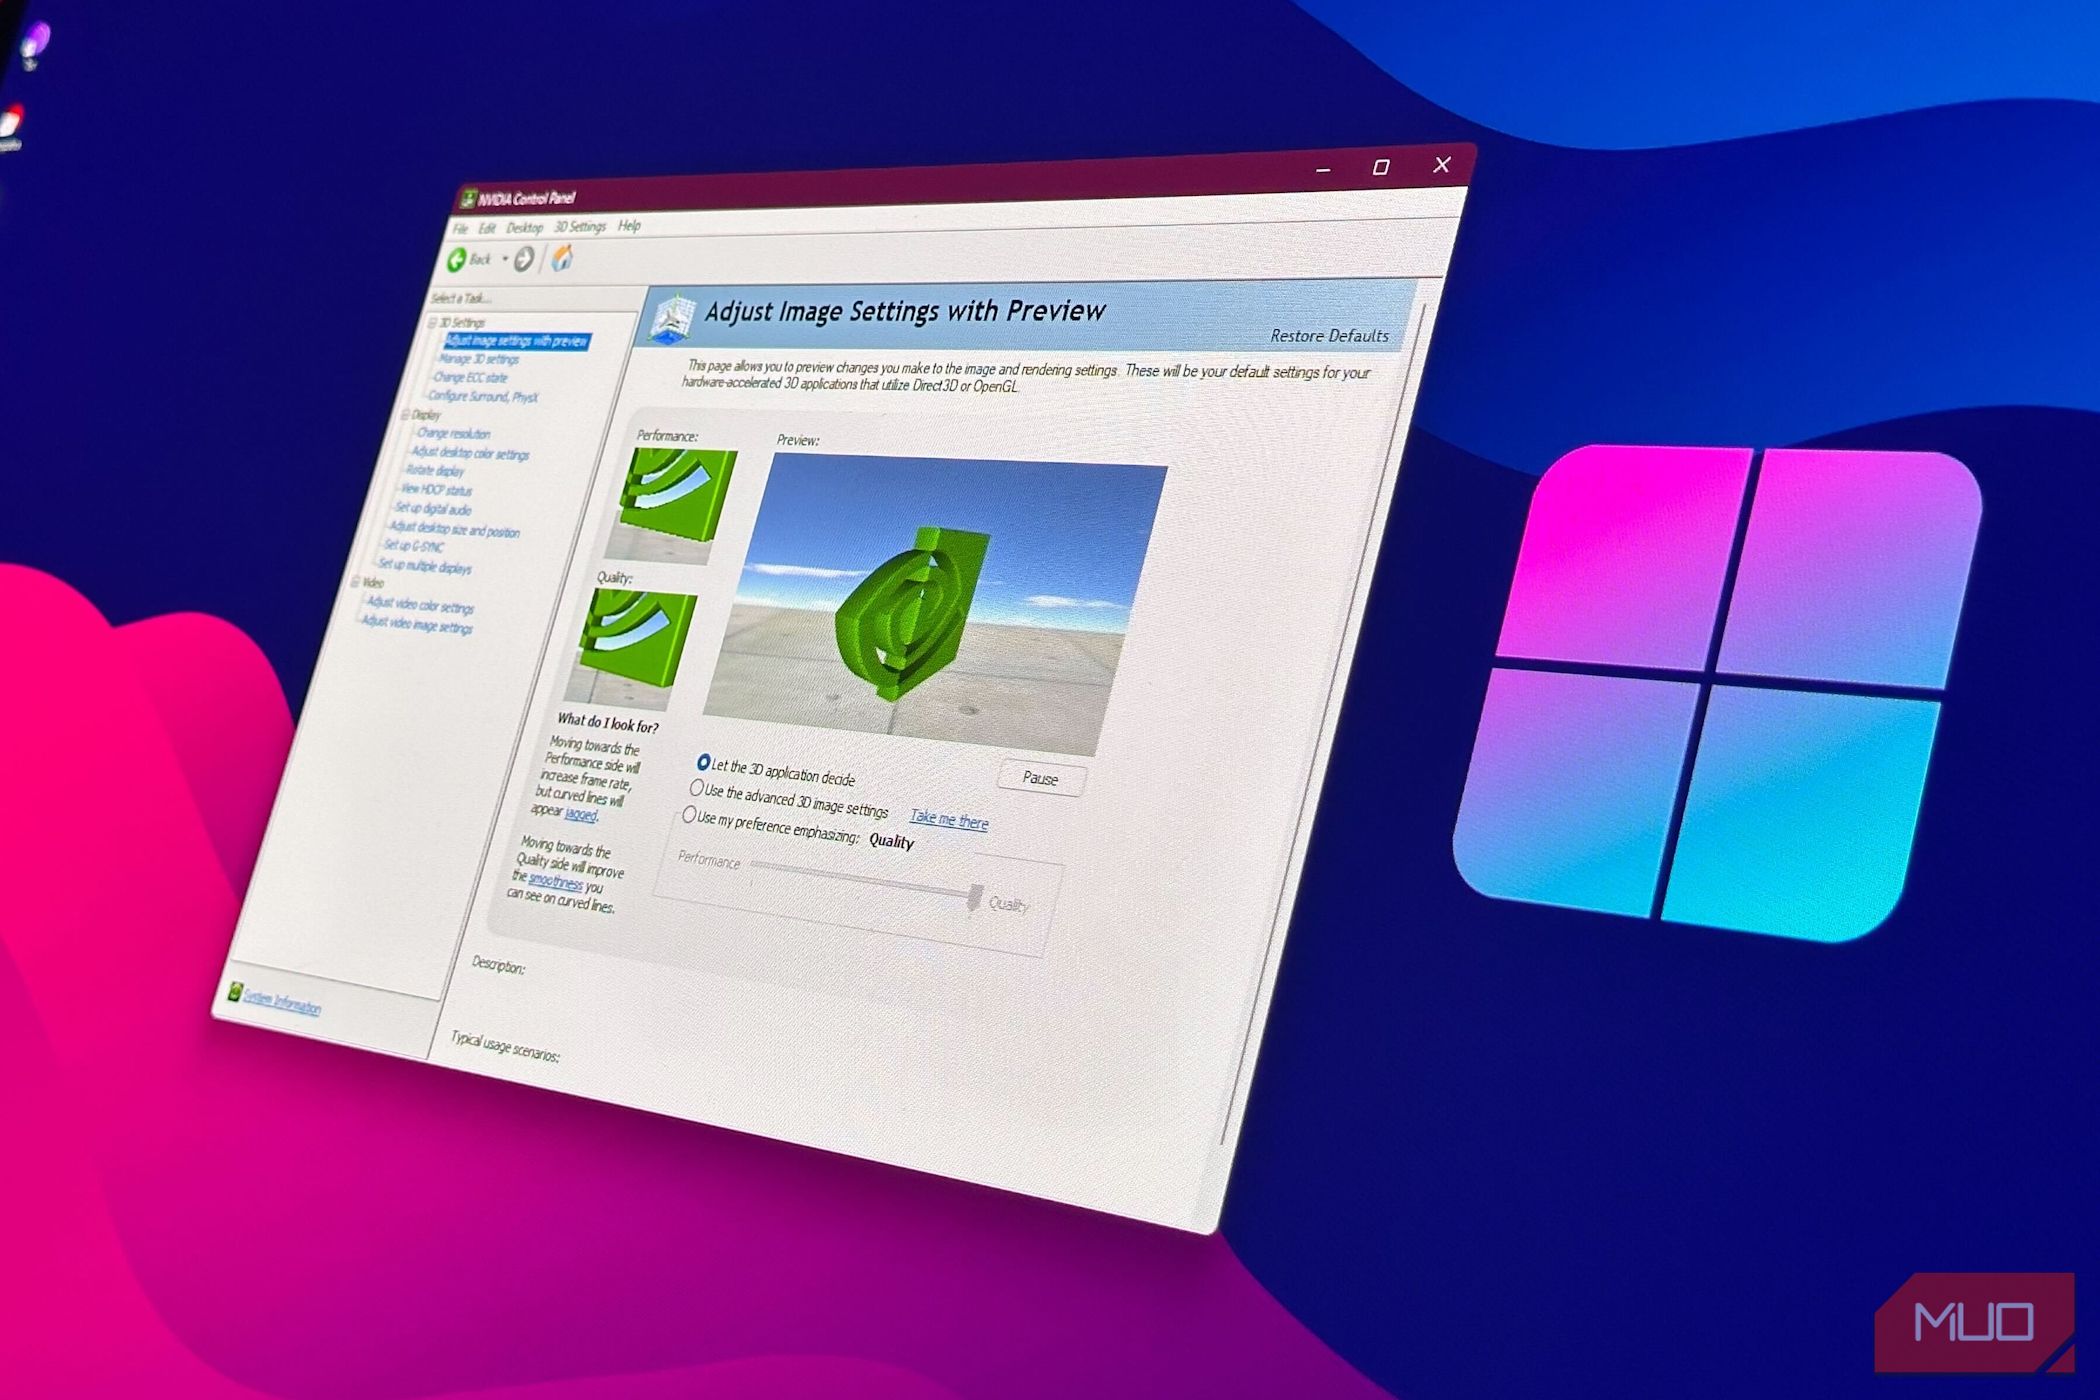
The NVIDIA Control Panel is essential for fine-tuning graphics settings, optimizing game performance, and adjusting display configurations. However, if you can’t find it on your Windows PC all of a sudden, here are some tips that will help you restore this useful utility.


1. Check and Enable NVIDIA Services

The missing NVIDIA Control Panel issue can arise if certain NVIDIA services are disabled. Hence, the first thing you should do is make sure all NVIDIA services are configured to run automatically on your system. Here’s how to do that:

  1. Click the search icon on the taskbar, type services in the text box, and hit Enter.
  2. Scroll down to locate NVIDIA services on the list. Double-click any NVIDIA service to open its properties.
  3. Click the Startup type dropdown menu to select the Automatic option.
  4. Hit Apply followed by OK.
  5. Similarly, change the startup type for all the NVIDIA services to Automatic.


Restart your PC after making the above changes and see if you can find the NVIDIA Control Panel again.

2. Update the NVIDIA Graphics Card Driver

As the NVIDIA Control Panel is closely linked to its graphics card, it can go missing due to an outdated or incompatible NVIDIA driver. To fix this, you can try updating the NVIDIA graphics driver using these steps:

  1. Press Win + R to open the Run dialog box.
  2. Type dxdiag in the box and hit Enter.
  3. Go to the Display tab and note down the graphics card details.
    The DirectX Diagnostic Tool

  4. Open the NVIDIA driver download page in a browser.
  5. Use the dropdown menus to locate the latest driver for your hardware and download it.
  6. Run the downloaded installer file to update the graphics driver.

After updating the drivers, check if you’re still facing this issue.


3. Reinstall the NVIDIA Graphics Card Driver

If updating the NVIDIA graphics driver didn’t help, or if the latest driver is already installed, try reinstalling the driver instead. To do so, follow these steps:

  1. Right-click on the Start icon and select Device Manager from the list.
  2. Double-click the Display adapters category to expand it.
  3. Right-click your NVIDIA graphics driver and select Uninstall device.
  4. Tick the Attempt to remove the driver for this device checkbox.
  5. Click Uninstall to confirm.

Confirmation Prompt for Uninstalling NVIDIA Driver on Windows

Restart your PC after completing the above steps. Then, download and install the latest NVIDIA driver for your graphics card, as outlined in the previous section.


4. Access the NVIDIA Control Panel via File Explorer

If you can’t find the NVIDIA Control Panel through the search menu, you can try opening it using File Explorer. The specific file to look for is “nvcplui.exe.” Here are the folder paths you’ll need to check for the “nvcplui.exe” file:

  • C:Program FilesNVIDIA CorporationControl Panel Client
  • C:Program FilesWindowsAppsNVIDIACorp.NVIDIAControlPanel_8.1.962.0_x64__56jybvy8sckqj

If you can’t find the Control Panel Client folder, then “nvcplui.exe” is probably within the WindowsApps folder path specified above. However, since the WindowsApps folder is not readily accessible, you’ll first need to take ownership of that folder. If you need help with that, check our guide on taking ownership of files and folders on Windows.

If you find the “nvcplui.exe” file in File Explorer, right-click it and select Run as administrator to open the NVIDIA Control Panel. Then, click Desktop in the app’s menu bar and select the Add Desktop Context Menu and Show Notification Tray Icon options to restore the app on the system tray and desktop context menu.


NVIDIA Control Panel Window

5. Copy the “NVDisplay.Container” File Into the Startup Folder

Adding the “NVDisplay.Container” file, which is associated with the NVIDIA Display Container LS service, to the Windows Startup folder can also help fix a missing NVIDIA Control Panel. Here’s how you can go about it.

  1. Open the Services app using Windows Search.
  2. Find and double-click the NVIDIA Display Container LS service to open its properties.
  3. Copy the file path mentioned in the “Path to the executable” field.
  4. Press Win + E to open File Explorer, enter the copied path in the address bar at the top and hit Enter.
  5. Right-click the Display.NvContainer file and select Copy.
  6. Press Win + R to open the Run dialog box, then type shell:startup and hit Enter.
  7. Paste the copied Display.NvContainer file in the Startup folder and restart your PC.


Startup Folder on Windows

6. Reinstall the NVIDIA Control Panel

If nothing else works, you can try uninstalling and reinstalling the NVIDIA Control Panel on your PC. Here’s how to do it.

  1. Press Win + S to open the search menu.
  2. Type NVIDIA Control Panel in the search box and click the Uninstall option on your right,
  3. Select Uninstall again to confirm.
  4. Head to NVIDIA Control Panel’s Microsoft Store page to download and install it.

A NVIDIA Control Panel Uninstallation Prompt on Windows


Now, you should be able to find and use the NVIDIA Control Panel on your PC as usual.

At least one of the many tips we listed above should help you restore the missing NVIDIA Control Panel on your Windows 10 or 11 PC. Once restored, you can access and adjust your graphics settings and monitor configurations as desired.

These 6 Apps Track Your Habits With Minimal Fuss

Key Takeaways

  • You can use several habit-tracking apps to monitor habits you want to build and quit.
  • Examples of apps to try include Habitica and Davetech’s Habit Tracker app.
  • Focus on habit trackers that are easy to use to reduce daily friction.


When I started my self-improvement journey in 2019, a handful of apps made it easier to track habits like going to the gym. They also helped keep me accountable. If you’re looking to make small, regular tweaks in your day-to-day life, these apps will help.


1 Habitica: Best for Gamification

One of the best ways to keep up with a habit is to realize that life is like a video game that you play for real. And since Habitica gamifies the habit-tracking experience, it’s one of the best apps to use to make lasting changes.

Habitica lets you set up a positive habit tracker (like walking for 10,000 steps per day) or a negative one (like qutting the afternoon coffee). You can change the category via tags and set a difficulty level.


Using Habitica, you can reset the counter on any of your habits. You can also add notes that you think will be useful to record. At the top of the home screen, you’ll see bars for health and experience—along with your gaming level. The level progresses as you achieve objectives.

Once you’ve built up enough points, you can buy different things for your avatar. It’s one of many wellness apps that turn self-care into a game.

Download: Habitica for iOS | Android (Free, in-app purchases available)

Habitica Pricing

You can use Habitica for free, but the app also has optional subscriptions. If you want to support the project, pricing is as follows:

1 Month

Quarterly

Every 6 Months

Annual

$4.99

$14.99

$29.99

$47.99


2 Super Habit: Best for iOS Users

If you’re looking for a less gamified version of Habitica, I recommend checking out this habit tracker instead. You can enter your habit name and choose how many days per week you’d like to complete it. For example, I aim to work out four times per week (Monday, Wednesday, Friday, and Sunday).

When using this habit tracker, you can also pick a start date. You can also choose how many reminders you want to see and decide on which day you want your calendar week to begin.

For additional customization, you can customize the color of your habit tracker. To get a full overview of your history, you can see your progress for the current month and year. Most in-app features are free, but you can upgrade to a paid subscription or get a lifetime purchase for unlimited habits.


Download: Super Habit for iOS (Free, in-app purchases available)

3 Habit Tracker: Best for User-Friendliness

Davetech’s Habit Tracker app has a simplified user interface with several templates, such as breathwork, reading books, eating vegetables, and reviewing your day. Within each of these, you can choose specific goal periods and whether it’s one you want to build or quit.

Habit Tracker lets you change the icon for each of your habits, allowing you to navigate them more easily. Moreover, you can customize the chart type and choose whether it’s relevant for the morning, afternoon, or evening.


Some of the “quit” habit templates available include drinking less alcohol, complaining less, and not spending as much time on video games. You can create your own habits if you don’t want to use any of the templates.

Habit Tracker allows you to look at the status of your habits based on whether you met them or not. You can also track how you feel, which can help you find patterns when you keep up with or skip your habits.

Download: Habit Tracker for iOS (Free, in-app purchases available)

Habit Tracker Pricing

Most features are free, but you can upgrade to a subscription or become a lifetime member. Pricing is as follows:

Enhance Yourself

Habit Promo

Lifetime Membership

$4.98

$5.98

$12.98

4 Habitify: Best for Full-Day Visualization

Habitify lets you pick from five starter habits, including drinking water and practicing yoga. You can also add your own later. The app lets you choose how often you want to repeat these habits, and you can set daily goals for how long you’d like them to last.


The Habitify app helps you keep everything organized by creating different areas. So, if you’re looking to keep your family organized or simply track what’s going on in your life, it’s a great choice. For each area, you can adjust the name and also pick a different color.

If you want to push yourself, you’ll find several challenges to participate in. These are split on a daily and monthly basis, and you’ll also find several subcategories to explore for more specific challenges.

Habitify has comprehensive statistics to give you an overview of your habits, and you can see which habits you finished and missed—along with those that you partially completed.


Download: Habitify for iOS | Android (Free, in-app purchases available)

Habitify Pricing

Habitify has monthly, annual, and lifetime subscription packages. Monthly costs $5.99/mo, but you can only get this on the website.

Pricing for the other two is as follows:

Annual

Lifetime Access

$35.99/yr

$53.99

5 Streaks: The Best Paid Habit Tracker

You have to pay $5.99 for the Streaks app, but you get lifetime access, and it’s quite comprehensive. So, if you want to take your habit-tracking more seriously, it might be worth considering.


Streaks lets you track several habits, such as walking your dog and decreasing your daily sugar intake. You’ll also find options for reading, learning a language, tidying the house, and more. Streaks integrates with the Health app, meaning that you can track various wellness-related aspects like upping or lowering your calorie intake.

To confirm that you’ve completed your habit for today, you simply have to tap and hold on to the icon. You’ll see all of your habits in the same place on the home screen.

Download: Streaks for iOS | Android ($5.99)

6 Way of Life: Best for Journaling About Your Habits

Way of Life is a simple habit-tracker that lets you choose whether you completed a habit by simply tapping the tick icon. You can also add notes for each habit you want to track, and it’s possible to journal within the app as well. So, you may want to consider it if you’re also looking for a micro-journaling app.


The Way of Life app lets you look at trends over extended periods via a bar graph or pie chart, meaning that you can tell if you’re on the right path. You can also set up daily reminders to ensure that you complete your habit each day.

When using Way of Life, you can activate password protection if you don’t want others to see what you’re doing.

Download: Way of Life for iOS | Android (Free, in-app purchases available)

Way of Life Pricing

Way of Life is free to use, but you can upgrade to a premium subscription or get lifetime access. Monthly pricing starts at $4.99/mo, and you can get the lifetime version for $29.99.


When choosing a habit tracker, you should pick something that’s easy to use and focus on core features to begin with. If you need to, you can then get something with more complex bells and whistles.

Anyone Can Take Interesting Abstract Photos on Their Smartphone: Here’s How

Key Takeaways

  • Abstract photography is a genre focused on anything removed from reality, straddling the line between photography and art.
  • To shoot abstract photos, look for opportunities that either reveal themselves organically or are engineered by you.
  • To get the best results, experiment with angles, lighting, and editing to create truly compelling abstract photos.


Smartphone cameras are capable of shooting across all photographic genres these days, and that includes abstract photography. Once you grasp what abstract photography is, learn how to shoot abstract photos, and edit your existing shots to turn them into abstract photos, you’ll have a new genre to explore.


What Is Abstract Photography Anyway?

Abstract photography is, in a nutshell, any photos that are removed from reality in some way. They’re photos that aren’t immediately recognizable as belonging to the physical world we inhabit. Abstract photographers use light, textures, perspective, movement, extreme close-ups, and more to create photos that are both satisfying and otherworldly.

All photography can be art (and it is possible to get your photos displayed in an art gallery), but abstract photography straddles the line between photography and art like no other genre. It’s for this reason—the feeling that this is too highbrow for ordinary folk—that many people don’t even venture into trying it, but also why more people should.


The best abstract photos in the world can be extremely compelling to look at, and contain meaning ascribed by the artist/photographer. However, there’s no pressure to treat them as art if you don’t want to.

Abstract photography is a fascinating genre of photography that, when done right, should be able to scratch anyone’s creative itch. However, it can feel rather overwhelming at first, so, as with so many creative ventures, the trick is to just give it a try and see what happens. We’re here to help with some guidance on how to get started shooting and editing abstract photos on your smartphone.


What to Look for When Shooting Abstract Photos

If there’s one word that sums up what you need to look for when shooting abstract photos, it’s “opportunities”. Photographers are (or should be) constantly looking around for photo opportunities. And abstract photography is no different from any other genre in that regard. You should always be on the lookout for interesting shapes, patterns, textures, reflections, light sources, and angles.

However, unlike other genres of photography, you need to have abstract photography in mind when looking for these opportunities. You can also either take advantage of opportunities that reveal themselves organically, or engineer your own opportunities by utilizing different objects, angles, and light sources around you.

Organic opportunities are those you spot and can shoot without changing anything. The bark of a tree, when shot in a certain light, will cease to look like the bark of a tree. A textured material that, when shot close up, reveals its fibers and creates something that, without context, looks otherworldly. This picture is of a tree, but could equally be a lizard’s eye.


An abstract photo of a tree's bough
Dave Parrack/MUO

Engineered opportunities are those that need your input to exist. This can mean anything from shining a light source on an object to change the way it looks, to arranging a series of objects in a certain way to get the look you’re after. As long as the results are abstract to the viewer, it doesn’t matter how the photo was set up. This picture is of the inside of a washing machine, with a blue object added to provide a splash of color.

An abstract photo of the inside of a washing machine
Dave Parrack/MUO


How to Shoot Great Abstract Photos on Your Phone

There’s no real difference between shooting abstract photos on your smartphone and shooting them on other equipment. The one exception is when you’re using extreme close-ups to create abstract images. While many smartphones have decent zooms on them, they quickly lose focus compared to a dedicated DSLR with a macro lens attached.

However, this doesn’t need to be a handicap. You can, if you want to, purchase a clip-on macro lens for your smartphone. These differ in price and quality, but if you can find a decent one, it will enable you to get closer to a subject without your smartphone’s camera losing focus. And good macro photography can form the basis for great abstract photography.

It isn’t the only way to capture beautiful abstract photos that will fasciate viewers though. Experiment with angles, different light conditions, and objects that wouldn’t normally make good subjects to photograph. When shooting abstract photography, you are the architect, bending and shaping the world around you to find otherworldly qualities.


I start by pointing my camera at something I think has the potential to be morphed into something abstract. If it doesn’t, I move on, but if it does, I’ll zoom in on the most interesting part, change the angle to subvert expectations, or turn the flash on (even in bright conditions) to make something ordinary look extraordinary.

Experimentation is the key.

In writing this article, I shot and edited over 20 abstract photos; some of which I have uploaded. Some turned out better than expected, while others just didn’t work at all. Some were perfect as shot, while others needed heavy editing before they lost touch with the natural world. And if anything, editing is the most important part of the process.


How to Edit Your Photos to Make Them More Abstract

Editing is absolutely crucial in creating satisfying and memorable abstract photos. To the point that it would be rare to leave a smartphone shot as it is without at least touching it up in post slightly to create the abstract effect you’re looking for. There are certain edits I apply to all photos, but you have to delve deeper to create compelling abstract photos.

Thanks to editing, any photo you have ever shot on your smartphone could be turned into an abstract photograph. By cropping a photo down, rotating it, adding a filter, and changing various other elements, you can turn the ordinary into an abstract work of art. And once you get a taste of it, I guarantee you’ll be hooked.

Just like shooting, editing a photo to make it more abstract requires experimentation. Even if you have a clear end result in mind, once you start editing, you may find yourself heading in a different direction. Let your creativity take charge, and edit the photo in whatever way feels right. That way, the results may even surprise you.


An abstract photo of someone watching television
Dave Parrack/MUO

Start by cropping the image down to the exact part you want in the frame, even if this means focusing on a tiny part of a larger photo. Then try rotating the image, and adding a filter. Once those initial edits are in place, you can adjust individual specific elements such as the contrast, shadows, warmth, tint, and sharpness to create the exact effect you’re looking for.

The image above is actually my hand holding a drink, with the TV in the background, and a purple light illuminating the room. Now that I’ve pointed out what it is, you can probably see it (especially if you tilt your head to the left). But thanks to some extreme editing, the individual elements have ceased to make sense without context.


I personally recommend Google Photos or Snapseed (Android and iOS) for editing smartphone photos, as both boast an array of tools that can be used to make a photo abstract. And, unlike conventional photography, it’s virtually impossible to over-edit an abstract photo, as the more extreme edits you make, the less in touch with reality it becomes.

To sum up, abstract photography can feel too arty and even pretentious for ordinary people to get into. But it really isn’t. Instead, it’s a compelling way to explore your creativity, and one that you’ll probably enjoy more than you think. Look for opportunities to shoot abstract photos, and then spend some time editing them. And if you’re not happy with the results, there is an endless array of objects and textures to try working with.

Roku Not Working? Try These Troubleshooting Steps

Roku streaming devices offer a great way to bring the world of streaming entertainment into your living room. But just like any electronics, your Roku may occasionally suffer from issues. Here are some troubleshooting tips to help when your Roku isn’t working.


1 General Fixes

AhmadDanialZulhilmi/Shutterstock
 

Before we examine specific issues, here are some general fixes for your Roku.

Update Your Roku

Just like with most electronics, it’s always good to keep any Roku device up-to-date with the most recent software. That can help take care of some issues. Any Roku is designed to update its software automatically, but you can also manually check for an update:

  1. Press the Home icon on your Roku remote.
  2. Select Settings > System.
  3. Choose Software update and then Check Now to check for an update manually.

If an update is available, it will automatically download and install.


Restart a Roku

A simpler option when troubleshooting a Roku is to restart the device. The easiest way to do that is to remove the power cord for 60 seconds and then plug it back into the device, but you can also restart the device without unplugging it.

To do that, once again, press the Home button on the remote. Choose Settings > System. Next, select Settings and then System Restart.

Factory Reset a Roku

A more drastic action is a factory reset. That will reset the device, erase all of your presets, unlink your device from your Roku account, and reset all the settings into an initial setup mode.

  1. Press the Home icon on the Roku remote.
  2. Choose Settings > System > Advance system settings.
  3. Select Factory reset.

Now, follow the on-screen instructions.

2 No Audio Output


If you’re not hearing audio from your Roku, there are a few steps to try. If the streaming device is connected directly to your TV, make sure that all the cables are secure on both the Roku and the TV. Next, try the cable at a different input on your TV. You can also try replacing the cable itself.

If the Roku is connected to a soundbar or other sound system, check all the cable connections and confirm the system is set to the correct input for the Roku. Then, try a different input to determine if the problem is the Roku or your audio equipment. Replacing the cables with new versions is also another option.

With continuing issues, try this:

  1. Press the Home icon on the Roku remote.
  2. Choose Settings > Audio > Digital output format.
  3. Select Stereo.

3 Remote Control Won’t Work


The Roku remote control is the heart of the streaming device. With a single tap, you can quickly access everything you need. There are a few different fixes to try if your Roku remote isn’t working.

One of the most common issues is that the remote becomes unpaired from the Roku itself. To re-pair the remote, unplug the Roku box from the power supply and wait 60 seconds. Wait until the Home page loads and find the pairing button on your remote. Hold down the pairing button for at least five seconds until the Roku remote starts blinking.

4 Wi-Fi Issues

If you have wireless connection issues, you have a few options. First, try restarting your Roku device, modem, and router to see if that helps.

If the problems continue, head to Settings > Network > About to see the most recent connection check done by the Roku device. Take a look at both the Signal strength and Internet download speed numbers. If those are low, you might consider moving your router closer to the Roku device or purchasing a wireless mesh networking system to improve the connection.


5 Audio and Video Are Out of Sync

It’s obvious and annoying when audio and video are out of sync on your Roku. First, restart your TV, Roku, and other audio equipment. Next, you can go to Settings > Audio > Audio Mode. If it’s set to Auto, try switching to Stereo.

6 Low Power Warning

A Roku device showing the low power message
Russ Ware/MakeUseOf

Many smaller Roku devices can be plugged directly into a free USB port on your TV and receive enough power to operate. That helps you save space, especially if you have a wall-mounted TV without worrying about finding a free electrical outlet. However, an older TV might not provide enough power from the USB port to use the Roku.


If the Roku doesn’t have enough power to start, the status light on the device will slowly flash red. You might also see an error message that says insufficient power.

To fix the Roku Low Power warning, try switching out your USB cable with a new option. Next, try plugging the Roku into another USB port on your TV to see if it will provide more power. If neither of those fixes works, you’ll need to power the Roku from an electrical outlet.

7 Roku App Doesn’t Work

Roku controller with roku logo on smartphone screen
renata colella/Shutterstock

The Roku app for iOS or Android is a great companion for the streaming device. It can act as an additional remote control, cast media files to your television, and launch channels on your Roku device, and more.


If the app isn’t working with your streaming device, there are a few things to try. First, restart the Roku and your smartphone or tablet. Then, make sure that both your Roku and smartphone use the same Wi-Fi network. Next, make sure that Wi-Fi access is enabled on your Roku by going to Settings > Systems > Advanced system settings. Then select Control by mobile apps > Network access. Make sure it is set to Default.

8 External USB Drive Not Recognized

Some Roku devices have an additional USB port to connect an external USB drive. This allows you to play photos, audio, and video stored on the drive, as well as pause live television.

If you’re having issues accessing content on the drive, there is likely an issue with low power or how the drive is formatted. Make sure that the drive uses an external power adapter if provided. If you don’t have one, try using a powered USB hub.

To be used on a Roku, the drive needs to be formatted in FAT16, FAT32, NTFS, Ext2, Ext3, exFAT, and HFS+.


With just a little work, you can easily troubleshoot most issues with your Roku device and get back to streaming all the content you can imagine.

Here’s What You Can Do

Key Takeaways

  • Manifest V3 will remove Web Request API, limiting blocking functionality for extensions.
  • Google aims to improve extension security despite potential disadvantages for users.
  • Check your Chrome extensions for affected items. Alternatively, switch to Firefox, which still supports Web Request API.


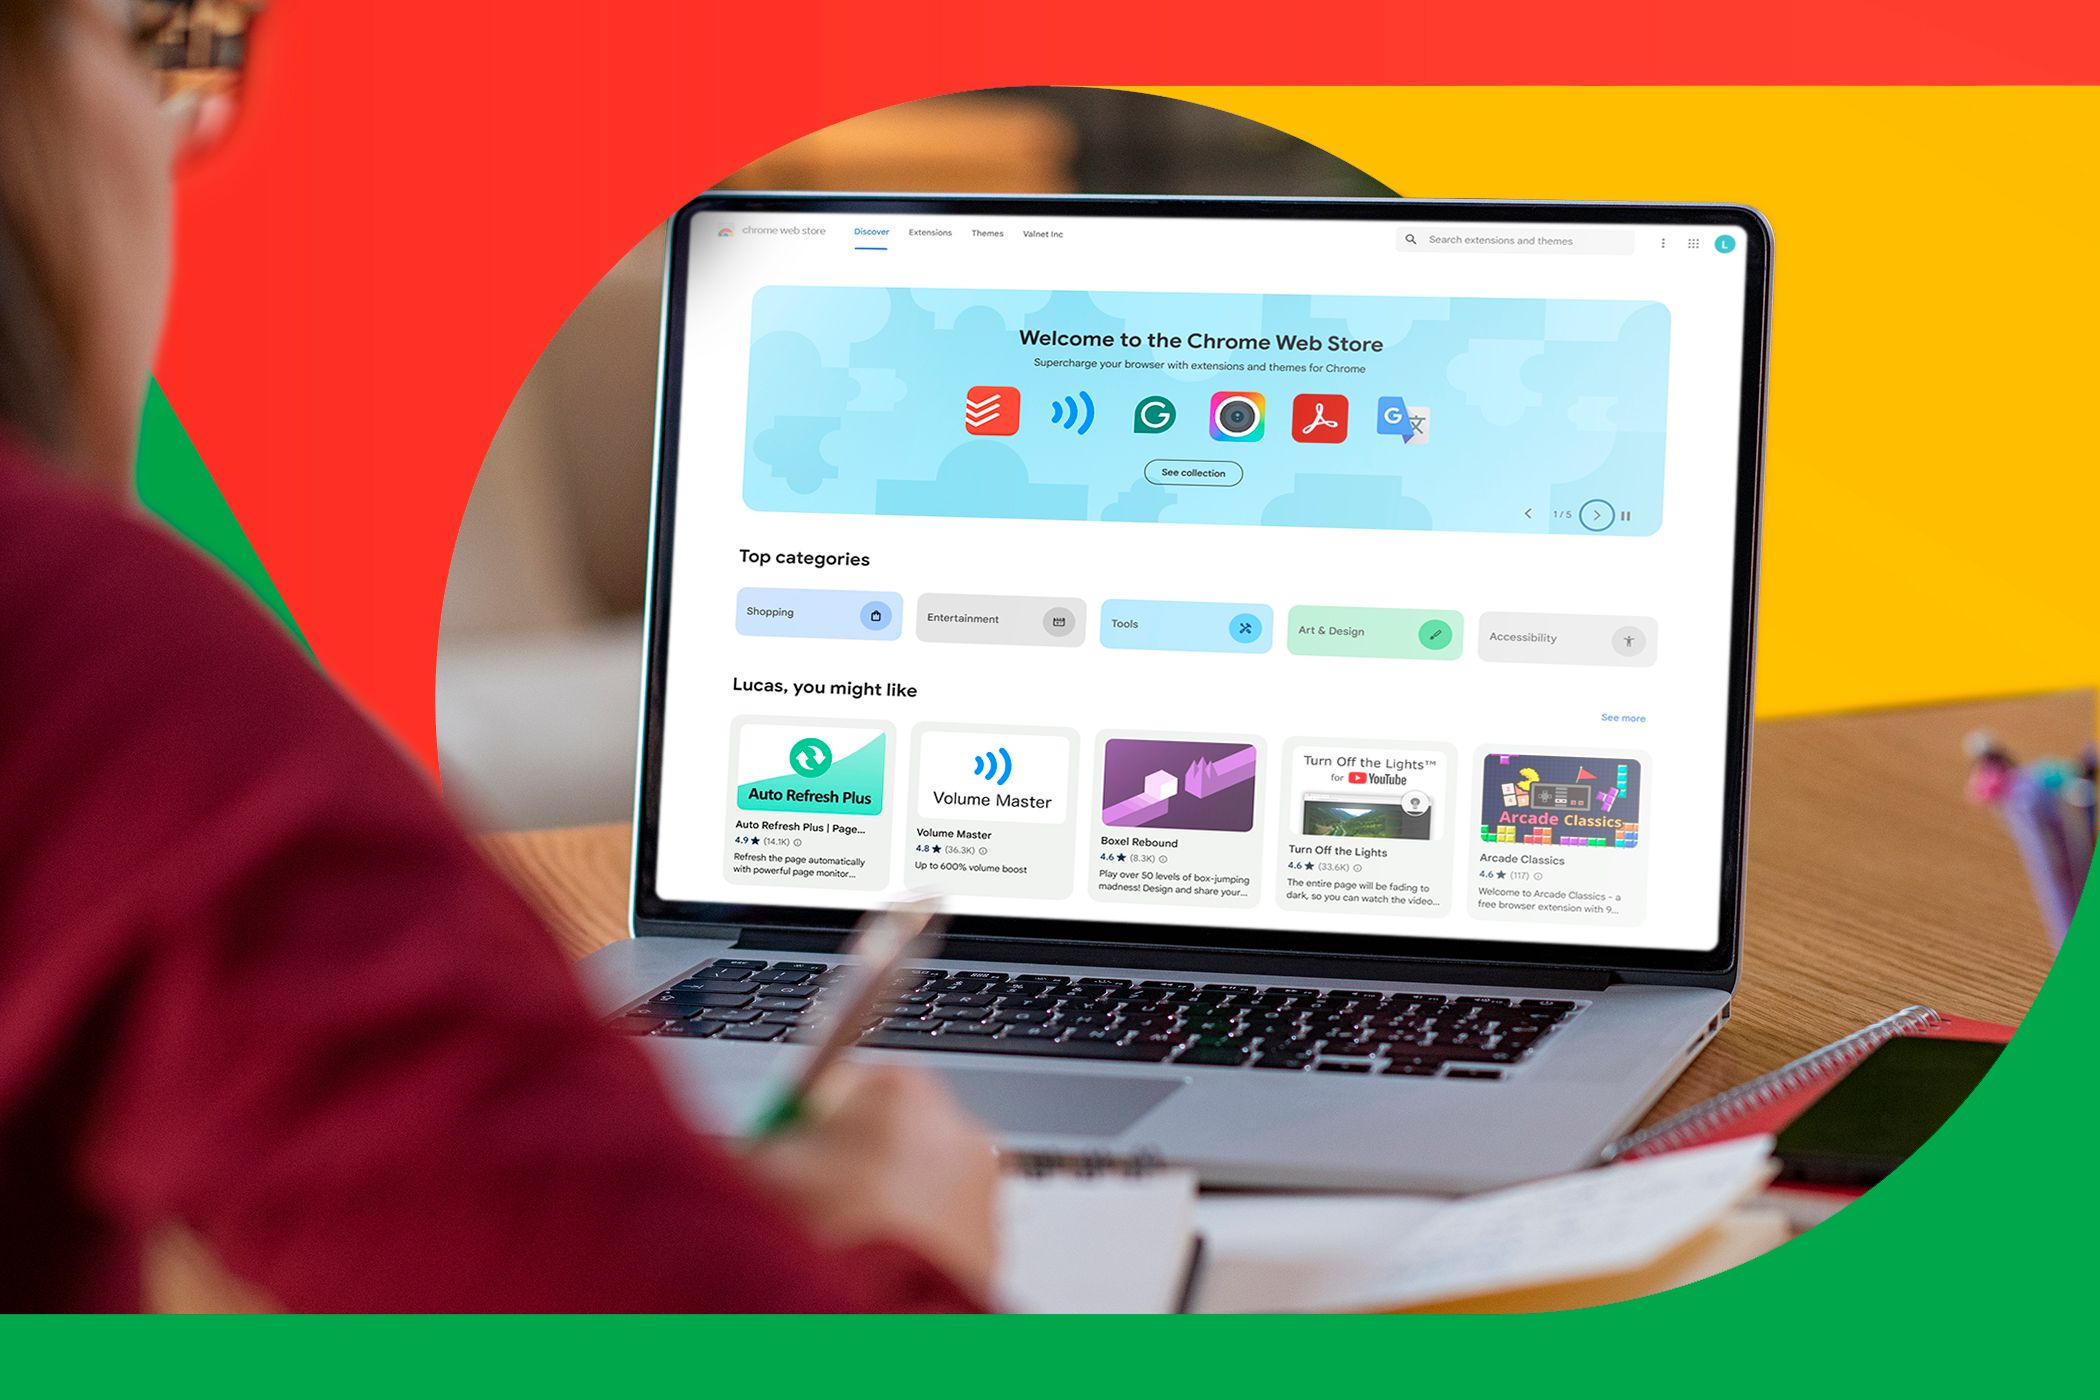
Google is officially transitioning to Manifest V3, the new Chrome extension specification. The latest version brings new features and, unfortunately, some limitations that will kill some of your favorite browser extensions when it starts rolling out in 2025.


Why Google Is Set to Kill Your Favorite Extensions

In Manifest V2, extensions relied on an API feature dubbed Web Request to monitor traffic while visiting websites, allowing them to block or modify select requests in flight. Using the Web Request API, extensions could, for example, block websites from making requests to certain domains, like those belonging to advertisers, ultimately blocking ads and trackers.


However, malicious actors could also abuse the Web Request to create shady Chrome extensions. Google has long had concerns about malicious actors abusing the Web Request API. That’s why, in Manifest V3, Google moved the blocking functionality to a new API called Declarative Net Request and restricted some previous functionality.

For instance, Google has removed support for remotely hosted code, meaning extensions can only execute scripts included within the package. This gives the company all the power to decide what extensions can and can’t do as they manually review packages before publishing them on the Chrome Web Store. Manifest V3 also limits the number of filtering rules an extension can have, which could hinder the effectiveness of blocking extensions.


According to Google, Manifest V3 will help to bolster the “security, privacy, performance and trustworthiness of the extension ecosystem as a whole.” However, if some of your favorite extensions relied on the removed or limited functionality, they could no longer be effective or, at worst, be gone for good once Manifest V3 is released to everyone.

How to Check Which Chrome Extensions Are Affected

Chrome Extensions page showing extensions that will stop working once Manifest V3 goes live

You can check if your extensions are affected by navigating to chrome://extensions. On this page, you’ll see a list of extensions Chrome will no longer support once Manifest V3 goes live.

If one of your extensions is affected, you can hope the developer updates the extension as soon as possible before Google’s deadline. However, you can also seek alternative extensions with the same functionality.


Google has a handy Find Alternative button available on the chrome://extensions page for any extension that will be defunct if the developer doesn’t provide an update before the deadline.

Alternatively, switch to another browser like Firefox, which still supports the Web Request API. Most Chrome extensions are also available on Firefox, so you might not miss out on much if you switch. If you’re worried about losing your data, you don’t have to. You can easily switch from Chrome to any other browser while retaining your bookmarks and settings.

5+ Reasons Why Your Next Laptop Should Be a Chromebook

Key Takeaways

  • Chromebooks are extremely affordable; most range in price from $150 to $500.
  • Chromebooks are portable due to their smaller size and weight, making them easy to carry anywhere.
  • Chromebooks are simple to use thanks to a lightweight interface, suitable for users of all ages.


Chromebooks have evolved considerably since they launched in 2011 and are now more capable than ever. Why, then, do so few people consider them when buying their next laptop? This question has bugged me for ages, so I’m here to convince you to buy a Chromebook.


Why I’ve Been Using Chromebooks for Years

I purchased my first Chromebook in 2013, and have used one as my main laptop ever since. I may have gone through four different devices in that time, but this was by choice—shiny new Chromebooks compelled me to upgrade after a few years. I currently own a Pixelbook Go, the most powerful (and therefore expensive) Chromebook I have ever purchased.

I do also use an all-in-one Windows PC at home, when I want to sit upright at my desk. But at all other times, my humble Chromebook is perfect for work, play, and everything in between. There are many reasons I’ve stuck with Chromebooks for so many years, and why I think your next laptop should be a Chromebook.


Chromebooks Are Affordable

Dave Parrack/MUO

The first, and most obvious, reason to consider a Chromebook is the sheer affordability of these devices. If you shop around, you can pick one up for as little as $150, although most cost between $200 and $500. Either way, as laptops go, they’re extremely affordable.

Compare Chromebooks to Windows laptops or MacBooks, and the difference is clear. Excellent Chromebooks with great build quality, a good touchscreen, plenty of RAM, and a solid battery life are more affordable than poor-to-average Windows laptops. And even the best Chromebooks are cheaper than any MacBook you may be considering buying.


Chromebooks Are Portable

An open Chromebook on a garden table
Dave Parrack/MUO

All laptops are portable, obviously; the clue is in the name. However, Chromebooks are particularly portable as they’re generally smaller and lighter than equivalent Windows laptops or MacBooks. Sure, you could drop $1,000 on a paper-thin MacBook Air, but as well as the high asking price, you’ll be stuck using macOS.

A machine’s portability isn’t just about its size and weight either. Because Chromebooks are so affordable and rugged, there’s an inherent portability about them. You can chuck one into a rucksack and use it anywhere you want without worrying too much about it getting stolen or damaged.

To connect your Chromebook to the internet while out of the house, you’ll need to use either a local internet connection or your phone’s mobile data.


Chromebooks Are Simple to Use

The simplicity of the ChromeOS homescreen showing a wallpaper of a US landscape and a small dock for launching apps at the bottom
Dave Parrack/MUO

Chromebooks are so simple to use that anyone from young kids more used to phones to elderly people who have never used a computer could pick one up and use it without any guidance. As long as you have a Google account, you can use a Chromebook, basically. Press the power button, sign in, and you’re good to go within seconds.

ChromeOS is an extremely lightweight Linux distro. Because it relies on web-based applications and Android apps, it boots up in seconds, without the churn you’ll have experienced using Windows or macOS. And then, once you’re actually using ChromeOS, your main UI is the Google Chrome web browser. You’re probably already familiar with it, and Google is constantly improving it too.


If you ever get sick of ChromeOS’s simplicity—which is pretty unlikely—you can always install Windows on a Chromebook instead.

Chromebooks Are Versatile

The Spotify Web Player on a Chromebook showing a list of Liked Songs
Dave Parrack/MUO

When they first launched, Chromebooks were a little lacking in some areas, and this reputation has, unfortunately, stuck. However, modern Chromebooks are incredibly versatile machines, capable of running apps and games, handling your work and entertainment, and generally fulfilling what most people need from a laptop.

There will be web apps for most programs you’ll want to use, and if not, there will likely be an alternative that does the job. Any Chromebook you buy today can also run Android apps installed from the Google Play Store, opening up more options. This includes games, so, yes, you can use your Chromebook as a gaming machine.


There are even Chromebooks designed specifically for gaming, as they boast the processing power to support cloud gaming.

Chromebooks Are Durable

A Chromebook open on a brick wall in the park
Dave Parrack/MUO

Last but not least of the reasons to buy a Chromebook is their durability. Admittedly, some of the early models were a little flimsy since manufacturers used cheap materials. I had one which I had to replace due to the hinge breaking. However, that was after using it every day for almost two years, and opening and closing it many times per day.

These days, Chromebooks are built to last, and built with students (their largest customer base) in mind. The cheapest Chromebooks may still feel a little plasticky, but once you hit the mid-range options, the build quality means that these devices are more than capable of taking some punishment.


Don’t Forget Battery Life and Security

Chromebooks have other, smaller advantages that I didn’t have time to go into: long battery life and top-notch security are just two examples.

Chromebooks boast some of the best battery life of any laptop you can buy, thanks to the lack of moving parts (such as a hard drive) and their use of efficient components. As a lightweight Linux distribution, ChromeOS requires far less power than Windows or macOS.

ChromeOS is also extremely secure, thanks to Google’s sandboxing approach to security. Any app you use will run in a self-contained environment, preventing it from infecting the rest of your system. And due to their always-online nature, Chromebooks will always be patched with updates, as long as your device is new enough to be supported.


For all these reasons, my next laptop will be a Chromebook—my fourth in a row. If you’ve been suckered into thinking your choice is a binary one between Windows and macOS, it’s time to rethink. For most types of work and entertainment, there’s a perfect Chromebook for you to buy.

Here’s Why It’s So Exciting

Key Takeaways

  • Choose custom laptop specifications, from GPU to port options, with the Framework laptop.
  • Framework laptops are easily repairable, allowing users to swap out parts with standard tools.
  • Reduce e-waste and customize hardware appearance with interchangeable options like keyboards and screen bezels on the Framework laptop.


Laptops are great for flexibility and portability. However, you cannot upgrade them, and you’re stuck with the specs that manufacturers offer. I plan to get a new computer in the next few months, and as I was browsing, saw the Framework laptop. Here’s why I find this laptop exciting—and why I’m going to buy it next.


1 I Can Choose the Specifications I Want

When I’m shopping for a specific laptop model, I’m typically limited to the specifications that the manufacturer offers. I’m not just talking about the processor and memory configurations here, though. I’m also looking at the discrete GPU, keyboard and macro pad options, and, most importantly, port options.


For example, I have a triple monitor workstation at home, but I occasionally spend a week working in another place every quarter or so. So, when I’m at home, I want a laptop with a discrete GPU, two Thunderbolt 4 ports, two USB-A ports, an audio port, and an ethernet port.

But when I’m outside, I’ll swap out the discrete GPU for Expansion Bay Shell since I rarely game when I’m exploring another place. I also don’t need the audio and ethernet ports, so I’ll swap them out for the microSD expansion card and an HDMI port for my portable monitor. These swappable ports mean I no longer need to carry a separate USB hub, like the Baseus Metal Gleam Series II.

2 The Framework Laptop Is Easy to Repair


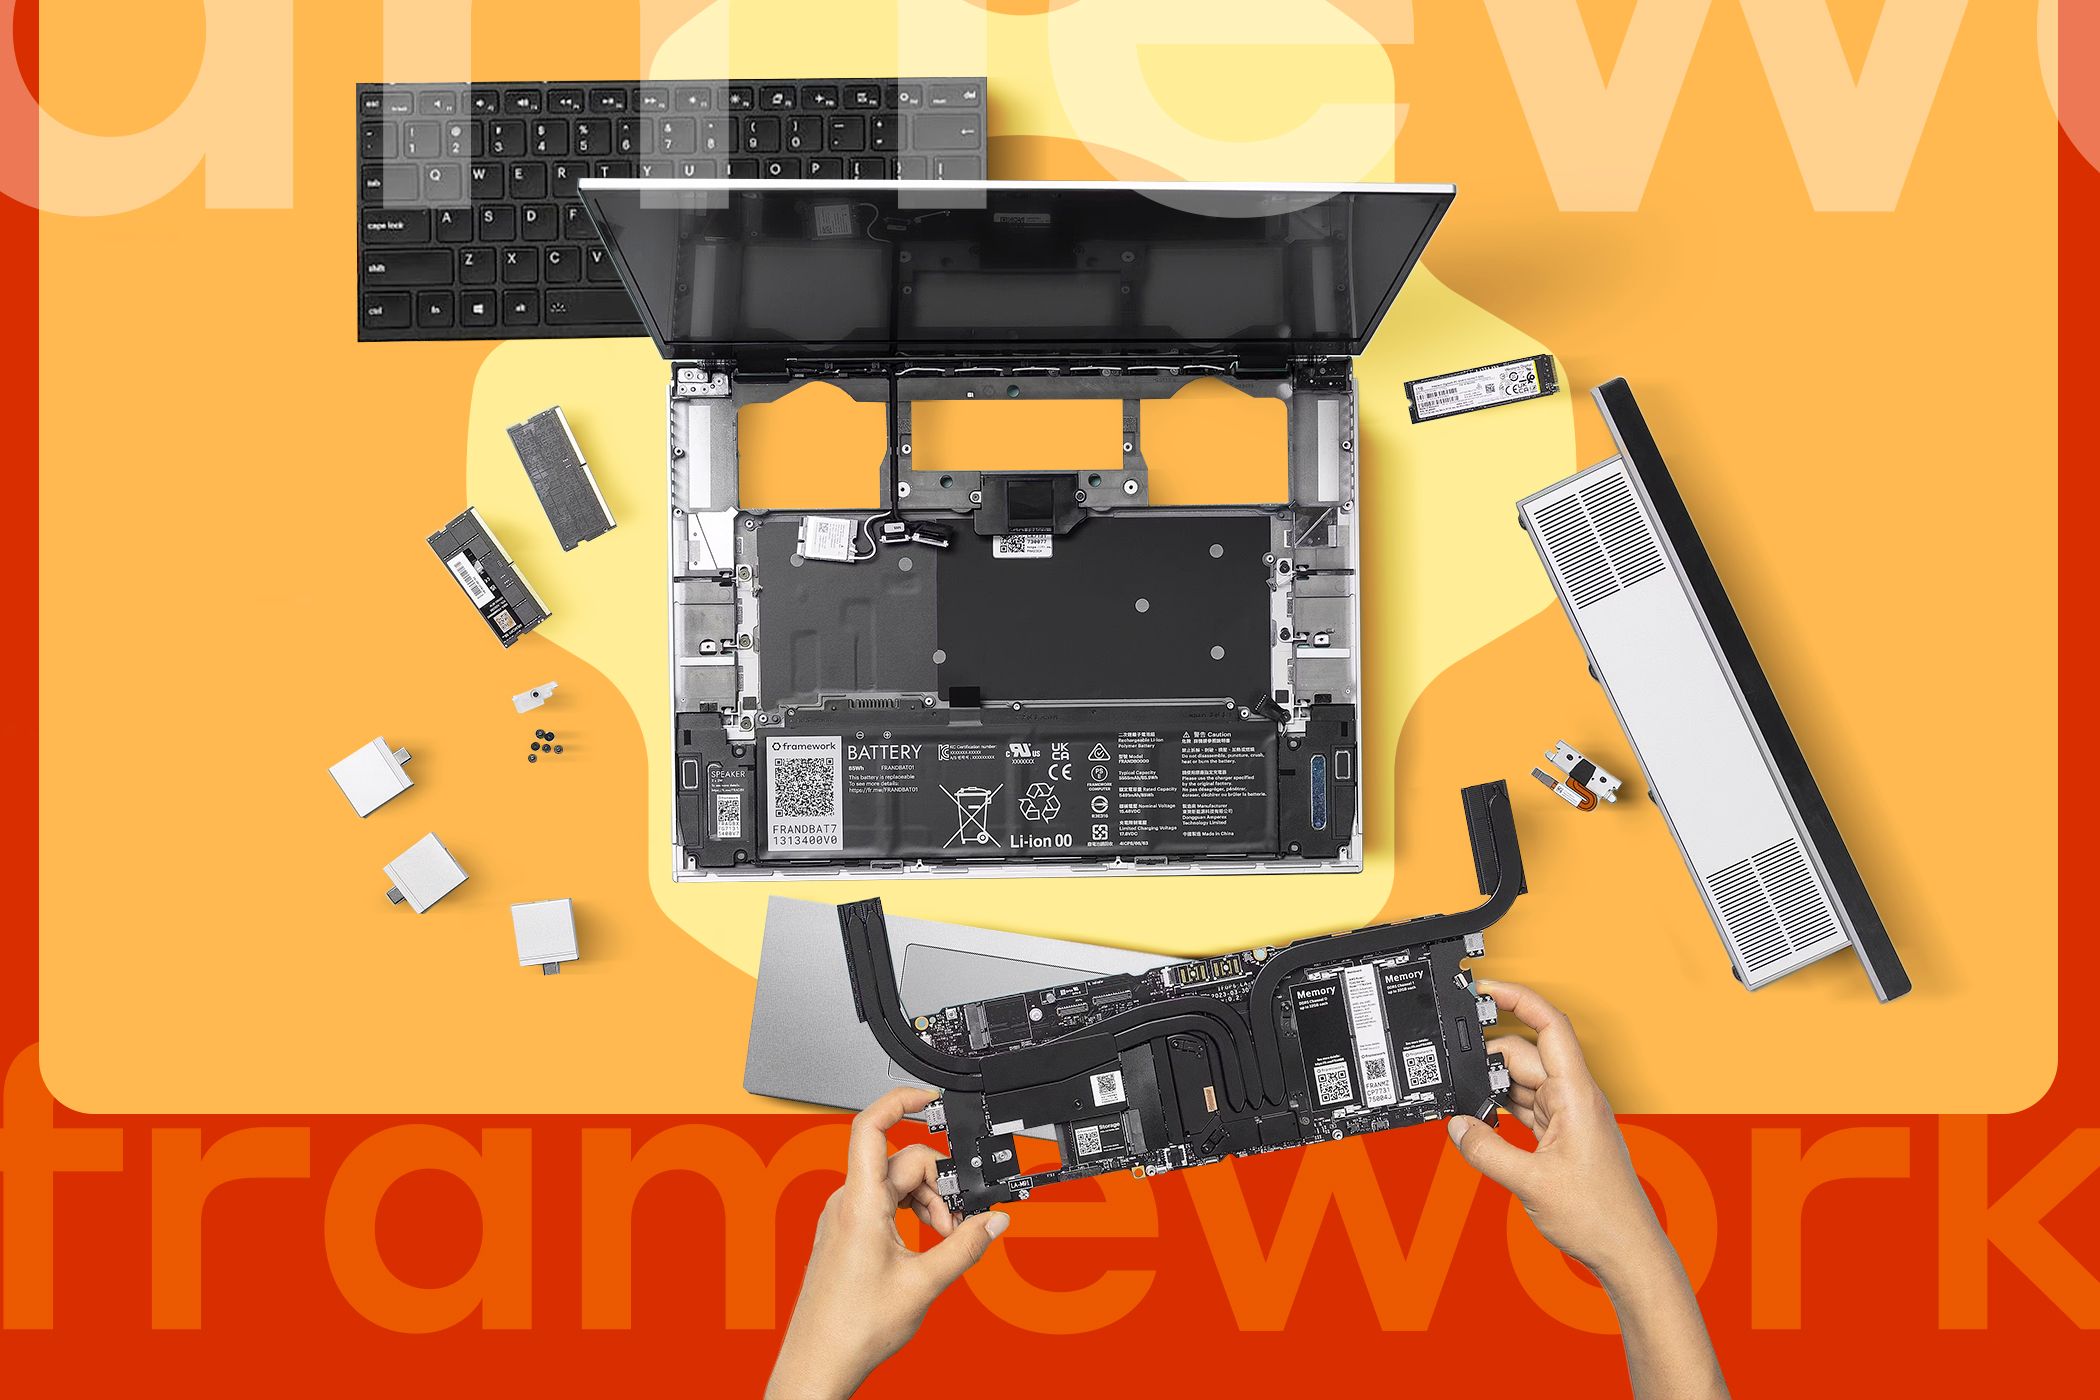
Most thin-and-light laptops aren’t repair-friendly, as many manufacturers solder everything and use glue to keep everything tight. However, Framework has been able to retain the same slim form factor while keeping everything modular. This makes it the darling of the right-to-repair movement, showing everyone how a laptop should be built.

So, if you ever encounter a problem with a battery, screen, or any other part or peripheral, you just need to pop open the cover, use a standard small screwdriver, and you can easily swap out parts. You don’t have to take the laptop to a specialist or deal with expensive service fees to repair the Framework laptop.

This even applies to warranty services. For example, say one of the memory cards on the Framework laptop fails. You can then disassemble and take out the bad part and still use the laptop while you’re waiting for a replacement; that way, you’re not without a laptop as Framework ships you a new RAM stick.


3 I Don’t Have to Buy a New Laptop to Upgrade It

One reason I’m looking at a new PC is that my current one is turning five next year. Since I use my computer primarily for work, I stick to a five-year upgrade cadence to ensure reliability. However, that means I must buy a new laptop every five years to keep up with technology because I can’t upgrade it piece by piece.

With a Framework laptop, I can just choose the parts I want to upgrade as needed. For example, let’s say I bought a Framework laptop 16 today with a Ryzen 9 7940HS, Radeon RX 7700S, 64GB of RAM, and 4TB of storage. If I want to upgrade to a new discrete GPU next year, I can just buy one from Framework and slap it in the Framework 16 instead of buying an all-new laptop altogether.


It also applies to all other parts, like the processor, RAM, storage, and even the display. Framework has proven its support for multiple generations of CPUs, as it started with an 11th-gen Intel CPU. The Framework 13 now supports Intel Core Ultra Series 1 and AMD Ryzen 7040 series chips, and you don’t have to buy an all-new laptop just to upgrade to these latest processors.

4 I Reduce E-Waste With the Framework Laptop

One side effect of this modularity is that I greatly reduce e-waste with the Framework laptop. So, if I encounter an issue with the Framework laptop after its warranty expires, it’s much easier (and cheaper) to replace the problematic parts compared to non-modular laptops, giving users less incentive to buy a new laptop and throw away the old one.

This is unlike before, when you’re more likely to discard a fixable old laptop because the complexity of the repair drives up the cost, making it impractical to fix.


This is also true with upgrades. Since I can just buy and install new parts, I don’t have to purchase a new laptop every so often and I can just keep my Framework laptop chugging along for several years. I no longer have to add to my stack of 10-, 15-, and 20-year-old laptops just sitting in my drawer since I (nor anyone else I know) would have no use for them anymore.

So, buying a Framework laptop is one of the ways I can reduce e-waste. Even if just a thousand people buy and upgrade a Framework laptop a decade, that’ll keep about 2,000 laptops out of the landfill if everyone typically replace their computers every three years.

5 I Can Easily Change How the Laptop Looks and Make It Unique


Aside from the easily interchangeable hardware, the Framework laptop is also fairly customizable. The company offers a plethora of keyboards, including ANSI and ISO layouts and keyboards for different languages, such as Traditional Chinese, Korean, Danish, Swedish, Spanish, German, International English, US English, British English, French, and more.

You also get a Numpad Module and an RGB Macro pad option for those who work with a lot of numbers and those who need extra assignable keys. Aside from that, Framework also offers three different screen bezel colors, five spacer colors (if I don’t want to install the Numpad or macro pad), and even a programmable LED Matrix.

Framework also partnered with Cooler Master and started offering cases for 11th- to 13th-gen Intel mainboards, allowing users who are upgrading to more modern chips to use these older ones as a standalone PC. And, if you’re the type to build your own custom parts, there’s also the Framework Community. This is where you can find projects and ideas that will help my Framework laptop truly your own.


These are some of the few things why I excited to get my hands on a Framework laptop when I upgrade my computer next year. It’s like having the size and portability of a laptop, but the upgradability and utility of a desktop computer. I just hope that it becomes available across more areas next year, as it’s not yet available in my region. But if I was based in the U.S., then I’d definitely have this as my next Windows PC.

Why the Stream Deck Neo Is the Perfect Productivity Companion for Anyone

Key Takeaways

  • Elgato’s Stream Deck Neo offers a more affordable, work-focused alternative to the regular Stream Deck.
  • The Stream Deck Neo includes capacitive touch buttons to navigate between pages, maximizing functionality.
  • With a compact, professional design, the Stream Deck Neo provides eight buttons at a competitive price of $99.99.


Whether you’re streaming or working on a spreadsheet, a macro pad can help you in more ways than you can imagine. With its launch of the Stream Deck Neo, Elgato is turning its focus to the world of work. The new Neo might just be your perfect productivity companion.


Stream Deck vs Stream Deck Neo

You may be confused about which Stream Deck model to buy, and the decision’s about to get harder. The Neo is the latest addition to Elgato’s Stream Deck lineup, sitting between the Stream Deck Mini and the regular Stream Deck.

The “Neo” tag comes from the new budget-friendly lineup that the company has launched. These products, which aim to be more accessible to a mass audience, include a key light, mic, and webcam. But the Stream Deck Neo is something new altogether.

Yadullah Abidi / MakeUseOf


The device is larger than the Stream Deck Mini, so it packs in more functionality. But it’s also affordable enough to appeal to new buyers who aren’t full-time Twitch streamers. In my opinion, the Stream Deck Neo hits the spot if you’re looking for a macro pad to boost productivity without having to spend too much money.

How Does It Help Productivity?

At its core, the Stream Deck Neo is very much a regular Stream Deck. You get eight buttons, with individual displays, that you can set to do anything you want. The Deck also lets you create custom profiles for individual programs.

The Neo’s core functionality is supported by Elgato’s Stream Deck application. This means the Stream Deck Neo, the regular Stream Deck, Stream Deck Mini, and Stream Deck XL all work the same way.

Keep in mind that you can still use your regular Stream Deck to help your productivity. But the additions that Elgato has made to the Neo may help you even more.


Dedicated Page Buttons

Unlike other Stream Decks, the Neo has capacitive touch buttons to switch between pages. These pages let you create several groups of shortcuts or commands, in case you need more than eight.

On older Stream Decks, you had to dedicate at least one or two of the main buttons to navigate between pages. That doesn’t sound like a lot, but those 15 keys on the regular Stream Deck can run out pretty quickly.

The Stream Deck has eight buttons with individual displays showing off their associated action.
Yadullah Abidi / MakeUseOf

The Stream Deck Neo solves this problem by adding two capacitive touch buttons that are mapped to switch between pages. This frees up all eight buttons for actual functionality. Since the navigation buttons are always in the same spot, illuminated by individual lights, they’re quick and easy to use.


More Buttons

Speaking of buttons, the Stream Deck Neo hits the right spot with its eight buttons. If you’re just planning on using a Stream Deck for work macros and general productivity, 15 buttons on the regular Stream Deck can be overkill, while the six buttons on the Stream Deck Mini can be too few.

Considering you don’t have to assign buttons to switch pages, the Stream Deck Neo has just the right number of buttons.

The Info Bar

The Stream Deck Neo comes with a small display called the info bar, between the two page-switching buttons, that shows useful, basic information. If you’re using a regular Stream Deck and want it to tell the time or date, you have to dedicate a button to that task. However, the Neo can display this information in its info bar.

A close-up of the lower half of the Stream Deck focuses on its clock and date display.
Yadullah Abidi / MakeUseOf


Admittedly, the info bar doesn’t do that much; you can set it to show either a page indicator or the system time. Elgato’s software design does suggest that we’ll see more options in the future, though.

One great use of the info bar would be if it displayed different contents based on the active page. Hopefully, Elgato will add more utilities to the info bar in the future, which will greatly enhance the device’s functionality.

More Work-Focused Design

The design language of the Stream Deck lineup has remained more or less the same since it launched in 2017. For most people, it’s a simple black box with customizable buttons on top. With the Mk 2 iteration, you can get the Stream Deck in a white color with interchangeable faceplates, but that’s about it.


The Neo takes everything good about the Stream Deck’s design and puts it together in a package that will look just as good on an accountant’s desk as it does for a gamer playing Fortnite. The collapsible stand at the rear also gives you two different slant angles and an option to lay the device flat on your desk.

The Stream Deck has two rows of four buttons and a separate display underneath them.
Yadullah Abidi / MakeUseOf

The overall form factor is quite compact, and the rounded edges give it a neat, professional look. So the Stream Deck Neo won’t look out of place on your desk at work. The white color scheme pairs especially well with a Mac, in case you’re looking to up your productivity on a Mac with your Stream Deck.


A Competitive Price

Last but not least, the Stream Deck Neo is selling at a very compelling price tag of $99.99. For comparison, the Stream Deck Mk.2 retails at $149.99, while the smaller Stream Deck Mini comes in at $59.99. The only other options in the lineup are the gigantic Stream Deck XL at $249.99 and the Stream Deck + at $199.99.

The latter two serve very different purposes, but if you’re looking to get a Stream Deck for productivity, the Neo may be your best option. It’s not as expensive as the regular Stream Deck, but retains full functionality and, as far as I’m concerned, a much better design. The Stream Deck Mini is a good alternative if you’re on a tight budget, but the limitations of its six buttons might hamper your productivity instead of enhancing it.

My Favorite Photo Editing Apps That Aren’t Oversaturated With AI Features

Key Takeaways

  • Affinity Photo 2 offers advanced photo editing with a user-friendly interface and non-destructive RAW editing.
  • Capture One allows for instant photo sharing and editing.
  • VSCO provides unique filters and editing tools but requires a subscription for full access.


Artificial intelligence is being integrated into just about everything nowadays, and one popular use case is taking and editing photographs. If, like me, you prefer to edit your photos manually, here are the best apps I’ve tried that use little or no AI.


1 Affinity Photo 2

Affinity Photo is a multi-award-winning editing app that can be used on macOS, Windows, and iPad, which means you can work on the same file using any of these devices. Standout features of Affinity Photo include skin retouching and blemish removal, a huge library of filters and effects, and extremely precise pen and brush options. While Affinity supports various AI plugins and extensions, these, thankfully, aren’t mandatory for editing your images.


The latest iteration, Affinity Photo 2, has a much-improved user interface layout, which is smoother and more intuitive. In addition, the most recent update allows for non-destructive editing of RAW files, which means you can edit and develop RAW images (such as those created with a DSLR camera) without losing a copy of the original RAW file, making it an excellent choice for professional and keen photographers.

Download: Affinity Photo 2 for Windows and Mac | iPad ($33.99 for Mac and Windows, $8.99 for iPad)

2 Capture One

Using the editing features on Capture One.


If you work as part of a team or want to instantly share photos with collaborators, then you might want to check out Capture One. This software allows you to shoot images directly to a desktop, iPad, or iPhone, without any uploading or downloading, allowing for instant feedback from friends or clients.

Capture One features all the expected editing tools, along with a large range of preset filters and styles. While Capture One does incorporate AI, you can choose the level integration, and just leave the boring jobs like exposure balance and cropping to the robots, thus saving your time for the artistic touches.

You can take advantage of the 30-day free trial, after which there are various paid packages available, from the dedicated mobile app to the full studio subscription for professionals.

Download: Capture One for Windows and Mac | iOS (Free, subscription available)

3 VSCO

Using the editing tools on VSCO.


Similar to Instagram, VSCO is an image-sharing and editing app that works across Android, iOS, and desktop devices, allowing photographers to share their photos with other users on the platform. While there is a free version available, it only provides limited access to the VSCO community and the editing functions. To take advantage of over 200 preset filters and advanced editing tools, you will need to purchase a monthly or yearly subscription.

Standout features of VSCO include access to imaging effects and GIFs that aren’t found on other platforms, a unique range of movie-inspired effects and overlays—think graining, scratches, or dust—and the ability to group collections and galleries together, and choose who can see them.

Download: VSCO for Android | iOS (Free, subscription available)


4 Afterlight 2

Editing photos using Afterlight.

Afterlight and the all-new Afterlight 2 are both software applications designed for Apple devices. However, there is now a version that runs on Windows. It is aimed more at beginner photographers and has a simple, user-friendly interface with large, clear icons. It supports importing RAW images and exporting files in HEIC, or High-Efficiency Image Compression format.

Along with a full suite of editing features, the app also allows you to adjust some of the settings on your phone camera before you take a photo, such as white balance, exposure, shutter speed, and ISO. The app also allows you to add layers of graphics and text to create stunning and unique visuals, and then upload them to social media.


Download: Afterlight 2 for Windows | iOS (Free, subscription available)

While artificial intelligence is certainly a useful and welcome addition to our lives, there are some things that the artistic among us would just rather do ourselves. To the discerning photographer, an editing tool that allows full user control is much more useful than an AI-powered tool that churns out run-of-the-mill photos.

How to Remove Yahoo Search Engine From Chrome

Key Takeaways

  • Remove Yahoo from the list of search engines and set your preferred search engine, such as Google, as the default.
  • Check for and remove potentially unwanted programs (PUPs) on your device. Likewise, run a malware scan to remove viruses and threats.
  • If none of these solutions work, uninstall Chrome and its remaining files. After that, reinstall a fresh copy.


Google is the default search engine in the Chrome web browser since both are Google products. However, malware or potentially unwanted programs (PUPs) can automatically switch the default search engine from Google to Yahoo.

Here’s how to remove the Yahoo search engine and save yourself the hassle of repeatedly changing it back.


Set Your Preferred Search Engine as Default

Chrome allows users to use different search engines, with default options including Bing, DuckDuckGo, Yandex, and Yahoo. First, check what search engine your browser is using as its default. If that’s Yahoo, you can change Chrome’s default search engine and return it to Google.

  1. Click on three vertical dots in the top-right corner and select Settings.
  2. Navigate to the Search Engine tab from the left sidebar.
  3. Click on Manage Search Engines and Site Search
  4. If Yahoo is set as default, tap on three vertical dots next to Google and click Make Default.


Switching the default search engine to Google should temporarily fix the issue. However, it may automatically revert to its previous state after a few days. So, to make this change foolproof, you’ll have to remove Yahoo and other search engines.

Remove Yahoo’s Search Engine From Chrome

In Chrome, you can remove Yahoo from the search engine list to minimize the chance that your browser will default to Yahoo again.

Removing-Yahoo-From-List-Of-Search-Engines-In-Chrome

  1. Click on three vertical dots in the top-right corner and select Settings.
  2. From the left sidebar, navigate to Search Engine.
  3. Click on Manage Search Engines and Site Search.
  4. Tap on the three vertical dots right next to Yahoo.
  5. Hit Delete.


Additionally, you can remove all other search engines, except Chrome, from the list if they become defaults. After this, your browser cannot default to Yahoo again.

Identify and Remove Potentially Unwanted Programs

If Google’s search engine is replaced by Yahoo again, you should remove any Potentially Unwanted Programs (PUPs) that might be causing the issue, particularly those associated with Yahoo.

To do this, type Control Panel in Windows Search, open the Control Panel app, and go to Programs and Features. Here, look for any suspicious programs that may be associated with Yahoo, right-click on them one by one, and select Uninstall.

Uninstalling-Program-In-Control-Panel


Run a Security Checkup on Your Computer

If none of the previous fixes worked, it’s time to check your computer for browser hijackers or malicious files that need removal. Run the Microsoft Defender virus scan to eliminate hidden, potentially harmful files.

Microsoft Defender will detect threats and inform you of their severity. If it finds any malware or threats, remove them immediately. Depending on the amount of data on your system, the scan might take some time.

If you’re facing this issue on macOS, check your MacBook for malware and remove any you find.

None of the Fixes Worked? Reinstall Chrome

As a last resort, you can try reinstalling Chrome. First, uninstall Chrome and its associated files before reinstalling it.

Windows users can refer to this article on how to uninstall programs in Windows, while macOS users can refer to this guide on how to uninstall programs on a Mac.

After uninstalling Chrome according to these guides, delete any remaining files to ensure no junk data is left behind. Then, install a fresh copy of Chrome.

These Are the 7 Best Forums and Sites For Your Security News

If you’re looking to stay up to date with the latest cybersecurity news, you’ll find plenty of forums for all manner of security topics and genres. Here are some of the best places to ensure that you remain up to speed.


Reddit is one of the most popular online forum sites, and it has several subreddits related to security—including r/Cybersecurity. The subreddit has over 800,000 members, and users post links to security-related stories daily. You can also talk about different topics in the cybersecurity space and seek inspiration and tips from others.

If you want to make a career in cybersecurity, you’ll also find associated tips. There are several features you can use to improve your Reddit experience, too, such as using the search function within r/Cybersecurity and other subreddits.


The Malwarebytes Forum Page

Even if there are several great alternatives to Malwarebytes Premium, it’s still an excellent tool for keeping your computer safe. But beyond the main product, you’ll also find a comprehensive forum with several subcategories. If you’re looking to get your news, you should go to the Research Center section.

In the Malwarebytes’ Research Center, you’ll see all of the latest threats that could impact your Windows or Mac computer. On top of that, you will also find a list of the latest malware and mobile threats—plus more.

The forum also has a section where you can keep up with the latest news about Malwarebytes, such as new features and updates. And if you’re having trouble using the app, you’ll also find assistance related to solving those issues.


The MalwareTips Forum

MalwareTips has a similar layout to Reddit in the way that you can browse posts by new, popular, and other subcategories. Users will share news related to privacy and security with links to various publications around the web. You also have easy access to cybersecurity news if you click on the News tab.

MalwareTips lets you browse forum posts based on both security and tech news. The forum has a few news-related posts per day on average, but you won’t necessarily see daily content. Nonetheless, it’s worth checking out once per week to stay updated with what’s going on. Besides reading the forum’s posts, you can reduce your chances of infecting your device by understanding the most common sources of malware.


To browse the Malwarebytes forum in more detail, you need to sign up for an account. You may also want to sign up for a Malwarebytes trial if you need a Kapersky alternative following its ban in the US.

The Antionline Forum

The Antionline forum has a dedicated security news section that receives intermittent updates, but you can learn more about cybersecurity thanks to its subsections. For example, you’ll find tips about web security, programming security, regulatory compliance, and network safety. If you’re on the lookout for a new antivirus tool, this is also the place to go.


To get a better overview of what’s happening in the forum, you can navigate to the What’s New? Tab. Here, you’ll see all of the latest posts, comments, and so on. At the very least, you’ll have a better understanding of cybersecurity trends and threat awareness after spending some time on Antionline.

The r/Malware subreddit

Another Reddit forum worth checking out for cybersecurity news is r/Malware. Whereas r/Cybersecurity is more general and also covers careers in cybersecurity, the r/Malware subreddit is more focused on—you guessed it—malware.

You’ll see malware-related news and round-ups in this forum, and people will also report on what they’ve experienced on a personal level. If you’re having issues with malware infecting your device, you can also ask this forum for tips.


r/Malware is much smaller than r/Cybersecurity, with around 79,000 members. Nonetheless, that’s still a pretty substantial number. Moreover, you might also like the fact that it’s more targeted. If you want to start from scratch when using the app, you can always delete your Reddit history, too.

The Windows 11 Forum

If you own a Windows computer, you’ll find Windows 11 Forum a goldmine of information for fixing issues and using your device in general. However, it’s also quite useful if you want to keep up with the latest security news. You’ll find a handy News tab, which shares both Windows and tech-related news.


While these are naturally mixed with other forms of news, you can use the search tab to search specifically for cybersecurity news and posts. It’s worth using several terms and seeing what you can find, such as “malware”, “security”, and “VPN”. There’s a decent level of security news posted, so you’ll often find new results and articles to read.

By using the search feature, you’ll also be able to find helpful tips and tricks posted by others. Even though the forum is primarily for Windows users, you can still find some use from it if you’ve got a MacBook.

The Security Affairs Blog


Security is one of the most comprehensive online resources for security news, and you’ll find content covering several topics—such as cybercrime, data breaches, and cyber warfare. The article is updated with the latest news stories across the security space, and you can sign up for the newsletter if you want stories delivered to your inbox.

If you want more in-depth content, Security Affairs has what you need. A ticker of must-read stories at the top of the homepage keeps you up to date on all the essential stories.

Besides reading the latest news, you can also implement various minimalist cybersecurity tips to stay safe.

Staying up to date with the latest security news will help you identify problems that you may need to fix in your own life, such as updating your devices or learning what to be aware of. With several online forums to help you out, you can easily enhance your online security by checking these out. It’s also a good idea to contribute to them so you can meet like-minded people.


Is Facebook Marketplace Safe? Here’s My Experience With the Platform

Key Takeaways

  • You can use Facebook Marketplace for buying and selling a wide range of items safely by checking profiles and descriptions.
  • Be cautious of potential scams by paying in cash, researching thoroughly, and setting clear communication expectations.
  • Take the time to research items and profiles, set realistic prices, and maintain good communication with buyers and sellers for successful transactions.


Facebook Marketplace is a popular way to buy or sell second-hand items online. But is it safe to use? Here are my experiences and tips to get the best results on Marketplace.


What Is Facebook Marketplace?

Facebook Marketplace is an online market hosted by Facebook. To use Facebook Marketplace, you must have a Facebook profile. There are no restrictions on who can buy or sell, with all communication taking place between the buyer and seller only.

Facebook Marketplace was introduced to the social platform in 2016 as a built-in way for users to buy and sell items. You can find the Marketplace as a Facebook app from both the mobile app and browser versions of Facebook. You can buy and sell almost anything on Facebook Marketplace, whether it’s small home goods like bedside cabinets and smartphones or large-ticket items like cars or even houses.


My Experience Buying on Facebook Marketplace

When I’m looking to buy specific items, Facebook Marketplace is often my go-to platform. Over the years, I’ve bought two cars and a campervan through Marketplace, as well as a MacBook Pro, other electronics, and home goods like lamps. Marketplace is a great way to buy a discounted MacBook or other typically high-priced electronic goods.

Facebook Marketplace sellers who have sold multiple items may also have reviews from previous buyers. I check their reviews and their profile before messaging. I always write a custom message rather than the default one Facebook supplies, as I want to show the buyer that I’m genuinely interested and not a scam bot.


Free TV Listing on Facebook Marketplace

Before messaging a seller, I read the entire description. Sometimes sellers list a lower price for attention, and they’ll write the real—higher—price in the description, or other caveats such as the item not functioning. When researching a product, I also compare prices and conditions with other retailers or discount marketplaces to know the item’s worth.

While it isn’t the best safety tip to meet a stranger at their or your house, that’s where I’ve met most of the sellers when buying items. I’m always communicative and punctual when meeting a seller and I often take another person with me for safety, confidence, or help with loading.


I’ve only had positive experiences as a buyer on Facebook Marketplace. I always research the product and the seller beforehand, and if anything feels off, then I drop out of the deal. You can’t return items bought from Facebook Marketplace, so when I meet to buy, I always check the item thoroughly before exchanging cash.

My Experience Selling on Facebook Marketplace

As a seller on Marketplace, I’ve found many more frustrations than I do as a buyer. It’s common that users don’t read the description and sometimes don’t look at all the photos. While I still recommend uploading all the information, just be aware that it doesn’t mean people look at it.


When arranging for a buyer to come to pick up their item, I give them specific time parameters for visiting—otherwise they might waste your entire day—and explain whether the item will need another person to help load it or other important information.

I only accept cash payment as this helps avoid scams with online banking or failed transactions, and I wait until everything is confirmed before I give my full address—I’ll provide a nearby vague area before that.

After selling an item, you can set the listing to “Sold” which will stop people from messaging you continually asking if the item is still available. This is preferable rather than deleting the listing advert, since it shows your selling history, which can help vouch for you as a review in the future.

How I Spot Scams on Facebook Marketplace

There are ways to stay safe on Facebook Marketplace, and there are many things you should take note of as both a buyer and seller on Marketplace.


Firstly, write a full and honest description of your item. Include images of any damage and explain anything the new owner should know. As a buyer, making sure you read and look at all the information presented helps you buy your product with correct expectations.

Check out a buyer or seller’s profile. This helps to see if they are genuine, if their story lines up with their conversation, and if they have any negative reviews or interactions that make you wary to engage with them.

Use apps to reverse image search the listings images. This helps confirm the listing is genuine, as the photos shouldn’t be available elsewhere. Similarly, look for duplicate listings with the same title, images, or descriptions. There should only be one listing for one item.


Typically, the best way to avoid a scam through Marketplace is to only pay in cash once you physically exchange the item. It’s not recommended to pay online, through a bank transfer, and especially not using any online gift cards.

Some people prefer to lock down their Facebook privacy settings if they are selling or buying frequently on Marketplace. This includes changing your name—use your middle name or a shortened version of your last name—and keeping any recent photos of you and your loved ones viewable to your Friends List only. Don’t fill your feed with your upcoming vacation plans if you’re giving your address to strangers when selling items.

Selling on Facebook Marketplace is a great way to clear your possessions responsibly or for buyers to find new items at great prices. Just keep your wits about you and remember the buyer or seller is a stranger who you owe no loyalty to and selling or buying something fast isn’t worth being scammed.


My Advice to Facebook Users on Marketplace

Cars for Sale on Marketplace

Take your time to research both products and profiles when using Marketplace. Don’t let the FOMO cause mistakes or scamming opportunities when you excitedly confirm a purchase.

To avoid wasting your time, give a time parameter for anyone you’re meeting with. If they fail to arrive, move on to the next person in line. It’s common that some Marketplace users have bad communication, are late, or even totally ghost you. Don’t get disheartened, just move on.

Since Marketplace doesn’t charge fees or process any payments, you can set the price however you like—including giving away items for free. From experience, most people who buy from Marketplace will try to push the price lower, so price your item with that in mind. It’s easiest to take cash only, so round the price to an even number.


To avoid people messing you around if you want to give an item away for free, just put a small price like $10 on it. It’s up to you whether you still give it for free when the buyer shows up, but it’s a low enough price to stop time-wasters.

Facebook Marketplace is a helpful tool for people clearing out unwanted possessions and for those who want to buy new-to-them items without eye-watering prices. Being communicative and honest will yield the best results for both sellers and buyers.

8 Amazing Android Apps You Won’t Find on the Play Store

Google’s Play Store is undoubtedly the biggest source of Android apps, but that doesn’t mean it has everything. There are some real gems in a popular alternative app store called F-Droid. Here are some of my favorites.


1 Kvaesitso

Most launchers consist of app grids, but not Kvaesitso, which instead places the focus on your widgets and the ability to search for what you need.

In Kvaesitso, your Home screen shows only a clock and a search bar (though you can add a dock if you wish). Swipe up to view all of your widgets arranged in a column. Tap the search bar or swipe down to search for apps, files, contacts, web links, and more.

For such an unconventional launcher, Kvaesitso remains highly customizable, giving you a wide range of freedom to make the distinct experience better fit your tastes.

Download:Kvaesitso (Free)


2 Auxio

Streaming music has never been my thing, but I love local music players. Auxio has been my go-to for years. It’s a beautiful app that fully embraces Android’s Material You vibe.

Are there standout features about Auxio that set it apart from other players? I think of it the other way. It has all the essential features, is fully free, and doesn’t track my listening habits. By setting such a high bar, I’m left wondering: why search for anything else?

Download:Auxio (Free)

3 Breezy Weather


Weather apps are a dime a dozen. Unfortunately, many weather apps are privacy nightmares, tracking your location and selling that information. They can monetize your usage even if they don’t show you ads.

Breezy Weather is a fully open-source and private option that is also one of the more attractive weather apps around. The card-based layout feels right at home on a Pixel, and you get a diverse selection of widgets.

On top of that, the app includes an animated live wallpaper that changes to match the current weather in your area.

Download:Breezy Weather (Free)

4 Table Habit


An issue I regularly face with to-do list apps is that many of my tasks are small and recurring. I don’t need to give them an urgency level, set a due date, or write a detailed description. I just want to remember to do them and maybe have an idea of how often I’ve missed the mark. The Table Habit app is perfect for this sort of task.

It can help you do more of the tasks you consider positive or reduce the habits you think of as bad. Need to water the plants each morning? Set a reminder in Table Habit and jot down when you’re done so you also have a record of how often you’ve watered. Want to spend fewer hours binge-watching Netflix shows? Set a goal and note whether you’ve gone over.

The app is a helpful aid that isn’t trying to sell you a subscription service to monetize your desire to make a few positive changes in your life. You can think of it as a less flashy version of the Habits app that helps you build productive habits.


Download:Table Habit (Free)

5 Fridgey

I’ve never been big on apps that help you catalog the items in your home, be that books or your vinyl collection, but I do get the appeal, particularly with an app like Fridgey. This is a place to log all the food in your fridge to help you keep tabs on what you have on hand.

Yes, using this app takes quite a bit of work. Still, it can go rather far in helping you cut down on food waste and save money since it helps you not only view what you have but also manage expiration dates. This way, you cook food before it goes past its prime. You can pair Fridgey with other ways to use tech to save money on groceries.

Download:Fridgey (Free)


6 Orgzly Revived

Orgzly is both a note-taking and to-do list app. You arrange notes into notebooks and have the freedom to both jot and sort things however you want.

You can include to-dos within notes and mark them as done. You can use your notes as tasks and give them a date. In short, you can view your notes as notes, tasks, or calendar events.

Orgzly is available on the Play Store, but that version hasn’t been updated in a few years. Orgzly Revived is a fork of that project that still receives support. It’s a good option unless you need a cross-platform note-taking app you can use on multiple devices.

Download:Orgzly Revived (Free)


7 Wall You

Many of us prefer Android because it gives us much more freedom to make the device our own. We can change the launcher, app icons, and the theme. Yet when you’re done with all of these, you still need a good wallpaper. It’s a shame that searching for one online can be an overwhelming, somewhat sketchy-feeling affair.

Wall You is a polished app that displays wallpapers from various sites such as Wallhaven, Unsplash, OWalls, and Bing without exposing you to tracking or anything nefarious. You can add wallpapers to your favorites for later use and apply them to your phone directly from the app.

Download:Wall You (Free)


8 Sharing

AirDrop and Quick Share are great if you’re operating within one ecosystem, but their usefulness falls apart when you use an unsupported device. Cloud storage services are great, but they’re a bit excessive if you just want to send a file from one device to another.

Sharing is an app that works across any device as long as the receiver is connected to the same network and can open a web browser. You select files on your phone that you wish to share, press the Power button within the app, and then type in the displayed URL in a web browser on the receiving device (or scan the generated QR code).


Sharing uses unsecured HTTP, so if you’re on a public Wi-Fi network, it’s best to first generate a hotspot on your phone and connect the receiving devices to it. This way, no one else can snoop on your files during the transfer process.

Download:Sharing (Free)

The above apps are all free and open source. So, even if I didn’t explicitly call out their privacy credentials, know they’re safer options than trying out apps randomly from the Play Store. Why expose yourself to relentless tracking and ads if you don’t have to?

Once you’ve downloaded your favorite streaming apps or the messaging apps you need for your social circle, check out F-Droid when you need a useful tool or utility. There are more options out there than you might expect.

Here’s Why Samsung’s Galaxy Ring Is Better Than the Oura Ring

Despite being Samsung’s first smart ring, the Galaxy Ring packs all the health-focused features you’d expect. This makes it a great competitor to the Oura Ring, which has been the go-to choice for many. We think the Galaxy Ring is a better choice, though, and here’s why.


1 No Monthly Subscription

The Galaxy Ring costs $399.99 in the US, while the Oura Ring starts at $299—$100 cheaper than Samsung’s offering. The latter is available in multiple finishes, with the Stealth and Gold variants costing $400 and $450, respectively. The Hozion variant of the Oura Ring starts from $349 and features a titanium body.

Given the lower starting price, you might think the Oura Ring provides more value for money than Samsung’s smart ring. But that’s not the case.


To unlock additional features with the Oura Ring, you also need the Oura membership. For $5.99 per month, the membership provides access to detailed sleep analysis, personalized health insights, body temperature tracking, and even basic features like live heart rate monitoring. Oura provides a free month of membership with the ring, but once it expires, you have to subscribe to the paid plan.

The Galaxy Ring syncs all health data to the Samsung Health app, with none of its functionality locked behind a paywall.

If you plan to use the Oura Ring for three years, you will pay an additional $216 over its lifetime. So, while the Oura smart ring might seem cheaper than Samsung’s offering, you’ll end up paying more in the long run.

2 Portable Charging Case

Both Samsung and Oura ship their rings with a size-specific charger. However, Samsung’s implementation has an edge, as the Galaxy Ring charger is portable and easy to carry.


It’s similar to a charging case for a pair of wireless earbuds, except that it doesn’t have a built-in battery. Instead, you have to plug in a USB-C cable connected to a power adapter to start charging.

The Galaxy Ring’s charging case also supports wireless charging, which allows you to place the case on top of a wireless charger for a quick top-up.

The portable design of the charging case makes it easy to charge the Galaxy Ring anywhere. In comparison, the Oura Ring’s charger isn’t designed for portability. To initiate charging, you must place the charger on a desk and then place the ring in the cradle.

3 Gesture Controls


While basic, the Galaxy Ring supports two handy gestures. You can use a double punch gesture to dismiss alarms and take a picture or video in the Camera app. The only catch is that these gestures only work when you’ve paired the Galaxy Ring with a Samsung phone. It won’t work with non-Samsung phones.

On the other hand, the Oura Ring does not support any such gesture, limiting its usefulness.

The ability to dismiss an alarm or trigger the shutter in the Camera app through a smart ring is handy, and Oura should consider bringing a similar feature to its ring. Samsung could also expand gesture support on the Galaxy Ring to control more features, including incoming calls.

4 More Size Options


Samsung offers the Galaxy Ring in nine sizes ranging from size 5 to 13. In comparison, the Oura Ring is available in eight sizes, from sizes 6 to 13. This means the Galaxy Ring is available in an additional smaller size than the Oura.

So, if you have tiny hands and fingers, the Galaxy Ring might be your only choice. And if it matters, the Galaxy Ring is also one gram lighter than the Oura, though you are unlikely to notice this.

Both companies are willing to send you a free sizing kit so that you can determine and order the correct ring size.

The Galaxy Ring and Oura Ring are both impressive smart rings with advanced health-tracking capabilities and a long battery life. But when you compare the two, it’s clear that Samsung’s first smart ring gets a lot of things right and provides a superior experience.

Which Apple Devices Support Apple Intelligence?

Unfortunately, Apple Intelligence isn’t available for all devices that support iOS/iPadOS 18 and macOS Sequoia. But does your iPhone, iPad, or Mac make it to Apple’s list of compatible devices? Let’s find out below.


iPhones That Support Apple Intelligence

Aryan Surendranath/MakeUseOf

Apple severely limits the iPhone models that support the various Apple Intelligence features announced at WWDC 2024. Unfortunately, you need an iPhone with at least the A17 Pro chip or newer to use Apple Intelligence. Here are the only models that are eligible as of August 2024:

  • iPhone 15 Pro
  • iPhone 15 Pro Max

Even the standard iPhone 15 models don’t support Apple Intelligence since they pack the older A16 Bionic chip from the iPhone 14 Pro models.

iPads That Support Apple Intelligence

Stage Manager on an iPad Pro attached to a Magic Keyboard
Hamlin Rozario/MakeUseOf


Unlike iPhones, you don’t need the latest and greatest iPads to use Apple Intelligence when Apple rolls it out in fall 2024. All you need is an iPad with the M1 chip or newer, and you’re good to go. Here’s the complete list:

  • iPad Pro 11-inch and 12.9-inch with the M1 chip (2021)
  • iPad Pro 11-inch and 12.9-inch with the M2 chip (2022)
  • iPad Pro 11-inch and 13-inch with the M4 chip (2024)
  • iPad Air 10.9-inch with the M1 chip (2022)
  • iPad Air 11-inch and 13-inch with the M2 chip (2024)

As you can see, if you bought a high-end iPad in the last three years, you don’t have to worry about Apple Intelligence support.

Macs That Support Apple Intelligence

16-inch MacBook Pro on a table
Will Graf/MakeUseOf


Like iPads, Apple limits Apple Intelligence to Mac models powered by Apple silicon chips (M1 and newer). If you’re unsure, you can quickly check if your Mac has an Intel or Apple silicon chip. Either way, here are all the supported Macs:

  • MacBook Air 13-inch (late 2020 and newer)
  • MacBook Air 15-inch (all models)
  • MacBook Pro 14-inch (all models)
  • MacBook Pro 16-inch (2021 and newer)
  • Mac mini (late 2020 and newer)
  • iMac (2021)
  • Mac Studio (2022)
  • Mac Pro (2023)

Even though Apple began its transition to Apple silicon chips in 2020, I’m quite surprised that even a 2020 Mac is fully capable of running Apple Intelligence, but an iPhone from 2023 can’t do the same.

If your Apple devices made the above list, know that you don’t have to wait for Apple to roll out Apple Intelligence to the general public in fall 2024. You can try Apple Intelligence right now by installing the iOS/iPadOS 18.1 or macOS Sequoia 15.1 beta.


However, note that not all Apple Intelligence features are available, and since these software builds are in their early experimental stages, you may encounter bugs and other issues more often than you’d like.

Why the PS5 DualSense Edge Controller Was Worth Every Penny

Key Takeaways

  • The DualSense Edge controller provides enhanced control with back paddles and hair triggers for improved performance and responsiveness.
  • Comprehensive software allows for deep customization, tailored profiles, and independent stick sensitivity adjustments.
  • The modular design allows for easy stick and faceplate customization and eliminates stick drift issues found in standard DualSense controllers.


When the DualSense Edge was first announced, I was skeptical. I honestly thought it was just gimmicky hardware. But after weeks of using it, I can confidently say it’s been an absolute game-changer. It’s not just a controller; it’s a performance upgrade.

Here’s why I think the controller is worth it.


1 Enhanced Control with Back Paddles and Hair Triggers

Although the standard DualSense controller has many hidden features, it doesn’t quite feel like the ultimate pro-gaming weapon. The DualSense Edge, however, absolutely delivers on this promise.

The controller includes two sets of buttons you can install on the backside. Once installed, you can assign any button or action to them. I’ve found the paddles incredibly useful in competitive shooters, where split-second decisions can make all the difference.


For example, I can assign sprint to one paddle and reload to the other. This means that if I’m walking and sense that an enemy might be onto me, I can quickly sprint away and reload my weapon without moving my thumbs off the right stick.

Another standout feature is the hair triggers. Adjusting the trigger sensitivity to my preference has significantly improved my aim and responsiveness. The switches for adjusting the trigger lengths are conveniently located right next to them, so you can do it on the fly without opening an app.

For instance, when I’m playing a game like GTA, I set the trigger length to a minimum on foot, so I can quickly shoot my weapon. For driving, I set the trigger length to maximum to have more control over the car’s acceleration. It’s like having a tailor-made controller designed specifically for my play style.


2 Comprehensive Software for Customization

Customization software for the DualSense Edge

The software accompanying the DualSense Edge is a game-changer in personalization. It’s incredibly user-friendly and offers a deep level of customization that I haven’t seen in any other controller. The possibilities are endless, from adjusting dead zones and trigger sensitivity to creating custom button mappings. I’ve spent countless hours fine-tuning my settings to create profiles tailored to different games.

As you’d expect, you can create multiple profiles and quickly switch between profiles for different games, ensuring optimal settings for each one. The software also allows you to adjust the stick sensitivity independently, which is a fantastic feature for games that require precise aiming. It’s clear that Sony put a lot of thought into creating a software experience that truly complements the hardware.


Moreover, the function keys (Fn) add a whole new layer of functions. Once you’ve set up the profiles, you can very conveniently switch between them in-game by holding down the function keys and tapping the assigned buttons. The function keys also let you control things like headset volume, making the overall experience even more seamless and enjoyable.

3 The Modular Design Advantage

DualSense Edge with the modular sticks removed

The modular design of the DualSense Edge is a stroke of genius. It’s a feature that I never knew I needed until I had it. The stick caps are easily switchable; I just have to yank them out and add new ones. But the modularity goes further than that. You can swap out the faceplate with the switch of a button, an experience much unlike swapping out the faceplate of a DualSense controller. Moreover, once you take off the faceplate, you can remove the entire stick module by releasing a lever.


Being able to swap out the stick modules easily is a major leap. Stick drift has been a significant issue with the standard DualSense controller. It’s frustrating to deal with stick drift, which seems to be almost inevitable with the DualSense. Fixing stick drift on the standard DualSense is no easy feat. However, with the DualSense Edge, you can replace the sticks without touching a screwdriver or sending the entire controller in for repair.

Additionally, after using the DualSense Edge for over a year, I’m pleased to report that the sticks are still in excellent condition. This is impressive, especially compared to my experience with the standard DualSense.

4 Sleek and Functional Charging Case

DualSense Edge charging carrying case


​​​​​​​The case is more than just a pretty accessory; it’s a practical and essential part of the DualSense Edge package. It’s sleek, stylish, and does an excellent job of protecting the controller from damage. The fact that it also charges the controller is a massive convenience.

The inclusion of a charging lock is a small but thoughtful touch. It prevents the charging cable from accidentally disconnecting, ensuring that my controller is always ready to go. You could say that PlayStation has somewhat compensated for the shorter battery life by making charging more convenient.

5 A Premium Feel

Closeup shot of a DualSense Edge showing the grip pattern


You know you’re holding something special when you pick up the DualSense Edge. The build quality is exceptional, with premium materials and a solid weight that exudes durability. The grips are comfortable and provide excellent support, even during extended gaming sessions. The controller just feels more substantial and refined than the standard DualSense.

The attention to detail is evident in every aspect of the design, with the dotted grip patterns revealing themselves as the PlayStation symbols on a closer look. The overall aesthetic is sleek and modern, with a subtle elegance that sets it apart from other controllers. It’s clear that Sony aimed to create a product that not only performs exceptionally but also looks and feels like a premium accessory.

In the end, the DualSense Edge controller is an investment that serious gamers won’t regret. Every aspect of this controller is designed with the player in mind. While it might carry a premium price tag, the unparalleled control and comfort make it a worthwhile purchase for those seeking the ultimate gaming experience.


Trust me, once you’ve experienced the DualSense Edge, it’s hard to go back to a standard controller.

For Faster SSD Data Transfers, Make Sure You Check This Hidden Stat Before Buying

Key Takeaways

  • SSD DRAM caches are high-speed memory buffers between SSDs and PCs using volatile memory.
  • SSD DRAM cache enhances data transfer rates by temporarily storing data for quick retrieval.
  • To check if an SSD has an SSD DRAM cache, look at manufacturer specifications, product labels, and online reviews.


When buying an SSD, storage capacity and read/write speeds are normally the top priorities. However, there is one hidden stat that is often overlooked: The SSD DRAM cache. But what is this mysterious stat, and how does it affect data transfer rates?


What Is SSD DRAM Cache?

SSD DRAM caches, or DRAM (Dynamic Random Access Memory) buffers, are high-speed memory buffers that act as a conduit between SSDs (Solid State Drives) and PCs. This volatile memory can quickly store and retrieve data but loses its content once the power is off. It’s different from a long-term storage device such as an SSD, which uses NAND Flash technology.

For a better understanding, let’s break down each component:

  • SSD: These drives use NAND Flash technology to store data. Unlike traditional HDDs (Hard Disk Drives), they have no moving parts and retrieve data faster.
  • DRAM: This volatile memory temporarily stores data for faster processor access. It offers higher speed than non-volatile NAND Flash memory used in SSDs.
  • Cache: In computing, a cache is a temporary storage area that holds frequently accessed data for quick retrieval.


How SSD DRAM Cache Affects Data Transfer Rates

Now that we know what an SSD DRAM cache is, let’s see how it affects data transfers. When accessing data, the processor sends a request to the SSD. The SSD then retrieves the data from its NAND Flash memory and temporarily stores it in the DRAM cache. From there, the DRAM buffer receives the data and passes it on to the processor. This process is much faster than retrieving data directly from SSD NAND Flash memory.

To better understand, think of a busy highway with additional lanes. The highway is your SSD, while the extra lanes represent your DRAM cache. When there is heavy traffic (high data transfer rate), the additional lanes (DRAM cache) allow for faster movement of cars (data) compared to a single lane (directly retrieved from NAND Flash memory).


Without an SSD DRAM cache, the processor would have to wait for the NAND Flash memory to retrieve and transfer data. This delay is known as latency, and it slows down data transfers. Additionally, DRAM cache size significantly affects data transfer rates. A larger DRAM cache can store and retrieve more data temporarily, reducing the need for slower NAND Flash memory.

How To Check SSD DRAM Cache Before Buying

So far, we’ve discussed the SSD DRAM cache and its impact on data transfer rates. But how can you tell if your SSD has one? Here are some ways to find out:

  • Check Manufacturer Specifications: Check the specifications of the SSD to see if it has a DRAM cache. Most manufacturers list this information in their product descriptions or technical specifications. Look for terms like DRAM cache or DRAM buffer to confirm.
  • Read the Product Label: If you’re purchasing an SSD in-store, ask the seller or check the packaging for mention of a DRAM cache. Manufacturers often highlight this feature as it is a significant selling point.
  • Online Forums and Reviews: You can also check online forums and reviews for SSD models. Users usually mention and share their experiences in their reviews.


DRAM is an excellent way to get more power from your SSD and speed up transfer times. So, if you regularly share big files, you should strongly consider purchasing an SSD with a good DRAM cache.

What Is Xbox Game Pass? Tiers, Pricing, and More Explained

Key Takeaways

  • Xbox Game Pass has four tiers: Core, Standard, PC, and Ultimate, each offering different benefits.
  • Game Pass Core is the cheapest and offers fewer games, online multiplayer, and discounts.
  • Ultimate combines PC and console subscriptions and includes Xbox Cloud Gaming.


Xbox Game Pass is Microsoft’s gaming subscription service that gives you access to a library of games. It has several different tiers, allowing you to access the subscription on PC and your Xbox console. Here’s everything you need to know about the Xbox Game Pass.


What Is Xbox Game Pass?

Game Pass gives you access to a library of over 250 games to play for a monthly fee. You can play as many of these games as long as you like until your subscription expires, or the game leaves the library.

However, there are multiple kinds of Xbox Game Pass memberships, and each comes with its own benefits and features.

But overall, the available Xbox Game Pass tiers are as follows:

  • Xbox Game Pass Core
  • Xbox Game Pass Standard
  • Xbox Game Pass for PC
  • Xbox Game Pass Ultimate


If you primarily play games on your Xbox console, you can pick between the Core, Standard, and Ultimate tiers. On the other hand, PC gamers can choose between the Xbox Game Pass for PC and Ultimate tiers.

The primary feature of every Xbox Game Pass tier is that you get online multiplayer, access to some or all of the Microsoft game library, and deals and discounts on Xbox titles. Of course, each tier will have its own perks and benefits, so let’s explore them all.

What Is Xbox Game Pass Core?

The Xbox Game Pass Core is the cheapest tier available. This tier replaces Xbox Live Gold and gives you the following benefits:

  • Access to over 25 games from the Xbox Game Pass catalog, as listed by Xbox.
  • Online multiplayer access to your Xbox console.


The most important feature of Xbox Game Pass Core is that it allows you play online multiplayer games on your console. You do get a smaller selection of titles to enjoy with your subscription, but you also get up to 50% off on select game titles via Deals with Game Pass Core.

Game Pass Core is best for gamers who simply want to access online multiplayer on their console, play specific titles, and are not interested in exploring new games all the time. At the very least, you still get a few games included in the subscription, so you can do some exploring, but the library is small compared to other tiers.

What Is Game Pass Standard?


This tier used to be called Xbox Game Pass for Console and gave you access to more games but no online multiplayer. So, Microsoft replaced it with a new tier called Game Pass Standard. This tier allows you to play the wider Microsoft Game Pass library, but you won’t get day-one access on some titles.

Game Pass Standard isn’t available yet at the time of writing, though—Microsoft will launch this service on September 12, 2024.

If you feel that the Core game library is too small for your liking, you should upgrade to Game Pass Standard instead. This subscription tier will give you access to over 300 titles; a huge jump from the tiny library that Xbox Game Pass Core comes with. So, if you’re interested in looking at various games but really don’t buy into the hype of the latest titles, you can choose this tier instead.


What Is Xbox Game Pass for PC?

This tier, also called PC Game Pass, gives you access to Microsoft’s wider gaming library for your computer. But, more than that, it also offers day-one access to Microsoft’s latest titles, allowing you to enjoy the latest games as soon as they launch at no extra cost.

Besides this, Xbox Games Pass for PC also includes EA Play, allowing you to play EA titles in its library. This makes the Xbox Game Pass for PC a compelling subscription and the main reason why I no longer subscribe to EA Play individually. It also includes benefits for Riot Games if you’re a fan of their titles like Valorant.

If you’re a PC gamer, Xbox Game Pass for PC offers excellent value for the monthly price you pay. You can also get Xbox Game Pass for free if you sign up for Microsoft Rewards and earn enough points for redemption.

What Is Xbox Game Pass Ultimate?


This is the most expensive Xbox Game Pass tier. It combines the benefits of Xbox Game Pass for PC and Game Pass Standard, allowing you to enjoy the subscription on both your PC and console.

Furthermore, this tier opens one more feature not available on any other tier: Xbox Cloud Gaming. Although it’s still in beta, Xbox Cloud Gaming allows you to play Xbox games on tons of devices, including Android phones and iPhones, iPads, MacBooks, smart TVs, and even VR headsets. Check out Xbox’s list of supported devices to see if you can take advantage of it.

Game Pass Ultimate is the best tier for hardcore gamers—those who play on both console and PC and want to have access to their titles on other devices via Cloud Gaming. Furthermore, you get all the features of all the other tiers, so you won’t miss out on anything with Xbox Game Pass Ultimate.


How Much Does Xbox Game Pass Cost?

Of course, each Xbox Game Pass tier will have different prices based on the features they have. So, here’s a comparison of how much you’ll pay for each tier on a monthly basis.

Xbox Game Pass Core

$9.99

Xbox Game Pass Standard

$14.99

Xbox Game Pass for PC

$11.99

Xbox Game Pass Ultimate

$19.99

Also, note that only the Xbox Game Pass Core comes with an annual subscription of $74.99. You can only get all the other subscriptions on a monthly basis. While these prices are set, Xbox Game Pass prices will likely increase over time. However, more often than not, Xbox will provide entry offers that allow you to get a month of Game Pass at a discounted price.


Where Is Xbox Game Pass Available?

Xbox Game Pass is generally available in most regions. For instance, regions like the United States, the United Kingdom, and Japan support all aspects of Xbox Game Pass.

And while countless other regions support all the features and tiers of Xbox Game Pass, there are some, like Russia or China, that don’t or come with unique restrictions. Additionally, Cloud Gaming isn’t available in every country and region.

For this reason, when checking if Xbox Game Pass is available in a specific region, you need to check the live list of every supported and unsupported region provided by Xbox. This way, you can directly locate a region and view everything you need in terms of Game Pass compatibility.

How Do I Subscribe to Xbox Game Pass?

Photo of the Xbox Game Pass home page
Yadullah Abidi / MakeUseOf


Now you know everything you need to about Xbox Game Pass, you might want to start subscribing to the service. Luckily, there are plenty of easy ways to do so.

The best place to buy Xbox Game Pass is through the Xbox Game Pass listing via Xbox. From here, you can select Join Now to choose the specific tier of Game Pass you want and link it to your Microsoft account.

But if you want to make the most of Xbox Game Pass, you should also download the Xbox Game Pass app for your PC via the official Xbox page for PC or smartphone via the official Xbox page for mobile. This way you will be able to stream games to your devices and download Game Pass titles remotely.

How Do I Cancel Xbox Game Pass?

By default, Xbox Game Pass will renew automatically every month. If you want to stop this or cancel your membership entirely, it’s simple. Go to the official Microsoft site, and Sign in. Once you are signed into your Microsoft account, select View all subscriptions > Xbox Game Pass > Manage > Cancel subscription.


There are numerous ways you can cancel Game Pass beyond the Microsoft website. You can even cancel your Xbox Game Pass subscription directly from your Xbox console if you would prefer. But the most direct way would be through Microsoft.

If you have time to play lots of different games, Xbox Game Pass is going to be really worthwhile. Not only do you get access to modern hits, but a wide back catalog of classics as well. So, if you’re a gamer, Xbox Game Pass offers the best value for money subscription you can get to enjoy tons of different titles.

What Is the Command Key on Windows? A Guide to Mac Keys on Windows 10 and 11

Key Takeaways

  • When using a Mac keyboard on Windows, the Command key serves as the Windows key.
  • If you switched from a Mac to a Windows PC, you can use the Ctrl key to perform many Command key functions.
  • You can use Microsoft PowerToys to reassign modifier keys on a Mac keyboard, placing them where they should be on a Windows keyboard.


Whether you’ve plugged a Mac keyboard into a Windows computer or switched from macOS to Windows, know that some modifier keys function differently across operating systems. Below, we’ll explain what the Command key does on Windows.


Windows vs Mac Keyboard: The Command Key

When you use a Mac keyboard with Windows and press the Command or CMD key, you are essentially pressing the Windows Key. The Windows key’s primary function is to open the Start menu and perform several shortcuts that help you navigate Windows when pressed with other keys.

For instance, the following popular Windows key shortcuts will work when you press the Command key on Windows:

Shortcut

Action

Command + S

Open Windows Search

Command + E

Open File Explorer

Command + R

Open Windows Run dialog box

Command + I

Open the Settings app

Command + D

Show the desktop


On the other hand, if you’re a Mac user who switched to Windows, it helps to think about what the Command key does on a Mac. Since it’s a modifier key used for shortcuts like copying, cutting, pasting, selecting, undoing, and saving, the closest Windows equivalent is the Ctrl key.

Although not all shortcuts are similar, the most widely used ones for text editing, navigation, and window management will work the same. Here’s a quick comparison:

Mac

Windows

Action

Command + C

Ctrl + C

Copy

Command + V

Ctrl + V

Paste

Command + X

Ctrl + X

Cut

Command + A

Ctrl + A

Select All

Command + S

Ctrl + S

Save

Command + Z

Ctrl + Z

Undo

Command + F

Ctrl + F

Find

Command + T

Ctrl + T

New Tab

Command + N

Ctrl + N

New Window

Command + W

Ctrl + W

Close Window


Although the Mac keyboard also has a Control key, it often serves as a way to right-click things. But it is the same as pressing the Ctrl key if you’re using a Mac keyboard on a Windows computer.

How to Reassign Keys on Windows

Reassigning keys can help if, for example, you want to swap the left Command and Option keys on a Mac keyboard to resemble the placement of the Windows and Alt keys on a Windows keyboard.

To do that, you will need to install Microsoft PowerToys on your Windows PC. Next, open PowerToys and select Keyboard Manager from the left sidebar. Then, toggle on Keyboard Manager on the right and click Remap a Key.


In the Remap Keys window, click the plus (+) button below the Select heading.

The Remap Keys window in PowerToys on Windows.

On the next screen, click Select on the left side. When you get a pop-up, press the key you want to remap and click OK.


Afterward, click the Select button below the To Send heading on the right. Once the pop-up appears, press the key you want to change and click OK. Back in the Remap Keys window, click the OK button in the top right to accept the changes.

If you want to return the keys to normal, open the Remap Keys window again, click the Trash icon next to the remapped keys you want to delete, and then click OK.

Remapped keys in PowerToys on Windows.

Luckily, every other key outside the Command, Option, and Control keys functions like their Windows keyboard counterparts. If things get confusing, you can always reassign the keys to suit your preferences and master the Mac keys on Windows.

How to Speed Up or Slow Down Videos in Your iPhone Camera Roll

Whether you want to slow down a video for cinematic impact or speed up dull footage for hilarious time-lapses, your iPhone can help you achieve both. Here are a couple of easy ways to adjust the speed of videos in your iPhone’s camera roll.


How to Speed Up or Slow Down Videos Using the iMovie App

Apple’s iMovie app makes it easy to adjust the speed of your videos. You can download the iMovie app from the App Store for free if you don’t have it already. Once you’re ready, follow these steps:

  1. Open the iMovie app and select the Movie option on the Start New Project page.
  2. Choose a video you want to slow down or speed up, and tap the Create Movie option at the bottom.
  3. Select the video in the timeline and then tap the speedometer icon at the bottom.
  4. Move the slider at the bottom to the right to increase the speed up to two times. Similarly, you can move the slider to the left to decrease the video speed to as slow as 1/8.
  5. Tap the Play button above the timeline to preview the video. After setting your video to the desired speed, tap Done in the top-left corner.
  6. Tap the Share icon at the bottom and select Save or Share Video. Then, choose the Save Video option to store the edited video.


Similarly, you can use the iMovie app on your Mac to speed up or slow down a video easily.

How to Speed Up or Slow Down Videos Using the Photos App

The built-in Photos app on your iPhone includes several video editing tools, allowing you to crop, rotate, apply filters, and more. You can also use it to speed up or slow down videos, but this feature only works for videos recorded in slow motion on your iPhone.

So, if you’ve captured a slow-motion video and want to adjust its playback speed, here’s how you can do it using the Photos app:

  1. Open the Photos app and select the slow-motion video you want to speed up or slow down.
  2. Tap Edit in the top-right corner. Below the timeline, vertical lines closer together reflect the video’s regular speed, while lines farther apart indicate the slow-motion part.
  3. Drag the two taller vertical bars together to remove the slow-motion effect and speed up the video. Similarly, to slow it down, drag the two taller vertical bars further apart.
  4. After making the desired changes, tap Done in the top-right corner to save the edited video.


With the above methods, you should be able to slow down or speed up just about any video saved in your iPhone’s camera roll. If you want more options, you can also download one of the many free video editing apps for your iPhone to change the speed of a video just as easily.


You Can Try Apple Intelligence Right Now: Here’s How

Key Takeaways

  • The developer beta builds of iOS 18.1 and macOS 15.1 include some Apple Intelligence features.
  • Apple Intelligence is currently limited to US users, but you can change your device’s region to access it from anywhere.
  • Apple requires you to join a waitlist for Apple Intelligence, but the wait times aren’t long as of this writing.


Apple Intelligence wasn’t part of the initial iOS 18 and macOS Sequoia beta releases, but Apple has finally rolled it out to compatible devices. Although it won’t be available to the public until fall 2024, we’ll show you how to access it on your Apple device right now.


Apple Intelligence Is Included With iOS 18.1 and macOS 15.1 Betas

While we’re still awaiting the public release of iOS 18 later in 2024, Apple has already begun rolling out developer beta builds of iOS 18.1, iPadOS 18.1, and macOS Sequoia 15.1 with Apple Intelligence baked in.

If you haven’t already, you first need to install the iOS/iPadOS 18 beta on your iPhone or iPad (or the macOS Sequoia beta on your Mac). Afterward, you need to select the iOS 18.1 or macOS Sequoia 15.1 beta channel in the Software Update menu and update your device again.


You’ll only see the iOS/iPadOS 18.1 or macOS 15.1 update on devices that support Apple Intelligence. So, at least an iPhone 15 Pro or an iPad or Mac with the M1 chip or later is required to be eligible for this beta channel.

Even if your device supports Apple Intelligence, you need to meet a couple more requirements before you can try Apple’s AI features early. For starters, Apple Intelligence is currently limited to users in the United States.

However, if you reside elsewhere, you can change your iPhone’s region to the United States by heading to Settings > General > Language & Region. You can also do the same on a Mac from System Settings. Additionally, you need to set Siri’s language and device language to English (US).


Joining the Waitlist for Apple Intelligence

Doing all the above is still not enough to get Apple Intelligence on your compatible iPhone, iPad, or Mac. You need to join the waitlist by heading to Settings > Apple Intelligence & Siri and tapping Join the Apple Intelligence Waitlist option at the top. You can do the same from the System Settings app on your Mac.

Join the Apple Intelligence waitlist option in iPadOS 18.1 beta

Once you join the waitlist, you just need to wait a few hours for Apple to let you in and download support for the on-device processing of Apple Intelligence models. I only had to wait a little over an hour since I was early, but the wait times may become longer as more users sign up.

Once you’re in, you should see an Apple Intelligence toggle in the same menu. Toggle it on to start using AI features on your Apple device. You’ll know Apple Intelligence is active when you invoke Siri and see its new interface. Once you disable It, Siri will revert to the old UI.


After checking out Apple Intelligence for a bit, I quickly realized that several AI features Apple announced at WWDC 2024 are still missing, like Image Playground, Genmoji, ChatGPT integration, and more.

On the bright side, iOS/iPadOS 18.1 beta gives you access to Writing Tools, improved Siri, call recording with transcription, natural language search in the Photos app, Smart Reply in Apple Mail, and Reduce Interruptions Focus mode. I assume Apple is saving the rest of the Apple Intelligence features for future updates.

Here’s Why You Probably Don’t Need A Pro-Style Game Controller

Key Takeaways

  • Pro-style controllers offer customization, but most games don’t require the extra buttons they provide.
  • The adjustability of pro-style controllers may not be worth the steep price difference from standard gamepads.
  • Performance benefits of pro-style controllers are significant for serious competitive gamers, but not casual or solo gamers.


Every gaming console comes bundled with a standard controller so that you can start gaming right out of the box. However, you’ll now find pro-style controllers available as a standalone purchase. These get you tons of cool new features, but there’s a good chance you’re perfectly fine without them.

Here’s why you probably don’t need to invest in a pro-style game controller like the DualSense Edge or Elite Series 2 and can stick with your basic gamepad.


What Is A Pro-Style Controller?

A pro-style controller is a controller that comes with additional buttons, features, and customization options not found on your standard gamepad. For example, the Xbox Elite Series 2 lets you adjust the actuation depth of its triggers, swap out its analog sticks, and remap buttons located on its back.

None of this can be found on the Xbox Core Wireless controller, making the Elite Series 2 and other pro-style controllers popular with competitive gamers who love customization options.


Some pro controllers, like the DualSense Edge, are first-party offerings. But there are also a variety of third-party brands, like SCUF and Razer, that offer pro controllers.

When choosing the best controller for your gaming experience, you might want to consider extra paddles and adjustable triggers. But for most gamers, a standard controller will do.

Additional Buttons Aren’t Needed For Most Games

While there’s no denying that pro-style gamepads are definitively better than their standard counterparts, you’ll find that most games don’t require the extra buttons they offer. The back buttons found on pro-style controllers are incredibly useful for accessibility purposes, but all games today are designed with the standard controller in mind.


That means you won’t lose out on functionality by having the standard controller, as no game on the market requires extra inputs that are unavailable on the DualSense, Xbox Core Controller, or Nintendo Joy-Con. While it might be nice to have the extra back buttons, most gamers will find they’re not a necessity.

Adjustable Components Aren’t Worth The Price

Another big selling point of pro-style controllers is their adjustability. From stick sensitivity to trigger actuation depth, there are a handful of unique ways to modify their performance. But once again, most gamers won’t find these options to be worth the price of admission.


The Elite Series 2 and DualSense Edge retail for $180 and $200 respectively. The Xbox Core Wireless Controller and DualSense retail for $60 and $70 respectively. That’s a serious gap in pricing. You could essentially buy two new games for the price difference between the standard and pro-style controllers, which is a steep price to pay for a few customization options and back buttons.

More importantly, many titles let you adjust sensitivity options in-game, giving you more than enough flexibility for most situations with just a standard gamepad.

Only Serious Gamers Will Reap the Performance Boost Benefits


You’ll find heaps of cool tech packed into pro-style controllers, but just because they’re more powerful than standard controllers doesn’t mean your performance will see a radical improvement. If you’re trying to become a professional gamer or want to climb the leaderboards in Call of Duty, then buying a pro-style controller is a wise investment.

But if you’re playing single-player RPGs, platformers, or action games, the potential performance boost offered by a pro-style controller isn’t nearly as dramatic. You might notice slight improvements in your skills when playing these titles, but pro-style controllers are largely designed for highly competitive environments. So for a solo game night with Stardew Valley or Baldur’s Gate 3, there’s little reason to splurge on a pro controller.

You’ll Save Money With A Well-Reviewed Standard Controller

If you’re looking for a great controller that won’t break the bank, there are plenty of critically acclaimed standard controllers to choose from. The DualSense and Xbox Core Wireless Controller are favorites among reviewers, as they’re designed by Sony and Microsoft, offer responsive buttons, and are built to last years before running into issues.


In fact, we named the Xbox Core Wireless Controller the best Xbox controller, thanks to its ideal combination of pricing and performance — making it a good choice for nearly every gamer.

Third-Party Alternatives Exist

8BitDoUltimate
8BitDo

Not thrilled with the default controllers offered by Xbox, Nintendo, and Sony? Then be sure to check out the wealth of third-party alternatives on the market.

Many of these straddle the line between standard and pro gamepads, offering additional buttons and functionality beyond what’s found on your DualSense or Xbox Core controller. For example, the 8BitDo Ultimate 3-Mode Controller for Xbox comes with its own charging dock, uses upgraded Hall Effect sticks to eliminate drift, and is equipped with two back paddles for added functionality.


On Switch, you’ll find options like the PowerA Enhanced for $60 and the Nitro Deck for $50. These are nice alternatives to your standard Joy-Con, as the first is designed as a more traditional gamepad, while the latter is built specifically for handheld play.

Best of all, these are often available for a fraction of the price of pro-style controllers, giving you a nice performance boost without needing to drop $200 on a gamepad designed for professionals. The 8BitDo mentioned above is only $70, putting it in line with standard gamepads while giving you cool features typically reserved for pro-style controllers.

At the end of the day, pro-style controllers are exactly what they sound like — controllers built for professional play. If you’re trying to go pro or are extremely dedicated to honing your skills, something like the Elite Series 2 or DualSense Edge might make sense for your game room. Pro-style controllers can also be useful for accessibility purposes, as their back buttons and customization options might make them more comfortable to use than a standard controller.


How to Fix the “File or Directory Is Corrupted and Unreadable” Error on Windows 10

Key Takeaways

  • Consider running SFC and CHKDSK scans to repair issues caused by damaged system files or bad sectors on the external drive.
  • Temporarily disabling your antivirus program and assigning a new letter to the external drive can also help resolve the error.
  • If the 0x80070570 error persists after trying all these steps, you may need to format the affected drive.


Are you encountering the frustrating “File or directory is corrupted and unreadable” error (0x80070570) on Windows? This error often appears when you try to access, copy, or delete files on your external hard drive. We’ll help you resolve it with the following tips.


1. Repair System Files With an SFC Scan

Damaged or missing system files can sometimes trigger the “file or directory is corrupted and unreadable” error on Windows. System File Checker (SFC) is a handy command-line tool that can check for and repair any problematic system files that might be causing file operation issues.

To run the System File Checker scan, follow these steps:

  1. Press Win + S to open the search menu.
  2. Type cmd in the box and select Run as administrator.
  3. Type sfc /scannow and hit Enter.


Wait for the scan to complete, and then restart your PC. After that, check if the error appears again.

Another thing you can do is scan the external drive with the CHKDSK tool. If the error is because of a bad sector or directory error within the drive, this tool will help fix it.

Our guide to running CHKDSK on Windows explains how to initiate a Check Disk scan. To run the scan, you’ll need to connect the external drive to your PC and specify its drive letter within the command. For example, a CHKDSK command for scanning an external D: drive would be:

chkdsk d: /f /r 
Check disk in Windows 10

Windows will scan the drive for bad sectors, directory errors, or lost clusters. Depending on the drive’s read speed and data size, this might take a while.


3. Try Moving Files to a Different Location

Does the 0x80070570 error code only appear when you’re trying to open a specific file? If so, you can try moving to the internal drive and see if that helps.

You can do that by right-clicking the affected file and selecting either Cut or Copy. Then, head to a folder on your PC’s internal drive, right-click again, and select Paste. Following this, you should be able to open the file without any errors.

4. Check Your Computer for Malware and Disable Antivirus

If you’ve noticed other problems on your computer, not just the inability to access external hard drives, your PC may have malware. You can use your third-party antivirus program or the built-in Windows Security tool to check this. To do so, use these steps:

  1. Open the Windows Security app using the search menu.
  2. Go to the Virus & threat protection tab.
  3. Click Scan options, select Full scan, and hit the Scan now button.


Full System Scan in Windows Security

Once the scan is complete, restart your computer and try to access the external hard drive.

There’s also a chance that your PC’s antivirus shield is hindering the file operation and causing the error 0x80070570. This could happen if your antivirus software wrongly flags the files you’re trying to transfer between drives as suspicious. Try temporarily disabling Microsoft Defender before performing the file operation and see if that works.

If you have a third-party antivirus tool on your PC, right-click its icon in the system tray and select the option to disable or turn off shield protection.


Temporarily disabling antivirus from the Windows system tray

5. Set a New Drive Letter

It’s possible that the “file or directory is corrupted and unreadable” error is related to a drive letter conflict with another drive or a system glitch. If so, assigning a new letter to your external drive should help. Here’s how to do it:

  1. Press Win + R to open the Run dialog.
  2. Type diskmgmt.msc in the box and click OK.
  3. Right-click the external drive in the Disk Management window and select Change Drive Letter and Paths.
  4. Select the drive letter and click the Change button.
  5. In the Change Drive Letter or Path window, check the Assign the following drive letter option and choose a new letter from the dropdown menu. Then, click OK.


Change drive letter in Windows 10

Once your external drive has a new letter, you should be able to open it.

Windows may have trouble accessing certain files or folders due to memory-related issues. To address this, use the Windows Memory Diagnostic tool. Since this requires a system restart, be sure to save all your work and close any running apps beforehand.

The easiest way to launch the tool is to input Windows Memory Diagnostic in the Start menu search bar and select the Best match. Then, select Restart now and check for problems.

Memory diagnostic tool in Windows 10


7. Perform a Startup Repair

If the Windows Memory Diagnostic tool doesn’t help, Startup Repair is another built-in tool you can use to fix the corrupted and unreadable file error on Windows.

To run the Startup Repair tool, press Win + I to launch Settings and go to Update & security > Recovery > Restart now. Then, select Troubleshoot > Advanced options and click the Startup Repair option.

The Start-up Repair option

Windows will then search for and repair all possible errors and restart after that. Once the process is complete, you should be able to access your files again.


8. Format the External Drive

If none of the above troubleshooting steps helped, formatting the affected external drive may be your only option. Doing so will wipe all data on the drive, so make sure you back up or recover any important data from the external drive before proceeding.

You can format an external drive with the Windows Disk Management utility or in File Explorer. Connect the drive to your PC, and then follow the steps in our guide on formatting a USB drive to do this within File Explorer.

Format Drive window

Running into errors is always frustrating, especially when they prevent you from accessing crucial files. Fortunately, fixing the “file or directory is corrupted and unreadable” error is usually manageable with the solutions outlined above. However, if nothing works and you encounter similar errors on other computers, the drive might be failing, and you should purchase a new one.


I Can’t Start Using a New Mac Without Installing These 10 Apps First

As a Mac user for over half a decade, I’ve gotten used to a handful of apps to help me with various tasks. Barring the obvious apps like web browsers and password managers, these are the ones I install as soon as possible on a new Mac.


1 1. Raycast

Raycast is my favorite Mac app on the list. In fact, it’s one of the best Spotlight search alternatives for your Mac; it’s not only fast but also offers a slew of features and customizability options to improve your productivity on the Mac.

I use Raycast on my Mac every day for performing calculations (including unit conversions), checking clipboard history, searching for files (and performing various actions on the results directly), looking up things on the web, quickly snapping app windows on the screen, typing long repetitive text with snippets, and many more.


Besides, I have several app extensions installed on Raycast that allow me to do specific things without going into their apps. For example, I have Google Translate to help me translate text quickly, TinyPNG to compress images on the go, and Search Browser Bookmarks to search for bookmarks.

Last but not least, Raycast also has AI, thanks to ChatGPT. It’s available in Raycast Pro, and you can use it to get answers to all sorts of questions, get help with writing code, and automate repetitive tasks, among other things.

Download:Raycast (Free, premium version available)

2 2. Hyperkey

Hyperkey preferences window on a Mac.

Hyperkey is a macOS app that offers two functions. First, it lets you remap the Caps Lock key on your keyboard to another key. This is useful if you aren’t a fan of Caps Lock and want to remap it to another key that’s either broken or not easily accessible on the keyboard.


Second, it gives you a hyper key, which is essentially a combination of different modifier keys: Command, Control, Option, and Shift (optional). You can then use this hyper key to create unique keyboard shortcuts for various apps on your Mac without worrying about them interfering with existing ones.

I use Hyperkey on my Mac to remap the Caps Lock key to the hyper key. Then, I’ve set up multiple keyboard shortcuts with this hyper key for various actions like launching apps, running shortcuts (from the Shortcuts app), executing Finder Quick Actions, and more. Plus, I’ve also set up unique hotkeys for various Raycast actions.

Download:Hyperkey (Free)

3 3. LANDrop

Transfering files using the LANDrop app on a Mac.


LANDrop is a cross-platform app for transferring files between devices over LAN. I use it every day to wirelessly move files between my Mac and Android phone.

What I like the most about LANDrop is that it doesn’t require any setup. The app takes care of everything as long as your devices are connected to the same Wi-Fi network. And when you’re outside, you can set up a personal hotspot and share files between devices over it.

I enjoy using LANDrop because it doesn’t compress photos and videos during transfers. As such, you have the convenience of wireless sharing without worrying about losing the quality of your photos and videos.

Download:LANDrop (Free)

4 4. OpenMTP

OpenMTP app with macOS and Android storage open in split view.


LANDrop is great for wirelessly transferring files between my Mac and Android phone. However, there are times when I need to move several large files between my devices. This is when I switch to the OpenMTP app, which lets me transfer multiple files (larger than 4GB) in one go.

OpenMTP is a free and open-source app I use to transfer files between my Mac and Android devices. It’s one of the best alternatives to Google’s Android File Transfer app, which is known to be quite buggy, unreliable, and slow. The app has a clean interface, is super smooth, and easy to use. It also offers drag-and-drop support for easily moving files between your devices.

Download:OpenMTP (Free)

5 5. Shottr

Shottr app menu bar menu and preferences window.


Shottr is my favorite Mac screenshot tool. As someone whose work requires taking a lot of screenshots, I like Shottr because it’s fast and has built-in annotation tools, so I don’t need another program to annotate and edit my screenshots.

One of my favorite Shottr features is the ability to set up the default window background for screenshots. This ensures my screenshots look consistent throughout. You can also use Shottr to take scrolling screenshots and delayed screenshots, which I find beneficial.

Moving to annotation and editing, Shottr lets you write text or draw a few different shapes and add arrows to your screenshots. It even has blur and erase tools to help you remove sensitive information from screenshots.

Download:Shottr (Free, premium version available)


6 6. Amphetamine

Amphetamine Mac app menu bar options.

Amphetamine is my go-to app for keeping my MacBook awake in clamshell mode. It’s pretty straightforward and requires you to toggle a simple switch to enable it. Alternatively, there’s support for triggers, which lets you automatically start a keep-awake session until the specified task runs on your MacBook.

For example, I’ve set up a trigger that automatically starts an Amphetamine session when I plug my MacBook into an external display. This lets me keep my MacBook’s lid closed when hooked onto my external display, even when it’s not on charge.

If you use your MacBook hooked to an external display, Amphetamine is a must-have Mac app that can prolong your battery’s lifespan.

Download:Amphetamine (Free)


7 7. Dropover

Dropover shelf holding the items on a Mac.

Dropover is a very useful Mac app with a simple idea: make moving files between folders easy. Since I need to move lots of files between different folders on my Mac multiple times a day, I use Dropover to help me do it efficiently.

Dropover gives you a shelf where you can temporarily hold all the files you want to move from different source folders and then drop them off to their destination folder. You can access this shelf anywhere by selecting an item and simply shaking the cursor, after which it’s a simple drag-and-drop procedure.

The app preserves up to ten of your previous shelves, in case you need them. You can also save your shelves in the cloud and share them with someone using a public link.


Dropover doesn’t just support files; it works with folders, URLs, and text snippets too. Other notable Dropover features include clipboard sharing, custom scripts, and pinned shelves.

Download:Dropover (Free, premium version available)

8 8. CheatSheet

CheatSheet app showing a list of all keyboard shortcuts supported by macOS Finder.

CheatSheet is a must-have Mac app for anyone who loves using keyboard shortcuts. As the name implies, CheatSheet gives you a cheat sheet of all the Mac keyboard shortcuts supported in an app, so you don’t have to look them up online.

Accessing the cheat sheet is easy. Simply press and hold the Command key in the app whose shortcuts you want to view, and you’ll see an overlay screen with all its shortcuts. You can then press the other key(s) of a shortcut combination to trigger the corresponding action on that app.


Download:CheatSheet (Free)

9 9. Velja

Velja app menu bar items and preferences window on a Mac.

Velja is a browser and app picker that can make your life easier. Simply put, the app lets you choose which browser (and even browser profile) or app to open a link in, so you aren’t stuck with it open in your Mac’s default web browser.

For example, if you prefer to open Google Sheets links in Safari but don’t want to set the default browser to Safari, you can set up a rule in Velja. That way, whenever you click a Google Sheets link, Velja will open it in Safari. Similarly, if you have the Zoom app on your Mac, you can set Velja to open any Zoom link you click on directly in the native app.


Alternatively, you can configure Velja to show a list of your favorite browsers when you click a link. You can then pick a browser from the list to open that link based on your preference.

Download:Velja (Free)

TinkerTool Mac app showing all the available tweaks for different system elements and apps.

TinkerTool is an app that lets you get more out of your Mac by enabling or modifying system preferences that are otherwise missing or not easily accessible in the System Settings app. The app doesn’t change any component of the operating system, and any changes you make are reversible.

TinkerTool shows hidden preferences for several system components and apps. Simply pick a category from the left sidebar and enable or disable the ones you want. In some cases, you may need to relaunch apps to apply the changes.


Some of my favorite tweaks include Add Quit item in Finder menu, Disable delay when showing hidden Dock, Disable fade-in effect when opening from Launchpad, and Prefer expanded Save dialogs when using new applications in General.

Download:TinkerTool (Free)

These are all the apps I can’t start using a new Mac without. While some apps give me additional functionality, others help me do things on my Mac more efficiently and, in turn, boost my productivity.

Here’s How I Take Professional-Looking Headshots With My Smartphone

Key Takeaways

  • Check your camera format to capture professional headshots on smartphones—make sure it’s on the highest quality and toggle RAW on.
  • Utilize natural lighting indoors or outdoors for professional headshots and dress for success.
  • Create contrast between the subject and background, avoid straight-on shots, and use burst mode for better timing.


Professional headshots don’t need to be shot in a photography studio by a professional photographer. With a smartphone and a few extra tips, you can easily get professional-looking headshots that land you the job.


Check Your Camera Format

Most phones’ default camera format will be standard quality, which is usually fine. For professional-looking headshots, you need high quality from the moment the shutter clicks.

On an iPhone, head to Settings > Camera > Formats. From here there are two options for quality: Camera Capture and Photo Capture. Select High Efficiency for the best quality, and toggle on Apple ProRAW for the ability to capture in RAW format.


Shooting in RAW allows for the most details and colors to be captured, improving the editing process later on. Standard settings may lack color depth and be more pixelated. Once Apple ProRAW is toggled on, from the iPhone camera, toggle RAW on or off per photo.

If you have an Android, you can also shoot and edit RAW images using a Samsung Galaxy S23 and other models.

Use a Tripod or Ask Someone to Take Your Photo

Ruby Helyer / MakeUseOf

Although my go-to when taking smartphone photos of myself is a selfie, having an arm sneaking from the edge of the frame won’t result in a professional headshot, no matter how good my face looks.


Instead, you should use a phone tripod or even better, a trusted friend—especially one with a good eye for photography. Having another person taking your photo will be faster, more accurate, and provide live feedback on how to improve your headshot.

Utilize Natural Lighting

Lighting can be difficult to get right, especially for a professional headshot. If you’re not in a well-lit photography studio, natural lighting should be your aim. You can still take your headshot indoors with natural lighting by utilizing large windows at the correct time of day. If indoors isn’t an option, then taking your headshot photos outside is another choice.

Consider the time of day if you’re relying on natural lighting. Shadows can be a menace when the sun is too high and bright, while golden hour’s hues may be too romantic for your professional shots.

If you have the time and patience, take photos throughout the day and test different places that utilize the sun—an overcast day provides flat, natural light for your shots, too.


Consider Your Background

Gray Office Setup

Whether you’re taking your headshot photos indoors or outside, your background plays a huge part in how professionally you’ll come across.

Consider setting up a space similar to the industry your headshot is used for—an office worker could take headshots in a well-lit office, for example, using office props subtly in the photos.

For a neutral background indoors or outdoors, avoid clutter and too many textures: an all-encompassing background such as a wall works well. Alternatively, using an out-of-focus natural background can work well, too.

As you’re the subject, keep the background neutral, clear, and less focused than you are.


Dress For Success

For professional headshots, even taken on your smartphone, dress for the job you want. If you have the time, you should switch outfits or elements of your clothing and accessories.

Make sure all your clothes have been ironed and are free of fluff or hair. Don’t dress in an unprofessional theme, such as all in pink or clashing colors and textures.

You can always inject your personality into your outfit with fun earrings, colorful eyeglasses, a fun tie and pocket square, or a pop of your favorite color. Professional headshots don’t have to suck away your personality.

Create Contrast Between You and the Scene

Contrast Photos
Ruby Helyer / MakeUseOf


Encompassing the previous two points, you and your photographer should ensure there’s a high contrast between you as the headshot subject and whatever you’ve chosen for your background.

Setting your camera to RAW will also help with contrast when it comes to editing your headshots, as you’ll have more control over colors.

High contrast doesn’t mean a garish difference—just enough that you don’t fade into the background, shadows, or colors in any way. For example, an indoor office photo may have a setting of light and neutral whites or grays, so if you wear a pop of color—such as a burgundy blazer—and have dark hair, you’ll contrast enough against the scene to stand out naturally.

Don’t Stand Straight On

Angled Portrait
Ruby Helyer / MakeUseOf


Unlike taking passport photos with a smartphone, a professional headshot doesn’t need you to face the camera straight on without smiling. In fact, you should experiment with different angles and facial expressions for your headshot.

Standing or sitting at a slight angle adds some dimension to your headshot. Although the smartphone should be held level to where your head is, along with being parallel with any vertical and horizontal lines in your photo—such as corners of internal walls or doorframes, you, the subject, do not need to be so strictly lined up.

Despite a headshot being traditionally just your head and upper torso, depending on the purpose of your headshot or your intended professional role, you can experiment with incorporating the entire length of your body into the frame.

From this, you can then add shape and dimension to your limbs, so you should consider arm, hand, leg, and foot placement too.


Keep the Default Focus and Zoom Settings

Most smartphones offer wide angle as well as macro zooms, and both have their uses. For a professional headshot, though, I’d recommend keeping your camera’s default focal settings.

Wide angle, named on phone cameras as 0.5x zoom, warps much of the subject as well as the background, giving unprofessional results. Great for taking photos at a nightclub or party, but not for promoting your LinkedIn profile.

You also shouldn’t use Portrait Mode. This artificial method of creating harsh depth-of-field can look tacky and overdone. Avoid using any zoom on your smartphone—if you need to get closer, zoom with your feet and move the tripod or your photographer closer to you instead. The background will naturally blur, creating a natural depth of field and keeping you in focus.


Use Burst Mode

Even in a prepared headshot photoshoot, it can be difficult to time your blinking or the perfect smile. Using burst mode on a smartphone is a great way to capture missed moments.

Burst mode allows you to capture multiple images within seconds, meaning if you’re the type of person who usually blinks at the microsecond the shutter closes, this offers insurance against that.

Don’t Over-Edit

Headshot Edited in Photoshop


While there are an infinite number of ways to edit your smartphone photos, whether on your phone or through an app, or even transferring them to a computer to use desktop software, for professional results on your headshot, you want to keep the editing light. Both Lightroom Mobile and Snapseed are great options for easy on-the-go editing, if you require it.

If you’ve used natural lighting, set up good composition and contrast, and have taken a multitude of images for all purposes, the photos should already look fantastic.

Shooting in RAW allows for subtle editing to enhance details or correct color balance. A professional headshot is not the place to apply filters of any kind—keep those for your Instagram feed.

Use AI as a Last Resort

AI Headshot in Canva


AI can offer a lot for your smartphone photography and specifically for professional headshots. If you’re a desktop photo editor, your photos may benefit from Retouch4Me’s subtle AI editing software.

If you struggle to take headshots you’re happy with, there may be a variety of reasons such as lack of a suitable setting or background, not owning the right wardrobe options, or simply having a bad hair day. But there are plenty of AI headshot generators you could use. Fotor, an affordable AI tool, offers an AI headshot generator if your photos don’t come out as well as you’d have liked.

Lost One AirPod Only? Here Are Your Replacement Options

Given their small size, misplacing AirPods is almost inevitable. If you tend to put your AirPods in your pocket or find one bud looser in your ears than the other, you have a higher chance of losing one AirPod. Here are the options you have in such a situation.


1 Locate Your Lost AirPod via Find My

The first (and probably the best) shot you have at finding your lost AirPod is to attempt to locate it using Apple’s Find My app. To locate your lost AirPod using the Find My app, here’s what you need to do:

  1. Open the Find My app on your iPhone, iPad, or Mac.
  2. Head to the Devices tab. Here, you can see all your Apple devices that use the same Apple account and have Find My enabled.
  3. Select your AirPods from the list. Then, simply select the bud you’ve misplaced.

You’ll see a list of options to help you locate your lost AirPods, such as playing a sound or getting directions. You can also activate Apple’s Lost Mode from the same menu. This way, you’ll be notified when someone finds your AirPods and the finder will be able to see your contact details.


You can only use Find My to locate your lost AirPod if you had Find My enabled on a paired iPhone, iPad, or Mac prior to misplacing it. If not, you’ll need to consider one of the options below.

2 Opt for a Replacement

If Find My wasn’t enabled on a paired Apple device and you couldn’t locate your lost AirPod by retracing your steps, your next best option is to replace your lost AirPod. According to Apple’s Get an Estimate tool, if you have the first, second, or third-gen AirPods, a replacement AirPod will cost you around $69.

For the first or second-generation AirPods Pro, you can expect to pay around $89 for a replacement.


Apple's Get an Estimate tool page showing the replacement cost for AirPods Pro 2nd generation

The above pricing is applicable even if you paid for an AppleCare+ extended warranty plan when you purchased your AirPods.

3 Get New AirPods Instead

Purchasing new AirPods is usually a much better option than spending $69 or $89 on a replacement bud. If you’ve been using your AirPods for a few years and own an older model (like the first-gen AirPods or AirPods Pro), it may be time to start fresh and upgrade to a newer model anyway. Newer models often feature improvements like better active noise cancellation (ANC), battery life, and more.

While getting new AirPods will cost you much more than the price of one replacement AirPod, the new features ultimately make the investment worthwhile. If you look around a bit, you’ll find AirPods on sale on Amazon or stores like Best Buy, especially during the holiday season or sales events like Prime Day.


How to Delete iMessages on Your Mac

Key Takeaways

  • You can delete individual messages and entire conversations or set automatic deletion for the Messages app on your Mac.
  • Remember that deletion is permanent and might affect synced devices, so back up your Mac first.
  • Disable “Messages in iCloud” to delete messages and texts from your Mac but not your iPhone.


You have multiple options if you’re looking to clean up the Messages app on your Mac. You can delete messages individually, clear entire conversations, or turn on automatic deletion. We’ll walk you through the steps for all of them.


Deleting Messages on Your Mac

There are a few options for deleting messages on your Mac. First, you can delete a single message—perhaps it contains credit card details or some other sensitive information. Second, you can select and delete multiple messages within a conversation without clearing the whole thing. Either way, we’ll show you the best and quickest way to get it done.

Deleting messages on your Mac will also delete them on your synced iPhone and iPad (unless you disable Messages in iCloud first). This action is permanent and irreversible, so you should only do it if you’re absolutely sure you want to. We strongly advise you to
back up your Mac
first in case you delete something important.


To delete a single message, open a conversation in the Messages app, Control-click the text bubble you wish to delete, and choose Delete from the context menu.

To delete multiple messages, hold Command on your keyboard, select the messages you want to delete, and press the Delete key. You’ll see a prompt confirming that you want to delete it from all your devices; click Delete if you’re okay with that.

If you want to remove the messages only from your Mac but not your iPhone (or other Apple devices), you’ll have to disable it in the Messages settings window:

  1. With the Messages app open, mouse up to the menu bar and click Messages.
  2. Click Settings in the resulting menu and select the iMessage tab.
  3. Toggle off the Enable Messages in iCloud box.
  4. Choose Disable This Device.


iMessage Messages settings in the Messages app for Mac

If you wish to
unsend a message on a Mac
instead, you must delete it within 15 minutes of sending it. Otherwise, deletion will only be on your end, and the recipient will still have a copy of the messages.

Clearing an Entire iMessage Conversation

To delete an entire conversation, open the Messages app and look for the conversation you want to delete on the left sidebar. You can either scroll through your conversations manually or click the Search field at the top of the list and type in a contact’s name.

The,n you can continue with any of these options:

  • Use your two fingers to swipe left on the conversation and click Delete.
  • Control-click on the conversation and select Delete Conversation from the popup window.
  • Select the conversation, then click Conversation in the menu bar and choose Delete Conversation.


Messages conversation context menu

Deleting iMessage Attachments on Your Mac

The other half of deleting iMessages is also deleting the attachments that came with the messages. You can do that in Finder by following these instructions:

  1. Launch a Finder window, then click Go in the menu bar and select Go to Folder.
  2. Copy and paste this into the input box:
    ~/Library/Messages/Attachments
  3. Drag the contents to the trash. If you don’t want to delete all the attachments, you can browse the folders and delete the attachments individually.

Finder Go to Folder box with a file path to Messages attachments


You can also open your Mac’s Settings app, go to General > Storage, and click the Info (i) icon. From there, you can see a user-friendly breakdown of all the attachments saved by the Messages app.

Messages attachment management window in macOS Settings

Select what you want (hold Command for multiple), and click Delete in the bottom-right corner to remove them. You can also preview what exactly it is by hitting space bar on your keyboard.

Setting Your Mac to Automatically Delete Messages

If you’re tired of manually deleting old messages and conversations on your Mac, you can set the Messages app to automatically delete messages after a specific period. Follow these steps:

  1. Launch the Messages app.
  2. From the menu bar, head to Messages > Settings.
  3. Select the General tab.
  4. Click the dropdown menu next to Keep messages and choose how long you want to keep your messages.


General tab in Messages settings on macOS

Now, your Mac will only store messages for the duration you set, and you won’t need to manually delete them.

You can quickly delete individual texts or entire iMessage threads on your Mac using any of the methods we discussed. But remember that deleted messages will also disappear from your other devices if you’ve enabled iCloud for the Messages app. So, be careful while tidying up the Messages app, and make sure you have a backup just in case you accidentally delete something valuable.

Is Granting Location Permission to a Website or App Safe?

Have you ever been using an app when a notification pops up asking you to grant location permission? You might need the location to get directions or find nearby places.


But what about those times when you’re not sure why the app needs your location? You start to wonder—who’s getting that info and what they’re doing with it? Is it safe to hit the “allow” button?


Is Granting a Website or App Location Permission Safe?

Whether it’s safe to share your location isn’t a hard yes or no. It can be fine, but it really depends on who’s asking and what they plan to do with it. It’s kind of like handing out your home address—you probably wouldn’t give it to a random stranger, but you would share it with a delivery person bringing you a late-night pizza, right?

Apps and websites often want location access to get info that’s more specific than just your general area from your IP address. This is especially true for devices with GPS that can pinpoint where you are within a few hundred feet. But all that detailed location data stays private on your device. If someone wants it, they have to ask permission first. That’s why your device will prompt you before sharing your exact location with an app or site.


The main perk of allowing location access is how helpful and convenient it can be. Take navigation apps like Google Maps, for example—without location permission, getting directions would be back to the Stone Age of manually typing in your starting point every single time. You’ll also appreciate granting location permission to weather apps that give you real-time updates based on where you are. That sort of precise information is super useful when you’re deciding whether to bring an umbrella or sunglasses with you that day.


Beyond navigation and weather, location data enables rideshare apps like Uber to know where you’re at to match you with nearby drivers. Social media apps can suggest nearby locations or events to check out or make tagging your posts much easier. Some apps, like your email or financial apps, even use it to boost your security—if they notice unusual activity based on your location, they’ll know something might be up and alert you.

But When Isn’t It Safe to Grant Location Permissions?

Sharing your location with apps and sites can be handy in most cases, but you have to be careful who you trust with that information. Where you are and where you go is actually pretty private business. It makes sense that one of the reasons why companies collect your data, and especially location, is to know where you are so they can show local ads. But really, just using your general location from your internet connection should be enough for that. They shouldn’t need your permission to see exactly where you are.


So, when should you think twice about letting a website or app see where you are?

A big red flag is when they ask for it but really don’t need to know. For example, if a basic calculator or document viewer suddenly wants your location—that’s weird! Those apps can do their job just fine without tracking where you are. That sort of request should make you think something fishy is probably going on, or they just want to collect unnecessary data on you. These shady apps and sites may log your entire location history if you allow them and build up a really detailed picture of everywhere you go daily. In the wrong hands, all that info could be used for stalking, identity theft, or other similar nefarious activities.

Another thing to watch out for is giving location access to apps from untrustworthy places. If you download an app from a third-party app store instead of an official one, it’s more likely to be sketchy. The official stores do a better job screening apps, so those that harvest your data or have viruses are less likely to slip through.


Also, keep an eye out if an app wants constant access to your spot. Most modern devices let you control when an app can access your location. You can set it to Allowonly while using the app (or similar) instead of Allow all the time (or similar), which is a great middle ground. Not only does it prevent nonstop tracking from aggressively draining your battery, but your location will stay private unless you’re actively using that app.

Location Permission options on Android phone

On a final note, if you allow apps or websites to use your data or your current location, you’re subject to their terms, privacy policies, and practices. You should review these to understand how they use your location and other information.


The Emoji Keyboard and More

Key Takeaways

  • The easiest way to type emojis on your Mac is by using the built-in emoji picker.
  • If you want to type emojis like you would on Discord or Slack in any app, you can use a third-party app like Rocket.
  • For a vast library of emojis, check out Emojipedia, which has nearly every emoji in existence.


Entering emojis on a Mac isn’t as straightforward as on your iPhone since the physical keyboard doesn’t have a dedicated emoji key. But it’s still pretty easy once you know what to do. And you have multiple options. So, let’s take a look.


1. Use the Built-In Emoji Picker

If you’ve been a longtime Mac user, you may know about the built-in emoji picker. When your cursor is active in a text field, just press and hold the Function (Fn)/Globe key, which will bring up the emoji picker, where you can select and type in any emoji of your choice.

All the emojis are sorted into categories, and you’ll find your frequently used section at the top. You can expand this section by clicking the icon at the top-right of the pop-up to view more categories and different symbols. This is the easiest method to insert and use emojis across multiple apps on your Mac.


If you’ve reassigned the Function (Fn)/Globe key to a different action, you can still open the emoji picker using the Cmd + Ctrl + Space keyboard shortcut.

To remap the Function (Fn)/Globe key back to opening the emoji picker, go to System Settings > Keyboard and set the Press Globe key to option to Show Emojis & Symbols. Now, pressing the Fn key will automatically bring up the emoji picker, allowing you to insert emojis easily.

macOS System Settings Keyboard settings with the option to change the action of the Function (Fn)/Globe key.


If you’d rather have an on-screen shortcut instead of using a dedicated key, follow these steps:

  1. Go to System Settings > Keyboard.
  2. Click the Edit button next to Input Sources under Text Input.
    macOS System Settings Keyboard Settings

  3. Enable the Show Input menu in menu bar option.
    macOS System Settings Input Sources Menu

  4. Now, you can bring up the emoji picker by clicking the input menu icon in the menu bar and choosing Show Emojis & Symbols.
    macOS Menu Bar with the Input menu icon selected, showing two options: Show Emoji & Symbols and Show Keyboard Viewer.

While this is a convenient way to type emojis, you may want to explore other methods that could be faster or offer more choices. So, let’s discuss some additional options.


2. Search on Emojipedia

Emojipedia Home Page

For someone who didn’t grow up using emojis, Emojipedia is a lifesaver. As the name suggests, it’s the emoji encyclopedia. It lists every emoji known to mankind and provides a handy shortcut to copy one.

When you open the website, you can either select an emoji from various categories or search for a specific one. After choosing an emoji, simply click the Copy button and then paste the emoji wherever you want.

Emojipedia Victory Hand Emoji Page


You can also combine any two emojis to create a new one, but remember that these will be sent as images rather than standard characters in most apps.

I find it really easy to search for unknown emojis on Emojipedia using descriptive terms. When I’m writing or in the middle of a conversation, Emojipedia often gives me better and faster results than other options.

Visit:Emojipedia (Free)

3. Use Rocket for Quick Emoji Typing

Rocket app for macOS working in the Notes app

Many messaging apps like Slack or Discord make it easy to insert emojis by typing a colon (:) followed by a descriptive shortcut for the emoji. You can enable this method across all your apps using a third-party tool like Rocket, which lets you type emojis the same way in any app.


After downloading the setup, install it like any other DMG file and follow the on-screen instructions. Once installed, you can start using Rocket by typing emojis after a colon (:). For example, typing :thumbsup will give you a “like” emoji.

The free version of the app is a bit limited, though. But if you pay the $10 fee, you’ll unlock full emoji search and a GIF pack. More importantly, you’ll also get the ability to add custom shortcuts for emojis and GIFs, so you don’t have to adhere to Rocket’s nomenclature. You can also use the Rocket button in the menu bar to easily search and insert emojis anywhere.

Download:Rocket (Free, premium version available)

4. Use Text Expansion Shortcuts

If you don’t want to install a third-party app like Rocket, you can use the built-in Text Replacement feature to achieve the same result. The Text Replacement feature lets you expand shortcuts to long phrases of text, which can be a huge time saver. We can use the same feature for emojis.


To set up emoji shortcuts, follow these steps:

  1. Head to System Settings > Keyboard and click the Text Replacements button under Text Input.
  2. Now, click the (+) button.
  3. In the Replace section, type your shortcut text, and in the With section, paste the emoji (you can find emojis on Emojipedia, for example).

Adding a Text Replacement in macOS

Next time you type that shortcut, macOS will replace it with the emoji. Repeat the above steps for the emojis you use frequently. For example, to use :wave: for a waving emoji, enter :wave: in the Replace section and paste the wave emoji in the With section.


While typing emojis on a Mac might seem more complicated than on an iPhone, there are plenty of options to explore. I find Rocket the quickest method, as it’s ready to use right after installation. However, the built-in emoji picker might be the better choice if you prefer a more visual interface.

Don’t Open Any CrowdStrike Repair Emails; They’re All Fakes

Whenever something big happens in the technology world, scammers are not far behind. The 2024 CrowdStrike outage is no different, and while the issues have been mostly sorted out, scammers are hot on its heels, peddling their latest tricks.


So, here’s what’s going on with the CrowdStrike repair email and why you should ignore it.


What Is CrowdStrike?

CrowdStrike is a global cybersecurity company whose clients include some of the world’s biggest companies. Companies that can’t risk data loss or having their systems compromised usually invest in something a little beefier than the Windows antivirus apps that you and I use on our personal computers, which is where expert organizations like CrowdStrike are required.


CrowdStrike is one of the more popular options for businesses, offering defense against hackers trying to gain access to vital systems, endpoint security, threat intelligence, and cyberattack response services. Given that the loss of these vital systems could cost companies millions of dollars at best or human lives at worst, companies need the best security they can get.

The CrowdStrike outage happened when the security firm pushed a bad update to companies worldwide. This update caused Windows computers to suffer a Bluescreen of Death loop when they booted up and rendered the affected systems unusable. This caused chaos worldwide, from canceled flights to important hospital software going offline. Furthering the issue, most affected computers needed to be reset and rebooted manually, adding millions of hours of downtime to vital systems.

What Is the CrowdStrike Repair Email?

As you might imagine, the CrowdStrike bug caused companies to panic. Many were looking for solutions from either Microsoft or CrowdStrike, both of which eventually published updates and tools to help PCs get back on track. Unfortunately, where there’s widespread panic, scammers aren’t far behind.


CrowdStrike identified a scam making the rounds that uses the latest outage as part of its bait. As described on the CrowdStrike blog, scammers took a copy of Microsoft’s advice on how to fix a computer affected by CrowdStrike. They then pasted it into a Word document and added a Word macro designed to download the Daolpu malware onto the target PC. They then email the infected Word document to people in hopes of getting a catch.

When someone receives the email with the infected Word document, they download it to learn how to fix the CrowdStrike bluescreen error. If they enable Word macros, the Daolpu malware downloads onto the victim’s PC. From here, Daolpu steals cookies and login details from the victim’s browser and sends them back to the scammer.

What to Do If You Receive a CrowdStrike Repair Email

Image Credit: CrowdStrike


Fortunately, the CrowdStrike repair email scam requires quite a bit of interaction to trigger. You’ll not only need to receive the email, but you also need to download the Word document and also enable macros. Some quality antivirus apps will detect if a Word document contains macros and will block the download before it even arrives.

Even if it does land on your PC, Word will warn you that the document contains macros and won’t let you enable them without your explicit permission. This scam makes for a good learning experience for a common rule of thumb: if you don’t know where the Word document came from, never enable macros. Who knows what’s lurking in there?

Should You Worry About CrowdStrike?

If you receive a CrowdStrike repair email, you may wonder: Will the CrowdStrike flaw affect my PC? Fortunately, if you’re reading this from your personal computer, I can guarantee that you’re not affected by CrowdStrike at all.


Remember, CrowdStrike is a business-orientated security suite designed to help organizations protect themselves. There’s an extremely high chance that your personal computer does not use CrowdStrike as its antivirus; it’d be like putting bulletproof glass on your everyday car. And because you don’t have CrowdStrike on your system, you’re unaffected by the recent outage.

If anyone claims that your PC is under threat because of CrowdStrike, there’s a high chance they’re trying to scare you into doing whatever they say. Don’t believe them; CrowdStrike is not a hidden service on your Windows PC, nor is it something you’d usually download on a personal PC.

The CrowdStrike repair scam is pretty nefarious, capitalizing on fear to spread malware. Fortunately, if you receive it on your personal computer, you have nothing to worry about. If you are using it, don’t trust a random email; instead, use Microsoft’s recovery tool or read CrowdStrike’s documentation on the outage for more information.


How to Use an NTFS Drive on Mac: 3 Methods

By default, macOS can read and copy files from NTFS drives but cannot write to them, and to enable full access, you’ll need to use a workaround. But don’t worry; we’ll teach you how to read and write to an NTFS drive on a Mac.


1. Format an NTFS Drive to FAT32 or ExFAT

If your NTFS drive doesn’t contain any valuable data, formatting to FAT32 or ExFAT is the simplest solution for sharing files between macOS and Windows.

Once you’ve switched to a cross-platform compatible format, you can read and write to your external disk on both Windows PCs and Macs. While either FAT format will work, FAT32 has several limitations, including a 4GB file size limit. Therefore, in most cases, ExFAT is the superior choice.

Here’s how to format a hard drive to FAT32 or ExFAT on macOS:

  1. Launch Disk Utilityusing Spotlight search on your Mac or the Launchpad.
  2. Select your NTFS drive from the left sidebar and click Erase in the toolbar.
  3. Switch the format to FAT32 or ExFAT, rename if necessary, and click Erase.


Once you complete the process, your external drive will be in a format that’s fully compatible with both macOS and Windows.

2. Use a Third-Party App to Write to NTFS on Mac

If you need to stick with NTFS and can’t use another format like ExFAT, you’ll need a third-party app to write to your NTFS drive. I recommend Mounty because it’s free, open-source, and has a simple user interface.

Before using Mounty, you’ll need to install Homebrew on your Mac. If you have an Apple silicon Mac, make sure to enable kernel extensions. Here is how you can install and use Mounty on your Mac:


  1. Open Terminal on your Mac and type in the following command to install Mounty along with all the required dependencies:
    brew install  
  2. Open Mounty via Spotlight or the Launchpad.
  3. Follow the on-screen instructions, and you’ll see a new M icon on your menu bar. Click it to access Mounty’s options.
  4. Connect your drive to your Mac and select the Re-mount option. When prompted, enter your Mac’s password.
    macOS Menu Bar with an option to re-mount an NTFS drive via Mounty

  5. A new Finder window will open automatically, allowing you to write to your NTFS drive as you would with any other drive.
    macOS Finder Window with an NTFS drive open

  6. When you’re done, unmount the drive by selecting the Unmount option from Mounty’s menu.
    macOS Menu Bar with an option to unmount an NTFS drive via Mounty

If you’re facing issues with Mounty, you can also try other apps like Microsoft NTFS for Mac by Paragon. But note that it only comes with a 10-day trial, and you’ll need to pay for a license once the trial expires.


3. Use Virtualization Software to Write to NTFS on Mac

Windows running on a Mac via Parallels

You can also try running Windows on your Mac using Parallels or any other virtualization software to write to an NTFS drive. However, keep in mind that a virtual machine can take up a lot of disk space.

It’s worth considering this option if you already virtualize Windows on your Mac for some other task. If you have an Intel Mac, you can also install Windows on your Mac alongside macOS, giving you the best of both worlds.

However, if you want to work seamlessly between Windows and macOS, having a drive formatted in either FAT32 or ExFAT will save you a lot of time and effort. The key is to configure the external drive before you fill it with important information.

How to Watch the 2024 Summer Olympics

The 2024 Summer Olympics will officially open on Friday, July 26, 2024, in Paris and run for 16 days, ending on August 11. 10,000+ athletes from across 200 nations will compete.


If you’re yet to cut the cord, you can watch the live events and highlights on NBC’s channels: NBC, NBC Sports, USA Network, and CNBC. But if you prefer streaming, here are your best options:


The easiest (and most affordable) way to stream the Olympics is via Peacock. You can stream every single event live on the platform, and the best part is that you can even set up Discovery Multiview, which lets you stream up to four sports simultaneously.

Some of the other highlights of the platform include a “Browse by Sport” feature that can come in handy if you’re looking to find all the highlights, live events, and replays for a specific sport, and a “Search by Star Athlete” option that lets you keep tabs on all your favorite athletes across different sports.


And if you happen to miss anything, don’t worry, because Peacock lets you add events to the “My Stuff” section to access later. If you want to stream via Peacock on your smart TV, sign up for one of the company’s plans, which starts at $7.99 per month.

Homepage of YouTube TV

Google has partnered with NBCUniversal to bring live coverage of the Summer Games to YouTube TV. While the platform offers access to over 100 channels, including all the ones that will let you stream the Olympics, like NBC, CNBC, and the USA Network, the highlight of using YouTube TV is that it has a pretty stellar DVR feature that will allows you to record shows and events.


They’ll remain on the platform for up to nine months, which gives you more than enough time to catch up on the highlights or live events from the Games. Now, the downside is that you’ll have to pay $72.99 per month for a YouTube TV subscription, but you can get around this by signing up for a free subscription.

Homepage of DirecTV Stream

DirecTV Stream is nowhere near as popular as the other platforms on this list, but it offers access to all the necessary channels for watching the Olympics, including CNBC, USA Network, Olympics Channel, and NBCSN. The best part is that these channels are available on DirecTV’s lowest-tier plan—the Entertainment package, which costs $79.99.


Want to save some money? Try the subscription for free and move to the Entertainment package or one of the other plans if you think the streaming service is right for you.

Homepage of Hulu + Live TV platform

You’re likely already familiar with Hulu. Hulu + Live TV is an extension to Hulu’s on-demand service and costs $83 per month.

The platform gives you access to live and on-demand TV from over 95 channels, including all the ones that stream the Olympics. You also get access to cloud DVR storage for up to 200 hours, which is certainly helpful if you’re looking to catch all the action in your free time.


Homepage of Sling TV

If affordability is important, you’ll likely appreciate how you can pick and choose packages with Sling TV. If you’re not one for customization, just opt for Sling Blue, which will give you access to the USA Network and NBC (the latter is only available in select geographies).

The subscription costs $40 per month, but if this is your first time signing up, you’ll enjoy your first month at $25 off, meaning you only have to pay $15 for your subscription.

Homepage of CBC Gem


If you reside in Canada, you’ll have to catch the Olympics on TV channels like CBC, Sportsnet, or TSN. However, if you’ve cut the cord, you can watch the Games on the free CBC Gem streaming platform.

With so many options to choose from, you’ll have no trouble finding a suitable platform to stream the Games. Just don’t forget to set reminders and mark your calendars for the events you don’t want to miss—I sure have!

Why I Wouldn’t Recommend Anyone Get Adobe Creative Cloud in 2024

Key Takeaways

  • Adobe’s subscription is costly, potentially hindering the growth of aspiring creators.
  • Adobe employs predatory pricing practices, charging high cancelation fees.
  • Alternative software options are emerging as viable competitors to Adobe’s suite, offering more affordable pricing and enhanced features.


I have used Adobe’s software for nearly seven years for creative tasks, especially video and photo editing. I’ve been lucky enough to get it for free for most of that time through university connections and employers providing it, but here’s why I’m considering jumping ship and picking alternatives to Adobe Creative Cloud.


The Subscription Is Prohibitively Expensive

Adobe’s pricing model is prohibitively expensive. Adobe’s flagship, all-inclusive Creative Cloud plan costs $89.99 per month ($1079.88/year) if you pay monthly, $59.99 per month ($719.88/year) if you sign a year-long contract, or an up-front annual payment of $659.88 per year ($54.99/month).

For a profitable freelancer or creator, this may not be a huge expense. Conversely, for aspiring creators who aren’t earning money from their work yet or not earning enough to offset the expense, this is prohibitively expensive.


Adobe does offer some individual software and smaller bundles at reduced costs, but many creators, especially those in video, cannot suffice with just Premiere Pro, or just Photoshop and Lightroom. I only use four Adobe software with any regularity, yet I have to pay the price to use the entire suite.

Adobe has positioned itself as the industry standard for creative professionals, making it the most likely option to be selected by these aspiring artists and students, and also gives Adobe the leverage to charge these exorbitant prices. In many cases, Adobe is only worth it for pros.


Adobe Creative Cloud Student Subscription

While Adobe does offer student discounts—at a whopping 66% off—these often also face scrutiny due to Adobe’s predatory pricing model.

Adobe Employs Predatory Pricing Practices

I mentioned that Adobe Creative Cloud is $59.99 per month if you sign a year-long contract. While Adobe has become more forthcoming about early cancelation fees, most consumers are unlikely to read the exact details of what they mean. I say this as someone who wanted to cancel early, and then chose not to because of the surprise fee.

Reading Adobe’s cancelation terms, if you cancel your $59.99 per month Adobe Creative Cloud plan after 14 days or before your final monthly payment of that contract, you will be charged 50% of the remainder of that contract’s annualized price.


Adobe Early Cancellation Policy on Year Contract

Let’s do the math. An annualized plan comes out to a bit under $720 per year. If you use it for three months, decide it’s too expensive, and want to cancel, that cancelation fee will be $720 minus three months of $59.99, then divided in half. Rounded, that’s about $280 to cancel your Adobe subscription after three months of usage: a cancelation fee of around $100 more than what you paid to use the service.

I would have no qualms about the pricing model if Adobe were more clear about its implications. However, the company instead ends up tricking most users into thinking they are paying a better monthly price, when it is a monthly price with expensive strings attached.


Many creative people with limited funds likely purchase the “less expensive” monthly option, end up wanting to cancel it because it’s too costly, and then find out they have a huge cancelation fee—I have been one of these people. It’s predatory, plain and simple, and the U.S. Department of Justice and FTC are even suing Adobe over this pricing scheme.

The ToS Give Adobe Too Much Ownership of Your Content

Adobe faced recent controversy about a terms of service update, where the company may “view, access, or listen to your Content through both automated and manual methods in order to improve our Services and Software and the user experience.”

The company did clarify its statements and revise some of its wording in the ToS, stating that user content would not be used to train Firefly, Adobe’s generative AI tool. However, in other areas, it already has done so.


Adobe Stock is a service where photographers can upload high-quality stock images and get paid when people use them. However, Adobe states that it used Adobe Stock images to train Firefly.

Adobe Firefly training on stock images quote
Screenshot from Adobe’s Blog

While many of these photographers and artists were compensated for providing these images to train Firefly and may have known how their works would be used, unless they carefully read Adobe’s terms of service frequently and in-depth, they likely had no idea their own work was used to potentially make them obsolete.


AI features can add numerous layers of efficiency to creative workflows, but many folks in creative fields may not want their content to unknowingly be used to continue making them obsolete, especially considering Adobe’s somewhat ambiguous ToS over content rights. As such, many may end up preferring to use software that provides better protection from AI.

Adobe Is Losing Its Status as Industry Leader

For many creative tasks, Adobe is and has been the leading software solution. Very few alternatives have full feature parity with their Adobe counterparts. However, as creative tasks have dispersed to more and more job roles, far more user-friendly alternatives to Adobe have arisen, such as Canva giving non-designers powerful and easy design tools, and Snapseed for free mobile photo editing.

Moreover, numerous alternative tools to Adobe’s software have surpassed it in certain tasks, such as DaVinci Resolve offering many superior features to Premiere Pro, especially when it comes to color grading and correction. DaVinci Resolve additionally offers a completely free version of its software, albeit with reduced features, which can also act as a free trial before dropping $295 on the full release.


DaVinci Resolve License Pricing

Similarly, multiple browser-based alternatives to Illustrator are free, and Affinity provides many of the same features as Photoshop, Lightroom, and InDesign with similar user-friendliness but for a single purchase, rather than an exorbitant monthly payment.

Affinity, which was recently acquired by Canva, even offers a six-month free trial to new users who want time to learn the software before financially committing to it. And ever since Adobe’s ToS controversy has come to light, it has offered 50% off its base price for the software until August 15th, 2024, a single-purchase lifetime license.


Affinity Universal license pricing (on sale)

In my case, as a video creator who often edits photos and graphics, I could purchase Affinity for $82.99 (on sale) and DaVinci Resolve for $295 to replace Photoshop, Lightroom, and Premiere Pro for my work. For these two one-time purchases, I would be spending $377.99 once for all the software I need to create content, whereas one year of Adobe without any discounts would be $659.88 at the absolute cheapest.

On top of that, many creators can absolutely get by with completely free alternatives to Adobe.


Great Software Doesn’t Outweigh Poor Ethics

I write this article as someone who has used Adobe for many years. I do think the company’s software is generally fantastic, and in many cases, it is the best solution for many creative tasks. However, with exorbitantly high fees, a predatory pricing model, ambiguous ToS, and a growing base of alternatives, I probably won’t renew my subscription next time. I’m willing to sacrifice some features and convenient workflows between software, but cannot ethically support Adobe until it improves its pricing model and privacy.

The Ultimate List of Helpful Windows Alt Codes to Insert Special Characters

Emoticons, Bullets, and Symbols

Alt + 1

Smiley Face

Alt + 2

Dark Smiley Face

Alt + 3

Heart

Alt + 4

Diamond

Alt + 5

Club

Alt + 6

Spade

Alt + 7 / Alt + 0149

Small Bullet Point

Alt + 8

Inverted Small Bulletpoint

Alt + 9

Large Bullet Point

Alt + 10

Inverted Large Bullet Point

Alt + 11

Male Gender Symbol

Alt + 12

Female Gender Symbol

Alt + 13

Eighth Note

Alt + 14

Two Eighth Notes

Alt + 15

Sun

Alt + 0153

Trademark Symbol

Alt + 0169

©

Copyright Symbol

Alt + 0174

®

Registered Symbol

Arrows and Angles

Alt + 16

Block Right Arrow

Alt + 17

Block Left Arrow

Alt + 18

Up and Down Arrow

Alt + 23

Up and Down Arrow With Base

Alt + 24

Up Arrow

Alt + 25

Down Arrow

Alt + 26

Right Arrow

Alt + 27

Left Arrow

Alt + 28

Right Angle Symbol

Alt + 29

Left and Right Arrow

Alt + 30

Block Up Arrow

Alt + 31

Block Down Arrow

Punctuation and Markup

Alt + 19

Double Exclamation Mark

Alt + 20 / Alt + 0182

New Paragraph Sign

Alt + 21 / Alt + 0167

§

Section Sign

Alt + 33

!

Exclamation Mark

Alt + 34

Quotation Mark

Alt + 35

#

Number Sign

Alt + 38

&

Ampersand

Alt + 39

Apostrophe

Alt + 40

(

Open Parenthesis

Alt + 41

)

Close Parenthesis

Alt + 42

*

Asterisk

Alt + 44

,

Comma

Alt + 45

Hyphen

Alt + 46

.

Period

Alt + 47

/

Slash

Alt + 58

:

Colon

Alt + 59

;

Semi-Colon

Alt + 63

?

Question Mark

Alt + 64

@

At Sign

Alt + 91

[

Open Bracket

Alt + 92

Backslash

Alt + 93

]

Close Bracket

Alt + 94

^

Caret

Alt + 95

_

Underscore

Alt + 96

`

Backtick

Alt + 123

{

Open Brace

Alt + 124

|

Vertical Bar

Alt + 125

}

Close Brace

Alt + 166 / Alt + 0170

ª

Feminine Ordinal Indicator

Alt + 167 / Alt + 0186

º

Masculine Ordinal Indicator

Alt + 168 / Alt + 0191

¿

Inverted Question Mark

Alt + 173 / Alt + 0161

¡

Inverted Exclamation Mark

Alt + 174 / Alt + 0171

«

Open Double Angle Quotation Mark

Alt + 175 / Alt + 0187

»

Close Double Angle Quotation Mark

Alt + 250 / Alt + 0183

·

Interpunct

Alt + 255 / Alt + 0160

Space

Alt + 0130

Single Low Quotation Mark

Alt + 0132

Double Low Quotation Mark

Alt + 0133

Ellipsis

Alt + 0134

Dagger Mark

Alt + 0135

Double Dagger Mark

Alt + 0136

ˆ

Circumflex Mark

Alt + 0139

Open Single Angle Quotation Mark

Alt + 0145

Open Single Quotation Mark

Alt + 0146

Close Single Quotation Mark

Alt + 0147

Open Double Quotation Mark

Alt + 0148

Close Double Quotation Mark

Alt + 0150

En Dash

Alt + 0151

Em Dash

Alt + 0155

Close Single Angle Quotation Mark

Alt + 0166

¦

Vertical Bar

Alt + 0168

¨

Diaeresis Sign

Alt + 0175

¯

Macron Sign

Alt + 0180

´

Accent Sign

Alt + 0184

¸

Cedilla Sign

Lines, Shapes, and Shades

Alt + 22

Black Rectangle

Alt + 127

House

Alt + 176

Light Shade

Alt + 177

Medium Shade

Alt + 178

Dark Shade

Alt + 179

Vertical Box Drawing

Alt + 180

Vertical and Left Box Drawing

Alt + 181

Vertical Single and Left Double Box Drawing

Alt + 182

Vertical Double and Left Single Box Drawing

Alt + 183

Down Double and Left Single Box Drawing

Alt + 184

Down Single And Left Double Box Drawing

Alt + 185

Double Vertical and Left Box Drawing

Alt + 186

Double Vertical Box Drawing

Alt + 187

Down Double and Left Single Box Drawing

Alt + 188

Double Up and Left Box Drawing

Alt + 189

Up Double and Left Single Box Drawing

Alt + 190

Up Single and Left Double Box Drawing

Alt + 191

Down and Left Box Drawing

Alt + 192

Up and Right Box Drawing

Alt + 193

Up and Horizontal Box Drawing

Alt + 194

Down and Horizontal Box Drawing

Alt + 195

Vertical and Right Box Drawing

Alt + 196

Horizontal Box Drawing

Alt + 197

Vertical and Horizontal Box Drawing

Alt + 198

Vertical Single and Right Double Box Drawing

Alt + 199

Vertical Double and Right Single Box Drawing

Alt + 200

Double Up and Right Box Drawing

Alt + 201

Double Down and Right Box Drawing

Alt + 202

Double Up and Horizontal Box Drawing

Alt + 203

Double Down and Horizontal Box Drawing

Alt + 204

Double Right and Vertical Box Drawing

Alt + 205

Double Horizontal Box Drawing

Alt + 206

Double Vertical and Horizontal Box Drawing

Alt + 207

Up Single and Horizontal Double Box Drawing

Alt + 208

Up Double and Horizontal Single Box Drawing

Alt + 209

Down Single and Horizontal Double Box Drawing

Alt + 210

Down Double and Horizontal Single Box Drawing

Alt + 211

Up Double and Right Single Box Drawing

Alt + 212

Up Single and Right Double Box Drawing

Alt + 213

Down Single and Right Double Box Drawing

Alt + 214

Down Double and Right Single Box Drawing

Alt + 215

Vertical Double and Horizontal Single Box Drawing

Alt + 216

Vertical Single and Horizontal Double Box Drawing

Alt + 217

Up and Left Box Drawing

Alt + 218

Down and Right Box Drawing

Alt + 219

Full Block

Alt + 220

Lower Half Block

Alt + 221

Left Half Block

Alt + 222

Right Half Block

Alt + 223

Upper Half Block

Alt + 254

Black Square

Currency

Alt + 36

$

Dollar Sign

Alt + 155 / Alt + 0162

¢

Cent Sign

Alt + 156 / Alt + 0163

£

Pound Sterling Sign

Alt + 157 / Alt + 0165

¥

Yen and Yuan Sign

Alt + 158

Peseta Sign

Alt + 0128

Euro Sign

Alt + 0164

¤

Currency Sign

Math

Alt + 37

%

Percent Sign

Alt + 43

+

Plus Sign

Alt + 60

<

Less Than Sign

Alt + 61

=

Equal Sign

Alt + 62

>

Greater Than Sign

Alt + 126

~

Tilde

Alt + 171 / Alt + 0189

½

Vulgar Fraction One Half

Alt + 172 / Alt + 0188

¼

Vulgar Fraction One Quarter

Alt + 236

Infinity Symbol

Alt + 239

Intersection

Alt + 240

Equivalent To Sign

Alt + 241 / Alt + 0177

±

Plus-Minus Sign

Alt + 242

Greater Than or Equal To Sign

Alt + 243

Less Than or Equal To Sign

Alt + 244

Top-Half Intergral Symbol

Alt + 245

Bottom-Half Integral Symbol

Alt + 246 / Alt + 0247

÷

Division Sign

Alt + 247

Almost Equal To Sign

Alt + 248 / Alt + 0176

°

Degree Sign

Alt + 249

Bullet Operator

Alt + 251

Square Root Sign

Alt + 252

Superscript Latin Small Letter N

Alt + 253 / Alt + 0178

²

Squared Sign

Alt + 0137

Per Mille Sign

Alt + 0179

³

Cubed Sign

Alt + 0185

¹

Superscript Number One

Alt + 0190

¾

Vulgar Fraction Three Quarters

Alt + 0215

×

Multiplication Sign

Alphanumeric Characters

Alt + 48

0

Digit Zero

Alt + 49

1

Digit One

Alt + 50

2

Digit Two

Alt + 51

3

Digit Three

Alt + 52

4

Digit Four

Alt + 53

5

Digit Five

Alt + 54

6

Digit Six

Alt + 55

7

Digit Seven

Alt + 56

8

Digit Eight

Alt + 57

9

Digit Nine

Alt + 65

A

Latin Capital Letter A

Alt + 66

B

Latin Capital Letter B

Alt + 67

C

Latin Capital Letter C

Alt + 68

D

Latin Capital Letter D

Alt + 69

E

Latin Capital Letter E

Alt + 70

F

Latin Capital Letter F

Alt + 71

G

Latin Capital Letter G

Alt + 72

H

Latin Capital Letter H

Alt + 73

I

Latin Capital Letter I

Alt + 74

J

Latin Capital Letter J

Alt + 75

K

Latin Capital Letter K

Alt + 76

L

Latin Capital Letter L

Alt + 77

M

Latin Capital Letter M

Alt + 78

N

Latin Capital Letter N

Alt + 79

O

Latin Capital Letter O

Alt + 80

P

Latin Capital Letter P

Alt + 81

Q

Latin Capital Letter Q

Alt + 82

R

Latin Capital Letter R

Alt + 83

S

Latin Capital Letter S

Alt + 84

T

Latin Capital Letter T

Alt + 85

U

Latin Capital Letter U

Alt + 86

V

Latin Capital Letter V

Alt + 87

W

Latin Capital Letter W

Alt + 88

X

Latin Capital Letter X

Alt + 89

Y

Latin Capital Letter Y

Alt + 90

Z

Latin Capital Letter Z

Alt + 97

a

Latin Small Letter A

Alt + 98

b

Latin Small Letter B

Alt + 99

c

Latin Small Letter C

Alt + 100

d

Latin Small Letter D

Alt + 101

e

Latin Small Letter E

Alt + 102

f

Latin Small Letter F

Alt + 103

g

Latin Small Letter G

Alt + 104

h

Latin Small Letter H

Alt + 105

i

Latin Small Letter I

Alt + 106

j

Latin Small Letter J

Alt + 107

k

Latin Small Letter K

Alt + 108

l

Latin Small Letter L

Alt + 109

m

Latin Small Letter M

Alt + 110

n

Latin Small Letter N

Alt + 111

o

Latin Small Letter O

Alt + 112

p

Latin Small Letter P

Alt + 113

q

Latin Small Letter Q

Alt + 114

r

Latin Small Letter R

Alt + 115

s

Latin Small Letter S

Alt + 116

t

Latin Small Letter T

Alt + 117

u

Latin Small Letter U

Alt + 118

v

Latin Small Letter V

Alt + 119

w

Latin Small Letter W

Alt + 120

x

Latin Small Letter X

Alt + 121

y

Latin Small Letter Y

Alt + 122

z

Latin Small Letter Z

Special Letters

Alt + 128 / Alt + 0199

Ç

Latin Capital Letter C With Cedilla

Alt + 129 / Alt + 0252

ü

Latin Small Letter U With Diaeresis

Alt + 130 / Alt + 0233

é

Latin Small Letter E With Acute

Alt + 131 / Alt + 0226

â

Latin Small Letter A With Circumflex

Alt + 132 / Alt + 0228

ä

Latin Small Letter A With Diaeresis

Alt + 133 / Alt + 0224

à

Latin Small Letter A With Grave

Alt + 134 / Alt + 0229

å

Latin Small Letter A With Ring Above

Alt + 135 / Alt + 0231

ç

Latin Small Letter C With Cedilla

Alt + 136 / Alt + 0234

ê

Latin Small Letter E With Circumflex

Alt + 137 / Alt + 0235

ë

Latin Small Letter E With Diaeresis

Alt + 138 / Alt + 0232

è

Latin Small Letter E With Grave

Alt + 139 / Alt + 0239

ï

Latin Small Letter I With Diaeresis

Alt + 140 / Alt + 0238

î

Latin Small Letter I With Circumflex

Alt + 141 / Alt + 0236

ì

Latin Small Letter I With Grave

Alt + 142 / Alt + 0196

Ä

Latin Capital Letter A With Diaeresis

Alt + 143 / Alt + 0197

Å

Latin Capital Letter A With Ring Above

Alt + 144 / Alt + 0201

É

Latin Capital Letter E With Acute

Alt + 145 / Alt + 0230

æ

Latin Small Letter AE

Alt + 146 / Alt + 0198

Æ

Latin Capital Letter AE

Alt + 147 / Alt + 0244

ô

Latin Small Letter O With Circumflex

Alt + 148 / Alt + 0246

ö

Latin Small Letter O With Diaeresis

Alt + 149 / Alt + 0242

ò

Latin Small Letter O With Grave

Alt + 150 / Alt + 0251

û

Latin Small Letter U With Circumflex

Alt + 151 / Alt + 0249

ù

Latin Small Letter U Grave

Alt + 152 / Alt + 0255

ÿ

Latin Small Letter Y With Diaeresis

Alt + 153 / Alt + 0214

Ö

Latin Capital Letter O With Diaeresis

Alt + 154 / Alt + 0220

Ü

Latin Capital Letter U With Diaeresis

Alt + 159 / Alt + 0131

ƒ

Latin Small Letter F With Hook

Alt + 160 / Alt + 0225

á

Latin Small Letter A With Acute

Alt + 161 / Alt + 0237

í

Latin Small Letter I With Acute

Alt + 162 / Alt + 0243

ó

Latin Small Letter O With Acute

Alt + 163 / Alt + 0250

ú

Latin Small Letter U With Acute

Alt + 164 / Alt + 0241

ñ

Latin Small Letter N With Tilde

Alt + 165 / Alt + 0209

Ñ

Latin Capital Letter N With Tilde

Alt + 0138 / Alt + 0352

Š

Latin Capital Letter S With Caron

Alt + 0140 / Alt + 0338

Œ

Latin Capital Ligature Oe

Alt + 0142 / Alt + 0381

Ž

Latin Capital Letter Z With Caron

Alt + 0154 / Alt + 0353

š

Latin Small Letter S With Caron

Alt + 0156 / Alt + 0339

œ

Latin Small Ligature Oe

Alt + 0158 / Alt + 0382

ž

Latin Small Letter Z With Caron

Alt + 0159 / Alt + 0376

Ÿ

Latin Capital Letter With Diaeresis

Alt + 0192

À

Latin Capital Letter A With Grave

Alt + 0193

Á

Latin Capital Letter A With Acute

Alt + 0194

Â

Latin Capital Letter A With Circumflex

Alt + 0195

Ã

Latin Capital Letter A With Tilde

Alt + 0200

È

Latin Capital Letter E With Grave

Alt + 0202

Ê

Latin Capital Letter E With Circumflex

Alt + 0203

Ë

Latin Capital Letter E With Diaeresis

Alt + 0204

Ì

Latin Capital Letter I With Grave

Alt + 0205

Í

Latin Capital Letter I With Acute

Alt + 0206

Î

Latin Capital Letter I With Circumflex

Alt + 0207

Ï

Latin Capital Letter I With Diaeresis

Alt + 0208

Ð

Latin Capital Letter Eth

Alt + 0210

Ò

Latin Capital Letter O With Grave

Alt + 0211

Ó

Latin Capital Letter O With Acute

Alt + 0212

Ô

Latin Capital Letter O With Circumflex

Alt + 0213

Õ

Latin Capital Letter O With Tilde

Alt + 0216

Ø

Latin Capital Letter O With Stroke

Alt + 0217

Ù

Latin Capital Letter U With Grave

Alt + 0218

Ú

Latin Capital Letter U With Acute

Alt + 0219

Û

Latin Capital Letter U With Circumflex

Alt + 0221

Ý

Latin Capital Letter Y With Acute

Alt + 0222

Þ

Latin Capital Letter Thorn

Alt + 0227

ã

Latin Small Letter A With Tilde

Alt + 0240

ð

Latin Small Letter Eth

Alt + 0245

õ

Latin Small Letter O With Tilde

Alt + 0248

ø

Latin Small Letter O With Slash

Alt + 0253

ý

Latin Small Letter Y With Acute

Alt + 0254

þ

Latin Small Letter Thorn

Alt + 0256

Ā

Latin Capital Letter A With Macron

Alt + 0257

ā

Latin Small Letter A With Macron

Alt + 0258

Ă

Latin Capital Letter A With Caron

Alt + 0259

ă

Latin Small Letter A With Caron

Alt + 0260

Ą

Latin Capital Letter A With Ogonek

Alt + 0261

ą

Latin Small Letter A With Ogonek

Alt + 0262

Ć

Latin Capital Letter C With Acute

Alt + 0263

ć

Latin Small Letter C With Acute

Alt + 0264

Ĉ

Latin Capital Letter C With Circumflex

Alt + 0265

ĉ

Latin Small Letter C With Circumflex

Alt + 0266

Ċ

Latin Capital Letter C With Dot Above

Alt + 0267

ċ

Latin Small Letter C With Dot Above

Alt + 0268

Č

Latin Capital Letter C With Caron

Alt + 0269

č

Latin Small Letter C With Caron

Alt + 0270

Ď

Latin Capital Letter D With Caron

Alt + 0271

ď

Latin Small Letter D With Caron

Alt + 0272

Đ

Latin Capital Letter D With Stroke

Alt + 0273

đ

Latin Small Letter D With Stroke

Alt + 0274

Ē

Latin Capital Letter E With Stroke

Alt + 0275

ē

Latin Small Letter E With Stroke

Alt + 0276

Ĕ

Latin Capital Letter E With Breve

Alt + 0277

ĕ

Latin Small Letter E With Breve

Alt + 0278

Ė

Latin Capital Letter E With Dot Above

Alt + 0279

ė

Latin Small Letter E With Dot Above

Alt + 0280

Ę

Latin Capital Letter E With Ogonek

Alt + 0281

ę

Latin Small Letter E With Ogonek

Alt + 0282

Ě

Latin Capital Letter E With Breve

Alt + 0283

ě

Latin Small Letter E With Breve

Alt + 0284

Ĝ

Latin Capital Letter G With Circumflex

Alt + 0285

ĝ

Latin Small Letter G With Circumflex

Alt + 0286

Ğ

Latin Capital Letter G With Breve

Alt + 0287

ğ

Latin Small Letter G With Breve

Alt + 0288

Ġ

Latin Capital Letter G With Dot Above

Alt + 0289

ġ

Latin Small Letter G With Dot Above

Alt + 0290

Ģ

Latin Capital Letter G With Cedilla

Alt + 0291

ģ

Latin Small Letter G With Cedilla

Alt + 0292

Ĥ

Latin Capital Letter H With Circumflex

Alt + 0293

ĥ

Latin Small Letter H With Circumflex

Alt + 0294

Ħ

Latin Capital Letter H With Stroke

Alt + 0295

ħ

Latin Small Letter H With Stroke

Alt + 0296

Ĩ

Latin Capital Letter I With Tilde

Alt + 0297

ĩ

Latin Small Letter I With Tilde

Alt + 0298

Ī

Latin Capital Letter I With Macron

Alt + 0299

ī

Latin Small Letter I With Macron

Alt + 0300

Ĭ

Latin Capital Letter I With Breve

Alt + 0301

ĭ

Latin Small Letter I With Breve

Alt + 0302

Į

Latin Capital Letter I With Ogonek

Alt + 0303

į

Latin Small Letter I With Ogonek

Alt + 0304

İ

Latin Capital Letter I With Dot Above

Alt + 0305

ı

Latin Small Letter Dotless I

Alt + 0306

IJ

Latin Capital Ligature Ij

Alt + 0307

ij

Latin Small Ligature Ij

Alt + 0308

Ĵ

Latin Capital Letter J With Circumflex

Alt + 0309

ĵ

Latin Small Letter J With Circumflex

Alt + 0310

Ķ

Latin Capital Letter K With Cedilla

Alt + 0311

ķ

Latin Small Letter K With Cedilla

Alt + 0312

ĸ

Latin Small Letter Kra

Alt + 0313

Ĺ

Latin Capital Letter L With Acute

Alt + 0314

ĺ

Latin Small Letter L With Acute

Alt + 0315

Ļ

Latin Capital Letter L With Cedilla

Alt + 0316

ļ

Latin Small Letter L With Cedilla

Alt + 0317

Ľ

Latin Capital Letter L With Caron

Alt + 0318

ľ

Latin Small Letter L With Caron

Alt + 0319

Ŀ

Latin Capital Letter L With Middle Dot

Alt + 0320

ŀ

Latin Small Letter L With Middle Dot

Alt + 0321

Ł

Latin Capital Letter L With Stroke

Alt + 0322

ł

Latin Small Letter L With Stroke

Alt + 0323

Ń

Latin Capital Letter N With Acute

Alt + 0324

ń

Latin Small Letter N With Acute

Alt + 0325

Ņ

Latin Capital Letter N With Cedilla

Alt + 0326

ņ

Latin Small Letter N With Cedilla

Alt + 0327

Ň

Latin Capital Letter N With Caron

Alt + 0328

ň

Latin Small Letter N With Caron

Alt + 0329

ʼn

Latin Small Letter N Preceded by an Apostrophe

Alt + 0330

Ŋ

Latin Capital Letter Eng

Alt + 0331

ŋ

Latin Small Letter Eng

Alt + 0332

Ō

Latin Capital Letter O With Macron

Alt + 0333

ō

Latin Small Letter O With Macron

Alt + 0334

Ŏ

Latin Capital Letter O With Breve

Alt + 0335

ŏ

Latin Small Letter O With Breve

Alt + 0336

Ő

Latin Capital Letter O With Double Acute

Alt + 0337

ő

Latin Small Letter O With Double Acute

Alt + 0340

Ŕ

Latin Capital Letter R With Acute

Alt + 0341

ŕ

Latin Small Letter R With Acute

Alt + 0342

Ŗ

Latin Capital Letter R With Cedilla

Alt + 0343

ŗ

Latin Small Letter R With Cedilla

Alt + 0344

Ř

Latin Capital Letter R With Caron

Alt + 0345

ř

Latin Small Letter R With Caron

Alt + 0346

Ś

Latin Capital Letter S With Acute

Alt + 0347

ś

Latin Small Letter S With Acute

Alt + 0348

Ŝ

Latin Capital Letter S With Circumflex

Alt + 0349

ŝ

Latin Small Letter S With Circumflex

Alt + 0350

Ş

Latin Capital Letter S With Cedilla

Alt + 0351

ş

Latin Small Letter S With Cedilla

Alt + 0354

Ţ

Latin Capital Letter T With Cedilla

Alt + 0355

ţ

Latin Small Letter T With Cedilla

Alt + 0356

Ť

Latin Capital Letter T With Caron

Alt + 0357

ť

Latin Small Letter T With Caron

Alt + 0358

Ŧ

Latin Capital Letter T With Stroke

Alt + 0359

ŧ

Latin Small Letter T With Stroke

Alt + 0360

Ũ

Latin Capital Letter U With Tilde

Alt + 0361

ũ

Latin Small Letter U With Tilde

Alt + 0362

Ū

Latin Capital Letter U With Macron

Alt + 0363

ū

Latin Small Letter U With Macron

Alt + 0364

Ŭ

Latin Capital Letter U With Breve

Alt + 0365

ŭ

Latin Small Letter U With Breve

Alt + 0366

Ů

Latin Capital Letter U With Ring Above

Alt + 0367

ů

Latin Small Letter U With Ring Above

Alt + 0368

Ű

Latin Capital Letter With Double Acute

Alt + 0369

ű

Latin Small Letter U With Double Acute

Alt + 0370

Ų

Latin Capital Letter U With Ogonek

Alt + 0371

ų

Latin Small Letter U With Ogonek

Alt + 0372

Ŵ

Latin Capital Letter W With Circumflex

Alt + 0373

ŵ

Latin Small Letter W With Circumflex

Alt + 0374

Ŷ

Latin Capital Letter Y With Circumflex

Alt + 0375

ŷ

Latin Small Letter Y With Circumflex

Alt + 0377

Ź

Latin Capital Letter Z With Acute

Alt + 0378

ź

Latin Small Letter Z With Acute

Alt + 0379

Ż

Latin Capital Letter Z With Dot Above

Alt + 0380

ż

Latin Small Letter Z With Dot Above

Logic Signs

Alt + 169

Reversed Not Sign

Alt + 170 / Alt + 0172

¬

Not Sign

Greek Characters

Alt + 224

α

Greek Small Letter Alpha

Alt + 225 / Alt + 0223

ß

Greek Small Letter Beta

Alt + 226

Γ

Greek Capital Letter Gamma

Alt + 227

π

Greek Small Letter Pi

Alt + 228

Σ

Greek Capital Letter Sigma

Alt + 229

σ

Greek Small Letter Sigma

Alt + 230 / Alt + 0181

µ

Greek Small Letter Mu

Alt + 231

τ

Greek Small Letter Tau

Alt + 232

Φ

Greek Capital Letter Phi

Alt + 233

Θ

Greek Capital Letter Theta

Alt + 234

Ω

Greek Capital Letter Omega

Alt + 235

δ

Greek Small Letter Delta

Alt + 237

φ

Greek Small Letter Phi

Alt + 238

ε

Greek Small Letter Epsilon

4 Video Editing Features I Wish the iPhone Photos App Had (and How to Get Them Now)

Key Takeaways

  • The iPhone’s Photos app lacks a comprehensive video editor, but there are free apps you can download that offer more features.
  • CapCut is one of the best free video editing apps for basic timeline editing, appealing to both experienced editors and beginners.
  • Other apps like Instagram, TikTok, and Video Star offer additional features like sound design and effects for videos.


While convenient, the iPhone Photos app isn’t a comprehensive video editor. Advanced video editing software exists, but it can be less accessible to the average user. Here are four features I’d love to see in future iOS updates, and where to access those features right now (for free).


1 Timeline

With videos increasingly present on social media, the ability to stitch multiple videos together is in high demand and has been simplified by many platforms. While the Photos app lets you cut within one captured video, you’re not able to connect multiple clips. I’d love to see a basic timeline editor, where you can select more than one video to achieve simple compilations.


In the meantime, CapCut is a free app that allows you to edit your videos on a straightforward timeline. I like this app because it appeals to both experienced video editors and newbies. If it’s your first edit, CapCut offers templates to get you started. If you’re a little more comfortable, you can easily create a quick compilation:

  1. On the Edit tab, tap New Project.
  2. Select which videos you’d like to use. Upon first use, CapCut will ask you for permission to access your videos. You can grant it full or limited permission.
  3. Tap Add, and you’ll be transported into a timeline, where you can trim your videos, add and edit audio, adjust speed, add transitions, and more.

CapCut seamlessly integrates with TikTok, so this is a good app to download if TikTok is the destination for your creations!


While there are some differences between the free and paid versions of CapCut, basic timeline editing is available at no cost.

2 Sound Design

Even if you’re not going for blockbuster-worthy sound design on your iPhone videos, it would be nice if there were a few basic audio functions on the Photos app. I’d love to be able to add music to a clip (hello, Apple Music integration?), or at least adjust the volume of the video’s diegetic audio.

In addition to the aforementioned CapCut, Instagram is another option for adding music to your videos on an iPhone. In the case you don’t already live on Instagram, the social media app is free to download.


Here’s how to use Instagram to add music to your videos:

  1. In the Instagram app, go to the + icon located on the bottom bar.
  2. Choose Reel from the options along the bottom, select the video(s) you would like to edit, and tap Next.
  3. Tap the music noteicon on the left-hand side and choose a song.
  4. Tap Next, and you’ll see a timeline of your synced video and audio. You can select the lower track labeled Tap to add audio if you’d like to add another song. You might do this if you want to cut from one song to a different song partway through the video.
  5. At this stage, you can make any other necessary adjustments to your video and then Share.

Although Instagram offers an incredibly easy way to add music to your video, you have to publish it on Instagram to share it. Instagram does let you download an edited video without publishing, but only without sound.


3 Visual Effects

Although Apple touts its capability of removing backgrounds from images on the iPhone, that feature doesn’t exist for videos. I get it, because motion introduces a whole set of challenges. But I have to wonder if Apple could leverage the current technology it uses for photos and apply it at least to videos with solid backgrounds.

The good news is that, once again, CapCut has a feature to remove backgrounds that is accessible to anyone, even the non-visual effects pros.


If you’re looking for more advanced visual effects, you may have to pay for CapCut Pro. Or, you can explore another app called Video Star. When comparing CapCut with Video Star, Video Star comes out on top with its keyframe editor, with which you can create unique masks for each frame of a video clip. Essentially, you could remove a clip’s background with precision akin to expensive software like After Effects.

While you can download Video Star for free, you will need a paid package or subscription to access its advanced keyframing features.

4 Text Effects

Captions can be a great asset to your videos, and they are fairly ubiquitous on social media today. Again, I feel like the technology exists here for Apple to integrate into their Photos app, but at the time of writing this, the offering is not there.

Instead, I often use TikTok to add automated text captions to videos. Although CapCut and Instagram share this capability, I find TikTok to be the least amount of effort, but it all depends on what apps you are most comfortable with.


Here’s how to add automated captions on TikTok:

  1. In the TikTok app, tap the + icon at the bottom of the screen.
  2. Tap Upload to locate the video(s) you’ve previously recorded on your iPhone.
  3. Select Captions on the right-hand side of the video.
  4. TikTok will process and present you with automated captions. You can change the language if necessary, edit the text by tapping the pen icon, or adjust the formatting by tapping the A icon.
  5. Tap Save. From here, you may download the video to your phone by tapping the Save icon on the right-hand side, or publish it on TikTok.

If I had to choose one app to use while waiting for the Photos app to step up its game, it would be CapCut for its range. Ultimately, the best app for your mobile editing needs depends on you and your most familiar UI.


Why the Microsoft Surface Pro 11 Is Better Than the M4 iPad Pro

Apple’s M4 iPad Pro packs incredible hardware for a tablet, but iPadOS and a few other factors hold it back from achieving its maximum potential. If you want a tablet that will truly replace your laptop, you’re better off going with Microsoft’s Surface Pro 11.


iPadOS Holds the M4 iPad Pro Back

Hamlin Rozario/MakeUseOf

The 13-inch iPad Pro packs cutting-edge hardware—the flagship M4 chip, up to 16GB of RAM and 2TB of storage, and an all-new Ultra Retina XDR display. However, many people, including Apple loyalists, say iPadOS holds it back from reaching its true hardware potential.

The biggest stumbling block with iPadOS for the longest time has been its inability to multitask efficiently. While iPadOS 17 introduced Stage Manager to improve the multitasking experience, it’s still not close to a true desktop multitasking experience.

iPadOS also lacks a system-wide file management utility. Sure, Apple offers the Files app for managing all your files, but it doesn’t have full access to your iPad’s file system like Finder on macOS.


Another gripe most pro users have about the iPad versus a MacBook is the inability to customize the Home Screen. While this is one of the best features of iPadOS 18 that we’re finally getting after years of waiting, it still doesn’t let you place files on the desktop like on a Mac.

Surface Pro Options Are Cheaper

Apple devices command a premium, and the added price might be a dealbreaker if you’re not invested in the Apple ecosystem. Let’s compare the prices of the M4 iPad Pro with Microsoft’s Surface Pro 11. Note that we’re only pitting the 13-inch Wi-Fi-only iPad Pro against Microsoft’s offering, as that makes for an even comparison due to the form factor.


Storage Capacity

13-Inch M4 iPad Pro with Ultra Retina XDR Display

Microsoft Surface Pro / Snapdragon X Plus with LCD Display

Microsoft Surface Pro / Snapdragon X Elite with OLED Display

256GB

8GB RAM / 9-core CPU

$1,299

16GB RAM / 10-core CPU

$999.99

512GB

8GB RAM / 9-core CPU

$1,499

16GB RAM / 10-core CPU

$1,199.99

16GB RAM / 12-core CPU

$1,499.99

1TB

16GB RAM / 10-core CPU

$1,899

16GB RAM / 12-core CPU

$1,699.99

32GB RAM / 12-core CPU

$2,099.99

2TB

16GB RAM / 10-core CPU

$2,299

If you look at these prices, you can see that Apple’s offerings with comparable storage space are significantly more expensive. For example, you have to pay a $300 premium if you need 256GB of storage, while the 1TB 13-inch iPad Pro is $200 more expensive than the comparable Surface Pro 11 tablet.

If you want the cellular variant of the iPad Pro, you’ll need to spend an additional $200 on top of the price tags we listed in the table above. Microsoft’s Surface Pro 11, on the other hand, doesn’t have LTE support.


Apple’s M4 chip may be more powerful than Qualcomm’s Snapdragon X Elite, but does that really justify the price difference? Well, not unless you need the absolute performance of the M4 chip. And even if that’s the case, you’re likely better off getting a MacBook Pro with the M3 Pro or M3 Max chip.

Users who need a tablet for professional use will likely appreciate extra ports. The M4 iPad Pro has a single USB-C port, but the Surface Pro 11 has two. This means you can recharge your tablet while attaching another USB-C peripheral to it, unlike the former, where you need a dongle to do so.


You will get an extra port if you purchase the Magic Keyboard for the iPad Pro, but that’s an additional expense. And if you don’t want to use Apple’s expensive keyboard case, you need a hub to use multiple USB devices with your iPad.

Official Accessories Are More Affordable

Microsoft Surface Pro 11 keyboard accessory and Slim Pen
Microsoft / YouTube

As mentioned earlier, the Magic Keyboard for the iPad Pro will give you an extra USB-C port. However, official Apple accessories are expensive. For example, the Magic Keyboard for iPad Pro, which requires a physical connection to your tablet, costs $329. On the other hand, Microsoft’s Surface Pro Keyboard only costs $139.99.


If you plan to use your tablet with a stylus, you can get the Surface Pro Keyboard with pen storage, which costs $179.99. This might be a tad more expensive, but it will at least securely store the Surface Slim Pen. Microsoft also offers the Surface Pro Flex Keyboard for $349.99. This is about $20 more expensive than Apple’s offering, but it connects wirelessly to your tablet.

Apple has the advantage when it comes to stylus options, though. You can get the Apple Pencil Pro for $129, while the Apple Pencil (USB-C) costs $50 less at just $79. Microsoft has only one option: the Surface Slim Pen for $129.99. It’s not only pricier but also doesn’t include a charger.

The Apple Pencil Pro doesn’t need a separate charger as the M4 iPad Pro charges it wirelessly, while you can charge the Apple Pencil (USB-C) with any USB-C cable. Feel free to check out our Apple Pencil comparison if you’re unsure which stylus to get for your M4 iPad Pro.


If you’re not getting the Surface Pro Flex Keyboard, you need to purchase the Surface Slim Pen Charger for $34.99. However, if you buy any Surface Pro Keyboard and the Surface Slim Pen as a combo, you automatically get a discount—something that Apple rarely offers.

The Surface Pro Keyboard with Slim Pen costs $279.99, giving you a $30 discount compared to buying these items separately. However, you still need to get the Surface Slim Pen Charger, thus negating the discount that you get.

The Surface Pro Flex Keyboard with Slim Pen costs $449.98 together. This gives you the same $30 discount, but since the Surface Pro Flex Keyboard can charge the Surface Slim Pen, you don’t need to purchase a charger separately.


Nevertheless, both official Apple and Microsoft accessories are pretty expensive. That’s why buying cheaper alternatives to the Magic Keyboard makes more sense.

It’s the Better Choice if You’re a Windows User

Unless you’re deeply invested in the Apple ecosystem, the Microsoft Surface Pro 11 is the better device in terms of flexibility. The latter’s single major advantage is its use of Windows 11, allowing you to use it as a proper laptop replacement with all the multitasking capabilities you expect from a computer.

Still, we’re not discounting the M4 iPad Pro’s astounding performance. If Apple decides to make iPadOS closer in performance to macOS than iOS, it would hands down beat Microsoft’s Surface Pro in every department except price.

Which Smartwatch Is the Best for Your Kids?

Key Takeaways

  • Apple Watch SE is the best smartwatch for kids, striking the perfect balance between price and features.
  • Google Pixel Watch 2 is ideal for Android users wanting a kid-friendly experience with Fitbit integration.
  • Fitbit Ace offers a kid-friendly design with features like parental control, location tracking, and fun fitness games.


A smartwatch is an excellent option for a younger child who’s not yet ready for a full-fledged smartphone. It provides a number of advantages for both parents and children. Below, we’ll highlight some of the best smartwatches for children.


The Best Apple Watch for Kids

Overall, the best smartwatch for kids is the Apple Watch SE (2nd generation). It strikes the perfect balance between cost and essential features, making it a top choice for children.

The second-generation Apple Watch SE is available in both a 40mm and 44mm case. The smaller 40mm watch is perfect for smaller wrists, while the 44mm option features a larger screen and takes up a bit more room on a wrist.


You can choose from a wide variety of aluminum case colors and bands. In addition to Apple’s official band options, you can find a host of cheaper options on Amazon and other third-party retailers.

Because it’s cheap, there are a few tradeoffs compared to other Apple Watch models. The Apple Watch SE lacks ECG functionality and doesn’t feature an always-on display. But those shouldn’t be on top of the list for kids. It can still track heart rate and record important fitness metrics, though.

You can choose between two variants of the Apple Watch SE. The GPS-only Apple Watch SE requires a paired iPhone for texting and making phone calls. The GPS + Cellular Apple Watch SE is a much better choice for kids.


With the cellular model, you can use the Family Setup feature to let your child use their Apple Watch without an iPhone. They can make phone calls, send messages, and share their location with you using Wi-Fi or a cellular network. Your child will have a separate phone number, but you’ll have to pay an additional monthly fee—usually around $20—on your carrier bill.

After purchasing the watch, set it up with your iPhone and then choose your child. During that process, you can enable Schooltime to limit some watchOS features during school hours.

The Best Wear OS Watch for Kids

If you’re an Android user looking to provide a Wear OS smartwatch for your child, the Google Pixel Watch 2 is the best choice. There is a lot to like about the Pixel Watch 2, most notably Fitbit integration, which can help better analyze fitness metrics.


Unlike the Apple Watch, the Pixel Watch 2 is only available in a single case size, 41mm. It’s small and unobtrusive, and it will work well on most children’s wrists. You can select from a number of case color and band options.

You can also choose between Wi-Fi and LTE variants. The cellular version is the best bet if you want to give your child only the smartwatch.

That said, setting up the Pixel Watch 2 as a standalone device takes more work than the Apple Watch SE. There’s no dedicated option to allow a child to use the smartwatch for taking calls, text messaging, and sharing location, without a paired Android device.

One workaround is to purchase an inexpensive Android device and pair that with the watch. The Pixel Watch 2 will work with most phones running Android 9.0 or later.


The Best Fitbit for Kids

Another great option, compatible with both Android and iOS, is the Fitbit Ace LTE. The smartwatch is designed specifically for kids aged seven and older. The wearable device combines a Fitbit and smartwatch into a kid-friendly combination.

There are two band/case color options to choose from. And since it’s designed for younger kids, it comes with a protective bumper case.

Parents can use the companion Fitbit Ace app to contact their children and see their location at all times. You can also approve up to 20 other people your kids can communicate with via calls, text, and voice messages.

To make the device fun for kids, the Fitbit Ace has an animated eejie that becomes happier as your child moves and hits their fitness goals. It also offers several other movement-based games to keep your kids engaged.


To use the watch, you have to pay a $9.99 monthly fee for the Fitbit Ace Pass, which provides unlimited calling, messaging, and location sharing along with all the available games. It’s not tied to a specific carrier.

A smartwatch is a big step for both parents and children. Any of these wearables can provide a great first taste of mobile technology without some of the hassle and negative aspects of using a smartphone.

How to Control Which Apps Can Track Your Location on Android

Apps on your Android phone require location access to perform various functions, but that doesn’t mean you have to sacrifice your privacy. Android offers several options to control which apps can track your whereabouts. We’ll discuss them below.


How to See Which Apps Have Location Permissions

Granting permissions to Android apps is straightforward, and you might sometimes do it quickly when using the app for the first time. Thankfully, Android shows which apps can access your location data in one central menu within the Settings app. Here’s how to access it:

  1. Open the Settings app on your phone.
  2. Scroll down to tap on Location.
  3. Select App location permissions to view a list of apps categorized based on their location access. Under the “Not allowed” section, you will see a list of apps that don’t have access to your location.


How to Change Location Permissions for Android Apps

You can easily adjust the location settings for your apps from the same App location permissions menu. Simply select the app for which you want to change location permissions and choose from one of the following options: Allow all the time, Allow only while using the app, Ask every time, or Don’t allow.

Note that the available options in the location permission menu may vary for different apps. When granting an app location permission, you can also enable the Use precise location toggle if necessary. This setting helps apps like Uber and Google Maps detect your location as accurately as possible.

How to Check Which Apps Have Recently Requested Your Location

In addition to seeing which apps have location permissions, Android also keeps a record of when an app accesses your location, along with other important smartphone permissions. You’ll need to use Android’s Privacy Dashboard feature to view this. Follow these steps:


  1. Open the Settings app and head to Security & privacy.
  2. Tap Privacy and select Privacy Dashboard from the dropdown menu.
  3. On the next page, choose Location to go to the Location usage page.

On the next page, you’ll see a 24-hour timeline showing which apps recently accessed your location data with the exact times they did. By default, Android does not display location usage for system apps and services. To include them in the timeline, tap the three-dot menu in the top-right corner and select Show system.

You can also quickly see which apps recently accessed your location data by heading to Settings > Location.


If you can’t find the Privacy Dashboard feature on your Android device, you can use a dedicated app to manage Android app permissions, which offers a similar experience.

Managing location permissions on Android doesn’t have to be so complicated. Following the steps above should help you limit the location access for third-party apps and regain control of your privacy.

4 Ways to Send Photos and Videos From iPhone to Android Without Losing Quality

Key Takeaways

  • Sending media via email is one of the best options if you don’t want to compromise media quality, but attachment size is limited.
  • Alternatively, you can use cloud storage services and media file transfer apps to send large files without quality loss.
  • You can also use instant messaging apps, but you need to be careful how you do it to avoid compression.


Platforms like WhatsApp and Instagram are convenient for sharing images and videos from iPhone to Android. However, if you want to share high-quality media without losing quality, you should be wary of image compression. So, use these methods instead.


One straightforward method to send photos and short videos from iPhone to Android is by using email. However, the only drawback to this method is that there are limitations on file size for attachments. Gmail, the most popular email service, allows a maximum attachment size of 25MB.

Considering this limitation, you won’t be able to send any long, high-quality videos via email. However, this option still works great for sharing small files and is one of the most effortless methods of sharing photos online.

If you use Gmail, you can send media by following these steps:


  1. Tap Compose, then enter the recipient’s email address in the To field. Optionally, enter an appropriate subject.
  2. Tap the File attachment icon in the top-right corner.
  3. Tap All adjacent to the Photos option.
  4. Select the item(s) you’d like to share.
  5. Hit Send to share.

If the media files you want to share are too large to attach, consider using a cloud storage service to upload the files and then share the download link in the email instead. We’ll discuss this option in detail below.

2. Use Cloud Storage Services

One of the most convenient and efficient ways to send videos from an iPhone to an Android phone without quality loss is to utilize one of the best cloud storage services. They preserve the original quality, and the recipient can download the file(s) at their convenience. Furthermore, utilizing cloud storage ensures you have a backup copy in case the original gets deleted.


Several free cloud storage platforms like Google Drive, Dropbox, and OneDrive allow you to share photos and videos through a shareable link that you can send to the recipient via instant messaging apps or email. Doing so allows you to send large files as email attachments.

The process of creating a shareable link is pretty straightforward, no matter which cloud service you’re using. Typically, you’ll need to upload your desired photos and videos to the cloud and then access the platform’s sharing settings to obtain the link. For instance, you can use the Partner Sharing feature in Google Photos to share media with Android users.

3. Send It as a ZIP File

If you’re dealing with multiple videos or larger files, compressing them into a ZIP format is a practical option. You can create ZIP files on your iPhone directly in the Files app or use third-party file compression apps.


Once you’ve compressed the media into a ZIP file, you can send it to the Android user via email or any messaging app. This method preserves the quality of the media and makes it easier and faster to transfer multiple files in a single package.

To send ZIP files via Gmail, follow these steps:

  1. Tap Compose, enter the recipient’s email address in the To field, and, optionally, add an appropriate subject.
  2. Tap the File attachment icon in the top right.
  3. Select the blank folder icon under Attachments.
  4. Select the ZIP file you’d like to share and tap Open in the top right to attach it to your email draft.
  5. Tap the Send icon to share the ZIP file.


Several third-party apps are designed specifically for seamless cross-platform media sharing. Apps like Send Anywhere, SHAREit, Zapya, and Xender allow you to transfer photos and videos from your iPhone to Android devices without compromising quality.

Send Anywhere, for example, allows you to send files through various methods, such as sharing a 6-digit key, creating a shareable link, or sending directly to nearby devices. You simply need to select the files you wish to send and tap Send.

Alternatively, you can leverage apps like WeTransfer or MediaFire for large file transfers. These apps also allow you to upload files from your device to the cloud and generate a unique download link that your friend can use to retrieve them on their phone.


Various third-party apps offer different file-sharing features, but they all share the common objective of simplifying cross-platform media sharing without compromising quality.

You can also use WhatsApp and Telegram to share your media files. However, you’ll need to share your media as a document on WhatsApp and as a file on Telegram to prevent them from compressing your files. On WhatsApp for iPhone, you can achieve this by doing the following:

  1. Tap the Plus icon on the left of the text input bar.
  2. From the options, select Document.
  3. Tap Choose from files (if you have the media saved in the Files app). Otherwise, select Choose from photo or video to pick from the Photos app.
  4. Select the file or files you’d like to send and tap Send.


Transferring photos and videos from an iPhone to an Android phone without sacrificing quality is achievable through various methods. Whether you choose cloud storage, ZIP file compression, instant messaging, or third-party apps, each option provides a reliable way to preserve the original media quality.

That said, emails may be less reliable for sharing videos due to file size restrictions, but it’s still the best option for sharing photos online without too much effort.

How I Use Google’s Custom Language Model to Supercharge My Studies

Key Takeaways

  • Google’s NotebookLM uses personal files to generate summaries for students’ research, providing source links for efficient sourcing.
  • NotebookLM synthesizes notes from various sources, helping students streamline research and discover overlaps or discrepancies.
  • Despite limitations like sourcing restrictions and potential inaccuracies, NotebookLM is a helpful research and note-taking tool for scholars.


Google has a little-known AI tool called NotebookLM that’s perfect for students. It’s a free tool that uses Google Gemini to power its processing and output. NotebookLM can be a bit complicated to use effectively, but you can use it to supercharge your studies and research.


What Is NotebookLM?

NotebookLM is a self-contained large language model (LLM) that uses the notes and documents you provide as sources. When you upload files—PDFs, Google Drive documents, web URLs, and more—it creates a summary of each source, which you can read by clicking on the source in the left menu.


Google states that it doesn’t use the information you submit to help train Gemini, so it has a layer of privacy many other LLMs lack. But you should still avoid uploading any documents with personally sensitive information.

Once you’ve uploaded documents, you can get NotebookLM to generate notes based on them by writing prompts. Based on your uploads, it also suggests questions you might ask to generate notes. You can also include or exclude specific sources when writing prompts, so you can ignore less relevant information.

Example exclusion of sources in NotebookLM

Providing your own sources helps to ensure quality output, considering the issue of AI likely running out of high-quality training data.


Find Sources of Information

The standout feature of NotebookLM is that it provides links to the exact point in a source its information is from. If you upload 10 documents and ask a question, NotebookLM will add a citations section which lists where it pulled its information from. For example, using several articles as sources, I can see which article provides which piece of information.

Example source check in NotebookLM

Because NotebookLM states the sources it pulled information from, I can then refer to the source texts when adding citations to my papers. This makes it much quicker to use sources when you write a paper, since you don’t have to read and re-read them all. It can also help you find and skim quality sources, and then ask NotebookLM questions about them.


Use NotebookLM to Synthesize Notes and Research

When you’re researching and writing papers, one of the most important yet tedious steps is to parse the information present in all your sources. Thanks to NotebookLM’s creation of source summaries, it’s easy to remember what information comes from which source. Because NotebookLM cites its sources when it creates notes, you can spot any overlaps and even check which sources cover a certain topic.

Example asking NotebookLM for information attribution

NotebookLM can effectively connect the dots between the sources you provide. NotebookLM is extremely useful to see where your sources agree or disagree. By synthesizing many sources at a time, you can use some to fill in the gaps that others may have. This helps provide you with a more complete understanding of the topic.


Most evidently, NotebookLM automatically synthesizes the contents of your notebook into a Notebook Guide, which discusses the overarching topics of your sources.

Example Notebook Guide in NotebookLM

You Don’t Need to Format Notes Anymore

Author Tiago Forte, a proponent of NotebookLM, states in his book Building a Second Brain to “…think of yourself not just as a taker of notes, but as a giver of notes.” To turn quickly-taken notes into effective study materials, you’ll typically need to format them in a more readable form. NotebookLM’s automatic formatting means that simply jotting down information can make you a “giver of notes.”


NotebookLM can parse, synthesize, and cite your sources, then format the resulting notes. You can focus your note-taking purely on gathering information, then delegate formatting and synthesizing to Google. This is especially helpful thanks to the ability to exclude sources when creating notes, so you can create topic outlines using just a few sources at a time.

Example formatted output in NotebookLM

In some cases, you might be able to skip taking notes yourself entirely. For example, instead of taking notes on lecture slides, you might instead upload those slides and use NotebookLM to generate notes. You might also have to watch a pre-recorded video lecture for a class, and instead of taking notes, you can download the transcript and add it to the notebook for that class on NotebookLM.


Taking notes, formatting them, and synthesizing the information yourself can help you learn and remember a topic, but NotebookLM can speed up the process.

Limitations of NotebookLM

NotebookLM has recently evolved to expand its features, such as allowing simple URL pasting for sources. But it still has some limitations. Notebooks could initially support up to 20 sources, although the limit is now 50. Similarly, each source in a notebook can only have up to 500,000 words, which is a limit most sources will never reach. For context, the entire Lord of the Rings trilogy has around 481,000 words in it.

Sometimes, when I’ve uploaded sources, NotebookLM gives up, even when the source is nowhere near the word limit. This was most apparent for me when PDFs with more complex formatting like images, charts, and other non-text elements. It also cannot read copy-protected PDFs.


Moreover, NotebookLM cannot scan a PDF for text, so any PDFs uploaded must have copyable text. If you lack such text, Adobe Acrobat can scan a PDF for text and make it selectable, though this process is error-prone.

Unscanned PDF showing Source Is Empty in NotebookLM

Last, the biggest limitation of NotebookLM is shared by all AI language models: inaccuracy. At times, the citations it provides can be nonsensical or unrelated to the information in the note. Similarly, the answers it provides can have errors or otherwise come to incorrect conclusions when synthesizing articles. Students hoping to use AI to empower their education may wish to add other study tools to their arsenal, too.


NotebookLM Doesn’t Replace Your Effort

As useful as NotebookLM is at accelerating research and synthesizing your notes, you still need to do research, write notes, and discern the outputs you receive. I treat NotebookLM as a useful tool to assist in my graduate schoolwork and not a replacement.

While it connects the dots between your sources, you still need to provide NotebookLM with good dots, and you shouldn’t let AI get in the way of your learning.

Why I’m Worried About the Rise of Generative AI in Games

Key Takeaways

  • Generative AI in gaming can improve graphics, audio, and procedural generation, but may lead to significant job losses in the industry.
  • Automated creativity from AI may lack the human touch found in unique, diverse games.
  • Open-ended content generated by AI could be offensive or inappropriate, raising concerns about auditing and accountability.


Artificial intelligence has made a big impact on most creative fields in recent years. While the possibilities are vast, we should be careful to ensure all these rapid changes are beneficial.


What Is Generative AI and How Can Games Use It?

Generative AI is a branch of artificial intelligence that deals with the programmatic generation of content like images, music, and more.

When it comes to video gaming, the sky’s the limit for generative AI. Just some of the areas that this new technology may touch on include:

  • Graphics, including background scenes, 3d textures, and character sprites or models.
  • Audio assets from sound effects to complete music scores.
  • Textual artifacts like narration, speech dialogue, and descriptive prose.
  • Maps and procedural generation.

Why I Think Generative AI Would Be Bad for Gaming

Generative AI is a fun field with some brilliant people working in it. But I fear there are enough downsides for gaming that we should be wary of.


Industry Job Losses

Whatever ethical or legal dilemmas surround AI, most people agree on one outcome: jobs in certain roles will be lost. Maybe current artists have to retrain, and maybe new disciplines arise, but the goal of generative AI is to make some tasks easier and faster, and job losses are an inevitability.

Victor Moussa/Shutterstock

Certain jobs are bound to rise up, then fall out of fashion as the progress of technology marches on. But losses at scale, in a short period, will impact individuals and the wider industry. 2023 and 2024 have been terrible years for the gaming industry, with at least 20,000 job losses so far.


Automation Devalues Creativity

Although artists can benefit from generative AI, it’s pretty clear that we lose something if we remove the human element from artistic productions. Could an AI ever replicate the creativity inherent in bizarre games like Baba Is You, the humor and satire in a game like The Stanley Parable, or the mind-bending psychedelic twists of Super Mario Wonder?

Much of the visual AI art we’ve seen so far has been of a similar style, an unreal, uncanny valley of AI slop. As someone who grew up observing huge progress in graphical power, I’ve noticed how much more varied gaming has become as an art form. AI threatens to turn the dial back.

Open-Ended Content May Be Offensive or Unsuitable for the Audience

shutterstock_2181012883


How can you audit your content when you don’t know quite what it may be at launch? If your generative AI has too much agency, it may start using words you don’t like or creating imagery that is inappropriate for your audience. AI can be biased, so it may end up offending the audience or creating games that are lacking in diversity.

There have been many cases of AI going rogue, using rude language or bigoted words. Some of the issues surrounding the safety of self-driving cars apply here; if an AI creates undesirable content, who exactly is to blame?

Is AI Just Another Bandwagon?

While gaming at its best can be innovative, it has quite a conservative tendency to latch onto a singular idea. We’ve suffered microtransactions, fallen victim to scam NFT games, and heard countless claims about crypto in gaming that have failed to deliver.

Each of these much-hyped technologies has seen companies falling over themselves to be involved, often without asking why they should. I’m concerned that companies aren’t listening to what gamers actually want and, instead, are simply rushing to introduce AI for the sake of it.


Are There Any Upsides?

I can see some valid uses for AI in gaming. Such cases would provide a clear tangible benefit and wouldn’t threaten existing jobs or creativity.

For example, an AI could act as a translator for player names, generating audio dialogue dynamically. This would be impractical any other way than programmatically, and would probably require some form of AI to pronounce any name realistically.

This is a small niche, though. There are enough concerns that I think we should go lightly, at a slower pace than I fear we already are.

These Were the Biggest Drawbacks

After using a MacBook Air as my go-to travel computer for a few years, I switched to an M4 iPad Pro in 2024. I thought the transition would be reasonably smooth, but unfortunately, I had to make several sacrifices. Let’s discuss them one by one.


1 Magic Keyboard’s Limited Viewing Angles

Hamlin Rozario/MakeUseof

The first thing I noticed after I attached my iPad Pro to the expensive Apple Magic Keyboard was that the viewing angles were pretty limited. I often use my laptop while lying on the couch, but the flexibility of a MacBook’s lid was missing here.

The Magic Keyboard offers a good viewing angle when you have it on your lap or place it on a desk. However, if you tend to use your laptop elsewhere, like on your bed or couch, know that you can’t push the iPad further back than what you see in the picture above.

2 Inferior Battery Life

The iPad Pro offers decent battery life for a tablet—Apple rates it for up to 10 hours of web browsing. However, that’s a lot less than what my M1 MacBook Air offers—up to 10 hours of browsing or up to 18 hours of video playback.


Ever since Apple transitioned to its in-house Apple silicon chips, MacBooks have offered amazing battery life across the board. Unfortunately, Apple decided to make their iPad Pros thinner in 2024 rather than putting a bigger battery to narrow the gap.

3 Stage Manager Is a Downgrade

Stage Manager on an iPad Pro attached to a Magic Keyboard
Hamlin Rozario/MakeUseOf

Stage Manager is Apple’s half-baked attempt at improving the multitasking experience on iPadOS. Sure, it’s more advanced than Split View and Slide Over for running multiple apps simultaneously on an iPad.

However, it simply cannot match the native app window management in macOS. Stage Manager is also available on macOS, but it immediately felt like a downgrade when I started using it.


For starters, you can’t resize windows and place them according to your liking; you’re restricted to Apple’s preset layouts and positions. iPadOS also limits you to four apps at a time if you don’t have an external display connected to your iPad.

4 Managing Files Was Cumbersome

Finder makes it easy to manage all the files on your Mac. Unfortunately, you’re stuck with Apple’s Files app in iPadOS, which is pretty limiting. Because, unlike Finder on Mac, the Files app doesn’t have full access to your iPad’s file system.

Additionally, the Files app doesn’t allow me to choose a desired app whenever I try to open a natively unsupported file; there’s no “Open With” option. I also can’t sort files by type or batch rename them to be able to find them easily.

All in all, consider Files an app for storing all your files; it’s not a system-wide file management utility like Finder.


5 Lack of Desktop-Class Apps

An iPad Pro running Photoshop next to a MacBook running Final Cut Pro on a desk
Hamlin Rozario/MakeUseOf

Apple tries hard to push the iPad as a laptop replacement, but at the end of the day, iPadOS is still a supersized mobile operating system. We need actual desktop-class apps before we can solely rely on an iPad as our primary computing device.

In 2023, Apple introduced Final Cut Pro and Logic Pro for iPads. But from my experience using Final Cut Pro on both an iPad and a Mac, I can confidently say the iPad version is essentially a stripped-down product.

For example, if you’re a professional, you’ll have a hard time color grading with Final Cut Pro on an iPad. It also lacks some features that are available on the Mac counterpart, like Object Tracker, Speed Ramping, Optical Flow, and Scrolling Timeline.


Likewise, I paid for an Adobe Photography Plan hoping I can take advantage of Lightroom and Photoshop on my iPad. While Lightroom for iPad is nearly identical to its desktop app, Photoshop is a cut-down version, lacking vector support, Pen tool, and many filters and effects.

6 No Extensions for Third-Party Browsers

Google Chrome running on an iPad Pro attached to a Magic Keyboard
Hamlin Rozario/MakeUseOf

As much as I love and enjoy using Safari on my iPhone, I prefer using Chrome on my computers, including my MacBook. One of the main reasons for that is extension support. Safari’s extension library is very limited, even on macOS.

Once I switched to an iPad, I quickly started to miss some of the best Chrome extensions I take advantage of. That’s because Chrome and other third-party browsers for iPad don’t support extensions at all; your only option is Safari if you need extensions.


More importantly, there’s no parity between the Safari extensions offered on iPadOS and macOS. For instance, the Grammarly extension functions differently than the one available for Safari on macOS. It doesn’t feel like a desktop browser extension, even though Apple calls Safari for iPad a desktop-class browser.

Now, you understand why I regret switching to an iPad as my primary computing device for travel. My iPad can’t do everything my Mac could, but that’s mainly due to iPadOS limitations rather than the hardware that powers it. At this point, I can only hope that Apple turns iPadOS into a desktop-class operating system over time.

This Spotify App Is the Easiest Way to Make Clean Playlists

Key Takeaways

  • Cleanify can clean up explicit playlists by replacing cursing with clean versions.
  • The Explicitify Playlist option adds explicit versions of clean songs if they exist on Spotify.
  • Cleanify needs access to your Spotify account, and may freeze at times, so it isn’t perfect.


As user-friendly as Spotify is, unless you keep a close eye on your liked songs, saved albums, and curated playlists, things can get out of hand quickly. Therefore, third-party Spotify tools are worth exploring. This one, called Cleanify, specializes in cleaning up explicit playlists.


What Can Cleanify Do Exactly?

Cleanify is a web app that can do three things: clean up explicit playlists, make clean playlists explicit, and delete playlists from Spotify. The last option is somewhat unnecessary, as it’s easy to delete playlists from within Spotify itself, so let’s focus on the other two options.


The first option, and the one you’re most likely to use, is “Cleanify Playlist”. This, as the name suggests, cleans up a playlist, replacing any songs that contain cursing with their clean versions (if available). The idea is to ensure a particular playlist is family-friendly, allowing you to play your previously curse-laden playlist in front of kids, whether they’re yours or other people’s.

The second option, whose name reveals its mission, is “Explicitify Playlist”. This does the exact opposite of the Cleanify option, finding explicit versions of any clean songs you have in a playlist. The use case here is less obvious, though, with the only benefit being the ability to play the version the artist intended to be consumed, with the cursing intact.

How to Use Cleanify to Clean Up Playlists

To clean up a Spotify playlist (or make one explicit) using Cleanify, first, navigate to Cleanify. Then, you’ll need to log in to your Spotify account to grant the app access to manipulate your playlists.


The Cleanify app having fetched playlists from Spotify

Cleanify will then fetch your playlists from Spotify and list them in the left-hand sidebar. You need to select one and then choose what you want to do with it, with the options “Cleanify,” “Explicitify,” and “Delete.”

The Cleanify app converting a playlist

After you have chosen your preferred option, Cleanify will do its thing, either cleaning up, making it explicit, or deleting the playlist you selected. You’ll still have some options to explore afterward, but ultimately, this is the limit of Cleanify’s abilities.


Whichever option you choose, the new playlist will be added to Spotify with either “Explicit” or “All Clean” in brackets to prevent confusion.

Things to Note When Using Cleanify

This Spotify tool is likely to be most useful for people who listen to songs that cross genres. For example, rap and R&B songs usually have two versions released: the original for mature fans and a more mainstream version that all ages can listen to. It should be noted that, even without Cleanify, Spotify lets you filter out explicit songs.

The option to Explicitify a playlist isn’t particularly useful. For most playlists, you’ll already have a mix of explicit and non-explicit songs, and this will only replace clean versions with explicit versions if it can find any. Which, in most cases, it won’t.


Granting permission for Cleanify to access Spotify

Like most third-party Spotify tools, Cleanify requires access to your Spotify account. So, be sure to heed the warning when logging into Spotify using Cleanify. And if you stop using Cleanify, be sure to revoke its access to your Spotify account.

On a couple of occasions while writing this article, Cleanify froze up for me, with the app stuck “Fetching Playlists” or “Fetching Tracks From Playlists”. This rendered the app unusable, and no amount of reloading or signing out and then back in again fixed the problem. Whatever the cause, you’ll need to wait for Cleanify to start working again before fixing any playlists.

In conclusion, Cleanify isn’t perfect, but it’s a nice little tool if and when you need to add or remove cursing from a Spotify playlist.


Here’s Why I Love It

Key Takeaways

  • Foldable phones have gotten better over the years, especially in terms of durability.
  • I find it easier to use Samsung’s foldables with one hand. And although they’re thick, they feel compact.
  • The inner folding screen not only helped me be more productive but also opened more ways to take photos, watch content, and read ebooks.


I purchased a Galaxy Z Fold 5 in February 2024, and it has been a delight to use. It helped me be more productive, and I’ve had a hard time putting it down. Here’s what it has been like to live with a foldable phone.


It’s Almost as Durable as Slab Phones

The original Galaxy Fold from 2019 wasn’t as durable as slab phones, but Samsung has come a long way since then. I’ve dropped my Z Fold 5 more than any other phone I’ve owned in recent memory. After a few months, my phone received its first scratch on the cover screen. The interior display, thankfully, is just fine.

I carry phones around without a case. I prefer how they feel this way and accept the risk. However, given its cost, this is the first phone I’ve bought insurance for. Nonetheless, the frame has been rock solid with only minor dings after many drops to a hardwood floor. The hinge still closes with a satisfying sound like it did when I first opened the phone.


I haven’t owned the phone long enough to say how well it will stand the test of time, but so far, I don’t treat it any more delicately than any other slab phone I’ve ever owned.

It Feels Smaller Despite Its Thickness

Zarif Ali / MakeUseOf

Is the Z Fold a thick phone? Sure, but that doesn’t mean it isn’t comfortable to hold or takes up too much space in my pocket. The super thin and wide shape of modern smartphones isn’t exactly comfortable in the pocket or hand. I find the Z Fold 5’s girth has been a gift. It’s nice to hold, and the thickness helps when taking photos.


The phone has a tall aspect ratio, but it’s actually shorter than most other phones. This makes it easy for me to use one-handed. The phone also has a taller aspect ratio than other foldables. Many reviewers have become tired of the Z Fold’s form factor, but I think Samsung has made some pretty smart decisions when shaping this device.

I Enjoy Reading on It

I read on my foldable all the time. While the phone’s aspect ratio isn’t great for watching videos, it’s perfect for reading ebooks, graphic novels, and magazines. The high-resolution OLED screen makes the text sharp and easy on my eyes. I love e-ink tablets, but after using the Z Fold 5, I’ve realized I don’t need it to enjoy reading ebooks.


Now, I keep a large library of ebooks and comics I want to read on my phone. They come in handy when I’m bored while traveling. It’s hard to resist the siren call of a thousand compelling books, all rendered beautifully. That’s coming from a person who ditched a smartphone for a dumbphone a few years ago.

Using a Stylus Feels Like Writing in a Notebook

A man holding a Samsung Galaxy Z Fold with an S Pen showing the Samsung Notes app
Bertel King/MakeUseOf

Not everyone loves a stylus. I get that. I have mixed feelings about them when it comes to slab phones, but I love them on a foldable. A stylus makes a book-style foldable feel like a digital moleskin.

I get to handwrite my thoughts in Samsung Notes, knowing I can convert it all to text later. It’s no small thing to write by hand rather than type words that appear on the web.


But be careful with that stylus, though. Unlike the Galaxy S24 Ultra we reviewed, the Z Fold 5 and Z Fold 6 don’t have a place to store Samsung’s S Pen. I’ve broken two S Pens as a result.

I Love Having a Built-In Phone Stand

Taking a picture with a folded Galaxy Z Fold 5 on a desk.
Bertel King/MakeUseOf

You can prop up a foldable phone at any time without having to buy a special case or adhere anything to the back. This makes them great for watching YouTube videos or taking photos and videos without an extra hand.

If I’m doing anything in the kitchen, I can pull out my phone, put on something to watch, and place my phone half-bent on the counter. I can do the same thing in bed. As is often the case, a blessing can also be a curse. I’ve been watching my screen time creep higher and higher.


Foldables Are Great for Taking and Sharing Photos

Having a built-in phone stand expands when and where you can take a picture. It helps you take snapshots of yourself or capture views that would otherwise be difficult, like macro photography close to the ground. It’s akin to upgrading from a professional camera with a fixed screen to one you can rotate.

The inner display helps you review images you take and provides enough detail to make edits without having to zoom in nearly as much. The large 7.6-inch screen also makes it convenient to show your images to a bunch of people.

Having a foldable phone changes the concept of a selfie camera. Rather, your main camera is your selfie camera, and you can see yourself while you frame a shot. Your selfie game instantly levels up.


Foldable phones like the Galaxy Z Fold 5 and Z Fold 6 don’t have the best camera hardware for the price you pay. That’s one of the downsides of going with this form factor. Yet the addition of a hinge and having this flexibility can have a bigger impact on your photography than having more megapixels, better low-light performance, or more zoom.

I Can Handle More Tasks Without Pulling Out a PC

A book-style foldable is truly an impressive productivity device. I chose the Galaxy Z Fold 5 partly because it allows me to use Samsung Dex to turn my phone into a PC. What I didn’t foresee was how little I actually use DeX. I end up getting most things done without needing to connect my phone to another display.


The inner screen is just large enough to view most web pages comfortably. The S Pen helps me interact with on-screen elements that are too small for a finger. Unfolded, the phone is large enough to type comfortably without becoming unwieldy like a tablet. The inner display on foldables makes many apps feel like tablet or desktop apps.

The Z Fold, in particular, has a great aspect ratio for office documents and PDFs. I filed taxes from my phone, from start to finish. So far, working with spreadsheets has been the one task that makes me pine for something bigger.

Overall, I find it fascinating that I can do so much with a tiny device that slides into my pocket now. After years of owning boring slab phones, a foldable feels downright exciting. And if you’re looking to buy one yourself, the Galaxy Z Fold 6 is one of the best options as of 2024.

What Is AI Slop and What Can You Do About It?

Key Takeaways

  • “AI slop” is unwanted AI-generated content thrust upon users without their request, similar to spam emails.
  • AI slop includes bizarre and surreal images, including religious imagery, animals, and handcrafted objects for engagement.
  • To tackle AI slop, point it out to create awareness and be skeptical of AI-generated content, and avoid creating AI slop irresponsibly.


You may have heard the term “AI slop” in regard to the bizarre AI-generated images circulating on social media. You may have even seen these images yourself.

But what is AI slop? How do you recognize it, and what can you do about it?


What Is AI Slop?

“Slop” has become a term for any unwanted AI-generated content on the internet, the same way that “spam” has become synonymous with unwanted email. The term seems to be related to the “slop” that farmers feed to pigs. The term was first spotted on X, then elaborated on by open-source developer Simon Willison, who defines “slop” as “mindlessly generated and thrust upon someone who didn’t ask for it.”

Why Does AI Slop Exist?

The driving force behind AI slop is that it’s easy and cheap to generate AI images, and these things attract likes and comments. In other words, it’s engagement bait. AI slop is a lot like internet trolling: even if the content isn’t very good, what matters is that it gets people’s attention.


It’s just engaging enough to grab some attention but not enough to warrant spending time really analyzing the content.

“AI slop” may be difficult to define, but you’ll know it when you see it. One X account showcases it as “Insane Facebook AI Slop.” Many of the posts on the account showcase tropes that have become associated with AI slop, including religious imagery, animals, soldiers, supposedly handcrafted objects, just plain bizarre images, and airline cabin crews.


AI slop also ties into the dead internet theory, which posits that most of the internet is now controlled by AI-powered bots and other AI tools that are all busy making a constant stream of content, drowning out human interactions. With many AI slop images generating thousands of likes and comments, it seems improbable that enough actual humans interact to reach such numbers. Still, with hordes of bots interacting, it’s enough to propel this AI slop into the feeds of regular folks.

While social media networks should do more to counter AI slop and the resulting interactions, numerous rumors suggest they need bot activity to keep sites looking busy. As human users leave social media networks, company owners still need upward trending figures to maintain advertising income, and reams of bot activity are easy to blend in with regular user activity.


How Do You Recognize AI Slop?

AI slop might be obvious when you see it. Anyone who’s ever seen AI-generated imagery can spot it. Infamously, there are people with extra or missing fingers. AI image generators also seem to have difficulty rendering the nuances in human skin as of this writing. While there are tools to detect AI-generated images, a lot of AI slop is obvious to anyone with good old human eyeballs.

As mentioned earlier, AI slop tends to have a surreal look, depicting situations that would likely never happen in real life. The Washington Post compared the deluge of AI slop to the surrealist art movement. What would Salvador Dali have thought of generative AI?

The captions to these images are about as nonsensical. “Beautiful cabin crew,” “Scarlett Johansson,” and “Why don’t pictures like this ever trend?” have become memes and are frequently tagged in AI slop images.


What Can You Do About AI Slop?

Is there anything you can do about the seeming unending tide of AI slop? Unfortunately, options are limited, and the real onus is on social media networks to work harder to reduce such pointless content. But there are some small steps you can take to fight back against AI slop.

Many people on X and other social media platforms laugh at the bizarre AI art floating around the internet. Perhaps it’s a kind of lashing out a form of content they feel has been foisted upon them by major tech companies.

The popularity of social media highlighting AI slop is partially doing the work of pointing it out. Facebook’s audience may not be as familiar with AI-generated images. It would be helpful to point out that what people may see online might not represent the real world.

AI slop is a good reminder to everyone to be skeptical of what they see. Not everything is as obvious as “Shrimp Jesus,” so it’s important to remember that not everything you see on the internet is real.


And, of course, generative AI tools don’t seem to be going away. As with other technologies, you should use AI responsibly. Try not to contribute to the AI slop problem!

How to Reset Your Apple Watch and Its Passcode

You can easily reset your Apple Watch and its passcode through the Settings app on watchOS. But what if you forget your passcode or can’t unlock your Apple Watch? Well, here are your options.


Reset Your Apple Watch Using Your iPhone

If you forgot your Apple Watch passcode, the first way to reset it is by using your iPhone. Open the companion Watch app on your iPhone and head to the My Watch tab. Select General and scroll down to the very end of the page. At the bottom, choose Reset.

On the Reset page, select the first option: Erase Apple Watch Content and Settings. Because it’s impossible to undo this, you’ll have to confirm that option one more time to begin the reset process.


If you have a GPS + Cellular Apple Watch model, you’ll see a final dialog box where you can choose to keep or remove your cellular plan. If you plan to continue using the Apple Watch, you should keep your cellular plan.

As a final step, you’ll have to enter your Apple ID password to deactivate the Activation Lock security feature. Before it completely erases and resets, a full Apple Watch backup will automatically be saved on your iPhone. You’ll need to be patient as the entire process can take a lot of time, especially on older Apple Watch models.

If you forgot your watch’s passcode, the reset process with an iPhone is the same regardless of the Apple Watch model you have.

Factory Reset an Apple Watch Without an iPhone

If you don’t have your iPhone handy, you can still reset your Apple Watch by pressing these buttons:


  1. Press and hold the side button on your Apple Watch. You’ll see two options: Medical ID and Emergency Call.
  2. Now hold down the Digital Crown until you see Erase all content and settings.
  3. Tap Reset twice to confirm.

The watch will then begin the factory reset process. This method won’t make a new backup before wiping the Apple Watch, so the backup you see for restoration will be a few days old.

Keep your Apple Watch on its charger until you complete the process.


How to Restore Your Apple Watch

Now that you’ve wiped your Apple Watch, it’s time to restore it with backup. To start the process, bring your iPhone near the Apple Watch, then follow the steps:

  1. Your iPhone will display a dialog box that says, Use your iPhone to set up this Apple Watch.
  2. Tap Start Pairing > Continue.
  3. Align your iPhone’s camera with the animation on your Apple Watch. Hold your phone over the watch until you see a message saying, Your Apple Watch is Paired.
  4. Choose whether to Set Up as New Apple Watch or Restore from Backup.
  5. Agree to the Terms and Conditions.
  6. Create a passcode for your Apple Watch when prompted. Then, choose the settings you want for your Apple Watch.


Once you’ve completed these steps, the watch will play a sound to inform you it’s ready to use.

As you’ve seen by now, forgetting your Apple Watch passcode isn’t nearly as problematic as forgetting your iPhone’s passcode. As long as you have an iPhone handy, you can get your Apple Watch back up and running with just a bit of work.

7 Fundamental Issues I Have With Shortform Social Media Videos

Key Takeaways

  • Most shortform videos are meaningless fodder with no enriching content or (even worse) clickbait designed to get clicks.
  • Robotic voiceovers, overused laugh tracks, and the same handful of songs all lead to immediate disinterest for viewers.
  • Staged videos fool people into thinking a certain way, while others perpetuate misinformation without ever being corrected.


Shortform social media videos are everywhere these days. TikTok is literally built on the format, and other sites, such as Facebook and Instagram, have followed suit with Reels in order to keep people engaged. But I cannot stand the form factor, and wish it would die a quick death. Here are my reasons why…


1 Most Shortform Videos Are Meaningless Fodder

I don’t follow any creators pumping out these shortform videos. And yet I still see them on Facebook and Instagram, and (in the case of TikTok videos) shared on social media. And my overriding experience is that most of the videos are just meaningless fodder purely uploaded to draw eyeballs.


There are videos of cats making weird noises, of people condoning new ways of cooking or eating food, of pranksters acting like nuisances in public. And that’s just the tip of the nonsensical iceberg. None of our lives are enriched by these videos, so creators are wasting their time uploading them, and viewers are wasting their time watching them.

2 The Robotic Voiceovers Are Dull and Uninspiring

If you’re going to upload a shortform video, please, for the love of whatever higher power you worship, do the voiceover yourself. Sure, it’s a little more work than using the robotic voiceover offered by the text-to-speech tools, but I guarantee that it’s worth it. Otherwise, your video sounds exactly the same as everybody else’s video. Which is sad.


The first time I heard the robotic voiceover, I thought it was quite clever. Now, after hearing that same dull tone in hundreds of videos, I can feel my intelligence being eaten away by the soulless voiceover, and I no longer even tune into what’s being said. In fact, I usually click away as soon as it kicks in, meaning I’m not even willing to sit through a 30-second video clip.

3 The Same Laugh Tracks and Songs Are Overused

Even without a robotic voiceover, the audio of these Reels and TikToks is shockingly repetitive. Even as a very minor consumer of these videos, I hear the same laugh tracks and songs used over and over again. I get it, in the same way as finding original stock images for written articles is tricky, there are only so many options available in terms of audio for these videos. But still, you could at least try.


The laugh tracks are particularly annoying, as they’re like something out of an old-school sitcom, with canned laughter designed to clue you into the fact that what you’re watching is meant to be funny. And sadly, it generally isn’t. I can count the number of times I have laughed out loud at a Facebook Reel on the fingers of one hand, and yet 50 percent of them (or so it feels) feature a laugh track trying to persuade me that something’s funny.

4 There’s a Tendency Towards Frustrating Clickbait

While, as we’ve already discussed, many shortform videos are meaningless fodder, some are even worse than that. They’re pure, unadulterated clickbait designed to lure viewers into watching before revealing that they don’t contain what was promised. While we’re all used to clickbait ads and articles, it’s sad to see it used in videos too.


Creators will use the format to their advantage, choosing the opening shot or looping part of the video to reel people in as though they were fish jumping onto a hook. Because, all that matters is that you click and watch the video. Even if you’re left feeling utterly frustrated and asking, “What was the point of that?” afterward.

5 Staged Videos Pretending to Show Real Events

One of my biggest bugbears is staged videos implying that the events depicted are real. While I have no problem with scripted videos, it’s the intent of fooling viewers that grinds my gears. It’s lying, basically, with creators manipulating viewers.


What makes this worse is the sheer number of people who fall for it. Click on any shortform video which is clearly fake, and you’ll find hundreds of comments from people who have taken what they’ve seen at face value. That inability to detect artifice seems to be growing.

6 People Will Do Anything for Attention From Strangers

While this isn’t limited to shortform video (with content creators and social media influencers also trending this way), the lack of morals on display when clicks are available is shocking. People will do (almost) anything to gain that attention they so desperately desire.


Examples include videos showing animals getting rescued from drains or other predicaments, when it’s obvious that someone has placed that animal in danger in the first place. Another is pranksters who mess with strangers who have no desire to be part of a prank.

7 Misinformation Is Rife, and People Tend to Believe It

Lastly, but probably most seriously, is the amount of misinformation being spread via this format. This is also a problem with longform video on YouTube, with pliant audiences ripe for believing whatever they get told. However, shorter videos are so easily consumed that an incorrect fact included in one can be consumed by millions of people in an instant.


Misinformation and disinformation can be both mild and serious. Something mild would be a “life hack” that actually turns out to be nonsense. Something more serious would be an outright lie about a politician or celebrity that spreads online without being called out or corrected.

Even with all of these reasons outlined, I haven’t even mentioned my belief that these videos are having a negative influence on society. Not only are they potentially addictive, with people choosing to watch them when they have any spare moment of time, but they’re also reducing people’s attention spans to an absolute minimum. Therefore, I won’t be watching this particular form factor anymore, and would encourage you to join me in my protest.

3 Ways to Open MSConfig in Windows 11

MSConfig, also known as System Configuration, is a handy tool for configuring your PC’s boot settings and managing system services. Whether you need to troubleshoot startup issues or adjust how Windows boots, here are three quick ways to open MSConfig.


1. Open MSConfig via Run

Using the Run tool is one of the simplest ways to open the MSConfig on your Windows 11 PC. So, let’s start with that.

  1. Press Win + R to open the Run dialog box.
  2. Type msconfig in the text box.
  3. Hit the Enter key or click OK to bring up the System Configuration window.

The Windows Search menu makes it easy to open the built-in tools and programs on your PC. Here’s how you can use it to open the MSConfig tool.

  1. Click the magnifying glass on the taskbar or press Win + S to bring up the search menu.
  2. Type MSConfig in the search box.
  3. Select the first result that appears, or click the Run as administrator on your right.
    The msconfig search


Did you know you can also run programs and processes as a different user on Windows? Check out how to add the “Run as Different User” option to the Windows 11 Start menu.

3. Use Windows Terminal to Launch MSConfig

Windows Terminal is an app that incorporates both Command Prompt and PowerShell. You can open MSConfig with either of these command-line tools in the same way as the Run dialog. Here’s how you can go about it.

  1. Right-click the Start icon and select Terminal (Admin) from the context menu.
  2. Select Yes when the User Account Control (UAC) prompt appears.
  3. Type msconfig in the Terminal window and hit Enter.
    The msconfig command

So, these were some of the easiest and quickest ways to open MSConfig in Windows 11. If you use this tool frequently, you can also add it to your Windows 11 desktop or pin it to the taskbar for quicker access.


Don’t Make These 3 Simple Mistakes

As much as I love and enjoy using the S Pen with my Samsung Galaxy Z Fold 5, it’s surprisingly easy to break. If you use your S Pen with a foldable or a tablet, here’s what you don’t want to do.


1 Don’t Carry Your S Pen Without a Case

Bertel King / MakeUseOf 

When you buy your S Pen as an optional add-on, it comes with a case. At first, I thought this added unnecessary bulk, so I carried mine around loosely in my phone sleeve alongside my phone. This worked well until it didn’t.

What happened, you ask? I believe something pressed against the pen’s nib and broke it. After that, I was left with a pen I couldn’t write with, nor could I remove the nib. It was useless!

I searched around and found a solution on Reddit that worked. However, while removing the broken nib, I ended up damaging some electronics in the S Pen. Now, it doesn’t write reliably, either failing to register that it’s touching the screen or writing on the screen when it’s not actually touching.


So, to avoid a similar situation, make sure you put your S Pen in its case unless your phone has an S Pen slot—like the Galaxy S24 Ultra we reviewed.

2 Don’t Leave the S Pen Lying Around

A broken Fold Edition S Pen on a bed.
Bertel King / MakeUseOf

The nice thing about a foldable is that you can get quite a bit done wherever you are, even if that’s in bed. The downside? You can get quite a bit done without getting out of bed.

Here’s my story: I was using Samsung Notes on my Z Fold with the S Pen when I had to run to the bathroom. I put the phone and pen down, then ran off. When I came back, I got back into bed absentmindedly and heard a crunch. The S Pen was curled up in the blankets, directly under my knee. It was a shattered mess.


There was no point in trying to find a Reddit post to help. I had to continue using my phone without the awesome S Pen apps I usually rely on.

Pay attention to where you put your S Pen. If you have a Galaxy Tab, put the S Pen back to the side of the tablet with the magnets that hold it. But if you have a foldable like me with no obvious place for the S Pen, remember to put it down on a table, in your pocket, or back in a bag.

3 Don’t Buy the Wrong S Pen

Two S Pen Fold Edition on a desk
Bertel King / MakeUseOf

In case you aren’t aware, there are multiple types of S Pens. Don’t try to use the Galaxy S24 Ultra’s S Pen to write on a Z Fold 5; it won’t work and could damage your very expensive screen. For foldable phones, you need to buy the S Pen Fold Edition.


Okay, so what does that have to do with breaking your stylus? Well, there are multiple variants of the S Pen Fold Edition. The S Pen for the Z Fold 5 and Z Fold 6 have a different design from the S Pen add-on for the Z Fold 3 and Z Fold 4.

The former is much thinner—so thin that it can bend from everyday use. Will it break from everyday use? Not likely, but it’s more fragile. This is the one I broke with my knee by diving back into bed.

Fortunately, the Z Fold 5 is perfectly compatible with the older S Pen Fold Edition. I personally prefer the older model for other reasons besides durability. It’s a bit thicker and much closer to a regular pen, which makes it much more comfortable to hold. Sadly, it doesn’t fit in the S Pen holder of the Z Fold 4’s case.


Why does this matter? At $50, Samsung’s S Pen isn’t cheap. I don’t feel that bad about how much I spent on my Z Fold 5 since I managed to get it for 50 percent off MSRP. However, spending $100 on broken S Pens? That hurts. So, please don’t make the same mistakes I did.

The 6 Key Differences Between the Galaxy Z Fold 6 and Z Fold 5

The Galaxy Z Fold 6 might not seem like a big upgrade over the Z Fold 5, but Samsung has improved the hardware and added some nifty features to deliver a better experience. Below, we’ll look at the main differences between them.


1 The Z Fold 6 Is Lighter and Slimmer

The Galaxy Z Fold 6 is noticeably lighter and slimmer than the Fold 5. To be specific, it’s 1.3mm slimmer when folded (0.5mm thinner when unfolded) and 14 grams lighter. While it’s not the thinnest foldable on the market, it’s the slimmest foldable Samsung makes.

The lighter body will allow you to use the Z Fold 6 more comfortably with one hand. Extended gaming sessions on the big inner screen wouldn’t also be as fatiguing. Similarly, the slimmer design should allow the phone to slip into your pocket easily.

2 Minor Display Improvements

Samsung Galaxy Z Fold 6 unfolded on white table
Zarif Ali / MakeUseOf


A book-style foldable is all about its big inner folding screen. And the Galaxy Z Fold 6 packs two key improvements over the Fold 5 in this area.

While the display size remains the same across both models at 7.6 inches, the Fold 6’s inner screen can reach a peak brightness of 2,600 nits. For comparison, the Fold 5’s display tops out at 1,750 nits. The higher brightness should improve the screen’s visibility when using the phone outdoors under direct sunlight.

The Fold 6’s folding display is also more durable thanks to its “enhanced layers.” Essentially, Samsung has replaced the ultra-thin glass on the folding panel with a foldable thin glass, which is slightly better at withstanding sharp objects and external forces.

The Fold 6 packs one key improvement for the outer display. It has a slightly wider 22.1:9 aspect ratio, making it feel less cramped and ideal for one-handed use. For comparison, the Fold 5’s cover screen measures 6.2 inches with a 23.1:9 aspect ratio,


This is a welcome change since the cramped outer display has been a big issue with previous models. However, the OnePlus Open and the Google Pixel Fold pack an even wider cover display, and Samsung has plenty of room to improve in this area.

3 More Powerful With Snapdragon 8 Gen 3

Like the best Android flagships launched in 2024, the Galaxy Z Fold 6 uses Qualcomm’s Snapdragon 8 Gen 3 chip. Qualcomm claims this chip is 20 percent more efficient and delivers 30 percent faster CPU performance than its predecessor. This should bode well for the Z Fold 6’s battery life, especially since its capacity remains unchanged at 4,400mAh.


Additionally, the Snapdragon 8 Gen 3’s GPU is 25 percent faster and more efficient than the 8 Gen 2 in the Z Fold 5. And to keep the chip cool, the Z Fold 6 packs a 1.6x larger vapor chamber compared to the outgoing model, meaning thermal throttling shouldn’t be a problem despite packing a more powerful chip.

However, the Snapdragon 8 Gen 2 is still a powerful chip, and you might notice the Fold 6’s faster performance only in heavy workloads. RAM and storage options across the two foldables remain the same: 12GB of RAM and up to 1TB of storage.

4 Better Durability With IP48 Rating

Samsung Galaxy Z Fold 6 in-hand (navy)
Zarif Ali / MakeUseOf

A major issue with all foldables is their durability. Due to moving parts and the fragile folding screens, they cannot withstand the same daily abuse as typical smartphones. Samsung has made notable progress in this area over the years.


The Galaxy Z Fold 5 has an IPX8 rating, meaning it’s water-resistant for up to 30 minutes in freshwater up to 1 meter. However, Samsung achieved an IP48 rating with the Z Fold 6. The newer model provides limited protection against 1mm or greater solid dust ingress.

While not as good as IP68 certification on today’s flagship smartphones, this is still a notable improvement. If anything, it takes Samsung one step closer to achieving an IP68 rating on its future foldables.

That’s not it, though. In addition to a more durable chassis made with “enhanced Armor Aluminum,” Samsung has strengthened the folding edge to better distribute shocks during a drop or fall.

5 Longer Software Support

Samsung Galaxy Z Fold 6 in Silver and Pink on wooden table
Zarif Ali / MakeUseOf


The Z Fold 6 ships with Android 14-based One UI 6.1.1 and packs some new Galaxy AI features. Earlier in 2024, Samsung rolled out Android 14-based One UI 6.1 to the Galaxy Z Fold 5, which brought Galaxy AI features from the S24 Ultra. And according to SamMobile’s report, Samsung is planning to bring Z Fold 6’s new Galaxy AI features to the Z Fold 5 as well.

Where the two phones differ in software is long-term support. Samsung promised four years of Android upgrades and five years of security updates when it launched the Z Fold 5. So, the phone should receive updates until 2028. However, with the Z Fold 6, Samsung promises seven years of OS and security updates, just like it did for the Galaxy S24 series.

Extended software support is one of the Galaxy Z Fold 6’s best features, as it easily trumps even its competitors with superior hardware and design in this area.


6 Higher Price Tag and New Color Options

Despite all the modest improvements over its predecessor, the Galaxy Z Fold 6 has a $100 higher price tag. The base model with 256GB of storage now costs $1,899 instead of $1,799. The same $100 price hike applies to the higher storage variants.

With no significant hardware upgrades, the price increase on the Z Fold 6 is hard to justify. You can take advantage of various offers that Samsung runs occasionally to get a better deal, including boosting trade-in values of older devices.

As for colors, the Galaxy Z Fold 6 is available in five colors, all different from the Fold 5. This includes Pink, Navy, Silver Shadow, White, and Crafted Black, with the last two being exclusive colors you can only purchase from Samsung’s website.


If you own the Galaxy Z Fold 5, upgrading to the Fold 6 makes little sense. The improvements are modest and do not immediately stand out. The lighter, more durable chassis, brighter display, and better performance are welcome changes, but they won’t radically improve or benefit your workflow. I’d wait till 2025 to see what Samsung has in store for the Z Fold 7.

This New Browser Is a Productivity Miracle

Key Takeaways

  • Arc Browser enhances productivity with streamlined tabs and bookmarks, a customizable Focus Mode, and easy data import.
  • It boasts high performance, with lower RAM and CPU usage than competitors like Chrome and Edge.
  • Arc Browser is highly customizable, letting you tailor website appearance and sync data across devices.


Browsers like Google Chrome are amazingly versatile, but they can turn into distraction-driving machines when you’re working. Arc Browser is a hot new alternative, and it might be exactly the miracle you need to get productive.


What Is Arc Browser and Why Is It a Productivity Miracle?

Arc Browser is a new web browser that offers a novel approach to surfing the web. While other web browsers are simple to a fault, Arc Browser seeks to address distractions and inefficiency by providing features tailored for productivity.

There are a few things that make Arc Browser stand out. It accommodates and streamlines the habit of having dozens of open tabs by encouraging you to search them rather than to click on them, and it effectively combines bookmarks and open tabs.


Arc Browser also periodically closes and archives any tabs that you don’t pin, effectively giving you a fresh start every 12 hours and preventing an inevitable need for reorganization. (This feature is adjustable and optional, of course.)

Like any other tool, Arc Browser won’t provide a revolutionary increase in productivity if you don’t use it properly. It’s fantastic at eliminating distractions from your digital environment, but it can’t stop you from pursuing them anyway.

If you want a browser that takes a novel approach to tab management and provides a unique outlook on user customization, however, there’s no better option. And considering just how new Arc Browser is, we may see many more incredible features added shortly.

Why Should I Use Arc Browser?

There’s no shortage of reasons to use Arc Browser, but some of its highlights include easy data importing (making the switch simple) and fantastic performance. Here are some of the best characteristics of Arc Browser.


Arc Browser Improves Focus

using split view to focus on multiple tabs with arc browser

One of the best features of Arc Browser is its Focus Mode, which lets you clear out clutter and concentrate better on one subject. You can completely hide the sidebar and activate Focus Mode by pressing Ctrl + S.

When you’re using the sidebar, you’ll find that Arc Browser’s unique approach to tab organization minimizes distractions. The combination of bookmarks and tabs ensures that everything you need is kept close.

If you need to work from two tabs, you can access both while staying in Focus Mode by pressing
Ctrl + T
to add a split view.


Arc Browser Is High-Performing

comparing the performance of different browsers on windows 11

Compared to other browsers, Arc Browser also offers an impressive level of performance. Its RAM usage is typically 50% less intensive than Microsoft Edge and Google Chrome on my Windows 11 PC.

Arc Browser’s CPU usage also tends to be lower, though to a lesser degree. On my system, I found that Arc Browser and Microsoft Edge both usually had near-zero CPU usage (when not loading webpages), while Google Chrome tended to have elevated CPU usage.

Arc Browser Is Customizable

creating a new boost customization in arc browser


One of the most interesting qualities of Arc Browser is how customizable it is. You’re not just limited to customizing your homepage background and taskbar like in other browsers — you can also customize any website you visit.

You can create these website customizations, known as Boosts, by pressing Ctrl + T to open the command/search bar and entering arc://boost/new. Afterward, you’ll be brought to a page that allows you to pick a template or start a new Boost from scratch.

Some of the things you can customize using Boosts include:

  • website color
  • font
  • webpage size
  • light/dark mode
  • contrast, brightness, and saturation
  • custom code
  • layout

Arc Browser Supports Easy Data Import

importing my old browser data into arc browser


Like many other browsers, Arc Browser also makes switching simple through its easy data importing process. You can import bookmarks, passwords, extensions, and even your browser history during setup or at any point afterward through the settings.

Arc Browser supports data import from Chrome, Brave, Firefox, Safari, Microsoft Edge, Opera, Opera GX, and Vivaldi, according to the website. This may vary by OS, as I found that only Edge and Chrome were offered on a Windows 11 system where I also use Firefox.

You can import your data by navigating to Arc > Import from Another Browser and following the prompts that appear.

Bookmarks will be imported as
Pinned Tabs
.


Arc Browser Is Great for Tab Management

learning about pinned tabs in the sidebar in arc browser

Arc Browser’s novel approach to tab management also makes it a unique (and compelling) option. It’s particularly helpful if you struggle to keep your tabs organized and find yourself frequently derailed by the task of sorting through them.

In essence, Arc Browser closes all tabs (except pinned tabs) every 12 hours. You can change this duration if you wish. Closed tabs are still accessible through your history but, in practice, you may find that you don’t need the majority of your tabs to stay open anyway.


Arc Browser Syncs Between Devices

enabling syncing between devices in arc browser

Beyond closing tabs, Arc Browser also minimizes redundancy by syncing between devices. This is incredibly helpful if you take your work on-the-go, since resuming from exactly where you left off is always as simple as loading the synced tabs from your other device.

There’s no requirement to use Arc Sync if you don’t want to, but the easy access to your spaces, folders, and tabs generally makes it worthwhile. Passwords, history, extensions, and profiles aren’t synced yet, but Arc will likely add support for these soon.

Is Arc Browser Worth Using?

Arc Browser isn’t distinct enough from other browsers to be worthwhile for every user, but its Boosts feature and unique approach to tab management make it worthwhile for users seeking extra customizability or a more dynamic workflow.


If you’ve found yourself even slightly interested, you should give Arc Browser a try. Setup is exceedingly simple and the program is supported on Windows, iOS, and macOS, so you’ll only need to worry about a simple uninstall process if it’s not for you.

How to Start Using Gemini 1.5 Pro for Free

Key Takeaways

  • Gemini 1.5 Pro is a versatile AI model with capabilities like transcription, summarization, and coding. It can handle up to 1 million input tokens efficiently.
  • You can access the free version of Gemini 1.5 Pro with rate limits or subscribe to the paid version of the model to leverage its full capabilities.
  • Alternatively, you can access the AI model if you’re subscribed to Google Advanced.


Google released Gemini 1.5 Pro in February 2024, but the model only became widely available in June 2024. Since then, it has seen rapid adoption, showing just how capable it is. While you’ll need to pay a subscription fee to access its complete suite of features, there is a way you can start using Gemini 1.5 Pro for free today.


What Is Gemini 1.5 Pro?

Gemini 1.5 Pro is a medium-sized model with a range of capabilities, including transcription, summarization, and coding. The model can handle up to 1 million input tokens, allowing it to process massive amounts of data and complex tasks efficiently. However, if you’re looking to leverage the full potential of Gemini 1.5 Pro, you’ll have to subscribe to the paid plan.

The input prices are as follows:

  • $3.50 per 1 million tokens (for prompts up to 128K tokens)
  • $7 per 1 million tokens (for prompts longer than 128K)

The output prices are as follows:


  • $10.50 per 1 million tokens (for prompts up to 128K tokens)
  • $21 per 1 million tokens (for prompts longer than 128K)

While exact numbers vary, Gemini 1.5 Pro’s enormous context window means it can handle more than 500,000 words at a time, with some estimates up to 700,000.

How to Use Gemini 1.5 Pro for Free

Although the version of Gemini 1.5 Pro with a 1 million token limit is behind a paywall, you can access a free version of the model, subject to certain rate limits. Here’s what you need to do:

  1. Navigate to the Google AI for Developers page.
  2. Click Tools.
  3. Select Google AI Studio from the drop-down menu.
  4. Click Sign In to Google AI Studio.
  5. In the right pane, make sure Gemini 1.5 Pro is selected as the AI model.


You can now enter your prompt and view the model’s responses in the window.

Another way to access Gemini 1.5 Pro is if you’re subscribed to Google Advanced, which many compare to ChatGPT 4. While the subscription technically costs $19.99 per month, you get a number of additional perks apart from access to the AI model, such as up to 2TB of storage from Google One and integration with Google Workspace apps. If you’re unsure whether a Google Advanced subscription is the right choice for you, be sure to check if you’re eligible to sign up for a free trial.

What Can You Do With Gemini 1.5 Pro?

Gemini 1.5 Pro is touted as one of Google’s most capable AI models, but what exactly can you do with it? Here are a few things you can use the model for:

  1. Summarization: Whether you want to summarize the key findings from a report or dozens of numerical tables, Gemini 1.5 Pro can leverage its capabilities to extract the most relevant information and outline it in a clear and concise manner.
  2. Audio Transcription: If you need to transcribe meeting notes, Gemini 1.5 Pro can extract relevant speech from your audio clip for transcription while ignoring background sounds.
  3. Comparison: Gemini 1.5 Pro can compare different versions of documents or data sets and highlight any changes, as well as similarities and differences.
  4. Coding: You can also run and edit Python code within Gemini 1.5 Pro. This feature might be especially useful for developers who need to test or generate scripts.


Gemini 1.5 Pro is clearly a powerful AI model with an extensive set of features. While it has “Pro” in the name, don’t let that put you off. There’s plenty you can use Gemini for in your daily life.

Meta AI’s Suggestions Finally Make Instagram Enjoyable Again

While Meta AI is not the most well-rounded AI tool, there is one specific use for it on Instagram that helps me find more content to enjoy: asking Meta AI for posts and accounts about topics I love.


Finding Enjoyable Instagram Content Is Difficult

Lately, it has gotten more difficult to find content you want to see on Instagram. There are more ads taking up space on your home feed than ever. The test of unskippable Instagram ads may even make you want to quit using the platform. Digging through them to get to your friends’ posts or fun Reels is time-consuming. And the Explore Page is equally frustrating sometimes.

I find that my Explore Page shows me content I’ve already seen or even content I’ve already liked. But Meta AI can help you get to the content you want to see more easily.

How to Ask Meta AI to Find Fun Content For You

I have found two main ways to find quality fun content on Instagram using Meta AI. There are obviously tons of ways to interact with Meta AI, but these work the most reliably for me.

1. Ask Meta AI For Creators or Accounts

You can ask Meta AI to list accounts that post certain types of content, so you can follow them and add that content to your home feed. For example, I have a pet corgi, so I asked Meta AI to suggest some popular corgi accounts.


Meta AI will list accounts with clickable links to help you explore the platform. Depending on your search, it may even provide information about the type of content that the account posts.

2. Ask Meta AI for Reels

Meta AI notably won’t suggest static photo posts for some reason, but it is happy to show you tons of Reels. This allows you to tap a Reel to get right into what you want to see. Using my previous example, I asked Meta AI for Reels of corgis.


I could click these Reels within the message to visit them, making it an easy way to browse. I would definitely recommend that you try Meta AI, even if you don’t think you will like it. You can always mute Meta AI after you try it if it doesn’t work out.

Meta AI can connect you with online communities on Instagram that you will enjoy seeing and becoming part of. It is a great tool for widening your Instagram use beyond just seeing friends’ photos.

7 Features That Make the Galaxy Z Flip 6 Worth Buying

The Galaxy Z Flip 6 is one of Samsung’s flagship folding phones for 2024, competing against the likes of Motorola Razr and Razr+ (2024). Here, we’ll discuss all the standout features it offers that make it worth your hard-earned money.


1 The Snapdragon 8 Gen 3 Processor

Samsung/YouTube

If you’re looking to buy a new smartphone in 2024 and are hoping to get value for your money, performance is one factor you shouldn’t compromise on.

Like Samsung’s flagship Galaxy S24 Ultra, the Z Flip 6 packs Qualcomm’s Snapdragon 8 Gen 3 chip. According to Qualcomm’s claims, the chip offers a 30% increase in CPU performance and a 25% enhancement in GPU performance compared to the 8 Gen 2 in the Z Flip 5.

2 Galaxy AI Features

Interpreter Mode working in two Galaxy Z Flip 6 models side by side
Samsung/YouTube


The Galaxy Z Flip 6 has all the best Galaxy AI features that Samsung introduced alongside the Galaxy S24 series. However, Samsung’s foldable lineup has a few new additions. One such example is the Photo Ambient feature, which allows you to set AI-powered wallpapers that change based on the time and weather.

Another Galaxy AI feature, called Interpreter, now works in Flex Mode. This feature essentially turns your device into a real-time translator, allowing both participants in a conversation to see translations simultaneously on both the main screen and the cover display.

Lastly, Samsung has added a Sketch to Image feature that generates realistic images from your sketches or drawings. You can also draw on top of the pictures you’ve taken to add realistic objects with ease.


3 12GB of RAM

Samsung Galaxy Z Flip 6 back panels (all colors)
Zarif Ali / MakeUseOf

Considering high-end Android phones nowadays ship with 12GB of RAM, we’re glad to see Samsung including 12GB as standard on the Z Flip 6. So, whether you go with the 256GB or 512GB storage variant, you get the same amount of RAM>

Coupled with the Snapdragon 8 Gen 3 chip, you can already imagine how powerful this phone would be. It’s also the first phone in the Z Flip line to feature a vapor chamber, ensuring it stays cool during heavy-duty tasks like gaming and running multiple apps simultaneously.

Nonetheless, you can rest assured that the Galaxy Z Flip 6 can not only meet all your multitasking needs but also exceed your expectations.


4 4,000mAh Battery

Even though the Galaxy Z Flip 6 isn’t any thinner than its predecessor, it packs a slightly larger 4,000mAh battery. Also, since the Snapdragon 8 Gen 3 chip is 20-25 percent more efficient than the 8 Gen 2, the Z Flip 6 should easily last you through the day. Hopefully, battery life is the last thing you’ll need to worry about with the Z Flip 6.

5 50MP Main Camera

Camera quality has always been one of the major downsides of flip phones. Thankfully, Samsung has addressed this with the Z Flip 6 by adding a 50MP wide-angle primary camera, which is the same as the one on the Galaxy S24.


Another meaningful AI feature you get has to do with the device’s camera. With Auto Zoom, FlexCam can now automatically detect the subject of an image and find the best frame by zooming in and out.

The Galaxy Z Flip 6 also uses Samsung’s ProVisual Engine, which allows you to capture images with incredible detail, even in low-light conditions.

6 IP48 Dust and Water Resistance

While an IP68 dust and water-resistance rating isn’t uncommon in the smartphone world, you’ll seldom come across a foldable phone offering it. The Galaxy Z Flip 6 breaks this barrier with an IP48 rating, meaning it’s not only water-resistant but also the first to offer some degree of dust resistance.

The IP48 rating provides protection from foreign particles larger than 1mm. While it isn’t the dust resistance rating we’ve been hoping for, it’s certainly better than what we’ve seen in other IPX8-rated flip phones.


7 Software Updates for Seven Years

In 2024, Samsung followed Google and extended the software support for its high-end phones to seven years. As a result, like the Galaxy S24 series, the Galaxy Z Flip 6 will also receive seven years of major Android upgrades and security updates. So, if you tend to keep your phones for a long time, the Galaxy Z Flip 6 could last you until 2031 with proper care.

Although we won’t say that the Galaxy Z Flip 6 is a revolutionary release in the world of foldable devices, it’s still an excellent option if you’re looking to purchase your first foldable phone. Samsung’s long-term software support ensures you won’t need to upgrade to a newer phone due to outdated software.


You Can Now Make In-Game Recordings on Steam

Key Takeaways

  • Steam has launched a Game Recording beta to allow users to record gameplay within the Steam client.
  • Access the feature by enabling the beta in client settings, then use Shift + Tab in-game to start recording.
  • While the tool is in beta and lacks advanced features, it offers a simple recording solution without requiring third-party apps.


Have you ever wanted to record your gameplay for Steam games but don’t want to deal with a third-party app? Steam’s Game Recording beta lets you record from right within the Steam client.


Steam Launches Game Recording Beta

Steam announced the launch of its Game Recording beta in July 2024. The tool is built into Steam’s overlay, which you can access by pressing Shift + Tab while playing a Steam game.

While the tool is still in beta, it’s still packed with various features including the ability to share clips and find highlights. Like other tools that let you record gameplay, Steam includes timeline highlights to help you find moments that matter.

Here’s all you need to know about getting access to the feature and how to use it.

How to Access Steam’s Game Recording Feature

To try out the feature, you will need to enable the beta in Steam’s client. To do this, open Steam, go to the top header bar, and click on Steam > Settings.


Once you’ve opened your settings, head to the Interface tab. Under the heading that says Client Beta Participation, click on the dropdown menu and select Steam Beta Update.

You will also see the Steam Families beta here, but it looks like you can only opt into one beta at a time. You will also need to restart Steam after selecting a beta so that the relevant tools can be made available.

How to Use Game Recording on Steam

Once you’ve restarted Steam with the beta selected, you will be able to access the Game Recording tool. After opening a game, press Shift + Tab to open the Steam Overlay. You will see a popup with the new Game Recording tool and can click on Get started to start using the tool.


accessing steam overlay with recording feature

This will open a popup introducing the Game Recording beta and its features. Click on Got it to start adjusting your settings.

getting started with game recording settings on steam

By default, game recording is set to Off/Don’t Record. To enable the feature, select Record in background or Record on demand. You can also set the length of your recordings and where Steam should store clips.


game recording settings on steam

When you’ve recorded clips in games, you can access them by going to the game listing in your Library and scrolling down to Recordings and Screenshots. The updated window is where your Screenshots would usually be located on your profile.

Click on Manage my recordings and screenshots to access a folder with your recent media from the game. You can then edit the recording by selection portions you would like to clip and share.

game recording on steam with clip option


Is Steam’s Game Recording Feature Any Good?

Since it’s in beta, the game recording tool is still in its early stages. For those who want to record long sessions or capture clips using Steam’s overlay, this is a simple tool that doesn’t require third-party software.

However, if you’re likely to forget you’re recording, you’d want a gameplay recording app like Outplayed that triggers when you hit certain milestones or events in games.

With Steam’s recording tool, game-added markers that signify highlights are only available for “timeline-enhanced games”. When I used the tool with Baldur’s Gate 3, no specific fights or events were highlighted on the recording’s timeline.

However, when I got an achievement in Apex Legends, a marker appeared on the recording timeline. Unfortunately, it did not highlight kills during the game.

Hopefully Valve continues to update the tool and we see more games with timeline enhancements that help flesh out the feature more. Right now it’s a useful tool, but is easily outmatched by other feature-rich game recording apps.


6 Features That Make the Galaxy Z Fold 6 the Best Foldable Phone

Samsung launched the Galaxy Z Fold 6 at its Galaxy Unpacked event in July 2024. Despite facing stiff competition from Google and OnePlus, these features make Samsung’s Galaxy Z Fold 6 the best foldable phone you can buy today.


1 Snapdragon 8 Gen 3 Chip

A flagship foldable phone should pack the best possible chip, and Samsung does not skimp in this area. The Galaxy Z Fold 6 uses Qualcomm’s Snapdragon 8 Gen 3 chip for flagship-level CPU and GPU performance. The Z Fold 6 features a bigger vapor chamber than its predecessor, which should also ensure better-sustained performance and heat dissipation.

The powerful Snapdragon chip is coupled with 12GB of RAM, so your apps should remain in memory for longer in the background. And while the base model ships with 256GB of storage, you can opt for the 1TB variant to ensure you never run out of storage space for all your favorite apps and games.


More importantly, the Qualcomm chip ships with a Snapdragon X75 modem, which is among the best basebands for mobile devices. It supports a wide range of 5G and 4G LTE bands, ensuring the Fold 6 can latch onto a network even in areas with spotty coverage.

If you want a foldable phone for effortless multitasking or gaming, the Galaxy Z Fold 6 has the raw horsepower to handle whatever you throw at it. This is backed by a 4,400mAh cell with 25W wired fast charging and 15W wireless charging support.

2 Samsung’s Thinnest Foldable Yet

A major issue with Samsung’s Z Fold line so far is the bulky design. With the Galaxy Z Fold 6, the company is addressing this problem to a large extent. It’s the thinnest and lightest Z Fold yet, measuring 12.1mm thick when folded and weighing 239g. When unfolded, the device is only 5.6mm thick.


For comparison, the Galaxy Z Fold 5 measures 13.4mm and weighs 253g. The OnePlus Open, the only other major book-style foldable available in the US, also weighs 239g. However, it’s slightly thinner than Samsung’s offering, with an 11.7mm waistline.

A lighter body should make the Galaxy Z Fold 6 more comfortable to hold for an extended period.

3 IP48 Dust and Water Resistance

Samsung Galaxy Z Fold 6 in-hand (navy)
Zarif Ali / MakeUseOf

The best Android smartphones nowadays have an IP68 rating, making them dust and water-resistant. However, such IP ratings are not common in the foldable world. The Galaxy Z Fold 6 raises the bar slightly higher with its IP48 certification.


While previous Galaxy Z Folds were water-resistant, the Fold 6 is the first to have a dust protection rating. It’s still not fully dust-resistant, as the IP4x rating only protects from foreign particles larger than 1mm.

Besides the IP rating, Samsung uses a more durable chassis on its new book-style foldable with “enhanced Armor Aluminium.” The company also claims to have strengthened the folding edge to better distribute shocks from external impacts. Given how durability is a concern with folding phones, these are small yet noteworthy improvements.

4 2,600 Nits of Brightness for Outdoor Use

Samsung Galaxy Z Fold 6 unfolded on wooden table with Buds 3 Pro
Zarif Ali / MakeUseOf

A folding phone is all about the convenience of packing a big screen in a compact form factor. Unsurprisingly, the quality of the big, folding screen plays an integral part in this. The Galaxy Z Fold 6’s inner screen excels in this area.


The 7.6-inch 120Hz panel can hit a claimed peak brightness of 2,600 nits. This ensures it’s bright enough for outdoor use, even under direct sunlight. And since it’s an LTPO panel, it can ramp down its refresh rate to as low as 1Hz when showing static content to save battery life.

Plus, Samsung says it uses “enhanced layers” on the folding screen to reduce the crease visibility and improve durability. Considering the delicate nature of folding screens, any improvement in this area is always welcome.

Another highlight of the Z Fold 6’s folding screen is S Pen support. While the foldable does not ship with the stylus, you can purchase one separately and use it for sketching, doodling, and more.

5 New Galaxy AI Features


Samsung has been at the forefront of integrating AI into its smartphones and other devices with Galaxy AI.

The Galaxy Z Fold 6 is no exception, packing all the best Galaxy AI features that debuted on the Galaxy S24 series, like Circle to Search and Live Translate. The latter is getting even better on the Fold 6 with support for third-party apps.

For an even better experience, Samsung is introducing new Galaxy AI features on its latest book-style foldable. “Sketch to image” uses generative AI to convert your S Pen sketches into life-like images. For example, you can doodle a balloon on your child’s photo, and Sketch to image could replace it with a life-like picture.

Interpreter mode gets a new Conversation option that transcribes and translates speech from both parties in a conversation and shows it on the Galaxy Z Fold 6’s inner and outer screens. The feature supports 16 languages across 23 dialects.


Like the Galaxy S24 and other premium Samsung phones, the Galaxy Z Fold 6 gets free access to Galaxy AI until the end of 2025.

6 Seven Years of Software Updates

You may find foldable phones with better design and specs than the Galaxy Z Fold 6. However, Samsung’s offering trumps them all with its long-term software support.

Samsung promises seven years of OS and security updates for the Z Fold 6, besting every other foldable on the market. Even better, the Korean giant is among the first companies to update its premium devices to the latest monthly security patch and a new Android release. Theoretically, Samsung’s promise means the Z Fold 6 will receive updates until mid-2031.


If you buy a smartphone in 2024, extended software support should be a prerequisite, and Samsung’s foldable delivers in this area.

Although Samsung hasn’t reinvented the wheel with the Galaxy Z Fold 6, all the key features mentioned above add up to deliver a great overall experience. If you already own a foldable, the Z Fold 6 is not worth upgrading to. But if you want to purchase your first book-style foldable, you can’t go wrong with Samsung’s offering.

These 6 AI Tools Give You Real Job Interview Practice

Acing your job interview requires much more than a solid set of skills and experience. To land that dream job, you’ll need to present your best self and convince your interviewer that you’re the right person for it.


Thankfully, there are several tools that use AI to provide realistic interview practice that will help you perform at your best.


Zilta is an AI interviewer that conducts mock behavioral interviews and provides detailed feedback to help you improve.

To get started, enter your role, job description, and company. The AI then uses these details to ask some initial questions, which it follows with further questions based on your answers.

You can answer these questions by recording your audio, but the Premium plan provides an option for video as well.


After the interview, Zilta shares detailed, well-rounded feedback. Besides the content of your answers, it also comments on your speech and delivery. For example, it can highlight the excessive use of filler words. This helps you improve your answers and avoid common interview mistakes.

Perhaps the only downside is that you can practice just one interview for free.

huru ai screenshot

Huru is another tool that is available online as well as a mobile application. It has pre-made interview questions for over 2,000 job roles. But you can practice for any job listed on sites like Indeed or LinkedIn by installing the Huru Chrome extension, generating a QR code on your desktop, and scanning it with the mobile app.


As you answer its questions, Huru records your video and displays it during evaluation so you can assess your expressions and body language.

After the interview, Huru provides an analysis, discussing the accuracy of each answer alongside your grammar, speech quality, and confidence. It also suggests ideal answers and tips for better responses.

While it does help you with interview practice, there are a few drawbacks. First, it shows the questions and asks if you’re ready to answer. This gives you more time to think than you’d get in a real interview. Second, Huru does its analysis after every answer, which can take a long time and breaks the flow. It provides only one interview as a free trial.

Interview school interview screenshot-1


Interview School conducts mock interviews using its AI coach. It has a large number of pre-built interviews, but also lets you create a custom one. The existing library includes interviews for specific companies as well. For example, you can practice for the role of a Financial Analyst at Amazon.

To make your practice more realistic, it not only records your video but also shows an animated, human-like interviewer.

One of the things it could improve is the quality of questions. Most questions it asked me were quite basic and followed a similar theme. But you can solve this by creating a custom interview.

On a free plan, it does save your interview video for you to assess, but doesn’t provide detailed feedback using AI. Instead, it just shares an overall grade.

ava by wizco interview report screenshot


If you’re looking for a free AI tool to practice for your interviews, Ava by Wizco is a great option. It covers both behavioral and technical questions in a single session.

It begins your practice session by asking for details about the job you’re applying for. This includes your field, role, company, job responsibilities, and professional background. Based on these, it generates and asks personalized questions. It can even follow up on your answer, asking you to share more details or specific examples.

The best part about Wizco is its detailed feedback report. First, it provides an overall summary and score, rating your attitude, confidence, communication, and knowledge based on your answers. Then it assesses each response, giving it a score out of 10, analyzing your tone and providing key takeaways.


On the downside, Ava by Wizco doesn’t record your video. So if you’re looking to assess your body language as well, it’s perhaps not for you.

star method coach screenshot

STAR Method is a technique to answer interview questions by describing the situation, task, action, and results. This simplified framework not only helps you highlight your experience but also provides a coherent way to communicate your thoughts.

If you’re trying to prepare interview answers using this technique, STAR Method Coach can help you perfect your responses. The best thing about this tool is that there are multiple ways it can generate questions. It has pre-made question lists for different job roles, companies, and skills. But it can also generate customized questions based on your resume or job description. And you can even supply the questions you want it to ask.


Once the questions are ready, you can choose between two modes: mock interview and guided conversation.

The guided conversation mode first asks you to answer the question. It then evaluates your answer and helps you to improve it, ensuring that it appropriately follows each element of the STAR framework. For instance, it asked me to provide more details about the situation part. After your answer is complete, it gives a score and feedback.

During the Mock Interview mode, STAR Method Coach asks follow-up questions with no assistance, more accurately replicating up a real interview.

Overall, I liked this tool because of the detailed follow-up questions it asks (which you will typically encounter during any interview), but there is no option to record your video.

If you found the STAR method useful, you can use these STAR templates to organize your answers.


interviewsbyai screenshot

interviewsbyai is a simple tool to help you practice for interviews, using AI to generate questions and provide feedback. It asks you to paste the job description and then generates customized technical and behavioral questions.

You can answer these questions both by speaking or typing. After each response, the tool provides feedback and a sample answer so you can assess your performance. Once you’ve completed the interview, it again shows a summary for each question, highlighting the positives and negatives of your answer.

On a free plan, you can practice just three questions per month, so it’s more like a trial account.


From asking personalized questions to providing actionable feedback, these AI interview coaches offer you an excellent opportunity to practice. They can help you think on your feet and face tricky follow-up questions. But there are a few common interview questions you should prepare for beforehand.

Why I Never Delete Old Photos From My Phone

Key Takeaways

  • Unlimited storage options, including cloud storage and hard drives, make deleting photos unnecessary.
  • Photos of all kinds can spark memories and emotions many years later, including those you deem unimportant.
  • Old photos can be used in future creative projects or as historical records, and you simply don’t know what shots will prove useful.


The majority of people take multiple photos on their smartphone every day. And many more when on vacation or trip, at an event, or doing something more interesting than existing. Which means that the number of photos on your phone can massively increase over time.

However, despite this, I don’t delete any photos from my phone (beyond the blurry shots or those taken by mistake), and I heartily recommend that you never delete any photos from your phone either. Here are the reasons why…


Unlimited Storage Means Deleting Photos Is Unnecessary

The primary reason why I opt not to delete any photos from my phone is that there’s really no need to these days. Between cloud storage and (the many forms of) physical storage, there should be more than enough room for you to save every single photo you shoot from now until the end of time.


I personally own a Google Pixel and use Google Photos to store and organize my photos. Now, it is true that Google only offers a limited amount of cloud storage for free, with everyone able to rack up 15GB of content across Gmail, Photos, Drive, etc. I’m actually getting quite close to filling those 15GBs, but I still won’t be deleting photos. That’s because I have other options going forward.

I can pay Google a couple of dollars every month for masses more storage, or I can back my photos up to a physical hard drive and delete them from Google’s servers. I would rather do either of these latter options than delete photos from my phone and potentially erase a memory I can never revisit.


You Cannot Predict What Photos Will Spark a Memory

As I addressed in my article looking at why I never delete digital photos, you never know which photos will spark a memory years after they were taken. So that miscued shot that you could have decided to delete immediately could end up being a source of nostalgia many years later.

Photos are obviously snapshots of moments in time. But interestingly, it’s almost impossible to predict what photos will spark emotions when viewed at a later date. As an experiment, scroll casually through your camera roll now and mentally note which photos spark a memory.


Yes, the usual suspects will likely do that job; a photo of you and your partner smiling, your parents in their younger days, or a pet being cute. However, a picture of a building that summed up a cracking vacation, or a picture of a meal that made your mouth water can also do the job. Therefore, you’d be foolish to delete those photos that may seem unimportant when you’re scrolling through your shots.

The Subjects You Capture Will Not Always Be There

This is a tough aspect to write about, but the fact is that the people, places, and things you’re taking photos of today may not be there tomorrow. The most obvious example being photos of people who then pass away or leave your life for another reason.


As someone who has lost loved ones, any photos I have of those people that have passed are like gold dust. Unfortunately, I didn’t take enough photos of them while they were alive, but those I did take are important for obvious reasons. Therefore, I’m glad I never deleted any of those photos after shooting them; even those that are clearly far from perfect in terms of composition or quality.

Less important examples, but ones worth mentioning, are places and things. Those innocuous photos you shoot of your local town may, in time, prove to be important historical records as your town changes. As could that random shot of a new piece of technology you took as you opened it in a state of excitement.

You Never Know When Photos Might Come in Handy

Beyond the nostalgia and emotional support that old photos can offer, another reason to keep hold of them is the option of using shots in future creative projects. Whether that’s scrapbooking, digital art, or even gifts for a loved one. After all, you may have nieces, nephews, or even grandchildren in the future.


As you grow older and your hobbies and interests change, you may find yourself becoming more creative and needing access to old photos for a project. Childhood photos of an adult are a classic example, as they can be used to celebrate someone’s milestone birthday.

That photo of something unimportant that, right now, may seem surplus to requirements, could be a key element of a future project. You may not ever use it, but you may do, and it’s better to have a stock of your own original images rather than rely on other sources.

Tips for Those Who Decide Not to Delete Smartphone Photos

Now that you know why I never delete photos from my phone, and why I think you should follow suit, here are some tips to consider…


  • Never deleting anything means that organizing your photos becomes even more important. So, employ folders and albums as much as you can, sorting your photos in logical ways.
  • Don’t take the “Never” too literally. If I accidentally hit the shutter button and take a photo of the ground, I delete it. As I do with overly blurry shots where the subject is unrecognizable.
  • Try not shooting as many photos in the first place. Start thinking like an old-school photographer with a limited number of exposures, and shoot more carefully in the first place.

As you can see, there are plenty of reasons to never delete photos off of your phone. And, given the range of storage options available these days, there is no need to do so either.

These Are My Favorite Canva Free Features

Canva provides many graphic design tools and features, but many are only available for Canva Pro users. You can access plenty of great tools from a free Canva account, however. These are my favorite free Canva features.


1 Website Builder

Canva is mostly used for creating social media designs, but you can also create entire websites using Canva’s website builder. While you won’t get the most extensive website, it’s a great place to build one-page sites or landing pages using Canva’s easy templates along with its drag-and-drag process for design elements.

You can add navigational menus to jump to different parts of the one-page design, hyperlinks to external sites, images, animations, text designs, and all design elements available. Your website is also responsive—all without needing to know how to code, host, or troubleshoot.


There are pros and cons for using Canva’s website builder, but for a free feature, it’s one of Canva’s best offerings. Canva offers free users up to five Canva domains to host for your Canva websites, meaning you can have up to five live websites for free hosted by Canva.

Canva Animation Tools

The majority of Canva’s animation tools are available to free users, except Magic Animate—an AI animation tool—and some speed/intensity settings for the animation tools.

You can easily transform your Canva designs for social posts or online adverts by adding animated elements, text, or images. Canva’s free animation tools work effectively and are easy to navigate.


You can choose from subtle or bold entrance or exit animations, page animations, or you can animate an element along a self-drawn path across your design using Canva’s Create an Animation feature. The tools look simple, but they produce high-quality results.

3 Color Edit

Canva Edit Color

The Canva Elements library feels infinite, but sometimes the elements you find aren’t in the colors that match your design. Luckily, for both vectors and other image elements, there are free ways to edit the colors in Canva.

You can use the Color Edit feature to change colors in an SVG vector uploaded to Canva, which allows you to rebrand elements to fit your design’s colors. You have to navigate your way through a few menus, so Color Edit tools are often overlooked by Canva users.


Canva Duotone Effects

There are other color editing tools for non-vector graphics, such as duotone, colorize, and filters.

Canva Links

Sharing your Canva projects is helpful in more than one way. Not only does it let you easily collaborate with project partners by sharing your project with team members, but you can also share your designs with anyone. Linking your project lets you receive feedback or save time when others need access to your project, since they can open and edit it directly at the same time.


Canva lets you choose whether your project link can be used to edit your project or be kept as read-only. Sharing editable Canva links is the best way to create and sell Canva templates on online marketplaces like Etsy—we recommend you make a duplicate copy of your project when using links to distribute to others.

5 Layers

Canva Layers

Using layers in graphic design software is one of the best ways to keep your projects organized and to easily access elements overlapping with others.

From the Position tab, you can select between seeing all the layers in their order or specifically viewing only overlapping layer elements. Viewing your layers directly in the Layers panel saves time and frustration rather than clicking and double-clicking throughout your project to navigate to the correct element.


Along with the alignment tools also found in the Position tab, easily being able to re-order the layers is one of the most helpful free Canva features.

6 Docs to Decks

Canva Docs

Canva Docs is an area of Canva that’s set up slightly differently than the other design options. You can create well-designed documents such as resumes, documentation for meetings, presentation notes, articles, and more.

With Docs to Decks, at almost the click of a button, you can quickly transform your written document into a beautiful presentation deck. This works most successfully when your document uses correctly sized headings and titles, images, and paragraphs.


Canva Docs to Deck

Docs to Decks is found by selecting Magic Resize—even if you’re a free user—then you can choose the design type to match your document design, and Canva will apply all the information correctly to each slide.

You may have to edit the colors or branding throughout the generated presentation deck, but the auto-layout works very well. It’ll save you time from creating the entire presentation from scratch, although you can do that with templates in Canva too.

7 Video and Audio

Canva Video and Audio Tools


Canva is primarily a design tool, but it also offers some video and audio features within its free access. While there are better video editing tools, such as CapCut or Premiere Pro, if you don’t need anything expertly produced or if you’re adding a quick video to social media, Canva’s tools are a great free option.

You can use any of the free video templates in the extensive video library. These include YouTube intro videos where you can edit text or swap out image elements. You can also upload your own videos to Canva, although they only work as elements, so you don’t have much editing power over them.

There’s an audio library in Canva too, although the majority of audio is for Pro users only. However, when using any free tracks, it allows you to easily add the track to your video where you can extend or crop the sound to fit with your visual project. Canva Pro users can sync the audio to the visuals—which might be a good enough reason to choose Canva Pro over Canva Free.


Using Canva’s free video and audio tools means you don’t have to learn video editing software or pay high-end subscription prices, especially if you’re not creating videos very often.

8 Design Accessibility Check

Canva Design Accessibility Check

Good design should be accessible to everyone, which is why it’s important to keep accessibility in mind when designing. Design accessibility includes high-contrast colors, bold and readable text, large enough minimum body text, and well-placed layouts. Web-based accessibility needs to fit the WCAG ratio for acceptable contrast and size.


Overall, the best design practice is to design inclusively at every stage. You can use Canva’s built-in design accessibility checker to test your design to the minimum standards. Inclusive design is often overlooked, but with a free built-in tool like this, there’s no excuse for your designs to not be accessible to everyone who may view them.

Found under the File tab of the design page, the design accessibility check reveals green ticks when your design hits the mark and numbered issues where you can improve. When selected, the issues will show advisories on fixing your design to make it more accessible.

Canva’s free tools provide great design options and the available tools go beyond this list, including text tools, element libraries, and Canva’s third-party apps. These are my favorite free Canva tools as they are often overlooked, but you can do so much with them without paying for Canva Pro. Though feature availability may change, all mentioned features are available for free at the time of writing.


Here’s How It Compares to the Free Version

Key Takeaways

  • Photoshop Express Premium offers RAW editing and additional features for customization.
  • It’s not as powerful as Photoshop for desktop and has fewer premium features compared to other tools.
  • Photoshop Express Premium is worth considering for advanced photographers or those who want to edit RAW files, but the free version is sufficient for most casual users.


I’ve often recommended Photoshop Express as a fantastic mobile editing app, especially if you want to create graphics for social media. You can also purchase a premium version, but is it worth getting? I tested it over an extended period to find out.


The Differences Between Photoshop Express Free vs. Premium

Photoshop Express Premium has a handful of features you won’t find with the free version, such as editing RAW files. You also get access to additional themes for collages and other types of edits that aren’t available with a free plan.

Furthermore, Premium provides full access to the app’s suite of editing tools. If you aren’t sure what you can do with the app, check out this guide on what Photoshop Express is and how it works. You can tell if a feature is premium in Photoshop because it will be marked with a purple star, which you’ll also see if you’ve signed up for Premium on your profile picture.


How to Get Photoshop Express Premium

You can get Photoshop Express within the app by following these instructions:

  1. Go to the settings icon.
  2. If you have a free account and haven’t tried PS Express Premium before, you should see an option asking if you want to start a free trial. Tap Start Trial.
  3. The following windows will inform you of your free trial’s terms and conditions. Confirm that you want to proceed, and when the free trial ends, upgrade if you’re happy with how the features worked for you.

Download: Photoshop Express for iOS | Android (Free, in-app purchases available)

What I Liked About Photoshop Express Premium

Having used Photoshop Express Premium for a while, there are several things that I like and dislike. First, I’ll discuss the things that I am a fan of with PS Express Premium.


1. Editing RAW Files

By far the biggest advantage of using Photoshop Express is the ability to edit RAW files. I almost always shoot in RAW on my Fujifilm camera, and sometimes, I don’t want to edit on my computer. Having Photoshop Express as an alternative option is quite nice, and it’s one of many reasons that I think PS Express is one of the Adobe mobile apps worth using.

RAW editing gives you more options to make deeper edits, and some smartphones are also starting to introduce RAW file editing. So, this feature will be useful even if you don’t have a DSLR or mirrorless camera. An alternative to Photoshop Express for RAW file editing is Lightroom, and if you choose to go for that app instead, check out these Lightroom mobile tips and tricks.

2. Access to More Editing Features

The free version of Photoshop Express has a decent enough selection of features, especially if you’re just looking to make basic adjustments to your smartphone pictures. But at the same time, it’s also nice to have additional tools if I want to switch up my designs a bit.


More specifically, I like how Photoshop Express Premium has more filters to choose from. This is not only nice for editing my designs, but it’s also helpful for testing new things that I might want to hone with my professional photos later.

3. More Customization for My Designs

Another benefit of upgrading to Photoshop Express is that I have much more flexibility when it comes to customization. For example, I can choose from different collage layouts and pre-designed templates to add my images to. As a result, it’s easier to make designs stand out if I want to share different graphics and whatnot.

If you want to make your visuals more striking, consider checking out these essential basic design elements and how to use them.


What I Disliked About Photoshop Express Premium

I’ve mentioned a handful of things that I like about Photoshop Express Premium, but it’s far from the perfect tool. To help you make a better decision, I’ll also outline two big things I didn’t like—I would actually argue that these are even more important than the pros.

1. It’s Nowhere Near Good as Photoshop for Desktop

I’m not really surprised about this because Photoshop Express is supposed to be a “lite” version of the full Photoshop app. However, if you’re looking for advanced photo editing features, I would recommend getting Photoshop for desktop any day of the week. You’ve got a more comprehensive suite of features, such as better color balance features and access to Camera Raw.

The Remove Background Button in Adobe Photoshop


Even though you can edit RAW files on Photoshop Express, I still prefer to use Lightroom Classic on my computer for initial edits and then finetune in Photoshop if needed. You should consider improving your Photoshop skills via keyboard shortcuts, observing the masters, and more if you decide to use the full version.

2. The Premium Features Lack Compared to Other Tools

While it’s true that Photoshop Express Premium gives you more editing features, I’m not sure if I can recommend it to everyone. In my opinion, there isn’t a big enough difference between the free and paid editions to justify upgrading if you’re a casual photo editor.

Compared to other Adobe apps, for example, I think that Adobe Express’s paid version has enough exclusive features to justify the upgrade. Similarly, for other tools, I think Canva’s paid plan is a significant upgrade to the free edition.


Using the free trial for Photoshop Express is a good idea; if you don’t use any of the new features compared to what you did before, you probably don’t need to upgrade.

Is Photoshop Express Premium Worth Getting?

Photoshop Express is worth getting, but only for some people. If you already use an extensive range of in-app features, it’s worth thinking about getting the paid plan. I would also suggest upgrading if you edit RAW files or you want to start doing so, and the same goes for if you’re already pretty advanced at photography and want to enhance your skills further.

However, I’d argue that most people don’t need to upgrade to Photoshop Express Premium. If you only want to add a few filters and access basic features, the free version of Photoshop Express is plenty comprehensive. I would suggest first looking at Adobe Express or Canva if you want more advanced design features.

How to Uninstall Apps on a Mac

Key Takeaways

  • You can use a third-party app like AppCleaner to fully delete unwanted apps and their leftover files.
  • Some apps, like Adobe software, come with their own installers. In such cases, it’s better to use their dedicated uninstallers.
  • You can use Terminal commands to forcefully remove apps and their residual files when other methods don’t work.


Most of the time, uninstalling apps on your Mac is pretty straightforward. However, some apps may leave behind traces even after you’ve uninstalled them. We’ll show you how to completely remove those apps, including any files they leave behind.


1. Move Apps to the Trash

The simplest way to uninstall an app from your Mac is to drag it to the Trash icon on your Mac’s Dock.

Note that you must do this from the Applications folder in Finder; you can’t uninstall an app by dragging the app’s icon from the Dock to the Trash. You can also Control-click on an app’s icon and select Move to Trash from the context menu.

If you’d like to remove multiple apps, hold the Command key and click the app icons to select them individually. Then, Control-click and select Move to Trash.


Now, to delete the app permanently, Control-click on the Trash icon in the Dock and select Empty Trash from the context menu. If you can’t empty the Trash, make sure the application isn’t running in the background.

Emptying the Trash in macOS

This method removes all the app’s files from the Applications folder, which can sometimes be more than just the app itself. While most apps will completely uninstall using this method, others might leave some residual files behind. To get rid of everything from a given app, use the next method instead.


2. Use AppCleaner to Delete Apps Fully

macOS deals with app files in two separate ways. Besides the app itself, there are associated files spread across the file system. These can be in the Library folder or a related folder in an entirely different location. To completely uninstall an app, you need to delete those leftover files as well.

AppCleaner is a free utility that helps you delete all leftover files from an app. You can also use AppCleaner to delete unwanted apps that shipped with your Mac, such as iMovie, GarageBand, Pages, and more. After opening AppCleaner, you’ll see a blank area where you can drop any app you want to uninstall.

Download:AppCleaner (Free)

AppCleaner on Mac


The best part about AppCleaner is the transparency it brings to the uninstallation process. You’ll see a list of all its associated files. The app will automatically select related files that are safe to delete. All you need to do is click Remove.

Deleting Zoom using AppCleaner

You can also set up AppCleaner to automatically delete any related Library files when you delete an app. To do this, click AppCleaner in the menu bar and select Settings from the dropdown menu. Now, switch to the SmartDelete tab and toggle the switch to ON.

AppCleaner SmartDelete toggle


Now, when you move an app to the Trash, you’ll see a pop-up asking if you want to move associated files to the Trash as well. Just uncheck the items you don’t want to delete and select Remove.

3. Use Dedicated App Uninstallers

Some Mac apps come with their own installers. These apps install their own helper and update utilities, which makes it much harder to completely uninstall them down the line.

Adobe, in particular, makes the process unnecessarily complex. Even if you delete an Adobe app, the helper utility and menu bar app will still say put. Even using an app like AppCleaner won’t be helpful in these cases.

The only way to get rid of apps like this is to use their own uninstaller. First, open Spotlight (or Finder search), and look for the app name followed by “uninstaller.” If you find one, open it and start the uninstallation process. A pop-up menu might appear asking you to enter your Mac’s password or use Touch ID.


typing uninstall in finder's searchbar

If you can’t find it on your Mac, do a Google search. Some apps will let you download an app-specific uninstaller to remove them.

Application resources are stored in the Library folder. These are files that an app requires to function properly. When you delete an app on your Mac, the related files in the Library folder usually stay put unless you use a program like AppCleaner.

Messing around with Library files can be dangerous. If you delete a file that’s crucial to macOS, it can result in crashes and data loss. But if you know what you’re doing and you only want to delete specific files related to an app, here’s what you need to do:


  1. Open a Finder window and click Go in the menu bar while holding the Option key. From the dropdown, click on Library.
  2. Now click the Search button and enter the name of the app or the file you’re looking for. Click the Library button to narrow down your search to the Library folder.
  3. When you find a related file, select it and drag it to the Trash. Alternatively, you can Control-click the file and choose Move to Trash.

Moving apps to Trash from the Library folder in macOS

Remember to empty the Trash to permanently remove the residual file from your Mac.

5. Uninstall Mac Apps Using Terminal

Terminal is a powerful tool for taking matters into your own hands. Instead of downloading and trusting a third-party app, you can get the job done with just a command. Even if you’re new to Terminal, you can still use a simple command to uninstall an app.


Just open Terminal from Applications > Utilities in Finder and type the following command:

sudo uninstall file:// 

Next, drag the application icon to the Terminal window, and it will automatically enter the path of the app, as shown in the screenshot below:

sudo uninstall file:///Applications/Rove Papers.app 
Deleting Rove Papers app via a Terminal command

Press Return (or Enter), input your admin password, and Terminal will uninstall the app for you. If you run into any trouble, use the following command instead:

sudo rm -rf  

Add a single space to the end of the command and drag the app into Terminal to input the path before pressing Return. As an example:

sudo rm -rf /Applications/Rove Papers.app 
Deleting Rove Papers app via Terminal commands


You’ll be prompted to enter your Mac’s admin password again. Simply do that, and the app will be deleted from your Mac entirely.

Use caution while running the
sudo rm -rf
command. Inserting an incorrect path can lead to data loss.

Usually, deleting an app will result in the app and all its data being completely removed from your Mac. However, in the rare case that some data and leftover files remain, you can use any of the methods above to remove them from your Mac.

5 Things a Mac Can Do That Your iPad Can’t

When used together, a Mac and iPad complement each other, thanks to various Apple Continuity features. Depending on your workflow, you may be inclined to pick an iPad over a Mac. However, there are still many things an iPad can’t do that a Mac can.


1 Download Third-Party Apps From the Internet

With an iPad, you’re limited to downloading apps from the Apple App Store. On the other hand, you can install third-party apps on your Mac from both the App Store and the web, especially after you completely disable Gatekeeper.

While you should be able to find most of the apps you need to use daily on the App Store, it can still be quite limiting. For example, if you purchase an iPad for college, you may soon realize that you can’t download certain software you need for your degree.

One notable example is Visual Studio Code, which is available for Macs but not iPads.


2 Macs Let You Multitask Better

Sure, with an iPad, you can use Split View and Slide Over to efficiently multitask on your iPad. If you want to take it one step further, you can also use Stage Manager on your iPad to use more than three apps simultaneously.

Split view displaying Canva and GoodNotes apps side by side

Despite all that, multitasking on a Mac is much better. Even though you can use Split View and Stage Manager on your Mac, the best part about multitasking on a Mac is that you aren’t limited in the number of tabs, windows, and apps you can use simultaneously.

You can also use Mission Control on your Mac to see your Split View screens and all your open windows.

Mission Control displaying open Split View screens and windows


Additionally, you can create multiple desktops with Mission Control to better organize your workflow. The macOS Sequoia update, which Apple plans to roll out in fall 2024, makes window tiling even easier. You will be able to drag windows to the edge of the screen and snap them in place.

3 Capture a Portion of the Screen

Capturing a specific portion of the screen is handy when you want to show the relevant bits without revealing your entire desktop. On an iPad, you’re limited to taking a screenshot or screen recording of your entire screen and then cropping it to focus on a specific part of your screen.

Taking screenshot of a specific part of iPad Screen


On the other hand, with macOS, you can simply hold and press the Shift + Command + 4 keys simultaneously. All you need to do is drag the crosshair across the part of your screen that you’d like to take a screenshot of, and that’s it!

Similarly, if you’d like to screen record instead, you can do so by pressing Shift + Command + 5 keys simultaneously. Now, choose the Record Selected Portion button. Simply adjust the box that appears to cover the part of the screen you’d like to record and click the Record button.

Capturing specific part of screen on Mac

While this isn’t a major feature that will drastically transform your workflow, it can help you save some time if you capture your screen frequently.


4 Act as an AirPlay Receiver

AirPlay lets you wirelessly stream content or mirror your Apple device’s screen to nearby AirPlay receivers like an Apple TV, HomePod, AirPlay-enabled TVs or speakers, or even your Mac.

Unfortunately, while you can stream content or mirror your iPad’s screen to a Mac, you can’t mirror your Mac’s screen to an iPad because the latter can’t serve as an AirPlay receiver. You can mirror your Mac’s screen to another Mac, though—or any other AirPlay receiver you own.

Additionally, macOS Sequoia introduces iPhone Mirroring to let users interact with their iPhones directly from their Macs. Unfortunately, this is not one of the iPadOS 18 features Apple announced at WWDC 2024.


5 Manage Files More Efficiently

As someone who uses an iPad and Mac for work and college, I can confidently say that the Files app on the iPad is quite limited compared to Finder on Mac. On an iPad, you can sort your files by Name, Kind, Date, Size, and Tags.

iPad Files app showing sorting options

In contrast, you have more options on a Mac, like Date Last Opened, Date Added, Date Modified, and Date Created. This means the Files app lacks subcategories under the sort by date option. While this may seem minor, being able to sort files by the last time you opened or modified them can be very useful if you frequently edit documents.


Mac finder app showing sorting options

Additionally, while you can group files via Tags in the Finder, you can’t do the same in the Files app. There’s also no “Open With” option in the Files app, which can be inconvenient.

Finder on macOS also allows you to customize how your files and folders appear. You can choose between a list view, column view, icon view, or gallery view, whereas the Files app lacks the gallery view. Finder also lets you create Smart Folders, which automatically gather files based on criteria you specify—another feature not available on iPadOS.

macOS Finder menu bar with 'File' dropdown menu


Ultimately, while the Files app on your iPad will suffice for managing a smaller number of files, such as for schoolwork, things can get quite chaotic if you have hundreds of documents.

Before you decide between an iPad and a Mac, I recommend glancing at your workflow. Remember that iPads don’t come with a keyboard. So, basic tasks like drafting emails and navigating your device can be cumbersome unless you invest in one of the best iPad keyboards.

If you anticipate needing to perform any of the tasks mentioned above, an iPad may not be a great purchase unless you already own a laptop or desktop.

This Is the Easiest Method

Key Takeaways

  • Disk cloning is the simplest method for moving Windows OS and data to a new drive, using software like Macrium Reflect or manufacturer-specific tools.
  • Ensure the new drive is detected, initialized, and has sufficient space before cloning.
  • After cloning, set the new drive as the boot drive in BIOS or UEFI settings to boot from it.


Whether you are upgrading from HDD to SSD or installing a bigger capacity drive, here’s the easiest way to move your existing Windows operating system installation and all the data to another drive.


Important Things to Consider Before You Begin

Disk cloning is the process of moving an existing Windows installation to another drive. While a backup image also works, it unnecessarily complicates the process. With disk cloning, you choose your source drive (the current system drive) and your destination drive (the new drive) and then configure the boot drive. Once you have done that, you’ll be booting from your new drive in no time.

To move Windows to another drive, you need migration software. You have two options for this. First, you can use a manufacturer-specific data migration tool like the Samsung Magician Software or Acronis True Image for Crucial SSDs. You can check whether your PC manufacturer offers a cloning solution.


If you can’t find a first-party migration tool, you can use Macrium Reflect. It’s a premium third-party utility for creating disk images, cloning, and PC backup. Other disk cloning software includes Acronis, EaseUS Disk Copy, CloneZilla, and DiskGenius. However, Macrium Reflect gets the edge because to its ease of use and less intrusive design.

Tashreef Shareef/MakeUseOf

Before we begin, it’s important to install your new SSD/HDD drive on a laptop or PC and make sure it’s detected in the Disk Management utility. You may also need to initialize the SSD before you can use it. If you are trying to replace your HDD with a SATA SSD, you’ll need a SATA-to-USB cable to clone disk before swapping the drive.


How to Move Windows to Another Drive Using Macrium Reflect

Macrium Reflect is a premium storage backup and cloning tool for Windows. Go to the Macrium Reflect website and download the Home version of the tool. You can purchase a license or opt for a free trial. After entering your details, you’ll receive a download link in your email. Use this link to download the installer and run it on your computer. Follow the on-screen instructions to install the app.

To prevent any issues, make sure the new drive has equal or more space than your current drive or disk cloning won’t work. It will delete all the data on the destination drive, so don’t forget to back up anything important.

Once done, follow these steps to move Windows to another drive:

  1. Launch Macrium Reflect to start the cloning process. In the Local Disks tab, locate and select your Windows installation drive. Then click the Clone this disk option.
    Macrium Reflect Software with the Local Disks tab open

  2. A new Clone dialog will open, showing the Windows installation drive selected as the source. Make sure all the partitions of the source drive are selected with a check mark.
    Macrium Reflect Software clone tab showing the source and destination option

  3. Now, you need to select the destination (new) drive to which the Windows files will be moved. Click Select a disk to clone to and choose your destination drive from the list.
    Macrium Reflect Software clone tab showing source and destination option 1

  4. Then click the Erase Disk option to erase all the data from the destination drive.
  5. To move the installation, select the Copy selected partitions when I click ‘Next’ option in the bottom-right corner. Then click Next to continue.
  6. If you get the “too many primary partitions, nothing copied” error, then click the Copy Partitions option and choose the Shrink or extend to fill the target disk option. Click Next to continue.
    Macrium Reflect Software clone tab showing the Copy Partitions option

  7. On the next screen, you can schedule the clone. To clone immediately, click Next. Read the summary of drive cloning and click Finish.
    Macrium Reflect Software clone tab showing the clone summary and finish option

  8. In the pop-up menu, select the Run this backup now and Save as a backup definitionfile box. Agree to any warnings and click OK.
    Macrium Reflect Software clone tab showing the backup save option

  9. Depending on your disk size, this process may take some time to complete. Once the clone is complete, both drives will look the same in Macrium Reflect.


Set Your New Drive as the Boot Drive

To boot from your newly cloned drive, you may need to replace your existing SATA drive with it, except when moving Windows from SATA to M.2 SSD. Regardless, you’ll need to set your new drive as the main boot drive in the BIOS or UEFI settings.

You can enter BIOS on Windows 10 and 11 by pressing the F10 key during restart. However, the hotkey can vary depending on the manufacturer. Instead, we’ll use the Esc key to access the start menu and proceed from there.

  1. Shut down your computer. Then press the power button to turn it on and press the Esc key repeatedly to view the Startup menu. In the startup menu, press the corresponding key to enter the BIOS or UEFI utility. In this instance, it’s F10 for the HP laptop.
    HP startup menu utility
    Tashreef Shareef/MakeUseOf

  2. Once in the BIOS utility, go to Boot Options. Again, there may be some differences depending on your manufacturer, but anything related to ‘Boot‘ is a good guess.
    HP BIOS utility showing the Boot Options tab
    Tashreef Shareef/MakeUseOf

  3. Use the arrow keys to highlight OS Boot Manager, then press Enter to select it. In the OS Boot Manager dialog, select your newly cloned drive and press F10 to save it as the boot drive.
    HP BIOS Utility with the OS Boot Manager drive selected
    Tashreef Shareef/MakeUseOf

  4. Finally, navigate to the Exit tab and select Save Changes and Exit. If successful, your computer will restart and boot from the new drive.


Disk cloning is the easiest way to move Windows 10 or 11 to another drive. In rare instances, you might experience a Windows activation issue, but it’ll resolve on its own within 24 hours. However, remember that installing the cloned drive on a different computer and booting from it won’t activate Windows, as the digital license is tied to your system’s motherboard.

If you plan to install the cloned drive on another computer or new hardware, make sure to link your Windows product key to your Microsoft Account first. You can then sign in to Windows with your Microsoft account, and it will automatically activate the license.

Why You Should Avoid the Motorola Razr+ (2024)

Motorola launched the Razr+ (2024) in June 2024 with some key improvements like a bigger outer display, faster chip, and better cameras. While it poses a threat to Samsung’s Galaxy Z Flip line, I still find it hard to recommend due to the reasons below.


Motorola Is Slow to Deliver Android Updates

Mamun sheikh K/Shutterstock

This detail can be easy to miss if you don’t regularly follow smartphone news. Nonetheless, it’s the biggest reason why you may want to avoid Motorola’s flagship foldable. The original Razr+ launched with Android 13 in June 2023. Google unveiled Android 14 a few months later, but the Razr+ didn’t get it until July 2024.

That means Razr+ owners are getting Android 14 just as all the attention is shifting to Android 15, expected to launch in late 2024. By comparison, the Galaxy Z Flip 5 got Android 14 in late November 2023.


The Razr+ has actually fared better than many other Motorola devices. The company’s budget phones often never receive a major version update. Unfortunately, this is just not something the company prioritizes, even for its flagships.

Motorola Only Offers ​3-4 Years of Support

Motorola promises three years of Android version updates and four years of security updates. This isn’t a bad commitment, but considering how slowly Motorola releases updates, there’s reason to be skeptical if you see more than two major version updates. But even if you do, you can probably still do better by sticking with Samsung.

In 2024, Samsung promised seven years of software support for the Galaxy S24 series. It’s safe to expect the same for Samsung’s upcoming foldables as well. Is it realistic to expect a foldable to last for seven years? Maybe not, but that hasn’t stopped Samsung from promising four years of support for the Galaxy Z Flip 5.

If this is a big purchase for you (and for most of us, it is) and you want your phone to last as long as possible, you may not want to jump on the Razr+ bandwagon.


The Build Quality Isn’t Great

Many reviewers will tell you the 2023 Razr+ doesn’t feel quite as sturdy as the Z Flip 5. The hinge feels a tad less stable, something you notice as you flip the phone open all throughout the day. As our comparison of the Razr+ and the Z Flip 5 summarized, the Razr+ looks better, but the Z Flip 5 works better. The trend was the same for older models as well.

With the Razr+ (2024), it’s not the hinge where you’re most likely to notice a difference; it’s the screen. The Razr+ has a larger outer screen than the Z Flip 5, which is a big part of its appeal. However, Motorola uses Gorilla Glass Victus for the outer display, which is outdated, considering it first appeared on the Galaxy S21 in 2021.


The Z Flip 5 already had Gorilla Glass Victus 2 in 2023. With the outer screen serving as part of your inner screen’s protection, it’s nice to see it be as resilient as it can be. Unfortunately, the Razr+ (2024) doesn’t deliver in this regard.

​Motorola’s Software Isn’t As Robust

If you prefer stock Android, you may find much to love in Motorola’s Hello UX over Samsung’s One UI. You may especially love Motorola’s approach to the cover screen, pictured above, which allows you to run full apps on the exterior of the device.


However, Samsung has packed so much functionality into its phones that’ll get you hooked quickly. For instance, you can extensively customize your Samsung phone using Good Lock. The One Hand Operation+ module is handy with such a tall phone. In addition to Samsung’s more developed range of apps, its camera software is more feature-complete.

Motorola has added some nifty features to the Razr+ (2024), but in many ways, it seems like the company is just playing catch-up. Motorola’s unique take on the cover screen may not be enough to overcome all that you’re missing out on.

While I find the Razr+ to be the more exciting phone, I don’t think I’d be happy owning it once the novelty wears off, and I’m left wondering whether or not it’ll get Android 15. It’s also an open question whether bigger cover screens are actually a good idea on flip phones.

Did You Know There Are Two Different Microsoft Defender Apps?

Key Takeaways

  • Windows Security is a built-in antivirus and firewall solution, while Microsoft Defender is a standalone app for Windows, Mac, iPhone, and Android.
  • Microsoft Defender offers additional features like identity theft monitoring, VPN, and a centralized dashboard, but these are limited in availability depending on the device and region.
  • Both services work together and complement each other, but it’s essential not to disable built-in or third-party protection.


Your Windows computer comes with Windows Security, a built-in but barebone security solution. You can get more premium features by installing Microsoft Defender, a standalone security app for Windows, Mac, iPhone, and Android devices. If that sounds confusing, blame Microsoft’s atrocious naming game. But these two are separate security solutions and offer different, albeit complementing features. Let’s explore the differences between them.


What is Windows Security?

Formerly known as Windows Defender (which would have made the nomenclature even more confusing), Windows Security is a built-in antivirus and firewall solution within the Windows operating system. It offers essential protection against offline and online threats, including manual scans and threat management capabilities.


If you have a Windows computer, chances are you’ve used it before, and it is probably the only antivirus your computer will ever need. Here’s what you get with Windows Security:

  • Virus & threat protection: Windows Security uses the Microsoft Defender Antivirus engine at the core of its security solution to provide real-time protection against malware. You can perform a quick, custom, or offline scan, adjust ransomware settings, manage controlled folder access, and create exclusion lists.
  • Account Protection: Secure your Microsoft account settings, including login, account recovery, and password options.
  • Firewall & network protection: Customize your firewall settings on different networks and configure inbound and outbound traffic rules.
  • App & browser control: You can control how Windows screens your apps for malware and customize SmartScreen settings to filter websites and downloads.
  • Device Security: Allows you to access advanced security to monitor your system for core isolation, secure boot, and hardware security options.
  • Device performance and health: This shows a quick overview of your device’s health, including battery life, storage capacity, and potential issues with apps and software.
  • Family options: Manage parental control to set screen time habits, track your child’s digital activity, and filter accessible content on the PC.


What’s Microsoft Defender?

While it may sound similar, Microsoft Defender is a standalone security app for Windows, Android, iOS, and macOS. Microsoft clarifies that it’s not an antivirus replacement on Windows and iOS devices but offers malware protection on Android.

Microsoft Defender app showing the Device Protection screen

Microsoft Defender is part of the Microsoft 365 suite, so you don’t need to pay extra to install the app. If you are a subscriber, the app is likely already installed on your device. If not, you can install it from the Microsoft Store or your device’s respective app store.

Put simply, Microsoft Defender acts like an add-on that works alongside Windows Security or any third-party antivirus software installed on your computer or smartphone. However, it offers some of its own unique security features:


  • Identity theft monitoring: Track 60 different types of personal data and get alerts when there’s a data breach or suspicious activity on your credit report.
  • Identify theft insurance (US only): It provides up to USD 1 million in coverage for restoration costs and support in case of data breach or identity theft.
  • Threat and suspicious activity alerts: Monitor and receive security alerts for up to five devices linked to your Microsoft account through a centralized dashboard.
  • Device Protection: On Android, Microsoft Defender can scan for malicious apps, run a malware scan, check the blocked apps list, and block unsafe websites. However, iOS devices are limited to jailbreak detection and web protection only.
  • Privacy protection: Browse privately by hiding your IP address through encryption with the included VPN service, which offers up to 50GB of data usage per month.


Windows Security vs Microsoft Defender: Which is Better?

Despite their confusing names, Windows Security and Microsoft Defender are not competing but complementary services. Windows Security is built into your Windows operating system for basic protection and runs locally on your computer. Microsoft Defender is an additional security layer that works with your existing antivirus solution. On a Windows computer, it acts like a security dashboard for Windows Security or your third-party antivirus.

So, even if you have Microsoft Defender on your computer or smartphone, it’s important not to turn off your built-in or third-party protection, as it’s not meant to replace it.

Microsoft Defender app showing the Other devices screen


What sets Microsoft Defender apart is its centralized dashboard. Compared to third-party rivals, it works quietly in the background with minimal effect on system performance and no intrusive prompts. It allows you to view and manage security risks across all your devices from one place. It also includes additional features to protect your online presence across various devices, regardless of whether you use Windows or not.

Here’s a quick comparison between Windows Security and Microsoft Defender:

Feature

Windows Security

Microsoft Defender

Centralized Dashboard

No

Yes

Antivirus/Anti-Malware

Yes

Yes

Firewall

Yes

No

Device Security

Yes

Yes

App & Browser Control

Yes

Yes

Family Options

Yes

Yes

Identify Theft

No

Yes

Cross-Device

No

Yes (Windows, Mac, Android, iOS)

Parental Controls

Yes

Yes

VPN

No

Yes (up to 50GB)

Password Manager

No

No

Subscription

Free

Microsoft 365 Personal/Family


Microsoft Defender Caveats…

Microsoft Defender is a nifty add-on for Microsoft 365 subscribers, but there are some caveats. Microsoft Defender’s premium features are largely restricted to the US. For instance, at the time of writing, the VPN service is limited to Android and iOS devices in the US, Canada, Germany, and the UK. Moreover, you can’t manually select a geo-location and are capped at 50GB of data per month.

Identity theft monitoring and identity theft insurance are also exclusively available to US users. And while you benefit from antivirus protection and malicious app scanning on Android, iOS users only have access to web protection and jailbreak detection.

So, even if you are a Microsoft 365 subscriber, the availability of features can vary depending on the device/platform and region. You won’t miss out on anything if you are in the US, though.


Should You Use Microsoft Defender?

Microsoft Defender for Individuals is a premium service bundled with your Microsoft 365 subscription. In the absence of a dedicated antivirus solution, depending on your region, you can use Microsoft Defender to make up for the security features missing in Windows Security, like identity theft management, VPN, and centralized management of multiple devices. When combined, Microsoft’s security offering should keep you safe both offline and online.

However, if you are not a Microsoft 365 subscriber and want premium security features, a dedicated third-party antivirus tool can offer more features with fewer restrictions.

How to See Your Spotify Stats

Key Takeaways

  • Check your top artists and tracks on the Spotify web app by accessing your Profile and selecting Show All under Top Artists This Month and Top Tracks This Month.
  • Use third-party apps like Stats for Spotify, Chosic, and Obscurify to analyze your Spotify statistics, including top artists, genres, and songs, as well as more in-depth insights.
  • To protect your privacy, log out of third-party websites by removing access to your account.


Curious about your Spotify vibe? Do you want to know your Spotify statistics? Or learn about the songs and artists you’ve listened to the most?

You don’t have to wait until Spotify Wrapped at the end of the year to do that. Music statistics are a fun way to learn about your taste in music, as well as your listening habits, and you can use Spotify and third-party apps to check out your stats.


How to Check Your Top Artists and Tracks Using the Spotify Web App

Spotify Wrapped appears at the end of each year, providing statistics like the top songs you listened to, your top artists, what percentage of listeners you fall into, your top genres, etc. You can even view your old Spotify Wrapped playlists after Spotify Wrapped is over.

However, did you know you can check some of your Spotify stats without waiting for the yearly Wrapped feature? You don’t get specific minutes listened to or the in-depth analysis of Spotify Wrapped, but it gives you a good quick insight into your recent listening habits. All you need to do is go to Spotify.com (it doesn’t work in the desktop app), log into your account, then follow these steps:


  1. Click on the user icon in the top right corner of the web page and select Profile.
  2. You should see a section titled Top artists this month. Click on it or the Show All option located to its right. You’ll be able to see all your top artists for the month.
  3. Next up, head back to your Spotify Profile and scroll down to Top tracks this month. Again, click the link or select Show All, and you’ll see your top tracks for the month.

As you can see in the Spotify web app, this information is only available to you, so you don’t need to worry about someone else finding what you like.


How to See Your Spotify Statistics Using Third-Party Apps

Seeing your top tracks and artists is useful, but if you’re like me, you want the hard data behind your listening habits. Thankfully, there are tons of third-party apps and websites you can use to check your Spotify statistics. These apps access your account, collect data, and provide statistics.

You’ll need to permit these apps to access your data, but there are three free, easy-to-use ways to check your Spotify statistics.

1. Stats for Spotify

Stats for Spotify is a free website that allows you to check statistics like top artists, top genres, top tracks, and recently played songs. It even lets you create playlists. Just log into the website with Spotify and begin your search.


Stats for Spotify lets you check your Spotify statistics over three time periods: four weeks, six months, and all-time. And when you’re done, you can choose to create a playlist of all your most streamed songs for any timeframe. You can then share your Spotify playlists with your friends and family.

2. Chosic

Chosic is another useful and free website for checking your Spotify statistics. With Chosic you can not only check your top artists and songs, but you can check your top main genre, sub-genre, decade, mood, and listening habits. It also allows you to run these statistics against three time periods: a month, six months, and all-time.


Chosic also provides services like the Spotify Playlist Analyzer, where you can analyze any playlist for information and statistics like ratings, genre, popularity, and moods. Another service Chosic provides is the Spotify Playlist Sorter, where you can easily sort your playlists alphabetically, by release date, or in any order you want.

3. Obscurify

Obscurify is a free website that lets you check your Spotify statistics, learn about your music taste, and compare your music tastes to other people around the world.

Obscurify lets you check your top genres, artists, and songs from the current period (defined as six-weeks) and all-time. It also analyzes your moods and favorite decades and provides song recommendations.


Perhaps the most unique feature of this website is its obscurity rating. Obscurify analyzes how rare and obscure your overall music is compared to other listeners. You can also switch to different countries to determine how obscure your music is compared to other listeners in that country. It also highlights your top five obscure artists and songs (though it feels like some are less obscure than others).

How to Log Out of Third-Party Websites on Spotify

When you are done checking and analyzing your Spotify statistics, it would be best to remove the website’s access to your account to keep your Spotify account private. To do this, log into your account on the Spotify web app and follow these steps:

  1. To open your Spotify account, select your profile icon in the top right corner, then select Accounts.
  2. In the new window, scroll down to Manage apps.
  3. Click on Remove Access to prevent the websites accessing your account and data.


Everyone loves Spotify Wrapped. The end-of-year roundup is a fun way to see what you’ve been listening to throughout the year. But a whole year is a long time to wait, especially when there are other ways to see your Spotify listening data ahead of time.

I Replaced Discord With Steam Chat: Here’s Why

Key Takeaways

  • Steam Chat offers seamless integration into the Steam client, avoiding the need for additional applications during gaming.
  • Neglecting Steam Chat is common due to its subtleness, leading users to miss out on its robust group chat functionality.
  • While Steam Chat is great for existing gaming groups, its limitations compared to Discord make it less versatile for expanding social circles.


For years, Discord reigned supreme as my go-to communication platform when gaming. Its smooth interface, plethora of features, and vibrant communities made it a one-stop shop for chatting with friends and all sorts of socialization. But recently, I found myself drawn to a simpler solution: Steam Chat. Here’s why.


Steam Chat vs. Discord: Communication for Gamers

Gamers have relied on communication platforms to strategize, share laughs, and build friendships. And when it comes to PC gaming, there’s no gaming client more popular than Steam. Like virtually all other gaming clients, Steam comes with its own communication platform.


Seamlessly integrated into the Steam client, Steam Chat offers a familiar and convenient way to connect with your Steam friends. It has been around for as long as Steam has been around, and while it started as a very simple texting service, Steam Chat has evolved to do a lot more now.

Discord, on the other hand, has carved a broader niche as a multi-purpose communication hub. While it started as chat for gamers, Discord isn’t just for gamers anymore; it welcomes anyone seeking a feature-rich communication platform. Vibrant public servers, a focus on community building, and a wider range of functionalities like screen sharing and custom bots make Discord a powerful tool for diverse online interactions.

The Neglected Beauty of Built-in Simplicity

Steam Chat overlay on a video game


The biggest advantage of Steam Chat is its integration into the Steam client. You don’t need to open a separate app to chat with people you’re playing with on Steam.

I have an AMD graphics card and Razer peripherals, and when I play a Steam game on Windows while talking to my teammates on Discord, all the third-party apps fight to have their overlays on my game, so much so that I’ve basically run out of shortcuts for them. If you have a similar setup, you know that less is more when it comes to third-party apps and background processes.

Steam’s overlay is necessary when playing a Steam game, and if you’re using Steam Chat, you don’t need to minimize your game or bring up a sluggish Discord overlay to leave a voice channel. Steam Chat’s built-in simplicity not only saves your computer some memory but also saves you a ton of extra steps if you simply want to talk to a teammate.


Once you’re in-game, all you need to do is press Shift + Tab on your keyboard, and the Steam overlay will pop up. From there, you can chat with any friend and tap the plus icon on the top right to invite more friends and start a group chat.

Creating a group chat in Steam

Steam Chat offers robust group chat functionality that feels very similar to Discord servers. You can create channels for specific topics (like a strategy for your next raid or just casual banter), assign roles with different permissions, and enjoy a familiar chatting experience within the Steam ecosystem.

Steam Chat also has a refreshingly lightweight design, which I can’t emphasize enough. The design focuses solely on text and voice chat, minus the bells and whistles you might not use often.


A group chat in Steam

One likely reason why many neglect Steam Chat is its subtleness. When updating Steam, which happens less frequently than updating Discord, you don’t get eye-catching notifications about the latest features. As a result, many users, myself included, assume that Steam Chat remains the same as it was five years ago.

Permission settings for a Steam group chat


In a specific scenario, when I played Warhammer Vermintide 2 and teamed up with a stranger, we decided to do more missions together. At that time, to connect with him, I sent a friend request on Steam, and once he accepted, I messaged him and sent a Discord invite, but the link didn’t work. Then I had to type out my Discord username, have him add me, accept it, and add him to my Discord server.

All this hassle was simply because we were oblivious to Steam Chat’s existence and convenience.

Steam Chat Can’t Do All That Discord Does

Server discovery tools on Discord

While Steam Chat excels in maintaining a pre-existing gaming group, it has limitations compared to Discord’s versatility. Expanding your social circle or finding new communities is significantly harder. Unlike Discord’s public server discovery tools, Steam’s chat functionality remains largely tied to your Steam friends list. This insular nature makes it challenging to stumble upon new groups or connect with players outside your network.


Although you can create invite links to your Steam Chat group and share them on social media, Steam Chat inherently requires a Steam account, which is somewhat of a barrier to entry for non-gamer friends.

While Discord functions seamlessly regardless of gaming preferences, convincing someone who doesn’t use Steam to create an account solely for chatting presents a hurdle. This exclusivity makes Steam Chat less ideal for broader communication needs that extend beyond the realm of gaming.

Even if friends do agree to join Steam for Steam Chat, Discord offers so much more as a casual hangout den that it wouldn’t make sense to use Steam. Discord activities are easy to hop on and off for quick fun, and Discord bots really expand Discord’s domain for every purpose.


Despite these limitations, Steam Chat doesn’t aim to replace Discord completely. It thrives in a specific niche: fostering communication within established gaming groups. For those who already have a solid squad, Steam Chat offers a streamlined and integrated experience that perfectly complements their gaming sessions.

However, if you crave a feature-rich platform for diverse online interactions, Discord remains the undisputed champion. You won’t see a YouTuber drop a link to their Steam Chat group in the video description; it’s always Discord.

In the end, for those who prioritize a lightweight and focused experience for their existing gaming circle, Steam offers a surprisingly compelling alternative. It might not be a one-size-fits-all solution, but Steam Chat’s simplicity and integration can be a breath of fresh air within the ever-growing complexity of online communications.

I Ditched My Camera for My Smartphone as a Pro Photographer: Here’s How It Went

Key Takeaways

  • Smartphone photography can produce good photos, but has limitations compared to dedicated cameras.
  • Using a smartphone can make you more creative and take more everyday photos.
  • Smartphones are great for learning photography basics before investing in a camera.


As someone who does professional photography and also takes pictures as their main hobby, I was compelled to undertake a bold experiment: ditch my camera and just use my smartphone. After testing this approach for a week, here’s what I learned.


1. You Don’t Need a Proper Camera to Take Good Photos

Danny Maiorca/MUO

I’ve said for years that gear does and doesn’t matter, and I stand by that opinion after running this experiment. It’s easy to get caught up in marketing campaigns and listen to manufacturers say that you need something. The truth is that while cameras can help you upgrade your photography, you don’t need one to take good photos.


When I let go of my camera for a week, I was initially worried about not being able to capture shots that I liked. But photography is primarily about the story you tell, and you can do that with a smartphone. I also found it quite easy to adjust the colors and such using Apple Photos, and I also think that I know more about what does and doesn’t work now.

I actually took photos exclusively on my smartphone for two years before deciding to get my first camera. If you’re still figuring out whether you want to take photography more seriously, I suggest doing the same. And if you’re just a casual photographer, you can get away with only using your smartphone.

2. But Smartphone Cameras Still Have Their Limitations

The other side of the coin here is that smartphone cameras are still limited. I don’t think I’d ever use a smartphone for professional work, and I also didn’t like using my smartphone for capturing objects farther away. For example, the image quality is—in my opinion—not as good on a smartphone when photographing cityscapes or landscapes.


these are the features that I think smartphones need to compete with cameras. The zoom quality on smartphones is nowhere near the standard I’m used to on my mirrorless camera, and even if I use smartphone camera apps, they don’t give me anywhere near the flexibility of a purpose-built camera.

Every device has its limitations, and this also goes for cameras. I’m sure that I will need to upgrade my device at some point; your smartphone can be a stepping stone if you later want to further pursue your photography.

3. Using My Smartphone Forced Me to Get More Creative

Photo of house roofs in a city
Danny Maiorca/MUO


Despite the drawbacks of using a smartphone camera, I have to say one thing for sure: it forced me to get more creative, and I liked the challenge. When I use prime lenses and smartphone cameras, I often find that the limited flexibility from not being able to zoom actually brings out more of my creative side. That was also the case with this experiment.

Because I had to think more carefully about taking good pictures, my smartphone forced me to think outside the box and seek interesting angles. I found myself observing my surroundings more for different objects that I could leverage, which ultimately led to more interesting shots.

If you want some ideas to start with, check out this guide on getting the perfect composition in your smartphone photos.

4. Organizing Your Photos Is Even More Important on a Smartphone


I always keep my camera pictures organized in different files and folders, but admittedly I sometimes slack a little in this area. However, when taking pictures on my smartphone, I quickly realized the importance of keeping my camera roll in shape. Your smartphone camera roll features screenshots, videos, and various other things, and not organizing them will quickly become confusing.

To stop my camera roll from becoming cluttered, I made an effort to delete pictures that I knew would never be put to use. You can do this by first marking the images you like as favorites; once you’ve done that, go through the others and decide whether they’re worth using or not. If they aren’t, there’s no point in keeping them.

5. I Took More “Everyday” Photos With My Smartphone

Photo of a cityscape along a lake
Danny Maiorca/MUO


Another big insight I got when ditching my camera for my smartphone is that I took more “everyday” pictures. For example, I was more likely to capture shots of things that I thought looked nice at home. This is mainly because taking pictures with a smartphone requires less effort than taking my camera out of my bag, turning my device on, changing the aperture, and then getting the shot.

Since my mood is always better when I take photos, this was a very nice byproduct of only using my smartphone. It’s also something that I would like to continue, even though I now use my proper camera again. If you’re thinking of doing the same, make sure that you tweak some essential settings before posting your smartphone photos.


6. Smartphones Are Excellent for Learning the Basics of Photography

As I mentioned earlier, I used a smartphone to learn the basics of photography for two years before getting my camera. One could argue that I would have learned more if I’d bought the camera first, but I don’t think that’s true. Why? Because if you can’t use a tool, it’s ultimately useless—regardless of the specs.

If you’re totally new to photography, I suggest using your smartphone to learn basics like composition and lighting. Once you’re comfortable with the core components of taking a good picture, you can upgrade to a camera. It was nice to have this reminder when ditching my camera for my smartphone.

7. You Care Less About the Technical Aspects When Taking Photos With a Smartphone

Image of a Cityscape Along a Lake
Danny Maiorca/MUO


I’ve made a conscious effort to care less about the technical aspects of photography over the past years because it felt like I was stifling my creativity. In my opinion, you become an expert at something when you learn the rules and then know how to break them. When you look at a great photo, you probably don’t think too much about the aperture it was taken at or what ISO the camera has.

When I took photos with just my smartphone, I cared a lot less about the technical aspects than on my camera. The main reason behind this was that I had less control, so I focused more on what to photograph instead. My key takeaway here would be this: learn the technical aspects, but once you’re experienced enough, use them as a guideline and not an absolute rule.

I Won’t Ditch My Camera Forever, but I Learned a Lot From This Experiment

Having a week away from my camera and focusing just on smartphone photography was quite nice, and it was good to get back in touch with the basics of photography. I wouldn’t use my smartphone for professional photography, and to be honest, I was quite happy to start using my mirrorless camera again. Nonetheless, it made me realize that it’s not essential to have your camera if you want to take good photos.


I would actually suggest using a smartphone to learn the basics of photography before upgrading to a camera later. However, you’ll also need to understand the limitations of your device.

7 Things to Consider Before Using Smart Bulbs for Your Smart Home

Key Takeaways

  • Understand the differences between smart lights, switches, and bulbs for installation purposes.
  • Consider whether you need a smart hub and weigh the costs of smart bulbs vs. smart switches.
  • Be aware of smart bulb drawbacks, such as compatibility with certain fixtures and potential security risks.


Many people choose smart bulbs as an easy way to automate their lighting. These devices are relatively inexpensive and simple to install. Plus, they’re available everywhere. Sounds perfect, right? Well, not so fast. Here are a few things you’ll want to consider before going all-in on smart bulbs.


1 What Are the Differences Between Smart Lights, Smart Switches, and Smart Bulbs?

You may have heard these terms used interchangeably. However, it’s important to understand the key differences to avoid buying the wrong product. The biggest of which is the method of installation.

  • Smart lights is a blanket term that refers to all smart lighting devices. This includes everything from LED strips to bulbs to entire lighting fixtures.
  • Smart switches usually denote replacement light switches designed to be hard-wired into your home’s electrical system.
  • Smart bulbs are light bulbs with some type of networking capability. They look just like regular bulbs and most will fit standard E26 fixtures.


Based on these differences, make sure you know which one you want to buy for your smart home.

2 Do I Need a Smart Hub to Use Smart Bulbs?

A smart hub is like a control center for your lighting. Manufacturers like Philips Hue require the purchase of a hub to use their bulbs. We love Philips Hue for several reasons. However, many manufacturers sell bulbs that explicitly work without a hub.

Ultimately, whether you’ll need a smart hub comes down to the number of devices you intend to add to your home. Lighting installs with only a handful of bulbs won’t need one. If you have a larger home or many lights, then a hub is probably the better choice.

3 Is it Cheaper to Install Smart Bulbs or Smart Switches?

Emmily/Shutterstock


The number of smart devices you want to control will affect whether it is less expensive to buy bulbs or switches. Likewise, your skill at installing electrical equipment could play a role.

If you have several lights that you operate with a single switch, it might be cheaper to just replace the switch. However, if you feel you’ll need to hire an electrician for that job, then choosing bulbs might save you some money.

4 What Kind of Support Do Smart Bulb Manufacturers Offer?

It’s always a good idea to know what to do if a smart bulb goes bad. And most name-brand smart lighting manufacturers offer excellent warranty support if you experience a defect. Some, like Philips, even offer 24/7 chat support. The exceptions are usually more budget-centered product offerings.

The best way to avoid being left in the dark when an issue emerges is to compare product reviews on various websites. Note how support issues are handled. Is the company responsive, empathetic, and professional, or are they argumentative and cold? These interactions can provide insight into how a company might treat you if there’s an issue.


5 What Type of Light Fixture Am I Using?

relay and bulb
Samuel Garbett/MakeUseOf

Most smart bulbs are direct replacements for the bulbs you’re using now. But be aware that dimming fixtures usually require a special type of bulb. If you see a designation that a smart bulb should not be used in a dimming fixture, don’t disregard the warning. Using a non-dimmable bulb in a dimming fixture can cause the bulb to flicker or otherwise act strangely.

6 Can I Install Smart Bulbs if I Rent?

If you’re a renter, using smart bulbs is a great way to lower your energy costs and ensure you get back your security deposit. They’re easily replaced with regular bulbs when moving out, and you can take them with you to install in your new home.


However, you should always check your rental agreement before installing smart devices to ensure you won’t be in violation. Doing so could keep you from running into future problems. We’ve put together an entire list of smart home products for renters that you might want to check out.

7 What Are the Downsides of Using Smart Bulbs?

a lock icon on a smartphone screen
antstang/Shutterstock

We think that smart bulbs are a good all-around solution for many people, with a few caveats. First, you’ll find that cost can be a concern. As we mentioned earlier, if you need to outfit a large home, and you’re on a tight budget, then buying a boatload of bulbs probably won’t be very cost-effective.


Specialty fixtures can also limit your ability to employ smart bulbs. If your fixtures use E12 candelabra bulbs, EM16 track lighting, or T9 fluorescent bulbs, for example, then you could have a hard time finding smart replacements.

Finally, smart bulbs could pose a threat to your home’s network security. In August 2023, researchers from Italy and the UK published a paper identifying a vulnerability in one of the most popular smart bulb products, the TP-Link Tapo L530E. If exploited, this vulnerability could allow hackers to steal Wi-Fi passwords. Fortunately, the issue has since been resolved.

Likewise, a 2019 study found that some smart bulbs can be “maliciously used to violate users’ privacy and security.” It should be noted, however, that reports of hackers attacking smart bulbs are relatively rare.

Overall, smart bulbs are a great point of entry into the smart home space. But you should know that they aren’t right for every person or every scenario. If you keep that in mind, you’ll be much happier as you outfit your smart home.


6 Smartphone Camera Apps That Will Lead to Better Photos

Key Takeaways

  • There are plenty of apps available for your smartphone that will help you take and edit better photos.
  • 1998 Cam provides retro filters and effects for a vintage look, with a paid subscription for more filters and features.
  • Other good camera apps include DAZE CAM and ProCam.


Make your pictures more interesting with these smartphone camera apps. Some of them will automatically edit your images, while others let you add unique filters. You can use most of these apps for free, and many have paid subscriptions if you want to upgrade.


1 OldRoll

OldRoll’s app resembles a film camera when you take pictures on your smartphone, and you can replicate the photography style of several devices (you’ll need a paid plan to unlock everything). One of the best features is the ability to change your white balance, which will give you more control over how warm or cool your image looks and help you get the perfect white balance in your photos.


When using OldRoll, you can also adjust the lighting in your image. Moreover, you have the option to turn the flash on or off. After taking your picture, you can change the contrast, saturation, and other aspects such as cropping your picture and adding blur, grain, and vignette.

It’s also possible to choose whether you want watermarks on your picture or not. Once you’ve edited your photos and exported them, you can share them wherever you wish. The app is available on tablets in addition to your smartphone. If you choose to upgrade to the full version, unlimited plans cost $2.99 per month or $9.99 per year.

Download: OldRoll for iOS | Android (Free, in-app purchases available)

2 1998 Cam

Taking pictures on the 1998 Cam app


1998 Cam is another great app if you want to make your images look retro. You can choose from several filters for your images, which cover numerous styles—such as film and vintage. You can also use different grids to frame your pictures better, and it’s possible to edit the effects in your photo—such as whether you want bokeh—after taking them. 1998 Cam also lets you add timestamps to make the pictures look more old-fashioned.

The app has a paid version that offers access to more filters and other features, which costs $17.99 per month for an annual subscription. If you want to try out the full edition before committing to a purchase, you can get a 30-day free trial. At the time of writing in July 2024, the app is only available on iOS.

Download: 1998 Cam for iOS (Free, in-app purchases available)


3 ProCam

Smartphone photography via the ProCam app

ProCam lets you take pictures in RAW, TIFF, and other formats. So, if you want to do more editing later, you’ve got a lot of flexibility (note, however, that these bigger file sizes will consume more storage space on your smartphone).

You can change the ISO in your pictures, which gives you much more control than you’d normally have on most smartphone cameras. You’ll have more flexibility in situations with low light, and it’s also ideal for reducing the amount of light coming in on sunny days; I often find that smartphone images are particularly flat when it’s bright out.


Moreover, you’ll see what the white balance is like in your pictures and get a better understanding of your shutter speed. Even if you don’t change any of these settings, I recommend monitoring them so that you learn how lighting works. You can also look at this guide to the exposure triangle in photography for more context.

When using ProCam, you can change the focal length and set a long timer. The latter is especially helpful if you want to take long-exposure photos in low lighting conditions, and you can get creative by experimenting with it in different daytime conditions as well.

Download: ProCam for iOS (Free, in-app purchases available)

4 Timestamp Camera Basic

Timestamp Camera Basic App for iOS


Timestamp Camera Basic is an easy-to-use app that, as the name suggests, lets you add a timestamp to your pictures. You can include the date and even the location where you are. When using this app, you can also change your photo resolution and pick from numerous filters to get the exact style you’re looking for.

The app lets you pick from long-exposure timers of three, five, and 10 seconds. Moreover, you can use it for time lapses and videos. To ensure that you don’t burn through your battery, you can also make the most of battery-saving mode.

If you want to upgrade and get full feature access, you can do so for $4.99.

Download: Timestamp Camera Basic for iOS | Android (Free, in-app purchases available)

5 RetroCam


RetroCam is one of my favorite apps for adding film and other retro-style looks to my images. I use it for both smartphone photos and JPEGs that I import from my mirrorless camera. You can quickly add multiple filters for different lighting effects, and it’s also possible to include overlight effects to make your image look older. For each of these, you can adjust the intensity.

RetroCam also has basic filters that change the colors in your images and look similar to some of the best Instagram filters. You’ll find a significant range of filters for free, along with a number of paid options; in my opinion, RetroCam is one of the best alternatives to VSCO.

When using the RetroCam app, you also have access to various other photo editing features. For example, you can adjust each of the following:

  • Brightness
  • Contrast
  • Vibrance
  • Highlights
  • Saturation
  • Temperature


Some features, like adding a date, are available if you upgrade to the full version. If you want to do that, RetroCam costs $19.99 per year. You can get a three-day free trial before deciding whether to commit to a purchase.

Download: RetroCam for iOS | Android (Free, in-app purchases available)

6 DAZE CAM

Another smartphone camera app that I recommend for taking better photos is DAZE CAM. You can use this app to take film-style pictures and choose from different filters to pick the right effect for your image. Joshua Tree was one that I thought looked particularly good, but there are plenty of others (you can also adjust the intensity slider to better fit your style).


For some images, you can change aspects other than just the intensity—such as radius and sensitivity. It’s also possible to add a date and choose whether you want dust and other particles to appear in your image. Moreover, you have an option to add vignette if you feel like doing so.

If you have a free plan, you can develop up to five photos. Upgrading to a paid subscription will offer unlimited access, and doing so costs $19.99 for an annual subscription.

Download: DAZE CAM for iOS (Free, in-app purchases available)

Whether you want to take or edit pictures on your smartphone, you’ll find plenty of apps that help you create better photos. Many of these have comprehensive free versions, and if you want to upgrade for full access, monthly and annual plans normally aren’t that expensive.

Why You’re Seeing 403 Errors and How to Fix Them

Key Takeaways

  • A 403 forbidden error indicates restricted access to a resource or page, often due to membership, location, or IP address restrictions.
  • Different issues can cause a website or service to display a 403 error message.
  • To fix a 403 error, try reloading the page, clearing your browser cache, using a different network, checking the site URL, contacting the website, contacting your ISP, or checking back later.


Have you encountered a 403 forbidden error message while trying to access a website and wondered what it means or why it was shown? There are various reasons why you may see this error.

We’ll break down what a 403 forbidden error means and share some tips on what you can do to fix this issue whenever it arises.


What Is a 403 Forbidden Error Message?

A 403 forbidden error is an HTTP status code that notifies you that the resource or page you want to gain access to has been blocked. Essentially, a 403 forbidden error is a “you can’t go in there” warning. The 403 forbidden error message is similar to the “Do Not Disturb” sign hotel guests place on their doors.


Websites display the error message in line with their code as the error is displayed from the server, and as such, it may vary. You may see the error messages in the different variations: 403 Forbidden, HTTP 403 Permission Required, 403 – Forbidden Error, 403 – Forbidden: Access is denied, or Forbidden You don’t have permission to access / on this server.

What Are the Possible Causes of 403 Forbidden Error Messages?

Different websites report 403 forbidden errors for diverse reasons and in diverse ways. Here are the most common reasons this happens:

Content Access Is Limited to Subscribed Members

You may be unable to access a website because its owner has privatized the content. They could do this for any reason. For instance, some hotels, bars, or gyms only have membership access, so only subscribers can access the websites. It is also possible that the site is undergoing changes the owner does not want to reveal yet.


Only Authorised Members Can Access Content

Certain facilities are only accessible to a select few; a typical example of this is a school library. Usually, you would need your school ID card to access a school library and maybe a library card to borrow books. In the same vein, websites can limit their access to specific users.

error 403 forbidden page example
ninefotostudio/Shutterstock

Website Content Is Limited to Specific Locations

Geo-blocking is a tactic used by content providers to limit access to their content based on location. Many websites function this way, and you can only access them if you live within a specific location. A common example of a service that does this is Netflix.

You may wonder how the website can identify your location; your internet protocol (IP) address works like an address. It is possible for someone or a service to pinpoint your specific location from your IP address.


Multiple Failed Login Attempts From an IP Address

A website might block an IP address when there are too many failed login attempts from an IP address. Websites usually take this precaution to avoid spam and unwanted posts from the IP address.

Other Causes of a 403 Forbidden Error

Another reason you may run into a 403 forbidden error is a server misconfiguration. Misconfiguration can happen in various forms, including missing index files, misconfigured plugins, wrong permission for the site’s files and folders, the site’s domain not pointing to the correct server, or a conflict between folders and website pages with identical names.

How to Fix a 403 Error Message

403 errors stem from different causes, so fixing them also requires different approaches. We’ll start with general quick fixes for this error before narrowing it down to more specific solutions.

1. Reload the Page

It’s no new thing to hear of websites being incorrectly configured. Usually, the website will be inaccessible for the duration of the misconfiguration.


Once the issue has been resolved, the site will be accessible to everyone again. It would be best if you try this solution first because it is the fastest and least complicated way to troubleshoot a 403 error message.

2. Clear Browser and Cookies Cache

Sometimes, you may see a 403 error message on a webpage with cached files or cookies on your browser. This may happen when the website has been tweaked or the saved cached data in your browser is outdated.

Google Chrome cookies settings on macOS

This prevents your browser from visualizing the webpage the way it should—resulting in a 403 forbidden access message. Clearing your cache and cookies and reloading the page can help solve a 403 error.


3. Use Another Network

There is a possibility that a website has intentionally blocked access from a specified range of IP addresses or locations, and your IP address could be among the blocked ones. Try opening the site from a different network, changing your IP address, or using a VPN to redirect to another country.

If you gain access to the site with the new network, your network or country has been blocked. You can check our guide on bypassing internet restrictions and viewing any website for more tips.

4. Check the Site URL

Typographical errors can occur anywhere, even on a website you’ve visited many times before. Checking that you have the right URL by retyping it can solve your 403 forbidden error message.

Another reason to check your URL is to ensure you are referring to a webpage, not a directory, as most websites disallow directory browsing. Directory browsing occurs when you access a website’s files and folders instead of a webpage.


5. Contact the Website

make a complaint website example

403 error messages are sometimes a mistake. This means everyone, no matter their location or what internet service provider they use, receives an error message every time they attempt to access the website.

In most cases, the website doesn’t know this is happening. You can contact the site to inform them of the problem so they can rectify it.

6. Contact Your Internet Service Provider

Another method you can employ to solve this issue is reaching out to your internet service provider. You should do this when you are confident that other people can access the website, especially people in the same location as you.


7. Check Back Later

If you’re certain you have the right URL and are not the only one experiencing this problem, you must take a step back and check later. The website owners will be notified about the situation based on your complaints and those of others, and the issue will likely be sorted out.

403 error messages can be annoying, and depending on the resource you’re trying to access, they can rain on your internet parade. However, stay calm and try one of the numerous methods listed here to troubleshoot the error.

If the tips above don’t work, try our platform-specific solutions. Remember, different websites and services can display 403 error messages for different reasons. As such, fixing Roblox’s 403 error messages will differ from fixing 403 errors on Windows. The same applies to solving 403 errors on Linux.

“Super Bundles” Can Help Save on Streaming, but What Are They?

Key Takeaways

  • Super Bundles combine multiple subscriptions into one monthly payment, including TV, phone, and internet.
  • Companies like Verizon, T-Mobile, and Comcast offer these bundles to save consumers money and reduce stress.
  • As more providers offer super bundles, they may become the norm, simplifying monthly bills and saving consumers money.


Today’s streaming landscape makes it difficult to figure out which services are worth paying for. With so many monthly subscription payments, we’re often forced to continuously sign up for and cancel subscriptions just to watch our favorite shows.

But a new addition to the entertainment landscape is the “super bundle,” which will make things significantly easier for everyone and change how we approach our media subscriptions.


What Are Streaming Super Bundles?

Nate Williams/MakeUseOf

While there are several streaming bundles out there that combine multiple streaming services into one monthly subscription, super bundles take it one step further by combining everything you pay for in a month into one deal, including TV, phone, and internet.


Companies like Verizon, T-Mobile, and Comcast have opted to start offering these kinds of bundles, which aim to take stress off the consumer and save them money. Even though these bundles are starting to pop up more often, there aren’t quite enough options to make switching to one of these plans an obvious choice.

Why Is There a High Demand for Super Bundles?

Subscription cancellation screen
Daisy Daisy/Shutterstock

Bundling multiple monthly subscriptions into one bill is nothing new. In the days of cable, people bundled their cable and internet, and now you can bundle your at-home Wi-Fi directly into your phone plan. Consumers prefer a streamlined process where they can have fewer monthly bills to pay and save money on necessities.


The ideal plan is one where everything required is included in one monthly subscription, with no worry about juggling multiple bills every month. This would include more than just phones, Wi-Fi, and streaming, but even music, sports, gaming, and whatever else each person is interested in.

More companies offering these super bundles with different plan options based on your interests would be a huge win and make the often overcomplicated subscription process less of a headache. It would also make it easier to decide which mobile carrier provider is the best option for not just wireless but home internet and streaming, too.

But it’s not just regular folks who benefit from these bundles; it’s the providers, too. Offering bundle options ultimately brings in more revenue and, most importantly, cuts down on high subscription turnover. So, what’s stopping these companies from offering these bundle options?


With so many subscription services out there, it comes down to the bigger providers being willing to bring together a variety of options for their customers. At this point, with more of these super bundles popping up, it seems like only a matter of time before they become the norm.

4 Super Bundles Available Now

1. Xfinity

The first bundle we’ll look at actually isn’t a full-fledged super bundle quite yet, but it does allow you to get internet and mobile service, with the option to include a few streaming services for an added price. When you get at-home internet and mobile through Xfinity, you’ll save on both, picking up both for $35 per month. You can also add Xfinity Streamsaver to your internet plan for another $15 a month. With Streamsaver, you’ll get Netflix, Peacock Premium, and Apple TV+, saving 30% on each service individuall.y


Xfinity already offers various services that can be added to your monthly bill, including cable, home security, and home phone. This bundle isn’t perfect, but considering it’s a fairly new deal, there is a lot of room for growth. Even as is, you’ll only be paying a little less than $100 for at-home Wi-Fi, mobile service, and some of the best streaming subscriptions available.

2. T-Mobile

Hulu with T-Mobile offer

The T-Mobile super bundle is undoubtedly one of the best values currently available. At just $50 a month, you can get T-Mobile 5G Home Internet with Go5G, T-Mobile’s most reliable mobile plan. But included in the Go5G plan, you get Netflix, Hulu, and Apple TV+ at no additional cost.


Not only is this one of the best bundles available now, it will only get better with time. T-Mobile just recently added Hulu to its streaming suite, which shows they are constantly trying to improve their plan. They also have limited-time deals and free trials on additional services that you can benefit from, including MLB.TV, Pandora, and SiriusXM.

3. Verizon

Verizon perk options for $10 per month

Out of all the providers currently offering super bundles, Verizon is the most on top of it. The plan options at Verizon are by far the most customizable, and their website is very user-friendly. You can choose which mobile plan is the best for you based on your data needs and the number of lines you have. No matter which mobile plan you choose, you can easily add home internet for only $35 a month.


But what really sets Verizon apart is the plethora of add-ons they offer. You can add the Disney Bundle (Disney+, Hulu, and ESPN+), Netflix and Max, Walmart+ (including a Paramount+ subscription), an Apple Music family plan, YouTube Premium, and many others, all for only an additional $10 a month.

This is about as perfect of a super bundle plan as you can get, with some of the best mobile and home internet plans at good prices and the ability to easily add on whichever plans appeal to you and save on all of them. If you’re looking for one plan to meet all of your needs, the Verizon super bundle is the best option.

4. AT&T and Spectrum

Spectrum TV plans with Disney+


There are a few other companies worth mentioning, like Spectrum and AT&T, which seem to be dabbling in bundles, although the options are quite limited. Spectrum offers the Disney Bundle in some of its TV plans, which you could get alongside Spectrum mobile and home internet.

Then there’s AT&T, which seems to be going backward in terms of plan options. You used to be able to get HBO Max included with certain AT&T and Direct TV bundles, but they seem to be slowly removing it without any mention.

These plans could get better in the future, but if any of the first three internet providers are available in your area, it would be advisable to steer clear of Spectrum and AT&T for the time being.

The biggest takeaway is that the Verizon super bundle is the obvious choice as far as add-on options and value. The other providers have catching up to do. Still, it’s only a matter of time before we start to see super bundles become the best way to pay for mobile, internet, streaming, and whatever else you’d typically pay for every month.


The only thing stopping these bundles from being more common now is collaboration between companies. But once a few of them start to work together, the competition will inspire more bundles to come about.

Here’s Why You Shouldn’t Bother With It

Key Takeaways

  • LinkedIn Premium offers limited messaging and job recommendations for a high price.
  • Low response rates mean that the paid messaging feature is not worthwhile.
  • The high cost, unhelpful job recommendations, and low response rates led me to cancel my premium subscription.


LinkedIn lets you stay in touch with professional connections and hunt for jobs. I recently tried out LinkedIn Premium after graduating, which offers extra features to help members during the job search. But I won’t be returning.


What Features Does LinkedIn Premium Offer?

LinkedIn Premium has multiple subscription tiers, ranging from $39.99 to $139.99 per month. The basic membership tier, Career, offers limited messaging with people you are not connected to, AI writing assistance, resume insights, the ability to see who has viewed your profile, as well as access to learning courses and interview prep materials.


The higher tiers of membership focus more on people who are hiring or looking for sales connections, so these tiers do not relate to the vast majority of people using LinkedIn for job hunting and connections.

Reasons I Cancelled My LinkedIn Premium Subscription

I recently graduated from law school, so I’ve been looking for a full-time job. But ultimately, the features just weren’t the price.

Low Response Rates

Part of the graduate job search involves the game of networking. Some job postings on LinkedIn include the name and profile of the person who posted the job. This is a great way to connect with a potential hiring manager to move your resume up in the pile. However, I found that I often did not receive responses from people I messaged.

The Career subscription offers five InMails per month, which means you can message five people you are not connected with. While I got some responses and a job lead, ultimately more than 50 messages went unanswered.


Screenshot of LinkedIn Premium Career Tier with benefits and price

It’s just not worth it to pay for these messaging features after receiving such low response rates. With a free subscription, you can add a note of up to 200 characters when sending an invitation. I’ve had luck using this free method to introduce myself and chat with people who work at companies I’m interested in or have knowledge of a particular field of interest.

Irrelevant Job Recommendations

Another feature LinkedIn Premium offers is a list of top job opportunities that match your profile and skills. More often than not, this feature showed me irrelevant job recommendations.


For example, even though I have a background in law, journalism, and policy, I was recommended jobs from grocery stores, car agencies, and fast food joints. While these jobs are great in a pinch, they do not relate to my prior experience or job goals. I had much better luck setting daily alerts for jobs with specific keywords.

If you’re looking for a new job, here are some tips for using LinkedIn to research your next job. Additionally, we’ve compiled some ways to improve your LinkedIn profile using AI to stand out for employers.

Unhelpful Candidate Comparisons

LinkedIn Premium also provides comparisons of your qualifications to other applicants for the job posting. Some breakdowns include the types of degrees applicants have, companies the poster typically hires from, and schools the company has hired from.

I’ve applied to more than 100 jobs over the past two months and received few responses, even from postings where LinkedIn said I was a top applicant.


Screenshot of LinkedIn Premium feature showing how a person compares to other job applicants broken down by experience level

The High Price

The lowest tier premium plan is a hefty $39.99 per month. For someone who is looking for a job or has been laid off, this cost is high. If people are using LinkedIn to look for a job after being laid off, why would they put precious resources towards a subscription without guaranteed results? Even for people who are employed, this can be too much, as well.

Ultimately, the high cost, unrelated job recommendations, and low response rates I experienced led me to cancel my premium subscription. The free version of LinkedIn works just fine for me.

How to Download Netflix Videos for Offline Viewing

Key Takeaways

  • You need an active subscription to download Netflix content. You can download content on all Netflix plans except the Basic with Ads plan.
  • Not all content is available for download on Netflix. However, all downloads have an expiry.
  • Enable Smart Downloads to efficiently manage your downloaded content.


You can stream movies and TV shows on Netflix anytime you want. However, whenever you need to watch on the go, you can download titles ahead of time so you don’t use up all your data.

Downloading your favorite shows and movies on Netflix for offline viewing is simple, but there are some tips and quirks you should be aware of.


Universal Rules for Netflix Downloads

There are some rules regarding Netflix downloads that stay the same no matter what platform you use.

  • You will need an active subscription. Not all plans offer downloads; the Basic with Ads subscription is the only plan that won’t let you download any shows or movies, so you’ll have to pick the right Netflix subscription.
  • Not all titles are available for download.
  • You can download individual episodes of TV shows, so you don’t need to download full seasons at a time.
  • You can download videos to multiple devices. Netflix allows a different number of downloads depending on your plan.
  • Downloaded movies and TV shows can only be viewed on the device you downloaded them. For example, if you downloaded Stranger Things on your iPad, you can’t watch it offline on your Android phone.
  • Downloading and streaming content consume the same amount of data, so downloading won’t save you any bandwidth unless you plan to watch a video multiple times.


How to Download Netflix Videos

Before downloading your favorite shows and movies on Netflix, you need to make sure you have the right device for the job.

Device Category

Minimum OS Requirement

Netflix App Requirement

Additional Information

Windows PCs and Tablets

Windows 10 or Windows 11

Netflix for Windows

As of June 2024, Netflix is removing the download feature. If you don’t see the option, it has been removed.

Android Phones and Tablets

Android Kit Kat 4.4.2 or newer

Netflix for Android

iPhones, iPads, or iPods

iOS 9.0 or newer

Netflix for iOS

Amazon Fire tablets

Fire OS 4.0 or later

Netflix for Amazon Fire

Chromebook or Chromebox

Any OS

Netflix app from Google Play

As mentioned above, Netflix will be removing downloads from its Windows app starting in June 2024. The Netflix help page explains, “A new Netflix app for Windows is coming soon, which includes support for watching live events, increased streaming quality, compatibility with ad-supported plans.” At the time of writing (July 1, 2024), the Windows app still allowed downloads, though we expect that to change with an upcoming update.


You’ll need to use the Netflix app on your laptop or computer to download content, as it’s impossible to do so via the browser. Unfortunately, Netflix doesn’t have an app for MacOS and Linux, so you can’t download titles on either platform.

To download content on Netflix, follow these steps:

  1. First, download and install the official app for your operating system. Next, log in to your Netflix account.
  2. On the home screen, select a title that you want to download. Alternatively, use the search icon to search for the item you want to download and tap on it from the search results to go to the dedicated page.
  3. Once you’re on the next page, click or tap the Download button to start the process. If you can’t see the button, the title is unavailable for download.
  4. For TV shows, hitting download will only save the first episode offline. You can download the rest manually by hitting the Download button adjacent to each episode title.


The procedure is more or less the same across all three platforms. There are only a few differences on Windows and Android.

  • Windows: By default, Netflix stores all data on the primary hard drive. We did not have a computer with two hard drives to test, but most Windows 10 apps only ended up writing on the primary hard drive. You can find the Netflix downloads on your computer, but you can only actually play the videos through the Netflix app.
  • Android: Netflix allows Android users to save videos to their internal memory or an SD card. To download to an SD card, tap your profile in the top right, then go to App Settings > Download Location and switch from Internal Storage to SD Card.


If your phone doesn’t have SD card support, or it has, but you haven’t inserted an SD card, you’ll only see Internal Storage (as shown above) as the only option when you tap Download Location​​​​​​.

What Are Smart Downloads on Netflix?

Netflix smart downloads

Netflix wants to ensure you have a great time watching content offline, so it has implemented a Smart Downloads feature. It means you’ll spend less time managing your downloads and more time watching them. Once you’ve watched a downloaded episode of the latest series, it will delete it and then automatically download the next episode.


Of course, this doesn’t just happen since you have to enable this feature yourself. It also only deletes a file once you reconnect to a network, so if you’re on a long flight, it will only delete the files when you touch the ground and your device goes back online.

  • On Windows, you can manage this feature by going to Menu > My Downloads > Smart Downloads > Enable Smart Downloads.
  • On Android, tap your Netflix profile in the top right, then navigate to App Settings > Smart Downloads and toggle on Download Next Episode.
  • On iOS, tap your profile at the bottom right and select the hamburger menu at the top right, then go to App Settings > Smart Downloads and enable Download Next Episode.

You can learn more about the feature in our article on how to use Smart Downloads on Netflix.


Netflix Downloads Aren’t Permanent

Remember, however, that Netflix downloads aren’t permanent. First, all Netflix downloads expire. Once a title expires, you can “renew” it by deleting the offline copy and downloading it afresh. Second, some titles have a limit on the number of times you can download them for offline viewing per year.

Lastly, while most Netflix originals are there to stay, the content the platform licenses from other content makers may only be present for a specific time. When movies and TV shows are removed from the catalog, they’ll also be removed from people’s downloads.

In summary, downloading content to watch later on Netflix is super easy to do. Thankfully, you should now be more than covered in any situation, regardless of your device.

How to Turn Off Location Services on Your iPhone

Key Takeaways

  • Apple lets you turn off location access for specific apps and system services individually.
  • You can also prevent your friends, family members, and contacts from tracking your location via the Find My and Messages apps.
  • We don’t recommend disabling location access for Find My iPhone, as it helps you track your device if you lose it.


Don’t want your iPhone to constantly track your location? Whether you’re concerned about privacy or simply want to save battery life, it’s easy to disable location services for specific apps and system services on your iPhone.


How to Disable Location Services for an App

Your iPhone allows you to revoke specific permissions for an app whenever you want. However, keep in mind that some apps will fail to function correctly without real-time access to your location.

To disable location access for an app on your iPhone:

  1. Open the Settings app on your iPhone.
  2. Scroll down and tap Privacy & Security.
  3. Tap Location Services. You should then see all apps that have requested access to Location Services.
  4. Select an app with location access, such as Camera.
  5. Tap Never to disable location services for the app.


Alternatively, you can select While Using the App to provide the app access to your location, but only while actively using it. That should prevent apps that rely on your location—such as Apple Maps and Google Maps—from breaking down completely.

You can also choose to disable Precise Location to provide an app only with a general idea of your current whereabouts, which is ideal if it doesn’t need a precise location to work normally.

Similarly, you can disable location access for specific system services on your iPhone. However, it’s best not to do that since many of these services are related to important tasks like tracking your iPhone if you lose it, setting the time correctly, and placing emergency calls. You can review and disable location access for non-essential services if you want.


How to Disable Location Tracking for Friends and Family

Your iPhone allows you to relay your location to friends, family members, and contacts via the Find My and Messages apps. However, if you don’t need this feature, you can stop location sharing using these steps:

  1. Open the Settings app on your iPhone.
  2. Go to Privacy & Security > Location Services.
  3. Select Share My Location.
  4. Turn off the switch next to Share My Location.

How to Disable All Location Services on iPhone

You can also disable all location services on your iPhone at once. However, we don’t recommend this, as it can prevent you from doing things like finding your parked car in Apple Maps.

If that’s exactly what you’re after, here’s how to do it:

  1. Open the Settings app.
  2. Go to Privacy & Security > Location Services.
  3. Turn off the switch next to Location Services at the top.
  4. Select Turn Off when you get a confirmation pop-up.


Keep in mind that iOS may temporarily restore location services if you activate Lost Mode for your iPhone. If you want to stop that (which we don’t recommend), you must disable Find My iPhone.

How to Disable Find My iPhone

Find My iPhone not only helps you find your device if you end up losing it but also prevents would-be thieves from wiping and using it due to a feature called Activation Lock.

However, if you’re looking to disable every last bit of location tracking on your iPhone, you may want to turn off Find My iPhone too. Here’s how:

  1. Open the Settings app and tap your Apple ID name at the top.
  2. Go to Find My > Find My iPhone.
  3. Turn off the switches next to each setting you want to disable:
    • Find My iPhone: Helps you track your iPhone if you lose it.
    • Find My network: Helps you participate in Apple’s Find My network to locate other Apple devices.
    • Send Last Location: Sends the iPhone’s last location when the battery is critically low.


That’s pretty much all you need to know about disabling location services on your iPhone. Turning off location services is one way to preserve your privacy. However, it’s important to strike a balance between disabling location access for privacy-invasive apps and maintaining permissions for those that are beneficial.

How to Spot Fake ChatGPT Apps on the Apple App Store

Key Takeaways

  • The official ChatGPT app will have OpenAI as the developer name on its App Store page.
  • You won’t find ChatGPT’s desktop app on the Mac App Store. You need to download it from OpenAI’s official site.
  • Remember to double-check the app’s logo and read the reviews while looking for the official ChatGPT app on the App Store.


Have you ever searched for ChatGPT on the App Store and found multiple apps claiming to be the official ones? Unfortunately, most of them are dangerous for your iPhone. But how do you spot a fake ChatGPT app on the App Store? Let’s find out.


Does ChatGPT Have an Official App?

DenPhotos/Shutterstock

If you wish to use ChatGPT on your iPhone or Mac, you may want to install the dedicated app from OpenAI. iPhone users can install the official ChatGPT app directly from the App Store. Mac users can download the ChatGPT desktop app from OpenAI’s official site; you won’t find it on the Mac App Store.


Simply put, you should be skeptical of any ChatGPT app that’s not developed by OpenAI. Cybercriminals always seek the easiest opportunity to target a bunch of users to scam them. Currently, they’re cashing in on ChatGPT’s popularity. As a result, you’ll find fake versions of ChatGPT on the App Store that may lure unsuspecting users into downloading them.

Apart from the official app, there is another way to use ChatGPT on your iPhone and Mac. You can do that easily by navigating to the official website through Safari or any other browser on your Apple device.

Download: ChatGPT for iOS | macOS (Free, subscription available)

How Can You Spot a Fake App on the App Store?

You should always take some precautions when downloading an app from the App Store and check if it is a legitimate version of ChatGPT. Here are some ways to spot a fake ChatGPT app on the App Store.

Check the Developer’s Name

The most reliable way to identify a fake app is to check the developer’s name. If you find another app claiming to be the official ChatGPT app but without OpenAI as the developer, it is surely a fraudulent version.


You can also check the developer’s profile on the App Store for more information about them.

Look for the App Reviews

ChatGPT App Store page on an iPhone
Tada Images/Shutterstock

The second step you should take is to check the reviews of the app you want to download. To quickly spot a fake app on the App Store, you should always refer to the reviews section and see what other users think.

If there is a series of negative reviews, it might be a sign that something is wrong with the app. It is also important to check if the reviews were done by real people or not, as fake reviews can be deceiving. This is a tactic known as click farming.

Review App Permissions

Another reliable way to spot a fake app on the App Store is by closely examining its permissions. If an app requests more than what is necessary, it could be a sign it is not legitimate.


For instance, a simple calculator app asking permission for your contacts is obviously suspicious. Similarly, why might a ChatGPT app need access to your address book? Before you download it, check if the app actually requires access to your contacts, location data, or other sensitive data.

Check the Logo and Grammatical Errors

It is also important to check the logo, graphics, and description of the service, as fake apps often use outdated logos, poor quality graphics, and have grammatical errors in descriptions. If you notice any discrepancies in these areas, it is likely that you are dealing with a fraudulent version of ChatGPT.

Examine the Number of Downloads

You can also get an idea of the trustworthiness of an app by checking the number of downloads it has. Generally, apps with many downloads are more reliable as they have been verified and tested by other users. Fake chatbot apps typically have lower download numbers than legitimate ones, so this may be another indicator that you’re dealing with something fraudulent.


Verify App Versions and Authenticity

Always ensure that the app you are downloading is the latest version and has been updated regularly by its developer. Fake apps often remain unchanged for a long time, which can be an indication that something is amiss.

Lastly, if an app seems too good to be true, it probably is. Before downloading anything, especially apps related to chatbots and AI, you should double-check it for authenticity and security.

Fake ChatGPT apps can put your device’s security at risk by downloading malicious code, tracking your browsing activity, and collecting private data. It’s important to be aware of such fake apps on Apple’s App Store as they may contain malware or spyware, which can cause damage to your device and even harm your privacy in the long run.

Fortunately, taking a few precautions when downloading an app can help you avoid any potential risks associated with malicious apps.

How to Tell If Your Phone Is Tapped: 7 Warning Signs

Key Takeaways

  • If your battery runs low very fast or your smartphone gets hot, your device might be tapped.
  • Unwanted ads, apps, and messages are further clues.
  • Android users can use secret codes to see if their data is being forwarded to a third party.


How can you tell if your phone is tapped? Many parties can tap into your smartphone, including hackers, your employer, an ex-partner, the government, or even the press. They might be listening to your calls, reading and sending messages and emails, or altering information on your interface. But how do you know if your phone is tapped?


Has Your Cell Phone Been Tapped?

There are a few ways to tell if your cell phone has been tapped, notably:

  • Battery problems: Is your handset getting too hot? Has your data usage increased? These could be signs that data is being sent to a third party. If you use Android, you can at least check data forwarding using codes like *#21*.
  • Poor performance: Are you seeing unwanted ads? Have you spotted apps that you can’t remember downloading? Hackers could be interfering with your interface, even changing the appearance of websites.
  • Strange messages: If you’ve received odd messages on your smartphone, they’re not necessarily spam. It could be a fault in the spyware that’s letting you see instructions sent from and to hackers. If your phone sends odd text messages to contacts too, the malware might be trying to spread to other people’s devices.


Do these signs ring a bell? Here’s how to tell if your cell phone is tapped.

1. Battery Problems

Does your smartphone get hot? Using numerous apps and consuming media makes your handset warmer, though not enough to cause damage or shut itself down. Watching videos consumes a greater percentage of your battery than listening to songs or podcasts, for instance. So yes, your battery can be a problem, regardless of whether your phone’s been tapped or not.

Nevertheless, a hot battery can be a sign of cell phone tapping. Malicious software could be running in the background, allowing someone else to listen in. And be suspicious if your phone simply won’t hold charge.

Monitor your phone: remember which apps you’ve used and how they affect your battery. If it consistently runs low on battery, don’t ignore the issue. Older handsets don’t hold a charge like newer models do, so you need to eliminate other possibilities before looking for nefarious purposes.


Take note of other reasons your handset might be hot. Have you been sunbathing with it? Have you been using lots of apps consecutively? Is a case locking heat in?

High temperatures and low power can nonetheless indicate malicious software. You should then look out for other signs that your phone is being tapped.

2. Increased Mobile Data Usage

Midjourney and chainarong06/Shutterstock

Keeping a close eye on your phone bills can save you a lot of cash. But it can also help you spot spyware.

Countless apps use huge amounts of data, especially if you don’t connect to free public Wi-Fi. Still, you should know roughly how much data you use each month.


If this amount increases dramatically, you need to narrow down exactly why—it might be that a third party is intercepting your messages.

Malicious software uses your data allowance to send information it’s collected to an outside source. That means it’s not solely relying on your home Wi-Fi: it’s consuming data wherever you are.

3. Unwanted Ads and Apps

You need to know exactly what’s on your phone, especially any apps running in the background. If you’ve not installed an app, it could be malicious.

Your phone doesn’t have to be jailbroken to download fake apps: fraudulent apps have been spotted on official stores, including adware that presented malicious ads to users. Adware can be used to gather data and open a backdoor to hackers, inviting the installation of further malware. These ads could become intrusive to encourage victims to click on them and generate revenue on a pay-per-click basis.


Clicking on links can lead to more malware, which can generate a lot of ad traffic and increase data usage further.

You can reduce the risk of infection by only downloading from official app stores. Apple and Google screen apps and games before letting them become available to the masses, and though they sometimes mess up, that’s rare.

4. General Performance Issues

The more data used, the slower your device will be. Malware can gain root access to your smartphone or trick you into downloading a fake system update to completely dominate your activities. Information about you could then be transmitted to the hackers’ external servers.

Think of all that information being transmitted to and from your device. You might think slowing down is a case of your handset getting old, but you’ll suffer performance lags whatever method a cybercriminal uses to bug your phone.


Of course, real apps will take up power, but they shouldn’t noticeably affect your device’s reaction time.

You can check which apps are using the most RAM. On iOS, go to Settings > General > iPhone Storage. On Android, click Settings > Apps and swipe over to Running. You’ll probably see Photos and Music near the top of the list. From here, you can assess your app usage and check for anything that doesn’t ring true.

5. Strange Messages Can Indicate Phone Tapping

Two iPhones with a bright neon envelope icon in between
Yalcin Sonat/Cronislaw/Shutterstock

What you might pass off as spam, a nuisance, or a wrong number can be an alert that your phone is being spied upon.

Suspicious SMS could include a seemingly random series of digits, characters, and symbols that immediately strike you as odd but perhaps not especially malicious.


Don’t ignore suspicious messages.

If spyware hasn’t been installed properly, coded messages will appear in your inbox that would otherwise have gone unnoticed. These random data sets are instructions sent from a hacker’s servers to tamper with the fraudulent app. Alternatively, the app could be trying to contact its creator.

Likewise, if family or friends say you’re sending them bizarre texts or emails, your phone may be compromised. This could mean your infected phone is trying to install malware on the devices of your loved ones.

Keep an eye out for any activity you don’t recognize. Look at messaging chains and social media profiles, and check your sent folder and outbox. If you can’t remember sending something, be suspicious.

6. Websites Look Different

Clicking on a URL in a text or email, even by mistake, can cost you big bucks. You don’t have to be redirected to a fraudulent link through a message. If there’s a malicious app on your phone, it could alter the appearance of websites you frequent.


The malware acts as a proxy, intercepting communications between you and the site you’re trying to visit. It might present a false page to you or track anything you type. And no, it doesn’t matter if you’re on Private Browsing.

This is a big problem if you’re using online banking—or anything that requires personal details. That could be a password, financial details, or Personally Identifiable Information (PII), a major currency on the dark web.

You might not notice any differences. They could solely be minor changes, like pixelated logos. And if you do see something strange, it could just be the website experimenting with a new interface. Compare the mobile version with that displayed on a PC, bearing in mind responsive themes look slightly different.


7. Use Android Forwarding Codes Like *#21#

This only works on phones running Android, but it’s the perfect way to find out whether any of your data is being forwarded to a third party. You can use secret USSD codes to maintain your security and privacy.

Go to your keypad interface and type in either *#21*, *#67#, or *#62#, then tap the dial icon. If one doesn’t work, try another. They’re applicable to different devices, but all three have the same function: they direct you to a screen that details Call Forwarding.

It will list Voice calls, Data, SMS, Packet, PAD, and more. Ideally, each one should say “Not forwarded” afterward. If any instead say “Forwarded”, your smartphone’s probably been hacked.


So what can you do? Just type ##002# into your dial screen then press the dial symbol again. Your screen should now read “Erasure was successful”, meaning you’ve severed the cyberattack. You can navigate away from this screen by tapping OK.

That’s not the end of the matter: if your device has been tapped, it’s obviously susceptible to attacks, so check out ways to increase Android security, including downloading an antivirus app.

Use These Tips to Take Striking Black and White Photos on Your Smartphone

Key Takeaways

  • Experiment with classic subjects like portraits and urban landscapes for stunning black and white photography.
  • Frame shots with awareness, envisioning the scene in black and white and focusing on standout elements with contrast.
  • Shoot in color and then convert to black and white with editing apps while experimenting with different filters and tweaks.


Black and white photography can be a stunning alternative to color photography. And yet, most smartphone photographers will ignore the power of black and white photography, whether through ignorance or a perceived lack of skill.

I’m here to dispel any myths around black and white photography, encourage you to give it a go, and offer some tips and advice on how to get good results. Because if you get monochrome photos right, they can look absolutely amazing.


What Subjects Make for Good Black and White Photos?

The first thing to consider is what subjects make for good black and white photography. Ultimately, you shouldn’t let this conversation prevent you from testing all subjects out in black and white, as experimentation is a key tenet of photography. However, some subjects definitely make for better black and white shots than others.


Portraits, street photography, and urban landscapes are all classic subjects for black and white photography. This is because the monochrome finish adds a gritty realism to these shots. In more general terms, subjects that have stand-out elements that aren’t reliant on colors are the key. So, strong lines, patterns, shapes, or textures. Strong variances between light levels. And images that conjure up a downbeat mood.

However, any scene can work in black and white, so it’s worth experimenting. And that is made extremely easy with smartphone photography, as you can switch color photos to black and white with a single tap. So, if you want to conduct a black and white shoot specifically, target the traditional subjects that work, but then add in other shots that may work.


How to Adopt a Black and White Mindset When Shooting

Smartphone photography lends itself perfectly to on-the-fly shots taken as inspiration strikes. Which leads many people to ignore the fundamentals of shooting good photos. However, the one mobile photography technique guaranteed to work is to frame with awareness by taking an extra few seconds when lining up a shot. And this can stand you in good stead with black and white photography too.

Being able to picture what a scene you’re shooting will look like in black and white is a skill, but it’s one you can learn over time with perseverance. The key to success is literally seeing the world in black and white (and various shades of gray). So frame your shot and consider what it would look like with all the color sucked out of it.


Are there standout elements that contrast with others, or would everything in the frame melt into one gray mass? Is there a strong focal point in the picture that will draw people’s eyes in? Are there obvious areas of light and dark within the frame? Is there enough going on to hold people’s interest in the absence of any color?

Tips for Shooting Black and White Photos on Your Smartphone

The first thing to say here is that you should not bother shooting in black and white. Instead, shoot in color and then change it to black and white in post. All photo editing apps, including Google Photos and Snapseed (the two I personally use), have black and white filters and tools. However, that isn’t to say that you shouldn’t already have it in mind when shooting that a photo might turn out to look better in black and white.


As for specific tips:

  • When shooting, look for opportunities that would look good in black and white. This includes employing leading lines, using the rule of thirds, spotting signs of symmetry, capturing interesting patterns and textures, and taking a minimalist approach. With practice, you’ll see the potential for black and white shots everywhere you look.
  • Look to include elements in your photos that would look good in monochrome and not rely on vibrant colors for interest. If a subject is too reliant on its bold colors, then it probably isn’t a candidate for black and white photography. However, if it boasts high levels of contrast, it probably is.
  • Look for interesting sources of light, whether it’s filtering through clouds, lighting a specific area of the frame, or adding a strong contrast to your image. Light is an important element of all types of photography, but it’s absolutely crucial for black and white shots.


Tips for Editing Your Smartphone Photos Into Black and White

As we have already established, while it’s good to think about the possibility of turning a photo from color to black and white, and shooting with that in mind, the actual process can be handled in post. So here are some things to keep in mind when editing your smartphone photos from color to black and white:

  • Try switching every photo you shoot from color to black and white to see what works and what doesn’t. This is the best way of training your brain to understand the fundamentals of black and white photography. After a day of shooting, open your photo editing app of choice, and apply a black and white filter to each image in turn. If it works, save a copy, and if it doesn’t, discard your edits.
  • Most photo editing apps will offer multiple black and white filters, all of which produce slightly different results. So try them all. Snapseed, which I recommend to all smartphone photographers, also boasts a dedicated black and white tool that offers tweaks beyond filters. Changing the brightness, contrast, and/or grain can have a huge impact, and create unique black and white photos.
  • Try editing your images in other ways both before and after turning them from color to black and white. This could include dialing up the contrast to the highest it will go, or reducing the sharpness of the image. By tweaking quite specific elements, you can create some unique black and white photos. You can even use the same settings for multiple photos to create your own style.


A lot of amateur photographers will avoid black and white photography, opting instead to go all-in on color. However, thanks to the power of smartphone cameras and image editors, black and white photography is now accessible to everyone, so why not experiment with it yourself?

Microsoft Can’t Make Copilot Succeed Without Convincing Windows 10 Users

Key Takeaways

  • Microsoft introduced Copilot in 2023 and Copilot+ PCs in 2024, but many Windows users still don’t know about it.
  • Windows 10 still has a massive user base, so making Copilot available on all recent devices could increase adoption.
  • Offering Copilot on Windows 10 will introduce more users to AI PCs, help transition to Windows 12, and secure the AI tool’s successful future.


Microsoft introduced its Copilot AI in 2023 and launched Copilot+ PCs in June this year. Despite the company’s push to make Copilot the standard generative AI to assist its users, the average Windows user may not even know what Copilot is.

While anyone can access Copilot on Microsoft Edge on Windows 10, the dedicated Copilot app is only available with Windows 11 (and only on compatible devices, at that). If mass adoption is the goal, Microsoft will have to make this AI app available on all recent Windows devices.


Windows 10 Still Has a Massive User Base


Windows 11 has been around since 2021, so users have had plenty of time to migrate to Microsoft’s latest operating system. However, many have held off upgrading their computers, with reasons for staying on Windows 10 going from the lack of new features to unsupported hardware.

According to StatCounter, users running Windows 10 still account for more than 68% of the market as of May 2024, compared to Windows 11’s 27%. The operating system’s massive reach means millions of users are missing out on Copilot.

Copilot+ PCs require chips with AI processing capabilities (i.e., an AI PC), meaning that even computers bought as recently as last year won’t be able to run all of Copilot’s features on-device. To ensure that Windows 10 users can get on board, Microsoft will need to beef up its data centers to handle the AI processing requirements.


While this might be a massive expense on Microsoft’s part, it is a worthy investment. After all, if Microsoft can make Copilot as ubiquitous as the Start Menu, it would massively help increase adoption and even encourage more people to upgrade sooner rather than later.

Copilot on Windows 10 Will Introduce More People to AI PCs

If Microsoft can give the huge Windows 10 user base Copilot, even with limited features, it could be an easy way to make Copilot synonymous with Windows.

Just a simple keyboard shortcut, akin to the Copilot Key, to make the software easier to launch can make a big difference. This convenience means they will likely choose Copilot for their AI needs to avoid the extra steps of having to go to the OpenAI website to access ChatGPT or even open Microsoft Edge to find the Copilot icon.


As Windows 10 users get more used to the idea of having an AI companion on their computer, they’ll be more likely to accept its more integrated existence on their PC. This could be similar to Apple Intelligence—one of the best features that Apple will introduce with macOS Sequoia. However, if Microsoft does add Copilot+ features to all recent Windows PCs, it shouldn’t drop the ball on privacy and security, much like the step back the company had to take with the controversial Recall feature.

It Will Make the Transition to Windows 12 Much Easier

Microsoft logo above a screen showing Windows 11 and Windows 10 logos, highlighting different versions of the operating system.
Ralf Liebhold / Shutterstock / Microsoft

The introduction of Copilot+ PCs in June 2024 shows the future of Windows: generative AI features integrated into the operating system and several apps. So, giving Windows 10 users a taste of what the future holds will likely make moving to Windows 12 more palatable.


This could help Microsoft avoid the same issues it continues to face with Windows 11 adoption, which is wallowing at below 30% of the Windows PC market share three years after launch. Furthermore, Apple is introducing its version of AI to all Apple silicon MacBooks, meaning many users will get this feature retroactively. If Windows 10 users miss out on AI features, they might just get a MacBook instead because of Apple Intelligence.

What Would Copilot on Windows 10 Look Like?

Microsoft should make Copilot on Windows 10 look and act the same as it does on Windows 11. Granted, some features won’t be available on less powerful computers, but the company could just move this processing to its data centers. This will be slower, but it could at least give Windows 10 users a preview of Copilot’s capabilities.


Microsoft has many Copilot apps available, but Copilot in Windows 11 is likely the most important. That’s because it will introduce users who aren’t necessarily looking for an AI chatbot and could show them how useful these things could be. Microsoft could then supercharge this tool’s adoption by adding some (or even all) of its features to Windows 10 to ensure a successful future for its AI tool.

I Bring My Still Photos to Life Using These 4 Tools

Key Takeaways

  • Deep Nostalgia uses AI to animate faces in still photos, creating short video clips with realistic movements.
  • Clipfly transforms still images into talking avatars, allowing users to create animated scenes with their portraits or selfies.
  • Cutout.Pro and HitPaw are other easy-to-use tools for animating photos, offering various animation styles and historical photo enhancements.


Animating still photos is a fascinating way to bring them to life. It’s like getting a second chance to create a live photo where you had taken a static one. The best part about animating photos is how easy the process is.

With just your smartphone and an internet connection, you can animate any photo you want. Here’s a walkthrough of four tools you can use to animate your still photos.


Animating a still photo used to mean manually adding “fade in,” “fade out,” and “zoom out” animations to your photos. However, that’s changed with AI tools like Deep Nostalgia. Deep Nostalgia, provided by MyHeritage, is a tool that animates faces in still photos to create short video clips. It uses AI to apply realistic movements to the faces in your images, such as blinking, smiling, or turning the head.

How to Animate Photos Using Deep Nostalgia

The process is simple:


  1. Visit the Deep Nostalgia page on the MyHeritage website and sign up.
  2. Upload your photo via the Upload Photo button.

The AI detects the face in your photo and animates it. The result is a lifelike animation that can make people or characters in your photos seem as if they are moving.

Clipfly offers a unique twist to photo animation by creating AI-generated talking avatars from your still images. The tool is a fun way to make portraits or selfies talk as if they were part of an animated scene.

How to Animate Photos With Clipfly

Follow the steps below:

  1. Visit the AI Talking Avatar page on Clipfly’s website and sign up.
  2. Upload the image you’d like to animate.
  3. Select a voice and type in your script. You can also choose to upload your preferred audio clip.
  4. Click the Get Started button.


screenshot showing how to animate photo on clipfly-1

The AI then animates the photo to sync with the audio, making it appear like the person in the photo is speaking. Clipfly offers 20 free credits upon sign-up and charges 10 credits for each generation. After two generations, you’ll need to upgrade to its Pro plan to keep using it.

Cutout.Pro is another easy-to-use tool you can use to animate your photos. After uploading your image, you can choose from a variety of animation styles to give your photo the desired effect. You can have the character in your image sing the “Happy Birthday” song, turn its head, and so on.

How to Animate Photos Using Cutout.Pro

Below are the steps:


  1. Navigate to Cutout.Pro’s Photo Animer page.
  2. Select and upload the image you wish to animate via Upload Image.
  3. Customize the animation style using the Choose Exemplar slider.

cutout pro animate photo page

You can use Cutout.Pro’s Photo Animer for free. That’s, of course, if you don’t mind the giant watermark and 360p quality output. Cutout.Pro’s paid plans begin at $19 for 1 minute of video generation.

HitPaw animates your old photos by adding realistic movements to them. It’s particularly useful for bringing historical photos to life, making it seem as though the subjects are moving within their captured moments.

How to Animate Photos With HitPaw

Here’s how:


  1. Visit HitPaw’s Photo Animator page.
  2. Upload the old photo you want to animate by hitting Upload a Photo.
  3. Allow HitPaw to process the animation.

Hitpaw animate photo page-1

HitPaw allows you to download (boldly) watermarked versions of your animated photo for free. The Pro plans start at $3.99 per week.

Each of these tools offers a unique twist to animating still photos, whether it’s for entertainment, reminiscing, or artistic expression. The steps I’ve provided for each platform will help you transform your still images into animations that tell a story beyond the confines of a single frame. Feel free to explore every one of them (for free) to find the one that works best for you.

Best Wi-Fi Routers of 2024

Since we have multiple wireless devices like laptops, smartphones, and tablets, Wi-Fi is essential. However, Wi-Fi routers are often overlooked since you might already have a modem-and-router combo provided by your ISP. Those aren’t the best, though, and there’s a good chance your Wi-Fi is being held back by outdated hardware. Separate the modem and router by getting a dedicated Wi-Fi router!


TP-Link

Whether you live in a 1200-square-foot apartment or a 2000-square-foot home, the TP-Link Archer AX55 Pro is more than enough to provide Wi-Fi to every corner. In fact, all four antennas can be pointed in different directions or grouped together to create a stronger signal.

That’s not all: the TP-Link Archer AX55 Pro also features MU-MIMO and OFDMA technology, which reduces the overall congestion and latency that users inevitably experience when sharing the same network.

Lastly, the 2.5Gbps WAN/LAN port is a welcome addition, considering ISP speeds are getting faster and faster. It’s nice having that extra wiggle room, even if your internet doesn’t exceed a gigabyte. However, if your network is under a gigabyte, the TP-Link Archer AX55 offers the same features minus the 2.5Gbps WAN/LAN port.


tp-link archer ax55 pro wi-firouter

Best Overall

TP-Link Archer AX55 Pro

$130 $150 Save $20

The TP-Link Archer AX55 Pro is the golden child of our picks, striking a nice balance of performance and features without being overpriced. It’s perfectly suited for medium to large homes, although you may need to consider OneMesh extenders if it’s too large.

Pros

  • Wi-Fi 6 + 2.5Gbps WAN/LAN
  • Works exceptionally well in medium-sized homes
  • MU-MIMO, OFMDA, and beamforming technology
  • Supports VPN client and servers
Cons

  • OneMesh extenders are recommended in large homes

MSI Radix AXE6600 wi-fi router
MSI

Don’t be fooled by the MSI RadiX AXE6600’s aesthetic. Though its design will surely attract gamers, its performance is beneficial no matter what you do, and that comes down to its performance and features.

With Wi-Fi 6E providing lower latency by nature, the MSI RadiX AXE6600 takes the ball and runs with it. By combining AI QoS, OFMDA, and MU-MIMO technology, you’re far less susceptible to latency issues. MU-MIMO is certainly the MVP here, which serves to split traffic into more manageable queues as opposed to a single lane. That’s beneficial whether you’re gaming or just uploading and downloading images, videos, and so on.


MSI Radix AXE6600

Best Wi-Fi 6E Router

MSI RadiX AXE6600

The MSI RadiX AXE660 fully utilizes Wi-Fi 6E and its capabilities, providing superb performance on its 6Ghz band and even its 5Ghz band. Its mobile app and web interface are also incredibly intuitive, making it rather easy to adjust your network settings.

Pros

  • Excellent performance from both 5Ghz and 6Ghz bands
  • OFMDA, MU-MIMO, and beamforming technology
  • Tri-band design
  • Intuitive mobile app and web interface
Cons

  • 2.4Ghz band is average at best

tp-link archer a8 wi-fi router
TP-Link

Finding a Wi-Fi router on a budget is tricky, but look no further than the TP-Link Archer A8. It features both a 5Ghz and 2.4Ghz band, capable of handling 1300Mbps and 600Mbps, respectively. For a family of four, that’s plenty to maintain a good Wi-Fi connection in a small home.

The TP-Link Archer A8’s best feature is arguably MU-MIMO technology, which allows multiple devices to have their requests carried out at the same time. In practice, this makes your internet connection feel much snappier. The TP-Link Tether app goes beyond usual settings and includes features like parental controls and the ability to create a guest network for others to use temporarily.


tp-link archer a8 with three antennas

Best Budget

TP-Link Archer A8

$60 $80 Save $20

If you don’t need a Wi-Fi router with too many bells and whistles, the TP-Link Archer A8 is far more conscious of your budget while maintaining a few standout features like MU-MIMO and WPA3 encryption. Thanks to the TP-Link Tether app, it’s also very easy to set up.

Pros

  • 1300Mbps and 600Mbps on 5Ghz and 2.4Ghz bands, respectively
  • Good suite of parental controls
  • MU-MIMO technology reduces latency
Cons

  • Struggles with anything bigger than a small apartment/house

Best Wi-Fi Router for Gaming: ASUS RT-AX86U

asus rt-ax86u wifi router front and back
ASUS

Your average Wi-Fi router might be fine for casual gaming, but many popular titles are multiplayer and require more. With the ASUS RT-AX86U, you’re getting a lot more, considering it’s built with gaming in mind.

The ASUS RT-AX86U features adaptive QoS, which is incredibly handy to have if you game and stream at the same time. Devices higher on the list will experience even lower latency—a must-have feature when you’re gaming, especially competitively.

Two other gaming-centric features are Boost Mode and a dedicated gaming port. The latter is simply an Ethernet port that prioritizes any device wired via Ethernet cable, whereas Boost Mode is specifically for mobile devices, which you can enable at any time.


ASUS RT-AX86U wifi router

Best for Gaming

Asus RT-AX86U

Given its ability to prioritize network traffic as you see fit and its low-latency performance, the ASUS RT-AX86U is the go-to for gaming. Its boost mode and dedicated gaming port ensure you get the best connection, not everyone else in the house.

Pros

  • Incredibly low-latency + adaptive QoS
  • Wi-Fi 6
  • Boost mode comes in handy for mobile gaming
  • ?Gamer? aesthetic without being gaudy
Cons

  • Have to be comfortable diving into network settings

TP-Link Deco W7200 on entertainmet center, next to television
TP-Link

If you already have a Wi-Fi router and just need to extend the signal, the TP-Link Deco W7200 is arguably the best option given its performance and well-rounded features. Not to mention, it’s one step removed from plug-and-play, so if you’re someone who isn’t tech-savvy, TP-Link makes it incredibly easy.

The TP-Link Deco W7200’s best feature is its tri-band design, which includes a 2.4Ghz band and two 5Ghz bands. While the 2.4Ghz band is starting to show its age, it still comes in handy for handling smart home devices, like smart lights and cleaning gadgets.


It offers some future-proofing with support for Wi-Fi 6. However, if you want something beyond that, like 6E or even Wi-Fi 7, there’s the Deco XE75 and the BE10000, respectively.

TP-Link Deco W7200 router mesh system

Best Mesh Router System

TP-Link Deco W7200

With support for Wi-Fi 6 and two 5Ghz bands, the TP-Link Deco W7200 is a one-two-punch mesh system with performance to boot. Best of all, it has TP-Link’s signature easy installation process.

Pros

  • Up to 3 in a pack
  • Incredibly easy setup
  • Tri-band design
  • Wide coverage

FAQ

Q: What does Wi-Fi stand for?

To be accurate, Wi-Fi doesn’t stand for anything; however, it’s commonly referred to as a shortened version of “wireless fidelity.”

Q: What is Wi-Fi 6 and 6E?

Wi-Fi is split into various standards and each subsequent generation has better performance. For example Wi-Fi 6 is better than Wi-Fi 5. In other words, Wi-Fi 6 is just another generation of the technology.

In the case of Wi-Fi 6E, it acts as an extension of Wi-Fi 6. The most notably difference between 6 and 6E is that 6E can operate in the 6Ghz band, whereas Wi-Fi 6 is limited to 5Ghz.

Q: What is Wi-Fi 7?

Wi-Fi 7 is yet another standard that improves upon the last generation of wireless technology. It has a much higher link rate and can operate in the 6Ghz band, just like 6E.


Q: Do I need both a modem and router for internet?

It depends on what kind of modem you have. Your run-of-the-mill modem these days will act as a gateway to the internet via Ethernet and Wi-Fi.

If you were given one from your ISP and you have Wi-Fi, then that means your modem is both a modem and a router.

Q: How do I connect the Wi-Fi router to my internet?

Assuming you have your modem already connected to the internet:

  1. Connect an Ethernet cable into the AN port of your Wi-Fi router. It’s labeled “WAN.”
  2. Now connect the other end of the Ethernet cable into your modem. You can use any of the Ethernet ports at the back.
  3. Using your Wi-Fi router’s SSID and network key (located on the router itself), you can then activate your router through your browser.

Depending on the kind of Wi-Fi router you purchase, there may be a proprietary app that makes the setup even easier.

Q: What is the difference between a wireless router and Wi-Fi router?

There aren’t any. A wireless router and Wi-Fi router are synonyms for the same technology.

When Does Facebook Messenger Notify Others About Screenshots?

Key Takeaways

  • Facebook only notifies people if someone screenshots or screen records disappearing messages.
  • Anyone can screenshot your other messages on Facebook Messenger or even your Facebook profile.
  • Never share anything online that you’d feel uncomfortable with if it were made public.


Have you ever wanted to save a message on Facebook Messenger but been nervous about screenshotting it? What if the other person gets a notification to say you took a screengrab? It only happens in rare circumstances.

Facebook Messenger isn’t like Snapchat: it doesn’t automatically tell people when their private texts have been saved as a screenshot. But it does sometimes happen…


Facebook Notifies Others When You Screenshot Disappearing Chats

Facebook Messenger uses end-to-end encryption, meaning that messages are sent securely by default. But just because something is encrypted doesn’t mean one party can’t screenshot chats.

If you’re sending something private over Messenger, however, you can use disappearing messages. These vanish after 24 hours have elapsed. Sometimes, on older versions of Messenger, disappearing messages don’t vanish until 24 hours after the other person has seen them.


When disappearing messages are activated, Facebook will notify you both if one of you takes a screenshot. The notification appears in your chat so it’s not easy to miss.

Even when disappearing messages are turned off, a screenshot notification will still be displayed within 24 hours of those chats being sent.

Can Someone Still Take a Secret Screen Recording of Disappearing Messages?

The same rule applies to screen recordings. If you’re using disappearing messages, both parties will be notified if either one of you takes a secret screen recording too. This notification appears just as it would if someone takes a normal screenshot.

How to Switch to Disappearing Messages on Facebook Messenger

Want to send something private via Facebook Messenger? Your best option is still disappearing messages.


Just open the app and navigate to the person you want to contact (or type their name into the Search field at the top of your interface if you’ve not spoken to them before). Then tap on the person’s name and scroll down to Disappearing messages. Toggle this to 24 hours.

If you can’t find the option to create disappearing chats, either you or the other person doesn’t have the latest version of Messenger.

Just remember not to send anything that’s too sensitive because the person can still screenshot your chats. Knowing when someone records your disappearing messages is like shutting the stable door after the horse has bolted.


If they have a second smartphone, they could also technically take a photo of their primary device with the secondary device—in which case you won’t receive a notification.

Does Facebook Notify Others About Other Screenshots?

Facebook doesn’t notify people if anyone takes a screenshot of normal Messenger chats or Facebook profiles. You’ll only be notified if someone screenshots or records disappearing messages.

That means someone could trawl through your Facebook profile and take photos of your images, likes, and posts.

pixinoo/Shutterstock

This is a good lesson on privacy and security. Remember that anything shared online should be considered public—yes, even if your Facebook privacy settings are tight.


Can You Stop Someone From Screenshotting Facebook Messages?

There’s nothing you can do to actually stop a recipient from screenshotting Facebook Messenger. But knowing that you’ll be notified if they do that is a good deterrent.

When we tested screenshotting disappearing messages on an Oppo Reno 10 Pro+, the app disabled the screenshot function. But this is not the case for all devices and the other chat participant was able to take a screenshot. So know that even though some devices can’t take screenshots of disappearing chats, this isn’t the case for others.

Don’t share anything online that you wouldn’t want to be made public. The internet is not a private space, so don’t put sensitive information or photos online. You never know who could see these things. If you want to be safe, only talk about personal things face-to-face if possible.


Plenty of services offer encryption (thankfully), but screenshotting is nearly impossible to combat. Take Snapchat for example. Everyone knows that things sent there are designed to disappear, and that users are notified if anyone takes a screenshot. That doesn’t stop anyone from doing so regardless.

And if someone is determined enough, they’ll find a way to preserve messages, even if that means taking a photo using another device…Ultimately, you should keep private things private.

You Can Turn Any Old Tablet Into Your Smart Home Hub: Here’s How

Key Takeaways

  • Repurpose old tablets as smart home hubs for convenience and cost-effective home control.
  • Choose a tablet based on smart home platform compatibility.
  • Use a wall mount or stand and install a smart home manager app for full functionality.


You probably have an old tablet, like an iPad, in a drawer or cabinet. But if you’re a smart home fan, it’s simple and easy to give the technology new life as a smart home hub. We’ll show you everything you need to get started.


Why Use an Old Tablet as a Smart Home Hub?

RossHelen/Shutterstock

Smart home technology is a great way to make life just a bit easier. Whether you want to turn on the lights, unlock a door, or do something else, you can do it with just a voice command or tap of a screen.

Smart speakers, for example an Amazon Echo, can provide voice control for a wide variety of smart home products. But especially if you have a number of smart home devices, a hub is a perfect way to see and control your smart home at a glance.


A hub can be used in many locations in your home. Along with mounting the tablet on your wall, you can also find a stand to place it in a well-traveled part of your home so that everyone can use it. As the technology grows and becomes popular, you can find dedicated smart home hubs, like Amazon’s Echo Home Hub we’ve reviewed, for smart home control.

But there’s no need to spend the extra money for that advantage, especially if you have an old tablet lying around. Whether the tablet is from Apple, Amazon, or Google, you can create a smart home hub for much less and still enjoy the convenience of the technology.

How to Get Started

In just a few steps, you can turn any tablet into a powerful smart home hub.

Pick a Tablet

The first step to creating your smart home hub is to pick the tablet. A big consideration is which smart home platform you use at home. For example, you wouldn’t be able to use an Amazon Fire Tablet to control Apple HomeKit devices. Along with not being able to access Siri, Amazon’s tablet doesn’t offer any app to control HomeKit devices.


If you’re new to smart home devices, find out how HomeKit and Alexa compare.

So, to keep things simple, any Apple iPad is great for Apple HomeKit and Amazon Alexa. Amazon’s tablet is obviously great for Alexa-powered devices. And any Android tablet is the best choice for a Google Home setup.

To make the most of the tablet, you’ll first need to check and make sure it is in good working condition. The screen should be free of cracks and fully functional. Also, make sure to update the tablet with the most recent operating system.

Another must-have to turn the tablet into a smart home hub is a power cord and adapter. If the old tablet has a problem keeping a charge, it’s not a dealbreaker, especially if you can keep it plugged in constantly. You also don’t need to worry if the tablet has issues with the front or rear-facing camera as you won’t be taking pictures with a smart home hub.


Find a Wall Mount or Stand

a tablet with a desk mount
mmoktp/Shutterstock

After finding your tablet that best matches your smart home, it’s time to decide where you want it to be located. There are two major ways to use a tablet as a smart home hub. Each option has advantages and disadvantages.

First, you can use a mount to place the tablet on the wall. There are many universal mounts, like this option, which can hold any device with a 4.7- to 12.9-inch screen. It can rotate the tablet a full 360 degrees, so you can use it in either vertical or horizontal orientation.


To use almost any wall mount, you will need to drill holes in the wall. That might not be ideal for renters and apartment dwellers. Another downside is that it will need to be located near a power outlet to keep the battery charged or powered on. You’ll also need to deal with an unsightly power cord draping down the wall.

An alternative is using a tablet stand. This option can fit virtually any tablet on the market and is available in a wide variety of colors. You can place the tablet in either a horizontal or landscape orientation. There is also a convenient location to place a charging cord.

The big advantage of a stand is that it doesn’t place your tablet on a wall. You can place the tablet in the kitchen, bedroom, or pretty much anywhere else. You should also be able to hide the power cord in an out-of-the-way location like behind a table.

A disadvantage is that a tablet used on a stand likely isn’t as convenient as a wall-mounted option and might be more difficult for visitors and family members to use.


Install a Smart Home Manager App

apple home on a tablet
DenPhotos/Shutterstock

The final piece of the puzzle is finding a smart home manager app for the wall-mounted tablet or tablet on a stand. This step depends—once again—on what kind of tablet, and smart home platform, you’re using.

With an iPad, you’ll have the maximum flexibility. The most likely option is to use Apple’s stock Home app with HomeKit devices. While there are other third-party options to control an Apple-friendly smart home, the Home app looks great on the big screen of an iPad and allows tons of customization so you can access the accessories you need quickly.


Apple’s tablet is also an option for Amazon Alexa users. Download the Alexa app on the App Store and you’ll access control for Alexa-compatible products.

Amazon users can also make a Fire tablet a smart home hub with the Alexa app already built in. If you don’t want to open up the Alexa app, you can even choose the Device Dashboard from the lock screen or Quick Settings by swiping down on the home screen. In the Device Dashboard, you can choose your favorite smart home device and routines from the Alexa app.

Android and Google tablets can be set up to control Google Home devices with the built-in app. You can also download the Alexa app to control Amazon-compatible devices as well.

The convenience of a smart home hub might be closer than you think. With an old tablet, and just little bit of work, you can repurpose the technology for a modern smart home.

The Best 165Hz Monitors for Gaming in 2024

In the fast-paced world of gaming, a 165Hz monitor can give you the edge you need without blowing a hole in your wallet. Going from a 60Hz to a 165Hz display is a night and day difference, making everything feel smooth and responsive, whether playing the latest shooter or tackling intense productivity tasks.


Best 165Hz Monitor Overall: LG 27GP850-B

LG

A 165Hz monitor is worthless if your gaming rig can’t consistently push 165 frames per second (FPS). This 27-inch 1440p IPS display offers the optimal screen size and resolution for a 165Hz gaming monitor. It allows you to easily hit the maximum refresh rates with a mid-range PC build without sacrificing image quality, making it the best option for most people.

The 27GP850-B’s gaming performance is up there with the best. It boasts a lightning-fast 1ms pixel response time and low input lag, on top of the 165Hz refresh rate, which makes everything feel fast and responsive. But what really sets this monitor apart is that it can be overclocked to 180Hz and supports both FreeSync and G-SYNC, making it the fastest, smoothest 165Hz monitor you can get.


The Nano IPS panel also produces gorgeous colors with wide viewing angles, which are handy if you want to share the display with a friend. The 27-inch 1440p resolution also delivers sharp images and text.

LG qhd monitor

Best Overall

LG 27GP850-B

$297 $380 Save $83

The LG 27GP850-B is a 1440p 165Hz monitor that can be further overclocked to 180Hz for smoother gameplay. It strikes a nice balance between great performance and solid visuals without being too heavy on your graphics cards, unlike 4K alternatives.

Pros

  • Overclockable to 180Hz
  • Excellent motion clarity
  • Excellent display
  • Officially certified G-SYNC and FreeSync monitor

The ASUS VG248QG Gaming Monitor on a blue background.
ASUS 

The ASUS VG248QG is a perfect option if you want an inexpensive 165Hz gaming monitor for competitive gaming. It combines the higher refresh rate with an impressive 0.5ms response time and a powerful backlight strobing feature to eliminate persistent blur, resulting in one of the clearest monitors in motion you can get without breaking the bank.


The VG248QG also has native support for FreeSync VRR and G-SYNC compatibility, so you can expect a smooth and tear-free gaming experience, whether using an AMD or NVIDIA graphics card. In addition, you can tap into the ASUS GamePlus and GameVisual features for improved visibility and accuracy to get that extra advantage in fast-paced games.

There’s a compromise to keep the price low, though. It uses a TN panel with noticeably poor viewing angles and washed-out colors compared to an IPS or VA panel. However, that will only be a dealbreaker if you also want to use the monitor for productivity tasks—it performs exceptionally well for gaming.

asus 165hz gaming monitor

Best Value

ASUS VG248QG Gaming Monitor

The ASUS VG248QG is an affordable 165Hz gaming monitor with a class-leading 0.5ms response time, making it ideal for competitive gaming. It packs many advanced gaming features, including backlight strobing and G-SYNC, but its TN panel doesn’t have the best viewing angles.

Pros

  • Outstanding motion handling
  • Supports FreeSync and G-SYNC
  • Ergonomic design
  • Rich connectivity

The Odyssey Neo G7 on a desk with a gaming keyboard and mouse.
Samsung


The Odyssey Neo G7 from Samsung may come at a higher price, but it delivers stunning visuals and an immersive gaming experience unmatched by other 165Hz gaming monitors. Its biggest highlight is the bright and vibrant mini-LED display with 1,196 dimming zones and up to 2,000 nits of brightness that produces deeper blacks and much brighter highlights, making it perfect for HDR gaming. Non-HDR games also look absolutely stunning, thanks to the improved contrast and vibrant colors.

It also supports HDMI 2.1 bandwidth to maintain 4K 120Hz compatibility with the PS5 and Xbox Series X. A fast 1ms response time and native support for Freesync Premium Pro ensure a smooth HDR gaming experience with little blur around fast-moving objects for improved clarity.

samsung neo g7

Best 4K

Samsung Odyssey Neo G7

$654 $1100 Save $446

The Samsung Odyssey Neo G7 is a high-end 4K gaming monitor with a 165Hz refresh rate and HDMI 2.1 bandwidth, ideal for gaming PCs and next-gen consoles. Its mini-LED display with 1,196 local dimming zones significantly improves contrast and color, providing an immersive and captivating viewing experience in games and movies.

Pros

  • Brilliant contrast and HDR experience
  • Quick response time
  • AMD FreeSync Premium Pro support
  • HDMI 2.1 ports for PS5 and Xbox Series X

The Alienware AW3423DWF desk setup with Alienware desktop and keyboard.
Dell


Dell’s Alienware AW3423DWF is one of the best ultrawide gaming monitors available right now. It combines a 165Hz refresh rate with QD-OLED technology to deliver a fast and immersive experience. This monitor undercuts Dell’s own Alienware AW3423DW and the Samsung Odyssey OLED G8 while offering all the benefits of the enhanced QD-OLED panel, like improved brightness, a true HDR picture, oversaturated colors, and an infinite contrast ratio that results in deep, inky black.

Modern HDR-capable games look gorgeous here. The fast refresh rate and nearly instantaneous response time deliver a silky smooth gaming experience with excellent motion clarity, which is perfect for highly intense FPS games.

While the panel is only certified FreeSync Premium Pro, VRR works on both AMD and NVIDIA GPUs, so you don’t have to worry about screen tearing or choppy frames. In addition, the 1800R curvature and 3440×1440 resolution combine to add more immersion and detail to games and movies.


dell alienware monitor

Best Ultrawide

Alienware AW3423DWF Gaming Monitor

Between its 34-inch curved screen, vivid QD-OLED panel, enhanced brightness, solid Adaptive Sync support, and near-instant response times, Dell’s Alienware AW3423DWF delivers one of the most immersive and responsive gaming experiences, making it the best 165Hz ultrawide monitor you can buy right now.

Pros

  • Brilliant OLED display
  • Stunning SDR and HDR images
  • Ultra-quick response time
  • FreeSync and G-SYNC Compatible

The Samsung Odyssey G55T on a gray background.
Samsung

For less than half the price of the Alienware AW3423DWF, you can get the Samsung Odyssey G55T, an excellent entry-level ultrawide monitor for work and gaming. It’s a solid alternative if you want something affordable without sacrificing gaming performance or picture quality. While it can’t match the contrast and black levels of an OLED display, this monitor is still miles better than some premium IPS options, so you’re still in for an immersive and stunning viewing experience without breaking the bank.


Designed for gaming first, the Odyssey G55T boasts a 165Hz refresh rate and 1ms response time, FreeSync Premium VRR, and plenty of in-game enhancements to give you an advantage in competitive games with smooth transitions and excellent clarity in fast-paced scenes. In addition, the 3440×1440 resolution produces sharp and detailed images, which, combined with the 1000R curve and decent HDR performance, help breathe life into your games and movies.

samsung neo g5

Best Budget Ultrawide

Samsung Odyssey G55T

$369 $550 Save $181

The Samsung Odyssey G55T has many advantages, including a 165Hz refresh rate, a 1ms response time, FreeSync Premium, and a sharp, vibrant display packed into a relatively affordable 34-inch curved panel.

Pros

  • Sharp and immersive display
  • Good response time performance
  • FreeSync support

FAQ

Q: What does Hz stand for?

In computer monitors, Hz (Hertz) refers to the refresh rate. It measures how many times per second the monitor updates the screen with a new image. Therefore, a 165Hz monitor can display 165 images every second.

Q: Why are refresh rates important for gaming?

A higher refresh rate translates to smoother visuals with less stuttering or tearing, especially in fast-paced games. Compared to 60Hz monitors, the faster image updates on a 165Hz monitor allow gamers to see and react to in-game actions quicker, offering a competitive edge.


Q: Why a 165Hz monitor?

A 165Hz monitor strikes a good balance between competitive gaming and affordability. It offers smoother gameplay than 60Hz displays while remaining more affordable than higher refresh rate options like 240Hz monitors. Additionally, unlike 240Hz monitors, 165Hz models put less strain on the graphics card, so gamers don’t need a super expensive PC to take advantage of the higher refresh rate.

Q: Can a 165Hz monitor run 200 fps (frames per second)?

Yes, a 165Hz monitor can run games at 200 fps (frames per second), but the monitor can only display a maximum of 165 frames per second. While running games at 200fps on a 165Hz monitor is possible, it can lead to screen tearing, which can be visually distracting.

How to Stop WhatsApp From Saving Photos

Key Takeaways

  • WhatsApp automatically saves images to your camera roll from chats, even without opening them.
  • Stop photos from downloading at all by changing default settings on both iPhone and Android.
  • You can prevent media downloads on the WhatsApp Web and Desktop apps by adjusting settings there too.


Occasionally you’ll find strange images in your gallery that, for the life of you, you don’t remember downloading. Then you get an inkling to check your WhatsApp chats, and it hits you—WhatsApp automatically downloaded them from your chats and groups.

Here’s how you can stop WhatsApp from downloading media from your chats onto your phone…


How to Stop WhatsApp From Saving Photos to Your Camera Roll

When your friends send you images in your chats, WhatsApp automatically saves them to your camera roll. What’s more, WhatsApp saves those images even if you didn’t open the chats.

That’s why you often find images you don’t recognize on your phone or computer’s camera roll—not to mention how annoying it is when these images are WhatsApp spam. The only way to stop WhatsApp photos from saving to your camera roll is by changing your default chat settings. It’s a quick and easy process.


On iPhone, follow these steps:

  1. In the WhatsApp app, tap the Settings tab at the bottom and select Chats.
  2. Toggle Save to Photos off.

On Android, use these steps:

  1. Tap the three-dot menu and go to Settings > Chats.
  2. Disable Media visibility. This prevents WhatsApp from showing newly downloaded media in your gallery. But you can do this for specific chats too. Once in a chat, tap the contact or group name > Media visibility > No > OK.


How to Stop WhatsApp From Saving Photos At All

Even if you’re not saving WhatsApp images to your camera roll, they may still download automatically and take up space on your phone. This is especially annoying for group chats where a lot of photos or videos are being shared. Going back to delete them all from your storage is time-consuming and unnecessary.

Here’s how to stop media downloads on iPhone:

  1. Open WhatsApp and go to Settings on the bottom menu.
  2. Scroll to Media auto-download.
  3. Tap Photos, and select Never.
  4. Repeat for each media type.

Follow the steps below on an Android phone:

  1. Tap the three-dot menu > Settings > Storage and data.
  2. Tap each option in the Media auto-download section and untick each option. For example, select the When using mobile data option and make sure each option (Photos, Audio, Videos, and Documents) is de-selected.


This lets you manually download images instead. A blurred preview will appear in your chats and you can choose whether to download the image.

How to Stop WhatsApp Photos Downloading on Desktop

You can also stop automatic media downloads on the WhatsApp Web and WhatsApp Desktop apps.

To do this, follow these steps:

  1. Open the WhatsApp desktop app or WhatsApp Web on your computer.
  2. Click the downward-facing arrow above your chats on the left of the screen and select Settings.
  3. Click on Media auto-download and deselect all the options. If you don’t mind WhatsApp saving documents you can leave that box checked.


If you’re finding WhatsApp overwhelming in general, consider getting more familiar with using it through our WhatsApp guide. There are more measures you can take to improve your WhatsApp experience. For instance, you can use WhatsApp tools to organize chats, schedule messages, and tailor your overall experience.

After a busy day, you might prefer to ghost your friends on WhatsApp, at least until you’ve settled down for the evening. The last thing you’d want is to be met with images from the chats you’ve avoided. If you want to have peace of mind, stop WhatsApp from saving images on your phone and computer.

Turn Your 2D Images Into 3D With These AI Tools

You can easily create 3D images from your 2D images using AI tools. No longer do you have to slave away rendering 3D shapes, these tools will let you enjoy quick and varied results.


Using generative AI, you can transform 2D images or text prompts into 3D images in Alpha 3D. Although it’s a freemium software, new users get their first 50 AI-generated 3D image credits for free.

Alpha 3D’s image generator is focused on augmented reality (AR). Once created, your AR 3D image could be used in Adobe Aero, one of Adobe’s free apps, for creating augmented reality scenes.

At the time of writing in June 2024, the 2D-to-3D-image model is only trained on limited image types. As such, only images of shoes or furniture can be rendered into 3D models. While this limitation holds you back from more explorative 3D images, we expect it to change in the future to accommodate more creative freedom. The text-to-3D-image model doesn’t have the same limitations.


Make 3D Image

This free browser-based app lets you transform your flat photos into 3D images with depth perception. The 3D images are not 3D models, they still look like photographs, but with dimension as opposed to a typical flat photo.

You can upload your own photo or use an image URL to upload. The quality of the dimensional edit depends on the photo and how easy it is for depth perception to be achieved. You can use your 3D photos as an embedded image on websites or download them for personal use anywhere.

For a free app, the results are pretty good and fun to try out, but they’re not professional-standard, by any means.


3 Tripo (Freemium)

Tripo 3D Image Rendering

Tripo adds dimension to your uploaded image, turning it into a great 3D rendering. You can upload your flat images in the form of PNG, JPEG, WEBP, and BMP, both photos or illustrated images. You can also upload by using a text prompt for your creation.

Free users are limited to 600 monthly credits which they can use for 3D image generation and refinements like rigging and stylizing. Professional subscriptions are from $19.90 per month and include 3000 credits. The Premium subscription is from $139.90 per month and receives 25000 monthly credits.

The free version of Tripo produces the same results as either of the paying subscriptions, and they are good quality and accurate.


Immersity 3D Tool

Immersity AI not only produces 3D images from your 2D image uploads, but you can also create 3D motion videos and 3D videos from 2D images. Due to its neural depth engine, Immersity AI has a lot to offer.

After uploading an image, you get a variety of results. The initial result is 3D motion which comes with nine offerings of how the motion will move around your image. It’s subtle, and depending on your image, different animation options may yield better results.

You’re provided options for animation style, amount of motion, animation length, focus point, edge dilation, and depth map for you to edit your 3D motion image for the best output.


The 3D image provides fewer refinement options, but you can choose how to preview your 3D image, the amount of depth, focus point, edge dilation, and depth map. The results of the 2D image to 3D image are not as good as when turning a 2D image into 3D motion. Your results may vary depending on the image you upload.

New free users get 100 credits to use, but you can do a lot without even using any credits, such as outputting lower-quality downloads with watermarks on them. Once you’ve used the free credits, Immersity AI is a very affordable tool. You can purchase 500 credits for $5.00 or 1000 credits for $7.99.

5 Meshy (Freemium)

Meshy 3D Image Tool


New Meshy users get 200 free monthly credits and 50% off a premium subscription. Premium subscriptions start from $8 per month for a Pro subscription, $24 per month for Max, and $48 per month for a Max Unlimited subscription.

Each 2D image to 3D image generation costs five credits with further iterations using more credits. Free users cannot access the AI texture editing tool, and free users can only have one project in the queue at a time.

For a free tool, my results were not very impressive. I uploaded a clear digital illustration with block color sections, but the 3D rendering is fuzzy and amalgamated, so the subject is barely recognizable.

The premium offerings for Meshy have options to edit your 3D rendering, thus providing better results.


Spline is a tool that allows for 3D vector rendering. You can create 3D subjects and scenes for use on website animations and interactions. It also has an AI 3D generator, which allows you to create 3D imagery quickly and then edit it using the tools available in Spline’s software, which can be accessed via the browser, or on apps for both Mac and Windows systems.

While Spline offers some free features within its software, its AI generator for 3D images is part of its premium Super package, from $24 per month.

With Spline’s AI 3D image generator, you can create a 3D image by uploading a 2D image or by using a text prompt to generate your 3D image. You can also upload a 2D image and then use a text prompt that incorporates the 2D image into your 3D rendering. There are a handful of other AI features within Spline’s tools, such as AI textures to apply to your image, AI generation remix for finding different image results, and AI style transfer.


Out of these 3D image generator tools, my favorite is Tripo for free tools or Spline for premium options. Spline’s history in creating 3D imagery holds it accountable as a more reliable tool. Tripo is a great tool for those with little to no experience in 3D rendering.

You can add these AI 3D image generators to the list of creative AI tools that are more than just chatbot answers, and making 3D creations from your 2D images is a cool way to use AI.

What Is Fanfix? Everything You Need to Know About This Patreon Rival

Key Takeaways

  • Fanfix is a platform for exclusive content from creators.
  • Subscribers can see exclusive posts, view live streams, and send messages to creators.
  • Creators can monetize content but need 10,000 followers across social platforms to join.


Fanfix is a website offering fans opportunities to see exclusive content from their favorite content creators. Some content is behind a paywall, similar to how other sites like Patreon and Ko-Fi work, and some of the content is available for free. Here are the basics of what Fanfix is and how to use the service.


What Is Fanfix?

Fanfix allows creators to set up profiles to share exclusive, non-explicit content. Some creators share their content for free, while others lock their content behind a paywall. Fanfix is like Patreon, another service that allows content creators to monetize exclusive content for their patrons.


If you’re looking to learn more about services like Patreon and Ko-Fi from a creator’s perspective, we’ve broken down the pros and cons.

Screenshot of cassianx's creator page on Fanfix with option to subscribe

Fanfix offers the option to follow creators for free and see limited posts or subscribe for a fee. Note that once you follow an account, Fanfix does not currently have the option to unfollow creators. As a subscriber, you can see exclusive posts, view creators’ Fanfix live streams, and even send messages to content creators you like.

If you’re a fan of a creator, you can go to the creator’s Fanfix page and subscribe for exclusive content for a set monthly amount. This amount varies, with some creators charging anywhere form $5 to $12 per month for access.


Screenshot of Fanfix subscriber pricing

Alternatively, you can pay to unlock specific posts for a one-time fee that ranges from a couple bucks to $20.

Screenshot of Fanfix post behind a paywall of $20

There are options to like and comment on creators’ posts on Fanfix, as well. Followers and subscribers can also give tips to content creators via the website. Patreon currently does not have a way to tip creators, so this makes Fanfix stand out.


Screenshot of payment options to tip a creator on Fanfix

Because Fanfix is newer, its interface has some flaws. For example, you must have an account to search for creators on Fanfix. Patreon, however, allows you to search for creators without logging in.

Another major drawback is that Fanfix is only available via web browser, not via an app. Additionally, if you’re looking to support a smaller creator, creators with smaller followings than 10,000 across all platforms are not eligible for a creator account on Fanfix.

As of now, Fanfix only offers a flat rate for subscribers. This stands in stark comparison to Patreon, which offers different payment tiers of membership with potential incentives like personalized letters or merchandise for higher-paying subscribers. Some of your favorite creators might not be on Patreon, though, so Fanfix may be the best way to show your support.


How to Get Started With Fanfix

You can create an account by going to the website, Fanfix.io, and clicking the sign-up option. From there, you can search for content creators you’d like to follow or subscribe to. Fanfix allows users to subscribe to follow creators for free, but it is important to note that you must have a form of payment on file via the website to use the free follows.

Finally, if you’re a creator interested in joining Fanfix, you can submit an application through the website. Most notably, Fanfix requires creators to have a hefty 10,000 followers across all social media platforms like Instagram and TikTok to qualify.

Screenshot of creator application to qualify for creator status on Fanfix


With options to subscribe to and message content creators and view Fanfix-only livestreams, you can stay up-to-date with your favorite content creators. Whether you’re looking to join Fanfix as a creator or to support other creators, Fanfix has a host of opportunities for more interaction and exclusive content.

Here Are My Favorite Features

Google released the first Android 15 beta in April 2024, and I’ve been using it on my Pixel 8 Pro since then. It’s not a massive update, but it’s hard to overlook some quality-of-life additions. Below, I’ll list my favorite Android 15 features so far.


1 App Archiving

My Pixel 8 Pro only has 128GB of internal storage, with even less usable space. Once I install all my essential and favorite Android apps, the available free space declines even further, leaving less room for all my media.

Due to this, I have to constantly uninstall apps I don’t use as frequently to free up space. However, the problem is that uninstalling such apps also removes all user data. So, the next time I reinstall the app from the Play Store, I have to set it up from scratch again.


This is where app archiving comes in. While the Play Store has an automatic app archiving feature, Android 15 adds it natively to the OS. So, I can manually archive an unwanted or unused app on my phone to free up space. Archiving will not remove the app or any associated user data from the phone; only selected portions are removed.

The best part is that the archived app’s shortcut is not removed from your phone but only grayed out with a download icon on it. When you tap it, Android 15 automatically downloads it from the Play Store. Once reinstalled, I can tap the shortcut again and start using the app like before—all without having to set it up again from scratch.

To manually archive an app in Android 15, long-press its shortcut and select App info. From the page that opens, choose Archive.

2 Private Space


I have several important and sensitive banking and authenticator apps installed on my phone that I want to keep away from prying eyes. Similarly, there are documents and pictures that I don’t want anyone else using my phone to access. This is where Android 15’s Private Space comes in. It’s similar to Secure Folder on Samsung phones.

As the name indicates, the feature creates a “private space” on my phone for all my important apps and documents. The best part about the feature is that you can log in with a separate Google account. Additionally, you can set up a different PIN or pattern than the one you currently use for your device for additional security.

Setting up a Private Space is easy. Navigate to Settings > Security & privacy > Private Space. Then, simply follow the on-screen instructions to set up the feature.


3 Partial Screen Recording

Google added native screen recording with Android 11, though Samsung and other smartphone manufacturers had implemented this feature in their Android skins years before that.

With Android 15, Google is improving screen recording by adding a per-app recording option. So, instead of capturing my entire screen, I can set the recorder to only to capture the contents of a single app.

This is a great privacy improvement, as I do not need to worry about unwanted notifications or other personal content showing up in my screen recordings. I didn’t expect partial screen recording to be a big deal, but I was surprised by its usefulness since I started using Android 15 on my Pixel 8 Pro.


To start a partial screen recording in Android 15, follow these steps:

  1. Expand the Quick Settings panel on your phone and tap the Screen Record tile.
  2. Select A single app from the dialog box that appears and tap Start recording. You’ll be prompted to choose the app you want to record.
  3. When you select the app, a three-second timer will start in the status bar, after which the screen recording will start.

Incoming notifications, calls, and even your notification shade will not appear in the video when using partial screen recording.

4 Improved Bluetooth Toggle in Quick Settings


Android 15 improves the Bluetooth toggle in the Quick Settings panel by introducing a dialog box to control the paired devices. On Android 14, you can only toggle Bluetooth on or off through its Quick Settings tile. However, in Android 15, tapping the Bluetooth tile will bring up a dialog box showing the connected and paired devices you can quickly connect or disconnect from.

This might seem like a small change, but I frequently connect and disconnect several Bluetooth devices with my Pixel 8 Pro throughout the day. The Bluetooth dialog box speeds up the entire process and reduces unwanted taps.

Android 15 packs several usability improvements, but the above are a few that I have found most helpful in daily life. A lot of features are still only partially working or not fully implemented, so the experience should improve even further once the OS is ready for its public release.

5 Reasons I’m Buying Digital Consoles Going Forward

Key Takeaways

  • Digital consoles are cheaper, costing $50-$100 less—making them a budget-friendly choice.
  • Buying digital games is quick and easy, eliminating trips to the store and the need to swap discs.
  • Digital consoles are more travel-friendly, lighter, and free from disc-related issues such as noise.


With most gaming consoles offering digital and disc versions, choosing between them can be a real dilemma. For me, however, digital consoles have become the clear winner, and I’m fully committed to them going forward. Here are some reasons why.


1 Digital Consoles Are Less Expensive

As a gamer who’s always on the lookout for the best deals, the biggest perk of digital consoles for me is their price tag. They are usually $50 to $100 cheaper than their physical counterparts, primarily because they do not include a disc drive.

This can be a significant saving, especially for someone like me who prefers buying digital games over physical discs anyway. With those savings, I can grab a couple of AAA titles or purchase a gaming subscription for six months.

2 Purchasing Digital Games Is Quick and Easy

Not having a disc drive also means I can skip trips to the store every time I want to buy a new game. I don’t have to wait in lines or worry about whether the game I want is in stock. With a digital console, I can simply make the purchase online from the comfort of my couch and download the game immediately.


Not to mention the convenience of switching between games I own, since I don’t have to find and swap discs every time I want to play a different game. Of course, all of this is possible with a disc version console as well, but for me, that defeats the purpose of buying it in the first place.

3 They Are Less Bulky

ALDECA studio/Shutterstock

Going digital also means I can take my console and game library wherever I want. Digital consoles are typically less bulky and lighter than their disc drive counterparts. This makes them more portable and easier to carry, whether I’m heading to a friend’s house, going on vacation, or moving between rooms in my own home.


Having a digital library also means I don’t need to carry around a collection of discs; all my games are stored on the console. This makes digital consoles ideal for a traveling gamer like me who prefers a more minimalist setup.

Inserting a disc into a PS5
Lando Loic/MakeUseOf

Having owned disc consoles in the past, I’ve experienced disc-related issues from time to time. Sometimes, it’s the disc drive making excessive noise, while other times, I’ve had to spend time removing a stuck disc from the console. Fixing these issues often requires patience and a delicate touch to avoid causing further damage.

I’ve also experienced moments when my console wouldn’t detect the game due to minor scratches on the disc. This meant either trying to clean and repair the disc or, in some cases, purchasing a new copy of the game.


Opting for a digital console relieves me of all these concerns. Without a disc drive, there are no mechanical parts that can malfunction or create noise. So, that’s one less thing I have to worry about.

5 They Are Better for the Environment

Lastly, digital consoles are also better for the environment. First, they eliminate the need for physical discs, effectively reducing the amount of plastic waste generated from their production and disposal. Furthermore, digital distribution lowers the carbon footprint associated with shipping physical games.

While digital games also have an environmental impact, it is significantly less than that of physical games. It’s a small step, but collectively, choosing digital consoles can significantly promote environmental sustainability.


So these are some of my primary reasons for choosing digital consoles in the future. The convenience, cost savings, and streamlined experience make digital consoles a perfect match for my gaming style. If you also prioritize these things as a gamer, buying a digital console might be the perfect choice for you too.

How to Change the AirDrop Name on iPhone, iPad, and Mac

If you’ve ever used AirDrop in a crowded place, you know how frustrating it can be with all the devices that appear. Read along to find out how to make your device’s name unique so that you can find it easily in the AirDrop menu.


How to Change the AirDrop Name of Your iPhone or iPad

Using AirDrop to share photos from your iPhone is one of the easiest ways to share content with friends and family. To find the right device in the AirDrop menu among a sea of Apple devices, you can change the name of your iPhone or iPad by following these steps.

Go to Settings > General > About > Name. Then, tap the X icon next to the current name of the device. Next, type the new name you want to assign to your iPhone or iPad and tap Done to save your changes.

How to Change the AirDrop Name of Your Mac

If you own a Mac, it’s just as easy to change its AirDrop name. The new name will show up when AirDropping a file from an iPhone to a Mac. Here’s what you need to do in macOS:


  1. Click the Apple logo in the menu bar and select System Settings from the dropdown. You can also open System Settings via Spotlight Search.

  2. Click General from the left sidebar, then select the About option on the right.
    macOS Sequoia System Settings

  3. Just click on the name of your Mac and type in the new name that you want to show up in the AirDrop menu.
    macOS Sequoia General Settings About Menu

When you change your Mac’s name, its local network address will also change. So, if you have apps or devices that use this address, you may need to reconfigure some settings.


When it comes to sending files from one Apple device to another, AirDrop takes the cake for being one of the easiest ways to do it. By giving your iPhone, iPad, or Mac a unique name, you can make the process of sending photos, videos, or documents even faster and safer for everyone.


Why I Regret Buying an Android Tablet Instead of an iPad

Key Takeaways

  • iPads fit seamlessly into the Apple ecosystem, making integration between your devices easier.
  • Apple’s native apps and software optimization make the iPad a better choice than Android tablets.
  • Waiting and saving up for an iPad is more cost-effective because you aren’t buying two devices.


If you want an iPad, don’t consider an Android tablet even as a stopgap. I made the mistake of getting an Android tablet when I could’ve just saved money for an iPad. Here’s why I regret not buying the tablet I really wanted first.


1 An iPad Fits Better in the Apple Ecosystem

Danny Maiorca/MakeUseOf

While I’m not an Apple fanboy, I use iPhones and Macs because I think they perform better than their competitors. Of course, I can just use an Android tablet separately and sign into the other two with the same Google ID. However, having another Apple product makes it easier to integrate everything within the same ecosystem.


I can quickly AirDrop content between my devices, and having all of my passwords saved across multiple devices—without needing to use a third-party password manager—is also convenient. There are several other features that make the Apple ecosystem amazing, such as Handoff and AirPlay.

This point is irrelevant if you use an Android phone, but an iPad would fight right in if you’re already within the Apple ecosystem.

2 I Prefer Using Apple’s Native Apps

Apple Freeform app showing a canvas

Besides sticking to the Apple ecosystem, I also like using Apple’s native apps. Apple’s Notes app is one example; I think I’ve genuinely opened Google Keep about five times in my life.


I also like using FaceTime more than any other video calling apps, and iMessage is my preferred way to stay in touch with my friends and family. Freeform is also a helpful app for putting my creative ideas on paper.

I still use some Google apps on my iPad, such as Google Calendar. However, I’d much rather have the benefit of Apple’s native apps and then just download the Google apps I’m interested in.

3 iPadOS Runs Better Than Android

By far, the main reason I prefer Apple products is because of how they work. When I had my Android tablet, I got really frustrated with how slow the software would sometimes run. This is the exact why I switched from my Android smartphone to an iPhone over a decade ago, too.


iPadOS is by no means perfect, but I very rarely encounter performance issues. Moreover, the problems I run into are often solved before too long. Most of the time, I can also troubleshoot common iPad problems without too many issues.

4 An Android Tablet Was a Stopgap

The truth is that I always wanted an iPad, and an Android tablet was nothing more than a stopgap. I’ve often caught myself doing this with all kinds of items, such as clothes and headphones. If you don’t *need* whatever you want to buy, it’s often better to just save up and buy the actual thing you want.

Because I bought an Android tablet instead of waiting for an iPad, I spent more money than I would have. Moreover, I was less satisfied with it. If you’re a student who finds iPads expensive, you should get the Apple Student Discount and save money on your purchase.

5 Many iPad Apps Are Unavailable for Android

Footage on Top in DaVinci Resolve for iPad


Besides Apple’s native apps, some third-party apps I like aren’t available on Android. One great example is DaVinci Resolve, which offers powerful video-editing capabilities without needing a computer. I often use the app to create videos for multiple platforms, and I like how using DaVinci Resolve on an iPad provides access to nodes, comprehensive color grading, etc.

Procreate is another example of an app you’ll find on iPadOS but not Android. If creative apps like this are important to you, I’d strongly suggest saving up for an iPad—especially if you aren’t too interested in Android tablets.

Android tablets are good enough for many people, but I always wanted an iPad for creative work, and buying anything else seemed pointless. I like the Apple ecosystem features and the creative apps available for iPads. Plus, iPadOS usually runs without problems. So, If you’re considering a new iPad, I suggest waiting till you can afford one and not buying a stopgap.


The Best PC Gaming Controllers of 2024

The tried and tested keyboard and mouse setup has been a staple for PC gamers for decades. However, these days, some of the hottest PC titles are best enjoyed by switching to a gaming controller instead.


Microsoft 

If you’re a PC gamer who wants the best customizable experience possible with your controller, then the Xbox Elite Series 2 Core could be the one for you. Using this wireless controller with the Xbox Accessories app gives you a suite of customizable options, including button mapping, custom player profiles, and light array settings.

It sports a pair of adjustable-tension thumbsticks, shorter hair trigger locks, and a rubberized wraparound grip, which add to the overall pro feel. If you want to change the cosmetics, its thumbstick toppers, paddles, and D-pad can all be swapped out (a thumbstick adjustment tool comes included), and you can choose between wireless, Bluetooth, or USB-C connectivity for added versatility.


Add in an impressive 40-hour battery life, and you have a gaming controller that lives up to its ‘elite’ mantle. It doesn’t come cheap, but if you value near-limitless customization to level up your game time, this is a very worthy upgrade to the standard Xbox core controller.

Xbox Elite Series 2 Core TAG

Best Overall

Xbox Elite Series 2 Core

$117 $140 Save $23

Offering many options for individual player customization, the Xbox Elite Series 2 Core is one of the best gaming controllers for PC gamers overall.

Pros

  • Offers plenty of options for customization
  • 40 hours of battery life
  • Interchangeable D-pad and thumbsticks
  • Non-slip textured grip
  • Available in a range of colors

The Gamesir Kaleid plugged in
Jerome Thomas / MakeUseOf

The GameSir T4 Kaleid is one of the best budget-friendly wired gaming controllers PC gamers could wish for. Its transparent body is ideal for maximizing the customizable LED lighting features, allowing you to tailor its appearance to your liking and play style.


Hall-effect sticks provide a precise level of control free from any niggling drift issues, and macro back buttons allow you the freedom to assign your own commands for a more bespoke experience, which can be further customized using the GameSir Nexus software. Plus, for action gamers, a Turbo function allows you to switch to hair-trigger mode with a quick button press for ultra-responsive control.

Elsewhere, you’ll find a built-in six-axis gyro that supports motion control for intuitive aim assist or steering controls to round out the Kaleid’s list of functions. And with 6.5 feet of cable included, there’s no danger of your gameplay becoming restricted with this impressive, cost-effective controller.

GameSir T4 Kaleid TAG

Best Budget

GameSir T4 Kaleid Transparent PC Controller

For PC gamers who don’t mind a wired connection, the GameSir T4 Kaleid is one of the best feature-rich and budget-friendly gaming controllers currently available.

Pros

  • Affordable
  • Surprisingly feature-rich
  • Reasonable scope for customization
  • Cool-looking design

Best Retro PC Controller: 8Bitdo Pro 2

8Bitdo Pro 2 wireless controller with a computer monitor
Jordan Gloor / MakeUseOf


Offering a cool old-school look with convenient wireless functionality, the 8Bitdo Pro 2 is a retro gamer’s dream. But don’t let its more simplistic design deceive you. This wireless and Bluetooth-enabled controller hides plenty of customizable features behind that unassuming exterior.

Using the 8Bitdo Ultimate Software, you can assign macros, set trigger lengths, and access button mapping functions. Thumbstick sensitivity and vibration intensity can also be adjusted, and custom profile switching can be enabled depending on the game.

There are durable hall-effect joysticks that prevent any annoying stick drift issues, and the Pro 2 even supports motion control. Plus, with 20 hours of battery life in the tank (on a full charge), you can enjoy plenty of playtime before it needs a recharge.

8Bitdo Pro 2 TAG

Best Retro

8Bitdo Pro 2

Ideal for retro gaming fans, the 8Bitdo Pro 2 marries a cool retro style with modern-day wireless functionality and is ideal for fast-paced PC gaming.

Pros

  • Cool retro look
  • Decent amount of customization options
  • Hall-effect joysticks
  • 20-hour battery life
  • Also compatible with the Switch and Steam Deck
Cons

  • Software can be a bit hit-and-miss

Turtle Beach VelocityOne Flight Deck
Turtle Beach


The Turtle Beach VelocityOne Flightdeck is a premium controller that’s ideal for your Microsoft Flight Simulator gameplay. Sporting a world-first flight touch display and a customizable OLED HUD, it offers an unrivaled precision experience with more features than you can shake a (flight) stick at.

It consists of a stick module with a gear lever plus a three-position rotary dial, which provides super-smooth throttle control with enhanced haptic detents. It also has a four-way remappable navigation pad and an eight-way HAT switch, which allow you to toggle quickly between attack and fine-tune sensor modes. This gives you complete freedom for customization, with as many as 139 programmable button functions for advanced control.

All this customization comes at a considerable cost, but if you’re serious about your flight sims, this is the controller set you need to elevate your flight time to the next level.


Turtle Beach VelocityOne Flightdeck TAG

Best for Microsoft Flight Simulator

Turtle Beach VelocityOne Flightdeck

Navigate your chosen flight path with sheer precision and control with the Turtle Beach VelocityOne Flightdeck. The perfect gaming controller for fans of Microsoft Flight Simulator.

Pros

  • Incredibly deep customization
  • Offers precision control
  • Can be adjusted to suit all hand sizes
  • Multi-zone RGB lighting
  • On-board audio enhancements
Cons

  • Very expensive
  • For dedicated flight sim fans only

Best PC Fight Stick: NACON Daija Arcade Fight StickNacon DaijaIf you’re looking for a PC controller to help you to KO your opponent with as much proficiency and style as possible, theNacon Daija Arcade Fight Stickhas got you covered. Designed for top fighting games like Tekken, Mortal Kombat, and Soul Caliber, this customizable fight pad has everything you need to bring the pain.

Using the Nacon Daija Arcade Stick software, all buttons are fully mappable. You can set up custom profiles, and swap out the customizable SANWA joystick heads, action buttons, and faceplate to help you juggle those combos with ease. Plus, the textured palm rest means you can do it all in complete comfort, even during extended gameplay sessions.

With added support for audio and chat, you can celebrate your victories with a well-timed taunt or two, as well. The Nacon Daija Arcade Fight Stick is the perfect PC controller for any aspiring ultimate fighting game champion.

NACON Daija Arcade Fight Stick TAG

Best Fight Stick

NACON Daija Arcade Fight Stick

Juggle combos like a pro and get that KO with the Nacon Daija Arcade Fight Stick. Precision control with a host of customizable settings for fighting game enthusiasts.

Pros

  • Plenty of customization options
  • Can be cosmetically altered to suit individual style
  • Supports audio and chat
  • Textured palm rest for added comfort
  • Built with pro-level joysticks and buttons
Cons

  • Expensive
  • Not really suitable for other game genres

FAQ

Q: Can I use my Xbox controllers with PC?

Yes. There are plenty of PC games that allow you to use an Xbox controller instead of a keyboard or mouse. Most Xbox controllers enable you to connect wirelessly with your PC, or via Bluetooth or USB-C cable.


Q: Can I use my PS5 controllers with PC?

Yes. The easiest way to do this is with a USB-C to USB-A cable. With the USB-C end plugged into your DualSense controller and the USB-A plug inserted into your PC’s port, and Windows should automatically detect the controller.

Alternatively, provided that your PC supports Bluetooth, you can connect your PS5’s DualSense wirelessly. Bear in mind that only certain games will support the DualSense’s haptic feedback and adaptive triggers.

Q: Are all PC games compatible with a controller?

Most PC games nowadays do provide support for controller-based gameplay. Some older PC games won’t support a controller, although it is possible to map mouse and keyboard inputs into a controller, using an app such as reWASD, or by using Steam’s Big Picture Mode, provided that you have a compatible controller.

Q: How do I get my PC to recognize my controller?

If you are connecting your controller with a USB cable, insert the cable into the USB port and your Windows PC should automatically detect the controller, allowing you to use it immediately.


Alternatively, if your PC is Bluetooth-enabled, you will need to ensure that Bluetooth discovery mode has been engaged. Once this is done, press and hold the sync button on your controller until the Guide button begins to flash. Then, using the Bluetooth menu on your PC, select the option to add the device, to pair your controller with your PC.

How to Factory Reset Your Chromebook

Key Takeaways

  • Powerwashing a Chromebook can fix issues by deleting files and resetting system settings, but you will lose your data.
  • You can hard reset your Chromebook through the Settings app or with the logged-out method.
  • If issues persist after powerwashing, you may need to perform a full recovery by reinstalling ChromeOS.


Chromebooks are stable and secure, but your options for fixing a broken Chromebook are somewhat limited. If you’re not worried about data loss, powerwashing your Chromebook is one of the best ways to restore its functionality. Here are two methods you can use to factory reset your Chromebook.


How to Factory Reset Your Chromebook Through Settings

Factory resetting (or “powerwashing”) your Chromebook is the simplest recovery option you can use to try to repair your Chromebook. When you factory reset your Chromebook, the powerwash will delete all of your locally stored data but won’t reinstall ChromeOS itself.


It will remove your associated Google accounts, and will also delete any saved networks and owner account permissions on your device. Because powerwashing deletes all of your system configurations, it’s capable of repairing OS issues that you may have accidentally created.

Factory resetting your Chromebook can’t fix issues with the operating system, however. If issues with your Chromebook persist, you may need to reinstall ChromeOS to fix it.

Remember: you will lose all of your locally stored files if you factory reset your Chromebook. To preserve them,
back up your files
on an external drive or to the cloud.

To hard reset your Chromebook through Settings, take the following steps:

  1. Click on the time in the taskbar in the bottom right corner of your screen and then select the Settings gear to open the Settings app.
    accessing the settings through the mini taskbar menu on chromebook

  2. Find and select System Preferences in the navigation menu on the left side of the Settings app.
  3. In the expanded options that appear in the main panel, scroll down until you find the Reset section.
  4. Under the Reset heading, click on the Reset button to the right of the Powerwash option to reset your Chromebook.
  5. A prompt will appear asking you to restart your device before resetting it. Click Restart to initiate the powerwash.
    confirming the restart your device prompt before powerwashing chromebook


If you’re planning on giving your Chromebook to another person, make sure to remove any external storage devices, such as SD cards. Powerwashing only erases the hard drive of the Chromebook itself.

How to Factory Reset a Logged-Out Chromebook

You can’t access Settings if you’re locked out of your Chromebook, and you don’t have any hope of repairing issues with your Chromebook as long as you can’t access the device. Luckily, there is a workaround you can use to factory reset a logged-out Chromebook.

You shouldn’t try to factory reset a school Chromebook or managed device. If you’re experiencing issues with a managed device, it’s better to ask for help than to potentially damage the device.

Here’s how to factory reset your Chromebook, even when it’s logged out:

  1. Boot up your Chromebook and wait for the lock screen to appear. Ideally, your Chromebook should be plugged in before you attempt to factory reset it.
  2. Simultaneously press Ctrl + Alt + Shift + R to initiate the powerwashing process.
  3. A prompt will appear asking whether you want to Reset this Chromebook. Click on the Powerwash and Revert button to factory reset your Chromebook.


factory resetting a Chromebook without being logged in through the keyboard shortcut

After you reset your Chromebook, you’ll be prompted to log in to your Google account and set up the device. If you used Google Drive to back up your data before factory resetting your device, it will be immediately accessible once you log in.

No matter why you factory reset your Chromebook, powerwashing is a powerful process that can make even the oldest devices as good as new. If it doesn’t resolve your Chromebook’s problems, tactics like reinstalling ChromeOS may also help.


Today’s NYT Connections Hints and Solution (Saturday, June 22, 2024)

Connections requires players to find the connections between 16 words, and place them in four groups of four. If you want some help, we have the solution to Connections for Saturday, June 22, 2024, along with hints to help you solve it yourself.


SPOILERS AHEAD (CLUES)


Category Clues for Today’s Connections (#377)

Today, as every day, you need to split the 16 words that make up the Connections puzzle grid into four groups of four based on specific categories. It isn’t as easy as it sounds. Fortunately, we’re on hand to help you solve today’s Connections puzzle.

If you want to jump straight to today’s Connections solution, scroll past the next spoiler warning. However, if you’d rather see some hints designed to help you solve it without giving the answers away first:

  • Yellow: “When things connect to another in a line”
  • Green: “What Tiger Woods has been carrying in a bag for decades”
  • Blue: “I watch these while cowering behind ‘The Sofa'”
  • Purple: “Brits also call these ‘bangers’, and pair them with mash”

SPOILERS AHEAD (CATEGORIES)


Today’s Connections Solution (June 22, 2024)

If those clues aren’t enough, and you’re still struggling to beat Connections #377 without running out of mistakes, here is the solution…

Today’s Connections Categories

  • Yellow = “One Thing After Another”
  • Green = “Kinds of Golf Clubs”
  • Blue = “Horror Movies, With ‘The'”
  • Purple = “Words for Sausage”

With the categories revealed, you should try to guess which words belong where. There are 16 words in total, with four belonging to each category.

If you are still stuck despite knowing the names of each category, continue scrolling down for the 16 words organized into their respective categories.

SPOILERS AHEAD (SOLUTION)

Today’s Connections Solution

  • Yellow: “One Thing After Another” = CHAIN, TRAIN, SERIES, STRING
  • Green: “Kinds of Golf Clubs” = DRIVER, IRON, WEDGE, WOOD
  • Blue: “Horror Movies, With ‘The'” = BIRDS, FOG, OMEN, RING
  • Purple: “Words for Sausage” = BRAT, DOG, FRANK, LINK


How I Solved Today’s Connections Puzzle

Takeaways from solving today’s Connections…

  1. The most obvious red herrings are “train” and “driver,” as two words that often go together, “chain” and “link” as the latter forms the former, and the various words that rhyme (“chain” and “train,” “fog” and “dog,”) etc.
  2. The Blue category may cause issues for some people who aren’t big fans of horror films. However, as someone who is, I found this category quite easy.
  3. I personally found the Purple category the most difficult, as these words aren’t the ones that immediately spring to mind when I think of sausages. It feels like slang terms for sausages differ greatly from country to country.

Our Top Tips to Beat Connections Every Day

  1. Shuffle the words as many times as you need. Shuffling the words around means you’re more likely to spot the connections.
  2. Look for differences as well as similarities. The NYT is trying to trip you up, so look for what divides the words with similar meanings.
  3. Take your time, and don’t rush into a guess. Connections isn’t a timed challenge, so you have the luxury of planning everything out.
  4. Look for common themes over time. The more you play Connections, the more you’ll spot recurring themes cropping up regularly.
  5. Tune into the NYT editors’ way of thinking. It’s the puzzle setters you’re competing against, so you need to understand their game plan.


Now that you have completed today’s Connections puzzle (with a little help from your friends at MUO), you should check out some of the other free games from the New York Times.

Wordle is the best-known of them all, and challenges you to find a 5-letter word within six guesses. For every letter you find, you get told if it’s in the correct place, allowing you to whittle down the possible options. If you need help with Wordle, check out our tips and tricks to improve your Wordle score.

There’s also Strands, the newest addition to the New York Times’ burgeoning list of games. Just like Connections, it’s extremely challenging, but in a unique string-the-letters-together way. We recommend you check out our best tips for beating Strands to give yourself a leg up on the daily challenge.

Or, if you’re really only into Connections but want more tips than are offered above, check out our longer list of Connections tips and tricks.


Why I Still Use the PS4 in 2024

Key Takeaways

  • Owning too many unplayed PS4 games means that I’m resistant to upgrading to a PS5.
  • The lack of a big PS5 price drop means there’s no incentive to purchase a new console.
  • The lack of must-have PS5 games means there’s no immediate need to switch consoles.


I still own and use a PlayStation 4 as my main console even though it was released over a decade ago. And I’m far from alone. The numbers suggest that millions of PS4 owners are still happily using their outdated console, and refusing to upgrade to the PlayStation 5. But why? Let’s explore the reasons for this resistance together.


1 I Still Have Too Many PS4 Games to Play

Dave Parrack/MakeUseOf

The biggest reason why I haven’t yet switched is that I have 25 physical PS4 games that I have yet to play. And yes, I have counted them. I have added these to my collection over the past 10 years and then just never got around to playing them. Some were bought new, and some were bought used. But they’re all sat there unplayed.


This includes Tomb Raider, Spider-Man, The Last of Us: Part II, Horizon Zero Dawn, and Hogwarts Legacy. Some absolute crackers that together represent hundreds of hours of potential playtime.

I also have literally hundreds of digital titles yet to play; some purchased while on sale, and many more accumulated over the years through PlayStation Plus. Is this my fault? Sure. I should have played through my catalog of PS4 games as I acquired them, rather than letting them stack up.

But here we are. I am well aware that most PS4 games can be played on the PS5, but am I really going to drop hundreds of dollars on a new console only to then continue playing games from the previous generation? It’s unlikely.

2 The PS5 Hasn’t Dropped in Price As I Hoped It Would

Despite owning countless PS4-exclusive games, I would have switched if the PS5 had got cheaper—but it hasn’t. The PlayStation 5 was released in 2020, and yet the price hasn’t really shifted in the four years since.


Early on, with demand outstripping supply, most people had to pay over the odds in order to secure a PS5 console. The price then dipped slightly, but not enough to make me pull the trigger and finally buy one.

I’m old enough to remember several console generations and remember when the price of the hardware would drop over time with some level of consistency. But those times are clearly over, with the PS5 staying at roughly the same price.

If Sony suddenly cut the price in half, then that would be enough for me to purchase a PlayStation 5. But instead, the retail price of a PS5 has actually increased in some territories since launch—which is ridiculous.

3 There Aren’t Enough PS5 Games Worth Upgrading For

As someone who has owned all the previous Sony home consoles, from the original PlayStation all the way through to the PlayStation 4, I’m not completely immune to the lure of the PS5. In fact, I’m sure that I will be switching at some point; just not yet.


And one reason for that is the lack of PS5 games that I feel the need to play. Since launch, I have kept an eye on what’s being released on the PS5 and there have only been a handful of games that have made me wish I had a PS5.

This may not only be about the lack of triple-AAA games being released on PS5. I am also getting older, and don’t play console games as often as I used to. But still, so many years into the PS5’s lifespan, there should be more games that I personally want to play.

Grand Theft Auto VI could change everything here, as it’s only set to be released on the current-gen consoles. So, us gamers clinging on to our PS4s will be forced to upgrade if we want to play Rockstar’s latest epic.

4 Most PS5 Games Are Still Being Released on PS4

A wall of pre-owned PS4 games for sale
Dave Parrack/MakeUseOf


Tied in with the reason discussed above is the fact that most new games are also being released on PS4. Sure, the PS5 versions look and play better, but so far, that hasn’t been enough to lure me into upgrading to the newer console. Because I don’t own a PS5, I don’t know what I’m missing, so the PS4 versions of these games feel fine to me. For now.

This is a catch-22 for Sony and game developers. Right now, with so many people sticking with their PS4s, it would be unwise to cut such a huge potential audience out of the loop by only releasing a game on PS5. But the longer this goes on, the less likely people are to upgrade. So, there will come a tipping point when, for various reasons, games stop being released on PS4—but we’re not quite there yet.


5 The Price of New Games Is Just Too Expensive

A wall of new PS5 games for sale
Dave Parrack/MakeUseOf

Most new PlayStation 5 games retail for at least $60, with many priced even higher than that. Which, for someone who has rarely bought new games for many years, feels extremely high. While I completely understand that triple-AAA video games cost a fortune to develop and make, the high price of new games is a barrier to me hopping onto this console generation. Especially as, as I have already mentioned, I own too many older games as it is.

Regardless of inflation, it feels like the price of admission for gaming is higher now than it used to be. The retail price of games generally only buys you access to a basic experience these days, with even more money needed to unlock extra content.


So, beyond just the price needed to buy the hardware, upgrading to a PS5 means this particular hobby of mine becomes much more expensive. Especially when I can buy pre-owned PS4 games relatively cheaply.

Ultimately, I’m very likely to upgrade from PS4 to PS5 at some point. Unless Sony announces the PlayStation 6 before I’ve pulled the trigger. Which is unlikely. But for now, I’m happy with my PS4 and see no real reason to upgrade.

Today’s NYT Connections Hints and Solution (Friday, June 21, 2024)

Connections requires players to find the connections between 16 words, and place them in four groups of four. If you want some help, we have the solution to Connections for Friday, June 21, 2024, along with hints to help you solve it yourself.


SPOILERS AHEAD (CLUES)


Category Clues for Today’s Connections (#376)

Today, as every day, you need to split the 16 words that make up the Connections puzzle grid into four groups of four based on specific categories. It isn’t as easy as it sounds. Fortunately, we’re on hand to help you solve today’s Connections puzzle.

If you want to jump straight to today’s Connections solution, scroll past the next spoiler warning. However, if you’d rather see some hints designed to help you solve it without giving the answers away first:

  • Yellow: “What you queue up for at places like Disneyland”
  • Green: “When you want to say yes to someone’s plans”
  • Blue: “The Tortoise and The Hare is another example of this”
  • Purple: “Look for the slang terms for the part of the body we sit on”

SPOILERS AHEAD (CATEGORIES)


Today’s Connections Solution (June 21, 2024)

If those clues aren’t enough, and you’re still struggling to beat Connections #376 without running out of mistakes, here is the solution…

Today’s Connections Categories

  • Yellow = “Amusement Park Rides”
  • Green = “Approval”
  • Blue = “Types of Come-From-Behind Stories”
  • Purple = “Beginning With Synonyms for Rear End”

With the categories revealed, you should try to guess which words belong where. There are 16 words in total, with four belonging to each category.

If you are still stuck despite knowing the names of each category, continue scrolling down for the 16 words organized into their respective categories.

SPOILERS AHEAD (SOLUTION)

Today’s Connections Solution

  • Yellow: “Amusement Park Rides” = FERRIS WHEEL, MERRY-GO-ROUND, ROLLER COASTER, TILT-A-WHIRL
  • Green: “Approval” = CLEARANCE, GO-AHEAD, GREEN LIGHT, THUMBS-UP
  • Blue: “Types of Come-From-Behind Stories” = CINDERELLA, DAVID-AND-GOLIATH, RAGS-TO-RICHES, UNDERDOG
  • Purple: “Beginning With Synonyms for Rear End” = BUMPER-TO-BUMPER, BUTTERMILK, RUMPELSTILTSKIN, TAILGATE


How I Solved Today’s Connections Puzzle

Takeaways from solving today’s Connections…

  1. The most obvious red herrings are all the words separated by hyphens. Seven of the 16 phrases on the board are hyphenated, which is clearly designed to catch players out.
  2. The Blue category is tricky, as “stories of people coming from behind” is quite a broad category. I have also never heard of “Rags-to-Riches” or “Underdog”.
  3. I personally found the Purple category the most difficult, as it’s tricky to see words within other words when you don’t know what you’re looking for!

Our Top Tips to Beat Connections Every Day

  1. Shuffle the words as many times as you need. Shuffling the words around means you’re more likely to spot the connections.
  2. Look for differences as well as similarities. The NYT is trying to trip you up, so look for what divides the words with similar meanings.
  3. Take your time, and don’t rush into a guess. Connections isn’t a timed challenge, so you have the luxury of planning everything out.
  4. Look for common themes over time. The more you play Connections, the more you’ll spot recurring themes cropping up regularly.
  5. Tune into the NYT editors’ way of thinking. It’s the puzzle setters you’re competing against, so you need to understand their game plan.


Now that you have completed today’s Connections puzzle (with a little help from your friends at MUO), you should check out some of the other free games from the New York Times.

Wordle is the best-known of them all, and challenges you to find a 5-letter word within six guesses. For every letter you find, you get told if it’s in the correct place, allowing you to whittle down the possible options. If you need help with Wordle, check out our tips and tricks to improve your Wordle score.

There’s also Strands, the newest addition to the New York Times’ burgeoning list of games. Just like Connections, it’s extremely challenging, but in a unique string-the-letters-together way. We recommend you check out our best tips for beating Strands to give yourself a leg up on the daily challenge.

Or, if you’re really only into Connections but want more tips than are offered above, check out our longer list of Connections tips and tricks.


How to Compare Different CPUs the Right Way

Key Takeaways

  • Clock speed isn’t everything; modern CPUs rely on various parts for performance.
  • Rather than focusing on multiple cores, make sure that your CPU offers good single-threaded performance.
  • Cache performance is a crucial potential bottleneck; always consider cache specs before purchasing a CPU.


The central processing unit (CPU) is the brain of your computer, so it needs to be powerful. It isn’t easy to compare CPUs, but by understanding the right metrics and using the best tools, you can compare different processors the right way.


Clock Speed Isn’t Everything

Intel

Clock speed and cores are the most heavily advertised processor specs. Clock speed is usually measured in hertz (e.g., 3.14GHz), while core count is usually advertised as dual-core, quad-core, hexa-core, or octa-core. But given these two specs, what makes one CPU better than another?


For a long time, it was simple: higher clock speeds and more cores meant better speeds. Processors today don’t depend on clock speeds and cores as heavily for performance because modern CPUs have several other parts that determine how fast they can perform.

In a nutshell, it comes down to how much computing can be done when all parts of a CPU come together in a single clock cycle. If performing Task X takes two clock cycles on CPU A and one clock cycle on CPU B, then CPU B might be the better processor, even if CPU A has a higher clock speed.

You also shouldn’t rely on clock speeds and core count as your only method of comparison. Clock speed comparison is helpful when choosing between CPUs from the same family with the same number of cores, but it isn’t necessarily helpful otherwise.


If you’re comparing Intel Core i3 vs. Core i5 vs. Core i7 processors or Intel Core i5 vs. Core i7 vs. Core i9 processors, then clock speed and number of cores don’t matter. And if you’re comparing Intel vs. AMD or an AMD A10 vs. AMD A8 vs. AMD FX, then clock speed alone won’t tell you much.

comparing the clockspeed of two cpus from the same family with passmark

But between two processors in the same family, clock speed is a useful unit of comparison. For example, the Intel Core i5 12400 and 12600 processors have drastically different clock speeds despite having similar specs otherwise.

Check Single-Threaded Performance

PassMark's CPU Benchmarks List


The dirty little secret in the computer world is that even though you’re buying a processor with four cores, all four of those cores might not be used when you’re running applications. Most software today is still single-threaded, which means the program is running as one process, and a process can only run on one core.

So, even if you have four cores, you won’t be getting the full performance of all four cores for that application. That’s why you also need to check the single-threaded (or single-core) performance of any processor before buying it.

Not all companies explicitly release that information, so you’ll need to rely on third-party data from reliable resources like Passmark. With Passmark, you can search for your specific CPU model (which you can find through settings) and compare it to other popular models on the market.


comparing the single thread performance rating of two cpus

You can also add models you’re interested in to your comparison list and weigh them out against one another. Single thread performance ratings are included in the comparison sheet, so determining which CPU will likely run applications the fastest is a simple feat.

Cache Performance Is King

cpu pins
Alexander_Safonov/Shutterstock

The cache is one of the most under-appreciated parts of a CPU. In fact, a cache with poor specs could be slowing down your PC. So, you should always check the cache specs of a processor before you purchase it.


Cache is essentially RAM for your processor, which means that the processor uses the cache to store all the functions it has recently performed. Whenever those functions are requested again, the processor can draw the data from the cache instead of performing them a second time, thus making it faster.

comparing the cache size of two processors with passmark

Ideally, your processor’s cache size should have at least 64KB of L1 cache per core, but above 128KB is ideal for gaming or other resource-intensive activities. You can compare the cache sizes of CPUs with the main comparison table on Passmark. Cache size isn’t as important as other specs as long as it’s above a reasonable minimum, though, like the impressive 480KB of the CPUs above.


Integrated Graphics Matter, Too

a woman in front of a gaming pc
Dean Drobot/Shutterstock

Intel and AMD have combined the CPU and the graphics card into an APU. If you’ve ever purchased or built a gaming-oriented PC, you may know the difference between an APU, CPU, and GPU, but in simple terms, the APU saves space by combining them.

Because of recent technological changes, new processors can now usually handle the graphics needs of most people without requiring a separate graphics card. These graphics chipsets also vary in performance depending on the processor. Again, you can’t compare an AMD to an Intel here, and even comparing it within the same family can be confusing.


For example, Intel has Intel HD, Intel Iris, and Intel Iris Pro graphics, but not every Iris is better than HD. Meanwhile, AMD’s Athlon and FX series comes without graphics chips but costs more than the APU-centric A-Series, so you’ll have to buy a graphics card if you’re getting an Athlon or FX processor.

The Best Way to Compare CPUs

All of these factors come together to make CPU comparisons a difficult proposition. How do you know which one you should buy? The easiest and best way is to head to Passmark. Passmark is one of the best sites for an effective CPU comparison in minutes. This site explains the differences between processors in terms that any non-techie can also understand.

You’re not just limited to comparing CPUs, either: Passmark also has databases of information about video cards, hard drives, RAM, and pre-built PCs. Comparing CPUs on Passmark effectively only takes a few simple steps:

  1. Search for CPUs you’re interested in, then scroll down and click Compare to add it to your list.
  2. Once you’ve finished creating your list, click on the weighted scale icon in the upper right corner of your screen to access it.
  3. Compare your CPUs. The main values you should look at are clock speed, core count, single thread rating, and L1 cache size.


If you want more information than Passmark offers, you may also like the AnandTech CPU Benchmark Tool. On AnandTech, you can browse in-depth benchmarks conducted by one of the best independent hardware review sites and even compare two processors side-by-side.

Researching the CPUs you’re interested in may take time. There’s nothing wrong with being thorough. As you grow more confident with comparing CPU benchmarks, finding the best value CPUs on the market will become an easy feat.

Today’s NYT Connections Hints and Solution (Thursday, June 20, 2024)

Connections requires players to find the connections between 16 words, and place them in four groups of four. If you want some help, we have the solution to Connections for Thursday, June 20, 2024, along with hints to help you solve it yourself.


SPOILERS AHEAD (CLUES)


Category Clues for Today’s Connections (#375)

Today, as every day, you need to split the 16 words that make up the Connections puzzle grid into four groups of four based on specific categories. It isn’t as easy as it sounds. Fortunately, we’re on hand to help you solve today’s Connections puzzle.

If you want to jump straight to today’s Connections solution, scroll past the next spoiler warning. However, if you’d rather see some hints designed to help you solve it without giving the answers away first:

  • Yellow: “Items that a building contractor or tradesperson needs”
  • Green: “Items that anglers or fishermen and women need”
  • Blue: “Items that a hairdresser or barber needs”
  • Purple: “Words that can be paired with what emerges from an electrical storm”

SPOILERS AHEAD (CATEGORIES)


Today’s Connections Solution (June 20, 2024)

If those clues aren’t enough, and you’re still struggling to beat Connections #375 without running out of mistakes, here is the solution…

Today’s Connections Categories

  • Yellow = “Bits of Hardware”
  • Green = “Fishing Gear”
  • Blue = “Hair Salon Fixtures”
  • Purple = “Lightning ____”

With the categories revealed, you should try to guess which words belong where. There are 16 words in total, with four belonging to each category.

If you are still stuck despite knowing the names of each category, continue scrolling down for the 16 words organized into their respective categories.

SPOILERS AHEAD (SOLUTION)

Today’s Connections Solution

  • Yellow: “Bits of Hardware” = NAIL, NUT, SCREW, WASHER
  • Green: “Fishing Gear” = FLY, HOOK, LINE, SINKER
  • Blue: “Hair Salon Fixtures” = CHAIR, DRYER, MIRROR, SINK
  • Purple: “Lightning ____” = BOLT, BUG, ROD, STRIKE


How I Solved Today’s Connections Puzzle

Takeaways from solving today’s Connections…

  1. The most obvious red herrings are “sink” and “sinker” as two similar-sounding words, plus “washer” and “dryer” as two words that are often lumped in together.
  2. Green was made tricky by the appearance of “fly” next to “hook,” “line,” and “sinker”. The latter is a well-known phrase meaning to be fooled completely, making “fly” stand out.
  3. I personally found the Blue category the most difficult today, as I didn’t immediately lump these words in together. Maybe because I’m a certain age, and therefore follically-challenged.

Our Top Tips to Beat Connections Every Day

  1. Shuffle the words as many times as you need. Shuffling the words around means you’re more likely to spot the connections.
  2. Look for differences as well as similarities. The NYT is trying to trip you up, so look for what divides the words with similar meanings.
  3. Take your time, and don’t rush into a guess. Connections isn’t a timed challenge, so you have the luxury of planning everything out.
  4. Look for common themes over time. The more you play Connections, the more you’ll spot recurring themes cropping up regularly.
  5. Tune into the NYT editors’ way of thinking. It’s the puzzle setters you’re competing against, so you need to understand their game plan.


Now that you have completed today’s Connections puzzle (with a little help from your friends at MUO), you should check out some of the other free games from the New York Times.

Wordle is the best-known of them all, and challenges you to find a 5-letter word within six guesses. For every letter you find, you get told if it’s in the correct place, allowing you to whittle down the possible options. If you need help with Wordle, check out our tips and tricks to improve your Wordle score.

There’s also Strands, the newest addition to the New York Times’ burgeoning list of games. Just like Connections, it’s extremely challenging, but in a unique string-the-letters-together way. We recommend you check out our best tips for beating Strands to give yourself a leg up on the daily challenge.

Or, if you’re really only into Connections but want more tips than are offered above, check out our longer list of Connections tips and tricks.


6 Reasons You Should Store Your Games on an SSD

Key Takeaways

  • SSDs offer faster loading times and improved performance compared to HDDs due to faster data transfer speeds.
  • Faster data read/write speeds lead to fewer in-game stutters, especially in AAA titles.
  • SSDs improve graphics by loading textures faster, leading to better visual fidelity in games.


Many modern games can easily take up hundreds of gigabytes of storage space on your drive. When a game is that big, performance is not only determined by your CPU/GPU combo but also by how fast your PC’s storage is.

That’s where SSDs come in. They’re faster, more reliable, and are getting cheaper by the day. So if you were looking for a reason to switch to SSDs on your gaming PC, here are six.


1 Faster Loading Times

One of the most prominent advantages SSDs hold over HDDs is the significantly faster data transfer speed. Not only does this help transfer files quickly, but this faster data transfer speed also translates to faster loading times in games.

Generally speaking, SSDs are about four times faster than HDDs in terms of both read and write speeds. While the exact figures will vary based on what specific HDD and SSD you’re comparing, SSDs will provide a much faster user experience overall.


Western Digital

This is achieved partly thanks to the PCIe interface that SSDs use, compared to the slower SATA port used by HDDs. Even if you compare a SATA SSD to a SATA HDD, the data transfer speed figures will favor the SSD, providing a significant boost in performance. If you feel like there are too many choices, we’ve got you covered with a list of the best PCIe 4.0 SSDs for gaming.

This is most prominent in AAA or open-world games that need to pull massive files from the drive. If you’re storing your games on an older HDD, chances are you’re going to spend a significant chunk of time waiting around for maps or stages to load. Using an SSD can save you plenty of hours in the long term that you would otherwise spend waiting on loading screens.


Multiplayer games also benefit from this. Some games like Valorant don’t launch a map for everyone on a server until every player is done loading. Even if you get decent a frame rate to drag you through the game, loading times can greatly impact your overall gaming experience.

2 Better In-Game Performance

Another side effect of an SSD’s fast data transfer speed is better in-game performance. Suppose you’re looking to upgrade your computer. In that case, a speedy SSD is one of the easiest, most impactful, and cost-effective upgrades that’ll visibly affect your PC’s performance, which in turn translates to far fewer hitches during gameplay caused by the game trying to load certain assets.

When you consider that modern AAA titles can make thousands of tiny read-and-write operations as you play, transferring hundreds of megabytes or even gigabytes of data back and forth, faster data read and write speeds are your best friend.


However, do keep in mind that installing your game on an SSD isn’t a shortcut to an FPS boost. Your PC’s CPU/GPU combo still plays a big part in the game’s performance, but installing an SSD can help improve latency and prevent lag or stutter during gameplay.

3 Improved Graphics

a woman in front of a gaming pc
Dean Drobot/Shutterstock

While installing an SSD won’t make 720p games look ultra-realistic, the faster load times and better in-game performance do translate to better overall visual fidelity.

The way that most modern-day game textures work is that most objects have a low res texture when you’re further away from them, which is then replaced by a higher res texture when you’re nearby. When using an SSD, this swap between low-res and high-res textures is much faster as the game is able to load and swap textures faster.


So while your FPS will most likely remain the same, the game will likely look better as textures can be loaded in and out faster. Any ragged edges, misaligned or low-quality textures, and other visual glitches will also drop to a minimum. Once again, your CPU and GPU do play a bigger role here, but an SSD helps keep everything together.

4 Better Reliability Than an HDD

hard drive internals next to an ssd
daniiD/Shutterstock

Compared to HDDs, SSDs don’t have any moving parts inside. This makes them more shock-resistant and durable, providing far better reliability than an HDD.

When you’re working with an HDD, there are a lot of factors you need to keep in mind. Since these drives have mechanical moving parts inside them, they tend to wear out over time. The moving assembly inside an HDD is also rather delicate, meaning even a small impact on the drive can put it out of action.


That’s not to say that SSDs can be chucked around thoughtlessly and will still function, but they offer far better durability and long-term reliability than HDDs. The average lifespan of an SSD is 5-10 years, compared to 3-5 years on an HDD. They’re also less likely to corrupt or have internal component failure.

5 A Quieter System

Now granted HDDs aren’t exactly rocket engines when it comes to sound, but they still make some sound due to mechanical components spinning inside the drive enclosure. On average, an HDD can produce nearly 20 to 40 dB of white noise when in use. What makes SSDs more reliable than HDDs also makes them silent in operation—they have no moving parts inside.

The sound problem might be amplified if you have a particularly noisy or old HDD. There’s a chance that the HDD’s sounds might get drowned out by your PC’s fans, but if you’re looking to run your gaming PC as quietly as you can, getting an SSD is the way forward.


6 Better Power Efficiency

Whether you’re using a gaming PC or laptop, chances are you already have a power-hungry CPU and GPU. When gaming, both these components are under stress and draw as much power as possible to give you the best performance. Depending on your power supply, this might not leave enough overhead for other components to function properly.

SSDs require far less power than HDDs to run and perform better in these cases. An SSD uses anywhere between one to four watts of power, while an HDD can go as high as 20 to 25 watts on startup and settle later at a relatively lower four to nine watts during regular operation.

Other than the aforementioned reasons, there are more, smaller ways that SSDs can enhance your gaming and overall PC user experience. SSDs are faster, consume less power, are more durable, and require less maintenance compared to HDDs, and that makes them the better choice for any PC use case.


With SSD prices continuously falling and drives with more capacity and faster data transfer speeds getting cheaper, there’s never been a better time to upgrade if you haven’t already.

Today’s NYT Connections Hints and Solution (Tuesday, June 18, 2024)

Connections requires players to find the connections between 16 words, and place them in four groups of four. If you want some help, we have the solution to Connections for Tuesday, June 18, 2024, along with hints to help you solve it yourself.


SPOILERS AHEAD (CLUES)


Category Clues for Today’s Connections (#373)

Today, as every day, you need to split the 16 words that make up the Connections puzzle grid into four groups of four based on specific categories. It isn’t as easy as it sounds. Fortunately, we’re on hand to help you solve today’s Connections puzzle.

If you want to jump straight to today’s Connections solution, scroll past the next spoiler warning. However, if you’d rather see some hints designed to help you solve it without giving the answers away first:

  • Yellow: “What you can see on the clicker or zapper”
  • Green: “When you want someone not to see something”
  • Blue: “What a mixologist may stick in your cocktail”
  • Purple: “The name’s Connections, Mr. Connections”

SPOILERS AHEAD (CATEGORIES)


Today’s Connections Solution (June 18, 2024)

If those clues aren’t enough, and you’re still struggling to beat Connections #373 without running out of mistakes, here is the answer…

Today’s Connections Categories

  • Yellow = “Remote Control Buttons”
  • Green = “Hide From View”
  • Blue = “Drink Garnishes”
  • Purple = “First Word in Bond Movie Titles”

With the categories revealed, you should try to guess which words belong where. There are 16 words in total, with four belonging to each category.

If you are still stuck despite knowing the names of each category, continue scrolling down for the 16 words organized into their respective categories.

SPOILERS AHEAD (SOLUTION)

Today’s Connections Solution

  • Yellow: “Remote Control Buttons” = CHANNEL, MENU, POWER, VOLUME
  • Green: “Hide From View” = BLOCK, COVER, SCREEN, SHIELD
  • Blue: “Drink Garnishes” = CHERRY, OLIVE, SWORD, UMBRELLA
  • Purple: “First Word in Bond Movie Titles” = CASINO, DIAMONDS, QUANTUM, TOMORROW


How I Solved Today’s Connections Puzzle

Takeaways from solving today’s Connections…

  1. The most obvious red herrings are “channel” and “screen” as two words that could be connected to television, “quantum” and “power” as two words that could be associated with energy, and “sword” and “shield” as two items that were used in medieval warfare.
  2. I personally found the Blue category the most difficult today, despite drinking the odd cocktail. Partly because I’m more interested in the taste than the garnish, and partly because I have never had a sword stuck in my cocktail, so that threw me off.
  3. I actually found the Purple category quite easy today, as I’m a big fan of the Bond movies. While “tomorrow” is a common word, the others are all words I associate with Bond movie titles before anything else.

Our Top Tips to Beat Connections Every Day

  1. Shuffle the words as many times as you need. Shuffling the words around means you’re more likely to spot the connections.
  2. Look for differences as well as similarities. The NYT is trying to trip you up, so look for what divides the words with similar meanings.
  3. Take your time, and don’t rush into a guess. Connections isn’t a timed challenge, so you have the luxury of planning everything out.
  4. Look for common themes over time. The more you play Connections, the more you’ll spot recurring themes cropping up regularly.
  5. Tune into the NYT editors’ way of thinking. It’s the puzzle setters you’re competing against, so you need to understand their game plan.


Now that you have completed today’s Connections puzzle (with a little help from your friends at MUO), you should check out some of the other free games from the New York Times.

Wordle is the best-known of them all, and challenges you to find a 5-letter word within six guesses. For every letter you find, you get told if it’s in the correct place, allowing you to whittle down the possible options. If you need help with Wordle, check out our tips and tricks to improve your Wordle score.

There’s also Strands, the newest addition to the New York Times’ burgeoning list of games. Just like Connections, it’s extremely challenging, but in a unique string-the-letters-together way. We recommend you check out our best tips for beating Strands to give yourself a leg up on the daily challenge.

Or, if you’re really only into Connections but want more tips than are offered above, check out our longer list of Connections tips and tricks.


11 Easy Ways to Fix Steam When It Won’t Open

Key Takeaways

  • Make sure your internet is working properly and Steam servers are not facing a widespread outage.
  • Check if Windows Firewall or your antivirus program is preventing Steam from opening on your PC.
  • Consider clearing Steam’s cached data or reinstalling the app from scratch if the issue persists.


Is Steam refusing to launch on your Windows computer, leaving you stranded without your favorite games? This could happen due to several reasons, but it’s nothing you can’t fix with the solutions listed below.


1 Check If Steam Is Down

If Steam opens but won’t get past the connection screen, or if it won’t load at all, there might be an issue with Steam’s servers. They might be experiencing an outage, causing all Steam clients to stop functioning.

There are websites like Unofficial Steam Status that tell you the current status of the app’s servers. If you see any downtime there, that’s probably why Steam is not opening on your computer.


2 Check Your Network Connection

There’s a chance that Steam can’t open due to an unstable network connection. If you suspect this to be the case, restart your router, as network hardware can malfunction if it runs for extended periods.

If that does not help, you can also switch to a different network connection and then try to load Steam again.

3 End the Steam Process Using Task Manager

If Steam opens but gets stuck on the initial screen, one of its app’s processes may be malfunctioning. To fix this, you can kill Steam’s processes using Task Manager and give it a fresh start.

Follow these steps to stop the Steam process using Task Manager:

  1. Press Ctrl + Shift + Esc to open the Task Manager.
  2. Select the Processes tab in the left pane.
  3. Right-click on Steam in the processes list and select End task.

End Steam Client process from running


Once Task Manager closes Steam, reopen it, and see if it works.

4 Restart Your Computer and Check for Windows Updates

Steam may be failing to open due to temporary issues with your Windows PC. If that’s the case, restarting your PC will likely fix the problem.

Additionally, you should update your operating system. Running Steam on an older Windows version might cause a conflict and stop the app from working as usual.

Press Win + I to open the Settings app. Then, head to Windows Update and click the Check for updates button to download and install pending updates.

How to check for available updates in Windows 11


5 Allow Steam Through Your Firewall and Disable Your VPN

According to Steam, firewalls and other security apps might interfere with the Steam client. In this case, you should allow Steam through the Windows firewall. The same goes if you’re using a third-party antivirus. Try adding Steam to the exception list and check if this fixes the issue.

Similarly to antivirus software, VPNs could interfere with Steam functionality. If you can’t open Steam, turn off your VPN, or add Steam to its exception list.

6 Run Steam as an Admin

A lack of relevant permissions could prevent Steam from opening and functioning as expected on Windows. You can launch Steam as an administrator and see if that helps you open the app without any issues.

Here’s how you do that:

  1. Right-click the Steam shortcut on your desktop and select Open file location from the context menu.
  2. Find steam.exe in the files list, right-click on it, and select Run as administrator.
  3. Hit Yes when the User Account Control (UAC) prompt appears.
  4. Steam should now launch with admin rights.


Launch Steam with administrative rights

If this solves your problem, you can configure Windows to always open Steam with administrative privileges.

7 Avoid Running Steam in Compatibility Mode

Compatibility mode is a useful feature in Windows that allows you to run older programs on your PC. However, since Steam is already compatible with both Windows 10 and 11, running it in compatibility mode can cause issues.

It’s best to disable compatibility mode for Steam using these steps:

  1. Right-click on the Steam’s shortcut and select Properties.
  2. Go to the Compatibility tab and uncheck the Run this program in compatibility mode for checkbox.
  3. Hit Apply followed by OK.
    Disable Compatiblity Mode for Steam on Windows


8 Delete the Steam Cache Files

Like other apps, Steam also creates and stores cache files on your computer. These cache files are sometimes the reason you have various issues with Steam. In this case, your best option is to remove all Steam cache files from your computer.

To clear the Steam app cache:

  1. Close Steam if it’s running on your PC.
  2. Right-click the Steam shortcut on your desktop and select Open file location.
  3. Find and select the appcache folder.
  4. Click the trash icon at the top to delete it.
  5. Launch Steam and see if it works.

Clear Steam Cache on Windows

9 Flush the Steam Configuration and Refresh the App

Since Steam has many configuration files, the app comes with a command that lets you refresh the Steam configuration and installation on your computer. You can use this command to resolve many issues with Steam, including instances when it won’t open.


To refresh the Steam configuration files:

  1. Press the Win + R keys to open the Run dialog box.
  2. Type the following command, and then hit Enter.
    steam: 

Flush Steam Configurations

Once you run the above command, it will delete all the temporary files associated with Steam and log you out of the app. Following that, you shouldn’t experience any problems.

10 Check the Date and Time Settings

Having your Windows PC set to an incorrect date or time may not sound like much, but it can prevent apps like Steam from connecting to their servers. This can cause Steam to become stuck on the startup screen and prevent it from opening.

To avoid this, you can enable the automatic time option on your Windows PC using these steps:


  1. Open the Settings app from the Start menu.
  2. Head to Time & Language > Date & time.
  3. Turn on the toggles next to Set time automatically and Set time zone automatically.
  4. Open Steam and see if it launches.

Adjust the date and time settings in Windows 11

11 Reinstall Steam on Your Computer

If nothing else works, your last option is to uninstall and reinstall Steam on your computer. This will remove Steam and all of its files from your machine. Afterward, you can install Steam from scratch.

Reinstalling the app will fix most issues with Steam on your computer, including when the app refuses to launch.

To remove Steam from your computer:

  1. Launch the Settings app on your PC.
  2. Click Apps.
  3. Find Steam in the apps list, click the three-dot icon next to it, and select Uninstall.


Uninstall Steam on Windows

Once removed, head over to the Steam site using your web browser. Download and launch the Steam setup on your PC. After you reinstall Steam on your PC, it should open and work as expected.

Issues with Steam are very rare, but that doesn’t mean you’ll never encounter one at all. Thankfully, getting Steam back up and running isn’t too difficult if you apply the above tips.

Today’s NYT Connections Hints and Solution (Monday, June 17, 2024)

Connections requires players to find the connections between 16 words, and place them in four groups of four. If you want some help, we have the solution to Connections for Monday, June 17, 2024, along with hints to help you solve it yourself.


SPOILERS AHEAD (CLUES)


Category Clues for Today’s Connections (#372)

Today, as every day, you need to split the 16 words that make up the Connections puzzle grid into four groups of four based on specific categories. It isn’t as easy as it sounds. Fortunately, we’re on hand to help you solve today’s Connections puzzle.

If you want to jump straight to today’s Connections solution, scroll past the next spoiler warning. However, if you’d rather see some hints designed to help you solve it without giving the answers away first:

  • Yellow: “What you need to do if you sell something on eBay”
  • Green: “Types of product that people apply to their mouths”
  • Blue: “A situation you need to get yourself out of”
  • Purple: “360 masters struggling in hot weather, perhaps?”

SPOILERS AHEAD (CATEGORIES)


Today’s Connections Solution (June 17, 2024)

If those clues aren’t enough, and you’re still struggling to beat Connections #372 without running out of mistakes, here is the answer…

Today’s Connections Categories

  • Yellow = “Deliver, as a Package”
  • Green = “Kinds of Lip Makeup”
  • Blue = “Predicament”
  • Purple = “Measured in Degrees”

With the categories revealed, you should try to guess which words belong where. There are 16 words in total, with four belonging to each category.

If you are still stuck despite knowing the names of each category, continue scrolling down for the 16 words organized into their respective categories.

SPOILERS AHEAD (SOLUTION)

Today’s Connections Solution

  • Yellow: “Deliver, as a Package” = MAIL, POST, SEND, SHIP
  • Green: “Kinds of Lip Makeup” = BALM, GLOSS, LINER, STAIN
  • Blue: “Predicament” = CORNER, FIX, HOLE, SPOT
  • Purple: “Measured in Degrees” = ANGLE, CRIME, EDUCATION, TEMPERATURE


How I Solved Today’s Connections Puzzle

Takeaways from solving today’s Connections…

  1. The most obvious red herrings are “ship” and “liner” as two types of seafaring vessel. There’s also the order that the first three words are presented in, with “fix ship hole” being a sentence of sorts. This is a reminder of why it’s good to shuffle the words before you start sorting them into groups.
  2. I personally found the Purple category the most difficult today, as the “degrees” cited have multiple different meanings. I also struggled with the Green category because lip makeup isn’t something I’m particularly knowledgeable about.

Our Top Tips to Beat Connections Every Day

  1. Shuffle the words as many times as you need. Shuffling the words around means you’re more likely to spot the connections.
  2. Look for differences as well as similarities. The NYT is trying to trip you up, so look for what divides the words with similar meanings.
  3. Take your time, and don’t rush into a guess. Connections isn’t a timed challenge, so you have the luxury of planning everything out.
  4. Look for common themes over time. The more you play Connections, the more you’ll spot recurring themes cropping up regularly.
  5. Tune into the NYT editors’ way of thinking. It’s the puzzle setters you’re competing against, so you need to understand their game plan.


Now that you have completed today’s Connections puzzle (with a little help from your friends at MUO), you should check out some of the other free games from the New York Times.

Wordle is the best-known of them all, and challenges you to find a 5-letter word within six guesses. For every letter you find, you get told if it’s in the correct place, allowing you to whittle down the possible options. If you need help with Wordle, check out our tips and tricks to improve your Wordle score.

There’s also Strands, the newest addition to the New York Times’ burgeoning list of games. Just like Connections, it’s extremely challenging, but in a unique string-the-letters-together way. We recommend you check out our best tips for beating Strands to give yourself a leg up on the daily challenge.

Or, if you’re really only into Connections but want more tips than are offered above, check out our longer list of Connections tips and tricks.


The Best Free Roku Channels You Can’t Miss

Key Takeaways

  • Roku offers free public channels like The Roku Channel and Tubi with diverse content and no monthly subscription.
  • Access live news with channels like CBS News and enjoy a wide library of movies with FilmRise and Redbox.
  • Educate with TED Talks, explore space with NASA, and cast videos from Firefox and Roku Media Player.


Are you looking for the best free Roku channels around? We’ve got you covered.

After setting up your Roku device, it’s time to start installing channels—the Roku equivalent of apps. So, here are the best Roku channels you shouldn’t miss. All of them are free to install and do not require monthly subscriptions.


Movies and TV

1. The Roku Channel

The Roku Channel is an official release from Roku that lets you watch movies for free.

Thanks to content from several major studios, including Lionsgate, Metro-Goldwyn-Mayer, Sony Pictures, and Warner Bros, it offers hundreds of Hollywood movies across many categories.

You don’t need an account to watch the content, but be warned that you will have to sit through some ads.


Download:The Roku Channel

2. Tubi

Tubi Home Page

Tubi is one of the best free streaming services out there. It is ad-supported like other free services, but the ads are shorter and less invasive. It has a wide variety of movies and TV shows, with new content being cycled through frequently.

The best part is that you can access the entire Tubi library without making an account, but if you find yourself using it quite often, you can make an account to save your watchlist and get catered recommendations.

Download: Tubi

3. FilmRise

Film Rise home page


FilmRise has more than 10,000 free movies. You won’t find the same number of recent releases as on The Roku Channel, but it’s a great place to watch B-movies and classic films.

Again, no registration is required. You just need to install the channel to get started.

Download:FilmRise

4. Plex

Plex Home page

Plex is one of the most user-friendly services available on Roku, and it’s completely free. Plex lets you make a watchlist incorporating content from your favorite services.

However, Plex also offers free access to an on-demand library of movies and shows and over 600 live TV channels.

Download: Plex


5. Pluto TV

Pluto TV is a completely legal way to watch live TV.

The company has partnerships with NBC News, MSNBC, Sky News, and Bloomberg to bring you 24/7 coverage of the world’s current affairs. The channel also offers lots of minor channels, including Crime Network, Funny AF, IGN, Pro Wrestling, and All-Day Anime.

You can also enjoy a small library of 1,000 on-demand TV shows.

Download:PlutoTV

6. Crackle


Crackle is well-known for cord cutters. It offers free TV, some old movies, and even some original content. The exact shows you can enjoy varies between countries.

Because Crackle works on multiple platforms (including Android, iOS, Apple TV, PlayStation, and Xbox), your recommendations list and watch history will sync up regardless of which device you’re using.

Download:Crackle

7. Kanopy

Kanopy Login Page

Kanopy is another free service where you can watch a variety of movies and TV shows. It’s accessed through your local public library and has one of the best selections of documentaries on any service. Kanopy gives you a certain number of monthly tickets, which you can use to stream free content for both education and entertainment.


While it has different content based on your library, and you can only watch a certain number of things per month if you are already a frequent library goer, Kanopy is easy to set up and gives you access to content you won’t see anywhere else.

Download: Kanopy

8. The CW

The CW home page

The CW channel is the official Roku app of the American television network of the same name. It’s entirely free to use, so no cable subscription is needed.

It offers the last five episodes of a given series on-demand. Shows are generally available 24 hours after they air on TV.

Download:The CW


9. Redbox

Redbox free on demand page

Everyone knows Redbox as the DVD rental service, but their streaming service has made them much more than that. While you can still rent movies through the Redbox service, they also have a library of free content.

It offers free movies to stream and live TV. While its library isn’t comparable to that of some other streaming services, it’s another good place to find free things to watch.

Download: Redbox

News

10. CBS News


If you’re a cord-cutter in need of news, you can’t go far wrong with the official CBS app. It offers 24/7 live-streaming of its news channel, along with on-demand segments such as CBS Evening News, CBS This Morning, 60 Minutes, 48 Hours, Sunday Morning, and Face the Nation.

Download: CBS News

11. ABC News Live

Live news coverage is one of the many reasons people keep their cable subscriptions, but with the ABC News Live channel on your Roku, you can watch live news coverage and recent top stories.

This channel also lets you watch the most popular ABC News shows, such as Good Morning America, 20/20, Nightline, and World News Tonight.

Download: ABC News Live


12. NewsON

NewsON homepage

If you’re more interested in local news than global affairs, this is the channel for you. It offers more than 170 live local news channels from across the United States, and you can watch reruns from the previous 48 hours.

Unlike some other local news apps in the Channel Store, NewsON does not require a cable subscription to operate.

Download:NewsON

13. NBC News

Another one of the best options for streaming live news coverage on your Roku is NBC News. You can see all of today’s highlights on NBC as well as many other more specific news categories, such as sports, pop culture, food, and shopping.


Download: NBC News

14. WeatherNation

If you want to stay updated on the weather in your area, look no further than WeatherNation. It’s a very simple, user-friendly app that gives you detailed information and forecasts for the weather in your area and any other locations you’re interested in.

Download: WeatherNation

Kids

15. PBS Kids


The number of shows on PBS Kids isn’t vast, but it’s more than enough to amuse young children for hours. You’ll find classics such as Sesame Street and Curious George, as well as modern releases like Daniel Tiger’s Neighborhood, Dinosaur Train, Super Why, and Wild Kratts.

You can also find classics like Masterpiece, Frontline, and NOVA, as well as cutting-edge documentaries and even some original web content on the regular PBS channel.

Download:PBS Kids

16. Cartoon Network

The Cartoon Network channel offers free episodes of some of their best programming. With popular shows like The Amazing World of Gumball, Ben 10, Teen Titans GO!, and many others, there is enough content on this channel to keep your kids entertained for hours.

Download: Cartoon Network


Audio

17. Pandora

Pandora is another well-known audio app. Pandora offers three different plan options: Free, Plus, and Premium. The free tier has some limited features, but it still delivers on the core premise of learning your musical tastes over time and playing tracks you’ll enjoy. It’s perfect for background music at an event.

Download:Pandora

18. Spotify

Spotify home page


Spotify needs no introduction. It is the most popular music streaming app in the world. More than 100 million songs are available, its music discovery tools are the envy of the industry, and there is a never-ending supply of playlists made for you to listen to, made by Spotify’s over 600 million users.

Download: Spotify

19. iHeart Radio

iHeart is one of the best services for streaming free live radio. You’ll have access to all the top radio stations, including music, news, sports, podcasts, and local radio.

This channel also allows you to save and replay songs directly from custom artist radio stations, create personalized music playlists, and listen offline when you don’t have an internet connection.

Download: iHeart


20. Audacy

Audacy home page

Another great free option for audio streaming is Audacy. You can listen to all your favorite music, sports, news, and talk radio, and it lets you discover new radio stations and podcasts based on your interests.

One unique feature that sets Audacy apart is the ability to search for radio stations anywhere in the country. You won’t be limited to stations in your area; if there is a station you love based across the country, you can listen to it anytime.

Download: Audacy

21. True Crime Network

True Crime Network home page


If you’re a fan of true-crime podcasts, True Crime Network is a channel you’ll want to check out. You can watch the newest episodes of your favorite true-crime shows and there is even television content available as well.

This channel is full of crime investigation programming and even hosts some educational content to help keep users safe.

Download: True Crime Network

Gaming

22. Text Twist

We have covered some of the best Roku games elsewhere on the site, but Text Twist deserves a special shout-out.

It’s great for family fun. The app gives you either six or seven random letters, and you face a race against time to make as many words as possible before the clock runs out. If you can work out the top answer, you can move on to the next level.


Download:Text Twist

Educational

23. TED

The TED channel is one of the best educational resources on Roku, with access to over 2,000 educational TED Talks. There are countless categories of talks to look through, like science, psychology, technology, and many others, all told by accomplished people who are experts in their fields.

Download: TED

24. Hoopla

Like Kanopy, Hoopla is a service that works through your public library. Unlike Kanopy, though, Hoopla offers a broader variety of content for both education and entertainment.


Using your local library card, you can log in to Hoopla and browse their collection of more than 500,000 eBooks, eAudiobooks, music, comics, and movies.

Download: Hoopla

25. NASA

The NASA channel is the place for all things space. You can view on-demand videos from NASA missions and learn about recent discoveries. There is even a real-time view of Earth from the International Space Station.

Download: NASA

Apps

26. YouTube

YouTube free primetime movies


Everyone knows YouTube, but you might not know that it can fill needs met by almost every other service on this list. You can watch live news coverage and educational content, and listen to music and podcasts, there is even a selection of free movies available to stream right in the YouTube app.

Download: YouTube

27. Roku Media Player

If you’re looking for a way to view your local files on your Roku device, this channel is for you. With the Roku Media Player, you can access all the photo, video, and audio files you have downloaded on your other devices.

If your Roku has a USB connection you can plug directly into it and access your files through the media player, but if not, you can still play files on your Roku through your network.


Download: Roku Media Player

With such a wide variety of free content on Roku, it’s easier than ever to ditch your cable subscription and still watch everything you did before. These channels are just the tip of the iceberg; the more you use your Roku, the more channels you’ll discover.


Today’s NYT Connections Hints and Solution (Sunday, June 16, 2024)

Connections requires players to find the connections between 16 words, and place them in four groups of four. If you want some help, we have the solution to Connections for Sunday, June 16, 2024, along with hints to help you solve it yourself.


SPOILERS AHEAD (CLUES)


Category Clues for Today’s Connections (#371)

Today, as every day, you need to split the 16 words that make up the Connections puzzle grid into four groups of four based on specific categories. It isn’t as easy as it sounds. Fortunately, we’re on hand to help you solve today’s Connections puzzle.

If you want to jump straight to today’s Connections solution, scroll past the next spoiler warning. However, if you’d rather see some hints designed to help you solve it without giving the answers away first:

  • Yellow: “The set of circumstances right now”
  • Green: “Where you end up when you venture out of the city”
  • Blue: “What people choose to decorate their gardens with”
  • Purple: “Four different types of story”

SPOILERS AHEAD (CATEGORIES)

Today’s Connections Solution (June 16, 2024)


If those clues aren’t enough, and you’re still struggling to beat Connections #371 without running out of mistakes, here is the answer…

Today’s Connections Categories

  • Yellow = “Current Situation”
  • Green = “Remote Rural Area”
  • Blue = “Classic Lawn Ornaments”
  • Purple = “____ Tale”

With the categories revealed, you should try to guess which words belong where. There are 16 words in total, with four belonging to each category.

If you are still stuck despite knowing the names of each category, continue scrolling down for the 16 words organized into their respective categories.

SPOILERS AHEAD (SOLUTION)

Today’s Connections Solution

  • Yellow: “Current Situation” = CONDITION, FORM, SHAPE, STATE
  • Green: “Remote Rural Area” = BUSH, COUNTRY, STICKS, WOODS
  • Blue: “Classic Lawn Ornaments” = FLAMINGO, FOUNTAIN, GNOME, PINWHEEL
  • Purple: “____ Tale” = FAIRY, FISH, FOLK, TALL


How I Solved Today’s Connections Puzzle

Takeaways from solving today’s Connections…

  1. The most obvious red herrings are “country” and “state” as two territorial areas, plus “fairy” and “gnome” as two types of mythical creature from folklore. There’s also a high number of words starting with the letter F, with six of the 16 fitting that bill.
  2. I personally found the Blue category the most difficult today, mainly because I don’t have any ornaments adorning my lawn. For the second day in a row, I also found the Yellow category tricky. This time due to each word needing to be used slightly differently to describe the current situation.

Our Top Tips to Beat Connections Every Day

  1. Shuffle the words as many times as you need. Shuffling the words around means you’re more likely to spot the connections.
  2. Look for differences as well as similarities. The NYT is trying to trip you up, so look for what divides the words with similar meanings.
  3. Take your time, and don’t rush into a guess. Connections isn’t a timed challenge, so you have the luxury of planning everything out.
  4. Look for common themes over time. The more you play Connections, the more you’ll spot recurring themes cropping up regularly.
  5. Tune into the NYT editors’ way of thinking. It’s the puzzle setters you’re competing against, so you need to understand their game plan.


Now that you have completed today’s Connections puzzle (with a little help from your friends at MUO), you should check out some of the other free games from the New York Times.

Wordle is the best-known of them all, and challenges you to find a 5-letter word within six guesses. For every letter you find, you get told if it’s in the correct place, allowing you to whittle down the possible options. If you need help with Wordle, check out our tips and tricks to improve your Wordle score.

There’s also Strands, the newest addition to the New York Times’ burgeoning list of games. Just like Connections, it’s extremely challenging, but in a unique string-the-letters-together way. We recommend you check out our best tips for beating Strands to give yourself a leg up on the daily challenge.

Or, if you’re really only into Connections but want more tips than are offered above, check out our longer list of Connections tips and tricks.


Today’s NYT Connections Hints and Solution (Saturday, June 15, 2024)

Connections requires players to find the connections between 16 words, and place them in four groups of four. If you want some help, we have the solution to Connections for Saturday, June 15, 2024, along with hints to help you solve it yourself.


SPOILERS AHEAD (CLUES)


Category Clues for Today’s Connections (#370)

Today, as every day, you need to split the 16 words that make up the Connections puzzle grid into four groups of four based on specific categories. It isn’t as easy as it sounds. Fortunately, we’re on hand to help you solve today’s Connections puzzle.

If you want to jump straight to today’s Connections solution, scroll past the next spoiler warning. However, if you’d rather see some hints designed to help you solve it without giving the answers away first:

  • Yellow: “What you do when you shoot some hoops”
  • Green: “What anglers want to find on the end of their lines”
  • Blue: “What people’s hair exhibits in shampoo commercials”
  • Purple: “What words go before a synonym for kid”

SPOILERS AHEAD (CATEGORIES)


Today’s Connections Solution (June 15, 2024)

If those clues aren’t enough, and you’re still struggling to beat Connections #370 without running out of mistakes, here is the answer…

Today’s Connections Categories

  • Yellow = “Basketball Shots”
  • Green = “Fish”
  • Blue = “Qualities of Thick Hair”
  • Purple = “____ Child”

With the categories revealed, you should try to guess which words belong where. There are 16 words in total, with four belonging to each category.

If you are still stuck despite knowing the names of each category, continue scrolling down for the 16 words organized into their respective categories.

SPOILERS AHEAD (SOLUTION)

Today’s Connections Solution

  • Yellow: “Basketball Shots” = DUNK, FLOATER, LAYUP, THREE
  • Green: “Fish” = PERCH, PIKE, SKATE, SOLE
  • Blue: “Qualities of Thick Hair” = BODY, BOUNCE, LIFT, VOLUME
  • Purple: “____ Child” = FLOWER, ONLY, POSTER, PROBLEM


How I Solved Today’s Connections Puzzle

Takeaways from solving today’s Connections…

  1. The most obvious red herrings are “sole” and “lift” as two parts of a shoe, plus “only” and “sole” as words referring to individual elements. However, unless I’m missing something, I can’t see anything designed to majorly derail people trying to solve Connections today.
  2. I found both the Yellow and Purple categories difficult today, but for different reasons. Yellow, because I’m not familiar with basketball; another example of Connections being easier for Americans to solve. Purple, because while in hindsight, the connection is obvious to see, when you’re scanning the 16 words, it really isn’t.

Our Top Tips to Beat Connections Every Day

  1. Shuffle the words as many times as you need. Shuffling the words around means you’re more likely to spot the connections.
  2. Look for differences as well as similarities. The NYT is trying to trip you up, so look for what divides the words with similar meanings.
  3. Take your time, and don’t rush into a guess. Connections isn’t a timed challenge, so you have the luxury of planning everything out.
  4. Look for common themes over time. The more you play Connections, the more you’ll spot recurring themes cropping up regularly.
  5. Tune into the NYT editors’ way of thinking. It’s the puzzle setters you’re competing against, so you need to understand their game plan.


Now that you have completed today’s Connections puzzle (with a little help from your friends at MUO), you should check out some of the other free games from the New York Times.

Wordle is the best-known of them all, and challenges you to find a 5-letter word within six guesses. For every letter you find, you get told if it’s in the correct place, allowing you to whittle down the possible options. If you need help with Wordle, check out our tips and tricks to improve your Wordle score.

There’s also Strands, the newest addition to the New York Times’ burgeoning list of games. Just like Connections, it’s extremely challenging, but in a unique string-the-letters-together way. We recommend you check out our best tips for beating Strands to give yourself a leg up on the daily challenge.

Or, if you’re really only into Connections but want more tips than are offered above, check out our longer list of Connections tips and tricks.


The Best iPad Accessories of 2024

Whatever generation of iPad you own, these versatile accessories will help you take your productivity to the next level.


Spigen Rugged Armor Pro
Spigen


Striking an all-important balance between function and affordability, the Spigen Rugged Armor Pro is a versatile protective case for your iPad that won’t break the bank. Although this version is for the iPad Pro 13-inch (M4), other versions are available for the iPad Pro 11-inch (2024), iPad Air 13-inch (2024), and iPad Air 11-inch (2024) — as well as previous generations of the iPad Pro and Air.

Sporting a sleek and slim profile and embellished with carbon fiber accents, it looks every inch the premium case. It offers good all-around protection for your iPad, with Air Cushion corners for shock absorption and a reinforced back that protects against scratch and drop damage. It fully supports Apple Pencil storage and functionality, and its integrated kickstand allows for multiple viewing angles.


A foldable front cover provides an auto wake/sleep function for your iPad, while a soft microfiber lining keeps the screen free from dust and scuff marks. Its textured design feels good to the touch and is lightweight enough to make it practical for portability.

Spigen Rugged Armor Pro TAG

Spigen Rugged Armor Pro for iPad Pro 13 Inch

Best iPad Case

Providing rugged protection for your iPad, the Spigen Rugged Armor Pro offers a premium finish at an affordable price point. It also has convenient Apple Pencil storage and a foldable stand to support multiple viewing angles.

Pros

  • Rugged protection for your iPad
  • Integrated kickstand for multiple viewing angles
  • Supports Apple Pencil storage and charging
  • Premium look and feel
  • Reasonable price point

ESR for iPad Pro 13-inch
ESR

Designed to provide a paper-like feel for drawing or note-taking, the ESR screen protector for iPad Pro 13-inch attaches magnetically to your device’s screen when you’re feeling creative and can be removed and reused up to 100,000 times. In addition to the iPad Pro 13-inch, ESR makes this screen protector for the Pro 11-inch (2024), Air 13-inch (2024), and Air 11-inch (2024), as well as previous generations like the iPad 10th Gen.


Compatible with tempered glass screen protectors, it provides a bubble-free and frictionless surface on which to create. When not in use, it can be safely stored in the protective envelope supplied, ready for that next moment of inspiration. You can seamlessly transition between a matte surface for drawing and a pristine display for everyday use and media streaming.

ESR for iPad Pro 13-inch TAG

ESR for iPad Pro 13 Inch Magnetic Screen Protector

Best iPad Screen Protector

The ESR Magnetic Screen Protector provides a paper-like feel for frictionless drawing and note-taking. Its convenient magnetic attachment allows it to be reused up to 100,00 times.

Pros

  • Provides a paper-like feel for drawing and note-taking
  • Compatible with tempered glass screen protectors
  • Magnetic attachment
  • Reusable up to 100,000 times
Cons

  • Can cause some dimming of the screen display

Apple Pencil Pro
Apple

Although other iPad-compatible styluses are available, the Apple Pencil Pro has been designed to provide you with the best drawing and writing experience possible. Available for the iPad Pro 13-inch (M4) and 11-inch (M4) models, as well as the iPad Air 13-inch (M2) and 11-inch (M2), it comes fully equipped to feed your creativity with fluid movement and intuitive features.


Using the Apple Pencil Pro allows for seamless control across your canvas. For instance, squeezing it brings up a brand-new palette, enabling you to switch up tools, colors, and more in a split second. A barrel roll feature allows for precision rotation, control of brush features, and haptic feedback pulses to acknowledge each action.

Should you ever misplace your Apple Pencil Pro, you can locate it using the Find My app. Plus, for added convenience, it attaches and charges magnetically on the side of your iPad.

Apple Pencil Pro TAG

Apple Pencil Pro

Best iPad Stylus

Experience unparalleled precision and control with the Apple Pencil Pro. This unique stylus is ideal for artists and has all the tools you need to express yourself on the iPad’s canvas.

Pros

  • Provides fluid, precision control
  • Haptic feedback to confirm action switches
  • Barrel roll feature for precision use of shaped tools
  • Apple Hover feature adds extra control over your creations
Cons

  • Expensive
  • Only compatible with the latest iPad Pro and Air models

side view of the Apple iPad Pro (M4) in magic keyboard
Tyler Hayes / MakeUseOf


If you love the convenience of your iPad but are craving a more precise typing experience, the Apple iPad Magic Keyboard could be the answer. Compatible with the iPad Pro 13-inch, iPad Pro 11-inch, iPad Air 13-inch, and iPad Air 11-inch, this lightweight detachable keyboard case is ideal for working at home or on the go.

It features a floating cantilever design that can be adjusted to support multiple viewing angles, a USB-C pass-through for easy charging, and a large glass trackpad with haptic feedback for fluid navigation. Backlit keys give it a nice aesthetic, while ultra-quiet keystrokes allow you to work discreetly from wherever you are.

A lightweight and slim form factor makes it ideal for travel, while its magnetic attachment means there’s no need for pairing as it draws power directly from your iPad.

Apple Magic Keyboard Case TAG

Apple Magic Keyboard Case

Best iPad Keyboard Case

The Apple Magic Keyboard Case delivers an unrivaled typing experience for your iPad. With a large glass trackpad for extra control, customizable backlighting, and convenient magnetic attachment, it’s the perfect tool for managing workloads on the go.

Pros

  • Lightweight and slim form factor
  • Magnetic attachment powered by the iPad itself
  • Enlarged precision trackpad
  • Ultra-quiet keystrokes
  • Customizable backlighting

Apple AirPods Pro 2nd Gen sitting on the back of the iPhone 14 Pro
Justin Duino / MakeUseOf


The Apple AirPods Pro (2nd Generation) can easily stream music, movies, and more. Featuring the Apple-designed H2 chip, they provide an immersive audio experience with intelligent noise cancelation and low-distortion sound.

In addition to Active Noise Cancelation, the AirPods Pro features a Transparency Mode and Adaptive Audio, which blend both modes for the best of both worlds in any environment. The AirPods Pro and the charging case are IP54 sweat- and water-resistant and, when combined, provide a battery life of up to 30 hours.

The case is compatible with MagSafe for added convenience, and you’ll find personalized spatial audio with dynamic head tracking. Additionally, the AirPods Pro supports Dolby Atmos, making them ideal for enjoying music or movies on the move.

Apple AirPods Pro 2nd Gen TAG-1

Apple AirPods Pro (2nd Generation) Wireless Earbuds

Best iPad Headphones

$190 $249 Save $59

The Apple AirPods Pro provides up to 2x active noise cancelation, plus personalized spatial audio with dynamic head tracking, to give you the most immersive audio experience possible.

Pros

  • Active Noise Cancelation
  • Personalized spatial audio with dynamic head tracking
  • IP54 water-resistant
  • Up to 30 hours of battery life
  • MagSafe compatible

FAQ

Q: Do I need a case for my iPad?

You don’t need a case for your iPad, but using one will better protect your device against accidental drops and scratch damage.


Most iPad cases feature precise cutouts for all ports, speakers, buttons, and camera lenses too, so using one won’t impair any of its functions.

Q: Do I need to buy the Apple Pencil for my iPad, or can I use another stylus?

If you’re looking for a stylus to use with your iPad, you can find plenty of iPad-compatible choices and don’t necessarily need to choose the Apple Pencil.

However, the Apple Pencil has been specially designed to work exclusively with your iPad and offers full support for things such as pressure sensitivity and tilt recognition, offering you what is arguably a more complete drawing and writing experience.

Q: How do I connect my Bluetooth devices to my iPad?

Pairing Bluetooth devices with your iPad is a relatively simple process.

To get started, navigate to the Settings menu on your iPad, select Bluetooth, and switch on the Bluetooth function. Follow the on-screen prompts until the pairing process has been completed. Ensure your accessory has discovery mode enabled, and then wait for it to appear on your iPad.


Q: What are the latest iPad models?

The latest iPad models are the iPad Pro (M4) and the iPad Air (M4), both of which were released in 2024.

Today’s NYT Connections Hints and Solution (Friday, June 14, 2024)

Connections requires players to find the connections between 16 words, and place them in four groups of four. If you want some help, we have the solution to Connections for Friday, June 14, 2024, along with hints to help you solve it yourself.


SPOILERS AHEAD (CLUES)


Category Clues for Today’s Connections (#369)

Today, as every day, you need to split the 16 words that make up the Connections puzzle grid into four groups of four based on specific categories. It isn’t as easy as it sounds. Fortunately, we’re on hand to help you solve today’s Connections puzzle.

If you want to jump straight to today’s Connections solution, scroll past the next spoiler warning. However, if you’d rather see some hints designed to help you solve it without giving the answers away first:

  • Yellow: “Work that short-form writers produce”
  • Green: “A singer with a name that’s also a color would belong here”
  • Blue: “Charlie Lima Uniform Echo is a clue, literally”
  • Purple: “Almost but not quite number one”

SPOILERS AHEAD (CATEGORIES)


Today’s Connections Solution (June 14, 2024)

If those clues aren’t enough, and you’re still struggling to beat Connections #369 without running out of mistakes, here is the answer…

Today’s Connections Categories

  • Yellow = “Writing Assignments”
  • Green = “Things That Are Pink”
  • Blue = “NATO Phonetic Alphabet”
  • Purple = “Associated With #2”

With the categories revealed, you should try to guess which words belong where. There are 16 words in total, with four belonging to each category.

If you are still stuck despite knowing the names of each category, continue scrolling down for the 16 words organized into their respective categories.

SPOILERS AHEAD (SOLUTION)

Today’s Connections Solution

  • Yellow: “Writing Assignments” = ARTICLE, ESSAY, PAPER, REPORT
  • Green: “Things That Are Pink” = BUBBLE GUM, CARNATION, ERASER, FLAMINGO
  • Blue: “NATO Phonetic Alphabet” = FOXTROT, HOTEL, VICTOR, YANKEE
  • Purple: “Associated With #2” = DEPUTY, DEREK JETER, PENCIL, SILVER MEDAL


How I Solved Today’s Connections Puzzle

Takeaways from solving today’s Connections…

  1. The most obvious red herrings are “pencil,” “paper,” and “eraser” as three words associated with writing or drawing. There’s also “Derek Jeter” and “Yankee,” as the former spent his whole baseball career as a New York Yankee.
  2. I found the Purple category impossible today, mainly as a result of being British. For starters, I didn’t know who Derek Jeter was before Googling his name. I also didn’t immediately think of #2 when I saw “pencil,” as outside the US, pencils are graded on an HB scale. So it’s a good job that these were the only four words left after solving the other categories.

Our Top Tips to Beat Connections Every Day

  1. Shuffle the words as many times as you need. Shuffling the words around means you’re more likely to spot the connections.
  2. Look for differences as well as similarities. The NYT is trying to trip you up, so look for what divides the words with similar meanings.
  3. Take your time, and don’t rush into a guess. Connections isn’t a timed challenge, so you have the luxury of planning everything out.
  4. Look for common themes over time. The more you play Connections, the more you’ll spot recurring themes cropping up regularly.
  5. Tune into the NYT editors’ way of thinking. It’s the puzzle setters you’re competing against, so you need to understand their game plan.


Now that you have completed today’s Connections puzzle (with a little help from your friends at MUO), you should check out some of the other free games from the New York Times.

Wordle is the best-known of them all, and challenges you to find a 5-letter word within six guesses. For every letter you find, you get told if it’s in the correct place, allowing you to whittle down the possible options. If you need help with Wordle, check out our tips and tricks to improve your Wordle score.

There’s also Strands, the newest addition to the New York Times’ burgeoning list of games. Just like Connections, it’s extremely challenging, but in a unique string-the-letters-together way. We recommend you check out our best tips for beating Strands to give yourself a leg up on the daily challenge.

Or, if you’re really only into Connections but want more tips than are offered above, check out our longer list of Connections tips and tricks.


Did You Know Premium Games Can Contain Advertising? 3 Annoying Examples

Key Takeaways

  • In-game ads often mimic real-world advertising within premium games, such as billboards and product placements.
  • EA is looking to introduce ads in its premium games.
  • Well-executed ads can offset game development costs, but poorly implemented ads can disrupt gameplay and receive backlash.


EA’s proposed plans to add advertising to premium games have attracted backlash, with ads usually associated with free games. But here are some of the ways that premium games already advertise to paying players.


What Does In-Game Advertising Look Like?

When it comes to premium games, in-game ads can look a lot like real-world ads. It could be a billboard you see in the game’s world, a character interacting with a real-life product, or even a game built around a real-world organization or franchise.

Take the EA Sports’ NHL, F1, or even FIFA (now FC) games for example. While building these games, the studio not only has to focus on the actual game itself, but also all the teams, leagues, and franchises present in real-world sports to ensure they’re in the game as authentically as possible. It is a prime example of how a game can advertise a person (professionals in their respective sports) or a company (equipment or partner companies in the real sport).


Miguel Lagoa/Shutterstock

In addition to existing ads, EA is now considering putting ads in AAA titles. EA CEO Andrew Wilson confirmed the potential plans in the Q&A section of EA’s latest earnings call and claims that the company has internal teams working on how to “thoughtfully” implement in-game ads. In addition to advertising their games via their own launchers, game publishers might be about to uncover a whole new avenue of advertising.

EA isn’t the only major company looking to further capitalize on the gaming industry. Microsoft and Sony both have considered in-game advertisements for Xbox and PlayStation. Both companies also are planning on integrating ads without affecting the in-game experience. With the gaming industry expected to generate $221 billion in revenue by 2025, in-game ads could well be the new norm.


Well-executed in-game advertisements often go unnoticed. But it’s the gameplay-disrupting ads that often cause backlash from gamers. But why do ads appear in a game that you paid for anyway?

Why Are Publishers Putting Ads in Premium Games?

There are several reasons why publishers would want ads in your video games. From promoting products and partners to promoting crossovers, in-game advertising can significantly boost the revenue a game generates.

The ultimate motivation here is to make as much money from a game as possible, but it requires a proper implementation to ensure that the ads don’t distract gamers from the actual game they want to play.

A prime example of this is the in-game ads for the TV series The Boys in EA’s UFC 4. The ads were placed across the players’ screens, disrupting gameplay. It caused immense backlash from players, with EA eventually taking the ads down.


While freemium games do use ads and microtransactions quite often, you won’t expect the same ads in a premium game that you’ve paid for in the first place.

Past Examples of In-Game Ads

In-game ads aren’t new to the gaming industry and have been around since at least 1978’s Adventureland. However, there have been some bad implementations since then as well. Here’s a look at a few of them.

1. Pepsiman

Pepsiman is as blatant as an in-game advertisement can be and one of the best examples of an advergame—a game built for the purpose of advertising a specific product or brand. For those unaware, Pepsiman is a superhero mascot for Pepsi that had the power to deliver Pepsi to those in need.


The game was released in Japan in March 1999 for the PlayStation 1 and consisted of four stages, each divided into smaller segments. Your goal? To deliver cans of Pepsi to dehydrated people. You dash, jump, and run to avoid obstacles on the way to the person you’re helping, and that’s about it.

The game didn’t sell very well, but it did emerge as a frontrunner to similar running games later down the line like Temple Run and Subway Surfers.

2. Death Stranding

In 2019, Monster Energy and Sony Interactive Limited launched an ad campaign in the PS4 title Death Stranding. The game requires you to gulp down cans of Monster Energy drink to replenish your character’s stamina. In fact, the game’s very first mission requires you to drink a can of Monster, and the character does a vitality dance afterwards.


The game does feature other brands such as J.F. Rey sunglasses and Acronym clothing, but they’re nowhere as prominent as Monster’s energy drink and blend well into the game’s setting.

In a world as remote as the one Death Stranding is set in, branded items are rarity, but the stockpiles of Monster cans (the character even takes the drink around in his water canister), stand out rather oddly. The game doesn’t provide any explanation for why the cans are so plentiful either.

3. Battlefield 2142


Before EA descended into all the microtransaction and DLC controversy around its Battlefield games, Battlefield 2142 was a testing ground for in-game advertising as far back as 2006. The game features loads of in-game billboards for real companies scattered throughout the maps.

However, it wasn’t the visual part of advertising that caused outrage among gamers. The advertising technology developed by EA was reportedly sending off gamers’ IP addresses and other anonymous details to custom-tailor ads in-game, much like what we see on social media platforms today.

At least EA notified buyers of the full retail version of the package of the data collection, but that was still taking in-game ads too far.

In-game ads are a tricky thing to implement, and we have both good and bad examples. While selling digital ad space inside games can help publishers offset development costs and ultimately make games cheaper and more accessible for gamers, poorly implemented ads, such as those that interfere with the game’s experience, can leave a bad taste.


Today’s NYT Connections Hints and Answer (Thursday, June 13, 2024)

Connections requires players to find the connections between 16 words, and place them in four groups of four. If you want some help, we have the solution to Connections for Thursday, June 13, 2024, along with hints to help you solve it yourself.


SPOILERS AHEAD (CLUES)


Category Clues for Today’s Connections (#368)

Today, as every day, you need to split the 16 words that make up the Connections puzzle grid into four groups of four based on specific categories. It isn’t as easy as it sounds. Fortunately, we’re on hand to help you solve today’s Connections puzzle.

If you want to jump straight to today’s Connections solution, scroll past the next spoiler warning. However, if you’d rather see some hints designed to help you solve it without giving the answers away first:

  • Yellow: “Verbs for when you’re keen about something or someone”
  • Green: “Antonyms for a complete and utter failure”
  • Blue: “What Biden or Trump might hand out at campaign rallies”
  • Purple: “Words that go with what you do if you steal someone’s exam answers”

SPOILERS AHEAD (CATEGORIES)


Today’s Connections Solution (June 13, 2024)

If those clues aren’t enough, and you’re still struggling to beat Connections #368 without running out of mistakes, here is the answer…

Today’s Connections Categories

  • Yellow = “Enjoy”
  • Green = “Blockbuster”
  • Blue = “Campaign Swag”
  • Purple = “Words After ‘Copy'”

With the categories revealed, you should try to guess which words belong where. There are 16 words in total, with four belonging to each category.

If you are still stuck despite knowing the names of each category, continue scrolling down for the 16 words organized into their respective categories.

SPOILERS AHEAD (SOLUTION)

Today’s Connections Solution

  • Yellow: “Enjoy” = APPRECIATE, DIG, FANCY, LIKE
  • Green: “Blockbuster” = HIT, SENSATION, SMASH, SUCCESS
  • Blue: “Campaign Swag” = BUTTON, HAT, SHIRT, STICKER
  • Purple: “Words After ‘Copy'” = CAT, EDITOR, PASTE, THAT


How I Solved Today’s Connections Puzzle

Takeaways from solving today’s Connections…

  1. The most obvious red herrings are the four words that make up every YouTuber’s closing line… “Smash That Like Button”. Which the editor cleverly placed next to one another to throw us all off. There’s also “hat,” “cat,” and “that” as three words that rhyme.
  2. I found the Blue category the most difficult to beat today, as handing out campaign swag at political rallies is much more of a US thing (and I’m British). However, I spotted the Purple category as a result of being a copy editor myself, and needing to copy and paste text as a result.

Our Top Tips to Beat Connections Every Day

  1. Shuffle the words as many times as you need. Shuffling the words around means you’re more likely to spot the connections.
  2. Look for differences as well as similarities. The NYT is trying to trip you up, so look for what divides the words with similar meanings.
  3. Take your time, and don’t rush into a guess. Connections isn’t a timed challenge, so you have the luxury of planning everything out.
  4. Look for common themes over time. The more you play Connections, the more you’ll spot recurring themes cropping up regularly.
  5. Tune into the NYT editors’ way of thinking. It’s the puzzle setters you’re competing against, so you need to understand their game plan.


Now that you have completed today’s Connections puzzle (with a little help from your friends at MUO), you should check out some of the other free games from the New York Times.

Wordle is the best-known of them all, and challenges you to find a 5-letter word within six guesses. For every letter you find, you get told if it’s in the correct place, allowing you to whittle down the possible options. If you need help with Wordle, check out our tips and tricks to improve your Wordle score.

There’s also Strands, the newest addition to the New York Times’ burgeoning list of games. Just like Connections, it’s extremely challenging, but in a unique string-the-letters-together way. We recommend you check out our best tips for beating Strands to give yourself a leg up on the daily challenge.

Or, if you’re really only into Connections but want more tips than are offered above, check out our longer list of Connections tips and tricks.


These 5 Awesome Features Arrived in Google’s June 2024 Pixel Drop

Google’s June 2024 Android 14 Pixel Feature Drop brings a slew of improvements to compatible Pixel phones to deliver a better user experience. Feel free to learn about all the key new features in the update below.


1 Improved AI-Generated Summaries in the Recorder app

The Recorder app is among the best apps on the Pixel. It uses AI to provide real-time transcripts of voice notes being recorded with speaker label support. The June 2024 Feature Drop makes the app even better by letting you download AI-generated summaries of a recorded note.

Google also claims that the Summaries are now more detailed than before and will include speaker labels, making it easy to follow conversational transcripts.

More importantly, you can export the transcript of a recorded voice note to Google Docs or into a text file for easy sharing.


Downloadable AI-generated summaries are available on the Pixel 8 Pro. However, if you have the Pixel 8 or Pixel 8a, you can enable this feature through the hidden Developer options menu. The feature is also limited to English voice notes.

2 Manual Camera Mode Gets Even Better

The Pro camera mode in the Pixel Camera app is getting more powerful; you can now switch between lenses manually. So far, the Pixel’s camera app has automatically toggled between camera lenses based on lighting conditions and zoom.

Once you install the June 2024 Pixel Feature Drop, you can manually pick the camera lens you want to use in Pixel Camera’s Pro mode. Besides the Pixel Fold, this enhancement is available on the Pixel 6 Pro and newer Pro models.


3 Offline Phone Finding Support

The June 2024 Pixel Feature Drop also enhances Find My Device support on your Google Pixel by adding offline phone finding support in the Find My Device app.

As the name indicates, the feature allows you to track your lost or stolen Pixel phone for up to 23 hours after it’s powered off or runs out of battery. It relies on Google’s Find My Device network to work, ensuring that your location data is encrypted and not compromised in any way.

Offline phone finding only works on the Pixel 8 series and is not globally available as of early 2024.

4 DisplayPort Support

The June 2024 Feature Drop makes the USB-C port on the Pixel 8 a lot more useful by enabling DisplayPort support. In simpler terms, you can connect your Pixel 8 to a computer monitor with DisplayPort over USB-C and watch content directly on it.


While this might seem minor, it’s a handy addition, as you can use DisplayPort support to turn the Pixel into a mini-PC for viewing spreadsheets or movies on a bigger screen.

Do note that you must use a compatible USB-C cable with DisplayPort support for the external monitor output to work. This feature is only available on the Tensor G3-powered Pixel 8, Pixel 8 Pro, and Pixel 8a.

5 Quickly Lookup Unknown Numbers

It’s now easier than ever to look up unknown numbers quickly. You will see a new “Lookup” option when you tap an unknown number in your call log. Previously, you had to use a service like Truecaller or do a reverse search of the number on Google to identify the caller.


Reverse Phone Number Lookup is available on Pixel 6 and newer devices, including the Pixel Fold.

Besides these major additions, the Feature Drop also brings Gemini Nano to the Pixel 8 and 8a. However, you must enable access to the AI model through the hidden Developer options menu. Running Gemini Nano locally will speed up many AI tasks on your Pixel phone, like AI summaries in the Recorder app, Magic Compose in the Messages app, and more.

You can download the Feature Drop right now by heading to Settings > System > Software updates > System update on your Pixel phone.

Today’s NYT Connections Hints and Answer (Wednesday, June 12, 2024)

Connections requires players to find the connections between 16 words, and place them in four groups of four. If you want some help, we have the solution to Connections for Wednesday, June 12, 2024, along with hints to help you solve it yourself.


SPOILERS AHEAD (CLUES)


Category Clues for Today’s Connections (#367)

Today, as every day, you need to split the 16 words that make up the Connections puzzle grid into four groups of four based on specific categories. It isn’t as easy as it sounds. Fortunately, we’re on hand to help you solve today’s Connections puzzle.

If you want to jump straight to today’s Connections solution, scroll past the next spoiler warning. However, if you’d rather see some hints designed to help you solve it without giving the answers away first:

  • Yellow: “Films that Frank Sinatra and the Beastie Boys sang about”
  • Green: “Films that could be lines in a poem”
  • Blue: “Films that go the distance”
  • Purple: “Films that animals may enjoy watching”

SPOILERS AHEAD (CATEGORIES)

Today’s Connections Solution (June 12, 2024)


If those clues aren’t enough, and you’re still struggling to beat Connections #367 without running out of mistakes, here is the answer…

Today’s Connections Categories

  • Yellow = “Places in New York City”
  • Green = “Rhyming Titles”
  • Blue = “Ending in Units of Measurement”
  • Purple = “Starting With Animals”

With the categories revealed, you should try to guess which words belong where. There are 16 words in total, with four belonging to each category.

If you are still stuck despite knowing the names of each category, continue scrolling down for the 16 words organized into their respective categories.

SPOILERS AHEAD (SOLUTION)

Today’s Connections Solution

  • Yellow: “Places in New York City” = CHINATOWN, DUMBO, MANHATTAN, WALL STREET
  • Green: “Rhyming Titles” = BE KIND REWIND, E.T., FRIGHT NIGHT, KILL BILL
  • Blue: “Ending in Units of Measurement” = HEDWIG AND THE ANGRY INCH, MY LEFT FOOT, THE GREEN MILE, THE LONGEST YARD
  • Purple: “Starting With Animals” = BEETLEJUICE, FOXY BROWN, DOGMA, OCTOPUSSY


What Made Today’s Connections Difficult

Today’s Connections puzzle was made difficult due to the following:

  1. The obvious issue with today’s Connections is the fact that all the words are also film titles. So, when you first look at the 16 words together, it’s really difficult to separate them into smaller groups. So, rather than specific red herrings meant to trip you up, the whole thing is a red herring of sorts.
  2. I managed to find the Yellow category pretty quickly, but the other three categories took longer. Green because the rhyming isn’t as easy to spot as it should be. Blue because spotting the units of measurement within such long titles is tough. And Purple because the animals are pretty well hidden.

Our Top Tips to Beat Connections Every Day

  1. Shuffle the words as many times as you need. Shuffling the words around means you’re more likely to spot the connections.
  2. Look for differences as well as similarities. The NYT is trying to trip you up, so look for what divides the words with similar meanings.
  3. Take your time, and don’t rush into a guess. Connections isn’t a timed challenge, so you have the luxury of planning everything out.
  4. Look for common themes over time. The more you play Connections, the more you’ll spot recurring themes cropping up regularly.
  5. Tune into the NYT editors’ way of thinking. It’s the puzzle setters you’re competing against, so you need to understand their game plan.


Now that you have completed today’s Connections puzzle (with a little help from your friends at MUO), you should check out some of the other free games from the New York Times.

Wordle is the best-known of them all, and challenges you to find a 5-letter word within six guesses. For every letter you find, you get told if it’s in the correct place, allowing you to whittle down the possible options. If you need help with Wordle, check out our tips and tricks to improve your Wordle score.

There’s also Strands, the newest addition to the New York Times’ burgeoning list of games. Just like Connections, it’s extremely challenging, but in a unique string-the-letters-together way. We recommend you check out our best tips for beating Strands to give yourself a leg up on the daily challenge.

Or, if you’re really only into Connections but want more tips than are offered above, check out our longer list of Connections tips and tricks.


The 5 Best Discord Activities to Try With Your Friends

Many people use Discord as a place to hang out with friends—and while voice and video calls are great for catching up, sometimes you want to add a little extra activity to the mix. Thankfully, Discord offers a variety of built-in activities that are perfect for a virtual hangout with your friends. Here are the top ones.


1 Death By AI

Death By AI takes the concept of interactive storytelling and injects a healthy dose of dark humor. The activity uses a GPT language model to generate and narrate stories. Here’s the gist: one person sets the scene by choosing a pre-made scenario or crafting their own. Then, everyone in the group types out their escape plan. The host, a delightfully sadistic AI robot, reads each escape plan and narrates the outcome.


These scenarios can be anything from being trapped in a zombie apocalypse, falling off a skyscraper, or facing a deranged dentist. The AI host gleefully throws curveballs and twists of fate at your carefully constructed plans, which often lead to a hilarious and gruesome demise. There’s a character limit to how long your solution can be, and words like “live” and “survive” are banned. So, if you thought some basic AI prompting techniques would save you, you’ll have to get a bit more creative.

In my experience, the activity is even more enjoyable when you create your own personalized scenarios. This allows you to utilize the generative AI to get some really funny outcomes. The default game mode does not guarantee that anyone will survive the mortal scenarios. But if that’s too bleak, the game also has a single survivor mode, where the AI narrates a single twisted story, including all participants. Only one of you will survive.

2 Land.io

LandIO Discord activity


Land.io is similar to the classic Snake game—and like the original, it’s very simple. However, unlike the snake game, where you can’t touch your tail, in Land.io, you have to touch your tail to earn points. In this game, you and your friends start with a small plot of land, and the goal is to claim as much territory as possible before the timer runs out.

You can only expand your land by closing in the ends of your existing territory. The twist is that when you move outside your territory to expand it, you expose your tail. If other players snip your exposed tail, you lose all your territory to them and start over. The mechanisms are easy to grasp, making Land.io perfect for a casual hangout with friends who might not be hardcore gamers. After all, Discord isn’t just for gamers.


Despite the simplicity, Land.io can still be very exciting. I’ve been in many matches where I meticulously built an empire only to have a friend snip my tail right before time’s up, taking all my territory and winning the game. You can play a private Land.io game with your friends or join a public game to test your skills against players from other servers.

3 Chef Showdown

Chef Showdown Discord activity

Ever dreamed of running a bustling restaurant kitchen? Well, with Chef Showdown, you can experience the chaos (and occasional satisfaction) of the culinary world without the risk of burning down your actual kitchen. This activity takes inspiration from games like Overcooked, and the mechanisms are similar, albeit even simpler.


Chef Showdown takes place in a fast food joint with your menu consisting of burgers, fries, salad, and soda. The impatient pixelated customers will be waiting for their food, and you need to serve them quickly. You can easily serve salads and soda, but making burgers and fries requires multiple steps. The biggest challenge is that you can’t do anything when your hands are full. This simple rule throws a wrench into the best-laid plans.

There are two ways to play Chef Showdown: cooperative and versus. In cooperative mode, you and your friend can work together to earn a total score. In versus mode, you go head-to-head. Both of you work in the same kitchen, but only the one who fulfills the order gets the point. Be prepared for some trash talk when you’ve provided three of the four items on an order, and your friend steals the points by providing the last one.


4 Chess in the Park

Chess in the park Discord activity

Chess needs little introduction. Chess in the Park brings this timeless game to Discord and spares you from having to set up a physical chessboard and fumble with misplaced pieces. With a few clicks, you can create a game, invite your friend, and be locked in an intellectual battle.

Chess in the Park offers more than just basic functionality. If you like to analyze your games and learn from your mistakes, the activity stores a history of your matches. This allows you to revisit past games, identify critical turning points, and potentially develop new strategies for future battles. There’s also a handy move planner mode where you can contemplate your next moves while your friend ponders theirs.


Chess in the Park is a great way to unwind and talk with your friend while having something to think about during the occasional silence. You can also customize the board and pieces with different skins to add a touch of personality. Remember, if your friends are all offline, you can always join other Discord servers to find people to play with.

5 Watch Together

Watch Together Discord activity

Let’s face it: watching videos with friends online is usually a clunky affair. You send a link, they open it, there’s inevitable lag, and someone always seems to be a few seconds behind. Watch Together solves this problem by creating a seamless co-viewing platform directly within Discord. Think of it as having a virtual YouTube watch party on your server. You’ll see a familiar interface, complete with a search bar and trending videos.


Watch Together is one of the few Discord activities that isn’t a game; it provides a simple yet key functionality: synchronized playback. Whenever the host pauses, rewinds, or fast-forwards, the video adjusts for everyone on the call. No more pauses to let everyone catch up or re-sync playback. Watch Together lets you react to the videos together, discuss plot twists in real time, and enjoy watching something unfold simultaneously for all of you. You really feel like you watched the video together.

There are some limitations to keep in mind. Watch Together can’t play age-restricted content or videos requiring a YouTube sign-in. However, for most YouTube content, it offers a smooth and enjoyable way to share the viewing experience with your friends on Discord. YouTube also displays ads during playback, which can be a drawback for viewers.


These are just a few of Discord’s many fun and engaging activities. There are plenty more, and with their good variety, there’s something for everyone. So, next time you’re looking for a way to liven up your Discord session, give these activities a try. You’ll be surprised by how much fun you can have together.

Today’s Connections Hints and Answer (Tuesday, June 11, 2024)

Connections requires players to find the connections between 16 words, and place them in four groups of four. If you want some help, we have the solution to Connections for Tuesday, June 11, 2024, along with hints to help you solve it yourself.


SPOILERS AHEAD (CLUES)


Category Clues for Today’s Connections (#366)

Today, as every day, you need to split the 16 words that make up the Connections puzzle grid into four groups of four based on specific categories. It isn’t as easy as it sounds. Fortunately, we’re on hand to help you solve today’s Connections puzzle.

If you want to jump straight to today’s Connections solution, scroll past the next spoiler warning. However, if you’d rather see some hints designed to help you solve it without giving the answers away first:

  • Yellow: “I want to purchase an NSYNC song”
  • Green: “What gym bods are made up of”
  • Blue: “What some people listen to in their headphones”
  • Purple: “Simplified options when cooking food”

SPOILERS AHEAD (CATEGORIES)

Today’s Connections Solution (June 11, 2024)


If those clues aren’t enough, and you’re still struggling to beat Connections #366 without running out of mistakes, here is the answer…

Today’s Connections Categories

  • Yellow = “Homophones”
  • Green = “Muscles, Informally”
  • Blue = “Music Genres”
  • Purple = “Settings on an Appliance Knob”

With the categories revealed, you should try to guess which words belong where. There are 16 words in total, with four belonging to each category.

If you are still stuck despite knowing the names of each category, continue scrolling down for the 16 words organized into their respective categories.

SPOILERS AHEAD (SOLUTION)

Today’s Connections Solution

  • Yellow: “Homophones” = BI, BUY, BY, BYE
  • Green: “Muscles, Informally” = AB, PEC, QUAD, TRI
  • Blue: “Music Genres” = DUB, EMO, POP, TRAP
  • Purple: “Settings on an Appliance Knob” = HI, LO, MED, OFF


What Made Today’s Connections Difficult

Today’s Connections puzzle was made difficult due to the following:

  1. I found the whole thing quite difficult today due to the clever use of small, single-syllable words throughout. Upon first look, all 16 meld into one, and you have to seriously engage your brain in order to separate them out.
  2. The most obvious red herrings are the words from different categories that rhyme. As well as the four words that make up the yellow category, there’s “tri” and “hi”. There’s also “bi” (meaning two), “tri” (meaning three), and “quad” (meaning four).
  3. For me, the Blue category was the toughest today, as you either know or don’t know the names of music genres. Of these four, “trap” isn’t one I’m familiar with, which made it tricky to find the fourth word to complete the category.

Our Top Tips to Beat Connections Every Day

  1. Shuffle the words as many times as you need. Shuffling the words around means you’re more likely to spot the connections.
  2. Look for differences as well as similarities. The NYT is trying to trip you up, so look for what divides the words with similar meanings.
  3. Take your time, and don’t rush into a guess. Connections isn’t a timed challenge, so you have the luxury of planning everything out.
  4. Look for common themes over time. The more you play Connections, the more you’ll spot recurring themes cropping up regularly.
  5. Tune into the NYT editors’ way of thinking. It’s the puzzle setters you’re competing against, so you need to understand their game plan.


Now that you have completed today’s Connections puzzle (with a little help from your friends at MUO), you should check out some of the other free games from the New York Times.

Wordle is the best-known of them all, and challenges you to find a 5-letter word within six guesses. For every letter you find, you get told if it’s in the correct place, allowing you to whittle down the possible options. If you need help with Wordle, check out our tips and tricks to improve your Wordle score.

There’s also Strands, the newest addition to the New York Times’ burgeoning list of games. Just like Connections, it’s extremely challenging, but in a unique string-the-letters-together way. We recommend you check out our best tips for beating Strands to give yourself a leg up on the daily challenge.

Or, if you’re really only into Connections but want more tips than are offered above, check out our longer list of Connections tips and tricks.


How to Check If Someone Blocked You on Instagram: 7 Methods

Key Takeaways

  • If you can’t find the account of the person you suspect has blocked you, they might have changed their username, deactivated their account, or indeed blocked you.
  • To confirm if their account hasn’t been deactivated or deleted, you can ask a mutual friend to check for their account. You can also use the unique profile link technique for this purpose.
  • You can access their profile through an old DM to see if they have changed their username. If you’re unable to tag them or send a follow request, this confirms that you’ve been blocked.


Do you suspect that someone has blocked you on Instagram? Instagram does not allow you to see a list of people who have blocked you. In fact, the platform won’t even notify you when someone blocks you. There are, however, some methods you can use to find out if someone has blocked you on Instagram.

1 Search for Their Username

If you search for the profile of the person you suspect has blocked you but can’t locate it, there are four possible reasons: the person may have deactivated their account, Instagram may have banned their account, they might have changed their username, or they might indeed have blocked you.

To determine which of these possibilities applies to your situation, you need to rule them out one by one.


2 Ensure Their Account Is Still Active

If you can’t locate a person’s account through search, it’s worth checking whether the account in question still exists on Instagram or has been deactivated or removed. In the past, creating a new account to search for a profile was an option. However, Instagram now blocks any new account you create for that purpose, preventing you from verifying if you’ve been blocked.

Therefore, you should ask mutual friends to confirm if the person’s account still exists. If they’re unable to find it, the account has probably been deleted or temporarily deactivated rather than you being blocked. However, there’s a chance that the person has also blocked your mutual friends who are assisting you in checking the account.


To rule out this possibility, you can attempt to search for their account directly using a unique profile link.

When setting up your Instagram account, you’re assigned a unique URL that includes your username. Replacing the username in the profile link with the account handle of the person who you suspect has blocked you should take you to their account—if it exists.

If you open Instagram in your browser and search for their profile with a direct link, you’ll either see their profile directly, or the message: “Sorry, this page isn’t available.”

Account Doesn't Show up with Unique URL on Instagram


To confirm if the account exists or not, log out of Instagram and search the same URL in a new tab. You’ll see the same message if the account is deactivated (or no longer exists). If you see their profile this time, however, they have blocked you.

When someone changes their username, the URL name automatically changes too. So, if they have changed their username recently, the above methods won’t help you locate their profile.

4 Confirm They Haven’t Changed Their Username

If you’re unable to find your friend’s account through the search bar, and your friends are also facing the same issue, it’s important to confirm that the person hasn’t changed their username on Instagram.


When you are blocked, your previous conversations do not disappear. So, if you remember exchanging conversations via DM, open up your messages and go to their profile.

Since you can find out if someone has changed their username in this way, you’ll certainly have been blocked if their changed name doesn’t show up when looking for their account.

5 Make Sure They Haven’t Just Unfollowed You

When someone unfollows you on Instagram and has set their account to private, you won’t be able to view their photos and posts, and you’ll see a message stating, “This account is private.” Therefore, you should rule out the possibility that they’ve only unfollowed you. To confirm this, visit their profile and tap on the Follow button.

If they’ve unfollowed you, your follow request will be sent, and you’ll notice the Follow button changes to Requested. However, if they’ve blocked you, your follow request will be instantly canceled upon sending it, causing the Requested button to revert to Follow as soon as you tap on it.


6 Look Through Shared Instagram Group Chats

When someone blocks you on Instagram and they’re part of a group chat with you, Instagram gives them the option to leave the chat. If they decide to leave, you won’t receive any notifications about their departure, but you’ll find that their account is no longer visible in the group chat.

However, if they choose to remain in the group chat, you’ll still be able to see their profile and all the messages they send within the group chat. You can interact with their messages by replying or reacting to them.

If you notice that the person you suspect is actively participating in the group chat you share, but their profile displays “This account is private,” it suggests that they have either unfollowed you or blocked you.


Even if someone has blocked you on Instagram, you can still message them. However, they won’t receive these messages on their end. Therefore, if you can send messages to someone, don’t assume that you haven’t been blocked.

7 Mention and Tag the Account

When people block you on Instagram, you cannot mention or tag them in your posts or comments. That’s another way to find out if someone has blocked you. Nonetheless, making an account private has the same effect.

If you cannot tag or mention someone in a post on Instagram, search for their username or profile instead. If the account exists but you cannot see any posts, there is a good chance you have been blocked.

Instagram doesn’t notify you when someone blocks you on Instagram, but you can use some simple methods to check. If you discover that you were blocked by someone you’re close with, ask and see if they’ll unblock you.


If your relationship with someone is tarnished, or they refuse to unblock you, it’s important to respect their decision—whether you agree with it or not. Lastly, when someone blocks you on Instagram, the person gets automatically blocked from your side as well. So, you don’t need to retaliate and block them back.

Today’s Connections Hints and Answer (Monday, June 10, 2024)

Connections requires players to find the connections between 16 words, and place them in four groups of four. If you want some help, we have the solution to Connections for Monday, June 10, 2024, along with hints to help you solve it yourself.


SPOILERS AHEAD (CLUES)


Category Clues for Today’s Connections (#365)

Today, as every day, you need to split the 16 words that make up the Connections puzzle grid into four groups of four based on specific categories. It isn’t as easy as it sounds. Fortunately, we’re on hand to help you solve today’s Connections puzzle.

If you want to jump straight to today’s Connections solution, scroll past the next spoiler warning. However, if you’d rather see some hints designed to help you solve it without giving the answers away first:

  • Yellow: “The central element or tenet, but something an apple has too”
  • Green: “The opposite of simple, plus an Avril Lavigne song”
  • Blue: “I wonder if Santa Claus uses these when checking ‘it’ twice”
  • Purple: “Also what you can do to traverse a body of water”

SPOILERS AHEAD (CATEGORIES)


Today’s Connections Solution (June 10, 2024)

If those clues aren’t enough, and you’re still struggling to beat Connections #365 without running out of mistakes, here is the answer…

Today’s Connections Categories

  • Yellow = “Core”
  • Green = “Complicated”
  • Blue = “Symbols Used in Making Lists”
  • Purple = “What ‘Cross’ Might Mean”

With the categories revealed, you should try to guess which words belong where. There are 16 words in total, with four belonging to each category.

If you are still stuck despite knowing the names of each category, continue scrolling down for the 16 words organized into their respective categories.

SPOILERS AHEAD (SOLUTION)

Today’s Connections Solution

  • Yellow: “Core” = CRUX, ESSENCE, HEART, SUBSTANCE
  • Green: “Complicated” = BAROQUE, COMPLEX, ELABORATE, INVOLVED
  • Blue: “Symbols Used in Making Lists” = ARROW, BULLET, CHECKBOX, HYPHEN
  • Purple: “What ‘Cross’ Might Mean” = ANGRY, BETRAY, CRUCIFIX, HYBRID


What Made Today’s Connections Difficult

Today’s Connections puzzle was made difficult due to the following:

  1. The most obvious red herrings today are the four words that end with x: “crux,” “complex,” “checkbox,” and “crucifix”. Words ending with x aren’t very common, which is why seeing four together in a puzzle is bound to make your brain make a connection.
  2. I personally found the whole thing quite difficult today, with most of the categories throwing a spanner in the works. As an example, “baroque” isn’t exactly a common word, and the other three words in the Green category have dual meanings.
  3. As usual (and expected), the Blue and Purple categories are the trickiest. Blue because their use within lists isn’t the first thing I think of when I see these words. Purple because it’s quite a stretch to pool these words together under one heading.

Our Top Tips to Beat Connections Every Day

  1. Shuffle the words as many times as you need. Shuffling the words around means you’re more likely to spot the connections.
  2. Look for differences as well as similarities. The NYT is trying to trip you up, so look for what divides the words with similar meanings.
  3. Take your time, and don’t rush into a guess. Connections isn’t a timed challenge, so you have the luxury of planning everything out.
  4. Look for common themes over time. The more you play Connections, the more you’ll spot recurring themes cropping up regularly.
  5. Tune into the NYT editors’ way of thinking. It’s the puzzle setters you’re competing against, so you need to understand their game plan.


Now that you have completed today’s Connections puzzle (with a little help from your friends at MUO), you should check out some of the other free games from the New York Times.

Wordle is the best-known of them all, and challenges you to find a 5-letter word within six guesses. For every letter you find, you get told if it’s in the correct place, allowing you to whittle down the possible options. If you need help with Wordle, check out our tips and tricks to improve your Wordle score.

There’s also Strands, the newest addition to the New York Times’ burgeoning list of games. Just like Connections, it’s extremely challenging, but in a unique string-the-letters-together way. We recommend you check out our best tips for beating Strands to give yourself a leg up on the daily challenge.

Or, if you’re really only into Connections but want more tips than are offered above, check out our longer list of Connections tips and tricks.


Here’s How I Knew When It Was Time to Take a Break From Social Media

Key Takeaways

  • I found that social media was affecting my mental health.
  • Excessive scrolling meant that I felt drained after using social media.
  • I felt obligated to post rather than wanting to, which was a sign that I needed a break.


While social media is integral to our daily lives, excessive use does more harm than good. Taking a break is often beneficial, but recognizing when to do so can be challenging. Here’s how I realized I needed a break from social media.


1 It Started to Affect My Mental Health

19 STUDIO/Shutterstock

From comparing your looks to seeing how many possessions others have, watching others thrive can sometimes make you feel incredibly unworthy. Seeing someone else achieve milestones that I was yet to achieve led to unhealthy comparisons, which made me feel behind in life.


Sometimes, you open Instagram or Facebook for inspiration or relief from your hectic 9-to-5 job. Suddenly, you begin comparing your life to someone else’s, and that’s where it starts. While the loop of constant comparison may seem insignificant at the moment, the more it continues, the more it affects you mentally.

In situations when you feel like your mental health is dipping, I highly recommend stepping away from social media, even if it is just for a handful of days. I also recommend avoiding checking your social media accounts first thing in the morning.

a person looking at their smartphone in bed in the dark
Gorodenkoff/Shutterstock

We’ve all heard of doomscrolling. Despite having many school and work deadlines looming, I’d find myself constantly procrastinating and spending hours watching one Instagram Reel after the other. Before I knew it, half the day had already passed. Not only did all the unnecessary scrolling cause me to lose track of time, I’d also feel incredibly drained at the end of the day.


What was supposed to be a five-minute recharging Instagram or TikTok break, after a hectic study session, would eventually turn into an hour-long break that would suck up all my energy. I ended up losing energy that I could’ve put towards something that’d be an investment in my future self, like preparing for an important examination, going to the gym, or even taking a power nap.

Along with losing energy, I’d also feel immense guilt after realizing how much time doomscrolling cost me. The guilt I felt every single time was the primary reason I decided to push the FOMO (Fear of Missing Out) deep within and step away from my social media accounts.

3 Posting Began to Feel Like a Chore

the instagram logo on a smartphone
sdx15/Shutterstock


Social media is meant to be a source of relaxation, not the complete opposite. The moment I felt obliged to post rather than wanting to post because I genuinely desired to, I realized I needed to step away from social media.

At times, whenever I logged onto Instagram and saw everyone else thriving but me, I felt compelled to post something just to feel like I was doing something too. Eventually, this pressure to fit in with my circle took away the pleasure I used to derive from posting anything online.

I noticed that I had slowly transitioned from posting for myself to posting for an audience. I noticed that the only thing that’d make posting online worth it was no longer my own inner satisfaction, but rather the feeling of waking up to a hundred new likes and more followers. Although my relationship with social media has usually been quite positive and constructive, the consistent pressure to post slowly turned that once-positive relationship into an extremely toxic one.


All of these factors combined made me realize that a social media detox had been long overdue. Since Instagram was the app I was addicted to the most, I decided to deactivate my Instagram account entirely to avoid the urge to log into it. I deleted other apps like TikTok and Facebook from my device.

Today’s Connections Hints and Answer (Sunday, June 9, 2024)

Connections requires players to find the connections between 16 words, and place them in four groups of four. If you want some help, we have the solution to Connections for Sunday, June 9, 2024, along with hints to help you solve it yourself.


SPOILERS AHEAD (CLUES)


Category Clues for Today’s Connections (#364)

Today, as every day, you need to split the 16 words that make up the Connections puzzle grid into four groups of four based on specific categories. It isn’t as easy as it sounds. Fortunately, we’re on hand to help you solve today’s Connections puzzle.

If you want to jump straight to today’s Connections solution, scroll past the next spoiler warning. However, if you’d rather see some hints designed to help you solve it without giving the answers away first:

  • Yellow: “Four types of negative emotions”
  • Green: “Chuck around seemingly at random”
  • Blue: “Peel one away and you’ll find some more”
  • Purple: “One of the basic foodstuffs like rice and pasta”

SPOILERS AHEAD (CATEGORIES)

Today’s Connections Solution (June 9, 2024)


If those clues aren’t enough, and you’re still struggling to beat Connections #364 without running out of mistakes, here is the answer…

Today’s Connections Categories

  • Yellow = “Feeling Some Type of Way”
  • Green = “Throw Here and There”
  • Blue = “Things With Layers”
  • Purple = “____ Potato”

With the categories revealed, you should try to guess which words belong where. There are 16 words in total, with four belonging to each category.

If you are still stuck despite knowing the names of each category, continue scrolling down for the 16 words organized into their respective categories.

SPOILERS AHEAD (SOLUTION)

Today’s Connections Solution

  • Yellow: “Feeling Some Type of Way” = BITTER, SALTY, SORE, UPSET
  • Green: “Throw Here and There” = PEPPER, SCATTER, SPRINKLE, STREW
  • Blue: “Things With Layers” = CAKE, EARTH, ONION, PLYWOOD
  • Purple: “____ Potato” = BAKED, COUCH, HOT, SWEET


What Made Today’s Connections Difficult

Today’s Connections puzzle was made difficult due to the following:

  1. The most obvious red herrings today are “bitter,” “salty,” “hot,” and “sweet” as different taste profiles of food. It doesn’t help that “pepper,” “cake,” and “onion” are also there, as foodstuffs that could exhibit those taste profiles.
  2. I personally found the Blue category the most difficult today, as I did not recognize that these things all had layers. It’s tricky because the layers involved are all different, with layers of cake looking very different to layers of plywood.
  3. The Purple category was easy by comparison, as, as soon as I say “baked” or “couch,” I think of a potato. And once you have found two words that go together, it isn’t a huge leap to find four.

Our Top Tips to Beat Connections Every Day

  1. Shuffle the words as many times as you need. Shuffling the words around means you’re more likely to spot the connections.
  2. Look for differences as well as similarities. The NYT is trying to trip you up, so look for what divides the words with similar meanings.
  3. Take your time, and don’t rush into a guess. Connections isn’t a timed challenge, so you have the luxury of planning everything out.
  4. Look for common themes over time. The more you play Connections, the more you’ll spot recurring themes cropping up regularly.
  5. Tune into the NYT editors’ way of thinking. It’s the puzzle setters you’re competing against, so you need to understand their game plan.


Now that you have completed today’s Connections puzzle (with a little help from your friends at MUO), you should check out some of the other free games from the New York Times.

Wordle is the best-known of them all, and challenges you to find a 5-letter word within six guesses. For every letter you find, you get told if it’s in the correct place, allowing you to whittle down the possible options. If you need help with Wordle, check out our tips and tricks to improve your Wordle score.

There’s also Strands, the newest addition to the New York Times’ burgeoning list of games. Just like Connections, it’s extremely challenging, but in a unique string-the-letters-together way. We recommend you check out our best tips for beating Strands to give yourself a leg up on the daily challenge.

Or, if you’re really only into Connections but want more tips than are offered above, check out our longer list of Connections tips and tricks.


Android Phone Not Receiving Text Messages? Here Are 9 Fixes to Try

If your Android phone is no longer receiving text messages, you could miss OTPs and other important texts. So, it’s vital you resolve this issue quickly. I highly recommend going through the troubleshooting steps below to receive messages again.


1. Check Your Spam & Blocked Folder

You may be wondering why you’re not getting text messages when the problem is that they are being filtered into a separate hidden folder. Your SMS app can automatically forward all text messages from senders you block or those perceived as spam (if you have spam protection enabled) to the spam folder.

Assuming Google Messages is your preferred messaging app, you can view your filtered messages by tapping your profile image or text in the top right and selecting Spam & blocked.

If you use Truecaller or any other Android app for SMS messaging, the steps you need to follow may be different.


If you’re not receiving a message from a specific contact, you may have blocked their number. Google Messages doesn’t store texts from blocked contacts in the spam folder. In such cases, unblock the contact first so you can receive the text message the next time they send it.

2. Clear Storage Space

Modern smartphones pack large amounts of storage, so this may not be an issue. However, if you hoard media and have filled your phone storage, your device will receive no new messages. If this is the issue, your Android phone will notify you that messages will not be sent or received until there’s storage space.

The only fix is to clear your Android storage space by navigating to Settings > Storage. You can view a breakdown of your device’s storage use here. Select a category to inspect and clear unnecessary items. Wiping your media files is a good start (after you back up your data) because they often occupy lots of space.


If apps occupy the most storage, you can delete their storage or fully uninstall those that you don’t need. This should create considerable storage space to receive and store text messages again.

3. Make Sure Airplane Mode Isn’t Enabled

Airplane mode automatically turns off your cellular data, meaning you can’t send or receive text messages. This might sound obvious initially, but be sure to check whether Airplane mode is enabled on your device.

Typically, when Airplane mode is enabled, an airplane icon will display on your Android phone’s status bar at the top.


Alternatively, you can check this by swiping down from the top of your screen to view the Quick Settings menu. If you can’t see the Airplane mode toggle, swipe down again from the top and tap the airplane icon to disable it if it’s enabled.

If you’ve customized your Quick Settings menu and removed the Airplane mode toggle, you can access the feature by navigating to Settings > Network & internet.

4. Check Your Network Connection

If Airplane mode isn’t enabled, you may still not receive messages because your network connection is poor or unavailable. Android phones usually display the status of your network using different Android status bar symbols.

One way to confirm the status of your network is by checking the symbol in your status bar. If there’s no signal indicator or there’s only one bar displayed, you probably have an issue with your cellular network.


You may fix this by enabling Airplane mode and disabling it after a few seconds. Another option is to restart your device since most smartphone problems can be fixed with a restart. If that doesn’t work, try the next fix.

5. Reset Your Network Settings

Another option you can explore is resetting your network settings. This can help address unexpected network issues that you may be facing. Resetting your network’s settings might sound scary, but it’s not.

Unlike resetting your Android phone, this does not affect your data. It only reinstates network-related settings (Bluetooth, Wi-Fi, and cellular) to their initial state. To reset your network settings, follow these steps:

  1. Open your phone’s Settings app and select System.
  2. Tap Reset options and then choose Reset Mobile Network Settings.
  3. Tap Reset settings. You may be asked to enter your phone’s password to continue.
  4. Finally, tap Reset settings on the follow-up page to confirm.


If you own a Samsung phone, you need to head to Settings > General management to find the Reset option. You can also use the search bar in the Settings app to find it easily.

6. Switch Off iMessage if You Recently Switched From an iPhone

If you’ve ditched iOS for Android recently, you need to turn off iMessage. Since iMessage is officially unavailable on Android, you must use an iPhone to disable the service. Google says disabling iMessage is important because, if enabled, it could cause your SMS messages to continue being sent to your iPhone.

Disable iMessage on your iPhone by going to Settings > Messages and toggling off iMessage.


If you no longer have access to your iPhone, you can use Apple’s self-service portal to deregister your phone number from iMessage.

7. Disable Power Saving Mode

Power saving or battery saving mode is usually optimized to improve battery life above all else. Under the hood, this energy-saving feature restricts the number of background processes running on your device.

Due to this, some apps might not function properly. For instance, some app notifications might be delayed. Be sure to disable power saving mode because your messaging app might be one of the affected apps.

8. Update Your Messaging App

If you still can’t receive text messages on your phone, it’s time to double-check your messaging app because bugs may be affecting it. App developers issue updates to fix bugs and ensure everything is working smoothly.


Update option available for Google Messages in the Google Play Store

You can use the Play Store to check for app updates. Tap your profile icon in the top-right corner, and select Manage apps & device > Updates available. You’ll see all the apps that have new updates available. Hit the Update button next to your messaging app to install its latest version.

9. Update Your Android Phone

If none of the methods above worked, updating your Android phone might be the magic bullet that solves your issue. Like app updates, system updates often ship with fixes for existing software bugs.

An update might include a fix for your phone’s inability to receive text messages. Due to this, always ensure your phone is updated as soon as new Android versions are available.


You can check for software updates by going to Settings > System > Software update > System update and then tapping Check for update. You need an internet connection for your device to check for updates.

As you can see, several factors can affect your Android phone’s ability to send and receive text messages. But by going through the different fixes we discussed, you should be able to receive text messages again. If you’re still unlucky, it’s time to contact your carrier for personalized help.

Today’s Connections Hints and Answer (Saturday, June 8, 2024)

Connections requires players to find the connections between 16 words, and place them in four groups of four. If you want some help, we have the solution to Connections for Saturday, June 8, 2024, along with hints to help you solve it yourself.


SPOILERS AHEAD (CLUES)


Category Clues for Today’s Connections (#363)

Today, as every day, you need to split the 16 words that make up the Connections puzzle grid into four groups of four based on specific categories. It isn’t as easy as it sounds. Fortunately, we’re on hand to help you solve today’s Connections puzzle.

If you want to jump straight to today’s Connections solution, scroll past the next spoiler warning. However, if you’d rather see some hints designed to help you solve it without giving the answers away first:

  • Yellow: “Good public speakers can do this to you”
  • Green: “What vloggers do on a daily basis”
  • Blue: “Change the order of the letters around”
  • Purple: “The connection is a word that means both somewhat and attractive”

SPOILERS AHEAD (CATEGORIES)


Today’s Connections Solution (June 8, 2024)

If those clues aren’t enough, and you’re still struggling to beat Connections #363 without running out of mistakes, here is the answer…

Today’s Connections Categories

  • Yellow = “Grab One’s Attention”
  • Green = “Document With Video”
  • Blue = “Anagrams”
  • Purple = “Pretty ____”

With the categories revealed, you should try to guess which words belong where. There are 16 words in total, with four belonging to each category.

If you are still stuck despite knowing the names of each category, continue scrolling down for the 16 words organized into their respective categories.

SPOILERS AHEAD (SOLUTION)

Today’s Connections Solution

  • Yellow: “Grab One’s Attention” = ABSORB, ENGROSS, HOLD, RIVET
  • Green: “Document With Video” = FILM, RECORD, SHOOT, TAPE
  • Blue: “Anagrams” = PASTEL, PETALS, PLEATS, STAPLE
  • Purple: “Pretty ____” = GOOD, PENNY, PLEASE, WOMAN


What Made Today’s Connections Difficult

Today’s Connections puzzle was made difficult due to the following:

  1. The most obvious red herrings today are “rivet,” “tape,” and “staple” as three means of fastening things together.
  2. I personally found the Purple category the most difficult today due to the need to find one word that goes before the four answers. It doesn’t help that “pretty” means both somewhat and attractive. Connections is always easier when the words involved only have a single meaning.
  3. The Blue category was also quite difficult due to the need to spot that four words out of the 16 are anagrams of each other. Which is obvious in hindsight, but not at the time of playing.

Our Top Tips to Beat Connections Every Day

  1. Shuffle the words as many times as you need. Shuffling the words around means you’re more likely to spot the connections.
  2. Look for differences as well as similarities. The NYT is trying to trip you up, so look for what divides the words with similar meanings.
  3. Take your time, and don’t rush into a guess. Connections isn’t a timed challenge, so you have the luxury of planning everything out.
  4. Look for common themes over time. The more you play Connections, the more you’ll spot recurring themes cropping up regularly.
  5. Tune into the NYT editors’ way of thinking. It’s the puzzle setters you’re competing against, so you need to understand their game plan.


Now that you have completed today’s Connections puzzle (with a little help from your friends at MUO), you should check out some of the other free games from the New York Times.

Wordle is the best-known of them all, and challenges you to find a 5-letter word within six guesses. For every letter you find, you get told if it’s in the correct place, allowing you to whittle down the possible options. If you need help with Wordle, check out our tips and tricks to improve your Wordle score.

There’s also Strands, the newest addition to the New York Times’ burgeoning list of games. Just like Connections, it’s extremely challenging, but in a unique string-the-letters-together way. We recommend you check out our best tips for beating Strands to give yourself a leg up on the daily challenge.

Or, if you’re really only into Connections but want more tips than are offered above, check out our longer list of Connections tips and tricks.


6 Tips to Improve Your Privacy on Discord

Key Takeaways

  • Tweak your privacy settings to control interactions and how Discord uses your data.
  • Set your online status to “Invisible” to appear offline while using Discord.
  • Block users to prevent them from sending you direct messages, pings, and friend requests, as well as limiting interactions with them.


You have some level of control over your personal information and interactions on Discord. This allows you to improve your privacy and use the platform with peace of mind. Here are some tips that can help.


1 Tweak Privacy and Safety Settings

By adjusting your privacy and safety settings on Discord, you can control certain interactions. These include who can contact you, how Discord uses your data, and which messages to apply the spam filter to.

On Mobile

To access your privacy and safety settings on mobile, open the Discord app and tap your profile image in the bottom-right corner of the screen. Then, tap Settings–the gear icon–in the top-right corner. In settings, tap Privacy & Safety.


Select the Filter All Direct Messages radio button in the DM Spam Filter section to send potential spam to a different inbox marked for it. Then, scroll down to the Server Privacy Defaults section and toggle off Allow Direct Messages From Server Members so that server members who aren’t your friends on Discord can’t message you directly.

Remember toggling off direct messages from server members who aren’t friends only applies to servers you join from now on. The setting won’t affect servers you’re already a member of.


You can also tell Discord not to use data, such as your usage patterns, friends, and games, to improve its services and to personalize your experience. To do that, scroll down to the How We Use Your Data section and toggle off Use Data to Improve Discord and Use Data to Personalize My Discord Experience.

On Desktop

To access your privacy and safety settings on the Discord desktop app, open it and click User Settings–the gear icon–in the bottom left.

In the left-side menu, click Privacy and Safety.

The Privacy and Safety settings for Discord on desktop.


In the DM Spam Filter section, select the Filter All Direct Messages radio button. This will send messages that may contain spam to an inbox dedicated to this type of content.

Filtering all direct messages on the Discord desktop app.

Next, toggle off Allow Direct Messages From Server Members in the Server Privacy Defaults section. This will block messages sent by people who aren’t your friends when joining a server. It won’t apply to servers you’re already a member of before changing the setting.

The Server Privacy Defaults Section of the Discord desktop app.


Now, scroll down to the How We Use Your Data section. Here, toggle off Use Data to Improve Discord and Use Data to Personalize My Discord Experience. These settings will prevent Discord from using your data, such as your behavior on the platform, the people you chat with, and the games you play, to improve its services and customize your experience.

2 Set Your Online Status to “Invisible”

If you want to be online without anyone bothering you, you can set your status to “Invisible.” You will appear offline, but you can use Discord normally.

On Mobile

To appear invisible on the Discord mobile app, tap your profile image in the bottom right corner of the screen. On the next screen, tap your profile picture icon in the top-left and then tap Invisible in the menu.


Now people won’t know when you’re online since your status will show that you’re offline.

On Desktop

To appear invisible on the Discord desktop app, click your profile image in the bottom left. In the menu, hover the mouse pointer over Online and select Invisible.

Setting online status to invisible on the Discord desktop app.
Screenshot by Chifundo Kasiya — No attribution required

Now you will appear offline, but you can still interact with people normally.

3 Block Users You Don’t Want to Interact With

When you block someone on Discord, they can’t send you direct messages, ping you, add you as a friend, or see your online status or activity. It also reduces their ability to interact with you by hiding their messages on shared servers.


On Mobile

To block a user in the Discord mobile app, tap their profile image in the server. Next, tap the three-dot icon in the top-right corner and then tap Block in the menu.

You can also remove them from your friends list by tapping Remove Friend.

On Desktop

To block a user in the Discord desktop app, right-click the user’s profile image and click Block in the menu.

Blocking someone on the Discord desktop app.

In the prompt, confirm you want to block them by clicking Block. You can also click Remove Friend in the menu to remove them from your friends list.


4 Use a Generic Profile Image

Discord doesn’t allow you to make your profile image private or only visible to those you trust. However, you can enhance your privacy by using a generic profile image or remove it altogether.

However, you can set it to something generic to hide who you are, ensuring no one can use the profile image to track down who you are.

On Mobile

To change your profile image on the Discord mobile app, tap your profile image in the bottom left corner. Next, tap Edit Profile and tap your profile image in the top left. Then, tap Remove Avatar or Change Avatar in the menu.


If you choose to change the avatar and this is your first time doing this, Discord will need permission to access your photos. Next, choose a photo from your gallery to become your new profile image.

On Desktop

To change your profile image on the Discord desktop app, click your profile image in the bottom-left corner. Next, click the pencil icon in the top right corner to edit your profile.

Clicking the Edit Profile button on the Discord desktop app.

Below the Avatar heading, click Remove Avatar if you want nothing as your profile image. Otherwise, click Change Avatar.

Changing your avatar in the Discord desktop app.


Click Upload Image and select an image from your computer.

5 Don’t Share Sensitive Information

Discord is not only for gamers and many people use it for work or just chatting in general. Regardless of why you use Discord, there is information you should never share on the platform. For example, never share your password or token, with anyone. You also shouldn’t share personal details like addresses or credit card information. Discord doesn’t have end-to-end encryption, meaning malicious individuals can read your messages in the event of a data breach.

Also, Discord will never ask for that information. If you suddenly get a message or email from Discord asking for it, it is a phishing attempt.

Keep in mind that data scrapers have also gathered Discord messages in server chats in the past, so you don’t want to share any sensitive information on the platform.


If a link is coming from a bot or someone you don’t trust, you shouldn’t click it right away. It could lead to a malicious website that can infect your device with malware. It could also be a phishing website that can steal your sensitive information or take over your account.

Examine it and click only when you check if the link is safe. If you find out that it is indeed suspicious, report the user or bot that sent it to make Discord safer for everyone.

While these tips help with privacy, they won’t necessarily make your account more secure. We recommend improving your security as well by enabling two-factor authentication and using a stronger password on Discord.

Today’s Connections Hints and Answer (Friday, June 7, 2024)

Connections requires players to find the connections between 16 words, and place them in four groups of four. If you want some help, we have the solution to Connections for Friday, June 7, 2024, along with hints to help you solve it yourself.


SPOILERS AHEAD (CLUES)


Category Clues for Today’s Connections (#362)

Today, as every day, you need to split the 16 words that make up the Connections puzzle grid into four groups of four based on specific categories. It isn’t as easy as it sounds. Fortunately, we’re on hand to help you solve today’s Connections puzzle.

If you want to jump straight to today’s Connections solution, scroll past the next spoiler warning. However, if you’d rather see some hints designed to help you solve it without giving the answers away first:

  • Yellow: “Form an idea in your mind”
  • Green: “The outermost covering”
  • Blue: “Remove small particles of food from something”
  • Purple: “What Bill Gates-types do”

SPOILERS AHEAD (CATEGORIES)

Today’s Connections Solution (June 7, 2024)


If those clues aren’t enough, and you’re still struggling to beat Connections #362 without running out of mistakes, here is the answer…

Today’s Connections Categories

  • Yellow = “Dream Up”
  • Green = “Thin Covering”
  • Blue = “Remove, As Crumbs”
  • Purple = “Verbs for a Software Engineer”

With the categories revealed, you should try to guess which words belong where. There are 16 words in total, with four belonging to each category.

If you are still stuck despite knowing the names of each category, continue scrolling down for the 16 words organized into their respective categories.

SPOILERS AHEAD (SOLUTION)

Today’s Connections Solution

  • Yellow: “Dream Up” = CONCEIVE, ENVISION, IMAGINE, PICTURE
  • Green: “Thin Covering” = COAT, FILM, LAYER, SKIN
  • Blue: “Remove, As Crumbs” = BRUSH, FLICK, SWEEP, WIPE
  • Purple: “Verbs for a Software Engineer” = CODE, DEVELOP, HACK, PROGRAM

What Made Today’s Connections Difficult

Today’s Connections puzzle was made difficult due to the following:

  1. The most obvious red herrings today are “picture,” “film,” and “flick” as three terms for movies. People of a certain age may be surprised to see “skin” and “flick” in the same puzzle too, as it’s a risqué slang term.
  2. I personally found the Blue category the most difficult today. While it’s easy to see how they fit together in hindsight, the category does not stand out beforehand. The Purple category was easy for me by comparison, but that could be because I have written about technology for decades. Others may find it tougher.


Our Top Tips to Beat Connections Every Day

  1. Shuffle the words as many times as you need. Shuffling the words around means you’re more likely to spot the connections.
  2. Look for differences as well as similarities. The NYT is trying to trip you up, so look for what divides the words with similar meanings.
  3. Take your time, and don’t rush into a guess. Connections isn’t a timed challenge, so you have the luxury of planning everything out.
  4. Look for common themes over time. The more you play Connections, the more you’ll spot recurring themes cropping up regularly.
  5. Tune into the NYT editors’ way of thinking. It’s the puzzle setters you’re competing against, so you need to understand their game plan.

Now that you have completed today’s Connections puzzle (with a little help from your friends at MUO), you should check out some of the other free games from the New York Times.


Wordle is the best-known of them all, and challenges you to find a 5-letter word within six guesses. For every letter you find, you get told if it’s in the correct place, allowing you to whittle down the possible options. If you need help with Wordle, check out our tips and tricks to improve your Wordle score.

There’s also Strands, the newest addition to the New York Times’ burgeoning list of games. Just like Connections, it’s extremely challenging, but in a unique string-the-letters-together way. We recommend you check out our best tips for beating Strands to give yourself a leg up on the daily challenge.

Or, if you’re really only into Connections but want more tips than are offered above, check out our longer list of Connections tips and tricks.

6 Android Features I Miss After Switching to an iPhone

Switching from a Google Pixel to an iPhone as my primary device has been a positive experience, but it did come with its downsides. Here are some Android features I took for granted that I still miss when I use my iPhone.


1 Easy Multitasking via Split-Screen View

One of Android’s main features that improves multitasking is the split-screen view. You can use split-screen View on Android to view two apps simultaneously. For instance, I can watch YouTube at the top while chatting with friends on WhatsApp from the bottom.

On iPhone, however, there’s no such thing. I have to manually switch between apps if I want to do more than one thing at a time. While not yet available on iOS, iPadOS has Split View, which lets you view two iPad apps side by side. I hope Apple brings a similar feature to iPhones in the near future.


2 Multiple User Accounts

Another handy feature I’ve missed since switching to an iPhone is the ability to have multiple user accounts. Using multiple user accounts, I don’t worry about my essential apps being uninstalled or new apps being installed in my main account when I give my nephew or niece the phone to play some games.

Every account has a separate user space with separate apps and acts like a different phone. While I don’t share devices, this can also be useful for those that do. It can also be handy for maintaining your privacy when you take your device for repair.

3 Sideloading Apps From Third-Party App Stores

Tada Images/Shutterstock


One of the reasons why I switched from Android to iPhone is the fewer security risks on the platform. Unfortunately, one of the reasons iPhones have better security than Android is the tight controls Apple has put in place. Trying to sideload apps from third-party stores on an iPhone is tough.

While third-party stores exist, and you can sideload apps on your iPhone, the experience is less streamlined, unlike on Android. For instance, unless you live in the EU, you need a Mac to sideload apps on your iPhone.

On Android, I can download apps from anywhere; the only hurdle is allowing my device to install apps from third-party sources. That isn’t a hurdle since Android provides an accessible setting to enable sideloading.

4 Full Customization and Personalization

iPhone on a table with a keyboard and a MacBook in the backgrond
Raghav Sethi/MakeUseOf


Unlike Android, iOS has very limited customization and personalization options. For instance, on the iOS Home Screen, Apple only lets me remove or add app icons and widgets. I can also add some widgets to the Lock Screen, but only a select group that Apple makes available.

Customization and personalization options on Android are nearly endless. On the Home Screen alone, I can revamp the layout totally by simply switching to a different launcher. I can also change the grid, customize the size of app icons, and more.

Besides the available customization options, I can also root my Android phone and install a custom ROM to take it a mile further if I really want to.

5 Access Internal Storage on a Computer

iPhone Connected to MacBook with USB cable
blackzheep/Shutterstock


After switching to an iPhone, I miss accessing my device’s internal storage via USB. Connecting an Android phone to a Windows computer via USB allows you to access everything on the device. You can browse your phone’s internal storage like any external storage device. This enables faster file transfer than using wireless transfer methods.

I can’t view my iPhone’s internal storage if I connect it to my Mac via USB. Instead, I can only sync files between the two, which is very limiting. And if I connect it to a Windows computer, I’m limited to viewing images and videos stored on it.

6 Granular Sound Control

Another feature that I miss dearly after switching is Android’s granular sound control options. Android provides separate sliders for adjusting media volume, call volume, ring volume, notification volume, and the volume of your alarms.


The iPhone has an all-in-one sound control setting, making it hard to manage the volume. Everything under one setting means that if I lower the volume while playing media or mute it while scrolling social media, I must remember to increase it so I don’t miss out on my alarms later.

On iPhones, there are only two settings for controlling volume: one for ringtones and alerts and another for when you’re on a call or playing media. But to enjoy this separation, I need to toggle off Change with Buttons at Settings > Sounds & Haptics. Otherwise, lowering or increasing the volume using the buttons will also affect my ring volume and alerts like reminders and alarms.


Switching from Android to iPhone means making some sacrifices. If you’re a long-time Android user, remember that these are just some of the challenges you’ll face when switching to an iPhone from an Android device.

Today’s Connections Hints and Answer (Thursday, June 6, 2024)

Connections requires players to find the connections between 16 words, and place them in four groups of four. If you want some help, we have the solution to Connections for Thursday, June 6, 2024, along with hints to help you solve it yourself.


SPOILERS AHEAD (CLUES)


Category Clues for Today’s Connections (#361)

Today, as every day, you need to split the 16 words that make up the Connections puzzle grid into four groups of four based on specific categories. It isn’t as easy as it sounds. Fortunately, we’re on hand to help you solve today’s Connections puzzle.

If you want to jump straight to today’s Connections solution, scroll past the next spoiler warning. However, if you’d rather see some hints designed to help you solve it without giving the answers away first:

  • Yellow: “Come on, let’s get going!”
  • Green: “Things you’ll be familiar with if you play ‘you know’ what”
  • Blue: “I had to run as they were the size of a…”
  • Purple: “Sit down, and relax for a while”

SPOILERS AHEAD (CATEGORIES)

Today’s Connections Solution (June 6, 2024)


If those clues aren’t enough, and you’re still struggling to beat Connections #361 without running out of mistakes, here is the answer…

Today’s Connections Categories

  • Yellow = “Move to Action”
  • Green = “Uno Cards”
  • Blue = “Hail Size Comparisons”
  • Purple = “Places With Benches”

With the categories revealed, you should try to guess which words belong where. There are 16 words in total, with four belonging to each category.

If you are still stuck despite knowing the names of each category, continue scrolling down for the 16 words organized into their respective categories.

SPOILERS AHEAD (SOLUTION)

Today’s Connections Solution

  • Yellow: “Move to Action” = DRIVE, PROMPT, PROPEL, PUSH
  • Green: “Uno Cards” = DRAW, REVERSE, SKIP, WILD
  • Blue: “Hail Size Comparisons” = BASEBALL, GRAPEFRUIT, MARBLE, PEA
  • Purple: “Places With Benches” = COURTROOM, DUGOUT, GYM, PARK

What Made Today’s Connections Difficult

Today’s Connections puzzle was made difficult due to the following:

  1. The most obvious red herrings today are “drive,” “reverse,” and “park” as positions for an automatic gearbox. There’s also “baseball” and “dugout” due to the latter being part of the former.
  2. I personally found the Green category tough today, as I don’t play Uno. And I can imagine that a lot of Connections players are in the same boat. I also found the Purple category tough, as these four places have nothing in common apart from housing benches.


Our Top Tips to Beat Connections Every Day

  1. Shuffle the words as many times as you need. Shuffling the words around means you’re more likely to spot the connections.
  2. Look for differences as well as similarities. The NYT is trying to trip you up, so look for what divides the words with similar meanings.
  3. Take your time, and don’t rush into a guess. Connections isn’t a timed challenge, so you have the luxury of planning everything out.
  4. Look for common themes over time. The more you play Connections, the more you’ll spot recurring themes cropping up regularly.
  5. Tune into the NYT editors’ way of thinking. It’s the puzzle setters you’re competing against, so you need to understand their game plan.

Now that you have completed today’s Connections puzzle (with a little help from your friends at MUO), you should check out some of the other free games from the New York Times.


Wordle is the best-known of them all, and challenges you to find a 5-letter word within six guesses. For every letter you find, you get told if it’s in the correct place, allowing you to whittle down the possible options. If you need help with Wordle, check out our tips and tricks to improve your Wordle score.

There’s also Strands, the newest addition to the New York Times’ burgeoning list of games. Just like Connections, it’s extremely challenging, but in a unique string-the-letters-together way. We recommend you check out our best tips for beating Strands to give yourself a leg up on the daily challenge.

Or, if you’re really only into Connections but want more tips than are offered above, check out our longer list of Connections tips and tricks.

These 5 AI Assistants Make Email Less Agonizing

Email is still a vital part of our personal and professional lives, but managing an overflowing inbox can be agonizing and time-consuming. These AI assistants can automate various repetitive tasks and simplify your email use.


1 Sanebox to Organize Your Email Inbox

Managing a high volume of emails in your inbox can be overwhelming—how do you sort through that overflowing inbox before responding? Sanebox is one of the best tools you can use to reduce email overload. It’s an AI-powered inbox organizer that works with your existing email service, acting as an assistant in the background.

Getting started with Sanebox is simple; all you need to do is create an account using your email address and give Sanebox access to your inbox. This AI email service offers several folders to organize your emails.


For instance, your inbox holds important emails. You can enable @SaneBlackHole to train Sanebox to move annoying emails from specific people or companies into that folder. Use the @SaneNews folder to keep newsletters out of your inbox or @SaneLater for important but not urgent emails.

This tool uses AI to sort your inbox and learn your email habits. Simply moving emails from your inbox to another folder will train Sanebox to send similar emails there in the future.

Sanebox is a useful tool for helping you declutter your email inbox. It offers a 14-day free trial to test and see if it works for you.

2 Grammarly to Edit Your Emails

An email in Gmail showing GrammarlyGO's editing feature


Writing and sending well-constructed, grammatically correct emails is crucial, especially in professional settings. Grammarly is an AI-powered editing and writing assistant you can use to ensure that all your emails are error-free and polished. You can use this AI editing assistant in all your writing spaces, as it is accessible as a browser extension, mobile, and web app.

Once you sign up for a Grammarly account, you can install the browser extension or desktop app, and it will correct your spelling, punctuation, and grammar as you type your emails. It also uses generative AI to summarize long emails, suggest sentence rephrasing, and compose your emails.

Using Grammarly, you can set your preferred tone to ensure your communication is tailored to your preferences. It offers free, premium, and business plans.

3 Copilot to Summarize and Draft Emails in Edge

Copilot in Edge providing an email draft


If you use the Microsoft Edge browser, you’re likely familiar with the AI companion in the sidebar. It can help to summarize webpages, improve your shopping experience, or provide relevant responses to queries in a conversational style. Beyond these practical use cases, Copilot can also be a useful email assistant.

To use it, go to the Edge browser, log into your email account, and click the Copilot icon in the top right corner. Then, select the Compose tab to generate email drafts using professional, casual, or funny tones. If you are happy with the output, you can use it as your response or edit it before sending it.

Aside from drafting responses, Copilot can summarize long emails to save time or read your emails out loud with its text-to-speech feature. With Copilot in Edge, you can now handle email communication more efficiently and effectively for free.


4 Spike as Your All-in-One AI Email Assistant

Spike's desktop app showing its chat-like interface

What if you prefer an all-round AI email assistant with several practical features to streamline and enhance your email experience? Look no further than Spike. This innovative AI email tool has a user-friendly interface, making it a popular choice. So, how can you improve your email productivity using Spike?

If you have multiple email accounts, you may not want to add more or go back and forth between accounts to check emails. Spike’s Unified feed brings all your emails from different accounts into one central location, so you can see everything without leaving the app. Its chat-like interface, similar to the one found in popular messaging apps like WhatsApp, gives a more human touch to your emails, making it easy to read and reply quickly.


In addition, Spike’s Priority Inbox feature organizes emails by importance, helping you focus on critical messages. This helps you save time and avoid getting overwhelmed by a cluttered inbox. Spike also uses generative AI to summarize and write emails. It offers a free plan and two premium plans with additional features.

5 Shortwave to Turn Your Emails Into Todos

Shortwave's interface showing its bundles (categories)

Your email inbox should help you get things done rather than get in your way. Having a quick and easy way to turn emails into actionable tasks can be a game-changer for productivity. You can do this with Shortwave, an AI tool that integrates seamlessly with Gmail.


Once you sign in with Gmail, Shortwave automatically categorizes related emails into bundles to make them easier to manage. Next, select a category to see all the emails in that bundle. From there, you can quickly Star important messages, Add to todo to turn your emails into tasks, Snooze to deal with them later, mark them as Done, or Delete them. You can then go to the Todos tab to see all your tasks in one place.

Shortwave uses the capabilities of generative AI to help draft and summarize emails, making it easier to spend less time in your inbox. It offers a free plan for casual users and three paid plans for power users and businesses.

Today’s Answer and Clues (June 5, 2024)

Connections requires players to find the connections between 16 words, and place them in four groups of four. If you want some help, we have the solution to Connections for Wednesday, June 5, 2024, along with hints to help you solve it yourself.


SPOILERS AHEAD (CLUES)


Category Clues for Today’s Connections (#360)

Today, as every day, you need to split the 16 words that make up the Connections puzzle grid into four groups of four based on specific categories. It isn’t as easy as it sounds. Fortunately, we’re on hand to help you solve today’s Connections puzzle.

If you want to jump straight to today’s Connections solution, scroll past the next spoiler warning. However, if you’d rather see some category clues designed to help you solve it without giving the answers away first:

  • Yellow: “Slang terms for expressing a positive reaction to something”
  • Green: “Used to both connect and divide people and objects”
  • Blue: “Do you understand where I’m coming from?”
  • Purple: “When certain foods get deep-fried in batter”

SPOILERS AHEAD (CATEGORIES)

Today’s Connections Solution (June 5, 2024)


If those clues aren’t enough, and you’re still struggling to beat Connections #360 without running out of mistakes, here is the solution…

Today’s Connections Categories Without the Answers

  • Yellow = “Awesome!”
  • Green = “Variety”
  • Blue = “Gist”
  • Purple = “Fried Appetizer, Informally”

With the categories revealed, you should try to guess which words belong where. There are 16 words in total, with four belonging to each category.

If you are still stuck despite knowing the names of each category, continue scrolling down for the 16 words organized into their respective categories.

SPOILERS AHEAD (SOLUTION)

Today’s Connections Categories Plus the Answers

  • Yellow: “Awesome!” = COOL, NICE, SICK, SWEET
  • Green: “Variety” = KIND, SORT, STYLE, TYPE
  • Blue: “Gist” = DRIFT, IDEA, MESSAGE, POINT
  • Purple: “Fried Appetizer, Informally” = RING, STICK, TENDER, WING

What Made Today’s Connections Difficult

Today’s Connections puzzle was made difficult due to the following:

  1. The most obvious red herrings today are “type,” “message,” and “ring” as ways to communicate with people. Even though most of us choose not to “ring” people these days. There’s also “nice,” “sweet,” “kind,” and “tender” as words for having a pleasant attitude to people, or even life in general.
  2. I personally didn’t find any of the categories that difficult today, feeling that they were all pretty equal in difficulty. That isn’t to say any are easy; they’re just all on a par. At a push, Purple is the trickiest because of how many different meanings the words can have.


Our Top Tips to Beat Connections Every Day

  1. Shuffle the words as many times as you need. Shuffling the words around means you’re more likely to spot the connections.
  2. Look for differences as well as similarities. The NYT is trying to trip you up, so look for what divides the words with similar meanings.
  3. Take your time, and don’t rush into a guess. Connections isn’t a timed challenge, so you have the luxury of planning everything out.
  4. Look for common themes over time. The more you play Connections, the more you’ll spot recurring themes cropping up regularly.
  5. Tune into the NYT editors’ way of thinking. It’s the puzzle setters you’re competing against, so you need to understand their game plan.

Now that you have completed today’s Connections puzzle (with a little help from your friends at MUO), you should check out some of the other free games from the New York Times.


Wordle is the best-known of them all, and challenges you to find a 5-letter word within six guesses. For every letter you find, you get told if it’s in the correct place, allowing you to whittle down the possible options. If you need help with Wordle, check out our tips and tricks to improve your Wordle score.

There’s also Strands, the newest addition to the New York Times’ burgeoning list of games. Just like Connections, it’s extremely challenging, but in a unique string-the-letters-together way. We recommend you check out our best tips for beating Strands to give yourself a leg up on the daily challenge.

Or, if you’re really only into Connections but want more tips than are offered above, check out our longer list of Connections tips and tricks.

Here Are My Favorite Snapchat+ Features That Make It Worth the Subscription

Quick Links

Key Takeaways

  • With Snapchat+, I can set a custom story expiration time, ranging from a few hours to an entire week, and I can also see the exact time when my friends view my story.
  • I can also configure Snapchat to send me a reminder one hour before a streak with a friend is about to expire, helping me maintain it.
  • I can also set up custom notification sounds for specific friends on Snapchat and use exclusive Bitmoji backgrounds.


With Snapchat+, you can unlock exclusive features to improve your Snapchat experience. In this guide, I’ll share my favorite Snapchat+ features that make the subscription worth it.

موقع زيادة متابعين انستقرام


1 Custom Story Expiration

As a free user, the Snaps we add to My Story are automatically removed after 24 hours. With a Snapchat+ subscription, I can manage when my Snaps expire using the My Story Timer. I can set the expiry time from a few hours up to a whole week. This allows me to keep important stories for more than 24 hours and keep some of them for just a few hours.

اضافات سناب

To set a timer for the Snaps you post on My Story, follow these steps:

  1. Take a Snap as you normally do and tap Send To.
  2. Select My Story – Friends Only as the location you want to send your Snaps to.
  3. Tap the timer button that appears on the screen and select how long you want the Snap to stay on My Story.


2 Story Timestamps

I always wanted to see the exact time my friends view my stories and Snapchat+ made this possible for me with its Story Timestamps feature. Right where Snapchat lists my friends who have seen my story, the timestamp of when each friend saw it appears under their name.

3 Priority Story Replies

As a Snapchat+ subscriber, my replies to Public Stories from my favorite creators are prioritized above those from non-subscribers. This increases the chances of my favorite creator seeing and responding to my comments.


When I post my reply, I see a golden ring around the reply box, showing that I’m commenting as a Snapchat+ subscriber.

4 Story Rewatch Indicator

The Story Rewatch Indicator lets me see how many of my friends rewatch the Snaps I post to my stories. This lets me track which of my stories are engaging and get rewatched the most. However, I can’t check which specific friend has watched my story more than once.

This feature was turned off by default, so I had to enable it. If you want to use this feature, go to your profile, tap on Snapchat+, find the Story Rewatch Count, and turn on the toggle.

Snapchat showing the number of friends who've rewatched my story.


The next time someone rewatches your story, you’ll see a double-eyes emoji along with the number of friends who have rewatched it, in addition to the list of friends who have watched your story once (represented by an eye symbol), which you can see even with the free plan.

5 Snapstreak Reminder

One of the most important things I care about is not losing my streaks with friends. As a premium subscriber, Snapchat reminds me an hour before a Snapstreak is about to expire, giving me time to send a Snap and keep the streak going. This way, I don’t lose the streak and I don’t have to recover the lost Snapstreak.

To turn on this feature, follow these steps:

  1. Tap on your profile icon and navigate to Snapchat+.
  2. Locate and tap on Snapstreak Reminders.
  3. Turn on reminders for the streaks you want to get notified about.


6 Solar System

I have many friends on Snapchat, but am I one of the people my friends interact with the most? The Snapchat Planets feature lets me check that. If I’m among the top eight people my friend interacts with the most, Snapchat assigns me a planet in my friend’s solar system based on the frequency of our interactions with each other.

If I’m the person my friend interacts with the most, I’m placed on the Mercury planet in my friend’s solar system. If I’m on Venus, I’m the second person my friend interacts with the most, and so on. To learn more about how this feature works, how to enable it, and how to check your position, check out our detailed coverage of the Snapchat Planets feature.

7 Custom Notification Sound

What if you could know which friend has sent you a Snap or a text message just by the sound of the notification? Snapchat’s custom notification sound feature made this possible for me. It allows me to assign a custom notification sound for a friend or group chat, which plays whenever I receive a new notification from them.


To set up a custom notification sound, follow these steps:

  1. Tap on your profile icon and go to the Snapchat+.
  2. Open Custom Notification Sounds.
  3. Select a friend or group you want to set a custom notification for.
  4. Choose a custom sound from the available list.

Unless you’ve paused or disabled Snapchat notifications, you’ll hear your selected sound the next time you receive a notification from that friend.

8 Replay Again

As a free user, I used to only view a snap of my friend once. However, Snapchat+ lets me view a Snap two additional times.

To replay a snap, here’s what you need to do:


  1. After viewing the Snap from your friend for the first time, tap and hold on to your friend’s name to reload the Snap.
  2. Then, tap on the Snap to view it again.
  3. Once you’re done viewing it, tap and hold on to your friend’s name again to reload it for the second replay.

If you’re viewing the Snap within a chat, you’ll see an option that says Hold to replay again or save. Tap and hold on to it, then select Replay to reload the Snap. Watch it again, and if you want to, repeat the process one more time for a second replay.

9 Bitmoji Backgrounds

With a Snapchat+ subscription, I gain exclusive access to premium backgrounds for my Snapchat Bitmoji. These special designs make my friends ask, “Where did you get that background from?”


To use a custom background, follow these simple steps:

  1. Go to your profile.
  2. Tap the background icon in your 3D Bitmoji header and tap Pose and Background.
  3. Choose the exclusive background you like the most.
  4. Tap Save.

10 Snapscore Change

Another handy feature exclusive to Snapchat+ subscribers is the Snapscore Change. This feature allows me to see how much a friend’s Snapscore has increased since I last checked, helping me gauge how active my friends are on the platform.

To check the Snapscore change, follow these steps:

  1. Open your friend’s Friendship Profile.
  2. Tap on your friend’s Snapscore.
  3. Snapchat will then display the Snapscore change since the last time you checked it.


These Snapchat+ features can greatly improve your experience on the platform. If you’ve never tried a Snapchat premium subscription before, it’s definitely worth considering.

Today’s Answer and Clues (Tuesday, June 4, 2024)

Connections requires players to find the connections between 16 words, and place them in four groups of four. If you want some help, we have the solution to Connections for June 4, 2024, along with hints to help you solve it yourself.


SPOILERS AHEAD (CLUES)


Category Clues for Today’s Connections (#359)

Today, as every day, you need to split the 16 words that make up the Connections puzzle grid into four groups of four based on specific categories. It isn’t as easy as it sounds. Fortunately, we’re on hand to help you solve today’s Connections puzzle.

If you want to jump straight to today’s Connections solution, scroll past the next spoiler warning. However, if you’d rather see some category clues designed to help you solve it without giving the answers away first:

  • Yellow: “What you get paid for your employment”
  • Green: “Just picture Gandalf in your mind’s eye”
  • Blue: “Parts of what transports you across the ocean”
  • Purple: “Not quite as good as the B-List (from yesterday)”

SPOILERS AHEAD (CATEGORIES)

Today’s Connections Solution (June 4, 2024)


If those clues aren’t enough, and you’re still struggling to beat Connections #359 without running out of mistakes, here is the solution…

Today’s Connections Categories Without the Answers

  • Yellow = “Take Home, As Income”
  • Green = “Parts of a Wizard Costume”
  • Blue = “Found on a Ship”
  • Purple = “C-____”

With the categories revealed, you should try to guess which words belong where. There are 16 words in total, with four belonging to each category.

If you are still stuck despite knowing the names of each category, continue scrolling down for the 16 words organized into their respective categories.

SPOILERS AHEAD (SOLUTION)

Today’s Connections Categories Plus the Answers

  • Yellow: “Take Home, As Income” = CLEAR, EARN, MAKE, NET
  • Green: “Parts of a Wizard Costume” = BEARD, HAT, ROBE, STAFF
  • Blue: “Found on a Ship” = BRIDGE, DECK, HATCH, KEEL
  • Purple: “C-____” = CLEF, SECTION, SPAN, SUITE

What Made Today’s Connections Difficult

Today’s Connections puzzle was made difficult due to the following:

  1. The most obvious red herrings today are “bridge” and “span” as two words for overcoming a divide (whether physical or metaphorical). The other red herrings are words that can be paired, such as “clear” and “deck,” and “beard” and “net”.
  2. I personally found the Purple category the most difficult today. Unlike the others, which are all pretty straightforward, this category requires some brainpower. Then again, Green requires you to be familiar with a wizard’s outfit, and Blue requires you to be familiar with the layout of a ship. So they’re not easy either.


Our Top Tips to Beat Connections Every Day

  1. Shuffle the words as many times as you need. Shuffling the words around means you’re more likely to spot the connections.
  2. Look for differences as well as similarities. The NYT is trying to trip you up, so look for what divides the words with similar meanings.
  3. Take your time, and don’t rush into a guess. Connections isn’t a timed challenge, so you have the luxury of planning everything out.
  4. Look for common themes over time. The more you play Connections, the more you’ll spot recurring themes cropping up regularly.
  5. Tune into the NYT editors’ way of thinking. It’s the puzzle setters you’re competing against, so you need to understand their game plan.

Now that you have completed today’s Connections puzzle (with a little help from your friends at MUO), you should check out some of the other free games from the New York Times.


Wordle is the best-known of them all, and challenges you to find a 5-letter word within six guesses. For every letter you find, you get told if it’s in the correct place, allowing you to whittle down the possible options. If you need help with Wordle, check out our tips and tricks to improve your Wordle score.

There’s also Strands, the newest addition to the New York Times’ burgeoning list of games. Just like Connections, it’s extremely challenging, but in a unique string-the-letters-together way. We recommend you check out our best tips for beating Strands to give yourself a leg up on the daily challenge.

Or, if you’re really only into Connections but want more tips than are offered above, check out our longer list of Connections tips and tricks.

The New ROG Ally X Fixes the Handheld Console’s Biggest Issue

Asus has announced the ROG Ally X, the successor to 2023’s ROG Ally. It boasts several improvements, but arguably one of the best changes is its increased battery capacity.


The ROG Ally X Doubles The Original’s Battery Capacity

Announced at Computex 2024, the ROG Ally X improves the original handheld’s formula in many ways. One of the biggest differences is its battery capacity, which has been doubled. Rather than the 40Wh battery featured on the ROG Ally, the ROG Ally X includes an 80Wh battery.

Battery life was one of the biggest pain points for owners of the original ROG Ally, with the console lasting about 1.5 hours for AAA games. The increased battery capacity on the ROG Ally X means you will see a significant boost to its battery life, depending on how the other upgrades affect power usage. But with the same display and Ryzen Z1 Extreme APU, the improved battery life is a major bonus.


Since portability is a major selling point for handhelds and one of the key considerations when buying a handheld console, the improved battery life will give owners of the device more freedom of movement, for longer. After all, if you’re constantly tethered to a power outlet, you’re missing out on one of the biggest advantages of the handheld format.

Other ROG Ally X Improvements

Asus

The battery capacity is not the only improvement seen with the ROG Ally X. Asus has also improved the handheld console’s RAM, storage, design, and thermals.

It features up to 24GB of LPDDR5X-7500 RAM, along with a 1TB SSD. In terms of cooling, the console houses smaller fans with thinner fan blades to help improve airflow. This translates to 24% more air volume flowing through the device, according to Asus. This improved airflow results in the display being up to 6 degrees Celsius cooler than its predecessor.


You may also notice that the chassis has undergone a redesign, most notably the new black colorway. Asus introduced the new color based on feedback from customers. The company has also replaced the XG Mobile port with two USB-C ports (one of which is Thunderbolt), improving compatibility with third-party docks.

These improvements do, however, come with a higher price tag. The console is available for pre-order from the Asus online store at $799.99. The original ROG Ally Z1 Extreme was launched at $699.99.

While the improvements may not necessarily make you switch from a ROG Ally to a ROG Ally X, the new features and hardware definitely make it an appealing option in a competitive handheld market.

Why I Won’t Buy a Mac With 8GB of RAM Again

Key Takeaways

  • Macs with 8GB of RAM might not be enough if you’re not a casual user.
  • You may have trouble running several apps in the background or having a bunch of Safari tabs open simultaneously.
  • Using creative apps like Adobe Lightroom and Premiere Pro can be challenging with 8GB of RAM.


A MacBook Pro with 8GB of RAM met my needs when I first bought it, but I would absolutely not consider doing it again. Today, I’ll share the top three factors that contributed to my decision so that you don’t make the same mistake I did.


1 Browsing Was More Difficult

One of my biggest frustrations with my base spec MacBook is how difficult it can be to browse the web sometimes. While I try to keep fewer tabs open, it’s sometimes unavoidable due to the nature of my work as a writer or “journalist.”

Safari has frequently crashed when I have close to 10 tabs open, especially if one of them is playing media. Meanwhile, Chrome has sometimes closed and reset while I’m in the middle of work.


You can try various fixes if Safari keeps crashing on your Mac, but over enough time, regularly dealing with these browsing issues becomes annoying.

2 I Had More Computer Crashes

Photo of a MacBook on Table
Danny Maiorca/MakeUseOf

Besides browser-related issues, I’ve experienced several instances of my computer crashing or freezing. This often happens when I have multiple apps open, and while I don’t regret switching from Spotify to Apple Music, I’ve noticed that Apple Music sometimes crashes when I’m performing other tasks.

Again, I try to keep as few apps open as possible. But sometimes, you just have to use more than one. And when that happens, you want a computer that you can rely on. Nobody enjoys waiting for the rainbow wheel to disappear before you can continue doing your work.


3 Harder to Use Some Creative Apps

The Sky Selection Tool in Adobe Lightroom

My girlfriend often works with spreadsheets for her work and has to use a Windows computer. I jokingly tell her to “just buy a Mac” whenever her apps crash, but the truth is that I’ve had my fair share of issues with apps and tasks that need more energy.

I do a lot of photography and enjoy exploring other creative disciplines like videography, so I spend a lot of time using editing apps. Let me just say that if you have a 1,000-photo catalog in Lightroom on a Mac with 8GB of RAM, you’re in for a rough ride. I have experienced lagging and crashes when my library gets too big, and this quickly becomes frustrating.


As much as I love using my MacBook for writing and other creative projects, I need more than 8GB of RAM for my lines of work. A base-spec Mac may be adequate for your needs, but if you’re anything like me, I strongly suggest spending the extra money on more RAM to handle your tasks. Plus, there’s nothing wrong with future-proofing your machine.

How to Change DNS Server Settings on Windows 11

Key Takeaways

  • The DNS server provided by your ISP may not be the fastest or most secure option.
  • Google DNS, OpenDNS, and Cloudflare are excellent free DNS servers that can enhance internet speed and security.
  • You can easily change the DNS server settings using the Settings app in Windows 11.


If the default DNS server provided by your ISP seems slow, unsafe, or unreliable, you don’t necessarily have to stick with it. Here’s how you can change the DNS server settings on a Windows 11 computer.


How to Change DNS Server in Windows 11

A Domain Name System (DNS) translates human-readable domain names into IP addresses, allowing browsers to load web pages on your screen. When your ISP initially establishes your internet connection, it also configures the default DNS settings for you.

However, for most ISPs, the security or privacy of your DNS isn’t much of a priority, leaving you susceptible to all kinds of security problems. The good news, however, is that plenty of good third-party options, like Google, Cloudflare, and OpenDNS, offer better internet speeds and enhanced protection.

Here are the primary and alternate DNS numbers from Cloudflare, Google, and OpenDNS that you can use for your new DNS server:

  • Cloudflare: 1.1.1.1 and 1.0.0.1
  • Google: 8.8.8.8 and 8.8.4.4
  • OpenDNS: 208.67.222.222 and 208.67.220.220


While there are several ways to change the DNS server in Windows 11, the easiest one is through the Settings app. Here’s what you need to do:

  1. Press Win + i to open the Settings app.
  2. Navigate to Network & Internet > Advanced network settings.
  3. Click the network adapter available in the Network Adapters section. For example, if you’re connected via Ethernet, select that option. Likewise, choose Wi-Fi if you’re using a wireless internet connection.
  4. Select the View Additional Properties option.
  5. Click the Edit button next to the DNS server assignment.
  6. Under Edit DNS Settings, use the drop-down menu to select Manual and enable the IPv4 or IPv6 toggle.
  7. Enter the DNS server number in the Preferred DNS and Alternate DNS fields.
  8. Click Save.
    altering the dns settings in windows 11

In the guide above, we’ve used Google’s DNS, but you can choose any DNS server you prefer. Once you do, the DNS server settings on Windows 11 will be updated. To verify the change, open Wi-Fi or Ethernet properties to check which DNS server Windows 11 is using.


Changing your DNS server should result in better internet speeds and tighter security in most cases. You can also use DNS speed test tools like NameBench and the GRC DNS Benchmark to find the fastest DNS and optimize your internet speed.

The 9 Best DALL-E 3 Editing Prompts

Key Takeaways

  • DALL-E 3 offers several editing options for your AI art.
  • Remove objects, correct issues in generated art, and move objects to different places.
  • DALL-E 3 sometimes changes the entire scene, so you should pick what you want to adjust where possible.


Now that DALL-E 3 has an editing feature, you can make several quick improvements to your AI art with these effective editing prompts. We’ll cover how to correct issues in your images, along with what you can do to add new backgrounds, sharpen image sections, and much more.


1 Change Object Colors

One of the easiest ways to edit your AI art is by changing object colors where necessary. I asked DALL-E 3 to create a photorealistic donut. After receiving the original image, I decided to change the glazing color to pink with this simple prompt:

Please change the glazing color to pink

As you can see from the result below, I got what I asked for.


You can use this editing prompt with clothes, skies, and numerous other objects.

2 Remove Objects From Your Pictures

When you generate an image in DALL-E 3, you’ll normally receive a prototype that you can then work from. However, you won’t necessarily want to keep everything in your picture. Let’s look at the example below, where I asked DALL-E 3 to give me a landscape image for an NYC street scene.

DALL-E 3 Street Scene in NYC

I wanted to remove the white truck on the left, so I selected it and asked DALL-E to get rid of it. As you can see from the picture below, it’s no longer in the frame.

truck removed from image in dall-e 3


3 Correct Problems in Your Image

I’ve had several issues in DALL-E 3 before, such as flags looking weird or spelling errors. If you don’t want to remove these altogether, it’s possible to edit them. To correct these issues, you can follow the same steps I showed you in the previous section. Choose the area that needs fixing and tell DALL-E 3 what to do with it.

You should be as specific as possible to get the best result. Using these AI prompting tips and tricks will also help you generate better art.

4 Change Clothing Items

If you want to change what someone’s wearing, you can easily ask DALL-E 3 to make your requested changes. I’ve asked DALL-E 3 to create an image of a person with this prompt:

Please generate an image of a young person who works for a tech company. They will dress in smart casual.

This was the result I received:


AI image of person at desk in an office

I decided that I wanted to use the same model but give them glasses. This was the result that I got, which I was happy with:

Person With Glasses in an Office

If you want to use AI art, it’s important to consider the ethics. This guide on how to use AI art ethically will help you do that.

5 Add New Backgrounds

Many photo editing tools, like Adobe Firefly, let you quickly replace backgrounds in your images. It’s possible to change the background of your image in Canva, too, and you can do the same in DALL-E 3 if you aren’t happy with what your picture has. I asked DALL-E 3 to create a landscape image and got this result:


image of a landscape generated in dall-e 3

I wanted to change the sky, however, and asked DALL-E 3 to give me a sunset instead. After doing that, I received this result:

DALL-E 3 landscape image with a sunset sky

Besides changing the sky, you can also use DALL-E 3 to change portrait background colors. Make sure that you select the region you want adjusted to get more precise results.


6 Change and Object’s Position

It’s also possible to change where specific objects are in your picture. This can work well for portraits, street scenes, and similar types of imagery. In the picture from the previous section, I wanted to move the island in the lake further back. So, I selected this and asked DALL-E 3 to do that for me.

After asking the AI to move the island further back, it did so subtly. If I wanted to move it even further back, I would have been more specific with my prompt. For example, if there’s a car in your image, you can ask DALL-E 3 to move it to the left or right.

image generated in dall-e 3 with the island moved further back.

For my image, DALL-E 3 also didn’t have much room for maneuvering. So, if you need to move objects, you may want to create more space for the GPT to get you the exact result you’re looking for.


7 Add Reflections

Adding reflections to your images is one of many cool smartphone photography tricks that actually work, and including these in your DALL-E 3 images will also make your AI art stand out. You’ll often get these included when you use water in your pictures, but you can still ask DALL-E 3 to add specific reflections and adjust where necessary. I asked for this image of a lake in a city to begin with:

City and Lake in DALL-E 3 at Sunset

As you can see below, DALL-E 3 did completely change the angle of this picture. So, depending on what you want with your reflections, you may need to experiment a little here. And again, it helps to be as specific as possible.


An image of a building that has been sharpened in DALL-E 3

8 Sharpen Parts of Your Picture

Sometimes, we’ll get pictures in DALL-E 3 that aren’t as sharp as we’d like. This is precisely what happened in the image you saw in the previous section. Fortunately, it’s quite easy to change this.

After selecting the building closest to the lake, I asked DALL-E 3 to add a bit of sharpness. This was the result I got:

DALL-E 3 City Reflection on Water


9 Add New Characters to the Scene

If you want to add people or animals to your DALL-E 3 images, you can ask the GPT to include them after getting your initial picture. I asked DALL-E 3 to create a picture of a family Christmas gathering. This was the initial result:

DALL-E 3 Christmas Gathering Picture

Since there was no dog included, I decided to change that, and gave the GPT this prompt:

Please add a golden retriever sitting on the floor and looking happy

Since this changed the image completely, I selected where I wanted the dog to appear instead. After doing that, I still didn’t get the desired result. So, I asked it again—while the people in the picture changed, I was at least happy with this result:


Christmas Gathering With Dog in Frame

DALL-E3 has several editing capabilities, but as it’s still in its early phases, you may have to try several times before you get the results you’re looking for. Each of the prompts we’ve given in this guide should get you started with producing better art.

The Best Google Pixel 8a Cases

The Google Pixel 8a is an affordable mid-ranger, but that doesn’t mean it shouldn’t have the best protection possible. If you want to keep your new phone in pristine condition for as long as possible, the good news is there are plenty to choose from.


Spigen

The Spigen Ultra Hybrid offers the protection your Pixel 8a needs without compromising on style or cost. It’s an affordable case and features a tough polycarbonate back with a flexible air-cushioned TPU bumper that provides military-grade drop protection.

Your screen and camera lens are also protected thanks to the case’s raised edges preventing scratches when your phone is placed face down. Being designed specifically for the Pixel 8a, it’s perfectly cut and fits like a glove.

It has a slim, lightweight profile and is comfortable to hold, but the clear back may attract smudges and fingerprints. However, this transparency allows the Pixel 8a’s design to shine through, and you can choose from a variety of eye-catching patterns that complement this.


Spigen Ultra Hybrid

Spigen Ultra Hybrid for Google Pixel 8a

Best Overall

$17 $35 Save $18

The Spigen Ultra Hybrid provides affordable, military-grade drop protection with its tough polycarbonate back and air-cushioned TPU bumper. Its slim, lightweight profile perfectly fits the Pixel 8a, and it features raised edges for screen and camera protection.

Pros

  • Various patterns to choose from
  • Blue resin prevents yellowing
  • Slim and lightweight
  • Wireless charging compatible
  • Affordable

Best Budget Google Pixel 8a Case: Ringke Onyx

A person holding a phone in a Ringke Onyx protective case.
Ringke

This Ringke Onyx case may be affordable, but it offers excellent grip and a premium feel. The non-slip micro-dot embossing pattern on the sides helps prevent accidental drops and also gives it a comfortable grip. Ringke has also added a couple of lanyard holes, although the strap is sold separately.

The case is made from lightweight and flexible TPU and offers military-grade protection. Raised bezels fortify the screen against scratches while protecting the camera with raised edges. The case offers a precise fit and features notch-cutout buttons for authentic haptic feedback when pressing.

Ringke’s anti-fingerprint technology prevents unsightly smudges from marring this case’s sleek look. This stylish yet understated case is available in three professional-looking colors: black, dark green, and navy blue.


Two Ringke Onyx phone cases criss-crossing.

Ringke Onyx for Google Pixel 8a

Best Budget

The Ringke Onyx case for Pixel 8a combines affordability with excellent grip and a premium feel. It features non-slip micro-dot embossing and military-grade protection. It also includes raised bezels for screen and camera protection and anti-fingerprint technology. 

Pros

  • Affordable
  • Premium look and feel
  • Excellent grip
  • Haptic feedback on buttons

Best Rugged Google Pixel 8a Case: SUPCASE UB Pro

A person looping the SUPCASE UB Pro's stand around their finger.
SUPCASE

Those seeking rugged protection for their Google Pixel 8a should look no further than the SUPCASE Unicorn Beetle Pro. It’s a heavy-duty beast that provides full-body fortification for your phone. Its multi-layered design combines tough polycarbonate with shock-absorbing TPU, exceeding the military-grade protection standard.

Raised bezels safeguard the screen and lens, while a port cover protects against stray dust and accidental spills. A built-in screen protector completes this case’s 360-degree armor. However, this protector does not impact sensitivity, and you can still access your device via fingerprint ID. Additionally, the edges are slip-resistant and feature textured grip points.

Supcase UB Pro for Pixel 8a

SUPCASE UB Pro for Pixel 8a

Best Rugged

The SUPCASE Unicorn Beetle Pro provides unmatched rugged protection for the Google Pixel 8a, exceeding military-grade standards with its heavy-duty design. Featuring a multi-layered construction, raised bezels, port cover, built-in screen protector, and slip-resistant edges, it offers comprehensive defense against drops, dust, and spills.

Pros

  • Kickstand with horizontal and landscape modes
  • Bulky, durable build
  • Can withstand high drops
  • Fully-body phone protection
  • Rotatable belt clip included
Cons

  • Only one color
  • May not be the most aesthetically pleasing


A pixel 8a with a Caseology Capella clear case on.
Caseology

For those wishing to showcase the Google Pixel 8a’s unique colorways, a clear protective case, like the Caseology Capella, is a good choice. It provides good military-grade protection for peace of mind and features anti-yellowing tech, ensuring it remains clear and maintains its aesthetic appeal over time.

The materials consist of polycarbonate and TPU for a durable build, and raised edges protect the display and camera lens from scratches. Additionally, extra cushioning features on its textured edges and drop-proof grips add to the protection. With wireless charging and screen protector compatibility thrown in, the Caseology Capella is both a stylish and practical choice.

Caseology Capella

Caseology Capella

Best Clear

Showcase your Pixel 8a’s sleek design with the clear Caseology Capella protective case. It boasts military-grade protection, anti-yellowing tech, and precise cutouts for seamless compatibility, ensuring your phone stays stylish and secure.

Pros

  • Crystal-clear case
  • Anti-yellowing technology
  • Durable protection
  • Wireless charging compatible
Cons

  • Thick case adds a bit of bulk to the phone


A man with a Snakehive Leather Wallet Case to his ear.
Snakehive

This genuine leather wallet from Snakehive is a stylish way to hold your Pixel 8a. It’s handmade in Europe from Nubuck leather and offers a soft, suede-like finish that is genuinely pleasing to the touch and comfortable to hold.

The folio design enables the case to snap shut with a magnetic closure. You have full access to your phone’s ports, buttons, and speakers, and the inside has three card slots and a money compartment. Additionally, the folio cover folds into a viewing stand for video calling or watching media.

It may not offer military-grade protection, but it does still provide some sort of defense against drops. As it’s a folio case, the back and front prevent scratches on your phone. The casing around the lens is also raised to prevent accidents with your camera.


Snakehive Leather Wallet Case

Snakehive Leather Wallet Case

Best Wallet Case

Handcrafted in Europe from premium Nubuck leather with a soft suede-like finish, Snakehive’s stylish folio wallet case for the Pixel 8a offers full protection, card/cash storage, a built-in stand, and a raised camera lip in a genuine leather package that’s pleasing to touch and hold.

Pros

  • Available in four stylish colors
  • Genuine leather
  • Built-in stand
  • Holds cards and cash
Cons

  • May not work with all wireless chargers
  • Pricey

FAQ

Q: What is the difference between the Pixel 8 and the Pixel 8a?

In terms of case compatibility, the size difference is important. The Pixel 8 and the Pixel 8a have slightly different dimensions, with the 6.2-inch Google Pixel 8 measuring slightly larger against the Google Pixel 8a’s 6.1 inches. This means it is essential you buy a case specifically cut for the 8a. However, there are other differences that justify the higher price of the Pixel 8.

Q: What is the difference between the Pixel 8 Pro and the Pixel 8a?

The Pixel 8a is the budget choice in the series. Therefore, price is the main difference between the Pixel 8 Pro and the Pixel 8a. But, of course, there are differences in features that justify the price difference.

The Pixel 8 Pro has a bigger display (6.7 vs 6.1 inches). It also has a better screen resolution and more RAM (12GB vs 8GB). And while the Pixel 8a offers a higher 64MP camera resolution, it doesn’t have the excellent telephoto and ultrawide lenses that the Pixel 8 Pro sports.

Q: Can I use Pixel 8 cases on the Pixel 8a?

No, you cannot because the Pixel 8 is slightly larger. When buying a case for the Google Pixel 8a, you must ensure that it is cut specifically for that model.


Q: How many years of updates will the Pixel 8a support?

One of the best features of the Google Pixel 8a, and indeed the Pixel 8 and Pixel 8 Pro, is that they all get seven years of OS and security updates. Additionally, you can also expect fresh feature updates with Feature Drops.

How to Unlock a Carrier-Locked Phone

Key Takeaways

  • Carrier-locked phones can only access one carrier’s network and will not accept SIMs from another provider.
  • Since 2014, carriers in the US have been required to provide customers a way to unlock their phones for free.
  • Consider buying unlocked phones online or in stores to enjoy the freedom to insert any SIM into your phone from day one.


Does your carrier prevent you from inserting a SIM card from one of its rivals? If so, it’s carrier-locked. You’ll first need to unlock your phone to swap out your SIM. Here’s what you need to know about a carrier-locked phone.


What Does a Carrier-Locked Phone Mean?

Jonathan Weiss/Shutterstock

In this context, unlocking your phone does not mean entering a PIN to swipe away your lock screen. Nor is it related to unlocking your phone’s bootloader, a step you take when rooting your device or flashing a custom ROM.

Simply put, a carrier-locked phone can only access one carrier’s network. If you purchased your phone directly from a carrier store, there’s a good chance it’s locked to that carrier.


If you got your phone from a site like Amazon or Best Buy that listed it as an unlocked version, you can use it on any supported network. There’s no artificial restriction or lock from a carrier in place.

To know for certain whether you can swap out your SIM, here’s how to check if your phone is carrier-locked.

How to Unlock a Carrier-Locked Phone

Carriers in the US are required to give you the option to unlock your device for free. You can review device unlock policies on AT&T, T-Mobile, and Verizon’s official sites.

In general, this is the information you’ll need to provide before you can proceed with a request to unlock your device:

  • Your name (and, if you’re contacting your carrier, your phone or account number).
  • Your device’s IMEI number. You can typically find this information in your phone’s Settings app. Learn how to find any phone’s IMEI number.
  • Any telephone account management password you have set up.
  • Your phone should not have been lost, stolen, blocked, or associated with any fraudulent actions.
  • Any papers that confirm an overseas posting, whether this is military or corporate.


Unlocking your phone has been legal in the US since 2014. However, laws vary by country, so confirm the legality where you live.

If your phone meets the necessary conditions and you’ve gathered the information you need, here’s how to unlock your device:

  • AT&T: You can submit a request directly from AT&T’s website.
  • T-Mobile: There are instructions on the T-Mobile website detailing how to unlock your device on your end. If that doesn’t work, or your phone model isn’t listed, you’ll need to head to T-Mobile’s contact page for support.
  • Verizon: Verizon automatically removes the lock 60 days after activation. If you are a deployed member of the military, you can remove the lock even during the 60-day lock period by contacting Verizon support.

If you can’t unlock your device through your carrier, consider trying out third-party unlock codes instead.


Whether you’re speaking to your carrier directly or using a third-party approach, know that unlocking your smartphone can take a while.

Consider Buying an Unlocked Phone Next Time

Person holding Samsung Galaxy S24 Plus
Sergio Rodriguez/MakeUseOf

Your carrier won’t sell you an unlocked phone, but you can easily find one online or at big-box retailers. They may seem more expensive, but that’s because you’re viewing the actual cost of the phone rather than the monthly installments that carriers typically charge. Occasionally, carriers offer a genuinely enticing discount, but they make their money selling you costly service plans.

With unlocked phones, you can often save far more than you spend by switching to a lower-cost MVNO. You can also finance an unlocked phone in other ways if it’s the monthly payment plan you’re after, without having to deal with unlocking your phone later. There are many reasons to prefer buying an unlocked phone.


However you go about it, once unlocked, your phone is yours to do what you want. The great thing about network unlocking your smartphone is that it can’t be re-locked to a different network. You can use any compatible SIM card, and as long as you have an account and credit with that network, you can make calls, send SMS, and connect to the internet.

The Best Smart Lights of 2024

Smart lights make it easy to illuminate your home with a dazzling display of colors. From bulbs and light strips to string lights and light bars, here are the best smart lights for every home.


Nanoleaf Essentials Matter A19 installed on a desk lamp.
Nanoleaf

Nanoleaf is known for producing robust and reliable smart lights, and the Essentials Matter A19 is arguably their best creation yet. The powerful light bulbs can create a wide range of colors beyond white, making it easy for you to fill your home with millions of different colors depending on the occasion.

The Nanoleaf Essentials Matter A19 smart bulbs are reliable and easy to control thanks to support for Apple Home, Google Home, and Samsung SmartThings. You’ll even benefit from Matter support, allowing you to sync them with any other products with Matter, regardless of the smart home platform. They’re a bit expensive for smart bulbs, but most shoppers will find them to be a great addition to their home.

Nanoleaf Bulbs

Nanoleaf Essentials Matter A19

Best Smart Light Bulb

$42 $50 Save $8

They’re not cheap, but the Nanoleaf Essentials Matter A19 light bulbs are reliable, support millions of colors, and work with most smart home platforms.

Pros

  • Supports Matter
  • Access over 16 million colors
  • Tons of customization options


Philips Hue Bluetooth Lightstrip installed on shelving.
Philips

Light strips are a great choice if you want to install vibrant lights on the underside of cabinets, the back of a computer monitor, or any other piece of furniture. Few options are as compelling as the Philips Hue Bluetooth Lightstrip, as it’s built to the high standards of Philips and is available in a gigantic 80-inch bundle (which should be more than enough for most applications).

Part of the appeal of this light strip is that it works via Bluetooth—an uncommon feature in a marketplace dominated by Wi-Fi. You can also trim the strips down to size depending on your needs or check out prebuilt scenes, the latter of which makes it easy to quickly enjoy the lights without tinkering with dozens of settings.

However, you’ll need to bundle in a Hue Bridge for more automation and out-of-home controls. That shouldn’t be a dealbreaker, but will inflate your budget if you want to access everything the Hue Bluetooth Lightstrip has to offer.


TV Lights

Philips Hue Bluetooth Lightstrip

Best Smart Light Strip

You’ll need a Hue Bridge for some features, but the Philips Hue Bluetooth Lightstrip is easy to operate and reliable, making it a great choice for all your lighting needs.

Pros

  • Reliable Philips construction
  • Easy installation
  • Powerful companion app
Cons

  • Hue Bridge required for some features

Nanoleaf Essentials Matter String Lights along a staircase.
Nanoleaf

Whether you want to decorate your home’s exterior or light up an entire room, the Nanoleaf Essentials Matter String Lights are up to the task. They are IP44-rated for weatherproofing and offer Matter support so you can easily sync them with the rest of your smart home.

You can use the mobile companion app to dive into prebuilt scenes, create custom lighting effects, or set up a schedule for your lights to toggle on and off. You’ll also have plenty of string to work with, as the lights are 20 meters long and feature 250 addressable lights. They’re expensive when not on sale, but that’s about the only fault you’ll find with these premium LEDs.

Nanoleaf Essentials Matter String Lights

Nanoleaf Essentials Matter String Lights

Best Smart String Lights

$60 $120 Save $60

The Nanoleaf Essentials Matter String Lights can be used indoors or outdoors and work with all Matter products. Thanks to the intuitive Nanoleaf mobile app, you can also easily create your own scenes.
 

Pros

  • Includes 250 addressable LEDs
  • Easy to create your own scenes
  • IP44-rated for outdoor use


Govee RGBIC Floor Lamp in a living room.
Govee

The majority of light bars are designed to be placed horizontally in your home, but the Govee RGBIC Floor Lamp is different. This product features vertical construction and is best placed near walls or the corner of a room. While it may not be as versatile as horizontal light bars, this vertical light bar is great at lighting up large spaces with its comforting glow.

Like any good smart light, this Floor Lamp gets you access to thousands of colors, is highly customizable, and works with Alexa, Google Assistant, Apple Home, and Matter. Most shoppers will also love its design, which features a sleek base attached to a slim rod, both of which can be programmed to glow in different colors. If it fits with your space, this is a great option for any smart home.

Govee Lamp Light

Govee RGBIC Floor Lamp

Best Smart Light Bar

$120 $150 Save $30

As long as you don’t mind its vertical orientation, the Govee RGBIC Floor Lamp is an ideal companion for a stylish living room.

Pros

  • Unique design
  • Easy to install and customize
  • Matter support
Cons

  • Not a traditional light bar


Govee TV Backlight 3 Lite installed behind a TV.
Govee

The Govee TV Backlight 3 Lite is an ideal companion for your home theater. It is easy to install and uses a camera to track what’s happening on screen and customize its backlights on the fly. The lights are quite expensive (and grow more expensive if you have a TV over 65 inches), but that’s a minor knock on an otherwise well-rounded device.

Beyond adding an alluring glow to the back of your TV, the Govee TV Blacklight 3 Lite can sync with up to seven other devices. So, if you want to make your home theater pop, consider adding a few other Govee lights. And because the lights use a camera to mimic onscreen content, it’s compatible with movies, TV shows, video games, or anything else running on your display. The TV Backlight 3 Lite is particularly enticing to Google Home and Alexa users, as it works flawlessly with both assistants.


govee tv backlight

Govee TV Backlight 3 Lite

Best Smart TV Backlight

Using a camera that sits on top of your TV, the Govee TV Backlight 3 Lite offers an affordable and easy way to add ambient lighting to your TV viewing experience. It’s bright and responsive, and with DreamView mode, you can expand your system with other Govee lighting. 

Pros

  • Works with Google Home and Alexa
  • Innovative design for easy install
  • Supports all TV content
Cons

  • Larger TVs require more expensive model

FAQ

Q: Do smart lights need Wi-Fi to work?

Most smart lights require Wi-Fi to communicate with your smartphone. You might be able to find models that work with other communication methods, but Wi-Fi is by far the most common way to interact with your smart lights.

Q: Do I need a smart home hub to have smart lights work?

No, many smart lights can be controlled without any other devices. The vast majority let you customize their performance with a mobile app without the need for a hub.

Q: Do I need a smart light switch to make a smart light work?

No, a smart light switch isn’t required to use smart lights. Smart lights can be paired with a smart light switch for additional functionality, but most users will find pairing them together is excessive.

How to Pair Samsung Galaxy Buds to Any Device

Key Takeaways

  • You can pair the Galaxy Buds with an Android phone using the Galaxy Wearable app from the Play Store.
  • iPhone users can pair Galaxy Buds like any other Bluetooth device, but the lack of a Galaxy Wearable app limits their functionality.
  • It’s better to set up your Galaxy Buds with an Android device first before you use it with any other device.


You don’t necessarily need a Samsung phone to use your Galaxy Buds. Like any other pair of Bluetooth headphones, you can pair them with an iPhone, Mac, or even Windows PC. We’ll show you how to do that below.


How to Pair Samsung Galaxy Buds With Any Android Phone

Whether you own an Android device from Samsung, OnePlus, Google, or any other manufacturer, the pairing process of Galaxy Buds remains the same.

Before you proceed, ensure your Galaxy Buds are in the charging case and charged to at least 50 percent. Open the case lid and then follow the steps below:

  1. Download the Galaxy Wearable app from the Play Store on your Android device.
  2. Tap Start and grant the app access to the required permissions. It will then scan for any nearby devices to pair to.
  3. Your Galaxy Buds should appear in the scanned devices list. Tap its name to initiate the pairing process. The Galaxy Wearable app may download additional plugins during this time.
  4. Tap Pair when prompted.


Your Galaxy Buds should now pair successfully with your Android phone. If you use a Galaxy phone and are logged in with your Samsung account, the earbuds will automatically pair with other Samsung devices linked to it, allowing for seamless switching between them.

You can use the Galaxy Wearable app to customize various aspects of the earbuds, like the left and right touchpad gestures, Bixby voice wake-up, and equalizer settings, and enable some experimental features.

On non-Samsung phones, you will miss out on advanced features like 360 surround audio. So, if you use a Pixel or any other Android device and are looking to buy a new pair of earphones, consider buying other great wireless earbuds.

How to Pair Samsung Galaxy Buds With an iPhone or iPad

You can pair and use Galaxy Buds with your iPhone or iPad like any other pair of Bluetooth earbuds. However, since the Galaxy Wearable app for iPhone does not support these earbuds, you will miss out on some advanced features.


The lack of a companion app will also make it difficult to control features, like toggling ANC on or off and controlling music playback. But there’s a workaround for this. Make sure you haven’t connected your Galaxy Buds to another device, and then follow these steps:

  1. Open Settings and navigate to Bluetooth on your iPhone or iPad.
  2. Open the charging case of your Galaxy earbuds and wait for a few seconds.
  3. The earbuds should appear under the Other Devices section. Tap the device name to start the pairing process.
  4. Once connected, tap the Info (i) icon beside the earbuds name and select Device Type as Headphone.

If the earbuds do not show up, close the lid and wait for roughly 10 seconds. Then, open the case again and take out one of the earbuds.


Workarounds for Using Galaxy Buds With an iPhone

Since there is no Galaxy Wearable app for iPhone or iPad, you must first pair your Galaxy earbuds with an Android device and set up the touch gestures in the manner you like. They will then continue to work in the same way when paired with an iPhone or iPad.

There’s no workaround to getting features like 360 audio and Dolby Atmos to work, though. They only work when you pair these earbuds with a Samsung phone.

The Galaxy Buds 2 Pro can stream audio at a higher bit rate when paired with a Samsung phone running One UI 4.0 or later, but since iPhones use AAC Bluetooth codec, you will have to live with slightly inferior streaming quality.

Unlike AirPods, Galaxy Buds don’t support auto-device switching. So, they won’t automatically connect to your iPad when you switch from your iPhone. You’ll have to manually disconnect the Galaxy earbuds before connecting them to another device, which is annoying if you use multiple devices.


Jack Skeens/Shutterstock

By default, the earbuds will automatically try to connect to the last phone or PC they were paired with instead of the one you are currently using. Both the Galaxy Buds Plus and Buds 2 won’t connect to another paired device unless you disconnect them from the current one.

So, you will first have to manually disconnect the earbuds from the current device and then connect them to the new phone or tablet. This is not an issue with the Galaxy Buds 2 Pro, as it can connect to a paired device without disconnecting from the current phone.

Lastly, note that you can only update the firmware of your Galaxy Buds using an Android phone.

How to Pair Samsung Galaxy Buds With Your Mac

Samsung does not offer a Galaxy Wearable app for Mac either. But you can connect and use them with your Mac like any other pair of wireless headphones.


Keep in mind that you won’t be able to customize the touch gestures and control other settings. So, first, connect the Galaxy Buds with an Android device, set them up as you like, and then pair them with your Mac by following these steps:

  1. Open the Galaxy Buds’ charging case to put them in pairing mode. Ensure you haven’t connected them to any other device during the process.
  2. Click the Apple logo in the menu bar and choose System Settings from the dropdown.
  3. Select Bluetooth from the left sidebar.
  4. Turn on Bluetooth if it’s not already enabled. Your Mac will then scan for nearby Bluetooth devices.
  5. When your Galaxy Buds appear in the scanned devices list, click Connect.

Bluetooth settings menu in macOS showing Galaxy Buds Pro under Nearby Devices


If you use a Windows PC, you can use the Galaxy Buds app for Windows to pair and customize the various aspects of the earbuds. However, the app is buggy and might not work as intended. So, if you are facing issues with the app, pair the earbuds to your Windows PC directly from the Bluetooth menu in Settings.

Irrespective of which device you primarily decide to use your Galaxy Buds with, you will need an Android phone first to set them up correctly. After tweaking the touchpad controls and other options, you can use the earbuds with any device without any issues.

Without an Android phone, using the Galaxy Buds can be a challenge, as you won’t be able to customize or know what the touch gestures do, tweak various settings, or update its firmware.

Don’t Buy an iPad Pro With Nano-Texture Glass: Here’s Why

Key Takeaways

  • Nano-texture glass negatively impacts the visual fidelity that OLED panels are known for.
  • While it does offer a matte surface, it still attracts fingerprints and smudges. You should only wipe the screen with Apple’s polishing cloth to avoid damage.
  • Apple doesn’t advertise the nano-texture glass for drawing. Digital artists would be better off with a matte screen protector that offers a paper-like feel.


Apple offers a nano-texture glass option for its 2024 iPad Pro models. We’ve seen this before on the Apple Studio Display and Pro Display XDR, but should you pay extra for this glass when purchasing an iPad Pro? Probably not, and here’s why.


You Lose the OLED Display’s Perfect Blacks

Apple/YouTube

One of the biggest features of the 2024 iPad Pro models is their Ultra Retina XDR displays, which use two OLED panels in tandem to avoid sacrificing brightness levels. As you probably know, OLED displays can deliver perfect blacks with an infinite contrast ratio.

However, on an iPad Pro with nano-texture glass, the blacks appear closer to dark gray due to the matte surface. The colors aren’t as vibrant for the same reason, and therefore, you’re sacrificing a bit in terms of visual fidelity.


During the “Let Loose” launch event of the 2024 iPads, Apple said its nano-texture glass maintains image quality and contrast, but that’s not quite the case. As users pointed out on MacRumors Forums, the display appears hazy, and any dark text on a white background looks degraded.

Nano-Texture Glass Is a Fingerprint Magnet

Since the nano-texture glass offers a matte surface, you’d be quick to assume that it’s more resistant to fingerprints. But in reality, it attracts more fingerprints than the standard glass option. Smudges appear on the screen very quickly and are more noticeable when the iPad displays a white background.

That’s one of the reasons why Apple includes a polishing cloth in the box when you buy an iPad Pro with nano-texture glass. Apple highly recommends using its polishing cloth instead of anything else to clean the nano-texture glass without damaging it. So, if you plan to pay extra for the nano-texture glass, that’s one more thing you need to carry around for maintenance.


The $100 Add-On Is Limited to 1TB and 2TB Models

Glass options for 2024 iPad Pro on Apple Store Online

I don’t mind paying $100 extra for the nano-texture glass, but unfortunately, Apple limits this glass option to the 1TB and 2TB iPad Pro models. Therefore, although the 11-inch and 13-inch iPad Pro models start at $999 and $1,299, respectively, you need to spend at least $1,699 (for the 11-inch iPad Pro) or $1,999 (for the 13-inch model) if you really want the nano-texture glass to minimize glare.

Most people don’t need 1TB or 2TB of storage space on their iPads, especially with iCloud+ subscription plans available at various price points. So, I don’t understand why Apple forces its customers to upgrade to higher-tier configurations for a matte anti-glare coating.


It Doesn’t Give a Paper-Like Feel

You might think the nano-texture glass would be perfect for drawing as it adds a matte texture to the surface. But that’s not quite the case. Sure, it provides a bit more friction than the standard glass, but it doesn’t come close to the rough texture that some matte screen protectors offer.

In fact, Apple doesn’t even advertise the nano-texture glass for drawing purposes. Its main purpose is to minimize the glare while using the iPad Pro in bright outdoor conditions.

Therefore, if you want a rough surface for drawing, choose the standard glass and then buy a Paperlike screen protector (2-pack) for less than 50 bucks. Alternatively, you can buy ESR’s magnetic paper-feel screen protector for under $15, which you can easily detach once you’re done drawing or note-taking on your iPad.


As much as I dislike the nano-texture glass option on the 2024 iPad Pros, it does have a target audience. This add-on could be well worth the price if you mostly use your iPad outdoors or in an area with bright light sources. It does an excellent job of scattering ambient light to minimize glare, which no matte screen protector can match.

Here’s How I Get the Perfect Composition in My Smartphone Photos

Key Takeaways

  • Composition is the key to great smartphone photography, and considering composition when shooting is guaranteed to bring you success.
  • There are literally dozens of composition techniques you can employ, but three simple ones are leading lines, the rule of thirds, and filling the frame.
  • To make things easier, all smartphone photographers should employ grid lines, shoot from different angles, and take multiple photos before deciding on the best one.


Almost everyone now owns a smartphone, and most smartphones boast decent cameras. However, it’s far too easy to shoot bad photos on your smartphone. Especially if you just point and shoot with no thought about what you’re doing. Thankfully, there are techniques you can employ to help you take better smartphone photos.


Composition Is the Key to Smartphone Photography

For me, while there are plenty of tricks you can use when taking photos on your mobile, smartphone photography is all about composition. And while this is also true of other forms of photography, it’s especially true for smartphone photography. Let me explain why.

First, what do we mean by composition? For the unaware among you, composition refers to how you as the photographer arrange the components in the photo. It can also be referred to as framing, and being aware of what you’re shooting and how you’re framing things is the key to taking exceptional smartphone photographs.


As you can see in the example pairing below, one photo is just a quick snapshot of a church, while the other is a photograph I’m proud of. And all it took was for me to consider the composition, allowing the buildings either side to draw the eye in, and capturing the whole height of the church against an overcast sky.

Understanding composition, and then applying what you’ve learned, is what separates people who merely take photographs from photographers. For some of you, good composition will come naturally, while others will need to learn composition through techniques and tips.

The key tenet is to consider the composition of a shot before you press the shutter button. An extra 10 seconds spent at that moment can be the difference between taking a photo that merely captures a moment in time and taking a photo that could be considered art. At the very least, you’ll be more keen to show these photos to other people.


3 Composition Techniques for Smartphone Photos

There are a host of ways to improve the composition of your photos, with certain things to look for in the frame. Here are just a few composition tips when shooting photos on your smartphone to get you started.

1. Employ Leading Lines

Leading lines are components of a photo used to draw the viewer’s eyes into the shot. Think of a path or road leading to the subject of the shot, hills pointing their way to the peak, or a bridge pointing to a cityscape. The point is to not leave any room for doubt as to where you want your viewer to focus their attention. Show them using elements of the photograph.

2. Use the Rule of Thirds

A lake and trees with the sun setting, demonstrating the rule of thirds


The rule of thirds is probably the best-known composition technique, and its name is somewhat self-explanatory. It suggests placing important elements of your photo on the lines a third of the way up, down, to the left, and/or to the right of an image. This is a simple yet extremely effective way of adding aesthetic interest to a shot, which is why it’s so commonly used.

3. Fill the Whole Frame

Manchester buildings and a tram demonstrating how to use the full frame

A photograph comprises multiple elements, not just the main focus. So, be sure to use the whole frame, including interesting elements. The best way of doing this is looking to the edges of the screen when framing your shot. Is there a lamppost, tree, person, or building that could add interest to the overall image? Then adjust your position or focus to include it.


3 Tips to Help With Photography Composition

There are certain shortcuts you can take to help with photography composition. Below are a trio of really simple tips to help you get started improving the composition of your photos.

1. Enable the Grid Lines

Someone using the gridlines on their phone to help with composition
John B Hewitt/Shutterstock

To help with composition, the first thing you should do is enable the grid lines on your smartphone’s camera app. Most will offer various different layouts, with a 3×3 grid best for the rule of thirds, but others good for alternative techniques. This may even include a golden ratio grid which divides your screen into a ratio of approximately 1.618 to 1.

2. Shoot From Different Angles


If possible, shoot your subject from multiple angles. If you’re shooting a landscape with elements far into the distance, this won’t necessarily be possible, but for human subjects or buildings, it will. Different angles will change the face, size, and/or texture of your subject. But it will also affect what other elements are in the background.

3. Take Multiple Photos

Now that you know how important composition is, and some quick tips to help you with it, I would encourage you to shoot multiple photos every time you shoot something. If you’re worried about storage, you can always delete some afterward, but at least you’ll have multiple shots to select from. And I guarantee that one will stand out above the others.


If All Else Fails, Fix Things in Post Editing

While composition is the key to great smartphone photography, thankfully, you can fix things in post. So, while it helps immensely, it isn’t always necessary to capture exactly what you want to capture at the time of shooting.

There are a host of free image editors available on your mobile, and all of them give you the option to change the way an image looks long after you’ve moved away from the subject you’re shooting. My personal favorite, and the image editor I would recommend to everyone reading this, is Snapseed. Despite being owned by Google, Snapseed is available on iOS as well as Android, and is completely free to use, with no features hidden behind a paywall.


Above are two examples of what can be achieved by editing. The original photo was good, but one has been enhanced to make the colors pop, and the other to make everything black and white and overexposed. Both were based on an original photo that I had already cropped to improve the overall composition.

Whether you use Snapseed or otherwise, the point is you can change the composition of a photograph by editing it after the fact. Options include cropping the image to make better use of leading lines, employing the rule of thirds, or filling the frame. You can also rotate the image, change the perspective, focus on a subject to obscure other elements, and much more besides.

While it’s always better to consider the composition of a photo at the moment you shoot it, editing it with aplomb can save it from only being worth deleting.

How Often Should You Upgrade Your PSU?

Key Takeaways

  • Replace your PSU every 5-10 years based on warranty.
  • Consider upgrading your PSU with significant component upgrades.
  • Watch for signs like blue screens, noises, and performance dips.


We often neglect our computer’s power supply. In fact, most of us could go for years and generations of the latest PC hardware without touching it. But whether you’re currently building a new PC, plan to upgrade your desktop soon, or already have a reliable computer that satisfies all your needs, you should still know when you should replace your PSU.


Every Five to Ten Years, Depending on Your Warranty

Power supplies are generally designed to last longer than other PC components, which is why they typically come with longer warranties. For example, Seasonic offers an astounding 12-year warranty with its PRIME series power supply. So, even if it fails after a decade of use, you can RMA it to the manufacturer and get a replacement.

However, not all PSUs have the same quality and warranty, so some models may come with shorter guarantees. Most manufacturers would have tested the power supplies that they offer, ensuring that their products would last longer than the warranty. So, you can stay confident that your power supply will last as long as what the maker guarantees.


It doesn’t mean that you should replace your PSU as soon as its warranty expires, though. If you take good care of it (by keeping it clean, avoiding overloads, and having a clean electricity supply), your PSU could last a few more years after the warranty date.

Don’t take too long to replace it, though, as power supply internal components still suffer from age. A good rule of thumb is that you should consider your PSU about a year or two after its warranty ends. While the PSU might still look good externally after that period, would you be willing to risk the other more expensive components on your computer just to save a few dollars?


When You Make a Significant Upgrade

A white liquid-cooled GeForce RTX 4090 graphics card inside a PC Case
Hamlin Rozario/MakeUseOf

Power supplies have a rated maximum capacity, and it should be enough with what you have on your computer as long as you don’t run into any issues. So, should you reuse your old PC’s power supply if you plan to upgrade it?

Unfortunately, there is no straightforward answer to this question, as you must consider several factors. But if you’re going for a massive spec bump, then it’s prudent to buy a new power supply unit to go along with your shiny new graphics card.

That’s because components that have higher specifications typically have higher power requirements. For example, the RTX 2080 Ti has a 250-watt TDP. If you pair this with an Intel Core i7-12700K with a 190-watt TDP, then a 600-watt PSU should be more than enough for your needs. But if you upgrade your GPU to an RTX 4090, which requires 450 watts of power, you need to upgrade your power supply to accommodate this demand.


If You Start Getting These Signs

Whether you have a brand-new computer or keep a trusty old desktop around after several years, you should always look out for how it performs. That’s because PSUs, regardless of age, could fail for various reasons. So, if you start seeing some of these symptoms on your computer, you should replace or upgrade your PSU (or RMA it to the manufacturer if it’s still under warranty).

  • Blue Screen of Death with the following errors:
    • 0x00000080: NMI_HARDWARE_FAILURE
    • 0x00000122: WHEA_INTERNAL_ERROR
    • 0x00000124: WHEA_UNCORRECTABLE_ERROR
    • 0x00000127: PAGE_NOT_ZERO
    • 0x0000012B: FAULTY_HARDWARE_CORRUPTED_PAGE
  • Crackling and static sounds
  • Unexplained CPU or GPU performance issues
  • Electrical instability

These signs and symptoms could mean that your PSU is starting to deteriorate, and you should upgrade or replace it soon. You don’t want a PSU issue to get out of hand, causing your PC to stop working while you’re using it or, worse, damaging other, more expensive components, like your processor or GPU.


Like any other computer part, you must maintain your PSU to extend its useful life. But no matter how well you take care of it, there will come a time when it needs replacing. So, it’s better to be proactive and replace it before it gives up on you in the middle of work or play instead of waiting for it to die and potentially take other parts with it as it goes to the e-waste bin.

Is This Free Adobe Illustrator Alternative Better Than the Real Deal?

Inkscape is a powerful and free alternative to Adobe Illustrator, offering a robust set of tools for vector design. But how does it truly compare to Illustrator? Let’s find out.


What Is Inkscape?

Inkscape is a free, open-source design software used for illustration and digital drawing, and it resembles Adobe Illustrator. You’ll even find similar tools, such as the pen and pencil, layers, and text tools—everything you’d expect in a robust digital drawing tool.

Inkscape has been around since 2003, with version 1.3.2 released in late 2023. With so many contributors and supporters, Inkscape is a fantastic free source for digital design. It’s available for multiple platforms, including Mac, Linux/GNU, and Windows.

Why I Like Inkscape

Inkscape Interface


The biggest selling point—pun not intended—of Inkscape is that it’s free. Many designers and hobbyists are frustrated with the high price point of Adobe software, and due to its industry-standard nature, it can be hard to find comparable software with a low price point.

While Inkscape is cost-free, it doesn’t hold back on features—much of what you can achieve with Adobe Illustrator can easily be done with Inkscape. The interface is also similar to Illustrator’s. Although there’s a slight learning curve, and some naming and shortcut differences, not needing to learn a new interface layout is helpful if you’re used to Illustrator, and most of the tools are easy to find with little searching.

You can create vectors and save primarily in SVG and vector formats, as well as raster. Its bitmap tracing feature is simple yet effective and provides layered results that are easy to separate for vector editing.


The computer system requirements for Inkscape are minimal, meaning you don’t need the latest OS to run it. This, combined with being totally free, offers a low barrier for entry and learning graphic design compared to higher cost and more intensive software, like Adobe Illustrator.

What Does Inkscape Do Better Than Illustrator?

Community learning is a great aspect of using Inkscape because you’ll find many tutorials, advice, pointers, and hacks from other users. There’s no gatekeeping for this software and it’s open to all. You can even be part of Inkscape’s development.

Inkscape Gradient Tool

Inkscape’s gradient tool is easier and more intuitive to use compared to Illustrator’s. Gradient stops, direction, gradient pattern, and colors are all visually placed in a tool over the artwork, so you can see how and where the tool changes the gradient. In Illustrator, all this is done on a side window before applying the gradient tool to the art, making it more laborious and difficult to manage precisely.


Inkscape Nodes Tool with Star

Anchor points—or nodes, as they’re called in Inkscape—in paths are easier to edit in Inkscape. You can select an anchor point or node using different keyboard shortcuts or a number of clicks depending on how you want to edit them. This is faster than doing it in Illustrator, which requires selecting a separate tool on top of using shortcuts to edit them.

Inkscape Save Formats


Inkscape’s main file format is SVG—which means Scalable Vector Graphic—making Inkscape a great free candidate for creating SVG files for Cricut designs. SVGs can also be used for laser cutting, engraving, or generally producing high-quality vector graphics for various uses, and they’re also commonly used in web design and for creating editable images in Canva. Inkscape offers a host of other vector formats to save your projects in.

Inkscape CSS Selectors

It has a CSS selector menu, so you can identify the CSS properties of your SVG graphics, such as HEX codes for stroke and fill, width, or opacity. This is beneficial to anyone creating graphics for web design, or those using CSS to code websites. This isn’t a feature at all in Illustrator.

Inkscape’s Limitations Compared to Illustrator

Inkscape vs Illustrator Shape Builder


Inkscape doesn’t have a native shape builder tool like in Illustrator. Shape Builder helps you create graphics by overlaying simple shapes and combining or removing aspects to create a new unified shape. You can, however, do this—more slowly—using Inkscape’s Path tools.

Illustrator has an abundance of save and export options that retain quality for both raster and vector format files. Inkscape’s save options are all vector-based; however, its export options do include PNG and JPG along with other vector-based formats.

Illustrator AI Features

Being part of Adobe Creative Cloud means Illustrator users benefit from many AI tools integrated into Adobe products. With Illustrator’s AI, you can recolor your vectors in seconds, use generative AI to create countless editable vector graphics in infinite styles, and read and recognize typefaces to recreate in your designs.


AI tools are yet to appear in Inkscape, but you can still do all those things manually without the use of AI. As a designer or hobbyist, learning the proper ways to achieve design elements will make you a more well-rounded designer.

There’s a lack of 3D tools in Inkscape that are available in Illustrator. However, if you’re already using open-source programs to avoid using Adobe, you’ll likely be willing to use Blender as an open-source alternative for 3D design.

Inkscape is a standalone program, so although you can do a lot with it, it’s much harder to integrate your designs into other programs. In Adobe Illustrator, you can save your designs as assets to be opened in any other Adobe program for cross-platform use.

Should You Replace Illustrator With Inkscape?

For the average user, Inkscape will suffice. There are few limitations that make much difference between the free-to-use Inkscape and the expensive subscription of Adobe Illustrator.


Inkscape is a helpful tool that takes up little space in your hardware. It’s smooth to run, easy to learn and use, and you can create great graphics with it. No one would be able to tell which program you used by looking at your final design.

However, if you’re working as a professional or want to get into a digital design profession, it is worth keeping your subscription, or getting a subscription, to Illustrator. If you’re a freelance designer who doesn’t need to share working files with clients or peers, Inkscape is still a great option.

There’s merit in using Inkscape over Adobe Illustrator. If you’re looking to get a cheaper alternative to Illustrator, and you aren’t required to use Adobe software exclusively, Inkscape is your perfect choice. Additionally, building the open-source community for this software can only benefit its users.

5 Reasons to Buy a NVIDIA GPU Instead of AMD in 2024

Key Takeaways

  • NVIDIA dominates the GPU market with an 80% market share and boasts impressive shipment growth.
  • NVIDIA’s GPUs outperform AMD in benchmarks with top-tier models like RTX 4090.
  • NVIDIA offers innovative features like ray tracing, DLSS, Reflex, and Broadcast for enhanced performance and versatility.


If you’re in the market for a new graphics card, you’re probably choosing between Team Green (NVIDIA) and Team Red (AMD). Both manufacturers make great products, but there are a bunch of reasons to choose NVIDIA.

So, let’s take a look at why an NVIDIA GPU deserves a spot in your rig. The first reason may not surprise you…


1. NVIDIA Is the GPU Market Leader

The GPU industry has grown dramatically in recent years and shows no signs of slowing down. Mordor Intelligence estimates the GPU market will be worth around $65 billion in 2024 and is projected to balloon to over $274 billion by 2029. That’s a crazy 33% compound annual growth rate.

A few big things are fueling this surge. More and more people are into powerful computers and gaming consoles that need mighty GPU hardware. Artificial Intelligence development is also finding newer uses for these chips and helping the market expand further.


Amid all this opportunity, NVIDIA is in a perfect spot to cash in as the longtime king of this booming sector. Its dominance is clear from analyst Jon Peddie’s reports. In Q4 2023 specifically, JPR found NVIDIA shipped 4.7% more graphic cards than the quarter before and a hefty 22.3% more than the same time last year. It is estimated to control a massive 80% of the add-in board market.

2. NVIDIA’s GPUs Are More Powerful

Hamlin Rozario/MakeUseOf

Based on GPU benchmarks released by tester site GPU Check, NVIDIA’s Ada Lovelace architecture is performing well. In the top 10 rankings, NVIDIA takes seven of the spots, led by its top-ranking flagship, RTX 4090.

Gamers care most about real gameplay; here, the RTX 4090 flexes its muscles. It delivered an average of over 356 frames per second at 1080p resolution, around 273 fps at 1440p, and nearly 173 fps at 4K—impressive results that keep it at the top of the pack.


AMD’s highest-end card, the RX 7900 XTX, in third place, retails for $999, which is cheaper than NVIDIA’s offerings. Its numbers were still mighty impressive, getting over 321 fps at 1080p, around 241 fps at 1440p, and close to 139 fps at 4K. But it lags slightly behind the leaderboard, coming after the RTX 4080 Ti and the RTX 4090.

One note is that the performance gap narrows in the mid-range and budget segments. Here, AMD provides strong options at competitive prices against NVIDIA’s competing models.

3. NVIDIA Pulls Ahead with Cool Features

Ray tracing is the holy grail of graphics. But now you can do it in real-time thanks to fancy algorithms and special hardware. NVIDIA’s RTX GPUs, especially the newer Ada Lovelace SKUs, have dedicated ray tracing cores that can mimic how light works in the real world. This means you can get hyper-realistic environments with dynamic lighting, shadows, and reflections in virtually generated worlds that constantly change.


NVIDIA introduced Deep Learning Super Sampling (DLSS) to boost performance while still keeping visuals looking good, which has proved to be better than AMD’s FSR in providing better overall performance and image quality. Using the GPU’s Tensor Cores and AI upscaling, DLSS can majorly boost your frame rate without compromising image quality. The latest version, DLSS 3.5, further enhances ray tracing with tricks like Ray Reconstruction that reduce weird artifacts and improve detail.

DLSS FSR Comparison
Hardware Unboxed

If you demand the fastest, most responsive experience possible, NVIDIA Reflex minimizes lag time. By optimizing how frames are processed with features directly integrated into supported games, Reflex makes sure frames are handled as smoothly as possible to lower input lag and improve reaction speeds for competitive gamers.


Content creators also reap rewards from NVIDIA innovations. NVIDIA Broadcast transforms any space into a home studio with AI-powered audio and video effects. Features cut out background noise and echo, enable virtual backgrounds, optimize video quality, and more—all powered by the GPU to produce pro-level results without expensive gear or complex setups.

4. NVIDIA Dominates the AI Landscape

NVIDIA GPUs, especially those with Tensor Cores, are good at generative AI, especially images and videos, crushing the competition in performance tests in AI tasks. Tom’s Hardware tested 45 of the top GPUs from NVIDIA, AMD, and Intel, running Stable Diffusion, an image generator, and NVIDIA’s cards kicked butt every time.


The Tensor Cores are special chips NVIDIA designed specifically to speed up AI calculations, which can make generative AI models way faster. For example, when tweaked right, NVIDIA’s GeForce RTX and RTX GPUs can run those AI models up to five times quicker than other GPUs.

NVIDIA’s GeForce RTX 40 Super graphics cards, like the GeForce RTX 4080 Super, take its dominance further by generating AI videos 1.5 times faster and images 1.7 times faster than the previous RTX 3080 Ti GPU. These GPUs crank out up to 836 trillion operations per second, unlocking crazy AI abilities for gaming, content creation, and everyday stuff.

NVIDIA’s AI supremacy isn’t just down to better hardware. It also has software tricks up its sleeve with tools like NVIDIA TensorRT, NVIDIA RTX Remix, and NVIDIA ACE that further optimize and speed up AI model performance on PCs.

5. NVIDIA Cards Play Nice with Basically Everything

Thanks to robust hardware compatibility, NVIDIA GPUs integrate seamlessly with a wide range of motherboards from various manufacturers, supporting different PCIe standards. In terms of displays, NVIDIA cards support an immense array of monitors—whatever weird or wonderful panels you throw at them, they’ll drive the pixels.


They handle all display tech, such as G-Sync, HDR, and variable refresh rate, with aplomb, making them perfect for high-fidelity gaming and creative work where visual quality is paramount. With drivers for Windows and Linux, they work across operating systems for maximum flexibility between platforms.

Its software ecosystem takes compatibility to the next level. The NVIDIA Control Panel is like a one-stop shop for tweaking every setting to your liking. GeForce Experience also adds awesome features—like automatic game optimization, recording and streaming video using NVIDIA ShadowPlay, and streaming to an NVIDIA Shield for remote gameplay on the big screen. So, if compatibility and powerful performance in multiple fields are what you need, NVIDIA graphics cards truly shine.

Ultimately, the best option depends on your needs and budget. But if bleeding-edge performance and features are high on your list, NVIDIA seems like a safe bet for next-gen goodness.

The 4 Best Video Game Emulators to Install on Your iPhone or iPad

Modern mobile games are fun, but retro console games are even better if you grew up playing them. Emulators let you play thousands of retro games without worrying about ads or microtransactions. Here are the best emulators you can install on your iPhone.


Although using emulators to play games is within legal bounds, downloading ISOs for games you don’t own is strictly illegal.

1 Delta

Raghav Sethi/MakeUseOf

Delta is your best bet if you’re looking to emulate classic Nintendo titles on your iPhone. It’s the successor to the hugely popular GBA4iOS emulator, and you can download it directly from the App Store.

Delta supports a huge range of Nintendo consoles, such as:

  • Game Boy, Game Boy Color, and Game Boy Advance
  • NES and SNES
  • N64
  • Nintendo DS


It offers several fantastic features, including the ability to speed up gameplay to breeze through tedious sections, the option to save your progress manually at any point, and full support for controllers and keyboards. If you’re looking to play all the classic Pokémon games on your iPhone, look no further than Delta.

You can also customize the emulator skins that appear on your iPhone screen and choose buttons for Delta to hold down, so you don’t need to keep pressing certain buttons as you play.

Delta also integrates really well with AirPlay, meaning you can wirelessly connect your iPhone to a TV while using your iPhone as a controller. The app even supports local multiplayer.

Download:Delta (Free)

2 DolphiniOS

iPhone Running Super Mario Galaxy 2 Using DolphiniOS
Raghav Sethi/MakeUseOf


DolphiniOS lets you play GameCube and Wii games on your iPhone or iPad. With DolphiniOS, you can enjoy classics like Super Mario Sunshine, The Legend of Zelda: Twilight Princess, Pikmin, and more.

DolphiniOS also allows you to upscale the resolution of your games, and some Wii games actually look like proper modern titles after this visual upgrade.

Unfortunately, DolphiniOS is not available on the App Store, meaning you will have to sideload the app using AltStore, which can be a bit of a hassle. On top of this, if you have an older device, you should note that your experience might not be great since Wii emulation can be pretty demanding on the hardware front.

Once you install DolphiniOS, you can take your gaming experience to the next level by taking advantage of its support for cheats and save states.

Download:DolphiniOS (Free)


3 PPSSPP

iPhone Running Assassin's Creed: Bloodlines on PPSSPP
Raghav Sethi/MakeUseOf

PPSSPP is dedicated to emulating PlayStation Portable (PSP) games across various platforms, including your iPhone and iPad. While it should be able to run any PSP game on your device, older iPhones might not run the games at full speed.

Perhaps one of the best features of PPSSPP is that it lets you transfer existing saves from your real PSP. This means you can pick up where you left off in games like GTA: Vice City and Assassin’s Creed: Bloodlines.

I highly recommend connecting a controller to your iPhone when using PPSSPP to emulate games. The touch controls aren’t great, especially since the PSP has two shoulder buttons that don’t fit well on a touchscreen.


One drawback of PPSSPP is its lack of proper support for cloud saves, making it a bit challenging to switch between multiple devices while playing games.

Download:PPSSPP (Free)

4 RetroArch

iPhone Running Pokémon FireRed Using RetroArch
Raghav Sethi/MakeUseOf

If you’ve ever tried emulating games on other platforms before, you may have heard about RetroArch. It’s the most extensive all-in-one emulator available for your iPhone and is regarded as the go-to emulator within the retro gaming community.

Besides PlayStation, Game Boy, and SNES emulators, RetroArch also supports older platforms, such as:

  • Atari
  • DOS
  • MSX
  • Neo Geo Pocket
  • PC Engine
  • Sega Genesis


RetroArch uses the same gamepad for all the different emulators included. This makes it easy to get comfortable with the touchscreen layout no matter which game you’re playing, which is possible because of RetroArch’s wide support.

RetroArch’s Netplay feature allows you to connect to other players for multiplayer sessions. This works across multiple platforms, so you can even play with Android or PC users as well.

Unfortunately, setting up RetroArch can be complicated due to its extensive customization options. However, it’s an excellent choice if you’re looking for a multipurpose emulator.

Download:RetroArch (Free)

Emulators offer a fantastic way to relive your favorite retro games on your iPhone. Whether you’re a fan of Nintendo classics, PlayStation hits, or games from other platforms, there’s an emulator that fits your needs.


While setting up some of these emulators may require some effort, the reward of having a vast library of ad-free games at your fingertips is well worth it. So, explore these options, find your favorite, and dive into the world of retro gaming on your iPhone!

4 Things I Would Never Use to Clean My MacBook Again

Key Takeaways

  • Avoid nail polish remover, even if it contains isopropyl alcohol, as other ingredients can damage your Mac’s finish.
  • Don’t use general-purpose cleaning sprays directly on your Mac. Opt for a microfiber cloth dampened with water or a 70 percent isopropyl alcohol solution for tough stains.
  • Paper towels, tissues, and random cloths can scratch your Mac’s surface and leave lint. Stick to a lint-free microfiber cloth for safe cleaning.


Cleaning your MacBook with the wrong items can lead to disastrous results, such as discoloring its aluminum frame or stripping the oleophobic coating off the screen. Here are some lessons you can learn from my experience.


1 Nail Polish Remover (or Any Alcohol-Based Solution)

Apple says the only way to clean your Mac is to use a damp, lint-free microfiber cloth or a 70 percent isopropyl alcohol (IPA) solution for tougher stains, like smudges and fingerprints.

With that in mind, I bought nail polish remover wipes that contained isopropyl and another unspecified alcohol to clean off tough stains. I thought it would be a good way to get some cleaning solution onto my Mac and then wipe it off with a microfiber cloth.

Initially, the nail polish remover wipes seemed to work fine, effectively removing fingerprint and food stains. However, one fateful day, I left the wipes on my rose gold MacBook Air for a few minutes while engrossed in work. When I finally remembered and rushed to wipe it off, I noticed that my once vibrant rose-gold MacBook had discolored into a gray hue.


Dreamchild Obari/MakeUseOf

Even though some isopropyl was in the mix, the regular rubbing alcohol in the nail polish remover corroded with the aluminum and discolored its surface. The lesson here is that non-isopropyl alcohol cleaners—even when combined with IPA—will discolor your Mac.

I used a nail polish remover because its label said it didn’t have acetone. However, most nail polish removers contain this compound, which is highly volatile and will discolor your Mac. Nail polish remover is just one of those
products you should never use to clean your computer
.

2 General-Purpose Cleaning Spray

Aerosol spray hovering over a MacBook
Dreamchild Obari/MakeUseOf


You should avoid using cleaning sprays altogether unless the product’s packaging specifies it’s safe for your Mac. You should also never spray it directly onto your device; instead, spray it onto a microfiber cloth and use the damp cloth to wipe down your Mac.

I ignored both cleaning tenets by purchasing a foam cleaning agent spray and spraying the aerosol can directly on the Mac. I thought it would be fine since my Mac’s aluminum is technically metal, and the label said it was safe for metal and plastic computer surfaces. I was wrong, and the worst happened.

I would hear the MacBook power on, but the screen no longer worked; the cleaning agent had seeped into the internals and damaged its connection. The Apple agent at the Genius Bar said it showed signs of water damage, which isn’t covered by warranty. Another Mac had bitten the dust thanks to my negligence.


Additionally, the foam cleaning agent didn’t clean my Mac’s surface well in the first place; it left a sticky residue that attracted even more dirt and fingerprints.

3 Tissue Paper, Paper Towels, and Random Cloths

Paper towel in a hand hovering over a MacBook
Dreamchild Obari/MakeUseOf

If you’re like me, you probably eat a lot around your Mac. When I take a break between work sessions, my work desk pretty much serves as a dining table. Whenever I used a paper towel, tissue paper, or even my T-shirt to wipe food particles that ended up on my Mac, it either left micro-scratches or lint residue.

Micro-scratches may not be noticeable initially, but they become more obvious as you add more. Your Mac’s screen is especially sensitive to this, and repeated cleaning will remove its anti-reflective and oleophobic coating. This compromises the display quality and reduces your Mac’s resale value.


The second problem is lint. Apple specifies “lint-free” when describing what micro-fiber is best for cleaning a Mac. Paper towels and tissue papers are abrasive and leave small fibers (lint) wherever they touch. The result is that your Mac doesn’t end up looking clean afterward. Doing this can also compound under your keyboards over time and dampen your typing experience.

4 Toothbrush (or Any Hard-Bristled Brush)

I’ve had some pretty tough stains on my Mac that I struggled to remove. One of the first things I grabbed to remove them was a repurposed toothbrush without realizing it was a hard-bristled brush. Unfortunately, it didn’t remove the stain without leaving some scratches on the Mac’s surface first.

In short, avoid any hard-bristled brush—toothbrush or not. Apple doesn’t recommend brushes for cleaning your Mac, but a soft-bristled, high-quality brush could sweep the gaps between your keyboard and remove particles from the speakers. Anything else might lodge debris deeper into crevices or even eject their own fibers.


There are many other things I didn’t list here that will damage your Mac, like soap, excessive water, and bleach. However, these are the items I will surely avoid from personal experience. You should read Apple’s guide on how to clean your Apple devices to learn more about what to avoid when cleaning.

The Best iPads of 2024

It’s no secret that Apple’s lineup of iPads is unanimously loved by creators and is among the best tablets around. They’re sleek and durable, have incredible displays, and the latest iPad Pros even rock Apple’s M4 chipset, the same one inside Apple’s MacBook and iMac. Whether you’re an artist looking for an upgrade, need a work device, or just want it for general use, you can find the best iPad for the job below.


Tyler Hayes / MakeUseOf

The Apple iPad Pro 13 could just as easily fit here, but given that the Apple iPad Pro 11 has a mere two inches smaller display for notably less, the iPad Pro 11 takes the spot. Unless you’re an artist or plan to use the iPad Pro as your main workstation, the size won’t make a difference and is still a very comfortable experience.

Being the thinnest iPad yet has its perks, too. Compared to the 13-inch model, the iPad Pro 11 is a third of a pound lighter, making it easy to hold and transport. More important is the hardware underneath. The last iPad Pro model had the still powerful M2 chipset, but the iPad Pro 11 (2024) utilizes the same M4 processor in Apple’s iMacs and MacBooks. It’s a powerhouse for productivity, art, editing, and even gaming.


apple ipad pro 11-inch model (2024)

Apple iPad Pro 11 (2024)

Best Overall

With a beautiful 11-inch display and Apple’s M4 chipset running the show, the iPad Pro 11 can easily handle the latest art programs, editing, and even games when it’s time to relax.

Pros

  • Powerful M4 chipset
  • Lightweight and thin
  • Storage options between 256GB and 2TB

iPad Mini with an Apple Pencil on top attached magnetically
Kris Henges / MakeUseOf

Full disclosure: the Apple iPad (10th Gen) is more affordable than the Apple iPad Mini (6th Gen). However, the Mini takes the spot as the best budget iPad because of its A15 Bionic chipset, which has more staying power than the iPad’s A14 Bionic chipset. Additionally, the gap in price between the iPad Mini and the iPad is much smaller than that of the iPad Mini and the iPad Air (5th Gen).

If you plan on creating, editing, or kicking back with a game, that extra processing and graphical performance will ensure a much smoother experience without breaking the bank. Another big plus of the Apple iPad Mini (6th Gen) is its battery life. Continuous use gives you 10 hours of life, which is more than enough for a single work or school day. And yes, the iPad Mini (6th Gen) works with both the Apple Pencil and Smart Folio.


An iPad Mini 6th Gen

iPad Mini 6th Gen

Best Budget

$400 $499 Save $99

Whether you’re on a tight budget or need an entry-level Apple tablet, the iPad Mini is the perfect baseline experience. It’s lightweight, incredibly compact, and all-around powerful tablet for general use.

Pros

  • Ideal entry model
  • Good battery life
  • 12MP camera on front and back
Cons

  • 8.3-inch display is just barely enough screen real estate

woman drawing on apple ipad air 13 with apple pencil
Apple

As an artist, you can never have enough screen real estate. With 13 inches of headroom, the Apple iPad Air 13 gives you as much space as the latest iPad Pro while maintaining a lightweight build and thin profile.

More importantly, the Apple iPad Air 13 also supports the new Apple Pencil Pro, giving greater features like squeeze and barrel roll. Pair that with the extra screen space and portability, and you have a very comfortable drawing experience. The M2 chipset is still relevant, at least more so than the A15 and M1.

view of display to the apple ipad air 13 (2024)

Apple iPad Air (2024)

Best for Drawing

With 13 inches of screen real estate, the Apple iPad Air is an exceedingly comfortable experience for artists and designers. It’s even compatible with the Apple Pencil Pro, which adds several new features.

Pros

  • Comfortable drawing experience
  • Compatible with Apple Pencil Pro
  • Great battery life

Person holding the 10th Generation iPad to show the back
Hannah Stryker / MakeUseOf


If you need an e-reader that packs a punch, the 10th-generation Apple iPad is among the most inexpensive options. What was once top-of-the-line can now be easily repurposed as your very own media machine, from catching up with the news to reading the latest novel.

With its 10.9-inch display, reading is quite an enjoyable experience. It suits books just as much as comics, magazines, and even newspapers. What’s particularly nice is the Apple iPad (10th Gen) will adjust naturally to the ambient lighting, so your eyes won’t strain against a screen that’s too bright or too dark.

Apple iPad 10th Generation tag image

Apple iPad 10

Best for Reading

$329 $349 Save $20

Although it’s fitted with Apple’s A14 chipset, that’s enough to make the 10th-gen Apple iPad the ideal tablet for reading. Its 10.9-inch display with True Tone technology makes for a comfortable reading experience, no matter the format.

Pros

  • True Tone adjusts the screen based on ambiance
  • 10.9-inch display is more than enough for reading
  • Inexpensive compared to recent models
Cons

  • Lacks an anti-glare coating

side view of the Apple iPad Pro (M4) in magic keyboard
Tyler Hayes / MakeUseOf


Wielding the mighty M4 chip and a 13-inch display, it’s incredibly hard not to recommend the latest Apple iPad Pro 13, especially when you consider the smallest MacBook Air matches it in size, but features a slower processor. Of course, you’ll still need a Magic Keyboard, but once you have that, the iPad Pro 13 will rival even the MacBook Pro.

The Apple iPad Pro 13 has one of the best-looking displays, given that it combines OLED technology, ProMotion, and a wide P3 color gamut. In practice, the visual experience is a feast for the eyes, especially if you’re working with colors. On top of that, it isn’t a very reflective display on its own, but you can opt for more with nano-texture glass.

The storage options for the Apple iPad Pro 13 are also quite plentiful, with a choice between 256GB, 512GB, 1TB, and 2TB. Unfortunately, the prices between the storage options are rather expensive, so I recommend checking out the best portable SSDs if you need more than 512GB.

apple ipad pro 13 inch tablet with picture of a field of flowers

Apple iPad Pro 13 (2024)

Best Laptop Replacement

Thanks to its M4 chipset and 13-inch display, the Apple iPad Pro 13 can go toe-to-toe with the MacBook Pro, especially when you saddle it with the Magic Keyboard.

Pros

  • Powerful performance that rivals the MacBook Pro
  • 13-inch display is plenty for productivity
  • Only 1.28 lbs

FAQ

Q: What are the current iPad models?

There are two new models as of 2024: the iPad Pro, which utilizes the M4 chip and the iPad Air, which uses the M2 chip. Both have an 11-inch and 13-inch variant.


Q: Can an iPad replace a laptop?

Yes, absolutely. This is especially true when you consider that the latest iPad Pro has the same M4 featured in Apple’s MacBooks and iMacs. On that same note, Apple has a detachable Magic Keyboard for their lineup, turning compatible tablets into laptops. And if that wasn’t enough, a lot of popular creative software has made its way onto Apple’s App Store ecosystem, like Adobe Photoshop and Procreate.

Q: How do I turn off my iPad?

Using the physical buttons, you can turn off your iPad by holding the top button (the one you put the tablet to sleep with) and either of the volume buttons. When the slider appears, drag it to turn it off completely.

Q: How do I take a screenshot on an iPad?

Using the same buttons you would use to turn off your iPad—the top button and either volume button—but rather than holding them in, you simply press them together at the same time.

However, if your iPad has a Home button, then you’d press the top button and the Home button at the same time instead.

You can also go into Settings and shut down your iPad under the General option.


Q: Do I need an Apple Pencil with an iPad?

No. Apple Pencils are entirely optional. That said, if you take notes or have any artistic talent that you’d like to explore, having an Apple Pencil makes it exponentially easier.

How to Use AirPlay on Windows

Key Takeaways

  • AirPlay on Windows allows screen mirroring for presentations and content viewing.
  • X-Mirage is a user-friendly app that serves as an AirPlay receiver for Windows PCs.
  • Other alternatives like LonelyScreen and 5KPlayer offer similar AirPlay features for Windows users.


AirPlay isn’t just for Apple devices. Windows users can easily join in on the fun, sharing screens and streaming media from their iOS devices to their PCs. Here’s how to use AirPlay on Windows.


Can You Even Use AirPlay on Windows?

AirPlay is a wireless streaming technology similar to Miracast. It offers several advantages, the main one being convenience. You tap AirPlay, select the device, and that’s it. However, AirPlay is developed by Apple, and like all things Apple, it doesn’t like talking to other systems.

Although you can use AirPlay on some TVs, that’s only because the manufacturers had to pay Apple for this service. Aside from that, AirPlay doesn’t work on non-Apple devices. However, due to the freedom developers have on Windows, plenty of workarounds are available.

While you can’t modify your iPhone to list Windows devices for AirPlay, you can certainly install an app on your PC to act like an AirPlay receiver. Apps like X-Mirage have no-nonsense interface and make using AirPlay on Windows incredibly easy.


How to Screen Mirror with AirPlay on Windows

Screen mirroring with AirPlay on Windows allows you to display your iOS device’s screen on a PC monitor. This is particularly useful for presentations, demonstrations, or to simply enjoy content on a larger display.

First, download and install X-Mirage on Windows. X-Mirage provides a 7-day trial with access to all features. While you can bypass the time limit, it is reasonably priced at $20. If you plan to use AirPlay on Windows frequently, it’s definitely worth the investment.

After installation, you should see the X-Mirage icon in the system tray. Next, ensure both your iOS device and Windows PC are connected to the same Wi-Fi network. This is crucial for AirPlay to function properly.


On your iOS device, swipe down from the top-right corner to open the Control Center and tap the Screen Mirroring button. A list of available AirPlay devices will appear. Choose X-Mirage[your PC’s name] from the list. You can also customize the AirPlay name from X-Mirage.

Your iOS device’s screen should now be mirrored on your PC monitor. Once connected, you can interact with your iPhone or iPad as usual, and all actions will be mirrored on your PC screen. The X-Mirage app allows you to adjust the mirroring quality and other settings.

Screen Mirroring on Windows with XMirage


How to Stream Music and Movies with AirPlay on Windows

Streaming music and movies with AirPlay through X-Mirage is seamless. It allows you to leverage your PC’s superior audio capabilities or enjoy content on a larger display while maintaining control over playback.

iTunes used to be the easiest way to cast music from your iOS device to Windows, but the app is now mostly defunct and doesn’t support AirPlay anymore.

As before, ensure X-Mirage is running on your Windows PC and that both devices are on the same Wi-Fi network. Open your preferred music or video app on your iOS device and start playing the content you wish to stream. Tap the AirPlay icon (triangle icon with concentric circles) within the media app. If you’re watching something in your gallery, the AirPlay option is in the Share menu.


Once you tap AirPlay, a list of available AirPlay devices will appear. Choose X-Mirage[your PC’s name]. The audio or video should now be streaming to your PC.

Streaming music on Windows with Airplay

X-Mirage acts like an AirPlay receiver, capturing the media stream from your iOS device and playing it on your PC. You can control the playback (play, pause, and skip) from either your iOS device or the X-Mirage interface on your PC. To stop streaming, simply select your iOS device as the audio output from the AirPlay menu.

Other Ways to Use AirPlay on Windows

While X-Mirage is a robust AirPlay receiver for Windows, several alternatives offer similar or even additional features.

LonelyScreen

LonelyScreen is a simple AirPlay receiver for Windows. It allows you to mirror your iOS device’s screen and stream audio/video content to your PC. While it lacks some advanced features found in X-Mirage, it’s a good option for basic AirPlay functionality.


5KPlayer

5KPlayer is a versatile media player that doubles as an AirPlay receiver. It supports various video formats and allows you to mirror your iOS device’s screen, stream media, and even download online videos. Its comprehensive feature set makes it a compelling alternative to X-Mirage.

Reflector 4

Reflector 4 is another premium AirPlay receiver known for its sleek interface and powerful features. It allows you to mirror multiple devices simultaneously, record mirrored screens, and stream to various platforms like YouTube and Twitch. Its content creation and sharing focus makes it a popular choice among educators and streamers.

Kodi

Kodi is a free and open-source media center software that can be extended with add-ons to support AirPlay. With the right configuration, Kodi can act as an AirPlay receiver, allowing you to stream media from your iOS device to your PC. It’s a good option for users who already use Kodi for their media management. Additionally, Kodi is available on Android TV and you can use it to turn your TV into an AirPlay receiver.


AirDroid

AirDroid is primarily a file transfer and screen mirroring tool for Android devices. However, with the AirDroid Cast feature, you can also mirror your iOS device’s screen to a local webpage and access it from any device, like your Windows machine.

Using AirPlay on Windows can greatly improve your media experience and give you more flexibility in how you interact with your iOS devices, regardless of which application you choose.

Is Arc on Windows Really the Chrome Replacement It Promises to Be?

Key Takeaways

  • Arc Browser is a new take on web browsing, focusing on user experience and efficiency.
  • The Windows version lacks features present in the macOS version but offers unique tools like Spaces, Peek, & Sidebar compared to other browsers.
  • Arc is not yet a full Chrome replacement, but its distinct browsing experience is worth a try for users seeking efficiency.


We haven’t seen a lot of innovation in the web browser space since Google cracked the code with its Chrome browser (and the subsequent Chromium browsing engine). Every successful browser has essentially been some derivative of it — adding certain features to make itself stand out.

The Browser Company has decided to try something new. It’s called the Arc Browser, and it might just be the Chrome replacement you’ve been waiting for. Like everything else in the tech space, it comes with a catch.


What Is Arc Browser and Why Is It Different?

Arc is the shiny, new kid on the internet browser block. It’s a browser that’s built from the ground up with a design-first mindset. Instead of trying to be the fastest or the safest, Arc tries to be the smartest instead. This means that you get to focus more on the web page you’re visiting than be distracted by the dozens of other UI elements littering your browser window.


Under the hood, Arc is powered by the same Chromium browser engine that runs Chrome, Edge, Brave, and countless other browsers. However, it’s much more than just a pretty skin on top of Chrome. The developers have put in some serious work and thought to ensure using Arc is a calming experience.

Traditionally, web browsers have been treated as tools for viewing web pages. Arc, however, wants to go deeper than that. It’s trying to become what the folks at TBC call the operating system of the Internet. This shows in Arc’s design the first time you launch the browser. Although the user experience isn’t quite the same on Windows as on macOS (more on this later), the browser starts with a simple interface with a blank screen and a command bar to get you started.


Image of Arc browser home page on a desktop

It’s so different from a regular web browser that you’ll have to get used to it. There isn’t even a homepage. TBC has been very keen on removing anything from the browser that doesn’t add to the user experience, even if it means axing features that you might think are obvious must-haves.

Once you get through the initial adjustment, Arc’s reinvented use of tabs, bookmarks as app launchers, a completely new sidebar concept, and loads of other tricks will make you wonder how you were using any other browser in the first place. There are plenty of reasons why you should try out Arc.

Arc Browser Features and Getting Started

If you’re a macOS user, chances are you’ve already heard about or even used Arc. However, users had to wait a long time for the browser to be released on Windows. You can now download Arc for Windows from its website. Here are the main features you get on Arc for Windows right now that make it stand out.


Spaces

Spaces in Arc is a new take on profiles that allows you to keep different parts of your internet browsing separate. You can create as many as you’d like and switch between them with a gesture, a keyboard shortcut, or clicking through the space icons at the bottom of the sidebar.

Each space comes with its own set of pinned and daily tabs and themes to help you tell the difference between them. Depending on how many tabs you keep open every time you use your browser, this can massively help reduce clutter.

arc-browser-on-windows-spaces

For example, your work space can have specific pinned and active tabs throughout the day. Should you need to do something on a personal note, you can just switch to your personal space without disturbing the tab structure that you’ve set up for work. This ensures you always pick up where you left off across different avenues of your work or personal use.


Peek

Peek is a very simple feature, but so useful that it will make you wonder why no other browser has it. When you press the Shift key and click on a link, it opens in a smaller window that lets you “peek” at the page. You can then either expand it to a full tab or click anywhere else to dismiss it.

arc-browser-on-windows-peek-feature

This is one of the best Arc features for someone like me who clicks on hundreds of links a day just to look up some information. It avoids turning your browser into a burning mess of tabs, and only temporarily opening tabs also improves the browser’s performance.


Pinned and Favorite Tabs

When switching from another browser, the difference between pinned and favorite tabs isn’t obvious right off the bat. Simply put, favorites are sites you might use regardless of what you’re doing in the browser. This includes tabs like your calendar, email, music app, and others. These are accessible across spaces and appear as individual icons on the top of the sidebar.

Pinned tabs, on the other hand, are a cross between an app and a bookmark. If you’re on a pinned tab and click a link leading to an external page, it opens up in a peek window instead. You can go through the page and dismiss it without leaving the original tab or website.

Arc’s sidebar is where most, if not all, of the browser’s activity happens. It keeps track of your pinned and unpinned tabs, which space you’re in, what’s going on with the browser, and other information. It can be quickly toggled using the Ctrl + S keyboard shortcut.

arc-browser-on-windows


When the sidebar is hidden, you’ll have an uninterrupted web page view. It’s a great way of containing necessary information without cluttering the browser’s interface too much.

Performance and Efficiency Benefits

Even though Arc for Windows lacks much of its promised functionality, it offers surprising performance and efficiency benefits, especially considering the program was in closed beta not so long ago.

I’ve used Microsoft Edge for close to five years now, and even though it’s optimized for Windows, Arc provides significantly more battery life when used on a laptop. Arc may not be the fastest browser around, but it isn’t slow, either. And, of course, TBC keeps adding more performance and stability improvements in almost every update.

So What Is the Catch?

If you’ve made it this far and think that Arc is the perfect browser to replace your memory hog that can’t keep 10 tabs open at the same time, you’re not wrong. But it isn’t quite there yet, either.


Many of the features that make Arc what it is aren’t currently available on Windows. The 1.0.1 update felt like a true first-generation version, and there’s no feature parity with the macOS version at all.

For now, Arc on Windows lacks any of the Arc Max suite of AI features that make the browser a dream to use. While performance and efficiency shouldn’t be an issue, the Arc subreddit is full of complaints about the browser crashing frequently. A software update has since addressed these issues, though.

arc-browser-on-windows-card

Aside from Arc Max features, Arc on Windows doesn’t have full theme support, space icons, Easels, shortcuts, ChatGPT support in the command bar, dev mode, and so on. Even something as simple as a site search doesn’t work in Arc at the moment, despite the option being present in the browser settings. Gestures and shortcuts can also be buggy from time to time.


Part of the reason for this feature parity between Windows and macOS is that Arc was first developed for macOS in Swift, and TBC has since been heavily invested in running Swift code natively on Windows. While that is impressive, it has significantly slowed down the development of Arc on Windows.

Is Arc the Right Choice for You?

Even in its current form, Arc provides a unique enough browsing experience to warrant switching from your existing browser. However, it is a significant departure from your existing workflow, especially if you’re a Chrome or Edge user, so the switch won’t be easy.

Owing to its current lack of features, I don’t think Arc is the Chrome replacement it claims to be on Windows. Yet. New features are often being added, and TBC has been quick with updates. If you are looking for a different browsing experience than what you might be used to, Arc for Windows is definitely worth checking out.

Black Screen at Boot on Windows? Here’s How to Fix It

Key Takeaways

  • Check the cables connecting the CPU to the monitor and ensure they are firmly plugged in.
  • Unplug all external devices and verify that the projection settings are correctly configured.
  • Reinstall the display drivers or perform a system restore if Windows keeps showing a black screen at boot.


A black screen at boot can be frustrating. With no visible information on the screen, identifying the underlying problem can be tricky. However, there are a few things you can do to fix the black screen issue on Windows 10 and Windows 11.

1. Check If Windows Is Responsive

First, it’s important to check that your computer and Windows are booting. To do this, press Win + Ctrl + Shift + B. This will restart your graphics driver and produce a beep sound.

If you hear a beep, then Windows is responsive. However, if you don’t hear anything, it means that your computer isn’t booting. In that case, you might need to repair a PC that won’t boot or fix a black screen of death.

2. Check Your Monitor and Cables


This may seem simple, but it’s crucial to check the display connection if you haven’t already. Start by removing all your monitor cables, and then firmly plug them back in to ensure they are securely connected. Also, make sure your monitor is actually turned on.

If you can, use another monitor connection. For example, move from HDMI to DisplayPort. Alternatively, use a new cable. This will help you determine whether the issue lies with the monitor port or the cable. You can also try connecting your monitor to a different computer, if available, to check if the monitor itself is faulty.

3. Unplug Your External Devices

Turn your computer off and disconnect all external devices, including your mouse, keyboard, external hard drive, and anything else. Restart your computer and see if you still get the black screen. If this solves the problem, plug each device in one at a time until you find what’s causing it.

Once you find the problematic device, try updating its drivers, and you might have to find and replace specific drivers if necessary.


4. Adjust Projection Settings

It’s possible that your system’s projection settings are misconfigured. For example, if your display is set to project onto a second screen that doesn’t exist, your monitor might display a black screen.

windows 11 projection settings

Press Win + P to bring up the Projection menu. From top to bottom, the options are PC screen only, Duplicate, Extend, and Second screen only. While the first is the default, yours might not be set to it.

Press P to highlight the next option, and Enter to select it. Since you’ll likely be trying this while the screen is dark, it will require some trial and error. Repeating this four times will return it to the original setting, though hopefully, one of the settings along the way will restore your display.


5. Reinstall Display Drivers

To reinstall display drivers, you’ll need to boot into safe mode. The method you need depends on various factors, so follow the appropriate steps below and then continue reading to discover how to reinstall your display drivers.

windows 10 advanced options

A. You Can See the Login Screen

  1. Restart your computer.
  2. At the login screen, hold Shift, click the Power icon, and select Restart.
  3. Once restarted, select Troubleshoot > Advanced options > Start-up settings > Restart. Again, your system will restart and present you with different options.
  4. Press F5 to select Safe Mode with Networking. If that doesn’t work, follow the prior steps, but select F3.

B. You Can’t See Anything and Have a Recovery Drive

Good job if you already created a recovery drive before this problem occurred!

  1. Shut down your system and then connect the recovery drive.
  2. On the Choose an option screen, select Troubleshoot > Advanced Options > Start-up Settings > Restart.
  3. Once restarted, press F5 to select Safe Mode with Networking. If that doesn’t work, follow the prior steps, but select F3.


C. You Can’t See Anything and Don’t Have a Recovery Drive

You need access to a working computer to create Windows 10/11 installation media. Download Windows 10 or Windows 11 from Microsoft and then use this to create installation media. If you need help with that, see our guide on making a bootable ISO. You then need to set the boot order in the BIOS to read your installation media first. Again, if you need a hand, see our guide on how to change the boot order.

Then, on the installation screen:

  1. Select Repair your computer.
  2. Select Troubleshoot > Advanced Options > Start-up Settings > Restart.
  3. Once restarted, press F5 to select Safe Mode with Networking. If that doesn’t work, follow the prior steps, but select F3.

How to Reinstall Your Display Drivers

Once you’re in Safe Mode, follow these steps:

  1. Press Win + X and click Device Manager.
  2. Double-click the Display Adapters category.
  3. Right-click your graphics card and select Properties. Go to the Driver tab.

If available, click Roll Back Driver, select a reason, and click Yes. This will take you back to the previously installed driver.


If this doesn’t work or isn’t an option, select Uninstall to remove the driver completely. Then, go to the manufacturer’s website (likely AMD, NVIDIA, or Intel) and install an older driver or contact them for support.

6. Clean Inside Your Computer Case and Assess Your Internal Hardware

Turn your computer off, unplug everything, and open it up. Look over all your components for signs of damage. Remove each component and reseat it, ensuring it’s firmly secured.

If you’ve recently upgraded one of the components inside your computer, such as the graphics card or RAM, ensure it is installed correctly. You may have to contact the manufacturer if the part is faulty.

The black screen issue can also occur if the power supply unit (PSU) is not supplying enough power to support the new parts. Use an online power supply calculator to verify if your PSU is sufficient for the current setup.

graphic card


Something else to do is to ensure that your computer is not overheating. Keeping your PC cool extends the lifespan of your components and helps prevent the black screen issue.

Grab a microfiber cloth and air blower and use this to clean out all dust and dirt inside your computer, especially from the fans. It’s best to do this outside if you can since it will kick up a lot of dust. Try not to let it settle back inside the computer.

7. Use the Startup Repair or Perform a System Restore

As the name suggests, running the Startup Repair tool can help fix issues your Windows PC may be encountering while booting up. This tool will scan your system for any issues that may trigger the black screen at boot and try to fix them.

If the issue remains even after running this, perform a system restore as a last resort. This will allow Windows to revert any recent changes made to your system that could be causing the black screen issue during boot.

Your Cheap Smartphone May Come With Serious Privacy Issues

Key Takeaways

  • Cheap smartphones may compromise your privacy by selling your data to subsidize the cost of hardware.
  • Some brands collect extensive data without permission, including personally identifying information, putting users at risk.
  • To protect privacy, invest in secure hardware like an iPhone or consider installing privacy-focused ROMs like CalyxOS.


For years, reports have said that cheap smartphones are shipping equipped with spyware and even malware. Unfortunately, that situation remains unchanged, but it’s not always clear if what you’re buying is a risk. Here’s what you need to know about cheap smartphones—and how you can shop for a safe new device.


Why Are Cheap Smartphones Bad for Privacy?

Gavin Phillips/MakeUseOf

Simply put, there’s a limit to how cheap producing a phone can be, and at a certain price point, you’re selling your privacy to save a few extra dollars on your new smartphone. Unfortunately, you’re not walking out of it with a good deal—the data stolen from you is far more valuable than the new smartphone.


According to the University of Edinburgh, some brands, including OnePlus, Oppo, Realme, and Xiaomi, reportedly harvest massive amounts of data from Chinese users without awareness or permission. While cheap phones sold internationally don’t use the same data collection, they come loaded with third-party apps that may also harvest data.

American-made brands aren’t always better. Blu, a Miami-based smartphone brand, has been caught twice in privacy scandals. While both incidents were likely unintentional, as they involved third-party vendors harvesting data and sending it to Chinese servers, the negligence involved put hundreds of thousands of users at risk.

You might pay more for a phone with better privacy, but you’re avoiding the data sale that makes hardware-subsidized smartphones so ubiquitous. iPhones are the king of privacy in terms of protecting you from external attacks, but installing an Android ROM like CalyxOS or GrapheneOS will give you the best privacy overall.


What Data Do Cheap Smartphones Harvest?

Cheap smartphones harvest a variety of data. Most data isn’t directly harmful and focuses on data such as IMEI numbers and MAC addresses. However, researchers looking into OnePlus and other brands also found that, within China, phones collect information about each user’s phone number, app usage patterns, performance data, call and SMS history, GPS coordinates, and contact numbers.

Much of this data is Personally Identifying Information (PII). It isn’t clear what these brands intend to use the data for, but it’s best to ensure that companies receive as little of it as possible—you never know who might see your data or how someone might use it later on. For that reason, it’s important to be selective about who you buy your phone from and what software you use.

How to Check Your Smartphone for Spyware

If you’re concerned that your phone might not be as private as you thought, it’s vital to check for and remove any spyware on the device. Unfortunately, some budget phones have suspicious apps that you can’t remove. In some cases, you might need to remove the operating system altogether. To remove spyware:


  • Remove any apps you don’t recognize.
  • Navigate to Security and privacy > Other security settings > Device admin apps to check for apps with admin permissions.
  • Use an anti-malware app to run a scan for spyware.
  • Watch for symptoms of spyware, like constant battery draining or sluggish performance.
  • Look for strange behaviors like random shutdowns or reboots.

If malware scans and manual software searches aren’t turning up any obvious spyware, but you’re seeing possible symptoms of spyware, activating safe mode is the best way to check the root cause. Safe mode prevents third-party apps from running, so if your phone suddenly works on safe mode, you’ll know that you probably have spyware installed.

Turn safe mode on android screenshot


You can activate safe mode by holding your power button until the reboot options appear. These options vary by device, but you can generally boot to safe mode by long-pressing Power Off and waiting for a Reboot to Safe Mode option to appear. Once an option appears, tap on it and allow your phone to restart.

After your phone restarts, you should try using it and observe whether the same symptoms of spyware are still there. If they are, your phone might just have failing or underpowered hardware. But if it’s suddenly performing well again, you should navigate to your apps in Settings and uninstall everything you don’t completely trust. You should also:

  • Check your Downloads folder and App List for any files or apps that you don’t recognize
  • Run another scan with your anti-malware app since some malware can bypass detection outside of safe mode

If performance differences in regular and safe mode persist but you can’t fix the issue, you may only be able to resolve it by factory resetting your device. You can usually factory reset your device in Settings by navigating to System > Reset > Factory reset.


Tips for Buying a Spyware-Free Smartphone

Various smartphones displayed in a store
bodnar.photo/Shutterstock

If you intend to buy and use a smartphone off-the-rack, you’ll never achieve perfect privacy, but there are plenty of great contenders. Apple doesn’t offer complete privacy, but you can protect yourself from most external spyware by using an iPhone. Name-brand Android devices are also unlikely to carry spyware.

However, that doesn’t mean companies like Apple and Samsung aren’t collecting some data. If you want perfect privacy, you’ll need to install another operating system. CalyxOS and GrapheneOS are both ideal. Investing in a device with a bootloader you can re-lock, like a Google Pixel, will also ensure that your security isn’t hampered by your effort to protect your privacy.


And remember that every app you install poses a risk to your privacy, no matter what smartphone manufacturer you buy from or what operating system you use. If you’re uncomfortable with Google or Meta, seek alternative apps because no matter what phone and OS you use, they’ll keep collecting any data they’re allowed to.

There will always be risks to your privacy as long as you access the Internet and download various apps, but making the right decisions about what smartphones you purchase and what operating system you use can make an enormous difference.

Here’s How to Spot One

Key Takeaways

  • In toll payment scams, scammers send fake texts about undue toll charges, enticing people to click on the link and expose financial or personal information.
  • These texts create urgency, request payment through unusual methods, threaten recipients with serious consequences, and are generic with no personalized information.
  • If you receive such a text, confirm that it’s fake and report it to the relevant law enforcement authority in your state.


Have you received a text asking you to pay an overdue toll charge to avoid incurring late fees or penalties? While the text could be genuine, scammers are targeting people with similar messages nationwide.

So, how does the toll payment scam work, how can you spot it, and what should you do if you encounter it?


How Does the Toll Payment Scam Work?

koonsiri boonnak/Shutterstock

The toll payment scam is a smishing scam where scammers pose as representatives from a tolling agency and send a text message claiming that the recipient has unpaid tolls. They add a link that directs recipients to a website where they are instructed to pay the overdue toll charges.

Believing the message to be genuine, recipients click the link and are directed to a fake website closely resembling the official website of the toll collection agency, appearing authentic. Unaware, recipients proceed to make the payment through this counterfeit website, inadvertently sending the funds to the scammers.


As a result, victims not only lose their money but also expose their personal and financial information to scammers, who can then use it for fraudulent activities. The FBI, on their official website, recently reported an increase in such scams and instructed drivers to be vigilant. But how can you identify such a scam?

How to Spot a Toll Payment Scam

If you pay close attention, spotting a fake toll payment scam text is simple. Here are a few signs that might indicate you’re dealing with a scam:

  • You haven’t used the route that the tolling agency covers, yet you’re being asked to pay toll charges.
  • You’re being asked to use unusual payment methods, such as cryptocurrency or wire transfers, to pay the toll charges.
  • The text doesn’t mention any details about your vehicle and is generic with no personalized information.
  • The text creates a sense of urgency for paying the unpaid toll.
  • The message threatens serious consequences if you don’t pay the toll urgently, such as canceling your vehicle registration.
  • The URL provided in the text to pay the unpaid toll doesn’t look like the official website of the tolling agency and may have misspelled words.


Try to remain calm and ask yourself these questions; you’ll figure out whether it’s a scam or not quickly.

What Should You Do When You Receive a Toll Payment Message

When you receive a text about an undue toll payment, check the phone number it came from and confirm it belongs to the tolling agency mentioned in the text.

Instead of clicking the link in the text, search online for the tolling agency’s official website. Make sure not to click on any search advertisements, as scammers might use them to direct you to a fake website. Double-check the website’s URL to confirm you’re on the official site.

On the official website, enter your license number and other details to check if there is an overdue toll fee. If there is, call the tolling agency’s official number and speak to a representative to confirm. Only pay the charge if you’re sure it’s legitimate.

If the text turns out to be a scam, file a complaint with IC3, including the phone number you received the text from and the link to the fake website mentioned. Also, delete the fake text and block the number to avoid further phishing messages.


If you’ve already clicked on a phishing link, ensure your phone hasn’t been hacked, change passwords saved on the browser, and take other necessary precautions. If you’ve exposed your financial details, freeze your credit or debit card (or the account itself) to prevent misuse.

Hopefully, you now understand how toll payment scams work and how to protect yourself. Since such scams are on the rise, spread the word to your contacts to raise awareness.

How do microwave circuit board handle chemical exposure?

microwave circuit board handle chemical exposure

Microwave circuit boards are instrumental in enabling precise signal transmission at higher frequencies, facilitating technological advancements across multiple industries. These unique devices require specialized engineering and manufacturing to accommodate the stringent requirements of high-frequency circuitry. Continuous innovation in materials, design optimization strategies, and manufacturing processes holds immense promise for shaping the future of microwave PCBs.

High-frequency circuits must be designed with exceptional attention to detail, incorporating various best practices for delivering superior performance in challenging environments. For instance, adherence to impedance control measures is imperative for matching the characteristic impedance of transmission lines accurately and ensuring seamless signal propagation without distortions or reflections. Strategic signal routing techniques also play a key role in mitigating crosstalk and minimizing ground loops.

Moreover, careful consideration must be given to the substrate material used for microwave circuit board fabrication. Substrate materials with low thermal expansion coefficients and stable electrical properties are preferable for high-frequency applications. Additionally, a good substrate material must also be resistant to moisture and chemicals, particularly in the case of circuits that are exposed to harsh environments.

How do microwave circuit board handle chemical exposure?

Conductor skin effect occurs at higher frequencies when electrons begin to flow along the outer surface of a conductor instead of passing through it. This phenomenon causes unwanted signal loss that can degrade circuit efficiency and impact performance. It can be minimized through careful impedance control and the use of tin or silver plating.

Another common problem associated with the design of high-frequency circuits is coupling between traces. This occurs when the electric fields of two traces overlap, causing them to behave like a capacitor and cause interference between signals transmitted over the same path. This can be minimized by using matched trace lengths and implementing other effective grounding techniques.

The future of microwave PCBs is on a promising trajectory, fueled by innovative technology and the continued demand for reliable communication systems in modern society. Continual research and development initiatives focus on material science breakthroughs that can elevate circuit performance and extend the operating frequency range of current technologies. This will ultimately lead to significant growth opportunities in the global market.

Microwave PCBs must be fabricated with extreme precision, requiring a high level of skill and expertise to ensure flawless operation. Consequently, the demand for highly skilled engineering professionals with expertise in designing high-frequency PCBs is on the rise. To ensure the highest quality, professional engineers should work with a manufacturer that offers a wide range of high-frequency products, including FR4/copper hybrid multilayer PCBs, Rogers microwave PCB, and embedded antenna PCB.

Moreover, the company should provide one-on-one engineering support throughout the project. Additionally, it should offer quick turnaround times on prototypes and bulk production. This will allow the engineer to ensure that the final product meets all the specifications and performance criteria of the application. Finally, the company should also offer a competitive price and fast delivery. PCBONLINE is a leading manufacturer of high-performance RF and microwave PCBs, offering PCB prototyping, design services, and assembly production for a wide variety of industries.

A Beginner’s Guide to Flex pcb board

Flex pcb board

A flexible printed circuit board can be used for a wide range of applications. These include medical devices, wearables and IoT products. However, there are a few important things to keep in mind when designing your next product. Flex PCBs are more complex than rigid ones and require specialized manufacturing and assembly processes. In addition, they can be more expensive to produce than rigid PCBs. These factors make it essential to find a reliable supplier for your next project.

The most common insulator for a flex PCB is polyimide (PI). This material is the cover layer and insulates the copper conductor. It also protects the conductor from chemical attack, and it is solderable. PI is usually finished with electroless nickel immersion gold (ENIG). However, there are other finishes available for flex PCBs. It is important to choose the right finish for your design, as it can affect performance and cost.

For a flex pcb board, it is essential to minimize stress on the copper conductors. To do this, you must avoid overlapping traces and use wide endings at the edge of the board. Moreover, you should offset the conductors to prevent stress concentration that could cause them to break during bending. It is also necessary to route traces perpendicular to the bend line to eliminate stress points.

A Beginner’s Guide to Flex pcb board

Static or dynamic mechanical stresses can damage a flex PCB’s layers. To avoid this, the manufacturer can add stiffeners to specific areas of the flex circuit. This is done by laminating a stiffer material, such as FR4, to the area. However, this will reduce the flex circuit’s signal transmission capabilities.

Flex circuits are generally a bit more expensive than rigid PCBs, due to the additional steps and materials involved in their manufacture. This is especially true for flex and rigid-flex PCBs. However, you can save money by choosing a flexible PCB with a lower layer count and by using a thinner design.

It is also important to consider how your flex PCB will be mounted. You should always use a reliable turnkey PCB manufacturer that can handle flex and rigid-flex circuits. They should have the requisite certifications and registrations to meet industry standards. They should also be able to offer a high quality-to-cost ratio.

A flex circuit is made up of several components, including the flex ribbon, the rigid or flexible sections, and the rigid or flex-friendly connections. The rigid and flex sections of the circuit are typically built up from common PCB laminates. The most common rigid insulation material is FR4, but there are also other types of PCB laminates, such as high-speed or mmWave. For a flex PCB, the rigid sections are usually attached to the flex section by means of pressure-sensitive adhesives (PSAs). In some cases, manufacturers may apply stiffeners to certain areas of the flex circuit to increase its thickness and durability. This can help prevent the flex PCB from breaking during bending.

Can This AI Design Tool Hold a Candle to Canva?

Key Takeaways

  • Stockimg.ai offers AI tools like image generators and logo creation similar to Canva, with unique features like AI upscaling.
  • Stockimg.ai provides affordable plans with native AI tools, ensuring future availability and unlimited projects.
  • Canva has a more flexible subscription plan with a longer free trial and greater design versatility compared to Stockimg.ai.


Canva has many competitors, but in the world of AI, can this tool be Canva’s arch-nemesis? Let’s compare them and find out.


What Is Stockimg.ai?

Stockimg.ai is a browser-based AI design tool. It’s similar to Canva in the things you can create, such as social posts, logos, or background imagery. Additionally, it offers a slightly different selection of design outputs to Canva, like book covers and web interfaces.

Stockimg.ai is a freemium tool. To access the AI tools, you’ll need to pay for the Starter or Premium plans. The first three days are free before the payment sets in, which is reasonably priced.

As an AI-based tool, the majority of anything you can create is done using various AI features. However, like Canva, there are text, template, and element tools, along with brush and background tools, and the ability to upload your own images to use in your design.


What AI Features Does Stockimg.ai Offer?

Non-AI-based tools like Canva or Adobe software still offer great AI features, so when a tool like Stockimg.ai labels itself as an AI design tool, you can expect exciting possibilities when signing up. Here are the AI features available:

1. AI Image Generators

Stockimg AI Generated Book Covers

AI image generation is considered the bare minimum an AI design tool should offer. Technically speaking, most of the AI features in this tool are image generators of sorts. However, the types of image outputs vary enough to be categorized separately. All AI image generators on Stockimg.ai use a text-to-image prompt box.

Image generators offered on Stockimg.ai include:

  • Book cover generator
  • Photorealistic stock imagery
  • Art in over 25 different style choices
  • Logos
  • Illustration in six different styles
  • Wallpapers and posters
  • Illusion creator


Unfortunately, any text in your prompts will be generated with the tell-tale AI gibberish text. There’s no text editing tool, but it’s something you can fix in Canva using its AI tools.

2. AI Logo Generator

Stockimg AI Logo Generator

Using AI to create a logo is a sought-after method. While Canva offers logo templates, they’re not made using AI. Stockimg.ai’s AI logo generator creates some great logo results; however, they are flattened PNGs and non-editable past regenerating a new logo.

PNGs are great for transparency, but not very versatile for the use of most logos. So when creating a logo, you should always export in a vector format for scalability.


Stockimg.ai’s generated logo results are fun and look good. If you only need a logo for a small project or to use as a social media icon, for example, then its AI logo generator is good to try. If you need more versatility, though, try Kittl for generating logos, which produces AI-editable vector logos.

3. AI Upscaling

stockimg upscale AI

This feature of Stockimg.ai is only available to Premium subscribers. While you can scale an image down with ease, it’s much harder to scale up while retaining quality. Upscaling using AI, however, can turn your pixelated images into large, high-quality images in seconds. This tool is helpful for any images you create or have, providing more usability for your images.

4. AI Background Removal

Stockimg Background Removal AI


AI background removal is great when you’ve created logos or want to cut out a subject from the background for various usages. Usually, a background removal tool is a paid-for feature in most software, and that’s the case for both Stockimg.ai and Canva.

Stockimg.ai removes the background quickly, and, once complete, it provides a duplicate version of your image with the background removed. This is helpful as sometimes you still require the original.

5. ChatGPT App

ChitChat AI Bot

Stockimg.ai’s free ChatGPT4 app is provided via Whatsapp rather than the browser, like everything else. The app is called ChatChit AI, and although it’s a cool extra to have, it seems quite removed from the rest of Stockimg’s software.


ChatChit AI offers image generation, sticker generation, audio transcribing, image detection, file conversion, and a story maker. You can also use ChatChit AI via audio messages as well as standard text messages.

6. Web UI Layout Generator

Stockimg Web UI AI Generator

Do you want to design a website layout but don’t have the skills? You can easily use Stockimg.ai’s web UI layout AI generator to create a basic layout.

Although you’ll receive AI-generated web layouts in seconds, you’ll still need other design tools like Figma or a web developer to turn your new design into a working website. This generator creates a visual you can use as a guide for inspiration. You can create a one-page website with Canva, but there are some pros and cons, such as the lack of AI.


7. Quirky QR Design Generator

Stockimg QR Code AI Generator

QR codes are somewhat common in the smartphone era. Black and white maze-like codes are boring to see, though.

Using Stockimg.ai’s QR code design generator, you can create funky or branded designs to go along with your fully working QR code. This is a fun way to make a boring QR link look inviting and stand out against your competitors. Remember to test if your QR code works before you add it to any projects.

What Does Stockimg.ai Do Better Than Canva?

Stockimg Gallery

All tools and features found within Stockimg.ai are native tools, meaning Stockimg.ai provides and develops them. With native AI tools, users can rest assured that their favorite tools will always be available with subtle improvements in the future.


While Canva does have some native AI tools, many of its AI—and other—tools are third-party apps built into Canva. Third-party apps are owned by other companies and may be removed from or added to Canva at any point. Canva apps change frequently, which means you may have to change your workflow as you can’t always rely on specific third-party apps.

Stockimg.ai’s subscriptions are affordable. From the Starter kit onwards, subscribers receive unlimited AI image credits and projects. Unlike Canva, its free plan is pretty useless since it doesn’t offer any AI credits; but you can still use non-AI templates, text, brush, and background tools.

All plans offer a three-day free trial. The Starter plan begins from $9.50 per month with the Premium plan starting from $14.50 per month at the time of writing. The Premium plan includes commercial use for physical and digital products, extra AI tools like upscaling and background removal, and unlimited access to all features. Stockimg’s Premium cost is comparable to Canva’s premium AI features.


Many of Stockimg’s AI results are much better than Canva’s, however, Canva does have better editing tools to fix those generic AI-made mistakes. Stockimg’s web UI generator and book cover generator are unique tools not found in Canva.

What Does Canva Do Better Than Stockimg.ai?

Canva vs Stockimg

Canva has a more flexible subscription plan. Its free plan allows for lots of design, saving options, graphics, and even some of its AI features. Canva’s free trial is longer too, allowing you to get much more use from it than Stockimg’s three-day offering.

When creating designs in Canva, for most uses, you can edit elements, change parts of the layout, duplicate for multiple uses, and save in many formats and quality options. Stockimg has less versatility in its generated images and saving options.


Even though Stockimg’s AI generators can create infinite results, sometimes you just want to browse through a library to select pre-made elements—Canva is great for that. Canva’s pull is that it’s a design tool with some AI features, rather than an AI tool with some design features, like Stockimg.ai.

Does Stockimg.ai Hold a Candle to Canva?

I wouldn’t consider Stockimg.ai a direct competitor of Canva. Although its categories of use are similar—social media posts, posters, illustrations, logos—the ability to personally design and craft your designs is lost in Stockimg.

Stockimg is a great AI generator with multiple uses. It can be used as a personal library of various elements. You can save your generated results and upload them to Canva, wherein you can utilize its extensive tools to create great designs. Overall, I’d say Canva still runs ahead with its huge library of elements, boasting toolbox, and many great AI features.

Which Storage Device Should You Choose?

Quick Links

Key Takeaways

  • SSDs are faster than HDDs and can expedite things like file transfers and booting your computer.
  • HDDs are cheaper for storage but more vulnerable to damage due to their moving components.
  • SSDs offer increased energy efficiency, while HDDs offer better data recovery and have a lower cost per GB.


If you want to purchase a new computer or upgrade your existing machine, you’re probably weighing up SSDs and HDDs. So, what is the difference between SSDs and HDDs, and which is better? Here’s what you need to know.


What’s the Difference Between an SSD and an HDD?

The difference between HDDs and SSDs is simple: Hard Disk Drives (HDDs) store data on a magnetic disk, while Solid State Drives (SSDs) store data in electronic “flash memory.” Because of how different the two storage implementations are, HDDs and SDDs have some major differences:

  • SSDs are much faster at reading/writing files than HDDs.
  • HDDs are easier to damage than SSDs.
  • More storage space is cheaper on HDDs than SSDs.
  • It’s easier to recover data from HDDs than SSDs.

What Is an SSD?

Justin Duino / MakeUseOf


Solid State Drives (SSDs) use NAND flash memory chips and are often smaller than HDDs. Like HDDs, SSDs come with SATA III ports and can easily be installed in the same system. SSDs also have PCIe connections, which can be linked directly to the motherboard and offer significantly faster data transfer speeds.

SSD Averages

Speed

SSDs have average read/write speeds of around 500MB/s. Older SSDs might have read/write speeds as low as 200MB/s, while a high-end M.2 SSD might reach up to 7000MB/s. Reading is faster than writing, and any SSD will be faster over PCIe.

Durability

SSDs have an estimated lifespan of 10 years. They’re highly shock-resistant and can be reliably stored long-term.

Storage

Consumer-oriented SSDs can be found in sizes as large as 30TB. Enterprise server SSDs can be 100TB or larger.

Cost

Storage space on SSDs is more expensive than HDDs. The average cost is between 5 and 10 cents per GB.

Type of User

SSDs are ideal for gamers, video editors, and others who require fast loading. SSDs aren’t recommended for situations where data recovery is essential.

Noisiness

SSDs are completely silent because they lack moving parts. You may hear a quiet buzzing if C-States are enabled.

Installation

Installing an SSD is simple. It can be inserted directly to replace an HDD. If you want to use PCIe, you will need to connect directly to the motherboard.

Power Consumption

SSDs are more power efficient than SSDs because they lack moving parts.

Maintenance

SSDs are relatively low-maintenance but must remain under 15% of their total capacity to function properly.


What Is an HDD?

Hard Disk Drives (HDDs) store and access data by spinning a magnetic disc (known as the platter) and a mechanical read/write arm. Most HDDs use a SATA connection, and modern HDDs use SATA III. HDDs are highly affordable, and premium HDDs with several TB capacities are readily available.

HDD Averages

Speed

The average HDD has a read/write speed between 80MB/s and 200MB/s, but higher- and lower-quality HDDs may have different transfer rates. The fastest HDDs can offer rates as high as 500MB/s.

Durability

HDDs aren’t very shock-resistant because the read/write arm and the platter are susceptible to damage. They last for 3 to 5 years on average but may last longer when stored as long as the HDD is used at least once every few months.

Storage

1TB HDDs are readily available and affordable. Industry-leading HDDs offer capacities as high as 30TB.

Cost

Storage space is extremely affordable with HDDs, with drives frequently costing a cent or less per GB.

Type of User

HDDs are ideal for the data-prioritizing user who wants to maximize space, minimize costs, and avoid data loss.

Noisiness

HDDs generally emit a quiet hum. Old hard drives may become louder, and failing HDDs may begin to make grinding and scratching noises.

Installation

Installing HDDs is a simple process that involves inserting the drive into a bay and connecting the proper SATA cable.

Power Consumption

HDDs aren’t as power-efficient as SSDs because of the energy used by their moving internal parts.

Maintenance

HDDs require minimal maintenance beyond defragging and firmware updates.


Speed

SSDs are generally four times faster than HDDs in terms of both read and write speed, but performance varies by the drives you’re comparing. You can exponentially increase your data transfer rate using PCIe rather than SATA as your SSD interface. Speeds vary by drive, but some performance speeds you might see with mid-range SSDs and HDDs include:

SSD with PCIe (3.0)

SSD with SATA (3.0)

HDD

Read Speed

2500 – 3000 MB/s, theoretical limit of 3500MB/s

300 – 550 MB/s, theoretical limit of 600MB/s

80 – 200 MB/s, theoretical limit of 600MB/s

Write Speed

2200 – 2700 MB/s

300 – 500 MB/s

80 – 160 MB/s

Durability

a hdd platter is completely shattered
Simon Yeo/Flickr


SSDs and HDDs both have durability advantages, so which storage solution you should choose depends on what risks you consider most important to minimize.

Average Lifespan

What Causes Aging

Shock Resistance

Data Recovery

SSDs

5 to 10 years

Erasing and writing. SSDs have an inherent terabytes written over time (TBW) limit.

High.

Less likely to corrupt.

HDDs

3 to 5 years

Motor bearings or other internal components may fail. HDDs may also fail if they are not booted every few months.

Low. Any impacts may damage the mechanical components inside.

Easier to recover data from.

Storage Capacity

SSDs are the clear winner for people who need to use or transfer large files regularly, but HDDs offer some advantages for file storage.

Capacity

File Transfers

Limitations

SSDs

Consumer SSDs can be as large as 30TB.

Fast with PCIe.

Should be kept at least 15% under capacity for performance.

HDDs

Consumer HDDs can be as large as 22TB.

Slow.

Some empty space is recommended to allow defragging.

Cost

Although SSDs are usually considered the expensive option, either can be affordable — it just depends on what you’re measuring the price against. Fast booting is cheaper with SSDs, for example. Here are some examples of what you can expect while shopping:


Types of User

If you’re still torn between SSDs and HDDs, consider your type of user. If you work with video content or play video games, SSDs are the universal winner—their read/write speeds can’t be beat. However, HDDs are best for budget users and anyone who stores large amounts of files.

Noisiness

SSDs are far quieter than HDDs, thanks to their use of electronic storage rather than a spinning disk. They’re perfect for people like musicians, voice actors, and anyone else who needs to minimize noise. HDDs are louder, producing an average of 20-40 dBA of noise while in use.

Installation


SSDs and HDDs can be installed in standard drive bays using SATA or PCIe. Even if you’ve never opened a computer, installing a hard drive is simple when you use the right video to guide you.

Power Consumption

SSDs and HDDs don’t use enough power to make a big difference in your energy bill, but you might need to consider their power consumption if you don’t want to overwhelm your PSU. Here’s what kind of power consumption you can expect from the average HDD and SSD:

Running

On Startup

SSD

0.1-4W

0.1-4W

HDD

4-9W

20-25W

Maintenance

SSDs and HDDs are both easy to maintain, but each requires a few different steps for ideal care. Here’s what you should keep in mind for either device:

SSDs

HDDs

  • Enable TRIM so that your SSD can better handle deleted files and other garbage data.
  • Regularly update your SSD’s firmware.
  • Keep your SSD at least 15% under capacity for performance purposes.
  • Do not defrag your SSD. This will shorten its lifespan.


HDDs and SSDs are the primary storage devices for most computers, and the option you choose really comes down to what you’re storing, how long you want to store it for, and most importantly, how much you want to spend. The price of storage continues to decrease, giving us more options than ever—which is vital, considering how much data we now all produce and need to keep track of.

How the Choice of Substrate Material Impacts PCB and SMT Assembly Processes

Substrate Material Impacts PCB and SMT Assembly Processes

PCBs are the backbone of modern electronics, powering everything from smartphones to 5G networks. And although we often take them for granted, these technological marvels would not be possible without a little-known hero: the substrate material.

The choice of substrate material impacts a number of crucial aspects of the assembly process, including thermal management, signal integrity, and mechanical strength. To ensure that the finished product meets all performance and reliability requirements, it’s vital to thoroughly evaluate each option.

For example, the electrical properties of a substrate material are particularly important. A key factor is its dielectric constant, which determines the material’s ability to store charge. A lower value typically indicates better insulation, reducing signal interference and capacitance between circuit interconnects. Other important factors include the material’s loss tangent, which is its inefficiency in converting electric energy into heat, and the coefficient of thermal expansion (CTE), which defines the degree to which the material expands or contracts with temperature changes.

Regardless of the specific application, the substrate material should also provide exceptional chemical resistance and mechanical strength. These characteristics may be especially critical for circuits that must operate in harsh environments or demanding conditions. Finally, it’s also vital to consider the substrate material’s ability to withstand high temperatures and electrical discharges. For these reasons, many PCB manufacturers use flame retardant (FR) materials as the base for their products.

How the Choice of Substrate Material Impacts PCB and SMT Assembly Processes

To assemble a Printed Circuit Board (PCB), the first step is to apply solder paste to the surface of the substrate. After this, the components are strategically placed on the board using automated pick-and-place machines. Depending on the technology used, these devices can differ in speed and mounting capability, but all must be able to quickly adhere the small components to the solder paste on the pads. The assembled PCBs then go through a reflow solder machine, which heats the paste to melt it and establishes the connections between the components and the substrate. Once the solder is cooled, the assembly is ready for inspection and testing.

The SMT assembly process is more efficient than the through-hole method, as it can be completed in less time and at a lower cost. However, it’s important to work with an experienced and trustworthy PCB manufacturer to ensure that the assembly process goes smoothly. They will be able to provide you with the best solution, based on your design and production requirements. To learn more about the various assembly technologies available, speak to a PCBPit sales representative. They can offer guidance on the best PCB assembly process for your unique needs, and help you choose the right substrate material to suit those requirements. Their expertise can also help you avoid the common pitfalls that can occur during pcb smt assembly.

The primary function of a stencil in PCB SMT assembly is to accurately deposit solder paste onto the PCB. The stencil acts as a mask with openings that correspond to the pads on the PCB where the components will be placed. High precision in this process is vital for several reasons:

10 Ways to Maintain Your iPhone’s Battery Health

The lithium-ion batteries in iPhones naturally degrade with use over time. Therefore, it’s critical to maintain your iPhone’s battery to ensure it lasts as long as possible. Here are several ways to slow down battery degradation on your iPhone.


1 Avoid Maximizing Your Charge Cycles

According to Apple, after roughly 500 charge cycles, iPhones retain only up to 80% of their original battery capacity. You go through a charge cycle when you use up 100% of your iPhone’s battery—for example, you used up 50% yesterday and another 50% today.

So, in general, the less you use your iPhone, the fewer charge cycles you go through and the longer the battery will last. You can check how many battery cycles your iPhone has gone through without even using an app.

Moreover, keeping the device at full charge or completely drained can negatively impact your iPhone’s battery health. For this reason, you should try to keep your device between 40% and 80% battery as much as possible to preserve your iPhone’s battery health.


2 Turn Off Unnecessary Features

To use fewer charge cycles and maintain the battery health of your iPhone, you should turn off any features you don’t absolutely need. For example, we recommend turning off power-hungry features like Background App Refresh. Go to Settings > General > Background App Refresh > Background App Refresh > Off to do so.

To further save battery life on your iPhone and get the most out of a full battery charge, you can turn off the always-on display (if your iPhone has it) and enable automatic brightness so that your iPhone automatically reduces the screen brightness whenever it’s environmentally suitable.

To turn on automatic brightness, head to Settings > Accessibility > Display & Text Size and toggle on Auto-Brightness.


3 Don’t Leave Your iPhone Without Charge for Too Long

DenPhotos/Shutterstock

The battery cells that make up lithium-ion batteries have a limited lifespan, meaning you should take care of your iPhone’s battery if you want to keep reaping the benefits of your device.

One of the biggest killers of a smartphone’s battery is letting it die completely. This is because when a battery cell depletes and is left that way for a long time, it may enter a deep discharge state and never work again.


Luckily, iPhone batteries still keep some reserve charge even when powered off to avoid this problem. But if your iPhone dies, you should remember to charge it again as soon as possible. To avoid this, take advantage of your iPhone’s Low Power mode when the battery is at 20% or lower until you can get to an outlet.

4 Don’t Leave Your iPhone Charged Overnight

Many people charge their phones overnight because it’s the most convenient option. However, charging your phone overnight can be bad because overcharging an iPhone like this can result in a damaged battery and reduce the life of your phone.

Frequent overcharging damages your battery because it forces more current into already full cells than they are designed to hold. It also means your iPhone spends most of the night at 100% charge, which is bad for its battery health.

Luckily, iOS has an Optimized Battery Charging feature to help maintain your iPhone’s battery health. You can enable it by going to Settings > Battery > Battery Health & Charging and toggling on Optimized Battery Charging.


If you take your phone off charge at roughly the same time every day, your iPhone will learn this pattern and avoid charging to 100% until right when you need it.

5 Avoid Charging and Using Your Phone Simultaneously

There’s no harm in looking at some messages and scrolling through social media for a while. However, avoid engaging in a prolonged gaming session when charging your iPhone.

Multiplayer games, in particular, tend to cause your iPhone to overheat. Charging your device at the same time will just worsen the issue and affect your iPhone’s long-term battery health.

Therefore, it’s best to plan ahead a little and charge your device sufficiently beforehand to take care of your iPhone’s battery. Plus, it’s uncomfortable to hold and use a hot iPhone properly anyway.


6 Use Only Official Apple Chargers

Apple 20W USB-C power adapter in its box on a desk
Cerise Noire77/Shutterstock

Many unscrupulous companies produce low-quality iPhone chargers. While they can still charge your device, these chargers are not certified by Apple, meaning they don’t maintain the same quality and compatibility with your iPhone’s battery.

Only use Apple MFi-certified accessories for your safety and your iPhone’s battery health. Some of these officially approved items include the best Lightning cables to charge your iPhone. They help protect against power surges and short circuits, which could otherwise cause injuries to you or damage the phone’s internal components, including the battery.


7 Avoid Extreme Temperature Changes

Keeping your iPhone safe from extreme temperatures will help its battery get through its entire lifespan without damage to core components. Therefore, being mindful of this measure can help maintain the battery health of your iPhone.

Extreme low temperatures can cause a shortened battery life, affecting the battery’s ability to hold charges or making it stop working altogether. On the other hand, extreme highs can permanently prevent you from using some of the phone’s features, such as causing cracks in the device itself, which can impact overall battery performance.

8 Invest in a Case for Your iPhone

Person holding a silicon case next to an iPhone 13 Pro with plants in the background
Hadrian/Shutterstock


We’ve all probably dropped our iPhones at some point. Although the iPhone’s Ceramic Shield does contribute to the device’s durability, it’s still safer to have a case. Repeated impact on hard surfaces will inevitably contribute to internal component damage over time, which affects your iPhone’s battery health.

Furthermore, to preserve your iPhone’s battery health, keep it away from dusty or dirty environments. This can lead to shorter battery life due to dust and dirt particles accumulating on the battery contacts.

Using a protective case can help protect your iPhone’s ports by trapping the debris before it enters your device. Additionally, a good iPhone case can protect your iPhone from other issues as well, such as broken screens and water damage.

At the same time, ensure your case doesn’t swaddle your iPhone, which may cause it to overheat and negatively impact its battery health. If necessary, remove your iPhone case while charging your device to prevent this issue.


9 Update to the Latest iOS Version

Keeping your iPhone’s software updated can also help maintain its battery health. As time goes on, your iPhone receives software updates that improve its speed and performance. This keeps the battery in good condition over the long term.

Additionally, these updates often come with new battery-saving features you can enjoy. For instance, the introduction of Screen Time in one of the updates helps to track how much time users spend on their devices and which apps they use the most. Users can then adjust their daily habits to ensure they are not spending too much time on their phones.

Go to Settings > General > Software Update to check if an update is available for your device.


10 Charge to 50 Percent Before Storing Your iPhone

A man charging an iPhone with a MagSafe connection
LL_studio/Shutterstock

Our final tip applies to an iPhone you intend to keep in storage. When you buy a new iPhone, there’s no need to throw away the old one. Keeping a functional device to serve as a backup is one of the eco-friendly ways to prevent your old iPhone from becoming e-waste.

However, it’s essential to maintain the battery health of your iPhone; otherwise, you may find yourself with a non-functioning device the next time you take it out of the drawer.

All you need to do is charge your iPhone’s battery to around 50 percent and turn it off to prevent battery consumption before storing it. Then, set a reminder to charge the iPhone to 50 percent again every six months if you know you won’t use or charge it in between.


Although there is no way to completely stop iPhone batteries from becoming less effective with time, you can prolong your device’s longevity by taking the precautionary measures we listed above.

Besides helping you make your iPhone last for years, keeping the battery healthy can eliminate slowdowns, app crashes, and more. So, use these tips to keep your iPhone’s battery in good condition. But if it’s too late as you’re reading this, you can consider replacing your iPhone battery instead of buying a new iPhone entirely.

Can hdi pcb fabrication be used in medical devices?

hdi pcb fabrication

High-density interconnect (HDI) printed circuit board (PCB) fabrication has become increasingly prevalent across various industries due to its compact size, enhanced functionality, and improved performance. One area where HDI PCB fabrication is gaining traction is in the field of medical devices. The question arises: can HDI PCB fabrication be effectively utilized in medical devices?

The answer lies in understanding the unique requirements and challenges of medical device applications and how HDI PCB fabrication can address them. Medical devices often require compact designs to fit within confined spaces, such as wearable devices or implantable sensors. HDI PCB fabrication offers the ability to densely pack components and interconnections into a smaller form factor, making it well-suited for these applications.

Moreover, hdi pcb fabrication enables the integration of advanced features and functionalities that are essential for modern medical devices. This includes features such as embedded components, multilayer designs, and high-density interconnections, which allow for greater flexibility, miniaturization, and performance optimization. These capabilities are particularly valuable in medical devices where space constraints and performance requirements are critical considerations.

Can hdi pcb fabrication be used in medical devices?

Furthermore, HDI PCB fabrication offers advantages in terms of signal integrity and reliability, which are paramount in medical device applications. Medical devices often require precise and accurate measurement and control of signals, such as in diagnostic imaging equipment or patient monitoring devices. HDI PCB fabrication techniques, such as impedance control, signal routing optimization, and EMI shielding, help ensure consistent signal quality and reliability, even in challenging operating environments.

In addition to performance considerations, HDI PCB fabrication also offers benefits in terms of manufacturability and scalability, which are important factors in the medical device industry. Advanced manufacturing processes such as laser drilling, sequential lamination, and precision etching enable the creation of intricate and high-quality PCBs with tight tolerances and precise control over critical parameters. This ensures that medical devices can be produced consistently and reliably, meeting stringent regulatory requirements and quality standards.

Moreover, the versatility of HDI PCB fabrication makes it suitable for a wide range of medical device applications, from diagnostic equipment and imaging devices to wearable sensors and implantable devices. Whether it’s monitoring vital signs, delivering therapeutic treatments, or performing surgical procedures, HDI PCBs can be tailored to meet the specific requirements of each application, enabling innovation and advancement in medical technology.

Despite these benefits, there are some considerations to keep in mind when using HDI PCB fabrication in medical devices. One concern is the need for stringent regulatory compliance and validation processes, given the critical nature of medical devices and the potential risks to patient safety. Manufacturers must ensure that HDI PCBs meet all applicable regulatory requirements and undergo thorough testing and validation to verify their performance and reliability.

Furthermore, the reliability and durability of HDI PCBs in harsh operating environments, such as sterilization procedures or exposure to bodily fluids, must be carefully evaluated and validated. Specialized materials, coatings, and encapsulation techniques may be required to ensure the long-term reliability and performance of HDI PCBs in medical device applications.

In conclusion, HDI PCB fabrication holds great promise for the advancement of medical device technology, offering compact designs, enhanced functionality, and improved performance. By leveraging the unique capabilities of HDI PCB fabrication and addressing the specific requirements and challenges of medical device applications, manufacturers can develop innovative and reliable solutions that improve patient care and medical outcomes.

Here’s How I Find the Best Games to Play on Apple Arcade

Key Takeaways

  • Apple Arcade recommends great games in curated lists like Must-Play and App Store Greats. Check those out first.
  • Check reviews before downloading; they can help you discover hidden gems or avoid bad games—look for high ratings from many reviews.
  • Use filters to find games that fit your preferences, like controller compatible titles or recently updated ones.


Apple Arcade’s curated selection of games can be a little difficult to navigate. Although there aren’t many titles, finding the best ones can still be tricky if you don’t know how to look. As someone who has been using Apple Arcade since it launched in 2019, I have some tips on how to find games you’ll like.


1 Browsing Apple Arcade’s Must-Play and App Store Greats Categories

The easiest thing to do is check out the games that Apple recommends. These recommendations are not random selections but the result of meticulous curation by teams of editors and curators with decades of experience. They’ve arranged them in lists called Must-Play and App Store Greats.

Follow these steps when you go into the App Store to find them:

  1. Tap Arcade at the bottom menu.
  2. Scroll down the page to find a curated list called Must-Play Games (usually the 5th category).
  3. Tap See All to see the games in the category.
  4. Return to Arcade.
  5. Scroll down the page to find App Store Greats (usually the 12th category).
  6. Tap See All here, as well.


Must-Play Games is a short list with only 21 titles in it, but most, if not all of them, are worth the time. I found Snake.io and Turmoil from this list, and I quite enjoyed them.

The second category, App Store Greats, is more like an expansion of the Must-Play list. Any game on the list in a genre that you like is bound to be a lot of fun. I found Prune, Stardew Valley, and Slay the Spire here, and I must add that Stardew Valley is one of the reasons I subscribe to Apple Arcade.

2 Checking the Reviews to See What Others Think

This is an age-old tip, and of course, it doesn’t apply only to Apple Arcade. You should always read reviews before downloading a game. Reviews have convinced me to download games I otherwise wouldn’t have and caused me to hesitate before gleefully tapping the Get button.


It’s not enough to just read the snippets on the app’s page; there’s a detailed method to get all the shared opinions about the game.

When you find a game on Apple Arcade that you think you may like, follow these steps to see its reviews:

  1. Tap the app name (not the Get or Download buttons) to open its App Store page.
  2. Scroll to the Ratings & Reviews section. You’ll see a number indicating the average score (maximum of five) and how many people have rated it.
  3. Select See All next to the Ratings & Reviews header.


Following the steps above will take you to a page dedicated to all the reviews for the game. I don’t expect any game on Apple Arcade to have a rating of less than 4.0. But if it does, and it has 100 or more reviews, you should probably skip it. On the flip side, a rating of 4.5 or higher from 100 or more reviews is also a good sign.

By default, all the reviews here are sorted by Most Helpful, meaning other users agree with what that user wrote. You should read at least five of the most helpful reviews. After that, tap Sort by Most Helpful and change it to Most Recent to see the last thing other gamers thought about it.

This filter will help account for newer changes to the game that the older, more helpful comments wouldn’t. You can also use the other sorting criteria, but Most Helpful and Most Recent are recommended.


You can now download the game if you’re OK with all you’ve seen.

3 Filtering Games by Controller Compatibility and Last Updated

Developers who create their games to be controller-friendly and those who still update and maintain their games count for making the best games on Apple Arcade. This is only because they are intentional with their creation. One of the cons of Apple Arcade is that it caters more to casual gamers; filtering by controller support helps mitigate that disadvantage.

However, this is no hard-and-fast rule; it doesn’t mean all the games in these categories will fit the bill. But it’s a good way to filter out the fluff and old, irrelevant games.

Here’s how to filter the games:

  1. Go to Arcade in the App Store.
  2. Scroll all the way down to the very end of the Arcade page.
  3. Tap See All Games.
  4. Select the Filters dropdown at the top of the page.
  5. Choose Last Updated to arrange all the games by that criteria.
  6. You can also filter out all the games without Controller Support by switching the toggle on.
  7. Tap Done in the top-right corner to finish.


Doing this will return you back to the page containing all the Apple Arcade games. Now, they’ll be sorted by when they were last updated, and all of them will have controller support. If you want to see the last updated games and don’t care about controller compatibility, return to Filters and toggle off Controller Support.

You can also sort by Category in the Filters menu, so take advantage of that if your favorite games are in a certain genre. However, some genres are very large, so it won’t do much narrowing down for you.


If you follow these tips and finetune them to your tastes, I’m sure you’ll find the best games on the Arcade. But I would like to add that you can’t really go wrong with picking a game from Apple Arcade; all of them are free, and most of them are good anyway.

GPT-4 Is Now Free for Everyone, but There Are Still 6 Reasons to Keep Using ChatGPT Plus

Key Takeaways

  • Free users get limited access to GPT-4o, the latest AI model, while Plus subscribers get more messages and guaranteed availability.
  • ChatGPT Plus subscribers can create custom GPTs and access features like image generation and early access to new features like Voice Mode.
  • Free users get limited access to advanced features like data analysis and web browsing, while Plus subscribers get full access.


Following OpenAI’s Spring Update, GPT-4o has become publicly available to Free users. This means that everyone can access GPT-4-level intelligence without paying. You might wonder why you would want to keep paying $20 monthly when you can get it for free.

Well, here are some reasons you might want to keep your ChatGPT Plus sub.


1 More Access to GPT-4o

GPT-4o is OpenAI’s latest flagship GPT model, which it states is twice as fast as GPT-4 Turbo and 50% cheaper (when using APIs). However, Free users are not granted unlimited access to GPT-4o. OpenAI provides Free users with “limited access to GPT-4o.”


GPT-4o is now ChatGPT’s default model, but Free users will be reverted to GPT-3.5 when it’s unavailable. As a Free user, your access to GPT-4o is not guaranteed and is subject to availability. The term “limited access” implies usage restrictions or reduced availability during peak times.

Regardless, one thing is for certain: ChatGPT Plus users will get up to five times more messages for GPT-4o. Furthermore, Plus users can send up to 80 messages every three hours. From that, we can infer that Free users would get about 16 messages per hour on a good day. It’s not bad, but it’s quite low if you’re a heavy user.

However, all of these message rates are the best you will get. As ChatGPT becomes the crutch for more businesses and individuals, usage and availability will likely decline (temporarily) in the near future. Based on this, you’d likely want a Plus subscription to insure against crowded conditions.


2 Retain Access to GPT-4 Turbo

Benchmarks and tests revealed that GPT-4o may be faster, but GPT-4 Turbo seems more accurate in some categories. It’s difficult to confirm the criteria for this and how some of these tests have been executed, but some users have reported better results from GPT-4—especially in mathematical and programming problems. Even OpenAI admits this, and according to its text evaluation results, GPT-4T does better at DROP (​​Discrete Reasoning Over Paragraphs) tests.

If some arbitrary tests don’t convince you, consider the number of extra GPT-4 prompts you’ll get from a sub. OpenAI allows 40 messages every three hours on GPT-4T and 80 messages every three hours on GPT-4o, giving you a grand total of 120 messages you can send to the GPT-4s in three hours.


3 Create Your Own Custom GPT

OpenAI will allow Free users to access the GPT store and use custom GPTs as part of its free package. However, this allowance doesn’t extend to the creation of custom GPTs.

You must have a Plus subscription to create custom GPTs. Paying will let you build a custom GPT with your own data and documents, which can then be shared with friends and colleagues or published freely on the marketplace.

4 Generate Images With DALL-E

chatgpt dalle 3 prompt example

When OpenAI announced the slew of features coming to ChatGPT’s Free tier, they didn’t mention direct access to its image generation AI, DALL-E. With DALL-E, you can enter any prompt, and the AI will attempt to create an image from your text. It’s pretty useful, and it’s easily half the reason why I keep my Plus subscription. Even with access to GPT-4o, Free users cannot generate images from text—all DALL-E capabilities are locked behind the subscription paywall.


We are uncertain how this will translate to Free users’ access to the GPT store, seeing as many custom GPTs rely on DALL-E. But it’s very likely going to be completely unavailable until you pay.

5 Get Early Access to ChatGPT Voice Mode and the ChatGPT Desktop App

OpenAI’s demo of GPT-4o made waves on the internet because of its realistic Voice Mode. Due to how quickly GPT-4o can understand words and context, none of that characteristic delay happens while the AI is “thinking,” making for fluid—humanlike—conversation. On top of that, you can essentially video call the AI while in Voice Mode, and it will understand visual cues and objects it sees (thanks to its vision capabilities).


This new Voice Mode is not yet generally available, but Plus users will receive it as an early access feature. If you want to use this technology before most people, you’ll need to keep your ChatGPT subscription up and running.

While OpenAI’s recent demo showed us that the feature will come with the Mac app, Voice Mode is only available now through the ChatGPT smartphone app. Features like this are why many consider the
ChatGPT iOS app better than the website
.

OpenAI also introduced us to a ChatGPT desktop in its demo. That is undoubtedly one of the early access features paid users will enjoy, and is first coming to macOS users. There may be more cool features down the line that offer very good value propositions, and paying for Plus is the only way to be among those who use it.


6 Full Access to Advanced Data Analysis, File Uploads, Vision, and Web Browsing

ChatGPT plans on its website

Advanced data analysis, file uploads, vision, and web browsing were once features exclusive to OpenAI’s paying customers. That has now changed, and all of these are available to Free users but with more limits. The limits include fewer prompts, fewer file uploads, and lower priority access to these services during peak hours.

For some, this has disincentivized carrying on a Plus subscription. However, you will need a subscription if you’re a heavy ChatGPT user and rely on it to understand, parse, and analyze documents and photos. Granted, these are features that many don’t use very often, but if you fall within the minority, you might want to keep your Plus sub.


Also, having full access to web browsing is super useful. ChatGPT has a knowledge cutoff, and web browsing helps bridge that knowledge gap by letting it search the web to find current information. If you use ChatGPT for tasks that require current information, you might get frustrated with a Free plan.

Frankly, all the reasons for getting a ChatGPT Plus subscription are subject to how much you use the AI. If you use it a lot, you’ll find yourself hitting the limits very often. It can be well worth the money if you can afford it and don’t mind beta-testing new OpenAI features.

Take Better Smartphone Photos by Unlearning These Bad Habits

Key Takeaways

  • Many smartphone photographers pick up bad habits that need unlearning.
  • Overdoing Portrait Mode can result in some of your images looking worse than they should.
  • Avoid over-reliance on filters; use them sparingly to enhance, not mask, your photos.


With just a few adjustments, you’ll find taking better smartphone photos much easier. From failing to adjust your lighting to over-reliance on filters, here are some of the main habits you must unlearn if you want better pictures—I’ll also show you what to do instead.


1 Not Manually Adjusting Your Lighting

Although smartphone cameras have limited lighting customization tools, you should still adjust what you can. Even the most basic smartphones normally have some kind of brightness meter you can turn up or down.

To adjust your brightness, move the slider after holding your screen for a few seconds. Manually changing your brightness is especially important when taking pictures in situations where you have too much or not enough light, as this is when your camera is particularly susceptible to bad photos.


You can also use light modifiers, but there’s no need to go to those lengths as a hobbyist.

2 Taking Photos From the Same Angle as Everyone Else

One of the best things about smartphone photography is that you always have your camera with you. If you see something you like, you can simply snap it and continue with your day. However, if you want your pictures to look unique, you need to think differently.

There’s nothing wrong with taking pictures on your smartphone with your normal standing stance, but don’t limit yourself to that. Look for unique perspectives, such as holding your camera higher or lower. You can also try one of my smartphone photography tricks that actually work, like photographing behind walls.

If you plan to use your smartphone for photography on your travels, it’s also worth checking out this guide on taking unique photos in popular locations.


3 Only Shooting in Portrait Orientation

Despite my historic love-hate relationship with the platform, I still think that Instagram is the most fun place to share your photos. Most of us optimize our images for the 4:5 format, which means that photographing in portrait orientation is often the default.

But whether you’re photographing for social media or somewhere else, always holding your smartphone upwards will limit your creativity. Landscape mode has several advantages, especially when you’re trying to capture cityscapes and expansive natural scenery. So, shoot whichever way feels necessary depending on the scenario.


Photo of a city taken on a smartphone

If you want to share your landscape-orientation shots on Instagram, you can always use a free graphic design tool like Canva or Adobe Express to add borders or frames where necessary. And if you want better landscape pictures, see my essential smartphone landscape photography guide.

4 Ignoring the On-Screen Grid

You might have heard of photography concepts like the rule of thirds, and these techniques don’t just apply to mirrorless or DSLR cameras. You can get excellent results with your smartphone, too, by paying attention to the grid on the screen.

Using the on-screen grid, you can frame your image more effectively. It’s also a great tool for determining whether you should wait for something to enhance your image, such as a person or cyclist.


Most smartphone cameras let you use a grid, but it may not be switched on by default. If it isn’t, you can turn it on via your Settings app. Here’s how to enable grids on your iPhone and how to use the camera on your Android phone.

5 Only Taking One Picture of the Same Thing

Smartphone cameras are defacto point-and-shoot devices, which is great for convenience. And while off-the-cuff snapshots can work out amazingly for action scenes (e.g. street photography), you should think outside the box when photographing inanimate objects or portraits.

Some people advise against snapping multiple shots of one thing, but I disagree (unless you start overthinking and subsequently miss other photo opportunities). There are two reasons I recommend you take multiple pictures:


  • If one of your pictures is blurry, you have other choices.
  • You might find an angle that you otherwise wouldn’t have.

Try photographing different angles and going back in different lighting conditions. If you’re photographing people, get them to perform different poses. You can also capture the same thing in portrait and landscape mode.

6 Relying Too Much on Filters

Select the Sliders Icon in VSCO

I hold my hands up here because I love photo editing and am sometimes guilty of this. When you take lots of photos and start using tools like Adobe Lightroom or VSCO, you can quickly fall into the trap of thinking that every image is fixable with a filter. The same goes when you’re posting on social media, especially when there are so many amazing filters for your Instagram photos.


But the truth is that filters should enhance your photos, not make them. Relying too heavily on filters can lead to complacency creeping in, resulting in worse photos over time. You also risk overdoing your edits, which is one of the biggest mistakes that most photographers—amateur or professional—make.

Use filters sparingly and focus on the most important smartphone photography aspects like lighting and composition. And if you like a photo straight out of your camera, don’t worry about posting it without editing.

7 Overdoing Portrait Mode


Smartphone photography has evolved significantly since Apple first introduced Portrait Mode in 2016. It’s amazing that you can now control the aperture without needing to buy an expensive camera, and newer smartphones even have multiple modes that adjust lighting for you. However, this doesn’t mean that you need to use Portrait Mode on every image.

A lot of people think that a blurry background automatically means the picture is good. This, however, is not always true. I’m not going to police when you should use Portrait Mode on your camera, but I do recommend that you ask whether it’s really necessary for the photo you’re taking.

The best way to determine if this is the case is by taking the same image in Portrait Mode and with your normal camera settings, and comparing them. Learn more about using Portrait Mode on iPhone here.

Taking great smartphone photos is more effortless than you think, and the easiest way to improve your photography is by doing less of the bad stuff. None of these are hard-and-fast rules, but you’ll notice a significant difference if you implement at least some of them.


How to Find Hidden Tracking Devices With Apple and Google’s Detection Tool

Key Takeaways

  • Bluetooth trackers are useful for keeping track of objects, but can also be used for harmful purposes.
  • Google and Apple are working together to provide unified alerts on unknown Bluetooth trackers.
  • The new system will detect various Bluetooth trackers, including Apple’s AirTag, to enhance personal privacy and safety.


Bluetooth trackers are absolutely genius for helping you keep tabs on luggage, hardware, and other important objects, no matter where you go.

But they also have a dangerous underside, where AirTags and other Bluetooth trackers are used to keep tabs on unsuspecting victims and have been implicated in harassment and stalking cases.

Google and Apple have heard these worries and have teamed up to deliver a unified response to this growing problem.


What Are Bluetooth Tracking Devices?

As they sound, Bluetooth tracking devices are small devices capable of tracking the location of an object. Apple’s AirTag is one of the most popular options worldwide, especially among Apple users. However, Tile, Chipolo, Eufy, Samsung, Cube, and other manufacturers provide similar Bluetooth trackers, all used for similar purposes.

There are heaps of reasons to use a Bluetooth tracker, but most center on keeping track of valuable or useful objects. They can be attached to car keys, slipped into a wallet, sewn into the lining of a bag, and so much more.


However, their versatility has also seen them used for more nefarious needs, such as tracking people, vehicles, animals, and more, typically with a view for theft, stalking, harassment, or otherwise.

How Are Apple and Google Stopping Hidden Bluetooth Tracking Devices?

It’s this dangerous underside that Google and Apple are working to eliminate by unifying messaging and tracking for hidden and unwanted Bluetooth tracking devices.

As per the Apple Newsroom, Apple and Android devices will inform the user if an unknown Bluetooth tracker is traveling with them—regardless of the platform.

That’s the key difference here. Previously, Apple devices would inform you if an unknown AirTag was traveling with them, while Google had its own unwanted tracker alert.


But the tech behemoths have combined forces for the greater good, and now, Apple devices running iOS 17.5 (and onwards, when they launch) and Android devices running Android 6.0+ will deliver the “[Item] Found Moving With You” alert regardless of the platform they’re paired with.

Which Bluetooth Tracking Devices Can It Detect?

Alerts will cover Apple’s AirTag and Find My devices, while Bluetooth tracker manufacturers such as eufy, Chipolo, Motorola, Jio, and Pebblebee have all committed to making future tags compatible with the new system.

If one is detected, users can view the specific tracker identifier, have the tracker play a sound to track it down, and access specific instructions on disabling it.

The new combined alert should drastically reduce the chances that someone can slip an unknown and unwanted Bluetooth tracker onto your person or an object, which is great for personal privacy and safety.


What is a flex rigid pcb manufacturer?

flex rigid pcb manufacturer

In the realm of electronics manufacturing, the term “Flex Rigid PCB Manufacturer” denotes a specialized entity engaged in the production of flex rigid printed circuit boards (PCBs). These PCBs represent a sophisticated solution designed to accommodate the increasingly complex demands of modern electronic devices. They combine the advantages of both flexible and rigid PCBs, offering enhanced durability, space efficiency, and reliability.

Flex rigid PCBs, also known as flex-rigid boards, feature a combination of flexible and rigid board technologies within a single package. This unique construction allows them to bend and fold without compromising electrical integrity, making them ideal for applications where space constraints or dynamic movement are prevalent. Such applications include aerospace, automotive, medical devices, and consumer electronics.

The manufacturing process of flex rigid pcb manufacturer is intricate and requires specialized expertise. Flex rigid PCB manufacturers possess the technical know-how and equipment necessary to fabricate these complex boards with precision and consistency. They employ advanced techniques such as laser drilling, controlled impedance routing, and multilayer lamination to meet the stringent specifications of their clients.

What is a flex rigid pcb manufacturer?

One of the key advantages offered by flex rigid PCB manufacturers is their ability to customize designs according to the specific requirements of each application. Whether it’s a miniature wearable device or a high-performance aerospace component, these manufacturers can tailor the flex rigid PCBs to meet the desired form factor, electrical performance, and environmental conditions.

Quality control is paramount in the production of flex rigid PCBs, and reputable manufacturers adhere to stringent quality standards throughout the manufacturing process. From material selection to final inspection, every step is meticulously monitored to ensure the highest level of reliability and performance. This commitment to quality is crucial, especially in mission-critical applications where any failure could have serious consequences.

Another essential aspect of flex rigid PCB manufacturing is innovation. As technology evolves and new applications emerge, manufacturers must stay ahead of the curve by investing in research and development. This includes exploring new materials, refining manufacturing processes, and integrating cutting-edge technologies to push the boundaries of what flex rigid PCBs can achieve.

Collaboration is also a key element in the relationship between flex rigid PCB manufacturers and their clients. By working closely with OEMs, design engineers, and product developers, manufacturers can gain valuable insights into the unique requirements of each project and provide tailored solutions that meet or exceed expectations. This collaborative approach fosters innovation and drives continuous improvement in the field of flex rigid PCB manufacturing.

In addition to production capabilities, flex rigid PCB manufacturers often offer value-added services such as design assistance, prototyping, and assembly. These services help streamline the product development process and enable clients to bring their ideas to market faster and more cost-effectively. By leveraging the expertise and resources of the manufacturer, clients can overcome technical challenges and achieve their goals with confidence.

In conclusion, a flex rigid PCB manufacturer plays a vital role in the electronics industry by providing specialized solutions for complex electronic applications. Through advanced manufacturing techniques, rigorous quality control, innovation, and collaboration, these manufacturers enable the creation of cutting-edge devices that push the boundaries of what’s possible in the world of electronics. As technology continues to advance, the role of flex rigid PCB manufacturers will only become more crucial in shaping the future of electronic devices.

How does the choice of substrate material impact Pcb assembly companies processes?

choice of substrate material impact Pcb assembly companies processes

The choice of substrate material plays a significant role in the PCB (Printed Circuit Board) assembly process, impacting various aspects of manufacturing efficiency, performance, and reliability. PCB assembly companies must carefully consider the properties and characteristics of different substrate materials to ensure optimal outcomes in terms of manufacturability, functionality, and cost-effectiveness.

One of the key factors influenced by the choice of substrate material is the manufacturability of the PCB assembly process. Different substrate materials, such as FR-4, ceramic, and flexible substrates, have distinct mechanical properties, thermal conductivity, and dimensional stability, which can affect processes such as drilling, routing, and soldering. For example, FR-4 is a popular substrate material known for its affordability, ease of fabrication, and compatibility with standard PCB assembly processes.

However, ceramic substrates offer superior thermal conductivity and dimensional stability, making them suitable for high-power applications where heat dissipation is critical. Flexible substrates, on the other hand, enable the fabrication of flexible or bendable PCBs for applications such as wearable electronics and medical devices. By selecting the appropriate substrate material, pcb assembly companies can optimize manufacturing processes and minimize the risk of issues such as delamination, warping, or dimensional inaccuracies during assembly.

How does the choice of substrate material impact Pcb assembly companies processes?

Moreover, the choice of substrate material can impact the electrical performance and reliability of the finished PCB assembly. Substrate materials vary in terms of dielectric constant, loss tangent, and signal integrity properties, which can affect signal propagation, impedance matching, and electromagnetic interference (EMI) shielding. For high-frequency or high-speed applications, selecting substrates with low dielectric constant and low loss tangent is essential for minimizing signal distortion and maintaining signal integrity.

Additionally, substrate materials with excellent EMI shielding properties help prevent interference from external electromagnetic sources, ensuring the reliability and robustness of electronic devices in demanding operating environments. By carefully evaluating the electrical characteristics of different substrate materials, PCB assembly companies can optimize the performance and reliability of their products while meeting stringent design requirements and industry standards.

Furthermore, the choice of substrate material can impact the thermal management capabilities of the PCB assembly. Some substrate materials, such as metal core or ceramic substrates, offer superior thermal conductivity compared to traditional FR-4 substrates, enabling efficient heat dissipation from high-power components or densely populated PCBs. Effective thermal management is essential for preventing overheating, component degradation, and premature failure, particularly in applications with stringent thermal requirements or operating in harsh environments. By selecting substrate materials with enhanced thermal conductivity and heat dissipation properties, PCB assembly companies can improve the reliability and longevity of their products while minimizing the risk of thermal-related issues such as solder joint fatigue or thermal runaway.

Additionally, the choice of substrate material can influence the environmental sustainability and regulatory compliance of PCB assembly processes. Some substrate materials, such as FR-4, are widely used in the industry due to their affordability, availability, and recyclability. However, concerns have been raised regarding the environmental impact of certain substrate materials, such as halogenated flame retardants used in FR-4.

As a result, there is growing interest in alternative substrate materials with reduced environmental footprint and compliance with regulations such as RoHS (Restriction of Hazardous Substances) and REACH (Registration, Evaluation, Authorization, and Restriction of Chemicals). By choosing environmentally friendly substrate materials and implementing sustainable manufacturing practices, PCB assembly companies can reduce their ecological footprint and meet the evolving expectations of customers and regulatory authorities.

In conclusion, the choice of substrate material has a significant impact on PCB assembly processes, affecting manufacturability, electrical performance, thermal management, and environmental sustainability. By carefully evaluating the properties and characteristics of different substrate materials, PCB assembly companies can optimize manufacturing processes, improve product performance and reliability, and ensure compliance with regulatory requirements. With advancements in material science and manufacturing technologies, the selection of substrate materials continues to be a critical consideration for PCB assembly companies seeking to achieve excellence in electronic product design and manufacturing.

What types of Flexible circuit board manufacturers do you offer for prototyping?

types of Flexible circuit board manufacturers

Flexible circuit boards, also known as flex PCBs, have revolutionized the electronics industry with their versatility and adaptability to various applications. When it comes to prototyping flexible circuit boards, manufacturers offer several options tailored to the specific needs and requirements of their clients. In this article, we delve into the types of prototyping services available from flexible circuit board manufacturers and how they facilitate the development and testing of innovative electronic designs.

One of the prototyping options offered by flexible circuit board manufacturers is quick-turn prototyping. This service caters to clients who require rapid turnaround times for their prototype designs. Manufacturers leverage streamlined processes and dedicated production lines to expedite the manufacturing of flex PCB prototypes, allowing clients to receive their prototypes in a matter of days rather than weeks. Quick-turn prototyping enables engineers and designers to iterate on their designs quickly, accelerating the product development cycle and reducing time-to-market.

Another prototyping option available from flexible circuit board manufacturers is low-volume prototyping. This service is ideal for clients who need small quantities of prototype boards for initial testing and validation purposes. Manufacturers can produce low-volume prototype runs cost-effectively by leveraging efficient production methods and optimizing material usage. Low-volume prototyping allows clients to assess the performance, functionality, and manufacturability of their designs before committing to full-scale production, minimizing risks and potential costly revisions down the line.

What types of Flexible circuit board manufacturers do you offer for prototyping?

In addition to quick-turn and low-volume prototyping, some flexible circuit board manufacturers offer prototype assembly services. These services involve the assembly of prototype boards with surface-mount and through-hole components, allowing clients to evaluate the functionality and performance of their designs in real-world conditions. Prototype assembly services often include options for manual or automated assembly, depending on the complexity and volume of the prototype build. By outsourcing prototype assembly to experienced manufacturers, clients can focus on design optimization and validation without the hassle of sourcing and assembling components themselves.

Moreover, some flexible circuit board manufacturers provide design-for-prototyping services to assist clients in optimizing their designs for prototyping and manufacturing. Design-for-prototyping services involve thorough design reviews and consultations with experienced engineers to identify potential issues and recommend design modifications for improved performance, reliability, and manufacturability. By leveraging the expertise of manufacturers in flexible circuit board design and fabrication, clients can refine their prototypes to meet their specific requirements and achieve better overall outcomes.

Furthermore, collaborative prototyping programs offered by flexible circuit board manufacturers enable clients to work closely with manufacturers throughout the prototyping process. These programs typically involve dedicated project managers who serve as liaisons between clients and manufacturing teams, ensuring that project requirements are met and any concerns or modifications are addressed promptly. Collaborative prototyping programs foster a partnership approach to prototyping, where manufacturers act as extensions of their clients’ engineering teams, providing valuable insights and support to achieve successful outcomes.

In conclusion, flexible circuit board manufacturers offer a range of prototyping options tailored to the diverse needs and requirements of their clients. Whether it’s quick-turn prototyping for rapid iteration, low-volume prototyping for initial testing, prototype assembly for real-world evaluation, design-for-prototyping services for design optimization, or collaborative prototyping programs for partnership-based approach, manufacturers play a crucial role in facilitating the prototyping process and accelerating the development of innovative electronic designs. By leveraging the prototyping services and expertise of manufacturers, clients can bring their ideas to life faster, more efficiently, and with greater confidence in their success.

7 Free AI Music Generators to Create Unique Songs to Use In Your Projects

AI is influencing almost everything, and AI music generators are finally catching up. With these tools, you input parameters for a song and they create it for you. Each track is tailored to your preferences and feels unique to you. Ready to become the conductor of an orchestra of bots?


1 Suno (Web): Generate Any Kind of Music for Free

Suno is a free AI music generator that can create songs from a text prompt. The output tracks can be in any genre, mood, or style. To use Suno, simply enter a description of the song you want to create, such as “a happy pop song about love” or “a sad ballad about heartbreak”. Suno will then generate a song that matches your description.

Two of Suno’s great features are continuing and remixing songs. If you find a piece you like, you can continue it until you create a full song. The remix feature lets you create new songs without deviating from the original sound. Additionally, Suno can generate AI lyrics and vocals and add them to your songs.


Suno is free to use and gives you 50 daily credits (usually enough for 10 generations). Suno songs don’t need attribution for personal use, but you can pay for a subscription to get more credits and use the songs in commercial work.

2 Soundful (Web): AI Music With Custom Key, Notes, and Beats Per Minute

Soundful will create AI-generated music based on your choices of major and minor key, and which base note you want it to be in

Soundful generates songs based on musical metrics, rather than emotional ones. Once you’ve signed up, you can explore the catalog to find a genre or subgenre that interests you most.

Then, Soundful asks you to customize the song based on two factors: the first is beats per minute (BPM), which sets the tempo of the music track, and the second factor is notes and keys. You can choose the song’s base note (C, D, E, F, G, A, B) and set whether you want it in a major or minor key.


The preview of the song might sound a bit low quality, but that’s only because it’s a preview. Once you save the song and download it from your Soundful library, you’ll get a better-sounding mastered version.

Soundful also lets you create loops for those tiny tracks that serve as the perfect background music for short videos. You can check out their library of templates for inspiration or the global tracks added by others.

The free version of Soundful allows you to download ten created songs a month. However, you’ll need to attribute Soundful for the music copyrights anywhere you use the track.

3 AIVA (Web, Windows, Linux, Mac): Full Step-by-Step Music Generation

Composing a song in AVIA -1


AIVA is a powerful AI music generator that provides a lot more control than most other AI tools. You can create tracks based on a style, chord progression, and influence, and it has a wide offering of genres that includes lesser-known genres.

Once you generate the song, you can edit the composition by changing the chord progression, rewriting the melodies, and modifying the instruments. What sets AIVA apart is that it’s not solely designed for absolute beginners. If you know a little bit of music, you can edit the piano roll yourself, or import a MIDI melody to turn into a full song.

Although AIVA is available as a web app, it’ll likely tell you that your browser isn’t compatible with live playback, so you’ll have to install the app to listen to the song.

The free subscription allows only three downloads per month and you’ll have to credit AIVA for the songs. However, paid subscriptions lift these limits to allow more downloads and grant you the right to monetize the songs.


4 Soundraw (Web): Customize Your Composition

Editing a song in Soundraw

Soundraw operates somewhat differently from other AI music generators. In the Create Music page, where you can modify the length, tempo, and select the mood of the track, you’re essentially creating a guideline. Soundraw will mass-produce dozens of sample tracks according to those parameters. The tracks are based on tags (which you can further modify) that show specific samples.

The sample tracks are all original pieces fed to the AI by Soundraw’s producer team, and you can play, edit, share, and like each sample. Depending on how you envision the dynamics and transitions from one section to another, you can modify the energy of the track segments among Quiet,Mid, Intense, and Extreme, making the customization of the song even more personalized.


Additionally, you can duplicate sections of the songs by clicking the plus icon under the selected segment on the sound wave, and remove a segment the same way by clicking the trashcan icon. You can also create similar songs to a sample you liked to further expand your options.

While you can generate unlimited tracks on the free plan, you’ll have to upgrade your membership if you want to download the song.

5 Boomy (Web): Add Custom Vocals to AI-Generated Songs and Release Them

Selecting a substyle in Boomy AI

Boomy is an AI music generator that can work with vocals. It starts you off by presenting a choice of musical styles: Electronic Dance, Rap Beats, Lo-Fi, Global Groove, Relaxing Meditation, or Custom, where you can create something personal. You’ll get mood options based on your choice, and then the Boomy AI will generate your base track.


The app provides several editing options to customize your track. One of the features is the ability to add vocals by singing directly into the app or uploading an audio file. Additionally, Boomy offers an Auto Vocal option that magically turns any spoken audio into a complete song. This is a key feature that sets Boomy apart from other AI music generators.

The AI-generated song is broken into sections, allowing you to drag and move these sections to create new arrangements or even copy or delete them. You can also change the instruments used in the song, filtering out any sounds you don’t want the AI to consider while generating the track.

Boomy lets users release their tracks, which will automatically submit the track to music streaming platforms like Spotify and Apple Music. It’s best to read the Boomy terms and conditions in detail to understand how revenue will be shared.


Unfortunately, free-tier users can’t download the songs, but they get three releases per month (each up to 12 songs). The Creator and Pro subscriptions increase these numbers and add more features to Boomy.

6 Beatoven.ai (Web): Generate Music From a Text Prompt

Editing a song in Beatoven

Beatoven is one of the simplest free AI apps to generate music. Sign up, and immediately start composing a new song by entering a prompt describing it. You’ll then land in the main timeline editor where you can play the AI-generated song and further edit it by removing instruments, breaking the song into sections, and changing the emotion, genre, and tempo. You can also hear alternate track options.


Beatoven lets you customize the song by changing the emotion. You can add new emotions, or change the emotion on an existing track; click the play button on each card to play a preview of the emotion. Once you’ve applied your selection, it will take a few minutes for the AI to create a new track from its existing samples to match your choices.

After making changes, you’ll have to click Compose Track to make sure the changes apply. While Beatoven allows free users to create unlimited songs, downloading them is unfortunately not an option. However, in addition to subscriptions, Beatoven allows you to purchase minutes so that you only pay for the time you use the service.

7 Loudly (Web): Quickly Generate and Distribute AI Music

Editing a song in Loudly


Loudly is an AI-powered music generator that lets you create songs in a variety of genres. It covers both methods of generating music: you can either pick a genre or generate from a text prompt. Once you’ve created the song, you can blend it with another genre, and change the tempo, energy, and duration.

Loudly also offers five mastering presets: Radio, Destroy, Heavon Low, and Master Punch. You can tweak each of these knobs to change the overall feel of the song. Although Loudly’s output almost always sounds good, there aren’t many more controls beyond this.

The free subscription allows 25 song generations per month, each to a maximum of 30 seconds, and one download per month. You can get more and longer songs by opting for a paid subscription. The paid subscriptions also provide commercial licensing so you can monetize your songs.


Loudly also has a distribution feature that lets you release your song to music streaming platforms directly from Loudly.

Once you’ve made your AI-generated music track, you’ll probably want to download it and use it in your projects. Depending on the app you chose and the plan you bought, you should be covered by their terms and services. However, copyrights can be tricky with AI-made music, so keep this in mind when generating songs.

What Is a Snapchat Public Profile and How Do You Create One?

Key Takeaways

  • A Snapchat Public Profile expands your reach to the entire community, extending beyond just your friends.
  • Public Profiles on Snapchat offer valuable insights into content performance, which can be beneficial for businesses and influencers.
  • You must be at least 18 years old to create a Public Profile on Snapchat.


With a Public Profile on Snapchat, you can show off your creativity and personality to a larger audience. Here’s what the Public Profile on Snapchat is and how you can use it to your advantage.


What Is a Snapchat Public Profile?

A Snapchat Public Profile allows you to share your content with the entire Snapchat community, not just your friends and contacts. This means that anyone on Snapchat can view your content. Snapchatters who are not on your friend list can discover your profile when your stories appear on Spotlight. If users enjoy your content, they can choose to subscribe to your profile.

Creating a Public Profile on Snapchat can be helpful if you want to use the platform for more than just connecting with friends. If you are a business owner or a social media influencer seeking to expand your audience and build a community, having a Public Profile can be advantageous. The best part is that you can still choose to create private Snapchat stories with your friends if you want.


A Public Profile also gives you access to valuable engagement insights on Snapchat that can help you monitor the performance of your content. This includes metrics such as the total number of views, audience demographics, shares, and more.

How to Create a Public Profile on Snapchat

Unlike before, the ability to create a Public Profile is no longer limited to just verified Snap Stars. Now, nearly anyone on Snapchat can create a Public Profile, as long as they are 18 years or older and have had an account for more than 24 hours.

Snapchat won’t let you create a Public Profile if you have previously violated any of its community guidelines.

To create a Public Profile on Snapchat on your Android or iPhone, follow these steps:

  1. Open Snapchat and tap the profile icon in the top left corner.
  2. Tap My Public Profile and then hit Okay.
  3. Enter your profile bio and location. Use the toggle to specify whether you want to show or hide your follower count on the profile.


Once you have set up your Public Profile, you can start adding new stories to it. Later, you can also add your top snaps in the Spotlight section for others to see when they visit your profile. Switch to the Insights tab to observe the graph of content engagement over the past 7 or 28-day period.

How to Edit, Share, or Delete Your Public Profile on Snapchat

You can fine-tune your Snapchat Public Profile whenever you want. You can also share its link with your friends and followers on other platforms. Here’s how:

  1. Open Snapchat and tap the profile icon in the top left corner.
  2. Tap on My Public Profile.
  3. Tap the gear icon in the top right corner.
  4. From this menu, select Edit Profile to change your account picture, bio, or location. Use the Share Profile option to share your profile link with others.


If you want to delete your Snapchat Public Profile, head to its settings page and tap the Clear Public Profile option at the end of the page. Doing so will erase your bio, stories, and profile information. Note that this won’t affect your regular Snapchat account in any way. Your private snaps, stories, and chats with friends will all remain intact.

And that’s pretty much all you need to know about Snapchat’s Public Profile feature. With a little effort, you can use Snapchat’s Public Profile to boost your online presence.

How to Find and Change Your WhatsApp Phone Number

Whether you’re transitioning to a different phone, getting a new SIM card, or simply curious, finding and changing your WhatsApp phone number is simple. Here’s how you can do it.


How to Find Your WhatsApp Number

Finding the phone number linked to your WhatsApp account may be essential if you’re switching to a new device or want to update it. Here’s how you can find your number on WhatsApp:

  1. Open WhatsApp on your phone.
  2. Tap the three-dot icon in the top right corner and select Settings. If you have an iPhone, tap the Settings tab in the bottom right corner.
  3. Tap on your name at the top to view your registered phone number.

How to Change Your WhatsApp Number

Although it is possible to use your old WhatsApp number with a new SIM card, it’s generally not recommended, especially if you’re planning to abandon the old number. This is because it will make it impossible for you to receive the WhatsApp verification code when you reinstall WhatsApp or switch to a new phone.

Also, if your old number is assigned to someone else, they could potentially gain access to your WhatsApp account.


Fortunately, changing your WhatsApp phone number is easy and does not affect your messages or media. Here’s how you can do it, depending on whether you are using the same phone or a different one.

Changing Your WhatsApp Number on the Same Phone

To change your number on the device you’re currently using WhatsApp on, follow these steps:

  1. Put the new SIM card into your phone and open WhatsApp.
  2. Go to Settings > Account > Change number.
  3. Tap Next.
  4. Enter your old and new phone numbers with the correct country code and tap Next.
  5. Specify whether or not you want to notify your contacts about the new number, and then tap Done.
  6. Enter the code received via SMS on your new phone number to verify.


Changing Your WhatsApp Number on a New Phone

If you are switching to a new phone, you will first need to back up your WhatsApp data to your Google Drive or iCloud. Once you have done that, change your WhatsApp phone number on the old phone using the same steps mentioned above.

After that, install WhatsApp on your new phone, enter the new number, and restore the chat backup. WhatsApp will then automatically log you out of the old phone.

What Happens When You Change Your WhatsApp Number

Changing your WhatsApp phone number does not affect your existing messages, groups, or media. WhatsApp also preserves all your account information, settings, and blocked WhatsApp contacts.

Once you change your WhatsApp phone number, your old account is deleted. As a result, those who have your old number won’t be able to find you on WhatsApp. Your group chats will automatically receive a notification about your number change. Additionally, if you have chosen to notify your contacts about the number change, they will receive a message.

And that’s pretty much it. Changing your WhatsApp phone number is a breeze and won’t disrupt your conversations one bit. After the change, you can also link your new WhatsApp account to another phone or computer.


The 6 Best Ways to Filter Out TikTok Content You Don’t Want to See

Key Takeaways

  • You can hide unwanted content by blocking or muting TikTok accounts.
  • Select “Not Interested” on irrelevant photos or videos so you see less similar content.
  • Filter out spam or offensive comments for a better comment section.


Do you find yourself scrolling on TikTok but finding a lot of irrelevant or unappealing content? Algorithms aren’t perfect. These tips can help filter out content that isn’t right for you on TikTok for a better experience


1 Block Accounts You Don’t Want to See

If you’re looking to avoid a certain account on TikTok, you can completely block the account. This will prevent you from seeing any content from that account.

To block an account on TikTok, go to that account’s page, click the arrow in the top right corner, and select Block from the bottom row of options.


2 Select Not Interested on Irrelevant Posts

To avoid different types of content, you can select “Not interested” on photos or videos that you don’t want to see. This may be helpful if, for example, you’re not a gamer but keep seeing content about video games. To do this, press and hold down on the video or photo, then click the broken heart that says Not Interested. This will signal to the algorithm to not show this type of content while you’re scrolling.

If the For You page isn’t recommending content that you’re interested in, try changing your FYP to fit your preferences. This includes rewatching content you enjoy and commenting on posts you like.


Sometimes the comment section on TikTok can be a toxic trip. If you want to hide offensive comments or spam from bots on the content you post, TikTok has a setting for this. Go to your profile, click the three horizontal bars at the top right, select Settings and privacy > Privacy > Comments, and then click the toggle for Filter spam and offensive comments.

If you activate this setting, you will have the choice to manually approve any comments that TikTok identifies as offensive or spam.

TikTok also has a setting to filter certain keywords from comments under your own content. For instance, if you’re tired of hearing about a certain topic, you can restrict these comments.


To use this feature, go to your profile, click the three horizontal bars at the top right, select Settings and privacy > Privacy > Comments, and then click the toggle for Filter keywords. You can then click the bar that says Add keywords and select any words you’d like to automatically hide from your comment section.

After you activate this setting, you can manually approve any comments that use the filtered keywords.

5 Filter Video Keywords

If you’d like to avoid content with certain keywords while scrolling, TikTok has a feature that allows you to do this. To filter video keywords, go to your profile, click the three horizontal bars at the top right, select Settings and privacy > Content preferences > Filter video keywords, and then click on Add keyword.


On this screen, you can select single words you’d like to filter from content. For example, you could filter “gaming” from your feed by typing that word into the box. From there, you can select if you’d like to filter out that content from your For You page, Following, Friends, and/or STEM page. If your friend posts gaming content, but you don’t want to see other people’s gaming content, you can just hide the gaming keyword on your For You page.

While this is a great way to fine-tune the content TikTok shows you, but you can also completely reset your For You page to start from scratch.

6 Mute Accounts


Finally, if you want to stop receiving notifications about an account’s content, you can mute post notifications from that account. Go to that account’s page, click the bell icon in the top right corner, and select None from the list of options.

You can train the TikTok algorithm to show content that is related to your interests with these tips. Next time you see content that doesn’t align with your hobbies, you’ll know what to do.

These Are the Most Important Components for Your Gaming PC

Key Takeaways

  • Prioritize the CPU or GPU based on the types of games you play for optimal performance on a budget.
  • At least 16GB of RAM, an NVMe SSD, cooling system, and high refresh rate monitor will all enhance your gaming experience.
  • When choosing parts, keep in mind compatibility and requirements for your motherboard, case, and power supply.


Choosing components for your gaming PC can be quite a daunting task. Let’s ensure you get the right parts by identifying key gaming components and how they boost or affect gaming performance.


1 CPU and GPU

Miker Rivero/Midjourney/MakeUseOf

At the heart of any gaming PC lies the CPU (Central Processing Unit) and GPU (Graphics Processing Unit). These two components work in tandem to handle the complex calculations and rendering required for gaming.

Depending on what type of games you primarily want to play, prioritizing either a better CPU or GPU can be a smart decision if you’re on a tight budget.


Games that perform better with a strong CPU are often those that are heavily reliant on physics calculations, artificial intelligence (NPCs), and complex simulations. These include:

  • Real-time strategy (RTS) games: Titles like StarCraft II or Age of Empires prioritize CPU power for handling numerous units, AI calculations, and game logic.
  • Massive multiplayer online games (MMOs): Games like World of Warcraft or Albion Online benefit from strong CPU performance to handle player interactions, NPC behaviors, and world events.
  • Simulation games: Titles such as Cities: Skylines or Flight Simulator require robust CPU performance for simulating detailed environments, traffic, weather, and physics.

On the other hand, games that demand better GPU performance rely heavily on rendering and visual effects, such as:


  • First-person shooters (FPS): Games like Call of Duty, Battlefield, or Cyberpunk 2077 prioritize GPU power for rendering detailed environments, character models, and special effects.
  • Open-world games: Titles such as Assassin’s Creed or Red Dead Redemption require strong GPU performance to render vast, visually stunning landscapes and complex lighting effects.
  • Virtual reality (VR) games: VR titles like Half-Life: Alyx or Beat Saber demand high GPU performance to maintain smooth frame rates and render immersive 3D environments for an optimal VR experience.

It should be noted that all modern games today require a well-rounded PC to play smoothly. So, it is still important to strike a balance between both components so as not to encounter any bottlenecks when gaming.

When shopping for CPUs, look for models with high clock speeds and multiple cores to ensure smooth gameplay and multitasking capabilities. As for GPUs, look for faster clock speeds, more VRAM, and higher CUDA Cores (NVIDIA) or Stream Processors/Compute Units (AMD).


Remember, prioritizing one component over the other is fine as long as both the CPU and GPU are working at around the same capacity when gaming.

2 RAM

Two RAM sticks on top of a computer motherboard
Zoomik/Shutterstock

Both the GPU and CPU require fast memory to store temporary data while gaming. GPUs already come integrated with their own Video Random Access Memory (VRAM), while CPUs require a separate Random Access Memory (RAM) component which you’ll need to purchase and install on your motherboard.

When buying RAM, here are the specifications you need to check out:


  • Memory Size: Measured in Gigabytes (GB). Indicates the maximum amount of memory a stick of RAM can store.
  • Speed: Depending on the manufacturer, RAM speed can be measured in mega-transfers per second (MT/s) or megahertz (MHz). Mega-transfer measures the amount of data RAM can transfer per second, while megahertz measures the frequency or clock speed of the RAM.
  • DDR Generation: DDR (Dual Data Rate) RAM currently has five generations. The most common RAM generation used today is DDR4, with DDR3 becoming obsolete, and DDR5 gaining adoption on newer PCs. Each RAM generation has a different number of pins and pin layout. Make sure to check what DDR generation your motherboard supports.

Opt for at least 16GB of RAM to ensure smooth gameplay and multitasking capabilities. Higher capacities can further improve performance, especially in memory-intensive games or applications.

In terms of speed, you’ll want to choose RAM no slower than 3000 MHz /MT/s for DDR4 compatible motherboards and RAM speeds of at least 5000 Mhz/MTs for DDR5. Due to labeling mistakes in the past becoming a common convention today, RAM data rate and frequency rates have become quite a confusing topic.


There is no need to worry about it right now as it doesn’t really affect performance. As long as you don’t go below 3000 MHz /MT/s for DDR4 and 5000 Mhz/MTs for DDR5, your gaming PC should work fine.

3 A Solid State Drive (SSD)

Solid-State Drives (SSDs) have become essential storage for gamers due to their fast read and write speeds. With a good SSD, game load times are significantly reduced, while also improving overall system responsiveness.

SSDs can come in many different types, versions, and form factors. But for gaming, all you really need to be concerned about is the memory capacity and type.

There are two types of SSDs: SATA and NVMe. SATA (Serial Advanced Technology Attachment) is a standard interface used for connecting storage devices such as hard disk drives (HDDs) and solid-state drives (SSDs) to a computer’s motherboard. While NVMe (Non-Volatile Memory Express) provides better performance by using a PCIE slot for faster data transfer at lower latencies.


Unless you already have a SATA SSD lying around, we won’t recommend them anymore, since the price difference between SATA and NVMe SSDs is negligible. Get yourself an NVMe M.2 drive with at least 1 terabyte of capacity. It should be faster, easier to install, and be around the same price as any SATA SSDs available today.

4 Cooling System

graphics card with aio cooling solution in rgb case
Alberto Garcia Guillen/Shutterstock

Installing high-performance components on your gaming rig makes overheating more likely. To ensure you can continue gaming for extended periods of time, finding an effective cooling system is essential.


Air cooling solutions, such as aftermarket CPU coolers and case fans, provide adequate thermal dissipation for most gaming setups. For enthusiasts pushing the limits with overclocking or high-performance components, liquid cooling solutions offer superior heat dissipation and quieter operation.

We recommend getting an AIO (All-In-One) liquid cooler, as it provides better CPU cooling, while also being relatively easy to install and maintain. When choosing an AIO, consider factors such as radiator size, pump noise, and coolant type when choosing a liquid cooling setup.

As for fans, always make sure to fill all the available fan slots within your PC case. Having fewer but bigger case fans can make your gaming rig quieter, while having smaller case fans allows for an extra two to five extra fans which can provide stronger air pressure, albeit being noisier and messier to install and maintain. Of course, if you can afford it, expensive solutions such as MagLev PC fans and iCUE LINK are always available.


5 A High Refresh Rate Monitor

Two OLED monitors VESA mounted on a desk with keyboard and mouse below it
Hamlin Rozario/MakeUseOf

A high refresh rate monitor can elevate your gaming experience by displaying more frames per second, resulting in smoother motion and reduced input lag. Aim for a monitor with a refresh rate of at least 144Hz, though higher refresh rates, such as 240Hz or even 360Hz, are available for those seeking the utmost fluidity.

Additionally, look for features such as adaptive sync technologies (NVIDIA G-SYNC or AMD FreeSync) to eliminate screen tearing and stuttering for a tear-free gaming experience.

6 Other PC Parts to Consider

Beyond the core components mentioned above, several other parts play a crucial role in building a gaming PC:


  • Motherboard: Choose a motherboard that supports your chosen CPU, GPU, and RAM and which offers features like overclocking support, ample connectivity options, and future upgradeability.
  • Power supply: Invest in a reliable power supply unit (PSU) with sufficient wattage to power your components safely, while also considering any potential upgrades in the future. Make sure that the power supply can support all the new components on your gaming rig.
  • Case: Select a case that not only accommodates your chosen components but also offers good airflow, cable management, and aesthetics to suit your preferences. A bigger case allows room for bigger components as well as more case fans, which can help cool the system better.

In conclusion, when building a gaming PC, prioritize the CPU and GPU for raw processing power, complemented by ample RAM and fast storage for smooth performance. Invest in a robust cooling system to maintain optimal temperatures and pair your setup with a high refresh rate monitor for a truly immersive gaming experience. Finally, consider the compatibility of all components and invest in quality parts to future-proof your gaming rig for years to come.


How do you ensure quality control in Flex pcb supplier?

quality control in Flex pcb supplier

Ensuring quality control in Flex PCB (Flexible Printed Circuit Board) manufacturing is a multifaceted process that involves stringent measures at every stage of production. Flex PCB suppliers implement comprehensive quality control protocols to guarantee the reliability, performance, and durability of their products. These protocols encompass design validation, material inspection, process control, in-line testing, final inspection, and continuous improvement practices.

Quality control begins at the design phase. Ensuring that the initial designs are robust and error-free is crucial for the success of the entire manufacturing process. Design validation involves using advanced computer-aided design (CAD) software to create detailed schematics and models. These designs are then subjected to rigorous simulations to predict how the flexible circuits will perform under various mechanical and electrical stresses. Design for Manufacturability (DFM) and Design for Reliability (DFR) checks are conducted to identify potential issues that could arise during production or use.

The next step in quality control involves inspecting the raw materials used in the production of Flex PCBs. High-quality materials are essential for the performance and longevity of the final product. Flex PCB suppliers rigorously test incoming materials, such as polyimide or polyester substrates, copper foils, and adhesives, to ensure they meet specified standards. This includes checking for material purity, thickness, flexibility, and thermal stability. Suppliers often work closely with their material vendors to maintain consistent quality and traceability.

How do you ensure quality control in Flex pcb supplier?

Process control is vital to maintaining quality throughout the manufacturing stages. This involves closely monitoring and regulating each step of the production process, including photolithography, etching, plating, lamination, and drilling. Advanced process control systems and automation are employed to ensure precision and consistency. For example, photolithography must be precisely controlled to create accurate circuit patterns, while etching must be carefully managed to avoid over- or under-etching.

In-line testing is conducted during the manufacturing process to identify and address defects as early as possible. Automated Optical Inspection (AOI) systems are used to scan the Flex PCBs for visual defects such as misaligned components, solder bridges, and trace discontinuities. AOI systems use high-resolution cameras and image processing software to detect anomalies with high accuracy. Electrical testing is also performed to verify the integrity of the circuit paths and to ensure that there are no short circuits or open circuits.

After the assembly and primary testing phases, a comprehensive final inspection is carried out to ensure that the Flex PCBs meet all quality standards. This includes visual inspection, electrical testing, and functional testing. X-ray inspection may be used to examine solder joints and internal layers for hidden defects. Environmental stress testing, such as thermal cycling and humidity exposure, is conducted to simulate real-world operating conditions and to ensure the reliability of the Flex PCBs under various stresses.

Quality control in Flex PCB manufacturing is an ongoing process that involves continuous improvement practices. Flex PCB suppliers collect data from the production line, testing phases, and field performance to identify areas for improvement. Statistical Process Control (SPC) techniques are used to analyze data and to identify trends and variations in the manufacturing process. Root cause analysis is performed to investigate any defects or failures, and corrective actions are implemented to prevent recurrence. Suppliers also invest in research and development to stay abreast of the latest technologies and to enhance their manufacturing capabilities.

In conclusion, ensuring quality control in Flex PCB manufacturing requires a comprehensive and systematic approach that spans from design validation to continuous improvement. By implementing rigorous material inspections, precise process controls, in-line testing, and thorough final inspections, Flex PCB suppliers can produce reliable and high-performance flexible circuits. Continuous improvement practices ensure that the quality control processes evolve and adapt to new challenges, maintaining the highest standards in the industry. This multifaceted approach to quality control is essential for meeting the stringent demands of various applications, from consumer electronics to aerospace and medical devices.

The Best Mobile Carrier for You: Verizon, AT&T, or T-Mobile?

Key Takeaways

  • Verizon is best for rural areas due to its massive network, but the carrier is less friendly to unlocked phones.
  • T-Mobile excels with fast speeds, international travel perks, and flexible MVNO options.
  • AT&T offers the best value with affordable prepaid plans, enticing bundles, and decent coverage in smaller towns.


There are really only three nationwide networks to pick from in the US: Verizon Wireless, T-Mobile, and AT&T. Most other carriers lease access to these networks to offer more bang for your buck. But which one should you choose? Well, that depends.


Verizon: The Best for Rural Areas

All carriers now offer unlimited data plans, discounts for having multiple lines, home internet bundles, and 5G speeds. Prices fluctuate to stay competitive, so it’s no longer the case that one costs significantly more than the other. Verizon’s base prices still tend to start a bit higher, but the gap closes as you tack on more perks.


Verizon has long offered a massive network with towers covering the largest land area. In the past, this meant that the network was your only option in many rural parts of the country. Thankfully, following T-Mobile’s acquisition of Sprint, Verizon has competition in areas where it used to exercise a monopoly. Yet Verizon’s network is still the largest and probably your safest bet if you live in or frequently visit rural areas.

Before its transition to 4G LTE and 5G, Verizon was a CDMA network incompatible with GSM, preventing you from swapping a SIM card between devices. With 3G gone, this has changed. Still, Verizon remains one of the more restrictive carriers, limiting which phone models can access their network.

Buying an unlocked phone is cheaper than going through a carrier in most cases, but Verizon’s network tends to be compatible with fewer devices.

T-Mobile: The Best for Fast Speeds

T-Mobile website homepage


T-Mobile’s network used to be very spotty, limited primarily to cities and densely packed suburbs. You could expect excellent speeds and performance in cities, but you wouldn’t be able to place a call if you ventured to places that interstate highways don’t pass through.

Now, T-Mobile is competitive with Verizon in many rural parts of the country. In some places, its network is even stronger. In 2022, PCMag rated T-Mobile the strongest network in the US. It began the transition to 5G sooner than the other two, offering faster speeds to more customers.

T-Mobile used to compete with Verizon and AT&T by trying to undercut them in price. Now that T-Mobile’s network is comparable to the other two, the carrier’s prices are roughly the same.

You’re free to take your SIM from one phone to another, and T-Mobile has long been one of the best options for people who prefer to buy unlocked phones (though if you buy your phone directly from T-Mobile, it will still be carrier-locked). It’s also welcoming to Mobile Virtual Network Operators (MVNOs) like Google Fi and Red Pocket, where you can access T-Mobile’s network for significantly less money.


T-Mobile bakes international travel to over 210 countries into its current non-prepaid plans. They land you plenty of data and unlimited text, with calls at 25 cents per minute. If you need international calling, T-Mobile’s plans are significantly cheaper than those of Verizon and AT&T. If you leave the country regularly, T-Mobile is the way to go. Keep phone calls to a minimum, and your wallet will barely suffer.

AT&T: The Best Value

AT&T website advertising mobile plans and devices

AT&T is the largest phone carrier in the US in terms of subscribers, but it offers neither the largest network nor the fastest speeds. It does provide the most affordable prepaid plans, enticing bundles, and plenty of discounts. In many instances, the carrier simply sells a service that is good enough for just the right price.


The network does a decent job of serving many smaller towns and rural counties. In some parts of the country, it’s the best option, but that’s not the case if you look at the country as a whole.

Like T-Mobile, AT&T tends to be a good choice for people who prefer to shop for unlocked phones. The story is different when it comes to international travel, as its prices are comparable to Verizon’s.

What About Other Carriers?

The options don’t end there. You may live within range of a regional carrier like US Cellular or in one of the areas where Dish Wireless, a newer player, is available.

For most of us, though, it’s worth looking at subsidiaries and MVNOs.

The Best Subsidiaries

These are carriers who are owned by one of the big three:

  • Visible: Unlimited data plans on Verizon’s network starting at $25 a month.
  • Mint Mobile: Some of the most affordable plans for people willing to buy a year of service upfront, all on T-Mobile’s network.
  • Cricket Wireless: Competitive low pricing on AT&T’s network


The Best MVNOs

Most other carriers are MVNOs. They provide cell phone connectivity without building and maintaining their own infrastructure. Instead, they lease a nationwide carrier’s network.

MVNOs are often cheaper if you aren’t a heavy data user. On the downside, these services lack carrier stores, so you have to be comfortable heading online and troubleshooting yourself.

There are so many factors to consider when deciding which mobile carrier is the best fit for you. Where do you live? How often do you travel? Do you stream music and movies over mobile data? Do you buy unlocked phones?


No company can claim to be the best carrier in the US for all purposes and in all areas. Your best bet is to try out a carrier’s network before signing any long-term agreements.

The 12 Best Deep Search Engines to Explore the Invisible Web

Quick Links

Key Takeaways

  • The invisible web is vast, including the deep & dark web.
  • Specialist search engines like Ahmia and Torch can access it but use Tor to access individual sites from the search results.
  • Sites like Pipl, Directory of Open Access Journals, The Wayback Machine, Veridian, and Project Gutenberg hold valuable content for different use cases.


Not everything on the web will show up in a list of search results on Google or Bing; there are numerous places that the sites’ web crawlers cannot access.

To explore the invisible web, you need to use specialist search engines. Here are our top 12 services to perform a deep internet search.


What Is the Invisible Web?

Before we begin, let’s establish what the term “invisible web” refers to. Simply, it’s a catch-all term for online content that does not appear in search results or web directories.

There is no official data available, but most experts agree that the invisible web is several times larger than the visible web. The true size of the internet is unknown, and the same goes for the invisible web. However, the invisible web can be roughly divided into the deep web and the dark web.

The Deep Web

The deep web is made up of content that typically requires some form of accreditation to access. Examples include library databases, email inboxes, personal records (financial, academic, health, and legal), cloud storage drives, and company intranets. If you have the correct details, you can access the content through a regular web browser.


The Dark Web

The dark web is a subsection of the deep web. You need to use a dedicated browser (such as Tor) to access dark web content. It’s more anonymous than the regular web and is thus often the home of illegal activities. However, not everything on the dark web is illegal. Some of the best dark web websites are just versions of regular sites but are hidden to enable users in totalitarian regimes to access them.

The 12 Best Deep Search Engines

1. Pipl

Pipl brands itself as the world’s largest people search engine. Unlike Google, Pipl can interact with searchable databases, member directories, court records, and other deep internet search content to offer you a detailed snapshot of a person. You can also use Pipl to deep search yourself.


2. The Wayback Machine

Regular search engines only provide results from the most recent version of a website that’s available.

The Wayback Machine is different. It has copies of more than 850 billion web pages on its servers, allowing you to search for content that’s no longer available on the visible web. It’s also a handy site for viewing old versions of any website.

3. The WWW Virtual Library

www virtual library search tool

The WWW Virtual Library is the oldest catalog on the web. It was started by Tim Berners-Lee, the creator of the World Wide Web, back in 1991.


Volunteers compile the list of links by hand, thus creating a high-quality index of deep web content across dozens of categories.

4. DuckDuckGo

DuckDuckGo's onion site viewed using Tor browser

DuckDuckGo is well-known as one of the best private search engines for the visible web and offers one of the best privacy-focused smartphone browsers. But did you know the company also offers an onion site that lets you explore the dark web?

Even the regular search engine offers more deep web content than Google. It pools results from more than 500 standalone search tools to find its results. If you pair the regular DuckDuckGo engine with the Onion version, you can perform an entire web search.

The Onion site can be found at https://duckduckgogg42xjoc72x3sjasowoarfbgcmvfimaftt6twagswzczad.onion/.


5. USA.gov

www.usa.gov website homepage

The amount of content on USA.gov is seriously impressive. It’s a portal to all the public material you need on every federal agency and state, local, or tribal government.

You will also find information about government jobs, loans, grants, taxes, and a whole lot more. Most of the information on the site will not appear on Google.

6. Directory of Open Access Journals

Drectory of Open Access Journals' website

The Directory of Open Access Journals is a deep internet search engine that provides access to academic papers. The papers are available to anyone without charge.


The current repository has over 20,000 journals with over 10 million articles across all subjects. Although you can easily find free articles on Google Scholar, and it can access some of the information, we think that the DOAJ is a better research tool.

7. SearXNG

SearXNG deep web search engine website homepage

If you are looking for a dark web search engine that also gets data from the visible web, check out SearXNG. The site has an Onion domain name, so it is not accessible through a standard web browser. To load it, open a dark web browser such as Tor and paste http://searx3aolosaf3urwnhpynlhuokqsgz47si4pzz5hvb7uuzyjncl2tid.onion/ into the address bar.

It pulls data from different search engines, so it opens you to a world of endless possibilities. If it exists, this search engine can probably find it.


8. Veridian

Veridian's projects section containing historical newspapers and articles

Veridian aims to provide a single portal to all the historical newspapers of the world. It’s a fantastic resource for researchers—especially family historians, genealogists, and students.

Many of the newspapers on the site are exclusively on the deep web; they will not show up on Google. At the time of writing, over 3.6 million newspapers are available.

Veridian Software is the company behind Elephind, the now-dead portal for historical newspapers. If you loved Elephind and want an alternative, you’ll be happy to know that all of its library is still accessible via Veridian’s website.

9. Torch

Torch deep web search engine homepage


As one of the oldest deep web search engines, Torch is one of the best. Torch prides itself on not censoring any search results, and it scours the deep web every day for new publicly available Onion websites on the Tor network.

There are over three million documents indexed by the search engine as of writing. To access Torch, copy and paste the following link in Tor: http://xmh57jrknzkhv6y3ls3ubitzfqnkrwxhopf5aygthi7d6rplyvk3noyd.onion/

10. Ahmia

Ahmia deep web search engine home page

Ahmia is a dark web search engine. But there’s a twist—it is one of the few dark web search engines that is available on the regular web. Of course, any links and results will not be openable unless you have the Tor browser installed on your computer.


However, it’s still a great way to get a taste of what’s available on the dark web without exposing yourself to the inherent risks of using the dark web. Before exploring, you should first know how to avoid dangerous content on the dark web.

11. WorldCat

worldcat internet search tool

How do you know which books the different local libraries in your area have in stock? Going through each library’s site individually is time-consuming and potentially error-prone.

Instead, check out WorldCat. This deep internet search engine has two billion indexed items from libraries around the world, including many links that are only typically available with a database search.

12. Project Gutenberg

Project Gutenberg's website homepage


If you search for obscure copyright-free ebooks on Google, you’ll have to click through several pages to find a result that provides a download link.

Project Gutenberg offers over 70,000 free ebooks for you to check out and download. It provides variable formats and a list of similar books to download. It’s undoubtedly one of the best sites to download ebooks for free.

The 12 search engines we have introduced you to should provide a solid base on which to start your hunt for content. Sadly, one of the most famous deep search engines from the past, Deeppeep, no longer exists, but all the sites in the article can help to recreate the lost features.

What are the steps involved in Printed circuit board assembly manufacturer?

steps involved in Printed circuit board assembly manufacturer

Printed circuit board (PCB) assembly is a meticulous process that transforms bare PCBs into functional electronic devices capable of performing a wide range of functions. The assembly process involves several sequential steps, each crucial for ensuring the quality, reliability, and functionality of the final product. Let’s explore the key steps involved in PCB assembly manufacturing.

The first step in printed circuit board assembly manufacturer is the preparation of components. This includes sourcing electronic components such as resistors, capacitors, integrated circuits, and connectors from suppliers. Components are inspected for defects, verified for compatibility with the PCB design, and organized for efficient assembly. This stage is critical for ensuring that all necessary components are available and that they meet quality standards before proceeding with assembly.

Next, the PCB is prepared for component placement. This involves applying solder paste to the PCB using a stencil. Solder paste is a mixture of tiny solder particles and flux, which helps the solder adhere to the PCB pads and components during the soldering process. Stencil printing machines accurately deposit solder paste onto the designated areas of the PCB, guided by the PCB design file. Precise application of solder paste is essential for ensuring proper soldering and electrical connections.

What are the steps involved in Printed circuit board assembly manufacturer?

Once the solder paste is applied, components are placed onto the PCB. This can be done manually or using automated pick-and-place machines, depending on the scale of production and complexity of the assembly. Pick-and-place machines use vision systems to accurately position components onto the solder paste pads with high speed and precision. Correct component placement is crucial for ensuring proper electrical connections and functional integrity of the PCB assembly.

After component placement, the PCB undergoes reflow soldering. Reflow soldering is a process where the PCB is subjected to elevated temperatures to melt the solder paste and form strong, permanent connections between the components and the PCB pads. The PCB is passed through a reflow oven, where carefully controlled heating profiles ensure that the solder paste melts uniformly and solidifies without defects. Reflow soldering is a critical step that requires precise temperature control to prevent issues such as solder bridging, tombstoning, or insufficient wetting.

Following reflow soldering, the assembled PCB undergoes inspection to identify and rectify any defects. Automated optical inspection (AOI) systems use cameras and image processing algorithms to detect issues such as missing, misaligned, or improperly soldered components. AOI helps ensure the quality and reliability of the PCB assembly by identifying defects that may compromise performance or functionality. Any detected defects are addressed through rework, where faulty components are replaced or solder joints are repaired.

Once the PCB assembly passes inspection, it may undergo additional processes depending on the specific requirements of the application. These may include conformal coating application for protection against environmental factors such as moisture, dust, and chemicals, or testing to verify functionality and performance. Conformal coating provides a protective barrier that enhances the durability and reliability of the PCB assembly in harsh operating environments.

Finally, the finished PCB assemblies are packaged and prepared for shipment to customers or further integration into larger electronic systems. Packaging may involve placing the assemblies in trays, tubes, or tape-and-reel packaging for safe transportation and handling. Proper packaging helps prevent damage to the PCB assemblies during transit and storage, ensuring that they arrive at their destination in optimal condition.

In conclusion, the PCB assembly process is a systematic sequence of steps that transforms raw materials into functional electronic devices. From component preparation to final inspection and packaging, each step is essential for ensuring the quality, reliability, and performance of the finished PCB assemblies. By adhering to rigorous quality standards and employing advanced manufacturing techniques, PCB manufacturers can produce high-quality electronic products that meet the demands of modern technology and consumer expectations.

How does pcb assembly manufacturer compare to traditional methods?

pcb assembly manufacturer compare to traditional methods

The evolution of PCB assembly manufacturing has seen a significant shift from traditional methods to more advanced techniques, ushering in a new era of efficiency, precision, and reliability. A comparison between PCB assembly manufacturer services and traditional methods reveals the transformative impact of modern manufacturing technologies on the electronics industry.

Traditionally, PCB assembly involved manual processes such as hand soldering, wire wrapping, and point-to-point wiring. These methods were labor-intensive, time-consuming, and prone to errors, resulting in inconsistent quality and reliability. Hand soldering, in particular, required skilled technicians to solder individual components onto the PCB manually, leading to variations in solder joint quality and the risk of defects such as cold joints, solder bridges, and tombstoning.

In contrast, pcb assembly manufacturer services leverage advanced automation and robotics to achieve higher levels of precision, consistency, and efficiency. Automated pick-and-place machines swiftly position surface-mount components onto the PCB with micron-level accuracy, eliminating the variability associated with manual component placement. Automated soldering equipment, such as reflow ovens and selective soldering machines, ensure uniform solder joints and reliable connections, reducing the risk of defects and improving overall product quality.

How does pcb assembly manufacturer compare to traditional methods?

Furthermore, modern PCB assembly manufacturers utilize advanced inspection and testing technologies to ensure the quality and reliability of PCB assemblies. Automated optical inspection (AOI) systems and X-ray inspection machines can detect defects such as misalignment, solder voids, and component placement errors with unparalleled accuracy and speed. In contrast, traditional inspection methods such as visual inspection and manual testing were time-consuming and prone to human error, leading to higher rates of defects and rework.

Moreover, PCB assembly manufacturer services offer greater flexibility and scalability compared to traditional methods. Specialized PCB assembly houses can accommodate a wide range of PCB sizes, complexities, and production volumes, from small-batch prototyping to high-volume production runs. By leveraging automated assembly lines and flexible manufacturing processes, PCB assembly manufacturers can respond quickly to changing market demands and customer requirements, without sacrificing quality or efficiency.

Additionally, PCB assembly manufacturer services provide enhanced supply chain management and component sourcing capabilities. Specialized PCB assembly houses maintain extensive networks of suppliers and distributors, ensuring a reliable and uninterrupted supply of electronic components and materials. This reduces the risk of supply chain disruptions and component shortages, which can impact production schedules and time-to-market. In contrast, traditional methods often relied on in-house component sourcing and inventory management, which could be cumbersome and inefficient.

Furthermore, PCB assembly manufacturer services offer improved cost-effectiveness compared to traditional methods. By leveraging economies of scale, bulk purchasing power, and optimized production processes, specialized PCB assembly houses can offer competitive pricing to their clients. This allows businesses to reduce overhead costs associated with maintaining in-house manufacturing capabilities, such as equipment maintenance, labor expenses, and facility overheads. Additionally, outsourcing PCB assembly to specialized manufacturers enables businesses to allocate resources more strategically, invest in core competencies, and maximize profitability.

In conclusion, the comparison between PCB assembly manufacturer services and traditional methods underscores the transformative impact of modern manufacturing technologies on the electronics industry. By leveraging automation, robotics, advanced inspection and testing technologies, and optimized supply chain management capabilities, PCB assembly manufacturers can achieve higher levels of efficiency, precision, reliability, flexibility, scalability, and cost-effectiveness, compared to traditional methods. As the demand for smaller, faster, and more powerful electronic devices continues to rise, the importance of PCB assembly manufacturer services in driving innovation and competitiveness in the electronics industry cannot be overstated.

I Won’t Buy a Smartphone in 2024 Without These 8 Features

Quick Links

Looking to buy a smartphone in 2024? From my experience using flagship phones for the last 15 years, a high-end phone should meet current industry standards. However, it’s okay for a mid-range phone to miss out on a couple of key features.


1 High Refresh Rate Display

Zarif Ali/MakeUseOf

High-end smartphones today should have a 120Hz refresh rate. I absolutely cannot compromise in that regard because my eyes have adapted to high refresh rate computer monitors and TVs. Everything feels choppy when I switch back to a 60Hz display.

Some people who haven’t used a high refresh rate screen before would struggle to notice the difference between 60Hz and 120Hz. However, once you downgrade to a 60Hz screen, you’ll immediately notice the choppiness as you scroll and navigate through menus.


Considering you’ll be looking at your phone’s screen every time you pick it up, you shouldn’t settle for anything less than 120Hz, especially if you’re paying over $800. But if you’re in the market for a mid-range phone, make sure it has a 90Hz refresh rate at the very least.

2 Triple-Lens Camera Setup

A woman holding two iPhones showing their cameras
Paul Antill / MakeUseOf

We all take a ton of photos and videos with our smartphones today. Therefore, it needs to pack a class-leading camera setup with multiple lenses that allow you to shoot in different scenarios.

Most high-end phones take great pictures with their main lenses, but you need to make sure they have equally good ultrawide and telephoto lenses for the price you pay. Personally, I would want the most versatile lens setup if I’m paying a grand or more.


However, if you’re in the market for a mid-range phone, settling for a smartphone with a dual-camera setup is okay. The second lens may be either telephoto or ultrawide, so choose depending on what kind of shots you plan to take with your phone.

3 OLED Screen

Lock screen of the Google Pixel 8
Sergio Rodriguez / MakeUseOf

Whether you’re looking for a mid-range or high-end smartphone, it should have an OLED display to meet today’s standards. OLED and AMOLED screens are superior to LCD panels, as they pack self-emitting pixels that can control their brightness individually instead of using an LED backlight.

You get perfect blacks as the pixels shut off individually to display black content, resulting in an infinite contrast ratio. They also offer the widest viewing angles and can display a broader range of colors with great accuracy, making them perfect for content consumption.


4 Flagship Processor

A17 Pro chip on the iPhone 15 Pro
Apple/YouTube

For 2024, I would want the Snapdragon 8 Gen 3 chip if I’m going for an Android device or Apple’s A17 Pro chip if I’m interested in the newest iPhones. You shouldn’t settle for anything less if you’re paying $1000 or more for a smartphone.

Mid-range buyers should carefully check the specifications and see if the phone has yesteryear’s flagship chip, like the Snapdragon 8 Gen 2 or the A16 Bionic.

These high-end processors will ensure smooth performance no matter what task you throw at it. They will continue to do so for several years, so you don’t have to upgrade your smartphone often.


5 At Least 8GB of RAM

Gone are the days when you could get away with 4GB of RAM in a smartphone. In 2024, I’d want at least 8GB of RAM, especially if it’s an Android device. 6GB is fine if it’s an iPhone, as iOS does a much better job at memory management.

You’ll be able to multitask effortlessly and have several apps running in the background with no issues on a phone with 8GB of RAM or higher.

Almost all Android flagships in 2024 come with 12GB of RAM—the Galaxy S24 Ultra we reviewed is a good example. However, phones in the $500 to $800 price bracket often pack 8GB of RAM, like the Google Pixel 8 we reviewed in late 2023.

6 All-Day Battery Life

A Redmi powerbank fast charging a Redmi phone
sdx15/Shutterstock


No matter what phone you buy, its battery should be good enough to last you for a whole day under normal use. Nobody wants to carry around power banks or chargers every day they head to work. As a power user, I want my phone to get me through a whole workday despite heavy use.

From my experience, Android phones with a battery capacity of 5000mAh or higher tend to meet my expectations. As for iPhones, the bigger Pro Max and Plus variants last noticeably longer than their smaller siblings. I highly recommend opting for bigger phones, as they generally have bigger batteries.

7 256GB of Storage

Today’s smartphones can shoot high-resolution photos and videos that quickly eat up your precious internal storage space. The iPhone 15 Pro, for example, takes 24MP photos by default and records at 4K/60FPS. And if you shoot in Apple’s ProRes and ProRAW formats, even 256GB of storage won’t be sufficient.


Apps are also getting bigger and better with each passing day, so you need to make sure you can use your phone for years without worrying about storage space. Otherwise, you’ll have to pay a monthly fee for a cloud storage service like iCloud or Google One and move some of your data to the cloud.

Therefore, I highly recommend getting a phone with 256GB of internal storage. You can get away with 128GB of storage if you’re a casual user who rarely takes photos and doesn’t install a ton of apps. It’s also a nice bonus if the phone has an SD card slot.

8 Long-Term Software Support

If I’m spending a grand on a smartphone, I expect the manufacturer to support it with software updates for several years. Apple does an excellent job in this department, as iPhones released in 2018 officially support its most recent iOS version, iOS 17.


Android phones are a bit behind in this aspect, typically offering OS updates for two to four years. However, as of 2024, both Google and Samsung promise seven years of OS updates for the flagship Pixel 8 and Galaxy S24 series of phones. So, if you plan to buy an Android phone from any other manufacturer in 2024, be sure to check these details beforehand.

If a smartphone I’m interested in misses the mark in any of these aspects, it’s a major dealbreaker. There are other features that I consider, like wireless charging and a higher water resistance rating, but I could definitely live without them.

Why I Prefer to Game in an Office Chair Instead of a Gaming Chair

Key Takeaways

  • Office chairs are generally more ergonomic than gaming chairs, offering better back support and allowing for more natural movement.
  • Gaming chairs are often cheaply made and overpriced, with their focus on aesthetics sacrificing comfort and build quality.
  • Office chairs provide a more neutral aesthetic that blends in better with most setups and avoids looking too childish.


There’s a popular myth that every gaming setup needs a gaming chair. On the surface, it makes sense; where else would you need a gaming chair? However, I’ve used both office chairs and gaming chairs long enough to establish reasons why an office chair is indeed better.


1 Office Chairs Are Often More Ergonomic and Comfortable

Because office chairs aren’t restricted to some “gaming” aesthetic, they are often designed more ergonomically than gaming chairs. Here are some gaming chair ergonomics pain points for me…

Race car Bucket Seat Design

Standret/Shutterstock

All the gaming chairs I’ve bought share a common feature: they’re designed like race-car bucket seats. For those who don’t know, bucket seats have side bolsters on the seat and back that taper and curve out, designed to keep the occupant in place during high-speed turns.


While this design effectively resists G-forces, it becomes a hindrance when gaming at a desk. It could be useful if you’re building a motion-driving simulation rig, but most gamers are not. So, it essentially forces you to remain in one position. However, office chairs allow you to stretch and move about.

Gaming Chairs Are Typically Too Big

Another thing that makes gaming chairs uncomfortable is that they are usually too big. I’m about 5’11—an above-average height—and I still find many gaming chairs too big. While big chairs are good for lounging, they don’t compare to how snug and smart a good office chair feels.

Even when I find a small-sized gaming chair, it’s designed so that when I sit properly, I am still far away from my desk.


A properly sized chair allows you to rest your back and actually use the chair’s lumbar support while at a desk. If you use an oversized chair, you might be forced to sit close to the edge just to engage properly with your desk and gaming accessories. This can lead to slouching, poor posture, and eventually back pain.

Oddly enough, larger people may still struggle with gaming chairs because the bucket seat design is restrictive.

Bad Lumbar Support

Man in an office chair at a desk
Dreamchild Obari/MakeUseOf

Lumbar support is one of the key arguments for using ergonomic chairs. You may have heard it a lot as a buzzword in the ergonomic chair industry, but it boils down to supporting the natural curve of your spine.

It’s important because good lumbar support will minimize back pain in those long gaming sessions. Additionally, it helps correct your sitting posture and reduces the risk of long-term problems arising from improper posture. I should add that good posture is a key tenet to staying healthy as a gamer.


If you look at the profile of most low-end gaming chairs, they have a long, straight back with a pillow as lumbar support. Give it a couple of hours, and that lumbar support pillow will flatten and take away what little lumbar support it provides.

For gamers reading this who have some kind of back pain from using gaming chairs, it might be time to consider switching to an office desk chair designed to prevent back pain. I use a mesh office chair with a curve that matches my spine, and it has helped improve the pain I developed from my gaming chair days.

2 Gaming Chairs Are Cheaply Built and Overpriced

I’ve seen this many times: a regular, not-so-great accessory is packaged with a “gaming” design and sold for a markup. It’s a popular marketing gimmick, and you may have noticed it yourself. Unfortunately, this is also often the case with gaming chairs. In fact, it’s a core reason not to buy a gaming chair.


If you compared a $300 regular ergonomic office chair to a $300 – $500 gaming chair, you’d see that the office chair offers more by way of comfort and adjustability than its gaming counterpart. Additionally, in the category of budget-friendly ergonomic chairs, office chairs seem to be the ones with the better build quality these days.

For instance, my last gaming chair cost north of $250 and was made with PU leather. The material was barely breathable, and its lumbar support was that infamous pillow. It had an unnecessary retractable footrest attached to metal arms, which began to show signs of rust three months later.

On the other hand, my $200 office chair is made of mesh and fabric and is way more comfortable. It also has more adjustability, with a multi-dimensional headrest and armrest. The gaming chair didn’t have an adjustable headrest, and its armrests could only go up and down.


Gaming chairs’ costs go into their metal frames and multi-colored upholsteries. However, while office chairs have more modest designs and plastics, they are better designed and cost less.

3 An Office Chair Is Aesthetically Safer

Computer setup with a white office chair
Dreamchild Obari/MakeUseOf

Another thing about “gaming” designs is that they can be polarizing. They have a very hit-or-miss effect where they stand out either positively or negatively. Gaming chairs can help make your gaming setup look more aggressive and bold, but they can also come off as childish and out-of-place.


My gaming setup doesn’t have RGB lights on the keyboard or desk, and neither does it have LED strips behind the monitor. It looks normal, and a gaming chair doesn’t feel at home at my desk. My mesh office chair, however, fits right in, and its see-through design and white plastic give my setup a mature feel. Because of its neutral design, it would still fit without any clashes if I wanted to create a more RGB-oriented setup.

If you’re a streamer, and chair style is an important part of your presentation, an office chair is a safer bet since it’s less likely to put off the more casual viewers. Besides, if you also use your gaming setup for work, an office chair looks more professional in online meetings.

This isn’t to say gaming chairs are completely worthless; there are still some pretty good brands out there, especially at the higher price points. It’s just that you’re far more likely to get a better deal with a smaller budget if you choose an ergonomic office chair.

Here’s Why HDMI 2.1 Is So Important For Gaming

Key Takeaways

  • HDMI 2.1 offers support for 8K video, 48Gbps bandwidth speed, and reduced interference from other wireless devices.
  • Consoles like the PS5 and Xbox Series X already utilize what HDMI 2.1 has to offer.
  • Game Mode features deliver lag-free graphics with little to no screen tearing


If you’re serious about gaming and want to get a responsive, high-definition experience, you should invest in an HDMI 2.1 cable and compatible display and gaming device.

The newest HDMI standard isn’t just important for TVs. In fact, it offers special features specifically for gamers. Here’s a look at why the standard is so important for gaming.


What Is HDMI 2.1?

Though they look the same, there are different types of HDMI cables, but all of them transmit audio and video data. While the HDMI 1.4 standard was usurped by HDMI 2.0, there’s a newer standard that’s been adopted by manufacturers—HDMI 2.1.

Naturally, this comes with a range of improvements, including the ability to stream 8K video, a bandwidth speed of 48Gbps, and reduced interference with other wireless devices.

Which Consoles Support HDMI 2.1?

Joeri Mostmans/Shutterstock


HDMI 2.1 makes media look and sound great, so it’s only natural that it’s taken advantage of by gamers and console manufacturers. So which gaming consoles actually support HDMI 2.1 right now?

Currently, next generation consoles like the PS5 and Xbox Series X ship with an HDMI 2.1 cable. The connectors are the same as previous interfaces too, so if you’ve bought either first-hand, you can take advantage of everything 2.1 has to offer straight away (though this is dependent on your other hardware like your TV or monitor). So if you’ve got an HDMI 2.1 cable from a PS5, for example, you can use it for an Xbox Series X.

We don’t know what the long-rumored Nintendo Switch 2 will offer, but support for HDMI 2.1 is very likely. And most new PCs with modern GPUs support HDMI 2.1, so if you’re a PC gamer, the latest HDMI support is still essential.


Why HDMI 2.1 Is Essential for Games

You can still use HDMI 2.0 on consoles that support newer cables, so why should you upgrade anyway? Obviously, streaming 8K video will take full advantage of the graphics games on supported consoles offer. With the ability to process 7680 x 4320 pixels—that’s four times as many as 4k—worlds are rendered in incredible detail, so you get an immersive experience.

This is especially of interest to anyone who loves open-world titles like Cyberpunk 2077 or Marvel’s Spider-Man 2.

This immersion is enhanced by HDMI 2.1’s support for High Dynamic Range (HDR), so colors are vibrant, deep, and rich. It is also backwards compatible and capable of processing 4K at 60fps: you won’t lose anything from older games by upgrading your hardware, though they naturally won’t appear as crisp as a release that utilizes 2.1’s capabilities.

HDMI 2.1 actually supports 10k resolution, up to 120fps, and while most consoles don’t give gamers this just yet, by investing in HDMI 2.1, you’re future-proofing your equipment.


2.1 was introduced in 2017, but 2.0 remained the standard for a few years afterward; that means that 2.1 is still seen as the future for this technology. We doubt it’ll be replaced for some time—especially as its 10k capability hasn’t been widely adopted yet.

Using Game Mode With an HDMI 2.1 Cable

The chief reason gamers should use an HDMI 2.1 cable, however, is its support for Variable Refresh Rate (VRR), sometimes called Game Mode, combined with its Auto Low Latency Mode (ALLM) and Quick Frame Transport (QFT).

GPUs have a lot to do when you’re gaming: to render each scene, they’ve got to process a complex graphic, at the correct frame rate, at the selected resolution, as smoothly and quickly as possible. If it doesn’t render a frame fast enough, it’ll either display the previous frame again, which leads to graphics falling behind then jumping; or render an incomplete frame, which could result in tearing or another visual artifact.


Effectively, then, HDMI 2.1’s support for Game Mode transports frames for display as soon as they’re rendered, cutting out any latency and syncing them to create more detailed and responsive gameplay.

How? VRR lets your graphics card and monitor work together to decide the optimal and appropriate frame rate. So if the former can’t quickly render, say, 60 frames per second, your monitor or TV would, without VRR and ALLM, judder or tear. With HDMI 2.1 and VRR, these work in conjunction to show you only the fully rendered frames.

Yes, HDMI 2.1 is the future for the technology, but it’s also right now. As a gamer, it’s only sensible to take advantage of the very best HDMI has to offer.

10 Free Movie Streaming Sites With No Sign Up Requirements

Quick Links

Key Takeaways

  • Access legal free movies with no sign-up from platforms like YouTube, Crackle, Tubi, and more.
  • Use a VPN if the content is region-blocked; free VPNs are available to help access content from any region.
  • Platforms like Tencent Video, Popcornflix, and CBC Gem offer a variety of movies and shows for free without sign-ups.


Countless streaming services like Netflix, Paramount+, and Disney+ make it easy to watch movies, but you need to sign up and pay a monthly subscription fee. Over time, accessing all those movie libraries can get expensive.

Fortunately, multiple streaming services let you watch free movies legally—and you don’t even need to register.

Here is a list of the best free movie streaming sites with no sign-up required.


You May Need to Use a VPN

All the streaming services listed below are free and have no sign-up requirements. However, you may need to use a VPN to access the content if it’s not available in your region. If the listed sites are region-blocked, a VPN is the only way to enjoy them.

Given there are totally free VPN services available and VPNs with free trial periods, that shouldn’t be an issue.


YouTube needs no introduction. It’s one of the most popular free video hosting sites for watching videos online.

YouTube doesn’t only offer user-uploaded videos, but there are many channels to watch legal movies and shows too. You can enjoy YouTube on every device you have, including TV, PC, tablet, and phone.

You don’t need to sign up to access YouTube content, but there are a few things you need to know. You will get ads shown while watching and sometimes uploaded movies, and shows can be removed without warning. Nevertheless, it’s still a great free option.

Of course, YouTube isn’t the only platform you can use. There are many great YouTube alternatives for watching videos online.

Crackle Homepage with Hells Kitchen ad


Crackle is one of the best free online movie streaming sites available. It doesn’t ask you to sign up for it, and the fact that Sony Pictures owns it gives the site credibility.

Crackle doesn’t just offer movies and TV shows but also the latest film information. You can opt-in to get notified of any new or upcoming flicks. Alternatively, you can enjoy the latest full-length films and series at no cost, which is quite the bargain.

 Tubi Homepage with Big Mood ad and recommended list

Tubi doesn’t ask you to sign up to enjoy its services. The streaming site lets you access an array of content: Tubi originals, movies, shows, and docuseries⁠—all for free. Everything is neatly organized by genre, and there’s even a section for kids’ content.


You can access Tubi from any device, and it also has an app (iOS and Android) you can download for your smartphone or tablet. A handy feature that the streaming service offers it’s how it lets you sync your activities and favorite movies or shows across all devices. You can pick up where you left off, regardless of the device you’re using.

Pluto Homepage with Star Trek ad

Pluto is a free streaming service with great live content. The streaming site boasts exclusive content that’s not available on other streaming sites. You do get commercial breaks, though, just like regular network television.

The Pluto site works a bit differently than other streaming sites. Instead of only giving you on-demand movies and TV shows, you also get access to hundreds of channels that offer live content. You can browse through the over 250 unique live channels and consume whatever is being broadcast at that moment.


XumoPlay Free Movie Page with Most Popular List

XUMO Play is a free streaming platform for live and on-demand TV. It doesn’t require you to sign up and gives you access to over 190 channels.

The free streaming service’s On Demand category neatly divides all of its available channels into categories. You can easily browse through them and select what to view.

You have Holiday Hub, TV & Movies, Comedy, and more. For example, from TV & Movies, you can select American Classics and see plenty of titles to choose from. At the time of writing, some of these classics include The Lone Ranger and The Immortal.

XUMO offers an impressive library of movies and shows, and the best part of the viewing experience is you won’t see any ads.


fawesome homepage

Fawesome, or Fawesome TV, stands for free awesome movies and TV shows. And, as you can imagine, it’s free. It also has no sign-up requirements and needs no subscriptions.

All you have to do is download the free app for Android or iOS and enjoy all the content it has to offer. And it’s a lot. Fawesome TV has over 10,000 movies and shows from every genre and over 250 channels to browse, so there’s a lot to choose from when it comes to your next watch.

wetv vip homepage


Tencent Video, also called WeTV VIP, offers a library full of features, both popular and original content, under every genre you can imagine. The catalog is extensive, so if you’re in the mood for some Asian shows or movies, that’s where to find it. Believe it or not, it’s also a great anime streaming service if that’s what you feel like watching.

You can watch WeTV VIP for free without even signing in to an account. But as with most other streaming services, if you decide to sign in or sign up, the platform offers various perks. For example, you can view content in advance, skip ads, add a second device linked to the same account, and so on.

You can subscribe to WeTV VIP and pay monthly ($5.99), quarterly ($17.49), or annual ($56.99) fees, or you can enjoy it for free.

wetv homepage


You can think of WeTV as a double-whammy. It turns out WeTV is a popular name for a streaming service. So, if you search for the platform by name, you might come across the above-mentioned one, with a library full of Asian features, or this one, which is American through and through.

WeTV has a catalog chock-full of reality TV and dramatizations, perfect for those guilty pleasure viewings. Some content on the platform requires you to sign in so you can view it, but other features do not. You can press play and start watching.

It’s completely free to enjoy, but like cable TV programming, you have to put up with a lot of ads along the way.

Popcornflix homepage with Moby Dick Movie

Popcornflix is an excellent source for free TV shows and movies. Content ranges from obscure titles to popular blockbusters of the past. Fans of 80s and 90s films will find a plethora of fan favorites.


No sign-up or account is required, making it a quick way to begin streaming, either through a web browser or the Popcornflix app.

While the content is free, Popcornflix does impose unskippable ads into both films and TV shows. Luckily, they are minimal and non-intrusive.

CBC Gem homepage

CBC Gem is a Canadian streaming service with a vast catalog of movies and shows. If you try to view the content outside Canada, a pop-up says the content isn’t available. Fortunately, there are ways to bypass internet restrictions, including using a VPN.

The streaming platform lets you browse shows, films, short films, short-form series, documentaries, and kids’ content. Everything is shown in neat categories. Plus, the service has Live TV and a Most Recent Episodes section where you can scout for the latest uploads.


You can enjoy the content for free; no sign-up or sign-in is required. You can simply open CBC Gem, press play on the first thing you see, and enjoy.

The free experience comes with ads, but if you’d like to view the streaming platform’s features without interruption, you can subscribe to its Premium plan. It’s $4.99/month, and new subscribers get their first month free.

How do you ensure signal integrity in custom pcb?

signal integrity in custom pcb

Ensuring signal integrity in custom printed circuit boards (PCBs) is paramount for maintaining the reliability and performance of electronic systems. Signal integrity refers to the ability of a signal to propagate from its source to its destination without distortion or degradation. In custom PCB design, several techniques and considerations are employed to mitigate signal integrity issues and optimize signal transmission.

One key aspect of ensuring signal integrity in custom pcb is carefully managing the routing of signal traces. Signal traces should be routed to minimize impedance mismatches, crosstalk, and signal reflections. Differential signaling, where signals are transmitted along paired traces with equal and opposite voltages, helps mitigate electromagnetic interference (EMI) and reduces the susceptibility to noise. Additionally, employing controlled impedance routing techniques ensures that the characteristic impedance of signal traces matches the impedance of connected components and transmission lines, minimizing signal reflections and maintaining signal integrity.

The selection of appropriate PCB materials also plays a crucial role in ensuring signal integrity. High-frequency signals, such as those used in modern digital communication systems, require PCB substrates with low dielectric constant and low loss tangent to minimize signal attenuation and distortion. Materials like Rogers Corporation’s high-frequency laminates or specialized low-loss dielectrics provide excellent electrical performance for high-speed signal transmission applications, helping to preserve signal integrity throughout the PCB.

How do you ensure signal integrity in custom pcb?

Furthermore, minimizing discontinuities in signal traces and transmission lines is essential for maintaining signal integrity. Discontinuities, such as changes in trace width, vias, or impedance transitions, can lead to signal reflections and impedance mismatches, degrading signal quality. Designing smooth and continuous signal paths, implementing appropriate termination techniques, and utilizing impedance-controlled vias and transitions help mitigate these discontinuity-related issues, ensuring consistent signal transmission and reception.

Another critical aspect of ensuring signal integrity in custom PCBs is thorough signal integrity analysis and simulation. Advanced simulation tools, such as SPICE (Simulation Program with Integrated Circuit Emphasis) and electromagnetic field solvers, enable designers to model signal behavior, identify potential signal integrity issues, and optimize PCB layouts before fabrication. Time-domain reflectometry (TDR) and eye diagram analysis are commonly used techniques to assess signal quality, evaluate signal integrity metrics such as rise time and jitter, and validate design improvements.

In addition to design considerations and simulation, proper power distribution and decoupling are essential for maintaining signal integrity in custom PCBs. High-speed digital circuits draw transient currents that can induce voltage fluctuations and noise on the power supply rails, affecting signal integrity. Implementing a well-designed power distribution network (PDN) with adequate decoupling capacitors helps stabilize power supply voltages and reduce voltage fluctuations, minimizing noise coupling onto signal traces and preserving signal integrity.

Furthermore, maintaining signal integrity requires attention to electromagnetic compatibility (EMC) considerations. EMC practices aim to minimize electromagnetic interference (EMI) and ensure that electronic devices operate reliably in their intended electromagnetic environment. Shielding sensitive signal traces, using ground planes effectively, and implementing proper grounding techniques help mitigate EMI and reduce the susceptibility of signal traces to external noise sources, preserving signal integrity in custom PCBs.

In conclusion, ensuring signal integrity in custom PCBs requires a comprehensive approach that encompasses careful routing, selection of appropriate materials, minimizing discontinuities, thorough analysis and simulation, proper power distribution, and adherence to electromagnetic compatibility principles. By addressing these considerations in the design phase, PCB designers can create custom PCBs that deliver robust and reliable signal transmission performance, meeting the requirements of high-speed and high-frequency electronic systems across various applications.

What considerations are important in designing a printed circuit board and assembly?

designing a printed circuit board and assembly

Designing a printed circuit board (PCB) and its assembly is a meticulous process that requires careful consideration of various factors to ensure functionality, reliability, and efficiency. From component placement to signal integrity, every aspect of the design plays a crucial role in determining the performance of electronic devices. Understanding the key considerations in PCB design and assembly is essential for engineers and designers aiming to create robust and optimized electronic systems.

One of the primary considerations in PCB design is component placement. The arrangement of electronic components on the PCB not only affects the overall size and form factor of the device but also influences signal integrity, thermal management, and manufacturability. Strategic placement of components can minimize signal interference, reduce electromagnetic interference (EMI), and optimize thermal dissipation, ultimately enhancing the reliability and performance of the electronic system.

Signal integrity is another critical aspect that designers must address during printed circuit board and assembly design. High-speed digital signals, analog signals, and power distribution networks all require careful attention to ensure proper signal integrity throughout the PCB. Factors such as trace length, impedance matching, and signal routing play pivotal roles in maintaining signal integrity and preventing issues such as signal degradation, crosstalk, and electromagnetic interference.

What considerations are important in designing a printed circuit board and assembly?

Thermal management is a vital consideration in PCB design, particularly for electronic devices with high power dissipation or operating in harsh environments. Efficient heat dissipation is essential to prevent overheating of components, which can lead to performance degradation and reliability issues. Designers must incorporate features such as thermal vias, heat sinks, and proper airflow to effectively dissipate heat and maintain optimal operating temperatures within the electronic system.

Manufacturability and assembly are key considerations that influence the ease of manufacturing and cost-effectiveness of the PCB design. Designers must consider factors such as component accessibility, solderability, and assembly process compatibility to ensure smooth and efficient assembly of the PCB. By optimizing the design for manufacturability, designers can minimize production costs, reduce assembly time, and improve overall yield and quality of the electronic system.

Material selection is another important consideration in PCB design, as the choice of materials can significantly impact the performance, reliability, and cost of the PCB. From substrate materials such as FR-4 and high-frequency laminates to solder mask and surface finish options, designers must carefully evaluate the properties and characteristics of different materials to meet the specific requirements of the electronic system.

Furthermore, compliance with industry standards and regulations is essential in PCB design to ensure compatibility, safety, and reliability of the electronic device. Designers must adhere to standards such as IPC (Association Connecting Electronics Industries) and RoHS (Restriction of Hazardous Substances) to meet quality and environmental requirements and to facilitate interoperability with other electronic components and systems.

In conclusion, designing a printed circuit board and its assembly requires thorough consideration of various factors to ensure functionality, reliability, and efficiency of the electronic system. From component placement and signal integrity to thermal management and manufacturability, every aspect of the design plays a critical role in determining the performance and quality of the PCB. By addressing these key considerations and leveraging best practices in PCB design and assembly, engineers and designers can create robust and optimized electronic systems that meet the evolving demands of the industry.

Which Adobe Video Editor Should You Get?

Key Takeaways

  • After Effects is best for motion design, static elements, kinetic typography, editing with keyframes, 2D and 3D animations, green screen compositing, and overlays.
  • Premiere Pro is better for non-linear editing, realtime playback, color grading, multi-camera editing, VR, and special effects.
  • Deciding which video editor to get depends on what you want to create, such as animation or special effects.


With two major industry-standard video editing tools, Adobe monopolizes the video design industry. What are the differences between After Effects and Premiere Pro? This breakdown will help you decide which one to get.


What Is After Effects Best Used For?

After Effects is a motion design video editing tool. While you can edit raw video footage in After Effects, that’s not its main purpose nor where it shines.

You’ll want to use After Effects when:

  • Animating static elements like logos or graphics.
  • Creating kinetic typography, such as lyric music videos where the lyrics animate to the beat of the song.
  • Creating animations of many different kinds.
  • Overlaying motion graphics on raw video footage, like animated lower third designs.


You can edit raw video footage directly in After Effects, although I wouldn’t recommend anything longer than a couple of minutes’ runtime. After Effects uses RAM playback, which is slow and uses a lot of computer power.

Things After Effects Does Better Than Premiere Pro

There are lots of things you can do in both After Effects and Premiere Pro, which is a blessing if you’re only subscribed to one of them. The two video editors aren’t equal though; here’s what After Effects does much better than Premiere Pro.

1. Video Intro Animations

Using After Effects is a great way to create video intro animations. Once created, you can save it and use it at the beginning of larger projects in Premiere Pro or other video editing tools.

Creating one intro animation saves you time and allows you to add your branding to each and every video with a quick drag-and-drop. An animation made in After Effects can be saved in different formats and used in other programs, like Premiere Pro, DaVinci Resolve, or even CapCut.


2. Animated Elements

It’s easy to create 2D animations in After Effects. I consider After Effects to be the motion version of Adobe Illustrator and prefer using it to create lower thirds, animate text, or animate logos.

Another great use for 2D animation in After Effects is creating Lottie animations to be exported for web animated files or UX/UI animated elements. Your output doesn’t have to be a video; animated UX/UI elements can be saved in different formats and used in website design as animated icons or illustrated imagery.

3. Green Screen Composites

After Effects Green Screen

After Effects has a great ability to apply chroma key—or green screen composite. The software makes it much quicker and easier to do this than Premiere Pro. There are even workarounds to achieve green screen effects if you have no access to a green or blue screen.


4. 3D Animation

Similarly to the 2D animated properties, After Effects allows for animation in 3D space by using a camera view. You can’t create 3D elements within After Effects, but you can add dimension to 2D elements and scenes or import 3D elements directly into your composition.

After Effects provides a 3D Transform Gizmo for editing in 3D space. You can view your scene from different angles to realize the dimensions and placements, and you can design scenes outside the composition frame using the Extended Viewer. This allows you to animate a scene that can be moved throughout as it exists outside the frame simultaneously.

5. Keyframes and Motion Tracking

Using keyframes, you can trigger animations at certain times or intervals, which makes motion tracking very easy in After Effects. Motion tracking has many uses, whether the footage is of fast-moving vehicles and you want to stabilize the shot, or you need to pixelate or blur a face that’s moving throughout the frame.


Keyframes keep all animations in the right place with the correct timing. They can be duplicated, deleted, and have styles attributed to them, such as scale, opacity, plugins, and movement.

What Is Premiere Pro Best Used For?

Premiere Pro Footage

Premiere Pro is an industry-standard video editor used in many blockbuster movies. It’s a heavy-duty powerhouse where you can edit video footage and special effects, use countless layers, and achieve long-form video output. Premiere Pro is also good for creating short-form social content, like vertical videos for Reels, Shorts, or TikTok.

Using AI, you can easily crop your footage from landscape to portrait to repurpose your landscape videos into vertical ones. Premiere Pro also has AI auto-captioning, which you can quickly and easily apply to your videos before exporting.

Things Premiere Pro Does Better Than After Effects

There are many things that Premiere Pro does much better than After Effects, particularly as it’s a hard-wearing video footage editor.


1. Non-Linear Video Editing

With non-linear editing (NLE), you can easily chop and change between sequences while editing without negatively affecting the final result. After Effects is considered a basic non-linear editor, but Premiere Pro offers features that allow NLE without stress.

Using some of Premiere Pro’s AI tools, like text-based editing, you can edit your footage by deleting dialogue rather than manually trimming clips by inching up and down the timeline.

2. Realtime Playback

Premiere Pro uses realtime playback whenever you need to review your footage—which, as video editors know, is a lot. After Effects uses RAM previews, which are much slower to load, laggy, and buffers when there’s too much going on.

Realtime playback reduces frustration and will aid your workflow since you can quickly review footage before carrying on editing. This is a huge plus when creating large or complex video comps.


3. Color Grading and Color Correction

Premiere Pro Color Correction

Premiere Pro’s color correction tools meet the industry standard found across the board. You can apply color grading directly with Premiere Pro, including using the huge library of presets or creating your own LUT presets from scratch.

You can do some color grading in After Effects, but Premiere Pro offers a better interface, tools, and results for color correction.

4. Multi-Camera Editing

Large film productions—as well as small ones—typically film using many cameras and a multitude of viewpoints, even for the same scenes. This can get hectic when it comes to editing all these views back together.

Luckily, multi-camera editing is one of Premiere Pro’s strong points. You can name your cameras and synchronize them together in your editing workflow. Premiere Pro makes this as easy as if you were editing from one camera’s footage alone.


5. Virtual Reality (VR) Video Editing

This doesn’t mean editing your video in virtual reality, but it does mean Premiere Pro can not only detect if your clips have VR properties, but also lets you edit 360-and-180-degree video footage, so you can create intense and fun virtual reality videos.

Premiere Pro offers 3-axis video rotation for editing VR footage, and it also provides a large library of VR effects and VR transitions to improve your virtual reality video. This really allows viewers to immerse themselves in your footage.

6. Special Effects

Premiere Pro allows for an array of special effects to be applied or edited onto your video footage. You can find a list of plugins on Adobe’s Premiere Pro webpage.

It offers a library of special effects (FX) overlays, transitions, and audio elements. Some of these are basic but imperative, like transitions. With Premiere Pro tools and a little bit of practice, you can create special effects seen in action movies and blockbusters too.


Which Adobe Video Editor Should You Get?

If you’re making videos as a hobby or learning how to animate, then Adobe After Effects offers all you need. Since you can still edit film footage with After Effects, you’re not losing out on true video editing abilities by sticking solely to this motion design tool.

If you already know the basics of video editing and aren’t interested in animation or motion design, then Premiere Pro will be your best option. Premiere Pro is a powerhouse in the video editing world, and your options for what and how you create are limitless.

Since both apps are the same price as a sole-app subscription, $22.99, opt for the one that better aligns with your editing needs. If you subscribe to the Adobe Creative Cloud all-apps plan, both are included in the subscription.

Struggling to Make a Restaurant Reservation? Try These 5 Apps and Services to Beat the Queues

Quick Links

Securing a reservation at one of the top restaurants in town can be challenging, especially in busy cities. Try out these apps to help you snag a table at the most in-demand restaurants and enjoy some of the best food around.


How to Make Restaurant Reservations

The most common way to make a reservation at a restaurant is to call ahead of the intended date of dining and request a table. While this works well for most restaurants, some popular locations can have fully booked tables months in advance. While the traditional route of calling a restaurant to secure a reservation is still a great first step, it often falls short, and hungry diners are left without a seat at the table.

If you are traveling and want to get a reservation at a local hot spot without the fuss of calling ahead, try asking for a concierge service that is available to you. Access to these services is often found within hotels and associated with credit cards that may already be in your wallet.

If you are left with no assistance and calling ahead does not garner you a seat at the table, consider using your smartphone to make a reservation. Some of the most popular restaurants around the world rely on digital systems to manage bookings, and the following apps may give you an edge.


1. Resy

Resy is one of the largest and most popular restaurant reservation applications, hosting many of the most popular restaurants in high-traffic cities like New York. It also caters to smaller towns and most likely has a few restaurants on offer near you.

Instead of crowdsourcing user reviews to gather details about a restaurant, Resy takes a more curated approach. It provides insight into why a patron may love the restaurant, what events the space is ideal for, and a general cost range per person.

It is important to note that Resy is only available through the Apple App Store or a web browser. It is not available for Android users.

Check out Resy’s curated lists to get ideas for your next date night, where it highlights restaurants based on one of three categories:


  • Top Rated: Most loved restaurants in an area
  • Climbing: Restaurants steadily moving up the list to join the top spots
  • New on Resy: Newly added restaurants to the app

Global Dining Access with benefits list

Global Dining Access is offered by Resy in conjunction with American Express. For American Express holders, it can mean the difference between getting a last-minute reservation and missing out. By providing priority service, if a reservation at the restaurant of your choice is canceled, Global Dining Access holders will get priority in booking the spot. In addition, at some of the most popular restaurants, American Express will pre-reserve a select number of tables for its members to enjoy, thereby guaranteeing a table for members.


To further entice those who love to enjoy the best dining around, Global Dining Access also hosts exclusive events at some of the most prestigious restaurants in major cities. These unique dining experiences are only available to be booked by Global Dining Access members.

2. Open Table

Open Table with Austin list

Open Table is the next best app to check when a desired restaurant is not listed on Resy. It hosts an impressive lineup of restaurants for most major cities. It is also the best option for Android users as it is available on Google Play, the Apple App Store, and online.

Open Table also offers insights into restaurants, such as its estimated cost per person per meal. It also lists Top Tags that help recommend restaurants based on desired qualities. Tags include helpful categories like:

  • Great for Fine Wines
  • Good for Special Occasions
  • Great for Creative Cocktails
  • Good for Business Meals
  • Good for Brunch


Trying to find the best restaurants near you? Be sure to also check out SnapChat’s restaurant recommendations on the Snap map.

3. Yelp

Yelp Reservations with Rose Gose Restaurant

Yelp remains one of the most popular business-reviewing applications. With its ability for users to post pictures and reviews and write recommendations, it has become an excellent way to crowdsourced opinions and information about restaurants worldwide.

Available on Apple and Android devices (as well as through its website), Yelp has become even more of a powerhouse by adding in-app reservations and wait lists. Users can now utilize the app to make restaurant reservations alongside reading reviews. One of the most beneficial features, however, is the waitlist section.


Should you fail to secure a reservation at a desired restaurant, you can join the wait list for walk-up service. In the past, this would have to be in person, and a patron would need to wait for a table. With Yelp’s waitlist feature, you can add yourself to a restaurant’s waitlist from anywhere. This allows patrons to avoid long wait times and arrive at the restaurant once a table is ready.

4. Tock

Tock with restaurant recommendations

Available for Apple and Android devices and via its website, Tock allows users to secure reservations for traditional dine-in tables and special dining experiences. It also features reservations for tastings and experiences at wineries.

Tock lacks some of the crowdsourced reviews and information included in other applications. However, it does include estimated price ranges by restaurant.


Tock stands out from other reservation applications by allowing anyone to reserve specialty dining experiences. Unlike Global Access Dining, no membership is required to make one of these reservations, often including curated meals from premier restaurants.

Indecisive about where to eat? Try one of these restaurant picker apps to guide you to your next favorite.

5. Appointment Trader

Appointment Trader with Lyla Dallas Offerings

If all else fails and you cannot book a reservation at a restaurant you would like to enjoy, consider purchasing a reservation from a service like Appointment Trader.

Appointment Trader hosts sellers and allows them to list secured reservations of any kind for a price they choose. Luckily, this includes restaurant reservations for some of the most prestigious restaurants. When it comes to hard to get reservations in cities like New York, this may be the best option.


Unfortunately, purchasing reservations often comes with a hefty price tag. But, if it is a restaurant you have your heart set on, the price may just be worth it.

What are the key considerations for panelization in Pc board assembly?

key considerations for panelization in Pc board assembly

Panelization, the process of arranging multiple PCBs on a single panel for assembly, plays a crucial role in streamlining manufacturing processes, improving efficiency, and reducing costs in PC board assembly. Proper panelization allows manufacturers to maximize throughput, optimize material utilization, and ensure consistent quality across multiple PCBs. In this article, we delve into the key considerations for panelization in PC board assembly and highlight essential factors to achieve optimal results.

One of the primary considerations for panelization is optimizing pc board assembly layout and panel design to maximize material utilization and minimize waste. By carefully arranging PCBs on a panel and optimizing the spacing between them, manufacturers can minimize material waste and maximize the number of PCBs that can be assembled in a single production run. Additionally, optimizing panel layouts to accommodate standard panel sizes and manufacturing equipment helps streamline production processes and minimize setup times, further enhancing efficiency and reducing costs.

Furthermore, ensuring proper fiducial placement and alignment is essential for accurate assembly and soldering of PCBs on panels. Fiducial marks, typically small copper pads or non-functional features, are used as reference points for automated assembly equipment to ensure precise component placement and alignment. Proper fiducial placement and alignment help minimize errors and misalignment during assembly, ensuring consistent soldering quality and reducing the risk of defects and rework.

What are the key considerations for panelization in Pc board assembly?

Moreover, selecting the appropriate panelization method and techniques is essential for achieving optimal results in PC board assembly. Common panelization methods include tab-routing, v-scoring, and panel breakaway tabs, each offering advantages and considerations based on the specific requirements of the PCB design and assembly process. Tab-routing involves routing thin channels or tabs between individual PCBs, allowing them to be separated easily after assembly. V-scoring involves creating V-shaped grooves or cuts along the edges of PCBs, allowing them to be snapped apart after assembly. Panel breakaway tabs are small tabs or perforations added to the panel edges, allowing PCBs to be separated by bending or breaking them along predefined lines.

Additionally, considering the electrical and mechanical requirements of the PCB design is essential for effective panelization. PCBs with sensitive components, high-speed signals, or stringent mechanical tolerances may require special considerations in panelization to ensure proper functionality and reliability. Proper spacing between PCBs, avoidance of sensitive areas, and adequate clearance for components and connectors are essential factors to consider to prevent electrical interference, signal degradation, or mechanical stress that could affect the performance and reliability of the assembled PCBs.

Furthermore, implementing proper handling and support techniques during panelization and assembly is essential for preventing damage and ensuring the integrity of PCBs. Handling PCB panels with care and avoiding excessive bending or flexing helps prevent mechanical stress and damage to components or traces. Additionally, providing adequate support and fixation for PCB panels during assembly helps prevent sagging or deformation under the weight of components or thermal stress, ensuring consistent soldering quality and minimizing the risk of defects and rework.

How Do Flexible PCBs Compare to Rigid PCBs?

Flexible PCBs Compare to Rigid PCBs

While both PCBs and flex circuits perform the same electrical function, they are distinct from each other in several ways. The differences are evident in their construction, materials and design rules. Depending on your application, one of these circuits might be a better choice for you.

Printed circuit boards, also called PCBs, are the base for most electronic devices. They mechanically support and connect electronic components using conductive pathways that are either printed or inscribed onto the surface of the board according to the engineering design file. PCBs are generally constructed of laminate material like fiberglass or composite epoxy, with a layer of dielectric base, an adhesive layer and a layer of copper or conductive material on one or both sides. Conductors are then plated or etched on the copper and coated with tin-lead to prevent oxidation. The most basic PCBs are single-sided, while multi-layer and rigid-flex PCBs have conductive paths on both sides.

Flexible circuits have many advantages over rigid-style PCBs, including the ability to bend or fold into unique forms. This flexibility allows them to fit into small spaces where traditional pcba circuit board cannot. Likewise, they are often lighter, and this is important in today’s electronics market where designers and consumers demand smaller and more portable devices.

Flex circuits are also much more durable than rigid PCBs. Their elasticity can help them withstand vibrations, shocks, and extreme temperatures. They can even withstand repeated bending for thousands of cycles, which is not possible with rigid circuits. These qualities make flex circuits ideal for wearable technology and mobile devices, as well as applications that need to survive harsh environments.

How Do Flexible PCBs Compare to Rigid PCBs?

Another benefit of flex circuits is their low production costs. This is especially true for low-volume or prototype runs. Rigid PCBs, on the other hand, are typically more expensive because they require a longer assembly process, and their specialized manufacturing processes make them more susceptible to defects.

The cost of a flex circuit depends on several factors, including its number of layers, the amount of copper used, and the type of coating. For example, a high number of layers can increase the manufacturing cost, as each additional layer requires more time and expertise to laminate. The thickness of the copper also influences cost, as thicker copper is more difficult to etch and solder. It is also worth considering the line width and spacing in the design, as reducing these parameters could reduce costs by allowing you to pack more traces on a single layer.

The most significant cost driver is the number of layers in your flex circuit. Adding layers increases the complexity of the lamination and can increase your material waste. It is therefore essential to design your flex circuit with the lowest number of layers possible. You can do this by minimizing the width and spacing of the traces and by utilizing techniques such as selective plating. You should also consider production panel utilization, which can help you minimize the number of panels required for your design.

Furthermore, PCBs enable the development of RF transceivers, which are essential in wireless communication systems. These transceivers incorporate RF front-end circuits for signal modulation, demodulation, and frequency conversion, all integrated onto a PCB for compactness and efficiency.

The 5 Key Differences Between the Google Pixel 8a and Pixel 8

The Pixel 8a is Google’s latest mid-ranger, while the Pixel 8 is its baby flagship. Both phones look similar and pack almost the same specs, but we’ll highlight the differences below so you can better decide which one deserves your hard-earned money.


1 The Pixel 8a Has a Smaller Display With Chunkier Bezels

The Pixel 8a features a better display than the Pixel 7a. But it’s not as good as the Pixel 8’s 6.2-inch screen, even if the specs sheet suggests otherwise.

The Pixel 8a’s 6.1-inch panel has a 120Hz refresh rate, up from the Pixel 7a’s 90Hz panel. Plus, it carries the Actua branding as the Pixel 8, meaning it can hit a peak brightness of 2,000 nits. However, Google’s mid-range Pixel has chunkier bezels, giving it a less premium look.

With a smaller 6.1-inch screen, you’d expect the Pixel 8a to be more compact than its expensive sibling. But that’s not the case, as the phone is taller, wider, and heavier than the Pixel 8. Plus, it uses Gorilla Glass 3, while the Pixel 8 features Gorilla Glass Victus.


2 The Pixel 8a Has a Plastic Back

Pixel 8a Obsidian Lifestyle
Google

The Pixel 8a might look similar to the Pixel 8, but it has an inferior build quality. Google’s mid-range Pixel features an aluminum frame with a “matte composite back,” which is a fancy way of saying plastic with a specialized rubber coating.

The Pixel 8, though, has glass panels on the front and back, giving it a more premium in-hand feel. Since it has slimmer bezels, it also looks a lot more modern.

3 The Pixel 8 Has Superior Cameras

Person taking a photo with the Google Pixel 8
Sergio Rodriguez/MakeUseOf


You might think the Pixel 8a’s 64MP primary shooter and 13MP ultrawide are better than the Pixel 8’s 50MP primary and 12MP ultrawide because of their higher resolution. But that’s not the case.

The Pixel 8 has a bigger 50MP 1/1.31-inch camera sensor with a wider f/1.68 aperture, allowing it to capture more light. Plus, the pixels themselves are bigger, so they are more sensitive to light. For comparison, the Pixel 8a’s 64MP shooter is physically smaller at 1/1.73″ and has an f/1.89 aperture.

Google claims the Pixel 8’s 2x zoom shots provide “optical quality.” That’s not the case with the Pixel 8a due to its smaller sensor. The same is true for the ultrawide camera. While the Pixel 8’s 12MP shooter features 1.25μm pixels, the Pixel 8a’s 13MP ultrawide has smaller 1.12μm pixels. The latter’s field of view is also narrower at 120 degrees vs. the Pixel 8’s 125.8 degrees.


More importantly, the Pixel 8a’s ultrawide camera lacks Macro Focus functionality, meaning you can’t focus on nearby subjects to click macro photos like with the Pixel 8.

Similarly, the Pixel 8a has an inferior 13MP front camera with 1.12μm pixels. In comparison, the Pixel 8’s 10.5MP f/2.2 selfie shooter will capture better pictures thanks to a 1.22μm pixel width. From a software standpoint, there’s no difference, and you get access to all AI-powered features like Magic Eraser, Magic Editor, and Best Take.

As noted in our Pixel 8 review, it delivers impressive camera performance. While the Pixel 8a should also capture impressive pictures, it won’t be close to that of the Pixel 8.

4 The Pixel 8a Has Slow Charging Speeds

Charging the Google Pixel 8
Sergio Rodriguez/MakeUseOf


The Pixel 8 and 8a have near-identical battery capacities; the former packs a 4,575mAh battery, whereas the latter has a 4,492mAh unit. Google even claims the two phones can last over 24 hours, with Extreme Battery Saver pushing the runtime to 72 hours. But there’s a big difference in the charging speeds of the two phones.

The Pixel 8 supports 27W fast wired charging and 18W wireless charging with the Pixel Stand (2nd gen). On a Qi charging pad, the phone will top up its battery wirelessly at 12W. In comparison, the Pixel 8a charges considerably slower, both wired and wirelessly. Over a USB-C connection, it supports 18W, while wireless charging limits you to just 7.5W.

Sadly, neither of the phones supports the newer Qi2 wireless charging standard. It’s also worth noting that you don’t get reverse wireless charging on the Pixel 8a. This feature can be handy for charging accessories like wireless earbuds when you’re out and about.


5 The $200 Price Difference

Person holding a Google Pixel 8 on the home screen
Sergio Rodriguez / MakeUseOf

For all the compromises the Pixel 8a makes, it comes with a lower price tag to justify them. You can get the mid-range Pixel 8a for $499 on the Google Store, with the 256GB variant costing $60 more at $559. The Pixel 8 costs $699, making it $200 more expensive than its mid-range sibling.

That’s a lot of money, but the hardware differences justify the gap. For the additional money, you get a phone with a bigger display, better build quality, better cameras, and faster charging. All these improvements add up and are easily noticeable in daily life.


Considering the Pixel 8 came out in 2023, you may find it at a discount on Amazon. Google also offers attractive offers for the Pixel 8 from time to time. With a good deal, you can snag the phone at a far lower price than its MSRP, making it a better deal than the Pixel 8a.

Microsoft Should Focus on Making Windows 11 Better, Not Just More Fun

Key Takeaways

  • Microsoft has increasingly prioritized AI in Windows 11 by frequently adding new Copilot features and integrations.
  • Many Copilot features are entertainment-driven rather than addressing lingering issues or meaningfully improving the OS over Windows 10.
  • Microsoft should strive for a better balance between Copilot additions and core functional improvements to create the best operating system.


With new Copilot features being released in quick succession, it’s clear what Microsoft is prioritizing with Windows 11 and beyond. Apart from the increasingly diverse ways to interact with AI, you might wonder where the meaningful improvements to Windows 11’s performance, functionality, and overall user experience are.


Microsoft Makes it Clear: Copilot Is the Future of Windows 11

Justin Duino / MakeUseOf

When Microsoft released Windows 11 in October 2021, it was called the Windows version for gaming. However, it’s become apparent that Microsoft’s focus regarding Windows 11 has shifted. The company has increasingly prioritized artificial intelligence (AI) with its continuous stream of Copilot integrations.

In December 2023, Executive Vice President and Consumer Chief Marketing Officer Yusuf Mehdi mentioned Microsoft’s commitment “to bringing more innovation and advanced capabilities to Copilot” in 2024.


The fruits of this commitment are now being realized in Windows 11, as several AI-powered features, updates, and improvements have been announced and released. A Copilot key is even available on some newer Windows 11 PC keyboards, making the AI assistant more accessible. Furthermore, in April 2024, Executive Vice President and Chief Commercial Officer Judson Althoff announced Microsoft’s goal of a “Copilot on every desk, every device and across every role.”

It’s clear that Copilot and AI, not gaming, have become central to realizing Windows 11’s full potential and Microsoft’s broader ambitions.

Where Are The Real Features?

Copilot key on an Acer laptop
Justin Duino / MakeUseOf


Microsoft’s Copilot features, while cool and awesome, sometimes feel more like fun additions than substantial improvements to Windows 11. For instance, the ability to make video chats look like paintings or create images with Copilot might be entertaining, but it doesn’t necessarily address the usability of Windows 11.

When I had the “Standard hardware security not supported” Windows Security error, Microsoft took a while to address this bug. In the meantime, the company released new Copilot features, including the seemingly unnecessary Copilot + Notepad integration. Releasing cool AI features, no matter how advanced, before addressing lingering issues reveals concerning priorities.

Where are the features that improve the functionality of Windows 11 over Windows 10? For most of us, everyday productivity does not revolve around Notepad, Paint, Snipping Tool, and Clipchamp. One of Copilot’s best uses would be automating troubleshooting, but unfortunately, it can’t do that yet.


Windows 10 set a high standard by delivering real features; for instance, Device Guard strengthened protection while Continuum and Hello modernized interaction methods. Most of Windows 11’s changes have revolved around redesigns or AI-fueled capabilities in areas like image generation, content creation, and automation. While amazing demonstrations of technological progress, they don’t really improve the essential day-to-day functionality of the operating system.

Lingering issues like an inconsistent UI, wonky taskbar, sluggish file explorer, and compatibility headaches leave many of us questioning whether it truly serves as an upgrade over Windows 10. Several users have even claimed that W11 lags behind W10 in responsiveness, particularly on older hardware.

Slow Steps in the Right Direction

Windows 11 Start menu open on a Dell XPS 16
Jerome Thomas / MakeUseOf


Despite my criticism, it’s only fair to acknowledge that Microsoft has also made moves in the right direction. Additions like the revamped Snipping Tool and an upgraded Snap feature for easier multitasking offer real utility. The Windows 11 interface is also starting to provide a welcome coherence compared to past releases.

Similarly, it’s easier and better to work with multiple monitors on W11 than on W10. The new and improved Widgets feature, integration of Teams, and Focus mode are also welcome Windows 11 additions. These features represent the type of functional updates we want to see prioritized over fun AI features.

Admittedly, Copliot has huge potential, and should only get more capable as AI PCs become more common. Eventually, the AI assistant should meaningfully augment Windows 11’s core functionality.

Copilot’s integration into apps and browsers on your W11 PC could save you valuable time, allowing you to focus on important tasks. The issue is when the balance is tipped in favor of fun Copilot features over functional features. As Microsoft continues to improve Windows 11, we can only hope that they will strive to create an operating system that is not just more fun but also better.


What are AI PCs, and What Makes Them Different?

Key Takeaways

  • AI PCs have specialized hardware and software for faster processing and real-time analytics.
  • Major players like Intel and AMD are introducing AI PCs, aiming for mass adoption by 2025.
  • AI PCs offer enhanced performance, personalized experiences, and improved security, but come at a higher initial cost.


AI PCs are set to revolutionize computing with their enhanced capabilities and efficiency. But what makes a computer an AI PC? We look at their unique features and whether an upgrade to these advanced machines is worthwhile.


What Is an AI PC, and How Does It Work?

Justin Duino / MakeUseOf

An AI PC is not just your average computer—it’s a powerhouse designed to handle artificial intelligence (AI) tasks with ease. The best part? Everything is processed directly on the device—eliminating the need for cloud data processing.

So, how does all this work? Unlike traditional computers, AI PCs are equipped with specialized hardware, including AI accelerators and GPUs (Graphics Processing Units), which boost their machine-learning capabilities.


These computers also feature advanced software algorithms that efficiently handle data-intensive AI operations, enabling faster processing and real-time analytics. These powerful features allow AI PCs to perform tasks like natural language processing and complex data analysis much more accurately than conventional computers.

When Will AI PCs Be Released?

AI PCs are starting to roll out already, primarily pushed by major players like Intel and AMD. Intel has made significant strides with its Intel Core Ultra lineup, which began rolling out in December 2023. This range includes built-in NPUs (Neural Processing Units) that enhance AI tasks on laptops.

Intel aims to sell around 100 million AI PCs by 2025, signaling robust growth and adoption in this sector. But your options aren’t limited to just Intel, either. AMD and Qualcomm are also enhancing their CPUs with AI capabilities, and you can expect new AI PC releases from them throughout 2024.

How Do You Easily Identify an AI PC?

Microsoft Copilot key on the Tecno Megabook T16 Pro
Justin Duino / MakeUseOf


A computer’s hardware specifications and software capabilities define an AI PC. On the hardware side, look for mentions of NPUs, AI-specific accelerators, advanced GPUs, and higher-than-average RAM and storage specifications. These features are crucial for handling large datasets and complex algorithms. However, the simplest giveaway that a Windows computer is an AI PC is the new Copilot key on the keyboard.

On the software side, AI PCs often come with pre-installed apps that leverage AI for improved functionality. This includes improved voice assistants, advanced security features like facial recognition, and apps that personalize content based on user behavior.

Performance-wise, AI PCs demonstrate significantly better efficiency and speed in processing large volumes of data, running sophisticated simulations, and rendering high-quality graphics.

Is It Worth Upgrading From a Normal to an AI PC?

Intel Core Ultra 7 sticker on the Tecno Megabook T16 Pro
Justin Duino / MakeUseOf


The decision to upgrade from a traditional PC to an AI PC will largely depend on your specific needs. To help you decide, here are some pros and cons to consider:

The Advantages of Upgrading to AI PCs

  • Enhanced Performance and Efficiency: AI PCs can process and analyze information at unprecedented speeds—making them ideal for tasks involving AI and data analytics.
  • Personalized Experiences: Thanks to AI-driven algorithms, these PCs can deliver customized recommendations, adapt interfaces to individual preferences, and even predict user needs based on usage patterns.
  • Improved Security: The built-in capabilities of AI PCs mean better threat detection and real-time security measures.
  • Compatibility With Emerging Technologies: AI PCs are built to seamlessly integrate with new technologies, ensuring they remain relevant as new innovations emerge.

The Disadvantages of Upgrading to AI PCs

  • Higher Initial Cost: AI PCs have a premium price tag due to their advanced hardware and capabilities.
  • Complexity and Learning Curve: The sophisticated technology integrated into AI PCs can be overwhelming for non-tech-savvy users.
  • Privacy Concerns: With advanced data-processing capabilities, AI PCs raise concerns about data privacy and potential misuse.
  • Energy Consumption for High-Performance Tasks: AI tasks are resource-intensive. So, running them on AI PCs could lead to higher energy consumption compared to performing standard tasks on traditional PCs.


Clearly, AI PCs represent a significant leap in computing technology, and we know that the future of Windows is AI. These devices can be suitable if you need high-performance machines capable of managing complex datasets and performing AI-related tasks. While the cost and complexity might deter some users, those in fields like data science and software development might find AI PCs to offer transformative benefits.

Here’s How to Create Your Own

WhatsApp has introduced a new organization feature that lets you create events in certain groups. But how do you create events and how useful is the feature?


The company announced the new events feature on 1 May on the WhatsApp blog, noting that it will initially roll out to groups within WhatsApp Communities. A WhatsApp Community lets you organize groups under a single umbrella, so the feature will come in handy for these types of groups that often include neighbourhood street groups and school groups.


While WhatsApp presents it as an easier way for people to plan get-togethers without leaving the WhatsApp app, there are a few flaws. While WhatsApp’s announcement says that you will receive a notification when the event draws near, this didn’t happen when I tried out the feature.

This means that I won’t be dropping my calendar app for WhatsApp events anytime soon. However, it is a useful way to get people to RSVP to an event without needing to send out emails.

How to Create Your Own Event on WhatsApp

At least for now, you will only be able to create an event on WhatsApp if your chat group is within a community. So if you really want to try out the feature, considering creating a community on WhatsApp.

Once you have the feature, creating an event is simple. Follow these steps to create a WhatsApp event:

  1. Open the chat where you want to create an event and select the paper clip icon for attachments.
  2. Select the Event option.
  3. Add the details for your event, including the Event name as well as its time and location. You can also toggle on the option for a WhatsApp call link if your event is a video or voice call.
  4. Once you have entered all the details, select the green arrow icon to send your event to the group.


Your event will appear as a special box within the chat. Group members will be able to RSVP to your event by selecting it and choosing whether they will be attending or not. If you created the event, you can also select Edit event to change certain details or to cancel the event.

When the event draws near, you should receive a reminder. However, when I tried out the feature, the event notification didn’t pop up and it passed by unnoticed. However, if you want to make sure you get a reminder, you can select the Add to calendar option in the event details to add it to your default calendar app. In my case, the option opens up Google Calendar and allows me to edit the event details and reminder before saving it.


If you want to make sure the event doesn’t get buried in your WhatsApp group messages, make sure to pin it by holding down on the event widget and selecting Pin.

WhatsApp’s events feature has the makings of a useful productivity feature, but for the time being it is limited to certain groups and reminders still need some work. However it will hopefully expand to become a handy feature that makes group outings and meetings easier to organize.

How to Install VirtualBox on an Apple Silicon Mac

Key Takeaways

  • Older VirtualBox builds offer native support for Apple silicon Macs, but they’re developer previews.
  • You can download and use VirtualBox for free. Setting up a VM in VirtualBox is also pretty straightforward.
  • Although VirtualBox is fine for general use, you should go for something like Parallels Desktop for heavier workloads.


If you don’t want to spend money on something like Parallels Desktop to virtualize Windows or Linux on your Mac, then VirtualBox is an excellent free alternative. Read along to find out how you can install and set it up.


Does VirtualBox Support Apple Silicon Macs?

VirtualBox does have native builds for Apple silicon Macs, but they are developer previews, meaning you might come across some bugs and performance issues. Also, you will have to use a slightly older version since Oracle hasn’t updated the Apple silicon version in quite a while.

Still, you should be able to run most major Linux distributions without a hitch, and you shouldn’t face any major issues with general usage despite its shortcomings.

How to Install VirtualBox on an Apple Silicon Mac

You can use the following steps to download and install the native version of VirtualBox on any Apple silicon Mac:

  1. First, head over to the VirtualBox Downloads page and scroll down to VirtualBox 7.0.8. Then click the Developer preview for macOS / Arm64 (M1/M2) hosts button to download the Apple silicon version of the virtualization app. Your Mac will download a DMG file that should appear in the Downloads folder.

  2. Open the DMG file and double-click VirtualBox.pkg to open the installer.
    VirtualBox installer running on macOS

  3. Follow the on-screen instructions till the setup is completed. Your Mac may ask you to provide the password during this process. The VirtualBox installer may also offer to move the DMG file to the Trash once the installation is complete.


Voilà! You have now successfully installed VirtualBox on your Apple silicon Mac. You can use Spotlight Search, Launchpad, or the Applications folder to launch VirtualBox.

Setting Up Your First VM in VirtualBox

We will show you how to set up your first virtual machine in VirtualBox for Mac. In this case, we have created a Linux VM running Ubuntu.

Before we begin, you have to download the ISO file for the operating system you want to install. If you also plan to start with Ubuntu, you can download it from the Ubuntu downloads page. Next, follow these steps:

  1. To create the first virtual machine, open VirtualBox and click the New button.
    select new VM on virtualbox

  2. Next, provide a name for the VM, select the storage location, and open the ISO file. If you are using a popular OS like Ubuntu, VirtualBox will automatically detect it and fill in the other details. If you want to configure settings like user accounts on the guest OS, check the box next to Skip Unattended Installation.
    select VM name and OS in VirtualBox

  3. If you chose Unattended Installation in the last step, you can now pick the username and password for the main account in the guest operating system.
    provide username and details

  4. Once you provide login details for the OS user account, you can select the VM’s resources like RAM and processors by dragging the sliders. Choose according to the tasks you plan to do with the OS, but a good idea would be to allocate half of your Mac’s RAM and CPU core count to the VM.
    select RAM and processors for VM

  5. Next, you need to select the storage options for the VM. Refer to the basic requirements of the OS and then consider the space you need on top of that to choose wisely. In the case of Ubuntu, I recommend a minimum virtual storage space of 25GB.
    create virtual hard disk for vm in VirtualBox

  6. Now, VirtualBox will show a summary of your entire configuration. So, use this opportunity to double-check your selection before creating the VM. Once you’re ready, you can click Finish.
    VM summary by VirtualBox

  7. VirtualBox may take several minutes to complete the OS installation. Once done, you can find the new VM on the VirtualBox sidebar menu. You can now select the VM and click the Start button to boot the virtual machine.
    run the new VM in VirtualBox


Congratulations! You have now created your first VM using VirtualBox on a Mac.

VirtualBox is adequate if your VM needs are simple, but don’t count on it for gaming or heavy workloads. While it’s a great free option, it does have its limitations in support and features. So, if you plan to run intensive tasks, I highly recommend running a VM using Parallels Desktop or UTM instead.

10 Tips and Tricks I Use to Make the Most of My HomePod

Key Takeaways

  • Use Sound Recognition to monitor smoke/CO alarms remotely. No data is sent to Apple.
  • Make your HomePod the speaker for Apple TV for upgraded sound quality.
  • A HomePod can function as a home hub and intercom, offers ambient sounds, and more.


The Apple HomePod can do much more than play music and answer your question to Siri. I’ve been a long-time fan of Apple’s largest smart speaker, and here’s how you can make the most of it.


1 Using Sound Recognition to Be Notified In Case of a Smoke or CO Alarm

One of the HomePod features you might not have heard about can help you keep your home and family safe. When away from home, you can be notified if a smoke or carbon monoxide alarm goes off. You will receive a notification on your iPhone and even your Apple Watch.

The feature uses on-device intelligence to listen for the alarm sound, no data is sent to Apple. You can find out more about the feature in our guide on how to set up smoke/CO alarm recognition on your HomePod.

2 Making a HomePod the Sound System for Your Apple TV


If you have an Apple TV, there’s no need to worry about spending additional money to upgrade your TV sound system. You can simply use your HomePod and its top-notch sound quality. If you’re just using your existing speakers on a TV, the HomePod can provide a major step up and bring a new dimension to movie night.

The process to make your HomePod the default speaker for an Apple TV is quick and easy.

3 Checking the Room Humidity and Temperature

While you can obviously use Siri on the HomePod to control smart home devices with a voice command, the speaker can also be part of your smart home. The HomePod features a built-in temperature and humidity sensor. You access that information in the Home app or by asking Siri on any of your devices.

But you can also use the temperature or humidity information as part of a smart home automation task. For example, if the temperature exceeds a certain custom point in a room, you can automatically turn on a fan attached to a smart plug to start cooling the area.


4 Pairing Two HomePods for Stereo Sound

While one HomePod can provide top-notch, room-filling sound, adding a second smart speaker to the mix can take your music and more to a new level. With two HomePods, you can create a stereo pair. Doing this creates a left and right channel for a more immersive listening experience, especially for use with an Apple TV. The end result is easily on par with a much more expensive dedicated home theater.

Find out the simple process of how to create a HomePod stereo pair just by using your iPhone.

5 Using a HomePod as a Home Hub


While HomeKit is a great smart home protocol, especially if you’re deep into the Apple ecosystem, there is a substantial downside. You need an Apple Home Hub to control your compatible smart home devices while away from your home Wi-Fi network, share control of accessories with others, and automate accessories.

But the good news is that your HomePod can act as a Home Hub. There’s nothing you need to do as the HomePod will automatically turn on the feature when set up.

Intercom is another great way to use your HomePod as part of your daily routine. The lesser-known feature allows you to turn your smart speaker into an intercom to inform others in your home. Think of it as the old-school intercom taking a leap into the future.


And along with using your HomePod, you can use any other Apple device like an iPhone or Apple Watch with Siri. Just say “Siri, intercom” followed by the name of the room. So for example, you can send a quick message to the living room HomePod to say that dinner is ready. The other party can even respond back.

Find out more about Apple Intercom and how you can set it up.

7 Finding Your Lost Apple Devices

It can happen to the best of us—a lost iPhone or other Apple device when you need it. When you misplace your iPhone, you usually think about using the Find My app. But if you don’t have any other Apple device handy, your HomePod can stand in and save the day.

All you need to say is “Siri, where is my iPhone?” Or “Siri, play a sound on my Apple Watch.” As long as the other device is on the same Wi-Fi network, it will make a sound to help you locate it. It’s a great help when you’re in a pinch. After locating the device, you can tap on the on-screen alert to turn off the sound.


8 Setting Up Voice Recognition for Everyone in Your Household

If you have multiple people in your household, everyone can better customize the HomePod and Siri experience with Voice Recognition. The HomePod is usually tied to the Apple account of the person who set up the smart speaker.

When someone else in your home wants to make a phone call, play music from their library, or something else; they will need to set up and use Voice Recognition. Up to six users in a home can be recognized, they just need a separate Apple ID. You can toggle Personal Requests for each HomePod in the home. When complete, Siri will know the other user’s name and provide a more custom experience for music playback and specific apps like Messages and Reminders.


9 Listening to Ambient Sounds

Ambient noise can help you all throughout the day. Whether you need something extra to sleep soundly or to just focus without distraction, your HomePod can help. The smart speaker offers a number of ambient sounds including rain, forest, ocean, white noise, fireplace, or stream sounds.

To access the sounds just say “Siri, play ambient sounds,” or for something more specific “Siri, play white noise.” You can also set a sleep timer where the sound will automatically stop after a certain period of time. The ambient sounds can also be added to Home app scenes that use multiple smart home devices or even a smart home automation.

10 Using Handoff to Move Music from Your iPhone

apple homepod with music
Apple 


Handoff is one of the best features of the Apple ecosystem that allows you to start work with something on one device and continue on another.

But Handoff also allows you to continue rocking out and move music directly from your iPhone 11 or later to HomePod. To transfer the music, podcast, or other audio, just place the iPhone near the top of the HomePod. You’ll feel haptic feedback on your iPhone and the music should automatically start playing.

As you can see, the HomePod is a versatile smart speaker perfect for any Apple fan. Make sure to use these tricks and tips to see everything that it can offer.

How to Fix Alexa When She Is “Having Trouble Understanding Right Now”

Key Takeaways

  • Did you know that Alexa issues are usually fixable with simple troubleshooting steps like addressing Wi-Fi, checking for updates, and checking connections?
  • If all else fails, you can also try a factory reset or contact Amazon support for further assistance.


A smart speaker can be handy, but also a pain in the neck when it fails to understand your commands. If your Echo keeps saying “I’m having trouble understanding you right now,” we’re here to help fix it.


Why Is Alexa Having Trouble Understanding?

Josh Dolloghan/MakeUseOf

As smart as it is, an Amazon Echo is just a device, so it can face technical issues. Luckily, most issues are easy enough to fix once you get to the root of the problem.

When Alexa is having trouble understanding, the first thing you need to know is that it’s probably not broken, and you don’t need to get a new device. The first thing you should check is the Echo light ring color meaning. For example, if the light ring is red your device is probably just muted. Otherwise, the problem here is not with the device itself, but with the connection.


Try out these troubleshooting steps to fix the issue…

1. Try a Simple Restart

Have you tried turning it off and on again? This advice is the most common one in tech support as it solves so many problems. The same is true for the Amazon Echo.

If you can’t get it to understand, simply unplug it from its power source. Wait a few seconds, connect it again, and wait for the blue light to stop circling before you try to talk to Alexa again.

2. Check Your Wi-Fi

Alexa can only work if it’s connected to the internet. So, if your connection is down, the device won’t work as well.

Check if the internet is working on other devices, like your laptop or smartphone. If it is, and Alexa is still not responding, try to reset your router and wait a few minutes before you talk to the device.

3. See If Alexa Is Connected to the Right Network


Maybe you just moved homes and forgot to change the Wi-Fi network on your Alexa app for iOS or Android. Or maybe you changed internet providers and forgot to update your Echo. Perhaps someone played with your Echo and changed the network by mistake. If so, you can connect your Echo and Alexa to Wi-Fi.

Go to the Alexa app on your phone, select Devices, go to Settings (small gear in the upper right), and tap Change next to Wi-Fi Network. Ensure that it’s connected to the right network. If not, tap Join another Wifi network, and follow the steps on the screen.

4. Make Sure the Software Is UpdatedAn Amazon Echo Dot displaying the time

Alexa automatically connects to its servers on a daily basis to check for software updates. If your device is having trouble understanding, maybe it’s because it couldn’t download the latest version for some reason.

The easiest way to prompt Alexa to check for updates is to say “Alexa, check for software updates”. Depending on your Echo model, it can update itself or Alexa will provide instructions.


5. Bring Alexa Closer to the Router

Even if your internet is just fine and the device is connected, the signal may not be strong enough to reach Alexa. This can happen if the router is on the other side of the house.

To test if this is the case, place the Amazon Echo right next to your router. If it works when you do that, you may want to leave your Alexa in that room or find a new location for the router.

6. Try a Factory Reset

As a last resort, you can opt for a factory reset. This will erase your saved routines, alarms, and reminders, and basically revert the device to how it was when you first plugged it in. However, this may be the thing to get it working again.

You can do a factory reset through your app. Find your device on the app and under Device Settings, scroll down until you see Registered To. Tap Deregister to continue with the reset.


After you complete the factory reset, you’ll have to reconnect it to your home Wi-Fi in order for it to work.

If you go through all of the above steps, and your Alexa is still having trouble understanding, the problem may be with Amazon itself. Check to see if Amazon servers are down with a site like DownDetector, or reach out to Amazon support on their website.

Hopefully, with these troubleshooting steps, you can get Alexa to understand your commands again. If not, your last resort can be to contact Amazon support.

How to Get the Most Out of EV Features in Google Maps

Key Takeaways

  • Google Maps provides info on the availability & power capacity of charging stations to ease EV trip planning.
  • Choose the right charging station with the correct plug type for your EV to avoid issues.
  • Utilize Google Maps & EV apps to plan road trips, extending battery life & ensuring a smooth journey.


With precise navigation and increased flexibility when planning long road trips, Google Maps’ new features for EVs should make planning your next trip much more convenient.

At the very least, you won’t worry about running out of charge!


1 Know How Many Charging Stations Are Free for Use

Electric vehicles have increased greatly in popularity since the first one rolled out of the factory, and so have their numbers. So much so, in fact, that they far outnumber the charging stations built for them.

If you’re not sure whether a particular charging station has charging ports free or in use, you can now find out before you travel there. Just look up a charging station directly to see how many charging bays are open.

It’s best to have this information before you plan your route to the closest charging station because they might be in use for a while.


2 Know the Power Capacity of Charging Stations

The higher the power output of an EV charging station, the faster you can charge your car. So, when searching for a bay to plug into, make sure you’re looking at the power capacity, too.

Just tap a particular option from the available charging stations on the map to take a look at the capacity that it offers.

Be wary, though, of using a station that is over-powered for your car, because DC fast-charging can affect your EV’s battery.

3 Choose Charging Stations That Suit Your EV

Now that electric vehicles have caught on, there is more diversity than before. It’s not just a number of auto-makers and battery types we are seeing; this diversity is also found in the plug design used for charging an electric car.


There’s no use getting to a charging station only to find that it doesn’t have the right kind of charger for your model. But you can choose the plug type your EV uses in Google Maps to filter out those stations that aren’t helpful.

  1. When looking for a charging station on Google Maps, click on the Any plugs option toward the top-right.
  2. Click on the Add plugs button.
  3. Choose the plug that fits into your EV from the list. You’ll see just those stations offering that specific plug type.

4 Find Exactly Where a Charging Station Is Located

It’s not always easy to find a charging station, even if you’ve narrowed down its general location. EV charging stations often have their own designated areas in parking lots and multi-level parking garages, making them difficult to locate precisely.


Google Maps will use AI to help in this regard. It will scour millions of user reviews to give you exact directions to a charging station.

The AI built into Google Maps might even encourage you to provide more information about your experience, including the type of plug you used and your wait time, so that this may benefit others looking for a spot to charge their cars.

5 See Nearby Charging Stations When Your Battery Is Low

If you have Google built into your EV, you might be surprised to see nearby charging stations showing up on the in-car map. This is perfect for when your battery is running low, and you need to quickly pick the closest charger to top up.


This in-map intel will also provide details in real-time on the number of ports available and their charging speed. Based on location and power, pick the station that suits your charging needs.

Driving on a battery that’s close to running out is not a good position to be in. Extend your EV’s battery life by taking care of it properly.

6 Plan Your Stops on a Road Trip

Planning a long road trip with an electric vehicle can get complicated. Their limited range and lengthy charging times (compared with gas-powered cars) mean stops can be more frequent and longer, a challenge that may lead to a return to less eco-friendly options.


But if you have Google built-in, this should be much simpler. Plan a multi-stop trip, and Maps will suggest the best charging locations based on your battery level. Use this information in conjunction with the EV filter on Google Travel to find hotels with on-site EV charging.

Another way to get the most out of a long road trip is to get yourself a few excellent EV apps to plan your route.

If you have an EV, be sure to use all Google Maps’ resources at your disposal to plan long trips and find the right charging station when your car is almost out of juice. Your time on the road just got a little easier.

5 Major Features of the 11-Inch and 13-Inch iPad Air 2024 Models

Quick Links

Apple updated the mid-range iPad Air lineup at its “Let Loose” event in May 2024, and this offers more than just a hardware refresh. You now even have multiple options to choose from. Here, we’ll discuss all the noteworthy changes.


1 Two New Screen Sizes

Previous iPad Air models came in one size—both the 2020 and 2022 iPad Air models featured a 10.9-inch display. And if you wanted a larger screen, you had no choice but to go for the far more expensive 12.9-inch iPad Pro.

Fortunately, the 2024 iPad Air comes in 11-inch and 13-inch screen sizes, so you can choose your preferred size depending on your use case. For instance, if you’re a budding artist who needs a larger canvas, you can opt for the 13-inch iPad Air instead of the 13-inch iPad Pro.

The 11-inch iPad Air has the same physical dimensions as the outgoing model, but Apple has shrunk the bezels to increase the display size by 0.1 inches.

2 The M2 Chip

Apple/YouTube


If the M1 chip in the outgoing iPad Air wasn’t powerful enough for your workflows, the M2 chip in the 2024 iPad Air models should meet your expectations. Apple says the M2 iPad Air is roughly 50 percent faster than the outgoing model for various productivity and creative tasks.

As you may have learned from our comparison of the M2 chip against the M1, the former packs two additional GPU cores and offers a faster 100GB/s memory bandwidth. Besides creative workflows, these improvements help the 2024 iPad Air perform a lot better in GPU-intensive games.

3 Landscape Front-Facing Camera

iPad Air with the landscape front facing camera focused
Apple/YouTube


I’ve always found the top-mounted selfie camera on iPads a bit weird for video calls. Most people use their iPad in landscape orientation during video calls, especially if they have a Magic Keyboard or a Smart Folio case. For the person on the other end, it seems like you’re looking to the side, and the camera angle is unflattering.

Thankfully, Apple has finally moved the front-facing camera to the landscape edge on the 2024 iPad Air models. Coupled with the Center Stage feature, this new camera position is better for one-on-one calls as well as group calls, as it can keep everyone in the field of view automatically.

4 Double the Base Storage

The base model M1 iPad Air came with 64GB of storage space, which isn’t adequate for even casual users. However, Apple has bumped the base storage to 128GB for the 11-inch and 13-inch iPad Air models while maintaining the same $599 starting price.

So for the same money, you’re not only getting a better iPad, but also more space to store all your photos, downloaded media, games, and apps.


5 Apple Pencil Pro Support

If you already have an Apple Pencil (1st or 2nd generation) you use with your current iPad, it won’t work with the 11-inch and 13-inch iPad Air models. You’ll need to buy the Apple Pencil Pro for $129 or the Apple Pencil (USB-C) for $79 to draw, scribble, or take notes.

I recommend getting the Apple Pencil Pro, especially if you’re a digital artist, due to all its new features. For starters, you can squeeze the Apple Pencil to open a contextual menu on the screen or rotate the barrel to change the orientation of drawing tools. The built-in haptic engine also provides gentle feedback for specific actions.


Additionally, it supports the Apple Find My network, allowing you to locate your Apple Pencil easily if you ever misplace or lose it.

We’re used to seeing minor hardware upgrades with each new generation of the iPad Air, but Apple offers a bit more than just a spec bump this time. Besides the standard space gray and starlight options, the 11-inch and 13-inch iPad Air are available in new purple and blue colorways. If they fall within your budget, you can order one now from Apple Store Online.

All Laptop Sleeves Should Double as a Portable Workspace

Key Takeaways

  • Versatile laptop sleeve for a portable workstation with premium vegan leather and recycled fabric materials.
  • Does not cover the charging port, and has a perfect fit for 14 to 16-inch laptops.
  • Provides a clean workspace in public areas, easy to clean, and durable with a sleek design and unique magnet closure.


Orbitkey has grown in popularity over the last several years due to its incredible build quality and attention to detail. It has a growing line of beloved products, particularly hybrid working products. The Orbitkey Hybrid Laptop Sleeve is the company’s recent addition to laptop sleeves. What is unique and stands out about this one is its portable workstation focus.

While most sleeves protect on transport, this sleeve is meant to add protection on transport and continue to be helpful at a workspace. It should come as no surprise that the Hybrid Laptop Sleeve is made of high-quality materials, has excellent construction, and is backed by Orbitkey’s two-year warranty.

Orbitkey Hybrid Laptop Sleeve

The Orbitkey Hybrid Laptop Sleeve is a versatile and stylish accessory that can transform any area into a sleek and convenient workspace. It is crafted from premium vegan leather and recycled woven fabric. This laptop sleeve can be unfolded to reveal a desk mat and a mousepad and then quickly folded down to its original slim size to carry or tuck away in a bag.

Pros

  • Multi-use design
  • High-quality materials
  • Easy to clean
Cons

  • No storage for accessories
  • Hard to charge non-Magsafe MacBooks

Orbitkey Hybrid Laptop Sleeve Port Access
Collin Probst / MakeUseOf


If you work remotely, this laptop sleeve might be the next addition to your portable workspace, particularly for use in co-working spaces, coffee shops, or wherever the day takes you.


Premium Build with a Functional Design

I noticed the high-quality, premium vegan leather when I opened the box for this hybrid laptop sleeve. The smooth touch of quality leather and the sleek finish are quite beautiful. The edges are pressed and stitched together with precision. The folding edge is intentional and done well. The internal measurements are perfect.

I have a 13-inch M2 MacBook Pro with some MOFT accessories, so my laptop is a tad thicker than a standard MacBook. Because of this extra thickness, I am quite happy that Orbitkey designed this product for 14-inch and 16-inch laptops. My computer slides in perfectly, with a tight, but not too tight, fit as though it was custom-built for my exact MacBook.

Orbitkey Hybrid Laptop Sleeve Overview
Collin Probst / MakeUseOf


The first few times I used my laptop sleeve, I didn’t quite understand the hype of the mousepad space. However, when I went to a coffee shop to work for a few hours and brought the sleeve with me, I finally found the benefit. Usually, I am overly protective of my electronics and would be paranoid that something is on the table. Additionally, I would be frustrated as I slid my mouse along a table rather than a mousepad, which could make me feel unfocused due to the lack of a defined workspace.

I benefit greatly from a defined, organized, and productive workspace. Thanks to this Hybrid Laptop Sleeve, I could quickly solve these minor frustrations and create a clear and clean workspace in the middle of a bustling coffee shop.

Beyond Drop Protection

Orbitkey has intentionally left out zippers, Velcro, elastic, or other materials that could cause friction, frustration, or fade. They chose all leather with quality stitching because rather than fading or wearing down in a way that will decrease value and allure, they know that over time and use, this leather will patina and become even more beautiful.


With the active choice to avoid zippers like most laptop-carrying sleeves, Orbitkey utilized minimal yet powerful magnets to hold their leather tight around your computer, protecting it from falling out and keeping the folding workspace closed when not in use. These magnets do not interfere with or affect the laptop or a mouse in any way, so you don’t have to be worried about that.

Speaking of the mouse, the leather mousepad works wonderfully as a tracking surface for any mouse I have tried, and trust me; I have tried a lot. Granted, it’s not a substantial horizontal space as it is only the depth of the sized MacBook (just over nine inches for the 14-inch laptop variant and just under ten inches for the 16-inch variant) as the laptop pouch is what turns into the mousepad.

It takes a moment to get used to the size, but as long as you are using it for work and not gaming, the width, in particular, works just fine. If you want this to be great for gaming or jumping the mouse around the screen while also using the 14-inch variant, you may find it narrow, but that’s a discussion for a different time.


Orbitkey Hybrid Laptop Sleeve Laptop Sleeve
Collin Probst / MakeUseOf

Even if you treat this sleeve and portable workstation as I do, they will get dirty in coffee shops, co-working spaces, park benches, libraries, and conference tables. The good news, however, is that this leather cleans very well. I’ve had mine get sticky from a hidden substance on a coffee table, and I could easily clean it off with a damp towel. So far, even after months of use, this Hybrid Laptop Sleeve still looks brand new.

Another design element is that Orbitkey was wise and left enough space to charge your MacBook while protecting it without opening the sleeve. Orbitkey designed this for the 14-inch and 16-inch MacBooks and their respective sleeves, specifically for those with MagSafe charging. While I don’t have a 14 or 16-inch MacBook with MagSafe charging, I tested this with a 13-inch M2 MacBook Air with MagSafe Charging, which worked wonderfully.


While keeping the sleeve closed, the MagSafe port is visible near the hinge of the leather cover, allowing me to connect the MagSafe charger to the port effortlessly. With my M2 MacBook Pro, I do not have MagSafe charging (sadly), but with a bit of wiggling, I can access my USB-C port for charging as well, just not as quickly as I could with the MagSafe port, as OrbitKey intended.

Orbitkey Hybrid Laptop Sleeve Fully Folded

Day to Day with the Hybrid Laptop Sleeve

The Hybrid Laptop Sleeve by Orbitkey is fantastic all around. I love how it folds and protects my beloved MacBook Pro, and I love the magnetic enclosure. The magnets help me feel a sense of security without having the annoyance or risk of scratching my MacBook that I feel when using a zippered sleeve.

The mousepad is excellent for on-the-go use. However, the only downside is that there is no way to store a mouse with this sleeve, not even a low-profile Magic Mouse. As a result, I either have to put the sleeve in my backpack where my mouse and other accessories are, carry the mouse in my pocket or loose in my hand, or use the mousepad as a nice place to put my phone instead of using it as a mousepad.


None of those scenarios are bad scenarios. Similarly, no storage compartments are available for cables or charging bricks on this sleeve. So, if you prefer to travel light, you can carry your laptop in this sleeve; note that it will be without any additional accessories.

Orbitkey Hybrid Laptop Sleeve Mouse Pad

Should You Buy the Orbitkey Hybrid Laptop Sleeve?

Orbitkey’s Hybrid Laptop Sleeve is a beautifully crafted leather laptop sleeve designed for the hybrid worker, “my office is the world,” kind of person. It is a fantastic take on the classic laptop sleeve, and it opts for clean lines and magnets instead of other bulkier closing methods. Orbitkey utilized high-quality materials and a premium design, creating a fantastic portable workspace. While it is expensive for a laptop sleeve, the durability and longevity of the sleeve itself make the price more palatable—you get what you pay for.

Orbitkey Hybrid Laptop Sleeve

Orbitkey Hybrid Laptop Sleeve

The Orbitkey Hybrid Laptop Sleeve is a versatile and stylish accessory that can transform any area into a sleek and convenient workspace. It is crafted from premium vegan leather and recycled woven fabric. This laptop sleeve can be unfolded to reveal a desk mat and a mousepad and then quickly folded down to its original slim size to carry or tuck away in a bag.

4 Products Apple Announced at Its “Let Loose” iPad Event (and What You Missed)

Key Takeaways

  • The iPad Pro now comes with an OLED display alongside the new M4 chip, which brings massive improvements to the Neural Engine.
  • The iPad Air also gets a hardware refresh in the form of the M2 chip. It’s now available in 11-inch and 13-inch sizes.
  • Apple also unveiled the Apple Pencil Pro and a new Magic Keyboard to complement the new iPad Pro models.


Apple’s “Let Loose” event in May 2024 marked a significant milestone for the iPad lineup, as the company introduced some of the most substantial upgrades since its inception. Read along to find out everything that Apple announced at this event.


1 OLED iPad Pro Models With the M4 Chip

The iPad Pro stole the spotlight at the event, and with good reason. Apple made the iPad Pro models thinner, with the 11-inch and 13-inch variants coming in at 5.3mm and 5.1mm thickness, respectively. More importantly, the new models finally get OLED displays with front-facing cameras on the landscape edge.


The new iPad Pro features not one but two OLED panels that work together. Apple calls this tandem OLED technology, where the light is combined from both panels to achieve a higher brightness. While the peak HDR brightness is still 1,600 nits, the full-screen brightness for both SDR and HDR content is now 1,000 nits compared to 600 nits on the older models.

Since OLED displays have individual pixel control, unlike LCD panels, there should be no backlight bleed, and you will see true blacks while viewing a dark scene. If you often use your iPad outdoors, directly under the sunlight, you can also opt for a Nano-texture glass option, which greatly reduces glare. However, this option is only available with the 1TB and 2TB configurations.

The iPad Pro also packs the all-new M4 chip, which Apple claims is 1.5x faster than the M2 chip in CPU performance. The GPU supports features such as hardware-accelerated ray tracing and Dynamic Caching. However, what’s more impressive is the M4’s Neural Engine performance, which is 60x faster than the A11 Bionic—Apple’s first chip with the Neural Engine.


The iPad Pro comes at a starting price of $999 for the 11-inch model and $1,299 for the 13-inch variant equipped with 256GB of storage. If you want the Nano-texture glass configuration, you’ll need to shell out an extra $100 on top of the cost of the 1TB and 2TB storage variants.

2 11-Inch and 13-Inch iPad Air

The iPad Air is now available in 11-inch and 13-inch screen sizes. Unfortunately, Apple retained the standard LCD panel instead of switching to the Liquid Retina XDR display we’re familiar with on the older iPad Pro models. The Air now packs the M2 chip instead of the M1 chip, which should give you slightly better performance, but don’t expect an incredibly noticeable difference.


Like the iPad Pro, the iPad Air also houses the front-facing camera on the landscape edge, making video calls much more comfortable. Additionally, the iPad Air introduces a slightly different blue and purple color option alongside the unchanged space gray and starlight variants.

As for pricing, the 11-inch and 13-inch models start at $599 and $799, respectively. But unlike the outgoing models, the redesigned iPad Air comes with 128GB of base storage.

3 Apple Pencil Pro

Apple added another Apple Pencil, dubbed the Apple Pencil Pro, to the lineup. It comes packed with several handy features to improve your experience. For instance, it can detect when you squeeze it to bring up more contextual options in apps, and it even gives you a little haptic feedback to confirm your actions.


Plus, it has a gyroscope that detects if you’ve rotated the pencil, allowing you to adjust pen and brush tools just like you would with a real pencil on paper. And if you ever misplace it, you can use the Apple Find My network to track it down.

The Apple Pencil Pro costs $129, but remember, it’s only compatible with the 2024 iPad Pro and iPad Air models. Similarly, if you’re eyeing one of these iPads, be aware that your existing Apple Pencil (2nd generation) won’t work with them; you’ll need to buy the Apple Pencil Pro instead.

4 Redesigned Magic Keyboard


Apple also introduced a redesigned Magic Keyboard for the M4 iPad Pro models. It now has an escape key and a function row, where you can adjust the brightness, control media playback, and much more—just like a MacBook.

The palm rest is now made of aluminum, but my favorite addition is the larger glass trackpad, which also has haptic feedback. With MacBook trackpads setting a high standard, it’s a welcome sight to see similar technology being integrated into iPad keyboards.

The new Magic Keyboard costs $299 for the 11-inch version and $349 for the 13-inch version. However, it’s important to note that it’s only compatible with the new iPads, which don’t work with the older Magic Keyboard.

With the release of these new iPads, Apple has discontinued the iPad (9th generation). So, the cheapest iPad you can buy today is the iPad (10th generation), which now costs $349—$100 less than its launch price.


Apple also introduced new versions of Final Cut Pro and Logic Pro, with a whole suite of new AI features. This aligns with our expectations of AI taking the spotlight at the WWDC 2024 event.