
A Gaming Phone in a Different Body

Key Takeaways

  • The ASUS Zenfone 11 Ultra features a large 6.78-inch OLED display, robust Snapdragon 8 Gen 3 chipset, and a substantial 5500mAh battery.
  • The phone’s design shifts away from its compact predecessors with its larger form, refined design language, and comfortable grip.
  • Despite its strong hardware and battery performance, the Zenfone 11 Ultra’s camera system is held back by over-processing.


In a world of iPhones, Samsung Galaxies, and Pixels, the rest of the smartphone market can often fall under the radar, especially when every manufacturer is trying to lock you into their respective ecosystems. ASUS’ Zenfone line has been around for quite some time and recently has captured attention for its highly competitive and capable Zenfone 10 and Zenfone 9 before it. So what happens when it goes all out on one ultra-flagship phone?

Enter the new ASUS Zenfone 11 Ultra, a massive departure from the compact-sized Zenfone 10 from last year, coming in with a new design, dramatically larger display and battery, and a supped-up camera system, but frankly loses the touch of the ASUS’ smaller phones.

Asus Zenfone 11 Ultra

The Sleeper Gaming Phone

The ASUS Zenfone 11 Ultra is a significant departure from its predecessors, with its new bigger body and expansive 6.78-inch OLED display. The phone has a substantially large 5500mAh battery, with its standout features including powerful performance powered by the Snapdragon 8 Gen 3 chipset. However, the phone’s camera system, despite delivering generally decent color accuracy and consistency across the entire camera array, suffers from over-processing, detracting from the overall experience. 


Brand
ASUS

SoC
Qualcomm Snapdragon 8 Gen 3

Display
6.79-inch LTPO AMOLED, 144Hz, HDR10, 2500 nits

RAM
12/16GB

Storage
256/512GB

Battery
5500mAh

Ports
USB-C, 3.5mm headphone jack

Operating System
Android 14

Camera (Rear, Front)
50 MP 24mm wide, 32MP telephoto with 3x optical zoom 13 MP ultrawide, 32MP selfie camera

Dimensions
163.8 x 76.8 x 8.9 mm

Weight
224g

Charge speed
65W wired, 15W wireless

IP Rating
IP68

Pros

  • Excellent battery life
  • Flagship performance
  • Headphone jack
Cons

  • Inconsistent camera experience

Zenfone Goes Big

As alluded to before, the Zenfone 11 Ultra ditches the compact design of its predecessors, and while it’s sad to see the small form factor go, this larger Zenfone is very nice. The phone’s back is a matte metallic glass finish, which has ASUS’ monogram subtly etched onto it, and the way it refracts light looks excellent. Despite its size, the Zenfone 11 Ultra’s mix of a curved back panel and flat aluminum sides provides a firm and comfortable grip.


ASUS Zenfone 11 Ultra back-glass-3
Zarif Ali / MakeUseOf

I think there’s one main design aspect that sticks out (literally) with the Zenfone 11 Ultra, and that is its camera bump, which is this massive protruding rectangle that awkwardly sits asymmetrically towards the top of the phone. This camera bump reminds me of the Galaxy Note 20 Ultra’s camera bump, just by the way it’s so visible, but what accentuates the awkwardness of it on the Zenfone is just how disproportionate it looks compared to the slender, curvier back panel—it looks very out of place.

ASUS Zenfone 11 Ultra camera
Zarif Ali / MakeUseOf


A Decent Snappy Display

The 11 Ultra’s larger footprint accommodates a 6.78-inch OLED display that has vibrant colors and deep contrasts. The Zenfone offers up to a 144Hz refresh rate when you enter the device’s gaming modes, but in typical usage, it’ll dynamically adjust to about 120Hz.

ASUS Zenfone 11 Ultra display
Zarif Ali / MakeUseOf

Compared to other flagships like the Samsung Galaxy S24 Ultra, I would say the Zenfone’s display is almost on par, but not quite at the flagship level. The screen-to-body ratio is about 88%, and the bezels are almost uniform all the way around, but with the bottom bezel being slightly bigger.

ASUS Zenfone 11 Ultra display-2
Zarif Ali / MakeUseOf


That said, the screen is only a 1080p panel, which, when compared to similarly priced flagships like the OnePlus 12, which has a dramatically brighter panel at 2,500 nits and can go up to 1440p in resolution, really doesn’t make the Zenfone’s panel look all that impressive.

Flagship Camera Woes

Onto the camera system, the Zenfone 11 Ultra is equipped with a main 50MP sensor that has a 6-axis hybrid gimbal stabilizer, a 32MP telephoto lens that offers 3x optical zoom and up to a 30x digital zoom, and a new 13MP ultra-wide camera that reduces lens distortion.

ASUS Zenfone 11 Ultra camera
Zarif Ali / MakeUseOf

In real-world practice, I think the cameras are decent, offering great dynamic range and mostly accurate color and consistency across the three sensors, but this camera system seems to have a watercolor effect on photos, where it tries to over-sharpen and reduce grain simultaneously and yields something that looks very over-processed in its final result.


These pitfalls can most likely be addressed with light editing and software updates to the camera, but I think the broader issue with how the phone handles photos is the fact that it tries to keep everything—even things that shouldn’t be sharp and in focus—sharp and detailed, and it reduces the overall versatility of this otherwise great hardware setup.

Performance of A Gaming Phone

When it comes to performance and battery life, this is where the Zenfone 11 Ultra truly shines, and where its larger footprint pays off. The device is powered by the Qualcomm Snapdragon 8 Gen 3 chipset and comes with up to 16GB of RAM and 512GB of storage.

ASUS Zenfone 11 Ultra colors
Zarif Ali / MakeUseOf


I had already tested the Snapdragon 8 Gen 3 on the Samsung Galaxy S24 Ultra earlier this year, and the performance is on par, with the Zenfone scoring 2,242 on single core and 6,920 on multicore for Geekbench 6, but what makes the Zenfone 11 Ultra feel arguably special is just how fluid the OS feels on this chip.

The Galaxy S24 Ultra is no slouch by any means, but ASUS’ skin on top of Android 14 feels very lightweight, and only addresses areas where ASUS sees fit, and that makes this phone feel excellent to use.

ASUS Zenfone 11 Ultra back-glass-2
Zarif Ali / MakeUseOf


There are no fancy designs or flashy new software features that are asking for your attention— the Zenfone 11 Ultra essentially runs like a pure stock Android phone that only adds in a light sprinkling of ASUS’ software features, most of which are opt-in during the setup process. Things like high-performance mode, which kicks in when you open a game (or hilariously, benchmark apps) are excellent and lets you use the 144Hz refresh rate, though the phone does get uncomfortably hot to the touch under intense performance loads of games like Genshin Impact.

Battery for Days

The battery life on the Zenfone 11 Ultra is excellent, though unsurprising. The phone sports a massive 5500mAh battery, which ASUS touts lasts for over 26 hours on a single charge, but in real-world usage, this translates to a phone that can comfortably be used the next day without needing to charge.

ASUS Zenfone 11 Ultra ports
Zarif Ali / MakeUseOf


The phone also charges very fast as well, with a peak charging speed of 65W that can get to 100% in 39 minutes and offers up to 15W of wireless charging. Overall, if you’re coming from a smaller device, I think there’s a notable change in how you will live with it and charge it, and it feels very liberating to have a reliable charge at all times.

Should You Buy the Zenfone 11 Ultra?

Overall, the ASUS Zenfone 11 Ultra is a decent choice for anyone looking for a capable phone in 2024, but I can’t conclude this review without addressing the big elephant in the room, which is the question: Isn’t this just a rebranded ROG Phone 8 Pro? And the answer is yes, this phone is essentially the same phone with a slightly tweaked design that drops all the gamer-esque polishes, and that just means that everything we discussed was, in part, just highlighting the typical benefits and pitfalls of owning a gaming phone.

ASUS Zenfone 11 Ultra display-2
Zarif Ali / MakeUseOf


The Zenfone 11 Ultra offers excellent performance and battery life, above all else, has an expansive high-refresh-rate display, and provides software features that specifically gear it towards gamers, despite not explicitly saying so.

This also means certain general-use fundamentals of the phone experience like the camera suffer in a way that other devices within the Zenfone’s flagship category may not. It depends on what aspects of the big phone experience you deem to be important to you.

ASUS Zenfone 11 Ultra back-glass-3
Zarif Ali / MakeUseOf

I recommend the Zenfone 11 Ultra to people who want a gaming phone without the gamer aesthetic, but in the grand scheme of things, the 11 Ultra feels like just another big phone entering a market that has assimilated itself to more-or-less the same big phone formula in different bodies.


ASUS Zenfone 11 Ultra Press

Asus Zenfone 11 Ultra

The ASUS Zenfone 11 Ultra is a significant departure from its predecessors, with its new bigger body and expansive 6.78-inch OLED display. The phone has a substantially large 5500mAh battery, with its standout features including powerful performance powered by the Snapdragon 8 Gen 3 chipset. However, the phone’s camera system, despite delivering generally decent color accuracy and consistency across the entire camera array, suffers from over-processing, detracting from the overall experience. 
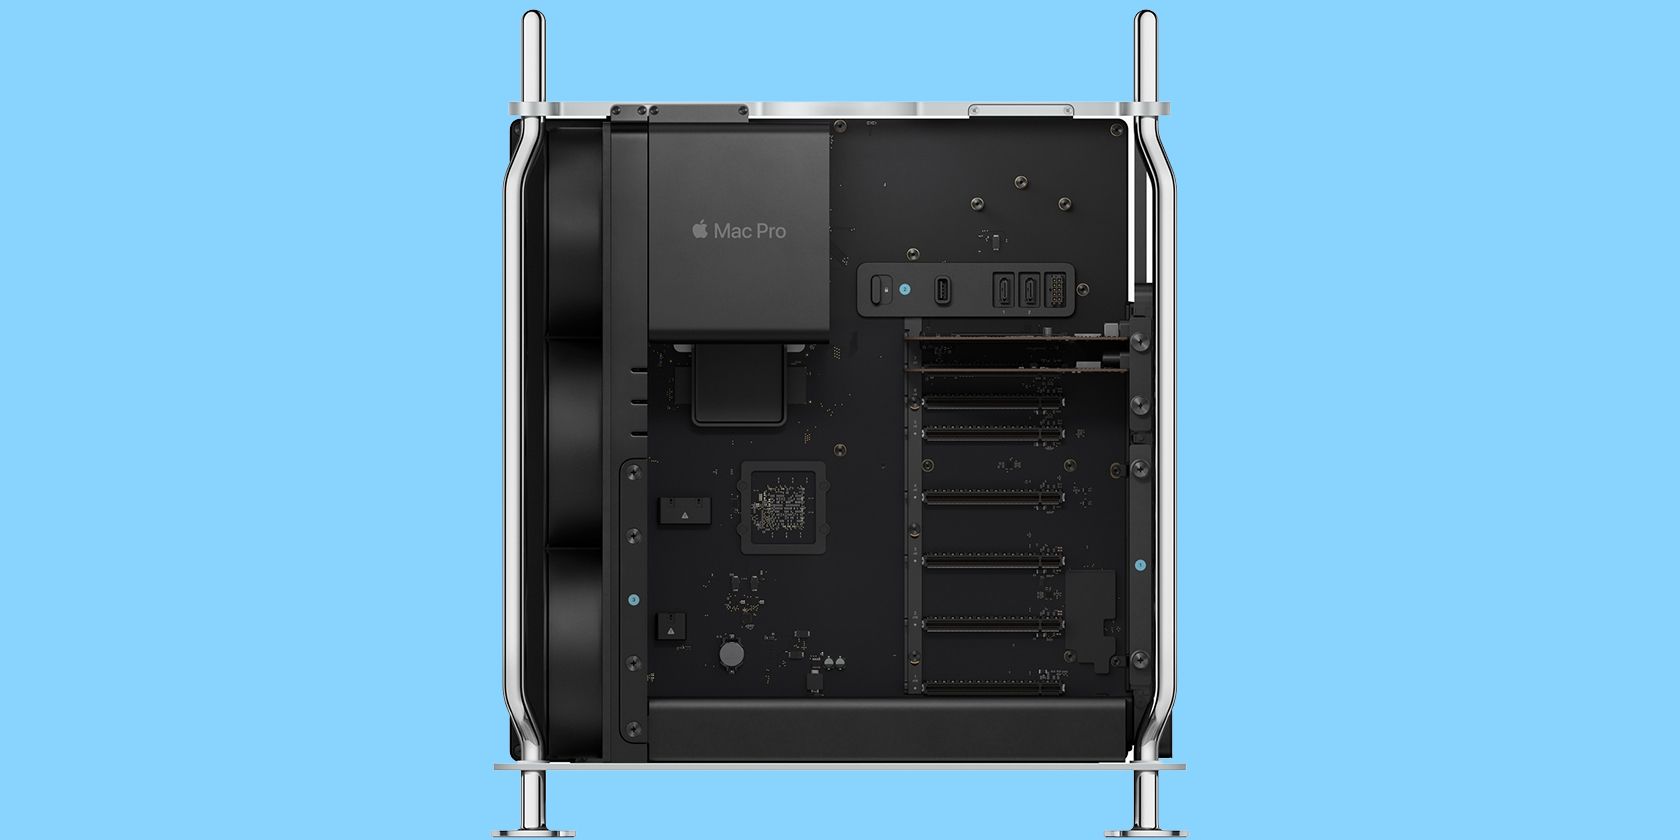
 

What Is Unified Memory on Your Mac and How Does It Work?

Key Takeaways

  • Apple’s unified memory architecture is faster and more power-efficient than traditional RAM.
  • Unified memory allows the CPU, GPU, and Neural Engine to access the same memory pool.
  • Consider your configuration options carefully when purchasing a Mac, as unified memory is expensive and not user-upgradable.


If you considered buying a modern Mac recently, you may have come across the term unified memory being used instead of RAM. But what does it mean, and how is it different from traditional RAM? Read along to find out.


What Is Unified Memory?

Apple/YouTube

People often think the Apple silicon chip is a CPU, but that’s not entirely true. It’s actually an SoC (System-on-a-Chip), which consists of various components in the same package, such as the CPU, GPU, Neural Engine, and more.

All these components require some place to temporarily store data in order to function, and that’s when Apple’s unified memory comes in. Unified memory consists of extremely fast DRAM chips that are located in the same package, which leads to lower power consumption and better performance.


The main advantage the SoC gains from this is that it can utilize a single pool of high-speed, low-latency memory that’s readily accessible by all components. This eliminates the need for data to be copied between different memory locations, a process that can be time-consuming and requires additional power.

How Is Unified Memory Different From Traditional RAM?

Two RAM sticks on top of a computer motherboard
Zoomik/Shutterstock

The CPU and GPU in a traditional system have different architectures; they depend on different types of RAM for getting data. There are two types of RAM on a traditional system with a dedicated GPU: the system RAM and VRAM (video memory)

The VRAM is responsible for sending data to the GPU, whereas the system RAM is responsible for transferring data to the CPU. The biggest bottleneck with traditional RAM is that it is connected to the CPU using a socket on the motherboard, which is generally slower than RAM integrated with the SoC.


On the other hand, Apple silicon uses the same substrate for mounting the RAM and the SoC. Although the RAM is not part of the SoC in such an architecture, Apple uses a silicon interposer to connect the RAM to the SoC.

In simpler terms, this setup means that the RAM is located very close to the components that need to access it. This eliminates the bottleneck we talked about, making it more power efficient and faster while also being suitable enough to be used by the GPU without any compromises.

Is Unified Memory Faster Than Traditional RAM?

M3 13-inch MacBook Air midnight lid2
Zarif Ali/MakeUseOf

As we explained earlier, the GPU and the CPU have different memory pools in traditional settings. Apple, on the contrary, allows the GPU, CPU, and Neural Engine to access the same memory pool, meaning data does not need to be transferred from one memory system to another, improving the system’s efficiency further.


Due to all these differences in the memory architecture, the unified memory system offers high data bandwidth to the SoC. In fact, the M2 Ultra provides a bandwidth of 800GB/s, which is substantially higher compared to discrete GPUs like the AMD Radeon RX 7800 XT, which offers a bandwidth of 624GB/s.

However, the M2 Ultra doesn’t offer the best figures in its class. NVIDIA’s GeForce RTX 4090 and AMD’s Radeon RX 7900 XTX both beat the M2 Ultra in terms of memory bandwidth (1008GB/s and 960GB/s, respectively) and general performance as well.

This high bandwidth enables the CPU, GPU, and Neural Engine to access vast data pools in nanoseconds. However, this also means that you may run out of memory more quickly during tasks that use both the CPU and GPU, such as gaming, because the RAM is shared across the entire SoC.

How Much Unified Memory Do You Need?

M3 MacBook Air Apple Store Page


The biggest disadvantage of Apple’s architecture is that since the memory is baked into the SoC, you cannot upgrade your Mac’s RAM down the line. On most Macs, Apple charges an absurd $200 for 16GB of unified memory, so you should carefully assess how much you need today and in the future.

I personally use an M1 MacBook Air with 8GB of unified memory, and although it’s enough for general use, it does go through the occasional struggle. So, I’ll definitely configure my next Mac with at least 16GB of unified memory. But if you need more help making an informed decision, we have a dedicated guide on how much memory you need for your Mac.

While the initial cost of upgrading unified memory may seem high, it might be better to just eat up that cost. It’s cheaper than buying an entirely new Mac just because you realized that your current configuration is not fit for your tasks two or three years down the line.

This Thunderbolt 4 Dock Has Everything But HDMI and an SD Card Slot

Key Takeaways

  • The Revodok Max 208 gives you three Thunderbolt 4/USB 4 ports and three USB-A ports.
  • It’s capable of charging your devices at up to 85 watts while in use.
  • The dock supports dual displays and features a physical RJ45 Ethernet connection for thin and light laptops.


Thin and light laptops are getting more power each year, but they will always miss out on something that bulkier computers have—a healthy number of ports for connecting everything you need. So, if you want to expand your port options without affecting your file transfer speeds, you need a Thunderbolt 4 hub. The Revodok Max 208 gives you that and more, turning your thin-and-light into a peripheral powerhouse.

Ugreen Revodok Max 208 Thunderbolt 4 Docking Station

$190 $280 Save $90

The Ugreen Revodok Max 208 adds six more USB ports and a physical LAN connection. It’s perfect for adding ports to a thin and light laptop, making it more productive.

Brand
Ugreen

Connection
Thunderbolt 4

Ports
3x Thunderbolt 4/USB 4, 3x USB-A, 1x RJ-45, 1x power

USB-C Power Delivery
85 watts

Power supply included
Yes

Maximum display resolution
8K@30

Weight
569 g

Dimensions
15.4 x 8.6 x 3.5 cm

Pros

  • Charges your laptop at up to 85 watts while using it
  • Can connect up to two displays at 4K@60
  • Plug-and-play connection
Cons

  • No SD card slot
  • No HDMI port

Comes in a Massive Box

Ugreen Revodok Max 208 on its box
Jowi Morales / MakeUseOf

The Revodok Max 208 is the little brother of the Max 213, so it’s smaller and lighter. The 208 weighs 569g and measures 15.4 x 8.6 x 3.5cm. It also has a perfectly rectangular shape, so having the Max 208 on your desk is like putting a little black metallic brick on it.


Aside from the dock, you also get a huge 140-watt power brick with a barrel jack for powering the dock and a Thunderbolt 4 cable for connecting your laptop to it. These three items come in a rather massive box for their sizes, belying the premium price point that the Revodok docks offer.

A Premium Dock on Your Desk

Ugreen Revodok Max 208 on Macbook
Jowi Morales / MakeUseOf

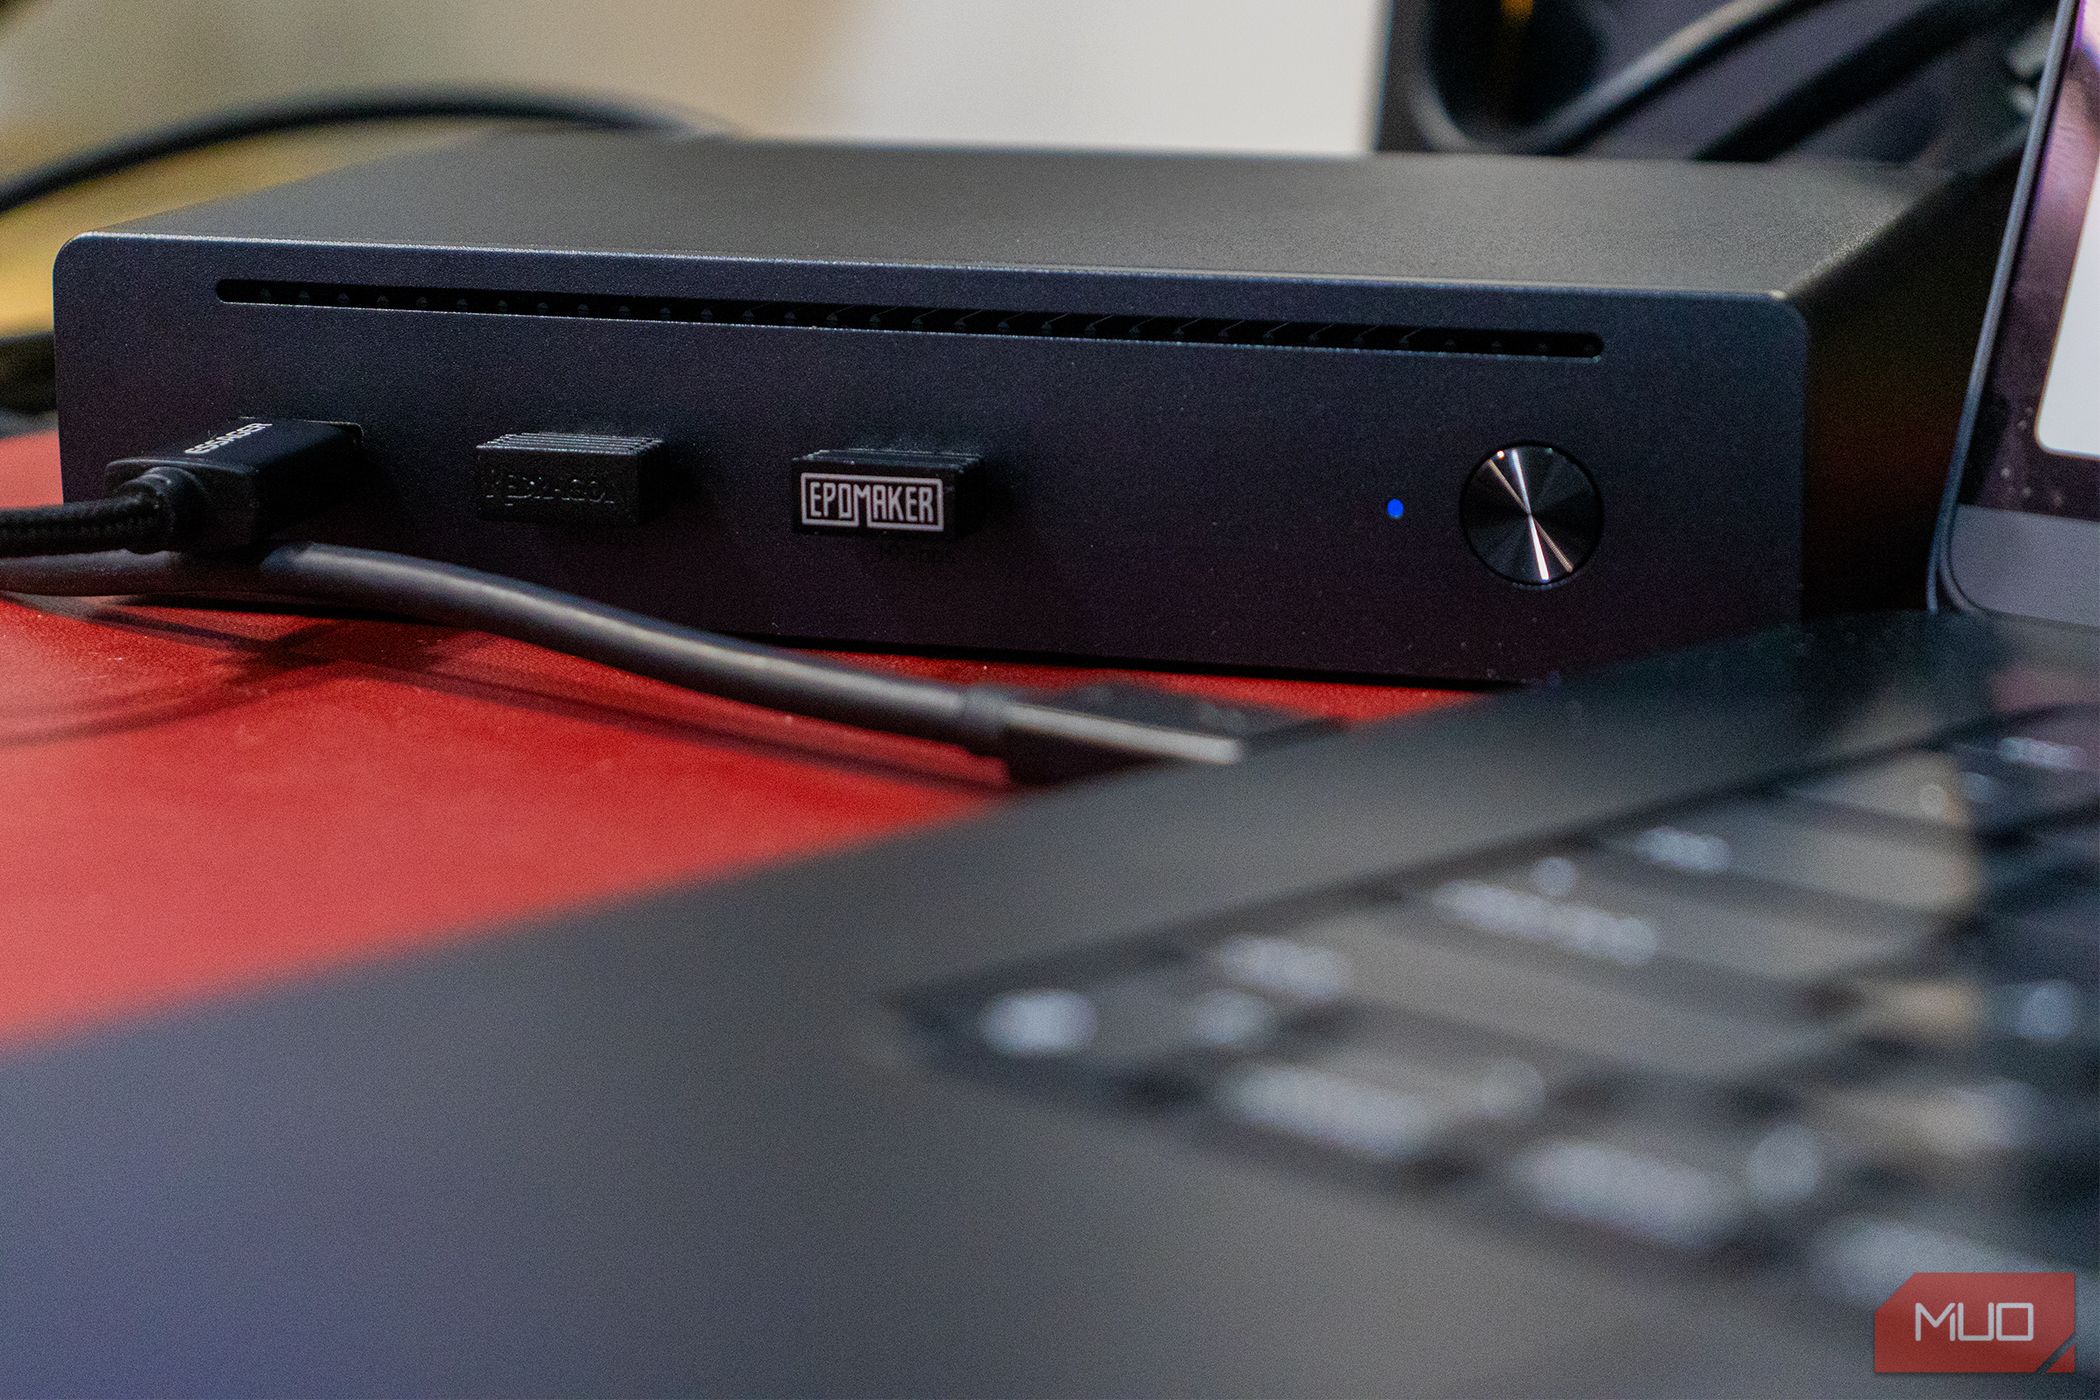
Although the Revodok Max 208 is shaped like a metal slab, it has two long, narrow vents—one in front and another at the back—that dissipate heat while adding a little flair to the dock. It also has a ridged metal power button and an LED indicator light.

Up front, you get three USB-A ports, while the back offers four USB-C ports, an RJ-45 port, and an outlet for plugging in the power barrel jack. It also has four rubber feet, ensuring it won’t slide around on your desk.


Adds Six High-Speed Ports and Gigabit Ethernet to Your Laptop

RJ45 port on the Ugreen Revodok Max 208
Jowi Morales / MakeUseOf

The USB ports at the back of the Revodok Max 208 are all Thunderbolt 4 ports, meaning they all support up to 40 Gbps of file transfer speeds. However, you can only use the port at the far end of the dock to connect and power your laptop, while all the rest are designed for output.

On the other hand, the USB-A ports in front of the dock can transfer up to 10 Gbps, while the RJ45 LAN port has a transfer speed of up to 1 Gbps. You can also transfer video data using any of the three Thunderbolt 4 ports. If you’re running Windows, you can get as much as 8K@30Hz on a single display or 4K@60Hz with two displays. But if you have a macOS device, you’re limited to 4K@60Hz, whether using one or two displays.


Also, the number of displays you can use with the Revodok Max 208 depends on your system. While most Windows laptops will support up to four external displays, the following Apple laptops will only work with one external display, even if you use the dock: M1 MacBook Air, M2 MacBook Air, M2 MacBook Pro, and the M3 MacBook Pro.

Charge Your Devices While Transferring Data

Ugreen Revodok Max 208 charging a Samsung Note10+
Jowi Morales / MakeUseOf

Aside from transferring data, the Max 208 will also recharge your gear. If you plug it into the appropriate Thunderbolt 4 port, it can quickly recharge your laptop with its 85-watt power output.

However, the other Thunderbolt ports can also output 15 watts, allowing you to juice up your other devices (although rather slowly) while transferring data. We also tested the USB-A ports and found that they could deliver up to 5 watts, so you don’t need external power for low-power devices you plug in.


When we sum the total maximum output of all the ports, the Revodok Max 208 can deliver 145 watts—close enough to the 140-watt capacity of the included power brick.

Will the Revodok Max 208 Work With Your Computer?

Ugreen Revodok Max 208 running Dex on Samsung Note10+
Jowi Morales / MakeUseOf

The Revodok Max 208 will work with any Thunderbolt 4 device and is backward compatible with Thunderbolt 3. This means the dock will work with any device with Thunderbolt 3 or 4 compatibility.

It also worked with my Samsung Note10+ and my wife’s Z Fold5, transferring video data for my devices with an Alt DP mode. However, it can only support a single external monitor for these non-Thunderbolt devices.

According to Ugreen, the Max 208 is compatible with the following devices: MacBooks with macOS 11.4 or above, Dell XPS, and Microsoft Surface Pro. However, it’s not compatible with the 2018 Mac mini powered by Intel.


What We Missed on the Max 208

Ugreen Revodok Max 208 with HDMI cable
Jowi Morales / MakeUseOf

Although the Revodok Max 208 gives your laptop seven extra physical connections, we missed out on a couple of ports we expected to see at this price range. For one, the 208 doesn’t have an SD card slot, so we do not recommend this if you frequently work with these external media.

Furthermore, it doesn’t have HDMI or DisplayPort. So, you must rely on a USB-C to HDMI or USB-C to DisplayPort cable or monitors with USB-C plugs.

Should You Buy the Revodok Max 208?

The Revodok Max 208 is an excellent dock for users with thin and light laptops who need more ports than what’s available on their device. At the cost of just one Thunderbolt 3 or 4 port on your laptop, you’ll get 85-watt fast charging, three extra USB-C ports, two of which can output displays, three additional USB-A ports, and an RJ45 jack for a physical internet connection.


You should buy this dock if you have a lot of peripherals, use two or more displays, and prefer the reliability and speed of a LAN connection. For example, you could attach a gigabit ethernet connection, two external displays, and a high-speed external drive at the back while plugging in your mouse and keyboard at the front. This would leave you with an extra USB-A port up front.

However, if you frequently work with removable media (as photographers and videographers do), this won’t work, as you have no place to plug in an SD card. That means you’ll need another hub with an SD card slot, which is a hassle—you’ll be better off investing in a dock with one already built in.

Ugreen Revodok Max 208 Dock

Ugreen Revodok Max 208 Thunderbolt 4 Docking Station

$190 $280 Save $90

The Ugreen Revodok Max 208 adds six more USB ports and a physical LAN connection. It’s perfect for adding ports to a thin and light laptop, making it more productive.

How I Kept My Mac Clean for Years

Are you having a hard time cleaning your Mac properly? This shouldn’t be a tedious process as long as you have the right equipment. Here, we’ll discuss how you can easily keep your Mac’s keyboard, screen, and chassis free from dust, dirt, and grime.


Aryan Surendranath/MakeUseOf

To clarify why you need an app to keep your keyboard clean, modern Macs turn on when you press any key on the keyboard, and in my experience, this usually accidentally triggers an activity while you’re cleaning.

To overcome this, I recommend KeyboardCleanTool. Its function is quite simple. The click of a button turns off all keyboard input on your Mac, allowing you to bring in any tools and get to cleaning. My tools of choice are a damp cloth and a mini brush.

If you own a MacBook, make sure to wipe your keyboard clean frequently, as some of the grime can transfer onto the display, leaving permanent marks.

Download:KeyboardCleanTool (Free)


A Mini Brush to Whisk Away Debris

Brush Tool To Clean Keyboard
Aryan Surendranath/MakeUseOf

After wiping down the keyboard, I suggest checking for debris beneath the keys, in the ports, or around the hinge. To help with this, I recommend using a mini brush set (pictured above). It’s one of the best keyboard cleaners, simple yet effective, and, not to forget, quite cost-effective.

Debris, like food crumbs or small bits of lint, can often cause mechanical failures, so it is best to keep them away from the nooks and crannies of your Mac.

A Microfiber Cloth to Bring Shine to the Display

A microfiber cloth placed on top of MacBook
Aryan Surendranath/MakeUseOf


Last on this list is a microfiber cloth that you can use for both the keyboard and display. You can buy it for cheap on Amazon if you don’t have one already. While wiping down a keyboard is fairly simple, you should exercise more caution when trying to keep the display clean.

First, ensure you’re using a clean microfiber cloth or at least a clean side of one. Next, once you start wiping, maintain straight movements from one side to the other. Avoid swirling the cloth, as this can lead to micro scratches.

If you notice a deposit on the screen that a dry microfiber cloth could not remove, dampen a part of your microfiber cloth with water or a screen cleaning solution. This should help buff out the mark. Follow this with a wipe from the dry side of the cloth.

With these simple steps, you can stay on top of any dirt and grime that may build up. You should have no trouble keeping your Mac’s keyboard, display, and chassis clean for the foreseeable future.

6 Polarizing Windows Features That Are Gone for Good

Not everyone will love what Microsoft puts into Windows. In fact, several features have caused a great deal of division and debate among users. We are going to look at five of them that Microsoft eventually removed.


1 Windows 10: Timeline

The idea behind Timeline, a window that allows you to access your recently opened apps, documents, and websites, seemed innovative. However, some users didn’t like it because it felt redundant. There was no need to use Timeline when many apps that supported it, like Word, Excel, and Edge, had built-in features to open recent files and websites.

The biggest turn-off was when Microsoft removed cross-device syncing. This feature uploads your activity history to your Microsoft account, allowing you to access recently used items on devices linked to the account. With cross-device syncing, you could start working on a Word document on your desktop or Android device and pick up where you left off on your laptop.


However, with its removal, even many who vouched for Timeline as a great productivity tool found it to be a former shell of itself. Timeline was eventually deprecated in 2021, and it did not make its way to Windows 11.

2 Windows 10: Cortana

Ask Cortana in Windows 11

Cortana received a lot of criticism for not being as accurate as Siri, Alexa, and Google Assistant when interpreting voice commands. Couple that with its lack of third-party integrations (other apps couldn’t take advantage of Cortana’s voice assistant shortcuts), and making a case for it was quite hard.


Some users also didn’t see the need for a voice assistant on Windows since it was usually faster to find what you needed using your mouse and keyboard. With Cortana’s shortcomings, being pre-installed in Windows 10 made it even more polarizing. Users didn’t appreciate having the feature forced on them. It also couldn’t be disabled and was always listening, which raised privacy concerns.

Eventually, Microsoft allowed users to disable Cortana and no longer urged people to use it.

3 Windows 8: Live Tiles / The Metro Interface

The Windows 8 Start screen

People found the Metro interface difficult to get used to. It was touchscreen-focused, which was not intuitive for desktop users, especially since touchscreen laptops didn’t take off the way some expected. While those with a Windows tablet or touchscreen laptop found it user-friendly, it was frustrating to use without touch input.


For anyone who disliked the Metro design, Live Tiles didn’t help. They were meant to display real-time information, including news, weather, and notifications. However, they didn’t work as advertised and had a noticeable performance impact.

4 Windows 7: The Aero Theme

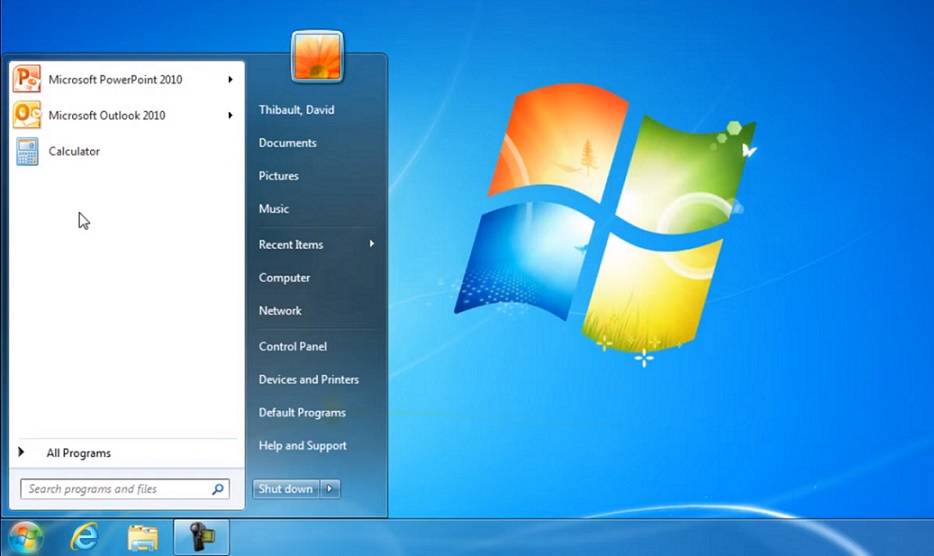
The Windows 7 Start menu

The Aero theme, which Microsoft introduced with Windows Vista and carried over to Windows 7, made windows, the taskbar, and other UI elements semi-transparent. App windows also had glasslike borders, live previews, and fluid transition animations. The theme’s slickness made Windows 7 enjoyable to look at and use, so why did some users hate it?


Well, everything that made the Aero theme great was graphically demanding for many computers at the time. People who didn’t have a great CPU and GPU had a terrible time with it. Luckily, you could disable the theme.

5 Windows XP: The Classic Theme

windows xp theme in windows 10

When Microsoft released Windows XP with all its enhancements and improvements, those coming from Windows 95, 98, and 2000 were glad it included the classic theme. However, others considered the minimalistic design simple, bland, and dated, even though it was better for performance.

The classic theme divided those new to Windows and those who came from previous versions. New users liked the vibrant and modern design of the default theme. The people who upgraded from prior versions found it childish and unprofessional—many even said it looked like a Fisher-Price toy.


6 Windows 98: Active Desktop

Active Desktop was a feature that allowed users to render web pages and other HTML content on the desktop. Some people didn’t like it because it was resource-intensive and impacted performance, causing the computer to become sluggish or even freeze and crash.

Of course, while some disliked these features, there were people who loved them. Regardless, Microsoft has ended support or removed them from Windows because they didn’t catch on. Other examples include Steps Recorder, WordPad, Mail, Calendar, and Windows Subsystem for Android, which future Windows users won’t get to enjoy.

PC Fans Running at Full Throttle? 6 Fixes

Quick Links

Key Takeaways

  • Fans running at full speed can indicate software issues or blocked vents, potentially wearing them out faster.
  • Check internal temps, clean vents, check background programs, and fan connections before seeking new fans.
  • Adjust fan curves, install required software for auto control, or replace fans to maintain optimal performance.


PC fans are among the most important bits of hardware, vital for keeping your system internals nice and cool. They usually just do their job in the background, and you likely won’t even hear them kick in unless your computer is under significant strain.

However, some issues can cause your fans to go full throttle the entire time, which, unless you’re okay with the noise and your fans wearing out, is not a good thing.


Why Your PC Fans Run at Full Speed

There are several reasons why your PC fans might keep running at full tilt for prolonged periods. Assuming everything is alright with your computer, the most common reason is an incorrectly connected or broken fan header.

Alternatively, you may have a software issue keeping your fans locked at full speed. This can range from misconfigured or missing fan control utilities to a program occupying system resources in the background.


Finally, some might think that their fans running faster than required isn’t an issue, but it is. While it’ll keep your PC comparatively cooler, all or even some of your PC fans running at full speed all the time will wear the fans out much quicker, aside from making your PC sound like a jet engine.

How to Stop Your PC Fans Running at Full Speed

Luckily, this isn’t a very difficult thing to fix. With a few checks here and there, you should be good to go.

Check Internal Temperatures and Clean Air Vents

The first thing to do is check your air vents. High-spinning fans are the first indication of a PC running hot. If you’re experiencing high CPU or GPU temperatures on idle or regular loads, there’s a good chance that either of the following is causing it:

  • The air vents are blocked off, causing poor ventilation inside the PC case.
  • The CPU thermal paste or heatsink isn’t doing its job well.
  • Issues with the CPU or GPU fan itself.

In any case, overheating internal components are not good. While there’s bound to be some heat when running heavy loads, you need to know how hot is too hot for your hardware. Dusting off your fans and air vents should fix the problem to a great degree, while there are other specific fixes for an overheating GPU.


Jhet Borja / MakeUseOf

If that doesn’t fix the problem, you can try to reapply your CPU’s thermal paste and GPU’s thermal paste. Remember to clean the old thermal paste off first! You can also reapply thermal paste on some laptop models, but it’s typically a more advanced procedure due to the nature of laptop manufacturing. Your best bet is to complete an internet search for “[laptop name/make/model] reapply thermal paste,” which will give you a good idea if it’s possible with your laptop.

Once you’re back up and running, you can keep an eye on your CPU temperatures to watch out for any such issues in the future.

Check Background Programs

Another reason your fans might be going into hyperdrive is that too many background programs are running on your PC, eating up system resources. This can cause a high system load, causing your fans to spin up faster.


On a Windows machine, the easiest way to tackle the problem is to fire up the Task Manager and look at the background processes running on your system. Close any processes that aren’t system-critical. That should help reduce the load on your PC, slowing down the fans in the process. You could also disable certain background apps in Windows 11 to further reduce the load.

Check Fan Connections on the Motherboard

DC and PWM fans are very different, and depending on which ones you have in your PC, you’ll need to wire them accordingly. Most fans come with a four-pin header allowing PWM (pulse-width modulation) control via software. This ensures your CPU, GPU, and other case fans run according to the computer’s internal temperature.

cpu fan pin headers plugged into motherboard
Jhet Borja/MakeUseOf


Check your motherboard to see whether your fans are plugged into the right headers. While the GPU usually controls its fan modulation, your CPU fan needs to plug into the correct header on your motherboard (generally labeled as the CPU fan header). This also holds true for the case fans, regardless of whether you’re using a fan controller or plugging it directly into the motherboard.

If you’re sure all fan headers are plugged in correctly, you can also check your BIOS to see what mode your fans are running in. Some manufacturers set the fans to run fans in DC mode instead of PWM in the system BIOS, meaning your fans will be running full tilt for no reason.

Check Fan Curves

Next, it’s also a good idea to check your CPU and GPU fan curves. Most motherboards or laptops come with some sort of manufacturer system utility software that lets you set fan curves that change the fan speed based on the CPU or GPU temperature.

msi-dragon-center-fan-curve


Alternatively, you can use a third-party tool like MSI Afterburner or Fan Control to manually set fan speeds and create a custom fan curve to ensure they run optimally instead of going full tilt all the time.

Install Manufacturer Software for Automatic Fan Control

Just like you need drivers for different components in your PC, you may need manufacturer software (typically from the motherboard manufacturer) to enable automatic fan speed control. It might not be the case, but installing recommended CPU/GPU or fan monitoring software from your motherboard or laptop manufacturer can save the hassle of downloading multiple third-party programs.

It often comes with built-in presets for fan speed modes, allowing you greater control over your fans at the press of a button. A few examples of such programs include Dragon Center by MSI, Armory Crate on ROG laptops, iCue for Corsair fans, and so on.

Get New Fans

If nothing else works out, you may have faulty fans that require replacing. Hopefully, it doesn’t come to that, as it’s really a last resort. However, like all things in life, your PC hardware ages with time and use, and it might be time for a replacement.


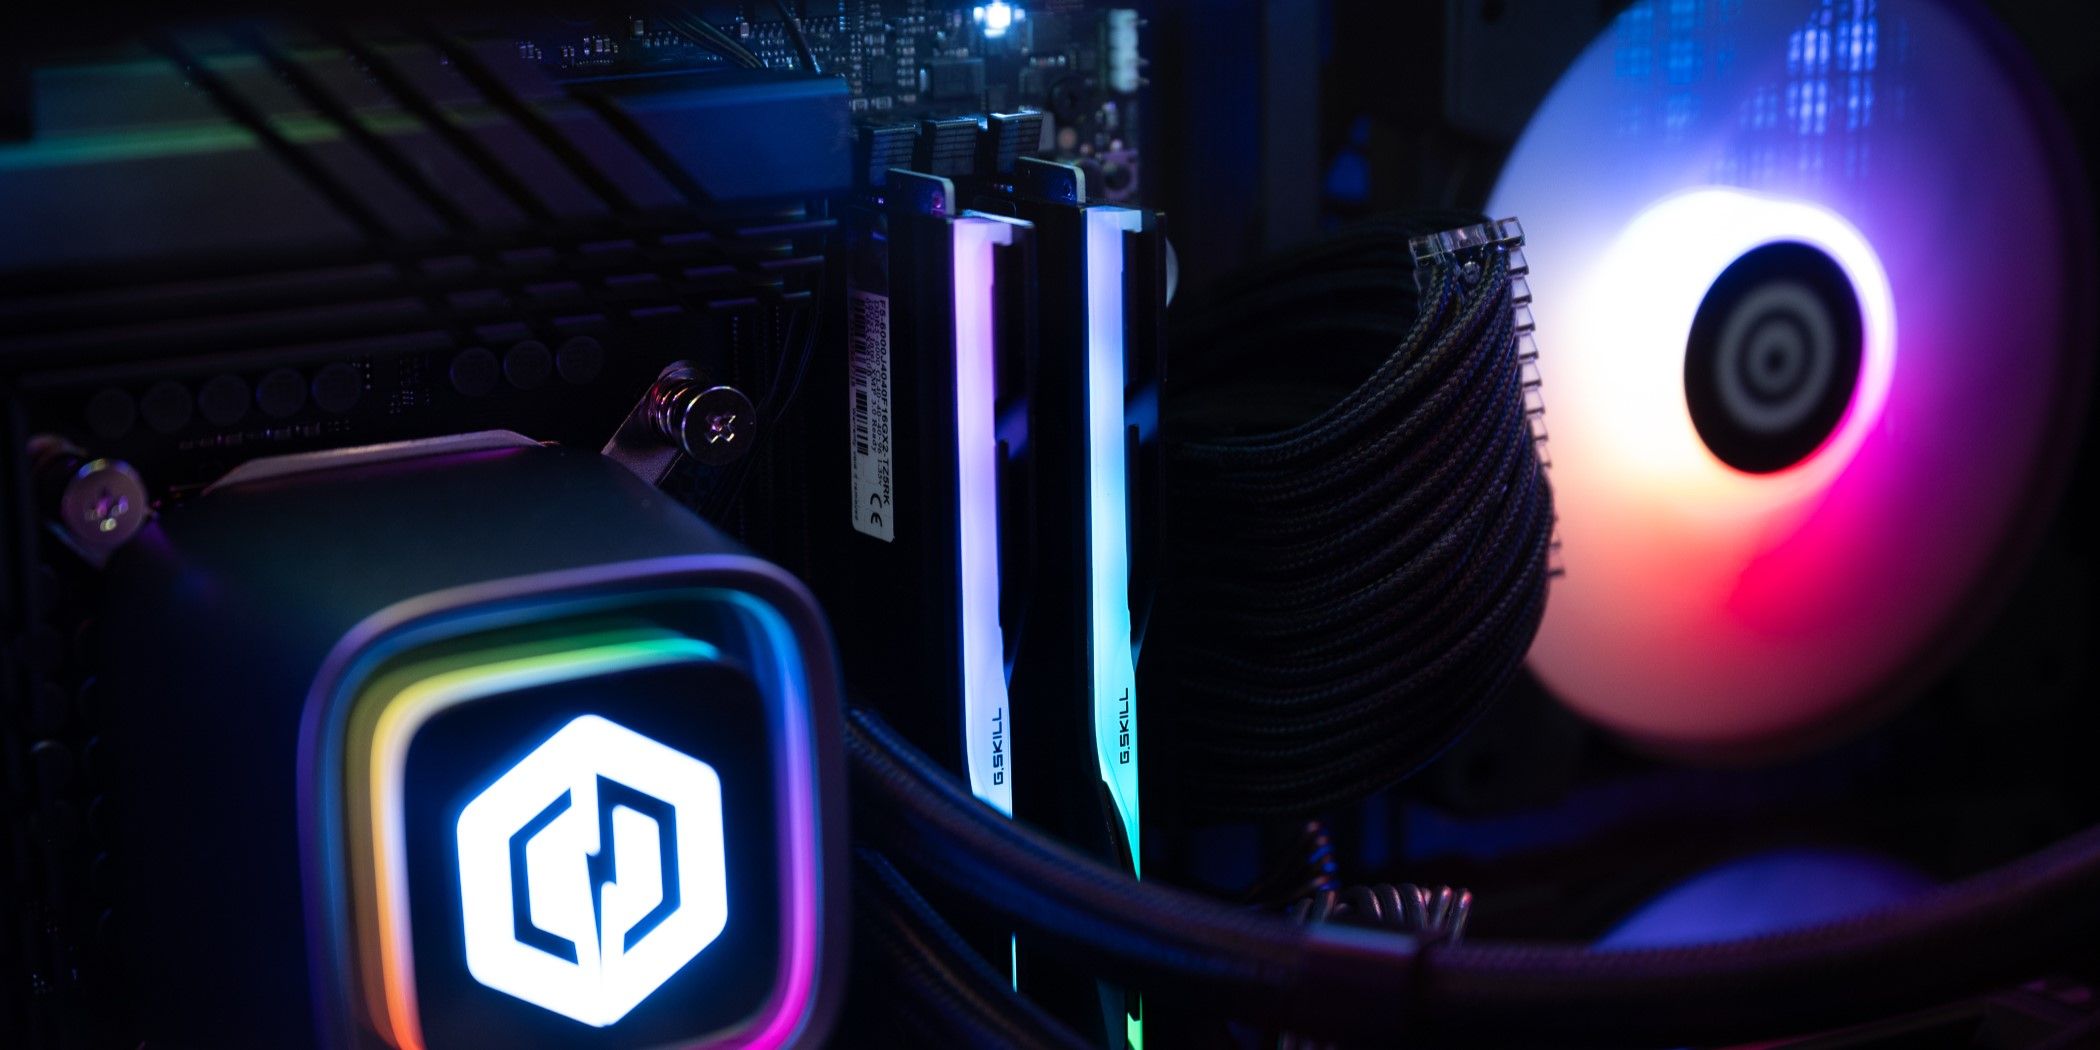
RGB fans in a gaming PC
Justin Duino/MakeUseOf

Our guide on choosing the best case fans for your PC is a good place to start, and we’ve also covered the best PC fan controllers should you want to upgrade that at the same time.

With a few simple troubleshooting steps, you can get those fans under control. Monitoring your PC’s fans also gives you a chance to troubleshoot any issues that might cause problems in the future, all while ensuring your PC runs in the best possible state without making a lot of sounds or unnecessarily wearing down your fans.

Overloaded With Google Calendar Events? 6 Tips to Keep Them Straight

Key Takeaways

  • Use advanced search to quickly find tasks and events in your Google Calendar.
  • Color-code events to help them stand out and organize your calendar better.
  • Modify events by dragging or stretching them; use Schedule view for a brief overview.


If your daily work routine involves a constant fight to balance events and tasks, a few simple Google Calendar strategies could come to your rescue. These tips will help you sort the clutter in your Google Calendar and take control of the chaos.


Advanced search is a nifty way to quickly find tasks and events that may be in your blind spot, or which may be buried under all the clutter on your calendar.

  1. To use Advanced Search in Google Calendar, click on the magnifying glass search icon.
  2. Then click the Search options drop-down arrow to the right of the search box.
  3. Filter by keyword, date, location, and people involved to find exactly what you want.


2 Use Colors to Make Things Stand Out

Did you know that you can color-code your events to organize your calendar?

Many similar-looking Google Calendar events

You should definitely use this approach if your Google Calendar is clogged with events. It will help your many tasks stand apart from one another and give an otherwise “flat” workspace some welcome character.

To use colors in Google Calendar, simply right-click on an event and choose a color you like.

You can only pick from a few standard colors, but that should be enough to spruce up your calendar.

Color-coded Google Calendar events


3 Quickly Modify Events

Sometimes, plans change and you need to adjust your schedule quickly. Google Calendar’s UI makes this easy, but you need to know how to use it. You can effortlessly drag and stretch events to change their timings.

Move Events Around by Dragging and Dropping

Just been notified of a rescheduled event? You don’t need to open it and start adjusting times, though; just grab the event and drag it to a new time slot to update it.

Change Google Calendar event timings easily

Extend/Shorten Event Durations by Dragging

If an event will start or end at a different time than initially planned, just drag the appropriate border of the calendar entry to stretch or shorten it.


Extend Google Calendar events easily

4 Get a Brief Overview of Events

Sometimes, all you need is a summary glance at an event; you don’t need all that information bogging you down. You can do this quickly by switching to Schedule view (previously called Agenda view) to get a brief outline of your events.

Google Calendar Schedule view option

To turn Schedule view on, click on the drop-down beside the gear icon and select Schedule.

Get an overview of events with Schedule view


Working in this view can give you productive information on the meetings and tasks for the day. That is why it is so important to create an efficient meeting agenda in Google Calendar.

5 Create Tasks on Google Calendar

Think of a task on your Google Calendar as a sticky note that you attach to your whiteboard or computer screen in real life. It serves as a way to remind you of something that you need to get done.

The great thing about tasks is that you can bundle together reminders that fall under the same category or that you set toward a specific goal.

How to Create a Task

Creating a task is similar to creating an event. Here’s how:

  1. Click on an empty slot in your calendar, on the day you wish to add a task to.
  2. In the window that appears, click on Task.
  3. Finally, add a description to serve as a reminder. You can even mark it as an all-day task and set it to repeat at intervals.


Google Calendar task as a reminder

You can view a list of all your tasks by clicking the tasks button to the left of the Google waffle menu (the 3×3 dot grid) or from the side panel.

6 Restore Deleted Events

Have you ever deleted an important event by mistake, only to have to re-create the item from scratch? With this tip, you shouldn’t need to do that ever again.

The next time your cat runs across your keyboard and accidentally deletes a calendar event, you can recover it like this:

  1. Click on the Settings option at the top.
  2. Select Bin. This houses a list of all your deleted events.
  3. Hover over the event you want to restore and click on the restore option that appears.


Go to the Bin to restore a deleted event

Sorting through the disorder that is your schedule need not drain every ounce of your mental energy. Plan your week properly using Google Calendar to get on top of your meetings and events.

How to Set Out of Office Status on Microsoft Teams

Planning to take a vacation from work? Here’s how to set “Out of Office” on Microsoft Teams so your co-workers know you’re away.

Key Takeaways

  • You can set an Out of Office (OOO) status in the Microsoft Teams desktop app, but things aren’t so easy on mobile.
  • Create an OOO message, set automatic replies, and specify dates for duration when you add your status.
  • Microsoft Teams lets you choose whether you want automatic replies to feature for internal or external contacts (or both).


Let your team know that you’ll be on vacation or have other commitments with an Out of Office status on Microsoft Teams. Learn how to enable this feature on desktop and mobile, plus how to set automatic replies and dates.


How to Set an Out of Office Status on Microsoft Teams for Desktop

You can set an Out of Office status and disconnect from your work environment pre-vacation on Microsoft Teams via your profile photo or in your settings. The first option is available on the desktop and web apps, while the second is only available via the desktop app.

How to Set Out of Office Through Your Microsoft Teams Profile Picture

To set Out of Office in Microsoft Teams via your profile picture, you’ll first need to sign into the desktop or web app. Once you’ve done that, follow these steps.

  1. If you’re a member of various teams, choose the organization or team for which you want to edit your status. Otherwise, skip this step.
  2. Tap your profile picture and select Set status message.
    Microsoft Teams Windows app - Profile menu

  3. On the bottom of the pop-up window, click the Schedule Out of Office button. This will open a new window.
  4. From the Out of Office window, enable the Turn on automatic replies option.
  5. Type in your OOO message, and when you expect to be back, in the text box. This will also be sent as an automatic reply in your Outlook. Enable automatic external replies if you need them too.
    Microsoft Teams Windows app - Profile menu - Out of office internal

  6. Next, set the message you want for your external colleagues. Type the reply in the dialogue box provided or copy and paste the message you put in your Teams status.
    Microsoft Teams Windows app - Profile menu - Out of office external

  7. Schedule the duration of your out-of-office period by ticking the Send replies only during a time period option and changing the dates for which you’re unavailable.
  8. Click Save.
    Microsoft Teams Windows app - Profile menu - Out of office - save


How to Set Out of Office Through Your Microsoft Teams Settings

If you’d prefer to use Microsoft Teams to change your settings, follow these steps instead.

  1. Open the Microsoft Teams app on your computer and click the three-dot menu beside your profile photo.
  2. From the options, select Settings.
    Windows Teams App - Settings-step 1

  3. On the left-side navigation, click General. Next, scroll down to the bottom of the General page and click Schedule. This will open the Out of Office window.
    Microsoft Teams Windows app - Settings - General

  4. Follow steps 4-8 in the previous section to customize your OOO status.

If you’re thinking about switching from Teams to another solution, consider checking out this Microsoft Teams vs. Google Chat comparison.

How to Set Out of Office Status on the Microsoft Teams Mobile App

While you can’t set an automatic OOO reply in the Teams mobile app, you can still change your status and set it to clear. Follow these steps to change your OOO status in Microsoft Teams on mobile:

  1. Open the Microsoft Teams app.
  2. Tap your profile photo in the top left-hand corner. Next, press Set status message.
  3. Add your status message to the text box provided. If you want to show your status message when people message or mention you, turn on the Show when people message me option. Then, set a timer on how long you’ll have this status message. After the chosen period, your status message will be cleared automatically.
  4. Press Done () in the top right corner. Now your contacts will see your status message whenever they message you on Teams.


If you’re using your smartphone app because Microsoft Teams isn’t working on your computer, consider these top ways to fix Microsoft Teams not working on Windows. Checking the server and restarting the app are two places to start.

With the Microsoft Teams Out of Office setting, you can have a peaceful vacation from work. Thanks to the automatic reply option, you don’t have to worry about teammates or clients wondering why you’re not replying to their messages. Don’t forget to draft an out-of-office reply that is clear and concise, to let your contacts know your present status.


This Small but Mighty Thunderbolt 4 Hub Is Perfect for Travel

Key Takeaways

  • Satechi Thunderbolt 4 Slim Hub Pro has 4 Thunderbolt 4 ports and 1 USB 3.2 Gen 2 with 10 Gbps data transfer.
  • The hub is compatible with Mac, Windows, and iPads, providing 90W upstream power and 15W downstream for charging.
  • The minimalist design, suitable for small desk spaces, efficiently dissipates heat.


Especially if you’re a Mac user, additional Thunderbolt ports can be used in various ways, like for external monitors and storage. And if you’re looking for a cost-effective option that looks great and won’t take up a lot of space on your desk, the Satechi Thunderbolt 4 Slim Hub Pro is a nice choice.

Satechi Thunderbolt 4 Slim Hub Pro

The Thunderbolt 4 Slim Hub Pro can upgrade your setup without breaking the bank or taking up tons of room on your desk. Along with an upstream Thunderbolt 4 that can provide 90W of power delivery to your laptop or desktop, there are three additional Thunderbolt 4 ports with 15W of downstream power for other devices like a monitor. Additionally, there is a USB 3.2 Gen 2 with up to 10 Gbps data transfer. The hub can be used with both compatible Macs and Windows devices. 

Ports
4 Thunderbolt 4, 1 USB 3.2 Gen 2

USB Power Delivery
90W upstream, 15W downstream

Power supply included
Yes

Max display res.
Single 8K or Dual 4K

Price
$199.99

Dimensions
12.2 x 2.91 x 0.71 in.

Pros

  • Compatible with Mac, Windows, iPads
  • Three downstream Thunderbolt 4 ports
  • Backwards compatible with Thunderbolt 3
  • Lower price compared to similiar options
  • Won’t take up tons of room on your desk
Cons

  • Lack of additional USB-A or HDMI port.
  • Metal shell could be prone to scratching if used while traveling

Unboxing and Setup is Easy

satechi thunderbolt 4 slim hub pro power
Jerome Thomas / MakeUseOf

Getting started with the Satechi Thunderbolt 4 Slim Hub Pro takes just a few minutes. After unboxing the hub itself, you’ll need to grab the power cords. Since this is a powered unit, the power equipment is large and extensive and actually takes up more room than the hub itself.


Attach the power cord to the plug on the hub and then into the included power brick. The power brick has the actual plug. I had to find a specific place in my desk’s cord management system to place the brick because it was so large—it reminds me of an old-school PC laptop power supply. Though it’s quite large, there is good news. The 150W power supply can output up to 96W of power to the host device, perfect for Mac laptops like the current-generation 14-inch MacBook Pro.

Satechi also includes an almost 3-foot Thunderbolt 4 cable that you can attach directly into your machine. While Thunderbolt hubs like this are mostly favored by Mac fans, you can also use it with a number of modern iPads and some Windows machines. I tested the hub mostly with my 2021 14-inch MacBook Pro with M2 Pro chip.

Just to note, even though it is a Thunderbolt 4 hub, it’s backwards compatible with Thunderbolt 3 and USB-C.

A Beautiful Design That Compliments Your Mac

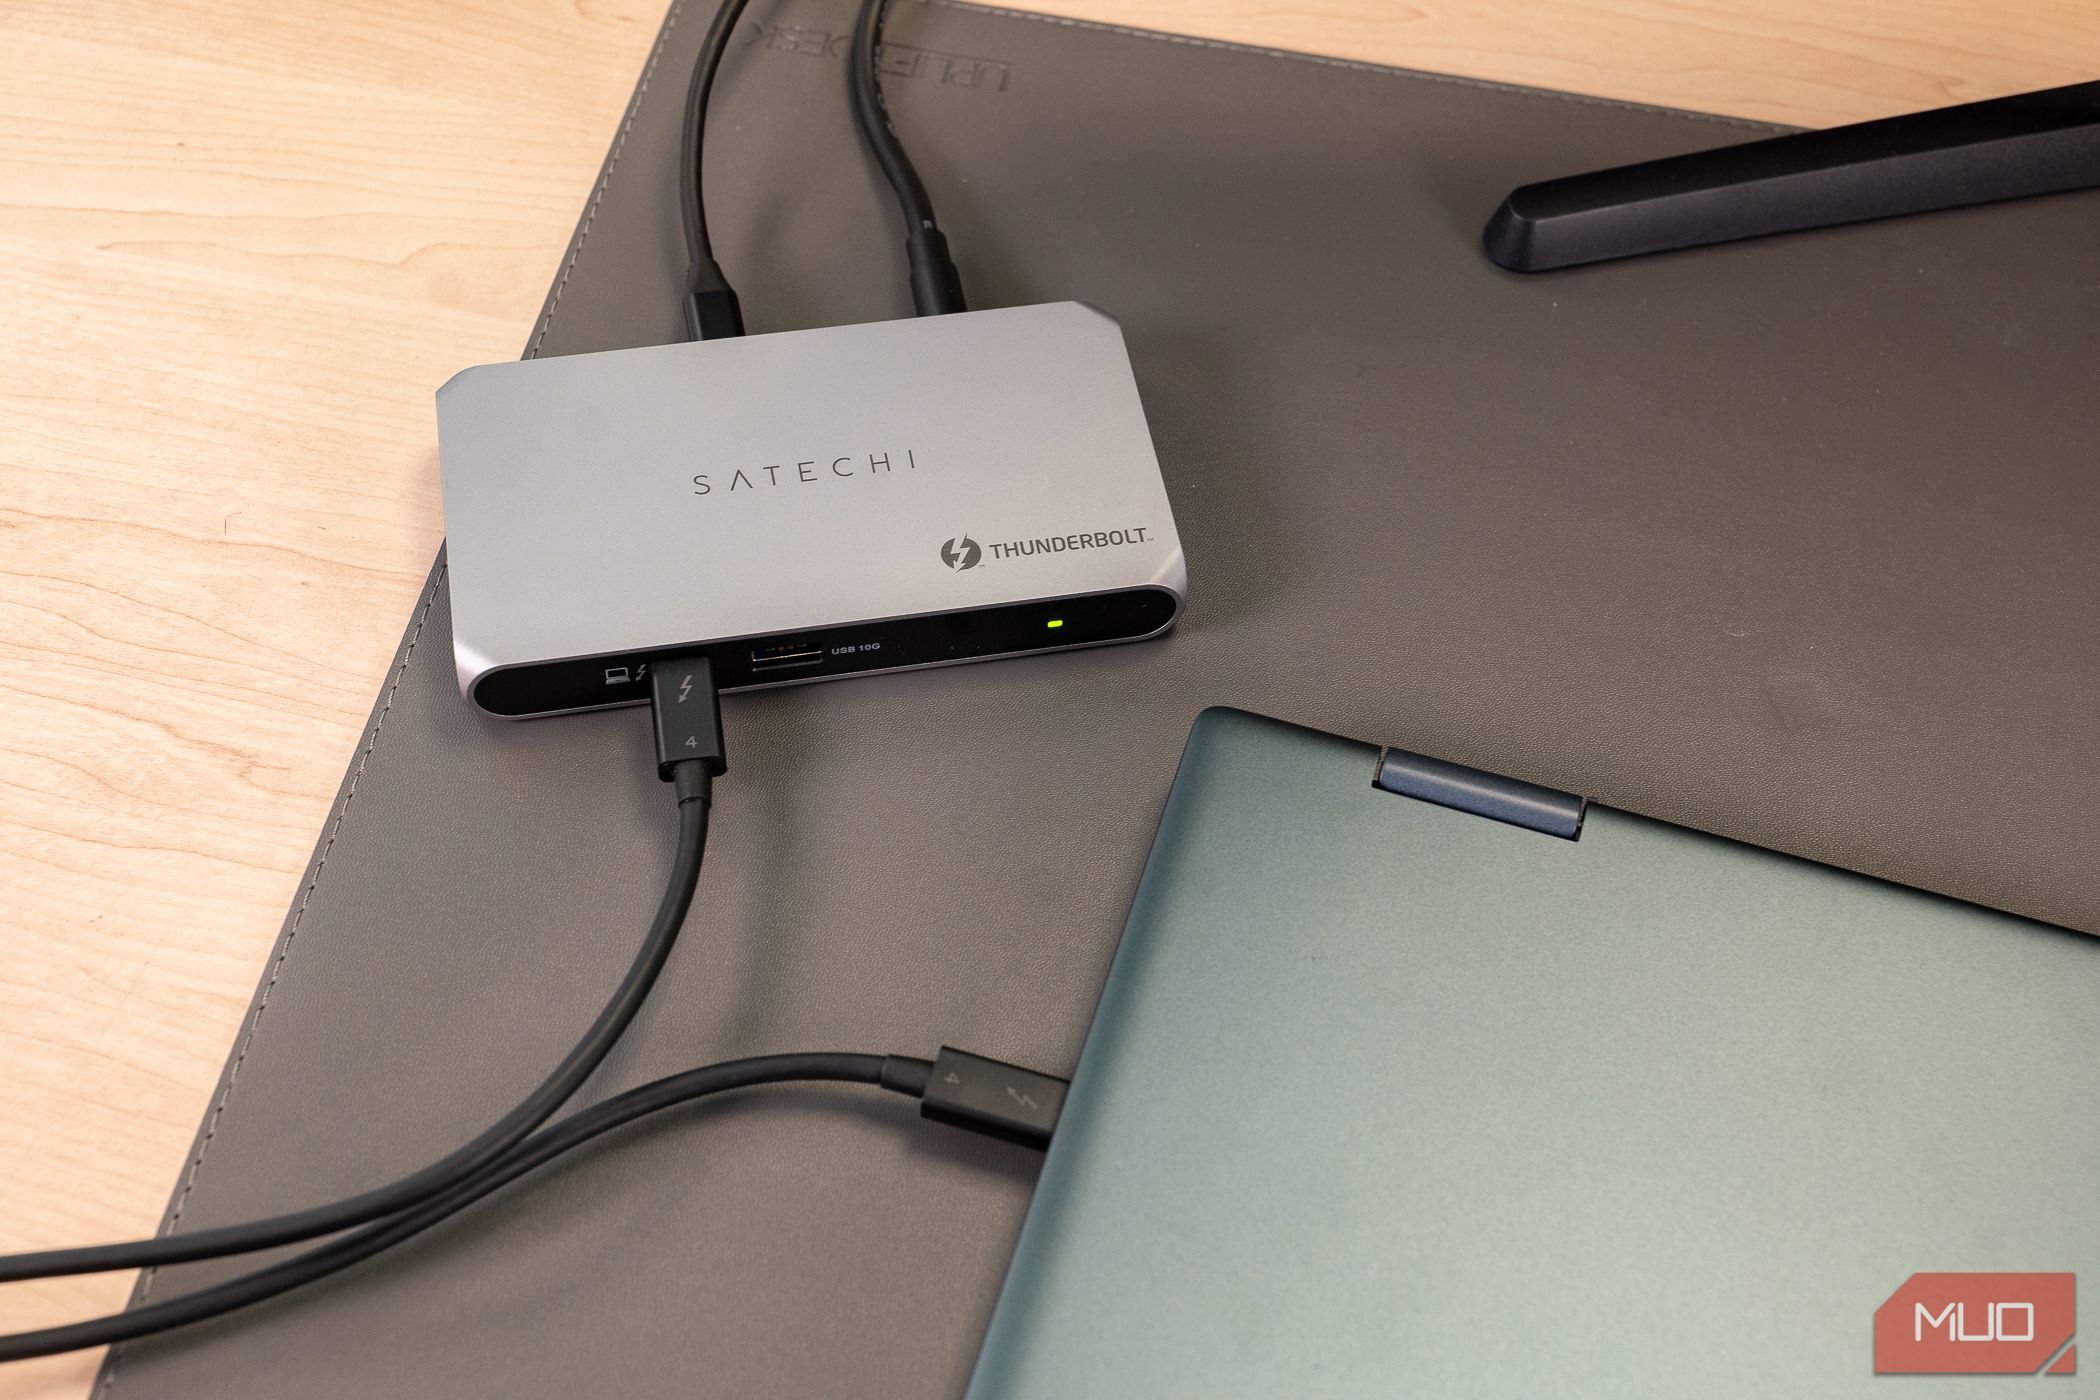
satechi thunderbolt 4 slim hub pro on desk
Jerome Thomas / MakeUseOf


I usually don’t worry about how something looks on my desk, but the Satechi Thunderbolt 4 Slim Hub Pro just looks great. The top, bottom, and sides are covered with a space gray aluminum that closely matches the same color of various Macs.

On the bottom are four, non-skid feet to help prevent the hub from sliding around your desk with just a bit of movement. Both of the longest sides, where the ports are located, are covered with a similar black material. Sloping down from the top are chamfered sides.

Overall, the hub is 12.2 inches long, 2.91 inches long, and just 0.71 inches deep. It weighs 8.5 ounces. So if you can find a spot for the power cord, the hub won’t take up tons of space on a desk. Since I don’t have a dedicated office space at my home, my desk is very small and tucked into the side of a living area, so was really nice to use the Satechi hub without having to rearrange and remove items from my desk.


The hub is even small enough that it shouldn’t be a huge burden to take with you while traveling, with one caveat. Make sure to keep any sharp items away from the aluminum as I suspect it might easily scratch if it rubs up against a set of keys or something else sharp.

Powerful Thunderbolt Ports

satechi thunderbolt 4 slim hub pro front
Jerome Thomas / MakeUseOf

On the front of the dock is the upstream Thunderbolt 4 port that can provide up to that 96W of power along with a maximum of 40Gbps of data.

Next to it is the USB 3.2 Gen 2 port provides a maximum of 10 Gbps. It’s also backwards compatible with older USB-A devices. I would have liked to have seen the port be moved a bit further from the upstream Thunderbolt 4 connector. When trying out a wide variety of different devices, some of my chunkier USB cords and a larger USB thumb drive were a very tight fit because of the port’s proximity to each other.


Finally, on the far right is a power button that turns green to let you know the hub is on and active.

On the other side of the hub is the power outlet for the brick and three downstream Thunderbolt 4 plugs that can provide up to 15W of power each. That should be enough to fast charge your iPhone with MagSafe connector.

All of the downstream connectors can also be used for video output. On the Mac, you can use dual 4K displays at 60Hz or a single 6K display at 60Hz. Windows is a bit better with dual 4K displays at 60Hz or a single 8K display at 60Hz.

Only one external display is supported on a Mac with the base-level M1/M2/M3 processor. That’s a disappointment, as one of the best use-cases for a hub like this is for a dual-monitor setup.

Works Well and Doesn’t Heat Up

satechi thunderbolt 4 slim hub pro ports
Jerome Thomas / MakeUseOf


I’ve used the Satechi Thunderbolt 4 Slim Hub Pro for around two weeks with my MacBook setup and haven’t experienced any issues. I used the hub for a wide variety of tasks like device charging, using a variety of peripherals like printers and hard drives, and with my main 38-inch Dell 4K display.

The connection to my display worked well without any flickering or other issues sometimes seen with Thunderbolt hubs. I used the hub to charge my MacBook Pro, and it charged just as fast as with Apple’s 96W adapter.

Another issue, sometimes found on Thunderbolt hubs, is that they can become warm or even hot to the touch when charging devices or during a large transfer. I previously used an older Thunderbolt 3 hub that became so hot, I was afraid my hand might have been slightly burned.

But that’s not the case with Satechi’s option. It’s designed to dissipate and regulate heat and operate between 86 and 122-degrees Fahrenheit during use. At least in my testing, the hub got mildly warm at most, nothing near the top of its range.


My only other small issue after testing, is that I had a bit of a hard time orienting the hub correctly because the usable Thunderbolt plugs were on the back of the dock. I would have loved to have seen the power cable plug placed with the single upstream and USB 3.2 port instead. That would make it easier to access the plugs without having to deal with the power cord snaking on my desk.

Should You Buy the Satechi Thunderbolt 4 Slim Hub Pro?

If you’re looking for a traditional hub with tons of legacy ports, a SD card slot, and HDMI, the Satechi Thunderbolt 4 Slim Hub Pro definitely isn’t for you. With only a single USB-A port, you’ll have enough room for a single device like a keyboard, mouse, or hard drive. Most likely, you’ll need to spend a bit more for something like a more powerful, and expensive, docking station.

But if you’d like a modern hub with tons of Thunderbolt 4 ports, and power to charge up pretty much any laptop and other devices, the Satechi is a nice option that doesn’t cost tons. It looks great on any desk, and it is small enough to pack up for travel easily. Just make sure to find a secure place for it in your travel bag so the beautiful exterior doesn’t get scratched.


satechi-thunderbolt-4-slim-hub-pro-amazon

Satechi Thunderbolt 4 Slim Hub Pro

The Thunderbolt 4 Slim Hub Pro can upgrade your setup without breaking the bank or taking up tons of room on your desk. Along with an upstream Thunderbolt 4 that can provide 90W of power delivery to your laptop or desktop, there are three additional Thunderbolt 4 ports with 15W of downstream power for other devices like a monitor. Additionally, there is a USB 3.2 Gen 2 with up to 10 Gbps data transfer. The hub can be used with both compatible Macs and Windows devices. 

Ports
4 Thunderbolt 4, 1 USB 3.2 Gen 2

USB Power Delivery
90W upstream, 15W downstream

Power supply included
Yes

Max display res.
Single 8K or Dual 4K

Price
$199.99

Dimensions
12.2 x 2.91 x 0.71 in.

What role do electronic PCB boards play in medical devices

electronic PCB boards play in medical devices

As the healthcare and life science industries evolve, they require sophisticated electronic devices with the highest standards of quality, precision, reliability, and performance. PCBs, which are the backbone of circuitry in these electronic devices, play a vital role in their functionality and design. Today, almost all medical and life science equipment, from small wearable devices to full-body imaging systems, utilizes advanced circuitry that is based on PCBs.

Medical PCBs have revolutionized the way doctors work with their patients. These devices enable record-keeping in the medical field which has helped speed up patient treatment processes and resulted in saving many lives. In addition, medical PCBs also allow for the transmission of results and records to other hospitals or clinics with ease.

The quality of the medical PCBs is regulated by strict and stringent standards. These standards are applied during the design, production, and inspection of the electronic pcb board to ensure that they are of the best possible quality. For instance, the medical pcb manufacturer must adhere to FDA regulations and ISO certifications. Moreover, they must use clean manufacturing environments to make sure that the boards are free of impurities.

What role do electronic PCB boards play in medical devices

In addition, the medical pcb board must be highly reliable and can withstand rigorous use and exposure to various conditions. This is essential as human lives depend on these devices. The reliability of the medical PCBs depends on a number of factors, including signal integrity, lower noise levels, higher density interconnects, and lead-free component placements. These factors are important because they help to reduce the chance of malfunction and increase the accuracy of the device.

One of the most significant advances in medical PCBs is their ability to fit into smaller, more compact spaces. This allows them to be used in portable and mobile medical devices that can be taken to remote areas and other locations that are difficult to reach for traditional medical equipment.

Additionally, the flexibility of medical PCBs is important because they can be incorporated into a wide range of diagnostic and surgical tools. For example, flexible PCBs are used in portable ultrasound and MRI scanning machines to capture accurate images of the body for diagnosis and treatment. They are also used in surgical tools to enhance maneuverability and control during surgery.

In the future, medical PCBs will continue to play a critical role in the development of advanced medical and healthcare technologies. These technologies include the Internet of Medical Things (IoMT), artificial intelligence, nanotechnology, and 3D printing. These trends are paving the way for a new wave of medical services that no longer need to take place in hospitals or doctors’ offices. Patients can receive lab tests and other information from their homes, with the help of mHealth solutions powered by medical PCBs. This will be especially beneficial for aging populations who have limited mobility or access to medical facilities.

7 Features Smartphone Cameras Need to Beat DSLRs

Key Takeaways

  • Smartphone cameras have evolved significantly, but they’re still a long way behind DSLRs.
  • To compete with DSLRs and mirrorless cameras, smartphone cameras need bigger sensors.
  • Better white balance control and more shooting modes would also enhance smartphone photography.


Smartphone cameras have evolved significantly since their early iterations, but they’re still markedly behind DSLRs and mirrorless cameras. To truly compete with more professional devices, these are the features that smartphone cameras need.


1 More ISO Options

While you can take good photos with your smartphone in low-light conditions, it’s much more difficult than during the day. The best way to control lighting on a camera is via ISO, but smartphone cameras are often severely lacking in this area.

If I use my Fujifilm camera as an example, I can boost my ISO all the way to 12,800. Even when I had an old Nikon DSLR, I could increase my ISO to 25,600. Granted, I rarely go above 1,000 when using my camera, but the option gives more flexibility when shooting in low light.


While you can adjust the brightness, many smartphone cameras don’t provide the option to change your ISO. For this reason, people who want more customization over their photography will still look to DSLRs and mirrorless devices.

If you’re new to photography, you can learn all about ISO here.

2 Larger Sensors

Photo of a DSLR Camera Digital Sensor

Smartphone manufacturers often talk about how many megapixels their cameras can take images in. But while megapixels play a role in getting good pictures, they’re not as essential as you might think. The camera sensor will have a bigger influence on your picture quality.


Camera sensors are where the light bounces off and generates an image. You can usually see your DSLR sensor on your camera body when you remove the lens. You’ll notice that the sensor is relatively large, and often much more so than what smartphones can offer.

Because camera sensors are bigger, more light can enter—as a result, you often get better photos. Smartphone camera sensors will need to become bigger if they want to truly compete with DSLRs, but manufacturers will encounter challenges with device size and space to make this a reality.

The many different types of digital camera sensors differ significantly. Understanding these will help you choose a better camera if you want to go that route.

3 Better Control Over White Balance

Adjust Your In-Camera White Balance Settings


Another common annoyance with smartphones is that you have nowhere near as much control over the white balance as you would with a DSLR camera. If you need a refresher, see our guide on white balance—essentially, it’s how warm or cool your picture looks. Ideally, you want the whites in your images (e.g. paper) to actually look white, hence the name.

When you use a DSLR camera, you can often choose a Kelvin number to nail the white balance. Moreover, you have different presets to pick from—such as cloudy and daylight. Most smartphone cameras offer neither of these, which means you have to put all of your trust in your device to hopefully get the shot right.

The best way to edit the white balance in your smartphone photos is by using editing software like Adobe Lightroom. You can also edit the warmth in your native photo editing app after taking the picture. Nonetheless, being able to control your white balance when taking the photo typically produces much better results.


4 More Shooting Modes

Modern smartphone cameras offer multiple filters, just look at the numerous iPhone camera filters. They’ve also started offering more shooting modes, but smartphones are better for videos than photos in this respect.

When I use my purpose-built camera, I can shoot in Auto, Manual, Shutter Priority, and Aperture Priority modes. These diverse options mean that I have much more control over my pictures.

You can still increase the quality of your smartphone photos without investing in an expensive camera, but it would be much easier to take great pictures if more shooting modes were available.

5 Better Shutter Speed Control

Panasonic Lumix G DSLR Aperture Shutter Speed ISO Sensitivity


Shutter speed is one of the most important aspects of photography, and it often determines whether an image is blurry or not. But while you can control the aperture on some smartphone cameras, it’s often impossible to control the shutter speed manually. The only real exception is when you get to choose whether you want a longer timer for low-light images.

Because users don’t have much control over shutter speed, it’s more difficult to take better pictures in conditions where adjusting the shutter speed is necessary. For example, you may want a slower shutter speed when taking pictures of sports.

If smartphone cameras don’t make this feature more widespread, their chances of competing with DSLRs are virtually non-existent.

6 Better Zoom Image Quality

Zoom Camera at 2.1 x on a Smartphone


If I were to have one particular gripe with smartphone photos, it would undoubtedly be the zoom image quality. When I use my iPhone, the quality deteriorates significantly after around 1.5 (and even more so as you get closer to and beyond 2x). The reason is that smartphones, unlike cameras, don’t have variable optical zoom.

On the flip side, I have a 16-80mm lens on my Fujifilm camera, and the image quality is still fantastic as you get toward the 80mm mark. I see absolutely no reason why I would use my smartphone to take zoom images (unless I don’t have my main camera with me).

There’s no disputing that many modern smartphones have pretty good image quality for wide-angle shots. But sometimes, we can’t move closer to our subject and would rather zoom in. It would be nice to do that without the picture quality dropping so much, especially when cropping still seems to deteriorate how the image looks more than on a DSLR camera.


7 More Options for Shooting in RAW

While editing JPEGs is fine in many cases, your options are much more limited than if you worked with RAW files. More smartphones let you shoot in RAW than was once the case, but it’s still quite rare to find a device with this option.

Almost every DSLR lets you shoot in RAW, meaning that you have more detail to work with if you want to edit your images. So, while there are some situations in which you should shoot JPEG instead of RAW, people will still buy DSLRs if they want this feature.

Even for the casual shooter, smartphone cameras still have limitations that a DSLR would solve. The lack of image quality when zooming, limited customization controls, and smaller sensors mean that purpose-built cameras still often reign supreme. Whether smartphone manufacturers can compete with DSLRs depends on multiple factors, such as dealing with the smaller sizes of their devices and a lack of specialty in this area.


Intel’s Debut Gaming Handheld has Big Potential

Key Takeaways

  • MSI Claw’s game performance is currently behind the ASUS ROG Ally in most popular titles due to driver and game support issues.
  • The Claw offers a cooler gaming experience and faster battery charging but lacks game compatibility with Intel XESS in many titles.
  • Although the Claw offers newer hardware, its Intel chip is proving to be its own Achilles heel.


With the recent release of the MSI Claw, handheld gaming enthusiasts are eagerly awaiting to see if Intel Arc hardware can revolutionize the handheld gaming scene by delivering a meaningful boost in performance or efficiency. Positioned to challenge established devices like the Lenovo Legion Go and ASUS ROG Ally, the MSI Claw’s biggest selling feature lies in its utilization of an Intel chip, rather than the customary AMD variants that have dominated the market for years.

Boasting beefier and newer specs compared to its competitors, on paper at least, this should be a slam-dunk victory for MSI and Intel. However, early testing has shown inconsistency in this device’s performance and suggests that this may need more time to bake. Will the MSI Claw be the game-changer we’ve been waiting for, or will it serve as a cautionary tale of Intel’s unpreparedness to enter the handheld gaming arena?


MSI Claw

Does the MSI Claw have what it takes to be a worthy competitor to the ASUS ROG Ally? Intel Arc graphics make their way to gaming handhelds for the first time, but early testing reveals that it isn’t all smooth sailing. This device needs more fine-tuning before it can hit the big league.

Dimensions
294 x 117 x 21.2mm

Playing Time
1.5hrs

Brand
MSI

Weight
675g

Chipset
Intel Core Ultra 5/7

RAM
16GB LPDDR5-6400MHz

Storage
512GB, 1TB NVMe

Wireless Connectivity
Killer WiFi 7 BE1750, BT 5.4

Display
7″ FHD, 120 Hz, Touch Screen

Graphics
Intel Arc 8 Xᵉ-Cores

Ports
1x Thunderbolt 4

Battery
53Wh

Operating System
Windows 11

Pros

  • New Intel Chip could be promising
  • Stays cooler in hand than ROG Ally
  • Chargers from 0 to 100% faster than competition
Cons

  • Inconsistent gaming performance
  • Drivers and game support are behind AMD
  • Windows 11 is still poorly optimized for handhelds

An Uphill Battle

The short answer: it’s complicated. Going toe to toe with its closest competitor, the ASUS ROG Ally, the Claw, in many ways, these feel like identical devices. Both use the same 7-inch IPS display and their button layout is extremely similar. While the Claw is slightly larger and heavier, in hand it’s hardly noticeable. After about 15 minutes of playtime, however, I quickly realized that the Claw managed to stay cooler to the touch and had quieter fans under full load. My first impressions were very positive.

MSI Claw-10-2
Paul Antill / MakeUseOf

The MSI Claw shows most promise in games like Gotham Knights, where it outperforms the ASUS ROG Ally by a significant amount, as well as a desktop replacement where I could easily multi-task and forget I was using a handheld. However, as of right now, as a gaming-first device, in many popular titles like Red Dead Redemption 2, it trails behind by about 5-12 FPS (frames per second) in most presets, while in games like Shadow of the Tomb Raider, the Claw at best matches the performance of the ROG Ally.


Adding to the uncertainty is the lack of support for Intel XESS in many games. Similar to its AMD counterpart, this feature optimizes gaming performance by dynamically adjusting resolution and settings in real-time to increase your FPS. However, not all games have implemented support for Intel XESS, further leading to an AMD performance advantage in many titles.

On top of this, there are a few titles, like Batman Arkham Knight, which fail to properly identify Arc graphics and will not load without a level of troubleshooting which your average gamer probably doesn’t want to go through. In many ways, the Claw feels like a beta with the potential for greatness, but in its current state, it’s asking gamers to bank on future performance improvements with better driver and game developer support. Considering Intel Arc Graphics is barely two years old now, this hardly comes as a surprise.


Fixes could come, but how soon and how significant will they be? If you want to enjoy all of your favorite titles – right now – the Claw’s is either really good or underwhelming. While recent driver updates have provided more consistent frame rates with fewer random dips, Intel Arc still has a long way to go.

Configurations

The MSI Claw is available in three configurations, each equipped with a 7-inch 120Hz Full HD display and 16GB LPDDR5 6400MHz RAM. The entry-level model, priced at $699, features the Intel Ultra 5 135h chip and 512GB of SSD storage. For $749, you jump up to the Intel Ultra 7 155h chip, promising enhanced performance. For $799, storage increases to 1TB. At this time, you must select the Ultra 7 chip if you want more storage out of the box without doing the upgrade on your own.

Speaking of upgrading, while usually a simple task, with Claw you first need to remove the fans and heatsink in order to access the SSD which is located behind. MSI is usually known for its more user-friendly upgradability, so this comes as a surprise, and for most users, you’re better off getting the 1TB configuration from MSI than doing this yourself.


MSI Claw-04-2
Paul Antill / MakeUseOf

Comparatively, the top-tier AMD Z1 Extreme 1TB Lenovo Legion GO retails for $749, while the ROG Ally offers maxes out at 512GB for $699. Given the MSI Claw’s newer hardware, its pricing is justified. However, given the frequent sales on these older models, the Claw finds itself in a tricky spot. Currently, the maxed-out ROG Ally is available for just $599. Even if you only occasionally game on the go, the Ally is hard to pass up at this price.

In the box, alongside the MSI Claw itself, you’ll find a 60W charger which is the same found with many of MSI’s smaller laptops. Overall, it is less compact than the one found with the ROG Ally, but I prefer having a cord go from the brick to the wall instead of plugging it in directly so that you don’t have to worry about it falling off, especially with less secure outlets.


Just as with the Ally, the Claw offers a single USB-C port, forcing you to choose between charging or using an accessory unless you have a separate hub. MSI will be releasing the Nest Docking Station for $79 sometime in the summer. This will give you full-size HDMI 2.0, USB-Type A, and extra USB-C ports, effectively transforming the handheld into a desktop setup.

While alternative USB-C docks and hubs offer similar functionalities at a lower price point, enthusiasts seeking the official branded MSI experience, complete with cradling the Claw upright, may find the Nest Docking Station to be a solid choice.

MSI Claw-07-2
Paul Antill / MakeUseOf


Do You Want Windows 11?

Beyond hardware concerns, there’s another major hurdle to overcome: Windows 11. Like other Windows handhelds, the MSI Claw is held back by the limitations of its operating system. Windows 11’s lack of touch optimization makes navigating menus and executing tasks a cumbersome experience. The virtual keyboard often fails to appear when needed, and performing basic functions feels clunky and unintuitive.

These usability issues takeaway from the overall gaming experience, leaving users longing for the simplicity of a traditional mouse and keyboard setup. The software experience plays a big role, and while this is no fault of the Claw, instead it falls on Microsoft to significantly overhaul its UI if it wants mobile gaming to be taken more seriously, this is why so many people love the Steam Deck so much, despite its far weaker hardware.


Design: Somewhat Familiar

Right away, the MSI Claw looks like a blacked-out version of the ROG Ally. The Claw weighs 676 grams, which is almost 70 grams heavier than the Ally’s 609, but a good amount lighter than the much larger 8″ Lenovo Legion Go which weights 854 grams with its controllers or 650 grams without. Switching back and forth between the Claw and the Ally, I wasn’t able to feel the weight difference much. The deeper controller grips might give you more of that locked-in experience you get with a traditional X-Box or PlayStation controller, whereas the Ally feels slightly smaller, but I find both equally enjoyable to use.

MSI Claw-08-2
Paul Antill / MakeUseOf

Where it mostly differs is with its grated cooling vent system on the back, which not only makes the Claw look more “gamer”, it actually translates to a much cooler playing experience even with longer sessions with its hardware maxed out. You can also find subtle red stripes on the back along with the dragon logo and its two customizable buttons. It’s not until you look closer that you realize the actual cutouts for the fans’ cooling take up much less space and that the rest is purely for aesthetics. Where these grates seem to make the most difference, however, is on its top where you can see the internals of the device when looking through them. At the top as well, MSI includes the power/fingerprint reader, a MicroSD card reader, USB-C Thunderbolt 4, 3.5mm Combo Audio Jack, and a volume rocker.


MSI Claw - Back View
Paul Antill / MakeUseOf

The similarities to the Ally carry over to the front as well, where we also find nearly the same exact button and control layout. A few minor differences include the Ally using colored XYBA buttons which pop nicely against its white body whereas the Claw opts for a more subdued black and grey scheme. The Claw’s joysticks feel like a harder plastic whereas the Ally uses a softer rubber which I prefer.


The Claw uses a 7-inch 120Hz Full HD IPS display that looks decent indoors with very solid blacks. It’s best for playing indoors and really doesn’t hold a candle compared to the Stead Deck OLED, which is on a completely different level, offering significantly better brightness and contrast.

MSI Claw-13-2
Paul Antill / MakeUseOf

Staying Cool

One area where the Claw shines most is in its ability to keep its cool during longer gaming sessions. While both devices get hot, compared to the Ally, the Claw seems to be doing a better job at dissipating heat away from its side controllers and towards its central exhausts, resulting in a noticeably cooler experience.

MSI Claw-11-2
Paul Antill / MakeUseOf


In terms of battery life, the Claw boasts a larger 53Whr battery, offering extended usage for general tasks like web browsing and video streaming. With the Claw, you can expect around 30 minutes or more of usage on a single charge compared to the Ally’s smaller 40Whr battery.

However, when it comes to gaming, which I expect is what most of you care about most, the Claw’s larger battery is offset by its more power-hungry Intel chip, resulting in a maximum runtime of about 1.5 hours in most games at high performance. In contrast, the Ally manages to squeeze in an additional 20 to 30 minutes of gameplay before needing to recharge. On a positive note, the Claw impresses with its faster charging capabilities, making it one of the fastest handhelds to reach a full charge from 0% in a little under 1 hour and 15 minutes.


Gaming Performance

Despite its higher price tag compared to the Ally, its actual gaming performance often falls behind or at best matches its counterpart. In titles like Batman: Arkham Knight, the Claw is nearly identical to the Ally once that patch was installed. However, in games like Red Dead Redemption 2 and Shadow of the Tomb Raider, the Claw trailed behind by about 5 to 12 frames per second and 2 to 5 frames per second, respectively.

While this isn’t too significant, I found Red Dead 2 to be the perfect example of a title that felt much smoother and more enjoyable to play when I could consistently hit 40-45fps on the Ally compared to the Claw which more often dipped below 30 fps and experienced ongoing frame timing issues.

Similarly, it’s here that I noticed another more significant issue. In titles like Red Dead 2, the Claw’s full 8-GB of V-RAM isn’t recognized in the game’s settings, instead thinking it has 256 MB only. There were a few times when I went to increase the game’s visual presets to Normal or High where it would automatically crash when I tried to apply them. This was an inconsistent experience, as I at times could successfully benchmark the game at these more demanding presets, while other times I would have to restart and try again.


Interestingly, Gotham Knights emerged as a standout title where the Claw showcased better performance, reliably hitting 70 to 75 frames per second compared to the Ally’s lower 40s. While this may seem like a promising advantage, it’s essential to consider personal preferences in game selection. For the reviewer, Gotham Knights might not be a preferred title, thus diminishing the significance of this performance boost.

MSI Claw

Min

Avg

Max

Red Dead Redemption 2

5

35

61

Batman Arkham Knight

39

49

67

Shadow of the Tomb Raider

37

48

81

ASUS ROG Ally

Min

Avg

Max

Red Dead Redemption 2

5

42

118

Batman Arkham Knight

39

51

67

Shadow of the Tomb Raider

48

55

79


Should You Buy the MSI Claw?

While the MSI Claw holds promise with its Intel Arc, it faces challenges in delivering a seamless gaming experience. As Intel continues to refine its drivers and developers optimize their games for Intel XESS and the new hardware, the MSI Claw may yet realize its full potential. In general, MSI tends to be one of the best choices for performance per dollar.

Even with some promising results, overall, the Claw isn’t there yet. With so much desire to prove themselves in the gaming space, I imagine Intel is going to be putting a lot of effort into improving this generation of Arc. For now, expect the usual shortcomings as an early adopter playing a balancing act between your games, either running really well or facing a bunch of hiccups and underwhelming performance.

We probably won’t see a dramatic improvement in the next few weeks, but I have my fingers crossed that in 3 to 6 months we can revisit the MSI Claw and have a much happier ending to this story.

MSI Claw

MSI Claw

Does the MSI Claw have what it takes to be a worthy competitor to the ASUS ROG Ally? Intel Arc graphics make their way to gaming handhelds for the first time, but early testing reveals that it isn’t all smooth sailing. This device needs more fine-tuning before it can hit the big league.

Why I Regret Buying an Apple Magic Keyboard for My Mac

Key Takeaways

  • The Magic Keyboard doesn’t have backlit keys, which is absurd considering its price.
  • The keyboard isn’t ergonomic; you can’t adjust the tilt, and Apple doesn’t include a wrist rest for comfort.
  • It pales in comparison to mechanical keyboards due to its poor tactile response and lack of customizability.


If you’re planning to buy Apple’s Magic Keyboard for your Mac, thinking it’s your best option, hold your horses. I’ve used one for years with my MacBook and monitor setup, but besides its sleek profile and Touch ID, I really wish I got something else.


The Magic Keyboard Has No Backlight

Dreamchild Obari/MakeUseOf

When I switched to an M1 MacBook Air and a monitor for my work setup, I also bought a Magic Keyboard to fit it all together. Considering the built-in keyboard had backlit keys, it seemed safe to assume that Apple’s Magic Keyboard would be backlit too. In fact, most modern keyboards have this functionality, as it’s the industry standard.

Imagine my surprise when I realized that it doesn’t have backlit keys. The only explanation I can think of for why Apple went this route is battery life. It’s nice that I only need to charge the Magic Keyboard once a week, and Apple may have built it for that kind of longevity.


However, a good compromise is letting the user choose if they want to sacrifice some of that battery life for backlit keys (just like how you can with the Magic Keyboard for iPad). Or, better yet, allow backlighting when the keyboard is plugged into a power source.

The Keyboard Is Far From Ergonomic

Hands on an Apple Magic Keyboard on a wooden desk
Dreamchild Obari/MakeUseOf

Most modern keyboards let you adjust the tilt to make them more suitable for long typing sessions. As someone who spends several hours daily behind a keyboard, I really appreciate that functionality.

Unfortunately, Apple’s Magic Keyboard for Mac doesn’t allow me to choose the height and tilt I prefer. I’m limited to the subtle (almost flat) incline, which sometimes puts strain on my wrist. It’s not so much that I can’t use it at all, but it’s a mildly annoying problem that crops up after long typing sessions.


On top of that, the keyboard is “compact.” That’s a great word to hear if you’re on the move. But if you plan to use it on your desk and have basketball-worthy hands, you’ll definitely make typos from the cramped arrangement of the keys. It’s even worse if you have the Magic Keyboard without a numeric keypad—the arrow keys are all mashed together.

Since Apple is more dedicated to uniformity and its core, simple design language, I can’t enjoy the advanced ergonomics that other keyboards offer. The Magic Keyboard has no wrist rest, no contoured and split design; it just sits there like a good-looking aluminum slab.

Poor Tactile Response

Finger pushing a key on Magic Keyboard
Dreamchild Obari/MakeUseOf

As much as I like Apple’s move from butterfly switches to the scissor-switch mechanism, there’s still plenty of room for improvement in the tactile feedback department.


Admittedly, it’s because I find myself gaming on my Mac more often than I’d like to admit. I need to feel the actuation point when I press a key so that I don’t have to push it all the way down. Even though the Magic Keyboard has a really short travel distance (about 1mm), the actuation point and the absolute bottom travel distance are indistinguishable.

This can make typing or inputting information slower and generally more strenuous, especially if you’re already used to the best mechanical keyboards with better travel distances. Those keyboards give that audibly satisfying click or bump when you actuate a key without having to push it all the way down.

Zero Customizability


The Magic Keyboard with Touch ID and a numeric keyboard comes only in silver with the option for white or black keys. You can’t change how it looks once you purchase it.

When I first bought it, I thought I didn’t care, but after using it for a few months, I began to feel like the keyboard made my setup too robotic. There were no fun colors or keycaps with cool art on my keyboard, and my work setup looked lifeless and boring.

Overall, the Magic Keyboard pales in comparison to the sheer breadth of possibilities you could have with a custom—or even a pre-built mechanical keyboard. So, if you’re someone who likes to make their keyboard stand out, stay far away from Apple’s offering.

Expensive for What It Offers

Magic Keyboard with Touch ID and Numeric Keypad product listing on Apple's website


I bought Apple’s Magic Keyboard for $179. If you want the one with black keys, it will cost you an extra $20 ($199). That’s pretty expensive for a membrane keyboard, considering I can buy the Epomaker TH80-X we reviewed for $100. That’s a mechanical keyboard with a built-in color LCD screen and a control knob.

Apple doesn’t build Macs to be picky about what keyboards it can use. With the Magic Keyboard, you’re mostly paying for the convenience of having Touch ID. However, I could just use my MacBook’s built-in Touch ID button when I start my session. Of course, it makes more sense if you have a Mac desktop, though.

I’m not saying the Magic Keyboard should be cheap; it has a great build and a firm feel. Apple never makes anything flimsy, which may have added to its cost. But with all the reasons I listed above and the sheer number of options you can get for under $200, I regret choosing this aluminum slab of a keyboard.

Travel Savvy and Stay Charged

Key Takeaways

  • The Satechi 145W travel charge’s 4 ports allow simultaneous charging.
  • USB PD 3.1 power delivery protocol enables super-fast charging.
  • Includes adapters for the US, UK, EU, and AU, plus a handy travel pouch.


Indulging in wanderlust and planning your next vacation is always a fun endeavor. However, it is not without its planning needs. From iPhone chargers to laptop power cords, your devices may not be compatible with the country you are traveling to as electrical outlet design is not universal.

The Satechi 145W USB-C 4-port GaN travel charger is a sleek solution to this common issue that incorporates multiple ports and four different adapters to keep you charged while abroad.

Satechi 145W USB-C C4-port GaN Travel Charger

The Satechi 145 USB-C C4-port GaN Travel Charger provides users with a convenient system to keep travelers plugged in by including adapters for most global electrical outlet formats.

Pros

  • 4ports avalible for simultaneous charging
  • 3.1 power delivery protocol
  • Includes adapters for US, UK, EU, and AU
  • Includes travel bag for convenient storage
Cons

  • Heavy
  • Fixed plug positioning

What Comes in the Box

Satechi Travel Charger Whats in the Box on desk
Sergio Rodriguez / MakeUseOf

When venturing into a foreign country, one of the first concerns many seasoned travelers have is device charging capabilities. In a world with a huge dependence on mobile access to the internet when traveling to manage our funds, reservations, directions, and so much more, loss of battery life can be a large issue. For this reason, a reliable travel charger and adapter are a must for any savvy traveler.


Developed by Satechi, the 145W USB-C 4-Port GaN Travel Charger is an excellent choice for those not-so-weary travelers ready to venture out into a new country other than their own.

Offered at a $119.99 price point, the Satechi Travel Charger comes with everything you need to keep your USB-C devices powered within the US, UK, EU, or AU.

Within the box, purchasers will find a complete package including:

  • Charging Block (with 4 USB-C ports)
  • US Adapter
  • EU Adapter
  • AU Adapter
  • UK Adapter
  • User Manual
  • Black Mesh Travel Pouch

Additionally, the purchase includes a 30-day return window if needed, as well as a 1-year warranty.

Standout Features

Satechi Travel Charger Ports on desk with 4 ports
Sergio Rodriguez / MakeUseOf


If you are utilizing your smartphone to plot a trip across a foreign country, you will need to ensure your device is chargeable with the proper power adapter. The sleek silver design of this travel charger combined with the utilization of GaN technology and graphene as internal insulators for heat reduction, make for a winning combination.

The Satechi 145 USB-C C4-port GaN Travel Charger allows users to simultaneously charge up to four devices. Speeds vary based on configuration:

  • 1 connected device supports up to 140W
  • 2 connected devices support up to 100W
  • 3 connected devices support up to 65W/30W/45W or 100W/25W/20W
  • 4 connected devices support up to 65W/30W/25W/20W (145W total)

When connected to more than one device, the Satechi 3.1 delivery protocol aids in correct power distribution across all connected devices. Set apart from other chargers by this smart delivery protocol, the Satechi Travel Charger automatically adjusts power delivery to best suit the connected devices’ needs in multiple configurations.

Users should note that it is recommended by the manufacturer, that should all four charging ports be in use simultaneously, the largest device should be connected to the PD1 port.


The included travel adapters for the UK, EU, AU, and US are easily interchangeable with the press of a release button. Once pressed, the interchangeable electrical plug adapter piece easily slides free, and another can be quickly clicked into place.

The Satechi Travel Charger boasts a significant list of compatible devices ranging from Apple and Android products, to most Thunderbolt and USB-C devices.

Drawbacks to Consider

Satechi Travel Charger with Devices plugged in on desk
Sergio Rodriguez / MakeUseOf

Overall, the Satechi 145 USB-C C4-port GaN Travel Charger is an excellent charger for those with multiple devices. However, it is not without its drawbacks.

When packing for an extended trip to a new country, the weight of items becomes an important factor. Unfortunately, travel adapters are notorious for being heavy. While not the heaviest block on the market, the Satechi 145 weighs in at 346g, which is a noticeable weight when carried in luggage.


Additionally, the dimensions of the charger may be tight for some spaces. Especially when considering that the adapter point does not allow for any other configuration or rotation to adapt to outlet locations. The device measures 3.78 x 2.99 x 1.22in making it larger than a deck of cards in both height and width.

Satechi Travel Charger US Plug
Sergio Rodriguez / MakeUseOf

It is also important to take into consideration the following device recommendations and limitations set forth by Satechi for optimal performance:

  • Certified eMark charging cables (which are sold separately) should be used in conjunction with the Satechi 145 USB-C C4-port GaN Travel Charger.
  • When charging a MacBook Pro, in order to reach 140W of charging, a MagSafe3 power cable should be utilized.
  • Only the top two USB-C charging ports (PD1 and PD2) have the capacity to reach 140W and will only do so for one device at a time.


Should You Buy the Satechi 145 USB-C C4-port GaN Travel Charger?

No matter where you decide to go next, a Satechi Travel Charger is an invaluable tool along the way. The Satechi 145 USB-C C4-port GaN Travel Charger provides adventurers with a convenient system to stay plugged in by including adapters for most global electrical outlet formats and featuring 4 simultaneous charging ports with a smart power distribution system.

Satechi 145W USB-C C4-port GaN Travel Charger

Satechi 145W USB-C C4-port GaN Travel Charger

The Satechi 145 USB-C C4-port GaN Travel Charger provides users with a convenient system to keep travelers plugged in by including adapters for most global electrical outlet formats.

How do hdi printed circuit boardss handle high-frequency signals?

hdi printed circuit boardss handle high-frequency signals

High-frequency signals are essential for a range of applications, from medical imaging devices like MRI and ultrasound machines to the high-speed data transmission systems that power modern-day technology. These signals travel through a circuit board at high speeds and must be processed with care to avoid signal distortions and interference.

How do hdi printed circuit boards handle these high-speed signals? High-density interconnect (HDI) PCBs offer superior electrical performance than traditional PCBs by reducing the number of vias (electrical connections between layers), pads, and traces. This allows them to support more components and reduce the size of a circuit board while maintaining its functionality, reliability, and energy efficiency.

The increased component density, smaller spaces between traces, and use of microvias in HDI PCBs require careful design to ensure proper signal integrity. A variety of factors can cause signal distortions, including impedance mismatch and crosstalk. These factors can also increase the risk of failure due to electromagnetic effects.

How do hdi printed circuit boardss handle high-frequency signals?

During operation, a circuit board generates heat that can damage the core and surface finishes of the board, so it’s important to minimize losses. The choice of materials for a PCB can help minimize losses, as well as the use of cooling techniques and thermal management tools to manage temperature fluctuations. For example, a PCB made with PTFE or another material with a low dielectric constant and loss tangent will absorb less energy than a PCB made of conventional materials. The lower Coefficient of Thermal Expansion (CTE) of these materials also helps to prevent breakage and damage during thermal cycling.

In addition to selecting the right materials, strategic PCB assembly techniques can also help reduce interference and improve signal integrity. Differential signaling can be used to improve noise immunity and reduce crosstalk, and the placement of critical components closer together can decrease signal path lengths and reduce impedance and capacitance. Choosing the correct signal routing can minimize interference risk and ensure signal integrity, especially at high data rates.

To avoid signal distortions, HDI PCBs should also be designed with a solid ground plane. Ideally, the ground plane should cover as much of the circuit board as possible to minimize interference and provide a stable reference point for signal return paths. In addition, the use of metal shields or Faraday cages can help to contain electromagnetic radiation.

The higher the frequency of a signal, the more sensitive it is to the impedance of the signal-carrying circuit board tracks. This is because the dielectric material in the circuit board absorbs energy from the signal, reducing its strength. This is known as skin effect and can cause signal attenuation, skew, and timing issues.

To address this, HDI PCBs should be constructed using a dense copper alloy that has low losses at high frequencies. In addition, the signal-carrying traces should be kept as short as possible to eliminate impedance matching issues and reduce the risk of reflections. The use of stacked vias can further improve signal integrity and reduce impedance mismatch.

How to Connect an iPhone or iPad to a TV

Do you often find your iPhone’s display to be a bit too small for watching content? You can easily overcome this problem by connecting your iPhone or iPad to a TV. Here, we’ll explore all your options.


Connect an iPhone or iPad to Your TV Wirelessly

If you want to connect your iPhone or iPad to a TV wirelessly, the easiest way is to use AirPlay. However, you’ll need to check if your TV supports AirPlay to take advantage of this method.

The Apple TV is one of the easiest ways to add AirPlay to your TV, but it’s not the only way. Several TV manufacturers make TVs with built-in AirPlay support. These manufacturers include Samsung, LG, Sony, and Vizio.

If you don’t have an AirPlay-supported TV and don’t want to buy an Apple TV, you’re not out of luck. There are AirPlay receivers available that will let you stream to your TV wirelessly and cost less than an Apple TV. Take a look at our roundup of cheap AirPlay receivers for a few recommendations.

Once your TV is ready to stream AirPlay, the rest of the process is fairly easy. Most popular streaming apps include support for AirPlay. In any of these, choose what you want to watch, then tap the AirPlay icon—stylized with a rectangle and an arrow along the bottom edge.


You may see a few options depending on how many AirPlay-ready devices you have in your home. However, you should be able to recognize your TV easily by its name.

Now, one caveat of this approach is that not every iPhone or iPad app supports AirPlay. In such cases, you can typically mirror your iPhone’s screen to your TV. But if your TV doesn’t support AirPlay mirroring, you can use the method below.

Connect an iPhone or iPad to Your TV via HDMI

You need a couple of things to connect your iPhone or iPad to your TV via HDMI. Firstly, you need a free HDMI port on your TV—a relatively easy ask. In the worst-case scenario, all you’ll need to do is temporarily unplug something else.

Secondly, you will need the right cable or adapter for your iPhone or iPad. If you have an iPhone or iPad with a Lightning port, you can use Apple’s Lightning Digital AV Adapter along with a HDMI cable to connect it to your TV.


However, if you have an iPhone or iPad with a USB-C port, you can either use Apple’s USB-C Digital AV Multiport Adapter, which costs $49, or a USB-C to HDMI cable, which you can buy for cheap on Amazon.

Now, all you need to do is plug the adapter into your iPhone or iPad, then plug an HDMI cable into the adapter, and lastly, plug the other end of that HDMI cable into the HDMI port on your TV.

Note that if your iPhone or iPad has a Lightning port, you’ll be limited to 1080p output. However, if you have an iPhone or iPad with a USB-C port, you can get 4K output, provided the adapter or cable supports the HDMI 2.0 standard.

As you’ve seen, you have multiple options to connect your iPhone or iPad to your TV. That said, depending on the phone or TV you own, you may need to jump through a few extra hoops to get everything working properly.


5 Reasons to Switch From Google Calendar to Notion Calendar

Key Takeaways

  • Notion Calendar has several advantages over Google Calendar, such as embedding Notion pages.
  • With Notion Calendar, you can use Dark Mode on all devices where it’s downloadable.
  • Notion Calendar’s streamlined interface is modern and intuitive, and it easily syncs with your Notion databases.


Since launching in January 2024, Notion Calendar has been a tempting alternative to Google Calendar. Both apps have their pros and cons, but there are some pretty good reasons to consider switching to Notion Calendar. Today, you’ll discover five of the best.


1 Use Dark Mode on All Devices With Notion Calendar

Although you can use Dark Mode in the Google Calendar smartphone app, it’s not available in the web version without plugins or external theming. Even if you switch on Dark Mode for your Mac, only the browser’s outer edges turn dark; Google Calendar itself remains bright.

Notion Calendar, meanwhile, respects your computer’s Dark Mode setting, turning dark when it’s on. You can also use Dark Mode on Notion Calendar for your smartphone.


Notion Calendar in Dark Mode on a Computer

If you own an Android phone and can enable Dark Mode for Chrome and all Android sites, the fact that Notion Calendar doesn’t have an Android app isn’t a deal-breaker. But for iPhone and Mac users who enjoy using Dark Mode, it could be.

2 Embed Notion Pages in Notion Calendar

You might find it easier to keep everything in one place rather than scattering it across different sources. Notion Calendar lets you embed Notion pages, which might be a compelling enough reason to switch from Google Calendar.

Embedding a Notion page in Notion Calendar on your computer is very simple. Follow these steps:


  1. Open Notion Calendar. Then, either create a new event or open an existing one.
  2. Go to Docs and links.
  3. In the text box, search for the Notion page you want to embed. Alternatively, choose from the list of recent pages when they appear.

Access Docs and Links in Notion Calendar

While you can embed Notion pages in the Notion Calendar desktop and web apps, this is not—at the time of writing in April 2024—possible on Notion Calendar for iOS. So, you should either perform this action on your computer or copy and paste the link from your smartphone.

3 Sync Your Notion Databases With Notion Calendar

In addition to embedding specific pages in Notion Calendar, it’s also possible to sync your databases within the app. However, like embedding Notion pages in Notion Calendar, you can only perform this action on your computer. Moreover, the databases you sync must have a calendar or timeline view.


  1. In Notion Calendar, find your database on the left-hand side and expand it.
  2. Select Add Notion database and search for the database you want to sync.

Add Notion Database in Notion Calendar

4 Notion Calendar Has a More Streamlined Interface

Besides its unique features, Notion Calendar’s easy-to-navigate user interface is another reason to switch. There’s nothing inherently wrong with how Google Calendar looks, but Notion Calendar’s interface is—from personal experience—more modern and feels more intuitive.


Create and customize a new meeting that you'll schedule in Notion Calendar

The app fits more onto your screen but does so in a non-intrusive way, and its fonts are easy to read. You can easily navigate to your Notion pages, too. The only downside of Notion Calendar’s interface is that while it’s currently optimized for smartphones and computers, the iPad app is optimized for iPhone screens.

5 You Can Sync Google Calendar With Notion Calendar

One of the biggest challenges when migrating from one app to another is transferring all of your data. However, if you decide to switch from Google Calendar to Notion Calendar, you have nothing to worry about; you can easily add each of your calendars on desktop or mobile devices.


  1. Go to the left-hand side. On your smartphone, tap the three-dots icon to expand the toolbar.
  2. Select Add calendar account.
  3. Tap Connect and enter the details associated with your Google Calendar account.

Add a new Notion Calendar account to your workspace

While Notion Calendar is currently only available on iOS and desktop, users of these devices have plenty of compelling reasons to switch. From a more intuitive experience to syncing Notion pages and databases, the app is especially handy if you already use Notion. Since you don’t need to manually transfer all of your data from Google Calendar, it’s well worth trying out.

How do printed board assembly accommodate for dynamic mechanical loads?

printed board

When designing a PCB, you must ensure the board can handle dynamic mechanical loads such as constant vibration and movement. To do this, you need to work with an engineer who can help you simulate the behavior of a bare or unpopulated circuit board under these conditions. This way, you can make changes to the design before the final product goes into production to avoid costly errors down the line.

To begin with, you must choose the right substrate material for your printed board assembly. Some environments are extremely harsh, and you need a durable material that can handle the extremes in temperature, humidity, and vibration. For example, polyimide is more resistant to these types of environments than epoxy resins and is commonly used in electronic components like capacitors, resistors, and sensors.

Once you have chosen the substrate material, you need to determine how much flex you want your board to be able to sustain. This will have a direct impact on the cost of your finished product. For example, a stiffer rigid-flex board can be more expensive to manufacture than a more flexible flex board.

How do printed board assembly accommodate for dynamic mechanical loads?

Next, you need to determine the amount of copper layering your bare circuit board should have in order to support the intended mechanical loads. For instance, a rigid-flex board will typically require 1 oz copper per square inch for power and signal layers and 0.5 oz for the other layers.

You must also consider how your traces and pads will interact with the component leads once they’re on the board. For instance, through-hole technology uses holes that are drilled in the bare circuit board so the component’s wire leads can be inserted into them. These wires are then soldered to the copper traces on the circuit board to complete the electrical connection.

In a rigid-flex printed circuit board, you must make sure the copper layer is thick enough to meet your desired bend radius. You must also plan for the type of forming tool and the number of times you’ll be bending the ribbon. For example, a compression forming tool may be more suitable for a flex circuit ribbon that requires several bends in a small area than a tension forming tool.

For a populated circuit board, you must consider the number of components and the type of components in each part. You must use the right solder paste, and you must be able to inspect the placement of each part on your circuit board using techniques such as AOI (automated optical inspection) or X-ray inspection.

Finally, you must take into account your manufacturing process in determining the time it takes for your circuit boards to be ready for assembly and testing. For instance, you’ll want to minimize the manual steps required for loading and removing components from the trays. Fortunately, there are automated solutions for this process that can help you reduce your manual labor and improve your efficiency.

I Edited My Photos With These AI-Powered Apps: Here Were the Results

Key Takeaways

  • Enhance your photos easily with AI editing tools like Google Photos, Pixlr, Luminar Neo, and Fotor.
  • Google Photos, Fotor, and Luminar Neo all have AI enhancement features that will give you subtle changes for better results.
  • Experiment with different AI editing tools to adjust brightness, reduce noise, and remove backgrounds for improved images.


You can make your pictures look great with minimal effort using AI photo editing. Today, you’ll discover a range of AI editing tools I used to adjust my images, including auto-enhance, noise removal, and several other features. Let’s jump right in.


I tried two specific features in Google Photos: Auto-Enhance and tweaking the sky. Keep in mind that Google Photos’ AI editing tools require a Google One subscription.

Auto-Enhance

The Auto-Enhance tool in Google Photos is similar to enhancement features you’ll find in most image-editing apps, including Adobe Lightroom and Canva. Here’s the original image that I used Auto-Enhance for in Google Photos:


Now, here’s what the image looked like after using Auto-Enhance:

An auto-enhanced image in Google Photos

The changes were subtle. Google Photos added some brightness to the image, and it also looks a bit punchier. Overall, I was happy with these edits.

The changes were also subtle on other pictures I tried Auto-Enhance with, but your mileage may vary as it depends on how much editing is needed for your original image.

Editing the Sky

Google Photos also uses AI to edit the sky in your images. You can choose from seven presets:

  • Vivid
  • Luminous
  • Radiant
  • Ember
  • Airy
  • Afterglow
  • Stormy

I used the same picture to try out sky editing. As I took the image on a sunny day, I was curious to see how it’d look with the Stormy filter…


A picture in Google Photos that has the Stormy filter

I actually quite liked how Google Photos desaturated and darkened parts of my image. Before trying the tool, I naively thought it was going to replace the sky with a stormy one; instead, they work more like filters.

The Afterglow Filter in Google Photos

You still have to think about the colors in your pictures, though. I tried Afterglow next, and the results weren’t so great. However, I believe this filter would work well if you want to improve your nighttime sky photography.


2 Enhance Your Images Using Pixlr AI

Pixlr is one of the best free Photoshop alternatives, and it has several AI tools you can use to enhance your photos. I tried three: Super Sharp, Noise Removal, and Generative Fill. Here’s how each of them worked.

Super Sharp

Below is the original image I edited with Pixlr Super Sharp, and I also used it for the other AI tools we’ll discuss in a moment.

A photo of a city skyline taken during the daytime

I noticed that Pixlr significantly compressed my image after uploading it, so that’s something to keep in mind. Here’s the result:

Super Sharp Applied to a Photo Via Pixlr AI


If you only have a free Pixlr membership, you get 12 coins for its AI features.

Noise Removal

You can remove noise from your pictures with Photoshop and several other tools. If you don’t know how to manually do this, consider starting with Pixlr’s Noise Removal feature.

When I zoomed into my picture, I saw that much of the noise that was previously there was now gone. Still, I personally prefer Photoshop’s tools for both smartphone and DSLR/mirrorless camera images—even if you have to pay for the software.

Pixlr's AI Denoise tool in action


Generative Fill

You can add generative fill to your pictures in Photoshop, but how does the tool work in Pixlr? To find out, I wanted to create an overcast sky effect in my images and gave Pixlr the following prompt:

Please replace the selected area with an overcast sky. I don’t want a huge storm; just gray clouds.

That didn’t quite work as planned…

Results of an AI-Generated Attempt in Pixlr

I then sought to ask a clearer prompt:

Please replace the sky in my picture with an overcast day

Again, this did not work as I wanted.

A second attempt to use generative fill in Pixlr


Adobe Express has a much better generative fill tool, so I’d recommend using that. I also gave the other Firefly AI features in Adobe Express a spin if you’re interested in using the app.

Luminar Neo is one of the most popular AI photo editing apps, and I tried editing some of my images with numerous of its tools. Unlike the other apps we’ve discussed so far, you have to download an app for Luminar Neo. After doing that, I tried out AI Enhance, GenExpand, and Relight.

AI Enhance

First, I tried the AI Enhance feature in Luminar Neo. Here’s the original image:

Photo of a city landscape on a river

Luminar Neo lets you choose how strong you want the enhancements to be. You can also determine how much you want to change the sky. I opted for subtle changes to both:


The enhance feature in Luminar Neo

Having the slider was quite nice, as I’ve often found it annoying that editing apps give you a default change. This time, I felt like I had more control.

Relight

Luminar Neo also has a Relight feature that lets you add brightness to different parts of your image. You get three sliders:

  • Brightness Near
  • Brightness Far
  • Depth

Depth is especially useful for choosing how much of your image you wish to brighten. I made a few slight changes to this picture, focusing mainly on Brightness Far. Here is my result:

Relight sliders in Luminar Neo


The Relight feature worked similarly to the exposure and brightness sliders that you see in Lightroom and Photoshop. I’m not sure that I would use it as a replacement for those unless I made the switch to Luminar Neo. Nonetheless, it’s a helpful feature.

4 Using 1-Tap Enhance in Fotor

1-Tap Enhance is one of Fotor’s free AI editing features, and I was curious to see how it would fare in comparison to Google Photos’ Auto-Enhance. This time, I used this picture:

An image of a kayaker on a lake

As you can see below, Fotor’s 1-Tap Enhance was pretty similar to Google Photos. Most of the changes to my image involved brightening. You do have to deal with a Fotor watermark, but you can always crop this out—I’d therefore recommend uploading and editing a picture that you later want to crop anyway.


An image enhanced with Fotor's One-Tap Enhance tool

5 Background Removal With CutOut Pro

If you’re looking for a fast way to remove the background from a photo, consider using CutOut Pro’s background removal tool. All you have to do is upload your image, let CutOut Pro do its thing, and within a few seconds, you’ll get a downloadable file.

The Background Removal tool in CutOut Pro

You can download your picture in JPEG and PNG. I was pretty satisfied with the result, so I would definitely recommend CutOut Pro for background removal purposes.


AI is a great way to make quick edits to your pictures, such as automatically enhancing them or getting rid of the background. Many are free, and even the paid versions often have free trials. Give each of these tools a try and see what you can come up with.

No, Your Antivirus Doesn’t Need to Be Open Source—Here’s Why

Key Takeaways

  • Open source may not be suitable for antivirus software, as proprietary solutions can more rapidly respond to emerging threats.
  • Closed-source antivirus programs offer various advanced defenses beyond simple signature scanning and have considerable resources to maintain high code quality.
  • While open source has advantages in other domains, antivirus may be better served through a proprietary approach that concentrates responsibility.


By openly sharing code, many developers are able to review and improve programs together; this approach has led to remarkable innovations. However, when it comes to antivirus software, “the more eyes, the better” may not hold true.

While proponents have valid arguments, there are several reasons why antivirus programs don’t need to be open source.


Antivirus programs require constant updates to stay one step ahead. Maintaining this relentless pace of vigilance and response through an open-source project presents some hurdles.


Open-source antivirus programs commonly rely on crowdsourced signature databases contributed voluntarily. As a result, they tend to lag behind paid alternatives in rolling out signature and definition updates. For antivirus software to be truly effective, fixes must be implemented and updates deployed within mere days before viruses can spread widely. Expecting an all-volunteer community to deliver fixes and updates regularly and quickly is ambitious.

Additionally, open-source development depends on the unpaid contributions of security experts and engineers. However, these professionals routinely command high compensation in commercial roles, as this income is necessary to earn a living. When the demands of continually monitoring malware threats and keeping definitions fully up-to-date compete with responsibilities from paying jobs, it’s understandable that paid work would take priority over volunteer work.

If the ongoing efforts of volunteers are to be sustained, who will foot the massive bill for intelligence gathering, regular signature updates, and evolving methodologies? Remember that, at the end of the day, the product will be given away for free. Without long-term commercial backing dedicated to this task, meeting the demands of mission-critical protection through an open model seems unreliable.


2. The Cons of Exposing Antivirus Code Outweigh the Pros

A commonly cited advantage of open source is allowing anyone to review and modify the code. However, this transparency presents unique challenges in the context of antivirus software.

By making core detection and removal mechanisms visible in the source code, malicious actors could scrutinize these defenses closely. As with all software, vulnerabilities inherently exist—whether the code is open or closed. However, public access to the source means cybercriminals may have greater and prolonged insight into weaknesses before they are patched.

While open source alone does not birth more vulnerabilities, it changes security dynamics in ways that could hinder antivirus efficacy. These programs rely partly on obscurity to gain ground over evolving threats. Were bugs to become widely known through public review, bad actors could more swiftly circumvent protections. Even after a fix arrives, they may already have workarounds prepared.


Additionally, a 2022 Cornell University study found open source projects sometimes take nearly three weeks after disclosure to release patches—ample opportunity for attacks during that window. Besides, contributions from volunteer communities wane unpredictably over time, possibly resulting in unaddressed risks, vulnerabilities, or threats. For antivirus demands of constant vigilance, “many eyes on the code” may not offset publicity-enabled risks in this time-sensitive domain.

3. It’s Difficult to Maintain High-Quality Code in a Community-Driven Project

Keeping standards optimum across millions of lines of code is a monumental task, even for dedicated teams of paid developers. In an open-source environment where contributions come from volunteers with differing abilities and priorities, ensuring excellence and adherence to best practices across the board presents a significant challenge.


Additional factors, like how promptly vulnerabilities are found and patched, shape the quality of a program’s code over time. Likewise, algorithms and techniques must evolve continuously to counter advancing malware tactics. Maintaining this swift development cycle within an open model is quite difficult.

4 Reasons Why Proprietary Antivirus Solutions Are Better

The closed-source or proprietary model may prove better suited for antivirus software, and there are several reasons why.

1. Commercial Businesses Can Match the Fast-Moving Threat Landscape

Proprietary antivirus companies employ dedicated teams of cybersecurity aficionados, malware analysts, and code craftspeople focused solely on product development, care, and support. This facilitates the rapid analysis of new malware samples, the design of effective detection and removal techniques, and user updates, all with minimal delays.

Open-source projects often rely on volunteers contributing in their spare time. Closed-source projects, on the other hand, have paid employees explicitly tasked with rapidly responding to emerging threats full-time.


Additionally, security research and development demand handsome remuneration. Commercial businesses can fund sizable groups—like Microsoft’s battalions, aimed squarely at fixing vulnerabilities and releasing updates across their platforms. The nature of antivirus protection aligns well with proprietary models built for relentless, acute response to cyberattacks.

2. Proprietary Antivirus Solutions Have Lots More Features

Open-source antivirus software has its place, but most folks don’t realize just how limited these solutions are compared to commercial-grade antivirus. Proprietary antivirus is packed with defenses far beyond signature scanning—features most of us aren’t taking advantage of but absolutely should be.


Proprietary antivirus leads the charge with multipronged defenses that go well beyond mere signature matching. Technologies like behavioral monitoring, application sandboxing, and integrated firewalls form a robust shield against emerging threats like zero-days and sneaky malware.

This approach contrasts open-source options like ClamAV. While handy for basic duties like email scanning, its detection rates and regular signature updates can’t compete. Open-source antivirus mainly sticks to signature databases without extra tactics like heuristic analysis or behavior blocking.

Even affordable commercial players like Comodo offer bundled perks on top of detection—features like web protection, Wi-Fi security, parental controls, and firewalls. Built-in defenses from the likes of Microsoft and Apple Inc. now automate malware removal and routine updates, lessening reliance on third-party antivirus for newly installed systems.


3. The Code Isn’t Revealed, but That’s Not a Disadvantage

When it comes to protecting your devices, transparency is surely a virtue—but without adequate security, what good is visibility into a software’s inner workings? Besides, effective security solutions do not inherently require publicly visible code.

In 1984, while receiving the ACM TuringAward, Ken Thompson said that to trust code, you must write it yourself, as any software could potentially contain inserted vulnerabilities. However, if writing it yourself isn’t possible, you only have to ensure the code’s creator prioritizes protecting your interests as highly as their own.

Open-source proponents argue that widespread independent review strengthens defenses against exploitation, meaning your interests are always protected. However, adequately testing all open-source software can be a challenge. Proprietary advocates thus argue that concentrating responsibility within a single entity—with financial motives to prioritize your interest—provides stronger incentives for diligence.


Under the open model, it’s also simpler to insert harmful code snippets, where any reviewer could compromise security. Of course, bad actors exist on both sides. However, proprietary companies understand that endangering users would destroy their business overnight. So, for critical security tasks like antivirus, a sole for-profit developer who keeps their code private may actually be more aligned with your security needs.

4. There Are Many Proprietary Antivirus Solutions Available

With adequate research and due diligence, you can select a proprietary antivirus that perfectly suits your needs without compromising security. Several antivirus providers have established track records over many years, and their reputations depend on delivering robust protection and timely updates. There are also capable free antivirus programs from Avira, Avast, and others that fuse anti-malware signatures with personal firewalls for robust everyday security. For Linux users in particular, integrated defenses have advanced to the point where third-party antivirus bears minimal added value.


While the open-source model thrives on community collaboration, many closed-source antivirus companies actively solicit feedback through forums, bug-reporting portals, and cooperation with independent research initiatives. For instance, Gen Digital Inc. allows people to report bugs; these reports benefit brands like Norton, LifeLock, Avast, and Avira.

Gen Digital Inc.'s Request for Vulnerability Reports

While open-source spurs remarkable innovations, antivirus is better off being closed and proprietary. An open model may work better in other domains, but antivirus demands rapid response, and concentrated responsibility may aid that. Closed-source antivirus providers leverage teams, technologies, and strategic security focus to offer a comprehensive defense against an evolving risk landscape.


For protection against emerging threats, the commercial self-interests of a proprietary security provider could prove the closest alignment with your security needs.

How to Change Notification Sounds for Each App on Your Android Phone

Key Takeaways

  • On Android, you can easily customize notification sounds for individual apps using the Settings app.
  • If needed, you can use the built-in voice recorder app to create custom sounds for notifications.
  • For more advanced management of notification alerts, consider using third-party customization apps.


Tired of guessing which app sent you a notification? We’ll teach you how to set custom notification sounds for each app on your Android phone so that you can easily distinguish between important and unwanted notifications.

How to Set a Custom Notification Sound for Specific Apps via Settings

The Settings app on your Android makes it easy to customize notification sounds for apps. However, the steps may vary depending on your phone and the Android version it’s running.

Customize Notification Sounds on Phones Running Android 13 or Older

The instructions below are accurate for Samsung Galaxy phones running Android 13 or older. If you own a Google Pixel or another device that runs stock Android, the steps may differ slightly.

  1. On your Android phone, navigate to Settings > Apps.
  2. Find and select the app you wish to set a custom tone for.
  3. On the app info page, tap Notifications and toggle on the slider button for Show notifications.
  4. Choose the appropriate notification category and select Alert. Do note that categories will vary across different apps.
  5. On the Notification category page, scroll down and tap Sound. Then, select your desired notification tone from the list.


Customize Notification Sounds on Phones Running Android 14

On Samsung phones running Android 14 (One UI 6.0) or later, here’s what you need to do:

  1. Open the Settings app and scroll down to tap Apps.
  2. Find and select the app you wish to set a custom tone for.
  3. On the app info page, tap Notifications and turn on the Allow notifications toggle.
  4. Tap Notification categories and select the alert type for which you want to change the notification sound.
  5. Tap Sound and choose your preferred alert sound from the list.

If you don’t see the Notification categories option on your Samsung phone, head to
Settings > Notifications > Advanced settings
and enable the
Manage notification categories for each app
toggle.


How to Use Your Own Audio Files as Priority Tones

Not satisfied with the default notification sounds on your device? No problem. You can easily record your own audio clips or select songs from your music library to use as custom notification sounds.

Whether you’re a fan of techno beats, classical strings, or ringtones that sound like vintage phones, you can choose a sound that suits your style. Let’s take a look at how to do this.

Step 1: Record Some Realistic Sound Clips

With a little work, you can record some audio clips using the pre-installed voice recorder app on your phone. Once you’ve recorded the audio clip, use a free audio editing app to trim and transform the sound clips to the right length and file type.

After editing the recording to your liking, export it as an MP3 file and add it to your Notifications folder. For our example, we’ll use the free MP3 Cutter and Ringtone Maker app. Here’s how you can edit your audio file:

  1. Install and launch the MP3 Cutter and Ringtone Maker app.
  2. Upload the recorded audio file.
  3. Adjust the Start and End handlebars to trim the clip to the required length. You also have the option of mixing in sound effects and merging audio files.
  4. Hit Save and export the file in MP3 format.


Step 2: Set an MP3 as a Custom Alert

If you already have a lot of music files downloaded on your smartphone, you can use them as notification alerts. To do this, cut or trim the audio files using the steps listed in the section above.

Remember, the audio file needs to be stored locally in the Notifications folder within your file manager app. Here’s how to do this:

  1. On your device, open My Files or File Manager app.
  2. Navigate to Categories > Audio > Music folder(s).
  3. Select the MP3 file of your choice and tap Move.
  4. Head to My Files > Categories > Audio > Notifications and tap Move here to transfer and store the file locally.
  5. Open the Settings app and tap Apps.
  6. Select the app you wish to set up a custom alert for.
  7. Navigate to the Sound settings (as mentioned in the first section), and you’ll now see the music file added to the list.
  8. Tap the file to set it up as your custom alert tone.


How to Manage Notification Alerts With Third-Party Apps

On Android, you also have the option to use third-party apps to set custom notification sounds for different apps. Notification Sound Manager is one such app that lets you upload custom sounds or enable text-to-speech functionality for announcing notifications. You can download it from the Play Store for free.

Here’s how you can use Notification Sound Manager to configure and manage alerts:

  1. Install and open Notification Sound Manager on your phone.
  2. Give it permission and head to the home page of the app. Then, tap the plus (+) icon in the top-right corner to add a new sound.
  3. Choose the app and select the audio file using File Explorer.
  4. Tap the floppy disk icon in the top-right corner to save your template.


If you need moments of uninterrupted focus, Notification Sound Manager also lets you disable specific notifications temporarily.

Setting different notification sounds for your apps is an excellent way to customize your notifications. However, if you still find yourself overwhelmed after that, you can try using third-party apps to better manage notifications on your Android device.

Today’s Connections Answer and Clues (Sunday, April 28, 2024)

Connections requires players to find the connections between 16 words, and place them in four groups of four. If you want some help, we have the solution to Connections for April 28, 2024, along with hints to help you solve it yourself.


SPOILERS AHEAD (CLUES)


Category Clues for Today’s Connections (#322)

Today, as every day, you need to split the 16 words that make up the Connections puzzle grid into four groups of four based on specific categories. It isn’t as easy as it sounds. Fortunately, we’re on hand to help you solve today’s Connections puzzle.

If you want to jump straight to today’s Connections solution, scroll past the next spoiler warning. However, if you’d rather see some category clues designed to help you solve it without giving the answers away first:

  • Yellow: “When you really care about something”
  • Green: “Whether by accident or on purpose”
  • Blue: “Visible background radiation”
  • Purple: “A female first name”

SPOILERS AHEAD (CATEGORIES)

Today’s Connections Solution (April 28, 2024)


If those clues aren’t enough, and you’re still struggling to beat Connections #322 without running out of mistakes, here is the solution…

Today’s Connections Categories Without the Answers

  • Yellow = “Passionate, as a Feeling”
  • Green = “Bang Into”
  • Blue = “Analog TV Interference”
  • Purple = “____ Mary”

With the categories revealed, you should try to guess which words belong where. There are 16 words in total, with four belonging to each category.

If you are still stuck despite knowing the names of each category, continue scrolling down for the 16 words organized into their respective categories.

SPOILERS AHEAD (SOLUTION)

Today’s Connections Categories Plus the Answers

  • Yellow: “Passionate, as a Feeling” = DEEP, EXTREME, FIERCE, INTENSE
  • Green: “Bang Into” = BUMP, BUTT, KNOCK, RAM
  • Blue: “Analog TV Interference” = FUZZ, NOISE, SNOW, STATIC
  • Purple: “____ Mary” = BLOODY, HAIL, PROUD, VIRGIN

What Made Today’s Connections Difficult

Today’s Connections puzzle was made difficult due to the following:

  1. The most obvious red herrings here are “snow” and “hail” as two different types of weather, plus “bloody” and “butt” as two different mild curse words. All of these words have different meanings depending on the context being used.
  2. Blue is probably the trickiest category, at least for anyone under a certain age who may have never seen an analog TV before. Yes, television static is a trope in old films and TV shows, but even then, knowing four different names for the phenomenon is a push.


Our Top Tips to Beat Connections Every Day

  1. Shuffle the words as many times as you need. Shuffling the words around means you’re more likely to spot the connections.
  2. Look for differences as well as similarities. The NYT is trying to trip you up, so look for what divides the words with similar meanings.
  3. Take your time, and don’t rush into a guess. Connections isn’t a timed challenge, so you have the luxury of planning everything out.
  4. Look for common themes over time. The more you play Connections, the more you’ll spot recurring themes cropping up regularly.
  5. Tune into the NYT editors’ way of thinking. It’s the puzzle setters you’re competing against, so you need to understand their game plan.

Now that you have completed today’s Connections puzzle (with a little help from your friends at MUO), you should check out some of the other free games from the New York Times.


Wordle is the best-known of them all, and challenges you to find a 5-letter word within six guesses. For every letter you find, you get told if it’s in the correct place, allowing you to whittle down the possible options. If you need help with Wordle, check out our tips and tricks to improve your Wordle score.

There’s also Strands, the newest addition to the New York Times’ burgeoning list of games. Just like Connections, it’s extremely challenging, but in a unique string-the-letters-together way. We recommend you check out our best tips for beating Strands to give yourself a leg up on the daily challenge.

Or, if you’re really only into Connections but want more tips than are offered above, check out our longer list of Connections tips and tricks.

Don’t Buy the Wrong OLED Monitor

Key Takeaways

  • Choose between QD-OLED and WOLED monitors depending on your use case.
  • QD-OLED monitors are better suited for low-light conditions, whereas WOLED monitors show their strengths in bright rooms.
  • Dell, MSI, and Gigabyte use QD-OLED panels exclusively, whereas Acer, Corsair, and Viewsonic use LG’s OLED panels. Asus offers both QD-OLED and WOLED monitors.


Not all OLED monitors are created equally. Some are better suited for darker rooms, whereas others work well in brighter rooms. So, be careful before you splurge on a new OLED monitor, whether you plan to use it for gaming, work, or media consumption.


OLED Panel Options: QD-OLED and WOLED

Several brands sell OLED monitors today, but only two companies manufacture all these OLED panels: LG Display and Samsung Display. LG Display makes WOLED panels, whereas Samsung Display makes QD-OLED panels.

PC peripheral makers source OLED panels from these two companies and sell them by making their own changes to the monitor’s design, software, etc. But what’s the difference between LG’s WOLED and Samsung’s QD-OLED panels?

Both panels offer all the standard benefits of OLED technology, but they’re manufactured differently, as they vary in panel composition and subpixel structure.


LG’s WOLED uses an OLED layer that emits white light and has a fourth white subpixel on top of red, green, and blue. On the other hand, QD-OLED’s OLED layer emits blue light, which passes through a Quantum Dot layer. This Quantum Dot layer modifies the light wavelength for the red and green subpixels.

As a result, you’ll notice some minor differences in picture quality and color reproduction between these two panels. But when it comes to monitors, there are more noteworthy differences to worry about, which we’ll discuss below.

LG’s WOLED Panels Have a Matte Coating

Hamlin Rozario/MakeUseOf

As of this writing, all OLED panels that use LG’s WOLED panels have a matte coating on the screen. This has been a controversial topic among consumers, as a matte screen coating isn’t ideal for OLED displays; it negatively impacts the picture quality and contrast ratio.


LG’s matte screen coating is a bit harsh, and it can often make the picture appear grainy. Samsung’s QD-OLED panels, on the other hand, typically use a glossy/semi-gloss coating, just like most OLED TVs on the market.

However, LG’s matte coating has its benefits. For instance, if you work in a bright room, like in a studio, LG’s matte coating does an excellent job of minimizing reflections. Monitors that use Samsung’s QD-OLED panels will reflect any light source in front of them. However, this shouldn’t be a problem if the light sources are behind the monitor.

So, it comes down to where you plan to use your OLED monitor. If you plan to use it in a light-controlled room, go for a QD-OLED monitor, as you wouldn’t have to worry about coating grain. Otherwise, a WOLED monitor may be better for you.

Samsung’s QD-OLED Panels Have a Magenta Tint

QD OLED and WOLED monitor side by side showing magenta tinting
Hamlin Rozario/MakeUseOf


Although I prefer Samsung’s glossy QD-OLED panels, they’re not perfect. Samsung’s QD-OLED panels have a magenta tint, which is most noticeable when ambient light sources are in front of the monitor. This is due to the lack of a polarizing layer in the panel structure, meaning any ambient light bounces off it.

Therefore, when you watch dark content on a QD-OLED monitor in a bright room, the blacks won’t appear as true blacks even if the individual pixels are off. The monitor’s bezels are far more noticeable, which isn’t the kind of experience you’d want with an OLED display. This isn’t an issue with LG’s WOLED panels, thanks to their anti-reflective matte coating.

However, if light sources are behind the monitor, you’ll struggle to notice the magenta tint. So, in a dark room, they perform just as well as WOLED monitors in terms of black levels.


QD-OLED Monitors Offer Slightly Better Text Clarity

Text clarity in Windows on an OLED monitor
Hamlin Rozario/MakeUseOf

Text clarity is an issue on both types of OLED monitors, especially if you use Windows. That’s because Windows uses a subpixel text rendering technique that suits traditional LCD displays with RGB stripe subpixel layouts.

Unfortunately, both QD-OLED and WOLED panels have different subpixel layouts. WOLED panels use an RGBW stripe layout, whereas QD-OLED displays use a triangular RGB subpixel structure. Since these subpixel structures deviate from the common RGB stripe layout, the text quality will be lower compared to a standard LCD monitor.

On a QD-OLED monitor, you’ll see color fringing on text, with green outlines at the top of the text and pink outlines at the bottom. This is more noticeable at 1440p resolution than 4K, especially when you get closer to the display. On WOLED monitors, you’ll see some shadowing on the left and right edges of text.


From my experience, I disliked the shadowing on my WOLED monitor more. Plus, the QD-OLED monitor handles smaller font sizes better. However, both Samsung and LG have tried to address text clarity issues with their newer generation of OLED panels.

I currently own an Alienware AW3423DW, which uses a first-generation QD-OLED panel, and an Alienware AW2725DF, which uses a third-generation QD-OLED panel. I can confidently say color fringing is less of an issue on the newer panel.

Which Brands Sell QD-OLED and WOLED Monitors?

You now know that Samsung manufactures QD-OLED panels and LG makes WOLED panels. But which brands use Samsung’s panels and which ones use LG’s? Let’s find out.

Brands That Use Samsung’s QD-OLED Panels

Here are the popular monitor brands that use Samsung’s QD-OLED panels, along with the latest models they offer as of April 2024:


Brands That Use LG’s WOLED Panels

Here are the top brands that have used LG’s WOLED panels to date, along with their most recent offerings:

As you can see, Asus is the only company, as of early 2024, that makes both WOLED and QD-OLED monitors. But this may change down the line. If you want to know whether a monitor uses a QD-OLED or WOLED panel, read the product description or spec sheet.

You won’t see the term “QD-OLED” anywhere in the product description of an OLED monitor that uses LG’s panel. LG Display also doesn’t use the term “WOLED” to market its panels.

Which OLED Monitor Is Right for You?

Are you still having a tough time deciding between QD-OLED and WOLED monitors? Let me make this simple for you.


If you use your computer in a dimly lit or dark room and there are no ambient light sources, like 3D light panels, in front of the monitor, buy a QD-OLED monitor without second thoughts. You won’t notice the magenta tint at all, and you’ll appreciate the glossy screen that maintains crystal-clear image quality.

However, if you prefer working or gaming with the lights on or have a window next to your PC, go for a WOLED monitor instead. Its matte coating will minimize reflections, and the screen will remain pitch black even in a bright room. Just make sure you don’t sit too close to the monitor so you don’t notice the coating grain.

Platform-Exclusive Games Might Be a Thing of The Past: Here’s Why That’s Good

Key Takeaways

  • Platform-exclusive games are on the decline, with Microsoft’s move to make some Xbox exclusives available on other platforms the opening salvo.
  • The gaming industry is slowly shifting towards platform agnosticism, focusing more on the games themselves rather than hardware exclusivity.
  • Opening formerly exclusive titles up to other platforms could bring in more revenue compared to limiting them to one console, benefiting both companies and consumers.


The end of platform-exclusive games is nigh, and we’re here for it. While some key IPs are likely to be kept on one console (and/or PC), many will be available to play on whatever platform you choose. And that has to be a good thing. Here’s why…


A Brief History of Platform Exclusivity

For decades, platform exclusives have played a big part in the story of video games. And they have had a hand in deciding which console won each generation.

Console exclusives started in the 1980s, with Atari securing exclusive home console rights to popular arcade games such as Space Invaders and Pac-Man. At this point, the idea was to persuade regular arcade-goers to buy a home console in order to play their favorite titles from the comfort of their sofa and without having to feed a machine with endless quarters. Ironically, you can now buy arcade machines designed for your home.

Giuseppe Cammino/Shutterstock


In the late 80s and early 90s, this platform exclusivity formed around two now-iconic characters: Sonic and Mario. Nintendo and Mario were well-established, but then Sega and Sonic entered the scene. And if you wanted to play the Sonic games, you needed to own a Sega system. And millions duly bought Sega’s consoles as a result.

Once we entered the PlayStation/Xbox era, platform exclusivity became an even bigger part of the story. Both Sony and Microsoft created original IP designed to shift units, as well as paying third-party developers and publishers large amounts of money to secure timed exclusives. And that battle of the exclusives (of all kinds) has persisted ever since.

How Platform Exclusives Are Coming to an End

Thankfully, things are starting to change. In February 2024, in a post on Xbox Wire, Microsoft announced that four Xbox exclusives would also be coming to PS5 and Switch, with more titles to follow. The games currently confirmed to be coming to other platforms are Hi-Fi Rush, Pentiment, Sea of Thieves, and Grounded.


The industry is clearly changing, and Microsoft’s gaming executives are adapting. On an episode of the official Xbox Podcast, Microsoft Gaming CEO Phil Spencer said, “I do have a fundamental belief that over the next five or ten years exclusive games, games that are exclusive to one piece of hardware, are going to be a smaller and smaller part of the game industry”.

Spencer also made the reason for this change clear, saying, “We’re focused on these four games and learning from the experience […] really want to respond to what customers want and what our players and creators are looking for”.


Furthermore, he clearly stated that the era when platform exclusivity was the key to shifting units is behind us, saying, “People think that one exclusive game kind of kicks off the sales of a platform, but the industry just doesn’t really work that way today”.

It isn’t just Microsoft and Xbox either. As a whole, the industry seems to be moving away from platform exclusives, entering an era of platform agnosticism. Essentially, the hardware you use to play games is becoming a secondary concern over the games themselves.

After focusing hard on securing and producing exclusives in the PS4 era, Sony’s lineup of games exclusive to the PS5 has so far been a little lacking. Sure, the COVID-19 pandemic hit game development hard, pushing release dates back by years, but the overall picture is still one of Sony putting less stock in exclusives.

The same is true for Nintendo, which has released games featuring some of its biggest characters (Mario, Pokemon) on smartphones. The company hasn’t yet released a Mario game on a rival console, but that doesn’t mean it never will.


Why Platform Exclusives Are Going Away

horizon forbidden west page on steam

So, why are platform exclusives coming to an end? The obvious answer is that they’re no longer the best option available to the companies responsible. The benefits of opening titles up to everyone, regardless of platform, massively outweigh the benefits of keeping titles exclusive to one console. As outlined above, Phil Spencer, someone who should know, said as much.

For Microsoft, the logic is clear to see. In the battle between PS5 and Xbox Series X, the PS5 is winning. The Switch has also outsold the Xbox Series X|S to date, with no hint of that changing. So, not only have Microsoft’s exclusives not shifted units, the company is losing out on potential revenue by not selling software to as many people as possible.


Under those circumstances, it makes more sense from a business point of view to launch games on as many platforms as possible and make money from those sales. Especially when games hardware is usually sold at a loss.

Mobile gaming is also playing a part, with more and more people looking to play games on their smartphones. As is the popularity of Steam and PC gaming. Again, those factors make it less attractive to lock down games to one specific platform and artificially limit the potential audience.

The biggest element driving this change is Xbox Game Pass and the other gaming subscription services that include cloud-based gaming. These essentially mean that you don’t need to own a games console anymore.

This is especially true for Microsoft, as Game Pass Ultimate includes Xbox Cloud Gaming. While currently in beta, this lets subscribers play Xbox games on a range of devices beyond Xbox consoles. This includes phones, tablets, PCs, smart TVs, and VR headsets.


Why I’m Glad Platform Exclusives Are No More

While gamers have all gotten used to platform exclusivity as a kind of default, that doesn’t mean all of us were happy about it. I have owned at least one console in each generation, but couldn’t afford to buy the other consoles released in that generation. And that meant missing out on certain games that were only available on specific platforms.

The PlayStation icons picked out in neon lights
mkfilm/Shutterstock

This led me personally to choose PlayStation over Xbox, as Sony’s exclusives always suited my tastes better. But had Microsoft’s original IP also been available to play on PlayStation, the company would have made money out of me buying Halo, Gears of War, Forza, and others.


The practice of making some games exclusive to one platform is anti-consumer, as it forces gamers to buy multiple consoles to play specific games. And while I can see why it has been standard practice for decades as manufacturers sought to make sure their platform was the essential one, it’s about time we opened gaming up to be more inclusive. And this could start by switching to platform agnosticism.

What Are the Environmental Considerations in Rigid Flex PCB Supplier?

Environmental Considerations in Rigid Flex PCB Supplier

Rigid flex PCBs combine the advantages of rigid and flexible circuit boards. They offer greater design flexibility while allowing a wider range of material options and enhanced electrical performance. These features make them ideal for a wide range of applications, from consumer electronics to aerospace and military-grade equipment. In addition, these boards can be fabricated with more advanced fabrication techniques that improve impedance control and thermal management. However, there are a number of key differences between rigid-flex and rigid PCBs that should be taken into account when choosing the right option for your project.

Rigid-flex PCBs require more complex and intricate construction processes than their flex counterparts, which can lead to increased manufacturing costs. These boards also have more layers and interconnects, requiring a more complex design with careful alignment of rigid and flexible sections. Rigid-flex boards may also require additional conductive materials for better conductivity, which can increase overall costs.

Regardless of the type of rigid-flex PCB you choose, it is important to work with an experienced and knowledgeable supplier who understands the specific requirements of this technology. This will help you avoid common design mistakes that can increase the time-to-market and cost of your board. A qualified supplier will be able to recommend the right materials and manufacturing process for your specific project, minimizing risk and ensuring maximum reliability.

Many different factors can impact the reliability of rigid flex pcb supplier, including exposure to extreme temperatures, humidity levels, and mechanical stress. By proactively accounting for these factors in the design phase, engineers can ensure that rigid-flex circuits are designed to withstand a variety of operating conditions.

What Are the Environmental Considerations in Rigid Flex PCB Supplier?

The PCB design process for rigid-flex circuits begins with the schematics and layout using CAD tools to determine the layer stack and placement of components, traces, and flexible areas. Once the layout is finalized, it is ready for tooling and panelization. During the tooling process, molds, templates, and fixtures are created to be used during production. During panelization, the layout is arranged onto a larger panel or array, maximizing material utilization and efficiency.

During the assembly process, copper foil and prepreg (pre-impregnated fiberglass or epoxy) are laminated together with high heat and pressure to form the rigid base. The flex section of the PCB is then bonded to this base layer using an adhesive system. Rigid flex manufacturers utilize a variety of adhesive systems, including heat-curable acrylics, hot-melt thermoplastics, and liquid photo-imaged polymer.

Depending on the design, rigid-flex PCBs can be finished with different types of surface finishes to protect the copper and improve solderability. For example, surface finishes can be etched or plated to provide a smooth, solderable surface for the copper. Stiffeners are also often used to relieve strain, balance weight, and improve abrasion resistance. Depending on the design, the stiffener can be made from materials like aluminum or stainless steel. Additionally, stiffeners can be capped with coverlay or insulated with epoxy to prevent damage to the copper during handling and abrasion.

Which Option Rings Better for Your Smart Home?

Key Takeaways

  • Wired video doorbells offer always-on power for constant monitoring.
  • Wireless video doorbells provide flexibility in placement but require battery recharging.
  • Wired smart doorbells are good when you have existing wiring and want advanced features; but wireless doorbells provide an easy setup and flexibility.


A video doorbell is a great addition to any smart home that can keep a constant eye on your front door. We’ll help you better decide between the two major types of video doorbells—a wired or wireless version.


How Does a Wired Video Doorbell Work?

Brent Dirks / MakeUseOf

Many modern homes have a traditional doorbell which draws power from low-voltage wires installed behind it. A wired video doorbell uses those wires to provide constant power to the doorbell and usually feeds a chime box inside your home. The chime box is what actually makes noise inside the home when the bell is pressed.

Once installed, the wired video doorbell, just like the traditional model, will always have power. That means that when someone approaches or simply pushes the doorbell, you’ll be notified via a companion app or doorbell.


The large majority of wired video doorbells will work automatically with a chime box, so you will always be able to hear your familiar ding-dong when someone rings the bell. Some wired video doorbells work with the existing chime box directly, while others might require installing a small adapter placed inside where the chime wiring is located.

How Does a Wireless Video Doorbell Work?

A wireless video doorbell brings true freedom to your smart home setup. Instead of depending on the existing doorbell wiring, you can place a wireless version pretty much anywhere around your front door.

That’s perfect in many situations where you don’t want to worry about wiring or can’t—like if you’re a renter or in an apartment. Make sure to take a look at other smart home devices that are perfect for rented homes.


The wireless doorbell models take power from a rechargeable battery. In most situations, you can remove the battery to recharge it. Depending on the model, and how much the video doorbell is used, the battery usually lasts a few months.

Advantages and Disadvantages of a Wired Video Doorbell

spotcam video doorbell closeup
Christian Cawley/MakeUseOf

The largest advantage of a wired video doorbell is the always-on power supply. With that power, you will always know the device is watching over your front door. The only exception is if the power is ever out at your location.

And since the wired doorbell always has power, it will continue to operate and chime when someone presses the doorbell, even if you have some type of internet connection issue.

Some wired doorbells available on the market can provide 24/7 recording because it always has power. That’s not possible with any wireless model as the battery would be drained in just a few days.


Other wired doorbells, like the Ecobee Smart Doorbell, offer many unique smart home integrations not possible with battery power. If you also have an Ecobee Premium Smart Thermostat, when someone presses the doorbell, a live video appears on the thermostat screen. You can also talk with the person at your front door.

There are some disadvantages to wired models as well. The largest is likely the installation process. For an idea on what’s required, take a look at our primer on how to install a Ring Video Doorbell the right way.

As you might have guessed, the process can take some time, especially depending on your DIY and smart home knowledge. You’ll need to turn off power to the doorbell and remove the old model to install a new wired model. Equipment, like a drill and screwdriver, is also required.


The good news is the majority of video doorbell manufacturers like Ring, Arlo, Eufy, and others, provide comprehensive installation guides online or through the companion app needed to see live video. But if the idea of installing electrical wires concerns you, or if you have an older home with known wiring problems, it’s probably best to avoid wired models.

Most electricians can install a wired doorbell, though. But that means you’ll have to pay substantially more. Another downside with wired models is that they are not easy to uninstall, something to consider if you’re planning on moving anytime soon or always want to keep up with the latest and greatest model.

Advantages and Disadvantages of a Wireless Video Doorbell

With a wireless doorbell, the biggest advantage and disadvantage is the battery. Thanks to the battery, you can install the doorbell almost anywhere you’d like around your front door. That makes it much more useful if you don’t want to try to deal with the existing doorbell and wiring, or even if there isn’t a doorbell.


Many traditional doorbells aren’t located in an ideal spot to record video. While some wired models can use assistance from devices like a wedge to better angle the camera, sometimes the wiring just won’t cut it. That makes a wireless model perfect.

Installing a wireless model is much easier than its wired counterpart. In most instances, you won’t even need to drill. Just install the compatible mount wherever you’d like and then attach the doorbell.

But you’ll also have to recharge the battery. While most wireless models will always let you know the battery status at a glance via the companion app, you’ll still need to remember to recharge it.

This means your doorbell might be out of commission while the battery is charging. You can usually purchase an additional battery, but that does add some substantial cost, usually around $40.

Battery life can vary widely, especially due to usage and even where you are located. Extreme cold or heat can play havoc with a battery’s charge. A poor Wi-Fi signal can also drain the battery faster than normal.


Another issue with wireless video doorbells is that they don’t work with existing home chimes. You’ll likely need to purchase an add-on chime that plugs into an electrical outlet. Those are also around $40.

How to Decide Which Kind of Video Doorbell Is Right for You

While both wired and wireless video doorbells are perfect for improving your home security, there are some substantial differences in installation and everyday use.

If you have a newer home and are fine with some light DIY work required for installation, a wired video doorbell should be for you. The full-time power supply opens up many features not available with a wireless version and will likely allow you to use the existing chime box.


A wireless video doorbell is for you if you don’t have existing doorbell wiring, don’t feel comfortable with wired doorbell installation, or want to have a better look at the front door. While you’ll need to recharge the battery and likely purchase a chime box, that installation flexibility is often worth the hassle.

Here’s Why You Should Buy One

Key Takeaways

  • OLED displays offer superior HDR experience and picture quality with true black levels and infinite contrast ratios; no LCD monitor even comes close.
  • You can forget about ghosting in video games after upgrading to an OLED monitor, thanks to their near-instant response times.
  • Most OLED monitors come with a multi-year warranty that covers screen burn-in. You can find several OLED monitors today for under $1,000.


Are you on the fence about buying an OLED monitor? Since 2022, I’ve been using an OLED monitor as the main display for my PC, and I can confidently say I can’t go back to an LCD monitor anymore. Here’s why you should go for it.


1. Unmatched Picture Quality

Hamlin Rozario/MakeUseOf

The first thing you’ll immediately notice after upgrading to an OLED monitor, especially if you’re coming from a standard LCD monitor, is the picture quality.

OLED displays can shut off each pixel individually, and this makes a huge difference when it comes to black levels. The blacks you see on OLED displays during a dark scene are true blacks because the pixels shut off, and as a result, you get an infinite contrast ratio.


LCD displays, on the other hand, have a backlight that remains on even while showing pitch-black content. Take a look at the image above, for example. You can immediately tell the monitor on the left uses an LCD panel due to its backlighting.

And if that’s not enough, I want to point out that the monitor on the left has a 4K resolution, whereas the OLED monitor on the right is 1440p. I still prefer watching videos on the OLED monitor despite the lower resolution due to its superior picture quality, no matter what angle I look at it from.

Even if I look at the monitor from the side, the colors never appear washed out, and the picture quality remains consistent. If you prefer a display with a wide viewing angle, you should consider buying an OLED TV or monitor, as these displays are unmatched in that aspect.

2. True HDR Experience

OLED monitor on a desk displaying HDR content
Hamlin Rozario/MakeUseOf


Several LCD monitors in the market today advertise HDR support, but how can they truly support HDR content when most of them offer peak brightness levels around 600 nits?

OLED monitors can go up to 1,000 nits when viewing HDR content, even though their peak SDR brightness is far lower than that of LCD monitors. That’s because the pixels can shut off individually, which gives these displays a huge advantage in a 10 percent window (i.e., 10 percent of the display shows a white screen while the rest is black).

It’s worth noting that OLED monitors are indeed no match for mini-LED displays or VA monitors in terms of HDR brightness levels. The latter can exceed 1,000 nits in some cases. However, the unmatched black levels and infinite contrast ratio of OLED monitors give them the edge; they offer better visual immersion, especially in a dark room.

3. Instant Response Time for Gaming

Valorant game running on an OLED monitor mounted on a desk with keyboard and mouse below
Hamlin Rozario/MakeUseOf


If you’re a gamer, a high refresh rate OLED monitor will give you a better experience than most LCD gaming monitors. That’s because OLED displays have a near-instant pixel response time of 0.03ms. In comparison, the fastest TN LCD monitors advertise a 0.5ms response time. But what does this mean in real-world use?

In fast-motion scenes, OLED monitors will appear clearer, as they leave no trails behind moving objects. This means you don’t experience “monitor ghosting”— an issue that plagues almost all LCD monitors, even at higher refresh rates.

Simply put, the lower the monitor’s response time, the less ghosting you’ll experience. However, most gaming monitors have a response time between 1ms and 3ms, which is no match compared to OLED displays.
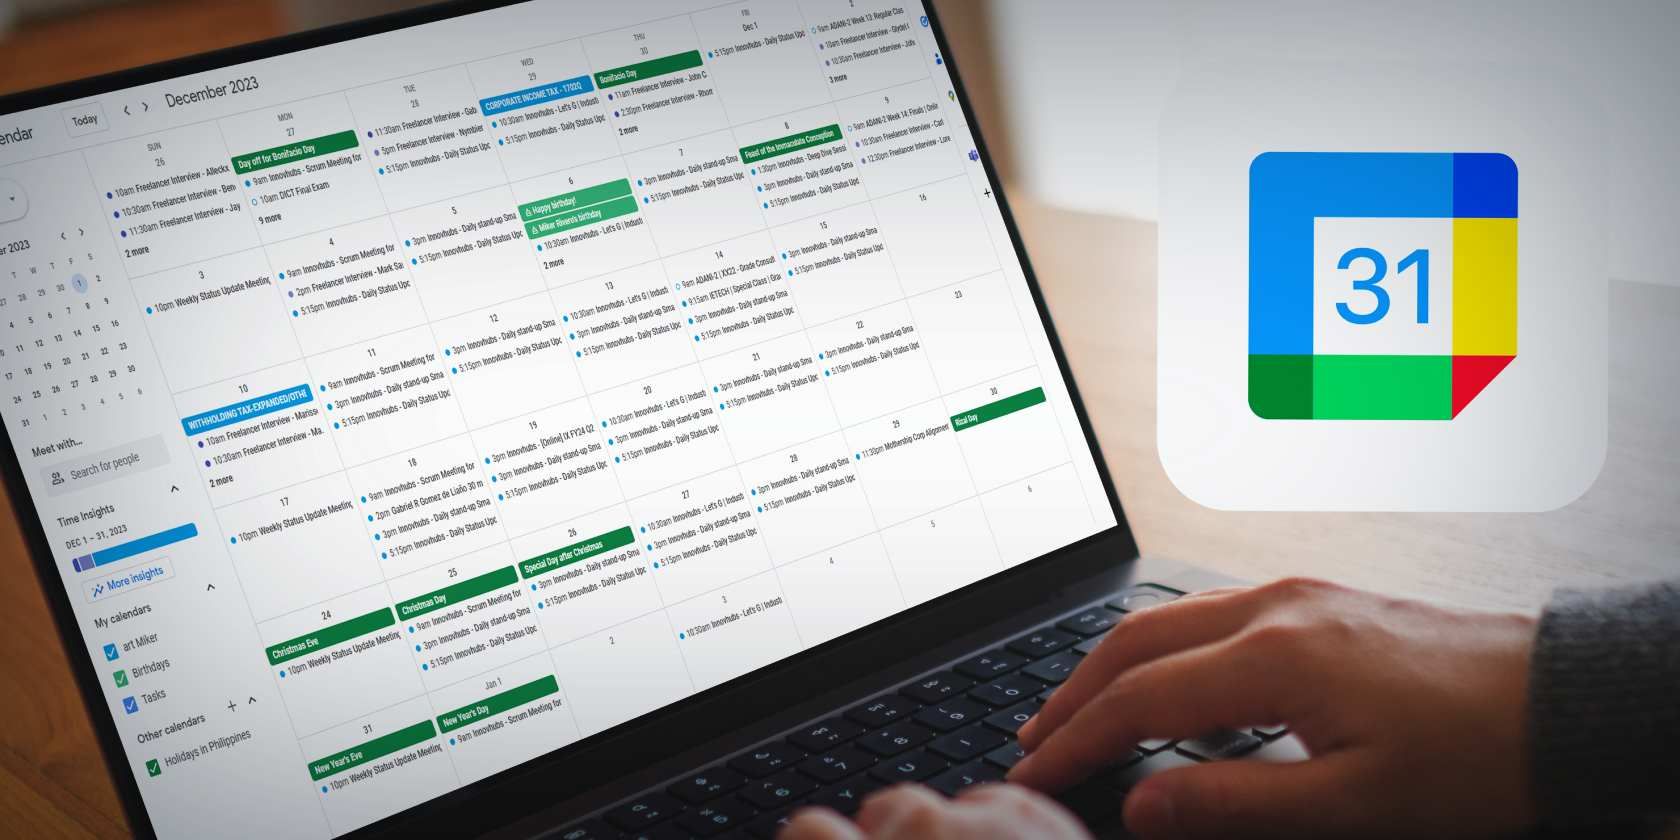
Many gaming monitors have a pixel overdrive feature to lower the response time and minimize ghosting. However, this causes another issue known as inverse ghosting, where the pixel changes colors quickly and overshoots what the target color is supposed to be, creating a ghost image on the screen. You won’t experience any of these issues on an OLED display.


4. Most OLED Monitors Include Burn-In Warranty

Alienware AW3225QF OLED monitor warranty details

It’s no secret that screen burn-in is one of the biggest cons of OLED displays. This is mostly why people hesitate to buy an OLED TV or monitor. While it’s true that screen burn-in is unavoidable in the long term, I haven’t seen image retention on my OLED monitor despite using it daily since 2022.

Sure, if you display a static screen on an OLED monitor for hours daily over a long period, you will eventually see image retention. Fortunately, most OLED monitors in the market today offer OLED panel care features like pixel shift, pixel refresh, and panel refresh. As long as you utilize them, the chances of screen burn-in are minimal.


If you’re still concerned, we’re happy to let you know that most OLED monitors are backed by a two- or three-year warranty, which includes coverage for screen burn-in. For example, Dell and MSI back their OLED monitors with a three-year warranty, whereas Asus offers a two-year burn-in warranty. But be sure to check the warranty details on the monitor’s specs page.

5. OLED Monitors Aren’t as Expensive as You Think

Amazon listing page for Asus ROG OLED monitor

Considering all their benefits, you’d be quick to assume that OLED monitors cost well over a grand, but that’s not always the case. Sure, they used to be expensive in 2022 when the technology was new in monitors, but in 2024, you can find several OLED monitors for under $1,000.

MSI’s flagship 4K/240Hz QD-OLED monitor, the MSI MPG 321URX, has an MSRP of $950. Likewise, you can find older 2023 models like the Asus ROG Swift PG27AQDM and LG 27GS95QE for under $900 on Amazon.


As you can see, you don’t have to burn a hole in your wallet while shopping for an OLED monitor. If anything, they cost a couple hundred dollars more than high-end LCD gaming monitors. So, what’s stopping you from upgrading to an OLED monitor today?

How to Share Internet From Your Android Phone With a PC via Tethering

Key Takeaways

  • You can share your Android phone’s internet connection with your PC wirelessly or using a USB cable.
  • Wi-Fi tethering allows you to share your Android phone’s internet connection with multiple devices simultaneously.
  • USB tethering is your best option if you want the fastest internet speeds. It also ensures a more reliable connection.


Need an internet connection for your PC or laptop but don’t have access to public Wi-Fi? The solution is simple: use your phone’s mobile data on your PC through tethering. We’ll show you how to do it on your Android phone.

What Is Tethering?

Tethering is the term for connecting your mobile device to your computer so your PC can go online using your phone’s mobile data connection. It is usually free, aside from using your data allowance.

On Android, you have three tethering options to share the internet connection with your laptop, tablet, or desktop PC:

  • Use your phone as a wireless hotspot
  • Connect your phone to your computer via USB
  • Connect via Bluetooth

Wireless tethering may be convenient, but it quickly depletes your phone’s battery level. It’s also not as fast and reliable as USB tethering.


1. Use Your Phone’s Hotspot Feature to Connect a PC to the Internet

The most convenient way to share your Android phone’s internet is by turning it into a Wi-Fi hotspot. This feature allows your phone to create a private network, enabling you to connect your devices securely with a password. Here’s how to set it up.

  1. Open the Settings app and head to Connections > Mobile Hotspot and Tethering.
  2. Tap Mobile Hotspot and enable the toggle at the top.
  3. Tap the Network name and Password to edit it.
  4. You can also configure advanced settings like the security type, Wi-Fi band (2.4GHz or 5GHz), hotspot visibility, and more.

Some menus may look different depending on the device and Android version you’re using, but the general instructions remain the same for all models.


Once you’ve configured the wireless hotspot on your Android phone, you can easily enable or disable the feature from the Quick Settings panel. With everything set up on Android, here’s how to connect your PC to the hotspot:

  1. Press Win + I to open Settings.
  2. Go to Network & internet > Wi-Fi.
  3. Click Show available networks and browse to find the network your phone created.
  4. Select the network and click Connect.
  5. Input the password as displayed on your phone to establish the connection.

In my tests, I achieved download speeds of 36.38Mbps and upload speeds of 4.95Mbps over a 5G connection. Additionally, you can share your Android phone’s internet connection with multiple devices simultaneously, including PCs (Windows, Mac, or Linux), Chromebooks, iPads, game consoles, and even other phones.


2. Share Your Phone’s Internet Connection With a PC via USB

Mobile phones have long had a modem feature, allowing you to hook up the device to your computer using USB tethering. This lets you share the mobile internet connection over a wired connection with your laptop or other devices. Here’s how to use it.

  1. Enable mobile data on your Android phone and connect it to your PC with the USB cable.
  2. Access the notification panel and tap the Android System notification that appears.
  3. Select the USB tethering option.

If you don’t see a notification, you can manually enable tethering over USB by following these steps:

  1. Open the Settings app on your phone.
  2. Head to Connections > Mobile Hotspot and Tethering.
  3. Toggle on USB tethering.


Thanks to a wired connection, USB tethering typically provides better speeds. In my tests, I recorded download speeds of 95.39Mbps and upload speeds of 4.66Mbps.

3. Use Bluetooth to Share Mobile Internet With a PC

Another way to share your phone’s internet with your PC involves Bluetooth. This short-range wireless technology provides sufficient bandwidth to transfer data between your phone and a paired device. You’ll need to pair your phone with your computer to do this:

  1. Enable Bluetooth on your phone from the Quick Settings panel.
  2. Now, on your Windows computer, press Win + I to open the Settings app.
  3. Head to Bluetooth & devices and toggle on Bluetooth.
  4. Click Add device right below and choose Bluetooth from the list of options.
  5. Select your phone when it appears, and complete the pairing process. If you encounter problems, check our guides on setting up Bluetooth in Windows 10 and connecting to Bluetooth in Windows 11.


Pair Bluetooth Device With Windows 11 PC

Once paired, on your phone, go to Settings > Connections > Mobile Hotspot and Tethering and enable Bluetooth tethering. Now, you can share your phone’s internet connection using these steps:

  1. Press Win + I to open the Settings app.
  2. Head to Bluetooth & devices > Devices.
  3. Click the three-dot icon next to your phone and select Join Personal Area Network (PAN).
  4. Choose Access point and click Connect.

Join a Personal Area Network From Windows 11 PC


Bluetooth tethering tends to provide the slowest internet speeds compared to other tethering methods, as Bluetooth is mainly intended for short-range communications and data transfers. In our tests, download speeds dropped to just 0.24Mbps, and upload speeds decreased to 0.12Mbps.

USB tethering consumes the least amount of battery power and offers the fastest speeds. Bluetooth tethering is also battery-friendly but provides really slow internet speeds. Overall, Wi-Fi tethering remains the most preferred option due to its convenience and ability to connect multiple devices.

Your Guide to Private Browsing in Safari

Key Takeaways

  • Private Browsing in Safari hides browsing history, autofill details, downloads, and locks tabs after inactivity.
  • Safari on Mac groups private and non-private tabs, while on iPhone it shows all tabs regardless of mode.
  • To use Private Browsing in Safari, identify it by a dark address bar, “Private” indicator, or “Private” next to the site URL.


Most browsers offer a private browsing mode that aims to keep the websites you view off the record. But what exactly does it do in Safari and how do you get the best out of it?


What Private Browsing Does in Safari

First and foremost, Private Browsing keeps the website pages you visit out of your History. The aim is to prevent someone else from seeing which pages you have visited if they have access to your phone or computer.

In Safari, Private Browsing does a lot more than just hide URLs. It also:

  • Prevents recent searches from showing up in your history.
  • Stops remembering details you enter in forms for autofill.
  • Keeps downloaded items from appearing in your Downloads list.
  • Locks private tabs after a period of inactivity.
  • Adds tracking and fingerprinting protection.

However, it’s important to note that Private Browsing does not stop you from being tracked altogether. Websites you visit will still be able to use various methods to track you, and will still have access to all data that you send them.


On macOS, iOS, and iPadOS, Safari groups private tabs together, and separates them from non-private tabs. On Mac, each Safari window is either private or non-private, and can have as many tabs as you want.

On iPhone, you can switch between private and non-private modes, each of which shows all tabs belonging to that mode.

You can spot when you’re viewing a private tab with these signs:

  • The address bar has a dark background. This may be less noticeable if you’re using Dark Mode.
  • On Mac, you’ll see a prominent Private indicator in the title bar.
  • On iPhone, you’ll see Private alongside the site URL at the bottom of your screen.

How to Use Safari Private Browsing on iPhone and iPad

The steps to enter Private Browsing mode are nearly identical on an iPhone and iPad. The only difference is that the tab icon is at the bottom of the screen on iOS and the top on iPadOS.


  1. Long-press the tab icon (two overlapping pages) on the bottom-right (iPhone) or top-right (iPad) of your screen.
  2. Tap the New Private Tab menu item.
  3. If locked, enter your passcode to unlock Private Browsing.

How to Use Safari Private Browsing on a Mac

You can enter Private Browsing mode on macOS using either a menu item or a keyboard shortcut:

  1. Open the File menu and choose New Private Window.
  2. Alternatively, use the keyboard shortcut Shift + Cmd + n.
  3. Use the browser as you normally would. Any tabs you open from this window will open in the same window, in private mode.

A screenshot of Safari in macOS showing the New Private Window menu item


How to Disable Safari Private Browsing on iPhone and iPad

You may want to prevent users of an iPhone or iPad from using Private Browsing mode at all. To do so:

  1. Open the Settings app.
  2. Tap on Screen Time.
  3. Under RESTRICTIONS, click on Content & Privacy Restrictions.
  4. If not already enabled, press the toggle next to Content & Privacy Restrictions to enable.
  5. Tap Content Restrictions.
  6. Change the Web Content setting to Limit Adult Websites.

The option to enter private mode will now be gone.

How to Disable Safari Private Browsing on a Mac

On macOS, the wording of certain options differs slightly, but the overall process is near-identical to iOS:

  1. Open System Settings via the Apple menu.
  2. Click on Screen Time in the left panel.
  3. Under the Restrictions section, click on Content & Privacy.
  4. Click Content Restrictions.
  5. Change the Access to Web Content setting to Limit Adult Websites.


Web Content access settings on macOS

Private Browsing will now be unavailable in Safari, although any existing private windows will stay open.

Of course, anyone can re-enable Private Browsing using the same process, in reverse. However, you can use Screen Time’s Lock Screen Time Settings option to set a passcode and enforce the setting permanently.

Can flex circuit boards be used in automotive applications?

flex circuit boards

Today’s cars are packed with sophisticated electronics controlling virtually every function. Flex circuits have become an essential part of this technology, providing a flexible platform for routing signals across hinges, slides, and moving joints. A flex PCB can handle the vibration, movement, and temperature extremes that are common to automotive applications. Moreover, the design flexibility offered by a flex circuit eliminates the need for bulky and expensive wiring harnesses that limit the placement of electronic components.

A flex circuit is an ultra-thin printed circuit board composed of a flexible polyimide substrate that supports multiple layers and conductors. The conductive copper traces are etched on the substrate in a series of layers, followed by a dielectric layer to separate the copper from the underlying material and a coverlay that protects the traces from moisture, dirt, and damage.

A typical flex circuit boards has a thickness of between 12 and 120 microns, making it thinner than a rigid PCB. This allows a flex circuit to be more flexible and can accommodate multiple bends without damaging the copper traces. In addition, a flex circuit can be formed into complex shapes that cannot be achieved with flat cable.

Can flex circuit boards be used in automotive applications?

The most popular flex circuit materials are polyester and polyimide. Polyimide is a strong, heat-resistant film that is ideal for high-temperature and high-density applications. Unlike standard rigid PCBs, which use epoxy resin to form the laminated layers, a flex circuit uses polyimide film as the dielectric. This makes it able to tolerate harsh environments and extreme temperatures, while still maintaining its strength and reliability.

Moreover, the thin substrate enables a flex circuit to be molded into different shapes for unique applications, allowing for space savings and reduced weight. Additionally, the material can accommodate a variety of connectors, including zero-insertion force (ZIF) and flexible flat cable (FFC) connectors, which allow for the connection of surface mount components to the conductive traces. For larger components, the flex circuit can be used in conjunction with a rigid section to create a hybrid rigid-flex board.

The flex PCB industry is constantly developing to meet the needs of a rapidly changing world. To keep up with this rapid growth, the flex circuit industry has developed several new technologies to support advanced electronics for a range of applications. These technologies include a variety of finishes and materials that are designed to reduce costs, improve flexibility, and extend the lifespan of the flexible circuit. These technologies are helping the flex circuit industry to achieve significant growth, especially in new energy vehicles and aerospace applications.

These AI Tools Show Generative AI Is More Than Just ChatGPT Text Answers

By now, you’re probably well-acquainted with AI chatbots, but AI’s capabilities extend far beyond churning out text answers. If you’re itching to explore the world of AI, these tools are a must-try.


Making beats might feel like sorcery if you’re not musically inclined. But thanks to tools like Beatoven.ai, it’s not just an art reserved for those with musical talents anymore.

If you’ve got an idea for a song in your head, all you need to do is describe it in a text prompt as best you can, and the AI will whip up a song from scratch. You can also use the Generate a Prompt feature if you’re coming up blank.

There are some standard audio editing tools you can use to adjust the results, such as tempo and fades, but most of the customizations are nothing like in a DAW—it’s more akin to fine-tuning your AI art.


Beatoven.ai's Editing Window

I ended up removing the melody from my hip-hop track via the Instrument section and added a “calm” mood from the Create Emotion option. I also played around with the Recompose option to fine-tune my track further.

I couldn’t download my song because I didn’t pay for the subscription, but it sounds impressive.

Customizing Instruments on Beatoven.ai

While Beatoven.ai is primarily for content creators in need of unique background music, it’s a super fun and easy tool to play around with if traditional audio editors intimidate you.


2 Voicemod: Text-to-Sound

Text-to-sound is just too much fun, so I had to include this one as well. Voicemod is completely different from Beatoven, however—its primary function is acting as a real-life voice changer and soundboard for streamers.

If you just want to play around with the AI-powered sound effects, there’s no need to download the app. Head to the Text To Song or Text To Speech options on the Voicemod website.

Choosing an AI Voice on Voicemod

For Text To Song, you’ll have to select a song and a voice, and then type some lyrics. My song probably won’t get nominated for a Grammy, but it’s supposed to sound silly—Voicemod is often used for creating meme audios after all.


Text To Voice works the same, except there’s no music. Select your voice, type some text, add an effect if you’d like, and hit Generate. You can download the audio for free.

3 Kaiber: AI Animation

Kaiber takes AI art to the next level by animating still images. Gone are the days when you need drawing and software skills to create a captivating animation, all you need to know is how to write a good prompt.

Go to Create Video and select Motion. You can upload a reference image or just start writing a prompt. If you’re coming up empty, select some of the prompt ideas and styles on offer. Toggle your video settings, hit Create Video, and await a masterpiece.

Creating and Customizing Animation on Kaiber


My reference image was created using Shutterstock.AI, and I also let the Kaiber AI choose my animation style. So my result had pretty much no human input, and it still looks awesome.

You get 100 free credits when signing up, so use them wisely because they don’t replenish. Once they run out, you’ll have to choose a subscription plan. You can download your animations for free during your free trial, but they’ll have the Kaiber watermark.

4 Toolsaday: AI Story Generator

AI tools can be very handy for those struggling with writer’s block—but something like ChatGPT probably won’t cut it. Enter Toolsaday, an AI story generator tool that can help you figure out every element of your story.

There are 12 elements to choose from—I went with Short Story Generator. On the left panel, you can instruct the AI on what you’re looking for, but most of the text boxes are optional. I left all the fields completely blank to see if Toolsaday was up for the task.


Short Story Results on Toolsaday AI Story Generator

It did not disappoint—I might actually continue developing this short story further. Let’s see if the Story Plot option can give me a captivating plot based on one simple idea.

Plot Generator Results on Toolsaday AI Story Generator

Not bad at all. If you’re getting stuck with the details of your story, or just want to see if AI can come up with something worth writing, give Toolsaday a go.

If you’re not a professional designer, Canva is probably your go-to design tool. But there are a bunch of other options worth exploring, especially if they have AI features integrated.


Stockimg.AI lets you create pretty much any type of design and illustration you can think of with a text prompt. You might be thinking “Why not just use an AI image generator?” Because Stockimg.AI tailors every generation to whatever it is that you need to create and comes with the relevant customization options.

If you want to create an AI avatar, there’s a selection of avatar models to choose from. Illustration? You can choose from six different popular illustration styles. And AI wallpapers give you the option of selecting the perfect dimensions.

Customizing AI Design on Stockimg.AI Editor Page

Keep in mind that the credits you get when signing up don’t replenish. If you design on the regular, a subscription will be worth it.


One of the coolest things that generative AI is capable of is creating videos just from text prompts, so I had to include a text-to-video tool, and Invideo is one of the best you’ll find.

I entered a prompt about mindfulness meditation, and it created a three-minute video complete with stock footage, an informed script on my chosen topic, and a voiceover for the script. I have no complaints, the video is in good enough condition to post straight to social media.

AI Video on Mindful Meditation Created With Invideo.AI

The subscription might be worth it if you’re a professional content creator—it’s actually perfect for bloggers who need to convert their blog posts to video format for socials, and it will also remove the watermarks. But it’s not worth the money if you’re not going to use it often, just an awesome tool to play around with in that case.


These AI tools are flipping the script on what we thought possible, showing that there’s more to AI than just ChatGPT answers. Take them for a spin and see what fresh ideas you can generate!

Are ceramic PCB boards suitable for high-frequency applications?

Are ceramic PCB boards suitable

When designing circuit boards, it is important to keep the frequency range in mind as a higher frequency can cause signal loss. The design of the PCB must also ensure that high-frequency traces are isolated from each other to minimize crosstalk and maintain signal integrity. In addition, the substrate material plays a critical role in this process as it must be able to tolerate varying temperature variations, moisture, and chemicals. Conventional FR-4 substrates often exhibit limitations when used in high-frequency applications and may be replaced by specialized materials such as Rogers or Teflon (PTFE) that have lower loss tangents and stable dielectric constants across a wide frequency spectrum.

In addition to improving signal integrity, high-frequency PCBs offer other significant benefits such as enhanced thermal management and superior durability in harsh operating environments. These properties make them ideal for demanding electronic applications such as telecommunications and 5G infrastructure. In addition, ceramic multilayer PCBs can deliver increased circuit density and superior miniaturization.

ceramic pcb board are made of alumina (Al2O3) or aluminium nitride and feature low CTE, excellent dielectric constant, and lowered loss tangent. They can be manufactured using a variety of techniques, including sputtering and chemical vapor deposition, to create insulative and conductive layers on the surface. Conductive traces can be added using either thick or thin film paste and are baked at high temperatures to create a durable and reliable circuit board.

Are ceramic PCB boards suitable for high-frequency applications?

The high thermal conductivity offered by ceramic multilayer PCBs prevents hot spots from forming on surfaces or inner parts, which can damage the circuit board. The material can also dissipate heat quickly to prevent excessive temperature rise and overheating, even when a high power load is applied. This thermal stability, combined with ceramic multilayer PCBs’ resistance to moisture and corrosive chemicals, offers exceptional reliability factors that can withstand prolonged use.

High-frequency performance is crucial for today’s telecommunications and 5G infrastructure systems, which require rapid and reliable data transfer between devices. Ceramic multilayer PCBs can help meet these demands by delivering high-speed connectivity and improved performance in critical applications such as aerospace, automotive, and medical equipment.

Ceramic PCBs can be fabricated using a number of processes, which vary in their physical and electrical properties and cost. The most economical option is LTCC, which involves printing a thick layer of copper onto a ceramic substrate using standard PCB technology. This technique allows the manufacturer to achieve accurate alignment and precise via hole dimensions. In addition, it allows the board to be etched using conventional methods without damage or degradation to the ceramic.

Besides reducing manufacturing costs, this type of PCB also requires fewer layers and uses less copper compared to traditional FR-4 PCBs. This helps lower the overall weight and improves its flexibility. Thinner traces also facilitate greater circuit density and enable smaller, thinner, and more compact device packaging. This makes ceramic multilayer PCBs an excellent choice for portable electronic devices and automotive applications.

How I Curbed My YouTube Addiction With These Simple Steps

Key Takeaways

  • If you’re trying to overcome YouTube addiction, analyze YouTube usage to identify your habits.
  • Limit YouTube app time on the smartphone, turn off notifications, and set reminders for breaks and bedtime.
  • Block the YouTube website on your computer, bookmark the Subscriptions page, and remove distractions.


From watching videos on Komodo dragons to cool life hacks, I found myself falling down the YouTube rabbit hole more often than before. It’s time-consuming, especially when you have other important tasks to take care of.

If you’re heading down the same path, here are the few simple steps I followed to overcome my YouTube addiction.


Analyzing YouTube Time and Habits

Understanding and analyzing your YouTube habits can help you decide which further steps are necessary to reduce your YouTube usage.

For instance, if you watch YouTube on your phone, there’s no need to block it on your computer. Likewise, setting a bedtime reminder won’t make any difference if it doesn’t affect your sleep hours.

So, as a first step, note the following:

  • Time spent each day on YouTube
  • The device you watch on (phone, TV, or desktop)
  • Particular days or hours when you spend more time on YouTube


To analyze your usage, open YouTube on your mobile phone, go to the You tab, scroll down to Time Watched, and select it. Here, you can find your YouTube usage stats for the last seven days. For more detailed stats or earlier data, you can use features like Digital Wellbeing or Screen Time.

However, note that YouTube Time watched includes videos on all devices using your profile. But if you use screen time tracking apps, you’ll have to set them separately for each device.

Limiting YouTube App Time on Mobile Phone

For me, the most effective measure was to limit the time I spent on the YouTube app through screen time monitoring and tracking. Android devices have the Digital Wellbeing and Parental Control app for this, while iPhone users can use Screen Time.

On Android devices, head to Settings > Digital Wellbeing & parental controls > Dashboard. Find YouTube from the list of apps and set a daily timer for it.


If you’re an iPhone user, you can use Screen Time to cut your phone usage and set a time limit for YouTube.

Setting YouTube Break and Bedtime Reminders

YouTube has a couple of built-in features to help you reduce your watching time. First, you can set a reminder for a break once you’ve spent a certain amount of time on YouTube. To set this limit, go to You tab > Time Watched > Tools to manage your YouTube time.

From here, you can create a bedtime reminder by setting a custom schedule or using your phone’s bedtime settings. Likewise, you can set a break reminder, so YouTube reminds you to take a break after a set time.

These reminders work only on the mobile app.

Turning Off Notifications


YouTube notifications can take a toll on your productivity. If you can’t resist watching videos from your favorite channels after receiving one, you should turn off or manage YouTube notifications.

To do so, go to You tab > Settings (top-right corner) > Notifications. Here, you can turn off different types of notifications individually. On a computer, you can access Settings from the sidebar.

If you don’t want to turn off the notifications, another way is to create a scheduled digest. This way, instead of disturbing you during work hours, all your notifications will be sent as a digest at a set time. To create a scheduled digest, go to Settings > Notifications, toggle on Scheduled digest, and set the delivery time. Win-win!

Disabling Autoplay

Another feature that keeps you hooked to YouTube is autoplay. When enabled, YouTube automatically starts playing the next video, and you don’t even realize how many videos you’ve watched.


To disable autoplay on YouTube, toggle off the autoplay button after playing any video. On a mobile phone, you can also go to You tab > Settings > Autoplay and turn it off.

Blocking YouTube Website on Computer

Site Blocker Chrome Extension

If you can’t help but watch YouTube on the computer while working, blocking the YouTube website on your device is the best solution.

You can install a site-blocking extension, such as Block Site or Site Blocker, and add youtube.com to the blocklist if you use a particular browser for YouTube. The other way to block sites is by editing the Hosts file.

Bookmarking the Subscriptions Page

YouTube’s algorithm keeps you glued to your screen. Scrolling through the home feed makes it easy to fall into the trap.

One way to avoid this trap is to bookmark the YouTube Subscriptions page on your computer instead of the home page. So when you open the site next time, you can directly choose the videos from your favorite channels instead of watching unnecessary videos.


Removing YouTube Recommendations

youtube with unhook extension screenshot

After bookmarking the homepage, the next step to defeat the YouTube algorithm is to remove recommended videos.

One way is to turn off your YouTube watch history. This way, YouTube will still suggest videos, but since it won’t have your history, the recommendations might not be as tempting.

For a stricter approach, use a browser add-on that removes YouTube’s suggested videos. Though there are several of them available, Unhook is a popular one that works on Chrome, Edge, and Firefox. This extension removes the homepage feed, related videos, and end cards. Best of all, it removes YouTube Shorts, which can be one of the reasons for your addition.

Download: Unhook for Chrome | Firefox | Edge (Free)


Saving Videos to Watch Later

Instead of playing videos from the Home or Subscriptions page, save videos to Watch Later and only play them from there. This little step can prevent you from being enticed into watching videos that aren’t worth your time.

Ideally, you should watch videos a couple of days (or at least hours) after adding them to Watch Later.

Watching YouTube Videos on a Third-Party Website

watchkin website screenshot

If none of the above works, you can use a third-party website to watch YouTube videos. Doing so means you will no longer have to face YouTube’s algorithm that keeps you hooked.

One such site is Watchkin. It asks you to paste the URL of any YouTube video and plays that video on its site. With no distractions on the screen, you won’t be tempted to watch any lifehacks.

SafeShare is another site you can use for this purpose. Though it was meant to share YouTube videos, it can also help you remove all the distractions and overcome YouTube addiction.


Without a doubt, YouTube is the go-to source of entertainment and education for billions of folks. But watching it excessively can seriously hamper your productivity and sleep. So, if you’re looking to cut down on your YouTube usage, you can try out these tips and apps to overcome your addiction and protect your mental health.

How to Keep Your iPhone in Low Power Mode All the Time

Your iPhone automatically exits Low Power Mode as soon as you charge it to 80 percent. So, what do you do if you want to keep your iPhone in Low Power Mode all the time? Apple’s Shortcuts app can serve as a workaround.


Activate Low Power Mode Permanently Using Shortcuts

Shortcuts is a built-in iOS app that simplifies performing various tasks on an iPhone. You can use it to create a shortcut that will allow you to keep your iPhone in Low Power Mode all the time. Here’s what you need to do:

  1. Open the Shortcuts app, head to the Shortcuts tab, and tap the plus (+) icon in the top-right corner to create a new shortcut.
  2. Tap the Add Action button and search for Set Low Power Mode. Select it to add the action to your shortcut.
  3. Make sure the Low Power Mode action is set to On.
  4. Tap the Set Low Power Mode text at the top and select Rename to change the shortcut’s name.
  5. Tap Done in the top-right corner to save your changes.

Once you’ve made your iPhone shortcut, you’ll see it on the Shortcuts tab in the Shortcuts app.


Tap the shortcut to run it, and your iPhone will permanently go into Low Power Mode. This means Low Power Mode will stay on when the battery goes beyond 80% while charging. Additionally, your iPhone will remain in Low Power Mode even after you restart it.

However, if needed, you can still turn off Low Power Mode on your iPhone from the Control Center. And if you ever want to delete the shortcut, locate it in the Shortcuts app, long-press it, and choose Delete from the context menu. Hit Delete Shortcut when prompted to confirm.

Although Low Power Mode disables many features and background tasks on your iPhone, there are scenarios where you’d still want to keep your iPhone in Low Power Mode permanently. For instance, when you’re traveling somewhere and aren’t sure you’ll get a chance to charge your iPhone.


Similarly, having your iPhone in Low Power Mode all the time can be helpful when you’re on data roaming in a foreign country, as it’ll prevent apps on your iPhone from refreshing in the background and, in turn, reduce your data usage.

Should You Leave Low Power Mode on Permanently?

Low Power Mode doesn’t impact your device unless you constantly need background apps to refresh. For example, you won’t get new email notifications if you have Low Power Mode on, but you can still read your new emails by opening the Mail app.

If you want to use all the features your iPhone has to offer, we don’t recommend keeping Low Power Mode enabled all the time. However, if you’re more concerned about battery life, leaving it on will give you exactly what you want—better endurance.

We’re All Talking About the Yeedi M12 Pro+ Robovac

Yeedi has introduced some impressive new tech with the Yeedi M12 Pro+. It’s a robot vacuum and mop cleaner that has impressed to the point that MUO felt it necessary to award the company with some merited recognition. Its groundbreaking technology has lead to it earning a well deserved Spotlight Award Badge.


And here is why it was chosen.


Superior Cleaning Features

The Yeedi M12 Pro+ boasts a cleaning performance never before seen by a robovac. It boasts an abundance of functions that lifts it above the heads of its competitors and is available at a very agreeable price.

Among these functions is an industry-leading suction power of 11,000Pa. And with its powerful Carpet Boost mode, which enables the robot to deliver enhanced deep vacuuming, nothing is too much trouble for this little guy. You can also fine-tune its performance with specialized cleaning modes designed for different carpet types.


However, the M12 isn’t only about vacuuming. This busy little droid is also a highly trained mopper. It showcases an OZMO Turbo 2.0 mopping system with dual rotating scrub plates that spin at a dizzying speed of 180rpm. The microfiber chenille mop pad and plastic scraper utilizes hot water at a temperature of up to 158°F (70°C), enabling it to take care of the toughest of stains.

Complementing these two workhorse attributes, you get a 200-minute battery life. This offers enough power to tackle large rooms in large houses, even though Yeedi has made this robovac its most compact yet.

TruEdge and ZeroTangle Technologies

yeedi m12 pro+ diagram showing edge to edge cleaning

But the fun innovations don’t end there. This little helper boasts innovative tech that sets it apart from regular robovacs.

The first of which is its TruEdge technology. The M12 Pro+ can extend and retract the mop as if it had its own little arms. This pushes the mop flush against all edges it encounters and ensures a thorough clean to within one mm.


The form of the edge doesn’t matter, either. If it’s curved, straight, or irregular, the Yeedi M12 Pro+ doesn’t discriminate. Consider your floor surface polished and clean right to the edge.

However, we’re not done yet! ZeroTangle Anti-Tangle tech does exactly what you imagine. It’s a godsend for anyone with pets, especially those who have been left untangling pooch hair from a roller brush in the past.

Well, Yeedi says no more! With a V-shaped design and anti-static bristles, the hair is easily taken care of before it becomes entangled. Then, dual-comb teeth funnel the hair into the suction path where the dust compartment hungrily awaits.

Compact Size Yet Powerful Performance

yeedi m12 pro+ base station on wood floor


Don’t judge a book by its cover; this is one powerful little bot. Despite the M12’s OMNI station featuring a tank 17% shorter in size and an auto-refill module at an impressive 30% more compact, all the Yeedi advanced features remain.

Among these capabilities are auto-emptying and refilling, one-tap self-cleaning, and hot-air drying. For a robovac that is housed in the smallest all-in-one station on the market today, that is very impressive. It means you not only get all the power of a large robovac, but it can discreetly reside in a small area of any room, too.

Yet despite its compact build, it still manages to hold a 3.4L dust bag. This means you don’t need to empty it for around 90 days.

The compact but mighty nature of this robot vacuum cleaner makes it unique in the industry and, for sure, one that won’t let you down.

Superior Mapping and Obstacle Avoidance

yeedi m12 pro+ obstacle avoidance


The Yeedi M12 Pro+ utilizes intersecting lasers to sense objects in its path and plots out 3D maps to ensure it can avoid them. No navigation is too complex, and when you add new furniture to the room, you can easily input it into the vacuum’s pre-plotted maps.

You can also update floor and carpet types to ensure the M12 performs to the best of its capabilities every time.

The M12 maps out areas very quickly, too. It plots a 1,075 sq ft room in just six minutes, and it has a memory capacity for up to four 3D maps. From there, it can quietly go about its business without bothering anyone. It even has a sensor on the bottom that warns it of stairs, so cleaning is never interrupted by accidental falls.

The Award-Winning Yeedi M12 Pro+: Revolutionary Robovac Engineering

If you’re looking to purchase your first robot vacuum cleaner or upgrade your existing machine, the Yeedi M12 Pro+ is, quite simply, an easy decision. With its superior technology and features, it’s one of the most reliable and advanced robovacs you can find. And the Spotlight Award from MUO is a testament to that.


It’s the ideal robovac for families with children, pets, or busy schedules and a blessing for the elderly and anyone with limited mobility.

This is a sponsored post. The product choices and opinions expressed in this article are from the sponsor and do not reflect the editorial direction of MakeUseOf or its staff.

This App Lets You Play Nintendo Classics on Your iPhone: Here’s How

Key Takeaways

  • The Delta emulator on the App Store makes it easy to play your favorite GBA, NES, and Nintendo DS games.
  • You need to import the ROM files for the games you own to start playing them on your iPhone using Delta.
  • To play Nintendo DS games, Delta requires you to import the console’s BIOS files first.


It’s now easier than ever to play your favorite Nintendo classics on your iPhone. And it’s all thanks to the Delta emulator that’s finally available on the App Store. We’ll teach you how to use it to play all the old Nintendo games you own.

Although you can use emulators to play games legally, downloading and installing ROMs for games you don’t own is strictly illegal.


Using the Delta Emulator to Play Retro Nintendo Games

Previously, you had to sideload emulator apps like Delta on your iPhone using third-party app stores like AltStore. But thankfully, Apple updated its App Review Guidelines in April 2024 to allow retro game console emulators on the App Store.

As a result, you can now easily install Delta just like any other app. But before you can actually use the app to play Nintendo games, you need the ROM file for the game you want to play. But how do you get the ROM file, you ask?


If you own the game cartridge, you can use a cartridge dumper like Epilogue’s GB Operator with your PC to extract the ROM file from your cartridge legally. Then, you can transfer the ROM file from your PC to your iPhone and follow the steps below in Delta to start playing:

Download:Delta (Free)

  1. Tap Get on Delta’s App Store page to install it on your iPhone.
  2. Launch the app and tap the plus (+) icon in the top-right corner.
  3. Choose Files from the context menu and browse to the directory where you saved the ROM file.
  4. Select the ROM file, and it’ll show up in the app. Now, just tap the game to run it. All the console controls will appear on the bottom half of your screen.


The catch with GB Operator is that you can only use it to extract ROMs from Game Boy cartridges. However, you can find similar tools if you own other retro Nintendo consoles like NES, SNES, Nintendo DS, Nintendo 64, etc.

Keep in mind that your ROM files should be in one of the following formats, depending on the console Nintendo made the game for:

Console

Supported File Formats

NES

.nes

SNES

.smc, .sfc, .fig

Game Boy

.gb

Game Boy Color

.gbc

Game Boy Advance

.gba

Nintendo DS

.ds, .nds

Nintendo 64

.n64, .z64

While Delta supports Nintendo DS, you can’t play Nintendo DS games out of the box even if you have the ROM files. That’s because Delta requires you to manually add the DS BIOS files by following these steps:


  1. Launch Delta and tap the gear icon in the top-left corner to go to its settings menu.
  2. Scroll down and tap Nintendo DS under Core Settings.
  3. You’ll see three filenames under the DS BIOS Files section at the bottom. You need to import these files just like you imported your ROM files before.

Like ROM files, downloading or importing BIOS files for consoles you don’t own is strictly illegal. So, unless you own a Nintendo DS, don’t try to import its BIOS files into Delta.

As you can see, setting up the Delta emulator to play Nintendo games is pretty straightforward as long as you have the required files. Although Delta is just one of the many Game Boy Advance emulators for iOS devices, its availability on the App Store makes it our recommended choice now more than ever.


Don’t forget that if you already own a Nintendo Switch, Nintendo already makes it easy to play retro NES, SNES, N64, and Game Boy games on your Switch console. You just need to pay for the Nintendo Switch Online Expansion Pack.

How to Install and Dual Boot Linux on Your Mac

Key Takeaways

  • If you have an Apple silicon Mac, you can either install Asahi Linux or run Linux on a virtual machine.
  • Make sure to back up your Mac before attempting to install Linux.
  • To boot Linux from your external media on a Mac, you’ll need to disable some security features in macOS first.


If you feel like your Mac is slowing down with updates and are frustrated with Apple’s walled garden, it’s time for a change. You can breathe new life into your Mac by installing Linux, and we’re here to show you exactly how to do that.


Before You Run Linux on an Apple Silicon Mac

If you have an Apple silicon Mac, know that you can’t just grab a USB flash drive and install any Linux distribution of your choice.

As of this writing, your only option is to install Asahi Linux on your Mac, which is still in active development and lacks a lot of crucial features like Thunderbolt support. Plus, it’s not compatible with M3 Macs yet.

If you want a more stable solution, you can install and run Linux using Parallels Desktop, but this method comes with a performance hit as you’re running Linux on a virtual machine.

For everyone else, we’ll explain how to dual-boot Linux on Intel-based Macs below.

Step 1: Prepare Your Mac for Installing Linux

To install Linux on your Mac, you need a USB flash drive with at least 2GB of storage. You’ll erase the flash drive in a future step to put an Ubuntu installer on it, so make sure you’ve backed up any important files first.


Use an Ethernet adapter to connect your Mac to the internet. This is important because your Wi-Fi may not work in Ubuntu without third-party drivers. Similarly, desktop Mac users should get hold of a USB keyboard or mouse in case Bluetooth doesn’t work.

If you plan to dual-boot your Mac with Linux, you also need to make sure you have enough free storage. Open the Apple menu and go to System Setting > General > Storage to check that you have at least 25GB of space (but preferably more).

Finally, make a backup of your Mac. You won’t lose data by installing Linux in a dual boot partition. However, if something goes wrong, you may need to erase your entire Mac to fix it.


If you plan to replace macOS with Linux rather than creating a dual-boot system, use a service like Carbon Copy Cloner to back up your macOS Recovery partition. This will make it far easier to revert to macOS again in the future.

Step 2: Create a Partition on Your Mac Drive

For a dual-boot system (which we strongly recommend), you need to create a Linux partition on your Mac’s drive. If you don’t want to create a dual boot system, skip to the next section.

In fact, to dual-boot Linux on a Mac, you need two extra partitions: one for Linux and a second for swap space. Ideally, you should set the swap partition to about half the RAM your Mac has. You can check how much memory you have by clicking on the Apple logo in the menu bar and choosing About This Mac from the dropdown.

You can use Disk Utility to create new partitions on your Mac by following these steps:

  1. Open Disk Utility from the Applications > Utilities folder in Finder. Alternatively, you can use Spotlight search on your Mac to find it.
  2. In the top-left corner, select View > Show All Devices.
  3. Select the highest-level drive on your Mac, then click Partition.
    macOS Disk Utility

  4. Use the plus (+) button to create a new partition and click Add Partition. Name it UBUNTU and set the format to MS-DOS (FAT32). Give it as much space as you want to use for Linux.
  5. Click Apply to create the partition.
    macOS Disk Utility Create Partitions Menu

  6. Repeat the steps above to create another partition. Name this partition SWAP and set the format to MS-DOS (FAT) again. Make the size match half the amount of RAM in your Mac—for example, 4GB, 8GB, or more.
  7. Click Apply to create the partition.


If you can’t create new partitions, it could be because FileVault is encrypting your Mac’s drive. Go to System Settings > Network > FileVault to turn it off.

Install rEFInd for Better Boot Options

The standard boot manager on your Mac doesn’t always work with Ubuntu. This means you need to install a third-party boot manager instead, which will let you easily choose between macOS or Linux when you start your computer.

Therefore, your next step is to download rEFInd, which is the boot manager we recommend. To install rEFInd, you need to temporarily disable System Integrity Protection in macOS. This is an important security feature, so make sure you re-enable it after.

To install the rEFInd boot manager, follow these steps:

  1. With SIP disabled, open Terminal from Applications > Utilities in Finder (or search for it using Spotlight).
  2. Open Finder in a separate window and navigate to the rEFInd download.
  3. Drag the refind-install file into your Terminal window and press Return (or Enter).
  4. When prompted, enter your administrator password and press Return again.
    macOS terminal running the rEFInd setup

  5. After the installation, remember to enable SIP again.


Next time you restart your Mac, the rEFInd menu should appear automatically. But if it doesn’t, hold Option while booting up to load your boot manager.

Step 3: Create an Ubuntu USB Installer

Download the latest version of Ubuntu as a disk image from the Ubuntu website. You need to use a third-party app to create a USB installer from the Ubuntu disk image. One of the simplest apps for this is Etcher, but you can use anything you like.

To create an Ubuntu USB installer with balenaEtcher:

  1. Open Etcher and click Select Image.
  2. Navigate to the Ubuntu disk image you downloaded and click Open.
  3. Insert your USB flash drive, and Etcher should automatically select it. If it doesn’t, click Select Target or Change to manually select the flash drive.
  4. Make sure the correct drive is selected since the next step erases it.
  5. Click Flash and enter your administrator password to erase the USB flash drive and create an Ubuntu USB installer. Once the flashing process is complete, you’ll get a prompt to Eject the flash drive.


balenaEtcher window ready to create an Ubuntu USB installer

Step 4: Allow Booting From an External Drive

If you own an Intel Mac made between 2018 and 2020, it likely has a T2 security chip. This can cause problems when booting from a USB drive. To solve this, you’ll need to take some extra steps. You can ignore this part if your Mac doesn’t have a T2 chip.

  1. Turn on your Mac while holding Command + R, and release the keys as soon as you see the Apple logo. This will boot you into macOS Recovery.
  2. Enter the password for a user you have access to. Keep in mind that it should be an administrator account.
  3. Select Utilities > Startup Security Utility from the menu bar. You’ll once again be prompted to enter your administrator password.
  4. Under Secure Boot, select the No Security option, and under Allowed Boot Media, select Allow booting from external or removable media.
    macOS Startup Security Utility

Step 5: Boot Ubuntu From Your USB Installer

Restart your Mac while holding the Option key and reinsert the USB flash drive directly into your computer. When the boot loader appears, use the arrow keys to select the Ubuntu Boot EFI option and hit Return (or Enter).


rEFInd Boot Manager With Options to boot from Windows or Ubuntu

An Ubuntu loading screen appears, followed by the Ubuntu desktop. Use this opportunity to test Ubuntu on your Mac. Note that because Ubuntu is running from your USB flash drive, it may be slow. Since Ubuntu can’t use your Mac’s Wi-Fi by default, use an Ethernet adapter to connect to the internet.

Ubuntu Desktop

Step 6: Install Ubuntu on Your Mac

When you’re ready, double-click the Install Ubuntu item on the desktop.

Follow the on-screen prompts to choose your language and keyboard layout. Select Normal installation and check the box next to Install third-party software. You need to connect your Mac to the internet using an Ethernet cable to install this software, which makes functions like Wi-Fi and Bluetooth work. Then, click Continue.

Ubuntu Installer Installation Type Menu


If prompted, choose to keep your partitions mounted.

Option 1: Dual Boot Ubuntu With macOS

From the Installation type screen, select Something Else and click Continue. On the next screen, you need to identify and select the UBUNTU partition you created. Unfortunately, there are no recognizable partition names, so look for a device with fat32 in the name that matches the partition size in MB.

Ubuntu Installer Disk Partitions Menu

Double-click to select it and choose Use as: Ext4 journaling file system. Set the Mount point to / and check the box to Format the partition. Click OK. In the popup alert, click Continue to write previous changes to the disk.

Now, identify your SWAP partition, which should also have fat32 in the name. Double-click it and choose to Use as: swap area, then click OK. Open the Device for boot loader installation dropdown menu and select your UBUNTU partition again. The name should match what you selected for it from the table above.


Take a moment to ensure you selected the correct partitions, then click Install Now. Click Continue in the popup alert to confirm you want to write changes to those disks. Finally, follow the on-screen prompts to choose your time zone and create a user account, then wait for the installation to complete.

Option 2: Replace macOS With Ubuntu

From the Installation type screen, select Erase disk and install Ubuntu.

Installation type for Ubuntu

This erases everything from your Mac, including the operating system and the recovery partition!

When you’re ready, click Install Now and select your disk. Follow the on-screen prompts to set the correct time zone and create a user account, then wait for the installation to complete.


You’ve now installed Linux on your Mac successfully! If you have an older Mac that no longer receives macOS updates from Apple, we highly suggest making this switch. Ubuntu or other popular Linux distributions will breathe new life into your old Mac, as you’ll get optimal performance even on outdated hardware.

Although dual booting is unlikely to affect the data on your macOS partition, we strongly recommend backing up your Mac before installing Linux.

How to Install and Customize Ringtones on Android Phones

Key Takeaways

  • You can use the Zedge app to find custom ringtones from movies, video games, and more.
  • Use the Ringtone Maker app to edit audio files and create your own custom ringtones.
  • Android also lets you set a custom tone for each contact and app on your phone.


Android excels at customization, and your ringtone is no exception. Want to use your own track as a ringtone? Apply custom ringtones to specific contacts? Set custom notification sounds? Here’s what you need to know.


How to Create Custom Ringtones on Android

No, we’re not talking about writing your own music. Downloading tracks and saving them in the right places will suffice.

You can grab thousands of ringtones and notification sounds using an app like Zedge. You can quickly download ringtones from movies, video games, memes, and more. The app can set any available sound as a ringtone, notification sound, or custom notification.


Download:Zedge (Free, subscription available)

If you don’t want to use the app, you can stick to the Zedge website and download files directly or check out one of the other top sites for downloading ringtones. Or check out these free ringtones that sound like real phones.

To make changes to a tone before you assign it, consider Ringtone Maker. This app can create ringtones, alarms, and notification sounds from multiple audio file types. You can use it to edit audio on your phone, perhaps to boost a track’s audio, trim silence, or similar.

Download:Ringtone Maker (Free, premium version available)

How to Change Your Ringtone on Android

Now that you’ve gotten your hands on tunes and chimes, you’re ready to actually set your ringtone. The steps may vary slightly depending on your Android phone’s model, but we’ve covered detailed instructions for both Google Pixel and Samsung Galaxy phones.


On a Google Pixel Phone

If you own a Google Pixel or any phone that runs a mostly stock version of Android, you can follow these steps:

  1. Go to Settings and tap Sound & vibration.
  2. Tap Phone Ringtone, Default notification sound, or Default alarm sound depending on what you want to change. This will take you to a page containing a list of preinstalled tones as well as the ones you’ve added.
  3. Pick a category and then tap a ringtone to listen to it. Select My Sounds to view files your phone has scanned in folders labeled “ringtones.” To manually add files from other locations, tap the + icon in the bottom-right corner.
  4. When you’ve decided which one you like, hit Save in the top-right corner.


On a Samsung Galaxy Phone

Samsung’s version of Android is slightly different due to the One UI interface. Here’s what you need to do to change your ringtone on a Samsung Galaxy phone:

  1. Go to Settings > Sounds and vibration.
  2. Select Ringtone or Notification sound.
  3. Choose from the existing options or tap the + icon in the top-right corner to add a ringtone or sound you downloaded. Your phone will display any audio file it detects in your internal storage, so use the search option and enter the filename.

You can assign a specific ringtone to a contact if you want even more customization. And when that particular contact calls, you’ll know who it is just from the tone.


On a Google Pixel Phone

To set a contact’s ringtone on a Pixel phone or any phone that runs stock Android, follow these steps:

  1. Open the Contacts app.
  2. Select the contact for whom you want to use a custom ringtone.
  3. Tap the three-dot menu in the top-right corner and choose Set ringtone.

Now, simply select your desired ringtone, and you’re all set!

On a Samsung Galaxy Phone

The steps on a Samsung phone are nearly identical. Here are the steps:

  1. Open the Contacts app and select the contact for whom you want to change the ringtone.
  2. Tap the three dots in the bottom-right corner and select Change ringtone/vibration.
  3. Now, select whether you wish to set a custom ringtone or vibration.


Now, simply choose your desired tone from the list and exit the menu.

Before smartphones came along, changing the ringtone was one of the first steps to make a phone feel like your own. Now, with so many options, much better speakers, and custom sounds per app and contact, the experience is even better than it was back then.

Whether you’re changing your ringtones for fun or to be sure you can tell calls apart, Android devices make the whole process easy.

Today’s Wordle Answer and Clues (Sunday, April 21, 2024)

Wordle is a daily puzzle from the New York Times. If you want some extra help to solve today’s Wordle, we have the answer to Wordle #1037, plus some extra clues.


SPOILERS AHEAD (CLUES)


Today’s Wordle (#1037) Basic Clues

If you just want the answer to the Wordle puzzle for April 21, 2024, scroll down past the clues and the next spoiler warning. Otherwise, here are a set of clues to help you solve today’s Wordle somewhat on your own.

  1. Today’s Wordle contains four consonants and one vowel.
  2. One letter appears twice, and in succession.
  3. The first letter is J.
  4. The last letter is Y.

The Big Clue for Today’s Wordle Puzzle

The big clue for today’s Wordle is, “I always enjoy Wordle, but I am especially happy about today’s answer”.

SPOILERS AHEAD (ANSWER)

Today’s Wordle Answer (April 21, 2024)

If you still haven’t beaten today’s Wordle even with the clues provided above, the answer is below…

The answer to today’s Wordle is “JOLLY“.


The word “Jolly” is most commonly an adjective, but can also be a noun, a verb, and an adverb. As an adjective, it means happy, joyous, and enjoying oneself. As a noun (especially in British slang), it refers to a party. As a verb, it refers to partying or engaging in banter. And as an adverb, it’s an old-school way of saying “very,” as in “You should be jolly well ashamed of yourself for that”.

According to the Online Etymology Dictionary, the word “Jolly” originated circa 1300 CE. It comes from the Old French word “jolif,” meaning festive, merry, or amorous. Some etymologists believe that “Jolly” ultimately comes from the Old Norse word “jol,” meaning a winter feast. This is still used in common parlance as “yule,” an archaic term for Christmas. As in “yule log” and “yuletide”.

Our Top Wordle Tips (to Beat It Every Day)

  1. Choose a good starting word. There are plenty to choose from, so pick one from our list of the best Wordle starting words.
  2. Try to eliminate all five vowels early. As there are only a handful of vowels, it’s best to use them all within the first 2-3 guesses.
  3. Use popular letters early. As well as the vowels, letters such as T, S, N, R, H, C, D, and L appear most commonly in English words.
  4. Take your time over your guesses. Wordle isn’t timed, so there’s no rush to complete it. You can even guess on paper first.
  5. Remember that letters can appear twice (and often do). Keep this in mind when guessing, as forgetting it can lead you to mess up.


Now that you have completed today’s Wordle puzzle (with a little help from your friends at MUO), you should check out some of the other free games from the New York Times.

Connections is a fun game that challenges you to find the associations between 16 words, splitting them up into four groups of four. To help combat the challenging nature of the game, check out our tips and tricks to help you beat Connections.

There’s also Strands, the newest addition to the New York Times’ burgeoning list of games. Just like Connections, it’s extremely challenging, but in a unique string-the-letters-together way. We recommend you check out our best tips for beating Strands to give yourself a leg up on the daily challenge.

Or, if you’re a Wordle purist and want more of the same, we recommend trying these awesome Wordle alternatives.

The Windows Photos App’s Generative Erase Is Actually Great

Key Takeaways

  • Windows Photos’ Generative Erase easily removes objects from images for free on Windows PCs.

  • The Erase tool is available on the Windows Photos app in version 2024.11020.21001.0 or higher.
  • While Google’s Magic Eraser is more lenient with object selection, Windows Photos did better at replicating and adjusting the background.


Removing objects from photos is easier than ever on a smartphone, but that’s largely limited to Pixels, Samsung flagships, or a Google One subscription. While you might think doing so requires expensive software on desktop, the Photos app on Windows is all you need to remove unwanted elements from an image. It’s easily accessible, free, and is pretty great!


What Is Windows Photos Generative Erase?

The name is pretty self-explanatory in this case. Generative Erase is a tool built into the Windows Photos app that lets you select and remove objects from an image. The AI-powered feature does so without disrupting the background, using machine learning to gauge what the photo would be like without the object.

You don’t need expensive photo editing software or a high-end phone. The Photos app is available on all Windows 10 and 11 machines. You should see the Erase tool after updating the Windows Photos app to version 2024.11020.21001.0 or higher.


How to Use Generative Erase in Windows Photos

Open the Photos app on your desktop and find or load the image you want to edit. If the Photos app is your default photo viewer, double-clicking the image should open it.

Screenshot highlighting the Edit button in the Windows Photos app

Click the Edit button in the top bar and select Erase. If you want to get granular with your edit, you can adjust the brush size and zoom in on the picture.

Erase button in the Edit tool in the Windows Photos app

The Auto Erase toggle is enabled by default and erases objects as you go. To erase multiple objects, toggle off Auto Erase, use the brush to highlight everything you want to remove, and then tap Erase.


Using the Erase tool on Windows Photos

You have to be precise with the brush tool, but the option to adjust the size makes highlighting objects relatively easy.

Is Generative Erase on Windows Photos Any Good?

I attempted to remove the light pole in the original image twice: using the Magic Eraser on the Pixel 8 Pro and with Windows Photos. In the edited photos, you’ll see that both did a pretty good job removing the object and adjusting the background. The second image was edited using the Windows Photos app, while I used Magic Eraser on the third.


The Windows Photos app actually did a better job with the background and at least tried to replicate the bench behind the pole. Meanwhile, Magic Eraser just removed half the bench, but did great replicating the tree behind the pole.

However, Magic Eraser is a lot more lenient with object selection. Simply tapping an object works most of the time on the phone, while you must be very precise with the brush tool on Windows Photos. Overall, the apps did a solid job of removing the object, and it is a complex background to work with. The images look great at first glance; you’d need to zoom in significantly to find any mistakes.

Both are far from perfect, but they will get the job done in a pinch. While features like Magic Eraser are a huge part of Google’s Pixel advertising, it may be a surprise to know that you have easy and free access to an equally good tool right on your Windows desktop!


Yes, You Can Still Poke People on Facebook: Here’s How

Quick Links

Key Takeaways

  • Facebook is reviving the “poke” feature with a design tweak.
  • The poke button shows up when searching for someone on the Android app.
  • You can access the poke feature by searching “poke” in the search bar on the Facebook website.


You may have thought poking was dead on Facebook. But it turns out the feature is still there and Facebook is even trying to revive it. Here’s what you need to know about poking someone on Facebook and how you can still use the feature.


What Is Poking on Facebook?

Those who used Facebook in its early days will remember the ability to “poke” someone on Facebook to get their attention. This would essentially send a notification to the person letting them know that you poked them. But the feature was eventually buried, with Facebook leaning towards post reactions and interactions instead.

However, according to Business Insider, Meta is trying to revive the feature with a design tweak that is reintroducing it to a new generation of users (and providing a throwback for early users of the platform). The design tweak will show the poke button next to a name when you search for a person.

While we haven’t seen the poke button on the Facebook website, we do see it when searching for someone using the Android app. However, even if you don’t see this resurfaced button, you can still use the poke feature.


You should also note that you can only use the feature with friends, so the button will not appear next to the names of people you’re not Facebook friends with.

How to Poke Someone on Facebook in 2024

The easiest way to poke someone on Facebook is to use the Poke button. To access this button, search for your friend’s name in the Facebook mobile app. Then select the Poke button. Once the action has been sent, the button will change to Poked.

If you don’t see this button, or you’re using the Facebook website, you can still access the poke feature in a slightly more roundabout way.


To do this, follow these steps:

  1. In the search bar, type the word “poke” and press Enter.
  2. Select the menu item that says Pokes. This will take you to a page where you can see who has poked you.

facebook pokes feature on website

From this page, you can also access the poke button to send pokes to friends. Facebook will provide a list of suggested users to poke, but you can also use the search bar to look for someone specific.

list of friends to poke on Facebook

When you poke someone, Facebook will send the person a notification to let them know that you used the feature.


poke notification on facebook web

If they click on the notification, Facebook will open the poke page for you where you can poke them back. You can choose whether to continue the cycle of nudges. While the feature is slightly buried, it’s an entertaining tool like seeing a friendship history on Facebook.

Facebook does not keep a history of people you have poked in the past, but you will be able to tell who you have poked based on whether the button is available when you search their name on the poke page. This prevents someone from spamming others with pokes. You don’t want poking to end up being the reason you block someone on Facebook, after all.

So if you want to catch a friend’s attention or just give the feature a try, check out the poke feature on Facebook for a sense of nostalgia or a new way to attract someone’s notice.


How to Reset Siri on Your iPhone, iPad, or Mac

The one troubleshooting step for all Siri-related issues.

Quick Links

If Siri often struggles to recognize your voice or you just can’t get “Hey Siri” to work, you can reset Siri on your Apple device. Doing this allows you to retrain Siri to recognize your voice better. We’ll teach you how to do it.


Resetting Siri on Your iPhone or iPad

Unfortunately, Apple doesn’t offer a “Reset” button just for Siri. However, you can use a simple toggle in the iOS/iPadOS Settings app to reset Siri when needed. Follow these steps:

  1. Open the Settings app on your iPhone or iPad.
  2. Scroll down and select Siri & Search.
  3. Tap the Listen for setting at the top and select the Off option.
  4. Now, wait for a few seconds and select either the “Hey Siri” or “Siri” or “Hey Siri” option according to your preference.
  5. When you do so, you’ll be prompted to set up Siri from scratch. Tap Continue and repeat the phrases that appear on your screen one by one.


You’ll have to repeat five phrases to retrain Siri to recognize your voice. Once you’ve repeated the last phrase, you’ll see a “Siri Is Ready” screen. Tap Done and continue using Siri as you normally would.

Resetting Siri on Your Mac

You can reset Siri on your Mac just as easily. The process is fairly similar, as you’ll use the System Settings app in macOS. Here’s what you need to do:

  1. Click the Apple logo in the menu bar and choose System Settings from the dropdown. Or, use any other way to open System Settings on your Mac.
  2. Scroll down and select Siri & Spotlight from the left sidebar.
  3. Toggle off the Ask Siri setting at the top on the right side and choose Turn Off when you get a confirmation pop-up.
  4. Wait a few seconds and toggle Ask Siri back on.
  5. Now, set the Listen for setting right below to “Siri” or “Siri” or “Hey Siri”.
  6. You’ll get a pop-up prompting you to set up Siri from scratch. Click Continue and repeat the five phrases that appear one by one.


That’s it! You’ve successfully reset Siri on your Mac.

This is one of the many troubleshooting steps to follow when Siri isn’t working on your Apple device. You can use this as a last-resort step when tweaking other Siri settings doesn’t fix the issue.

Once you reset and train Siri to recognize your voice again, you should have no trouble invoking Apple’s virtual assistant using the “Siri” or “Hey Siri” trigger phrase.


The Easiest Way to Know if Your CPU Is Bottlenecking Your PC

Quick Links

Key Takeaways

  • Your CPU is bottlenecking your PC if the GPU usage while playing games is lower than 90 percent.
  • You can use PC monitoring tools like MSI Afterburner to check your GPU usage.
  • Play games at higher resolutions and max out the graphics settings to reduce CPU bottlenecks.


Finding the bottleneck in your PC can often be time-consuming, but if you know what parameters to look for, you can determine the culprit within minutes. Below, we’ll teach you the easiest way to check if your CPU is bottlenecking your PC.


Monitor Your GPU Usage Using MSI Afterburner

MSI Afterburner is one of the best GPU overclocking software out there, but why did I suggest using it to monitor your GPU usage, you ask?

Well, MSI Afterburner comes with RivaTuner Statistics Server (RTSS), which makes it easy to monitor hardware statistics, like your CPU usage, GPU usage, power draw, clock speeds, memory frequency, temperature, and more.

If you’re wondering why we’re monitoring the GPU usage to determine a CPU bottleneck, it’s pretty simple. If your CPU is bottlenecking your PC, it will hold back your graphics card from performing at its full potential.

So, take some time to set up MSI Afterburner to display stats on your Windows PC first. Then, load up a game that you usually play and monitor the GPU usage while actively playing it for a few minutes. Since I play Valorant almost daily, I’ve used that as an example here.


If you notice that your GPU usage is less than 90 percent, it means that your CPU is holding your graphics card back from performing at its maximum potential. However, in some cases, it could also be due to the fact that the game is poorly optimized. Therefore, it’s worth checking the GPU usage across three or four games to see if your results are fairly consistent.

As you can see from the screenshot above, the GPU usage on my RTX 4090 is just 35% despite pushing nearly 500FPS at 1440p resolution. This clearly indicates that my CPU, the Ryzen 5900X, is bottlenecking my PC, and I would get higher and more consistent frame rates by upgrading to a newer Ryzen 7800X3D or Ryzen 7950X3D chip.


Additionally, take huge drops in frame rate as a vital sign that your CPU is bottlenecking your PC. For example, when a game runs at 150FPS but drops to 60 or 70FPS every few minutes.

Another easy way to determine a CPU bottleneck is by using online PC bottleneck calculators. You just need to enter your PC specs and select the resolution you play games at to know whether your CPU is holding your PC back.

Why Low GPU Usage Indicates a CPU Bottleneck

You experience low GPU usage when your CPU struggles to keep up with the graphics card to render more frames. This means the graphics card in your PC is more powerful than what your CPU can handle. And that’s when the term “overkill” comes in.

For instance, a top-of-the-line graphics card like the RTX 4090 is overkill for a PC powered by a Ryzen 5900X. As a result, you won’t be able to get the most out of your powerful GPU unless you upgrade to a newer flagship processor like the Ryzen 7950X3D or the Intel Core i9 14900KS.


Additionally, today’s high-end graphics cards target 1440p and 4K gaming. So, if you play games at a lower resolution, like 1080p, you will experience low GPU usage even if you have the fastest CPU on the market.

To reduce a CPU bottleneck, you can play games at higher resolutions, like 1440p or 4K, and crank up the graphics settings, which puts more stress on the GPU than the CPU. Otherwise, your only option is to upgrade to a faster CPU and get more usage out of your graphics card.

This AI Photo Editing App Is a Must-Have: 3 Reasons Why

Key Takeaways

  • Luminar Neo introduces Water Enhancer AI for quick and precise editing of water in your photos.
  • Twilight Enhancer AI simplifies editing twilight landscapes by allowing you to adjust the sky, scenes, and individual areas.
  • Object Select AI streamlines subject selection for easier and faster editing.


Luminar Neo has always been one step ahead of the photo editing game with its AI features. The Spring 2024 update—which will be available from April 25th, 2024—introduces three must-have AI photo editing features. Let’s see what they are.


1. Water Enhancer AI

Ever take a beautiful photo of a waterscape but the color of the water just ruins the shot? Luminar Neo’s AI Water Enhancer can fix that in seconds. The Water Enhancer tool automatically identifies and masks any water in your image, and you can refine the AI selection if required.

Find the Water Enhancer tool under the Landscape edit tools and use it to change the color from dirty brown, dark, or uninteresting to natural hues of blues and greens with luminescent reflections. The Water Enhancer AI tool has six sliders: Amount (strength), Blue, Green, Original Color, Brightness, and Contrast.


Luminar Neo Water Enhancer AI After

Below the main tool are options to refine the mask. Here, you can draw, erase, or restore the masked area, and within that, you can change the size, softness, strength, feathering, and depth of the mask.

Luminar Neo Water Enhancer Refine

This AI tool provides natural and even results that save a ton of time. There are plenty of other ways to use Luminar Neo more effectively to improve your photos.

2. Twilight Enhancer AI

Luminar Neo’s Twilight Enhancer AI tool enhances your twilight landscapes. And it’s not just for editing the sky in your twilight photo, it also edits the entire scene to match.


Luminar Neo Twilight Enhancer Before

Upload an image to the Catalog and find the Twilight Enhancer tool under the Landscape edit tools. The main tool offers global adjustments and masking, with a choice of five gradient presets. Like with Water Enhancer AI, you can create and refine a masked area if you only want to edit the sky or one part of your photo.

Luminar Neo Twilight Enhancer Mask

There are also sliders that affect five select areas of your photo, so you can edit parts of your landscape separately, including Sky, Dawn, Scene, Water Reflection, and Mask Refinement.


Luminar Neo Twilight Enhancer After

Skylum has thought of it all with its Twilight Enhancer AI tool. Not only can you create the perfect sky for your scene, but the individual sliders allow you to get the colors, shading, and exposure just right across the board. This tool feels like six tools in one!

3. Object Select AI

Object Select AI is Luminar Neo’s tool for making quick selections of subjects or shapes in your photos. It’s very helpful when you have many areas to select, and it’ll save time on drawing precise selections around each area.

Luminar Neo Object Select AI Mask


This handy tool can be found within the Masking section of any edit tool. With it, you can use AI to select the areas in which you want your chosen tool to be applied.

Luminar Neo Object Select AI Selection

With an option to Add and another to Subtract, it’s easy to add or remove the mask from multiple elements. Return to the Adjustments for the tool you’re using, and any adjustments you make will be applied to the masked areas. Quick and simple, with great results.

Luminar Neo Object Select AI Black and White Results


Luminar Neo also has a few generative AI tools which were released in 2023. GenSwap lets you add or replace objects, GenExpand lets you expand your borders, and GenErase lets you easily remove elements without a trace.

How to Get Luminar Neo

You can purchase Luminar Neo directly from Skylum’s website, or you can download it from the Google Play Store or the Apple Store for your device’s system. iPad users can also purchase Luminar for iPad, although its features aren’t as in-depth as the computer software.

Prices start from $11.95 per month, which includes a basic bundle of tools along with some presets—this can be bought for one month or as a monthly rolling subscription. The annual subscriptions go for $79 (12 months) or $119 (24 months), both include the Spring Assets Collection and a Forest Photography Masterclass, along with free presets. There is a 7-day free trial.


There’s also a lifetime license available for $199. This license includes everything in the annual subscription, plus one year’s access to generative AI tools. Luminar Neo allows you to buy extensions to add to your license without needing to purchase a new license.

Luminar Neo isn’t just a standalone tool. You can also use it as a plugin on various other software, including Adobe Photoshop, Adobe Lightroom, and the Apple Mac Photos app to enhance your workflow with AI editing tools.

There are many great photo editing tools on the market, but Luminar Neo’s AI offerings are in a league of their own—integrating them into your editing workflow will transform your photos. Water Enhancer AI, Twilight Enhancer AI, and Object Select AI will become available from April 25th, 2024.

Did You Know ChatGPT Has Games? Here Are the 6 Best Ones to Play

Bored of using ChatGPT for programming, chatting, and learning? It’s time to start using it for gaming instead.


ChatGPT has a wealth of games in its custom GPT store, covering everything from, RPGs and Dungeons and Dragons-style adventures, classic retro games, card games, quizzes, mysteries, and so much more.


Let’s start with one of the top-rated games on ChatGPT’s custom GPT store. Murder Mystery Mayhem is a procedurally generated game where you play the role of a detective in the year 1925.

As with all good investigations, Murder Mystery Mayhem begins by setting the scene, including an image of the scene and the six suspects, along with names, roles, and potential interview points. You then begin questioning each suspect, attempting to find holes in their story, check alibis, and uncover crucial evidence.

The story isn’t completely linear, but you don’t have much room to develop your detective’s character. I wrote that “I was pacing the room, looking at each suspect in turn, trying to detect a tell, anger, or worry,” but was informed that was outside the boundaries of the game by the Officer (the police officer present at the investigation with you).


Once you finger your suspect, you call in the Officer to make the arrest. Collar the wrong perp, and the game is over, and you begin with a new mystery.

Murder Mystery Mayhem is good fun, with the location and murderer changing round by round, and each suspect has new alibis and evidence to reveal. The changes keep it feeling fresh, and one game played through to the end can keep you engaged and seeking the truth for well over an hour. (Don’t forget, you don’t have to play it all at once!)

Dying of dysentery has become a longstanding meme from the original Oregon Trail game, but you can now relive that horrifying experience in ChatGPT. The Oregan Trail custom GPT brings one of the first edu-games (not the first, mind!) to ChatGPT… where you can suffer through the wilderness all over again.


You begin as the Oregon Trail does: choosing your character and buying supplies, then heading out into the wilderness. Most of your input to the game is choosing between the numbered options, such as where to head next, whether to buy more supplies, explore a new area, hunt for supplies, talk to the locals, look at the map, and so on.

It’s a basic version of the classic game, but it’s engaging enough. The custom GPT’s scripting doesn’t allow you to go off-piste and, say, rob the local convenience store for supplies (nor did the original), but it’s certainly a lot easier without so many setbacks constantly upending and destroying your party. It’s a much easier version, that’s for sure.

From the potential death and horror of the Oregon Trail to something a little more relaxing: Poker. You play against the AI in this Poker custom GPT, starting with 10,000 credits, and play standard five-card Texas hold’em until someone’s credits run out.


My only major gripe about this poker game is that ChatGPT seems to mimic your choices, such as check, raise, and so on, which can make the game predictable (or at least less random).

Now, this is a cool idea of how a custom GPT can span multiple types of input to create a custom game with a unique storyline.

When you first boot Console GPT, you meet the message “BOOT UP AND INSERT GAME.” But you don’t have a game cartridge to boot yet. Instead, you have to head to the Console GPT Glif page, which is a custom AI art tool that will create your “cartridge.”


Input the type of game you want in the text box, select Glif It!, and watch as your creation comes to life. I went with “retro-futurism crime lord” and was presented with “Cyber Syndicate,” a game where you “navigate a neon-soaked, cyberpunk metropolis teeming with high-tech heists and digital espionage,” with a goal of becoming the ultimate syndicate leader.

Now, download the Cyber Syndicate cartridge (as an image; it’s not really a cartridge file) by hovering over the image and selecting Download.

Head back to Console GPT and use the image upload button to insert the cartridge. For me, Cyber Syndicate instantly whirrs into life, declaring “COMPATIBLE CARTRIDGE DETECTED. LOADING ‘CYBER SYNDICATE.'” The first scenario boots along with a 70 percent full health bar, three options, and, most interestingly, the option to visualize the scene.


The narrative flow is a bit shaky, and Console GPT could use some extra commands to remember other parts of the story, but it’s good fun for a while. For example, one moment, I was a lone operative in a bar, and the next, I was planning a heist in a room with the rest of my assembled team.

Not content with card games, custom cartridge adventures, or adventuring? Why not give a custom GPT idle game a try instead?

I have to say, this implementation of Cookie Clicker is jarring. Cookie Clicker is one of the most well-known idle games of all time, building up your cookie income over time.


The custom GPT Cookie Clicker is decidedly different. You’re still building up a cookie empire in a similar style, but because ChatGPT doesn’t run automated commands and cannot keep the numbers ticking over like the original game, it requires more input.

Still, if you’re into idle games and want to try something different, it could be worth a try.

Adventure Inked has developed more than 200 ChatGPT text adventure games, so there are far too many to list here. Cute Little Zombies is a perfect example of why its text adventures are great, giving you a heap of different scenarios to play through, all with cute little AI-generated images to help build the story out.


You’re first presented with a list to choose your preferred type of zombie apocalypse. Perhaps you prefer a “Classic Horde,” or maybe you’re more into a “Biotech Disaster” or “Apocalyptic Cult?” Either way, Cute Little Zombies’ list of eight scenarios has you covered. Once you select, the game sets the scene, dropping you into a world filled with ravenous zombies, ready to make you one of their own.

What I like about Cute Little Zombies is that along with the numbered action options, it also makes it clear you can enter another action you want to take, which helps make the game a little more personal. Plus, the images created within the custom GPT game are ridiculously cute, and the storytelling is decent. I mean, it’s not going to win any prizes for writing, but it’s good enough to draw you in.


Gaming on ChatGPT is fun, but there is one major frustration that cannot be escaped: ChatGPT’s input limit. As you can only send ChatGPT Plus a limited number of messages (around 40 every three hours), any in-depth gaming will be interrupted periodically to reset the counter. The counter doesn’t roll over, either. You’re not building up extra hours of ChatGPT messages by not messaging; ChatGPT tracks your usage from when you send your first message during a session.

ChatGPT’s games are entertaining, and custom GPT games can add an extra dimension with some clever designs, but that limit means you’ll always have more fun with a regular game instead.

Apple AirTag vs. Tile: Which Tracker Is Best?

Quick Links

Key Takeaways

  • Tile and AirTags are both excellent smart trackers, but both come with their share of pros and cons.
  • While AirTags and Tile have the same IP67 water-resistance rating, AirTags feel more durable due to the metal and plastic construction.
  • Tile’s trackers have a bigger Bluetooth range, but AirTags benefit from Apple’s comprehensive Find My network.


Tile dominated the smart tracker market until Apple took the world by storm with its AirTags. Both are great products in and of themselves, being versatile and easy to use. But which is the best Bluetooth tracker for you? Let’s find out.


Price Comparison

Unlike most products with the Apple logo on them, AirTags are remarkably affordable. Only one version of AirTags exists; you can get a single AirTag for $29 or a four-pack for $99.

While Apple created AirTags as a one-size-fits-all tracking solution, Tile has an entire range of products designed to suit your needs. The Tile Sticker ($29.99) is the smallest tracker, while the larger Tile Mate—which features a keychain cutout—costs $24.99. Meanwhile, the Tile Pro is priced at $34.99 and is Tile’s premium tracker.


You can also choose the Tile Slim ($34.99), a credit card-shaped tracker designed to slide into your wallet. Tile also offers various bundles if you want to buy multiple tags. For instance, you can get the Tile Sticker 2-pack for $44.99 or the Tile Pro 4-pack for $99.99.

AirTags’ pricing is straightforward and affordable. However, the variety of options you get with Tile means that we’re giving Tile the point here.

Winner: Tile

Find My vs. Tile Network

Many people have questions about the range of Apple AirTags. Apple hasn’t officially revealed AirTags’ Bluetooth range, but after about 30 feet, they will start hopping on Apple’s Find My network.

That’s the same network that helps you locate a lost iPhone or MacBook. The Find My network utilizes hundreds of millions of Apple devices worldwide to give users extremely accurate tracking data almost anywhere.

Finding keys indoors using Precision Finding with the AirTag
Connor Jewiss/MakeUseOf


Tile’s Bluetooth range depends on the model you choose, but all of them have a bigger initial Bluetooth range than AirTags. The Tile Slim, Mate, and Sticker all have a bandwidth of 250 feet (76 meters). Meanwhile, the Tile Pro can stay connected to Bluetooth within around 400 feet (122 meters).

When Tile trackers are outside of Bluetooth spec, they operate on Tile’s proprietary network. Unfortunately, the Tile Network pales in comparison to Apple’s Find My network. While some estimates put almost a billion devices on the Find My network, the Tile Network only has around 35 million devices on it.

It’s also worth noting that while Apple devices come with the Find My app built-in, you need to install Tile’s app on your phone to access the network.

If you plan on primarily tracking with Bluetooth, Tile’s trackers should give you more range. However, if you’re like most people and want to track your items anywhere on the globe, AirTags will be much more accurate. For this reason, we’re giving AirTags the win in this category.


Winner: AirTag

Design Differences

There are lots of reasons to buy Apple’s AirTags. However, keep in mind that Apple designed the AirTag as a one-size-fits-all solution. That means they’re not designed for any one specific tracking need.

While AirTags are small and lightweight, they don’t fit very well into most wallets. Similarly, AirTags don’t come with a built-in keychain loop. That means if you want to hook one to your keys or a carabiner, you’ll need to pay extra for an accessory. On the other hand, Tile designed each of its trackers to do a specific job.

As the name suggests, Tile Sticker has an adhesive back for easy attachment. You can easily stick one on your remote or headphones or in places where it would be difficult to attach an AirTag.


The Tile Mate and Tile Pro have built-in cutouts that let you hook them to your keychain. And because the Tile Slim is shaped like a credit card, it’s a fantastic option for tracking your wallet.

We’re giving Tile another point because you can use its Bluetooth trackers in more specific places.

Winner: Tile

Durability

AirTags and Tile’s trackers are IP67 water-resistant. Both should survive being three feet underwater for up to 30 minutes but aren’t meant to be constantly submerged. Remember that waterproof and water-resistant mean two different things.

With this water resistance rating, AirTags and Tile trackers can withstand rain and splashes without too many problems.


Both AirTags and Tile trackers are durable and long-lasting. However, all of Tile’s trackers are made of plastic, while AirTags have a plastic and stainless steel construction. That should give AirTags a leg-up when it comes to durability.

Winner: AirTag

Pet Tracking

Officially, AirTags are only for tracking your physical items and not pets. But that hasn’t stopped some people from trying.

AirTags are light and compact, meaning they won’t be too heavy for most pets. However, you should remember that they will automatically play a sound if they’re separated from their paired iPhone for too long. That sound could distress your pet.


Tile markets its products as great options for pet tracking. The Tile Sticker and Tile Mate work great as attachments to pet collars. And unlike AirTags, Tile trackers don’t automatically play a sound or ping nearby iPhones. That means pet thieves are less likely to notice they’re being tracked, and your pet is less likely to become distressed in challenging situations.

Because Tile has created features designed specifically for pets, it wins in this category. If you plan to use a Bluetooth tracker with your pet, read these tips for attaching trackers to your pet.

Winner: Tile

Safety Measures

Although AirTags are one of the most innovative Apple products of the 21st century, they have also been a huge PR nightmare for Apple. There have been dozens of police reports involving AirTag stalking, and in March 2024, the Los Angeles Times reported that a class action lawsuit against Apple would proceed.


Since the initial AirTags release, Apple has released several updates to make AirTags safer. AirTags now play a louder sound if they get separated from their owner, and they send messages to nearby iPhones if they’re within range for too long.

Unlike AirTags, Tile trackers won’t automatically play a sound if separated from their owner. However, Tile did integrate a feature called Scan and Secure into its mobile app. So, if you think someone may be using a Tile to stalk you, Scan and Secure lets you search for any trackers that may be nearby.

Most of the bad press surrounding smart trackers has targeted AirTags. However, Apple has strongly committed to making AirTags safer, while Tile is still largely playing catch up. Despite the controversies with AirTags, Apple currently offers better safety features.

Winner: AirTag

Which Bluetooth Tracker Is Right for You?

To quickly summarize, below is a table of how AirTags and Tile’s trackers compare in key areas:

Product

Bluetooth Range

Price Range

Pet-Friendly Features

Durability

AirTag

30 feet

$29 – $99

No

IP67 water-resistant

Tile

250 – 400 feet

$24.99 – $109.98

Yes

IP67 water-resistant


If we tally up the scores for each section, AirTags and Tile trackers received three points each, and there wasn’t much between them. Tile’s trackers are better for versatility and use with pets, while AirTags have durability and the more popular Find My network going for them (even if the Bluetooth range is much less than Tile).

Since AirTags’ one-size-fits-all nature doesn’t work well in wallets, and you also need an accessory to clip them to anything, you should pick Tile if you have specific needs for your smart tags. On the other hand, AirTags are great if you want an ultra-powerful tracker that’s easy to use.

Bitwarden vs. 1Password: Which Is Better?

Quick Links

Key Takeaways

  • Bitwarden and 1Password both excel in security features, utilizing encryption and two-factor authentication.
  • Bitwarden offers robust password organization, while 1Password is better for non-password-related amenities.
  • Bitwarden has broader browser and device support, offering availability on more platforms compared to 1Password.


Using a password manager is vital to keeping your accounts secure. How else are you going to remember thirty different strong and unique passwords for each service you use?

Bitwarden and 1Password are two of the top-rated password managers, so I’ve tested them hands-on to determine which password manager is better and which one you should use to keep your accounts safe.


Security Features

When choosing the safest password manager, security features are essential. How do Bitwarden and 1Password compare with each other when it comes to security?

Bitwarden

Bitwarden uses zero-knowledge encryption, meaning that in the event of a security breach, the information that hackers obtain about you would be useless. They don’t store any password-related data, and they have no way of accessing your passwords. Bitwarden also uses open-source security, meaning that bugs and other potential threats are swiftly dealt with.


When you use Bitwarden as your password manager or generator, you can also enable two-factor authentication by going to Account Settings > Security > Two-step login and choosing how you want to verify your identity. If you want to set up a hardware security key, follow these steps but scroll down to FIDO2 WebAuthn.

You can also use Bitwarden Send to share sensitive files via a secure link. Moreover, Bitwarden has encrypted export settings to ensure that your data remains protected. Enterprise subscribers can use single sign-on (SSO).

1Password

1Password offers AES-256-bit encryption for your passwords, and you also get a secret key for all your devices. The secret key works similarly to zero-knowledge encryption in the sense that even if hackers breach 1Password’s systems, they still can’t access your data. 1Password claims that the secret key is “infeasible to guess no matter how much money or computing power an attacker has available”.


To ensure peace of mind, 1Password sends you notifications whenever a breach occurs. Moreover, you can only use 1Password in safe browsers and on websites where you’ve saved your login details.

1Password also has a Secure Remote Password (SRP) feature, which means that your passwords aren’t shared anywhere online. As a result, it’s much harder for hackers to gain access to your login credentials.

Like Bitwarden, 1Password offers hardware security key support if you want an extra layer of security. To activate this:

  1. Go to your name > My Profile > More Actions.
    The option to select your profile in 1Password

  2. Select Manage Two-Factor Authentication.
    The button to manage two-factor authentication in the 1Password app

  3. Tap Add a Security Key and enter the code.
    The option to set up a hardware security key in the 1Password app


Another handy security feature that 1Password has is Travel Mode, which removes vaults not marked as safe from your devices when away from home. You can activate this via the My Profile section.

While Bitwarden has a strong base of security features, we’re giving the point to 1Password for its advanced tools like Travel Mode.

Winner: 1Password

Password Organization, Management, and Generation

You can keep your passwords safe in several ways, and 1Password and Bitwarden are great options. But how do these two password managers compare when it comes to organization, management, and password generation?

Bitwarden

Bitwarden has an easy-to-use password storage solution that lets you easily add or generate new login codes. You can also pick which folder your passwords are in, along with adding usernames and uniform resource identifiers (URIs).

Store and generate a password in the Bitwarden app


If you need to add notes to each password you store in Bitwarden, you have a field to do that. Furthermore, you can use custom keys and, if you’re a Premium subscriber, authenticator keys. Once you’ve added new passwords, you’ll find them in the Vaults section. For frequently visited websites, you can add your login credentials as favorites.

If you use secure notes, you should read this guide on how to safely store sensitive information in Bitwarden.

1Password

1Password has a comprehensive password organization and generation tool. Select New Vault and customize your details before commencing.

The option to create a new vault in the 1Password app

Once you’ve tapped the + icon, you can choose Password and enter your login credentials and the web address. Like Bitwarden, you also have the option to add passwords as favorites if you’d like.


Store login details and additional notes for your passwords in the 1Password app

To organize your passwords better, 1Password lets you add labels and notes. You can store details for plenty of other things, too, like credit cards and your social security number.

While 1Password is better for organizing non-password-related amenities, we’re specifically comparing Bitwarden and 1Password as password managers. Since both are very similar in this area, we’re giving them a point each.

Winner: Tie

Browser and Device Support

1Password and Bitwarden aren’t just available on desktop devices. To ensure that you’re covered everywhere you want to log in, it’s time to compare browser and device support.


Bitwarden

Bitwarden is available on Windows, Linux, Mac, iOS, and Android. You can access your login details by signing into the Bitwarden website on your computer. iOS and Android apps are available from the App Store and Google Play. Bitwarden also has desktop apps for Mac, Linux, and Windows.

Download: Bitwarden for iOS | Android | Mac | Linux | Windows (Free, in-app purchases available)

Bitwarden also has web browser extensions for each of the following:

At the time of writing in March 2024, Bitwarden was also working on a DuckDuckGo extension for Mac. If you use Chrome and you’re struggling to remember your password, consider using these Chrome password extensions.

1Password

1Password has web and desktop apps for Windows, Mac, and Linux. You can also download the password manager and generator on your iOS or Android device. 1Password has a CLI tool.


Download: 1Password for Windows | Mac | Linux (.deb) | Linux (.rpm) | iOS | Android | CLI (Free, in-app purchases available)

While 1Password doesn’t have as many web browsers as Bitwarden, it does have a reasonable selection that’ll be more than enough for most users. You can use 1Password browsers on:

We’re giving Bitwarden the point here as it’s available in more browsers. However, the differences are marginal for the average user.

Winner: Bitwarden

Pricing

Bitwarden and 1Password have different pricing options, and we’ll break down your options in easily digestible formats below.


Bitwarden

Bitwarden has two pricing hierarchies: Personal and Business. If you choose a paid option, you’ll pay with annual billing. The free version has unlimited devices and password storage, but you can add file attachments and get security reports with Premium. Meanwhile, Families has unlimited sharing, six premium accounts, and other helpful features.

Below is a breakdown of Bitwarden’s Personal pricing plans:

Free Premium Families
Free $10 per year $40 per year

Bitwarden’s Business plans are Team and Enterprise, but you can also get a customized subscription if necessary. Below are the prices for Bitwarden Business (both are annual subscriptions):

Teams Enterprise
$48 per user per year $72 per user per year

1Password

1Password doesn’t have a free plan, but you can get a 14-day free trial before committing to a subscription. Families offers up to five members, Individuals gives unlimited devices and 1GB of storage for a single user, and Teams Starter Pack offers risk detection. Meanwhile, 1Password Business lets you integrate with Slack and other apps.


Below is a pricing breakdown for 1Password’s subscriptions:

Individual Families Teams Starter Pack Business
$2.99 per month $4.99 per month $19.95 per month $7.99 per month


For options, a free tier, and affordability, we’re giving Bitwarden another point here.

Winner:
Bitwarden

Bitwarden or 1Password: Which Password Manager Is Better?

When tallying up the points, Bitwarden won 3-2. For the average user in need of a user-friendly and secure password manager or password generator, Bitwarden is an excellent, affordable option. The free tier will be more than enough for most users, and you can use the software in several web browsers (and on multiple devices).As the close scoreline suggests, 1Password is still a good option for many people. Despite lacking a free pricing tier, you can access a decent range of features, and the monthly cost isn’t too high.

Why Does My AirTag Make Noise? What Each Chime Means

Key Takeaways

  • AirTags make different noises in varying scenarios.
  • You’ll hear chimes when you replace your battery and set up your AirTags.
  • Unknown AirTags will omit chimes or beeps, depending on whether or not you locate them in the Find My app.


Apple’s AirTags are capable of making noise under different circumstances. For instance, you may have connected it to your iPhone or located an unknown AirTag in Find My. Keep reading to discover all the reasons behind your AirTag beeping or chirping.


Your AirTag’s Battery Is Connected

When you connect a battery to your AirTag(s), you’ll hear a higher-pitched chime that soon alters to a lower frequency. Despite being at different volumes, the two chimes sound the same. You’ll also hear this noise when you replace your AirTag’s battery.

When you first purchase an AirTag, your tracker will play the same sound once you can set it up as it will when a battery is connected. So, if you’re wondering why your new AirTag is making noise, that’s probably why.


If you don’t know how long you have until you have to replace your AirTag battery, you can read our guide on checking your AirTag’s battery level.

You’ve Set Up Your AirTag

Connor Jewiss/MakeUseOf

It usually doesn’t take too long to set up your AirTags, and you’ll hear a shorter chime once the process completes.

Once you’ve set up your AirTags, you can play sounds from the Find My app whenever you need to find the item you’ve set up your tracker with. You can learn all about it in our AirTags explained guide.

An Unknown AirTag Is Moving With You


If you’re on the move and your iPhone doesn’t recognize an unknown AirTag is moving with you, you’ll hear a more fast-paced AirTag chirping. You will also usually receive an “AirTag Founded Moving With You” push notification on your iPhone.

If you know the item it’s connected to—for example, you’ve borrowed an item from your friend, family member, or neighbor—you don’t have anything to worry about. But if you don’t recognize the AirTag, erring on the side of caution is a good idea.

In 2022, Apple announced that it would introduce new features to protect people from stalking, but people with bad intentions could still use this technology to try and track you.

Fortunately, you can protect yourself against AirTag stalking in several ways. For example, you can remove the battery or use a Bluetooth scanner app.

You’ve Located an Unknown AirTag in Find My


If you hear an AirTag beeping three times, it’s likely because the Find My app hasn’t recognized it yet. The same rules from the previous section apply here; if you’re borrowing an item from someone you know, this isn’t a huge issue.

On the other hand, beeping sounds from unknown AirTags in Find My that you don’t recognize could be a cause for concern. Sometimes, you may hear this because you’ve picked up a wallet or keys that someone dropped and want to hand them to the police or lost and found. However, if that or a similar scenario hasn’t happened, it could mean someone is trying to track you.

AirTags are easy to use and set up; sounds are usually not a cause for concern. You’ll hear them when you’ve set up your trackers and if you replace your battery, along with whenever you choose to play a sound in the Find My app. You may also sometimes hear unknown AirTags, which can be concerning, but that’s a rare scenario.

Today’s Wordle Answer and Clues (Tuesday, April 16, 2024)

Wordle is a daily puzzle from the New York Times. If you want some extra help to solve today’s Wordle for April 16, 2024, we have the answer to Wordle #1032, plus some extra clues.


SPOILERS AHEAD (CLUES)


Today’s Wordle (Puzzle #1032) Basic Clues

If you just want the answer to the Wordle puzzle for April 16, 2024, scroll down past the clues and the next spoiler warning. Otherwise, here are a set of clues to help you solve today’s Wordle somewhat on your own.

  1. Today’s Wordle contains four consonants and one vowel.
  2. No letters appear twice, with all five unique within the word.
  3. The first letter is S.
  4. The last letter is K.

Today’s Wordle (Puzzle #1032) Big Clue

The big clue for today’s Wordle is, “She won’t thank you for hitting the ball with such abandon”.

SPOILERS AHEAD (ANSWER)

Today’s Wordle Answer for Tuesday, April 16, 2024

If you still haven’t beaten today’s Wordle even with the clues provided above, the answer is below…

The answer to today’s Wordle is “SHANK“.


The word “Shank” is most commonly a noun with several different meanings. The commonality across most of them is that they refer to something connecting one thing to another. In mammals, the “shank” is the part of the leg between the knee and the ankle, and on objects, the “shank” is often the straight part (think nails, fishhooks, and tobacco pipes). “Shank” can also be a verb meaning to hit wildly and in an unintended direction.

According to the Online Etymology Dictionary, the origin of “Shank” is from the Old English word “sceanca” meaning leg, shank, or shinbone. This evolved from the German word “schenkel” meaning shank or leg. The likely root is the Proto-Indo-European word “skeng-” meaning crooked, so later languages tweaked the meaning to that which bends. Which also explains how “Shank” came to be used to refer to a wild hit that went in the wrong direction.

Our Top Wordle Tips (to Beat It Every Day)

  1. Choose a good starting word. There are plenty to choose from, so pick one from our list of the best Wordle starting words.
  2. Try to eliminate all five vowels early. As there are only a handful of vowels, it’s best to use them all within the first 2-3 guesses.
  3. Use popular letters early. As well as the vowels, letters such as T, S, N, R, H, C, D, and L appear most commonly in English words.
  4. Take your time over your guesses. Wordle isn’t timed, so there’s no rush to complete it. You can even guess on paper first.
  5. Remember that letters can appear twice (and often do). Keep this in mind when guessing, as forgetting it can lead you to mess up.


Now that you have completed today’s Wordle puzzle (with a little help from your friends at MUO), you should check out some of the other free games from the New York Times.

Connections is a fun game that challenges you to find the associations between 16 words, splitting them up into four groups of four. To help combat the challenging nature of the game, check out our tips and tricks to help you beat Connections.

There’s also Strands, the newest addition to the New York Times’ burgeoning list of games. Just like Connections, it’s extremely challenging, but in a unique string-the-letters-together way. We recommend you check out our best tips for beating Strands to give yourself a leg up on the daily challenge.

Or, if you’re a Wordle purist and want more of the same, we recommend trying these awesome Wordle alternatives.

7 Mistakes You’re Probably Making in Canva

Canva is a pretty easy tool to understand, but there are some sneaky pitfalls you might overlook. Today, we’ll cover some of the biggest mistakes you’re probably making in Canva and how to avoid them.


1 Forgetting to Customize the Dimensions of Your Canvas

If you want your visuals to be of the best possible quality, you need to tailor your content to the different dimensions of websites and social media. One of the biggest mistakes beginners make in Canva is not customizing their dimensions.

You can customize your dimensions manually by going to Create a design > Custom size and entering the correct height and width. You can also pick one of the pre-made layouts if you already know where you’ll use your graphics and images.


If you’re not sure what the right dimensions are for each platform you use, see this guide that outlines the image sizes for Facebook, X (Twitter), and more.

2 Not Using Canva Projects to Organize Your Files

I use Canva for various projects, and I’m still guilty of leaving everything disorganized sometimes. This may not be a huge problem if you remember your file name, but things quickly become confusing when you have many projects.

The good news is that Canva has plenty of user-friendly tools to help you organize everything more effectively. In the Projects section, you can access your favorite projects via the Starred folder. And if you want to see the pictures you’ve added in Canva yourself, go to Uploads.

You can also create folders to keep everything organized:

  1. Press control + your trackpad (Mac) or right-click (Windows).
  2. Select Folder and give your folder a name. Once you hit Continue, you can start adding projects.

Add a new folder when using Canva


In addition to using Canva’s extensive suite of features, there are several Canva apps worth checking out, such as TypeCraft and Sketch to Life.

3 Only Uploading Files From Your Computer

Canva makes it easy to upload images and other file types directly from your computer into your projects. However, one major mistake that even seasoned Canva users make is thinking that it’s their only option.

If you click on the three dots icon next to the Upload files button, you’ll find a dropdown menu with all the upload options. For example, you can add pictures from Dropbox and Google Drive. It’s even possible to import images from Instagram if you have some content on your feed that you think would be good for your project.

Image showing how to upload different files to Canva


Once you’ve connected your account with each uploading option and verified who you are (if needed), you’ll have everything you need to add files and folders to your Canva projects. If you wish to maximize your experience using the app, check out these hidden Canva features you probably didn’t know about.

4 Using the Wrong Text Box Styles

One of the biggest errors that I consistently made in my early days of using Canva was only using a standard paragraph text box for everything. Things can get quite confusing when you have to add lots of text to one place, and you’ll probably struggle with formatting issues at some point.

The best way to organize your text in Canva is by using the correct styles. For example, if you need to add a subtitle, Canva has boxes already pre-formatted with the ideal text size:

  1. Click on the Text tab in your Canva project.
  2. Under Default text styles, pick your required text box format.
  3. Customize the text, font, color, and so on once the box is added to your project.


The different text box options in the Canva app

5 Going Overboard With the Fonts

If you spend a lot of time online, you’ve probably encountered the “graphic design is my passion” meme at least once. In short, this refers to visuals that don’t seem to work for some reason. It could be excessive colors or overdoing fonts—many Canva users are guilty of the latter.

Using too many fonts in your design can make everything look tacky and unprofessional. If you look closely at most advertising boards, logos, and branding themes, you’ll see that they normally use two or three fonts at most. Because of this, you’re not having your attention taken away from the core message.

Canva edit fonts on template.


Experiment with the various fonts in Canva to see which ones best suit your style. For example, you might want to achieve a minimalist design in Canva, in which case two sleek fonts will be enough.

6 Using Fonts That Don’t Complement Each Other

Even if you only use two or three different fonts, you can still put yourself at a disadvantage if they don’t complement each other. For example, Old English wouldn’t work well with Comic Sans, people who view your designs will just end up confused.

This will require some experimentation. If you’re not sure where to start, look at your favorite brands and then research the types of fonts they use on their websites, products, blogs, and so on.

Canva might not have the exact fonts you want, but you can search for “[Font Name] Canva alternative” in Google to find similar ones.

7 Failing to Use the Pink Alignment Lines

During my early days as a Canva user, I freely moved the boxes around in each project until I was happy with the result. While this led to some pretty good results, there were also instances where everything looked disorganized because the boxes weren’t aligned properly. Luckily, Canva has an easy solution to this problem: alignment lines.


Pink alignment lines when moving objects in Canva

When you move an element in your Canva design, various pink lines and boxes will appear. These are designed to help you keep everything organized more effectively, so using them will make your designs look much cleaner.

Canva is one of the best design apps for beginners, but it’s very easy to make mistakes if you’re not paying attention. This guide illuminates common pitfalls, like not organizing your projects to using too many fonts. Start with implementing one tip at a time, and you’ll be golden!

Today’s Wordle Answer and Clues (Monday, April 15, 2024)

Wordle is a daily puzzle from the New York Times. If you want some extra help to solve today’s Wordle, we have the answer to Wordle #1031, plus some extra clues to help you out.


SPOILERS AHEAD (CLUES)


Today’s Wordle (Puzzle #1031) Basic Clues

If you just want the answer to the Wordle puzzle for April 15, 2024, scroll down past the clues and the next spoiler warning. Otherwise, here are a set of clues to help you solve today’s Wordle somewhat on your own.

  1. Today’s Wordle contains two consonants and three vowels.
  2. No letters appear twice, with all five unique within the word.
  3. The first letter is E.
  4. The last letter is P.

Today’s Wordle (Puzzle #1031) Big Clue

The big clue for today’s Wordle is, “An electronic joke, perhaps”.

SPOILERS AHEAD (ANSWER)

Today’s Wordle Answer for Monday, April 15, 2024

If you still haven’t beaten today’s Wordle even with the clues provided above, the answer is below…

The answer to today’s Wordle is “EQUIP“.


The word “Equip” is a verb meaning to prepare or make ready for something. As in, “I need to equip myself with the skills needed for this job,” and “Before setting off on a trek, be sure to equip yourself with the tools needed”. Synonyms include “prepare,” “furnish,” and “outfit” (as a verb). Also of note is the word “equipment,” which refers to the resources or implements needed to be equipped.

According to the Online Etymology Dictionary, the origin of “Equip” is the French word “équiper” meaning “to fit out”. This can be traced back even further to the Old French “esquiper,” which meant specifically fitting out a ship, and the Old Norse “skipa,” meaning to arrange or place in order. Over time, the word has evolved to be used for any preparation and not specifically anything maritime.

Our Top Wordle Tips (to Beat It Every Day)

  1. Choose a good starting word. There are plenty to choose from, so pick one from our list of the best Wordle starting words.
  2. Try to eliminate all five vowels early. As there are only a handful of vowels, it’s best to use them all within the first 2-3 guesses.
  3. Use popular letters early. As well as the vowels, letters such as T, S, N, R, H, C, D, and L appear most commonly in English words.
  4. Take your time over your guesses. Wordle isn’t timed, so there’s no rush to complete it. You can even guess on paper first.
  5. Remember that letters can appear twice (and often do). Keep this in mind when guessing, as forgetting it can lead you to mess up.


Now that you have completed today’s Wordle puzzle (with a little help from your friends at MUO), you should check out some of the other free games from the New York Times.

Connections is a fun game that challenges you to find the associations between 16 words, splitting them up into four groups of four. To help combat the challenging nature of the game, check out our tips and tricks to help you beat Connections.

There’s also Strands, the newest addition to the New York Times’ burgeoning list of games. Just like Connections, it’s extremely challenging, but in a unique string-the-letters-together way. We recommend you check out our best tips for beating Strands to give yourself a leg up on the daily challenge.

Or, if you’re a Wordle purist and want more of the same, we recommend trying these awesome Wordle alternatives.

The Best LED Strip Lights of 2024

LED light strips are a great way to illuminate your home while filling it with color and fun. Whether you want to add a splash of color to your work or entertainment space or take your gaming setup to the next level, here are some of the best LED light strips you can purchase.


the razer chroma light strip expansion kit illuminates behind a monitor
Razer

If you want the best of the best, the Razer Chroma Light Strip Expansion Kit is a great choice. This light strip package features 120 individually addressable LEDs that offer spectacular RGB lighting. The kit includes one 100cm 60 LED light strip and two 50cm 30 LED light strips, as well as three individual controllers.

To achieve the ultimate gaming setup, you can place the Razer Chroma Light Strip Expansion Kit around your desk, on the back of your monitor, or wherever you like. This LED strip light offers universal compatibility with any ARGB device and is easy to expand since it supports daisy-chaining.

The Razer Chroma Light Strip Expansion Kit is expensive, but you’ll find that every cent you spend on it is worthwhile.

razer chrome strip light

Razer Chroma Light Strip Expansion Kit

Best Overall

$75 $80 Save $5

Versatile, luminous, and durable: the Razer Chroma Light Strip Expansion Kit is everything you could want from an LED light strip. The kit boasts three LED strip lights and all the wall-mounting essentials you could need, guaranteeing that the ideal light setup is just one purchase away.

Pros

  • Easily expandable
  • Quality construction
  • Features three individual LED strips
Cons

  • Expensive
  • Requires an RGB hub


a gaming desk is illuminated by a nanoleaf essentials lightstrip
Nanoleaf

With Apple HomeKit and Google Assistant compatibility, the Nanoleaf Essentials Lightstrip works with other smart home products. You can control the lights via Bluetooth, or via the included controller.

You can expand the strip up to 10 meters if you like. However, the starter kit is ideal since it’s budget-friendly. With customizable lighting, you can add dynamic scenes or mirror the lights from your TV or monitor.

nanoleaf essentials

Nanoleaf Essentials Lightstrip

Best Budget

$40 $50 Save $10

This affordable lighting solution offers seamless compatibility with all major smart home ecosystems and fantastic color customizability. The Nanoleaf Essentials Lightstrip’s combination of quality and affordability makes it the smart pick for anyone lighting their home on a budget.

Pros

  • Affordable
  • Fantastic color versatility
  • Compatible with major smart home ecosystems
Cons

  • App connectivity is sometimes spotty

a desktop is illuminated by internal corsair light strips
CORSAIR


If you’re looking to upgrade the inside or outside of your PC with some cool RGB lighting, the CORSAIR RGB LED Lighting PRO Strip Kit is a great choice. Four light strips are included, with 10 individually addressable LEDs on each strip.

When you combine the PRO strips with a CORSAIR Commander controller, you can adjust the colors of the LEDs on the fly. CORSAIR’s iCUE software allows you to do this seamlessly, even allowing you to sync the lights to match your other peripherals.

The CORSAIR RGB LED Lighting PRO Strips are incredibly easy to use thanks to their built-in mounting tape backings and magnetic fasteners. Once you plug them into your CORSAIR iCUE controller and set them up, you’re all set to use your PC in style.

corsair strip lights

CORSAIR RGB LED Lighting PRO Strip Kit

Best for Gaming

$30 $45 Save $15

The CORSAIR ecosystem of products excels in vibrancy and ease of use, and the CORSAIR RGB LED Lighting PRO Strip Kit is no exception. These affordable strips are ideal for lighting up your PC, provided that you’re up to the challenge of installing a CORSAIR LED controller.

Pros

  • Affordable
  • Vibrant and highly customizable color
  • Easy to mount
Cons

  • Requires an RGB connector
  • Installation requires minor tech know-how

govee lightstrip plus lights illuminate the exterior of a home
Govee


The Govee RGBIC LED Permanent Outdoor Lights are equally festive and subtle, but their most outstanding quality is their durability. These strip lights are designed to withstand harsh external elements like moisture and dust while still falling within a comfortable price point for most buyers.

Once you’ve mounted the strip light to your home, there’s no need to take it down like Christmas lights—the light can be turned on or off with just one click on the Govee app. You can create an atmosphere around your home by picking colors or brighten your home up year-round with warm white or cold white settings.

govee outdoor lights

Govee RGBIC LED Permanent Outdoor Lights

Best Outdoor LED Strip Light

Luminous, fun, and inviting are just a few choice terms to describe the Govee RGBIC LED Permanent Outdoor Lights. These fantastically durable fixtures come at an affordable price point and make the perfect addition to any home, whether they’ll be used for year-round brightening or festive decoration.

Pros

  • Suitable for year-round use
  • Fantastic color variety
  • Available in 32ft, 66ft, or 98ft varieties
Cons

  • Not expandable, each light strip requires a separate outlet

a phillips hue lightstrip plus illuminates a cabinet
Philips

Generating light at 1600 lumens, it’s easy to lighten up your workstation or gaming area with the Philips Hue Lightstrip Plus. You’ll get six feet of light to work with, which is expandable up to 32 feet. In addition, you can cut the light strips to suit your requirements.


Although the adhesive could be stronger, the Philips Hue Lightstrip Plus is easy to install. You can wrap the strip around walls, attach it to the back of your TV, and so on. You can control the lights using your smartphone or voice assistant. There are multiple colors to choose from, with different tones of light or RGB.

philips hue strip light

Philips Hue Lightstrip Plus

Best for Behind the TV

$73 $100 Save $27

No line of lighting products is better known for quality than Philips Hue, and that reputation holds true for the Philips Hue Lightstrip Plus. This LED strip light’s subtle design, fantastic durability, and easy app control make it the ideal option for installation behind a TV—once you’ve set it up, it’s sure to last.

Pros

  • Has a known reputation for quality
  • Easy to install and expand
  • Seamless app support

FAQ

Q: Do LED strip lights use a lot of electricity?

LED strip lights consume a miniscule amount of energy, especially when compared to incandescent bulbs. The LEDs are extremely efficient at converting energy to light rather than heat. Estimates suggest that the average LED strip light consumes as little as 10 to 20 watts per hour.

Q: How do I connect LED strip lights?

Most LED strip lights feature easy-to-use connectors. One connector will feature a socket, while the other will feature a prong. Before connecting the two strips, you should attach the socket to the wall while leaving a minimal amount of slack. By connecting the prong to the socket when it is already mounted, you will ensure that your LED strip light is perfectly positioned.


Q: Is it alright to leave LED strip lights on all night?

It’s okay to leave reputable LED strip lights on all night. LED light strips generally draw little power and produce little heat, as they’re produced to run constantly without overheating. Some poorly constructed LED light strips may get hot when allowed to run for long periods of time, in which case turning them off overnight (or replacing them) is ideal.

Q: Do LED strip lights get hot?

LED strip lights don’t get significantly warmer than the ambient room temperature when allowed to run for long periods of time. LED lights are far more efficient at turning energy into light than incandescent lights. As a result, it’s uncommon for LED strip lights to get hotter than 122°F.

Q: Can I put LED strip lights on wood?

You can put LED strip lights on wood, but the sticky side of LED light strips doesn’t adhere well to wood. You should use a stronger adhesive or light strip mounts to ensure that the light strip doesn’t fall down. LEDs generally don’t run hot enough to present a serious fire hazard, and if you’re concerned, you can use a timer to force the LEDs to occasionally turn off and cool down.


Today’s Wordle Answer and Clues (Sunday, April 14, 2024)

Wordle is a daily puzzle from the New York Times. If you want some extra help to solve today’s Wordle, we have the answer to Wordle #1030, plus some extra clues to help you out.


SPOILERS AHEAD (CLUES)


Today’s Wordle (Puzzle #1030) Basic Clues

If you just want the answer to the Wordle puzzle for April 14, 2024, scroll down past the clues and the next spoiler warning. Otherwise, here are a set of clues to help you solve today’s Wordle somewhat on your own.

  1. Today’s Wordle contains four consonants and one vowel.
  2. No letters appear twice, with all five unique within the word.
  3. The first letter is B.
  4. The last letter is P.

Today’s Wordle (Puzzle #1030) Big Clue

The big clue for today’s Wordle is, “If it’s a goodyear [sic], you may see one of these in the sky”.

SPOILERS AHEAD (ANSWER)

Today’s Wordle Answer for Sunday, April 14, 2024

If you still haven’t beaten today’s Wordle even with the clues provided above, the answer is below…

The answer to today’s Wordle is “BLIMP“.


The word “Blimp” is a noun that refers to a gas-filled airship. Unlike other forms of airship (such as Zeppelins), blimps have no internal framework, so the combination of the material and the pressure of the gas inside it is what maintains the shape. Blimps are primarily used for advertising and surveillance, though their use is falling out of fashion.

According to the Online Etymology Dictionary, the origin of “Blimp” isn’t clear. However, the most common theory suggests the name came from the designers. There was a “Type-A rigid,” (with an internal structure), and a “Type-B limp” (without an internal structure). This then got shortened to “blimp”. We do know that the word only came into being around 1916, and that it has a connection to the word “limp”.

Our Top Wordle Tips (to Beat It Every Day)

  1. Choose a good starting word. There are plenty to choose from, so pick one from our list of the best Wordle starting words.
  2. Try to eliminate all five vowels early. As there are only a handful of vowels, it’s best to use them all within the first 2-3 guesses.
  3. Use popular letters early. As well as the vowels, letters such as T, S, N, R, H, C, D, and L appear most commonly in English words.
  4. Take your time over your guesses. Wordle isn’t timed, so there’s no rush to complete it. You can even guess on paper first.
  5. Remember that letters can appear twice (and often do). Keep this in mind when guessing, as forgetting it can lead you to mess up.


Now that you have completed today’s Wordle puzzle (with a little help from your friends at MUO), you should check out some of the other free games from the New York Times.

Connections is a fun game that challenges you to find the associations between 16 words, splitting them up into four groups of four. To help combat the challenging nature of the game, check out our tips and tricks to help you beat Connections.

There’s also Strands, the newest addition to the New York Times’ burgeoning list of games. Just like Connections, it’s extremely challenging, but in a unique string-the-letters-together way. We recommend you check out our best tips for beating Strands to give yourself a leg up on the daily challenge.

Or, if you’re a Wordle purist and want more of the same, we recommend trying these awesome Wordle alternatives.

How to Run Windows Apps on Android With Winlator

A PC emulator like Winlator is all you need to run Windows apps on your Android device.

Key Takeaways

  • You can use Winlator, a PC emulator for Android devices, to run your favorite Windows apps.
  • You won’t find Winlator on the Play Store, but you can sideload the APK file from its GitHub page.
  • After a quick initial setup, you can run Windows apps as long as their files are in the Downloads folder of your Android device.


If you’ve ever thought about bringing your favorite Windows apps and games to your Android device, you’re in luck, as we’re here to show you how you can use Winlator to emulate Windows apps directly on your phone.


Download and Install Winlator

Winlator is an Android app that uses Wine and Box86 to translate and run Windows apps on Android. Unfortunately, it’s not available in the Play Store, which means you’ll have to sideload the Android app manually after downloading the APK file. You can do so by following these steps:

  1. First, go to Settings > Apps and tap the browser you normally use. Now, scroll down, select the Install unknown apps option, and then toggle on Allow from this source.
  2. Head over to Winlator’s GitHub page and download the latest available release. You might see a warning that the APK file might be harmful; tap Download anyway to proceed.
  3. Once it finishes downloading, you’ll get a banner at the top prompting you to open the app. Tap Open, then select Install to confirm.


Setting Up Winlator on Android

When you open Winlator for the first time, it will download some dependencies and additional files. Once that’s done, you might need to tweak some settings to ensure a smooth experience. For instance, if you plan to play games or run apps that might not work well with a touchscreen, we recommend connecting a keyboard and a mouse to your phone.

Now, to set up Winlator on your Android device, follow these steps:

  1. Tap the + (plus) icon at the top right to create a new container.
  2. If you have a relatively older or a lower-end device, reduce the resolution by tapping Screen Size and selecting a lower resolution like 800×600.
  3. If your phone has a Mali GPU (mainly found in MediaTek SoCs), change the Graphics Driver setting to VirGL (Universal). However, if it’s powered by a Snapdragon chip, choose Turnip (Adreno).
  4. Finally, tap the check mark at the bottom-right corner to create the container.


Running Your Windows Apps on Android

Now that you have set up a container, you can finally run your apps by following these steps:

  1. Ensure that all the necessary files of the Windows app are in the Downloads folder. This includes the app’s executable (.exe) and other supporting files.
  2. Open Winlator again, tap the three dots next to the container you created earlier, and select Run.

  3. Winlator will now launch a Windows-like environment with a proper desktop and a file manager. If you’re not using a keyboard and mouse, you can move the cursor by dragging your finger across the screen and double-click by double-tapping anywhere.
    Winlator File Manager

  4. Head over to your D: drive using the file manager, which opens up automatically on startup. Here, you will see all the files in your Downloads folder.
  5. If your app requires installation or setup, double-click the .exe file to begin the process and follow the on-screen instructions as you would on a Windows computer to install it. After installation, an icon for the app should appear on the desktop.
    Winlator D: Drive With Half Life's Setup Open

  6. Now, you can just double-click the desktop icon to launch the app.


Winlator makes it easy to run your favorite Windows apps and games directly on your Android device. However, if you’re facing issues like stuttering and frame drops, consider checking out our guide on boosting your phone’s gaming performance.

As Winlator continues to evolve with software updates, you can expect even more enhancements and optimizations, further improving the compatibility and performance of Windows apps and games on your phone.


Today’s Wordle Answer and Clues (Saturday, April 13, 2024)

Wordle is a daily puzzle from the New York Times. If you want some extra help solving today’s Wordle, we’re here with the answer to Wordle #1029, plus some extra clues to help you out.


SPOILERS AHEAD (CLUES)


Today’s Wordle (Puzzle #1029) Basic Clues

If you just want the answer to the Wordle puzzle for April 13, 2024, scroll down past the clues and the next spoiler warning. Otherwise, here are a set of clues to help you solve today’s Wordle somewhat on your own.

  1. Today’s Wordle contains three consonants and two vowels.
  2. One letter appears twice, and in succession.
  3. The first letter is S.
  4. The last letter is L.

Today’s Wordle (Puzzle #1029) Big Clue

The big clue for today’s Wordle is, “You need a strong resolve to wield a sword made from this”.

SPOILERS AHEAD (ANSWER)

Today’s Wordle Answer for Saturday, April 13, 2024

If you still haven’t beaten today’s Wordle even with the clues provided above, the answer is below…

The answer to today’s Wordle is “STEEL“.


The word “Steel” is primarily a noun, but can also be both a verb and an adjective. The noun variously refers to a type of metal, an instrument made of that metal, and a quality that brings the metal to mind. The verb means to forge something from steel or to have a strong resolve, while the adjective is used to suggest strength and/or determination.

According to the Online Etymology Dictionary, the origin of “Steel” is thought to be the Proto-Indo-European word “stek-lo-“, from the root “stak-” meaning that which stands firm. It is then found in Middle English as “stele,” Old Saxon as “stehli,” German as “stahl,” and lots more languages besides. The modern word “stay” shares a common root.

Our Top Wordle Tips (to Beat It Every Day)

  1. Choose a good starting word. There are plenty to choose from, so pick one from our list of the best Wordle starting words.
  2. Try to eliminate all five vowels early. As there are only a handful of vowels, it’s best to use them all within the first 2-3 guesses.
  3. Use popular letters early. As well as the vowels, letters such as T, S, N, R, H, C, D, and L appear most commonly in English words.
  4. Take your time over your guesses. Wordle isn’t timed, so there’s no rush to complete it. You can even guess on paper first.
  5. Remember that letters can appear twice (and often do). Keep this in mind when guessing, as forgetting it can lead you to mess up.


Now that you have completed today’s Wordle puzzle (with a little help from your friends at MUO), you should check out some of the other free games from the New York Times.

Connections is a fun game that challenges you to find the associations between 16 words, splitting them up into four groups of four. To help combat the challenging nature of the game, check out our tips and tricks to help you beat Connections.

There’s also Strands, the newest addition to the New York Times’ burgeoning list of games. Just like Connections, it’s extremely challenging, but in a unique string-the-letters-together way. We recommend you check out our best tips for beating Strands to give yourself a leg up on the daily challenge.

Or, if you’re a Wordle purist and want more of the same, we recommend trying these awesome Wordle alternatives.

Is an Adobe Creative Cloud Subscription Actually Worth It if You’re Not a Pro?

Key Takeaways

  • The Adobe Creative Cloud All Apps plan is between $59.99 and $89.99 per month for most users.
  • Non-professionals interested in multiple disciplines may want to purchase the All Apps subscription.
  • Students get a significant discount on the All Apps plan. However, for some people, the subscription is not worth getting.


Adobe’s Creative Cloud All Apps subscription lets you use Photoshop, Premiere Pro, InDesign, and several other apps. It’s not uncommon for professionals and agencies to purchase the All Apps plan, but is it worthwhile for non-professionals? Let’s find out.


What’s Included in a Creative Cloud All Apps Subscription?

The Adobe CC All Apps subscription includes all the major paid Adobe apps, including Lightroom, Audition, Premiere Pro, and Photoshop. You also get access to Adobe’s free programs, such as Photoshop Express—along with any paid tiers those apps may have.

See our complete guide to what’s included in an Adobe CC plan and how Adobe CC works if you want a full overview.

Who Should Get the Adobe All Apps Plan as a Non-Professional?

Considering that Adobe CC’s All Apps subscription costs $59.99-$89.99 per month, it’s a significant investment if you don’t use the software for your job, degree, or business. Nonetheless, some non-professionals will benefit greatly from paying for it.

If you fall into one of the categories below, you may want to consider purchasing the All Apps plan.


1. You Enjoy Multiple Creative Disciplines

Even if other people tell you to stick to one thing, the truth is that some people simply enjoy lots of different creative disciplines. For example, while photography is my main creative endeavor, I also like videography and recording audio. For these reasons, the Creative Cloud All Apps plan is the most logical choice.

Buying the All Apps plan is usually much better than the mental gymnastics involved in choosing, say, the Photography plan but then needing to find an alternative graphic design or audio editing solution. Instead, you can simply download all the apps you need and then focus more on the creative process.

2. You’re Experimenting With Different Hobbies

Before you find the creative hobbies and career paths that really interest you, you’ll often need to try multiple things to see what sticks and what doesn’t. If you’re in that phase, buying different Adobe plans can get expensive.


Remove Audio in the Adobe Audition App

If you don’t yet know what you want to do, the easiest choice is to try each Adobe app and creative discipline to see what’s best for you. You might find that you like everything equally, in which case you can keep your All Apps subscription.

But some users will find one core thing they like; if that’s you, simply cancel your Adobe subscription after the commitment period and choose a more specialized plan.

3. You’re Eligible for a Student or Teacher Discount

While an Adobe Creative Cloud subscription is quite expensive at full price, students and teachers can get a significant discount. If you qualify, you can get the All Apps plan for just $19.99 per month for your first year.


First-year student pricing for the Adobe CC All Apps subscription

After the first 12 months, your subscription will increase to $29.99 per month with an annual commitment. But even at this price, it’s still much less than what you would pay at full price. So, it’s often better to get the All Apps plan and have the flexibility when needed.

A list of the different Adobe CC All Apps pricing plans for educational institutions

Schools and universities can also get the All Apps plan for $34.99 per year, in addition to choosing other discounted pricing plans.

If you’re a student and on the lookout for tech discounts, you should also consider getting Apple’s Student Discount.


4. You’re Interested in More Than One of the Adobe Plans

Adobe has several subscription bundles, such as Lightroom and Photoshop for photographers and the Substance 3D collection. However, you’re only allowed to have one active plan on each Adobe account at any given time. While you can create multiple Adobe IDs, this quickly becomes confusing.

If you want to access multiple paid subscriptions, you’re much better off buying the All Apps plan and keeping everything in the same place. You also don’t need to worry about multiple payments going out of your account, making it much easier to monitor your budget if that’s something you’re concerned about.

When Should You Not Get the Adobe All Apps Subscription?

While the argument to get an Adobe CC subscription is compelling for some non-professionals, it’s not something everyone should pursue. Let’s discuss when purchasing the All Apps plan isn’t worthwhile.

1. You’re Only Interested in One Creative Discipline

Adobe lets you buy subscriptions for individual apps alongside its bundles, and many focus on one creative discipline. These are often much less expensive than the All Apps plan.


Reduce the Clarity Slider in Adobe Lightroom

If you’re only interested in one creative discipline, you’re not going to get the value for your money from the All Apps plan. So, stick with getting the apps related to your interests and upgrade later if you feel like it’s necessary.

2. You Often Use Non-Adobe Apps

Some people might be interested in more than one creative discipline but not use Adobe apps for all of them. For example, I’ve used DaVinci Resolve many times in the past for video editing and know creatives who would rather use Lightroom alternatives, such as Capture One.

New Footage in DaVinci Resolve Screenshot


If you use non-Adobe apps for some of your creative disciplines, you’re unlikely to get significant value from the All Apps plan. Moreover, you may need to pay for several subscriptions across different platforms, which will start to add up. If you want to later switch to Adobe, you always have that option.

3. You Only Want to Use Adobe’s Free Apps

While you need to pay for most of Adobe’s premium apps and services, you can use some of its tools for free. For example, Premiere Rush has a broad suite of features available without needing to pay. Similarly, you can use Adobe Express, Bridge, and Photoshop Express without paying.

The option to upload media to Adobe Express or choose from the app

If you’re only going to use Adobe’s free apps, the All Apps plan is not really worth getting. To use the various free tools, you only have to sign up for an Adobe CC account, which costs nothing.


Is the Adobe CC All Apps Plan Worth It if You’re Not a Professional?

It depends on the programs you need access to. If you’re interested in multiple creative disciplines and prefer Adobe apps, the All Apps plan is good value for money. Plus, students and teachers can get sizable discounts.

The All Apps plan is also worth getting if you aren’t necessarily interested in multiple disciplines but want to get more than one subscription on the same account.

On the other hand, you’re not getting much value if you only need one plan or only want to use Adobe’s free tools. You can find plenty of free alternatives or get a free trial if you’re still on the fence.

Today’s Wordle Answer and Clues (Friday, April 12, 2024)

Wordle is a daily puzzle from the New York Times. If you want some extra help solving today’s Wordle, we’re here with the answer to Wordle #1028, plus some extra clues to help you out.


SPOILERS AHEAD (CLUES)


Today’s Wordle (Puzzle #1028) Basic Clues

If you just want the answer to the Wordle puzzle for April 12, 2024, scroll down past the clues and the next spoiler warning. Otherwise, here are a set of clues to help you solve today’s Wordle somewhat on your own.

  1. Today’s Wordle contains four consonants and one vowel.
  2. No letters appear twice, with all five distinct from each other.
  3. The first letter is W.
  4. The last letter is Y.

Today’s Wordle (Puzzle #1028) Big Clue

The big clue for today’s Wordle is, “Henry and Hannah both enjoy a glass or two without complaint”.

SPOILERS AHEAD (ANSWER)

Today’s Wordle Answer for Friday, April 12, 2024

If you still haven’t beaten today’s Wordle even with the clues provided above, the answer is below…

The answer to today’s Wordle is “WHINY“.


The word “Whiny” is an adjective which means either having a high-pitched or shrill voice or a propensity to complain or nag. An example of the former in a sentence is, “Janice from Friends had a very whiny voice”. An example of the latter in a sentence is, “I love him to bits, but as he’s got older, he has become very whiny”.

According to the Online Etymology Dictionary, the origin of “Whine” (the verb that the adjective is taken from) are the Old English words “hwinan” and “hwinsian”. The former means “to whiz, hiss, or whistle through the air” and refers to arrows, while the latter refers to the whining sound made by dogs. The alternative (and now more common) meaning of complaining in a feeble way dates back to at least the 1520s.

Our Top Wordle Tips (to Beat It Every Day)

  1. Choose a good starting word. There are plenty to choose from, so pick one from our list of the best Wordle starting words.
  2. Try to eliminate all five vowels early. As there are only a handful of vowels, it’s best to use them all within the first 2-3 guesses.
  3. Use popular letters early. As well as the vowels, letters such as T, S, N, R, H, C, D, and L appear most commonly in English words.
  4. Take your time over your guesses. Wordle isn’t timed, so there’s no rush to complete it. You can even guess on paper first.
  5. Remember that letters can appear twice (and often do). Keep this in mind when guessing, as forgetting it can lead you to mess up.


Now that you have completed today’s Wordle puzzle (with a little help from your friends at MUO), you should check out some of the other free games from the New York Times.

Connections is a fun game that challenges you to find the associations between 16 words, splitting them up into four groups of four. To help combat the challenging nature of the game, check out our tips and tricks to help you beat Connections.

There’s also Strands, the newest addition to the New York Times’ burgeoning list of games. Just like Connections, it’s extremely challenging, but in a unique string-the-letters-together way. We recommend you check out our best tips for beating Strands to give yourself a leg up on the daily challenge.

Or, if you’re a Wordle purist and want more of the same, we recommend trying these awesome Wordle alternatives.

How to Take a Screenshot on Your Mac (Using Several Methods)

Key Takeaways

  • Use keyboard shortcuts to take screenshots as quickly as possible. You can capture the entire screen, a specific portion, or an app window.
  • You can use the built-in Preview app if you want more control over the location and image format in which your screenshots are saved.
  • Third-party screenshot apps like Snip My give you more options, like taking screenshots of multiple screens, adding a delay, etc.


Whether you want to take a screenshot of the whole screen or snip out a part of it, macOS makes it easy. You can use keyboard shortcuts, the built-in Screenshot app, or download free third-party apps to do so. We’ll explain each method in detail below.


Take Screenshots on a Mac Using Keyboard Shortcuts

The fastest way to take a screenshot on your Mac is by using keyboard shortcuts. There are three main keyboard shortcuts, each of which helps you take a screenshot differently.

Before proceeding further, ensure you’ve enabled the keyboard shortcut feature first. Go to System Settings > Keyboard > Keyboard Shortcuts > Screenshots. Check the list of boxes there and click Done.

Take a Screenshot of the Entire Screen on Your Mac

To take a screenshot of your Mac’s entire screen, press Cmd + Shift + 3 on your keyboard.


screenshot of full Mac screen

When you do that, you’ll see an image appear in the bottom-right corner of your screen. You can click on the image to edit, annotate, or delete the screenshot. You can add text, sketches, shapes, and even your signature.

Of course, you can opt to do nothing and let it auto-save to your desktop. macOS saves the image as a PNG file by default. However, if needed, you can set your Mac to save screenshots as JPG.

Take a Screenshot of a Specific Portion of Your Screen

To screenshot a particular section of your Mac’s screen, press Cmd + Shift + 4. Notice that your cursor turns into a crosshair icon. Simply click and drag it across the part of the screen you want to screenshot.

take screenshot of part of a mac screen


While making the selection, hold down the Shift key if you want to limit your adjustments to either the X or Y axis. To resize your selection proportionally from the center, hold down the Option key. And if you want to move the selection, hold down Space instead.

Changed your mind about taking the screenshot? No problem. Hit the Esc key to cancel the action. And once you’re satisfied with the selection, release the trackpad or mouse.

If you want to copy the captured image to the clipboard instead of saving it, press Control + Cmd + Shift + 4 instead.

Take a Screenshot of an App Window

Want to take a screenshot of an active app window? First, hit Cmd + Shift + 4. Then hit Space, and you’ll see the crosshair turn into a camera.

screen clip whole window on mac


The active window appears highlighted, and if you click the camera, you get a screenshot of it. Before clicking, you can also choose to move the camera’s focus to a different window.

If you want to take a timed screenshot, you’ll need to open your Mac’s built-in snipping tool. We’ll discuss this in the next section.

Take Screenshots on a Mac With the Built-In Screenshot App

If you prefer a more point-and-click approach, you can use the pre-installed Mac snipping tool called the Screenshot app. To access it, go to Finder > Applications > Utilities > Screenshot. Alternatively, you can use the shortcut Cmd + Shift + 5 to bring up the app.

The Screenshot app has three tools that perform the same action as the keyboard shortcuts we covered above: Capture Entire Screen, Capture Selected Window, and Capture Selected Portion.

To take a timed screenshot, click Options and choose either 5 or 10 seconds. Then, click Capture to start the countdown timer.


Mac Screenshot app

The native Screenshot utility also serves as a simple screen recorder app for your Mac.

Take a Screenshot on a Mac With Preview

The Preview app on your Mac also allows you to take screenshots of files you can open with it, such as images and PDF files.

The advantage of using Preview for screenshots is that, with each new capture, you can change the screenshot file format and save location on your Mac. Of course, you can also instantly edit your screenshots in Preview before saving them.

To take a screenshot in Preview, go to File > Take Screenshot. Again, you can choose to screenshot the entire screen, a section of it, or the opened window. Unfortunately, Preview doesn’t let you take timed screenshots.

screenshot options in Preview on Mac


​​​​​

Want more features that aren’t included in the built-in screenshot tools on your Mac? You can try one of these free third-party apps to take a screenshot on your Mac.

1. Snip My

Snip My app on Mac

Snip My has several timed screenshot options. You can choose to have a screenshot delayed from 1 to 15 seconds. The app lets you take a screenshot of multiple screens as well. On the paid subscription, you can opt to take a circular screenshot, too.

Download:Snip My (Free, subscription available)

2. iScreen Shoter

iScreen Shoter app on Mac


Besides the usual screenshot functions, iScreen Shoter comes with an optical character recognition (OCR) tool. If you need to extract text from a particular image, you can take a screenshot and then scan the text with this app so that you can copy it to your clipboard and paste it elsewhere.

Download:iScreen Shoter (Free, premium version available)

3. Awesome Screenshot & Recorder

Awesome Screenshot app on Mac

Awesome Screenshot is one of the best Chrome extensions for screenshots, and it has an app for Mac users too. A unique feature of the desktop app is that it comes with a color picker, so if you’re taking a screenshot and need to utilize the same color from an image elsewhere, just use the color picker to identify the color code!

Download:Awesome Screenshot & Recorder (Free, subscription available)


From built-in tools to third-party software, you can choose from a variety of different keyboard shortcuts and apps to screenshot your Mac. The best option depends on what exactly you want to take a screenshot of.

In rare cases, a screenshot may not capture all elements of the macOS user interface. In those situations, the workaround would be to screen record your Mac and then take a screenshot from the video.

Today’s Wordle Answer and Clues (Thursday, April 11, 2024)

Wordle is a daily puzzle from the New York Times. If you want some extra help solving today’s Wordle, we’re here with the answer to Wordle #1027, plus some extra clues to help you out.


SPOILERS AHEAD (CLUES)


Today’s Wordle (Puzzle #1027) Basic Clues

If you just want the answer to the Wordle puzzle for April 11, 2024, scroll down past the clues and the next spoiler warning. Otherwise, here are a set of clues to help you solve today’s Wordle somewhat on your own.

  1. Today’s Wordle contains two consonants and three vowels.
  2. No letters appear twice, with all five distinct from each other.
  3. The first letter is L.
  4. The last letter is E.

Today’s Wordle (Puzzle #1027) Big Clue

The big clue for today’s Wordle is, “The singular form of what children sometimes find in their hair”.

SPOILERS AHEAD (ANSWER)

Today’s Wordle Answer for Thursday, April 11, 2024

If you still haven’t beaten today’s Wordle even with the clues provided above, the answer is below…

The answer to today’s Wordle is “LOUSE“.


The word “Louse” is primarily a noun, but can also be a verb. As a noun, it refers to small, parasitic insets that live on warm-blooded animals. There are sometimes outbreaks of head lice in schools. As a verb, it refers to the practice of removing these creatures from their host or environment, as in “lousing” or (more commonly) “delousing”.

According to the Online Etymology Dictionary, the origin of “Louse” is the Old English word “lus”. The same basic word is found in Old Norse (as “lus”), Middle Dutch (as “luus”), and German (as “laus”). The alternative meaning of an obnoxious person dates from the 1630s.

Our Top Wordle Tips (to Beat It Every Day)

  1. Choose a good starting word. There are plenty to choose from, so pick one from our list of the best Wordle starting words.
  2. Try to eliminate all five vowels early. As there are only a handful of vowels, it’s best to use them all within the first 2-3 guesses.
  3. Use popular letters early. As well as the vowels, letters such as T, S, N, R, H, C, D, and L appear most commonly in English words.
  4. Take your time over your guesses. Wordle isn’t timed, so there’s no rush to complete it. You can even guess on paper first.
  5. Remember that letters can appear twice (and often do). Keep this in mind when guessing, as forgetting it can lead you to mess up.


Now that you have completed today’s Wordle puzzle (with a little help from your friends at MUO), you should check out some of the other free games from the New York Times.

Connections is a fun game that challenges you to find the associations between 16 words, splitting them up into four groups of four. To help combat the challenging nature of the game, check out our tips and tricks to help you beat Connections.

There’s also Strands, the newest addition to the New York Times’ burgeoning list of games. Just like Connections, it’s extremely challenging, but in a unique string-the-letters-together way. We recommend you check out our best tips for beating Strands to give yourself a leg up on the daily challenge.

Or, if you’re a Wordle purist and want more of the same, we recommend trying these awesome Wordle alternatives.

A Power Supply for Any Situation

The more that we rely on technology, the more that we rely on the power to keep it running. Whether this means making sure that your phone is running while you’re in the great outdoors or having peace of mind that your fridge will continue operating during a power outage, the need for portable power solutions is more prevalent than ever.


That’s where the OUKITEL P5000 comes in. This power bank is an absolute game changer when it comes to keeping your home and devices fully charged and will be ready to go whenever you are.


What is OUKITEL?

OUKITEL has been making and producing portable power solutions for years, with a focus on producing high-quality products always at the forefront. Whether it be durability, reliability, convenience, or power, OUKITEL has always been at the forefront of portable power solutions.

With a focus on customer service from pre-sale inquiries all the way to after-sales support, OUKITEL is a power supply brand that is dedicated to producing impressive products and always putting the customer first.

Impressive Power That Lasts


First and foremost, the OUKITEL P5000 comes with plenty of power to handle just about any device you can think of. Whether you’re looking to charge a laptop, camera, drone, or many more, the OUKITEL P5000 has more than enough juice to keep your devices topped up.

This is thanks to the OUKITEL P5000’s massive 5120Wh capacity and 2200W output capabilities. Not only is this an absolutely huge power supply, but it also how the output capacity to handle high-power devices with ease.

Lightweight and Easy to Transport

For travelers or outdoor enthusiasts, the OUKITEL P5000 is a match made in heaven. The portable power supply comes with built-in wheels, a stop, and a handle to ensure that you won’t have to lug around a big brick with you. Moving the OUKITEL P5000 is a breeze, and its lightweight design makes it easy to fit into any facet of your life, be it indoors or outdoors.

Safe and Reliable

P5000 power station home backup


Another area in which the OUKITEL P5000 excels is in safety and reliability. In the case of a blackout, the OUKITEL P5000 is capable of working as a 1400W Uninterruptible Power Supply, but what’s truly impressive is the fact that it can switch over to batter power in just 10 ms in order to keep connected devices up and running.

Combine this with the fact that you can connect the OUKITEL P5000 to your home’s existing main electrical panel or transfer switch, and you not only have an impressively powerful backup power generator, but you also have peace of mind that your home will continue to remain up and running no matter what happens to it.

Power Enough For the Great Outdoors

If you’re more concerned with having power out where there is none than you are keeping things running where there is, then the OUKITEL P5000 has you covered there as well. This is thanks to the OUKITEL P5000’s built-in MPPT controller that allows 99% conversion efficiency of solar power.


With a maximum solar input of 1000W, you can fully charge the power bank in roughly five hours using nothing but the power of the sun.

This means that you can easily power any devices or gadgets that you might need even in the harshest of conditions, but it also means that you can set up camp with all the creature comforts that you’ve grown accustomed to. The OUKITEL P5000 is more than capable of keeping lights, speakers, stoves, and more powered for your campsite.

Pick Up Yours, Today

P5000 power station outdoors

The OUKITEL P5000 comes with a huge range of impressive features, and it’s clear to see that customers across the board are impressed by the portable power supply with its plethora of five-star reviews.


What makes it even better, however, is that it’s currently on sale. Normally, picking up the OUKITEL P5000 and the PV400 Solar Power Generator would cost you $3799, but for a limited time, you’ll be able to get the two for only $2899.

That’s saving you $900 off of the OUKITEL P5000 and a 400W solar panel to keep it powered, and all you have to do to make the most of the offer while it lasts.

The OUKITEL P5000 comes with a three-year warranty and a 30-day money-back guarantee, so there’s little reason to worry about picking it up and finding that it isn’t right for you if you act fast.

Never Worry About Power Outages Again

As you can see, the OUKITEL P5000 is an impressive bit of kit, more than capable of keeping your devices and appliances powered both indoors and out. Whether you’re dissatisfied with your current power supply solutions and are looking for an upgrade, or you’re considering picking one up for the very first time, the OUKITEL P5000 is a perfect option no matter what your needs may be.

This is a sponsored post. The product choices and opinions expressed in this article are from the sponsor and do not reflect the editorial direction of MakeUseOf or its staff.


Today’s Wordle Answer and Clues (Wednesday, April 10, 2024)

Wordle is a daily puzzle from the New York Times. If you want some extra help solving today’s Wordle, we’re here with the answer to Wordle #1026, plus some extra clues to help you out.


SPOILERS AHEAD (CLUES)


Today’s Wordle (Puzzle #1026) Basic Clues

If you just want the answer to the Wordle puzzle for April 10, 2024, scroll down past the clues and the next spoiler warning. Otherwise, here are a set of clues to help you solve today’s Wordle somewhat on your own.

  1. Today’s Wordle contains four consonants and one vowel.
  2. No letters appear twice, with all five distinct from each other.
  3. The first letter is B.
  4. The last letter is H.

Today’s Wordle (Puzzle #1026) Big Clue

The big clue for today’s Wordle is, “The liquid in which food has been cooked”.

SPOILERS AHEAD (ANSWER)

Today’s Wordle Answer for Wednesday, April 10, 2024

If you still haven’t beaten today’s Wordle even with the clues provided above, the answer is below…

The answer to today’s Wordle is “BROTH“.


The word “Broth” is a noun which refers to the liquid in which food has been cooked. Whether that’s meat, fish, vegetables, or even grains. It’s often the basis for soups or what noodles are served in. As in, “The broth had a spicy zing, providing the noodles with some much-needed flavor”.

According to the Online Etymology Dictionary, the origin of “Broth” is the Proto-Indo-European word “bhreu-,” meaning to boil, bubble, or effervesce. This then morphed into the proto-Germanic “bruthan,” and then the Old English “broþ,” meaning “liquid in which flesh is boiled”. Other words with the same root include “braise,” bread,” “brew,” “broil,” and “brood”.

Our Top Wordle Tips (to Beat It Every Day)

  1. Choose a good starting word. There are plenty to choose from, so pick one from our list of the best Wordle starting words.
  2. Try to eliminate all five vowels early. As there are only a handful of vowels, it’s best to use them all within the first 2-3 guesses.
  3. Use popular letters early. As well as the vowels, letters such as T, S, N, R, H, C, D, and L appear most commonly in English words.
  4. Take your time over your guesses. Wordle isn’t timed, so there’s no rush to complete it. You can even guess on paper first.
  5. Remember that letters can appear twice (and often do). Keep this in mind when guessing, as forgetting it can lead you to mess up.


Now that you have completed today’s Wordle puzzle (with a little help from your friends at MUO), you should check out some of the other free games from the New York Times.

Connections is a fun game that challenges you to find the associations between 16 words, splitting them up into four groups of four. To help combat the challenging nature of the game, check out our tips and tricks to help you beat Connections.

There’s also Strands, the newest addition to the New York Times’ burgeoning list of games. Just like Connections, it’s extremely challenging, but in a unique string-the-letters-together way. We recommend you check out our best tips for beating Strands to give yourself a leg up on the daily challenge.

Or, if you’re a Wordle purist and want more of the same, we recommend trying these awesome Wordle alternatives.

The 8 Best Messaging Apps for Android and iOS in 2024

Not happy with the built-in Messages app on your phone? Perhaps iMessage isn’t sufficient to text your friends who own Android devices? If so, try one of these fun and reliable cross-platform messaging apps to stay connected with your loved ones.


1 WhatsApp

With end-to-end encryption and a range of social tools at your disposal, WhatsApp is rightfully the best messaging app out there.

You get to chat, call, join communities, and stay up to date with your favorite channels. If that’s not enough, WhatsApp is always finding ways to make your user experience fun.

For example, the app has a feature that lets you create and edit WhatsApp stickers from photos. You can personalize your profile and texts even more with status updates, emojis, GIFs, polls, and more.


Download: WhatsApp for Android | iOS (Free)

2 Messenger

Thanks to Facebook, Messenger is the go-to messaging app for iPhone and Android users alike. It complements Meta’s social media platform with communication tools, both essential and entertaining.

Besides texting and calling your contacts, you can share and see other people’s stories and even keep track of orders, payments, and Facebook’s marketplace activity.

For maximum user-friendliness, Messenger lets you customize your app in great detail. You have access to options like an avatar, dark mode, adjustable preferences, and family supervision.

Download: Messenger for Android | iOS (Free, in-app purchases available)


3 Telegram

Telegram is another must-have messaging app for individuals and groups. As with all top digital communication software today, you can write to your contacts or call them for an audio or video chat.

For a greater sense of community, you can also join the best Telegram channels and make new friends. The app can even detect users who are nearby.

Tailoring its settings to suit your chatting, security, storage, and other requirements can turn Telegram into the only networking tool you would ever need.

Download: Telegram for Android | iOS (Free, subscription available)

4 Viber


This messaging app is very popular for its convenience and versatility. You gain access to useful Viber features like group chats, adjustable backgrounds, sticker creation, and the ability to hide your status and block users, among many other security options.

Viber offers easy-to-use tools for chatting and calling, and it’s constantly expanding its extra services. Not only can you take notes, for example, but you can also use AI chatbots for useful insights like language or fun activities like playing games and getting tarot readings.

There’s so much to see and do on Viber that it’s easy to lose track of time while using it. Ultimately, it’s a digital communications app that doubles as a virtual assistant.

Download: Viber for Android | iOS (Free, subscription available)

5 Signal


When comparing the usefulness of WhatsApp and Signal, the latter may have fewer features, but it wins in terms of data and user security.

You’ll feel safe using Signal thanks to its settings related to your phone number’s visibility, PIN, screen and payment locks, and how quickly you want the app to make your messages disappear. Personalization settings are just as varied.

At the same time, you can enjoy all the standard communication tools. So, whether you want to text, call, video chat, or share stories with your friends without restrictions, Signal has you covered.

Download: Signal for Android | iOS (Free)

6 Snapchat

Snapchat is one of the most popular social apps on this list. It lets you text contacts, send them images and videos with cool or hilarious filters, share stories, and personalize your profile, for example, by creating and customizing your Snapchat Bitmoji.


We’re talking about a messaging platform with built-in photo editing tools and a spotlight reel, so connecting via Snapchat can be hugely entertaining.

Whether you’re chatting one-on-one or as part of a group chat, it’s worth making the most of the app’s features and tailoring it to your needs.

Download: Snapchat for Android | iOS (Free, subscription available)

7 Discord

If you’re looking for a community with the same interests as you and not just a way to talk to your friends online, Discord is the right messaging app for you.

You can join servers dedicated to a huge range of topics and geek out with other members. Chat privately or on messaging boards, interact with posts you love, and stay up to date with community news and events.


If privacy is important to you, learn how to become invisible on Discord and socialize on your terms.

Put simply, Discord is a social network for fan clubs. And the more you explore it, the more fun servers you’ll discover to engage with topics you’re passionate about.

Download: Discord for Android | iOS (Free, subscription available)

8 WeChat

What makes an instant messaging app great is the usefulness of its basic functions. WeChat is an excellent example of combining good security with fun and versatile communication tools.

It’s not the most attractive app, and signing up can take several steps, but once you’re on WeChat and bring in your contacts, the platform’s advantages become clear. After all, millions of users around the world trust it above all other platforms for good reasons.


Besides chatting and sending images and videos, you can find your friends in real time by sharing your location via the app. It lets you create a time capsule—a collection of short videos that disappear after 24 hours. You can also find games to play with friends or collect stickers to take your exchanges on WeChat to the next level.

Download: WeChat for Android | iOS (Free, in-app purchases available)

To narrow down the best messaging apps, you need to decide why you want them and what functions attract you the most. Whether you prefer straightforward and secure chatting, multiple features that make the user experience more enjoyable, or a full-blown social network that brings like-minded people together, one of the above options should suit your needs.

Today’s Answer and Hints (Tuesday, April 9, 2024)

Connections is an addictive puzzle from the geniuses at the New York Times. It requires players to find the connections between 16 words, and place them in four groups of four. We have the solution to Connections for April 9, 2024, along with hints to help you solve it yourself.


SPOILERS AHEAD (CLUES)


Today’s Connections (Puzzle #303) Category Clues

Today, as every day, you need to split the 16 words that make up the Connections puzzle grid into four groups of four based on specific categories. It isn’t as easy as it sounds. Fortunately, we’re on hand to help you solve today’s Connections puzzle.

If you want to jump straight to today’s Connections solution, scroll past the next spoiler warning. However, if you’d rather see some category clues designed to help you solve it without giving the answers away first:

Yellow: “Often the accompaniment to length”

Green: “Things you’d see in a salon”

Blue: “Regularly seen in Game of Thrones”

Purple: “Ringo Starr and Dave Grohl bash these”

SPOILERS AHEAD (SOLUTION)

The Connections Solution for Tuesday, April 9, 2024


If those hints aren’t helpful enough, and you find yourself struggling to beat Connections without running out of mistakes, here are the solutions for all four categories:

Yellow: “Breadth” = EXTENT, RANGE, REACH, SCOPE

Green: “Hair Tools” = BRUSH, COMB, DRYER, IRON

Blue: “Heraldry Terms” = ARMS, COAT, CREST, SHIELD

Purple: “Words Before ‘Drum'” = EAR, KETTLE, OIL, STEEL

What Made Today’s Connections Difficult

Today’s Connections puzzle was made difficult due to the following:

  1. The obvious sets of red herrings across multiple groups are “arms” and “ear” as two parts of the body, plus “iron” and “kettle” as household items.
  2. Many people may struggle with the blue group, as heraldry isn’t something most of us are either familiar with or deal with on a regular basis. Unless we’re watching shows about medieval history.

Our Top Tips to Beat Connections Every Day

  1. Shuffle the words as many times as you need. Shuffling the words around means you’re more likely to spot the connections.
  2. Look for differences as well as similarities. The NYT is trying to trip you up, so look for what divides the words with similar meanings.
  3. Take your time, and don’t rush into a guess. Connections isn’t a timed challenge, so you have the luxury of planning everything out.
  4. Look for common themes over time. The more you play Connections, the more you’ll spot recurring themes cropping up regularly.
  5. Tune into the NYT editors’ way of thinking. It’s the puzzle setters you’re competing against, so you need to understand their game plan.


Now that you have completed today’s Connections puzzle (with a little help from your friends at MUO), you should check out some of the other free games from the New York Times.

Wordle is the best-known of them all, and challenges you to find a 5-letter word within six guesses. For every letter you find, you get told if it’s in the correct place, allowing you to whittle down the possible options. If you need help with Wordle, check out our tips and tricks to improve your Wordle score.

There’s also Strands, the newest addition to the New York Times’ burgeoning list of games. Just like Connections, it’s extremely challenging, but in a unique string-the-letters-together way. We recommend you check out our best tips for beating Strands to give yourself a leg up on the daily challenge.

Or, if you’re really only into Connections but want more tips than are offered above, check out our longer list of Connections tips and tricks.

How to Take a Break From Being Facebook Friends With Someone

Key Takeaways

  • Facebook’s “Take a Break” feature allows you to mute updates from a friend without unfriending them.
  • You can prevent the friend’s posts from appearing on your feed while you take a break from them.
  • You can stop the break by reversing the settings. The feature helps maintain connections while creating space.


Feeling overwhelmed by a friend’s constant updates? Facebook’s “Take a Break” feature lets you temporarily mute their updates without cutting them off entirely. Here’s what you need to know about the feature and how to use it.


What Is the “Take a Break” Feature on Facebook?

The “Take a Break” feature on Facebook is a way to create some distance between you and another user. Unlike unfollowing someone, which only removes their posts from your News Feed but still allows them to see your activity, “Take a Break” works both ways—you’ll see less of their content, and they’ll see less of yours.

When you initiate a break, Facebook will not only limit how often their posts appear in your News Feed, but it will also remove their past posts from your feed. However, you’ll still be friends and you can view their profile or past posts by visiting their timeline directly.

There are several scenarios where you might want to take a break from someone on Facebook:

  • After a breakup or falling out with a romantic partner who is also your Facebook friend.
  • When you’re going through a difficult life event and need space from a friend’s constant updates.
  • If you find yourself frequently irritated or triggered by a friend’s controversial posts or opinions.
  • When you need to create some temporary boundaries with an oversharing or attention-seeking friend.


There are two key things worth noting about the Take a Break feature on Facebook:

  • Facebook will not notify the individual you choose to take a break from.
  • There’s no limit to how long you can take a break, so you’ll have to remember to manually revert the changes if you change your mind in the future.

By using the “Take a Break” feature, you can maintain friendships on Facebook while giving yourself a breather from their constant presence in your feed. This can be a useful alternative to unfriending or blocking someone on Facebook.

How to Take a Break From Someone on Facebook

Once you’ve made up your mind that you’ve had enough of someone’s posts, here’s how to go about taking a break from them:

  1. On the Facebook app, tab on your profile photo in the top left corner to open your profile page.
  2. On your profile page, scroll down and tap See all friends to see a list of your friends.
  3. On the next page, type the name of the friend you wish to take a break from into the search box.
  4. Once the friend’s name comes up, tap through to their profile page.
  5. On the friend’s profile page click on the button labeled Friends and then tap on Take a break.


From here on, we’ll represent the friend whom you want to take a break from with the letter X. On the Take a Break page, you’ll find some options that go with the feature.

  1. Tap on the first option that says See less of X’s Profile.
  2. Tap on Limit where you can see X’s profile, and click Save.

The individual’s post (and post they’re tagged in) will no longer appear in your news feed. Also, Facebook will stop prompting you to message or tag them in your photo.


The next option is to limit what this friend can see on your profile. The idea here is to update your privacy settings to stop the individual from viewing your posts. To do this:

  1. On the Take a break page, tap Limit what X’s profile will see.
  2. Tap on Hide your posts from X’s profile and click Save.

From there on, the user will be on the Restricted List. This means they cannot view or engage with posts you share with friends unless you tag them. However, all public posts will still be visible to the individual.

Next, return to the Take a break page and tap on the last option labeled Edit who can see past posts.

Here, you’ll find three options.

  1. The first option doesn’t change anything.
  2. The second option is labeled Edit individual posts—this option helps you to individually edit posts you are tagged in.
  3. The third option is labeled Edit all my posts and posts that I’m tagged in. Use this option to untag yourself from every post you have in common with the friend you want to take a break from. To do this, simply tap on the option and then tap Done to save the changes.


If you’re using Facebook on the web, you can bypass navigating through menus by visiting the Take a Break Facebook page directly to access the feature promptly. If you’d love to take a more comprehensive approach to restricting interaction with friends, we’ve previously written a guide on how to limit people from contacting you on Facebook.

You don’t have to maintain close interactions with all your Facebook friends. You can keep them at a safe distance without completely cutting them out of your digital life.

How to Stop Taking a Break on Facebook

If you decide it’s time to reconnect normally with your friend, you can reverse the “Take a Break” action. Here’s how to stop taking a break from someone on Facebook.

  1. Visit the Take a Break quicklink on Facebook.

  2. You’ll find the Take a Break search bar, type the name of the friend you previously took a break from.
  3. Click on the name of the friend.
    Name of freind to stop taking a break from

  4. You’ll find a menu with a list of actions you can take to stop taking a break.
  5. Click Edit beside each action. Firstly, click on Edit next to You’ve chosen to see less of X.
    Reversing you've chosen to see less of a person's post

  1. Select See X’s profile anywhere on Facebook and click on Save.
    See X's profile anywhere on Facebook

  2. Click the back button in the top left corner of the Take a Break menu, and click Edit next to Limit what X’s profile will see.
  3. Select No longer limit what X can see and click Save.
    No longer limit what a profile can see

  4. Click the back button in the top left corner once again, and click Edit next to Edit who can see past posts.
  5. Select Keep all posts as they are and click Save. Or Edit all of my posts and posts that I’m tagged in to edit posts on an individual basis.
    Keep all posts as they are


With that done, you’ve successfully stopped taking a break from the friend. You should now see their updates normally.

The Take a Break feature on Facebook provides a useful middle ground between staying friends and completely cutting someone off. It allows you to create some healthy distance and boundaries without burning bridges. By taking advantage of the feature, you can curate a more positive social media experience while still maintaining connections that matter.

Today’s Wordle Answer and Clues (Monday, April 8, 2024)

Wordle is a daily puzzle from the New York Times. If you want some extra help solving today’s Wordle, we’re here with the answer to Wordle #1024, plus some extra clues to help you out.


SPOILERS AHEAD (CLUES)


Today’s Wordle (Puzzle #1024) Basic Clues

If you just want the answer to the Wordle puzzle for April 8, 2024, scroll down past the clues and the next spoiler warning. Otherwise, here are a set of clues to help you solve today’s Wordle somewhat on your own.

  1. Today’s Wordle contains three consonants and two vowels.
  2. One letter appears twice, and in succession.
  3. The first letter is B.
  4. The last letter is D.

Today’s Wordle (Puzzle #1024) Big Clue

The big clue for today’s Wordle is, “My cat is a certain one of these, and your dog is another, altogether different, one”.

SPOILERS AHEAD (ANSWER)

Today’s Wordle Answer for Monday, April 8, 2024

If you still haven’t beaten today’s Wordle even with the clues provided above, the answer is below…

The answer to today’s Wordle is “BREED“.


The word “Breed” is both a verb and a noun. The verb form usually means to produce offspring, though it can also be used for other things, such as “pain can breed violence” and “good management can breed happy workers”. The noun refers to a type or kind of thing, such as “an exotic breed of chicken”.

According to the Online Etymology Dictionary, the origin of “Breed” is the old English word “bredan,” meaning to bring young into the world and the German “bruten,” meaning to brood or hatch. The Proto-Indo-European root is thought to be “bhreau-,” meaning to boil or bubble. The notion being that this refers to incubation/warming to hatch.

Our Top Wordle Tips (to Beat It Every Day)

  1. Choose a good starting word. There are plenty to choose from, so pick one from our list of the best Wordle starting words.
  2. Try to eliminate all five vowels early. As there are only a handful of vowels, it’s best to use them all within the first 2-3 guesses.
  3. Use popular letters early. As well as the vowels, letters such as T, S, N, R, H, C, D, and L appear most commonly in English words.
  4. Take your time over your guesses. Wordle isn’t timed, so there’s no rush to complete it. You can even guess on paper first.
  5. Remember that letters can appear twice (and often do). Keep this in mind when guessing, as forgetting it can lead you to mess up.


Now that you have completed today’s Wordle puzzle (with a little help from your friends at MUO), you should check out some of the other free games from the New York Times.

Connections is a fun game that challenges you to find the associations between 16 words, splitting them up into four groups of four. To help combat the challenging nature of the game, check out our tips and tricks to help you beat Connections.

There’s also Strands, the newest addition to the New York Times’ burgeoning list of games. Just like Connections, it’s extremely challenging, but in a unique string-the-letters-together way. We recommend you check out our best tips for beating Strands to give yourself a leg up on the daily challenge.

Or, if you’re a Wordle purist and want more of the same, we recommend trying these awesome Wordle alternatives.

What Is an M3U8 File? How to Open It

Quick Links

Key Takeaways

  • M3U8 files are text-based playlist files that enable efficient multimedia streaming by indexing media segments and their playback order.
  • While M3U8 files do not contain audio or video data, they facilitate smooth playback across various devices and platforms.
  • Understanding how to open, use, and potentially edit M3U8 files can help you take full advantage of M3U8 files.


If you stream music or videos regularly, you’ve probably encountered M3U8 files. Although you probably didn’t notice these files hard at work, they are crucial for seamless streaming experiences. Here’s everything you need to know about M3U8 files.


What Are M3U8 Files Anyway?

M3U8 files are the Unicode version of M3U (MP3 URL) files. The “8” in M3U8 stands for UTF-8 encoding, the most common encoding standard for electronic communications.

Originally, Nullsoft Winamp designed M3U files for audio playlists. However, M3U and M3U8 files are now commonly used for streaming video and audio content, particularly in HTTP Live Streaming (HLS), which Apple developed.

An M3U8 file doesn’t contain actual media data; it isn’t the video or music. It’s a text file with instructions for media players. When you hit play on streaming services that use this file format, M3U8 files tell your device where to find and in what order to play specific media segments (often called “chunks” or “fragments”) that make up the complete stream.


Say you’re streaming music on SoundCloud in your Chrome browser. If you inspect the page using DevTools while streaming and navigate to the Network tab, you’ll find M3U8 files.

If you copy the Request URL, paste it into the search bar of a new tab in your browser, and hit Enter, you can download the corresponding M3U8 file. A Request URL is typically a very long alphanumeric string. For example, here’s what the text in the M3U8 file I got from the above Request URL looks like:

An M3U8 File displayed in Windows Notepad


Each entry in the M3U8 file captured above represents a media segment with a URL pointing to its location.

One advantage of M3U8 files is that they allow your media player to adjust the quality of the media you’re streaming based on your available network bandwidth. M3U8 files contain information about the bitrate options available for each segment, allowing your media player to switch as needed.

M3U8 files are the basis for HLS (HTTP Live Streaming), which is widely used for streaming video and audio and is now a popular format for adaptive streaming in general. These files are commonly used on online video platforms like YouTube, live-streaming services, and even some video games that stream content.

How to Open M3U8 Files

While you may occasionally come across M3U8 files, you rarely need to open or interact with them manually. Most modern media players, web browsers, and streaming applications are designed to handle M3U8 files automatically in the background.


Like in the example I shared earlier, there’s rarely any need for you to interact with the underlying M3U8 files while streaming music on SoundCloud. However, this is not to say that there’s no need to open M3U8 files. They can be a good way to organize online media or media on a specific device.

If you do need to open an M3U8 file, the process varies slightly across different devices and platforms. M3U8 files can reference either local file paths or streaming URLs. This distinction is crucial in determining how the file will behave across different devices.

File Paths for Local Media

When an M3U8 file references file paths on a specific device (your laptop, Android smartphone, iPhone, etc.), it’s essentially creating a shortcut to those files. This is fantastic for organizing media on your own device, but it won’t work on other devices since they have different file systems.

An M3U8 File containing local file paths displayed in windows Notepad


For example, if an M3U8 file contains paths like “C:MusicGermanTrack 01.mp4,” it will only work in a media player on the device where that specific file path exists. Attempting to open the same M3U8 file on another device will likely result in errors.

Streaming URLs for Universal Access

When an M3U8 file contains URLs pointing to media streams online, it will work on any device as long as the device can access the URLs and has compatible media players. For instance, an M3U8 file with a URL like https://cf-hls-media.sndcdn.com/media/159660/0/31762/JXhjXLGeyK5M.128.mp3?Policy=… can be opened and played on any device with an internet connection and a compatible media player.

However, using streaming URLs requires a reliable internet connection for playback. Additionally, some popular streaming services (like Spotify or Apple Music) may not support M3U8 files, as they use their own proprietary playlist formats.


Something else to note is that the behavior of M3U8 files containing streaming URLS can be inconsistent across different devices, media players, and streaming services. This inconsistency could be due to codec support, licensing restrictions, or the streaming platform’s browser-specific technologies.

For instance, I tried opening an M3U8 file containing URLs for a YouTube video and a SoundCloud track on VLC on my Android phone and Windows laptop. I also attempted to open the file on my laptop using iTunes. Using VLC Player on my Windows laptop, the YouTube video initially refused to play; it even threw an error code. Then, it mysteriously started working after closing and reopening the app.

In contrast, the SoundCloud track played instantly. On my phone’s VLC Player app, the YouTube video played flawlessly every time, but the SoundCloud track required multiple refreshes and an agonizingly long loading time before playing. Meanwhile, the M3U8 file refused to play on iTunes.


The homepage of the iTunes Windows App displaying a playlist

These inconsistencies underline the complexities involved in media playback and streaming. Nevertheless, you should be able to play any M3U8 file—with local paths or streaming URLs—with no issues on VLC across all devices. Suppose your M3U8 file contains paths for local media. You should be able to use iTunes (available for Windows and macOS), Kodi (available on most devices), and MPV (available on most devices) without any issues.

Download:VLC Media Player (Free) | iTunes (Free) | Kodi (Free) | MPV (Free)

Troubleshooting Common M3U8 File Issues

You may encounter issues like playback errors or incorrect file paths while opening M3U8 files. Here are some troubleshooting tips:

  1. When opening M3U8 files with streaming links, use a stable data connection with sufficient bandwidth.
  2. Ensure you’re using the latest version of your preferred media player, like VLC.
  3. Double-check that the links listed within the file are correct. Be especially careful with local file paths or URLs containing special characters. If possible, always copy and paste the links or paths.


Remember, M3U8 files are simply playlists that point to actual media data. As a result, converting an M3U8 file to an MP3, MP4, or any other media file format isn’t possible. You must first locate or download the media files referenced by your M3U8 file. Then, you can use available media editing programs like FFmpeg or online file conversion tools to convert them to your desired file format.

Some online tools and software programs can help you locate and download the media files referenced in an M3U8 playlist, but they cannot directly convert the M3U8 file to a media format like MP3.

Editing M3U8 files

You can edit M3U8 files to add or remove media (segments), adjust bitrates, or modify playback options. You can use a text editor like Notepad to edit M3U8 files.

Most M3U8 files start with “#EXTM3U”. The “#EXTINF:” tag is optional, but it’s necessary for adding media length, artist name, song title, etc. Of course, you shouldn’t forget to include the actual media location: a local file path or streaming URL.


An M3U8 File displayed in Windows Notepad, showing distinct file configurations

M3U8 files are crucial for seamlessly streaming multimedia content across various devices and platforms. While they may seem super advanced, you can take advantage of all they offer by understanding them, how they work, and how to open or edit them.

Today’s Wordle Answer and Clues (Sunday, April 7, 2024)

Wordle is a daily puzzle from the New York Times that sees millions of people trying to beat it every day. If you’re struggling and want some extra help solving today’s Wordle, we’re here with the answer to Wordle #1023, plus some extra clues to help you out.


SPOILERS AHEAD (CLUES)


Today’s Wordle (Puzzle #1023) Basic Clues

If you just want the answer to the Wordle puzzle for April 7, 2024, scroll down past the clues and the next spoiler warning. Otherwise, here are a set of clues to help you solve today’s Wordle somewhat on your own.

  1. Today’s Wordle contains two consonants and three vowels.
  2. No letters are repeated, with all five being different.
  3. The first letter is V.
  4. The last letter is A.

Today’s Wordle (Puzzle #1023) Big Clue

The big clue for today’s Wordle is, “A French word that has made its way into the English language”.

SPOILERS AHEAD (ANSWER)

Today’s Wordle Answer for Sunday, April 7, 2024

If you still haven’t beaten today’s Wordle even with the clues provided above, the answer is below…

The answer to today’s Wordle is “VOILA“.


The word “Voila” is a French word adopted by English speakers. It’s an interjection used to draw attention to something or to express satisfaction with something. It’s usually preceded by “et,” the French word for “and”. The pronunciation of “voila” by English speakers varies considerably, but usually mirrors the French pronunciation.

According to the Online Etymology Dictionary, the origin of “Voila” is (as mentioned above) French. It’s the imperative form of “voir,” the French word for to see or to view. This comes from the Latin word, “videre,” which also means to see.

Our Top Wordle Tips (to Beat It Every Day)

  1. Choose a good starting word. There are plenty to choose from, so pick one from our list of the best Wordle starting words.
  2. Try to eliminate all five vowels early. As there are only a handful of vowels, it’s best to use them all within the first 2-3 guesses.
  3. Use popular letters early. As well as the vowels, letters such as T, S, N, R, H, C, D, and L appear most commonly in English words.
  4. Take your time over your guesses. Wordle isn’t timed, so there’s no rush to complete it. You can even guess on paper first.
  5. Remember that letters can appear twice (and often do). Keep this in mind when guessing, as forgetting it can lead you to mess up.


Now that you have completed today’s Wordle puzzle (with a little help from your friends at MUO), you should check out some of the other free games from the New York Times.

Connections is a fun game that challenges you to find the associations between 16 words, splitting them up into four groups of four. To help combat the challenging nature of the game, check out our tips and tricks to help you beat Connections.

There’s also Strands, the newest addition to the New York Times’ burgeoning list of games. Just like Connections, it’s extremely challenging, but in a unique string-the-letters-together way. We recommend you check out our best tips for beating Strands to give yourself a leg up on the daily challenge.

Or, if you’re a Wordle purist and want more of the same, we recommend trying these awesome Wordle alternatives.

What Is Google One? 4 Reasons Why You Should Use It

Key Takeaways

  • Google One offers increased storage, extra video calling features, and a VPN for Google Drive users who want to upgrade.
  • Users can also access Gemini and use the AI-powered tool in Docs, Gmail, and other Google programs.
  • Other benefits of Google One include premium subscription access and enhanced web security.


Google’s One subscription service is packed with features and offers extra storage, AI tools, and integration with other Google apps. There are a few different plans you can choose from, too, which gives you plenty of options, and there will be a plan that suits almost every potential subscriber.

I’ve been using Google One for a long time now, and there are plenty of reasons why you should start using it, too.


What Is Google One?

Google One is a subscription service that launched in May 2018. The service has over 100 million subscribers as of March 2024 and significantly increases your Google Cloud storage. But beyond that, upgrading to Google One offers you access to the following tools:

A Google One subscription also gives you several other benefits, such as exclusive offers (we’ll talk more about these later).


How Much Does Google One Cost?

If you want to upgrade to Google One, you can get Basic, Premium, or AI Premium subscriptions. The prices for these are below:

Google One Basic (100GB)

Google One Premium (2TB)

AI Premium (2TB)

$2.49/mo (monthly subscription)

$12.49/mo (monthly subscription)

$32.99/mo (monthly subscription)

$24.99/yr (annual subscription)

$124.99/yr (annual subscription)

Annual subscription not available

Besides extra cloud storage, Google One Premium offers access to Google Workspace Premium tools and 10% back in the Google Store. Meanwhile, AI Premium lets you use Gemini in Gmail, Google Docs, Meet, and Slides.

Why Should You Use Google One?

Google One has several advantages, such as increased storage and better online security. However, there are also benefits that you might not have thought about.

1. Use AI With a Google One Subscription

You can use Gemini (formerly known as Bard) in several ways, and Google One allows you to test its best features. After upgrading to an AI Premium plan, you can use Gemini to write new articles and summarize existing text in your documents. Moreover, you can refine and write emails in Gmail without a plugin.


Whether you upgrade to Google One or not, you may want to consider looking at the best AI Gmail extensions.

2. Share Storage With Others Thanks to Google One

Google One users can share their storage plan with up to five additional family members by creating a family group or sharing a plan with an existing group.

Another advantage of family storage is that while the storage space is shared by multiple users, other users can’t gain access to your files stored within the cloud unless you share them yourself.

3. Improve Online Privacy With a Selection of Features

Google One users get access to Google One’s exclusive VPN on desktop and mobile. If you regularly use public Wi-Fi networks and also require a lot of storage, a Google One subscription could represent better value for money than a standard VPN.

Even if you don’t use public Wi-Fi, you should still consider using a VPN. Benefits include saving money on holidays, improving internet speed, and safely using peer-to-peer (P2P) networks.

Besides the Google One VPN, Google One also has a dark web monitor. So you can protect your information and monitor it if any of your details find their way there.


4. Access Exclusive Offers and Features With Google One

Google One also offers access to several exclusive features and offers that normal Google Cloud subscribers don’t have. For example, if you’re interested in fitness, you can get a Fitbit Premium subscription with Google One (without paying extra).

When you upgrade to Google One, you can also get a Nest Aware subscription if you use Google Nest. And if you’re thinking about getting one, here are some really useful and fun things you can do with a Google Nest hub.

How to Sign Up to Google One

Signing up for Google One is very easy. Follow these instructions to do that:

  1. Go to Google One, select the best plan for you, and select Get Started.
  2. Sign into your Google account if you haven’t already done so.
  3. Enter your payment details. You’ll gain instant access once you’ve verified the payment.


Download: Google One for Android | iOS (Free, in-app purchases available)

How to Use Gemini With Google One

To use Gemini, go to the Gemini website and sign into your Google account. Enter whichever prompts you want.

Image of the Interface Within the Gemini App

If you want to use Gemini within Gmail, Docs, etc., follow these steps instead.

  1. Go to the document or program you want to use Gemini within.
  2. Select the Help me write icon if you want to write something from scratch. Otherwise, you can use the pen and star icon to help you rewrite sections and offer other suggestions.

Use Gemini to Help You Write in a Google Doc


How to Use the Google One VPN

To use Google One’s VPN, you’ll need to download the app for your computer or use the Google One mobile app. Let’s start by walking through how to use Google One VPN on your computer:

  1. Go to your Google One VPN Benefits tab and navigate to VPN for multiple devices > View details.
  2. Select Download app.
  3. Open the .pkg download and install Google One VPN on your device.
  4. Open the Google One VPN app, select Get started, and log in to your Google account when redirected to the webpage.
  5. Choose whether you want the VPN to automatically start when you turn your computer on.
  6. Toggle Use VPN on.

If you want to use Google One VPN on your smartphone or tablet, follow these instructions instead.

  1. Download the Google One app.
  2. Go to VPN > Set up.
  3. Tap Enable VPN.


How to Use Google One’s Features in Google Photos

You can use AI photo editing in Google Photos with Google One, in addition to adding HDR and doing much more. Accessing these features is very simple:

Access the Editing Features in Google Photos

  1. Go to Google Photos on your computer or mobile device.
  2. Choose the picture you want to edit and select the icon with sliders.
  3. Edit your images however you feel is necessary.

There are a variety of editing tools, styles, and more to choose from.

How to Sign Up for Dark Web Alerts in Google One

You can easily sign up for dark web alerts by going to your Google One account’s Benefits tab and doing the following:


  1. Go to Dark web report and select Set up.
  2. Click on Start monitoring.
  3. Set up your monitoring profile by adding your name, date of birth, address, and phone number. Then, select Done.

Google One is much more than a cloud storage solution. You can use a VPN, access exclusive offers, and even use AI in your emails and documents. Using Google One is very easy once you’ve signed up, and you can access many of its features on mobile and desktop.

Today’s Wordle Answer and Clues (Saturday, April 6, 2024)

Wordle is a daily puzzle from the New York Times that sees millions of people trying to beat it every day. If you’re struggling and want some extra help solving today’s Wordle, we’re here with the answer to Wordle #1022, plus some extra clues to help you out.


SPOILERS AHEAD (CLUES)


Today’s Wordle (Puzzle #1022) Basic Clues

If you just want the answer to the Wordle puzzle for April 6, 2024, scroll down past the clues and the next spoiler warning. Otherwise, here are a set of clues to help you solve today’s Wordle somewhat on your own.

  1. Today’s Wordle contains four consonants and one vowel.
  2. No letters are repeated, with all five being different.
  3. The first letter is F.
  4. The last letter is H.

Today’s Wordle (Puzzle #1022) Big Clue

The big clue for today’s Wordle is, “Twitchers will be more familiar with this word than everyone else”.

SPOILERS AHEAD (ANSWER)

Today’s Wordle Answer for Saturday, April 6, 2024

If you still haven’t beaten today’s Wordle even with the clues provided above, the answer is below…

The answer to today’s Wordle is “FINCH“.


The word “Finch” is a noun which refers to a family of songbirds. There are hundreds of different species in the family of Fringillidae, which are considered true finches. However, most countries have a limited number of species native to their shores. Common species include the goldfinch, chaffinch, and crossbill.

According to the Online Etymology Dictionary, the origin of “Finch” is the Old English word “finc”. It also appears in German and Dutch as “vink” and “vinke,” with speculation that the name in all languages is imitative of the bird’s call. Over time, different names have been assigned to particular species based on their characteristics, among other things.

Our Top Wordle Tips (to Beat It Every Day)

  1. Choose a good starting word. There are plenty to choose from, so pick one from our list of the best Wordle starting words.
  2. Try to eliminate all five vowels early. As there are only a handful of vowels, it’s best to use them all within the first 2-3 guesses.
  3. Use popular letters early. As well as the vowels, letters such as T, S, N, R, H, C, D, and L appear most commonly in English words.
  4. Take your time over your guesses. Wordle isn’t timed, so there’s no rush to complete it. You can even guess on paper first.
  5. Remember that letters can appear twice (and often do). Keep this in mind when guessing, as forgetting it can lead you to mess up.


Now that you have completed today’s Wordle puzzle (with a little help from your friends at MUO), you should check out some of the other free games from the New York Times.

Connections is a fun game that challenges you to find the associations between 16 words, splitting them up into four groups of four. To help combat the challenging nature of the game, check out our tips and tricks to help you beat Connections.

There’s also Strands, the newest addition to the New York Times’ burgeoning list of games. Just like Connections, it’s extremely challenging, but in a unique string-the-letters-together way. We recommend you check out our best tips for beating Strands to give yourself a leg up on the daily challenge.

Or, if you’re a Wordle purist and want more of the same, we recommend trying these awesome Wordle alternatives.

How to Get Water Out of Your iPhone’s Speakers

Key Takeaways

  • You can use the built-in Shortcuts app to quickly get rid of water trapped in your iPhone’s speakers.
  • Other tools like the Sonic app and the Fix My Speakers site also perform a similar function.
  • Avoid using rice to dry your iPhone’s speakers. Take your iPhone to Apple as soon as possible in case of severe water damage.


Although you’re not supposed to take your iPhone into the shower or for a swim, many users do so anyway, causing water to get into the speaker. Fortunately, there are several free, simple ways to get water out of your iPhone’s speakers.


Use the Water Eject Shortcut on Your iPhone

First, make sure you have the Shortcuts app on your iPhone. Shortcuts is a native Apple app, so if you haven’t got it, simply download it for free from the App Store.

Download:Shortcuts (Free)

Next, get the handy iPhone shortcut called Water Eject. On the webpage, tap Add Shortcut to download it to the Shortcuts app.

After successfully adding the shortcut, here’s how to use it:

  1. Open the Shortcuts app and head to the Shortcuts tab.
  2. Tap the Water Eject shortcut to run it.
  3. Select Start.
  4. You will be asked to Select Intensity Level. Choose what you see fit according to how much water might have gotten into your iPhone speaker. The maximum intensity gives better results.
  5. You will now see the volume bar on the left side of the screen. The volume will be at 100% and your iPhone will begin emitting a specific sound to eject water from its speakers.


When the water ejection is complete, you will hear a “ding” sound. At this point, the shortcut will prompt you to connect to the Wikimedia site. Tap Don’t Allow.

You can opt to add the shortcut to your Home Screen if you want quick access in case of an emergency. Tap the three dots icon on the Water Eject shortcut, tap the Share icon (a box with an arrow), and select Add to Home Screen.

Other Ways to Eject Water From Your iPhone’s Speakers

If you feel the Water Eject shortcut isn’t sufficient for removing water from your iPhone’s speaker, you can also try a couple of third-party tools.


Sonic

The Sonic app lets you adjust the frequency of the sound; you can choose from 0Hz all the way to 25kHz. After setting the frequency, tap theStartbutton in the Cleaner tab to begin ejecting water from your iPhone’s speakers.

Download:Sonic (Free, in-app purchases available)

Fix My Speakers

If you prefer not to download a shortcut or app on your device, you can head to the Fix My Speakers site to play the tone needed to eject water from your iPhone’s speakers. Just tap the button with the wind and water droplets emoji to activate the sound.


What to Avoid When Your iPhone Speaker Is Wet

Your iPhone’s speakers get wet when you accidentally drop the device in water. When you’re attempting to save a wet smartphone or tablet, you might instantly think of the method where people put their devices in rice to dry them.

However, that is merely a myth. In fact, the tiny particles may get into your iPhone and cause other damage. That’s just one of the reasons why you shouldn’t use rice to dry your iPhone. Also, don’t use your iPhone until it’s completely dry.

If it’s not a severe case, the Water Eject shortcut, Sonic app, or Fix My Speaker site should easily help you get rid of water from your iPhone’s speakers. In the future, remember that your iPhone is only water-resistant, not waterproof, so you shouldn’t submerge it in the pool, drop it in the sink, or expose it to other water activities.

Unfortunately, if your iPhone is already showing multiple symptoms of water damage, it’s best to take it to a nearby Apple Store or Apple Authorized Service Provider for hardware repairs.


Today’s Wordle Answer and Clues (Friday, April 5, 2024)

Wordle is a daily puzzle from the New York Times that sees millions of people trying to beat it every day. If you’re struggling and want some extra help solving today’s Wordle, we’re here with the answer to Wordle #1021, plus some extra clues to help you out.


SPOILERS AHEAD (CLUES)


Today’s Wordle (Puzzle #1021) Basic Clues

If you just want the answer to the Wordle puzzle for April 5, 2024, scroll down past the clues and the next spoiler warning. Otherwise, here are a set of clues to help you solve today’s Wordle somewhat on your own.

  1. Today’s Wordle contains four consonants and one vowel.
  2. No letters are repeated, with all five being different.
  3. The first letter is W.
  4. The last letter is T.

Today’s Wordle (Puzzle #1021) Big Clue

The big clue for today’s Wordle is, “Overworking this can cause a sprain or strain, so be sure to wrest it occasionally”.

SPOILERS AHEAD (ANSWER)

Today’s Wordle Answer for Friday, April 5, 2024

If you still haven’t beaten today’s Wordle even with the clues provided above, the answer is below…

The answer to today’s Wordle is “WRIST“.


The word “Wrist” is a noun which refers to the joint connecting your hand to your arm. It can also refer to the corresponding part of an animal or the part of a garment covering that area. Examples of the word in use include, “She has a tattoo on the inside of her wrist,” and “This coat has a strap on each wrist allowing you to keep the cold out”.

According to the Online Etymology Dictionary, the origin of “Wrist” is the Old English of the same name. The word also appears in other languages, including Old Norse (“rist”) and German (“rist”). The common root is “wer-” meaning to turn or bend. Something which the wrist has to do a lot.

Our Top Wordle Tips (to Beat It Every Day)

  1. Choose a good starting word. There are plenty to choose from, so pick one from our list of the best Wordle starting words.
  2. Try to eliminate all five vowels early. As there are only a handful of vowels, it’s best to use them all within the first 2-3 guesses.
  3. Use popular letters early. As well as the vowels, letters such as T, S, N, R, H, C, D, and L appear most commonly in English words.
  4. Take your time over your guesses. Wordle isn’t timed, so there’s no rush to complete it. You can even guess on paper first.
  5. Remember that letters can appear twice (and often do). Keep this in mind when guessing, as forgetting it can lead you to mess up.


Now that you have completed today’s Wordle puzzle (with a little help from your friends at MUO), you should check out some of the other free games from the New York Times.

Connections is a fun game that challenges you to find the associations between 16 words, splitting them up into four groups of four. To help combat the challenging nature of the game, check out our tips and tricks to help you beat Connections.

There’s also Strands, the newest addition to the New York Times’ burgeoning list of games. Just like Connections, it’s extremely challenging, but in a unique string-the-letters-together way. We recommend you check out our best tips for beating Strands to give yourself a leg up on the daily challenge.

Or, if you’re a Wordle purist and want more of the same, we recommend trying these awesome Wordle alternatives.

The 9 Best Free Photo Editing Apps for Android

If you’re looking to edit photos you shot on your iPhone or Android device, you have plenty of options. However, finding an app that suits your needs can be difficult. To help you out, we’ve handpicked the best free photo editing apps for Android and iOS.


1 Photoshop Express

Photoshop Express by Adobe is a simple yet powerful app that lets you make quick photo edits. It’s handy if you often take several pictures on the go. The tools available include overlays, filters, text, light leaks, and adjustments like exposure, saturation, tonal coloring, brightness, and shadows.

You’ll need an Adobe account and a premium subscription to get the most out of this app. You can log into your account on Photoshop for PC in case you need to perform advanced edits that Photoshop Express may be unable to handle.


Download: Photoshop Express for Android | iOS (Free, subscription available)

2 Snapseed

Simplicity is the standout feature of Snapseed. It’s a free, bare-bones photo editor that does exactly what it’s supposed to do without all the bells and whistles. Whether you’re a pro or just need to touch up a quick selfie, Snapseed has all the necessary tools on both Android and iOS.

You can sharpen, crop, blur, use filters, contrast, add frames, and brighten your images all in one place. You can also use Snapseed’s advanced options if you need them. For example, the Selective tool can help you focus attention on a particular portion of the image you’re working on.

Download: Snapseed for Android | iOS (Free)


3 PhotoDirector

Among all the apps in this list, PhotoDirector is the closest you’ll come to a full-fledged photo editing software. If you’re a pro, you can play around with the numerous advanced tools available at your disposal, like animating objects and retouching specific areas.

If you’re a beginner, however, you can take advantage of basic tools like contrast, brightness, cropping, and background replacement. You can also choose from the many available templates if you’re editing for social media.

Consider using the PhotoDirector app because it’s user-friendly and has no steep learning curve. Its premium subscription will get you more templates and elements to work with. It also comes with a couple of advanced AI tools, such as an AI background generator and an ID photo enhancer.


Download: PhotoDirector for Android | iOS (Free, subscription available)

4 YouCam Perfect

YouCam’s standout feature is its ability to enhance your photo in real time. It lets you beautify, add effects, and use frames before you even take a photo. Once you have the desired modification on the live image, you can share or use the photo right as it is.

Another feature you may find useful is the face reshaper tool. It lets you enhance your selfies by allowing you to add contours for better-looking cheekbones and jawline.

YouCam leverages a mixture of artificial intelligence and augmented reality to ensure any adjustments to your photos are as perfect and realistic as possible. You can get more advanced manual and AI-powered features by paying for a subscription.


Download: YouCam for Android | iOS (Free, subscription available)

5 Apple Photos

Apple Photos can get you through most basic photo editing tasks on your iPhone. Some of the features in Apple Photos include cropping, rotating, flipping photos, straightening and adjusting perspective, and applying effects.

On top of these basic but essential photo editing capabilities, Apple Photos also lets you batch-edit photos on your iPhone. The good thing about this app is that it comes pre-installed on iOS, so you won’t have to install a third-party editor if you want to do basic photo editing on your iPhone.

Download: Apple Photos for iOS (Free)

6 Picsart AI Photo Editor


Picsart is one of those photo editors that will serve you well whether you’re just getting started in editing or are a professional. It’s available for both Android and iOS, and the free version is good enough for most users.

One of its standout features is Photo and Artwork Remix, which lets you rework pictures or artwork already done by other Picsart users. However, my personal favorite is the Magic Effects feature, which uses AI to apply filters on pictures or art you’re working on without having to do much.

The only downside of this app is that it’s ad-ridden, so you may want to spend money on a subscription to get rid of them.

Download: Picsart for Android | iOS (Free, subscription available)

7 Canva


Social media campaigns need colorful and attractive images to capture the audience’s attention. Canva is an excellent app for this task, offering thousands of graphic templates and image elements alongside some AI assistance.

Canva templates are available and optimized for any social media platform you can think of—YouTube, TikTok, Facebook, Snapchat, Twitter, LinkedIn, Reddit, etc.

You don’t need any special skills to use Canva. All you have to do is upload your photo and use Canva’s many features to come up with a unique design within minutes. You can also collaborate with others in editing projects in a team setup across different platforms.

Although the free version is enough in most cases, a paid subscription will unlock even more unique elements, templates, and functionality like background removal and instant resizing of an existing photo or project. Keep in mind that you’ll need to create a Canva account to access your projects on different devices.

Download: Canva for Android | iOS (Free, subscription available)


If you own a Samsung Galaxy device, you don’t have to download a third-party photo editor. Samsung’s Gallery app has photo editing features similar to Apple’s Photos app.

To access these features, launch Samsung Gallery, open the image you want to edit, and tap the Edit tool (indicated by a pencil icon). Once you finish editing your image and tap Save, you should be able to locate the edited copy in the Gallery app alongside the original photo.

Samsung Gallery may not be as powerful as some dedicated editing apps on this list. However, its features should suffice if you only want to make minor touch-ups before sharing your pictures on social media platforms.

Download: Samsung Gallery for Android (Free)


9 Google Photos

Google Photos comes pre-installed on most devices that run stock Android. So, you likely already have one of the most user-friendly photo editing apps in your hand—even if its primary purpose is to back up your device’s photos.

Its tools are good enough for casual photo editing, and you’ll be happy with it if you just want to perform quick edits like fixing lighting, cropping, and applying simple filters.

Once you finish editing a photo on Google Photos, you can tap Save and access it on your other devices, like your iPad or PC (via a web browser), with the same Google account.

Download: Google Photos for Android | iOS (Free, subscription available)


With a bit of creativity and the right free photo editing app, you won’t have to spend a penny on an app subscription. You can get the most out of these Android apps without having to upgrade to their premium versions unless you need very specific features like advanced AI editing tools.

Today’s Wordle Answer and Clues (Thursday, April 4, 2024)

Wordle is a daily puzzle from the New York Times that sees millions of people trying to beat it every day. If you’re struggling and want some extra help solving today’s Wordle, we’re here with the answer to Wordle #1020, plus some extra clues to help you out.


SPOILERS AHEAD (CLUES)


Today’s Wordle (Puzzle #1020) Basic Clues

If you just want the answer to the Wordle puzzle for April 4, 2024, scroll down past the clues and the next spoiler warning. Otherwise, here are a set of clues to help you solve today’s Wordle somewhat on your own.

  1. The answer to today’s Wordle is a very common word.
  2. It contains four consonants and just one vowel.
  3. No letters are repeated, with all five being different.
  4. The first letter is C.
  5. The last letter is B.

Today’s Wordle (Puzzle #1020) Big Clue

The big clue for today’s Wordle is, “You can do this up or down, on or off, or related to both a hill and your career”.

SPOILERS AHEAD (ANSWER)

Today’s Wordle Answer for Thursday, April 4, 2024

If you still haven’t beaten today’s Wordle even with the clues provided above, the answer is below…

The answer to today’s Wordle is “CLIMB“.


The word “Climb” can be both a verb and a noun. Both relate to the act of ascending or descending, whether physically or something more figurative. An example of the verb is, “I endeavored to climb that steep hill”. An example of the noun is, “That was a steep climb up that hill”.

According to the Online Etymology Dictionary, the origin of “Climb” is the West Germanic word “klimban,” meaning to go up by clinging. In Old English, this became “climban,” meaning to rise gradually or ascend. Most languages with the same root as English have dropped the “b”.

Our Top Wordle Tips (to Beat It Every Day)

  1. Choose a good starting word. There are plenty to choose from, so pick one from our list of the best Wordle starting words.
  2. Try to eliminate all five vowels early. As there are only a handful of vowels, it’s best to use them all within the first 2-3 guesses.
  3. Use popular letters early. As well as the vowels, letters such as T, S, N, R, H, C, D, and L appear most commonly in English words.
  4. Take your time over your guesses. Wordle isn’t timed, so there’s no rush to complete it. You can even guess on paper first.
  5. Remember that letters can appear twice (and often do). Keep this in mind when guessing, as forgetting it can lead you to mess up.


Now that you have completed today’s Wordle puzzle (with a little help from your friends at MUO), you should check out some of the other free games from the New York Times.

Connections is a fun game that challenges you to find the associations between 16 words, splitting them up into four groups of four. To help combat the challenging nature of the game, check out our tips and tricks to help you beat Connections.

There’s also Strands, the newest addition to the New York Times’ burgeoning list of games. Just like Connections, it’s extremely challenging, but in a unique string-the-letters-together way. We recommend you check out our best tips for beating Strands to give yourself a leg up on the daily challenge.

Or, if you’re a Wordle purist and want more of the same, we recommend trying these awesome Wordle alternatives.

What Is HDR10+? Everything to Know About the HDR Format

Quick Links

Key Takeaways

  • HDR10+ is developed by Samsung, Panasonic, and Fox and offers better contrast, brightness, and detail for a more realistic viewing experience.
  • HDR10+ has dynamic metadata for “per-frame” adjustments leading to detailed and accurate colors and lighting.
  • HDR10+ adoption is growing, supported by flagship phones, laptops, and gaming PCs.
  • Both Dolby Vision and HDR10+ can coexist on displays.


HDR has quickly become one of the most marketed features on displays of all shapes and sizes—from mobile screens to TVs. However, new HDR variants and implementations keep showing up from time to time, which can make it confusing to figure out what you’re buying.

HDR10+ is one of the latest versions, building upon the promise of HDR10 and aiming to provide even better visuals… but what exactly does that mean?


What Is HDR10+?

Developed in partnership by 20th Century Fox, Panasonic, and Samsung, HDR10+ first launched in 2017. It builds upon the same feature set as HDR10 but makes two important improvements.

First, it increases the maximum brightness to 10,000 lumens. This means you get far better contrast as there’s more brightness for the display panel to play around with.

Samsung has taken this one step further by implementing HDR10+ Adaptive tech in its TVs, allowing them to detect the viewing space’s brightness and make changes to the TV’s brightness, contrast, and, more accordingly, for the best possible viewing experience regardless of the lighting around you.


Yadullah Abidi/MakeUseOf

Second, HDR10+ improves information handling by carrying “dynamic” metadata. Previously, HDR10 carried “static” metadata for content. This meant that there was only one set of values like brightness, contrast, saturation, and more for an entire piece of content. So while this metadata might work for most of a movie, some scenes would appear too dark, too bright, or oversaturated.

Dynamic metadata means the format now carries metadata for each specific frame. It keeps changing display values as the content plays out, giving each frame its own set of color, brightness, and contrast values, among other things. This makes each frame look much more realistic and detailed, with accurate colors and lighting.


These changes combined ensure that you get the best possible color accuracy and dynamic range from your content. Other benefits of HDR10+ include support for 8K resolution and up to a 16-bit signal, allowing for a staggering ~280 trillion colors. The HDR10+ whitepaper [PDF] is a great place to start if you’re looking to get into the serious technical details.

This also applies to the gaming industry, alongside benefits like no impact on game performance, better visuals (and hence higher immersion), and easy implementation as well as optimization.

What Do You Need to Get HDR10+?

As is the case with any other HDR format, you need a couple of things to view HDR10+-enabled content:

  • A source supporting HDR10+. This could be anything from a Blu-ray disk or a streaming service like Amazon Prime Video, Apple TV+, or Hulu, and even games.
  • A device capable of reading the HDR10+ format. This can be a media streamer, Blu-ray player, or just your PC or smartphone.
  • An HDR10+ compatible display panel, TV or otherwise.
  • An HDMI 2.1 cable.


While TVs remain the mainstay for HDR10+, the technology is starting to become more accessible in other devices, such as smartphones and laptops. Most flagship phones, including the Samsung S24 Ultra, Google Pixel 8/8Pro, and even the Xiaomi 13T Pro, support HDR10+. Presently, the iPhone 15 Pro/Plus only supports HDR10.

A man holding the S24 Ultra on the left and another guy holding the Pixel 8 Pro on the right
Zarif Ali and Justin Duino/MakeUseOf

Nvidia has also partnered with HDR10+ to bring support for the format using its GeForce RTX line of graphics cards. However, on a PC, you will need to have a compatible display from the likes of Alienware, Benq, Dell, and Lenovo. HDR10+ adoption is rising, so expect this list to grow. Currently, the format has been adopted by over 150 adopters.


For laptops, expect flagship machines from the companies mentioned above to have compatible displays, but unless specified otherwise, there’s a good chance you’ll end up with an HDR10 panel anyway.

The HDR10+ website has a complete list of certified products you can check to ensure the device you’re planning to buy supports the format. That said, finding a device in that list can be a tiring task considering it’s 972 pages of serial codes, but at least you have the option.

Is HDR10+ Better Than Dolby Vision?

If you look at the spec sheet, Dolby Vision and HDR10+ are practically the same, with the exception that Dolby Vision can only use 12-bit signals for a maximum of over 68 billion colors. Practically speaking, you’ll need superhuman eyes to tell a difference.


That said, Dolby Vision is currently the more popular format of the two, likely because it’s been on the market for four more years (launching in 2014). It has received multiple updates since then, making it into the format it is today, and consequently, it has won a large chunk of the market in the process.

Thankfully, we’re not being tugged into another format war here. Unlike previous conflicts in the video industry like Blu-ray versus HD-DVD, HDR10+ and Dolby Vision aren’t mutually exclusive. This means that a display manufacturer can support both formats at once providing maximum compatibility to the user.

Generally speaking, it’s pretty easy to find a combination of HDR10 and Dolby Vision on a lot of consumer TVs today, with HLG also thrown into the mix. Not sure about HLG? We’ve previously looked at how HLG, HDR10, and Dolby Vision compare and why HLG is preferred by some broadcasters.

Feature

HDR10+

Dolby Vision

Maximum Brightness

Up to 10,000 nits

Up to 10,000 nits

Color Depth

Up to 16-bit (280 trillion colors)

Up to 12-bit (68.7 billion colors)

Resolution Support

Up to 8K

Up to 8K

Dynamic Metadata

Yes, per-frame

Yes, per-frame

Static Metadata

No

Yes

Backward Compatibility

HDR10, SDR

HDR10, HLG, SDR

Year Introduced

2017

2014


However, while it’s relatively easy to support different HDR formats, very few manufacturers actually do. So it’s always a good idea to check a product’s specifications and supported HDR formats before buying a new monitor, TV, or otherwise..

HDR10+ sources work the same way. For example, streaming services like Amazon Prime Video or Apple TV can support both Dolby Vision and HDR10+. You can also find it on streaming devices from Amazon Fire TV, Roku, Apple TV, and even Google Chromecast. Even Unreal Engine natively supports both HDR10+ and Dolby Vision (alongside Dolby Atmos), and there are other ways you can find HDR content.

Regardless, with a little bit of reading the fine print, you should be able to put together a setup that greatly enhances your viewing experience. Since you don’t necessarily have to choose between the two formats, you also have a wide variety of sources and hardware to choose from.

Today’s Wordle Answer and Clues (Wednesday, April 3, 2024)

Wordle is a daily puzzle from the New York Times that sees millions of people trying to beat it every day. If you’re struggling and want some extra help solving today’s Wordle, we’re here with the answer to Wordle #1019, plus some extra clues to help you out.


SPOILERS AHEAD (CLUES)


Today’s Wordle (Puzzle #1019) Basic Clues

If you just want the answer to the Wordle puzzle for April 3, 2024, scroll down past the clues and the next spoiler warning. Otherwise, here are a set of clues to help you solve today’s Wordle somewhat on your own.

  1. The answer to today’s Wordle is a somewhat common word. However, there’s a synonym more commonly used in the US.
  2. It contains three consonants and two vowels.
  3. No letters are repeated, with all five being different.
  4. The first letter is P.
  5. The last letter is T.

Today’s Wordle (Puzzle #1019) Big Clue

The big clue for today’s Wordle is, “More commonly used in the UK than in the US, putting one together is a repetitive process”.

SPOILERS AHEAD (ANSWER)

Today’s Wordle Answer for Wednesday, April 3, 2024

If you still haven’t beaten today’s Wordle even with the clues provided above, the answer is below…


The answer to today’s Wordle is “PLAIT“.

The word “Plait” can be both a verb and a noun. The verb form denotes that you’re interweaving strands of a material such as hair or straw, as in “to plait someone’s hair”. The noun is what results from that plaiting, as in “she wore her hair in a plait”.

According to the Online Etymology Dictionary, the origin of “Plait” is the Latin word “plicare,” meaning to fold. This then became the Old French word “pleir,” which also meant to fold. By the late 14th century, this had become “pleit,” which meant both interlaced strands of hair and a flattened gathering of cloth of fabric.

Our Top Wordle Tips (to Beat It Every Day)

  1. Choose a good starting word. There are plenty to choose from, so pick one from our list of the best Wordle starting words.
  2. Try to eliminate all five vowels early. As there are only a handful of vowels, it’s best to use them all within the first 2-3 guesses.
  3. Use popular letters early. As well as the vowels, letters such as T, S, N, R, H, C, D, and L appear most commonly in English words.
  4. Take your time over your guesses. Wordle isn’t timed, so there’s no rush to complete it. You can even guess on paper first.
  5. Remember that letters can appear twice (and often do). Keep this in mind when guessing, as forgetting it can lead you to mess up.


Now that you have completed today’s Wordle puzzle (with a little help from your friends at MUO), you should check out some of the other free games from the New York Times.

Connections is a fun game that challenges you to find the associations between 16 words, splitting them up into four groups of four. To help combat the challenging nature of the game, check out our tips and tricks to help you beat Connections.

There’s also Strands, the newest addition to the New York Times’ burgeoning list of games. Just like Connections, it’s extremely challenging, but in a unique string-the-letters-together way. We recommend you check out our best tips for beating Strands to give yourself a leg up on the daily challenge.

Or, if you’re a Wordle purist and want more of the same, we recommend trying these awesome Wordle alternatives.

Do Alexa, Siri, and Google Assistant Use AI?

Key Takeaways

  • Virtual assistants like Alexa, Siri, and Google Assistant use AI, particularly machine learning and natural language processing, to understand and respond to voice commands.
  • These virtual assistants are not purely AI tools as they have other functions that don’t rely on NLP or machine learning, such as reminders and routines.
  • Virtual assistant providers are working on integrating generative AI, using large language models (LLMs), to better understand natural language requests and provide more natural responses. Amazon, Google, and Apple are actively developing LLM-based integrations for their virtual assistants.


If you have a smart home, chances are you use an assistant like Alexa, Google Assistant, or Siri. But do these popular home assistants use AI to function, and if so, how?


Do Virtual Assistants Like Alexa Use AI?

Because virtual assistants can listen to voice commands, they benefit from AI-based language processing, as it helps them better understand and respond to voice commands and questions.

All virtual assistants differ from one another, and the kind of AI they use differs, too. However, machine learning is a common technology used by most virtual assistants. Siri, Alexa, and Google Assistant all use AI and machine learning to interpret requests and carry out tasks.


Alexa uses machine learning and NLP (natural language processing) to fulfill requests. “Natural language” refers to the language used in human conversations, which flows naturally. In order to best process voice commands, virtual assistants rely on NLP to fully understand what’s being requested.

However, Amazon itself calls this natural language understanding, or NLU. Amazon states that it uses NLU to “deduce what a speaker actually means, and not just the words they say.” Amazon uses an example here, stating that NLU helps Alexa provide a weather forecast if a user asks what it’s like outside. Without specifically saying “weather forecast”, NLU allows Alexa to still discern what the user is asking for.

Furthermore, Amazon states that NLU “is all about providing computers with the necessary context behind what we say, and the flexibility to understand the many variations in how we might say identical things.” In short, NLU provides the means to better determine what a user is asking for when they communicate verbally.


Google Assistant uses NLP and a number of complex algorithms to process voice requests and engage in two-way conversations. Features like Look and Talk, which was introduced in 2022, use these algorithms to determine whether you, as the user, are simply passing by your Nest Hub or intending to interact with it.

Since then, Google Assistant has undergone several updates. In January 2024, Google announced that it would be removing lesser-used features, such as media alarms and Google Play Books voice control.

Finally, there’s Apple’s Siri. Siri currently uses AI for its functions, using both NLP and machine learning. Like the other two virtual assistants being discussed here, Siri recognizes voice triggers, and can pick up on the trigger phrase “Hey Siri” using a recurrent neural network.


AI assistants are also moving towards the use of generative AI. This is a more recent type of AI that is already being used in tools like ChatGPT.

Both Google and Alexa are currently developing generative AI capabilities for their voice assistants. Google is using Gemini, its own large language model (LLM). Amazon, on the other hand, is developing its own LLM that is currently known as “Alexa AI”.

As stated by Amazon, Alexa AI will allow for a few perks, including continued conversations without repeated wake words, more personalized responses, and control of multiple connected devices via one request.

In July 2023, it was announced that Apple was working on its own LLM, known as Ajax, which will be used in its chatbot, Apple GPT. In early 2024, reports started surfacing about Apple working to improve Siri using generative AI. In a Bloomberg Power On report, it was stated that Apple is “planning a big overhaul” for Siri.


More specifically, it’s reported that Apple is developing AI code, both for Siri and its Apple Care service. 2024 may reveal more information on these developments.

Should Siri, Alexa, and Google Assistant Be Considered AI?

Given how heavily virtual assistants rely on AI, be it through NLP or machine learning, it’s natural to categorize them as AI outright. Voice assistants like Alexa, Google Assistant, and Siri are often referred to as AI tools, given their constant use of NLP and machine learning.

While these virtual assistants have many other features that don’t use AI, they rely heavily on AI to function. So, they can be considered AI.

The Future of AI in Virtual Assistants

One thing that a lot of virtual assistant providers have in common is that they’re currently working on using generative AI in their systems.

Generative AI is a specific field of AI that uses deep learning and neural networks to generate text or media based on user prompts (which can also be in the form of text or images). The introduction of generative AI in virtual assistants is being done through the integration of LLMs.


In the future, generative AI could give virtual assistants the following capabilities:

  • Further personalizing the user’s experience (based on location, preferences, etc.).
  • Providing advice and recommendations for day-to-day issues.
  • Offering more meaningful conversations with users

As AI continues to become more sophisticated, we may see our trusty voice assistants become highly capable, being able to help us in all manners of things. AI has the potential to catapult existing technologies into a new age of capabilities, and voice assistants are no exception here.

Today’s Wordle Answer and Clues (Tuesday, April 2, 2024)

Wordle is a daily puzzle from the New York Times that sees millions of people trying to beat it every day. If you’re struggling and want some extra help solving today’s Wordle, we’re here with the answer to Wordle #1018, plus some extra clues to help you out.


SPOILERS AHEAD (CLUES)


Today’s Wordle (Puzzle #1018) Basic Clues

If you just want the answer to the Wordle puzzle for April 2, 2024, scroll down past the clues and the next spoiler warning. Otherwise, here are a set of clues to help you solve today’s Wordle somewhat on your own.

  1. Today’s Wordle contains three consonants and two vowels.
  2. No letters are repeated.
  3. The first letter is S.
  4. The last letter is M.

Today’s Wordle (Puzzle #1018) Big Clue

The big clue for today’s Wordle is, “In the north-east, they drink gin, but in the south-east, they drink that distilled liquor made from sugarcane”.

SPOILERS AHEAD (ANSWER)

Today’s Wordle Answer for Tuesday, April 2, 2024

If you still haven’t beaten today’s Wordle even with the clues provided above, the answer is below…

The answer to today’s Wordle is “SERUM“.


The word “Serum” is a noun that refers to the clear, watery portion of blood after the clotting agents have been removed. The word has also been co-opted by the cosmetics industry, as in “anti-aging serum”.

According to the Online Etymology Dictionary, the origin of “Serum” is the Latin word of the same name. This referred to a watery fluid or whey. The root of the word is older, with “ser-” meaning to run or flow.

Our Top Wordle Tips (to Beat It Every Day)

  1. Choose a good starting word. There are plenty to choose from, so pick one from our list of the best Wordle starting words.
  2. Try to eliminate all five vowels early. As there are only a handful of vowels, it’s best to use them all within the first 2-3 guesses.
  3. Use popular letters early. As well as the vowels, letters such as T, S, N, R, H, C, D, and L appear most commonly in English words.
  4. Take your time over your guesses. Wordle isn’t timed, so there’s no rush to complete it. You can even guess on paper first.
  5. Remember that letters can appear twice (and often do). Keep this in mind when guessing, as forgetting it can lead you to mess up.


Now that you have completed today’s Wordle puzzle (with a little help from your friends at MUO), you should check out some of the other free games from the New York Times.

Connections is a fun game that challenges you to find the associations between 16 words, splitting them up into four groups of four. To help combat the challenging nature of the game, check out our tips and tricks to help you beat Connections.

There’s also Strands, the newest addition to the New York Times’ burgeoning list of games. Just like Connections, it’s extremely challenging, but in a unique string-the-letters-together way. We recommend you check out our best tips for beating Strands to give yourself a leg up on the daily challenge.

Or, if you’re a Wordle purist and want more of the same, we recommend trying these awesome Wordle alternatives.

This Dual-Thunderbolt 4 Docking Station Has ALL The Ports

Key Takeaways

  • The Ivanky FusionDock Max 1 has a unique design and ample ports for Apple Silicon devices, but doesn’t fit in with the Mac aesthetic.
  • It supports up to quad 6K displays, but with limitations based on host device model.
  • It’s packed with ports: 19 total, including USB-C, HDMI, USB-A, 2.5GbE Ethernet, and SD/MicroSD slots.


The Ivanky FusionDock Max 1 is the ultimate docking station for any Apple Silicon-based Mac. It provides up to quad 6K monitor output and every other port you could possibly need, from multi-gigabit Ethernet networking to a full-size SD card reader and optical sound output. To do this, it utilizes a dual Thunderbolt 4 interface—but comes in at a hefty premium price of half the cost of a Macbook.

Ivanky FusionDock Max 1

$440 $550 Save $110

The Ivanky FusionDock Max 1 might be one of the priciest USB docking stations, but it’s the world’s first to offer quad 6K monitor outputs (assuming your hardware supports it), and gives you more ports than you’d ever need—including optical audio, multigig Ethernet, and SD card. 

Ports
Too many to list here (19)

USB Power Delivery
45W PD ports on the front; 96W back to host machine

Power supply included
Yes

Max display res.
6K

Price
$550

Pros

  • Absurd number of ports
  • Quad 6K60Hz output on supported Macs
  • USB-C, USB-A, Optical and analog audio, PD charging, micro SD and full size SD card slot?it has everything
  • Delivers up to 96W back to your host machine
Cons

  • It costs half as much as a Macbook!
  • You’ll keep everything plugged in, because you can
  • Only works with Silicon, not Intel Macs

Box Contents and Design: “I’m Not a Mac!”

ivanky fusiondock max 1 - package contents
James Bruce / MakeUseOf

Unlike some competitors that mimic the design language of a Mac Mini to look like a natural extension of your machine, the Ivanky FusionDock Max 1 doesn’t care for that at all, and goes off in a completely different design direction.


The FusionDock Max 1 is a large metal block in bluish dark grey, with sharp corners. It couldn’t be any less Mac-like if it tried. So much so that Mac purists might actually be put off by it. It definitely seems like it would fit better with blocky grey PC laptops.

The main dock appears to float on the base and left-hand side (looking from the front). It’s safe to assume this allows for better cooling, whether used horizontally or upright—but it’s a bold design statement in either case.

The front features a small Ivanky logo in the top left, and a discreet LED power light underneath it. It’s so discreet, in fact, that I thought it was broken the first time I plugged the power in. It’s entirely too dim, and you need to cup your hand around it just to see the faintest glimmer of white light. Even as I sit here at night with the room lights off, it’s barely visible. I’m not sure why this isn’t an RGB status LED, which could have been used to indicate what display modes are currently supported, if power is being delivered back, or if it’s not running at full speed for some reason.


The package includes some rubber feet for you to affix yourself, depending on the orientation you want to use the docking station in. At 171mm wide, 48mm tall, and 94mm deep (when laid flat), it’s remarkable just how much has been crammed in here.

Quad Display Output (But Not For Everyone)

ivanky fusiondock max 1 - instruction manual on how many displays
James Bruce / MakeUseOf

The FusionDock Max 1 supports, in theory, up to four displays—but only in limited circumstances. My Mac Mini M1, for instance, can only support a single display through the FusionDock Max 1. You’ll need a MacBook Pro with M1/M2/M3 Max chip or Mac Studio to support the full four external displays. To be exact:

  • A single display is possible on the MacBook Air (M1/M2), MacBook Pro (M1/M2/M3), and Mac Mini (M1/M2).
  • You can have dual displays on the MacBook Pro (M1/M2/M3 Pro), and Mac Mini (M2 Pro).
  • For quad displays, you’ll need a MacBook Pro (M1/M2/M3 Max), or Mac Studio


Intel Macs are not supported. In addition, Ivanky recommends avoiding using all four display ports on the back. If you plan to connect four displays, use a top and bottom layer port from both the front and back of the device.

Ports As Far As The Eye Can See

ivanky fusiondock max 1 - rear ports
James Bruce / MakeUseOf

The number of ports you get from the FusionDock Max 1 is almost comical. Firstly though, the magic that enables the Ivanky FusionDock Max 1 to do so much is the dual USB-C Thunderbolt 4 connector cable. This custom cable takes up two full ports on the side of your MacBook or Mac Mini; the ports are joined, so you can’t use one from one side or the other. While this fits the current generation of Macbooks, that’s no guarantee that the USB-C port spacing will be identical in the future, of course, so you might lose that convenience of a single cable.


ivanky fusiondock max 1 - double thick thunderbolt 4 cable
James Bruce / MakeUseOf

On the other end, this cable separates into the two upstream USB-C 40Gbps ports labeled “Laptop” on the FusionDock, which sit on top of each other. This can also deliver 96W back to your laptop, so you can keep your power brick in your bag and never accidentally leave it at home again.

ivanky fusiondock max 1 - front ports
James Bruce / MakeUseOf

So, what does sacrificing these two fast USB-C ports on your laptop get you in return? Quite a lot, as it turns out:

  • 4 x 40Gbps downstream USB-C. These can be used for data or 6K60Hz video (though, as mentioned above, video output is limited by your host machine model) and provide 15W of power each. There are two at the rear and two at the front.
  • 2 x HDMI ports (rear), each up to 4K60Hz.
  • 2 x 10Gbps USB-C 3.2 ports; data only, no video. Located on the front, these are also Power Delivery ports, providing 30W and 7.5W of power to charge smartphones and other devices.
  • 5 x USB-A 3.2 10Gbps ports, all providing up to 7.5W standard USB power. There are three on the back and two at the front.
  • SD and MicroSD card slots on the front; these can both be used simultaneously. Annoyingly, they’re upside down (if you’re using the dock horizontally), and there’s no obvious label to indicate that on the dock.
  • Front TRRS 3.5mm audio jack for a headset and microphone; plus a rear 3.5mm jack and Optical TOSLink for speakers.
  • 2.5Gb Ethernet port.


This makes it the world’s most expansive (and possibly expensive) docking station yet—a 19-in-1, perhaps?

It’s somewhat ironic that Ivanky supplies an HDMI cable rated to 8K, while the HDMI ports on the Dock can only support 4K. You’ll need to use a USB-C / Thunderbolt cable for higher resolutions.

ivanky fusiondock max 1 - 8k hdmi cable
James Bruce / MakeUseOf

Powered by an enormous 180W AC adapter, the FusionDock Max 1 can provide power back to your laptop through those dual Thunderbolt ports, as well as to USB-C monitors and PD power ports on the front, which are suitable for charging your smartphone or other accessories. So, not only can your laptop charger be left in your bag, but your phone charger too.


Will You See Any Performance Gains?

The FusionDock Max 1 in and of itself isn’t going to offer anything faster than a similar port on your Macbook or Mac Mini; it just gives you more ports. However, the multi-gig Ethernet port will be faster and more reliable compared to Wi-Fi, and even more so if it’s actually connected to a 2.5GbE backbone. I use a QNAP unmanaged 5-port switch that’s inexpensive.

You may see a speed benefit from the SD card slot, but only if you’re using the latest high-speed cards. On my U3 class 10 cards, I saw no benefit compared to a cheap USB adapter.

Should You Buy the Ivanky FusionDock Max 1?

The Ivanky FusionDock Max 1 (will there be a version 2? The mind boggles as to how many more ports that could have), is the luxury yacht of docks with a price to match, at around $500. But if you need a lot of ports for your Apple Silicon—even a desktop—the FusionDock Max 1 has everything you need. And if you need to dock your laptop when you get home or to your work desk, it’s just the one cable for everything—including 96W of power for the most demanding of MacBooks. Throughout my time testing, it has not once occurred to me that I might need another port. I’ve filled up all the rear ports with storage accessories, a monitor, various dongles and doodads, utilized the 2.5GbE port for superfast networking, ingested video through the front SD card slot, and still had the front ports left for charging and USB sticks. Not having to rummage around or yank cords out has been a breath of fresh air.


Still, if I were to point out one thing that’s lacking, it would be some kind of SSD storage option. I have a number of external storage drives, so it’s not a dealbreaker for me—but considering the cost of this, it would have been a useful addition.

ivanky fusiondock max 1 cable mess-1-1
James Bruce / MakeUseOf

However, I’ll warn you now: being able to plug in everything at once means you’ll never unplug anything, and for those of us who are somewhat lacking in the cable management skills department, well… you don’t want to see the state of my desk.

fusiondock max 1 thumbnail

Ivanky FusionDock Max 1

$440 $550 Save $110

The Ivanky FusionDock Max 1 might be one of the priciest USB docking stations, but it’s the world’s first to offer quad 6K monitor outputs (assuming your hardware supports it), and gives you more ports than you’d ever need—including optical audio, multigig Ethernet, and SD card. 

Ports
Too many to list here (19)

USB Power Delivery
45W PD ports on the front; 96W back to host machine

Power supply included
Yes

Max display res.
6K

Price
$550

Today’s Wordle Answer and Clues (Monday, April 1, 2024)

Wordle is a daily puzzle from the New York Times that sees millions of people trying to beat it every day. If you’re struggling and want some extra help solving today’s Wordle, we’re here with the answer to Wordle #1017, plus some extra clues to help you out.


SPOILERS AHEAD (CLUES)


Today’s Wordle (Puzzle #1017) Basic Clues

If you just want the answer to the Wordle puzzle for April 1, 2024, scroll down past the clues and the next spoiler warning. Otherwise, here are a set of clues to help you solve today’s Wordle somewhat on your own.

  1. Today’s Wordle contains four consonants and one vowel.
  2. No letters are repeated.
  3. The first letter is F.
  4. The last letter is D.

Today’s Wordle (Puzzle #1017) Big Clue

The big clue for today’s Wordle is, “Don’t be conned into picking large leaves off of plants”.

SPOILERS AHEAD (ANSWER)

Today’s Wordle Answer for Monday, April 1, 2024

If you still haven’t beaten today’s Wordle even with the clues provided above, the answer is below…

The answer to today’s Wordle is “FROND“.


The word “Frond” is a noun which refers to large leaves, particularly on palm trees or ferns. It’s often paired with “palm,” as in “palm fronds” to denote the hefty structures that palms and fern trees boast. A frond is essentially a large leaf, but is only really used when referring to specific flora.

According to the Online Etymology Dictionary, the origin of “Frond” is the Latin word “frons,” meaning “leafy branch, green bough, foliage.” The use of the word seems to be on the decline, with usage peaking in the 1860s.

Our Top Wordle Tips (to Beat It Every Day)

  1. Choose a good starting word. There are plenty to choose from, so pick one from our list of the best Wordle starting words.
  2. Try to eliminate all five vowels early. As there are only a handful of vowels, it’s best to use them all within the first 2-3 guesses.
  3. Use popular letters early. As well as the vowels, letters such as T, S, N, R, H, C, D, and L appear most commonly in English words.
  4. Take your time over your guesses. Wordle isn’t timed, so there’s no rush to complete it. You can even guess on paper first.
  5. Remember that letters can appear twice (and often do). Keep this in mind when guessing, as forgetting it can lead you to mess up.


Now that you have completed today’s Wordle puzzle (with a little help from your friends at MUO), you should check out some of the other free games from the New York Times.

Connections is a fun game that challenges you to find the associations between 16 words, splitting them up into four groups of four. To help combat the challenging nature of the game, check out our tips and tricks to help you beat Connections.

There’s also Strands, the newest addition to the New York Times’ burgeoning list of games. Just like Connections, it’s extremely challenging, but in a unique string-the-letters-together way. We recommend you check out our best tips for beating Strands to give yourself a leg up on the daily challenge.

Or, if you’re a Wordle purist and want more of the same, we recommend trying these awesome Wordle alternatives.

I Took Google’s Instrument Playground for a Spin, Here’s How It Works

Key Takeaways

  • Google’s Instrument Playground lets you generate unique audio samples of various instruments with AI.
  • The tool provides a hands-on experience allowing users to play with snippets and create music.
  • While not perfect, the samples have depth and charm, offering a fun and accessible way to explore music creation.


Ever dreamed of playing the sitar, a cello, or a funky electric guitar but lack the instrument or the skill? Google’s Instrument Playground puts a world of musical sounds at your fingertips. This AI-powered tool lets you type in an instrument, add a mood, and generate unique samples to play with and build upon.


What Is Google’s Instrument Playground?

Google’s Instrument Playground is a web-based tool that lets you type in the name of an instrument and an optional descriptive word. Then, you hit a button, and the tool conjures a unique 20-second audio sample based on your request. Where most AI music tools like Suno AI generate songs from a prompt, Google’s tool provides a more hands-on experience by letting you play the instrument yourself.


The engine behind Instrument Playground is Google’s MusicLM. Unlike a simple soundboard, MusicLM understands the nuances woven into different instruments and how musical styles interact. This understanding allows it to generate unique audio snippets that, while not perfect replicas, convincingly capture the essence of your chosen instrument and any descriptive flair you might add.

Google Instrument Playground

Think of it like a chef trained by tasting countless dishes. They wouldn’t simply copy an existing recipe, but could create a new one with the same flavors and spirit as the inspiration.

I took the tool for a spin, and attempted to create a demo song using the sounds it gave me. Here’s what I think of Google’s Instrument Playground.


Generating Instrument Clips With Google’s Instrument Playground

Naturally, I started with the familiar—guitar, piano, and even a dash of Chinese Guqin. I was pleasantly surprised. The samples weren’t mere MIDI imitations; they had a richness and depth that felt surprisingly close to the real deal.

Solo Guqin sample on Instrument Playground

But this is AI we’re talking about, so there were quirks. Most results weren’t purely solo instruments; a sprinkle of percussion often snuck its way in. For absolute sonic purity, this might be a limitation and make it difficult to simulate a complete instrument. But as someone just playing around, it honestly added to the charm.

Instrument Playground doesn't have all instruments


Google’s instrument database isn’t without its gaps. My request for a Persian Setar was politely rebuffed, and the Oud it did provide sounded, well, not very Oud-like. Still, for a free, AI-powered experiment, I could hardly complain.

Modifying My Sample Generation With Google’s Instrument Playground

The real fun of Instrument Playground lies in what you do after you get your initial sample. Each snippet comes with three playback modes: Beat, Pitch, and Ambient. Beat mode lets you trigger different portions of the sample like a drum machine, Pitch mode lets you stretch and reshape the original melody, and Ambient mode builds atmosphere by rapidly playing segments for a dreamy, textured effect.

Solo santoor sample in Instrument Playground

My most rewarding moment came when I typed in solo Santoor. That hammered dulcimer sound somehow reminded me of the Sleeping Dogs theme and triggered a wave of inspiration. I was already launching Ableton to put some drums on the sample.


Now, I am far from a producer. Most of my attempts at music-making end up as short, experimental bits. If I wanted to play this with a VST instrument, I’d be clueless. But Google’s Instrument Playground had already provided me with the primary component of what I was looking to make.

Downloading and Making a Song With the Google Instrument Playground Sample

If you’re already versed in sampling audio clips, you might want to download the full clip from Instrument Playground and then sample it in your favorite digital audio workstation (DAW).

Although that sounds like a wise course of action, there’s one minor hiccup: you can’t directly download those initial instrument samples from the Instrument Playground. In fact, the only time you can listen to the full clip is through the tour the website gives you when you’re using it first. But, you can download your recordings.

Downloading a Recording in Instrument Playground


So, if you record the whole clip, you can easily download it. Start by setting the playback mode to Pitch. Drag the first segment to the start of the clip and stretch it to cover the entire clip’s length. Then, hit the Record button and play the first key on the virtual keyboard. Once you’re finished recording, stop the recording and download the modified clip.

Instrument Playground sequencer

Google’s Instrument Playground features a simple sequencer that allows you to set notes like a piano roll and adjust the tempo to play them. Additionally, you can add up to four other instruments and play them together in the sequencer.

In my case, I didn’t use the sequencer. Luckily, Google’s Instrument Playground supports MIDI, and my MIDI keyboard was already connected. I switched to Beat mode, adjusted the segments, and recorded a clip which resulted in the output below:


Armed with my Santoor clip, I launched Ableton Live and imported the audio. A quick drum pattern, some basic automations, and before I knew it, I had an actual piece taking shape.

Instrument Playground sample in Ableton

Below is what an amateur came up with in fifteen minutes using the Instrument Playground sample. Will it win any awards? Absolutely not. Does it sound like the fever dream of a very amateur producer? Definitely. But here’s the thing: it was my fever dream, brought to life in a way that felt accessible and, most importantly, fun.


In addition, musicians can easily identify AI-generated music by ear. Given how Google’s Instrument Playground doesn’t make the song and only provides you with the sample, your track is exempt from being dismissed as AI-generated. It might still be dubbed amateur though.

Google’s Instrument Playground isn’t a replacement for real instruments, nor will it transform you into a musical genius overnight. What it does offer is a remarkably welcoming space for musical exploration. Seasoned musicians might find intriguing sonic textures to weave into their work, while those of us who normally just hum along to the radio can suddenly hear the music lurking within us. And that, in my book, is a powerful kind of AI magic.

Today’s Wordle Answer and Clues (Sunday, March 31, 2024)

Wordle is the daily puzzle that keeps on giving. Despite Wordle having been going for years, many of us still try to beat it every day. Thankfully, we’re here with the answer to Wordle #1016, plus some clues in case you get stuck and don’t want to lose your streak.


SPOILERS AHEAD (CLUES)


Today’s Wordle (Puzzle #1016) Basic Clues

If you just want the answer to the Wordle puzzle for March 31, 2024, scroll down past the clues and the next spoiler warning. Otherwise, here are a set of clues to help you solve today’s Wordle somewhat on your own.

  1. Today’s Wordle contains two consonants and three vowels.
  2. One letter is repeated twice AND in succession.
  3. The first letter is T.
  4. The last letter is O.

Today’s Wordle (Puzzle #1016) Big Clue

The big clue for today’s Wordle is, “The word itself can be uttered openly, but its meaning should not”.

SPOILERS AHEAD (ANSWER)

Today’s Wordle Answer for Sunday, March 31, 2024

If you still haven’t beaten today’s Wordle even with the clues provided above, the answer is below…

The answer to today’s Wordle is “Taboo“.


The word “Taboo” is primarily an adjective, but can also be used as a noun or verb. Regardless, the meaning remains pretty much the same; something that is banned or frowned upon due to morality, taste, or social acceptability. Examples of use include, “this particular subject is taboo,” and “they developed a taboo against it”.

According to the Online Etymology Dictionary, the origin of “Taboo” is somewhat unclear. However, we know that it only entered the English language at the end of the 18th century. Some etymologists believe it comes from the Tongan “ta-bu,” which was used to mark something out as especially sacred.

Our Top Wordle Tips (to Beat It Every Day)

  1. Choose a good starting word. There are plenty to choose from, so pick one from our list of the best Wordle starting words.
  2. Try to eliminate all five vowels early. As there are only a handful of vowels, it’s best to use them all within the first 2-3 guesses.
  3. Use popular letters early. As well as the vowels, letters such as T, S, N, R, H, C, D, and L appear most commonly in English words.
  4. Take your time over your guesses. Wordle isn’t timed, so there’s no rush to complete it. You can even guess on paper first.
  5. Remember that letters can appear twice (and often do). Keep this in mind when guessing, as forgetting it can lead you to mess up.


Now that you have completed today’s Wordle puzzle (with a little help from your friends at MUO), you should check out some of the other free games from the New York Times.

Connections is a fun game that challenges you to find the associations between 16 words, splitting them up into four groups of four. To help combat the challenging nature of the game, check out our tips and tricks to help you beat Connections.

There’s also Strands, the newest addition to the New York Times’ burgeoning list of games. Just like Connections, it’s extremely challenging, but in a unique string-the-letters-together way. We recommend you check out our best tips for beating Strands to give yourself a leg up on the daily challenge.

Or, if you’re a Wordle purist and want more of the same, we recommend trying these awesome Wordle alternatives.

Can You Turn Off Facebook’s In-App Browser? How It Works

Quick Links

Key Takeaways

  • Only message links in Facebook can be opened in external browser by using privacy settings.
  • For other links within Facebook, they will automatically open in the app’s built-in browser.
  • You can exit Facebook’s in-app browser when visiting a website.


The Facebook app opens links in its built-in browser by default. But what if you want to use your own preferred browser app instead? Here’s what you need to know about disabling Facebook’s in-app browser.


Can You Disable Facebook’s In-App Browser?

Facebook used to give app users more control over the links they opened, allowing you to open most links in an external browser. However, when we tested the feature in 2024, we saw that this is no longer the case on both the Android and iOS apps.

Rather, the option to open links in an external browser now only applies to links in Facebook messages. Links that you click on from Facebook pages or posts will automatically open in Facebook’s in-app browser. You will then need to manually open the link in an external browser.

So, while you can turn off Facebook’s in-app browser for message links, other links will continue to open in the app’s browser.

How to Turn Off Facebook’s Mobile Browser

Disabling Facebook’s in-app browser is simple. However, the privacy setting to open up links externally only works for links sent in messages.


If you open a link elsewhere on Facebook, such as on a Facebook page, it automatically uses the app’s built-in browser.

In order to open these types of links in a browser of your choice, you need to tap the three dots at the top of the page and select Open in external browser. This will then open the app in your default mobile browser.

Depending on the browser you use and your privacy settings, using an external browser could result in less tracking as you browse through the website on your phone.

If you want to force Facebook to open up message links in an external browser, follow these steps:


  1. On the home page of the app, tap the hamburger menu (with your profile icon) in the top right. On iOS, this icon is in the bottom right.
  2. Scroll down and select Settings & privacy, then tap on Settings.
  3. Scroll down and tap on the Media option. You will find it under the Preferences section.
  4. In the Media menu, scroll down and check the box that says Open links in external browser. On iOS, you will need to use a toggle button to switch the feature on.

The first time you open a link in a message after applying this setting, Facebook will notify you that you’re leaving messaging. Tap the Continue button to open the link.

There is some convenience to using Facebook’s in-app browser, but privacy-oriented users may want to use an external browser instead. For added privacy, you should also opt out of Facebook’s link history feature.


You can also use the off-Facebook activity tool to reduce the amount of data Facebook collects about you when you’re not using the app.

Unfortunately, the ability to completely disable Facebook’s in-app browser is no longer included in the app. But you can use your privacy settings to disable the built-in browser for message links.

Today’s Wordle Answer and Clues (Saturday, March 30, 2024)

Wordle is the daily puzzle that keeps on giving. Despite Wordle having been going for years, many of us still try to beat it every day. Thankfully, we’re here with the answer to Wordle #1015, plus some clues in case you get stuck and don’t want to lose your streak.


SPOILERS AHEAD (CLUES)


Today’s Wordle (Puzzle #1015) Basic Clues

If you just want the answer to the Wordle puzzle for March 30, 2024, scroll down past the clues and the next spoiler warning. Otherwise, here are a set of clues to help you solve today’s Wordle somewhat on your own.

  1. Today’s Wordle contains three consonants and two vowels.
  2. No letters are repeated twice.
  3. The first letter is F.
  4. The last letter is E.

Today’s Wordle (Puzzle #1015) Big Clue

The big clue for today’s Wordle is, “Often a synonym for strength, the police boast this”.

SPOILERS AHEAD (ANSWER)

Today’s Wordle Answer for Saturday, March 30, 2024

If you still haven’t beaten today’s Wordle even with the clues provided above, the answer is below…

The answer to today’s Wordle is “FORCE“.


The word “force” is both a verb and a noun with several different meanings. The collective connection between both is strength and the display of it. Examples of real-world use include “the force of nature,” “the force of the argument,” and “force your way through traffic”.

According to the Online Etymology Dictionary, “Force” derives from Latin (“fortia” and “fortis”) via old French (“force” and “forcer”). The word has always meant strength, power, and compulsion, and the Latin word also gave us “fort” and “fortress” meaning a castle or stronghold.

Our Top Wordle Tips (to Beat It Every Day)

  1. Choose a good starting word. There are plenty to choose from, so pick one from our list of the best Wordle starting words.
  2. Try to eliminate all five vowels early. As there are only a handful of vowels, it’s best to use them all within the first 2-3 guesses.
  3. Use popular letters early. As well as the vowels, letters such as T, S, N, R, H, C, D, and L appear most commonly in English words.
  4. Take your time over your guesses. Wordle isn’t timed, so there’s no rush to complete it. You can even guess on paper first.
  5. Remember that letters can appear twice (and often do). Keep this in mind when guessing, as forgetting it can lead you to mess up.


Now that you have completed today’s Wordle puzzle (with a little help from your friends at MUO), you should check out some of the other free games from the New York Times.

Connections is a fun game that challenges you to find the associations between 16 words, splitting them up into four groups of four. To help combat the challenging nature of the game, check out our tips and tricks to help you beat Connections.

There’s also Strands, the newest addition to the New York Times’ burgeoning list of games. Just like Connections, it’s extremely challenging, but in a unique string-the-letters-together way. We recommend you check out our best tips for beating Strands to give yourself a leg up on the daily challenge.

Or, if you’re a Wordle purist and want more of the same, we recommend trying these awesome Wordle alternatives.

These 5 Apps Made My Switch From Mac to Windows Possible

Switching from one operating system to another isn’t as difficult as it used to be, but what you miss are the little things. The apps on this list helped make my move from macOS to Windows much more comfortable.


1 Flow Launcher

The Windows start menu got much more useful in Windows 10 than it had been in previous versions. The bad news was that the start menu took a step backwards in Windows 11, at least for certain workflows.

Flow Launcher takes strong cues from macOS’s Spotlight, as well as aspects of the Windows start menu and other launchers like Alfred. Hit a predefined key combination, and a text window pops up letting you search apps, files, and even the web all from one place.


Of course, Flow launcher doesn’t stop there. You can run system commands like Shutdown, run shell programs, and run your own scripts. The launcher even functions as a simple calculator without having to open another app.

You can easily customize the look and feel of the app, helping it blend in with your system or just stand out. The app also supports community-made plugins, so you can expect more features to come in the future.

Download: Flow Launcher (Free)

2 Ditto Clipboard Manager

Ditto Clipboard Manager for Windows showing clipboard entries

There is a fairly powerful clipboard manager built into Windows 11. Simply press the Windows key + V key combination, and you pull up a history of everything you’ve copied recently. For most people, this works perfectly.

That said, if you’re looking for a more powerful clipboard manager, Ditto is the app you’re looking for. This can keep clipboards in sync across multiple computers, display thumbnails of copied images in the clipboard list, and other useful features.


Download: Ditto Clipboard Manager (Free)

3 AutoText

AutoText main window showing the default snippets

There are plenty of apps available to expand snippets into larger text fragments or even full-blown paragraphs. If all you need is some minor snippets expanded, the text replacement built into macOS is fairly powerful. This is less true of Windows.

The good news is there’s an easy fix for this in AutoText. This is a simple free app (though a commercial license is available) that makes for easy to use text expansion, perfect for everything from quick email replies to code snippets.

If you require extensive templating or other similarly advanced features, you may need to turn to a pricier alternative like TextExpander. For simple uses, though, AutoText works like a charm.

Download:AutoText (Free, $22.95 commercial)


4 f.lux

f.lux Settings Window

Windows 11 has built-in screen tinting features it calls Night Light to make your screen easier on your eyes at night. Unfortunately, unlike similar offerings from mobile operating systems and macOS, you can’t do much to customize this feature.

For years, f.lux has been at the top of the game when it comes to precisely controlling your screen tint. Not only will f.lux let you apply much more extreme settings to the tint than you’ll typically find, but you can get quite granular about when and how your screen changes.

While the built-in Windows Night Light abruptly changes your screen tint at the scheduled times, f.lux changes the tint so gradually that you barely notice the color of your screen changing. I typically find that I only really notice if I get up and leave my desk and return.


This isn’t a feature many people will use, but f.lux even lets you control certain Philips Hue lights to control your in-home lighting with the app. Not a feature for everyone, but still handy to have available.

Download: f.lux (free)

5 PowerToys Awake

Using PowerToys Awake on Windows 11

Windows (and, to be fair, most other operating systems) can be very aggressive about dimming and shutting off the display. If you’re on a laptop and looking to save battery life, this can be handy. Assuming you’re sitting or standing at a desk most of the day, this can quickly get annoying.

On macOS, I used an app called Caffeine to keep my screen awake. That app isn’t available on Windows, but there is an app built into Microsoft’s PowerToys utility simply called Awake that does the same thing.


It’s a simple app, sitting in your System Tray and quietly running in the background. Simply right-click on the app to tell it how long to keep your computer running for a set amount of time, or simply indefinitely.

This is a great utility if you want to keep your screen on occasionally, but not all the time, as you don’t have to touch your display or battery settings.

Download: Microsoft PowerToys (free)

Windows 11 is absolutely great out the box, and it may stand the test of time as one of the best Windows releases. That said, if you’re used to certain workflows and ways of doing things from another operating system, it can take some getting used to.

I found these few simple tools and utilities made my move incredibly easy. If you’ve already made the move, and you’re looking for more powerful tools, take a look at our roundup of the best utilities for Windows power users.

Today’s Wordle Answer and Clues (Friday, March 29, 2024)

Wordle is the daily puzzle that keeps on giving. Despite Wordle having been going for years, many of us still try to beat it every day. Thankfully, we’re here with the answer to Wordle #1014, plus some clues in case you get stuck and don’t want to lose your streak.


SPOILERS AHEAD (CLUES)


Today’s Wordle (Puzzle #1014) Basic Clues

If you just want the answer to the Wordle puzzle for March 29, 2024, scroll down past the clues and the next spoiler warning. Otherwise, here are a set of clues to help you solve today’s Wordle somewhat on your own.

  1. Today’s Wordle contains three consonants and two vowels.
  2. No letters are repeated twice.
  3. The first letter is R.
  4. The last letter is M.

Today’s Wordle (Puzzle #1014) Big Clue

The big clue for today’s Wordle is, “An area or domain of either a subject or a place”.

SPOILERS AHEAD (ANSWER)

Today’s Wordle Answer for Friday, March 29, 2024

If you still haven’t beaten today’s Wordle even with the clues provided above, the answer is below…

The answer to today’s Wordle is “REALM“.


The word “realm” is a noun with several different meanings, all of which are connected. In common parlance, a realm can be a place or a specific area of interest, as in, “This parcel of land is my realm,” or, “This is a new discovery in the realm of medicine”.

According to the Online Etymology Dictionary, “Realm” derives from the old French “reaume,” later “realme”. Several other words share the same origin, including “regal,” regimen,” and “royalty”.

Our Top Wordle Tips (to Beat It Every Day)

  1. Choose a good starting word. There are plenty to choose from, so pick one from our list of the best Wordle starting words.
  2. Try to eliminate all five vowels early. As there are only a handful of vowels, it’s best to use them all within the first 2-3 guesses.
  3. Use popular letters early. As well as the vowels, letters such as T, S, N, R, H, C, D, and L appear most commonly in English words.
  4. Take your time over your guesses. Wordle isn’t timed, so there’s no rush to complete it. You can even guess on paper first.
  5. Remember that letters can appear twice (and often do). Keep this in mind when guessing, as forgetting it can lead you to mess up.


Now that you have completed today’s Wordle puzzle (with a little help from your friends at MUO), you should check out some of the other free games from the New York Times.

Connections is a fun game that challenges you to find the associations between 16 words, splitting them up into four groups of four. To help combat the challenging nature of the game, check out our tips and tricks to help you beat Connections.

There’s also Strands, the newest addition to the New York Times’ burgeoning list of games. Just like Connections, it’s extremely challenging, but in a unique string-the-letters-together way. We recommend you check out our best tips for beating Strands to give yourself a leg up on the daily challenge.

Or, if you’re a Wordle purist and want more of the same, we recommend trying these awesome Wordle alternatives.

What materials are used in the construction of high frequency pcbs?

used in the construction of high frequency pcbs

The intricate dance of electromagnetic waves in the gigahertz range requires a nuanced approach to PCB material selection. The right choice ensures signal integrity, propagation, and overall performance. This guide explores the critical factors that make high-frequency pcb materials different, leveraging extensive experience and trusted specialists to optimize materials for specific end-use applications.

The selection of PCB laminate materials is key when designing boards that operate in the Microwave or Radio Frequency (RF) frequencies. These higher-frequency signals require a PCB construction with low losses to avoid interference and degradation.

While standard FR4 PCB materials have long served as the foundation for electronics manufacturing, new high-speed substrates are offering improved performance, particularly when routing traces at higher speeds. These high-frequency PCB materials typically have lower dielectric constants and dissipation factors, allowing for faster signal transmission. These materials are also characterized by having relatively smooth copper foil and low coefficients of thermal expansion (CTE) to reduce the effects of temperature on copper sheet thickness.

PCBs are typically constructed using multiple layers of conductive metals with a resin between them. Depending on the application, these layers can vary in size and thickness. A key factor in the selection of a laminate for a high-frequency PCB is its electrical properties, including its dielectric constant and dielectric loss tangent (Dk and Df). For the highest-performance PCBs, these values should be as low as possible to minimize RF losses.

What materials are used in the construction of high frequency pcbs?

A material’s dielectric constant can affect signal speed, resonance, and other factors related to the direction of electric polarization within the structure. For this reason, high-frequency PCBs need a substrate material that will provide consistent Dk values along all the axes of the structure.

Besides a low Dk value, a high frequency pcb should also have a good copper surface finish to ensure the best conductivity of copper traces and other components on the board. Ideally, the copper foil should be electrodeposited with a low roughness (normally defined as z-axis RMS roughness) and a low elongation to resistance ratio. This helps prevent the formation of loops during assembly, which can result in short circuits and other problems that compromise performance.

Finally, the PCB laminate should have a CTE and Tg that are comparable to the specified values of the underlying prepreg or core material. These properties are important for preventing delamination between the core and the prepreg sheet during PCB fabrication.

High-frequency PCBs are essential to driving innovation across today’s fast-changing and connected world. These cutting-edge electronic devices can help us stay more informed, entertained, and productive as we delve deeper into the vast frontiers of data and information. By selecting the right materials, manufacturers can ensure that these innovative devices perform at their peak, while also maintaining maximum reliability and safety.

By partnering with a PCB manufacturer that understands these critical requirements, designers can rest assured that their next device will be optimized for performance and longevity. The experienced and trustworthy team at Hemeixin PCB can help you select the perfect materials to meet your design and fabrication needs.

How to Find Hidden Apps on Android

Key Takeaways

  • Finding hidden apps is often as simple as heading to your Android device’s settings. You may also sometimes find hidden apps inside folders in the app drawer.
  • You can use third-party launchers and file managers to quickly find hidden files.
  • Look out for trick apps that may hide other sensitive data like photos and important documents.


Smartphones can keep many apps out of the limelight. If you’re wondering how to find hidden apps on Android, whether it’s your phone or someone else’s, there are several ways you can go about it.


Find Hidden Apps Through Settings

The Settings menu in Android is complex enough that you often need tools like the Google Settings app to access hidden features. So, that’s the first place to look for answers to the question, “How do I find hidden apps on my phone?”

Since every device features a full list of its apps, get to know the basic steps to display it. First, tap the Settings icon on your Home screen or app drawer and choose Apps from the menu. If things look different on your device, just go for the tab that deals with your phone’s apps.

From there, you should have access to a See all apps option. Tap it to see all the apps on your device. Just scroll through them to explore the device’s contents.


If you or another user did disable and hide apps, you should also find the option to only see these programs. Look for the All apps button. Tapping it opens a dropdown menu that can show you Disabled apps.

Find Hidden Apps With Special Access

In your Apps menu, you’ll find an option titled Special app access. Here, your apps are broken down by the privileges they have on your phone.

For example, if you go into All files access, it will show you every single app that can use your digital files. You can filter through apps with access to pictures, notifications, VR helper services, Wi-Fi control, and more.


This is a great way to narrow down the kinds of programs you’re looking for, putting a more productive spin on how to find hidden apps on Android.

Find Hidden Apps in App Drawer Folders

As Android devices evolve, they offer better ways to manage your content. Different manufacturers and launchers offer different solutions for hiding apps on Android, but they all have something in common: the app drawer. It’s the scrollable display of apps that you get when you swipe up on your phone’s Home screen.

From here, you can hide and unhide apps on some Android systems via the drawer’s menu button—it usually looks like three dots or a gear icon. Other devices have alternative features, such as folders. To use these, open the menu, select Create folder, type in a title, and choose apps to group together.


When looking for hidden apps, make sure you check for folders, as they can obscure the applications they contain. So, finding hidden apps on an Android device can be as simple as looking more closely.

Find Hidden Apps Through Your File Manager

Another way to sift through the apps on your phone is by using the file manager. All Android devices should come with this feature in one form or another, usually labeled Files.

Tap the file manager icon to open a list of categories and tools. Go into Apps to see all the programs installed on your device along with any APK (Android Package) files. Besides showing hidden and forgotten apps, you can manage each item from here, too, from sharing to uninstalling it.


However, the file manager doesn’t always display system apps that are part of the device’s basic functions. In other words, turn to your file manager only if you want to find hidden apps you previously downloaded.

Another feature to keep in mind is the Safe folder option in many file managers. This is a secure place to store files and needs a PIN or pattern to unlock. It doesn’t deal with apps so much, but it’s a good place to look for hidden data while also exploring the nooks and crannies available on Android devices.

If the file manager you already have doesn’t suit your needs, you can always download a better one. Try out apps like Cx File Explorer to enjoy a cleaner interface, smoother organization of your files, and a lot more detail regarding your phone’s active and hidden apps.

Find Hidden Apps With a New Launcher

If you don’t like the layout of your current Android system, you can install another launcher that fits your workflow. While there are safety concerns about third-party Android launchers, apps like Microsoft Launcher and Nova Launcher are among the best on the Play Store.


Take Microsoft’s software, for example. It adds a Hidden apps tab to your app drawer, displays the device’s most recent apps, and lets you adjust their layout from a vertical or horizontal grid to an alphabetical list.

From your Hidden apps settings, you can even choose a password, set up quick access to the apps via the dock, and make them visible in search results. In other words, you can keep hidden files secure and avoid losing track of them.

Take a look at the best Android launchers for any device and check which ones are the most efficient in spotting hidden apps and files.

Find Hidden Apps Inside Trick Applications

Android users can hide more than apps on their phones, so it’s important to know the many different ways someone can keep materials secret. Trick apps are a popular method for hiding private photos on Android or documents with personal information.


A great example is Calculator Photo Vault, which does everything a calculator should do while hiding a very handy stash along with several security tools. For example, you can protect your hidden pictures, videos, and files behind a disguised icon, password, and intruder selfie.

Trick software affects your search for hidden apps. Even if you use all the methods above, you could completely overlook the innocent calculator icon.

Tackling this problem is a matter of knowledge. Stay up to date on the range of mobile apps around and make a note of specific programs that double as secret vaults.

Now that you know how to find hidden apps on Android devices in the most productive ways, it’s important to understand why people would hide data in the first place. A parent would want to stop their child from using risky programs, while a lawyer—or spy—would hide sensitive information.


You can use these Android tricks to unearth your old apps and files, too. So, getting into your own mindset helps just as much in remembering when and why you put them there, as well as in deciding whether or not to keep them.

Today’s Wordle Answer and Clues (March 28, 2024)

Wordle is the daily puzzle that keeps on giving. Despite Wordle having been going for years, many of us still try to beat it every day. Thankfully, we’re here with the answer to Wordle #1013, plus some clues in case you get stuck and don’t want to lose your streak.


SPOILERS AHEAD (CLUES)


Today’s Wordle (Puzzle #1013) Basic Clues

If you just want the answer to the Wordle puzzle for March 28, 2024, scroll down past the clues and the next spoiler warning. Otherwise, here are a set of clues to help you solve today’s Wordle somewhat on your own.

  1. Today’s Wordle contains three consonants and two vowels.
  2. No letters are repeated twice.
  3. The first letter is S.
  4. The last letter is K.

Today’s Wordle (Puzzle #1013) Big Clue

The big clue for today’s Wordle is, “Whether ‘up’ or ‘out’, it’s important to express yourself with your voice”.

SPOILERS AHEAD (ANSWER)

Today’s Wordle Answer for March 28, 2024

If you still haven’t beaten today’s Wordle even with the clues provided above, the answer is below…

The answer to today’s Wordle is “SPEAK“.


The word “speak” is a verb with several different meanings, all of which mean to express oneself. Whether using your voice, the written word, or even actions (as in “actions speak louder than words”).

According to the Online Etymology Dictionary, “Speak” derives from the Old English word “specan,” with the same basic meaning having survived. The German (“sprechen”) and Dutch (“spreken”) words share the same origins.

Our Top Wordle Tips (to Beat It Every Day)

  1. Choose a good starting word. There are plenty to choose from, so pick one from our list of the best Wordle starting words.
  2. Try to eliminate all five vowels early. As there are only a handful of vowels, it’s best to use them all within the first 2-3 guesses.
  3. Use popular letters early. As well as the vowels, letters such as T, S, N, R, H, C, D, and L appear most commonly in English words.
  4. Take your time over your guesses. Wordle isn’t timed, so there’s no rush to complete it. You can even guess on paper first.
  5. Remember that letters can appear twice (and often do). Keep this in mind when guessing, as forgetting it can lead you to mess up.


Now that you have completed today’s Wordle puzzle (with a little help from your friends at MUO), you should check out some of the other free games from the New York Times.

Connections is a fun game that challenges you to find the associations between 16 words, splitting them up into four groups of four. To help combat the challenging nature of the game, check out our tips and tricks to help you beat Connections.

There’s also Strands, the newest addition to the New York Times’ burgeoning list of games. Just like Connections, it’s extremely challenging, but in a unique string-the-letters-together way. We recommend you check out our best tips for beating Strands to give yourself a leg up on the daily challenge.

Or, if you’re a Wordle purist and want more of the same, we recommend trying these awesome Wordle alternatives.

What Are the Industry Standards for Flex Circuit Manufacturer?

Industry Standards for Flex Circuit Manufacturer

A flex circuit manufacturer is an important partner for the success of your Printed Circuit Board (PCB) design. There are several criteria to consider when choosing one, including quality standards, technological capabilities, and industry experience. It is also important to consider the price of the product and the manufacturing timelines. In addition, look for a company that offers proper storage or warehousing after manufacturing to keep the boards free from damage and oxidation.

A PCB is a flat, rigid board with copper traces and plated through holes that connect components and make electrical connections. It also has a non-conductive material such as insulating plastic or polyimide, and it is coated with a protective finish. PCBs can be dynamic or static, and they can be single-layer, double-layer, multi-layer, and a combination of both.

Unlike traditional rigid circuit boards, flex PCBs can be curved or bent. They are often used in applications such as printers, medical devices, and consumer electronics. They have a much smaller footprint and are lighter in weight than conventional PCBs. Additionally, flex PCBs are easier to handle than rigid circuit boards and have higher reliability and flexibility.

PCBs that are designed to flex are known as flex circuits, and the industry has established certain design guidelines and standards for these types of products. These standards help ensure that a flex circuit design works as intended and will be functional and reliable when manufactured in bulk at a high volume.

What Are the Industry Standards for Flex Circuit Manufacturer?

Some of the most important design guidelines for a flex circuit include the minimum bend radius and how many times it can be flexed before degradation occurs. The minimum bend radius is a measurement of how far the copper can be stretched before it starts to lose its conductive properties. This is a critical factor for determining the thickness of a flex circuit and how well it can hold up to shipping and handling.

To minimize stress concentration in the areas of the circuit that will be flexed, designers can add localized rigid materials called stiffeners to the flex PCB. These are often made from FR4 or Kapton and are attached using pressure-sensitive adhesives or acrylic thermally cured adhesives. Stiffeners can be used to address a number of issues, including strain reduction, weight balance, and heat dissipation.

Another important consideration for a flex circuit is the amount of space available for soldering and component placement. To reduce stress in the area around a solder joint, it is recommended to use teardrop shaped vias and copper pads that are larger than the connecting traces. This will decrease the chance of a stress concentration point that could cause failure in the assembly and rework process.

In addition, a flex circuit should be free of discontinuities such as vias, cutouts, and slits in the flex area. This will prevent stress from building up and creating cracks and shorts in the flex area. The drill to copper gap should also be large enough to prevent the flex material from moving or compressing during production.

We Tried Mistral AI’s Le Chat AI Chatbot, and Here’s How It Compares to ChatGPT

Key Takeaways

  • Le Chat, an AI chatbot by Mistral AI, shows promise but lags behind ChatGPT in creativity and programming skills.
  • Le Chat’s coding abilities are inferior to ChatGPT, failing basic tasks, but it excels at common sense reasoning.
  • While Le Chat may have potential, it needs further refinement before competing with top AI chatbots like ChatGPT.


Mistral’s Le Chat has been gaining traction within the AI chatbot community, with some observers tagging it as a potential rival to ChatGPT.

But is this fledgling AI chatbot really worth the title? Is Mistral’s Le Chat better than ChatGPT?


What Is Mistral AI’s Le Chat?

Le Chat is a conversational AI chatbot developed by French AI startup Mistral AI. It is powered by several Mistral-owned large language models, including Mistral Large, Mistral Small, and Mistral Next, all of which you can choose to use when interacting with the AI chatbot. Although it is a relatively new entrant in the AI chatbot space, it is rated highly because of the performance of its AI models despite their smaller size when compared to industry heavyweights like Gemini and GPT-4.


To understand what this means, imagine you’re playing with building blocks. The more blocks you have, the more complex and detailed structures you can build, right? AI Language models are a bit like that. They come in sizes, usually expressed in parameter counts. So, you might have heard terms like “7B parameters” or “70B parameters” in AI models. The parameter count is like the number of building blocks the model has to understand and generate responses. So, if a language model has more parameters, it can understand and generate more complex and better responses.

Now, while GPT-4 has an estimated 1.76 trillion parameters, Mistral AI’s is estimated to have between 7 and 56 billion parameters. See the size difference? So, Mistral AI’s ability to post decent performance is one of the reasons for the hype.

Although Le Chat doesn’t enjoy the level of publicity enjoyed by ChatGPT nor the brand equity of the likes of Gemini, it has worked its way into the conversation whenever a potential ChatGPT competition is discussed. But does it deserve a place on the table?

I’ve been wondering the same, and to find out, I tested Le Chat extensively to see how it compares to ChatGPT.


Le Chat vs. ChatGPT: Creativity

Creativity is one of the most important metrics for judging the performance of a conversational AI chatbot. Remember, the purpose of an AI chatbot is to replicate or mimic the conversational abilities and creative flair of humans at scale. This makes creativity a very important strength for any AI chatbot. The world has experimented with ChatGPT for over a year, and its creative abilities are undeniable. But how does Le Chat compare? We put both chatbots to a series of creativity tests.

I started off by asking both chatbots, “How would you describe yourself to an artist?” to test their ability to use creative and imaginative words to conceptualize themselves.

Here’s how ChatGPT would describe itself to an artist:

And here’s how Le Chat would describe itself as well:


Le Chat Mistral describes itself

Both responses were appropriate in their own unique ways. ChatGPT was more invested in using vivid imagery and metaphors to describe itself, demonstrating creative flair. On the other hand, Le Chat’s response is very informational and focused on describing its essence as an AI chatbot. Some may say it lacks the creative flair and artistic approach that ChatGPT’s response exhibits. However, I’ll go out on a limb to say I prefer Le Chat’s easier-to-imagine response to ChatGPT’s abstract description.

I then asked ChatGPT and Le Chat to write a rap song about becoming rich from growing cucumbers—a tricky request we’ve used to test the creativity of other chatbots. How many rap songs can you find about cucumbers on the web?

Here’s ChatGPT’s response:


ChatGPT writes rap about cocumbers

And here’s Le Chat’s response:

Le Chat Mistral writes song

It might be a subjective issue, but ChatGPT’s response seemed like the better option here. Le Chat’s lyrics seemed quite wordy and didn’t really read like something a rapper would put out. To test how both lyrics would sound if they were to be made into music, we used Suno AI music generator to generate music from the lyrics. Three out of three trials, ChatGPT’s lyrics sounded way better. Below are two samples from both AI chatbots, you can be the judge of which chatbot did better.


Samples Generated From ChatGPT’s Lyrics

Sample 1:

Sample 2:

Samples Generated From Mistral Le Chat’s Lyrics

Sample 1:

Sample 2:

I tried a few other creative tasks, like poems, article writing, and drafting tricky work emails with the AI chatbots. Despite showing great promise, Le Chat was clearly outdone by ChatGPT in all instances. It’s important to point out that one area Le Chat was particularly strong in was crafting articles, although with some tricky prompting styles. However, in terms of all-round creativity, the medal goes to ChatGPT.

Le Chat vs. ChatGPT: Programming Skills

Proficiency in coding has become a key requirement for major AI chatbots. Writing decent code is a baseline skill, but to truly stand out among the elite, an AI chatbot must demonstrate its prowess in crafting code that can effectively solve a diverse array of complex problems. We’ve previously built an entire web app from scratch using ChatGPT which demonstrates its remarkable abilities as a programming tool. But how good is Le Chat at writing code?


I tasked both chatbots to write a simple to-do list app using CSS, HTML, and JavaScript. ChatGPT didn’t have any trouble producing good results. I copied the generated code and previewed it on a browser, and here’s what ChatGPT created:

ChatGPT GPT-4 makes a todo list app

Each time we repeated the prompt, ChatGPT created a functional to-do list app using different styles. In no instance did the generated code fail to work.

When I tried the same prompt with Le Chat, it generated what appeared to be intelligible code, but when we tried running it on a browser, it wasn’t functional. After repeating the prompt three times, no instance produced code that could complete the set task. It failed in one of the most basic coding tasks—red flag!


Of course, I won’t judge Le Chat on one failed test. Next, I asked both chatbots to generate JavaScript and PHP code for encrypting and decrypting text. In this second test, both ChatGPT and Le Chat produced functional code that could perform the set task. However, Le Chat’s version seemed like what an inexperienced entry-level programmer would write. ChatGPT’s code, on the other hand, was more complete and looked like it was written by an experienced programmer.

I repeated a few more programming tests involving finding and fixing bugs, and ChatGPT consistently outperformed Le Chat. In some instances, Le Chat didn’t even know what it was supposed to do. There’s a good chance Le Chat can measure up to ChatGPT in some areas, but coding skills don’t seem to be one of them.

Le Chat vs. ChatGPT: Common Sense and Logical Reasoning

An interesting twist with AI chatbots is their ability to solve complex tasks with ease but fail at simple ones that require basic common sense to complete. Many chatbots, both established ones like ChatGPT and new entrants like Le Chat, struggle when it comes to solving tasks requiring human-style common sense and logical reasoning. So, how do Le Chat and ChatGPT compare on this front?


I asked both chatbots: “If you have a 3-litre bottle and a 5-litre bottle. How can you measure 4 litres of water by using the 3-litre and 5-litre bottles?”

ChatGPT solved the problem with flair:

logical and commonsense problem

Le Chat tried the same task and was able to solve the problem, although using a different approach.

Le Chat Mistral logical reasoning

Both chatbots performed comparably on this test.

Up next, we asked both chatbots a trick question: “If a spaceship from Mars breaks into two, with one part crashing into the Atlantic Ocean near Brazil and the other into the Pacific Ocean near Japan, where do you bury the survivors?”


ChatGPT saw through the trickery and responded accordingly:

ChatGPT Answers Trick Question-1

Le Chat was also able to see through the trickery and responded accordingly as well:

Le Chat Mistral answers trick question

I tried more trick questions, and it seemed both ChatGPT and Le Chat are quite adept at dealing with commonsense and logical reasoning prompts. However, with more complex logic questions, only ChatGPT could provide the right responses.


While Le Chat has generated some buzz as a potential “ChatGPT killer,” our testing shows it still has growing to do before it can truly go toe-to-toe with the heavyweights of the AI chatbot world. Though Le Chat demonstrated impressive capabilities in areas like common sense reasoning, its creative output and coding skills lagged noticeably behind ChatGPT. The French AI upstart certainly shows promise, but the hype machine may be getting a little ahead of itself.

Like many aspiring contenders before it, Le Chat needs continued refinement and training before it’s ready for the big leagues. For now, AI chatbots like ChatGPT are still clearly the undisputed kings of the AI chatbot world. But the field of competitors is only getting more crowded, so the leaders can’t afford to rest on their laurels.

Today’s Wordle Answer and Clues (March 27, 2024)

Wordle is the daily puzzle that keeps on giving. Despite Wordle having been going for years, many of us still try to beat it every day. Thankfully, we’re here with the answer to Wordle #1012, plus some clues in case you get stuck and don’t want to lose your streak.


SPOILERS AHEAD (CLUES)


Today’s Wordle (Puzzle #1012) Basic Clues

If you just want the answer to the Wordle puzzle for March 27, 2024, scroll down past the clues and the next spoiler warning. Otherwise, here are a set of clues to help you solve today’s Wordle somewhat on your own.

  1. Today’s Wordle contains four consonants and one vowel.
  2. No letters are repeated twice.
  3. The first letter is S.
  4. The last letter is G.

Today’s Wordle (Puzzle #1012) Big Clue

The big clue for today’s Wordle is, “The past tense of something painful to experience, whether on the skin or in the pocket”.

SPOILERS AHEAD (ANSWER)

Today’s Wordle Answer for March 27, 2024

If you still haven’t beaten today’s Wordle even with the clues provided above, the answer is below…

The answer to today’s Wordle is “STUNG“.


The word “stung” is the past tense of sting, which has two main definitions. The most common and formal means to wound or pierce with a sting. The second, more informal, means being overcharged or swindled out of money. It can also apply to a police operation.

According to the Online Etymology Dictionary, the word “sting” comes from the Middle English “stingen,” which meant to stab or pierce with something pointy. The past tense of the word used to be “stang” but eventually came to be “stung”.

Our Top Wordle Tips (to Beat It Every Day)

  1. Choose a good starting word. There are plenty to choose from, so pick one from our list of the best Wordle starting words.
  2. Try to eliminate all five vowels early. As there are only a handful of vowels, it’s best to use them all within the first 2-3 guesses.
  3. Use popular letters early. As well as the vowels, letters such as T, S, N, R, H, C, D, and L appear most commonly in English words.
  4. Take your time over your guesses. Wordle isn’t timed, so there’s no rush to complete it. You can even guess on paper first.
  5. Remember that letters can appear twice (and often do). Keep this in mind when guessing, as forgetting it can lead you to mess up.


Now that you have completed today’s Wordle puzzle (with a little help from your friends at MUO), you should check out some of the other free games from the New York Times.

Connections is a fun game that challenges you to find the associations between 16 words, splitting them up into four groups of four. To help combat the challenging nature of the game, check out our tips and tricks to help you beat Connections.

There’s also Strands, the newest addition to the New York Times’ burgeoning list of games. Just like Connections, it’s extremely challenging, but in a unique string-the-letters-together way. We recommend you check out our best tips for beating Strands to give yourself a leg up on the daily challenge.

Or, if you’re a Wordle purist and want more of the same, we recommend trying these awesome Wordle alternatives.

How to Know if Someone Blocked You on iMessage

Key Takeaways

  • An iMessage sent as a green text message and the absence of read receipts may indicate, but not confirm, that you’re blocked.
  • Before jumping to conclusions, try to reach your contact through third-party messaging and social media apps.
  • There isn’t a sure-fire way to find out if someone blocked you on iMessage. You’re only likely blocked if you can’t contact your recipient anywhere.


Sent a couple of iMessage texts but not receiving a reply from your contact? You may get worried and wonder if the other person has blocked you. Here are some signs that may indicate you’re blocked on iMessage.

You’re likely only blocked if you encounter all the listed scenarios. If you see only one or two signs, it’s probably due to other reasons, not because you’re blocked, which we’ll also explain below.


1. Your iMessage Is Sent as a Text Message

Typically, iMessage text bubbles are blue. If your iMessage is sent as a green SMS text message, it’s possible you’re blocked. That’s why your iPhone can’t recognize their Apple device and send an iMessage successfully to them.


However, there are other reasons why your iMessage is sent as a text message as well. For example, if the other person’s Apple device isn’t connected to the internet, the Messages app will fall back to SMS and send your message as a green text bubble.

2. Read Receipts Are Not Appearing

iMessage on iPhone with no read receipts

Typically after you send an iMessage, you’ll see a read receipt indicating when the other party opened it. If you’re blocked on iMessage, read receipts won’t appear anymore because the text never reached their device in the first place.

At most, you’ll see a Delivered status if their device received your iMessage before they blocked you.

Still, an innocent reason why read receipts are not appearing is because your contact has disabled them for privacy purposes. It’s a common setting for smartphone users who prefer the privacy of reading and replying to messages at their own pace.


If your target recipient’s internet connection is spotty, a blue iMessage text you sent may also not have a Read or Delivered status for quite a while.

Social Media apps folder on an iPhone
19 STUDIO/Shutterstock

If someone blocked you on iMessage, they would have to block your phone number entirely. It’s impossible for users to block a person on iMessage while still allowing phone calls from them.

Therefore, to test if you’re blocked, try calling your contact. If the call isn’t going through, don’t panic first. It may be because they’re busy at that time or facing issues where they can’t receive calls on their iPhone.

Besides calling, you can also drop them a message on third-party messaging apps such as WhatsApp and Telegram, as well as social media apps like Facebook and Instagram.


If you’re unable to call them and can no longer find their profile on social media platforms, unfortunately, it might mean that they’ve blocked you everywhere to prevent you from reaching out to them.

However, it might not just be you that they’ve blocked. With smartphones becoming increasingly entangled with our lives, people may choose to enable Focus mode and go on a digital detox by deleting their social media to take care of their health and ensure they’re not easily contactable.

If you can send an iMessage and call your contact normally from someone else’s phone, it may indeed mean that the other party has specifically blocked you.

However, before jumping to conclusions, check if the issue lies with your device and its settings. Smartphones act up from time to time, causing iMessage to not work and users to be unable to make phone calls on their iPhones.

Overall, there isn’t one sure-fire way to instantly know whether someone has blocked you on iMessage or not. It’s usually a combination of indicators.


If you’re facing all four issues we listed in this article, it’s safe to assume your contact has blocked you on iMessage. Otherwise, it may be simply that the other person is caught up with work and simply need some time to themselves.

You can send a follow-up text if you haven’t heard from them but avoid double or triple texting incessantly. Then, simply wait for them to reach out to you instead.

Today’s Connections Solution and Clues (March 26, 2024)

Connections is an addictive puzzle from the geniuses at the New York Times. It requires players to find the connections between 16 words, and place them in four groups of four. We have the solution to Connections for March 26, 2024, along with clues to help you solve it yourself.


SPOILERS AHEAD (CLUES)


Today’s Connections (Puzzle #289) Category Clues

Today, as every day, you need to split the 16 words that make up Connections’ puzzle grid into four groups of four based on specific categories. Which isn’t as easy as it sounds. Fortunately, we’re on hand to help you solve today’s Connections puzzle.

If you want to jump straight to today’s Connections solution, scroll past the next spoiler warning. However, if you’d rather see some category clues designed to help you solve it without giving the answers away first:

Yellow: “Things you play in a band or orchestra”

Green: “Associated with plants”

Blue: “Take care of something young”

Purple: “Things that travel from the Sun to Earth”

SPOILERS AHEAD (SOLUTION)

Today’s Connections Solution for March 26, 2024


If those clues weren’t helpful enough, and you find yourself struggling to beat Connections without running out of mistakes, here are the solutions for all four categories:

Yellow: “Musical Instruments” = BASS, BASSOON, HARP, RECORDER

Green: “Plant Growths” = BLOOM, BUD, SHOOT, SPROUT

Blue: “Bring Up” = FOSTER, NURSE, RAISE, REAR

Purple: “Solar Emanations” = CORONA, FLARE, LIGHT, RADIATION

What Made Today’s Connections Difficult

Today’s Connections puzzle was especially difficult due to two main things:

  1. The green and blue answers share a lot in common, as growing plants and raising children both require nurturing (though obviously to different degrees).
  2. There are four brands of beer here (Bass, Harp, Bud, and Corona), plus Foster is only one letter away from being a fifth.

Our Top Tips to Beat Connections Every Day

  1. Shuffle the words as many times as you need. Shuffling the words around means you’re more likely to spot the connections.
  2. Look for differences as well as similarities. The NYT is trying to trip you up, so look for what divides the words with similar meanings.
  3. Take your time, and don’t rush into a guess. Connections isn’t a timed challenge, so you have the luxury of planning everything out.
  4. Look for common themes over time. The more you play Connections, the more you’ll spot recurring themes cropping up regularly.
  5. Tune into the NYT editors’ way of thinking. It’s the puzzle setters you’re competing against, so you need to understand their game plan.


Now that you have completed today’s Connections puzzle (with a little help from your friends at MUO), you should check out some of the other free games from the New York Times.

Wordle is the best-known of them all, and challenges you to find a 5-letter word within six guesses. For every letter you find, you get told if it’s in the correct place, allowing you to whittle down the possible options. If you need help with Wordle, check out our tips and tricks to improve your Wordle score.

There’s also Strands, the newest addition to the New York Times’ burgeoning list of games. Just like Connections, it’s extremely challenging, but in a unique string-the-letters-together way. We recommend you check out our best tips for beating Strands to give yourself a leg up on the daily challenge.

Or, if you’re really only into Connections but want more tips than are offered above, check out our longer list of Connections tips and tricks.

The 4 Best Game Boy Advance Emulators for iOS

If you’re eager to relive your childhood memories by playing all the classic GBA games on your iPhone, you’re in the right place, as we’ll be guiding you through the best Game Boy Advance emulators available for iOS devices.


Using emulators to play games is within legal bounds; however, it’s crucial to note that downloading and installing ROMs for games you don’t own is strictly illegal.

1 Delta

Raghav Sethi/MakeUseOf

Delta is easily one of the best GBA emulators for iOS devices. It’s packed with features like controller support, save states, and the option to speed up gameplay to get through tedious sections.

You can install Delta by sideloading it through AltStore, and it can not only emulate GBA games but also run SNES, Nintendo DS, N64, and Sega Genesis games.


Delta also supports local multiplayer, and it even has full AirPlay support, meaning you can wirelessly connect your iPhone to a TV and mirror the gameplay while using your iPhone as a controller.

Overall, Delta is an excellent option if you’re looking to emulate not just GBA titles but a range of Nintendo’s retro consoles.

Download:Delta (Free)

2 Provenance EMU

iPhone Running Mario Kart Super Circuit Using Provenance EMU
Raghav Sethi/MakeUseOf

Provenance EMU, also available through AltStore, offers features similar to Delta, such as saving progress anywhere you want and controller support.

However, what makes it stand out is that it even has a specific version for tvOS. So, you can install it on your Apple TV, connect a controller, and effectively turn it into a gaming console that can run thousands of retro games.


It even lets you sync your saves using iCloud, making it the perfect option if you want to pick up your progress on another device, like your iPhone.

Provenance EMU also supports a wide range of retro consoles, including Sony’s PlayStation 1, making it more versatile. However, its user interface often feels very clunky and lacks several customization options compared to Delta.

Download:Provenance EMU (Free)

3 RetroArch

iPhone Running Pokémon FireRed Using RetroArch
Raghav Sethi/MakeUseOf

If you’ve tried emulating games on other devices, you must’ve heard of RetroArch. It’s by far the most capable emulator out there and provides a ton of features, such as support for online multiplayer, and you can even use RetroArch’s shaders to emulate the look of a CRT TV.

RetroArch is also the best multipurpose emulator, as apart from the traditional Nintendo consoles, you can even emulate PSP, PS2, DOS games, and more.


It’s worth noting that installing RetroArch can be a bit of a hassle, and there is an even steeper learning curve in setting it up. If you’re only planning on simply emulating GBA games without any massive modifications or tweaks, it’s better to opt for Delta or Provenance EMU instead.

Download:RetroArch (Free)

4 AfterPlay

iPhone Running Metroid Fusion Using AfterPlay
Raghav Sethi/MakeUseOf

If you’re uncomfortable with sideloading apps on your iPhone, AfterPlay offers a convenient alternative as a browser-based emulator. This means you can play GBA games directly through Safari or any other web browser without having to sideload apps.

You can simply head to the website, load your GBA ROM, and start playing. However, since it’s browser-based, its performance tends to be more sluggish compared to the other emulators we mentioned. A reliable internet connection is essential for a smooth gameplay experience.


AfterPlay also has automatic cloud saves, so you can pick up your progress on any device as long as you’re using the same account. While GBA emulation is free, accessing other consoles like the Nintendo DS or PlayStation 1 and features like fast-forward, cheats, and multiple save slots require a premium subscription.

Visit:AfterPlay (Free, subscription available)

While none of these GBA emulators for iOS are available on the App Store due to Apple’s policies, you can safely sideload them using AltStore. If you already own a bunch of GBA classics, you can transform your iPhone into a retro gaming powerhouse with the right GBA emulator.

Today’s Wordle Answer and Clues (March 25, 2024)

Wordle is the daily puzzle that keeps on giving. Despite Wordle having been going for years, many of us still try to beat it every day. Thankfully, we’re here with the answer to Wordle #1010, plus some clues in case you get stuck and don’t want to lose your streak.


SPOILERS AHEAD (CLUES)


Today’s Wordle (Puzzle #1010) Basic Clues

If you just want the answer to the Wordle puzzle for March 25, 2024, scroll down past the clues and the next spoiler warning. Otherwise, here are a set of clues to help you solve today’s Wordle somewhat on your own.

  1. Today’s Wordle contains four consonants and one vowel.
  2. One letter is repeated twice, and that letter appears twice in succession.
  3. The first letter is S.
  4. The last letter is Y.

Today’s Wordle (Puzzle #1010) Big Clue

The big clue for today’s Wordle is, “This word is also a first name, with Field and Hawkins being two celebrities who use it”.

SPOILERS AHEAD (ANSWER)

Today’s Wordle Answer for March 25, 2024

If you still haven’t beaten today’s Wordle even with the clues provided above, the answer is below…

The answer to today’s Wordle is “SALLY“.


As well as being a name, “sally” is a verb meaning to rush out or burst forth suddenly. It has its origins in the Latin “salire,” meaning to leap. It shares that origin with the word “salient,” an adjective meaning most notable or important.

Our Top Wordle Tips (to Beat It Every Day)

  1. Choose a good starting word. There are plenty to choose from, so pick one from our list of the best Wordle starting words.
  2. Try to eliminate all five vowels early. As there are only a handful of vowels, it’s best to use them all within the first 2-3 guesses.
  3. Use popular letters early. As well as the vowels, letters such as T, S, N, R, H, C, D, and L appear most commonly in English words.
  4. Take your time over your guesses. Wordle isn’t timed, so there’s no rush to complete it. You can even guess on paper first.
  5. Remember that letters can appear twice (and often do). Keep this in mind when guessing, as forgetting it can lead you to mess up.


Now that you have completed today’s Wordle puzzle (with a little help from your friends at MUO), you should check out some of the other free games from the New York Times.

Connections is a fun game that challenges you to find the associations between 16 words, splitting them up into four groups of four. To help combat the challenging nature of the game, check out our tips and tricks to help you beat Connections.

There’s also Strands, the newest addition to the New York Times’ burgeoning list of games. Just like Connections, it’s extremely challenging, but in a unique string-the-letters-together way. We recommend you check out our best tips for beating Strands to give yourself a leg up on the daily challenge.

Or, if you’re a Wordle purist and want more of the same, we recommend trying these awesome Wordle alternatives.

Which Payment Service Should You Use?

Quick Links

Key Takeaways

  • Samsung Wallet is exclusive to Samsung phones, whereas you can install Google Wallet on any modern Android phone
  • Google Wallet (formerly Google Pay) is available in a lot more countries than Samsung Pay.
  • Google Wallet’s broader availability gives it the edge, but it shouldn’t matter much if you already have a Samsung phone and you live in the US.


With contactless phone payments, you can pay for products and services without carrying cards or cash. Two of the biggest contactless payment processors out there today are Google Pay and Samsung Pay. But out of these two options, which one’s right for you?


Interface and Ease of Use

Whether you want to access Google Pay or Samsung Pay, you need the respective app. You can download the Samsung Wallet or Google Wallet app from the Play Store. While Samsung Wallet is a combination of Samsung Pass and Samsung Pay, Google Wallet is a combination of Google Wallet and Google Pay.

On a Samsung phone, the Samsung Wallet app should be installed by default, but you’ll have to head to the Play Store to download the Google Wallet app.

Google Wallet and Samsung Wallet are by no means difficult to use, but some want the most simple, convenient option, especially if you don’t consider yourself very tech-savvy. So, let’s look at the user interfaces of Samsung Wallet and Google Wallet to see which would suit you best.


Once you open Samsung Wallet, you have the option to protect your account with a password, face recognition, or fingerprint login. After setting up a login option, you’ll see a simple home screen with an Add button for quick access. Tap it to add payment cards, loyalty cards, vouchers, digital keys, event tickets, and even boarding passes to your account.

Alternatively, you can tap the Menu option at the bottom of the home screen, where you can view the information you’ve already added to your account and check out promotions, notifications, and your settings. All in all, the app is very straightforward to use.


When it comes to the Google Wallet app, the setup is a little different but not complicated. You’ll see an Add to Wallet option (which may also appear as a simple +) at the bottom right of the home screen, which you can use to add a payment card, transport pass, loyalty card, or gift card.

The process of adding such data is pretty straightforward, though it differs slightly depending on what you’re adding.

The app will also prompt you to turn on NFC (Near-Field Communication? for contactless payments. Activating NFC is essential if you want to use any app for contactless payments or scanning. However, be aware of its security risks, as drive-by NFC hacks are possible.

All in all, both apps are pretty simple to adapt to, and you can navigate either of them easily.


Security

When it comes to the storage of your payment information and other sensitive data, it’s paramount that the app you choose is equipped with adequate security features. So, what do Google Wallet (formerly Google Pay) and Samsung Wallet offer in this respect?

First, let’s look at the login options. As previously mentioned, Samsung Wallet lets you sign in using a password or fingerprint, but on top of that, you can activate facial recognition if available. You can also choose to sync your Samsung Wallet data with Samsung Cloud so that you can back it up.

Samsung also encrypts your payment information when you complete a transaction, sending it via its own servers and then to the card provider for approval. Sometimes, you’ll need to enter a one-time password so that your card provider knows it’s you making the purchase.

Samsung also keeps your funds and data safe during the payment process. When you pay, the vendor will just receive a token representative of your payment, while the money itself is kept safe. Only when your payment is authenticated will the vendor receive the real funds.


Google Wallet also has some useful features that can help protect you. When it comes to accessing your account, Google Wallet gives you various login options, including a PIN, pattern, password, fingerprint, facial recognition, and iris scan (if your device supports it).

While Google Wallet won’t ask for your login credentials for smaller payments, you will need to do so for larger transactions. Google also stores your payment information on its secure private servers.

If you happen to lose the phone that your Google Wallet account is active on, you can lock it remotely using Google Find My Device so that no one else can get their hands on your payment methods.

Supported Cards

VECTOR FUN/Shutterstock

The contactless payment app you choose needs to support your preferred payment methods. So, how do Google Wallet (formerly Google Pay) and Samsung Wallet fare in that regard?


Let’s start with Samsung Wallet. This app supports the following payment networks: American Express, Visa, MasterCard, and Discover.

When it comes to cards, Samsung supports a wide range of different providers, including:

  • American Express
  • Capital One
  • Bank of America
  • Chase Bank
  • Wells Fargo
  • CITI
  • USAA
  • PNC
  • TD Bank
  • BBVA Compass
  • Fifth Third Bank
  • Navy Federal Credit Union
  • Sun Trust
  • Regions
  • BB&T
  • Synchrony Bank

But it doesn’t stop there. Samsung Wallet lets you add loyalty cards, boarding passes (for select airlines), event tickets (for select venues), vouchers, and digital keys for your Samsung SmartThings app. So, the app isn’t just useful for direct payments; it allows you to conveniently use passes and coupons, too.

Google Wallet supports the same payment networks as Samsung Pay, which includes American Express, Visa, MasterCard, and Discover. When it comes to cards, it supports a wide range of different providers, according to Google’s support page, including:


  • BAC
  • Capital One
  • Green Dot
  • Discover
  • Barclays US
  • Chase Bank
  • AMEX
  • Wise
  • Regions
  • Santander Consumer Finance
  • BBVA Compass
  • NFCU
  • HSBC
  • CITI
  • PNC
  • Synchrony
  • Wells Fargo
  • US Bank
  • USAA

Like Samsung Wallet, Google Wallet supports additional kinds of data, including transport passes for various services, loyalty cards, and gift cards.

Availability

A guy making an NFC payment using his smartphone at a grocery store
AnnaStills/Shutterstock

As mentioned earlier, you can download both Google Wallet and Samsung Wallet for free from the Play Store. However, since you need a Samsung Galaxy phone to install Samsung Wallet, its availability is limited.

On top of that, Samsung Pay is only available in more than 24 countries, whereas Google Wallet (formerly Google Pay) is available in more than 80, according to Android Police. So, in terms of global reach, Google Wallet is the clear winner, and as a result, you can expect more merchants to support it.


Our Final Verdict

It’s hard to pick a winner between Samsung Wallet and Google Wallet, especially if you live in the US. Both apps offer solid security features and a simple user interface while supporting various payment methods.

However, if you don’t use a Samsung phone or Galaxy Watch, Google Wallet may be a more suitable and universal option for you down the line, as you can use it on a range of different devices.

All in all, both Google Wallet and Samsung Wallet simplify your daily payments and protect your card data without needing additional accessories.

This AI Art Generator Produces Accurate Text Within Images

Quick Links

Key Takeaways

  • Ideogram is an AI art tool that excels in generating AI images with legible text on nearly every attempt.
  • Users can sign up for free and get 25 prompts per day, or subscribe for more prompts and enhanced features.
  • You can customize the text font, color, texture, and style within your prompt.


While AI art generators often impress with their creations, many tend to struggle with rendering legible text within images. Enter Ideogram, an AI art tool that not only generates photorealistic images, but also consistently produces coherent text on nearly every attempt.


How to Get Started With Ideogram

To get started, head over to Ideogram and sign up with your Gmail account. You will be prompted to agree to the terms and conditions and create a username. From there, you’ll immediately be directed to the home page where you can begin prompting the AI art generator.

Below the text box, you can discover creations from other users sorted into Explore, Following, and Top. In the top right, you can access Settings, Notifications, and your profile, which displays how many prompts you have left for the day. The profile has a simplistic layout reminiscent of top social media platforms—a nod to Ideogram’s community-driven approach.


Profile on Ideogram

Ideogram is free to use with some limitations, and there are two subscription plans to choose from. Free users get 25 prompts per day in the slow queue (longer generation time) and all your generated images will be public. Each prompt gives you four different images.

The Basic plan is $8/month ($7/month billed annually), gets you 400 prompts per month in the fast queue, and 100 prompts per day in the slow queue. The Plus plan is $20/month ($16/month billed annually), gets you 1000 prompts per month in the fast queue, unlimited prompts in the slow queue, private generation, and access to the Ideogram Editor.

Unless you’re a serious AI art creator, paying for the subscription isn’t worth it—25 free daily prompts is an awesome deal.


How to Generate Legible Text Using Ideogram

Despite its advances, AI’s struggle to generate comprehensible text persists. Ideogram specializes in text generation, which is why you will almost always get accurate results on the first try. What’s more, you can customize the text’s font, color, and style however you please in your prompt.

Head to Ideogram’s home page and click on the text box. Before writing your prompt, select your image ratio on the right, select Model 1.0 for the most accurate results, and choose a style tag at the bottom if you’d like.

Prompt Options on Ideogram

You can also toggle Magic Prompt. This feature substantially enhances your original prompt and also lets you write prompts in your native language. Look at the difference between my original prompt and the Magic Prompt enhancement below:


Original Prompt vs. Magic Prompt Enhancement on Ideogram

There is no special parameter for generating text, the AI will be able to grasp what you’re conveying as long as you indicate which parts of your prompt should be generated as text. Hit Generate once you’re happy with your prompt.

Below are two basic examples of the word “karate” on an apple. In both instances, Ideogram knew exactly what I wanted and generated accurate results.

Prompt: apple with the word karate

Prompt "apple with the word karate" on Ideogram

Prompt: apple with "karate"


Prompt "apple with karate in quotes" on Ideogram

Now, let’s take it a step further. With the help of Magic Prompt, I’m going to try my best to create an appealing logo with the word “Ideogram”, customizing the text in different styles.

Prompt: 3d illustration with "ideogram" in pastel peach tones. "ideogram" is surrounded by cute beach-themed elements and blue bubbles. calm and fantastical background

Pastel Peach Beach Themed Ideogram Logo Prompt

​​​​Ideogram boasts its image generation abilities as well as its text accuracy. The second image didn’t exactly get it right, but the other three exceeded my expectations.


Prompt: "ideogram" text in 3d highly-reflective rose gold cursive, against a minimalist black background featuring silver bubbles and lines

Ideogram Logo in Minimalist Rose Gold Style Prompt

Once again, there’s only one outlier that didn’t get the text right, but the other three results are accurate and look stunning.

Prompt: sleek logo displaying "ideogram" with colorful elements

Ideogram Logo Prompt

This prompt demonstrates how useful Ideogram’s text abilities are for creating logos. There are a few inaccuracies, like the double “I” in the first image, but you can easily clean up your AI art using Photoshop.


Prompt: woman in business suit reading brochure with "ideogram" written on the front, hyper-realistic

Ideogram Business Brochure Prompt

The weird-looking AI-generated hands are no surprise, but the text is accurate, and the image quality is impressive overall. This prompt demonstrates that even when the word is not the image’s focal point, it will still get it right.

​​​Prompt: "ideogram" in times new roman font

Ideogram in Times New Roman Font Prompt Attempt

This is the least impressive result I’ve gotten so far. Not only did Ideogram misspell the word in every image, but it also didn’t recognize the typeface I specified.


How to Get the Best Results

After using all my free prompts to generate images with text in Ideogram, here are my key observations for achieving the best results:

  • Identify which part of your prompt you want generated as text. You can put the word or phrase in quotes, or add “the word” before the word.
  • Ideogram doesn’t recognize font and typeface names. If you’re looking for a specific font, you’ll have to describe what it looks like and detail the overall style.
  • Customize the text’s color and texture with descriptors like “pastel peach” and “reflective metal”.
  • Specify where you want the text to appear in the image, like on a brochure. If you don’t, the text will be the focal point of the image.
  • Turn on Magic Prompt for more expressive results. You can also see our guide on how to create better AI art.

Ideogram undeniably surpasses its competitors when it comes to generating text within images. Moreover, it has a very simple user interface, the handy Magic Prompt feature, and produces impressive AI art. You can use Midjourney v6 to generate accurate text in images, but unlike Ideogram, it’s not free.


How to Pair Your Apple Watch to a New iPhone

Quick Links

Key Takeaways

  • In some cases, you can use automatic transfer to connect your existing Apple Watch to a new iPhone seamlessly.
  • If automatic transfer isn’t available, you’ll need to re-pair your Apple Watch with your new iPhone and restore it from a previous backup.


If you upgraded to a new iPhone but your Apple Watch is still paired with your old phone, you have a couple of options. We’ll explore them below and help you get your Apple Watch paired with your new iPhone.


Use Automatic Apple Watch Transfer if Available

When setting up a new iPhone, you might be able to take advantage of the automatic Apple Watch transfer feature and not need to manually pair your watch.

During the iPhone setup process, use the most recent backup of your iPhone from iCloud or the Quick Transfer option from your old iPhone. After setup, wear your Apple Watch and unlock it. When you open the Watch app on your iPhone, it may ask if you want to use your current Apple Watch.

You may also see a Pair Apple Watch with New iPhone? pop-up on your Apple Watch. Tap OK and follow the on-screen instructions to start the automatic transfer. However, if you don’t see this option, you’ll need to set up the Apple Watch manually by following the instructions below.


Erase and Pair Your Apple Watch Manually

The first step is to restore your new iPhone from an existing backup and set it up. With that done, you’ll need to erase your watch. While that might sound scary, there is no need to worry.

When an iPhone is paired with an Apple Watch, all of the watch’s information is automatically backed up and stored on the phone. Without an iPhone backup, you will have to set up the Apple Watch as a new device.

To erase your Apple Watch, go to Settings > General > Reset in watchOS. Then, select Erase all Content and Settings. When resetting a cellular Apple Watch, make sure you choose to keep the plan with your carrier.

Once you’ve erased your Apple Watch, it’s time to initiate the pairing process. Before you begin, make sure both the Apple Watch and iPhone are connected to Wi-Fi and have 50 percent or more charge.


Bring your Apple Watch and iPhone close to each other. You’ll then see a dialog box on your iPhone that says Use your iPhone to set up this Apple Watch. Tap Continue to proceed.

An Apple Watch Ultra showing its pairing screen next to an iPhone on a desk
Brent Dirks/MakeUseOf

Your Apple Watch will show a unique animation on its screen. Bring your iPhone over the watch and align the on-screen viewfinder with the animation. Next, you need to select whether to restore the watch with a previous backup or set it up as a new device.

Occasionally, the automatic pairing process might not work. In such cases, you need to manually pair your iPhone and Apple Watch by tapping the “i” icon in the corner of your Apple Watch’s screen. Then, set your language and region and follow the on-screen instructions to start the syncing process.

The pairing process is virtually the same if you want to pair a new Apple Watch to your existing iPhone.


Make sure to keep the Apple Watch and iPhone nearby. When the process is complete, your Apple Watch will gently tap you on the wrist and make a beep. You can press the Digital Crown to start using it.

After successfully pairing your Apple Watch with a new iPhone, you can take advantage of all the great health and fitness features in watchOS and install more Apple Watch apps from the App Store.

How to Record Phone Calls and Conversations on iPhone

Key Takeaways

  • iPhones lack built-in call recording features to comply with laws in various countries.
  • You can use Google Voice or a third-party app like TapeACall to record phone calls after notifying the other party.
  • Another option is to record calls using voicemail, which you can save to the Files app, depending on your carrier.


Your iPhone doesn’t offer a built-in feature for recording phone calls. That’s because laws regarding the legality of recording phone calls differ from country to country. Fortunately, with a few workarounds, you can still record phone calls on your iPhone.

Secretly recording a call on your iPhone could lead to legal consequences. If you’re going to record a phone call, you’ll need consent from the person on the other end to avoid getting into trouble.

How to Record Calls on an iPhone Without Apps

This is probably the quickest and easiest way to record a phone call on your iPhone for free, without paying for apps. You’ll need another device with a microphone to record audio (like another phone or tablet) to make it work. You can also connect one of the best podcasting microphones to your computer for high-quality recordings.

Provided you’re in a quiet environment and can use your iPhone’s speakerphone, it’s simple to pull off:

  1. Call your contact and tap the Speaker icon. Notify the other party that you’ll record the phone call on your iPhone.
  2. After gaining consent, start recording using your external recording device.
  3. Place your iPhone close to the microphone of the recording device. Stay physically close to the recording device if you want your own audio recorded as well.
  4. End the call and save your recording.


If you’re using another iPhone or iPad to record your calls, you can use Apple’s Voice Memos app. However, if you’re using a computer, we recommend using a free audio editing and recording tool like Audacity. You can check out our guide on using Audacity if you’ve never used it before.

Record Incoming iPhone Calls Using Google Voice

Google Voice is a free VoIP (Voice over Internet Protocol) calling service that provides you with a free phone number, a voicemail inbox, and the ability to make calls both domestically (free) and internationally (as per the Google Voice calling rates). The ability to record phone calls is one of the perks of Google Voice.


Before you can do this, though, you’ll need to take some time setting up the service. Ensure you’re not setting up or using a Voice for Google Workspace account at your company or educational institution. Otherwise, the recording feature won’t be available. Here’s how to set up Google Voice:

  1. Download Google Voice from the App Store. Launch it and sign in with your Google account.
  2. Tap Search. Select the new phone number you want to associate with your Google Voice account.
  3. Confirm your number. Hit Next until you’re prompted to enter your phone number.
  4. Enter the phone number you use on your iPhone. Confirm and wait for a verification code.
  5. Verify your new Google Voice setup using the code you just received.

You need to complete one final step before you can record calls on your iPhone. Open the Google Voice website and sign in with your Google account. Click the gear icon in the upper-right corner to open the Settings menu. Here, select Calls in the left sidebar, then scroll down and toggle on Incoming call options.


Google Voice call recording settings

When you receive a phone call via your Google Voice account, you’ll be able to press the 4 key on your iPhone number pad to start recording the call. When you do this, Google will notify the other party that they’re being recorded. You’ll find the recording in your Google Voice inbox, where you can download it for safekeeping.

Unfortunately, because of legal and safety concerns, there’s no way to record an outgoing phone call on your iPhone using Google Voice.

Record Phone Calls on an iPhone Using a Third-Party App

If the old-fashioned method of recording a phone call doesn’t work for you, it’s probably time to turn to a third-party app. As the name implies, TapeACall lets you easily record calls from your phone.

The app isn’t free, but you can use a one-week free trial upon signing up for the app’s subscription. Just make sure to cancel the subscription before the trial ends if you’re not interested in continuing to use the app.


When you open the app for the first time, it will walk you through a few steps, including setting up a number that TapeACall uses to record your calls. Once you’ve gone through the setup, you should be ready to start recording calls.

Open the app and hit the red Record button at the bottom to start recording a call. From here, you’ll have the choice to record an outgoing or incoming call. Don’t forget to use the Merge calls button to record incoming calls.

Once you’ve recorded the call, you can find the audio clip in the Recordings section of TapeACall.

Record Calls on an iPhone Using Your Voicemail

Have you already set up voicemail on your iPhone? You can use a cool trick to record phone calls to your voicemails. This final method depends largely on the carrier you use on your iPhone.


First, you need to check whether your carrier allows you to download your voicemail messages. Launch the Phone app on your iPhone and tap on the Voicemail tab in the bottom-right corner. If you see a list of voicemail messages appear, that’s great! You can download them and keep them on your device for future playback purposes.

If you only see a Call Voicemail option, you’re not so lucky. You won’t be able to download voicemails. However, you may be able to save them in your carrier’s audible voicemail. This means you’ll have to continue calling your voicemail every time you want to play back the message.

To download these messages externally, you can use the speakerphone method we discussed above to record the phone call on your iPhone. Depending on your carrier, you can try a similar recording method using call merging and your voicemail:

  1. Call your contact and gain consent to record the call. Ask them to hold.
  2. On your iPhone, tap Add Call to start a three-way conversation.
  3. Call your own phone number. You should get your own voicemail inbox.
  4. Wait for the voicemail greeting to finish. Tap Merge Calls to start the conference.
  5. End the call. Your conversation should record as a message you can retrieve from your voicemail inbox.
  6. Select the voicemail you want to save from the inbox, tap the Share button, and choose Save to Files to store the recording in your desired location.


Now, you have an overview of how to record a phone call on your iPhone. But keep in mind that all carriers don’t operate in the same way and won’t give you some of the options we mentioned here. So, try out a few recording methods until you discover which is right for you.

The two most reliable ways of recording a phone call on your iPhone are using the speakerphone method or paying for a third-party app to record the call for you. In any case, you should always get consent from the other party to record your phone calls legally.

Can’t Find Copilot on Windows 11? Here’s What To Do

If you go by what Microsoft says, Copilot is the future of Windows. But what if you want to try it but can’t find it? We’ve got some tricks to try if Copilot is missing on Windows 11.


Where is Copilot?

If Copilot is properly installed on Windows 11, you should be able to find the icon in the very bottom-left corner of your screen. Click the button here and the Copilot side panel will pop up.

On some versions of Windows, depending on which build you’re currently running, simply mousing over the Copilot icon activates it. Otherwise, you simply need to click or tap the button to get started.

You Need a Microsoft Account for Copilot

If Copilot isn’t available on your system, there could be a few different reasons. One of the most common, however, is not being logged into a Microsoft account.

If you installed Windows 11 without an internet connection, for example, you may not be logged into a Microsoft account. Don’t worry, as it’s fairly easy to switch from a local account to a Microsoft account on Windows 11.


You may have other reasons for not using a Microsoft account with Windows 11, but regardless of your reasons, Copilot will simply not work without a Microsoft account.

Have You Updated Windows?

Copilot may also be slow to roll out to your computer if you don’t have automatic updates enabled. To resolve this issue, either turn on automatic updates or simply check for updates manually.

To check for updates, press the Windows key, then search for “updates.” You should see Check for updates pop up in the list. Open this, then click the button labeled Check for updates in the top-right corner of the window.

Updating Windows 11 in search of Copilot

If any updates are available, choose to install them. After a restart, hopefully you’ll find Copilot is not present on your Windows 11 installation.


You’ll Need Some Patience

If you’re looking to try newer Copilot features right away, you’ll need to run an Insider build of Windows 11. These are handy for trying out new features, but they do increase the possibility of instability on your computer.

Assuming you would rather not sign up for the Windows Insider program, you’ll simply need to wait until your version of Windows 11 is updated. Microsoft is rolling out Copilot fairly quickly, so hopefully you won’t have to wait too long.

Hopefully, you now have Copilot happily running on your system. If you’re not sure where to go from here, take a look at our guide explaining how to use Copilot on Windows.

Even if you don’t have Copilot installed on Windows 11 yet, that doesn’t mean you’re totally out of luck. At the time of this writing, there are several versions of Copilot, running on platforms from Microsoft Edge to the web, so you should at the very least be able to get an idea of what Copilot is like.

7 Ways You Can Help Your Fitbit Last Longer

Key Takeaways

  • Taking care of your Fitbit will allow it to last for years and prevent you from spending money on a new one.
  • Practical tips include taking care of the battery, updating the firmware, and cleaning it regularly.
  • You should also avoid high-impact sports, extreme weather conditions, and contact with liquids.


Unlike many pieces of technology, fitness trackers such as the ones from Fitbit are often built to be durable. However, you still have to make a conscious effort to keep them pristine. Here are some ways to make your Fitbit last longer.


1. Take Good Care of Your Fitbit’s Battery

Dave Parrack/MakeUseOf

Like other electronics that use Lithium-ion batteries, your Fitbit’s battery will naturally degrade over time due to wear and tear. For this reason, the battery is often one of the first things to break, so you need to keep your Fitbit’s battery healthy.

Although many modern electronics have mechanisms for preventing overcharging, it’s still better to be safe than sorry. We don’t recommend charging your Fitbit every night; only do so when its battery gets low.


Also, avoid leaving your Fitbit with an empty battery for long periods. When left with a drained battery for long periods, your Fitbit may be unable to retain charges when you attempt to use it again. Thankfully, Fitbit does allow you to change your battery (for an additional fee).

2. Regularly Update Your Fitbit’s Firmware

A screenshot of the Fitbit device settings with firmware version

While Fitbit devices come with pre-installed software, the devices must be updated regularly to keep them running up to standard. In some cases, firmware updates address battery performance, bugs, and even Fitbit syncing issues.

According to the Fitbit Help Center, updates are released in phases. If an update is available, but you can’t see it, it’s best to check again a few days later.

Alternatively, you can open the Fitbit app and tap the Devices icon in the top-left corner. Then click on the device you want to update. If a newer firmware version is available, you can tap the Update button to install it.


When doing a firmware update, keep the Fitbit app open on your linked mobile phone. It’s also essential to keep your Fitbit close to your phone. Unfortunately, that means your Fitbit may not be able to count your steps accurately during this time.

Depending on how recent your last update was, firmware updates can take up to an hour or more to complete.

3. Avoid High-Impact Sports While Wearing Your Fitbit

A Fitbit Charge 5 on a runner's wrist
Dave Parrack/MakeUseOf

Despite being made for sports, Fitbit devices are not without their limits. For example, many Fitbit models, such as the Charge 5 (as seen in the images throughout this article) and Luxe, have color OLED panels, which are susceptible to scratches or cracks.


Although scratches may not affect how your Fitbit works, they will impact its cosmetic appearance and the visibility of its screen, which could influence its resale value or usability. Cracks may also affect your Fitbit’s dust and water resistance, leading to the potential for more serious damage.

4. Avoid Extreme Weather While Wearing Your Fitbit

A Fitbit Charge 5 that has fallen next to a stream
Dave Parrack/MakeUseOf

While they can take a more beating than the average watch, Fitbit models aren’t stress-tested for all situations, such as freezing cold temperatures, extreme heat, or extremely wet or dry environments.

You may risk its parts overheating or being damaged from exposure to extreme temperature changes or extremes of dry or wet conditions.

According to Fitbit’s product safety information, it’s best to avoid bringing your Fitbit into places with extreme conditions, such as hot showers, saunas, ice baths, etc. If you don’t really need to track your activity, keeping your Fitbit in a safe place until the temperature is more manageable may be better.


5. Switch Your Fitbit Band Often

A Fitbit with its original band in focus
Dave Parrack/MakeUseOf

Your Fitbit has a main body and a band. In some cases, not taking care of the band can lead to band failures and accidental damage to your Fitbit’s display. To prevent this, we recommend always opting for Fitbit’s official straps, which are tested for durability and safety.

However, it’s important to remember that even Fitbit-manufactured bands made of leather, steel, or woven materials are not designed for intense sports. In fact, these particular band types are only recommended for day-to-day use, as the materials won’t hold up well in hot, cold, or wet conditions.

While there are accessory bands from many third-party manufacturers, not all will fit properly. In addition, straps manufactured by third-party brands may contain materials that could affect your skin if you have allergies or other sensitivities.


6. Avoid Exposing Your Fitbit to Liquid

A Fitbit Charge 5 perilously close to a puddle of water
Dave Parrack/MakeUseOf

Besides being swim-proof, most Fitbit models are rated for up to 50 meters underwater. At first glance, you may assume your device is more than ready for exposure to liquids because this depth is further than what most recreational divers are allowed or able to dive. However, this isn’t always the case.

Water resistance ratings change with time because of natural wear and tear, and Fitbit devices can’t be tested in all real-world situations, so it’s best to err on the side of caution. Apart from water, Fitbit models are not fully tested with other liquids you might encounter daily.

It’s essential to be careful with the various liquids you expose your Fitbit to, such as shampoo, dishwashing liquid, and so on. If you ever submerge your Fitbit under seawater or other types of corrosive liquid, you should do a quick fresh water wash before drying it off.


Lastly, you may want to enable Water Lock on your Fitbit if this feature is available for your particular model.

7. Clean Your Fitbit Regularly (and Thoroughly)

Preparing to clean my Fitbit with a wipe
Dave Parrack/MakeUseOf

If you often use your Fitbit outdoors, cleaning it regularly can help it last longer. When using Fitbit devices outside, dirt and dust might enter the display’s corners and strap.

For large debris, you can use a soft toothbrush to clean it. In addition, it’s important to regularly wipe down your device with a microfiber cloth and cleaning solution. To clean the band, Fitbit recommends using only fresh water and soap-free cleansers.

In addition, avoid using anything metal to clean your Fitbit because this can damage the display and increase the chances of corrosion.


While no Fitbit device will last forever, there are plenty of things you can do to make your Fitbit last longer. By following these tips, you can prolong the life of your Fitbit and avoid spending money on a new one.

How to Reset Your TikTok For You Page

Quick Links

Key Takeaways

  • You can refresh your TikTok feed to reset your content preferences completely using the built-in refresh feature.
  • After you reset your feed, you should mark unwanted content as “Not Interested” to teach TikTok your preferences.
  • You should interact thoughtfully with new recommendations and avoid reverting to past behavior after resetting.


TikTok does a good job of recommending content that you enjoy. But sometimes its prediction of your interests could be far off the mark. If this is the case for you, here’s how to reset your TikTok For You Page to get the app to show you videos that you’re interested in.


How To Reset Your TikTok For You Page (FYP)

If the videos on your TikTok For You Page don’t match your interests, you have the power to take control of the content you see. Here are effective ways to fine-tune your feed, so that the app shows content tailored to your preferences.

1. Refresh Your For You Feed

The most important step to take when you are dealing with videos is to reset your feed completely. The feed refresh feature clears out your existing feed patterns and preferences, so TikTok can rebuild your content preferences from scratch.

To reset your TikTok feed, follow these steps:

  1. Open the TikTok app and tap the Profile icon at the bottom right of the screen.
  2. Tap the hamburger icon in the top right corner of your profile page.
  3. From the popup menu, choose Settings and privacy, then select Content Preferences.
  4. Tap on Refresh your For You feed, then Continue. Finally, tap Refresh to complete the process.


This allows you to rebuild your feed from scratch.

2. Mark Content as “Not Interested”

Once you’ve refreshed your feed, you’ll need to change your TikTok FYP to fit your preferences.

For example, if you come across a lot of soccer-related videos in your refreshed FYP, simply long-press on any soccer video that you come across and tap Not interested. Do this for as many soccer videos as you come across.

You can take things a bit further by unliking a category of content that you liked in the past that you wouldn’t want to see anymore on your FYP. For instance, you could go back to your profile and “unlike” soccer videos you’ve previously liked, to send a signal to the algorithm that you’re no longer interested in soccer videos.

To unlike videos you’ve liked previously:


  1. Tap on the Profile icon at the bottom of your screen to go to your profile page.
  2. Tap on the heart icon just below your bio to reveal videos you’ve liked.
  3. Scroll through the videos, click on a type of video you want to stop seeing and tap on the red heart icon to “unlike” it.

From here on, you need to make an ongoing effort to like and re-watch content you like while indicating disinterest in posts you don’t.

Take Control of Your TikTok Feed

TikTok’s powerful recommendation algorithm customizes your For You Page based on how you engage with content. To keep your feed relevant, be intentional with how you watch videos.

1. Thoughtfully Interact With New Recommendations

When unfamiliar videos appear on your FYP, don’t heavily interact with them unless you genuinely want to see more of that type of content. An accidental like or full video view of an irrelevant clip can skew your recommendations to surface more of that topic. Be selective in deeply engaging only with content that appeals to you.


2. Vary Your Content Choices In Early Usage

Try to interact with a diverse mix of videos covering different topics, genres, and formats that interest you. Don’t be too spontaneous in what you engage with—be intentional. TikTok’s algorithm locks onto those initial behaviors to build a profile of your interests. So vary it up early.

3. Don’t Revert to Previous Behavior After Resetting Your Feed

You can restart your FYP by resetting the algorithm, but be careful not to repeat previous engagement pitfalls. Repeating your past actions simply retrains the algorithm to bring back the content that you don’t like. Don’t slip up, take control of your TikTok viewing experience.

With some prudence in managing your interactions, you can guide TikTok to better align your For You Page with your preferences. Be wary of over-engaging with random irrelevant content that could pollute your feed. A little intentionality goes a long way in shaping your ideal FYP.

How to Generate and Use AI Art Ethically

Key Takeaways

  • Many AI art generators exploit copyrighted works, harming human artists.
  • To use AI art ethically, declare it as AI-generated and credit artists.
  • Be cautious with using AI art on products and advocate for fair usage rules.


AI art generators are useful, but they come at a cost for human artists. Get to know what the impact is and how you can generate and use AI art as ethically as possible. There are few official rules in place, so you must set your own limits, whether you’re just playing around with the technology or hoping to use it professionally.


Why AI Art Generation Isn’t Ethical

AI engines use machine learning to absorb and make sense of images and relevant data from all over the internet. Some of these online photos, paintings, or digital art are free to use, while others are copyrighted, which generators and their developers tend to ignore. They don’t ask for permission, pay, or even give credit to the artists whose works they mimic.

In 2023, artists and Getty Images sued Midjourney and Stability AI over it. But AI art generators are still getting away with exploiting copyrighted works.

Besides stealing art, creating images with AI engines is taking business away from human artists. This is one of the many ways AI-generated art is changing the future of art.


One way or another, the artistic landscape will need to adapt, if only to avoid greater disruptions for consumers and designers alike.

How to Create and Use AI Art Ethically

The debate surrounding AI art generators poses several questions, like is it even real art if an AI made it? What defines originality? Who is to blame for the AI’s copyright violation? The algorithm, its developer, or the user who entered the prompt?

The complexity of the problem is why it’s taking so long to establish boundaries and laws for AI engine usage. Until then, make a note of the following tips to minimize your impact on artists when you generate AI art.

1. Don’t Try to Profit From AI-Generated Art

Creating a stunning image with AI and posting it on Instagram to simply show people is relatively harmless. The artwork may be based on something copyrighted, but you’re not actively profiting from the image beyond getting some likes.


What’s unethical is declaring yourself the artist, using the image on products, or monetizing it. You’d be profiting from other people’s work without their consent.

2. Declare Art as AI-Generated When Sharing It Online

On the topic of AI art ownership, it’s best to acknowledge yourself as the prompt provider and not the artist. Act accordingly when posting your images online.

Add a line or hashtag to mark an image as AI-generated. You can even declare that you’re not the artist and mention who influenced the art. All-in-all, you’re better off being honest.

3. Give Credit to the Artists if You Know Who They Are

Some AI art generators have handy buttons with styles for your images, often labeled with the names of specific artists. Other platforms have vague labels, but which expand your prompts, sometimes mentioning an influencing artist.

When using NightCafé, for example, type in your prompt, and hit Advanced Prompt Editor. Under the Modifiers tab, you’ll find the Artists option, which lists real creators whose work can influence your AI art. They include Greg Rutkowski, Jordan Grimmer, and Kelly Freas among other sources.


The right thing to do, especially if you intend to monetize your AI images, is to give credit to the artists. Better yet, ask for their permission or offer a commission. Take the initiative to reduce the harm of AI generators.

While it’s not a good idea to have an AI-generated image marketing your brand, there’s little stopping you. Platforms like Kindle Direct Publishing (KDP) require you to declare any AI-generated content in publications, but such rules aren’t widespread or official laws. There are steps you can take of your own volition to avoid serious backlash.

Firstly, edit the AI image beyond recognition instead of just fixing minor details of Midjourney art with Photoshop. You could use only a part of it or have it as a vague background to your original art. Also, declare your use of AI imagery and give credit where it’s due.


5. Create Original Art With the AI Image as Inspiration

One way to use AI art engines without feeling guilty is to just have them for idea generation. Enter a prompt that clearly describes your vision, gather AI images that inspire you the most, and create original art with them in mind.

AI images are great for a range of things that don’t compromise your morals. They’re one of the best tools for creating vision boards with stimulating visuals, and you can make funny birthday cards and other gifts. In other words, personal use of AI art is ethically better than profiting from imagery generated from stolen works.

6. Advocate for a Fair AI Art System

The fine line between good and bad AI image usage is unfortunate because the potential of artificial intelligence to produce works of art and other materials is immense.


Completely discarding the technology would be a mistake, considering how writers can use AI-generated art, not to mention businesses, marketers, and even filmmakers.

What you can do to improve the situation is add your voice to calls for laws that protect artists’ property, and for developers of AI generators to change how their engines acquire data. For starters, images with copyright metadata should be off-limits, unless the artists give permission and get paid accordingly.

In the meantime, avoid unethical use of AI art engines, or stop accessing them completely, cutting off some of the platforms’ online traffic.

7. Don’t Use AI Art Generators

This is the ultimate solution many artists ask for to combat the unethical actions of AI engines and their creators, who add to the immediate risks of artificial intelligence.

When a website loses traffic and potential revenue, its owners pay attention and try to make up for the loss. So, if enough people stop using AI art generators, the brains behind them are forced to reconsider their business strategy.


There’s no guarantee that changes will fully benefit artists, but being crystal clear about why users are unhappy can help steer the industry toward a better system that doesn’t step on anyone’s toes.

Ethical AI Art Generators

Here are some of the most ethical solutions available today for generating AI images while protecting artists’ copyright.

1. Shutterstock

Shutterstock Ethical AI Art Generator

The Shutterstock Contributor Fund compensates any artist on the platform whose work is used in AI image generation. Shutterstock also has strict rules about how not to use its AI art—if it features a famous logo or face, for example, you can’t use it in any way as it violates intellectual property and could be used for deceptive purposes.


2. Adobe Firefly

Adobe Firefly for Ethical AI Art

Firefly is another ethical AI art generator that only trains its algorithm with its own licensed images from Adobe Stock alongside free-to-use content from the internet. It also compensates contributors and is working toward setting stricter policies for the responsible use of its AI images.

3. Mitsua Diffusion One by Hugging Face

Mitsua Diffusion One on Hugging Face for Ethical AI Art

Hugging Face offers its own text-to-image model for generating AI art ethically. It’s called Mitsua Diffusion One, and it only trains with images from the public domain or with copyright that allows free use. The app is a work in progress, but it costs nothing and paves the way for better AI generators.


4. Create or Fine-Tune a Stable Diffusion Model

You can start from scratch with a custom Stable Diffusion model and train it with copyright-free content. If you don’t have the money or computational power for this, you can always take a pre-existing model, such as Stable Diffusion v1.5 on Hugging Face, and enhance it according to your needs. For extra peace of mind, make sure the model is already ethically trained before fine-tuning it.

Artificial intelligence is a groundbreaking technology that’s here to stay. Its accomplishments are useful and beautiful, but they can also be dangerous. AI art generation harms human artists the most, so make the most of the tips above and find other ways to make AI images less immoral to use.

Microsoft’s 7 AI Copilots and Which One You Should Use

Quick Links

Key Takeaways

  • Microsoft offers AI Copilots for various tasks like chatbots, programming assistance, sales support, and security operations.
  • Subscribing to Copilot Pro or Copilot for Microsoft 365 provides enhanced features and AI integration with Microsoft apps.
  • GitHub Copilot aids programmers with coding tasks, GitHub Education offers free access, and Copilot for Security focuses on threat management.


Microsoft has launched a whole product line of AI Copilots to revolutionize how we interact with its software ecosystem, covering productivity, security, coding, and much more.

So, it stands to reason that choosing the right Copilot allows you to do more work with less time—but which Copilot is right for you, and how much does it cost?


1 Microsoft Copilot


Microsoft Copilot (formerly Bing AI Chat) is a free AI chatbot accessible through a web browser and on operating systems like Windows, macOS, and iPadOS. It can scan the internet to answer queries, create and edit AI images, and generate text while also having access to GPT-4 and GPT-4 Turbo during non-peak hours. You can also interact with it using text, voice, and images, and can use plug-ins and GPTs. So, if you want a free multi-modal chatbot with access to GPT-4, try using Microsoft Copilot right now using your web browser.

2 Copilot in Windows 11

microsoft copilot for windows 11 preview

Copilot in Windows 11 is a free AI-powered assistant installed with Windows 11 Version 23H2 and up. It’s directly integrated into Windows 11 but goes a step further than the Microsoft Copilot search option in the Start menu by bringing Copilot directly to the desktop and giving it the power to open programs, change features, and more. This opens up many possibilities as you can essentially use Microsoft Copilot to instruct Windows 11 on what to do.


Although currently in its preview stage, Copilot in Windows can already perform simple tasks such as changing Windows settings, organizing your app windows, setting alarms, launching apps, and troubleshooting your PC. This Copilot also adds extra AI functionalities to popular Windows apps like Paint, Photos, Snipping Tool, and Clipchamp.

3 Copilot Pro

Copilot Pro in Windows

Need a faster and more capable AI assistant? Supercharge your Copilot experience by subscribing to Copilot Pro. The individual license currently costs $20 per month but provides significantly more capabilities over Copilot in Windows by adding the following:


  • Priority access to GPT-4 and GPT-4 Turbo.
  • Faster DALL-E 3 image generation plus 100 daily boosts with Designer (formerly Bing Image Creator).
  • AI Integration into your Microsoft 365 apps like Word, Excel, PowerPoint, and Outlook (needs a separate Microsoft 365 subscription).
  • Access to Copilot Builder Tool, which allows you to create custom GPTs.

The biggest reason to pay for Copilot Pro is to harness the power of AI in your work. With Copilot Pro, you get AI functionalities in Microsoft 365 apps without requiring significant hardware resources on Retrieval Augmented Generation (RAG) found in apps like Nvidia’s Chat with RTX. This makes it a great solution for people looking to use AI on lower-power machines like laptops and tablets.

4 Copilot for Microsoft 365

If you find all the functionalities in Copilot Pro useful and need it for a whole team, Copilot for Microsoft 365 is a service that may interest your group. It provides all the features of Copilot Pro with powerful additions such as:


  • Copilot in Teams: Gets you up to speed by providing summaries of main points, action items, and decisions made by your group within Microsoft Teams.
  • Microsoft Graph Grounding: Create a secure and unified API that links various Microsoft 365 services together.
  • Enterprise-Grade Data Protection: Copilot for Microsoft 365 inherits your organization’s current Microsoft 365 security, privacy, identity, and compliance policies.
  • Copilot Studio: Quickly and easily make custom GPTs for your organization with minimal hand coding.

Copilot for Microsoft starts at $30 per individual. There is no minimum seat requirement, but your organization will need to pay annually. There are also prerequisites to attain Copilot for Microsoft 365, such as a license for Microsoft 365 E3/E5 or Office 365 E5 for enterprise customers, Microsoft 365 Business Standard/Premium for business customers, and Microsoft 365 A3/A5 for education customers.


5 GitHub Copilot

Github Copilot Active in VSCode

Looking for a Copilot specifically for programming? GitHub Copilot is a premium AI assistant integrated into some of the most popular programming environments, like Visual Studio Code and JetBrains IDEs. GitHub Copilot allows you to code faster and with fewer errors by using AI for code completion, suggestion, refactoring, and debugging. It also comes bundled with GitHub Copilot Chat, a chatbot that allows you to generate code, ask questions, and provide useful information for programming.

GitHub Copilot Individual is a premium service that costs $10 per month. However, if you are a student or teacher, GitHub Education offers this service for free once you get verified. If you’re a programmer, hobbyist, or person looking to learn code, GitHub Copilot is a great service that may provide better utility over other AI assistants like ChatGPT.


6 Copilot for Sales

Looking to use AI to help manage your e-commerce website? Copilot for Sales is your AI companion that integrates with your CRM to provide real-time insights to help you optimize your business. You can use Copilot for Sales to analyze leads, track deals, draft emails, present Outlook meetings with data from your CRM, generate summaries, and generate content in PowerPoint, Word, and Excel.

Copilot for Sales starts at $50 per month and will require the user to have a product license for Microsoft 365. Customers already subscribed to Copilot for Microsoft 365 can use this service for $20 per month.

7 Copilot for Security


Copilot for Security is an AI assistant that integrates services such as Microsoft Defender, Microsoft Sentinel, Microsoft Intune, and Microsoft Entra. Copilot for Security allows IT professionals to protect their services by proactively scanning for threats and deploying automated responses for faster threat management, combining conversational-style AI chatbot elements with threat intelligence.

A Microsoft Tech Community blog gave useful insight into two key areas of questioning for most folks: what will it do, and how much will it cost?

Copilot for Security will focus on four “critical security operations tasks:

  • Incident Summarization: Quickly gain an understanding of the security incident, provide alerts for specific security alerts
  • Impact Analysis: Use AI analytics to detail the direct impact of a security incident and organize responses
  • Reverse Engineering of Scripts: Copilot for Security will attempt to reverse engineer malware, scripts, and other threats to speed up analysis and incident response
  • Guided Response: Deliver a step-by-step outline for incident response, actionable directions, etc.


Interestingly, Microsoft is introducing a new pricing structure for Copilot for Security, suggesting the AI tool will be “billed monthly via a new Security Compute Unit (SCU) at the rate of $4/hr.” How much capacity, processing, or otherwise that gets you remains to be seen, but deep AI integration into security analysis could be a boon for the security sector.

The 8 Best AI Image Detector Tools

Key Takeaways

  • Hive Moderation offers a free and quick detector tool for AI images and texts, including a browser extension for Google Chrome.
  • Illuminarty provides a simple AI image detector with a premium plan for detailed analysis and API access.
  • AI or Not is an easy-to-use tool for detecting AI images with both free and paid plans available.
  • V7’s Fake Profile Detector Chrome extension helps you spot AI-generated profile pictures.
  • Hugging Face is good at detecting AI images created by older AI models, with an upgraded, more complex version available as well.
  • Content at Scale lets you quickly identify whether an image is AI-generated or human-made.
  • Is It AI is an AI image detector that uses percentages to demonstrate human or AI origin.
  • Fake Image Detector quickly detects AI-generated images and also offers Error Level Analysis for accuracy.


It’s becoming more and more difficult to identify a picture as AI-generated, which is why AI image detector tools are growing in demand and capabilities. Here are the best AI image detector apps on the market today.


Among several products for regulating your content, Hive Moderation offers an AI detection tool for images and texts, including a quick and free browser-based demo.

Drag and drop a file into the detector or upload it from your device, and Hive Moderation will tell you how probable it is that the content was AI-generated. It also breaks down how it classified the image.


Another option is to install the Hive AI Detector extension for Google Chrome. It’s still free and gives you instant access to an AI image and text detection button as you browse. You can upload files as usual or check online content on the spot.

There are ways to manually identify AI-generated images, but online solutions like Hive Moderation can make your life easier and safer.

AI Image Detected on Illuminarty

Illuminarty is a straightforward AI image detector that lets you drag and drop or upload your file. Then, it calculates a percentage representing the likelihood of the image being AI. Within a few free clicks, you’ll know if an artwork or book cover is legit.

A paid premium plan can give you a lot more detail about each image or text you check. If you want to make full use of Illuminarty’s analysis tools, you gain access to its API as well.


This app is a great choice if you’re serious about catching fake images, whether for personal or professional reasons. Take your safeguards further by choosing between GPTZero and Originality.ai for AI text detection, and nothing made with artificial intelligence will get past you.

AI or Not Detecting AI Image

AI or Not is another easy-to-use and partially free tool for detecting AI images. Note that you need to set up an account before using the app. With the free plan, you can run 10 image checks per month, while a paid subscription gives you thousands of tries and additional tools.

To upload an image for detection, simply drag and drop the file, browse your device for it, or insert a URL. AI or Not will tell you if it thinks the image was made by an AI or a human.


If you already know the answer, you can help the app improve by clicking the Correct or Incorrect button.

V7 Detector Checking LinkedIn Profile for Deepfake

Social media can be riddled with fake profiles that use AI-generated photos. They can be very convincing, so a tool that can spot deepfakes is invaluable, and V7 has developed just that.

It’s called Fake Profile Detector, and it works as a Chrome extension, scanning for StyleGAN images on request. It does not, however, catch deepfake videos or face swaps.

Its function is simple. You install the extension, right-click a profile picture you want to check, and select Check fake profile picture from the dropdown menu. A notification will pop up to confirm whether this person is real or not.


AI Generated Image Detected With Hugging Face App

If you want a simple and completely free AI image detector tool, get to know Hugging Face. Its basic version is good at identifying artistic imagery created by AI models older than Midjourney, DALL-E 3, and SDXL.

But there’s also an upgraded version called SDXL Detector that spots more complex AI-generated images, even non-artistic ones like screenshots.

Whichever version you use, just upload the image you’re suspicious of, and Hugging Face will work out whether it’s artificial or human-made. This app is a work in progress, so it’s best to combine it with other AI detectors for confirmation.

Content at Scale Checking for AI Image


Content at Scale is another free app with a few bells and whistles that tells you whether an image is AI-generated or made by a human.

Just upload the file in question or paste in the URL. The app analyzes the image for telltale signs of AI manipulation, such as pixelation or strange features—AI image generators tend to struggle with hands, for example. Within seconds, the detector will deliver a probability score.

Content at Scale is a good AI image detection tool to use if you want a quick verdict and don’t care about extra information.

Is It AI App Analyzing Image

Here’s one more app to keep in mind that uses percentages to show an image’s likelihood of being human or AI-generated.


As usual, you either drag and drop the file into the detector or browse your computer for it. Once you upload the image for analysis, click the Check button, and Is It AI will work its magic, quickly and quietly.

You’ll end up with clear and accurate results. Since you don’t get much else in terms of what data brought the app to its conclusion, it’s always a good idea to corroborate the outcome using one or two other AI image detector tools.

Fake Image Detector App Spotting AI Image

The Fake Image Detector app, available online like all the tools on this list, can deliver the fastest and simplest answer to, “Is this image AI-generated?” Simply upload the file, and wait for the AI detector to complete its checks, which takes mere seconds.


If it does find signs of AI manipulation, you’ll get the following message: Looks like Computer Generated or Modified image. Otherwise, it’ll say: No Error Level Detected. Fake Image Detector also offers Error Level Analysis (ELA), making it one of the best tools for detecting edited images, whether they’re AI-generated or not.

Once again, don’t expect Fake Image Detector to get every analysis right. Double and even triple-check results, just to be on the safe side.

The best AI image detector app comes down to why you want an AI image detector tool in the first place. Do you want a browser extension close at hand to immediately identify fake pictures? Or are you casually curious about creations you come across now and then? Available solutions are already very handy, but given time, they’re sure to grow in numbers and power, if only to counter the problems with AI-generated imagery.

5 ChatGPT Features You Aren’t Using, but Should

Quick Links

ChatGPT is packed with features—more than most folks realize. This means most of us aren’t using the full range of ChatGPT’s features and could be getting more out of the world’s leading AI chatbot.


So, here are five ChatGPT features you’re not using but absolutely should be.


Read Aloud

In March 2024, OpenAI launched ChatGPT’s Read Aloud feature, enabling the AI tool to read its responses to you. It can be handy if you’re working on a long piece of text and want to hear how it sounds spoken, but it also means that you can now effectively converse with ChatGPT (using ChatGPT’s voice input feature).

ChatGPT’s Read Aloud option is found underneath each response it creates.

  • On the web, scroll to the bottom of the response, and you’ll find the Read Aloud button.
  • On Android or iOS, tap and hold the message until the context menu appears, then select Read Aloud.

Furthermore, Read Aloud can speak in 37 different languages but will also try to auto-detect whatever language it’s reading.

Personalized Responses

ChatGPT’s Custom Instructions give you greater control over how the AI chatbot responds to your inputs. ChatGPT’s custom instructions can range from in-depth information about your life, business, or otherwise, to simple instructions, such as making sure it only uses imperial measurements or always responds with your name.


But it doesn’t stop there. If you use ChatGPT to fulfill a specific role each day, you could add a specific set of custom instructions that match your expectations. For example:

  • Always act as an expert in your field
  • Break down complex ideas into simple explanations with clear reasoning
  • Always provide sources for your claims
  • Refer to www.examplewebsite.com/examplepage for specific information when requested
  • Always take a deep breath and think before answering questions and requests

That’s a small example, but illustrates how you might shape ChatGPT’s output towards your daily use, saving you time each day.

ChatGPT Memory and Temporary Chat

ChatGPT Memory and Temporary Chat are two features launching together, aimed to give ChatGPT better recall—and a way to avoid that recall altogether.

ChatGPT’s Memory allows you to set specific information it should always remember about you. But that’s not all. Over time, its memory can improve, learn details about you to add to its memory, and deliver improved accuracy and performance based upon this.


Part of ChatGPT’s Memory is the supposition you’re talking to it about anything and everything. It gives an example of “You mention that you have a toddler and that she loves jellyfish. When you ask ChatGPT to help create her birthday card, it suggests a jellyfish wearing a party hat.” That’s cute, no doubt, but it’s not the sort of information most folks are providing to ChatGPT regularly (at least, I assume not).

But once those memories begin to stack up, you can also ask it to forget specific bits of information, removing data, personal information, and so on. You can also delete the entire ChatGPT memory, resetting it back to zero.

At the time of writing, ChatGPT Memory is only available to a small number of users, but the wider roll-out of this long-expected feature is due in 2024.


Temporary Chat

Now, when OpenAI launched ChatGPT’s Memory feature, many were worried about the additional privacy implications. ChatGPT already uses a lot of data to continually train its models, and with the addition of memory, some were worried there would be no way to converse with ChatGPT privately.

In response, OpenAI revealed ideas for Temporary Chat, a mode that enables “a conversation with a blank slate.” In Temporary Chat mode, ChatGPT won’t be aware of any previous conversations or memory, but would still use your custom instructions if set. It’s a little like Incognito or Private mode in a browser.


Unfortunately, at the time of writing, Temporary Chat mode is only available to a small number of users, limiting the amount of people using it. However, when it arrives, it’ll be a useful tool for those moments you want to ask ChatGPT a question but don’t want it linked to your profile forever more.

Free Trial Invites

Want to share ChatGPT Plus with your buddies, but they don’t have the cash for the subscription? Well, you can use a ChatGPT Plus free trial invite to grant them a 14-day free ChatGPT Plus experience, with access to every feature.

The only real downside to the ChatGPT Plus free trial is that anyone taking it has to sign up for an account using a credit or debit card—which means the card will be charged straight away when the trial ends.

If the person you invite to trial ChatGPT is put off by the credit card sign-up, you could share your ChatGPT conversation with them instead. ChatGPT’s shared links launched in May 2023 and offer a way for ChatGPT users to share conversations outside the confines of the web interface or the smartphone app.


chatgpt shared links with share name option

Anyone with the link can view the ChatGPT conversation. Those with a ChatGPT account can continue the conversation, taking over from you (making it a somewhat collaborative process). Those without an account can just scroll through and see what transpired between you and the AI chatbot.

You Can Play Fortnite on a Mac, But There’s a Big Catch

Key Takeaways

  • You can install Fortnite on your Mac using the Epic Games Launcher, but it will be an outdated version.
  • The outdated version of Fortnite for macOS lacks features like crossplay and in-game purchases.
  • Xbox Cloud Gaming lets you play the latest version of Fortnite on your Mac via a web browser, but you’ll need a good internet connection and a controller.


While you can use the Epic Games Launcher to play Fortnite on your Mac natively, it has its fair share of downsides. We’ll discuss all about it and teach you how to play the latest version of Fortnite on your Mac.


How to Get Fortnite on Your Mac

The only way to install Fortnite on your Mac is via the Epic Games Launcher for macOS. However, you should first check Epic Games’ website to see if your Mac meets the minimum requirements.

If you use an Apple silicon Mac, you should have no issues installing and running it. However, it doesn’t run smoothly on the base spec MacBook Air, which we recommend avoiding.

Follow these steps to get Fortnite on your Mac:

  1. Head to the Epic Games Store and download the Epic Games Launcher.
  2. After installing it, run the launcher and use the search bar at the top to look for “Fortnite” (not “Fortnite Battle Royale”—that’s unsupported).
  3. Click Download and wait for it to finish. Make sure you have enough space on your drive, as the game takes up roughly 95GB of your internal storage.
  4. Once complete, you can launch Fortnite from the Quick Launch menu on the left.


Why Installing Fortnite on Your Mac Is a Bad Idea

While Fortnite will likely boot and run smoothly on most recent Macs, the Epic Games vs. Apple lawsuit has marred the Fortnite experience on macOS because the developer has refused to update its game.

This means there’s no crossplay support for Fortnite on macOS. You will see your friends online, but you will not be able to join in their games since they are using a different version of Fortnite from you. The only way to play is if they also use Macs.

Almost empty outfit section in Fortnite Locker


Epic Games has also blocked access to V-Bucks and the Item Shop. So, you can’t buy new skins, emotes, gifts, back blings, or any other cosmetic items. And if you bought any on another device running a more recent version of Fortnite, you won’t see it in your inventory.

This, combined with its overly bloated size, makes the Fortnite experience on macOS very disappointing.

How to Play the Latest Version of Fortnite on Your Mac

Thanks to the Xbox Cloud Gaming service, you can still play the latest version of Fortnite on a Mac via your browser. It’s typically a paid service that costs $16.99 per month, but you can access some free games like Fortnite without a subscription.

However, since Xbox Cloud Gaming streams Fortnite over the cloud, the video quality won’t be as good as running it natively on your Mac. Here’s how to do it:

  1. Visit Fortnite’s Xbox Cloud Gaming page using a browser (preferably Google Chrome).
    Fortnite's Xbox Cloud Gaming page

  2. Click Sign In and enter your Microsoft account credentials.
  3. After signing in, click Play​​​​​​. You’ll need a controller to play Fortnite.
    Fortnite Xbox Cloud Gaming page with Play button

  4. Link your Epic Games and Microsoft accounts by following the instructions in Fortnite.
    Fortnite on browser asking to link accounts


Once you’re done with that, you should be ready to play Fortnite over the cloud. But ensure you have a fast and stable internet connection. Using a slow network means you’ll have to log in again frequently.

Alternatively, you can play Fortnite using Nvidia GeForce Now on an iPhone or Mac, but the same points and limitations apply regardless of the cloud gaming service you choose.

We’ve got bad news if you’re waiting for Fortnite to launch again on macOS. We have no evidence that suggests Epic Games will compromise and let Mac users play with everyone else again. It seems like the company has taken a stubborn stance and is waiting for a shift before taking decisive action.

This is mostly a bummer for gamers who just want to have some good old battle royale action without having to purchase a Windows PC. Since it’s unlikely Apple will change its App Store policies, we hope Epic Games makes a compromise soon.

The Best Subwoofers of 2024

Regular speakers are great but, unfortunately, don’t do justice to your bass-heavy songs and action-packed movies. The best subwoofers target lower frequency ranges, adding deeper tones to your audio content for total immersion. While some are more compact and ideal for small spaces, others are built to suit larger rooms, giving you plenty of choice.


Klipsch

A great choice of subwoofer for your home theater, the Klipsch Reference R-12SW is armed with a front-firing 12-inch driver that delivers 400 watts of peak power and a rear-firing port. A built-in, all-digital amplifier supplies deep, satisfying bass, and its diminutive stature means it can easily be placed anywhere without being a space hog.

Made from spun copper thermoformed crystalline polymer, this subwoofer is exceptionally light while still providing that all-important low-frequency response. Considering its size, the overall sound output is excellent. The R-121SW provides a frequency range of 25Hz to 100Hz for distortion-free audio with powerful bass tones, and it makes movie nights an absolute treat. Visually, you can opt to have the low-profile grille on or off, depending on how minimalist you like things to be, although it’s more striking to look at grille-free.


Klipsch Reference R-121SW Tag

Klipsch Reference R-121SW Subwoofer

Best Overall

$419 $599 Save $180

The Klipsch Reference R-121SW is a robust and versatile choice of subwoofer for your home theater setup. With up to 400 watts of peak power and rich deep bass tones, it provides best-in-class output for truly immersive audio.

Pros

  • Powerful bass
  • Minimal distortion
  • Visually appealing
  • Easy setup
Cons

  • Arguably not the best choice for larger rooms

Bestisan subwoofer on a TV stand next to a sound bar and TV
Bestisan

A decent subwoofer on a budget isn’t as impossible as you might think. With its sub-$100 price point, the Bestisan Powered Subwoofer offers plenty of value for money, enriching bass reproduction and rounding out your home theater setup.

Supporting both analog and RCA outputs, it can easily be integrated as part of your overall setup, lending powerful and distortion-free bass to any stereo or multi-channel audio system. It has a minimalist design that is suitable for small to mid-sized rooms, with a 6.5-inch down-firing subwoofer that sounds surprisingly punchy considering the price tag. It might not suit audiophiles, but it does represent a significant audio upgrade from your standard TV speakers.

BESTISAN Powered Subwoofer Tag

BESTISAN Powered Subwoofer

Best Budget

With its 6.5-inch down-firing subwoofer providing powerful and low-distortion bass, the BESTISAN Powered Subwoofer is one of the very best available at around the $100 mark. Ideal for smaller to mid-sized spaces, it provides an impressive upgrade to your home theater setup.

Pros

  • Affordable
  • Easy to set up
  • Powerful bass for the price
Cons

  • Not suitable for larger spaces


Polk Audio HTS 10 subwoofer on a table
Polk Audio

A very decent mid-range option, the Polk HTS 10 Subwoofer features a long-throw dynamic balance 10-inch driver as well as floor-firing power port technology that allows for a deeper bass response. And with up to 200 watts of peak power, it makes an excellent choice for smaller or medium-sized rooms.

It has a frequency response range of 25Hz to 180Hz and has universal ports that make it versatile for use with most home theater systems. That floor-firing port technology is effective at reducing any bass distortion, and there are plenty of output options to play around with, making it a good option if you like to tinker with your audio. It doesn’t have wireless connection options, and the Polk Audio HTS 12 is better for larger rooms. Provided you don’t mind a wired connection, the Polk Audio HTS 10 will serve you well with its deep bass sounds.


Polk Audio HTS Tag

Polk Audio HTS 10

Best Mid-Range

$399 $449 Save $50

If you’re looking for an audio upgrade with deep and powerful bass in the mid-range, you’ll want to check out the Polk Audio HTS 10. With features such as its floor-firing power port technology, you can experience high-quality audio with minimal distortion and fully immerse yourself in your favorite movies and TV shows.

Pros

  • More affordable option
  • Cool design
  • Impressive deep bass tones
Cons

  • Not suitable for larger spaces

SVS SB-2000 Pro subwoofer on the floor
SVS Sound

Delivering 500 watts of power and 1,500 watts of peak power, the SVS SB-2000 Pro Subwoofer is an absolute beast. If you want things to get low, this is the one for you. With a frequency response range of 19Hz to 240Hz, this one is designed to provide booming bass.

It features a front-firing 12-inch high-excursion driver and has a sealed design with no open ports. The powerful Sledge STA-550D amplifier delivers bass that’s meaty, and the highs and mids sound crisp. Although wired, this subwoofer can be controlled via Bluetooth with the SVS App. Providing phenomenal audio with lashings of bass, it’s an incredible option for home theaters. If you have a larger living area, this is a great go-to for filling every inch of that space.

SVS SB-2000Pro Tag

SVS SB-2000 Pro

Best for Movies

If you’re looking to enhance your home theater setup, the SVS SB-2000 Pro is a great way to do it. Capable of 1500 watts of peak power, it delivers thunderous bass with no distortion, allowing you to experience home cinema like never before.

Pros

  • Incredible audio
  • Suitable for larger rooms
  • Ideal for home theater
  • Customizable in-app settings
Cons

  • Expensive
  • Doesn’t support wireless connections


Sonos Sub Mini subwoofer on the floor
Sonos

With its unique cylindrical design, the Sonos Sub Mini stands out from most other subwoofers in a good way. It allows for a 5GHz Wi-Fi connection that enhances audio transmission speeds and can be easily paired with other Sonos devices. Using the Sonos App, there are various customizable settings here as well, including an adjustable EQ.

Housed inside an acoustically sealed cabinet, the Sonos Sub Mini can replicate the lower frequencies of a much larger subwoofer. Inward-facing dual force-canceling woofers have been strategically placed to minimize sound distortion so you can enjoy an enhanced bass response. With a maximum output power of 250 watts, the Sonos Sub Mini won’t blow out the windows in your home. However, the sound output is very impressive and provides clear and deep bass tones to enrich your audio experience at home.


Sonos Sub Mini Tag

Sonos Sub Mini

Best Wireless Subwoofer

$387 $429 Save $42

Boasting a fast and reliable wireless connection, the Sonos Sub Mini is the perfect subwoofer to pair with your wireless sound system. With customizable settings via the Sonos App, incredible low distortion, and powerful bass, it’s ideal for recreating that movie theater atmosphere at home.

Pros

  • Wireless option
  • Customizable settings via the Sonos App
  • Low distortion
  • Powerful bass
Cons

  • You may prefer the stability of a wired connection

FAQ

Q: What does a subwoofer do?

Essentially, a subwoofer is a speaker that emits lower sound frequencies, offering you a more rounded, deeper sound for your setup, and providing you with a more immersive experience.

Q: What are the differences between an active and passive subwoofer?

The main difference between an active and a passive subwoofer is that the former features a built-in amplifier, whereas a passive subwoofer does not.

Active subwoofers, therefore, tend to be more cost-effective as they don’t require the purchase or configuration of an external amplifier and are ready to use right out of the box. On the other hand, passive subwoofers offer much more versatility and can be used (with an external amplifier) to produce a much richer and more immersive sound.

Q: What is the difference between a subwoofer and a speaker?

Subwoofers are specifically designed to produce lower-frequency sound compared to regular speakers. Most regular speakers specialize in high and range-frequency sound, whereas subwoofers are capable of producing low-frequency bass-heavy sound to deepen the experience of the listener.


Q: Can I only use a subwoofer as part of a home theater system?

There’s no doubt that a subwoofer will add depth to any home theater setup and enrich the experience for everyone. However, most subwoofers will also greatly complement your stereo setup, hitting those lower frequencies that your current speaker setup will struggle to achieve and adding a new dimension to your music.

Q: Does a soundbar need a subwoofer?

To a large extent, this comes down to personal preference. If you plan on watching lots of movies at home and want the best experience possible, you’ll likely want to pair your existing soundbar with a decent sub, as even the best soundbars won’t be capable of picking up the depth of low-end frequency sound that a subwoofer can.

Many soundbars come packaged with a separate subwoofer, but this doesn’t always guarantee you the best possible sound quality, and shopping around for a more specialized subwoofer to complement your soundbar could produce far better results.

The 8 Best Lightweight Emulators to Play Android Games on PC and Mac

Quick Links

Want to experience your favorite mobile games on a bigger screen like your laptop or desktop computer? Perhaps you want to take advantage of your keyboard and mouse for better controls. You’ll need one of these Android emulators on your PC or Mac.


System Requirements to Run Android Emulators

Before we begin, you should know the requirements for running Android emulators on your computer. Here are the minimum system requirements to run a popular Android emulator, like BlueStacks 5, for example:

  • OS: Windows 7 or later
  • Processor: Any Intel or AMD dual-core processor
  • Memory: 4GB of RAM
  • Storage: 5GB of free disk space

Some emulators, like Nox Player, have stricter minimum requirements, like 8GB of RAM and 64GB of storage space. So, check the respective emulator’s requirements before you install it.

If you’re looking to play graphically demanding games like PUBG Mobile or Genshin Impact, your PC must meet the recommended system requirements instead:


  • OS: Windows 10 or later
  • Processor: Any Intel or AMD multi-core processor that supports Intel VT-x or AMD-V virtualization technology
  • Memory: 8GB RAM
  • Storage: 16GB of space on an SSD or hybrid drive
  • Video: OpenGL 4.5 or higher

While we don’t focus on Macs here, some of these emulators are also available for Intel Macs. However, if you own a modern Apple silicon Mac, you’re limited to cloud Android emulators or development tools like Android Studio.

Out of the several emulators we tested on Windows and macOS, we have selected the best and ranked them based on performance and stability. Let’s take a look.

1. MEmu Play

MEmu is one of the most powerful emulators on this list, which makes it an excellent choice for playing Android games on a PC. So, if you have a fairly powerful Windows PC with a discrete NVIDIA or AMD GPU, you should have no trouble playing graphically demanding games.


You can even install games and apps from outside the Play Store by just dragging and dropping APK files from your computer. It really can’t get any more convenient than that.

MEmu supports key mapping, which is handy for playing touchscreen games on a PC. In simple terms, you can map the actions you’re supposed to perform in a game to your keyboard, mouse, or gamepad keys. For example, you can use the WASD keys for movement, left mouse click to fire a weapon, and more.

Download: MEmu for Windows (Free, subscription available)

2. NoxPlayer

Nox Player running in Windows

NoxPlayer is another popular Android emulator with over 150 million users. It is available for Windows and macOS, but keep in mind that the macOS version is limited to Intel Macs. So, check if your Mac is powered by Intel or Apple silicon before downloading it.


The emulator is optimized to provide stable and smooth gameplay, even while playing graphically-intensive games. NoxPlayer also supports keyboard mapping and script recording. If you’re not aware, script recording allows you to assign a string of actions to a single keypress.

In 2024, NoxPlayer runs on Android 9 Pie, but you can download a beta build that runs Android 12 from its site if you’re interested. Other features include optional root access, installation of apps via dragging and dropping APK files, and an option to limit CPU and memory usage.

Download: NoxPlayer for Windows | Mac (Free, subscription available)

3. BlueStacks

BlueStacks 5 running on a Windows PC

BlueStacks is the oldest and arguably the most popular Android emulator on this list. Its developers have supported it for over a decade, and it has over 500 million users.


In 2024, you can download two versions of BlueStacks: BlueStacks 5 and BlueStacks 10 (or X). However, there’s a huge difference between the two. While BlueStacks 5 is your standard Android emulator that runs locally on your computer, BlueStacks 10 is a cloud-based emulator.

BlueStacks 5 is perfect for Windows users looking to play Android games on their PCs. It supports keyboard mapping with preset controls for some popular games. While playing, you can take screenshots and record your gameplay.

Unfortunately, BlueStacks 5 isn’t available for macOS, so if you own a Mac, you have to install BlueStacks 10 to play Android games over the cloud. However, the game selection on BlueStacks 10’s now.gg platform isn’t great, but you’ll still find popular titles like EA Sports FC Mobile and EA Sports UFC Mobile 2.

BlueStacks 10 now.gg running on a Windows PC in a browser


Unlike most other emulators on this list, BlueStacks 5 doesn’t need a premium subscription to get rid of ads. You can easily do it from the app’s Settings > Preferences menu.

Download: BlueStacks for Windows and Mac (Free)

4. Google Play Games (Beta)

Google Play Games running Asphalt 9 Legends on a PC

Google Play Games on PC is the official Android emulator from Google. You can’t use it to run just about any Android app or game. Instead, you’re limited to a curated selection of games. As of March 2024, you can access over 120 games on Google Play Games.

Popular titles include Asphalt 9: Legends, Alto’s Odyssey, and Genshin Impact. Besides popular ones, consider checking out our favorite games on Google Play Games for PC.

Since its rough launch, Google Play Games for PC has been updated to support keyboard remapping to fine-tune the controls according to your preferences.


My experience playing Asphalt 9: Legends using Google Play Games was mixed. It remained stable while delivering smooth frame rates on my Intel-powered laptop. However, when I tried running the game on a high-end PC with an AMD CPU, I frequently saw black boxes covering textures during multiple races.

Download: Google Play Games for Windows (Free)

5. LDPlayer

Plants vs Zombies running in LDPlayer on a PC

LDPlayer is one of the newer Android emulators that launched in 2016. Yet in a relatively short time, LDPlayer crossed 100 million downloads with over 2 million daily active users.

Like some other Android emulators on this list, LDPlayer supports keymapping, script recording, and optional root access. The emulator is optimized for many popular graphically demanding games in order to provide a high frame rate while playing.


LDPlayer shows some ads, but you can buy a premium membership to remove them.

Download: LDPlayer for Windows (Free, subscription available)

6. GameLoop

PUBG Mobile running in Gameloop emulator on PC

GameLoop is a popular gaming emulator developed by Tencent. With over 500 million downloads, the company claims it is the most downloaded Android emulator. While it was originally known as Tencent Gaming Buddy, the company later renamed it to GameLoop.

If you want to play games developed by Tencent, such as PUBG Mobile and Call of Duty Mobile, GameLoop is the best emulator for you. In fact, it’s the official emulator for Call of Duty Mobile, so you don’t have to worry about getting your account banned while playing online using it.

It is optimized for around 200 popular games, including games from some other developers, to ensure stable performance with a high frame rate.


GameLoop doesn’t come with the Google Play Store pre-installed, but you can install it manually if needed.

Download: GameLoop for Windows (Free)

7. MuMu Player

Angry Birds 2 running on Windows using MuMu Player 12

MuMu Player is one of the lesser-known emulators for the task. NetEase, the company behind many popular smartphone and PC games, developed this emulator. If you want to play titles developed by NetEase, you should definitely give this emulator a try.

MuMu Player 12 runs Android 12 out of the box, and it’s one of the very few emulators that support this version. You can run multiple instances of MuMu Player simultaneously to play different games at a time.

Like GameLoop, MuMu Player doesn’t have many games in its store. Thankfully, though, it comes with the Google Play Store pre-installed.


Download: MuMu Player for Windows (Free)

8. Android Studio

Fruit Ninja running in Android Studio on a Mac

Android Studio isn’t a gaming emulator; it’s actually a tool for developers to create Android apps. We don’t recommend installing it on a Windows PC for gaming, as all the other options are better.

However, if you use an Apple silicon Mac, Android Studio is your only option if you want to run Android games locally on your machine.

Once you install Android Studio, you need to create a new project and set up an Android device from the Device Manager section. The process is a bit complicated, but I followed the instructions in the YouTube video below to get it up and running.


Android Studio isn’t ideal for running any graphically demanding games like Genshin Impact as they would stutter. However, it’s perfectly fine for playing some light casual games like Fruit Ninja, Angry Birds, Planets vs. Zombies, and more.

If you’re not a fan of a cloud-based emulator like BlueStacks 10 due to the streaming quality, Android Studio is worth a try.

Download: Android Studio for Windows and Mac (Free)

As you can see, there are a lot of Android emulators available. Depending on the games you plan to play, your choice may vary. But if you want a seamless gaming experience, ensure the emulator you download supports keyboard mapping.

While Mac users, especially those with Apple silicon Macs, have very limited options, cloud-based emulators like BlueStacks 10 still make it possible to play some Android games without relying on your computer’s hardware.

The Best Budget Samsung Tablets of 2024

Samsung has something for everyone, whether you’re looking for a tablet to binge-watch, play games, or edit photos. The good thing is that you don’t have to spend a fortune to get a nice Samsung tablet.


The company has really good options that offer a great balance of performance and affordability, making them perfect for anyone looking to upgrade their tablet without breaking the bank.

Here are the best budget-friendly Samsung tablets available today.

Getting a Samsung tablet needn’t cost you a fortune, thanks to some great budget-friendly options. Samsung’s impressive roster of budget tablets offers a cost-effective solution to suit almost every need, whether you’re a student, a creative professional, or simply looking for something to keep yourself or the kids entertained.

Samsung

Launched at the tail end of 2023, the Samsung Galaxy Tab S9 FE is an elegant multipurpose tablet that ticks a lot of boxes. It has a 10.9-inch 1440 x 2304 LCD, dual speakers with support for Dolby Atmos, and a decent front-facing camera. Powered by the Samsung Exynos 1390 processor, there’s enough oomph to make this tablet a good choice for gaming, too.


The Tab S9 FE is available in 128GB and 256GB versions, with 6GB and 8GB of RAM, respectively. With up to 1TB of expandable storage, you’ll have plenty of space to download your favorite movies, TV shows, and games. A fast-charging 8,000mAh battery supplies 18 hours of juice on a full charge, and 5G connectivity ensures a reliable performance across the board. Plus, it’s one of the few water- and dust-resistant tablets on the market.

Samsung Galaxy Tab S9 FE TAG

Samsung Galaxy Tab S9 FE

Best Overall

$370 $450 Save $80

Lightweight and portable, the Samsung Galaxy Tab S9 FE is suitable for a multitude of purposes. Enjoy 5G connectivity, an impressive battery life, and super smooth performance. This is one of Samsung’s best budget tablets.

Pros

  • Good for multitasking and media streaming
  • Includes S Pen
  • Good battery life
  • IP68 water and dust resistant
  • Expandable storage

Samsung Galaxy Tab A9+
Samsung

The Samsung Galaxy Tab A9+ is an ideal budget tablet for more casual use. It has an 11-inch 1920 x 1200 LCD, up to 128GB of storage, 8GB of RAM, and quad speakers. It’s fitted with a Qualcomm Snapdragon 695 chipset and provides impressively smooth performance, allowing for fast, fluid web browsing.


It’s great for multitasking, too. With the Samsung Multi-Active Windows feature, you can browse, take notes, and make video calls simultaneously with the handy split-screen functionality. Battery life is good, putting in a solid 12-13 hour shift on a full charge, and it has a slim and lightweight design that makes it easy to transport. At around the $200 mark, the Galaxy Tab A9+ provides exceptional value for money.

Samsung Galaxy Tab A9+ TAG

Samsung Galaxy Tab A9+

Best Value

With its modest price tag, the Samsung Galaxy Tab A9+ represents excellent value for money. Boasting a smooth and fluid performance for browsing, multitasking, and media streaming, this budget tablet is an ideal choice for casual use.

Pros

  • Affordable
  • Decent screen size
  • Use multiple apps at once
  • Smooth performance for browsing and streaming
  • Ideal for more casual use
Cons

  • Not great for gaming
  • Doesn’t have a lot of built-in storage

Samsung Galaxy Tab A7 Lite
Samsung

A great tablet for kids doesn’t have to be one of the more costly, feature-rich options. Instead, you should be looking for something sturdy, with a good battery life, and easy to operate. Chuck in a bunch of kid-friendly content to explore, and you’re on to a winner. And the Samsung Galaxy Tab A7 Lite delivers all of this with aplomb.


The smaller 8.7-inch 1340 x 800 screen is ideal for kids, and there’s 32GB of expandable storage for downloading their favorite mobile games or the odd episode of their favorite shows. It’s small and light enough for kids to easily hold in their hands and robust enough to handle the odd few knocks. There’s a wealth of age-appropriate content here, courtesy of the Samsung Kids app, which has plenty of educational and recreational games and puzzles for the kids to immerse themselves in.

Samsung Galaxy Tab A7 Lite TAG

Samsung Galaxy Tab A7 Lite

Best for Kids

$99 $160 Save $61

Featuring a compact design that suits smaller hands and a rough-and-tumble build, the Samsung Galaxy Tab A7 Lite is the perfect way to keep the kids entertained for hours with fun, age-appropriate content.

Pros

  • Compact design suits smaller hands
  • Long-lasting battery life
  • Robustly built
  • Great for streaming
  • Designed for use with Samsung Kids app
  • Affordable option
Cons

  • Geared towards entertainment rather than productivity
  • Native storage is modest at best

Samsung Galaxy Tab S6 Lite
Samsung

The Samsung Galaxy Tab S6 Lite has a sharp 10.4-inch Full HD 2000 x 1200 LCD, up to 128GB of expandable storage, and offers reliable performance, thanks to its Qualcomm Snapdragon 720G processor. It weighs a whisker over one pound and supplies around 12 hours of use on a full charge.


Note-taking during lectures is easy with the Tab S6 Lite, as it comes with a handy S Pen. For students already invested in the Samsung ecosystem, it allows the syncing of multiple devices, with the S6 Lite acting as the control hub. Ideal for handling a full-on day on campus, it’s also great for streaming movies and music after all that studying, thanks to its impressive dual AKG speakers. It even comes in a choice of color tones to match your style.

Samsung Galaxy Tab S6 Lite TAG

Samsung Galaxy Tab S6 Lite Android Tablet

Best for Students

$278 $430 Save $152

The Samsung Galaxy Tab S6 Lite is the ideal study buddy for students, thanks to its super-slim and lightweight design. It includes an S Pen for note-taking and can be synced with multiple Samsung devices. Plus, with its more modest price tag, it will appeal to student budgets.

Pros

  • Affordable option for students
  • Includes S-Pen
  • Can be synced with multiple devices
  • Decent battery life
  • Compact and portable
Cons

  • Lacks power compared to some alternatives
  • Only suitable for basic gaming

Samsung Galaxy Tab S9+ Screen
Zarif Ali / MakeUseOf

Admittedly, the Samsung Galaxy Tab S9+ looks out of place in a roundup of budget Samsung tablets. This tablet screams premium quality all the way, featuring a dynamic 12.4-inch AMOLED 2X screen with Vision Booster, superfast Snapdragon 8 Gen 2 chip, and up to 512GB of expandable storage. But for anybody looking for the best possible drawing experience on a Samsung tablet, we’d be doing you a disservice if we didn’t recommend this tablet to you.


That beautiful AMOLED screen is tailor-made for bringing your creations to life, showing off exquisite colors and contrasts that make it a joy to draw or sketch with. It’s great for note-taking and annotating, too, with the S Pen allowing for pixel-perfect control, gliding across the screen with ease.

It may not be a budget Samsung tablet, but it’s a damn good one. And if you want the ultimate Samsung tablet for drawing without having to shell out on its larger, more expensive brother (the Samsung Galaxy Tab S9 Ultra), this is the one for you.

Samsung Galaxy Tab S9+ Plus TAG

Samsung Galaxy Tab S9+

Best for Drawing

$900 $1000 Save $100

With its dynamic 12.4-inch AMOLED 2X screen, the Samsung Galaxy Tab S9+ offers an incredible experience for drawing and sketching. And though not a budget tablet per se, it remains more affordable than some alternatives, such as the S9 Ultra.

Pros

  • Top-tier performance for drawing and sketching
  • Gorgeous AMOLED screen with Vision Booster
  • Great for multitasking
  • Protective Armor Aluminum frame
  • Good battery life and fast-charging
Cons

  • Expensive
  • Larger and heavier than other Samsung tablets

FAQ

Q: What’s the difference between the Samsung Tab A and Tab S series?

The main difference between the Tab A and Tab S series is processing power. Typically, the Tab S models are the more top-end models and feature faster, more powerful processors. In contrast, the Tab A models are better known for offering a more cost-effective or budget alternative, catering to basic functionality.


Q: Can I use a tablet as a laptop replacement?

The short answer is yes, you can. The longer answer is that it all depends on what you use your laptop for and what operating system its software uses. Tablets can be used as a viable alternative to laptops in many regards, though their comparative lack of power could mean that some tasks cannot be completed as efficiently as with a dedicated laptop.

Generally speaking, tablets are used for more passive activities rather than for anything productivity-based.

Q: Should I buy a Samsung tablet or an iPad?

Naturally, there are pros and cons for either choice. However, an iPad will probably appeal to someone already invested in the Apple ecosystem, as it provides a seamless and user-friendly experience for Apple aficionados.

Samsung tablets, on the other hand, arguably offer greater scope for customization, with a wider range of hardware options to consider. Both are important factors to think about, as are the respective operating systems, performance, design, and compatibility with your existing devices.

Q: How do you know when your tablet needs replacing?

Tablets are generally expected to have less shelf life than a conventional laptop, but that depends on your usage. A lot of people use tablets as secondary devices, and the overall wear and tear will likely not be as significant in that case.


Aside from the obvious (cracked screen, not powering on, etc.) you may notice a considerable slowdown on booting up, experience a fast-draining battery, or see signs of malfunction on the screen itself. If any of these factors are persistent, it’s probably time to put your tablet out to pasture and consider replacing it.

The Best Budget Laptops of 2024

Budget laptops have changed considerably over the years. Clunky designs and worrisome performance are concerns of the past, and we now have slim, lightweight devices that are stylish and functional. Many affordable options exist for those seeking a simple machine for browsing, streaming, or even playing less demanding video games.


Pavilion

The HP Pavilion 15.6-inch Laptop is available in a variety of configurations. These include RAM options ranging from 8GB of RAM with 256GB SSD storage to 32GB/1TB, all the while remaining in the budget price zone.

Not only can the HP Pavilion 15 handle everyday tasks like web browsing and media streaming with ease, but with its Intel UHD Graphics 600 card, it can also handle basic photo editing and light gaming.

The laptop’s 15.6-inch display has an HD resolution with a 220-nit peak brightness. It’s suitable for most everyday purposes. And, as long as you don’t mind details in your movies being a little on the softer side, it’s fine for streaming.

HP Pavilion 15.6-inch Laptop

HP Pavilion 15.6-inch

Best Overall

The HP Pavilion 15.6-inch budget laptop provides flexibility with its various configuration options, allowing users to choose the RAM and storage capacity that suits their needs. Better-specced models can efficiently handle everyday tasks, basic photo editing, and casual gaming while offering a decent display, respectable battery life, and convenient connectivity options.

Pros

  • Varied port selection
  • Good battery life
  • Lightweight
  • Windows 11 Home OS


A woman being productive on the Samsung Chromebook 4+
Samsung

The Samsung Chromebook 4+ is a good choice if you need a basic laptop for everyday tasks at a rock-bottom price. It features an Intel Celeron N4020 processor that provides a good base for basic computing jobs. It’s an excellent office accessory that will get the job done.

With 4GB of DDR4 RAM and 64GB eMMC storage, you can expect it to handle light video editing and barebones gaming on top of your everyday tasks. Performance may be modest, and multitasking may stutter at times, but you can’t expect much more at this price point.

The Full HD display is a pleasant surprise. You can stream sharp, vibrant movies and TV shows. This model has an 11.6-inch screen, but if that’s too small for you, there’s a 15.6-inch model at a slightly higher cost. But, as with most Chromebooks, storage is limited due to their intended integration with cloud services.


Samsung Chromebook 4+

Samsung Chromebook 4+

Most Affordable

The Samsung Chromebook 4+ offers an affordable solution for your everyday computing needs. With its budget-friendly price, this laptop provides a reliable option for basic tasks without compromising functionality.
 

Pros

  • Good battery life
  • Lightweight and portable
  • Full HD display
  • Lightweight and portable
  • Two USB-C ports

An HP Stream 14-inch Laptop
HP

The HP Stream 14-inch is worth considering if finding the lowest-priced laptop to handle basic everyday computing tasks is your priority. This model is a good choice for the office with its Intel Celeron N4000 processor, 4GB of RAM, and 64 GB eMMC storage. It’s the most affordable choice, and it can handle basic everyday productivity tasks.

However, should you need more power while remaining firmly in the budget-price range, there are boosted RAM and larger storage options of up to 32GB and 576GB (64GB eMMC plus 512GB card), respectively.

The HD display is fine for browsing the web or streaming content during your lunch break. The visuals are bright and clear enough for indoor use, although the display may not be of optimal quality for enjoying movies and shows in the evening.


HP Stream 14-inch

HP Stream 14-Inch

Best for Productivity

$195 $260 Save $65

The HP Stream 14-inch is available at an excellent price for those seeking a budget-friendly option for everyday computing tasks. Its lightweight and compact design offers convenient portability for work or leisure, making it a practical choice for those on a tight budget.

Pros

  • Rock-bottom price
  • Compact and lightweight design
  • One year subscription to Microsoft 365 and 1 TB of OneDrive Storage
  • Excellent battery life
Cons

  • Display is not Full HD
  • No USB-C port

A Lenovo IdeaPad Duet 5
Lenovo

With its Snapdragon SC7180 processor and Qualcomm Adreno Graphics, the Lenovo IdeaPad Duet 5 is an excellent 2-in-1. This device features 4GB of RAM and 64GB SSD storage. This capacity may not be enough for some; however, you can mitigate it with Chrome OS cloud computing.

Like most laptops in this price range, it performs well with everyday office tasks and web browsing while also offering light gaming and editing. However, where the Duet 5 excels is its gorgeous 13.3-inch OLED touchscreen. With a Full HD display, 400 nits of peak brightness, and a 100-percent DCI-P3 color gamut, images are among the best you’ll find in this price range.

Lenovo IdeaPad Duet 5 Chromebook

Lenovo IdeaPad Duet 5 Chromebook

Best 2-in-1

The Lenovo IdeaPad Duet 5 Chromebook stands out with its stunning 13.3-inch OLED display, Full HD resolution, and excellent peak brightness, all contributing to surprisingly good visuals for a laptop in this price range. Together with exceptional battery life, this 2-in-1 provides a delightful yet affordable experience.

Pros

  • Exceptional battery life
  • Beautiful touchscreen OLED display
  • 1080p webcam
  • Lightweight and portable
Cons

  • No headphone jack
  • Limited ports
  • Small storage capacity


Best Budget Laptop for Gaming: Acer Nitro 5

An Acer Nitro 5 budget gaming laptop
Acer

With a powerful Ryzen 7 5800H processor and an RTX 3060 GPU featuring NVIDIA DLSS technology, the Acer Nitro 5 (AN515-45-R92M model) offers ridiculous value to gamers on a budget. In addition, it boasts 16GB of RAM and 512GB of SSD storage, and there’s plenty of space inside for upgrades when you’re ready to move up a notch or two.

This big, heavy, chiseled-looking laptop comes complete with a customizable four-zone RGB backlight illuminating a robust keyboard that can take quite a clacking. It certainly looks and feels the part for gamers, and it boasts a plethora of ports.

However, you can’t have it all your own way at this price point. The 15.6-inch IPS display is a bit on the dim side, and colors are a little muted. But you do get a sharp Full HD resolution with a maximum 144Hz refresh rate for buttery-smooth visuals and reduced motion blur.


Acer Nitro 5

Acer Nitro 5

Best for Gaming

The Acer Nitro 5 checks most of the boxes you can expect to be checked for a budget gaming laptop. It boasts a 144Hz refresh rate, a robust RGB-backlit keyboard, and an all-around stellar performance that beats most gaming laptops in this price range. 

Pros

  • Excellent performance to price balance
  • Runs quietly and relatively cool
  • Easily upgradeable
  • 144Hz, Full HD display
Cons

  • Limited battery life
  • Below average audio
  • Display is somewhat dull

FAQ

Q: What is the difference between a Windows laptop and a Chromebook?

There are many significant differences between Windows laptops and Chromebooks. The most obvious is that the former runs on Microsoft Windows, while the latter uses Google’s Chrome operating system. However, there are many other differences to consider when choosing between a Windows laptop or a Chromebook.

Q: How much RAM does a laptop need?

How much RAM you need is relative to your intended purpose. In a nutshell, you can get by on 4GB of RAM if your laptop is for basic everyday tasks such as browsing the web, creating Word documents, or even streaming Netflix. However, it’s recommended that you get a laptop with 8GB, especially if you’re multitasking.

For a gaming laptop, some people think 8GB is sufficient for light gaming, but anything more serious than that will require at least 16GB. For CPU-intensive applications, such as those for graphic designers or architects, you’ll need something more powerful, and 32GB should cover you.


Q: How do I connect my laptop to an external display?

You’ll need a video output port on your laptop, such as HDMI, DisplayPort, or a USB-C, and a corresponding cable that matches the external display and laptop ports.

After connecting the cable, turn on the external display. You’ll have to configure the settings if you don’t see your laptop screen. You can do this by right-clicking and selecting “Display Settings,” or on a MacBook, go to “System Preferences/Settings,” then “Displays.”

From there, you can choose how you want your laptop screen displayed on the external screen. You can select “Extend,” which allows the external screen to act as an extension of your laptop; “Duplicate,” which exactly mirrors what’s on your computer; or “Second Screen Only,” which disables your laptop screen and transfers all content to the external display.

Q: What is Thunderbolt, and do I need it on a laptop?

Thunderbolt combines data transfer, video output, and power delivery. Once exclusive to MacBooks, it’s a high-speed connection that uses the same connector as USB-C and now has widespread availability. However, Thunderbolt and USB-C are not the same, and Thunderbolt boasts many advantages, including faster data transfer speeds.


You don’t necessarily need Thunderbolt, but it is advantageous if you transfer a lot of data, use multiple high-resolution displays, or use an external graphics card. However, if you only use one display, don’t transfer large data files, and just use your laptop for browsing the internet and light productivity work, USB-C has ample power.

Q: How do I disable my laptop’s keyboard?

It’s generally not advised to permanently disable your laptop’s keyboard. It’s an essential component for the majority of laptop functions. So, whatever reason you might have for disabling your laptop’s keyboard, make sure you have an alternative input method before proceeding. You can disable a Windows keyboard temporarily or permanently; if it’s the latter, be certain you want to do it before carrying on.

How to Mirror Your Android Device to Your TV

TVs are better than smartphones for media consumption due to their large screens. But what if you want to view photos or watch videos stored on your phone on a bigger screen? Android makes it easy to mirror your phone’s screen to a compatible smart TV.


Depending on what Android device you own, you can rely on one of the following methods to mirror its screen to a TV.


Use the Built-in Casting Feature in Apps

The easiest way to mirror your phone’s screen on a smart TV is to use the built-in casting feature on supported apps. For example, when you watch a video on YouTube, you’ll see a rectangular icon with a Wi-Fi logo in the corner. Just tap on it, and you should see all the supported devices to which you can wirelessly cast the video.

This function is also available on other apps, like the Google Photos app, VLC for Android, Netflix, Amazon Prime, and more. You can use this button to quickly view your pictures or watch videos on the big screen.


Mirror Your Android Device From the Google Home App

While the Cast button in apps is convenient, not all apps have this capability. In such cases, you can easily mirror your phone’s screen with the Google Home app. However, you need to set up your Google Chromecast or smart TV with your Google account before you can do this seamlessly.

Once your Chromecast device or Chromecast-enabled smart TV is linked to your Google account, here’s how you can wireless cast from Android to your TV:

  1. Open the Google Home app and tap the Devices tab.
  2. Select the TV you want to mirror your Android device to.
  3. Tap Cast my screen. When you get a pop-up, tap Cast screen.
  4. Most phones will ask for confirmation to start recording or casting. Tap Start now.

With that, your smart TV will mirror whatever that’s on your phone. When you’re done casting, swipe down from the top of your phone’s screen to reveal notifications. Then, tap the down arrow on the Casting screen notification and tap Disconnect.


Mirror Your Galaxy Device With Samsung Smart View

You can use Samsung’s Smart View feature to mirror your Android device if you have a Samsung phone, like the Samsung Galaxy S24 Ultra we reviewed.

You don’t need to set up a home device for Smart View to work. All you need to do is make sure your smart TV and Android device are connected to the same Wi-Fi network. Then, follow these two steps:

  1. Tap the Smart View toggle in your Samsung phone’s Quick Settings panel.
  2. Wait for Smart View to automatically find compatible devices in the Phone -> Other device tab. Select your TV from the list of devices that appear.
  3. When you get a confirmation pop-up, tap Start now.


You should see your phone’s screen on your TV immediately. The Smart View control menu will hide on the right-hand side of your smartphone; swipe the right edge towards the left on the Smart View toolbar to reveal options like Selfie video, App cast, Darken phone screen, Pause Smart View, and Disconnect.

These are the fastest and easiest ways to mirror your Android phone’s screen to a smart TV wirelessly, and they will work whether you’re using a Chromecast device, Google TV, or an LG TV that runs webOS.

If you want more connection options, check out our guide on connecting an Android phone to a TV. Alternatively, if you have sketchy internet and want a more reliable physical connection, you can connect your phone to your TV via USB.

5 Key Considerations When Using Multiple Monitors With a Laptop

Quick Links

Key Takeaways

  • Building the right setup with proper cables and ports is crucial for connecting multiple displays to your laptop effectively.
  • Utilize smart desk management by incorporating external accessories and a monitor arm to enhance your workstation layout.
  • Optimal monitor quantity depends on your usage; largely one extra monitor suffices, but some may need multiple screens for specific tasks.


Find yourself switching between windows way too often or cramming multiple windows on your laptop’s display? It’s time to get a second monitor.

Multiple monitors can significantly improve productivity as you have way more screen space to work with. But if you’re considering using a second monitor with a laptop, there are a few extra considerations to make.


1 Building the Setup

The first thing you need to get in place is the actual setup, including display output options, as that will determine the displays you can buy.

If you have an older laptop, you might have both an HDMI and a Mini DisplayPort available. This means that you can connect two displays without worrying about splitters or adaptors. On newer laptops, you’ll likely see only one HDMI port or a USB-C port with DisplayPort capabilities.


Pic Media Aus/Shutterstock

Look up your laptop manual to check its port specifications. For example, you need DisplayPort or HDMI 1.3 (or higher) if you want to use a 1080p monitor at 144Hz. Being aware of your laptop’s capabilities can save you an expensive purchase that you might not be able to use to its full potential.

Next up are cables. Purchase high-quality HDMI cables that are compatible with the resolution of your monitors. Though a standard HDMI cable can work on almost all monitors, it’s important to check the speed to ensure that the quality of the display is high. While most HDMI cables are the same, some variations in HDMI cables can catch you out. This applies to USB Type-C cables as well. Not every USB Type-C cable is built the same, and getting the wrong cable can be a hassle.


The actual connection part is simple, and we’ve already covered how to connect multiple displays to your laptop.

Just remember that there’s no point getting a top-of-the-line gaming monitor only to later find out your laptop doesn’t have the display output capabilities to make use of the high refresh rate and any other bells and whistles your display might have.

2 Managing Your Desk

Plugging in an external display to your monitor will almost certainly mean that you’ll have to put it down at an apt place on your desk so you can use your laptop’s display as a secondary screen. At this stage, if you’re still looking to use your laptop’s keyboard, things might get a little tricky.

person using laptop smartphone and tablet on one desk
Antonio Guillem/Shutterstock


Keep in mind that as soon as you decide to add an external display to your laptop, you’re moving towards a workstation-type desk. While you can get by placing your monitor next to your laptop and plugging in the required cables, it doesn’t give the best experience.

I recommend an external keyboard, mouse, and a stand to keep your laptop on. It will give you a more desktop-like feeling and ensure you can place things in the most ergonomic position possible.

At this point, you’ll start seeing another issue: a jumbled mess of cables on your desk. Once again, you can just tuck them away and forget about them, but managing these cables properly will be incredibly helpful when making changes, switching items, or even when you have to unplug your laptop to use away from the desk.

If you have a small desk, or if you find that the monitor stand is taking up too much space, I recommend getting a monitor arm. It’ll greatly improve the look of your setup while also giving you more flexibility in terms of positioning your display.


3 Deciding the Optimal Number of Monitors

How many monitors you require depends on what you’ll be doing most of the time with your laptop. For most people, just one extra monitor will suffice. So if you’re looking to create a triple-screen, curved display workstation, save the money and get a good widescreen monitor with a high refresh rate, low response time, and good color accuracy instead.

pc streaming setup with multiple monitors
DC Studio/Shuttestock

In fact, studies have verified this fact as well. For example, Microsoft’s Large Display User Experience found using a dual-screen setup can increase productivity anywhere between nine to 50 percent.

That said, there are use cases where adding three or even more monitors will be beneficial. If you trade, work with spreadsheets, are building a multi-screen setup for simulation-based games, or otherwise need screen space, don’t be afraid to go for multiple monitors.


Doing so will increase the cost and complexity of the setup. To keep this in check, invest in one good primary monitor and save a buck on the others.

4 Performance Issues

Since we’re talking laptops, performance is a big question. Unlike desktops, where you can simply plug your monitor directly into your GPU, your laptop’s display output may or may not be mapped to the discrete GPU, and that can be a problem.

If your laptop’s display output connects to the integrated GPU, it means that the external display will also be powered by the integrated GPU. So when you’re running performance-intensive programs or games that require your dedicated GPU, communication between the two can cause performance issues when using an external monitor.

graphics card ports up close
NATALIA61/Shutterstock


These issues may or may not be significant enough to be noticeable. Regardless, it’s best to ensure that your graphics card is up to the task of running dual monitors. Most modern laptops with dedicated GPUs do come with display outputs that connect directly to the dedicated GPU so you’re most likely covered there.

That said, Nvidia and AMD both offer control panel utilities that allow you to modify these settings, meaning you can change what GPU your laptop uses to run the external monitor. If you have performance in mind, using the dedicated GPU is the better option, otherwise, your integrated GPU can handle the rest. Do keep in mind, though, that depending on your laptop’s hardware, you may or may not have these options. Alternatively, a MUX switch can help improve performance by directly sending graphics data to the display without it having to go through the CPU first.

5 To Dock or Not to Dock

If your laptop has a Thunderbolt 4 port, docking stations can look promising. You get to connect all your displays, peripherals, network cables, and more while also charging your laptop over a single USB-C cable.


usb c laptop dock plugged into laptop port

However, getting the right dock is very important here. You’ll have to make sure that the dock’s display ports support your monitors so you can get the required resolution and refresh rate. Last but not least, make sure that the dock supports USB-C Power Delivery; otherwise, you’ll need another cable to charge your laptop if your laptop supports USB-C charging.

Using multiple monitors can significantly increase productivity and help you get more done with less effort. Deciding on a monitor and setting the whole thing up can be a hassle, but it’s well worth it in the end.

Did You Receive a Roku Password Reset Email? Go Check All Your Other Accounts

Key Takeaways

  • Roku experienced a breach impacting over 15,000 accounts due to credential stuffing attacks.
  • You should check other accounts that use the same login info if you received a Roku security notice.
  • Locate and secure any accounts linked to the compromised credentials to protect your data.


Have you recently received a password reset email from Roku? If so, you’d better check your other online accounts too.

In March 2024, streaming and smart TV giant Roku revealed that 15,000+ accounts were breached using a credential stuffing attack—which means any account you used the same password for is also vulnerable.


What Happened to Roku? How Was Roku Breached?

Roku’s official data breach notice [PDF] revealed suspicious activity on more than 15,000 Roku accounts.

However, despite Roku bearing the brunt of the issue, it wasn’t fully at fault. It appears the accounts were all breached using credential stuffing:

Through our investigation, we determined that unauthorized actors had likely obtained certain usernames and passwords of consumers from third-party sources (e.g., through data breaches of third-party services that are not related to Roku). It appears likely that the same username/password combinations had been used as login information for such third-party services as well as certain individual Roku accounts.


Credential stuffing, i.e., an attack that reuses the same username and password information across multiple services, is a massive user error and a huge problem in the age of enormous data breaches.

In this case, the attackers used the information to make purchases using banking details saved on Roku. But even then, Roku didn’t provide Social Security numbers, full payment account information (all purchases were limited to Roku), or other identifying information.

Received a Roku Password Reset Email? You Should Review Your Other Accounts

Now, credential stuffing is dangerous because people use the same username and password combo across multiple services. So if you received a password reset email from Roku following the breach, it stands to reason you should have a look at your other accounts.


Anywhere you use the same username and password combination could be at risk, even if you don’t use weak commonly used passwords. (You should never use those passwords!)

How to Check If Your Username and Password Are Breached

There are a couple of ways to figure out if your email and password combination has been exposed in a breach.

The first involves a trip to HaveIBeenPwned, Troy Hunt’s incredibly useful and free data breach checking site. Just enter your email address and hit pwned?, and it’ll reveal all of the data breaches your email address is found in.

have i been pwned database leak

That’s a good starting point, but it doesn’t specify usernames, account names, passwords, and so on (for good reason!). To find out where you used the username and password combination, you’re going to have to dig deeper, manually. We’ve covered how to find accounts associated with an email address in-depth, but here’s a quick overview of the methods you can use:


  1. Find Accounts Linked to Email for Free: Email accounts like Gmail and Outlook track linked accounts, and you can find the information there.
  2. Find Social Sign-Ins With Facebook and Twitter: Browse all the apps and websites you’ve logged into using your social media accounts.
  3. Search Your Inbox for Account Verification Messages: Scroll through your account and find those sign-up messages.
  4. Use Third-Party Account Deletion Tools: They can track down and erase your accounts.
  5. Find All Online Accounts With Namechk: This service scans websites for available usernames, and if your regular name is taken, you might have an account there.
  6. Check Your Browser’s Saved Accounts: While not the most secure password management method, it works well for many folks.
  7. Use a Password Manager: You likely use a strong, unique passwords with a password manager, but you might have had an off-day where you left some duplicates or weak passwords.


When you track down your old accounts, change each one to have a strong and unique password. Doing so will ensure your accounts are secure against not just credential stuffing attacks but other types of account breaches, password fraud, and more.

So take a minute to search your inbox for a Roku password reset email, and if it’s there, take action to stay safe!

8 Great Projects Apple Killed Like Its Electric Car

Quick Links

The Apple Car is one of the highest-profile projects Apple failed to complete, but it’s far from the only one. Here, we’ll take a trip down memory lane and revisit Apple’s canceled projects and other products that didn’t make the market.


1 AirPower

AirPower is perhaps the biggest announced Apple product that never reached store shelves. In September 2017, Apple initially made its intentions clear to launch a one-of-a-kind wireless charging mat that would let users charge an iPhone, Apple Watch, and AirPods simultaneously, but the road to release was rough.

Apple faced challenges meeting its hardware standards, as reported by TechCrunch, and the company officially canceled the product in 2019 after multiple delays.


Although AirPower failed to enter the market, you can still buy three-in-one wireless chargers for these devices on Amazon. And if you’re interested in cable-free charging, you may want to check out some of the best MagSafe chargers for your iPhone.

2 PenLite

An image of a prototype for Apple's PenLite
Marcin Wichary/Wikimedia Commons

The iPad product line is one of Apple’s greatest success stories, but the company was experimenting with tablets long before it released one. PenLite is an early example of what was soon to come, as Apple created prototypes for this product in 1992.

The tablet featured a touchscreen that you could navigate with a pencil, bearing some resemblance to the iPad and Apple Pencil. Compared to the early iPads, the PenLite had chunky bezels around its screen. The screen size was nine inches, but it would have been grayscale, unlike the iPad.


Apple canceled PenLite in 1993, but later that year, it released touchscreen products via the Apple Newton project that failed miserably.

3 The Bashful Tablet

Another early example of Apple’s desire to create high-end tablets was Bashful, which the company began conceptualizing around a decade before the PenLite and subsequent Newton project. This 1983 concept was developed by Frog Design, but as reported by Engadget and other publications, the tablet design only surfaced in 2010.

Wired gathered some images of what the tablet would have looked like. Compared to modern iPads, the Bashful tablet would have looked more like a computer and was also a lot thicker. Bashful got its name from the Snow White character, and Apple used Snow White design—also brought to life by Frog Design—on the computers that it released between 1984 and 1990.


While the tablet never saw the light of day, it does help us understand how Apple developed the concept of the iPad over time.

4 Apple Interactive Television Box

One can argue that Apple’s TV ventures aren’t as well-known as the MacBook, iPad, iPhone, or Apple Watch. But the company has been involved in this space for a while, and the Apple Interactive Television Box (AITB) is one example of that.

Apple began testing the AITB in the 1990s and experimented with both the European and US markets. The company also worked with Belgian communications company Proximus (then known as Belgacom), along with Verizon (then known as Bell Atlantic) and other global communications companies, to conceptualize and create the box.


Had it been released, users would’ve been able to access a broad access of TV shows after connecting the box to the TV. The project was disbanded despite rolling out to selected households in the US and Europe in 1994 and 1995.

While Apple didn’t fully release the AITB, the project paved the way for Apple TV—the streaming device, that is. If you’re confused by these product names, it’s worth learning the difference between Apple TV, Apple TV+, and the Apple TV app.

5 Magic Charger

While AirPower was one of the clearest examples of Apple experimenting with wireless charging before bringing MagSafe to iPhones, it might not have been the only one. In November 2022, some users posted on X (formerly Twitter) a photo of what looked like an unreleased charger for Apple devices.


The charger in these images has a platform that you can lift, and as mentioned by The Verge, it seems like this charger can only power an iPhone. That’s no match for some great 3-in-1 charging stations for Apple devices, so we’re not surprised that it didn’t enter mass production.

6 The Jonathan Computer

Apple revolutionized the computer landscape; one reason this was possible is because the company experimented with multiple prototypes throughout the years. The Jonathan computer is one of those, and Stories of Apple covered it in detail.

The idea behind the Jonathan computer was that you could continuously upgrade your computer’s operating systems in multiple ways. The computer itself is a thing of beauty, but we’re not sure whether the proposed functionalities would have worked in a practical sense.


Apple decided not to move forward with the project for several reasons, with profitability being a big factor. However, the company incorporated some of the designs in future projects, so it wasn’t a complete waste of time.

7 Copland

Copland was perhaps Apple’s most famous never-released software project. The company started working on the concept after it had scaling issues with Mac OS at the time.

Gershwin would have eventually replaced Copland had things gone according to plan. Copland was also supposed to be the gateway for unique new features like multitasking.

Besides scaling, Apple also had trouble competing with Microsoft’s Windows at the time. As reported by Cult of Mac, many people felt like the gap between Windows 95 and Mac OS System 7 wasn’t as big as with previous software versions.


Despite over a year of significant testing, Copland never saw the light of day, as Apple abandoned it along with the Gershwin project in 1996. Instead, the company released Mac OS 8 in 1997 and transitioned to a more scalable solution with Mac OS X in 2001.

8 Apple Paladin

An image of the Apple Paladin computer, fax machine, and telephone
Jim Abeles/Flickr

Apple experimented with all-in-one devices well before it introduced the original iMac in 1998. Apple Paladin was one of these, and the prototype was mainly aimed at businesses rather than consumers.

Paladin featured a computer and fax machine as part of the same device, in addition to a telephone. Had it been released, workers would have been able to organize everything from the same place—it would’ve been particularly useful for receptionists.


Despite its promise, the Paladin never officially made it to the market. We imagine fitting three systems into one posed a significant challenge for Apple.

All of these projects highlight the importance of failing if you want to succeed, and they also demonstrate Apple’s innovative nature. Many of the abandoned launches and concepts, such as Apple’s tablets, paved the way for future releases. So even if they never made it to the market, they’re still a core part of the company’s history.

How to Identify AI-Made Music: 3 Tools

Quick Links

Key Takeaways

  • AI music has evolved over multiple decades, with tools like free music AI generators making it accessible.
  • It’s tricky to identify AI-made music without apps, but inconsistencies like robotic voices may indicate AI involvement.
  • Tools like AI Voice Detector, PlayHT, and TimeStretch are efficient ways to detect AI-generated music for varying fees or free.


You may have heard “Heart on My Sleeve”, the AI song that featured generated voices of Drake and The Weeknd. And with that in mind, you may also be wondering how you can identify AI-generated music. Here are some tools that can help.


How Has AI Music Evolved?

Artificial intelligence has been around for decades, and we can actually trace its uses in music back to the 20th century. In more recent years, and as reported by the BBC, we’ve seen Iamus—a computer developed at Málaga University in Spain—become capable of generating classical tracks with minimal effort.

Whereas AI in music was often much less accessible to the masses, that is no longer the case. These days, you can use several apps—including a number of free music AI generators—to create your own tracks in little to no time. As machines have become smarter, users have also gained the ability to include several voice styles in their songs.


Is There Any Way I Can Detect AI-Made Music Without Apps?

Spotting AI-generated music without technological assistance is very difficult. Nonetheless, you can try a couple of things to determine whether a person sings your track or not. For example, you can try changing the speed of the track; the voices in AI-generated songs are sometimes inconsistent when you speed up or slow down what you’re listening to.

Even at a regular speed, AI-generated music sometimes has consistencies in sounds and speeds. For example, voices can sound robotic or randomly break where a normal person’s would not. However, it’s worth noting that while this could be a sign of AI-generated music, it might also stem from editing glitches.

Nowadays, music streaming services are also utilizing tools to identify AI-made music. For example, Deezer announced in June 2023 that it was working on tracking features that would help in this respect. So, if you suspect that others are copying your voice or music with AI, you often won’t need to do much (but you should still report a song if you suspect that happens to you).


If you want to identify AI-made music more efficiently, you can use one of many tools. Some are designed specifically to discover AI-generated music, whereas others will help you identify multiple kinds of audio.

Below is a list of our favorite AI music and audio identifiers.

1. Identify Fake Voices and AI-Generated Music With AI Voice Detector

AI Voice Detector is one of the most powerful tools on the market for identifying AI-generated voices, and it’s an ideal option if you want to quickly find out whether a song was created using AI or not. You can go directly to the AI Voice Detector website, but it’s also possible to download a browser extension if you need quicker and more frequent access to the tool.

If you want to use AI Voice Detector, you’ll need to pay a subscription fee. Month-to-month subscriptions cost $24.99/mo. If you’d prefer to pay annually, you’ll need to pay $200/yr instead. When you sign up, you can upload files in multiple formats and enjoy several other benefits.


To use AI Voice Detector:

  1. Sign up for an account.
    The Sign-up page for AI Voice Detector

  2. Go to the AI Voice Detector homepage. Browse for the audio file you want to examine.
    The Voice Detection Page on AI Voice Detector

  3. Select Detect Voice and wait for AI Voice Detector to determine whether the track is AI-generated or not.

If you want to find AI-generated music, you can check out these top places to find music made by AI.

2. Use PlayHT to Identify Whether a Song Was Made by a Person

PlayHT primarily specializes in helping users generate AI content, but it also has a handy tool that can help you determine if a voice recording is real or not. With PlayHT’s AI voice detection feature, you can examine files in MP3, WAV, or FLAC. To do so, simply go to the website and drag and drop your audio file. Alternatively, select Upload a file.


Detect AI-Generated Content With PlayHT

You can use PlayHT’s detection tool for free. Files normally don’t take too long to download, and you’ll see whether your track was generated by AI or not once PlayHT has scanned your content.

If you want to find out whether pictures were generated by AI or not, you’ll need to use a separate set of tools. You might want to check out this guide on how to identify an AI-generated image.

3. Check for Inconsistencies in Songs With TimeStretch

Since there isn’t a huge number of tools publicly available to detect AI-generated music, you may need to think outside the box a little. Since you can sometimes check to see if music was generated by AI by changing the speed of your song, TimeStretch offers a potential route to discover whether a track was made by a person or not.


When using TimeStretch, you can easily change the speed via a dial in the bottom left-hand corner. Moreover, you have the option to adjust a song’s pitch and tune. Again, all you need to do is move these dials to the left or right.

TimeStretch is completely free to use. Here’s how to use the tool:

  1. Drag and drop your track into TimeStretch after going to the website.
  2. Adjust the speed slider and anything else you feel is necessary.
    Search for inconsistencies in your music with the TimeStretch app

  3. Press the Play button to hear your track. You can then determine whether your song was developed by AI or not.

Considering that AI is still very new, it’s not surprising that discovering whether a song was developed using the technology is so difficult. It’ll almost certainly become much easier in years to come; in addition to more tools becoming available, music streaming platforms will also become more advanced at tracking these songs. However, these options are a good place to start.

Has Windows Subsystem for Linux Helped Linux Gain Desktop Market Share?

Since desktop Linux has existed, fans and detractors alike have either hoped for or laughed about the “year of the Linux desktop.” Now it seems that desktop Linux is starting to slowly gain market share, but why?


Do we have Microsoft and the Windows Subsystem for Linux to thank for introducing Linux to more people and getting them interested in it? Is Microsoft creating its own competition?


Desktop Linux Is (Finally) Gaining Market Share

While many people assumed the year of the Linux desktop is far away and may never come, the little operating system that could has gotten closer than ever before.

While it still has a long way to go, Linux reached a desktop market share of 4% at the end of February 2024. This is the biggest slice of the pie that the operating system has ever had.

Of course, while this pales in comparison to Windows, it does raise the question of why. There are plenty of reasons why Linux could catch up to Windows, at least theoretically, but these new users have to come from somewhere.

It’s unlikely that people completely new to computers are choosing a Linux install as their first foray into computing, and hopping between different Linux distributions wouldn’t count. So the answer must lie elsewhere.


Do We Have Microsoft to Thank for This Linux Boost?

2016 was when Microsoft first launched the Windows Subsystem for Linux. But at launch, it wasn’t particularly easy to use and it had some usability issues. While some people (like myself) dove in right away, it wasn’t until the launch of WSL 2 that the use of Linux on Windows became popular. This made it simple to run Linux commands on Windows.

Windows 10 and 11 make it incredibly easy to start using Linux on your Windows computer. Sure, it takes a bit of work to get started with WSL—but once you’ve done the background work, it’s easy.

All you need to do to install a new Linux distribution is search for it in the Windows Store. If the distribution you’re looking for can’t be found there, chances are pretty good you’ll find instructions on how to install it online. While there are other ways to get similar Linux features on Windows, they’re much more fiddly.


With this ease of sampling different varieties of Linux, it’s easy to see how those who end up liking Linux could want to go to the next step and install it on their computer in the traditional sense.

Is WSL Actually the Linux Desktop We Need?

The final question is, if some of these new Linux users are coming from Windows, how many will stick around? One of the biggest problems with Linux has always been software compatibility, and that’s still an issue. Even though more games than ever run on Linux, there are still plenty that only run on Windows.

For many people, the Windows Subsystem for Linux is the final evolution of Linux on the desktop. Not without irony, but still the much easier option for the vast majority of people.

What Is Photo AI, and How Do You Use It?

Key Takeaways

  • Photo AI allows users to generate portrait-style images with customizable features and backgrounds.
  • Choose from different AI characters or upload your own images.
  • Users can customize character features, styles, and settings, copy prompts, and download images easily.


Learn how to create intriguing AI-generated images with the Photo AI app. You’ll find out how to design your character and generate prompts, along with some tips to help you enhance your results. We’ll also cover pricing and more.


What Is Photo AI?

Photo AI is a tool that lets you generate portrait-style images using various prompts. You can customize your background, in addition to the clothes that your character wears and much more. You have the option to pick from different pre-existing characters, but you can also upload images of yourself if you would prefer.

Photo AI was launched in late 2022 by Pieter Levels, a Dutch digital entrepreneur who also founded Nomad List (we’ve got a full guide on what Nomad List is if you want to check that out as well). In addition to using the desktop version, Photo AI also has an iOS app that’s available for download.

Download: Photo AI for iOS (Free, in-app purchases available)


Is Photo AI Free?

To use Photo AI, you need to purchase a monthly or annual subscription. Prices begin at $29 per month and $390 per year for Photo AI Pro— the least expensive plan. You can also get Premium ($99/mo and $990/yr), and Business ($299/mo and $2,990/yr).

Photo AI Pro will be more than enough for most users, especially if you’re just using the app for fun. The main difference between each plan is that you get bigger allowances with Premium and Business. Below is a rundown of what you get with each subscription:

Photo AI Pro Photo AI Premium Photo AI Business
Create up to 5 AI characters per month Create up to 25 AI characters per month Create up to 100 AI characters per month
1,000-photo limit 5,000-photo limit 25,000-photo limit

If you don’t have the money to spend on an app, you can check out these free AI art generators instead.

What Can You Do With Photo AI?

You can mainly use Photo AI for generating portraits, whether that’s of yourself or a fictional character. One of the app’s biggest advantages is that you have several customization options, such as generating photos in many parts of the world. On top of that, you can select different packages if you’d prefer to keep your image style consistent.


Photo AI also lets you customize your character’s hairstyle and design images for different social media networks, such as Instagram. Moreover, you can use settings like speaking on stage and corporate headshots.

To make generating your photos easier, Photo AI also lets you copy and paste prompts. These are especially useful if you want to experiment with different ideas before you go ahead with your main creation.

How to Generate Images With Photo AI

Now that we’ve covered the basics of what Photo AI is, let’s look at how you can generate images using the app. We’ll show you the main steps and also walk you through some of the other essential features that you’ll find when using Photo AI.

Step 1: Create Your Character in Photo AI

The first step to generating your images in Photo AI is to create your character. If you want to include yourself in photos, you can upload pictures of yourself. The process takes just under 40 minutes on average, and you’ll see an option called Create your first AI character after signing up.


Alternatively, you can pick from one of the many characters available by following these steps:

  1. Scroll down on the left-hand side and navigate to Select character.
    Pick an AI character in the Photo AI app

  2. Choose your character from the list of options available. For this tutorial, we’re going to choose the AI character named Chris.

Even if you’re a photographer, you can still use tools like Photo AI to help you conceptualize and create. We’ve got a full guide on how photographers can use AI if you don’t know where to start.

Step 2: Choose Your Basic Photo AI Parameters

After picking your character or uploading images of yourself, you’re ready to start creating your images in Photo AI. First, you’ll need to set some basic parameters:

  • The number of photos you want to create (choose between one and 16 images)
  • Whether you want portrait, square or landscape images
  • Faceswap features
  • Whether you want to use the Final Upscaler feature


To access all of these, scroll down to Parameters and adjust your settings however you feel is necessary. For this demonstration, we’re going to pick eight images in portrait mode and see what we get.

Choose your different parameters in the Photo AI app

Step 3: Insert Your Prompts in Photo AI

After setting your initial parameters, you’re ready to move on to the fun parts of creating an image with Photo AI. First, scroll down to Prompt and enter exactly what you want to see in your pictures. The more detail you can give, the better; explain the clothes you want the model to wear, along with where you want them to be, and so on.

Write a prompt in the Photo AI app


You should also use the Negative Prompt section to explain what you don’t want. Think of the things that could potentially go wrong and put them here.

Photo AI enter a negative prompt to change parts of your image

If you don’t know where to start, you can always copy and paste one of the many prompts already in Photo AI. You’ll see an example image for each of them, meaning that it won’t be too hard to see what you’ll potentially get. Simply go to the Prompts tab and hover over an image you like, before selecting Copy Prompt.

Copy a prompt in the Photo AI app


The Results of Our Experiment in Photo AI

As you can see, the images we got in Photo AI had both positives and negatives. In many of the pictures where the model’s hands are visible, the hands weren’t generated properly.

Results from a photoshoot generated by Photo AI

The architecture in some of the pictures did not match what we asked for. For example, the wooden green building in the second picture is more typical of Norway or the Faroe Islands than the part of Copenhagen we asked Photo AI to generate. I also asked for sunny weather, but the images were all overcast.

We also noticed that while the tool took pictures in a turtleneck, it didn’t do so in the color that we requested. Nonetheless, the pictures where the model had his hands in his pockets actually came out quite well. Moreover, the focal length is close to what we asked for.


Consider Using Photo AI’s Copycat Feature

If you want your pictures to be more accurate, you should consider using the Copycat feature in Photo AI. Here, you can upload an image that you want to mimic in some way, shape, or form. You’ll find this option in the Copycat section on the left-hand side.

The Copycat section in the Photo AI app

To ensure that Photo AI knows what you want to mimic, fill out the text in the What to Copycat section.

The What to Copycat section in the Photo AI app

How to Download Your Images From Photo AI

Once you’ve created images in Photo AI that you’re happy with, downloading them is easy:

  1. Go to Camera and hover your cursor over the picture you want to download.
    Download images from the Photo AI app

  2. Click on the Download button. Your image will then be downloaded onto your computer.


If you want to view your pictures fully before downloading them, simply click once to expand the photo.

Photo AI offers you the chance to create interesting photos of virtual characters or even of yourself. The more prompts you give, the better your final results will be. Now that you’ve read this guide, consider trying out the app and seeing what you can create.

What Should You Do Now?

Key Takeaways

  • Microsoft will support Windows Subsystem for Android until March 5, 2025; you’ll need to find a replacement by then.
  • Amazon Appstore app installations stopped working on March 6, 2024.
  • As an alternative, Bluestacks allows playing Android games on Windows.


The ability to run Android apps through the Amazon Appstore, officially known as the Windows Subsystem for Android, was one of Windows 11’s launch features. However, Microsoft has announced that this feature is going away. What should you do if you use Android apps on Windows?


How Long Do Android Apps on Windows Have Support?

Microsoft announced that it will support Windows Subsystem for Android until March, 5, 2025. This should presumably give anyone using Android apps about a year from the announcement to find a replacement. March 6, 2024 was the last date to install new apps from the Amazon Appstore.

Microsoft guarantees on its website that current users will be able to download Android apps until the end of life. After that, the company will no longer offer technical support for Android apps.


Who Was Windows Subsystem for Android For?

Microsoft hasn’t explained exactly why it’s discontinuing support for Windows Subsystem for Android, but it seems likely that it’s due to the company’s change in focus for Windows 11. Microsoft is now emphasizing AI features such as Copilot over the ability to run Android apps.

The other main reason is likely that Android apps on Windows didn’t seem to attract a critical mass of users to justify continued support. In contrast to Chromebooks, where Google Play apps can significantly extend the device’s functionality by offering greater capabilities beyond web apps, there didn’t seem to be a compelling reason to install them on Windows.

There are already plenty of native Windows apps, and the Amazon Appstore’s selection is limited compared to Google Play.

You Can Still Play Android Games on Windows With Bluestacks

Bluestacks homepage


If you use any Android apps on Windows, your best bet is to find a replacement before the 2025 deadline. This will likely mean finding a native Windows app or a web app.

One possible exception is games. While many popular mobile games have Windows ports available through the Microsoft Store, Bluestacks offers the ability to play Android games on Windows machines. Google is also currently testing a Windows version of its Play store, perhaps sensing an opportunity now that Microsoft and Amazon are vacating this space.

How to Make Music From a Text Prompt Using Suno AI

Key Takeaways

  • Suno AI creates music based on text prompts, simplifying music production without complex skills or equipment.
  • Use Suno to create song segments, provide metatags to guide the AI, and continue the song with the Continuation feature.
  • Finish the song in Suno by providing outro lyrics, use Suno’s metatags like “[silence]” for the final segment, and download the full song.


If you listen to music a lot, chances are you’ve considered creating your own music at some point. However, in the traditional sense, bringing your creative ideas to life requires a lot of skill and equipment. With Suno AI, you don’t need to worry about that anymore.


What Is Suno AI, and What Can You Do With It?

Suno AI is a revolutionary tool created by a group of musicians and AI experts to eliminate the barrier between creativity and music production. The ultimate aim of this tool is to enable anyone to create music simply by imagining it, without having to learn music theory, play an instrument, and master a digital audio workstation.

Suno generates music based on text prompts. You describe the genre, vibe, instruments, and theme of your song and Suno generates two audio segments, usually including vocals. Aside from the web app, you can use Suno through Microsoft Copilot or as a Discord bot.


On the surface, that’s all there is to Suno. If you were looking for a brief audio segment, your journey ends here once you download the piece and share it. However, if you’re serious about using AI to make a full song, there’s much more you can do with Suno. The track below is about a specific video game character, and believe it or not, it was fully made with Suno AI.

Intrigued? Get started by signing up for the Suno AI web app. Once you are logged in, you’ll receive 50 free daily credits. You can get more credits by subscribing to a paid plan, starting from $8 monthly. Now, let’s make a full-length song with AI!


1. Come Up With an Outline For Your Song

First things first, you need to pinpoint what you want to make. This is all the more important since you’ll be using credits for each generation, so it’s best if you don’t waste them. Suno AI works best with lyrics, so the lyrics are going to be the main factor determining the song’s structure.

You can use ChatGPT or alternative AI chatbots to help you out here. Here’s how I used ChatGPT to come up with an outline for my song:

Generating lyrics with ChatGPT

I was happy with what ChatGPT gave me, so I kept it as it was. You can always ask it to make modifications to its response. Using prompting techniques can greatly improve your ChatGPT experience.


2. Make the First Segment of the Song in Suno

Now that the creative process is out of the way, it’s time to put Suno to use. Open the web app and go to the Create tab, where you’ll see a text box and a Create button. You can input a description of the song here to quickly generate two segments.

Create page in Suno AI

What we’re interested in is the Custom Mode toggle. Once you flip the toggle, the text box will change, and you can enter your own lyrics.

Custom Mode in Suno AI


The same Lyrics box is where you’ll instruct Suno on musical queues. You can use metatags to do this; a description is available on the Suno website. Basically, metatags are lines in the prompt put in parentheses or brackets that guide Suno on what sounds to make.

Metatags are important in making Suno work as desired but can also confuse it. Results aren’t reliable or reproducible, so sometimes you’ll just have to do your best at writing the prompt and hope for the best.

Creating a song in Suno AI

So, put in the lyrics, the title, and the style, and click Create. Two tasks will appear on the right-hand side of the screen, and Suno will start generating the song segments, along with an AI-generated cover.

Once the segments are ready, have a listen and see whether you like them. More often than not, the output feels like it’s the middle of a song or isn’t relevant to the prompt you entered. In such cases, click Create again (maybe with some modifications to the prompt) until you get a good starting segment.


The v2 model of Suno AI (Basic plan) can generate a maximum of 80 seconds of music. This is too brief to be a full song, but the continuation feature allows you to build upon and extend segments. We’ll cover this later in the article.

Oddly enough, in my case, leaving Style of Music blank finally gave me the vibe I wanted. Here’s the prompt I used:

I got a 20-second clip that sounded amazing. It ignored the [Drum Solo] metatag, but the track as a whole was great. This provided a solid foundation to build the rest of the song. The next segments won’t be as random since you’ll build them on this one.


Suno can be both wonderful and frustrating. To put that into perspective, above is the other segment generated from those exact prompts. It’s an 80-second track in an entirely different genre and doesn’t even sing the words in the prompt.

3. Continue the Song in Suno After the Initial Prompts

The rest of the process is relatively easy once you get the first segment down. This is because Suno will have a better understanding of what you’re looking for, and the outputs will be less random. Continuation is one of Suno’s best features, as it seamlessly generates the rest of the track.

Continuing a song in Suno AI


To continue a segment, click the three dots next to its name and then choose Continue From This Song. This will add the song to the prompt. Add the lyrics for the next part, and then click Create. To avoid any confusion, it’s best not to alter the style and title.

Here’s the prompt I used for the second segment:

Suno’s output was very impressive this time. The segment seamlessly continued from the previous one and had a very satisfying bass build-up.


From here, it’s a matter of continuing the song and changing the prompt. For the next prompt, I simply added a single metatag.

The output was fantastic. The more you give Suno to work with, the better it delivers.

4. Finish the Song in Suno

All good things must come to an end. However, finishing a song with Suno can be just as frustrating as starting it. In most cases, giving it outro lyrics will end up starting a new beat. After playing around with the prompts, I found this prompt to work best:


The beat and the excitement simmered down as the prompt had asked, but Suno still left the song unfinished. For the next segment, I input only the outro metatag:


This didn’t end the song either, but it created a very elaborate bass outro, which was a nice addition to the song. At this point, you could use any free audio editor to fade out the segment by yourself and finish the song. But if you insist on doing it all in Suno like me, here’s a prompt that worked. For the final segment, I used the metatag below:

And finally, Suno gradually removed instruments until the song faded to nothing. A perfect finish.

5. How to Download the Full Song in Suno

Although in bits and pieces, you now have your AI-generated song. Thankfully, Suno can detect which parts go together and give you the full length as an MP3 file. Click the three dots next to the final part of the song and select Get Whole Song. This will open a download page for an MP3 file.


Getting the whole song in Suno

Once you’ve downloaded it you can share it on Soundcloud or any other platform you like. If you used a premium Suno subscription to generate the song, you can even sell your music online, as stated in the Suno FAQs.

While Suno isn’t perfect and can sometimes generate irrelevant tracks, it’s still a powerful tool capable of producing full-length songs. Whether you’re an aspiring musician or just looking to experiment, Suno AI is definitely worth trying.

How to Avoid Scams When Riding With Uber

Quick Links

Key Takeaways

  • Most Uber journeys are trouble-free, and most Uber drivers are well-meaning, but you still need to consider scams on the app.
  • Common Uber scams include fake cleaning fees and inflated journey times.
  • You can report scams to Uber, but understanding how to avoid them in the first place is a much better tactic.


Grabbing an Uber? It’s one of the most popular forms of transport in cities worldwide, but it’s not without issues. Uber’s common issues include fake cleaning fees, inflated journey times, and more, but you can avoid becoming a victim of these Uber scams.


What Are the Most Common Uber Scams?

Several scams can occur when you ride with Uber, from longer trip durations to incorrect payment methods.

1. Your Uber Driver Scams You With Fake Cleaning Fees

You usually won’t pay a cleaning fee when riding with Uber unless you do something obvious, such as dropping greasy food on a seat. However, in rare situations, some ill-intentioned Uber drivers may scam you with a fake cleaning fee.

As reported by Newsweek, in 2023, a woman accused her driver of falsely charging her a $150 cleaning fee. After discovering that the image Uber sent her was from Google Images, she was refunded. Other users have complained about falling victim to this scam on social media platforms like Reddit.

2. Drivers Not Ending the Trip After They Drop You Off

Uber drivers are supposed to end your trip after dropping you off, but some riders have experienced situations where that didn’t happen. As a result, the trip cost much more than it should have.


Sometimes, getting a refund can be very difficult when this kind of scam occurs. So, it’s much better to avoid the problem altogether.

To maximize your experience riding with Uber, you may also be interested in checking out Uber’s different ride options. That way, you can arrive at your destination in total comfort.

3. Your Driver Scams You by Needlessly Increasing the Trip Duration

This type of Uber scam is closely linked to the one we previously mentioned, but the main difference is that the driver deliberately takes a longer route. Instead of going whichever way is the most efficient, your driver might—for example—take you around a city via multiple unnecessary backstreets.

If you need to change your route, the Uber driver should first consult you. The same goes for any taxi ride you take (this scam can impact any taxi-style transport provider).

4. Your Uber Driver Asks You to Pay in Cash When You Didn’t Choose to

Cash is one of the many ways to pay for your Uber ride. However, another scam to look out for is your driver asking you to pay with cash—even when you’ve already picked a different method in the app.


You are not obligated to pay in cash unless you choose that payment method. Similarly, your driver should not try to use tactics like getting aggressive to make you pay.

5. A Different Uber Driver Picks You Up

When you book an Uber ride, the person you see in the app should pick you up. But in some cases, users have experienced problems where a different person is driving the car that arrives.

In these circumstances, you should refuse to get in the car. It’s a potential scam and could also put you in unnecessary danger. You must verify your driver in advance to stay safe, and you can use other methods to improve your safety when riding with Uber.

How to Avoid Scams When Riding With Uber

Now that you know about some of the most common Uber ride scams, let’s examine the steps you can take to avoid them.

1. Check Driver Reviews Before You Confirm Your Booking

When you book a ride with Uber, you can confirm whether you feel comfortable choosing a driver by checking their reviews. It’s a straightforward process.

  1. Submit your Uber journey.
  2. Look for the driver’s star rating/profile picture and tap on this.
  3. Check through the reviews and ensure you’re happy with your chosen driver.


If you’re happy with your driver, you don’t need to do anything else. If you aren’t, you can cancel the ride.

2. Use Uber’s Trip Verification Feature

Uber has a tool that lets you verify your trip to ensure the right driver is picking you up. Once you’ve activated it, you can enter a PIN code to confirm that you’re getting into the right car. You can activate this feature in your settings:

  1. Open the Uber app and go to Account > Settings.
  2. Scroll down to Safety and select Verify your trip.
  3. Switch the toggle next to Use PIN to verify trips on.
  4. If you want to enable PIN for night rides only, toggle Night-time only on too. After you’ve made your preferred decision, select Done.


When your Uber ride arrives, verify with the driver that it’s intended for you by asking, “Is this for [your name]?”

If you get scammed on Uber or elsewhere, you should follow these steps after falling victim to an online scam.

3. Choose the Right Payment Method

To ensure that you only pay what you’re supposed to, you must pick the right payment method when riding with Uber. You can pick how you want to pay each time you confirm a ride:

  1. Book a ride with Uber by entering your destination and confirming your current location.
  2. On the next page, choose how you want to pay. If you need to add a card, you can do so by selecting the Add payment method.
  3. Continue through the on-screen instructions and wait for your driver to arrive.


4. Report Scams as Soon as Possible

Following these tips should drastically reduce the danger of falling victim to scams when riding with Uber. But in some cases, you could still be unfortunate enough to meet the wrong driver.

If you get scammed, you must report them as soon as possible. Doing so will protect other riders and ensure that Uber can do something about the offending driver. Here’s how to report scams and other issues:

  1. Open the Uber app and go to Activity before selecting the ride you want to report.
  2. Scroll down to help and select Report safety issue before following the on-screen instructions and reporting what happened. It’s a good idea to provide evidence where possible.


While most Uber drivers are trustworthy, and you’ll almost never encounter problems, you should still know how to avoid Uber scams!

How to Turn an Old Router Into a Wireless Bridge

Key Takeaways

  • Turn your old router into a wireless bridge using OpenWrt to save money and time.
  • Install OpenWrt firmware on your router to convert it into a wireless bridge, enabling you to connect more devices across your network.
  • Configure LAN and Wi-Fi interfaces on your old router to bridge them together wirelessly.


Looking for a way to connect your Ethernet devices without wiring your house with long cables? You can turn an old router into a wireless bridge and solve your problem.


What Is a Wireless Bridge?

A wireless bridge is a connection type where you join two or more local area networks (LAN) wirelessly. By combining two networks together through a wireless bridge, you essentially make one larger network where all devices are connected and have access to the internet.

The benefit of using this type of connection is that you save money and time by using Wi-Fi instead of buying and installing long Ethernet cables.

Turn Your Old Router Into a Wireless Bridge Using OpenWrt

Wireless bridge devices can be pretty expensive. But if you only need to connect networks within a building, then setting up an old router as a wireless bridge should suffice, and it takes just a few steps:


  1. Flash OpenWrt (an open-source router firmware that adds extra functions) on an old router.
  2. Set up a Wi-Fi interface that connects to the main router and a LAN interface that connects to our Ethernet devices.
  3. Bridge the Wi-Fi and LAN interfaces together, which connect our Ethernet devices to the main router, its internet access, and all the other devices within its network.

To turn an old router into a wireless bridge, you’ll need the following hardware:

  • A broadband internet connection
  • Two Ethernet cables
  • Two Wi-Fi routers (One connected to the internet and the other as your wireless bridge device)
  • A computer with an Ethernet port

The Initial Wireless Bridge Setup

Hardware set up illustration

  1. Make sure your internet connection is working.
  2. Select the proper Ethernet cable and connect your main router (the one connected to the internet) to your old router. This will provide your old router access to the internet to download firmware.
  3. Connect your computer to your old router via Ethernet.
  4. Turn off your computer’s Wi-Fi to ensure it’s only connected to the old router.
  5. Open your browser and connect to the old router’s web configuration page. If you’re not sure, check the default gateway address. To find the default gateway:
    • On Windows, open the Command Prompt and enter ipconfig
    • On macOS or Linux, open the Terminal and input ifconfig


The default gateway will be labeled as such on each operating system.

Download OpenWrt Firmware

  1. Go to openwrt.org
  2. If you know the exact unit and version of your router, scroll down the website and look for Download a firmware image for your device (firmware selector). Now, search for your device using the search bar. But if you’re unsure what version you have, go to the Download a firmware image for your device (Table of Hardware) and scroll through the list until you find your specific device.
    • If your router has multiple versions, open each link under the Device Page column and verify that the Hardware Highlight section and pictures match the hardware equipped on your router.
  3. Download both the kernel and upgrade BIN files.

Take note that routers often have different versions using slightly different hardware. Make sure to download the proper firmware of your router and its specific version.

Install OpenWrt on Your Router

OpenWrt supports thousands of devices from different manufacturers. Due to the difference in hardware and firmware, you must follow OpenWrt’s guide to install the OpenWrt firmware on your specific device.


Generally, supported devices from popular manufacturers like Linksys, D-Link, TP-Link, and NetGear will have an easier time installing firmware. Other devices like Xiaomi and BT may require extra tools like OpenWrtInvastion or even access the bootloader using different serial communication protocols like UART and JTAG.

If your router is supported by OpenWrt, a guide will be provided on its website. Make sure to follow only the guide corresponding to the device and its specific version, and don’t forget to upgrade your kernel when available.

Tinkering with your device’s bootloader may brick your router or put it into a bootloop. Read the instructions carefully and reassess your steps, or ask the OpenWrt community when something doesn’t align with the guide. If you brick your device, unbricking instructions can often be found past the installing and upgrading sections of the guide.

Once you’ve installed OpenWrt on your old router, it’s time to configure your device into a wireless bridge.

Configure the Wireless Bridge

Step 1: Download Luci-Proto-Relay

Luci-proto-relay is installable software for OpenWrt devices. It allows the router to use the relay bridge protocol, which is essential for bridging our LAN and Wi-Fi interfaces.


  1. Before downloading the software, update the system data settings to ensure you don’t get any SSL errors. On the top toolbar, go to System > System, then click on Sync with browser, then Save & Apply.
  2. Now go to System > Software and click on Update list. Once updated, search luci-proto-relay and hit Install.
    Installing luci-proto-relay software

  3. Next, reboot the router by going to System > Reboot and clicking on Reboot system.

This ensures that the software is properly installed and available when needed later.

Step 2: Configure LAN Interface

Since we want our main router to provide all our devices’ IP addresses, it’s time to configure the old router to disable DCHP.

  1. To disable DCHP on the old router, go to Network and select Interface. Select the LAN interface and hit Edit.
    Set up LAN interface

  2. In General Settings, make sure to set Protocol as Static address.
    Set IP address as static

  3. Go to DCHP Server, tick the Ignore interface box, and hit Save.

Step 3: Configure Wi-Fi Interface

Let’s now configure our Wi-Fi interface to receive data from the main router.

  1. Go to Network > Wireless and click Scan on radio, then hit Join Network on your main router’s Wi-Fi access point.
    Select and join to your Wi-Fi network

  2. On the pop-up menu, enter your main router’s Wi-Fi password on WPA passphrase and set Assign firewall-zone to lan.
    Enter your Wi-Fi password

  3. Once you hit Submit, a Device Configuration menu will pop up. Set your Operating Frequency as the same frequency as your main router’s Wi-Fi access point.
    Configure Wi-Fi interface


If you’re not sure of your device’s operating frequency, you can select Auto and leave everything as default before hitting Save.

Step 4: Bridge Wi-Fi Interface and LAN Interface

Now that we have set up our Wi-Fi and LAN interfaces, we can now bridge them together to create a wireless bridge.

  1. To set up the wireless bridge, navigate to Network > Interface and click on Add new interface.
    Create wireless bridge interface

  2. Now provide a name for the wireless bridge and select Relay bridge as Protocol and hit Create interface. If you can’t find the Relay bridge protocol, check if you’ve installed the luci-proto-relay software and make sure to reboot your old router.
    Create wireless bridge

  3. A general settings menu will pop up once you create the interface. To connect both interfaces, you’ll want to select both lan and wwan within the Relay between networks setting, then click Save.
    Connect LAN to the Wi-Fi interface

  4. Now let’s ensure that both networks are assigned within the same firewall-zone. Select the Firewall Settings section in the toolbar and select lan and wwan within Assign firewall-zone, then click Save.
    Add both Lan and Wi-Fi in the same firewall zone

  5. Now hit Save & Apply. Once settings have been applied, you’ll be disconnected from the OpenWrt’s Luci web interface. This is normal. Since your old router is now a wireless bridge using the default gateway of your main router, you can no longer access your old router’s web configuration page.


You can now unplug the Ethernet cable connecting the main and the old router since they are already connected wirelessly.

Congratulations! You now have a wireless bridge.

How to Use AirTags: A Complete Guide

Key Takeaways

  • You’ll need an iPhone or iPad to set up your AirTag for the first time. The process is similar to setting up AirPods.
  • You can use the Find My app on your iPhone, iPad, or Mac to locate or control your AirTags. Apple Watch users can use the Find Items app instead.
  • The Precision Finding feature helps you pinpoint the location of a missing AirTag that’s nearby with visual and audio cues.


Apple’s AirTags can help you keep tabs on almost any of your belongings. If you recently bought one and you’re not sure where to start, read on, as we’ll help you set up your AirTag with your iPhone and make the most of it.


What Is an AirTag?

Brent Dirks/MakeUseOf

An AirTag is a Bluetooth tracking device roughly the size of a bottle cap. The small disc can be attached to objects you might lose. Some of the best items you can attach an AirTag to include keys, remote control, wallet, and more.

Your iPhone will help you find any lost item with an AirTag attached. It does this by guiding your iPhone to the tracker if it’s nearby, or showing you the location of the tracker on a map if it is further away.

All AirTags are water-resistant and come with built-in safety features. That makes them an ideal solution for iPhone users who want to keep tabs on their belongings.


Setting Up an AirTag With Your iPhone

One of the best features of the AirTag is its easy setup process. It’s pretty similar to setting up your AirPods.

First, make sure that you’ve unwrapped the new AirTag from the protective plastic. Doing this will pull out the plastic tab that lets the AirTag turn on. You’ll know you’ve done this when your AirTag plays a chime.

Next, just bring a new AirTag near your iPhone. Then, a pop-up will appear at the bottom of the screen, asking you to connect to the AirTag.

Once connected, you can choose a name for the AirTag, which also assigns a matching emoji to represent it in the Find My app. Next, you need to register the AirTag to your Apple ID account to complete the setup process.


Using an AirTag With Find My

When it comes to using your AirTag, there’s no real work you need to do. The devices work automatically in the background. Each AirTag will refresh its location in the Find My app every time your iPhone comes near it or when it’s near a Find My network device.

What makes the tracker so powerful is the Apple Find My network, which safely and securely links more than 1 billion Apple devices on the planet together.

If you want to see your AirTag’s location, you just need to open the Find My app on your iPhone, iPad, or Mac. You’ll see your AirTags under the Items section on the bottom bar. You can also use the similar Find Items app on your Apple Watch.


The app will display your AirTags on a map, along with your current location and a list. From here, tapping on an AirTag’s name will give you the options of finding it, playing a sound, enabling Lost Mode, or removing it from your Apple ID. You can even share your AirTag’s location with others.

You control everything about the AirTag from the Find My app. On the device itself, you’ll only need to change the battery when it runs out, which Apple says is roughly once per year. Once you’ve put an AirTag somewhere, you can pretty much forget about it until you need to find it.

Using Your AirTag’s Precision Finding Feature

If you have an iPhone 11 or later, you can also take advantage of the Precision Finding feature. As the name suggests, the feature will provide specific instructions on locating your AirTag when it’s missing. You’ll need to be in the Bluetooth range of the tracker, though.


When it’s time to locate the AirTag, open the Find My app and head to the Items section. Pick the AirTag you want to find and then select Find Nearby. On your iPhone’s screen, you will see both distance and direction information like “5 ft to your right.”

If the on-screen instructions aren’t enough, you can press the speaker icon in the bottom-right corner of the screen to make your AirTag play a chime. This audio cue is handy if your AirTag is stuck between your sofa cushions or hiding under a pile of documents, for example.

Changing Your AirTag’s Battery

apple airtag case with its battery next to it on a rough surface
Brent Dirks/MakeUseOf

Unlike many other Apple products, AirTags come with a replaceable battery. This is a CR2032 battery, the same one many other Bluetooth trackers and watches use. Replacing your AirTag’s battery is a simple and quick process.


When you need to change the battery on your AirTag, just push down and twist the metal section of the device to open it up. It’s similar to the child safety cap on most medicine bottles. The metal part pops off, allowing access to the battery inside.

You can simply tip the battery out from the AirTag’s case and put the new one in with the positive (+) side facing towards you. The AirTag will play a chime when you twist the metal back cover to its original position, confirming that the battery works.

Now that you’ve learned the process of using an AirTag down to a tee, it’s time to start using yours. The next time you misplace your keys, you’ll be able to find them much easier than ever before.

How to Add a Passcode to Your Nintendo Switch

Key Takeaways

  • You can set up a passcode on your Nintendo Switch to prevent unauthorized access to games or software.
  • Use the Parental Controls app to add a passcode and set time limits for your console.
  • Remember that the passcode temporarily disables parental controls, affecting all accounts on the console.


Just because you share a console with someone, doesn’t mean they should be able to see everything in your account. Here’s how to set up a password (or pin code) on your Nintendo Switch or Switch Lite.


What Is a Nintendo Switch Passcode?

For most users, a passcode is more than enough for their privacy needs. Similar to mobile phones, a passcode on your Nintendo Switch will help prevent other people from opening certain games or software on your console without your consent.

Unfortunately, there’s still no official way to put a passcode on a Switch in the same way you can put one on a mobile phone, for example. Adding a passcode to your Nintendo Switch doesn’t prevent people from picking it up and being able to use it.

Instead, it is a Parental Control measure that blocks players from accessing games of their choosing and places a time limit on the Switch. While you can’t add a passcode to your Nintendo Switch in the traditional sense and lock it completely, the passcode options the Switch does offer are still great for parents who are keen on protecting their children on the device.


How to Enable a Passcode on the Nintendo Switch Using Parental Controls

While it’s not a straightforward feature, it is possible to add passcodes to your Nintendo Switch using the Parental Controls app. For this method to work, pair your Switch with your Nintendo Switch Parental Control app.

Once you’ve paired your Switch and mobile app, open your app and click Play Time Limit. Next, choose your preferred length of time before your console locks automatically.

The time limit you can set on the Nintendo Switch is very flexible, starting at 15 minutes and increasing at 15-minute intervals until it reaches six hours. Slide up or down on your screen until you reach your desired playtime. Then, select your preferred restriction level.

You can choose between None, Teen, Child, Young child, and Custom. Custom allows you to choose your own settings rather than choosing from the pre-made selections in the other age ranges.


Now that the basic set-up is complete, click Start Using Parental Controls and open the Settings in the bottom right corner. Select PIN to set your passcode. By default, Nintendo Switch will assign you a random 4-digit pin. However, you can change this pin to something easier to remember.

In addition, Parental Controls let you add up to 8 digits for your desired passcode. To change your Switch passcode, tap Change PIN, type in your preferred PIN, and press Save.

Afterward, your Switch will automatically sync your passcode when your console goes online. If you are already connected to the internet, a pop-up in the upper left corner of your Switch will confirm your new PIN.

Mistakes can happen though and you may find that you have forgotten your Nintendo Switch passcode. Thankfully, you can reset your Nintendo Switch passcode by following the instructions above and heading to the PIN page in the Parental Controls app.


How to Check if Your Switch Passcode Works

To check if your passcode works, let your Switch run until it reaches the set time limit. Next, attempt to open your games or other software that you have restricted. If you set up your Parental Control passcode correctly, a pop-up saying you cannot play this software will appear.

Nintendo Switch Time's Up Button

To use your Switch freely again, select the Time’s Up button on the top part of your screen.

Nintendo Switch Parental Control Pin Code


Then, use your control stick to enter your passcode as shown on the screen. You can press the R button to easily see if what you are entering is correct.

Switch Disabled Parental Code

Once you have successfully added the passcode, a pop-up saying Parental Controls have been temporarily disabled will appear.

NIntendo Switch Time's Up Button Off

To check if you were able to successfully disable your Parental Controls, simply look at the top part of your screen and check if the Time’s Up button now shows Off instead. All restricted features will then be accessible until the next time that your Switch wakes from sleep mode.


Keep Your Switch Safe

Because this was not an intended feature, it’s important to understand that there are some drawbacks to using this method.

For example, if you are using Parental Controls the way that it is meant to be used, unlocking your Switch essentially disables parental control temporarily. This can cause some concern if you have children who share your console.

Additionally, Parental Controls will affect every account on the console. For this reason, it may not be the best option for people who share their Switch with other adults.

However, if you’re simply using this method to add an extra layer of security and peace of mind while your child is playing on the Nintendo Switch, this feature will be perfect for you.

How to Make Android Devices Friendly for Seniors

Are your grandparents always calling for help using their new Android phone? With some simple tweaks, you can transform that complicated smartphone into a senior-friendly device, saving everyone time and frustration. Here are different ways to make that happen.


1. Use Senior-Friendly Android Launchers

One quick trick for transforming any Android smartphone into a senior-friendly device is installing senior-friendly launchers. Yes, they do exist, and there is quite a variety of them. Elder Launcher: UI for Seniors is a good example, and it’s one of the best senior-friendly Android launchers.

Elder Launcher allows you to add as many apps as you want on the Home screen. However, we suggest only adding essential apps to the Home screen. The icons on Elder Launcher are large, and the text size is big. It also allocates a dedicated section on the Home screen for adding important contacts.

The easy-to-use interface, coupled with the simple Edit option, allows seniors to operate their Android smartphones easily. You can tap the Edit option on the Home screen to easily add, remove, or reorder apps and contacts.


Download:Elder Launcher: UI for Seniors (Free)

2. Enlarge the Keyboard Buttons

Using senior-friendly Android launchers is just one piece of the puzzle. The next thing you should do is enlarge the keyboard buttons for ease of use.

Most Android smartphones ship with Gboard pre-installed, so we’ll use that in this example. But you can install Gboard from the Play Store if your phone doesn’t have it.

To enlarge the keyboard, you only have to change the height. First, open any app that allows you to insert text. You can use the default messaging app, for example. Tap on the text input field to bring up the keyboard.

Tap the menu (four squares) icon in the top-left corner of the keyboard and choose Resize from the options that appear. Then, stretch the edges of the rectangle up and down as you like.


If you want to revert to the normal size, tap the undo button on the left. Otherwise, tap the checkmark on the right to save your new keyboard height.

If you use Microsoft’s SwiftKey Keyboard instead, one of the best keyboard apps for Android, you can customize the size during setup or by opening the app and going to Layout & keys > Resize.

Download:Gboard (Free)

3. Increase Text Size Across the OS

Another way to senior-proof a smartphone is to increase the font size across the operating system. Android offers an easy way to change the font size through the Settings app.

Depending on the device you own, the steps you need to follow may vary slightly. I did this on a Moto E13 running Android 13 (Go edition), but here’s basically what you need to do:

  1. Open the Settings app and go to Display.
  2. Scroll down and tap Display size and text. It could be System font, Font size and style, or something similar on your device.
  3. Drag the slider under Font size to the right according to your liking.


The new settings will be saved automatically. You’ll notice all the text on your device is immediately bigger.

4. Uninstall or Disable Unwanted Apps

Most Android phones come with pre-installed apps. Some of them are usually unnecessary, which can be an issue for the elderly. Since they create a lot of clutter, it’s important to disable or totally uninstall them if possible.

Uninstalling unwanted apps on your Android device is as easy as going to Settings > Apps and tapping Uninstall. However, your device may have a slightly different way of accessing this setting, or some complications might be involved.

Ensure you don’t disable or uninstall essential apps that your device may require to function properly.


5. Turn Off Gesture Navigation

Gesture navigation is a cool way to navigate your Android smartphone, but this can be unintuitive to the elderly. To make a device more friendly for seniors, switch to the classic 3-button navigation system, which includes a triangular back button, a square overview, and a rounded Home button.

The 3-button navigation system can be a bit easier than gesture navigation. On devices running Android 10 or later, you can switch between the two by following these steps:

  1. Open your device’s Settings app and go to Accessibility > System controls > System navigation. On some devices, you may need to head to Display > Navigation bar > Navigation type.
  2. From here, select the classic 3-button navigation style.

With this change, your seniors can navigate their Android devices more easily.


6. Activate Easy Mode on Samsung Devices

If you have a Samsung phone, you can turn on Easy mode to simplify the interface and make it easy to use for seniors.

Go to Settings > Display > Easy mode and toggle on the feature to activate Easy mode. If you don’t find Samsuns’s Easy mode simple enough, the senior-optimized Android launchers we discussed earlier, like Elder Launcher and BIG Launcher, would be better.

7. Set Up Call Shortcuts

Your grandparents don’t have to search for their contacts whenever they want to make a call. Set up call shortcuts so your elders can easily make phone calls without navigating much on their phones.

Use the built-in speed dial feature if you have a Samsung phone. Open your Phone app and navigate to the Keypad tab. Long press any unassigned number and select a contact. Now, your elderly relatives can call by long-pressing the assigned number on the keypad.


Alternatively, you can create quick and easy call shortcuts on other Android devices with the Direct Dial widget. Follow these steps:

  1. Press and hold a blank area on your Home screen.
  2. Tap Widgets.
  3. Locate the Direct Dial widget under Contacts and drag it to your desired position.
  4. Select a contact.

Now, you have a one-tap shortcut on the Home screen to call that specific number quickly. This is perfect for important contacts like family members or frequently called services.

Making Android devices senior-friendly doesn’t have to be complicated. With these simple tweaks, you can transform any Android phone into an easy-to-use device. This way, your grandparents can enjoy their smartphones, even the latest ones, without the usual frustrations.

Name That Tune! The 8 Best Mobile Music Trivia Games

How much do you know about music? More specifically, are you good with song titles and artist names? Can you name a tune as soon as you hear a few notes?


If this sounds like you, then it’s time to put that knowledge to the test. These fun, free music trivia games will challenge your musical ear and have you singing a new song when you win.


1 SongPop – Guess The Song

Even if you’ve never played the original SongPop, SongPop is a must-have music trivia challenge. You play against others in a race against the clock for correct answers. Listen to the song and then select the answer, whether it is the song title or artist, as quickly as you can.

Since players take turns at their own pace, this is one of those mobile games you can play when you have just minutes to spare. Plus, each player chooses the playlist for their turn.


Do well, and you earn in-game coins that you can redeem for additional song lists. You’ll find something for everyone here. The game covers a huge variety of music genres and artists, and decades of tunes.

Download: SongPop for Android | iOS (Free, subscription available)

2 Trivial Music Quiz

If you like a bit more variety than just the “guess this song” trope in your music trivia games, Trivial Music Quiz could be the game for you. You do, of course, have to identify songs. But there is also a wide variety of more interesting questions, such as guessing which instrument a certain musician plays or what band a musician might be in.


Trivial Music Quiz does have a pop-up that appears the first time you open the app, asking for your support in keeping the game free for users by allowing it to track your data across other apps. This could turn users off, but you are not forced to agree. You still get full access to all aspects of the game if you deny the request.

There are also a number of ads in Trivial Music Quiz, but the game itself is interesting enough to ignore them. If you dislike any ads in your mobile games, however, there are plenty of free games with no ads or in-app purchases you can check out.

Download: Trivial Music Quiz for iOS | Android (Free, in-app purchases available)

3 Heard-It Music Trivia Game

The Heard-It Music Trivia Game is perfect for those who enjoy a challenge. On the first go, you only get to hear a one-second clip of the song. You can then guess the song or skip to get another second. Eventually, you do get to listen to a decent chunk of the song, but guessing right after a mere second clip would be both satisfying and impressive.


Unlike some of the other games on this list that give you four or five options to choose from, there are far more song choices in Heard-It. The options aren’t infinite, but there are dozens you can guess from, so the game doesn’t narrow it down for you much at all.

It also offers a link to the song on Spotify if you happen to love the featured song, which is yet another brilliant detail in Heard-It that makes it an excellent option for any music buff.

Download: Hear-It Music Trivia Game for Android (Free, in-app purchases available)

4 Top 90s Music Trivia Quiz Game

Maybe what you really love the most is music from the 90s. If so, then Top 90s Music Trivia Quiz Game is one to check out. First, choose from endless or timed game modes. Then, get ready for quite a challenge. The questions include song titles, lyrics, albums, artists, and even years.


As you earn coins for doing well, you can redeem them for adding more time, receiving hints, or skipping questions. Note that this game goes a little heavy on the ads.

But if you can get past the ads, Top 90s Music Trivia Quiz Game is a super challenging trivia game for fans of that era of music.

Download: Top 90s Music Trivia Quiz Game for Android (Free)

5 Guess The Song Pop Music Games

Do you think you’re good at song lyrics? If so, then Guess The Song Pop Music Games is for you. Pick from pop, 90s, or 2000s music and turn up your volume.

You’ll have the lyrics spoken to you or, if you’re lucky, you’ll hear a song clip. Then tap to select the correct song from the four possible titles. Score for your correct answers and lose points for those you guess wrong. You can climb the leaderboards, complete the achievements, and test your knowledge of lyrics with the game.


Download: Guess The Song Pop Music Games for iOS (Free, subscription available)

6 Guess The Song – Music Quiz

Guess The Song is a fun name-that-tune game available on Android. Put on your listening ears and answer as quickly as you can. You can pick from pop, rock, or country, or jump directly to your favorite decade of music.

Continue scoring and earning coins to unlock new levels. You can connect to Facebook to see how you compare to your friends. Guess The Song is a terrific music trivia game to enjoy the tunes you love while you challenge yourself.

Download: Guess The Song for Android (Free, in-app purchases available)

7 Jingle Quiz


Rather than dealing in the business of popular songs like most of the other apps on this list, Jingle Quiz offers you a selection of jingles to identify. The tunes featured are all from extremely popular franchises or companies that will be at least somewhat familiar to everyone, so you don’t have to worry about missing out because the jingle is from a company you don’t recognize.

The jingles are all iconic sounds you’ve most likely heard at least once in your life. But the app does offer hints, just in case you need a little extra help on some of the tougher questions!

Download: QuizUp for Android | iOS (Free, in-app purchases available)

8 Songpop Classic – Music Trivia


Songpop Classic is a very popular and highly rated music trivia game. As you open the app, you will be prompted to select three out of nine music genres. This ensures you will be answering questions related to the type of music you actually like and are interested in, which is a feature many other music trivia games lack.

You can also go head-to-head with real people and flex your music trivia skills with players from all over the world.

The downside to this, however, is that you need an internet connection to play and enjoy Songpop Classic. This probably won’t be a problem if you’re playing at home, but you might have to look for another mobile game to play when you have no internet or data, if you’re on public transport or away from an internet connection.

Download: Songpop Classic – Music Trivia for Android | iOS (Free, in-app purchases available)

These great music trivia games for Android and iOS are tons of fun and challenging at the same time. You’ll enjoy seeing how well you really know your favorite genres and artists.


If you like other types of trivia challenges, check out our list of free trivia apps for movie and TV buffs.

What Is PhotoPrism? How to Use the AI-Powered Photo App

Quick Links

Key Takeaways

  • PhotoPrism is a decentralized photo management tool.
  • The app has several AI-powered features, such as face detection.
  • You can use several tools in PhotoPrism, such as adding labels to your images.


Organize your photos and videos with PhotoPrism, an AI-powered and decentralized organization tool. We’ll show you how to get PhotoPrism, use its main features, and describe what it is today. You’ll also learn about how much the tool costs to use.


What Is PhotoPrism?

PhotoPrism is an AI-powered program for organizing and browsing your photos and videos. It’s one of the best self-hosted Google Photos alternatives and also works similarly to iCloud Photos. The main difference is that PhotoPrism is designed specifically with Web3 in mind.

You can use PhotoPrism on Windows, Linux, and Mac computers. It’s also possible to download various apps for iOS and Android, namely:

  • PhotoSync (iOS and Android): Allows you to upload images to PhotoPrism directly from your smartphone.
  • GalleryPrism (Android): Browse the pictures you’ve uploaded to PhotoPrism. Unfortunately, this app isn’t currently available on iOS.
  • Photo Map (Android): Browse your photos from your smartphone based on their location. This feature isn’t available for iOS, but you can use the Maps feature in Apple Photos as an alternative.


In the PhotoPrism desktop app, you can change your images’ metadata, mark photos as favorites, and much more. It’s very similar to Adobe Bridge (and if you’d like to learn more about Bridge, check out this complete guide to what Adobe Bridge is).

How to Get PhotoPrism

You can download PhotoPrism for your computer via several programs, including each of the following:

  • Docker
  • Raspberry Pi
  • FreeBSD
  • Digital Ocean

The installation process varies depending on how you want to download PhotoPrism. We’ve got a full guide on how to install PhotoPrism with Raspberry Pi if that’s your preference. For other installation instructions, you can refer to the Setup page on the PhotoPrism website.

How Much Does PhotoPrism Cost?

The basic version of PhotoPrism, known as Community, is completely free and good enough for most people. You get unlimited storage, full data ownership, regular updates, and access to public forums and community chat features. You also have access to the most important AI tools: Face Recognition, Image Classification, and an NSFW Detector. Moreover, you can use filters, browse based on multiple metrics (e.g. places and moments), and flag your favorite pictures.


Even if you want to upgrade to a paid version, personal plans are still very affordable. An Essentials subscription starts at €2 (c. $2.20) per month, and PhotoPrism Plus costs €6 (c. $6.60) per month. You can also get PikaPods if you’d prefer a cloud-hosted version of PhotoPrism, which costs $6.50 per month This comes with flexible storage. With paid PhotoPrism subscriptions, you get location updates, 3D vector and satellite maps, and some other handy tools.

Below is a quick rundown of the important features you get with each version of PhotoPrism:

Feature Free Essentials Plus PikaPods
JPEG, HEIC, PNG, RAW, and GIF files Yes Yes Yes Yes
Data Ownership Yes Yes Yes Yes
Video Files Yes Yes Yes Yes
Metadata Editing Yes Yes Yes Yes
Self-Hosting Yes Yes Yes No


What Can You Do With PhotoPrism?

PhotoPrism lets you perform several actions when it comes to photo organization, such as marking pictures as private and adding labels. Below, you’ll find step-by-step instructions for using the platform’s most essential features.

How to Upload Images to PhotoPrism

Before we talk about PhotoPrism’s features, you’ll need to know how to upload images. Doing so is simple:

  1. Select the upload icon at the top. It looks like a cloud with an arrow.

  2. Expand the dropdown menu to Select albums or create a new one.
    The option to upload photos in the PhotoPrism app

  3. Select Upload when you’re ready to add your photos. Then, pick the files you want to upload.

How to Change Your Photos’ Metadata in PhotoPrism

You can change the latitude and longitude of your photos in PhotoPrism, along with the image name, the camera you took the picture on, and much more. Follow these steps to change your photos’ metadata and other core details in PhotoPrism:

  1. Click on the details for the photo you wish to edit.
    Select an image in the PhotoPrism app

  2. Edit each field that you would like to change.
    Edit new images in the PhotoPrism app

  3. Scroll down to the bottom of the page and click Apply. After seeing the confirmation that PhotoPrism has applied your changes, select Done.


Adding Labels to Your Images in the PhotoPrism App

As your catalog builds, using labels will make your images much easier to organize and filter through. Use these instructions to add labels to your pictures and videos in PhotoPrism:

  1. Choose the image you want to adjust and select Labels.
    The option to add new labels within the PhotoPrism app

  2. Type the new label you’d like to add and click on the + button.

If you want to organize your images from your smartphone, consider checking out this compilation of the best photo manager apps for Android.

Viewing Your Images by Location in PhotoPrism

Your smartphone will likely add locations to your pictures automatically. But regardless of whether that’s the case or you include locations via PhotoPrism, you can easily view your photos on a map in the app.

  1. Select Places in the left-hand toolbar. The icon looks like a location pin.
    The Maps Feature in the PhotoPrism App

  2. Browse the map and click on the different regions for which you want to view your images.
  3. When the expander appears at the bottom of your screen, hit the magnifying glass icon to maximize your picture.
    Select a photo in the PhotoPrism app and maximize them


How to Favorite Your Photos in PhotoPrism

You can easily add any pictures you want particularly easy access to by favoriting them.

  1. Tap the heart icon next to each photo you’d like to add as a favorite.
    The option to add photos as favorites in the PhotoPrism app

  2. Select the heart icon in the left-hand toolbar to access your favorited images.
    Select the Favorites Section in the PhotoPrism App

How to Mark Images as Private in PhotoPrism

If you want to mark some of your pictures as private for whatever reason, you simply need to adjust one toggle. Here’s how to do that:

  1. Go to the photo you want to mark as private.
  2. Tap the cog icon to access your settings.
    Select the cog icon in the PhotoPrism app

  3. Switch the Private toggle on.
    Switch the Private toggle in the PhotoPrism app

How to Search for People in PhotoPrism

Once you’ve started organizing your pictures in PhotoPrism and let the AI do its face detection magic, you can easily access photos based on different people in your library.

  1. Click on the People tab.
    Select the People Icon in the PhotoPrism App

  2. Choose the people you’d like to browse through images of. If you can’t see who you’re looking for, select Show All New Faces.

If you don’t see the People tab, go to Settings and toggle People on.


Toggle the People icon in the PhotoPrism app

How to Download Your Photos From PhotoPrism

You can download your pictures from PhotoPrism to share with others, transfer them to other photo management apps, and various other purposes. The process is very simple:

  1. Select all the photos you want to download.
  2. Click on the download icon. It’s the arrow facing downward and pointing at a straight line.
    The Download Icon in the PhotoPrism App

  3. Wait for PhotoPrism to download your images.

If you’re looking for an easy-to-use decentralized photo management app, PhotoPrism is a great choice. You can easily organize your files, and the AI tools like face detection make it easy to access your pictures. Even with the free version, you’ll have a powerful tool for organizing your images.

The 4 Best Open-Source Video Conferencing Software

Key Takeaways

  • Open-source video conferencing software has several advantages, including better security and improved app performance.
  • Many open-source video conferencing tools are free to use, even if you want access to all of the big features.
  • You can typically use open-source conferencing tools on your computer without problems. However, some also facilitate usage on your smartphone and tablet.


Eliminate in-person meetings and get several other benefits by using open-source video conferencing software. This guide outlines our pick of the best tools on the market, and you’ll also discover the advantages of using these platforms compared to closed-source video conferencing tools.


Why Should I Use Open-Source Video Conferencing Software?

Open-source video conferencing software can often be more secure than closed-source alternatives. This is especially important when you consider past data breaches on closed-source platforms, such as the exposure of hundreds of millions of Zoom passwords and usernames in April 2020.

While open source isn’t perfect, a larger audience of code inspectors tends to unearth security issues sooner. Contributors can often identify and fix other bugs faster too, although this varies very much from project to project.

Open-source software also lets you have longer video conference calls for free. While not all closed-source software has time limits, much of it requires you to pay for unlimited access. For example, Zoom only lets you talk for up to 40 minutes on a free plan.


Now that we’ve discussed the top benefits of using open-source video conferencing platforms, let’s look at some of the best programs. Below, you’ll find our favorite choices.

Jitsi Meet is a free and user-friendly tool with secure technology. To invite people to a call on Jitsi Meet, you simply need to provide a link that users can access. This lets you hold calls without having to download a separate app.

If you prefer to plan your week in Google Calendar, Jitsi Meet can integrate your meetings within the app, meaning you’ll never lose track of when you should be on a call. This makes it reliable video conferencing software for remote work.


Jitsi Meet supports group video, live chat, screen sharing, streaming, and more. It works best on Google Chrome and has excellent audio and video quality without lag. The platform supports optional end-to-end encryption.

Jitsi Meet has extensions for Slack and Google Chrome. In addition to using the software in your web browser, Jitsi Meet also has mobile apps for iOS and Android.

Download: Jitsi Meet for iOS | Android (Free)

The App Interface in the Jami App

Jami is available on all devices and is completely free. You can easily set up calls with other users and create a username to make sure that others can easily search for you. In addition to video conferencing, you can use Jami to connect with others via instant messaging. So, if you’re looking for an internal communications tool for your workspace, Jami is a great choice.


Because Jami lets you remain anonymous and has end-to-end encryption, it’s a fantastic option if you care about your privacy. Jami also has distributed infrastructure and X.509-compliant user authentication. Moreover, you can use the tool offline.

Jami has no restrictions on features, storage, bandwidth, or users. It is ad-free, stable, and fast. You can donate to the platform if you enjoy using it and want to support the project.

Download: Jami for iOS | Android | Windows | macOS | Linux (Free)

An image of the call interface within Nextcloud

Nextcloud Talk lets you perform video meetings and share your screen, making it an ideal open-source video conferencing platform for many people. The platform is fully self-hosted, meaning that you don’t need to worry about your metadata getting leaked. On top of that, the platform has AES-256-level encryption, offers protection from brute force attacks, and lets you password-protect your calls.


Besides the video conferencing tools, Nextcloud Talk also offers several tools to make meetings more productive and interactive. For example, you can give presentations via the whiteboard feature. You can also use Nextcloud as an alternative to Google Drive and Dropbox; the program lets you store documents, images, and more.

Nextcloud Talk has several other interesting features that can help you get more out of your video conferences. For example, you can create in-chat polls if you need to extract essential information from the other attendees. You can also use two-factor authentication (2FA) to ensure that your calls remain secure.

If you decide to use Nextcloud Talk, you might also want to check out Nextcloud’s other products like Nextcloud Office and Nextcloud Files.

OpenMeetings User Call Interface


Apache OpenMeetings has two main options for video conferencing: one with just video and another where you can also doodle on a whiteboard. The latter is ideal if you want to host presentations or break down a complex topic for the other call recipients.

Apache OpenMeetings lets you report any potential security threats and makes them visible on its website, along with informing users whether the issue is fixed or not. So, you can decide for yourself whether you want to use Apache OpenMeetings or one of the alternatives we’ve mentioned.

In addition to video calls, you can also use Apache OpenMeetings to host audio-only meetings if you feel that doing so is sometimes necessary. You can use the one-click join feature to access your meetings without needing to download the app. If you need to access your meeting later, you can also use Apache OpenMeetings’ call recording features.

Nvidia Launches GeForce NOW Passes, But Is There Any Point to Them?

Want to enjoy top-tier cloud gaming without a subscription commitment? Nvidia is banking on that with the launch of its new GeForce NOW Day Passes.


Instead of signing up to GeForce NOW for a month, you can grab a Day Pass and experience all the benefits of its Ultimate and Priority memberships without worrying about your subscription running into the next month.


On paper, it sounds useful. In practice, I’m not so sure—and here’s why.


What Is an Nvidia GeForce NOW Day Pass, and How Much Does It Cost?

Nvidia first touted its GeForce NOW Day Passes at CES 2024, revealing that it would introduce a new access tier aimed at on-the-day cloud gaming. Stuck in a hotel room or on a train for a day? Why not grab a Day Pass and while the time away?

The GeForce NOW Day Pass comes in two tiers:

  • $3.99 Priority Day Pass: Skip waiting lines and play games at 1080p/60FPS for up to six hours.
  • $7.99 Ultimate Day Pass: Gain access to GeForce NOW’s RTX 4080 servers and game at 4K/120FPS for up to eight hours.


The Ultimate Day Pass also comes with all the extras you’d expect from an RTX 4080 GPU, such as DLSS 3 and Nvidia Reflex, so you can use it to play the latest releases even on underpowered hardware. Furthermore, it’s worth remembering that GeForce NOW doesn’t give you a catalog of games like Xbox Game Pass does. You can only play games you already own, linked to your Steam, Epic, GOG, or other game platforms.

GeForce NOW Day Pass vs. GeForce NOW Priority and Ultimate Subscription

Nvidia’s GeForce NOW is a great cloud gaming platform. I’ve used it on and off over the years, and it’s especially handy when I’m traveling with only a lightweight laptop that can’t run anything more visually demanding than Vampire Survivors or OpenTTD.

GeForce NOW is simple to download and install, and its multiple subscription tiers make it useful and accessible to anyone—which is why the Day Pass option doesn’t necessarily stack up in terms of cost.

The service has three standard subscription options:

Plan

Rig

Access Level

Session Length

Resolution

FPS

Ads

Price Options

Free

Basic Rig

Standard access to gaming servers

1 hour

720p-1080p

Variable

Yes

Free, ad-supported

Priority

Premium Rig | RTX ON

Priority access to premium servers

6 hours

Up to 1080p

Up to 60

No

$9.99/month; $49.99 for 6 months

Ultimate

GeForce RTX 4080 Rig | RTX ON

Exclusive access to RTX 4080 servers

8 hours

Up to 4K

Up to 120

No

$19.99/month; $99.99 for 6 months


Ignoring the basic Free tier, the difference between a single day’s access to the Priority tier and a month’s subscription is five bucks—for the price of a Starbucks drink, you can access Priority cloud gaming for a whole month. The jump between the Ultimate monthly subscription and Day Pass is steeper, with a $13 difference. However, there’s still much more value in grabbing the Ultimate monthly subscription and gaming whenever you want, versus a limited period.

Not to mention that despite being called a Day Pass, the Priority Pass gives you just six hours of gaming—with Ultimate giving you eight.

Is an Nvidia GeForce NOW Day Pass Worth the Money?

If GeForce NOW had an extensive catalog of games like Xbox Game Pass, I’d say this was a slam dunk. Given you’re working through your own game libraries (which, in fairness, are extensive for many folks), it seems limiting. The pricing between the Day Pass and a monthly membership is close enough that you’d likely consider just grabbing a month instead and not worrying about running out of time. At which point, who is the Day Pass really catering to?


So perhaps the GeForce NOW Day Pass is worth it for those occasions when you don’t plan to game anytime soon and just want to experience some RTX 4080 quality on the go. However, it seems more like a way to funnel folks into the monthly subscriptions than anything else—and I say this as someone who’s used GeForce NOW on and off over the years. I’d always grab a month rather than a day.

What Is the NYT’s Connections Game and How Do You Play It?

Key Takeaways

  • Connections is a daily logic puzzle from The New York Times. It’s beautifully simple to play but frustratingly tricky to master.
  • To play Connections, you need to place the 16 words into groups of four based on their shared connections.
  • Whether you succeed or fail, you can share your results in order to engage in some friendly competition with other people.


The New York Times’ Connections game is, like Wordle before it, an online game that a lot of people play every day. But what is Connections? How do you play Connections? And what do you need to know about Connections before you dive in?


What Is the New York Times’ Connections Game?

Connections is a daily logic puzzle created and curated by the New York Times. It’s available to play online for free by visiting the Connections website on desktop or mobile. Or you can play it on the New York Times Games app, which is home to all the publication’s various games.

The New York Times has offered a crossword since 1942. But in more recent years, the NYT has introduced a broader range of games. These include Spelling Bee, Letter Boxed, Tiles, Vertex, and Wordle. The latter being a phenomenon that spawned countless Wordle alternatives and spin-offs.


In 2023, the New York Times launched Connections. The game has since grown in popularity due to being simple to play but difficult to master. The basic rules are simple enough for anyone to understand, but actually succeeding at the game day-in, day-out can be a tough ask.

How to Play the NYT’s Connections Game

To play Connections, first visit the Connections website or open the New York Times Games app if you have it installed.

The New York Times website will sometimes prompt you to sign up or subscribe to play Connections. But this is entirely optional. If you want to play Connections for free, just refresh the page.

Click Play, and after the splash screen that tells you how to play Connections, you’ll be faced with a wall of 16 words.

NYT's Connections game as it appears before you make your first guess


The idea of the game is to place these 16 words into groups of four based on a connection they share with each other. I say “a” connection, because some words share multiple similarities. You need to find the correct one in each case.

Guessing the first group on NYT Connections

Look for the similarities and differences between the words—and try to find the first group of four. Once you are confident you have identified it, select each one on the screen, and hit Submit. If you change your mind after selecting four, you can click it again to deselect it or click the Deselect all button underneath the puzzle to wipe the slate clean.

A correct first guess on NYT's Connections game


If your grouping is correct, the words will move to the top of the game and that bar will change color. The groups are given colors to indicate their difficulty level, with green at the top; followed by yellow, blue, and purple in that order. But you don’t need to get them in that order—you just need to get them, period.

Two groups completed on NYT's Connections game

If you get a grouping wrong at any point, the words will be automatically deselected and you’ll lose one of your four lives. The NYT refers to these as mistakes and you can see how many mistakes you have remaining underneath the puzzle.

All 16 words grouped correctly in the NYT's Connections game


Continue guessing the groupings until you either fill out the whole board and complete the Connections puzzle for that day or you run out of lives. Either way, you then have to wait until midnight in your local timezone before the next puzzle goes live.

How to Share Your Connections Results With Others

To share your results, whether to celebrate success or to admit failure, click the Share Your Results button that pops up when you finish the game. Sharing your results is a way of engaging in some friendly competition with others who also play Connections on a daily basis.

NYT's Connections results page where you can share your results

On desktop, this copies your results to the clipboard. You can then paste them into an email or on your favorite social media site. On mobile, this also copies your results to the clipboard for pasting. However, you’ll also be given a number of ways to share it directly depending on what apps you have installed on your device.


Your Connections results for that day are shared as colored squares. This ensures that you’re not spoiling the game for anyone else by revealing the words or groups that they need to end up in.

If Connections isn’t your thing, there are plenty of other two-player mobile games to play with friends or strangers.

Things You Need to Know About Connections Before You Play

Before you start playing Connections, there are a few things you should understand:

  • There’s a new Connections game every day. This is comforting given that there’s a chance you’ll fail to solve it on some days. If you do fail, just wait for it to refresh and try again.
  • A new Connections is released at midnight in your timezone. If you want to avoid spoilers/seeing answers, avoid searching for Connections before you’ve played that day.
  • You will find some days more difficult than others. Your chance of success or failure depends on the choice of words and your knowledge of the subjects.
  • You can play the same Connections puzzle more than once. Unless you’re logged into the NYT’s Games App, your attempt is only saved locally. This means that you can try again either in an incognito window on your web browser or on another device.
  • Part of the fun is sharing your score with other people. It’s really easy to share your score with others, and if they share theirs too, you can have some friendly competition.
  • The colors are only revealed after you have guessed correctly. But you may find that you solve the purple or blue lines (that are meant to be the most difficult) first.
  • Each puzzle only has one solution, and you have to get it exactly right to progress. There are words that could fit into multiple categories, but that’s intentional.
  • Connections is curated by editors using the Oxford English Dictionary. However, as the New York Times is a US publication, there’s a US bias in the subjects chosen.
  • Every Connections puzzle is being archived. An unofficial Connections archive allows you to play the puzzles you may have missed when they were live on the New York Times website.


Connections has become one of several games I play daily. Alongside Wordle and The Mini crossword, it offers both a fun diversion and some friendly competition with my partner. Unfortunately, she generally beats me at all of the above.

What Are the Newest iPhone Emojis?

Key Takeaways

  • Apple introduced 118 new emojis in iOS 17.4, including a lime, brown mushroom, phoenix, broken chain, and head-shaking emojis.
  • The update also includes four gender-neutral family emojis, with variations of some existing emojis now available in right-facing versions.
  • To access the new emojis for a fresh way to express yourself online, update your iPhone or iPad to iOS 17.4 or iPadOS 17.4.


Emojis are one of the best ways to express yourself, and every year, Apple adds new emojis to iOS to give you more ways to react online. It’s no different with iOS 17 in 2024.


The Brand-New Emojis in iOS 17.4

New emojis are one of the many inclusions in the iOS 17.4 update. While Apple released 118 new emojis alongside iOS 17.4 and iPadOS 17.4 in March 2024, the six emojis below are the brand-new ones most people will be excited to try.

Lime

Lime has been a popular emoji request worldwide—so much so that a Mexican restaurant, Lime Fresh Mexican Grill, started a change.org petition demanding a lime emoji.

So if you’ve ever found yourself whipping up a dish that contains lime but had to end up using the lemon emoji to represent it, you’ll be pleased to know that iOS finally has a lime emoji.


Brown Mushroom

mushroom emoji

Another emoji from the Food & Drink category that the Unicode Consortium approved in 2023 is the brown mushroom emoji. While the red and white mushroom emoji has been a fan favorite, the new emoji is a more realistic fungi representation.

Phoenix

Phoenix emoji

Apple also introduced an emoji for the phoenix, a well-known creature from Greek mythology. The emoji represents rebirth and reincarnation.

Broken Chain

broken chain emoji


If you’re ever trying to represent a broken bond symbolically, you might find yourself searching for an appropriate emoji. Fortunately, iOS 17.4 includes a broken chain emoji.

Head-Shaking Horizontally

head shaking horizontally emoji

You’ll also find two new iOS emojis in the smiley category. One of them is a head shaking horizontally emoji, which is undeniably the perfect way to say no to something calmly!

Head-Shaking Vertically

head shaking vertically emoji

Want to tell your friends that you’d be happy to hang out with them without typing out the words? Well, you can now simply send them the head-shaking vertically emoji and call it a day!


Four New Family Emojis

gender-neutral family emojis

Once you update your iPhone to iOS 17.4 or iPad to iPadOS 17.4, you’ll find four gender-neutral family emojis. Here are the combinations available:

  • Adult, Child
  • Adult, Child, Child
  • Adult, Adult, Child
  • Adult, Adult, Child, Child

Fresh Emoji Variations in iOS 17.4

right-facing iOS emojis

Other than the six brand-new emoji concepts and gender-neutral family emojis, the remaining 108 emojis are slight variations of existing options.

While you can find these emojis before updating to iOS 17.4, you’ll notice the ones you have are all left-facing. With the release of iOS 17.4, Apple introduced the following right-facing emojis:


  • Person walking
  • Person kneeling
  • Person running
  • Person with a white cane
  • Person in a manual wheelchair
  • Person in a motorized wheelchair

All these emojis are available in three gender options and five different skin tones. To access the new emojis, simply update your iPhone or iPad to iOS 17.4 or iPadOS 17.4.

How to Check if Your Printer Is AirPrint Enabled

Key Takeaways

  • AirPrint allows wireless printing from Apple devices without drivers. However, it requires an AirPrint-enabled printer.
  • AirPrint only requires a compatible printer and Apple device to be on the same Wi-Fi network.
  • If your printer doesn’t support AirPrint, you can install your printer manufacturer’s driver or app to access wired and wireless printing capabilities.


AirPrint lets you wirelessly print from your Apple devices without installing any drivers. However, you need an AirPrint-enabled printer for this convenience. But how do you find out if your printer supports AirPrint in the first place? We’ll help you out.


What You Need for AirPrint to Work

FabrikaSimf/Shutterstock

Before you check if your printer has AirPrint capabilities, you need to make sure your printer supports a wireless connection. AirPrint works over Wi-Fi, so if your printer can’t be connected to Wi-Fi like most of the best printers for Macs, you can be certain AirPrint isn’t enabled on your printer.

You can still print from Apple devices to wired printers—you just can’t do so with AirPrint. You’ll need to download drivers or apps to have that work.


More importantly, you need a stable Wi-Fi connection, and your Apple device and the printer must be connected to the same Wi-Fi network. If you’re not on the same Wi-Fi, your iPhone, iPad, or Mac will have trouble finding the printer, whether it has AirPrint or not.

Check Your Printer’s AirPrint Compatibility

The easiest way to determine whether your printer supports AirPrint is to check with Apple. Apple’s Support page lists all current AirPrint-enabled devices. Once you visit this page, press Command + F on your keyboard and input your printer manufacturer and model number to find it quickly.

checking if my printer supports AirPlay

If your printer is on the list, you’re all set! In case you can’t find your printer on the list, another way to know if your printer is AirPrint enabled is to head to the manufacturer’s website or check the user manual that came with your printer. Simply search for your printer model on the manufacturer’s website and check its specifications.


Check AirPrint Compatibility by Trying to Print

If you don’t want to bother with Apple’s AirPrint device list or you want to verify its accuracy, the next best way to see if your printer supports AirPrint is by actually trying to print a document.

Since AirPrint allows you to print without downloading any drivers, this means you really just need to try printing anything to your wireless printer from your Mac, iPhone, or iPad without using any apps or making any downloads first.

To print on a Mac, press and hold the Command and P keys or click File in the menu bar and select Print from the dropdown menu. If the printer appears in the Printer dropdown menu without you installing any drivers, you can rest assured that it supports AirPrint.

printing a document on a Mac


If you don’t see the printer you’re checking for AirPrint, you may need to add the printer to your Mac. If you’re prompted to set up or download a driver during that process, it means your printer doesn’t support AirPrint.

Similarly, to try to print from your iPhone or iPad, tap the Share icon in a supported app and select Print. If your printer appears in the Printer selection menu of the Options page, it means your printer supports AirPrint.

If you don’t see your printer when trying to print from your iPhone or iPad, you’ll need to get the dedicated app from your printer manufacturer to print from your iPhone or iPad without AirPrint.


Having an AirPrint-enabled printer is convenient if you have an Apple device like a Mac, iPhone, or iPad. You can start printing without downloading any drivers or apps as long as both devices are on the same Wi-Fi network. However, if your printer doesn’t have AirPrint, you can install your printer manufacturer’s driver or app to unlock wired or wireless printing.

Spotify Has a New Audiobook-Only Plan (but Here’s Why You Should Skip It)

Key Takeaways

  • Spotify has launched Audiobooks Access, but at $9.99/month, it’s not worth the asking price compared to Spotify Premium at $10.99/month.
  • Spotify Premium offers many more perks for just a single dollar more, such as ad-free music, offline listening, and higher bitrates.
  • Even though Audiobooks Access competes with Audible in some ways, paying $1 more for Spotify Premium is a better choice for most users.


Spotify now offers an audiobooks-only tier called Audiobooks Access. This is designed for fans of audiobooks who aren’t that interested also in streaming music. Unfortunately, the price of Audiobooks Access compared to a Spotify Premium subscription makes it a non-starter in our opinion.


Spotify Launches an Audiobooks Access Plan for Free Users

On March 1, 2024, Spotify launched a new subscription plan squarely aimed at fans of audiobooks. Called Audiobooks Access, this paid tier offers 15 hours of audiobook listening per month, along with the same ad-supported access to Spotify’s catalog of music and podcasts you get with the free plan.


In a blog post on For the Record, Spotify announced this new paid tier by stating that it’s “continuously innovating to provide the best possible offering for every kind of audio fan.” And with “a 45% increase in free users searching for and interacting with Audiobook content each day,” we can understand why Spotify has launched this new audiobooks-only tier.

However, Audiobooks Access is priced at $9.99/month in the US (the only territory it’s currently available in). And that’s a problem.

Why Spotify’s Audiobooks Access Plan Isn’t Worth It

Spotify’s Audiobooks Access isn’t worth subscribing to based purely on how it compares to Spotify’s Premium plan. As already mentioned, Spotify’s Audiobooks Access plan costs $9.99/month, which sounds like it might be a good value until you compare it to Spotify’s Premium plan.

Spotify Premium costs $10.99/month for an individual user; that’s just a solitary dollar more than Audiobooks Access. And for that $1 more, you gain access to all the Premium perks on top of the 15 hours/month of free audiobook listening. That’s because all Spotify Premium plans now include the same 15 hours/month access to premium audiobooks.


Spotify Premium versus Free features

As a reminder, Spotify Premium perks include ad-free music listening, downloading albums and playlists to listen offline, playing songs in any order, listening at higher bitrates, and more. And you don’t get any of these with Spotify’s Audiobooks Access plan. Instead, you get the same features as Spotify Free users, plus those 15 hours of free audiobook listening.

Spotify Premium Is Clearly a Better Choice

At $10.99/month for an Individual plan—rather than the Duo ($14.99/month) or Family ($16.99/month) plans—Spotify Premium is great value for money. It already was a good deal thanks to the range of perks it offered over a Free account. Then Spotify added 15 hours/month of audiobooks on top of those Premium perks, adding an extra reason to subscribe.


So at $9.99/month—just a single dollar cheaper than Premium with almost none of its benefits—Audiobooks Access feels like a non-starter. Yes, it compares favorably to Audible in some ways; Audible costs $14.95/month for Premium Plus, offering one credit for a premium audiobook per month. However, current Audible subscribers debating whether to switch to Spotify would still be better off paying that extra $1 for Spotify Premium.

It should also be noted that even Spotify Free users can listen to some audiobooks for free—just not the premium audiobooks voiced by celebrities or authors which can be expensive. Still, regardless of what Spotify plan you have, you should check out our guide detailing how to listen to audiobooks for free on Spotify.

How to Use the ChatGPT Widget on Android

OpenAI’s ChatGPT app now offers a widget for Android devices. You can add it to your Home screen and quickly enter prompts using images, text, voice, or conversation mode queries. We’ll show you how to add and use it.


Before proceeding, you’ll need to update the ChatGPT Android app—if you’re on any version older than 1.2024.052, you can’t create this handy home screen widget. Currently, there’s only one variation of the ChatGPT widget: a 4×2 option.

To add the widget, follow the steps below, but do note that they may vary slightly from device to device:

  1. Unlock your device and long-press a blank space on your Home screen.
  2. Select Widgets from the options at the bottom.
  3. Tap the Search bar and type “ChatGPT”.
  4. Long-press the ChatGPT widget and drag it to your desired location on the Home screen.

The ChatGPT widget lets you enter any query with just one tap. To enter a text query, tap the Message field on the ChatGPT widget and start typing your prompt.


You can tap the camera or the image icon for an image query, but you’ll need to upgrade to a ChatGPT Plus subscription for this to work. You can also tap the microphone icon to enter prompts with your voice or the headphone icon to get into conversation mode.

No matter where you tap on the widget, your Android device will launch the ChatGPT app in full screen. Unfortunately, it seems the widget is nothing more than a shortcut to open and use the ChatGPT app on your mobile device in its current state. A minimalistic overlay of the AI chatbot would’ve been better.

On the bright side, you don’t have to waste time looking for the ChatGPT app on your Android device. However, the ChatGPT widget may need additional room on your Home screen, especially if you’ve already added several Android widgets or apps. But you can always add a new Home screen page to create more room for it.


You Can Now Replace Google Assistant With Copilot on Android

Key Takeaways

  • Microsoft rolled out an update to the Copilot app that allows you to set it as the default assistant on your Android device.
  • While you can access Microsoft’s AI chatbot at the press of a button, you won’t be able to perform on-device tasks with it.
  • Consider using Gemini on Android to maintain Google Assistant features while leveraging the capabilities of AI.


Typical voice assistants like Google Assistant and Bixby can’t keep up with the capabilities of AI chatbots like ChatGPT and Microsoft Copilot. If you’ve ever wanted to replace Google Assistant with an AI chatbot, Copilot lets you do just that.


How to Set Microsoft Copilot as the Default Assistant on Android

Microsoft rolled out an update to the Copilot Android app that allows you to set it as the default assistant on your Android phone. As of March 2024, this update is a part of the beta build—27.9.420225014—which anyone can access, provided you live in the United States.

You won’t have to join the beta once Microsoft updates the stable build, but for now, here’s what you need to do to set Copilot as the default assistant on your Android device:

  1. Launch the Play Store app and head to the Microsoft Copilot Google Play app page.
  2. Scroll down and tap Join under the Join the beta section.
  3. Then, relaunch the Play Store app, head to the same page, and tap Install at the top. If you already have the app installed, you’ll see an Update option instead.
  4. Now, go to Settings > Apps > Choose default apps > Digital assistant app and tap Device assistance app. This instruction may vary slightly depending on your phone.
  5. Select Copilot from the list of options. When you get a pop-up for confirmation, tap OK.


Now, you can launch and set up Copilot on your phone, choosing whether to enable features like GPT-4, change the conversation style, and more.

From now on, when you long-press the Home button or swipe inward diagonally from either of the bottom corners (if you use Android gesture navigation instead of the three-button layout), your Android phone will launch the Copilot app instead of invoking Google Assistant.

Replacing Google Assistant With Copilot Comes at a Cost

There’s no doubt that Microsoft Copilot is way smarter than Google Assistant because of its AI prowess. However, since it’s not baked into Android, you cannot use Copilot to perform on-device tasks like opening apps, sending messages, or making phone calls.


More importantly, this method is more akin to a shortcut for launching the app—it doesn’t have the same minimal and intuitive pop-up as Google Assistant. This could be annoying when you’re using another app, as you’ll be forced into the Copilot app to interact with the chatbot.

If you end up wanting to revert to Google Assistant, follow the same steps we outlined above and select Google instead.

However, if you want the best of what an AI chatbot can offer without losing your virtual assistant, you may want to consider using Google Gemini on your Android phone instead. Gemini maintains Google Assistant features and can seamlessly switch between the AI chatbot and the virtual assistant, depending on whether you make an on-device request or input an AI prompt.

How to Use the Rule of Thirds in Photography

Key Takeaways

  • Use the rule of thirds to create dynamic photos with balanced composition.
  • Enable the grid on your digital camera to apply the rule of thirds easily.
  • Remember different situations may require breaking the rule of thirds for better photos.


The rule of thirds is the first rule of photography every beginner will end up using the most. In a nutshell, it’s a method to frame your photos better with the help of a nine-squared grid that draws the eyes of the viewer to the object of attention. So, let’s see what the rule of thirds is and when you should use it.


What Is the Rule of Thirds?

The rule of thirds has one main purpose for better composition of your photos: balance.

It is one of photography’s most basic guidelines. Imagine your frame divided into three horizontal sections and three vertical sections by two horizontal lines and two vertical lines. Any interesting element in a scene should be placed along one of these lines or at one of their intersections for more dynamic photos.

The best way to imagine it is as a tic-tac pattern on top of your photo.


The rule of thirds works because science says that our eyes are naturally drawn to objects that are slightly off-center rather than the center of the image. The four intersecting points are the most effective off-center points of visual interest.

An interesting point of trivia: The term was first mentioned in John Thomas Smith’s book Remarks on Rural Scenery, published in 1797. There are other essential rules of photography that have been borrowed from mathematics and psychology.

How to Use the Rule of Thirds In-Camera

The rule of thirds is not a hard rule you must stick to. Placing the main subject of your photo away from the center will not always give you a nicer photo.

The rule of thirds can be applied to any subject, and it helps you think about your composition before you click the shutter. It can improve your otherwise humdrum shots. It also can be a quickfire shortcut to take a photo when you don’t have time to think and frame the scene.


Use the Grid in Your Digital or Mobile Camera

Almost all cameras, including your Android or iOS device, have the rule of thirds grid on their electronic displays and viewfinders. You might have to enable it. To do so, head into the settings on your camera and find the option to enable grid lines. Some manufacturers will include several different options.

Here’s how to enable or disable the Grid from an iPhone’s Camera settings (it is enabled by default).

  1. Open Settings.
  2. Scroll down the list to Camera.
  3. Under the Composition group, enable the toggle for Grid.

How to Use Grids and Crop Overlays in Photoshop and Lightroom

You can always crop your shots in any editing software and improve them with the rule of thirds. Photoshop and Lightroom have crop guide overlays that include the rule of thirds grid. Use this grid as you crop your image to place the most interesting elements along the intersecting lines.


You can also customize grid settings to create an overlay.

How to Show a Grid in Photoshop

In Photoshop, use the keyboard shortcut Ctrl + K (Mac: Command + K) to open Preferences. Click on Guides, Grid & Slices from the list on the left and change the settings for the Grid section as follows:

  1. Gridline every 100 percent. Subdivisions 3.
  2. Click OK.
  3. Press Ctrl + ‘ (Command + ‘) to toggle the grid on a photo every time.

Photoshop Preferences and settings for the Grid layout

You also get the grid with Photoshop’s most used tool—the Crop. When you click on it in the Toolbox (or press C), it instantly puts a rule-of-thirds grid over your image.

How to Show a Grid in Lightroom Classic

Lightroom helps you out with “Crop Guides” for more precise crops. Open your photo and follow the steps below.

  1. Go to the Develop module.
  2. Select the Crop Overlay option (or use the keyboard shortcut R) on the right panel.
  3. Click on Tools > Crop Guide Overlay > Thirds to display the grid on top of your photo.


Lightroom rule Of thirds crop overlay guide

You can check your composition against the rule of thirds or tweak the photo by cropping it for better balance.

The Rule of Thirds in Action

Let’s apply the guides to two common scenarios: Landscapes and Portraits.

Landscapes

Rule Of Thirds Landscape

It’s often tough to balance landscape shots—you cannot move anything to create a strong focal point. The rule of thirds helps to create visual appeal. For instance, you can align the horizon with one of the intersecting lines. Avoid placing the horizon in the middle of the frame when shooting landscapes. Usually, placing the horizon on the bottom line is best to convey the vastness of the sky.


Other elements in the photo (for instance, a tree or a house) can be placed near one of the four intersecting points.

Portraits

Portrait with the help of Rule of Thirds

While most portraits keep the subject in the middle of the frame, you can create interesting portraits by placing your subject away from the center. Eyes are always interesting points of interest, so you should place them along the intersections of the grids.

Also, try to align the axis of a person’s body along one of the vertical grid lines. Use the direction of the glance to place the person on the right or left vertical line.

When Not to Use the Rule of Thirds

The rule of thirds taps into the natural movement of our eyes. It can be a default method to go with, and you will do just that as you become better at photography. But do remember that the scene should dictate the composition and not the other way around.


These are not hard and fast rules, but there will be many situations when you should avoid using the rule of thirds.

1. When You Want to Fill the Frame

Filling the frame with your object

The most common alternative to the rule of thirds is placing the focal point of a photo in the center. Symmetrical photos like portraits, for example, will need an immediate and direct focus on the main subject. In such situations, you can safely fill the frame with your object at the dead center.

Some photos, like architecture or one part of a building with a repeating pattern, can have more than one point of focus. You can ignore the rule of thirds if some of them lie on the intersecting lines.

2. For Instagram Worthy Square Photos

Example of a square photo from Instagram


Centering an interesting element at the dead center of the photo works well for square photos. The element is then equidistant from all the four corners, creating symmetry.

3. In Photos With Busy Backgrounds

Field of flowers shot with shallow depth of field

You can break the rule of thirds when the background of your photo is busy. For instance, a field of flowers or a crowd at a fair. Use a shallow depth of field and center the main object of attention.

4. When Leading Lines Work Better

Example of Leading Lines in photography


Leading lines are another composition technique. In this photo, a track leads the eyes of the viewer towards a distant point from the center of the frame. Your gaze wouldn’t travel with the grass and the trees toward the house in the distance if you had used the rule of thirds to capture the photo.

Looking at everything from behind a grid might bake the rule of thirds into your muscle memory. But always try to break out and try different compositions. The idea behind the photo triumphs over everything else—the rule of thirds won’t work if the story in the photo is weak.

How to Change Your Reddit Avatar or Profile Picture

Key Takeaways

  • You can customize your Reddit avatar to stand out by selecting outfits, hair, and more elements for free on the app or website.
  • There’s a difference between the Reddit avatar and profile picture options: an avatar is a customized Snoo, while your profile picture is an uploaded image.
  • You can easily customize your avatar, but changing your profile picture requires you to use your profile settings.


You can customize your Reddit profile to represent your personality, including changing your Reddit avatar or profile picture. Here’s how you can edit and set your avatar so that your profile stands out a bit more.


Reddit Avatar vs. Profile Picture: What’s the Difference?

Most Reddit users opt for an avatar, which is a customized version of the platform’s mascot Snoo. As such, your avatar is a personal take on this small alien. Everyone gets a default avatar that they can customize.

However, you can also use a profile picture on Reddit, like any other social media website. This involves uploading a picture you have from your device.

While you can create a Reddit Avatar for free, there are also premium options for those who purchase them. Many of these are NFTs, but there are also specific clothing or style items that are available to Reddit Premium subscription users.

How to Change Your Reddit Avatar

Styling your Reddit avatar is easy and you can do it in the app or on the Reddit website.

To access your avatar style options on the app, follow these steps:


  1. On the home screen, click the yellow avatar icon in the top right.
  2. In the popup menu, select the Create Avatar button. If you already have an avatar, you can choose the Style Avatar button instead.
  3. Reddit will take you to its avatar shop. To create your avatar with free elements, tap the Edit tab at the top.
  4. Here you will be able to select outfits, hair, facial features, and more. Once you’re done selecting your elements, tap Save and then Confirm to display your new avatar.

The steps are similar on the website, but the user interface is slightly different.

To change your profile picture on the Reddit website, follow these steps:

  1. Select the profile icon at the top right of the website and select Create Avatar.

  2. You can use the Explore, Style, and You tabs to add elements to your avatar.
    styling reddit avatar on website

  3. When you’re done, click Save. Your profile will start displaying your new avatar.


Any time you want to go back and edit your avatar, you can just click on your profile icon and choose Style Avatar.

How to Change Your Reddit Profile Picture

The process of changing your Reddit profile picture is quite different compared to changing your avatar. To edit your profile picture, you need to access your profile settings.

A Reddit profile picture can be more personal, so you may not want to use it if you want to keep your Reddit profile private.

To change your Reddit profile picture on the app, follow these steps:

  1. On the Reddit home tab, tap the profile icon in the top right.
  2. From the popup menu, select My profile.
  3. On your profile page, tap the Edit button. On the Edit Profile page, select the pen icon below your avatar.
  4. To upload a profile picture, select the Pick image option. This will open your phone’s gallery and you can select an image from there.
  5. Once you have selected an image, tap the Add button.
  6. Don’t forget to tap the Save button to update your profile.


This will save your new profile picture to your account.

To upload a profile on the Reddit website, the steps vary slightly:

  1. On the Reddit home page, click your profile icon in the top right and select User Settings.
    reddit user settings

  2. On the next page, select the Profile tab. Then scroll down to Avatar and banner image.
    reddit user settings on website including images

  3. Select the plus icon to upload a profile picture. This will open your computer’s file explorer so that you can choose an image.
  4. Once your image is uploaded, your profile will automatically update with your new profile picture.

And that’s all you need to do to customize the profile image of your Reddit account. If you ever feel like a change again, you can swap between your avatar or profile image. You can also restore your avatar to a default if you want to start from scratch.

5 Free Alternatives to Midjourney

Key Takeaways

  • Microsoft Designer: Powered by DALL-E 3, limited daily boosts for quick image generation.
  • DreamStudio: Comparable to Midjourney, advanced settings, refine your image with the Negative Prompt tool.
  • DiffusionBee: Privacy-focused, run it offline with no limit on image creation.
  • ImageFX: Easy to use, undisclosed daily limit.
  • Dream by WOMBO: Mobile app and web version, whimsical, ideal for creating wallpapers.


If Midjourney’s price tag doesn’t appeal to you, delve into our lineup of free alternatives. Whether you’re looking for feature-rich image generators, or want to prioritize privacy and run a copy locally on your computer, there’s something for everyone.


Limit: Generate 15 images at fast server speed before it slows down. Replenishes daily.

What better alternative to Midjourney than its most well-known competitor: DALL-E? It’s no longer available for free through the developers’ website, but thanks to a partnership between OpenAI and Microsoft, you can use it entirely for free via Microsoft Designer.


The main restriction is the daily number of “boosts” used to generate images quickly. When they run out, you have to wait longer for your image to generate. Signing up for an account gives you 15 boosts each day.

Nothing like the ability to create higher-resolution images exists in Microsoft Designer. Nor the ability to change the aspect ratio like you can in Midjourney. However, you can click the Customize button and explore some image editing options in Microsoft Designer’s editing suite.

Removing background, blur background, adjust lighting, and add text or symbols are just some of the graphic design tools in the kit. Aimed towards creating social media posts or graphics to use in web design, newsletters, and other communications, this may or may not be your motive.

2 DreamStudio: Comparable to Midjourney

A neon image of a girl playing the synth created using DreamStudio


Limit: 25 free credits when you sign up. Does not replenish.

Counting the number of advanced settings, DreamStudio is one of the few free AI generators that holds a candle to Midjourney.

Ratio, seed, model type, style, prompt strength, and generation steps are features you can alter before prompting an image. This is the feature set you need if you want to craft an image instead of leaving it to randomization.

The model under the hood is called Stable Diffusion, and it’s one of the three big names in the AI world. We’ve made a comparison between DreamStudio, DALL-E, and Midjourney before, and ruled the Negative Prompt tool one of the stand-out features.

A Negative Prompt can help to refine an image by describing what you don’t want in an image. Midjourney does have this feature, but unless you know of it, it is likely to go unnoticed. In DreamStudio, it sits directly beneath the prompt box, making it a main part of the process.


The editing suite and option to upscale your image when downloading make this a well-rounded AI generator. You’ve got 25 free credits to use, so make the most of it.

DiffusionBee interface with an image of a girl wearing headphones

Limit: None.

Of all the AI generators on this list, DiffusionBee takes the top spot for privacy and comes with no limit to the number of images you can create.

The reason for this is that the app is downloaded and run locally on your computer. It’s not connected to the internet and doesn’t require you to sign up for an account.

The downside? It’s only available for Mac computers running an OS 12.5.1 or higher, and if you’re running an older Mac, it takes much longer to generate an image than any AI generator online. If you’re lucky to own an M1 or M2 MacBook, then your wait time is drastically reduced from around four minutes to around 30 seconds.


A Windows version is potentially in the works. Join the waitlist to get notified.

On first impressions, the results aren’t instantly beautiful in the way that Midjourney images are. But setting aside some time to explore the community of users, you will see that you can create some fantastic AI images.

Inpainting, outpainting, and the option to upload an image as a source completes the software. Our guide to generating images with DiffusionBee will show you just how easy the setup process is too.

4 ImageFX: A Simple Web App

Image of a women playing a synth created using ImageFX

Limit: Google hasn’t disclosed how many images you can create every day. But worry not as it replenishes daily.


Google appeared late to the scene of AI image generators with its free-to-use product, ImageFX. If you want to avoid all the extra bells and whistles attached to tools like Midjourney—learning parameters and commands, for example, takes a few sessions to get used to—then open ImageFX on your browser and start typing.

The number of images you can create daily is mysteriously kept a secret. But until you reach your limit, have fun by clicking on “Expressive Chips”, which Google calls the highlighted keywords that can be swapped out to create new variations.

Find out more about how to use Google’s free AI Generator which, all-in-all, takes less than 10 minutes to get started with.

5 Dream by WOMBO: Generate AI Images on Your Phone

Limit: Generate single images at a time with no limit to how many you make.


Aiming to be the fun and whimsical AI image generator among the serious contenders, WOMBO has created an app for Android and iOS that does just that. One area that it delivers on is making custom AI wallpapers, a task that Midjourney is often put to as well.

In the free version of the app, you can generate one image at a time, with the option available to regenerate the result. For more freedom, like creating variations or generating multiple images at once, you’ll have to pay for a subscription.

There’s also a web version of Dream by Wombo that has long been part of round-up lists of the best AI image generators.

Our picks for Midjourney alternatives are well worth exploring and will leave you with a folder full of great AI art during the process. It’s safe to say that Midjourney isn’t the only capable AI image generator around.

How to Copy and Paste on Chromebook

Key Takeaways

  • Copy and paste text easily by using Ctrl + C and Ctrl + V or right-clicking. Keep it simple!
  • Need to copy files or folders? Press Ctrl + C to copy and Ctrl + V to paste. Easy as that!
  • Want to access your clipboard history? Use Search Key + V to see the last five copied items.


If you’re using a Chromebook coming from another platform, you may wonder how to copy and paste. Fortunately, it’s easy to do.


Copying and Pasting Text

Text is the most common thing that you’ll need to copy and paste. So, let’s look at how you can do it.

Using the Keyboard or Touchpad

  1. Click and drag the cursor to highlight the text you want to copy from the starting word to the last. You can also double-click on a word to select it or triple-click to highlight a whole paragraph.
  2. Now, press Ctrl + C to copy or Ctrl + X to cut. You can also right-click and select Copy/Cut.

  3. Click once at the location you want to paste the text and press Ctrl + V or right-click and select Paste. If you want to paste without formatting, press Ctrl + Shift + V. Alternatively, right-click and select Paste as plain text or Paste without formatting.
    Right-Click and Paste Text

Using the Touchscreen

The method on the touchscreen is similar to that on the touchpad. You can follow these steps on your touchscreen:

Long-Press or Double-Tap > Select Text > Long-Press > Copy > Long-Press > Paste


Copying and Pasting Files and Folders

You can also copy and paste files or folders using the keyboard and mouse.

Using the Keyboard

  1. Click on the file or folder you want to copy. If you want to select all the files, press Ctrl + A. To choose specific ones, press Ctrl and click on those files and folders. You can also press Shift and select multiple consecutive files by clicking on the first and the last.
  2. Once you have made the selection, press Ctrl + C to copy or Ctrl + X to cut (move).
  3. Navigate to the location where you want to paste the file or folder you just copied.
  4. Once there, press Ctrl + V to paste.
    Paste the Selected Files in the Destination Folder by CTRL and V

If you want to copy the file name, click on the file and press Ctrl + Enter. Now, you can copy the file name with or without the file extension.

Using the Touchpad or Mouse

  1. Right-click on the file or folder.
  2. Select Copy for making a copy of the file or Cut for moving the file.
  3. Go to the desired destination and right-click anywhere in the free space.
  4. Click Paste to copy/move the item.
    Right-Click and Paste


If you want to copy the file name, right-click on the file and click on Rename. Once the file name is highlighted, right-click on the text and click on Copy or Cut. Now, you can paste the text anywhere you want.

Using the Touchscreen

The steps for using the touchscreen are almost the same as the ones for the touchpad. The only difference is how you get to the context menu. You can do so by long-pressing on the file or folder and then in the free space at the destination. So, the process will be:

Long-press > Copy/Cut > Long-Press > Paste

The basic steps for copying and pasting are the same as above. The following are the only differences to note:

  • When you right-click a link, you get options to Copy link address, Copy the text, or Copy link to highlight, which lets you share the page where you found the link. The pasting process is the same.
    Options You Get by Right-Clicking a Link

  • For images, you get an option to Copy image which grabs the image itself or Copy image address which copies its link address. The options are similar for videos.


Access the Last Five Copied Items on the Clipboard

A nifty little trick is to see the last five items you have copied to the clipboard by pressing Search Key + V. You can then paste any of those five items using the keyboard shortcuts mentioned above.

How Is Chromebook’s Copy and Paste Functionality?

Google has aimed to make the PC experience simpler with Chrome OS. Its copying and pasting functionality ranks high compared to other OSes. Also, Chromebooks are versatile and easy to use for daily users.

So, make the most out of your Chromebook with these useful methods to copy and paste your data.

What’s the Difference and Which Should You Buy?

Key Takeaways

  • Apple Vision Pro offers superior hand tracking technology compared to Meta Quest 3, but lacks controller support, causing delays.
  • The Apple Vision Pro features high-resolution micro-OLED screens, but weight, battery, and comfort issues compared to Quest
  • Apple Vision Pro promises new Spatial Computing experience, while Meta Quest 3 focuses on immersive gaming and customizable features.


In February 2024, Apple finally unleashed the Vision Pro on the world: a $3500 AR headset that Apple insists mustn’t be called an AR/VR/XR headset and must instead be referred to as a new paradigm of “Spatial Computing.”

Part of the reason is to avoid comparisons to existing headsets, but it turns out that the Meta Quest 3—a mixed-reality capable VR headset released in 2023 that retails for around $500—is actually quite similar.

Clearly, a device that costs seven times as much should be better in nearly every way, but there are more similarities than you’d think.


Controllers (or Lack Thereof)

The unique thing about the Apple Vision Pro is that you don’t need controllers to navigate the VR or AR space. Instead, Apple has designed the Vision Pro to be controlled using your eyes, hands, and voice.


The Meta Quest 3 comes with ergonomic controllers for interaction when you’re immersed in the VR or AR environment. If you’re playing a game that involves holding a gun or sword, these are superior to just your hands in every way. However, put the controllers to one side, and the headset will recognize your hands instead, allowing you to explore using point and pinch gestures. For general UI interactions, this works great.

meta quest 3 - shooting
James Bruce / MakeUseOf

By all accounts, the hand recognition of the Apple Vision Pro is superior to the Quest 3. It can see your hands when they aren’t directly in front, thanks to tracking cameras with a wider, higher resolution view, leading to more accurate interactions.


However, another way of putting this would be that you don’t have much choice on the Apple Vision Pro. You have to use your hands because there aren’t any controllers—even if a controller would be faster or more accurate in certain situations. In fact, some people have reported that gaming on the Vision Pro is tricky thanks to all the heavy processing for that accurate hand-tracking; there’s a noticeable lag compared to the Quest 3. This can likely be fixed if Apple adds a less accurate gaming mode.

Another control limitation of the Apple Vision Pro is that clicking a button requires you to look directly at it, a sort of double confirmation that you meant to click on that thing. This ensures accuracy even further, but it’s quite an unusual behavior. On the Quest 3, you can tap buttons while your gaze is elsewhere. Still, this is a facet of the software, so it’s possible this behavior will change over time.


Specifications

Weight

Despite the Apple Vision Pro headset weighing slightly more than a Quest 3, the overall weight is even higher because that figure doesn’t include the tethered battery pack, designed to be placed in your pocket or to one side. The Quest 3 battery is built into the front of the headset, but if you need even more juice, you can fit another battery on the back of the strap, which helps to distribute the weight more evenly.

It’s not surprising that the Vision Pro weighs significantly more; it has an awful lot of glass inside and out, as well as another screen on the front. While the decision to make the battery external was sensible given the constraints, the fact that it was so explicitly hidden from marketing is an admission of design failure. Any additional cabling on a VR headset is inconvenient and detracts from the experience. The Quest 3 is completely standalone—or can be wirelessly driven by a PC for enhanced graphics.


Battery Life

Both the Apple Vision Pro and Quest feature a battery life of around 2.5 hours, though the precise figure will vary according to how intensive the apps you’re running are, how loud the volume is, how bright the display is, etc. Normally, a more powerful chip like that inside of the Vision Pro would require more power to run, but it’s so efficient that it can perform many times faster than the Quest 3’s SoC while using the same amount of power.

Screen Quality and FOV

There’s very little comparison to be made when it comes to resolution; it’s similar to the jump from HD to 4K. According to the iFixit teardown, the Apple Vision Pro features dual micro-OLED screens running at 3,660 x 3,200, with a screen size of around 0.95-inches, resulting in an incredible 3.386 PPI (pixels per inch). The Quest 3 uses dual LCDs at 2,064 x 2,208 per eye but with larger screens, resulting in 1,218 PPI. That’s a massive jump in clarity and the highest pixels-per-inch density we’ve seen yet in any device.


However, while the Vision Pro may have the highest pixel density seen yet, it also sits very close your eyes. A better measure to use is PPD, or pixels per degree. PPD is a function of the field of view—the more of the virtual world that can be seen, the lower the pixels per degree would be for a similar resolution. The Vision Pro PPD is estimated at around 34; the Quest 3 is about 25. In fact, the Pimax Crystal features pixels per degree density similar to the Vision Pro, so it’s not out of this world.

On the other, the field of view—that is, the area of your vision that you can render something to (imagine a monitor on your desk that you can move closer to or further from, thereby increasing or decreasing your field of view)—is actually slightly lower on the Apple Vision Pro compared to the Quest 3. It’s not a huge difference, and measuring FOV isn’t an exact science, but anecdotal reports are that the vertical FOV is a little lower.


Increasing the field of view significantly requires major compromises elsewhere and complex lens systems that introduce their own shortcomings, so we’re unlikely to see much improvement here for a while. That said, both the Quest 3 and Apple Vision Pro offer a huge improvement over lightweight AR glasses such as the Microsoft HoloLens. The “ski-goggles” design is needed for any kind of immersion.

Finally, the Quest 3 can run those screens at up to 120Hz, while the Vision Pro maxes out at 90Hz. Most applications don’t (or rather, can’t, due to the processing power required) use the full refresh rate of the Quest 3, so this spec is somewhat moot.

But we should put this in perspective when it comes to claims of the Vision Pro being a screen replacement: a virtual screen on the Vision Pro (or the Quest 3) still can’t compete with a real monitor. While you might have 4K resolution on the Vision Pro, that’s a total resolution for your entire view, so placing a virtual monitor into a small part of that means the actual resolution of that virtual monitor will be significantly lower. If your work requires you to view something in a high resolution, you will need to stick with physical monitors for now, I’m afraid.


CPU and RAM

The Apple Vision Pro has an Apple M2 processor, which you can find in the MacBook Air, MacBook Pro, and iPad Pro devices. But to process information from the cameras and send information back to the screen with minimal lag, the Apple Vision Pro uses an additional chip, dubbed the R1.

The Meta Quest 3 is powered by a Qualcomm Snapdragon XR2 Gen 2 chip. There’s no comparison when it comes to the processing power compared to the Vision Pro; it’s like pitting a desktop against a smartphone.

The Apple Vision Pro features 16GB of RAM, while the Meta Quest 3 offers 12GB, but this spec doesn’t mean much to overall performance.

This table summarizes some of the key specs.

Apple Vision Pro Meta Quest 3
Price From $3,499 From $499
Processor M2 chip, R1 chip Snapdragon XR2 Gen 2 chip
RAM 16GB 12GB
Storage 256GB/512GB/1TB 128GB/512GB
Display Type Micro-OLED LCD
Display Resolution 3,660 x 3,200 per eye 2,064 x 2,208 per eye
Refresh Rate 90Hz 120Hz
Weight 600-650g 550g

Augmented Reality and Passthrough

The main selling point of the Vision Pro is that you can overlay applications onto your real-world view; this is called Augmented Reality to most of us, but Apple would rather you refer to it as Spatial Computing. The most crucial part of this is a good quality passthrough camera system. Unlike AR glasses that project additional information onto a clear lens, allowing you to continue seeing the world, the Vision Pro and Quest 3 both feed a live camera view back to you. Until the Vision Pro came along, the Quest 3 was the king of camera passthrough for AR. But the Vision Pro has a better camera system, with faster processing and, therefore, a lower latency until the image reaches the internal screens. That means your view of the outside world is significantly sharper and less delayed. Since both systems rely on small camera sensors, low-light situations severely degrade the quality of the passthrough, increasing noise levels. Both the Quest 3 and Vision Pro passthrough cameras operate best in well-lit areas. The other promise of spatial computing is that you can leave Windows and applications in a specific place and return to them later. On the Vision Pro, this works as described; some users have even reported losing app windows because they can’t remember where they put them.These features were promised on the Quest 3, but have yet to materialize. You’re currently limited to three side-by-side app windows, and even then, it’s far from true multitasking, and the Quest 3 doesn’t have the kind of desktop operating power that the Vision Pro has.The Apple Vision Pro isn’t just a standalone headset; it’s equivalent in power to a decent laptop, so it has no problem running all kinds of productivity apps.

OS, Apps, and Games Support

In their current state, the software offerings of the Quest 3 and Vision Pro differ dramatically.

The Apple Vision Pro uses a new operating system known as visionOS that lets you interact with familiar iOS and macOS apps in a mixed-reality environment. Besides that, you can watch movies (though the Netflix and YouTube apps are noticeably absent), browse the internet, and work using a virtual keyboard. You have multiple apps open, and bring your existing laptop screen into the virtual world. It’s your own private computing space with hundreds of virtual monitors. Many users report immersive movie watching as their favorite experience on the Vision Pro, though.


Apps open in Vision Pro
Will Graf/MakeUseOf

The Meta Quest 3 offers some of the same features, but it runs on a heavily customized version of Android OS. You’ll find some great immersive movie players, for instance—even ones where you can enjoy movies with other virtual friends—but it’s very much not a desktop replacement.

quest 3 clip - outdoors
James Bruce/MakeUseOf

The Meta Quest 3, however, is primarily designed for immersive virtual reality gaming experiences with haptic feedback controllers that make you feel like you’re touching something that isn’t there, like holding a virtual gun or sword. Meanwhile, the AR features of the Quest 3 are more for convenience than productivity, such as helping you see your phone screen or check if the cat you just stepped on is still breathing.


You can also play games on the Apple Vision Pro by connecting a Bluetooth gamepad, but only flatscreen games on a large virtual cinema screen. The lack of dedicated controllers will ultimately limit the VR games available on the Vision Pro. Of course, it’s possible that Apple could release handheld controllers in the future, but it doesn’t seem to fit with their vision for the device.

External Perception

EyeSight on Vision Pro
Will Graf / MakeUseOf

The Apple Vision Pro features a large glass front plate, beneath which lie two micro OLED displays that mimic your eyes—even down to where you’re looking, thanks to the eye tracking. It lets other people see your eyes when you’re in the augmented reality space. But if you switch to virtual reality (immersive mode), it won’t show your eyes on the outside. We may see additional features added to these small eye displays in the future.


meta quest 3 - side view
James Bruce / MakeUseOf

Meanwhile, the Meta Quest 3 just offers a large white plastic fascia. You can affix your own printed skins for some customization.

Comfort

Vision Pro lenses
Will Graf / MakeUseOf

Out of the box, the Apple Vision Pro features a single padded head strap with cushioning on the back. Whereas the Meta Quest 3 comes with a basic head strap and an additional strap on the top, which is more convenient for distributing weight and avoiding pressure on your eyes. Early adopters of the Vision Pro note that the weight distribution is the biggest flaw; it’s uncomfortable to wear for a long time.


However, both headsets have optional strap upgrades or modifications, such as the dual loop pictured above. The Quest 3 accessory ecosystem is naturally more developed at this point, but in time, we’ll see an even wider range of more comfortable alternative straps for the Vision Pro.

Price

The Apple Vision Pro starts at $3,499, making it the most expensive VR/AR headset on the market by a long shot. Its price is greatly influenced by its micro-OLED displays, external facing screens, incredibly powerful processor chips, as well as multiple cameras and sensors to track your eyes and hands. But regardless of how technically impressive all that is, it’s an undeniably large sum of money.


By comparison, the Meta Quest 3 with 128GB storage starts at $499. You could buy seven of those for one Vision Pro, and enjoy immersive virtual reality gaming with your whole family and neighbors.

Is It True That People Are Returning the Vision Pro?

While it makes for some great headlines, and undoubtedly many of the early Vision Pro orders are being returned within the 14-day window, it’s also not unexpected. Even our own Vision Pro reviewer Will Graf ended up returning his headset. Many early adopters of the Vision Pro have little to no experience with existing VR headsets. After all, Apple is marketing the Vision Pro as “not VR” and instead as a desktop replacement that you can work on for many hours a day. If you’re not used to wearing a headset at all, that’s a guaranteed way to induce headaches and neck pain.


Other early adopters who do have VR experience are likely experiencing some buyer’s remorse as they realize the limited applications available compared to much cheaper consumer offerings.

It seems like an unfair comparison—especially given the price difference of a few thousand dollars—but the Apple Vision Pro and Quest 3 have more in common than you’d think.

The Vision Pro is a wearable computer for early adopters already invested in the Apple ecosystem—or for developers who want to get a headstart on what might actually be the next paradigm of computing. Meanwhile, the Meta Quest 3 is an immersive virtual reality headset with a wide range of gaming, lifestyle, and entertainment apps already available at a much more affordable price point.

To me, the choice is obvious; but if I had a disposable income of ten times what I do now, I’d certainly be tempted.

What’s the Difference Between Samsung and Android Phones?

Key Takeaways

  • Android is a mobile operating system. Samsung is a consumer electronics manufacturer.
  • Samsung manufactures its phones and tablets under the brand name “Galaxy.” These devices run on Android OS.
  • Samsung adds a custom skin on top of Android that provides additional features, apps, and services. This helps differentiate Galaxy devices from the competition.


If you aren’t tech-savvy, it’s easy to get confused about different operating systems, manufacturers, device models, and specifications. One such example is people perceiving “Samsung” and “Android” as synonymous, which isn’t entirely correct. Let’s understand the difference between Samsung and Android phones.


Samsung Phones Run on Android OS

Android is a mobile operating system, whereas Samsung manufactures phones and tablets that run on Android. Simply put, Android provides the platform on which your Samsung phone runs apps and services.

Just like how Windows and macOS are operating systems for desktop computers, Android is one of the two major operating systems for mobile devices. The other one is Apple’s iOS, which runs on iPhones.

Sharky Photography/Shutterstock


That said, other smartphone operating systems do exist, some of which are defunct and no longer developed, including Windows Mobile, BlackBerry OS, and Tizen.

Note that Android is not a company and doesn’t manufacture smartphones, in the same way Windows is not a company, but Microsoft is.

Manufacturers often integrate Google Mobile Services (GMS) alongside Android, which provides Google-licensed interfaces and apps like Google Search and Google Chrome. However, Android and GMS aren’t intrinsically linked; a phone could run Android but still use proprietary interfaces and apps.

Google owns and develops Android, but the operating system itself is free and open-source for other developers to use and customize. More on that soon.

How Are Samsung Phones Different From Other Android Devices?

We’ve established that Android is an operating system, so how does Samsung fit into this? Samsung is a global electronics company that produces equipment like monitors, smart home appliances, and TVs. It also manufactures and sells smartphones, tablets, and other consumer electronics gadgets.


A guy holding a Galaxy S24 Ultra showing its back
Justin Duino/MakeUseOf

Samsung sells its smartphones under the brand name “Galaxy,” which splits out into product lines like Galaxy Z (foldable devices) and Galaxy S (top-tier, high-performance devices). Though Samsung has dabbled with other mobile operating systems, all Samsung Galaxy smartphones currently run the Android operating system.

One thing that differentiates Samsung phones from other phones that run on Android is One UI (formerly called Samsung Experience and TouchWiz). One UI is the custom “skin” or layer of software that Samsung adds on top of Android to make its Galaxy devices stand out from other options.


One UI is considered one of the best Android skins, as it’s packed with features, customization options, and Samsung apps and services that Android does not offer. Some of these features include Edge Panels, Modes and Routines, Secure Folder, and the Bixby voice assistant. In fact, many of Samsung’s software innovations have been adopted into the core Android experience.

Are All Android Phones the Same?

No, all Android phones are not the same. Samsung is just one of the many companies that use Android for its devices. Other major smartphone makers include Google, Sony, Motorola, OnePlus, Xiaomi, Oppo, and Vivo.

Various smartphones displayed in a store
bodnar.photo/Shutterstock

Just like Samsung, all of these major smartphone manufacturers add their custom skin on top of Android. This helps them differentiate their devices, stand out against the competition, and offer something unique to their customers.


Some Android skins are mostly about aesthetics, whereas some are focused on providing more functionality. You can learn all about Android skins and why companies prefer them over stock Android.

The core, unaltered Android experience developed by Google is known as “stock Android.” It used to be rare to find a phone that would offer the stock Android experience. Nowadays, it’s slightly more common, especially with Google’s Pixel phones rivaling Samsung’s offerings.

Do Samsung Phones Evolve With Android?

Android is an ever-evolving operating system. Google rolls out a new major version each year. For a long time, Android named its versions after desserts (Nougat, Oreo, Pie), but now sticks to numerical naming like Android 13 and Android 14.

Galaxy AI Live Translate in a phone call on S24 Ultra
Zarif Ali/MakeUseOf


As Android evolves, so does Samsung’s One UI. Generally, Samsung rolls out a new major One UI version for each major Android upgrade, but the company also releases minor updates within that cycle. For instance, the feature-packed One UI 6 update is based on Android 14, but the newer One UI 6.1 update unlocks Galaxy AI features on older Samsung phones.

Your Samsung phone won’t receive Android or One UI updates indefinitely. Samsung typically supports its newer devices with these major updates for four years after release. After that, your phone will only receive critical security updates, though even those will stop eventually.

It’s worth noting that Samsung is improving in terms of software support, promising seven years of major Android updates and security updates for the entire Galaxy S24 lineup.

However, since Samsung phones use a custom skin, they won’t receive updates as quickly as Google Pixel phones that run stock Android. Also, how quickly you get One UI updates depends on your location and phone carrier.


Does Samsung Make the Best Android Phones?

Now that you know the differences between Samsung and Android, should you buy a Samsung phone that uses Android? That’s down to personal preference, though there’s a good reason why Samsung sells the vast majority of Android phones. According to Statcounter, Samsung holds 23.69% of the global smartphone market share at the time of writing, second only to Apple.

There are plenty of Samsung phones for every budget; if you can afford it, stretch for the Galaxy S line to benefit from the best hardware, though the Galaxy A line is more affordable without too many sacrifices.

However, if you’re not a huge fan of Samsung’s custom One UI skin, consider checking out other manufacturers. Google Pixel phones, with their stock Android experience, might be right up your alley. Alternatively, you can sack Android entirely and go for an iPhone—Apple develops both the hardware and software with all the quality you’d expect from the company.


The Galaxy S series was born in 2010, with the first phone in the lineup selling over 20 million units. Though Samsung stumbled at the halfway point, the company has pulled the brand back and is never shy to innovate. Whether you want a flat display, a curved screen, or a foldable phone, Samsung has something in store you’d like.

A Charger and Docking Station in One

Key Takeaways

  • The Baseus GaN5 4-in-1 Charging Station is a compact hub and fast charger that can power three USB devices simultaneously.
  • It has two USB-C ports, a USB-A port, and an HDMI port, making it versatile for connecting laptops, monitors, and other peripherals.
  • The charging station has a maximum power output of 67W, making it suitable for average users with devices like MacBook Air or base MacBook Pros.


You probably need a charger for your laptop, phone, and earbuds once you get to your office. And if you have a permanent workstation, you likely plug your PC into a monitor before you start working. This could lead to many cables, dongles, hubs, and other accessories cluttering your desk. The Baseus GaN5 4-in-1 Charging Hub will help clear up your workstation.

Baseus GaN5 Pro 4-in-1 Charging Station

The Baseus GaN5 4-in-1 Charging Station is a fast charger capable of powering three devices that also acts as a hub and docking station. You can also attach an HDMI monitor to it that can output 4K@30.

Brand
Baseus

Model
GaN5 Pro Desktop Fast Charger

Output
2x USB-C (only one can be used for data), 1x USB-A, 1x HDMI

Output Power
67W

Color
Black

Weight
309g / 11oz

Dimensions
9.9 x 3.9 x 3.9cm

Cord Length
1.5m / 5ft

Pros

  • Convenient hub and charging function
  • You can connect a monitor to the HDMI port for 4K30 output
Cons

  • One of the USB-C ports is power only
  • As a hub, the ports would be better placed on the back
  • Must be powered?can’t act as an unpowered USB-C hub

A Little Black Brick on Your Desk

Baseus GaN5 4-in-1 Charging Station beside a 15-inch MacBook Air
Jowi Morales / MakeUseOf

The Baseus GaN5 4-in-1 Charging Station is more than just a fast charger. Instead, it could also be a small hub for your PC (or any other supported device), delivering power and transferring data to attached devices.

It weighs 309 grams (10.9oz) and measures 9.9 x 4.9 x 3.9 cm, so it won’t be a burden to keep in your laptop bag. But since it’s meant to go on your desk, it has a 1.5m (5ft) AC cable for plugging into an outlet. You also get a 110cm (3.6ft) USB-C to USB-C data cable to connect your device to the hub.


Despite being designed for workstation use, it doesn’t have a tremendous power output capacity. It can only deliver 67 watts across all the ports, so it’s not intended for users with powerful devices like the M3 Pro-powered MacBook Pros. But if you’re the average user with a MacBook Air or the base M3 MacBook Pro, this should be more than enough for your needs.

Less Like a Dock, More Like a Charger

Baseus GaN5 4-in-1 Charging Station ports
Jowi Morales / MakeUseOf

The GaN5 4-in-1 has two USB-C ports, one USB-A port, and an HDMI port; thus the 4-in-1 moniker. It also has a single blue indicator light that tells you if the hub is powered. However, while it is marketed as a combination of a hub and a charger, it acts more like the latter. That’s because even though it has an HDMI port that can accommodate 4K@30, only two of the USB ports can transfer and receive data.


So, if you plug your laptop into the Type-C 2 Data port, it will only be able to receive data from the USB-A port. The Type-C 1 port is power only and doesn’t communicate with the other ports on the hub. And because all the ports are placed at the front of the charger, you still have to deal with some cable spaghetti. It would’ve been better if Baseus had placed the HDMI and USB-A data ports at the back, as you’ll likely keep your monitor and keyboard plugged into the hub constantly.

Furthermore, since this device is primarily a charger, it doesn’t work without power. So, even if you have a USB-C-powered monitor and a laptop with a full charge, you can’t use the Baseus GaN5 4-in-1 to connect the two devices via HDMI.

Power for Your Laptop and Phone, Connection for Your Monitor and Keyboard

Using all the ports on the Baseus GaN5 4-in-1 Charging Station
Jowi Morales / MakeUseOf


Like most chargers, its maximum 67-watt power output will be divided when you plug in multiple devices. So, this is how the Baseus GaN5 4-in-1 divides the watts it delivers.

Type-C 1

67W

20W

Type-C 2 Data

67W

45W

Unfortunately, we do not have data for the USB / Data port, so we don’t know how many watts it can deliver and how it affects the other devices when you’re using it to charge a device. Nevertheless, when I used it on my workstation, the Baseus GaN5 4-in-1 delivered enough power to my gear.

I plugged my MacBook Air into the Type-C 2 Data port, my mechanical keyboard into the USB / Data port, my 4K TV into the HDMI port, and my smartphone into the Type-C 1 port. And since I only needed one USB-C port for power, video, and keyboard data transmission, that left my MacBook with one free USB-C port instead of using the MagSafe port for power, one USB-C port for my HDMI dongle, and the other for my keyboard, leaving no free ports.


An Efficient Plastic Box

Baseus GaN5 4-in-1 Charging Station power consumption
Jowi Morales / MakeUseOf

One of the things I look at when reviewing chargers is their efficiency—or how much power they deliver to your device versus how much energy they waste as heat. So, I first tested the charger by plugging in my 15-inch MacBook Air at about 60% battery level.

Surprisingly, my laptop initially drew 71 watts from the Type-C 2 port, with the charger drawing 78.1 watts from my outlet tester. Eventually, my computer settled at 67 watts, with my tester reporting 76.4 watts drawn from the wall. This equates to an average of 90% efficiency, which is pretty good for chargers of this size.

When I had four devices plugged into the hub, it felt a bit hot to the touch. But after I checked it with my infrared camera, the surface temperature registered to just around 50 degrees Celsius—which is average for charging hubs of this size.


Baseus GaN5 4-in-1 Charging Station infrared view
Jowi Morales / MakeUseOf

Your First Step to Getting That Clean Workstation

The Baseus GaN5 4-in-1 Charging Station is a suitable device for getting you started on clearing your workstation. It’s not perfect, but it’s a great starting point for clearing up extra cables and getting open ports on your laptop.

Yes, it’s not suitable for users who have high-powered devices, multiple displays, and many peripherals. But for most of us who only use one monitor and leave a nice mechanical keyboard at the office, the Baseus GaN5 4-in-1 Charging Station will do.

Baseus GaN5 Charging Hub eCommerce Image

Baseus GaN5 Pro 4-in-1 Charging Station

The Baseus GaN5 4-in-1 Charging Station is a fast charger capable of powering three devices that also acts as a hub and docking station. You can also attach an HDMI monitor to it that can output 4K@30.

How to Save Your Favorite Threads Posts (and Why You Should)

You can now save individual Threads posts to revisit at a later date. These are saved in a dedicated folder, allowing you to find and view them easily without having to go searching for them.


How to Save Posts on Threads

To save a Threads post, simply tap the three horizontal dots next to the post you want to save. This brings up a contextual menu that allows you to interact with that post and the poster in various ways. You can Save or Hide the post, or Mute, Block, or Report the poster. In this case, we want to save the post.

Tap Save, and that post will be saved to your Saved folder. A popup will appear telling you that you’ve saved the post, and invite you to See All. If you tap that quickly before it disappears, you’ll be whisked straight to your Saved folder. Otherwise, you’ll have to navigate there manually.

How to View Your Saved Threads Posts

To view your Saved Threads posts, which is, after all, the whole point of saving them:

  1. Tap the outline of a human on the right-hand side of the bottom menu bar. This takes you to your profile.
  2. Tap the two horizontal lines of differing lengths in the top, right-hand corner. This takes you to your Settings.
  3. Cast your eyes down until you see Saved, and click that to open your folder of saved Threads posts.


To delete or unsave a saved post, simply tap the three dots next to a Threads post you have previously saved, and click Unsave. The post will disappear from your Saved folder (after refreshing or revisiting it), never to be seen again.

Reasons Why You Should Save Threads Posts

Like all social media apps, Threads is full of content. Especially if you hang out on the For You tab where Threads recommends content it thinks you’ll like. Quite often, it’s wrong, but just occasionally it will surface a post worth saving from a stranger you don’t follow on Threads.

As reported by ZDNet, Threads is increasing in popularity as it continues to take bites of X’s userbase. This means that the number of posts is only going to increase.

You might want to save a Threads post because:

  1. It contains some helpful advice you want to revisit at a later date.
  2. It contains some words of wisdom you want to live by in the future.
  3. It contains a funny joke you want to save in order to retell others.


There will be plenty of other reasons too, but these are a just a handful of reasons why Threads’ Save function is useful. And if you can’t find anything on Threads worth saving, at least you can delete your Threads account without deleting your Instagram.

Charge Your Ebike While You Work Out

Key Takeaways

  • Stay active indoors with the MorphRover while generating free electricity.
  • It features a smooth ride and powerful motor, but it’s heavy and lacks nuance.
  • The most impressive feature is being able to charge the battery while working out, but it may not be ideal for beginners.


The Freebeat MorphRover is the world’s first 2-in-1 fat tire ebike for both outdoor riding and indoor exercise. And while you’re working out indoors with the connected Freebeat app, you’ll be charging your MorphRover ready for your next outdoor adventure. But while the MorphRover does a decent enough job of being both an indoor exercise bike and an outdoor ebike, it excels at neither.

Freebeat MorphRover

The Freebeat MorphRover is a powerful ebike that can transform into a variable resistance exercise bike indoors—and it’ll charge your battery while you work out, ready to power your next journey. But unless you’re already incredibly fit, I wouldn’t expect to generate much. 

Brand
Freebeat

Battery
720Wh

Weight
35kg / 77lbs

Brake Style
Hydraulic

Wheel Size
26×4 inch

Suspension
Front hydraulic only

Motor (W)
750W

Electronic Power Assist
5 levels

Charging
AC or self-charging exercise bike

Connectivity
Bluetooth to the Freebeat app

Rider Height
Step-through 5’1” to 6’; high step 5’6” to 6’4”

Tires
Chao Yang

Gearing
8 speed

Sensor
Cadence

Walk Mode
Yes

Frame
High step or step through

Lights
Front only

Rear Derailleur
Shimano

Dimensions
75″ front to back

Pros

  • Keep riding even when you can’t get out, and generate free electricity at the same time
  • Smooth stable ride on most surfaces
  • Powerful 750W motor
  • Variable resistance for workouts
Cons

  • You’ll need a Freebeat subscription to get the most from it as an exercise bike
  • Cadence sensor and controller lacks nuance and often overpowers
  • It’s enormous and heavy, no way you’ll get this up any stairs

Specifications: Powerful, and Huge

freebeat morphrover - outdoor rear shot in quarry
James Bruce / MakeUseOf

The MorphRover is a large and heavy bike at 77lbs, and measuring 75 inches from front to back, which means that despite its ability to transform into an indoor workout bike, it’s almost completely impractical to carry up a flight of stairs.


Available in three colors (Sage Green, Sahara Sand, and Midnight Black as reviewed), and either step-through or high-step frame, the MorphRover features 26×4 inch fat Chao Yang tires—the largest you’ll find on any ebike. The step-through should be suitable for anyone 5’1” to 6’, while the high-step should suit 5’6” to 6’4”. For reference, I’m 6’1”, so I opted for the high step.

Getting a heavy beast like this to move requires a powerful motor: a 750W rear-hub drive in this case, activated by a cadence sensor, and offering up to a claimed 85Nm of torque with a throttle capable of up to 20MPH.

For safety, you’ll find hydraulic disc brakes, a small front light, and a rear reflector. Curiously, the wiring for a rear light is present, but no actual light was provided in our package to plug it into. Gearing is a Shimano 8-speed, which sits closely next to a throttle; too close for my liking, as I found the shifter buttons a little hard to press.


freebeat morphrover - shifter and throttle
James Bruce / MakeUseOf

You’ll find an adjustable front suspension, though nothing at the rear. The battery can be fully removed with the use of a key, so you can charge it elsewhere or just remove for security. It’s all fairly standard stuff here, other than the enormous tires and convertible indoor/outdoor function.

Setup: More Construction Than Usual

freebeat morphrover - outdoor straight side shot
James Bruce / MakeUseOf


The MorphRover comes with an awful lot of bits and bobs to attach, like the screen and buttons to the handlebars. It has a relatively good printed quick start guide to follow, but misses some critical steps like which cables plug in where, and the fact that you should attach the brake cable to the frame before putting the front wheel in (or you’ll have to remove either wheel or the brake lever to thread it through correctly). None of this presented huge issues, but considering they have a quick start guide that’s excellent in all other regards, it seems like an oversight. However, you’ll find a bag full of all required tools, so no need to raid your drawer.

Once the main bike is built, you can move onto the static frame add-on; it’s another three or four boxes of bits nestled inside the main shipping box, and construction there is simple enough. The front wheels sit on a basic stand that prevents it from turning; the back is elevated and locks onto the axle with an easy and secure hand screw mechanism.

I’ll note that shipping everything in a single box is convenient, but does make it incredibly heavy—about 121lbs in total. This was far more than I could handle alone, and my wife wasn’t much help; we had to phone a friend to help shift it into the kitchen.


The MorphRover is imposing—one of the largest e-bikes I’ve reviewed yet. With 26-inch fat tires, it’s ready for some rough mountain trails, combined with a durable frame. This definitely wouldn’t be suitable for anyone on the smaller end of the spectrum. I’m 6’1″ or 185cm, and it still feels big to me.

The battery arrived completely empty, though in fairness, it was shipped over from the USA to the UK, and took around three months to deliver, so that’s probably not the case for most customers.

The full user manual also reveals a very interesting point: it refers to the “Velotric” bike six times. My guess is that the MorphRover is a modified Nomad 1. The specs and frame are identical, while the controller, with its Bluetooth capabilities, is probably the only difference.

As a Spin Bike: You’ll Probably Want a Freebeat Subscription

freebeat morphrover - indoor action shot
James Bruce / MakeUseOf


When you’re ready to exercise, elevate the rear wheel onto the stand; slot it onto the bar on one side, then tighten the bolt on the other. The front stand is even easier; slide it under the front wheel for stability. The rear stand folds up for storage, and the front side is small enough not to take up much room anyway.

freebeat morphrover - elevated stand detail
James Bruce / MakeUseOf

The whole thing felt stable enough that I could stand up and ride vigorously without fear of toppling over.

freebeat morphrover - indoor mode variable resistance screen detail
James Bruce / MakeUseOf


Before you can workout indoors, you’ll need to swap the bike over to indoor mode. You can either do this through the app—it connects easily over Bluetooth the sensors built-in to the bike—or via the LCD screen and control buttons on the handlebar. It’s also recommended that you place the MorphRover into the highest gear. When indoor mode is activated, you’ll find the usual speed adjustment instead changes the variable resistance in the motor, between 0-100. This can either be controlled manually with the +/- buttons on the handlebar, or you can let the app automatically adjust the level for you.

Without a Freebeat subscription, you’ll only be able to access the Free Ride section of the app, which contains some stats about your current ride. There’s no interactive elements or gamified experience there—just your cadence, power output, speed etc.

If you want access to any of the other programs, workouts, or gamified beat-matching parts, you’ll need to sign up to the 45-day trial, and provide your credit card details. After 45 days, you’ll be charged either $20/month for the single-user plan, or $35/month for the family plan.


So what does this get you?

First up: Exercise Classes. Follow along with an actual instructor, being scored on how well you match their specified cadence. I should note that I’m new to “spin” classes, and while I’m sure some people will enjoy this, I found them difficult to follow on a small iPhone screen—I could barely make out how fast they were cycling, and the interface is otherwise fairly unintuitive. This would be better if you’re riding in front of a TV screen, but out of the box there’s no detachable tablet stand or even iPhone holder.

workout screenshot from freebeat app

With some classes, I found the music and instructor’s voice was so badly mixed that I couldn’t hear a word the poor woman was saying. Some classes include other elements that involve getting off the bike, which is more suited to the rest of the FreeBeat range.


workout results

Then you get the Rhythm Game mode. Unlike the exercise classes, there’s no choice here—you’re thrown straight into a random song, none of which I actually recognized, and all sounded like generic pop music. Cycle faster or slower depending on the beat, and attempt to match the lines that come down the screen. But unlike games like Guitar Hero, there are no buttons to press, so it’s a tenuous connection at best between what your feet are doing and how it matches the beat.

Once you’ve done one song, it automatically moves onto another. Again, though, there’s no choice, and I don’t really see how this is any better than simply putting on Spotify. Sure, you won’t be scored on how well you match the beat, but you can make it up and spin away as your heart desires anyway.


Both classes and the rhythm-matching game modes include an automatic resistance adjustment, but it didn’t feel like it was working. It hovered around 10/100 no matter what I was doing. Eventually, I gave up and took control manually.

Finally, there are Scenic Rides. You can pick a lovely mountain pass or similar to ride through, and view it on your tiny phone screen. I was expecting that the faster I rode, the faster the video would progress. Or if I stopped, the video would stop. No such luck. Regardless of what I was doing, it played at the same rate. I started to wonder if my bike was broken, but no, it was still connected. You get the usual stats of course, but it’s completely disconnected from what the on-screen video does. It’s no better than finding a scenic ride video on YouTube, and playing that while you spin along.

There are other annoyances with the Freebeat app too, like the constant notifications telling you to ensure the bike is set at gear 8 (it was); this happens every session.


It’s a shame, because there’s so much interactivity they could have done with this. Instead, I canceled my membership and downloaded Holofit for the Meta Quest 3. Attach a cadence sensor to the pedal, and it knows how fast or slow you’re cycling, and moves your virtual cycle at the same rate. It’s fun, but the rendered scenery can be a little bland. VZFit is a similar app, but subscription-based, with access to actual Google Street View imagery (which sounds fun, but the reality is a bit of a distorted mess). Unfortunately, there’s no third-party access to the built-in sensors.

Heading Outdoors: Rough but Powerful

freebeat morphrover - outdoors cornish mines in background
James Bruce / MakeUseOf

The MorphRover features a cadence sensor, albeit a very responsive one, which means the motor kicks in with the full power of whatever level you’ve set it on the moment it detects some pedal action—up to 750W.


On flat terrain, even at level 1 PAS, this felt a little too much, as if my pedaling wasn’t required. On the other hand, turning off the PAS completely meant I could barely move the thing due to the sheer weight. There’s not a lot of nuance here.

The power that the cadence sensor commands on the MorphRover means you’ll be micromanaging your power levels and gearing quite often, depending on how steep the terrain is. On the other hand, what’s great about a torque sensor is that you only ever get your own power amplified; push harder, get more motor. But with the cadence sensor on the MorphRover, it feels like all or nothing.

The lack of a rear suspension or three-bar linkage also means that riding over really rough terrain is quite an ordeal. I also felt the pedals were a little too close to the ground compared to other off-road ebikes, resulting in more frequent scraping along deep valleys or rocky outcrops.


The 26-inch fat tires result in great traction and help to smooth out the ride a little, but the overall off-road ride experience was nothing compared to the Himiway Forest Cobra.

Range: Not Massive, but Not Tiny Either

The 720Wh removable battery, charged either via a traditional wall socket or your own pedal power while exercising indoors, should offer up to a stated 60-mile range. As always, that number will be tested with a 130lb test rider on flat terrain using only a single level of pedal assist. In reality, that meant I got more like 20–25 miles. Of course, if you’re particularly worried about range, you could also pop the stand in a backpack and recharge it yourself.

Freebeat claims 30 minutes of exercise will get you 10 miles of range; but again, that’s optimistic in every way. You would need to ride flat out for those 30 minutes, and you’d need to be on the light side for that to translate into 10 miles. In percentage terms, 30 minutes netted me about 5% battery, which is more like 1–2 miles.


Annoyingly, I also found the battery would drop 2-3% overnight. It’s possible the long shipping times had an adverse effect on the battery, so it could be an isolated issue that will eventually solve itself after calibration. For now though, that 5% battery I earn ends up diminishing completely if I leave it for a few days.

Should You Buy the Freebeat MorphRover?

From an ebike perspective, nothing on the Freebeat MorphRover is outstanding in any way, but what it does offer is a stable, powerful ride on or off-road (just not too off-road). The included indoor stand and conversion to an exercise bike with variable resistance is an outstanding feature that lets you recharge with your own pedal power and continue to enjoy your bike even when the weather isn’t agreeable.

On the software front, while I didn’t find the FreeBeat app and classes compelling enough to justify a subscription, it’s not required to use the indoor cycling mode.


However, you should realize that how much power your body can produce is likely a lot less than you think, so don’t be under the illusion that you’ll be leaving the wall charger in the box. Still, it’s a feature you just won’t find on other ebikes. That alone makes the MorphRover worth it.

morphrover

Freebeat MorphRover

The Freebeat MorphRover is a powerful ebike that can transform into a variable resistance exercise bike indoors—and it’ll charge your battery while you work out, ready to power your next journey. But unless you’re already incredibly fit, I wouldn’t expect to generate much. 

Brand
Freebeat

Battery
720Wh

Weight
35kg / 77lbs

Brake Style
Hydraulic

Wheel Size
26×4 inch

Suspension
Front hydraulic only

Motor (W)
750W

Electronic Power Assist
5 levels

Charging
AC or self-charging exercise bike

Connectivity
Bluetooth to the Freebeat app

Rider Height
Step-through 5’1” to 6’; high step 5’6” to 6’4”

Tires
Chao Yang

Gearing
8 speed

Sensor
Cadence

Walk Mode
Yes

Frame
High step or step through

Lights
Front only

Rear Derailleur
Shimano

Dimensions
75″ front to back

Why You Can No Longer Pay for Netflix Through iTunes

Quick Links

Key Takeaways

  • Netflix is informing subscribers in some territories that they need to stop paying through iTunes billing.
  • Subscribers who were on the old Basic plan are being forced onto either a more expensive plan or a cheaper plan which includes ads.
  • Netflix’s move allows it to avoid paying the Apple Tax of 30%, as Apple takes a cut of all App Store transactions.


Netflix is once again cracking down on people paying for the streaming service through Apple/iTunes billing. So, if you have been paying for Netflix this way for years, you may now be forced to switch to paying for Netflix directly.


Netflix Stops Subscribers Paying Through iTunes

As first reported by Cord Cutters News, Netflix has started informing customers that they need to switch from paying through Apple to paying directly. This affects people in “some territories,” including the US and Canada, who are currently on the Basic plan.

Netflix axed the Basic plan costing $9.99/month in 2023, and updated its tiers to Standard with Ads, Standard, and Premium. Anyone already on the Basic plan could stay at that tier and only pay the $9.99/month asking price. However, anyone signing up new (including after canceling) or changing their subscription is forced to switch to one of the new tiers and pay the new asking prices.


That now includes those affected by this latest change, as switching from paying through Apple to paying Netflix directly represents a change of subscription. This has led to some users losing their grandfathered Basic plan, and being faced with either paying considerably more for a Standard or Premium plan, or paying less but accepting the need to watch ads.

Netflix spokesperson MoMo Zhou told The Verge that this change affects “members on the basic plan who were using an iTunes method of payment”.

As long ago as 2018, Netflix stopped anyone from signing up for its service through the App Store using an in-app purchase. But now, Netflix is also forcing existing subscribers in some territories to switch to paying for the service directly using a credit or debit card. This closes a loophole that has existed for years.


Why Netflix Wants You to Pay Directly Instead

The obvious reason why Netflix wants you and your fellow subscribers to pay directly is the so-called “Apple Tax”. Apple takes a 30% cut of App Store transactions, including subscriptions. This means that 30% of any price paid for Netflix through iTunes billing goes to Apple rather than Netflix.

By switching subscribers away from paying through Apple and paying directly instead, Netflix can take the full cut itself. The added bonus is that forcing people to switch payment methods means they also need to switch plans. Which, whether through higher prices or advertising, suits Netflix.

Is this fair? While it must be annoying for anyone used to paying $10/month for their fill of The Crown and Squid Game, it makes absolute sense from a business perspective. Why give Apple a cut of your profits and enable users to stay on abandoned plans when you can fix both with one change of policy?


Still, Netflix users used to paying for the old Basic plan through Apple will be rightly aggrieved at being forced to switch—especially as the Standard plan costs $15.49/month, with Premium costing $22.99/month. The only way of avoiding a considerable bump in price is to opt for Standard with Ads, which only costs $6.99/month but, as the name suggests, forces you to watch ads.

What Is the New Nvidia App? How It Can Improve Your Gaming Experience

Key Takeaways

  • The Nvidia App combines the Control Panel and GeForce Experience tools for a unified interface.
  • Features include a GPU Control Center, Nvidia Overlay, Freestyle, and Application Hub.
  • Some features like overclocking and certain streaming functions are missing.


For many years, the Nvidia driver situation has been a little messy, with two applications to manage your graphics: the Nvidia Control Panel and Geforce Experience. Now, there’s a single unified experience for all things Nvidia-related—the Nvidia App—and it’s an essential download for gamers.


Why Should You Install the Nvidia App?

The new Nvidia unified app encompasses all the useful tools that Nvidia has built into their driver software over the years into a single unified interface.

Previously, if you wanted to adjust anything technical like Vsync, you’d need to drop into the arcane interface of the Nvidia Control Panel. Meanwhile, new drivers and game-specific settings and features could be found within the Geforce Experience.

Here’s a look at what is now included in the feature-packed Nvidia App.

GPU Control Center: This is the new home for all in-game optimization settings, like VSync, DSR, and Low Latency mode. And for those of us who don’t want to fiddle endlessly, there’s a one-click optimization that applies settings suitable for your specs from the data of thousands of other users.


Nvidia Overlay: The overlay allows you to quickly modify filters and see key performance metrics, such as frame rate and GPU utilization. And if you have a newer G-Sync monitor or supported mouse, you’ll find Reflex Analyzer built-in, which automatically measures the latency of peripherals.

Nvidia Freestyle: Exclusive to RTX-series card owners, Freestyle consists of two AI-powered filters: RTX Dynamic Vibrance and RTX HDR. These harness the AI features of RTX-series cards to enhance colors in real-time as you play. The RTX HDR filter means you can play SDR games in full HDR color glory on your HDR-enabled display.

Application Hub: As well as the built-in features listed above, the new Nvidia app provides an easy way to jump into the many other creative and gaming applications that Nvidia offers, such as the GeForce Now cloud gaming platform; Nvidia Canvas, an AI-powered landscape drawing application; or Broadcast, to record and stream your gameplay.


Optional Login: If you’ve ever been frustrated by having to log in to the GeForce Experience app just to download the latest drivers, you’re not alone. The login requirement has been removed—but you’ll still be eligible for some bonuses and rewards if you choose to log in.

Getting Started With the Nvidia App

nvidia app - install

As it’s a new and trending app, you’re sure to find some sketchy sites offering downloads that may not be safe or come bundled with other software. You should never download the app from anywhere except the official Nvidia website.

The Nvidia app is in beta at the time of writing, and you will need to uninstall your existing GeForce Experience and Control Panel, so click to agree with the prompt and wait for the installation to complete.


nvidia app - game ready choose

From there, you’ll be asked which driver version to use: either the Game Ready or Studio Drivers. Unless you’re exclusively using your PC for creative applications, you should choose Game Ready.

nvidia app - auto optimize

Next, you’ll be able to opt out of game and hardware analysis, which will automatically optimize settings for you. That would be wasting a huge benefit of the app, so I’d recommend leaving it on.

nvidia app - overlay


Then you can choose whether to enable the Nvidia Overlay or not. Don’t worry, you can always enable it later.

Finally, you can log in to an Nvidia account for rewards such as an exclusive Call of Duty bundle. This step is entirely optional, and you won’t be missing out on any driver features by not logging in.

Overview of the Nvidia App Interface

nvidia app- drivers screen

When you first launch the app, you’ll find the home screen, containing quick links to some apps it found and a Discover tab to launch the other Nvidia creative apps.

On the left is the navigation bar. Head to Drivers first to install the latest available. Compared to the GeForce Experience app, the drivers screen includes a useful summary of what’s new and what’s fixed in this release.


nvidia app - graphic settings

The Graphics tab is where you’ll find a simple unified interface for global or per-app game settings. Click through to a game title to see how your settings have already been optimized during the installation. Anything with a green check mark should be optimized already.

You’ll see a grey minus sign if it isn’t optimized or an exclamation mark if there’s an issue. Sure enough, the last time I launched Cyberpunk 2077 was for some monitor setting, and I left it in a thoroughly unplayable state. One click on the Optimize button and it was buttery smooth again.

Click the three-dots menu on a game to find a Launch button. It would be nice if this was more prominent in future versions, and not hidden in a menu. Once a game is running, press Alt-Z at any point to bring up the overlay, which gives you quick access to in-game stats, filters, and recording features.


If you just want the current frame rate and GPU utilization, use Alt-R instead. You can also customize precisely what stats you see in the performance overlay.

nvidia app game screenshots - overlay

You can also turn the new RTX filters on and off from here while you play, letting you see what a difference they make. Here’s a screenshot from Cyberpunk 2077 in the default settings:

nvidia app game screenshots - rtx dynamic off

And here’s a screenshot pf the game with Dynamic Vibrance enabled:


nvidia app game screenshots - rtx dynamic on

You can tone down the filter if you find it a bit much, but I’m finding it immensely helpful in a dark and gloomy game like this, where I often struggle in some environments to see anything.

Note that if the game has a built-in HDR mode and if you’ve activated that, the RTX Dynamic Vibrance and RTX HDR filters don’t appear to make a difference as they can’t stack.

If you’re logged in, the Redeem screen shows anything available to claim. Lastly, the Settings screen shows a brief overview of your system specs.

What’s Missing From the Nvidia App?

Unfortunately, not every setting has made it across yet, so you’ll still find the Nvidia Control Panel and GeForce Experience icon in your taskbar (unless you do a clean install; that seemed to remove GeForce Experience for me). Although eventually planned, there’s no support for overclocking through the Nvidia App yet or rolling back drivers.


Streamers and content creators may also be disappointed to hear that some features have been removed.

According to Nvidia’s announcement: “We’ve made the decision to discontinue a few features that were underutilized, especially where good alternatives exist. This discontinuation encompasses Broadcast to Twitch and YouTube, Share Images and Video to Facebook and YouTube, and Photo Mode 360 & Stereo captures.”

“Streamlining features helps the NVIDIA app install in half the time, deliver a 50% more responsive UI, and occupy 17% less disk space than GeForce Experience.”

The Nvidia App can automatically optimize your games, but still provides full control on a per-app or global basis for you to override with individual preferences. There’s little reason for gamers not to install the new Nvidia App.

It’s a single unified application for everything that Nvidia offers—some of which you probably never even knew about, thanks to the confusing interface of the GeForce Experience.


The Industry’s-First Laptop Powered by the Intel Core Ultra 7 Processor

The best and the latest technologies, gadgets, and smart devices are being unveiled by leading technology companies at Mobile World Congress (MWC) 2024, being held in Barcelona from 26 – 29 February 2024. One outstanding product showcased this year was TECNO’s Megabook T16 Pro 2024 Ultra laptop, combining the latest Intel processors, best-in-class AI experience, power-packed performance, and industry-leading battery life.


TECNO is a global innovative technology brand with operations in over 70 countries worldwide. The Megabook T16 Pro 2024 Ultra has been developed in line with the brand’s essence of “Stop At Nothing”, which is TECNO’s commitment to unlocking the best and newest technologies for forward-looking individuals, inspiring them to never stop pursuing their goals and their vision for the best future.


A Power-Packed Performer With Exceptional AI Capabilities for Professionals

With AI prevalent in every aspect of our lives, The Megabook T16 Pro 2024 is crafted to integrate AI industry applications into people’s everyday lives. The Megabook’s inbuilt PC Manager works with the Intel Core Ultra CPU and NPU to enhance productivity while maintaining user privacy and flexibility. As a user, you will be able to achieve AI Image, AI Conference, PC Cloning and System Optimization, etc. in operating localization. Megabook T16 Pro 2024 Ultra also supports Windows 11 system with Microsoft Copilot.


Megabook T16 Pro 2024 Ultra comes with the option of the Intel Core Ultra 7 and Ultra 5 processors, up to 32GB of LPddr5 RAM, and 1TB of PCIE 4.0 SSD storage. You can accomplish your most challenging tasks with ease, thanks to its ultra-clear 2.5K resolution ultra-boundless 16-inch screen with 100% RGB color and 400 nits brightness.

Stylish, sleek, compact, and lightweight, the Megabook T16 Pro 2024 Ultra is a dependable work companion for business and creative professionals. Moreover, its industry-leading 99.99Wh big battery will give an uninterrupted 20.5-hour usage. Plus, the 100W fast charger will get you going in no time.

With multiple ports for enhanced connectivity and a 2MP 1080 HP camera, the TECNO Megabook T16 Pro 2024 Ultra is built to meet the demands of modern gaming, productivity, and content creation, especially with AI.

This is a sponsored post. The product choices and opinions expressed in this article are from the sponsor and do not reflect the editorial direction of MakeUseOf or its staff.


Your iPhone and Apple Watch Need This Charger

Key Takeaways

  • The Twelve South Butterfly is ideal for jet-setters with a MagSafe iPhone and Apple Watch.
  • The charger comes with a 30W power adapter, USB-C cable, and four international adapters.
  • The Butterfly is not as thin as the MagSafe Duo, but it’s more premium and more powerful than most 2-in-1 wireless chargers.


MagSafe chargers made for nightstands and desks are a dime a dozen, but there aren’t many premium, travel-friendly options, especially after Apple discontinued the MagSafe Duo. Thankfully, the Twelve South Butterfly is the perfect wireless charger for jet-setting iPhone and Apple Watch owners looking to fast charge their devices.

Twelve South Butterfly 2-in-1 USB-C MagSafe Wireless Charger

The Twelve South Butterfly is built to be a compact two-in-1 wireless charger for your MagSafe-compatible iPhone and Apple Watch. It’s not as thin as the MagSafe Duo but comes with four travel adapters, a USB-C cable, and a power adapter.

Pros

  • Dual-device charger perfect for travel
  • 15W MagSafe for iPhone and fast wireless charger for Apple Watch
  • Comes with 30W power adapter, USB-C cable, and four international plug adapters
Cons

  • Can’t prop up larger iPhones
  • Isn’t as compact as the (discontinued) Apple MagSafe Duo

Price and Availability

The Butterfly charger retails for $129.99 and is available for purchase directly from Twelve South and Apple (both online and in-store). It only comes in one color: silver.

Specifications

Speed
MagSafe (15W) and Apple Watch Fast Charger (5W)

Dimensions
0.9 x 2.4 x 2.4in (2.35 x 6 x 6mm)

Weight
4.2 oz./119 g

Adapter included
30W (with four international plug adapters)

Comes With Everything You Need

The Twelve South Butterfly with its accessories
Hannah Stryker / MakeUseOf

In 2020, Apple stopped shipping power adapters with the iPhone. Four years later, everything from Samsung’s latest flagship to charging stations from Nomad have followed suit. Thankfully, Twelve South didn’t continue that trend.


When you unbox the Butterfly and move beyond the charger itself, you’ll find a USB-C to C cable and 30W power adapter. The brick isn’t anything to write home about, but the fact that it comes with four international plug adapters (for the U.S., U.K., EU, and AU) means it can be used almost anywhere on the planet. There’s also a travel bag that I use to store the unused adapters.

Personally, I didn’t end up using the included power adapter while traveling. I keep the Nomad 65W Slim in my bag, which is smaller and supplies twice the juice, but it’s still a welcome addition for those who want an international adapter.

Premium Hardware, Great Performance

An iPhone and Apple Watch charging on the Twelve South Butterfly
Hannah Stryker / MakeUseOf


The Butterfly, which Twelve South advertises as being the size of an AirPods Pro case (though it’s actually a tad bigger than that), is a silver aluminum puck that can be split in two and is connected with a piece of black vegan leather. This soft leather-like material also clads the inside of the charger to ensure your phone and watch aren’t scratched. Magnets hold the charger closed—both when folded closed with the metal casing exposed and when folded open with the vegan leather on the outside.

Separating the two halves, you find that the Apple Watch charger can be tilted vertically. This allows you to use your watch in Nightstand Mode and avoid awkward charging situations if your watch band doesn’t come apart. Additionally, you’ll find the USB-C port on the backside of the Apple Watch half of the charger.

Overall, the Twelve South Butterfly’s build quality is quite excellent. It’s sturdy and dense without weighing down any travel bag it’s placed in. It also supplies the maximum amount of power your iPhone and Apple Watch can accept. The phone side is fully MagSafe compliant, outputting 15W of power, and the other half is an Apple Watch fast charger, putting out 5W.


An iPhone using the Twelve South Butterfly as a stand
Hannah Stryker / MakeUseOf

My biggest frustration with the Butterfly came when I tried to use it as a display stand. Twelve South advertises this as being a core feature, but in my testing, it only worked on smaller iPhones, like the regular iPhone 15. When I tried propping up my iPhone 15 Pro Max (with and without a Peak Design Everyday case), the magnetic connection between pucks wouldn’t stay together, and my phone fell flat on its face.

Ultimately, this functionality wasn’t make or break for me. 99.9% of the time, I used the charger with both halves lying flat to charge my iPhone and Apple Watch. But the few times I did try to prop up my phone and watch something on YouTube, it didn’t work.


Should You Buy the Twelve South Butterfly?

The Twelve South Butterfly folded up
Hannah Stryker / MakeUseOf

As someone who still owns the Apple MagSafe Duo, I find it hard to ditch the extremely thin charger. But I ultimately did because the Twelve South Butterfly includes an Apple Watch fast charger, and it’s powered by USB-C. After upgrading to the iPhone 15 Pro Max, I stopped carrying around Lightning cables and had to purchase a USB-C to Lightning adapter to continue using Apple’s charger. It was too much of a hassle when the universal option sat right before me.

If you’re not a MagSafe Duo holdout and want a convenient charger for your next trip, I don’t have any difficulty recommending the Butterfly. It comes at a premium price ($129.99), but it’ll likely be the last portable wireless charger you need to buy for the next decade, especially as it’ll also work with Qi2 phones.


When I’m traveling, I want the smallest charger I can pack in my suitcase, but if you want a third charging pad for your AirPods (or other Qi-compatible earbuds), I recommend checking out the Infinacore T3. It’s a bit thicker and doesn’t have an Apple Watch fast charger, but you can charge all of your devices at the same time.

Twelve South Butterfly charger on a white background

Twelve South Butterfly 2-in-1 USB-C MagSafe Wireless Charger

The Twelve South Butterfly is built to be a compact two-in-1 wireless charger for your MagSafe-compatible iPhone and Apple Watch. It’s not as thin as the MagSafe Duo but comes with four travel adapters, a USB-C cable, and a power adapter.

How to Create Spotify Playlists and Add Songs to Them

Key Takeaways

  • Create playlists on Spotify tailored to your tastes by adding songs that match the chosen style or genre.
  • Use the Blend feature to create playlists with friends and family that Spotify updates daily.
  • Use Spotify’s recommendations or invite collaborators to enhance your playlists.


Spotify is one of the best streaming services around, but it gets even better once you start sorting your music into playlists. We’re here to show you how to create playlists, and then add songs to them. We also have some tips for creating Spotify playlists.


How to Create a Spotify Playlist and Add Songs to It

To create a Spotify playlist from scratch, first, go to Your Library at the bottom of the mobile app on Android or iOS. Then, click the + button at the top next to the Search icon. You’ll see two options: Playlist and Blend. Click Playlist to create a standard playlist for yourself, or click Blend to create a shared playlist with friends.

The method above is the same on the desktop app. Just go to
Your Library
and click
the + button
to create a new playlist.

Create a Spotify Playlist for Yourself

You can create a playlist about anything. You could theme it around a certain genre, or create it ahead of a particular event. The idea is to enable you to quickly and easily find the songs you want to listen to at a certain time. Just give your playlist an appropriate name, and click Create.


Spotify will then recommend you start building your playlist by adding songs. Click Add to the playlist, and you’ll see the Search bar and a list of Suggested songs based on your listening. The latter will refresh as you add songs to your playlist, with Spotify updating its suggestions to match what you’re adding manually.

If you click the Search bar, you’ll see a list of your recent searches. Songs will have a circled + button to the right of them. So just click that if you want to add the track to the playlist you’re creating. Alternatively, click on an artist you’ve previously searched for, and follow the links to add specific songs. Or search for something new (whether an artist, album, or song) until you can add what you’re looking for.


Every time you add a song, Spotify will take you back to the Add to this playlist page. When you’re done adding songs (for the time being), click the back button in the top-right to see your playlist taking shape. Spotify will still be recommending songs to add to your playlist, but it’s completely up to you whether you take its suggestions.

Your newly created playlist will now be visible in Your Library, and you can click on it to add more songs in the same way whenever you want. If you click the hamburger menu to the right of the Share icon at any time, you’ll see options to Add to this playlist, Edit playlist, Delete playlist, and more besides.


Create a Shared Playlist Using Blend

Blend is a type of playlist designed to be shared with friends. You can invite up to 10 friends to Blend, and Spotify will create a playlist based on the music you and those invited friends listen to. Blend updates daily based on the listening activity of everyone included in the playlist.

To invite friends to a Blend, click the Invite button to see your options. You can either copy an invitation with a link to share on whatever platform you want, or open a messaging platform and send it directly to a person or people. They will then see that you’ve invited them, and can choose to join your Blend or ignore the request.

How to Add Songs to an Existing Spotify Playlist

Adding songs to an existing Spotify playlist is simple. Essentially, once you have created your playlist, you can add songs to it at any time. When you’re listening to a song or looking at a song in Spotify, look for the three vertical dots menu. Click it, and you should see the option to Add to playlist. Click that, and you can select which playlist(s) to add the song to.


There is also a circled + button next to the name of the song you’re playing. But by default, clicking this adds that song to your Liked Songs. And while that is a playlist in its own right, it may not be the one you want to add this particular song to. If you’re quick, you can click Change to switch playlists. If not, you can click the Green Tick icon to switch the playlist(s) it’s in at any time.

Tips for Creating Spotify Playlists

As you can see, creating a Spotify playlist is pretty simple. However, not all Spotify playlists are created equal, so here are some tips to bear in mind.

  1. Choose a strong theme for your Spotify playlist. A playlist can be based on a specific genre or a certain tempo, be created with an event (a road trip, a wedding reception, etc.) or an activity (a workout, chilling after work, etc.).
  2. Choose a name that will make your playlist stand out. The name should be short, memorable, easy to spot, and descriptive. If you’re intent on creating lots of Spotify playlists, you’ll need to quickly find the one you want.
  3. Use Spotify’s list of Recommended songs to fill out your playlist. Underneath your own selections, you’ll see a list of songs Spotify thinks will augment your playlist. Just click the circled + button to immediately add them.
  4. Invite collaborators to help you populate a playlist. Spotify playlists don’t have to be a solo endeavor. If you click on the three dots next to the Share icon, you can “Invite Collaborators” to edit a playlist by sending the link to other people.
  5. Regularly revisit existing Spotify playlists to keep them fresh. Your playlists don’t have to remain untouched, as they were the day you created them. So, regularly take a look to see if any new songs deserve a place.
  6. Remember that there is no limit to the number of playlists you can create. This means you can create playlists for very specific needs and give them niche names (similar to what Spotify does with Daylists).
  7. View other people’s public playlists for inspiration. If you search for something, you’ll be presented with playlists galore. Scroll past the ones Spotify has “Made for You”, and you’ll see playlists made by other people.


Creating a number of Spotify playlists, and populating them with the songs you (and others) love is a simple yet effective way to get more out of Spotify. And if you excel at managing them, you should always have the perfect playlist to play at any given moment.

What Is a GIF? How (and When) to Use One

Quick Links

Key Takeaways

  • GIFs are image files that can host multiple static images and play them in sequence, creating an animation.
  • GIFs are useful for adding humor, reacting to online content, and demonstrating step-by-step processes.
  • You can find GIFs in online libraries, social media platforms, and create your own using various tools.


Today’s digital communication often revolves around quick messages and visual cues. You may have come across the term GIF and seen others use it. But what exactly is a GIF, and how can you use it like everyone else does? Let’s talk about the origin of GIFs and when and how to use them.


What Is a GIF, and What Is It Used For?

GIF stands for Graphics Interchange Format. It’s an image file that supports static images, like other formats such as JPG and PNG. However, unlike these traditional formats, a GIF can host multiple static images. Each of these images is a frame that’s played after the other.

When you view a GIF image and all the frames play back to back, it looks like an animation. The result is something very similar to the flip books we enjoyed as kids.


The GIF format was first introduced in 1987 by CompuServe, one of the earliest major online service providers. CompuServe initially designed the GIF format to display color images on computer monitors efficiently.

GIFs became popular due to their ability to convey motion in a small file size, and they are still widely used for online communication today.

Think of GIFs as short videos without sound. They are a more convenient option for use on the internet than videos because they are lighter and don’t require any embeds or players to function. You can simply add a GIF to a page, and it will start playing.

Thanks to their versatility and small size, GIFs have become the go-to method for adding humor, personality, and visual interest to online interactions. They are also useful in demonstrating step-by-step processes or tutorials visually. For instance, you can add animated GIFs to your Google Docs document to make the topic easier to understand.


Where and How to Find GIFs

With the vastness of the internet, finding the perfect GIF to express yourself can seem like searching for a needle in a haystack. Fortunately, there are plenty of sources that host libraries of GIFs on virtually any topic or emotion.

1. Online GIF Libraries

Online GIF libraries are digital repositories full of animated imagery, offering a collection of GIFs to convey emotions and reactions. Giphy is perhaps the most well-known library of GIFs on the internet. With a simple search bar and a vast collection of categorized GIFs, Giphy makes it easy to find the perfect GIF for any occasion.

Another popular platform is Tenor, which offers a diverse range of animated images. Like Giphy, Tenor allows you to search for GIFs by keyword or browse through categories and collections. After finding your desired GIF on any of these platforms, you can share it directly on social media, embed it in your blog, or save it for later use.


Additionally, if you prefer using Google to search for everything, you can also search for GIFs in Chrome with an extension.

2. Social Media Platforms

With the increasing popularity of GIFs, almost all online platforms have tried to incorporate them into their systems. Social media platforms like Facebook and X (formerly Twitter) have their own built-in GIF search feature where you can find and share GIFs. Moreover, you can also save the GIFs that other users post to use them yourself.


Messaging apps like WhatsApp, Telegram, and Instagram also offer a built-in GIF search feature that lets you find and share GIFs directly within your chat. You can access the GIF search by going to the emoji panel and tapping the GIF button.

Reddit is another source where you can find GIFs. As one of the largest online communities, Reddit hosts subreddits that are dedicated to sharing GIFs, such as r/gifs and r/HighQualityGifs. You can download these GIFs and share them wherever you see fit.

3. Keyboard Extensions

Many smartphone keyboards such as Gboard for Android and the default iOS keyboard have built-in GIF search functionality. All you need to do is open the keyboard while typing, tap the GIF button, and search for GIFs using keywords or browse the trending categories.


If you’re using third-party keyboards on your Android device, they probably have the GIF search feature along with other capabilities.

4. Create Your Own GIF

If you can’t find the perfect GIF for your needs, why not create your own? There are various tools for creating custom GIFs from videos and photos. In most cases, you don’t even need to install an app for it, as you can use websites that turn your photos into GIFs.

If you want to utilize the apps that you already have, you can use PowerPoint to create GIFs. And if PowerPoint isn’t enough, you can use Photoshop to make professional GIFs. In addition, websites like Giphy’s GIF Maker and EZGif provide intuitive interfaces for turning your videos into animated GIFs.

GIFs are a versatile and fun way to add visual interest to your online interactions. So, next time you’re looking for a way to express yourself, consider using a GIF!


Hide Your Number on Signal and Use a Username for More Privacy

Key Takeaways

  • Signal now allows usernames, letting you hide your phone number when adding new contacts on the app.
  • To get a Signal username, update the app and create a username in your profile settings.
  • You still need to share your phone number with the app to create an account and sign in.


Signal has announced the rollout of usernames on the app, allowing you to hide your number while still connecting with others. Here’s how you can hide your number on the app and connect with a username instead.


Signal Now Lets You Use a Username

Signal announced the new username feature on its blog on 20 February, 2024; along with enhanced privacy settings. The feature allows you to use a username to add others on the messaging app, rather than using your phone number.

“If you don’t want to hand out your phone number to chat with someone on Signal, you can now create a unique username that you can use instead,” the company said on its blog.

To use the feature, you will need to create a username on the app, which is different from the display name seen in chats.

The new privacy options are in beta and will be rolling out to everyone in the coming weeks. But you can sign up to the Signal beta to get the features earlier.

How to Get a Signal Username

To get a Signal username, first make sure that your app is updated. If you have access to the feature, you will be able to set a username in your profile settings.


Simply follow these steps to set a username:

  1. Open the Signal app and tap on your profile icon in the top left.
  2. On the Settings page, tap on your display name. This will open your Profile settings.
  3. At the bottom of the page, you will see the Username option. Tap on this.
  4. Set your new username in the text box and then select Save.

Signal will assign a number to your username and new sharing options will show up on your profile menu. Tap on QR code or link to share your username with someone else.

Sharing this code or link will allow others to connect with you on the app. It’s important to note that your username is not your login name. You will still need to use your phone number to create an account and log into Signal.


How to Hide Your Number on Signal

There are two options to hide your number on Signal: one hides your number from those you’re connected with and the other prevents people from finding you on the app using your number.

Luckily, Signal’s update will set the default to hide your number from your Signal profile. But you will have to manually change the settings for who can find you using your number.

To do this, follow these steps:

  1. On the Settings menu, select Privacy and then the Phone number tab.
  2. Make sure that under Who can see my number, Nobody is selected.
  3. Under Who can find me by my number, select Nobody if you want to prevent people from using their contacts list to find you on the app.

Once these settings are enabled, you can use your username as the only way to connect with you on the app.


This also prevents people from automatically adding you on Signal when they give the app access to their contacts. Rather, you will need to share your username with them to connect.

The Limitations of Signal’s New Privacy Feature

While these privacy features are a welcome addition for those who want to keep their number private, it does have a few limitations.

You will still need to share your number with the app to use Signal. And if people already have your number saved in their phone’s contacts, they will still be able to see it on Signal, according to the company’s blog post.

The username is also separate from your display name, which can make it a bit confusing for newer users. Your display name can be changed in your Profile settings as well.

So if you’re trying to connect with someone on the app, make sure you share your username and not your display name. Your username has numbers attached to it, so that’s the easiest way to tell the difference.


These privacy settings enhance the ability to hide your number on Signal and prevent random people who have your number from sending you message requests on the app. While you still need to use your phone number to sign up to Signal, you can at least avoid sharing it with contacts on the app.

If you’re a privacy-minded user, the ability to hide your number may be one of the best reasons to use Signal.

Which Older Samsung Phones Are Getting Galaxy AI?

Key Takeaways

  • Samsung has confirmed Galaxy AI support for all its high-end phones and tablets from 2023.
  • Galaxy AI will make its way to compatible devices alongside the One UI 6.1 software update.


Samsung plans to roll out Galaxy AI, the coveted set of AI features introduced alongside the Galaxy S24 series, to its older models over a software update in 2024. But not all Samsung phones are eligible. Find out if your Galaxy device makes the list.


Samsung’s List of Galaxy AI-Compatible Devices

In a Samsung Newsroom post, the Korean smartphone giant officially announced the list of devices that will support Galaxy AI with the One UI 6.1 software update. Besides older smartphones, Samsung is bringing Galaxy AI to its tablet lineup. Here’s the list of compatible phones and tablets:

  • Galaxy S23, S23+, S23 Ultra, and S23 FE
  • Galaxy Z Flip 5 and Z Fold 5
  • Galaxy Tab S9, Tab S9+, and Tab S9 Ultra

As you can see, all the premium phones and tablets Samsung released in 2023 are eligible to receive some of the best Galaxy AI features. Lower-end models like the Galaxy A54, Galaxy Tab S9 FE/FE+, and Galaxy A23, won’t get Galaxy AI, likely because their hardware just isn’t capable enough.


When Will Samsung Release One UI 6.1 With Galaxy AI?

AngieYeoh/Shutterstock

According to the announcement, Samsung will start rolling out One UI 6.1 from the end of March. We don’t have an exact date yet, but you should see a software update prompt on your compatible Galaxy phone or tablet in the last week of March. With One UI 6.1, Samsung plans to bring Galaxy AI to 100 million users in 2024:

“This is only the beginning of Galaxy AI, as we plan to bring the experience to over 100 million Galaxy users within 2024 and continue to innovate ways to harness the unlimited possibilities of mobile AI.”

9to5Google reported that One UI 6.1 will also make its way to older flagships like the Galaxy S22 and S21 series later in 2024, but unfortunately, Galaxy AI won’t be a part of it.


Which Galaxy AI Features Are Coming to Older Phones?

Galaxy AI Live Translate in a phone call on S24 Ultra
Zarif Ali/MakeUseOf

The fine print on Samsung’s Newsroom post confirms that some of the S24’s Galaxy AI features won’t be available on all older devices. Samsung promises the following features once you update your Android phone to One UI 6.1:

  • Live Translate and Interpreter
  • Chat Assist
  • Note Assist
  • Circle to Search with Google
  • Generative Edit and Edit Suggestion
  • Instant Slow-mo
  • Browsing Assist
  • Transcript Assist

Instant Slow-mo won’t be available for the Galaxy S23 FE.

On top of these features, compatible Galaxy devices running One UI 6.1 will also let you generate AI wallpapers with text prompts.


However, it’s worth noting that some Galaxy AI features like Live Translate, Note Assist, Chat Assist, and Generative Edit require you to log in with a Samsung account. Also, Chat Assist will be limited to Samsung Keyboard, whereas Browsing Assist requires you to use the Samsung Internet browser.

We believe that Samsung’s decision to bring Galaxy AI to older models is a step in the right direction. It shows the company’s commitment to supporting older devices in the long run. However, the One UI 6.1 update with Galaxy AI features could discourage some users from upgrading to the S24 or S24 Ultra.

How Scammers Are Using Your Face to Commit Fraud

Key Takeaways

  • Gold Pickaxe is a smartphone malware targeting facial data for scams.
  • Scammers use stolen faces for deepfakes and bank hacking.
  • Stay cautious of app permissions, avoid downloads from fake sources, & enable 2FA for added security.


How cautious are you about how your face is used on the internet? If you’re not, you should be.

Now is a good time to start, as there’s a new strain of smartphone malware called Gold Pickaxe designed to harvest your face data, all so it can be used as part of a scam.


What Is Gold Pickaxe?

As reported by Bleeping Computer, Gold Pickaxe is a malicious mobile app first spotted by security firm Group-IB, forming part of a much larger and sustained malware campaign called Gold Factory. Gold Pickaxe is usually disguised as a legitimate app to trick people into downloading it; it’s considered an iOS Trojan or Android Trojan.


To boost the number of people downloading the app, Gold Pickaxe’s operators send out social engineering emails impersonating government officials. The email typically pushes the user to download the fake app. In the reported example, the app was disguised as a digital pension manager using a page impersonating the Play Store, the Android app store.

How Does Gold Pickaxe Work?

Once the victim downloads the infected app onto their phone, it immediately starts gathering data on the user. This includes going through text messages, scanning web traffic, and looking through files. As part of the social engineering, victims are pushed to install a Mobile Device Management (MDM) profile. Once installed, the Gold Pickaxe malware operators have almost complete control over the device, as an MDM grants access to features such as remote wipe, device tracking, application management, and much more.


However, they cannot steal banking information immediately, and what separates Gold Pickaxe from other malware strains is its main goal. It will try to get a picture of the victim’s face, which it can achieve through one of two means.

The first is by directly asking the user to scan their face. This is why Gold Pickaxe usually takes the form of a government-backed app, as it’s not uncommon for these apps to ask for a face scan through the phone’s camera. When the user goes to log their face through the app, it grabs the data and sends it back to the scammer. Another more advanced variant of the malware, Gold Pickaxe

The second is by indirectly stealing the victim’s face data. In some strains of Gold Pickaxe, it will intermittently take a photo through the front-facing camera in hopes that it will catch your face. If it can’t do that, it can instead send over the photos saved on your phone to see if they contain your face.


As per Group-IB:

GoldPickaxe.iOS
is
the first iOS Trojan
observed by Group-IB that combines the following functionalities:
collecting victims’ biometric data
,
ID documents
,
intercepting SMS
, and
proxying traffic through the victims’ devices
. Its
Android
sibling has even more functionalities than its iOS counterpart, due to more restrictions and the closed nature of iOS.

It’s important to note that the malware does not get biometric face data from services like Face ID. Instead, it tries to photograph your face through the camera or within your files.

What Can Scammers Do With Your Face?

woman scanning her face with a biometric scanner
goffkein.pro/Shutterstock


It may seem odd that a scammer would try to get a photo of your face, but there are plenty of reasons why a scammer would seek it out.

Gold Pickaxe harvests facial data to help hack bank details. Some banks won’t allow users to send a large sum of money without a face scan, so grabbing the victim’s facial data allows scammers to avoid that limitation.

However, it’s by no means the only way a scammer can use a picture of your face. We’re seeing a rise in convincing deepfakes that allow people to make a fake version of someone say whatever they want. These deepfakes can then be used to perform more scams.

Finally, if someone is trying to steal your identity, your facial data is a good place for a scammer to start. With it, they may take out loans and create official documents under your name. The scammer will need a little more data than a name and a face to do this, but given how Gold Pickaxe sends over a ton of data, it’s possible for a scammer to pick out key bits of information from it.


How to Stay Safe From Face Scanning Attacks

As scary as Gold Pickaxe sounds, it greatly depends on someone believing the initial email and downloading the app from a fake website. As such, always do not download apps from suspicious sources, and learn how to protect yourself from social engineering attacks.

When installing an app, make sure to read all of the permissions. If an app that doesn’t need to see your face or surroundings asks for camera permissions, treat it with caution. You can also install an antivirus app to keep these malicious apps off your system. Also, on Android devices, don’t sideload apps, especially ones you don’t know or trust or can’t research or inspect where they came from.

And if you’re worried because there are a lot of images of your face on the internet, see if you can activate more defenses on your sensitive online accounts. For example, if your accounts support two-factor authentication (2FA), enabling it will add another layer of defense that a scammer needs to breach before they get into your data, and it’s really easy to set up and use.


How to Use Apple Sports on Your iPhone

Quick Links

Key Takeaways

  • The Apple Sports app offers real-time stats, scores, and betting odds for top sports leagues.
  • Apple Sports is only available on iPhones running iOS 17.2 or later. It’s also limited to users in the US, UK, and Canada.
  • Apple plans to add more leagues to the app over time.


Are you a die-hard sports fan looking for a convenient way to track your favorite sports leagues and teams? Apple’s Sports app has a minimalist interface to show real-time scores, stats, and betting odds. Here’s all you need to know about using Apple Sports.


What Can You Do With the Apple Sports App?

Apple introduced the Apple Sports app on February 21, 2024, to help iPhone users easily keep up with the scores and stats of their favorite leagues and teams. You can follow your favorite teams and leagues, check scores and team stats in real time, and view live betting odds, injury reports, lineup details, and their schedules.

The app displays real-time scores and stats for a few of the top sports leagues in the world, including MLS, NBA, NHL, Ligue 1, La Liga, Bundesliga, and more. While Apple Sports only supports limited leagues for now, Apple’s announcement revealed that it plans to add more leagues, like MLB, NFL, and WNBA, for their upcoming seasons.


As of February 2024, the Apple Sports app is only available in three regions—the United States, Canada, and the United Kingdom.

Getting Started With the Apple Sports App on an iPhone

To download the Apple Sports app, your iPhone must be running iOS 17.2 or later. If not, you can update your iPhone by heading to Settings > General > Software Update. Once you’re all set, you can download it from the App Store.

Download:Apple Sports (Free)

Launch the app after installation and tap Continue when you see the welcome page. To begin seeing real-time scores and stats, you’ll need to choose your desired leagues and teams.

Tap Get Started and tap the Favorite button next to the league you want to follow. To follow a team, choose a league and tap the Favorite (star) icon next to the one you want to follow. Tap Done once you’re happy with the selection.


If you’d like to follow a league or team later on, all you need to do is tap the three horizontal lines in the top-right corner, tap Manage, and repeat the steps above.

To view live and upcoming games and final stats and scores for all your teams in one place, tap the three horizontal lines in the top-right corner of the screen and tap My Teams. Similarly, you can view the same information for your favorite leagues by tapping My Leagues instead. If you’d like to find information about a specific league that’s not in your favorites, choose one from the list in the same menu.


If you use other Apple apps like Apple News and Apple TV, Apple Sports will sync data like your favorite teams, leagues, and athletes across these apps. However, if you’d like to disable this feature, tap the three horizontal lines and select your profile icon in the top-right corner. Then, toggle off Sync My Sports.

While Apple Sports does display a match’s betting odds by default, you can turn them off if you don’t find them useful. Strangely, you can’t disable betting odds directly from the Apple Sports app. Instead, you need to head to the Settings app on your iPhone, scroll to the Sports app, and toggle on Hide Betting Odds.


While you can find several great sports news apps on the App Store, Apple Sports sets itself apart with its clean and minimalist interface. Unfortunately, Apple Sports’s availability is currently limited to iPhone users. So, if you want to keep up with your favorite teams and league stats on your Mac or iPad, you’ll have to resort to third-party apps for now.

No, Gmail Isn’t Being Shut Down: It’s Just a Hoax

Key Takeaways

  • Google is not shutting down Gmail, despite a viral hoax claiming so.
  • Google quickly denied the fake news that Gmail is being sunsetted.
  • Gmail remains safe, with no danger of its 1.5 billion+ users losing access to their emails.


If you have seen the “news” that Google is sunsetting Gmail, don’t panic: it isn’t true. It’s just a dumb hoax that has gone viral on social media, forcing Google to deny the claim.


Why Do People Think Gmail Is Shutting Down?

On February 22, 2024, a screenshot of an email started spreading around the web like wildfire. The email claims that Google is sunsetting Gmail on August 1, 2024.

One of those who shared the screenshot was Chris Bakke, who claimed to be the SVP of Product at Google. Alongside the official-looking email announcement, he recounted a story about how, due to a miscommunication, Gmail was going away for good.

None of this is true, obviously. Google HAS sunsetted the Basic HTML version of Gmail, meaning everyone will be forced to use the Standard version going forward. But that’s it. Gmail itself is safe and not going anywhere.


How We Know Gmail Isn’t Shutting Down

Google acted quickly to deny the suggestion that it was sunsetting Gmail. Its denial came in the form of a perfectly worded post on X, the same platform Bakke and many others used to disseminate the hoax.

Even before Google issued its formal denial, X users had sought to add context using the Community Notes feature (formerly Birdwatch). Which is a useful tool given the amount of misinformation that springs up on the platform before being spread to other sites.

While Bakke was far from alone in sharing this fake email screenshot, his reach of 205k followers certainly helped it propagate. For context, Bakke works for X, and is known for joking around on social media. Meanwhile, his boss Elon Musk, who now owns X (formerly Twitter) has, as reported by Forbes, publicly criticized Google’s Gemini AI.


Google has been known to kill products and shut down services suddenly, and without warning, over the years. However, Gmail is, according to Statista, the most popular email service in the world, with 1.5 billion active users as far back as 2018. So Google would be crazy to shut it down.

What Is a Proxy Server?

Key Takeaways

  • Proxy servers act as a middleman between you and the websites you visit, enhancing your privacy.
  • You can use proxy servers for country-restricted website access and workplace monitoring.
  • Remember that proxies can’t hide browsing history, protect from ISPs, or encrypt data. For better privacy, use a VPN.


People use proxy servers to enhance their privacy as they surf the internet. But what is a proxy server, and how do people use them to browse the web and protect their privacy?


What Is a Proxy Server?

A proxy server acts as a middleman, sitting between you and the website you want to visit. Instead of visiting the website directly, you tell the proxy server to connect to it for you. The proxy server connects to it, gets the data from it, and then relays it back to you.

This is like hiring a messenger to deliver mail to someone. If you don’t want your recipient to know the letter is from you, you can give it to a third party who delivers it on your behalf. That way, you can get the message sent and not worry about revealing who you are.

What Is a Proxy Server Used For?

Proxy servers are useful to have, but why do people use them?


Using a Proxy Server on a Personal Level

Websites can tell where you’re connecting from by looking at your IP address. If a website has blacklisted your country and you try to connect to it, it will identify what country you’re connected from via your IP address and deny you access.

Proxy servers are an excellent option for people who want to visit websites with country restrictions, typically due to rights agreements. For example, you can watch TV shows on BBC iPlayer using a proxy server located in the UK and connecting to iPlayer through it.

When iPlayer checks your geographical location, it sees the proxy server’s IP instead of your own. It recognizes the proxy server as a UK-based source and permits the server to access its data. This data is passed onto you, allowing you to watch Doctor Who no matter where you are.

Using a Proxy Server on a Business Level

Due to their “middleman” nature, proxy servers can also monitor connections going out to the internet. As a result, it allows businesses to monitor employee network usage to ensure they’re not misusing the internet.


Whenever a worker wants to visit a website, it goes through the proxy server, which checks to ensure everything is fine. If the employee is found to be browsing a blacklisted site, the proxy server redirects the user to a webpage, informing the user that they can’t access it.

What Proxies Servers Can’t Do

Image Credit: Pixabay

Proxy servers are useful but are not a silver-bullet solution for all your needs. There are some things proxy servers can’t do that you need to keep in mind.

Proxy Servers Can’t Hide Your Browsing History

Proxy servers only affect the connection you’re on; therefore, it doesn’t alter anything on your computer or browser. While proxy servers are great at hiding your identity from websites, they don’t hide your browsing history on your browser.


Every website you visit will still get logged in your browsing history, so be sure to employ your browser’s private browsing feature if you want to do some secret gift shopping.

Proxy Servers Can’t Protect Your Data From Your ISP

Unlike a VPN service, a proxy server doesn’t hide your browsing habits from your Internet Service Provider (ISP). While the sites you visit won’t be able to identify you, your data has to go through your ISP to reach the proxy server. As a result, proxy servers are a poor choice if you want privacy from a prying ISP.

If you want to do this, you’re better off with a VPN. VPNs create a “tunnel” between you and the VPN’s servers, which stops your ISP from peeking at your data. It’s also great for protecting your connections from spying in general. For example, if you’re using an unsecured Wi-Fi connection and don’t want people peeking into what you’re doing.

Proxy Servers Cant Encrypt the Data You Send and Receive

Because nothing changes between your computer and the proxy server, so all data sent to the proxy server doesn’t go through any extra encryption, unlike a VPN. Therefore, proxy servers aren’t a solution for protecting your data from prying eyes over unsecured connections.


See our comparison of proxies and VPNs for more info on the differences.

golden auction hammer and palette

Unfortunately, using a public proxy server does carry its risks. These risks can either affect your privacy or your computer security.

For the former, cast your mind back to when we discussed business uses for proxy servers. We mentioned that the server owner can monitor connections and data passed through the server. Likewise, someone who owns a public proxy server can see connection data, which can make them a privacy risk.

Also, free proxy servers require a lot of advertising to keep things going. Usually, free proxy server providers don’t wish to inflict harm on their users, but some advertisers will use ads that lead to malware, a trick known as “malvertising.” If the free proxy server provider doesn’t screen their ads properly, you may end up getting something nasty from the ads they serve you.


The best way to prevent this is to use a private proxy service or make your own online proxy server. Once set up, you can browse the web without any fear of spying or bad advertising.

Fortunately, setting up and using a proxy server is legal as long as you’re outside of China, Iran, North Korea, and other restrictive countries.

Where to Find a Proxy Server?

Now you know about proxy servers, where can you find some good proxy servers to use? As you might expect, there are heaps of proxy server sites, but here are five of the best proxy server sites you can start using immediately:

Kproxy

  1. KProxy: A free, user-friendly proxy site that doesn’t require installation, with an option for a paid plan to eliminate ads and improve service.
  2. Whoer.Net: Offers a web proxy and VPN service that requires downloading tools for IP and DNS changes, with a paid subscription available for full functionality.
  3. HMA: Previously a popular free proxy, it now also offers a VPN, focusing on privacy improvement, offering a web proxy extension and a 30-day money-back guarantee for its VPN.
  4. Zyte: A smart proxy and web scraping solution for businesses, requiring API integration and offering plans starting from $29/mo.
  5. GeoSurf: Provides over 3.5 million residential IPs for enterprises to bypass geo-restrictions, with plans starting at $300 per month.


While they’re not a perfect solution to all your privacy concerns, proxy servers can be a great aid if you want to perform simple tasks. There are even free servers out there you can use; however, you should act cautiously and ensure you’re not connecting to a malicious one.

How to Listen to Audiobooks for Free on Spotify

Key Takeaways

  • Spotify currently offers over 375,000 audiobooks, including public domain classics that are available for anyone to listen to for free.
  • While Spotify Free users can listen to public domain audiobooks, Spotify Premium users get 15 free hours of premium audiobooks every month.
  • Premium users can also purchase 10-hour top-ups for audiobooks which last for 12 months, whereas the 15 free hours do not carry over from month to month.


While music is Spotify’s main focus, the streaming service also offers podcasts and audiobooks. And Spotify users, both on the Free and Premium plans, can listen to audiobooks for free (if they know where to look).


Does Spotify Offer Audiobooks?

Yes, Spotify has audiobooks available to listen to on its service, but the selection is limited to certain regions. Audiobooks are available on Spotify in the US, Canada, the UK, Ireland, Australia, and New Zealand.

While music has traditionally been its main focus, the platform has been adding more alternative audio-based entertainment offerings in recent years.

Spotify has pushed heavily into podcasts, both producing and hosting them. In January 2021, Spotify began releasing its own original audiobooks that are exclusive to the platform. And since then, Spotify has added premium audiobooks that are available to buy.


At the time of writing, Spotify boasts more than 375,000 audiobooks on its platform, so you should be able to find something worth listening to.

Does Spotify Let You Listen to Audiobooks for Free?

Yes, but the number of audiobooks you’ll be able to listen to for free depends on your subscription plan…

Public Domain Works Are Available to All

Spotify’s original audiobooks are mainly based on books that are so old they’re now out of copyright. This puts them in the public domain, and means anyone can reprint and distribute them without permission from the original author. Which, in the case of audiobooks, means someone can record a narration of the book and make it available to all.

These audiobooks based on classic novels are free for every Spotify member to listen to, no matter your plan. However, just like music and podcasts, Premium subscribers can listen to them without ads.

Premium Audiobooks Are Reserved for Premium Subscribers

Spotify also hosts what can best be described as “premium audiobooks”. These are recordings of new or more recent novels that are very much still in copyright, and therefore not entirely free to listen to. At the time of writing, these are only available in the US, the UK, and Australia.


These will be narrated by either the author, a celebrity, or someone trained in the art of narration. And they’ll be available to buy rather than listen to for free. However, Spotify Premium users are given 15 hours/month to listen to premium audiobooks for free. After that, you can also buy top-ups available in 10-hour increments, as detailed on this Spotify Support page.

What Audiobooks Are Available on Spotify?

Some of the classic audiobooks available for free are Frankenstein by Mary Shelley (read by David Dobrik), Great Expectations by Charles Dickens (read by James Langton), and Jane Eyre by Charlotte Bronte (read by Sarah Coombs).

Some of the more modern audiobooks that come with a price tag attached are The Hobbit by J.R.R. Tolkien (read by Andy Serkis), One Day by David Nicholls (read by Anna Bentinck), and Spare by Prince Harry (read by the author).


As good as Spotify’s audiobook offerings are, if you’re a big fan of this form factor for consuming books, you’ll likely get more value from an Audible subscription.

How to Listen to Audiobooks for Free on Spotify

How you can listen to audiobooks for free on Spotify depends entirely on whether you’re a free user or pay for the Premium plan.

If You’re a Spotify Free User…

Spotify Free users are limited to listening to the aforementioned out-of-copyright books now in the public domain. Unfortunately, there’s no easy way of browsing the audiobooks available to listen to for free. Spotify has chosen not to provide a list of these audiobooks. Which means you either need to search for the name of the book or author, or find playlists created by other users.


Probably your best option is to look online for a list of books in the public domain, then search Spotify for one you’re interested in listening to as an audiobook. For example, GoodReads has a list of Public Domain Books listed in order of popularity.

Unfortunately, some of these may still show up on Spotify as available to buy, as publishers can still sell a reading of books in the public domain. Others may have free versions available as podcasts or albums rather than audiobooks, with each chapter available as an individual episode or track. So don’t just click on the first match for your search.

If You’re a Spotify Premium User…

Spotify Premium users can use the same method as above to find audiobooks that are completely free to listen to. However, thanks to a Spotify Premium perk that is one of the many differences between Spotify Free and Spotify Premium, you also have the option to listen to 15 hours of premium audiobooks every month without paying a dime on top of your existing Premium subscription.


Once you have used these 15 hours in a calendar month, you’ll have to wait until the next month to carry on listening to a premium audiobook for free. Or, as previously mentioned, if you’re too impatient to wait, you can buy a 10-hour top-up.

FAQs About Listening to Audiobooks for Free on Spotify

Spotify Free users who don’t pay for the privilege of using Spotify can only listen to audiobooks for free that don’t have a lock icon attached to the Play button. While those audiobooks are available for everyone to listen to, free users will need to pay for those audiobooks by purchasing the title first.

Spotify Premium users can and should take advantage of the 15 hours of free audiobooks Spotify offers each month. This is a perk of subscribing to Spotify Premium, so you would be foolish not to use it.

If your Spotify subscription is part of a Duo or Family plan (how to get started with Spotify Duo), only the plan manager can take advantage of the 15 hours/month perk. Everyone else on the plan will be prompted to buy an audiobook in full before being able to listen to it.


The 15 hours of free audiobook listening per month does not carry over. So, if you don’t use all 15 hours, the remainder will be lost. However, the top-ups which are available to purchase in 10-hour increments do carry over from month to month. They also last for 12 months from the purchase date.

How to Automatically Capture Game Highlights With Any GPU

Quick Links

Key Takeaways

  • Most game highlighting software only tags events that happen during a full recording or require you to manually use hotkeys to capture them yourself.
  • Outplayed is an event-based highlight capture app that automatically captures in-game events like deaths, knockdowns, and headshots.
  • Unlike GeForce Experience, you don’t need an Nvidia GPU to use Outplayed.


While many PC gamers use GeForce Experience to capture game highlights, the software requires an Nvidia GPU. Thankfully, Outplayed can automatically capture highlights with any graphics card brand.


Why Most Highlight Capture Apps Are Bad

If you’ve ever heard of the term “clip it”, you’ll know that there really isn’t a game capture app that can just do that for you automatically. Nvidia’s GeForce Experience can automatically capture highlights, but there are two major downsides to it: only a few popular games support it and you need an Nvidia GPU.

While you can record gameplay on Windows, most alternative highlighting apps require you to press a hotkey to record the past few seconds or minutes. This can easily be forgotten when you’re focused on the game.

Some highlight apps tag highlights, but they require you to record the entire session. This leaves you with a huge file and needing to sort through the footage to find which clip is from which match.


How to Use Outplayed for Game Highlights Recording

Of the many highlight apps I’ve tried, Outplayed does it better than any other. It uses event-based capturing; like capturing deaths, knockdowns, and headshots.

It also comes with a user interface that opens up after your gaming session so that you can edit, save, and upload everything from the app. There’s barely any performance hit, though lower-end systems may feel an impact.

Nvidia requires the developers to implement the highlighting feature in their game, but Outplayed’s software can recognize those in-game events. That’s how Outplayed supports over 2,000 games, with its community voting on the next game to add support to.

1. Install Outplayed

Outplayed in Overwolf app store


If you want to use Outplayed, get it from the Overwolf app store. Just download and run the executable file that installs Outplayed.

You might also want to disable the GeForce overlay to avoid any overlapping hotkeys.

2. Make Sure Your Game Is Supported

Tracking an enemy in Apex Legends

Outplayed supports most online multiplayer games that have a competitive side to them. This means that if the game you play is popular and has your usual kill, death, and assist events; it probably supports it.

When launching a game for the first time, a pop-up will appear prompting you to choose whether you want to record the entire session, record it manually, or use automatic recording if it supports it. This can get annoying, but you can turn it off in the Notifications tab on the upper left in the settings.


Supported auto capture events in Outplayed

You can check the settings and click the + button and search for your game if Outplayed hasn’t detected it already. If you click on your game on My Games list, it should have an Auto captured events section if Outplayed supports it for the game.

For example, Apex Legends has eight events that can trigger auto-capturing.

While you’re in the settings, you might want to turn off Open Outplayed when game ends in case that feature annoys you. However, I find it convenient so I don’t forget to save good clips.

3. Customize Your Highlight Events

In case you don’t want to miss moments that build up to or happen after the event, you can customize the before and after duration of those events.


Advanced options for auto captured events in Outplayed

To customize the events, go to settings through the gear icon on the bottom-left, then click on the game you want to customize. In the game’s settings, click on Advanced options to open up the event sliders and choose how long you want the before and after duration to be. Though, most of the time, the default settings are pretty good.

Storage auto manage in Outplayed

If you’re worried about storage with all the automatic recording, you can set a storage limit. It’ll delete the oldest clip once it passes the limit. Don’t worry, you can favorite a clip by clicking the star icon so that it won’t get deleted.


Star and folder icons in Outplayed

4. Review, Save, or Edit Your Highlights

Outplayed sorting option

When you’re done playing, Outplayed will automatically open after closing the game so that you don’t forget to review and favorite your clips.

Outplayed knows if you’ve started a new match. This means that your clips don’t get jumbled up. You can also sort by the game and date in case you’re looking for an older clip.

If a clip is too long, you can open it in the editor or click on the Quick Edit button to quickly save it as a new clip.

This won’t delete the original clip, it’ll create a new clip that’s to the length you edited it at.


You can also rename the clip to easily find it in the file explorer if you want to manually upload it. To head to the clip’s location in the File Explorer, you can click on the folder icon on the upper left beside the star icon.

Outplayed quick editor features

You can now manually upload your gameplay to YouTube, Twitter, Facebook, or wherever you want to share your clips. We hope you enjoy using Outplayed and never miss your best moments in your games.

How to Fix “The User Profile Service Failed the Logon” in Windows 10

Key Takeaways

  • Enable built-in admin account via Windows Recovery Environment
  • Boot into Safe Mode to replace NTUSER.DAT file
  • Use SFC to scan for corrupt files and resolve the error


Most Windows errors occur after you’ve logged on to your computer. But the “User Profile Service Failed the Logon” error doesn’t let you sign in at all, which is why it is trickier to resolve than other Windows errors.

The “User Profile Service Failed the Logon” error occurs due to a corrupt NTUSER.DAT file, a corrupt registry entry or core system file, or an improperly configured User Profile Service. However, you can use the following steps to diagnose and fix the issue effectively.


Enable the Built-In Admin Account Using the Windows Recovery Environment

The first thing you should do is enable the built-in administrator account if you cannot log in using your account. All other fixes would be impossible to execute without this hidden account.

There are multiple ways to enable the built-in administrator account in Windows, but traditional methods won’t work here. So, we will use the Windows Recovery Environment (WinRE) to open an instance of the Command Prompt and modify the registry to enable the account.


Follow these steps to enable the administrator account:

  1. Click on the Power icon.
  2. Hold the Shift key and click on the Restart option.
  3. After your PC restarts, click on Continue.
  4. Select Troubleshoot.

  5. Click on Advanced Options > Command Prompt.

  1. Type regedit in the Command Prompt window and press Enter.
  2. Click on the HKEY_LOCAL_MACHINE key in the left pane.
  3. Click on File > Load Hive.
  4. Select This PC option.
    Modify the F binary value in registry to enable administrator account

  5. Click on Windows > System 32 > config folder.

  1. Find the SAM file and double-click on it.
    select the SAM file to load Hive in registry editor

  2. Name the key REM_SAM and click on OK.
  3. Navigate to the following registry key:
    HKEY_LOCAL_MACHINEREM_SAMSAMDomainsAccountUsers00001F4 
  4. Double-click on the F binary value.
  5. Go to the 00000038 entry in the first row.

  1. Modify the value 11 in the second column of the 00000038 row to 10.
  2. Click on OK.
  3. Exit the registry editor window.
  4. Close the Command Prompt.
  5. Click on Continue to boot to the lock screen. You will see an additional administrator account on the lock screen.


Boot Into Safe Mode

After enabling the built-in administrator account, the first thing you should do is boot Windows into Safe Mode. Safe mode essentially boots Windows with the bare minimum features and programs that it needs to function.

To boot into Safe Mode, follow these steps:

  1. Power up your computer as you normally would.
  2. When you reach the Sign In screen, hold down Shift and go to Power > Restart.
  3. Select Troubleshoot.
    Windows Recovery Environment

  4. Click on Advanced Options > Startup Settings > Restart.
  5. After your computer reboots, click on Safe Mode with Networking.
  6. Your computer will restart in Safe Mode.
  7. Log in to the administrator account and then proceed with the methods mentioned below.

Replace the NTUSER.DAT File

NTUSER.DAT file stores data about the user account, and if it is corrupt, you must replace this file. Log in to the administrator account that you enabled previously. Then repeat the following steps:

  1. Press Win + E to open the File Explorer.
  2. Click on View > Show > Hidden items.
    view hidden items in file explorer

  3. Open the Default folder. Click on the NTUSER.DAT file and rename it to ‘NTUSER.DAT.OLD’.
  4. Press Backspace. Go to the Administrator folder and copy the NTUSER.DAT File.
  5. Revisit the Default folder and paste the copied file there.
    copy ntuser file to default folder

  6. Restart your PC to apply the changes.


Use SFC to Scan for Corrupt Files

The most likely cause for the “User Profile Service Failed the Logon” error is a corrupt user file. This can happen due to various reasons, ranging from antivirus software scanning upon boot to a power cut while powering on your computer.

Fortunately, Windows has some in-built utilities that can help you find and fix corrupt Windows files automatically. One such utility is called System File Checker (SFC), and it is executed using Command Prompt:

Command Prompt window with the sfc command

  1. Ensure that your computer is in Safe Mode.
  2. In the Start menusearch bar, type cmd and select Command Prompt.
  3. In the Command Prompt window, type sfc /scannow and press Enter.
  4. Windows will begin scanning your computer for any corrupt files and automatically fix them. The whole process should take about 30 minutes.
  5. After the scan is complete, reboot your computer and try logging in again.


Restore Your Computer to an Earlier State

Windows has a useful feature called System Restore that lets you roll back changes to your computer and restore it to an earlier point in time.

Before proceeding further, you should know that the feature is not enabled by default, and you have to manually create restore points unless you configure Windows to create daily restore points.

If you remember creating a restore point before the error popped up, follow these steps:

System Restore wizard Windows 10

  1. Press Windows key + R to launch the Run dialog.
  2. In the Run box, type rstrui.exe and hit Enter.
  3. On the System Restore dialog box, click on Next.
  4. Choose a restore point from the list.
  5. On the next window, double-check everything and click Finish.
  6. Windows will restore itself to an earlier state, and you should now be able to log in without any hassles.


You should back up any important data or applications that they may have installed after creating the restore point.

Change Registry Configuration

Another way to tackle the “User Profile Service Failed the Logon” error is to make some changes to the Registry. This is an advanced troubleshooting method, and it is recommended that you create a System Restore point before proceeding further.

Do the following to configure the Registry properly:

Windows 10 Registry Editor

  1. Boot into Safe Mode using the steps in the first section of this article.
  2. Press Windows key + R to open the Run prompt. Type regedit and press Enter.
  3. In the Registry Editor, using the navigation bar on the left, go to:
    HKEY_LOCAL_MACHINESoftwareMicrosoftWindows NTCurrent VersionProfile List 
  4. Here, you should see two files with the same name, but one will have .bak as an extension.
  5. Right-click on the file with the .bak extension and select Rename. Remove the .bak extension while leaving the filename untouched, and press Enter.

  1. Now, right-click on the file that didn’t originally have the .bak extension and add .bak at the end of it.
  2. In the folder that has the renamed file from step 5, right-click on State, then select Modify.
  3. Change the value in Value data from 8000 to 0 (zero).
  4. After this, right-click on the RefCount entry and change the value in Value data to 0 (zero).
  5. Confirm the changes and close the Registry Editor.
  6. Reboot your computer and log in.


What if You Don’t Find a .bak File in the Registry Editor?

It is unlikely, but your computer may not have created a file with the .bak extension. In this case, open Windows Explorer and go to:

C:UsersDefaultAppDataLocalApplication Data

If you find another folder named Application Data under the one you’re on, delete it, and reboot your computer. It should fix the problem.

Enable the User Profile Service

In certain instances, the User Profile service itself may be disabled. Usually, a third-party application is the culprit. Luckily, you can enable it by running a simple command in the Command Prompt window:

Command Prompt in Windows 10

  1. Boot your computer into Safe Mode.
  2. In the Start menu search bar, type cmd. From the search results, right-click on Command Prompt > Run as administrator.
  3. In the Command Prompt window, type sc config ProfSvc start= auto and press Enter.
  4. After this, type sc start ProfSvc, and press Enter.
  5. Close Command Prompt and reboot your computer.


Some of these methods are useful in diagnosing many other common Windows errors as well. So, it’s useful if you keep them in mind when you experience other issues on your computer.

How to Use Instagram Notes to Post a Status

Want to post a status on Instagram that your friends and mutual followers can see? Instagram Notes lets you post an update that will appear in the Message folder. Here’s how to use the feature.


What Are Instagram Notes?

Notes are short updates that appear at the top of a user’s Instagram inbox on the mobile app. Like Stories, they disappear after 24 hours. When Notes first launched, they could be up to 60 characters and could only include text and emojis.

However, now you can post a video note on Instagram, as well as add music to your Instagram Notes.

The biggest difference between Stories and Notes is that Notes have shorter videos and they don’t appear in the same section of the app. They are also only shared with mutual followers or people on your Close Friends list.

How to Get Instagram Notes

If you don’t have the Notes feature yet, make sure that your app is updated. The feature rolled out in 2022, so you should have it by now.

It’s important to be aware though that the feature is only available on the Instagram mobile app. You can’t access Instagram Notes on the Instagram website.

Update: Instagram for Android | iOS (Free)

How to Create a Note on Instagram

Now that you know what the feature does, here’s how to use it. To get started with your first note, follow these steps…


  1. Open Instagram and select the paper plane icon to go to your message inbox.
  2. You will see a caption box on your profile picture at the top of your inbox with the text “Note…“. Tap on the text box.
  3. On the next page, type in what you want to share in the text box.
  4. If you want to share a video note, click on the camera icon on your profile picture. If you want to add music to your note, select the music note icon.
  5. Select your audience: Followers you follow back or Close friends. Then tap Done.
  6. When you’re finished, tap Share at the top of the screen. The status will now appear with your profile picture, alongside notes from other mutual followers.


The process is pretty easy. Just make sure you’re sharing with the right audience. Once you post a Note, people can reply to it with DMs that will arrive in your inbox, similar to Story replies.

How to Delete or Change an Instagram Note

If you made a mistake while creating a Note, you can easily delete it. Simply tap on your profile picture in your inbox and select Delete Note.

You can also add a new note by selecting the Leave a New Note option and simply posting something else. This new note replaces the old one and will expire after 24 hours.

Now you know how to post an Instagram Note. Make sure you’re only sharing it with people you trust if you’re using it as a personal status update. Also, remember that your mutual followers or friends will only see it if they visit their Instagram inbox.

Can You Change the Background on Your PS5?

Quick Links

Key Takeaways

  • The background on your PS5 automatically changes based on what game or menu item you have selected.
  • Customizing your PS5 profile background is possible, but the changes don’t show on the main home screen.
  • The PS5 doesn’t have themes like the PS4, but some profile customization options are available for users.


Console owners often enjoy making their user interface unique with custom themes and backgrounds. But can you change your background or theme on the PS5?


Can You Change Your PS5 Background? The Options Explained

While you can change the background wallpaper on your PS4, the background on your PS5 depends on what game or menu icon you have selected. These automatic backgrounds can’t be changed and will alternate according to which menu item you have selected.

media gallery selected on ps5

For example, when I hover over Baldur’s Gate 3, the background changes to the game’s cover art. When I hover over another title, the background changes again.


You can change the background or cover image of your PS5 profile, but this doesn’t show up on the main console home screen. You will have to visit your profile to see this image.

background on ps5 profile

Can You Use PS5 Themes?

Again, unlike the PS4, you can’t get themes for the PS5. Hopefully, the feature will roll out in the future so that users have a bit more customization available.

However, you do have some options to customize your profile on the PS5.

How to Change Your PS5 Profile Background

When it comes to adding some customization to your PS5, you can change certain aspects of your profile. This includes your profile picture or avatar and the background of your profile.

To edit your profile, go to the PS5 home screen and select your avatar in the top right corner. From the drop-down menu that appears, select Profile.


ps5 home screen

This will take you to your profile page, which is visible to you and your friends, depending on your privacy settings.

To begin editing your profile, select the pen icon on the right. This will take you to a menu where you can select which aspect of your profile you would like to change.

ps5 profile with pen icon

To change your profile background, select Cover Image.

edit profile options on playstation 5 console


If you already have a background imported from your PS4 console, you can choose to Remove Image. If you want to select a new image, choose Change Image. If this is your first time adding an image, choose Select Image.

changing your profile background on the ps5

Your media gallery will open and you can select a new profile background from the options provided. Choose whichever image you want to use and then click on the Select button. You can then crop your image and select Save.

selecting image for playstation profile background image

Once you have changed your background to your liking, select Done.


If you want to customize your profile further, such as changing your PS5 profile avatar, you can go back to the edit menu and select Profile Picture. There you can choose to use a pre-made avatar or upload a profile picture through the PS App.

If you select the Avatar option in the edit menu, you can choose between several avatars that you receive from your games, as well as some default avatars from Sony.

While these customization options are limited, they can offer you a way to make your PS5 user interface stand out a little bit more. Hopefully, Sony introduces more customization options in the future so that PS5 backgrounds aren’t so limited.

VPN Blocked? Why This Happens and What to Do About It

Quick Links

Key Takeaways

  • Streaming services block VPNs due to licensing restrictions, leading to access issues for non-local content.
  • Websites detect VPNs using IP blacklists, in-house fraud detection, port blocking, government blocks, and DNS leaks.
  • Bypass VPN blocks by trying different IP addresses, informing sites of VPN use, or paying for a private IP address.


Using a VPN is a great way to protect your privacy while surfing the web, but it’s not without its pitfalls. You may have noticed that some sites treat you differently because you’re using a VPN.

While using a VPN shouldn’t cause any issues, some websites will actively block your connection, which is frustrating. So, why do some websites block VPN users?


Why Do Websites Block VPNs?

Streaming services often block VPNs due to contract and licensing issues. For example, on a streaming site, along with original shows and movies, most services host content they did not make. Because streaming services do not own the non-original content they host, they’re often restricted by distribution licenses.

For instance, if Netflix is streaming Show A, but Netflix doesn’t own the show, it may only be legally allowed to stream the show within the US. So, if you live outside the US and try to access Show A via Netflix’s US site, your access could be blocked if a VPN is active. Netflix may not block all VPN users, but it can pick up on VPN server IP addresses and block them if the IP address has been flagged as one belonging to a VPN server.


Non-streaming websites can block VPNs for an array of reasons. Maybe the service the website offers is illegal in your country of residence, and the website has flagged the VPN IP address you’re using as blacklisted. Additionally, if you’re using a VPN to try and bypass a paywall, websites will often do what they can to stop this, monitoring your IP to see if a VPN server owns it.

How Websites Detect and Block Your VPN

Wondering how websites detect whether you’re using a VPN? There are several methods used to detect if you’re using a VPN.

1. IP Blacklists

Anti-VPN mechanisms primarily work by checking visitors’ IP addresses against blacklists of known VPN addresses. Since VPNs generally use known data centers to host their servers, it’s not very hard to determine the IP ranges they own.


Services like IPHub and ipinfo.io collect this information and make it available to customers for a price. If you’re connected to a VPN, IPHub will pick up on that and conclude that you’re connected via hosting, proxy, or simply a bad IP.

When you connect without a VPN active using your raw IP, IPHub will likely conclude that you have a “Good IP.”

screenshot of iphub result

A good IP is unlikely to get blocked, whereas a hosted or “bad” IP may get blocked by certain sites if it’s been blacklisted.

VPN IP address issues are typically confronted with a CAPTCHA screen, which checks if you’re a real person or a robot. However, at times, even if you enter the correct CAPTCHA information, the VPN block may remain.


CAPTCHA triggered by Google Search

2. In-House Fraud Detection

Large companies with a lot of resources, like Google and Netflix, are uniquely positioned to detect proxies due to the amount of traffic they handle. Even if a VPN service provides dozens of IP addresses, chances are they will still show up many times among their millions of users, allowing the companies to flag suspicious IPs easily.

These businesses have significant engineering talent, so their solutions may also use advanced technologies like machine learning to analyze and classify traffic patterns.

3. Port Blocking

Port blocking occurs when the virtual network port your VPN uses is blocked using a firewall. When this happens, your VPN’s tunneling method to surf the web is cut off, meaning you cannot access the sites you want to.


4. Government Blocks

Sometimes, the website you want to reach has been blocked by your place of residence’s government, or the government has outlawed the VPN you’re using. Some countries are fairly liberal with their VPN laws, but more extreme cases exist, such as Iraq, China, and North Korea. If you live in a country where certain, or all VPNs, are illegal, you may run into frequent blocks.

5. DNS Leaks

Sometimes, your connection may suffer a DNS leak, which involves your web requests still being sent directly to your internet service provider despite having an active VPN. This often happens if the VPN you’re using isn’t functioning correctly and can lead to you being instantly blocked by certain sites.

Many VPNs offer DNS leak tests to ensure your data is being leaked to your ISP. So, if you’re concerned about this, check if your VPN provider offers a leak test.

6. Sites That Completely Block VPN Users

screenshot of vpn block notification on social blade website


Some website owners attempt to block VPNs altogether. For example, Social Blade (shown above) uses Cloudflare to intercept VPN traffic, blocking access to anyone who has a VPN active when they load the website.

How to Bypass VPN Blocks

Most popular streaming sites tend to block VPNs, including:

  • Disney+
  • BBC iPlayer
  • Hulu
  • Netflix
  • Max

These can vary based on your location and your specific VPN. While there’s no foolproof way to always get around these mechanisms, there are a number of steps you can take to improve your chances.

1. Try Different IP Addresses

Many commercial VPN providers give you access to multiple servers spread out over different data centers worldwide. By switching to a different server, you change your internet-facing IP address.

tunnelbear location choice in desktop app


If you get blocked, cycle through the available servers. If you’re lucky, you could find one that isn’t on the site’s blacklist.

2. Inform Sites of Your VPN Use

It may be beneficial to notify certain sites that you use a VPN. For example, if you reach out to your bank’s customer service, they could put a note on your account to help resolve any problems should their fraud protection systems flag your VPN use.

This is a particularly good idea if you’ve previously been connecting to the service without a VPN but plan to start using one in the near future, perhaps due to travel. Remember that sites generally restrict proxied traffic to curtail abuse by bots, not because they are specifically prejudiced against people who use VPNs.

3. Pay for a Private IP Address

The more people that are using a particular IP, the more likely it is to land on a blacklist at some point. Having your own private IP address makes it much easier for your VPN to go undetected.

There are many private IP providers out there today, but before you go signing up for one, make sure your current VPN provider doesn’t already offer this feature. The following popular VPN providers offer private VPNs (often at an inflated price):


  • IPVanish
  • SurfShark
  • PureVPN
  • NordVPN
  • Windscribe
  • Ivacy
  • Private Internet Access
  • CyberGhost

If your current VPN provider doesn’t offer a private IP address, consider switching to another service or a dedicated private IP provider, such as IPv4 Global. Other handy VPN features can help you bypass blocks if you’d like to maximize your chances.

4. Use a Less Common VPN

Another way to avoid crowded servers is to use a less-known VPN provider. Since a few companies tend to dominate the VPN market, you can expect them to appear prominently in blacklists. A more obscure VPN may be less likely to get blocked or trigger a CAPTCHA.

Of course, this doesn’t mean you should use the cheapest, shadiest provider you can find. You especially want to avoid free VPN services. Not only are these usually swamped with thousands or millions of users, but they are also magnets for fraud, piracy, and other problematic behaviors. Sites have a strong incentive to target them for blocking.


5. Clear Your Cache and Cookies

In some cases, particular browser features or settings could trigger protection systems, or browser tracking could identify your browser easily.

Clearing your browser cache and cookies can reset how a website or service views you as a user and potentially unblock your VPN in the process. It’s simple to clear your cache and cookies on Google Chrome, and it’s a similar process on most other browsers.

6. Change Your DNS Servers

Another handy way to attempt to unblock your VPN is to change your DNS servers. The Domain Name System (DNS) translates human-readable domain names to IP addresses. Instead of having to remember difficult and long strings of numbers for each website, we can remember names instead, like MakeUseOf. When you get a new internet connection, you’ll use the default ISP DNS settings, but you don’t have to.

You can change your settings to use third-party DNS, which may well unblock your VPN and let you access the site or service. You can change your DNS settings on Windows, change your DNS settings on macOS, and find and change your DNS settings on Linux.


7. Roll Your Own VPN server

A more technical alternative is to install your own VPN server, either on a physical computer you control or on a virtual cloud server. You’ll be the only person using that server’s particular IP address, much reducing the chance that it ends up on a blacklist.

Note that the IP ranges of prominent cloud providers like Amazon AWS and Microsoft Azure are also public information, so this may not be a completely airtight solution either. It would be more reliable to install the server on a physical machine that connects to the Internet through your own ISP.

It can be annoying to face CAPTCHAs or other roadblocks while innocently surfing the web. But for the most part, there are simple ways to bypass the mechanisms sites use to discriminate against VPN users. By taking a few steps to make your traffic seem less suspicious, you can use VPNs to protect your online privacy with less hassle.

How to Turn Off Vibration on Your iPhone

Although you don’t have to worry about notification sounds when you put your iPhone in Silent mode, it will still vibrate whenever you get an alert. And that’s not everyone’s cup of tea. We’ll show you how to turn off vibrations entirely for certain apps and specific alerts.


How to Turn Off Vibrations for Calls and Alerts on an iPhone

If you’d prefer not to have your iPhone vibrate for incoming calls or alerts, you can disable this feature by following these steps:

  1. Go to the Settings app on your iPhone and select Sound & Haptics.
  2. Tap Haptics under the Ringtone and Alerts section.
  3. Select Don’t Play in Silent Mode or Never Play depending on your preference. For instance, if you don’t like vibrations when using your iPhone’s Silent mode, choose Don’t Play in Silent Mode.
  4. Return to the previous menu and select one of the alert types, like Ringtone, New Mail, Default Alerts, etc. Tap Haptics at the top and choose None.


How to Turn Off All Vibrations on an iPhone

While the method above disables most vibrations, your iPhone will still vibrate if you receive an emergency alert. If you’d like to turn off all vibrations on your iPhone, you can do so through your iPhone’s Accessibility settings. All you need to do is go to Settings > Accessibility > Touch. Now, scroll down and toggle off the switch next to Vibration.

You may have noticed how your iPhone vibrates slightly whenever you perform actions like toggling on a switch or long-pressing on a button in your iPhone’s Control Center or when you’re typing on your iPhone’s keyboard. These are called System Haptics and Keyboard Feedback. When you turn off all vibrations on your iPhone, you’ll also disable these features.

However, you can disable them without affecting all your apps by heading to Settings > Sound and Haptics and toggling off the switch next to System Haptics.


Similarly, tap Keyboard Feedback and toggle off the switch next to Haptics.

Keyboard Feedback settings on an iPhone

How to Turn Off Vibrations for Certain Apps

Instead of turning off vibrations for texts you receive or for all your apps, you may often want your iPhone to stop vibrating every time you get a notification from a third-party messaging or social media app like WhatsApp. The only way to turn off vibrations for specific apps is to adjust the app’s notification settings. Here’s what you need to do:

  1. Head to Settings and go to Notifications.
  2. Select the app you’d like to turn off vibrations for.
  3. Toggle off the switch next to Sounds.


While your iPhone will no longer vibrate when you receive notifications from the app, there is a catch: you’ll no longer hear a ping when you get a notification, even when your ringer is switched on. This is because this method essentially stops audio alerts. So, unless you’re looking to silence notifications on your iPhone, there’s currently no way to turn off vibrations for specific apps without sacrificing audio alerts.

How to Use Undo in Vim

When editing with Vim on Linux, it’s easy to make mistakes. Fortunately, it’s also easy to undo them. Here’s how to quickly undo your edits in the popular Linux text-editor Vim.


How to Undo a Vim Edit

Simple Vim undo operations are similar to the undo function you might have used in a modern word processor such as Microsoft Word, LibreOffice Writer, or Google Docs. Vim keeps track of changes that you make to a file and can roll back if you need to.

Vim considers anything you do in insert mode or any commands in command mode as changes. For example:

  • If you type several lines in insert mode, then perform an undo immediately, those lines will be deleted.
  • If you type a line, switch to command mode, then switch back to insert mode and type some more text, you’ll create two changes. Undo will remove each one separately.

You can also repeat Vim commands like “3dd” to delete three lines. If you issue one of these compound commands, this will also be redone as the latest change. You can keep undoing until you get back to where you started, when you opened or created the file.

If you realize you’ve made an edit in Vim that you didn’t want to make, undoing it is a simple two-step process:

  1. Press Esc to make sure you’re in command mode.
  2. Press u to undo the previous change.


That’s it. You’ll see a message about what changes are made, such as “n fewer lines.”

If you want to undo more than one change, you can do that too. Just prefix the undo command with the number of changes you want to undo, as you can with most other Vim commands. For example, if you wanted to undo two changes, you would press:

2u 

How to Redo in Vim

You may find that your undo command does something undesirable, or you just change your mind about it. In this case, you can issue redo commands to get your file back to its previous state.

As Vim keeps track of your changes, it also keeps track of your undos. So you can undo your undos if you need to through redo operations. Remember, Vim treats multiple lines entered in input mode as one change, so if you redo an operation, you’ll get several lines back in one command.


The command to do this is Ctrl + r, for “redo.” Make sure you’re in command mode by pressing Esc. Redo works on the same principle as undo; for example, you can repeat the redo by prefixing it with the number of redos you want to make.

Vim redo notification

As with undo, you’ll see a brief message about the changes that were redone, such as the number of lines added to the file. You can redo any number of times, until you get back to the current state of the file.

How to Hide Apps on Android

Key Takeaways

  • Keep your personal apps away from prying eyes by hiding them on Android.
  • Samsung devices let you hide apps natively, but someone can still find them using the Settings app or Google’s Search widget. Some Android phones, like the Google Pixel 8, only let you disable system apps instead.
  • As a universal solution, consider third-party launchers like Nova or Microsoft Launcher to hide and customize app visibility on Android.


Hiding your private apps is an excellent way to add an extra security layer to your smartphone’s screen lock or biometric authentication. We’ll show you how to hide Android apps using various methods so you can be sure no one else can access them.


How to Hide Apps on a Samsung Phone

All Samsung phones let you hide installed apps from the app drawer. The process is relatively straightforward as well.

  1. Long press on an empty area on the Home screen of your Samsung device. Tap Settings from the menu that appears at the bottom.
  2. Scroll down and select Hide apps on Home and Apps screens. Then, choose the apps you want to hide.
  3. Tap Done to apply the changes.

You’ll now see that all the apps you selected have disappeared from your Galaxy phone’s app drawer.


One good thing about Samsung’s implementation is that the hidden apps will not appear even if you search for them from the app drawer. However, they will appear in the search results of other third-party universal search apps and under Settings > Apps.

Samsung does not offer a hidden app drawer to provide quick access to the hidden apps. This makes accessing them a chore. You can always use Google’s Search widget or any other universal search app to work around this problem, though. Remember that there are several other ways to find hidden apps on Android.

Disable Apps on Android to Hide Them

On phones like the Google Pixel 8, there’s no native option to hide an app. You can always use a third-party launcher or app to achieve this. But if you’re not comfortable using one, you can consider disabling the app to hide it from your app drawer.

The only catch is that this method only works for system apps pre-installed on your phone. You cannot hide apps you downloaded from the Play Store using the below steps.

  1. Open the app drawer on your Android phone and scroll to the app you want to hide.
  2. Long-press on its app icon and select App info from the context menu. Alternatively, you can navigate to Settings > Apps and tap the app’s name from this list.
  3. Tap Disable and confirm your action by tapping Disable app from the dialog box that appears.


This will hide the app from your Android phone’s app drawer. The downside is that you cannot use the app unless you re-enable it.

How to Hide Android Apps Using Nova Launcher

If the default launcher on your Android device does not offer the option to hide installed apps, you’ll have to use a third-party launcher like Nova. Once you have installed Nova Launcher from the Google Play Store, set it as the default launcher on your Android device and follow the steps below:

Download:Nova Launcher (Free, premium version available)

  1. Open Nova Launcher’s settings using a two-finger swipe-up gesture on the Home screen. Alternatively, you can long-press an empty area of the Home screen and tap Settings.
  2. Select App drawer and scroll down to the bottom.
  3. Tap Hide apps under the Apps category.
  4. A list of all the apps on your device will appear. Select the Android apps you want to hide from the app drawer. Go back to save the changes.


Unfortunately, this method has its own set of limitations. If you use any universal search app or Nova’s built-in app search, the hidden app will appear in the results. It’s also possible to find the listing of the hidden app under Settings > Apps of your Android device.

If you own a OnePlus, you don’t need a third-party launcher to hide apps. OnePlus’ OxygenOS provides a native option to hide apps, and you can password-protect the hidden apps for additional security.

Use Microsoft Launcher to Hide Your Apps

Likewise, Microsoft Launcher also lets you hide apps on your Android device. Compared to Nova Launcher, Microsoft Launcher’s execution of hiding installed apps is superior, as you can password-protect them.

Download:Microsoft Launcher (Free)

  1. Long press on an empty area of your Home screen. Then tap Launcher Settings from the menu that pops up.
  2. Navigate to Home screen > Hidden apps.
  3. Tap Hide apps and select the apps that you’d like to hide. Then, tap Done.
  4. Now, head back to the Hidden apps menu and tap Settings icon in the top-right corner.
  5. Enable the Set password toggle to protect your hidden apps with a four-digit PIN.
  6. Toggle on Quick access in dock if you want to quickly view your hidden apps.


You can now swipe up twice on the dock to bring a hidden panel with access to the hidden apps. If password protection is enabled, you’ll have to enter the four-digit PIN first.

The Pros and Cons of Hiding Apps on Android

Hiding an app on your Android device prevents it from appearing in the app drawer. Sometimes, you’ll have to access another hidden app drawer to open the hidden apps.

Some phones only allow you to hide apps and do not offer any way to access them again, while others also let you lock hidden apps to ensure they aren’t easy to access.

If your Android device has pre-installed bloatware that cannot be disabled, you can hide them from the app drawer for a cleaner look. You can also hide your banking apps, password manager, and other apps that contain sensitive information for additional security.


Karlis Dambrans/Shutterstock

Some Android phones allow you to hide installed apps natively. If your phone does not have this feature, you can use a third-party launcher like Nova or Microsoft Launcher. A third-party launcher also allows you to change app icons for greater Android customization.

You should always hide apps containing critical or sensitive data on your phone to prevent anyone from gaining unauthorized access to it. While not foolproof, the implementation is still good enough to stop a nosy friend or family member from easily accessing it without the proper technical know-how.

How to Download Spotify Songs to Listen Offline

Key Takeaways

  • Downloading music on Spotify is surprisingly simple, and allows you to listen to content offline in order to save your mobile data.
  • Spotify Premium users can download music (and/or podcasts) on both the mobile and desktop apps, but not on the web player.
  • Premium users can download up to 10,000 songs on five different devices, while free users can only download podcasts and not enable Offline Mode.


It’s not only possible, but surprisingly simple, to download Spotify songs to listen to offline. And Spotify’s Offline Mode means you can ensure you’re only accessing downloaded content, preventing you from wasting your mobile data.


How to Download Spotify Songs to Listen Offline

You can download music (and podcasts) from Spotify on both the mobile and desktop apps (but not the Spotify Web Player). Here’s how…

How to Download Music on Spotify on Your Mobile

Open the Spotify app on your phone, and find the song, album, or playlist you want to download for offline listening.

To download an individual song, you’ll need to add it to a playlist first. The simplest way is to add it to your Liked Songs by clicking
the + symbol
while playing a song. Or you can create a Spotify playlist and add songs to it manually.

To download an album or playlist, search for the album or playlist you want to listen to offline, click on it, then look for the Download button (a down arrow within a circle). This is located above the song listings, to the left of the Play button.


Simply press that button, and the album or playlist will be downloaded to your device for you to listen to offline.

How to Download Music on Spotify on Your Desktop

  1. Open the Spotify app on your computer, and make sure you’re logged in.
  2. Navigate to the album or playlist you want to download, and click the Download button (the down arrow located on the same line as the Play button).

Unlike songs, you can download individual podcasts for offline listening. So, search for the podcast you want to listen to and select it to bring up the list of episodes. You’ll see the
Download
button in the lower-left corner of each episode. Simply click it to download that episode and
listen to your favorite podcast
.


How to Find Everything You Have Downloaded on Spotify

Once you have downloaded some content, you need to know where to find it. Here’s how…

  1. Open the Spotify app on your device and click Your Library.
  2. Scroll through the options until you find Downloaded.
  3. Click on that to reveal a full list of everything you have downloaded on Spotify.

If you have downloaded a lot of content, you can sort your Downloaded content in a number of ways to help you find what you’re looking for.

By default, your downloaded content is sorted by most recently accessed. But if you click Recents, you can sort by Recently Added, Alphabetical, or Creator.

Regardless of the device you’re using, the album, playlist, or podcast you have downloaded will now be available to listen to offline. Whether you choose to go offline or are forced offline.


Why You Should Download Music on Spotify

Now you know how to download music on Spotify, let’s tackle why you should do so.

In a nutshell, downloading content means that it will be available to listen to offline. So, whether you want to disconnect from the internet intentionally (to save your mobile data) or are forced offline (due to a lack of coverage or an outage) having some downloaded content (music and/or podcasts) to listen to is a sensible idea.

After all, unless you’re on Spotify’s free plan, and therefore have limited playback options anyway, you’re paying for the service. So, having access to the content you want to listen, regardless of whether you’re online or not, is important.

How (and Why) to Enable Spotify’s Offline Mode

Once you have downloaded some content to listen to offline, you can enable Spotify’s Offline Mode. Enabling Offline Mode means that when you’re offline, you’ll only be able to play the music and/or podcasts you have downloaded. This is another option only available to Spotify Premium subscribers.


To enable Spotify’s Offline Mode:

  1. Open the Spotify app on your mobile device, and log in.
  2. Click on your profile in the top left-hand corner, then click Settings and Privacy.
  3. Scroll down until you see Offline Mode under the Playback heading.
  4. Click the switch on the right to either enable or disable it (depending on its current position).

As stated above, Spotify’s Offline Mode limits you to listening to the content you have downloaded. This ensures that you don’t use mobile data or even your Wi-Fi to stream anything when you don’t want to do so. Which is important if you’re on a limited data plan or have another reason for not wanting to access the internet for a period of time.


What You Need to Know About Listening to Spotify Offline

Spotify Premium users like myself can download up to 10,000 songs each on five different devices, for a total of 50,000 songs. Which, with an estimate of three minutes/song (which is likely on the low side), would give you 2500 hours of music to listen to offline.

For context, that’s just over 104 days of listening nonstop. And if you’re without an internet connection for that long, you have bigger issues to tackle than your song collection.

Anyone using Spotify’s free plan CAN download podcasts to listen to offline, but CANNOT download music. Free users can also not enable Offline Mode. While not necessarily a problem, it means there’s a chance of accidentally streaming content you haven’t downloaded.

The Spotify app needs to connect to the internet at least once every 30 days. This means that you cannot remain in Offline Mode and only listen to your downloads in perpetuity. So, if you ever cancel your Spotify Premium subscription and switch to using the streaming service for free, you’ll eventually lose access to your downloads.


Spotify is a fantastic streaming service, and the ability for Premium users to download content to listen to offline is a Godsend. And given how easy it is to download albums, playlists, and individual episodes of podcasts, there’s really no reason not to give it a go.

How to Use the ChatGPT API

Key Takeaways

  • OpenAI has released the ChatGPT API, allowing developers to integrate ChatGPT’s capabilities into their applications.
  • To get started, you’ll need an OpenAI API key and a development environment with the official libraries.
  • You can use the ChatGPT API for both chat completion and text completion tasks, opening up possibilities for various applications.


With the release of its API, OpenAI has opened up the capabilities of ChatGPT to everyone. You can now seamlessly integrate ChatGPT’s features into your application.

Follow these steps to get started, whether you’re looking to integrate ChatGPT into your existing application or develop new applications with it.


1. Getting an OpenAI API Key

To start using the ChatGPT API, you need to obtain an API key.

  1. Sign up or log in to the official OpenAI platform.
  2. Once you’re logged in, click on the API keys tab in the left pane.
  3. Next, click on the Create new secret key button to generate the API key.
  4. You won’t be able to view the API key again, so copy it and store it somewhere safe.

The code used in this project is available in a
GitHub repository
and is free for you to use under the MIT license.


2. Setting Up the Development Environment

You can use the API endpoint directly or take advantage of the openai Python/JavaScript library to start building ChatGPT API-powered applications. This guide uses Python and the openai-python library.

To get started:

  1. Create a Python virtual environment
  2. Install the openai and python-dotenv libraries via pip:
    pip install openai python-dotenv 
  3. Create a .env file in the root of your project directory to store your API key securely.
  4. Next, in the same file, set the OPENAI_API_KEY variable with the key value that you copied earlier:
    OPENAI_API_KEY="YOUR_API_KEY" 

Make sure you do not accidentally share your API key via version control.
Add a .gitignore file
to your project’s root directory and add “.env” to it to ignore the dotenv file.

3. Making ChatGPT API Requests

The OpenAI API’s GPT-3.5 Turbo, GPT-4, and GPT-4 Turbo are the same models that ChatGPT uses. These powerful models are capable of understanding and generating natural language text and code. GPT-4 Turbo can even process image inputs which opens the gates for several uses including analyzing images, parsing documents with figures, and transcribing text from images.


Please note that the ChatGPT API is a general term that refers to OpenAI APIs that use GPT-based models, including the gpt-3.5-turbo, gpt-4, and gpt-4-turbo models.

The ChatGPT API is primarily optimized for chat but it also works well for text completion tasks. Whether you want to generate code, translate languages, or draft documents, this API can handle it all.

To get access to the GPT-4 API, you need to make a successful payment of $1 or more. Otherwise, you might get an error similar to “The model `gpt-4` does not exist or you do not have access to it.”

Using the API for Chat Completion

You need to configure the chat model to get it ready for an API call. Here’s an example:

from openai import OpenAI
from dotenv import load_dotenv

load_dotenv()
client = OpenAI()

response = client.chat.completions.create(
  model = "gpt-3.5-turbo-0125",
  temperature = 0.8,
  max_tokens = 3000,
  response_format={ "type": "json_object" },
  messages = [
    {"role": "system", "content": "You are a funny comedian who tells dad jokes. The output should be in JSON format."},
    {"role": "user", "content": "Write a dad joke related to numbers."},
    {"role": "assistant", "content": "Q: How do you make 7 even? A: Take away the s."},
    {"role": "user", "content": "Write one related to programmers."}
  ]
)

The ChatGPT API sends a response in the following format:

ChatGPT API output response format


You can extract the content from the response, as a JSON string, with this code:

print(response.choices[0].message.content) 

Running this code produces the following output:

Programming joke output generated via Chat Completions API

The code demonstrates a ChatGPT API call using Python. Note that the model understood the context (“dad joke”) and the type of response (Q&A form) that we were expecting, based on the prompts fed to it.

The most significant part of the configuration is the messages parameter which accepts an array of message objects. Each message object contains a role and content. You can use three types of roles:

  • system which sets up the context and behavior of the assistant.
  • user which gives instructions to the assistant. The end user will typically provide this, but you can also provide some default user prompts in advance.
  • assistant which can include example responses.


ChatGPT API Roles Diagram

You can further customize the temperature and max_tokens parameters of the model to get the output according to your requirements.

The higher the temperature, the higher the randomness of the output, and vice-versa. If you want your responses to be more focused and deterministic, go for the lower temperature value. And if you want it to be more creative, use a higher value. The temperature value ranges between 0 and 2.

Temperature parameter of ChatGPT API


Like ChatGPT, the API also has a word limit. Use the max_tokens parameter to limit the length of responses. Be aware that setting a lower max_tokens value can cause issues as it may cut off the output mid-way.

At the time of writing, the gpt-3.5-turbo model has a token limit of 4,096, while gpt-4‘s is 8,192. The latest gpt-3.5-turbo-0125 and gpt-4-turbo-preview models have limits of 16,385 and 128,000 respectively.

After high demand from developers, OpenAI has introduced JSON mode which instructs the model to always return a JSON object. You can enable JSON mode by setting response_format to { “type”: “json_object” }. Currently, this feature is only available to the latest models: gpt-3.5-turbo-0125 and gpt-4-turbo-preview.

You can further configure the model using the other parameters provided by OpenAI.

Using the ChatGPT API for Text Completion

In addition to multi-turn conversation tasks, the Chat Completions API (ChatGPT API) does a good job with text completion. The following example demonstrates how you can configure the ChatGPT API for text completion:


from openai import OpenAI
from dotenv import load_dotenv

load_dotenv()
client = OpenAI()

response = client.chat.completions.create(
  model = "gpt-3.5-turbo",
  temperature = 0.8,
  max_tokens = 3000,
  messages = [
    {"role": "system", "content": "You are a poet who creates poems that evoke emotions."},
    {"role": "user", "content": "Write a short poem for programmers."}
  ]
)

print(response.choices[0].message.content)

You don’t even need to provide the system role and its content. Providing just the user prompt will do the work for you.

messages = [
  {"role": "user", "content": "Write a short poem for programmers."}
]

Running the above code will generate a poem for programmers, for example:

A poem on programmers

ChatGPT API Pricing

The ChatGPT API pricing is based on the “price per 1,000 tokens” model. For chat completion requests, the cost is calculated based on the number of input tokens plus the number of output tokens returned by the API. In layman’s terms, tokens are equivalent to pieces of words, where 1,000 tokens are approximately equal to 750 words.

Model

Input

Output

gpt-4-0125-preview

$0.01 / 1K tokens

$0.03 / 1K tokens

gpt-4-1106-preview

$0.01 / 1K tokens

$0.03 / 1K tokens

gpt-4-1106-vision-preview

$0.01 / 1K tokens

$0.03 / 1K tokens

gpt-4

$0.03 / 1K tokens

$0.06 / 1K tokens

gpt-4-32k

$0.06 / 1K tokens

$0.12 / 1K tokens

gpt-3.5-turbo-0125

$0.0005 / 1K tokens

$0.0015 / 1K tokens

gpt-3.5-turbo-instruct

$0.0015 / 1K tokens

$0.0020 / 1K tokens


Note that the pricing may change over time with improvements in the model.

Build Next Generation Apps Using the ChatGPT API

The ChatGPT API has opened gates for developers around the world to build innovative products with the power of AI.

You can use this tool to develop applications like story writers, code translators, marketing copy generators, and text summarizers. Your imagination is the limit to building applications using this technology.

How to Easily Transfer All Your Data to a New Android Device

Key Takeaways

  • Google Photos makes it easy to transfer photos and videos between Android devices and lets you back up and restore different albums.
  • Google One allows you to restore your device settings, contacts, messages, and app data, whereas Wi-Fi Direct lets you transfer large files with ease.
  • Moving data to a new Galaxy phone is straightforward with Samsung’s Smart Switch app. You can use that or Google’s Switch to Android app to transfer data from an iPhone.


Transferring all your data to a new Android phone isn’t nearly as hard as it once was. Built-in solutions and third-party apps make the process easy whether you’re switching from another Android device or an iPhone. Here, we’ll explore all your options.


1. Transfer Photos and Videos With Google Photos

You could use many apps to move your photos and videos from one device to another. However, the easiest and most streamlined approach is to use Google Photos, especially for videos and photos taken with your phone’s camera.

Once you launch Google Photos for the first time, ensure all your albums are backed up. You may have multiple device folders for WhatsApp, Instagram, Twitter, etc, so you need to manually turn on backup for every folder whose contents you want on your new phone. The Camera folder is usually backed up by default, so you don’t have to follow this step if you don’t need other folders.


To back up a folder, open Google Photos, tap the profile icon in the top-right corner, and go to Photos settings > Backup > Back up device folders. Now, toggle on the folders you want on your new Android device. Go back to the previous page and ensure Backup is enabled.

Download Google Photos on your new phone—if it isn’t preinstalled—and log in with your Google account. All the media you backed up should instantly be viewable on Google Photos and downloadable to your phone’s gallery.

Download: Google Photos for Android | iOS (Free, subscription available)

2. Restore Your Android Device Settings and Data With Google One

Google One lets you restore your device settings, call logs, contacts, messages, and app data like passwords. Install and open the Google One app on your old device and sign in with your Google account. Now, tap the hamburger menu icon and go to Settings > Manage backup settings. Toggle on Device data and any other option you may need, and tap Backup now.


When you turn on your new Android phone for the first time, it will prompt you to enter your Google account credentials. If the phone recognizes a backup on Google’s servers, it will ask whether you want to use it. Tap Yes. Your settings should sync up and the apps you had on your old device should start downloading automatically on your new Android phone.

Of course, Google One also backs up photos and videos, but it doesn’t give you as much control as Google Photos does.

Download: Google One for Android | iOS (Free, subscription available)

3. Transfer Large Files Wirelessly With Wi-Fi Direct

This option is great if you want to transfer large files like videos or movies from one Android device to another. Wi-Fi Direct comes as an inbuilt protocol on Android phones. It works by making one of your phones an access point and the other device a client.


The steps you need to follow to use Wi-Fi Direct may vary on different devices, but the procedure is mostly similar. Open Settings and go to Settings > Wi-Fi > Wi-Fi Direct. To do the same on Samsung Galaxy phones, go to Settings > Connections > Wi-Fi, tap the three-dot menu icon, and select Wi-Fi Direct.

Do this on both devices and pair them by tapping one of the phone’s names. Now, go to your file manager app, select the file/folder(s) you want to move, and choose Wi-Fi Direct from the sharing options. Although the transfer speed is fast, transferring gigabytes of data may take a couple of minutes.

However, Wi-Fi Direct may sometimes fail in its raw form when sharing across devices from different manufacturers. In this case, consider installing one of the best third-party file transfer apps that use the Wi-Fi Direct protocol.


4. Transfer Your Data to a Samsung Galaxy Device

Samsung users have access to a proprietary app called Smart Switch. On your new Samsung phone, the app will scan for your old device and provide an interface for transferring your data. It lets you transfer media, user accounts, contacts, call logs, and other valuable data.

The Smart Switch app is available for non-Samsung Android and Apple devices to initiate the data transfer. Using Smart Switch to transfer files to your new Galaxy phone is easy; you can do it wirelessly or via USB.

Download: Samsung Smart Switch for Android | iOS (Free)

5. Transfer Your iPhone Data to a New Android Device


Switching from iPhone to Android can be hectic, but Google’s Switch To Android app makes transferring your data much easier. All you have to do is go to the App Store, install the app, create or log into your Google account, and follow a few on-screen prompts.

Switch To Android will guide you through what you need to do to transfer your contacts, photos, videos, calendar information, and some device settings. It also allows you to transfer your WhatsApp chats and prompt you to turn off iMessage to start receiving texts from iPhone users.

Please note that Switch To Android only moves free apps that are also available on the Play Store. You may have to repurchase paid apps if they are available for Android devices.

Download: Switch To Android for iOS (Free)

6. Transfer Large Files Manually

You can manually move any data on your phone that doesn’t fall into one of the prescribed categories. For instance, if you have audio, old podcasts, or important documents saved in random folders on your device, a manual transfer would be better.


First, use one of the best file explorers for Android to check the folders on your phone. If there’s content you want to salvage, you have two options:

  • USB Cable: You could use a USB cable to transfer the data from your phone to your computer and then from your computer into the same folder on your new device. If your computer has USB-C ports, you can use a Lightning to USB-C cable or USB-C to USB-C cable, depending on the phone you have.
  • SD Card: If your new phone has an SD card slot, you can purchase a SanDisk Extreme microSDXC card, move your data to it, and then insert the card into your new phone.

Of course, moving all your data is only one part of switching to a new phone. Even if you transfer everything, you still need to take several steps to set up your new Android phone before you can confidently say it’s ready to use.

10 Ways to Make the iPhone User-Friendly for Seniors

The iPhone’s ease of use makes it a great choice for older folks who want a smartphone, and there are plenty of options to make iOS easier to use and more accessible. Whether you’re setting up a phone for your great uncle (or you’re the great uncle!) we have a pile of great tips to share.


1. Consider Enabling Assistive Access

Assistive Access is a feature introduced in iOS 17 that greatly simplifies the iOS experience. While designed for people with cognitive disabilities, it’s also a good choice for seniors who only need to use the essential functions of their devices.

Raghav Sethi/MakeUseOf

A trusted person can set up Assistive Access to show only the apps that their loved one needs, which then run in a simplified format. This might be too drastic a step for tech-savvy seniors, but it’s worth a look if the user doesn’t want to be overwhelmed with apps and menus they won’t use anyway.

See our guide to Assistive Access on iPhone to learn more.

2. Use Display Zoom

Most people’s eyesight declines with age. To combat this, you can enable Display Zoom (on the iPhone SE 2, or iPhone XR and later) to magnify the screen:


  1. Open Settings and select Display & Brightness.
  2. Scroll down and tap Display Zoom.
  3. On the next menu, select Larger Text. A few simple previews to illustrate the differences.
  4. Tap Done to confirm your choice, then accept the prompt to restart your iPhone and apply the change.

3. Increase the Text Size

While Display Zoom makes everything on the screen larger, you can also increase text sizes to improve overall readability:

  1. Go to Settings > Accessibility > Display & Text Size (under the Vision heading).
  2. Select Larger Text.
  3. Adjust the slider to choose your desired text size.
  4. If the largest option isn’t enough, enable the Larger Accessibility Sizes slider at the top to show even bigger levels.


While on the topic of text, you may wish to enable the Bold Text slider on the Display & Text Size page to help text stand out.

4. Turn Up the Ringer Volume and Enable LED Alert Flashes

For a senior who is hard of hearing, it makes sense to boost the ringer volume so they don’t miss calls and other alerts.

Head to Settings > Sounds & Haptics and adjust the Ringtone and Alerts slider to set your preferred volume. You may want to disable the Change with Buttons slider; with it turned off, the physical volume buttons will only change the volume for media (like music and games). With it enabled, it’s easy to accidentally turn the ringer volume all the way down.

Make sure the selected Ringtone and other alerts are clear and distinct. To further reduce the chance of missing calls, it’s a good idea to choose Always Play under Haptics so the phone vibrates for all alerts.


Finally, it can help to turn on the LED Flash for Alerts feature, which gives a visual cue for incoming alerts by flashing the camera. To do this, go to Settings > Accessibility > Audio & Visual (under the Hearing header). Tap LED Flash for Alerts and enable the slider of the same name. You can choose whether it should also display when the phone is unlocked or in silent mode.

5. Try Live Captions

While in beta at the time of writing, Live Captions is a blessing for anyone who struggles with hearing speech clearly. It turns all spoken dialogue into text on the screen in real-time.


To use it, head to Settings > Accessibility > Live Captions (under Hearing) and enable the Live Captions slider. This will immediately show a toolbar for the feature at the bottom of the screen; choose Appearance to customize it. Tap the toolbar to show its buttons, which allow you to change its size or pause transcription. You can also drag the toolbar around as you see fit.

When it says Listening, the feature is waiting for speech playing on your device (from YouTube or a podcasts app, for example) and will transcribe it. Tap the Mic button to switch its function to transcribe speech around you.

You may also wish to enable the Live Captions in FaceTime slider to keep this active in FaceTime calls.

Your iPhone’s Favorites list makes it easy to keep your frequent contacts just a few taps away. This makes the iPhone more senior-friendly since it saves them the trouble of scrolling through their contact list all the time.


Here’s how to add all important contacts to your Favorites on your iPhone:

  1. Open the Phone app.
  2. Select Favorites from the bottom bar.
  3. Tap the Plus icon at the top-right corner to bring up your contacts list.
  4. Select a contact to add to your favorites, then choose what type of entry to add for them. It’s best to pick the method of contact you use most frequently for that person (calling, messaging, etc.).
  5. Repeat the process for each Favorite you want to add. Use the Edit button at the top-left if you need to remove contacts from favorites or want to rearrange them.

While you’re looking at this, it’s a good idea to organize your loved one’s iPhone contact list so it’s not bogged down with outdated entries.


7. Set Up Medical ID

Inside your iPhone’s Health app is Medical ID, which functions like a digital medical identification tag. This lets paramedics know of existing health conditions that need immediate attention, medications you take, and similar. It’s particularly useful in cases where the device owner is unconscious or otherwise unable to communicate.

Set up Medical ID on your iPhone by opening the Health App, tapping your profile picture at the top-right, and choosing Medical ID > Edit. Aside from medical information, it’s wise to add some Emergency Contacts as well. These people will be notified if you ever use your iPhone’s Emergency SOS feature; it also allows paramedics to contact your loved ones if you can’t provide their information.

At the bottom, ensure that Show When Locked is enabled, which makes your information available for anyone to see on the lock screen in case of emergency.


8. Configure Emergency SOS

The Emergency SOS feature on your iPhone alerts emergency services and your emergency contacts when you’re in trouble. While this is an iPhone feature everyone should set up, it’s especially important for the elderly.

Emergency SOS is available on the normal iPhone power-off screen. Drag the Emergency SOS slider and your phone will contact the emergency number for your region, then reach out to your emergency contacts with your location.

You should also configure the Emergency SOS shortcuts:

  1. Go to Settings > Emergency SOS.
  2. Enable Call with Hold and Release to contact emergency services by holding the Side and either Volume button for several seconds. (Keep holding them once the power screen appears.)
  3. On an iPhone 8 or later, you can also enable Call with 5 Button Presses if you like. This is the default shortcut for iPhone 7 and earlier.
  4. Depending on your iPhone model, you may be able to enable Call After Severe Crash and see information about satellite emergency contact.
  5. Ensure that you have added Emergency Contacts in the Health app. You’ll see them here and can tap the shortcut link to add more or edit the existing ones.


By default, both Emergency SOS shortcuts will play an alarm sound when they start their countdown. If you don’t want this, enable Call Quietly.

9. Enable Voice Dial for Siri

Siri’s voice commands let you cut down on physical interactions with the phone, which is a great way to simplify an iPhone for the elderly. Enabling Voice Dial grants Siri the ability to make calls from lock screen:

  1. Go to Settings.
  2. Select Face ID & Passcode or Touch ID & Passcode, depending on your device.
  3. Confirm your current passcode to continue.
  4. Enable the Voice Dial slider.

For more ways Siri can help your loved one, take a look at the best Siri commands you should know and explore its options at Settings > Siri & Search.


10. Simplify the Home Screen

Chances are that if you’re setting up an iPhone for an elderly person, they don’t need access to all the apps on the device. It’s thus a good idea to do some housekeeping on the Home Screen, such as:

With these tweaks, an iPhone becomes even easier to use for the elderly. We’ve focused on generally useful tweaks here, but it’s also worth exploring all iPhone accessibility options at Settings > Accessibility for options applicable to your loved one. You’ll find many more specific options to help with hearing, vision, motor, and other concerns.

How to Connect AirPods or AirPods Pro to a Mac

Quick Links

Key Takeaways

  • AirPods are designed to connect automatically to a Mac that’s logged into the same Apple ID as your iPhone.
  • A manual Bluetooth connection may be necessary if your AirPods don’t connect to your Mac automatically.
  • AirPods can switch between your Apple devices, including your Mac, seamlessly. However, your Mac needs to be updated to take advantage of this.


Unlike your iPhone, you don’t get a pop-up on your Mac when you bring your AirPods or AirPods Pro case next to it. So, how do you pair or connect your AirPods to a Mac? We’ll walk you through the steps.


How to Connect AirPods to a Mac for the First Time

If you haven’t used your AirPods or AirPods Pro with your Mac before, you need to pair them first. However, if you use an iPhone, chances are your AirPods are already connected to your Mac. So, spend a minute to check that first.

How to Check if Your AirPods Are Connected to Your Mac

Most AirPods users own iPhones. And thanks to the Handoff feature on Apple devices, the AirPods you’ve used with your iPhone may have automatically paired with your Mac if both devices use the same Apple ID. To check if your AirPods and Mac are already connected:

  1. Open the Control Center from the menu bar on your Mac.
  2. Click the Sound section of the Control Center.
  3. You’ll see a list of Output devices. If you see your AirPods here highlighted with a blue icon, it means they’re already connected to your Mac.


On the other hand, if you see your AirPods here but the icon’s not highlighted in blue, click it to establish a manual connection once your AirPods are out of the case.

AirPods (3rd generation) require macOS Monterey or later to connect to your Mac automatically, whereas AirPods Pro (2nd generation) owners need at least macOS Ventura installed. So, consider following
our guide to update your Mac’s software
.

How to Pair Your AirPods With Your Mac

If your AirPods or AirPods Pro don’t appear in the list of output devices, you can pair them with your Mac manually. The process is similar to pairing AirPods to a non-Apple device. Here’s what you need to do:

  1. Put your AirPods back in the charging case, but don’t close the lid.
  2. Press and hold the Setup button on the back of the case until the status light flashes white. Don’t let go of the button until the light flashes to enter pairing mode.
  3. On your Mac, click the Apple logo in the menu bar and go to System Settings > Bluetooth.
  4. Your AirPods or AirPods Pro will appear under Nearby Devices. But if they don’t, use the toggle at the top to turn off Bluetooth and turn it back on.
  5. Hover the cursor over your AirPods and click Connect.


AirPods Pro appearing under Nearby Devices in Bluetooth settings

If you’re unable to do so, follow our tips to fix AirPods that won’t connect.

How to Automatically Switch AirPods to Your Mac

One of the standout features of AirPods, AirPods Pro, and AirPods Max is that they can seamlessly switch between your Apple devices. For example, you can put your AirPods in your ears and start playing music from your MacBook, and they’ll automatically play through your earbuds rather than the built-in speakers.

The process is usually automatic—you don’t need to do anything. But if you were using your AirPods with another device, like an iPhone, you’ll need to click Connect in the notification that appears on your Mac.

AirPods Pro prompting to connect to Mac


However, if you’re not a fan of this feature, you can stop your AirPods from switching between your Apple devices.

In most cases, your AirPods connect to your Mac automatically, and you don’t need to do anything besides putting them in your ears and playing some audio. However, if that doesn’t happen, now you know how to manually pair your AirPods and select them from the audio output options.

Learning how to fix some of the common AirPods problems is essential if you plan to use them with your Apple devices in the long run. As seamless as they are, you will encounter connection issues occasionally, and we recommend you stay prepared.

How to Dual Boot Your Steam Deck to Windows and SteamOS

Key Takeaways

  • Steam Deck can dual boot with Windows, allowing users to have a familiar OS for productivity and access to Xbox Game Pass.
  • Valve has not released an official dual boot wizard, so users currently have to choose the OS through the boot manager.
  • Users can use a third-party dual boot manager to avoid constantly using button combinations to switch OSes.


You don’t have to sacrifice SteamOS to have Windows on your Steam Deck, since the Steam Deck is capable of dual booting either through the official method or a third-party dual boot manager. Here’s what you need to know about dual-booting Windows and SteamOS on your Steam Deck.


What Is Dual Booting on Your Steam Deck?

Jhet Borja / MakeUseOf


Dual booting in its most basic definition is having two OSes on your device—in this case, your Steam Deck. You can also have more than two OSes on your Steam Deck, but you’d be multi-booting by then.


While SteamOS is better for gaming, many people like to add Windows as another boot option for their Steam Deck. You can either dual boot it from the same SSD with each OS having its own partition or use an external source for Windows like an SD card.


If you install Windows on your Steam Deck, you’ll have the advantage of having a familiar OS that can allow you to do real work with apps like Photoshop, Lightroom, Microsoft Office, and more.


And since Xbox Game Pass isn’t available on SteamOS yet, Windows is the best way to take your Game Pass subscription on the go.


Steam Deck surrounded by peripherals
Jhet Borja/MUO


Valve states that the Steam Deck is perfectly capable of dual booting, so you’ll have no problems having two or more OSes on your Steam Deck.


However, Valve is yet to release the official dual boot wizard that’s expected to ship with SteamOS 3.0 (according to the Steam website), meaning you will have to choose your OS through the boot manager.

How to Dual Boot Your Steam Deck

The main and official way to dual boot your Steam Deck is by using the boot manager. It’s quite easy, but having to do this every time you want to switch OSes can be frustrating over time.


If you’re here, it probably already means that you have two OSes on your Steam Deck. Now, here’s how to switch between them…


Volume down and power button to enter Steam Deck boot manager
Jhet Borja/MUO


With your Steam Deck shut off, hold down the volume down button and the power button until you hear a chime. When you hear the chime, let go of the power button but keep holding down the volume down button until the boot manager pops up.


The boot manager lets you choose your boot options—in this case Windows and SteamOS on the same SSD in different partitions. If you use an SD card, you can select the SD card if it has Windows installed on it.


SteamOS in boot manager again

If you hold down the power button after the chime, you will most likely end up shutting your Steam Deck down again, so make sure to let go after the chime.

How to Set Up a Dual Boot Manager on Your Steam Deck

If you don’t like seeing the boot manager every time you want to switch OSes, you can instead use a dual boot manager.


A dual boot manager will make switching between OSes smoother as you don’t need to hold down any button combinations and it will let you choose your OS on startup.


In this guide, we’ll be using Clover for Steam Deck by ryanrudolfoba on GitHub.

Step 1: Getting Windows Ready for Clover Boot Manager

Before you install Clover on Windows on your Steam Deck, you need to get it ready for a smoother experience.


First, in Windows Search, search for “Turn Windows features on or off“. Then, under the Device Lockdown folder, select the box that says Unbranded Boot. This will prevent Clover from displaying random boot brands.


Selecting Unbranded Boot in Device Lockdown Windows Feature


Next, you’ll have to run a few commands in Command Prompt. Search “CMD” in Windows Search and right-click to select Run as administrator.


CMD commands for Clover on Steam Deck


In the Command Prompt, enter these commands one at a time:


In case those don’t work, you can also add:


Step 2: Setting up Clover on SteamOS on Your Steam Deck

Now that Windows is ready, you’ll have to boot to SteamOS on your Steam Deck.


Enter the boot manager by holding down the volume down button and the power button until you hear a chime. Let go of the power button, but keep holding the volume down button until the boot manager pops up.


Volume down and power button to enter Steam Deck boot manager
Jhet Borja/MUO


Select SteamOS. Go to desktop mode by selecting Power after pressing the Steam button. Once you’re in desktop mode, make sure you have a sudo password set in SteamOS.


Once your sudo password is set, search and open Konsole in the app launcher on the bottom left.


First two Konsole commands for Clover Dual Boot Manager


By this point, we suggest having a browser open on your Steam Deck so that you can individually copy and paste these commands one by one on your Steam Deck.


  1. cd ~/
  2. git clone https://github.com/ryanrudolfoba/SteamDeck-Clover-dualboot
  3. cd ~/SteamDeck-Clover-dualboot
  4. chmod +x install-Clover.sh
  5. ./install-Clover.sh


Clover successfully installed


After the last command, you’ll have to enter your sudo password to start installing Clover on your Steam Deck.


You’ll also be greeted with the option to choose which OS you want it to default to—in my case, it’s SteamOS since I’ll be using that more often.


Front facing Steam Deck wth Clover dual boot
Jhet Borja / MakeUseOf


Once it’s installed, you can restart your Steam Deck to try it out. If it doesn’t look good to you, don’t worry, you can always add your own custom theme.

Fixes for Dual Boot Issues on Your Steam Deck

The Clover dual boot manager isn’t an official Steam dual boot wizard as Valve is still working on that. This means you might face a few issues. Here are a few fixes in case you run into these problems…

1. You Can’t Find SteamOS in the Boot Manager

No SteamOS option in boot manager
Jhet Borja/MUO


SteamOS disappearing from the boot manager is a common occurrence, but don’t worry, it’s not actually gone from your Steam Deck. The boot manager just can’t find it.


To find it, shut down your Steam Deck. This time, instead of holding the volume down button for the boot manager, hold the volume up button to open the BIOS instead.


Boot from file Steam Deck BIOS


Once you’re in the BIOS, select Boot from file > eps > efi > steamos > steamcl.efi. This should boot you back into SteamOS.


Selecting steamcl.efi in Steam Deck BIOS to boot into SteamOS
Jhet Borja/MakeUseOf


To put SteamOS back on the boot manager, open up Konsole in desktop mode on your Steam Deck and enter this:


sudo efibootmgr -c -L "SteamOS" -l "EFIsteamossteamcl.efi" -d /dev/nvme0n1p1


Konsole command to make SteamOS appear in boot manager


This should put it back on the boot manager so that you don’t have to boot from the file anymore.

2. Setting a Sudo Password

Steam Deck user password


To set your sudo password, open desktop mode and head to Settings in the app manager or on the task manager at the bottom of your screen.


In settings, go to Users and enter a simple username and password. You now have a sudo account and you can access things that you couldn’t without one.

3. Windows Keeps Taking Over the Bootloader

If Windows takes over the bootloader and skips Clover, you should download the Clover dual boot manager for Windows on the same GitHub page you used for SteamOS.


Download Clover ZIP on GitHub


Click on <> Code then Download Zip.


Run CloverWindows.bat as administrator


Extract the ZIP file into a folder and right-click CloverWindows.bat to Run it as administrator. It will tell you that Windows doesn’t recognize the app, just click More Info > Run Anyway.


Windows protected your PC from CloverWindows


This will open up the Command Prompt. Once it’s done installing, just hit Enter.


Properties on CloverTask in Task Scheduler Library


Next, you’ll have to open up Task Scheduler by searching it on Windows Search. In Task Scheduler Library search for CloverTask. Right-click on it and click Properties.


Changed security options for CloverTask in Task Scheduler


In the properties, head to the general tab and select Run whether user is logged on or not and check the two boxes below it (see image), then click OK.


Run on CloverTask in Task Scheduler


Finally, right-click CloverTask once again and click Run.

4. A SteamOS or Windows Update Broke Clover Dual Boot

If an update on Windows or SteamOS broke Clover and the device says it can’t find any boot options, don’t panic, your Steam Deck is not bricked.


Refer to the first fix above and boot SteamOS from its file. Open up the BIOS by holding volume up and the power button, letting go of the power button once you hear a chime.


Boot from file Steam Deck BIOS


Once you’re in the BIOS, select Boot from file > eps > efi > steamos > steamcl.efi. This will open up SteamOS and fix Clover.


Selecting steamcl.efi in Steam Deck BIOS to boot into SteamOS
Jhet Borja/MakeUseOf


Those are some of the most common issues when dual booting your Steam Deck, but once you’re past them, switching between SteamOS and Windows should now be as easy as restarting your Steam Deck and selecting your OS once Clover pops up.

How to Change Administrator/Standard Account Type on Windows (4 Ways)

Key Takeaways

  • Administrator and Standard User are the two main account types on Windows PCs. The former gives you admin privileges, whereas the latter has limited access.
  • Using the Settings app on Windows is the most straightforward way to switch between the Administrator and Standard User account types. However, Netplwiz gives you access to more hidden account types.
  • You can also quickly grant or revoke admin rights for a Windows account by typing a simple command in Command Prompt.


If you created multiple user accounts to share your computer, you may want to change the account type for other users from Administrator to Standard User to limit their access. We’ll walk you through the steps to do so on both Windows 10 and 11.


Standard User vs. Administrator on Windows: What’s the Difference?

An Administrator account gives you unrestricted access to everything on your system. In contrast, you cannot use a Standard User account to manage system files or install any new applications on the computer.


The differences between Standard and Administrator accounts don’t end there. Existing programs that require administrator privileges cannot be operated with a Standard account, either. You cannot adjust any setting that affects the whole PC, like creating a new user account.


When you’re sharing your PC with someone else, it’s reasonable to have these restrictions in place. Of course, if you trust them enough, you can grant admin rights to their Windows 10 or 11 account too.


Any additional users that you create in Windows are standard accounts by default. It’s easy to check if a Windows account has admin rights. However, as long as you’re logged in as an administrator, you can provide elevated permissions by simply changing the account type.

1. Use Settings to Change Administrator or Standard Account on Windows

The Settings app in Windows is the go-to destination to personalize your computer. It gives you access to most of the basic settings you need, unlike the Control Panel, which can overwhelm new users. So, this method is preferable for quickly changing from Administrator to Standard account (and vice versa) on Windows 10 or 11.


Follow the steps below on a Windows 10 PC. If your PC runs Windows 11, you can skip to the next set of instructions:


  1. Press Windows+ I on your keyboard to open the Settings panel.
  2. Next, head to Accounts > Family & other users.
  3. Look under Other users and select the account for which you want to change privileges. Now, click Change account type.
  4. You’ll get a pop-up on your screen showing the current permissions of the selected user account. Click on it and choose either Administrator or Standard User.
  5. Now, click OK to apply these changes.


Changing account type in Windows 10


The steps you must follow on a Windows 11 PC are similar, but the Settings app’s user interface is quite different. Here’s what you need to do:


  1. Press Windows + I on your keyboard or search for “Settings” to launch it.
  2. Select Accounts from the left sidebar. Then, scroll down and click Other users on the right.
  3. Click the dropdown next to the local account to access more options and choose Change account type.
  4. When you get a pop-up, click the dropdown below Account type and choose between Administrator and Standard User.


changing account type for a local account on Windows 11


If the other account is part of your family group, you’ll need to head to Settings > Accounts > Family instead of Other users and repeat the rest of the steps to do the same. Also, consider going through our fixes if you can’t set your Windows account as Administrator.

2. Use Netplwiz to Change Administrator or Standard Account on Windows

Netplwiz is a dedicated panel for managing all the user accounts on your computer. It’s a system executable you can only access if you’re signed in as an administrator. Back when Windows didn’t have a dedicated Settings app, Netplwiz was a popular choice for switching between account groups, i.e., Standard User and Administrator.


Netplwiz User Accounts panel


  1. Type netplwiz in the Start menu search field and click the best match to open the User Accounts panel. Here, you’ll see all your user accounts.
  2. Double-click on the account for which you want to change privileges.
  3. Now, head to the Group Membership tab in the new window, and you’ll find the available account groups. Select your desired choice and click Apply.


Changing account type using netplwiz on Windows


Unlike the Settings app, Netplwiz displays a third option that further expands the account types. These are for very specific permissions that you’d like to grant the other user.


For example, you can select the Power Users option, which gives the account limited administrative powers. Or, you can choose Guest if you want Windows to restrict them even further than a Standard User account does.

3. Change Administrator or Standard Account From the Windows Control Panel

The Control Panel has been an integral part of Windows for as long as one can remember. It was the de facto settings panel for Windows computers until the introduction of the dedicated Settings app in Windows 10.


It still has its place since you can use it to make advanced system-level changes that the Settings app cannot currently complete. Follow these instructions to learn the old-school way of changing administrator settings on Windows:


Control Panel in Windows 11 with User Accounts section highlighted


  1. Type Control Panel in the Start menu search bar and click the Best Match.
  2. Select Change account type under the User Accounts section (this option has a shield icon).
  3. Next, select the account you want to change the permissions for. You’ll have multiple options for the selected account. Click Change the account type to continue.
  4. Select one of the two options, then click Change Account Type to apply the changes.


Account settings for a Windows user account in the Control Panel


You may be familiar with all these menu items if you’ve used legacy versions of Windows. Regardless, it’s mostly a straightforward process.

4. Use Command Prompt to Change Windows Administrator Settings

Command Prompt, or CMD, is the built-in command-line interpreter on Windows PCs. You can perform various tasks on your computer using the right CMD commands.


While the program is a power user’s paradise, you don’t need coding skills to change the Windows administrator settings with a simple command:


  1. Type Command Prompt or CMD in the Start menu search bar. Select Run as administrator instead of launching it directly.
  2. To change the account type to Administrator, type the following command and hit Enter.
    net localgroup administrators [USERNAME] /add 
  3. To switch back to Standard User, use this line of code instead and press the Enter key.
    net localgroup administrators [USERNAME] /del 


Changing account type with Command Prompt


If you get an error saying access is denied upon executing the command, chances are you aren’t running CMD as an administrator. As long as you know this command, you don’t have to fiddle with system menus like the other methods. Hopefully, you’re able to get the hang of it quickly.


As you can see, you’re not limited in terms of options. Now that you’re familiar with all the various methods, it’s up to you to try them out individually and find the best one. Some users may prioritize the Netplwiz method since it allows them to fine-tune the permissions further, whereas others would be more than happy with any of these methods.

How to Use This Free Tool to Catch Hackers When They Access Your Files

Key Takeaways

  • Canary Tokens is a free cybersecurity tool that alerts you when a hacker opens your files.
  • Embed a token in a file, like a folder, and receive an email notification when it’s opened.
  • Canary Tokens can be used on numerous files and services, and it works on different devices and operating systems.


Are you worried about your personal files getting stolen by hackers? Canary Tokens is a free and easy-to-use tool you can quickly deploy to get notified when a hacker opens your files.


What Is Canary Tokens?

Canary Tokens is a cybersecurity tool by Thinkst Canary used to track hackers when they get access to your personal data. It works by embedding your file with a special tracking URL that alerts you through email when opened. Just like how honeypots work, the idea is to place a tracker disguised as a regular file on your device. When a hacker opens the file, a hidden link is opened, alerting you to the breach.

How to Use Canary Tokens to Protect Your Data

I’m going to show you how to embed a Canary Tokens tracking URL on a Windows folder. However, you can use Canary Tokens to protect all sorts of files and services, ranging from Word and Excel documents to specific URLs, to online services like Azure and Microsoft SQL server, and more.


Let’s begin by visiting Canary Tokens.


Upon visiting the site, you will be greeted by the Canary Token generator. The generator requires you to set up three fields:


  • The first one is for selecting the proper token for your file type.
  • The second is for your email address.
  • The last is for anything you want to remind yourself of when the alert has been triggered.


Since we’re embedding the token into a folder, I’ve selected the Windows folder from the Select your token drop-down menu.


Filling up fields in token generator


I’ve also provided an email for receiving an alert and a text note to remind me of what the token is for.


After you’ve filled out the form, click Create my Canarytoken and download the ZIP file embedded with a special token.


Now, unzip the ZIP file by right-clicking it and selecting Extract All, then inputting the directory where you want the file to be located. Ideally, it should be somewhere easily located for the hacker to find. For example, if you wanted the file on your Desktop, you would input C:UsersYourUserNameDesktop (swapping out YourUserName). You can then add files to the folder and rename it to something a potential hacker might be interested in opening.


Now that our trap has been set, try opening the folder and check if an alert has been triggered.

How to Check if a Hacker Accessed Your Files

Checking to see if your special file has been opened is as simple as opening your email account (the one that you linked to earlier) and checking for Canarytoken Mailer in your inbox.


Allowing email notifications on Chrome or your favorite web browser will help alert you immediately when the file has been opened. You may also want to check your spam folder in case Canarytoken Mailer was identified as spam.


Triggering the token should alert you with an email which will look something like this:


Canary Mailer report


As you can see, it contains info such as date and time, the text note reminder, and the source IP, which can be used for a variety of things. You can use an IP tracker to find the general location of where your file was opened. Alternatively, select More info on this token here to view the incident map.


Canary Tokens incident location


The specificity of the location that Canary Tokens provide will vary depending on how the ISP of the person opening your file operates and whether they’re using a VPN to protect their location data.

How to Troubleshoot Canary Tokens

If you’ve tried opening the folder but still get no alerts, try following the troubleshooting steps.

Canary Tokens Won’t Trigger on a Windows Folder

If you’re using Windows 11 and the Windows folder won’t trigger an alert, it is likely that remote pathing is disabled. To fix the problem:


  1. Input edit group policy in the Taskbar Search and select the Best Match.
  2. Navigate to > Computer Configuration > Administrative Templates > Windows Components > File Explorer.
  3. In File Explorer, double-click on Allow the use of remote paths in file shortcut icons and make sure it is enabled.


Fix Windows folder error

Lost Filesystem Attribute

This should solve the problem, but if it still doesn’t work, it may be due to the folder’s filesystem attribute being lost during extraction.


  1. Open the directory where your special folder is located
  2. Click on the File Explorer address bar near the top of the folder and enter cmd.exe. This will open a command line interface right at the folder’s location. You can then add the required attribute by entering, with the quotation marks:
    • attrib.exe +s "embedded folder name"
  3. Now, if you enter the command below, you should be able to see an S right beside your embedded folder, indicating that the attributes have been added.
    • attrib.exe "embedded folder name"


Fix FileSystem error

Canary Tokens Keeps Triggering

If you keep getting alerts from Canary Mailer, and you’re sure they are false positives from your embedded Windows folder, it is likely that your antivirus software has scanned the folder causing the alert.


To solve this problem, you’ll want to exclude the embedded folder from your regular antivirus scans. If you’re using Windows Defender, here is how to exclude a file or folder:


  1. Input Windows Security in your Start Menu search bar and select the Best Match.
  2. Now, head to Virus threat and protection. Under Virus and threat protection settings click on Manage settings.
  3. Scroll down to Exclusions and click on Add or remove exclusions.
    Select exclusion type

  4. Click on Add an exclusion, then select Folder. Now find your folder and click on Select Folder.
    Fix Canary Tokens false positives


That should stop your file from getting scanned and prevent the false positives you keep getting from Canary Mailer.

Will Canary Tokens Work if the File Is Transferred to Another Device?

Yes, as long as the tracking URL was visited, you will be alerted about the incident. For the majority of the tokens provided, it shouldn’t matter whether the person opening the file is using Windows, Linux, macOS, iOS, or an Android device. As long as the device is capable of browsing the web, Canary Tokens should work.


Although this guide focused more on using honey tokens on Windows folders, Canary Tokens can do so much more! You can also embed honey tokens on other files (Word, Excel, PDF), online services (Azure, Microsoft SQL server, WireGuard, AWS), email, a specific URL, or even on credit cards. There is even a premium version of the service providing even more features that can help you secure entire networks.


How to Delete Multiple Emails in Outlook

Key Takeaways

  • To delete multiple emails in Outlook, you can select them all and delete them with a single click.
  • You can use the Conversation Cleaner Tool to delete redundant emails in conversations.
  • You can recover deleted emails in Outlook by moving them back to their original folder or using the Recover Deleted Items feature.


To keep your inbox organized and ensure that important emails are easily accessible, it’s a good idea to delete emails that you no longer need. Fortunately, there are several ways to delete multiple emails at once in Outlook, whether you’re using it on a desktop, web, or mobile. Let’s take a look at these methods and how you can use them.


How to Delete Multiple Emails in the Outlook Desktop App

There are different methods to mass delete emails in Outlook, and choosing the most suitable method depends on the emails you want to delete and where they are. You can delete folders, clean up conversations, or just manually select the emails and delete them.

Delete Multiple Emails at Once in Outlook

The most straightforward way to delete multiple emails in Outlook is to select them all together. If the emails are consecutive, this is all the easier.


  1. Select the first email.
  2. Hold down the Shift key on your keyboard.
  3. Select the last email. This action selects the first, the last, and all emails in between.
  4. Right-click any of the selected emails and select Delete.


If the emails aren’t consecutive, you’ll need a few more clicks to get the job done. To delete non-consecutive emails:


  1. Click on the first email.
  2. Hold down the Ctrl (Windows) or Command (Mac) key on your keyboard.
  3. Select the next email.
  4. Click each email you want to delete while holding down Ctrl.
  5. Once you’ve selected all the emails, right-click and select Delete to delete them.

Delete All Emails in a Folder in Outlook

There are two ways you can delete emails from a folder. You can either empty the folder, which will remove all the emails but keep the folder intact, or you can delete the entire folder, along with all the emails in it. Both processes are simple and require only a few clicks.


Deleting a folder in Outlook desktop


  1. Right-click on the email folder.
  2. Select Delete Folder to delete the folder and its contents.
  3. Select Delete All if you want to delete the emails in a folder and keep the folder itself.
  4. Click Yes in the prompt to delete the emails.

Use the Clean Up Conversation Tool in Outlook

Lengthy email conversations can clutter up your inbox. However, every new reply in a conversation includes every previous reply in the thread. This means that you only need the most recent email in the conversation, which includes all the previous ones.


To solve this problem, you can use Outlook’s Clean Up Conversation tool. This tool identifies redundant emails in conversations and moves them to the Deleted Items folder, only keeping the most recent email that includes all the previous replies. You can use this tool on a specific conversation, a folder, or a folder and its subfolders. Here’s how:


Using the clean up conversation tool in Outlook desktop


  1. Go to the File menu in the Outlook ribbon.
  2. In the Delete section, click Clean Up.
  3. Select one of the three options to clean up your email conversations.

You can only use the Clean Up Conversation tool on the desktop version of Outlook. It is not available on the web or mobile versions.

How to Delete Multiple Emails in Outlook on the Web

The web version of Outlook is very similar to the desktop version, including the process of deleting emails. You can delete emails by selecting them individually, or by deleting a folder. To select multiple emails in Outlook Web, you can use the same methods as in the desktop version.


  • If the emails are consecutive, select the first email, hold down Shift, and then select the last email to select all emails in between.
  • If you want to select a few sporadical emails, you can hold down Ctrl and click each to select it.


Deleting multiple emails on Outlook web


Additionally, in the web version, you can check the box next to each email to select it. Once you’ve selected the emails, click Delete in the toolbar to delete them.


Deleting a folder in Outlook web


Just like Outlook desktop, you can also delete folders or empty their contents in Outlook web. The steps are identical: right-click the folder, and then select either Delete Folder to delete the folder and its content, or select Empty Folder to only delete the folder’s content.

How to Delete Multiple Emails in Outlook Mobile

To delete multiple emails in Outlook mobile, you can only select each email one by one. Surprisingly, you can’t even delete or empty folders in the mobile version.


Given that you can’t use a physical keyboard with Outlook mobile, the only option is to select the emails you want to delete one by one. To do so, select the emails by tapping the checkbox next to them, and then tap Delete from the ribbon.

How to Recover Deleted Emails in Outlook

If you have accidentally deleted an email in Outlook, you can recover it in most cases. Depending on your email provider, you can also recover emails that you’ve permanently deleted.

Restoring Deleted Emails in Outlook

You can recover a deleted email by moving it back to its original folder, such as your inbox. Here’s how:


  1. Go to the Deleted Items or Trash folder.
  2. Right-click on the email you want to recover.
  3. Select Move, and then select the folder where you want to recover the email to.


Restoring deleted emails in Outlook desktop


This recovery method is applicable across all Outlook versions, including desktop, web, and mobile platforms.

Restoring Permanently Deleted Emails in Outlook

If you have permanently deleted an email and your email has a Deleted Items folder, you can still recover it. However, if your email has a Trash folder instead, you can’t recover permanently deleted emails. This feature is also absent altogether on Outlook mobile.


To restore permanently deleted emails in Outlook desktop, follow these steps:


  1. Go to the Deleted Items folder in Outlook.
  2. Go to the Home menu in the ribbon.
    Recovering deleted emails in Outlook desktop-1

  3. In the Actions section, select Recover Deleted Items from Server.
  4. Select the deleted emails you want to recover. If you want to recover all deleted emails, you can click Select All in the bottom left.
    Recovering deleted items in Outlook desktop

  5. Make sure that the Restore Selected Items radio is checked, and then click OK.


The recovered email will return to your Deleted Items folder. You can then move it back to your inbox by following the steps in the previous section.


Deleting emails is a hassle when there are too many to delete. The methods we discussed here make the task easier and less time-consuming. Additionally, if you accidentally deleted an item, now you know how to quickly recover it, even if it’s permanently deleted.

How the Disney+ Crackdown on Password Sharing Could Affect You

Key Takeaways

  • Disney+ is cracking down on password sharing outside the primary household, following in the footsteps of Netflix.
  • The new Terms of Service will allow Disney+ to analyze account usage to determine compliance and may lead to penalties.
  • Users caught sharing passwords may face limitations on their account or even termination of their account.
  • People making use of shared passwords will need to set up their own accounts and pay the full subscription price.


Just like many other TV and film streaming services, Disney+ is now cracking down on people sharing their passwords. But how will Disney+’s crackdown on password sharing impact you?


Disney+ Is Cracking Down on People Sharing Passwords

In August 2023, Disney’s CEO, Bob Iger, threatened to follow Netflix’s lead by cracking down on people sharing accounts outside their household. As reported by ZDNet, in a meeting with investors, Iger described the problem as “a real priority” that the company was actively seeking to tackle.


Then, in September 2023, Disney+ followed through on its threat, emailing Canadian subscribers that, “Unless otherwise permitted by your service tier, you may not share your subscription outside of your household.”


In February 2024, TechRadar reported that Disney+ subscribers in the US had started receiving similarly worded emails.


Among several changes to its terms of service, Disney+ stated that “We’re adding limitations on sharing your account outside of your household.” With a household being described as “the collection of devices associated with a primary personal residence.”

How Is Disney+ Going to Know When Passwords Are Being Shared?

Just like Hulu’s crackdown on password sharing, Disney+’s new ToS are set to come into effect from March 14, 2024. Which is when Disney+ could “analyze the use of your account to determine compliance” with its new rules around password sharing. So it’s at this stage that anyone found to be sharing their Disney+ password with people outside their household may be required to act.


Disney+ has not explained how it will determine compliance with its new rules, but it will likely revolve around analyzing how many devices are logged in to a single account at once, and where those devices are located.


There are ways to mask the information such as IP addresses that will allow Disney+ to follow through on its threats. However, the average Disney+ user will likely lose this game of cat and mouse and end up having to stop sharing their password with people outside their household.

How Will the Disney+ Crackdown on Password Sharing Affect You?

Whether this crackdown will affect you depends primarily on whether you’re sharing your Disney+ password with people not living at the same address. If not, then you have nothing to worry about, and can continue using Disney+ as you have been.


However, if people living elsewhere are accessing your Disney+ subscription, you may fall foul of Disney’s crackdown. Disney+ has stated that the accounts found to be flouting these rules may be limited or even terminated. The latter is pretty self-explanatory, but what limitations may be placed on an account found to be shared across households remains unclear.


The likelihood is that users will have to select a primary address for the account, and anyone found accessing it from elsewhere will be booted out. But we won’t know for sure until the rules around Disney+ password sharing are enforced in the US from March 14, 2024. And users start reporting what kind of punishments they have faced.


One issue is that, unlike Netflix, which offers an Extra Members feature, at the time of writing, Disney+ is demanding all subscribers have their own separate accounts. So, if you are caught sharing your password, the people you’re sharing it with will need to set up their own account and pay the full Disney+ subscription price.

How to Do It and What You Need to Know

Key Takeaways

  • Overclocking your Raspberry Pi can enhance its performance, making it more capable of running popular tools like RetroPie, RecalBox, and Kodi.
  • By overclocking your Raspberry Pi, you can improve retro gaming experiences, resolve streaming issues, and boost the performance of the Pi when used as a desktop computer.
  • Although overclocking can provide benefits, it comes with risks such as heat generation, component failure, and data corruption. It’s important to ensure proper cooling, use a reliable power supply, and consider the impact on connected hardware.


The Raspberry Pi is a great little computer, far more powerful than the models before it. But did you know you could squeeze even more power out of it? Here’s how to overclock your Raspberry Pi, and push it further than you ever imagined!


Why Overclock Your Raspberry Pi?

What’s the point of overclocking a Raspberry Pi? Well, to get the most out of it. Several popular tools will work better than intended with overclocking.


  • Retro gaming: If you’ve been struggling with running classic console titles on RetroPie, RecalBox, or whatever retro gaming solution you’ve chosen, overclocking will boost things considerably.
  • Kodi: Performance issues with streaming video in Kodi can be overcome thanks to overclocking your Raspberry Pi. If you’re also using a VPN, higher clock speed will help here too.
  • Desktop: Later Raspberry Pi models (3 and later) can be used as a standard desktop. Who wouldn’t want a bit of additional performance, courtesy of an overclocked processor?


Other benefits come from overclocking a Raspberry Pi. Using it as a Minecraft server, for example, or as a NAS, can benefit from a slightly faster CPU.


Image Credit: Raspberry Pi
 

Overclocking a Raspberry Pi 5 and Other Recent Models

Almost any Raspberry Pi model can be overclocked. This includes the most recent, the Raspberry Pi 5, and its immediate predecessors:


Our device-specific guides above will walk you through overclocking the corresponding Raspberry Pi model.

Overclocking Is Always Risky

While overclocking Raspberry Pi is simple to achieve, it is not without risk.


  • Heat is generated: Heat is bad for computer systems, as it slows processing, which in turn generates heat. Both the Raspberry Pi 4 and 5 require cooling.
  • Component failure: Increased heat can also result in the failure of components.
  • Data corruption: Using increased clock speeds often results in corrupted data. If you’re using a hard disk drive for your Pi’s operating system, this shouldn’t be a massive issue. However, if your Raspberry Pi relies on a microSD card (most do), then you may find flash media increasingly unreliable.
  • Reliable power supply: You should already be using a good quality power supply for your Raspberry Pi. Anything less than the recommended power adapter (check your model for the required power draw) is unsuitable for overclocking. Data corruption will quickly occur with a low power supply.


At one stage, overclocking your Raspberry Pi would void the warranty. However, as of September 19, 2012, this is not the case, thanks to built-in overclocking tools.

Can Older Raspberry Pis Be Overclocked?

Overclocking can push the performance of older Raspberry Pis. As ever, take precautions to ensure the device is efficiently cooled. Check the official system specifications of your model, and be sure not to increase the speed by more than 10 percent.


To overclock older Raspberry Pis, everything you need is built into Raspberry Pi OS.


Begin by opening the configuration tool, either on the desktop (Preferences > Raspberry Pi Configuration), or from the command line:

sudo raspi-config 

After noting the warning, choose Overclock.


Raspberry Pi overclock screen


In the next menu, you’ll find a list of options. The currently-selected overclocking option will be None, but you’ll have a selection of up to five alternatives, depending on your Raspberry Pi model. Pictured below is the overclock screen for the Raspberry Pi 2.


Raspberry Pi overclocking speed selection


While on other devices, overclocking is a case of making a small increase and testing, with preset options, this isn’t really necessary. All you need to do is select the overclocked preset you want to use, then select OK to apply it.


Note that overclocking can also affect the performance of connected hardware. As such, you’ll need to take additional precautions (such as manually adjusting the config.txt file after setting a new clock speed in the menu).


Overclocking is never an exact science. Spend some time assessing its impact on your Raspberry Pi and any regularly-used software.

8 Apps That Will Help You Find a Side Job

Many apps offer an easy way to find instant side jobs. All you need is your laptop or smartphone to look for temporary jobs that you can do in your free time. Download these helpful apps to help you find a side hustle.


1. Find Temporary Jobs With Wonolo


Wonolo offers a convenient way for businesses and workers to connect through temporary jobs. Job searching is available across several cities in the US, and Wonolo says that they’re working on expanding their reach. You can find legitimate temporary jobs in your area through the Wonolo app for iOS and Android.


Wonolo has strict rules for its workers. The app pays within three to five days, but only if the client verifies that you have completed the job. If you don’t show up for a job, your account may be restricted, and Wonolo may remove your ability to accept future jobs.


Withdrawing from the job less than 12 hours before the start also gets you breach points. While the policy seems stringent, it gives workers credibility, which is an advantage for you if you decide to sign up.


If you want to unlock more jobs, follow Wonolo’s pro-tips. Work on becoming a Preferred Wonoloer for more jobs to show up on your feed. Make sure that you also complete the following:


  • Turn on notifications.
  • Take the quick quiz about Wonolo’s rules for workers.
  • Set up your payment method.
  • Attend a one-hour online class on app basics.
  • Complete your first job.


Download: Wonolo for Android | iOS (Free)

2. Veryable for Logistics, Manufacturing, and Warehousing


Veryable helps you look for on-demand manufacturing, logistics, and warehousing jobs. If you become an operator or worker on the app, you get to work on flexible times and look for jobs in your area. The app works on a bidding system so that you can bid on tasks according to your schedule.


A shady online profile is one of the red flags employers look for when hiring candidates, so Veryable takes pains to conduct a background check on its operators. Give your full legal name, address, and other information for the required background check. Once you pass the background check, you’ll be able to apply for a Vault account, where you’ll receive your payments online. Veryable also asks for your W9 tax form.


Reviews say that Veryable pays quickly within two days and has responsive customer service. However, the number of opportunities depends on your area. If you get a good-paying gig, build a relationship with the company and stick with it.


Download: Veryable for Android | iOS (Free)

3. Tasker by TaskRabbit for Freelance Gigs


Tasker by TaskRabbit might be the app for you if you’re looking for the best places to find freelance work. TaskRabbit offers a variety of instant side jobs. Jobs range from desk jobs such as writing or accounting to more manual labor such as running errands, window cleaning, or indoor painting.


TaskRabbit made headlines with a Business Insider feature on four top-rated users who reportedly made six figures on the app. As a Tasker, you’re not only working on a side job; you’re growing your business. You can set your rates and availability. You can also choose to accept tasks on the same day.


Requirements may vary depending on your location. To get started as a Tasker, complete your online profile and pay the one-time $25 registration fee, which is applicable in some cities. If you’re in California, TaskRabbit requires a business license to comply with local regulations.


Download: Tasker by TaskRabbit for Android | iOS (Free)

4. Hyer Job Search for Diverse Job Offerings


Hyer offers users various side hustles. You can sign up as a bartender, cashier, dishwasher, in-store helper, pet sitter, landscaper, or more. To start making money, you need to attend an orientation, go through a background check, and set up a Stripe account where you’ll get paid.


Hyer makes it easy to look for jobs and receive quick payments. You can search for jobs in 27 states across the US. Once you complete a task, you can request an Instant Payout or wait for the default weekly payout. The latter is processed every Monday and should get to your bank account no later than Thursday. However, bank holidays may affect this schedule, so read Hyer’s guidelines if you need cash immediately.


Download: Hyer Job Search for Android | iOS (Free)

5. Instawork for Seasonal and Hospitality Work


Instawork is a gig economy site that lets you land a decent side job if you have hospitality, culinary, and light industrial skills. Businesses post one-time or seasonal gigs, while workers pick shifts that fit their schedules. Instawork is the intermediary that takes care of all the paperwork and financial matters.


Here are some tips to best access the jobs at Instawork:


  • Complete your profile and work history.
  • Provide as much detail as possible in the employment section.
  • Ask for a recommendation from a former supervisor or co-worker to boost your profile.
  • Take advantage of the free training materials in the app. You can show these off in your profile and qualify for more opportunities.


Instawork sends payments to your bank account every Wednesday, and payment terms state that you only have to wait one to three days for the amount to show up. If you were hired as a W-2 worker, the amount you receive would be subject to taxes. If you need your payments ASAP, you can choose the Instapay feature to receive your compensation within a few hours of completing a task.


Download: Instawork for Android | iOS (Free)

6. Find a Flexible Side Job With Indeed Flex


You may be familiar with Indeed, one of the best websites for hiring people online. In 2019, Indeed announced that it had acquired Syft, a UK-based staffing platform for part-time and flexible work. In 2020, the popular job site rebranded Syft and introduced Indeed Flex to the US. Indeed Flex is the app for you if you’re looking for hospitality, retail, industrial, facilities, clerical, and retail roles.


To access open roles, download the app and sign up. From there, you can complete your profile and choose which jobs you’d like to explore. You’d have to get verified to look for more jobs. Find a role on the My Jobs page and apply, so you can book an onboarding interview to get verified. After this step, you’ll be able to access more shifts.


Indeed Flex’s terms and conditions state that you should receive weekly payments at the hourly rate you agreed to with your client. Indeed Flex then deposits your earnings into your chosen bank account. To ensure you get paid the right amount, submit accurate timesheets by clocking in and out of the mobile app.


Download: Indeed Flex for Android | iOS (Free)

7. Use Thumbtack for Professionals if You Have Home Improvement Skills


Thumbtack for Professionals lets you book jobs and post listings instantly. This app is best for contractors who want to offer professional services like writing, home repair, massage therapy, cleaning, outdoor landscaping, tech repair, plumbing, furniture moving, and other odd jobs. Think of the usual tasks that eat up people’s rest days. If you have the skills, sign up as a Thumbtack Professional.


Complete your profile so that clients can find you. Thumbtack helps you create a business profile that you can customize with your business name, description, and hours. While signing up is free, Thumbtack will prompt you to set up a weekly budget for direct leads. Once someone contacts you or books an appointment, you’ll be charged for the initial communication.


Download: Thumbtack for Professionals for Android | iOS (Free)

8. Upwork for Landing Freelance Clients


Upwork is worth checking out if you have some skills in a digital field, such as marketing or SEO. You’ll find some higher-paying gems as you become more experienced, and you may also have the opportunity to pursue a full-time freelance career if that’s something you think you would enjoy.


When using Upwork, you can create a profile from scratch or upload your resume. Moreover, you have the option to import a PDF of your LinkedIn profile. To help you choose the best clients, you can also see how much you should expect to earn per hour—along with whether the job poster has spent money on projects in the past.


Upwork takes 10% of what you earn, and you also need to pay for “Connects” that let you apply for jobs. Nonetheless, you can still find success if you optimize your profile, build your skills, and provide value. If you want to land more gigs on Upwork, check out these tips for boosting your Upwork clientele.


Download: Upwork for Android | iOS (Free, in-app purchases available)


Many temporary job apps are available if you need extra income. Choose the best app for your skills and resources, considering when and how you’ll get paid. Then, use the app to earn quick cash or turn your side hustle into a business. Remember to review the profiles of each employer as well. While the apps do a background check, it doesn’t hurt to be cautious about online job scams.

How to Use Notion More Effectively With These 9 Simple Tricks

While Notion is an incredible productivity tool, it can be quite tricky to navigate. To help make your Notion journey much easier and more efficient, we’ve compiled a list of tricks you can use.


1. Use Keyboard Shortcuts and Commands

Using keyboard shortcuts and commands can make a massive difference and help you speed up your tasks significantly. From switching between different pages to creating a to-do list with checkboxes, there are over 130 Notion keyboard shortcuts for Windows and Mac. Here are a few useful shortcuts that we recommend starting out with:


  • To open a new Notion window: Ctrl/Cmd + Shift + N
  • To toggle between Dark and Light mode: Ctrl/Cmd + Shift + L
  • To bring up the Notion AI dialogue box: Ctrl/Cmd + J
  • To create a new page on the Notion desktop app: Ctrl/Cmd + N
  • To add a comment: Ctrl/Cmd + Shift + N
  • To go back a page: Ctrl/Cmd + [
  • To go forward a page: Ctrl/Cmd + ]


Other than keyboard shortcuts, you can use slash commands (/) to format your Notion pages quickly. Here are a few you should start with:


  • To create a new text block: /text
  • To create a bulleted list: /bullet
  • To create a numbered list: /num
  • To create a toggle list: /toggle
  • To upload an image: /image
  • To upload a video: /video
  • To change the text color of a block: /color
  • To change the background color of a block: /color background

Whether you’re a student with a ton of deadlines or have a 9 to 5, it’s human nature to forget stuff at times, even if you’ve outlined all your tasks and deadlines. One feature that you may not be aware of is the option to set up reminders in Notion.


To set a reminder, go to the page or task you’d like to be reminded of. Type @remind along with the date and time you’d like to receive a notification from Notion reminding you of the task or event. For example, if you’d like to be reminded of a task that’s due on Friday at 8 am, simply type @remind Friday at 8 am.


If you’re using a table to track your deadlines, you can also set a reminder by clicking on a date and clicking Remind. Now, you can choose to be reminded of the task on the day it’s due, the day before, two days before, and a week before it’s due.


setting a reminder in a notion table

If you spent hours writing notes on a topic you’re studying, spending a few more hours summarizing your lengthy notes to revise is definitely not time-efficient. Notion AI comes handy in such situations, and will save you hours of manual work. Notion designed Notion AI to help users enhance their productivity.


Other than summarizing pages, Notion AI can translate pages, fix spelling errors, improve your writing, expand or shorten your written text, change your writing tone, brainstorm ideas for you, create a to-do list for you, and much more.


To use Notion AI, open a page or create a new one. Now, you can either trigger Notion AI by typing the command /Notion AI or pressing the Ctrl/Cmd + J keys simultaneously to bring up the Notion AI dialogue box. A drop-down menu with multiple options will now appear on your screen. All you need to do now is pick a task you’d like Notion AI to do and see it work its magic.


Notion AI options


For example, if you’d like Notion AI to write something from scratch, choose Ask AI to write and give it some instructions in the dialogue box.


Notion AI writing about pollution


Unfortunately, Notion AI isn’t free. If you have a free Notion personal plan, you can try 20 responses per month. However, if you’d like to enjoy unlimited Notion AI responses, you’ll need to subscribe to a paid response.


If you have a Free Plan or a Plus, Business, or Enterprise subscription and are billed monthly, Notion AI will cost you $10 per month. On the other hand, if you have a Plus, Business, or Enterprise subscription and renew your subscription yearly, you can purchase Notion AI for $8 per month instead.

4. Use the Notion Chrome Extensions

One of the most underrated ways of pushing Notion’s limits and making the platform easier to navigate is using Notion extensions. There are tons of Notion extensions for Google Chrome available that can make your life easier, like the Notion Web Clipper extension that allows you to save a website that you’re currently browsing to a Notion database or ChatGPT to Notion, which allows you to preserve your ChatGPT conversations.

5. Create Buttons for Repeating Actions

One of the simplest ways of making your Notion workspace cleaner and easier to navigate is by using Notion buttons. This handy feature allows you to perform repetitive tasks that you perform on a day-to-day basis, like adding a new task to your to-do list, by simply clicking a button. To create a button, type the command /button.


typing the :button command in Notion


Now, type a name for the button and add an icon. Click + Add action under Do this and choose from: Insert blocks, Add page to, Edit pages in, Show confirmation, and Open Page.


dropdown menu that appears when you click Add action


For example, if you’d like to create a to-do task every time you click the button, choose Insert blocks from the five options and type /to-do list in the dialogue box. Finally, click Done.


creating a to-do button on Notion

6. Use the Toggle Feature in Notion

Toggle blocks are another great way to keep your Notion workspace tidy and organize chunks of text. To create a toggle block, type the command /toggle and type a name for the toggle header. You can also create a toggle list by typing > followed by a space on a new line.


typing :toggle list command


Click the triangle button next to the toggle, or click the text labeled Empty toggle to add blocks of content underneath the toggle header.


toggle list in notion

7. Customize Your Notion Workspace

Adding a bit of flair to your Notion workspace can make organizing your life fun. Fortunately, Notion offers multiple ways to customize your Notion workspace, and making your Notion setup aesthetic will only take a couple of minutes. You can begin by adding a cover photo to your Notion pages by hovering over the top of a page and clicking Add cover.


adding a cover photo to a notion page


Once you click Change Cover, you’ll be able to choose from a gallery of cover photos curated by Notion. If you’d like to upload your own image, click Upload.


uploading cover photo to notion


Styling the content of your Notion page is equally important. One way to do so is by changing the font style. Notion offers three different fonts: Default, Serif, and Mono. You can change the font style of the text on your Notion page by clicking the three horizontal dots at the top right of your screen and choosing from one of the three fonts under the Style header.


changing font style on notion


You can also change the color of the text, or its background, by highlighting the text and choosing the three horizontal dots from the menu bar that appears.


menu bar that appears when you highlight text on Notion


Finally, select Color from the drop-down menu and choose from the list of colors.


changing the text or background color in notion


You can also use the /embed tool to add images, videos, Google Documents, Spotify playlists, and more to your Notion workspace. To do so, type the /embed command, paste a link, and click the Embed link.


using Notion's embed tool

8. Create a Table of Contents

Whether you’re taking notes on Notion or writing an essay with multiple headings, you can add a table of contents to your Notion page. Simply type the command /table of contents on a new line, and a table of contents blocks will automatically be created. You can move this box around your Notion page.


table of contents on notion

9. Create a Major To-Do Database

If you’re someone who has a ton to keep up with, managing individual to-do lists for different parts of your life can get overwhelming. To counter that, you can consolidate several categorized task lists into a major to-do database and navigate your tasks by using filters.


Type the command /database and select “Database – Inline” from the drop-down menu. Now, tweak the database according to your requirements and enter the tasks you need to do. Make sure to create tags for different parts of your life, like work, university, groceries, etc.


major to-do database on notion


Once you’re done filling your database with your tasks, you can filter through them by clicking Filter and filtering them by Tags. For instance, if you’d like to see only the university-related tasks you need to do, simply select the checkbox next to University.


filtering through major notion to-do database


From customizing your Notion workspace to using Notion AI to perform tasks for you, mastering these tips will help you save tons of time in the long run.

How to Free Up Storage Space on iCloud

Key Takeaways

  • Freeing up iCloud storage space can often stop you from upgrading to a more expensive storage plan.
  • Deleting unwanted iCloud backups, managing your photo library, and clearing large iCloud Drive files can free up a few gigabytes of storage.


Running low on iCloud storage but don’t want to upgrade your plan? Learn to make the most of the space you already have, which involves removing unwanted items and making other storage optimizations to ensure your iCloud storage doesn’t fill up quickly.


How Much Does iCloud Storage Cost?

Fortunately, iCloud isn’t terribly expensive. If you want to upgrade to a higher tier rather than spending time deleting data to free up your existing storage, here are your options:


  • $0.99 per month for 50GB
  • $2.99 per month for 200GB
  • $9.99 per month for 2TB
  • $29.99 per month for 6TB
  • $59.99 per month for 12TB


You can also get iCloud storage along with other Apple services at a discounted price by subscribing to Apple One.

Check What’s Taking Up Your iCloud Storage

If you’re sure you’d rather spend your time instead of spending money, you need to check what’s eating up your iCloud storage first.


On an iPhone, go to Settings > [Your Name] > iCloud > Manage Account Storage.


On a Mac, click the Apple logo in the menu bar and go to System Settings > Apple ID > iCloud. Then, click Manage.


This will tell you what’s using space on your iCloud account. For most people, this will likely be photos, messages, iCloud backups, iCloud Drive, and apps. We’ll show you how to free up space for each of them and more below.

Delete Unwanted iCloud Backups

If you’ve owned multiple iOS devices over the years, the chances are high that each of these devices has its own backup stored in your iCloud account.


You can delete backups of old devices you no longer use by following these steps:


  1. On your iPhone, go to Settings > [Your Name] > iCloud > Manage Account Storage > Backups.
  2. Now, you’ll see which devices have been backed up. Select the device you don’t use anymore and tap Delete Backup. This will remove that backup from iCloud.
  3. You can also tap the backup of devices you still use and stop certain apps from saving their data in your iCloud account. Select the device and choose Show All Apps. Now, manually disable backups for specific apps and tap Turn Off. This will remove app data for those apps from your next iCloud backup.


If you use a Mac, go to Apple menu > System Settings > Apple ID > iCloud. Then, click Manage and select Backups. You can now choose which backups to delete. But if you don’t want to delete backups and need more room, don’t forget that you can reduce the size of your iPhone backup and delete app data from iCloud to help free up storage.

Change Your iPhone’s Camera Settings

Review your iPhone’s camera settings to ensure you aren’t using more space than necessary on iCloud. This involves deciding whether you can switch to 720p or 1080p videos instead of 4K, among other things.


  1. On your iPhone (or iPad), go to Settings > Camera > Formats. To save space, choose High Efficiency. Note that this will save your photos and videos in the HEIF and HEVC formats, respectively, which are not as widely supported as JPG and MP4.
  2. Now, go back to the Camera settings and tap Record Video. Ideally, you should select the lowest frame rate and resolution. You won’t get the smoothest or highest quality videos this way, but you’ll save iCloud space.
  3. Likewise, select the Record Slo-mo option in the Camera settings and choose the lower frame rate setting.
  4. Also, toggle off Live Photo by going to Settings > Camera > Preserve Settings. This will stop your iPhone from recording a three-second video of each photo you capture.


Trim Your Photo Library

Now that you’ve reduced how much space photos will take going forward, it’s time to start clearing unwanted items from your photo library.


Open the Photos app and tap Albums > Videos. Now you can tap Select in the top-right corner and clear all the videos you don’t need. Similarly, you can visit albums for the following items: Live Photos, Bursts, Panoramas, Slo-mo, Time-lapse, Screenshots, Screen Recordings, and more. Deleting stuff from these will clear out a lot of space quickly. Finally, review the Recents album in the Photos app to see if you can delete some pictures.

Get Rid of Old and Unwanted Messages

If the Messages app is taking up a lot of space on iCloud, you can quickly free up some space by following these steps:


  1. Go to Settings > Messages on your iPhone or iPad.
  2. Now scroll down to Keep Messages and change it from Forever to 30 Days or 1 Year. Then, tap Delete. Messages older than the time frame you set will now be removed automatically.
  3. Next, let’s clear out some chats that are taking up a lot of space. Go to Settings > [Your Name] > iCloud > Manage Account Storage > Messages. Now, tap Top Conversations.
  4. Tap Edit in the top-right corner and select the chats you want to delete. Then tap the trash icon in the top-right corner to delete a chat.
  5. If you aren’t ready to delete entire conversations, open a thread, tap the contact’s name at the top, and scroll down to Photos. Tap See All, then manually delete images and videos you don’t need. Similarly, you can visit the Documents section to delete large PDFs and other files.


Clear Large Files From iCloud Drive

If you use iCloud Drive on any of your Apple devices, check it to ensure junk files aren’t taking up much space. Open the Files app on your iPhone or iPad and tap Browse at the bottom. Select iCloud Drive and check each folder to see if you can delete anything. To do the same on a Mac, open a Finder window and click iCloud Drive in the sidebar.


However, if you accidentally delete the wrong file, don’t worry. There is a way to restore deleted files in iCloud Drive.

Delete Older Emails

If you use Apple’s Mail app and your iCloud email account, you’ll likely have several emails you no longer need. Those emails can take up your precious iCloud space too. Here’s how to delete them:


  1. Open the Mail app.
  2. Go to the Mailboxes page and choose iCloud.
  3. Select Edit in the top-right corner, then choose the emails you want to delete.
  4. Tap Trash, then select Trash Message.


Do note that this only applies to your iCloud email, not other email accounts—like Gmail—that you may have connected to the app.


Hopefully, you managed to free up a few gigabytes of storage space on iCloud by now. This should be enough to prevent the dreaded “iCloud Storage is Full” pop-ups on your iPhone, iPad, or Mac for the time being. But if you still need more space, consider upgrading your iCloud storage plan.

What Is the Best Free Plagiarism Checker?

Quick Links

Make sure that you haven’t copied someone else’s work with a plagiarism checker. Keep reading to discover some free websites to check for plagiarism and avoid any potentially serious repercussions. You’ll also learn about the different types of plagiarism.


What Is Plagiarism?

When we talk about plagiarism, we usually refer to copying someone else’s work. Sometimes, plagiarism involves copying and pasting content from elsewhere without changing any part of the text. However, improperly paraphrased content without citation is also considered plagiarism.


The consequences of plagiarism are often very serious. Other people’s work is often copyrighted, meaning that you can potentially face legal action for copying and pasting work—especially if the website has a clear “you may not reproduce my work without permission” message (or something similar).


Even if you don’t face legal consequences for plagiarism, it’s important to avoid such practices. Schools and colleges usually have a zero-tolerance approach to this particular act; if you’re found guilty of plagiarism, you may automatically fail your assignment and—in serious cases—be removed from your course altogether.


Plagiarism is also not tolerated in the workplace. At best, you’ll receive a stern warning (especially if you work in a content marketing or journalism-related field). But in some cases, plagiarism can result in an instant dismissal.

What Are the Different Types of Plagiarism?

Plagiarism isn’t always easy to spot, and there are several types. To help you ensure that you don’t accidentally or intentionally plagiarize, we’ll cover some of the most common versions below.

1. Paraphrasing

Paraphrasing is one of the most common forms of plagiarism, and it involves copying and pasting work published by someone else—but rewording it. However, it’s worth noting that paraphrasing isn’t always considered plagiarism. If you provide credit to the original creator, you normally won’t be plagiarizing their work.

2. “Consensual” Plagiarism

Do you remember the “copy but change it a little” memes that refer to homework assignments? If you actually copy your friend’s homework, that’s a form of plagiarism (even if you change it a little).


Purchasing essays or coursework written by someone else can also constitute plagiarism in some situations.

3. Accidental Plagiarism

It’s easy to think that all plagiarism is done in bad faith, but this isn’t true. Sometimes, you can unknowingly plagiarize—and it’s a good idea to check before submitting any piece of work. Not citing sources is one example of accidental plagiarism.


How you cite these sources depends; for college essays, you can often use a bibliography. When writing online articles, it’s wise to link back to the original source in your text.

4. Explicit Plagiarism

This form of plagiarism is what you probably associate the term with. Explicit plagiarism is when someone copies and pastes an entire project but claims it’s their own. You’re also committing this kind of plagiarism if you only copy and paste sections.


While these are some of the most common forms of plagiarism, they aren’t the only ones. It’s also worth noting that you can use plagiarism checkers for specific programs, such as these plagiarism checkers for Google Docs.

What Is the Best Free Plagiarism Checker?

Now that you have a better understanding of what plagiarism is (and some of the most common forms), let’s look at some free websites to check for plagiarism. Below are our tried-and-tested favorites.

1. Grammarly

There are several reasons to use Grammarly as a writer, and checking for plagiarism is one of them. While you need a subscription for unlimited access to Grammarly’s features, it does have a free plagiarism checker that lets you check texts up to 10,000 characters long.


You can either copy and paste your text into Grammarly via the box provided or upload a file. If you choose the former, follow these instructions:


  1. Copy and paste your text into Grammarly and select Scan for plagiarism.

  2. Grammarly’s editing suite will then open. Customize your settings and press Done.
    Text settings in Grammarly

  3. Tap Plagiarism to check for plagiarism. Analyze your text to ensure that you haven’t plagiarized.
    A plagiarism check that's taken place in Grammarly


If you want to use Grammarly for all of your writing efforts, consider checking out this Grammarly vs. Quillbot comparison before committing to any platform. Pricing for Grammarly Premium starts at $12 per month.

2. Copyscape

Copyscape is one of the most renowned plagiarism detection tools. If you can’t afford the full version, the website lets you check for plagiarism for free in a limited capacity. With Copyscape, you can enter a URL and see if there are other copies of your page online.


Image showing a URL being checked in Plagiarism


Another useful feature in Copyscape is the ability to compare two pages or articles alongside each other. Enter the URL or text and press Compare Items to get a full overview.


The URL comparison features in Copyscape


Copyscape also has a premium version that costs $0.03 for the first 200 words of your text, plus an extra $0.01 for every 100 words thereafter.

3. Plagiarisma

Plagiarisma is a completely free website that checks for plagiarism, and you can check for plagiarized content on both Google and Bing. The tool supports more than 190 languages, including English, French, Swedish, and German. Besides copying and pasting your text, you can also search by pasting any URLs you want to check.


A plagiarism checker appearing in Plagiarisma


Once you’ve searched for your text in Plagiarisma, you can scroll down to see a percentage of how unique your text is. You’ve got the option to upload files in .docx and numerous other formats, too.


An image showing the score of uniqueness for a text in Plagiarisma

4. PapersOwl

PapersOwl is an alternative to Plagiarisma if you want a free plagiarism checker, and its website layout is a little more user-friendly than the previously-mentioned version. When using PapersOwl, you can enter your title and the text of your article. Copy and paste both before tapping Check for Plagiarism.


Checking text for plagiarism in PaperOwl


Once you’ve submitted your text for plagiarism checking, you’ll see a percentage of what’s unique—and what’s similar—within a few seconds. You can then type your changes in the text box and paste them back into your project.


A plagiarism score for PaperOwl text

5. Duplichecker

If you want another website that checks plagiarism for free, make sure you take a look at Duplichecker. The program lets you upload files from Google Drive and Dropbox, in addition to copying and pasting your text for a plagiarism check. You can also upload files from your computer if you prefer.


Duplichecker lets you search for plagiarism from URLs as well.


Plagiarism Checker in Duplichecker highlighting the option to also enter URL


Once you’ve submitted your text for a plagiarism check, you’ll see how original your content is. With the free version, you can check up to 1,000 words; you can upgrade to Pro (from $25 per month) for more flexibility.


The results for a plagiarism check in the Duplichecker web app


You’ll find several free websites to check for plagiarism, and it’s a very good idea to do this every time you need to submit a major project. Doing so will help keep you out of trouble and ensure that your work is original. Start with this list and upgrade later if needed.

The Best PS5 DualSense Controller Chargers of 2024

DualSense charging stations reduce cable clutter, free up ports on your PS5, and keep your controllers ready for action. From minimalist solo charging stands to two-controller chargers and multi-functional docks with cooling, there are plenty of PS5 controller chargers available to charge and display them in style.


Best Overall PS5 DualSense Charging Station: PowerA Solo

A DualSense controller charging on the PowerA Solo Charging Station


Officially licensed for the PS5, the PowerA Solo Charging Station offers a safe and stylish way to charge and showcase your DualSense controller. It has Sony’s seal of approval and even sports a white and black design with a PlayStation logo to seamlessly blend into your PS5 setup.


This controller charger boasts a simple design with a wide base that makes docking your controller effortless and secure. It plugs into the front USB-C port on your PS5 and stops charging automatically when full, protecting your controller’s battery. PowerA also offers a dual charging station, ideal if you want to charge two controllers at the same time.

The PowerA Solo Charging Station

PowerA Solo Charging Station

Best Overall

Made by one of the few brands producing officially licensed PS5 accessories, this charging station guarantees a reliable charge for your DualSense controller and boasts a sleek design that complements your gaming setup.

Pros

  • Officially Licensed for guaranteed compatibility
  • Fast and reliable charging
  • Compact and stylish
  • Easy to use
Cons

  • Takes up the only USB-C port on the PS5

The OIVO PS5 Charging Station connected to a PS5.
OIVO 


The OIVO PS5 Controller Charger Docking Station is a solid option for an affordable PS5 dual controller charger. It boasts the same charging style and design as the official offering, with a white and black aesthetic matching the PS5 console for a uniform gaming setup.


Despite the lower price, this twin charger can top up two controllers in under two hours, making it faster than the official charging station. It also offers charging indicators on the front and an off switch, which is great if you just want to showcase your PS5 controllers.


However, it does not come with a power adapter like most options. Instead, it plugs into the front USB-C port or two USB-A ports at the back, making it a potential dealbreaker if you have multiple PS5 accessories.

The OIVO PS5 Controller Charging Station

OIVO PS5 Controller Charger Docking Station

Best Budget

$20 $22 Save $2

On a budget but craving twin-turbo charging for your PS5 controllers? OIVO’s dual charging station fuels two controllers simultaneously while remaining wallet-friendly.

Pros

  • Affordable
  • Charges two controllers at once
  • Sleek design with charging indicators
Cons

  • Takes up one or two ports on your PS5

The Sony DualSense Charging Station on a white background.
Sony


Sony’s official DualSense Charging Station is a popular choice among users, not only because it can charge two DualSense controllers simultaneously but also because it’s the safest and most reliable way to charge your PS5 controllers. Made by the same team behind the PS5 controller, you don’t have to worry about compatibility or damaging your controller.


This charging station charges two controllers in around three hours, the same time it takes to charge one DualSense controller via the PS5’s USB ports. It’s compatible with both the standard and the DualSense Edge controller, and the included power adapter means you can free up those valuable USB ports on your PS5.

The PS5 DualSense wireless charging station

Sony DualSense Charging Station

Best for Two Controllers

This is the official charging station for the DualSense controllers. It’s safe, reliable, works with all PS5 controllers, and won’t take up any ports on your PS5.

Pros

  • Official Sony charger
  • Charges two controllers at the same time
  • Safe and reliable
  • Easy to use
Cons

  • Cheaper alternatives available

The OIVO PS5 Controller Charger with Headphone Stand mounted on a PS5.
OIVO


Designed to sit perfectly on top of your PS5, the OIVO PS5 Controller Charger with Headphone Stand offers all the benefits of a charging station without taking up precious desk real estate. Its sleek white and black design flawlessly blends with your setup, making it feel less like an add-on and more like a natural extension of your PS5.


But this PS5 controller and headphone charger isn’t just about aesthetics. It boasts blazing-fast charging speeds that fully juice up your DualSense controllers in under two hours. The simple snap-down charging style makes docking or removing your controller effortless, while a dedicated holder keeps your gaming headset safely cradled.

oivo headphone stand

OIVO PS5 Controller Charger with Headphone Stand

Best With Headset Holder

Featuring two dedicated charging bays for your DualSense controllers and a convenient holder for your gaming headset, the OIVO PS5 Controller Charger with Headphone Stand deserves a spot on your PS5 setup.

Pros

  • Fast charging for two controllers
  • Works with standard and Edge DualSense controllers
  • Compatible with multiple headsets
  • Matching PS5 aesthetic
Cons

  • Not compatible with the PS5 Slim versions

The NexiGo PS5 Cooling Stand on a desk
NexiGo 


Beyond a basic DualSense charging station, the NexiGo PS5 Cooling Stand organizes your PS5 setup into one stylish hub. It securely holds the console, two controllers, the media remote, your headset, and up to ten games—all without cluttering your desk.


Two dedicated charging bays keep your controllers fueled and ready, while a built-in fan keeps your PS5 running cool during even the most intense gaming sessions. The entire setup is powered by a 15W adapter, ensuring quick charging for your consoles without taking up any USB ports on your PS5.

The NexiGo PS5 Accessories Silent Cooling Stand

NexiGo PS5 Cooling Stand

Best Charging Stand

$23 $60 Save $37

Though pricier than basic charging options, the NexiGo PS5 Cooling Stand delivers unmatched versatility. It keeps your DualSense controllers juiced and all your gaming essentials neatly organized for a clutter-free setup.

Pros

  • Charges two controllers
  • Keeps everything neat and organized
  • Effective cooling
  • Solid stand for PS5
Cons

  • Not compatible with the new PS5 Slim editions

FAQ

Q: What type of charger does the PS5 DualSense use?

The PS5 DualSense controller uses a USB-C to USB-A cable to charge. Simply plug the USB-C end into your controller and the other end into any of the PS5’s USB ports to easily and quickly charge your controller.

Q: Is it alright to charge the PS5 controller with a phone charger?

In most cases, yes, you can safely charge your PS5 controller with a phone charger, provided it outputs 5 volts. However, we recommend plugging directly into the console or using a dedicated DualSense charging station for safer and more reliable charging.

Q: Can I use my PS4 controller on the PS5?

Yes, you can use your PS4 controller on the PS5, but only for playing PS4 games. PS5 games require the new DualSense controller to take advantage of its special features, like haptic feedback and adaptive triggers.

Q: How long does it take for the PS5 DualSense to charge?

The PS5 controller typically takes about three hours to fully charge, whether you plug it directly into the console or use a charging station. However, some charging stations, like the OIVO PS5 Controller Charger Docking Station, boast faster charging times, potentially topping up your DualSense in just two hours.

The Best Liquid Cooling Kits for Your PC in 2024

With a high-end gaming rig, you might need a cooling system that’s far more efficient, so why not liquid cooling? There are plenty of liquid cooling kits for a PC, both extensive and simple, that have no problem keeping your system chill, especially if you plan to overclock.


Corsair Hydro X Series iCUE XH305i RGB PRO Custom Cooling Kit
Corsair


Corsair is no slouch when it comes to air cooling, and it’s no different in the liquid cooling department. The Corsair Hydro X Series iCUE XH305i RGB Pro Custom Cooling Kit not only keeps your high-end PC cool, but it looks pretty great when your RGB is all synced up using iCUE.


However, the keyword here is “custom,” which means you’ll have to map everything out with the Corsair Hydro X Series iCUE XH305i RGB Pro Cooling Kit. It’s an extensive kit, too, bundled with extra fittings, fans, an iCUE software block, a reservoir, a pump, and even tube bending tools.


If a custom loop is a little scary, we suggest a closed loop, like an AIO. The ARCTIC Liquid Freezer II 360, further down our list, is a perfect alternative for overclocking.

Corsair Hydro X Series iCUE XH305i RGB PRO fans, radiator, and water cooling pump

Corsair Hydro X Series iCUE XH305i RGB PRO Custom Cooling Kit

Best Overall

$540 $600 Save $60

The Corsair Hydro X Series iCUE XH305i RGB Pro is an extensive custom cooling kit packaged with all the essential components you need, including tools for bending tubes into shape. It’ll even look great, thanks to its 128 individually addressable LEDs.

Pros

  • Kit includes everything you need, including extra fittings and tube bending tools
  • Impressively efficient cooling
  • Tasteful ARGB
  • Fans

Thermaltake C240 pump, fittings, coolant, and radiator
Thermaltake


If budget is a concern, the Thermaltake Pacific C240 makes your decision easy. By giving you the option to choose between hard and soft tubing and radiator sizes, it’s up to you to decide what best fits your budget. The C240 offers premium cooling no matter what you choose, not to mention looking great with the included RGB controller.


What we found most impressive is how complete the Thermaltake Pacific C240 is. Even if you’re new to the world of water cooling, you can rest easy knowing this kit comes with all the necessary components. Despite its affordable price, you’re still getting a pretty powerful pump, a 200ml reservoir, and a copper radiator with thick fins for better heat dissipation.

Thermaltake C240 water cooling kit

Thermaltake Pacific C240 Cooling Kit

Best Budget

The Thermaltake Pacific C240 Cooling Kit is by far the most budget-friendly option, considering you can choose from two sizes of radiators as well as hard and soft tubing. Either way, you get everything you need to create a snazzy, custom, water-cooled system.

Pros

  • Soft tubing is easier to work with than hard tubing
  • Copper radiator with thick fins
  • Can opt for a bigger radiator and hard tubing
Cons

  • Solid option for beginners, but still requires a lot of research beforehand

Gigabyte AORUS WATERFORCE X 360 AIO
Gigabyte


Style should never trump performance, but the Aorus Waterforce X 360 AIO can be the crowning jewel of your PC. And since this is just an AIO and it’s compatible with a wide range of sockets—including AM4 and LGA 1700—it’s one of the easy ways to fit water cooling into your system.


Its style comes in the form of two features: an LCD and ARGB fans. That means you can adjust each individual LED in a myriad of colors, and the full-color LCD can be used to show off custom graphics as well as important information like temperature.

Gigabyte AORUS WATERFORCE X 360 AIO with cooling block

AORUS WATERFORCE X 360 AIO Liquid CPU Cooler

Best with RGB

$210 $240 Save $30

While not a kit but an AIO, the Aorus Waterforce X 360 is among the most stylish AIOs, given its LCD and ARGB. It also doesn’t hurt that it rocks at keeping your system cool while staying incredibly quiet.

Pros

  • Compatible with AM4, LGA 1700, and older sockets
  • Can adjust the LCD, pump, fan controls, and RGB
  • Uses a copper water block
  • Runs quiet and looks fantastic doing it
Cons

  • You’ll have to juggle software to get everything working correctly

Thermaltake Pacific Tough C360 radiator, water block, fitting, and water tank
Thermaltake


Considering what the Thermaltake Pacific Tough C360 offers, you can rest assured your gaming PC will be set up for success. Having a copper water block and a 360mm copper radiator with thick fins is a stellar combination. That alone offers superior heat dissipation than aluminum, and with three fans running at 2000 RPM, you’re giving heat the boot pretty quickly.


Another welcomed feature of the Thermaltake Pacific Tough C360 is the use of hard tubing as opposed to soft tubing. It’s a little tougher to work with, but totally worth the effort for better flow rates, which ultimately creates a much cooler and more efficient system.

Thermaltake Pacific Tough C360, tough fan, and coolant

Thermaltake Pacific Tough C360

Best for Gaming

If you’re confident with water cooling already, you’re the perfect candidate for the Thermaltake Pacific Tough C360, especially in a gaming rig. You’ll be working with a copper water block and radiator, along with hard tubing, for better flow rates.

Pros

  • Copper water block and radiator
  • Hard tubing offers better flow rates
  • 300ml reservoir
  • 4600rpm pump speed
Cons

  • Kit includes everything but tube-bending tools
  • No RGB

ARCTIC Liquid Freezer II 360 aio with screws, brackets, and fittings
ARCTIC


Overclocking is great for eking out performance, especially if your PC is rocking premium components, but if you aren’t careful, you can cook your hardware beyond repair. Luckily, strapping your CPU with the Arctic Liquid Freezer II 360 can wrangle powerful processors, like the i9-13900K and the Ryzen 9 7950x, with ease.


To help further reduce overheating, the Arctic Liquid Freezer II 360 features fins that are much thicker than your average AIO—38mm thick. There’s also a 40mm VRM fan for the voltage transformer and base to avoid adding unnecessary heat to your entire system. For all intents and purposes, the Arctic Liquid Freezer II 360 really lets you put your PC through its paces.

ARCTIC Liquid Freezer II 360 aio with cooling block

Arctic Liquid Freezer II 360

Best for Overclocking

Quiet, powerful, and efficient, the Arctic Liquid Freezer II 360 lets you push your processor’s limits, even for high-end options like the i9-13900K and the Ryzen 9 7950x.

Pros

  • Radiator has thicker-than-average fins
  • Compatible with LGA 1700 and AM5 sockets, among others
  • Cable management makes installation easy
  • Fast and quiet fans
Cons

  • Thicker radiator requires more headroom

FAQ

Q: Is liquid cooling better than a heatsink?

Yes, liquid cooling is, without a doubt, better at keeping the entire system cooler than air cooling. It’s simply more efficient at spreading and dissipating heat, which also ultimately reduces fan speeds and makes your rig a lot quieter, too.

Q: Do liquid coolers need to be refilled?

It depends on what kind of liquid cooling you’ve chosen. Is it an AIO or a custom job? The former, being a closed loop, means you never need to, barring a problem; the latter does require refills about every year to keep the loop running smoothly.

Q: Can I use distilled water for water cooling?

Technically, yes, but you shouldn’t. Unlike coolant, distilled water has the chance of being contaminated which can cause other problems. It’s best to stick with tried and true coolant.

Q: Does liquid cooling save electricity?

Your mileage may vary. Generally speaking, pumps draw just a tad more power than a fan in order to move all that water. A water-cooled system means your components may not have to run as hard (you can lower fan speeds, for example), but the energy saved is negligible. You can just as easily install a radiator, a passive component that doesn’t draw power, to help dissipate heat in an air-cooled system.

Q: Do liquid coolers leak often?

Liquid coolers are designed to be watertight, but if you tend to reinstall your liquid cooling kit often there is a small chance that it might leak if it has not been fitted back together well.

Which Ebook Reader Is Best for You?

Key Takeaways

  • Kindle offers a range of devices at varying price points, with some premium models. Meanwhile, Nook has a more limited range of e-readers.
  • The Kindle Paperwhite offers a larger screen with adaptive front light and wireless charging, while the Nook GlowLight has a 6-inch screen with two storage options.
  • Kindles tend to have a longer battery life and support audiobook playback, while the Nook GlowLight Plus allows audiobook playback, but other Nook models do not.


Because so many of us are turning to digital content, it is more important than ever to make sure your eBook reader meets your needs. But should you choose an Amazon Kindle or a Barnes & Noble Nook reader? We compare the two brands to help you choose.


Nook vs. Kindle: Price

Let’s be honest; the majority of all our buying decisions boil down to one thing: price. So, which brand is the most affordable? Barnes & Noble (which makes the Nook) and Amazon (which makes the Kindle) offer various models under the same brand name.


Amazon offers different devices at varying price points:


  • Kindle: From $99.99
  • Kindle Paperwhite: From $139.99
  • Kindle Paperwhite Signature Edition: From $189.99
  • Kindle Oasis: From $249.99
  • Kindle Scribe: From $339.99


The Kindle serves as Amazon’s most affordable base model with basic features and 4 LEDs. The Kindle Paperwhite offer users a larger display with 17 LEDs and a waterproof design. The Signature Edition differentiates itself from the Paperwhite by featuring auto-adjusting lighting and wireless charging.


Amazon offers customers more features through the Kindle Oasis and the Kindle Scribe. The Oasis allows Kindle users to enjoy 25 LEDs, automatic page rotation, and physical page turn buttons, all in a waterproof device.


In contrast, the Kindle Scribe, which is not waterproof, is ideal for those who wish to write or doodle in the margins of their eBooks. A battery-free pen is also included in the purchase price.


For families, it is important to note that Amazon also offers two Kindle options for kids. The Amazon Kindle Kids is priced at $119.99, which includes the e-reader as well as a case and a two-year warranty. The second choice for kids is the Kindle Paperwhite Kids, which offers young readers adjustable lighting and waterproof hardware for $159.99.


Similarly, there are several Nook products at different price points. However, only three of them—the Nook GlowLight 4, Nook GlowLight 4e, and the Nook GlowLight 4 Plus—are true e-readers.


The other devices are all Android tablets, akin to Amazon’s Fire tablets. You can use them to read eBooks, but the brighter screen and shorter battery life make them less optimal options for committed bookworms.


Barnes and Noble’s e-readers are available at the following price points:


  • Nook GlowLight 4e: $99.99
  • Nook GlowLight 4: $149.99
  • Nook GlowLight 4 Plus: $199.99


So, in terms of pricing, the brands are very similar depending on the exact device you choose. However, some Kindle products are priced much higher than Nook products.

Nook vs. Kindle: Specifications


Given that the two most direct competitors are the Nook GlowLight and the Kindle Paperwhite models, let’s analyze how they compare from a specs standpoint.


The GlowLight has a 6-inch screen with a 300dpi resolution, while the Paperwhite offers a 6.8-inch screen with a 300dpi resolution.


The Nook GlowLight is available in an 8GB or 32GB version, depending on whether you choose the GlowLight4 or GlowLight 4e. Similarly, the Kindle Paperwhite offers 8GB or 32GB devices, depending on if you get the Paperwhite Signature or not. It’s very similar to the original Paperwhite, save for the extra storage.


amazon kindle online store


The other main difference between the two Kindle Paperwhites is that the Signature model has an adaptive front light that adjusts the brightness to your environment. It also has wireless charging.


In truth, 8GB should be enough for almost all users, especially considering you can store content in the cloud.

Nook vs. Kindle: Page-Turning Functionality

The most significant difference between Nook and Kindle from a usability perspective is the presence of a physical button on the Nook. When reading with a Nook, you can use the button to turn the pages or tap the screen. When using a Kindle—except for the Kindle Oasis—you swipe on the screen.


This physical button addition allows for Nooks to not only turn by page but also chapter jump. This can be done by pressing one of the page-turning buttons twice. This feature, which is not available on the Kindle, could be an unexpected benefit for Nook users.

Nook vs. Kindle: Water-Resistance

kindle ereader held in a woman's hand
Erlo Brown/Shutterstock


If you worry about wet weather or water-based accidents, set your sights on the Paperwhite models, the Oasis, or the GlowLight Plus. Kindle’s waterproof models are IPX8-rated. You can submerge them for up to one hour in two meters of fresh water or up to 0.25 meters of saltwater for up to three minutes without damaging the tablets.


That’s a massive boon for anyone who likes to read in the bath every night, by a pool, or on a beach while on vacation.


The waterproofing details for the GlowLight Plus confirm that the tablet has an IPX7 rating. That allows submersion of up to 3.28 feet of fresh water for a half-hour. However, unlike the Kindle, Barnes & Noble does state that submersion in saltwater or other liquids should be avoided.

Nook vs. Kindle: Screen Size and Resolution

Kindle Paperwhite on desk
Kendra Gerken/MUO


If you’re the type of person who spends all day reading eBooks, it’s easy to argue that 6-inch devices, such as the Nook GlowLight 4 and GlowLight 4e, do not provide enough screen real estate.


Fortunately, many of the models covered here surpass that size. You’ll get larger screen sizes with the 7.8-inch Nook GlowLight Plus, the 7-inch Kindle Oasis, the 6.8-inch Kindle Paperwhite models, or the 10.2-inch Kindle Scribe. All Kindle devices provide a screen resolution of 300ppi and a glare-free front surface for easier reading.


At the other end of the scale, you might be happier with a lower resolution, especially if you’re only an occasional reader. In that case, you should consider the entry-level Nook GlowLight4e as it has a 212dpi display. The screen size is still 6 inches and has an affordable price.


The design of the Nook includes a thicker border around the usable portion of the screen. For those who prefer a slimmer appearance, the Kindle or one of the Kindle Paperwhites may be a better option.

Nook vs. Kindle: Battery Life

The battery life on a Nook and Kindle is so good that it shouldn’t form a meaningful part of your decision. The GlowLight 4, 4e, and GlowLight Plus offer a battery that Barnes and Noble claims lasts for weeks on a single charge. Amazon’s Kindle models claim to last for a range of six to ten weeks, depending on model and reader usage.


Amazon says its Kindle Oasis provides six weeks of battery life if a person reads for a half-hour daily, has the screen light setting at 13, and turns off the Wi-Fi and Bluetooth connections while reading. If you go for either of the Kindle Paperwhite options, they give up to 10 weeks of battery life per charge in the same situation.


Finally, the original Kindle lets you read for up to six weeks on one charge. Amazon does caution, though, that those figures are just estimates. Certain activities, such as listening to audiobooks on any of the Kindle devices, could alter the average battery life.


For practical usage, the Amazon Kindle Paperwhite seems to provide a slightly longer charge than its Nook counterpart.

Nook vs. Kindle: Audiobooks

Audiobooks have experienced rapid growth in popularity over the last few years. If you’re an audiobook addict trying to decide between a Kindle or Nook, the Kindle is the clear winner. All models of Kindle devices support audiobook playback via Bluetooth and Wi-Fi.


The Nook GlowLight 4 and GlowLight 4e do not allow audiobook playback. However, the Nook GlowLight Plus 4 comes equipped with both Bluetooth and a headphone jack that allow you to listen to audiobooks.

Nook vs. Kindle: Supported Ebook Formats

There are many ebook formats, so compatibility is important.


The Kindle supports AZW3, AZW, JPEG, GIF, PNG, PDF, DOCX, TXT, and HTML DOC. It also supports Audible’s audio format, AAX.


Nook devices support EPUB, PNG, JPG, GIF, BMP, and PDF file formats.


Despite the differences between Kindle and Nook devices, it is possible to read books on both, regardless of format, if you’re willing to use one of these eBook converters available online.

Nook vs. Kindle: eBook Catalog

book app icons on a smartphone
Tada Images/Shutterstock


An eBook reader isn’t much use without some eBooks to put on it. While there are many eBook stores worth using, Kindle owners will do most of their shopping in Amazon’s Kindle Books store. Nook users have access to the Nook Books store from Barnes & Noble.


Of the two competing stores, Amazon’s is more extensive and often cheaper. Both Amazon and Barnes & Noble add digital rights management (DRM) protection to their titles.


For readers of traditionally published content, the Nook is a good choice. However, if you would like access to more self-published or lesser-known author’s works, an Amazon device is the best choice.

Nook vs. Kindle: Other Features

The two devices each come with their own array of additional apps and features.


On a Kindle, users can access in-book dictionary definitions, the Word Wise vocabulary builder, and the X-Ray scanner, which allows readers to quickly skim through a book to find references to characters, events, references, and other information.


Nook devices have a night mode to prevent eyestrain and an automated content discovery program called B&N Readouts.


Kindles supports a connection with the Libby library app, which allows users to borrow eBooks from their local library and download them directly to their e-reader.


Both products provide a range of usability settings, such as different fonts, text sizes, and a backlight option. As you’d expect, you can also find plenty of third-party accessories, such as cases and sleeves, for both Kindles and Nooks.

Is a Nook or a Kindle Better for You?

So, to come full circle, which is the best e-reader for you? In our mind, there’s only one winner: the Amazon Kindle. The Barnes & Noble Nook has some nice touches, but the Amazon Kindle is faster, easier to use, and has access to a larger store.


The different Kindle models also mean there’s a good device for everyone.


If you want to do more research before purchasing, there are substantially fewer Nook reviews than Kindle ones, and people generally seem happier with their Amazon e-reader purchases.


Of course, you don’t need to use an eBook store to find content. Once you’ve purchased your e-reader of choice, you can download free eBooks online, or connect with your local library and save a few dollars.

8 Important Things to Do After Installing Windows 10

For the best experience with Windows 10, you should run through some basic but important tasks. Here’s what we recommend doing, whether you’re setting up Windows 10 for the first time or reinstalling a fresh copy.


1. Run Windows Update and Configure Update Settings

Even though you just installed Windows 10, some updates are likely pending. You should install these to get the latest security patches for your system.


To do so, open the Settings app (using the Win + I shortcut or the gear icon on the Start menu) and go to Update & Security > Windows Update. On this page, click Check for updates. After a few moments, it will begin to download and install updates, if needed. If there are any that require a restart, you’ll see a prompt to do so.


Windows Update runs automatically in Windows 10. While this means less manual work on your part, it can also be a pain if it interrupts you. Learn how to manage Windows Update to make it integrate with your workflow.

2. Make Sure Windows Is Activated

It’s easy to install Windows 10 without a valid license. If you didn’t enter a license key or sign into a Microsoft account that has a digital license during the setup process, you should activate Windows now to access all its functions.


Head to Settings > Update & Security > Activation to check if you’ve activated Windows yet. If you have, you’re all set. If not, you’ll either need to sign into your Microsoft account or enter a license key.


Windows 10 Activation Menu


See our full guide to Windows activation to learn more. You can use Windows 10 without activation, but there are a few limitations.

3. Update Your Drivers

update drivers in device manager


Device drivers are special software that allow Windows to properly communicate with your computer’s hardware. These are usually provided by hardware manufacturers, but like most software, aren’t always perfect. Sometimes they’re buggy or don’t get updates for compatibility with the latest versions of Windows.


You don’t need to keep a close eye on most types of drivers—generally, if they’re working, you don’t need to risk breaking something by updating them. But when you’re first setting up Windows, installing the right drivers is an important step. Windows will install generic drivers for devices like keyboards and mice on its own, but you should know how to install other important drivers that do need semi-regular updates.


See how to find and replace outdated drivers for instructions. If you’re wondering what drivers to install after installing Windows 10: prioritize graphics drivers, chipset drivers, and anything for special hardware that you rely on.

4. Install Essential Windows Software

Windows 10 comes with basic apps for many purposes, but a lot of the best Windows software isn’t pre-installed. We’ve written a full guide to the Windows software that everyone should install right away. Take a look at that list for our recommendations in categories like browsers, security, image editing, messaging, and more.


Whether you’ve just started using Windows 10 or did a full reset, your experience will be a lot better with the right tools at your disposal.

5. Change Default Windows Settings

Windows 10’s out-of-the-box settings aren’t optimal for everyone. They’re usable, but you’ll probably have a better experience by tweaking them. Since there’s a lot to manage in Windows 10’s Settings app, let’s focus on a few key recommended changes after a Windows 10 installation.

Adjust Default Windows Apps

After you’ve installed your favorite apps, you should set them to open files by default. To change the apps that Windows 10 uses for various purposes, perform the following:


  1. Head to Settings > Apps > Default apps.
  2. Select your preferred apps for each category, including Email, Music player, Web browser, and more.
  3. Below that, click on Choose default apps by file type if you’d like to associate various file types, such as PDF, DOCX, and TXT, with specific programs.
  4. For another view, choose Set defaults by app. Here you can pick an app to see which defaults it currently has and which ones it can use.


Windows Change Default Browser List


See our guide to setting defaults in Windows 10 for more help with this.

Disable Unnecessary Startup Items

Many apps set themselves to run at startup, which is a waste of resources and makes your computer take much longer to boot up. After you’ve installed your desired software, you should make sure that only approved apps run at boot.


To disable unnecessary startup items in Windows 10:


  1. Open the Task Manager with Ctrl + Shift + Esc, or by right-clicking on the taskbar and choosing Task Manager.
  2. Click More details to switch to the full view, if needed.
  3. Switch to the Startup tab.
  4. Right-click on every app you don’t want to start automatically and select Disable to prevent it from launching on startup.


taskmanager windows startup

Optimize Power Plan Settings

Windows 10’s power settings allow you to tweak various aspects of the operating system that involve power usage. This is important to help laptop users save battery life, but has useful performance-related settings that apply to desktop users too.


You can tweak your power plan using these steps:


  1. Head to Settings > System > Power & sleep.
  2. On the right side, choose Additional power settings to open the Power Options section of the Control Panel. If you don’t see this link on the right, increase the Settings window’s horizontal size and it should appear.
  3. You’ll see several plans to choose from, including Balanced, Power Saver, and High performance. Select the plan you want, then click Change plan settings to the right to modify it.
  4. Choose the amount of time that passes before the screen turns off and the computer goes to sleep. Then click Change advanced power settings for more options.
  5. While you can review everything here, pay special attention to the settings under the Hard disk, Sleep, Power buttons and lid, Processor power management, and Display categories.
  6. Click OK to save your changes.


windows 10 custom power plan sleep


See how to use Windows power plans to save battery on your laptop to learn more.

Tweak Privacy Settings

Windows 10 collects all sorts of information about how you use the operating system. This helps Microsoft improve its ever-evolving product, but many view it as an invasion of privacy. Thankfully, you can reduce or disable a lot of the telemetry functions.


Follow our guide to disabling telemetry in Windows for help with this.

Enable Night Light

Windows 10 Night Light Options


Windows 10 includes a built-in feature that makes your screen display warmer at night. This helps reduce the blue light that keeps you awake and makes your computer less harsh on your eyes when working late.


You can enable this by visiting Settings > System > Display. Enable the Night light slider and click Night light settings to change how it works. You can adjust the intensity of the effect and set it to run automatically from sunset to sunrise, or during certain hours of your choice.

6. Set Up a Windows Backup Plan

Selecting the Go to Backup and Restore (Windows 7) option in Windows


You wouldn’t want to go through all these Windows setup steps only to have your computer ruined by a malware infection or dead hard drive. It’s vital to back up your data to protect it from these and other dangers.


Consult our Windows 10 backup guide to learn easy ways to back up your computer without much hassle.

7. Configure Microsoft Defender

Microsoft Defender Quick Scan


Microsoft Defender, the built-in antivirus for Windows 10, is good enough for most people. From the moment you start using Windows 10, it protects your PC from all sorts of threats. But it’s smart to review how it runs and make changes to increase your computer’s resistance to threats.


See our overview of Microsoft Defender to get the most out of the tool.

8. Personalize Windows 10

Windows 10 Set Wallpaper Slideshow


While it’s not as important as the above steps, you should still take some time to customize your desktop after installing Windows 10. It’s amazing what a fresh wallpaper, unique mouse cursor, and other small personalization tweaks can do to make your system feel like home.


You have plenty of options for this. For some quick changes, we’ve shown how to change the look and feel of Windows 10. To get more in-depth, try some of the best tools to customize Windows 10.


Now you don’t have to wonder what to do after installing Windows 10. We’ve looked at the essential things to do with a fresh Windows 10 installation so your system is ready for everyday use. While you might still have to make small tweaks here and there, the initial setup is most of the work.

The Best RGB Mousepads of 2024

A mousepad helps you reduce the chance of your mouse picking up weird irregularities on your desk surface that disrupt its functions. However, the benefits of a good mousepad don’t have to stop at function. There’s always room for some pizzazz, too, and if you’re looking for a gamer aesthetic, you can add a touch of style and color with an RGB mousepad.


Corsair

A good mousepad feels even, but a great mousepad feels like you’re gliding on ice. With the Corsair MM700 RGB, you’re not only adding flair to your setup but elevating your gaming experience to the next level as well.

The Corsair MM700 RGB features a silky smooth, glide-enhanced woven textile surface that makes flicks and sweeps feel fluid. It’s the kind of control you want over your mouse if you frequently engage in competitive play. The anti-slip rubber base underneath also keeps everything in place when games get wild.

Performance aside, the Corsair MM700 RGB brings style and utility to the table. In the top-right is the button that allows you to cycle through multiple RGB color profiles, along with the option to make your own with Corsair’s iCue software. The button also doubles as a USB hub, so if you have a wired mouse or headset, you have two conveniently placed USB ports right there.

Corsair MM700 Tag

Corsair MM700 RGB Extended Cloth Gaming Mouse Pad

Best Overall

$50 $60 Save $10

The Corsair MM700 offers ample space for your mouse while still being wide enough for a full-sized keyboard. To keep everything stable and smooth, it also has a thick, anti-skid rubber base.

Pros

  • Large enough for a full-sized keyboard and mouse
  • Features two USB ports with passthrough
  • Mouse glides wonderfully on the surface

KTRIO RGB Large Gaming Mouse Pad
KTRIO

Building a PC isn’t cheap, even on a budget, and you might cut a few corners—like opting for a mediocre mousepad. Instead, consider the KTRIO RGB Gaming Mousepad, which is both budget-friendly and an excellent candidate for upgrading your setup.

The KTRIO RGB Gaming Mousepad is massive, measuring 31.5 x 11.8 inches. That’s plenty of surface area for accommodating full-size keyboards, and you still have room to sweep and flick your mouse.

Best of all, the KTRIO RGB Gaming Mousepad is surprisingly durable. The edges are nicely stitched to reduce fraying over time, which is great for longevity. While the surface has a small amount of friction, strictly for control, it’s ultimately a very smooth experience. It also features a spill-proof coating, so liquids will bead for easy cleanup instead of soaking into the fabric right away.

KTRIO RGB Large Gaming Mouse Pad Tag

KTRIO RGB Large Gaming Mouse Pad

Best Budget

The KTRIO RGB Large Gaming Mouse Pad is what you need when size and RGB are all you really want. Its surface is also quite smooth, and it is water-resistant.

Pros

  • Water-resistant coating
  • Rubber base gets a nice grip on the desk
  • Quality stitching around the edges
Cons

  • Stains are tough to get out

Thermaltake Argent MP1 RGB Mousepad
Thermaltake

Are you a competitive gamer? Whether you’re knee-deep in the trenches of PVP or just dabble ever so often, you want every advantage you can find. The Thermaltake ARGENT MP1 is one such advantage packaged in a sleek design.

The Thermaltake ARGENT MP1 won’t fold on you or drag your mouse down, and this is all thanks to its—rather large—plastic surface. You’ll ultimately have a greater deal of control over minute movements, which is the exact kind of advantage competitive players like to adopt.

The Thermaltake ARGENT MP1 also simply looks good. The dark finish against gun-metal gray looks great as it rounds along the top. Despite being thin, it’s exceptionally rigid. The cherry on top is the 20 customizable RGB zones that can be programmed with different effects, like breathing or solid.

Thermaltake Argent MP1 RGB Mousepad Tag

Thermaltake Argent MP1 RGB mousepad

Most Durable

The Thermaltake Argent MP1 RGB Mousepad foregoes cloth for aluminum and a hard surface. Its durability is on par with its performance.

Pros

  • Strong, rugged construction
  • Hard surface greatly reduces friction
  • Great deal of space to move
Cons

  • Needs plenty of surface real estate

HyperX Pulsefire 4S7T2AA Gaming Mouse Pad
HyperX

When you want a massive mousepad covering as much as possible, with durability and performance to boot, the HyperX Pulsefire Mat is the perfect choice.

Measuring 35.4 inches in width and 15.2 inches deep, you need quite a bit of desk real estate to accommodate such a gargantuan mousepad. To put that in perspective: there’s enough space for a mouse and full-sized keyboard, and you still have room to spare. I highly recommend measuring your desk to ensure it fits.

The size of a mousepad isn’t worth much if it falls apart. Thankfully, the HyperX Pulsefire Mat is relatively thick, with anti-fray stitching lining the edges. The densely woven cloth surface is particularly durable while simultaneously creating a playing field that feels more like a skating rink. It strikes a premium balance between control and speed.

HyperX Pulsefire 4S7T2AA Gaming Mouse Pad Tag

HyperX Pulsefire Mat

Best for Big Desks

The smooth, precision surface of the HyperX Pulsefire Mat is perfect for those who play a myriad of genres. The RGB software is also incredibly easy to use, not to mention the bonus of a conveniently placed RGB button.

Pros

  • Smooth, precision surface
  • Anti-fray stitching
  • All the space you’ll ever need

ASUS ROG Balteus Qi Vertical Gaming Mouse Pad
ASUS ROG

If you’ve finally made the jump to a wireless gaming mouse, then you’re already aware that it needs to recharge at some point. To prevent an untimely shutdown and enrich your desk with RGB, the ASUS ROG Balteus Qi is a no-brainer.

Placed conveniently in the top-right corner, the ASUS ROG Balteus Qi features wireless charging for Qi-compatible devices, delivering up to 10 watts of power. And yes, this also works for any Qi-compatible smartphone.

For style, the ASUS ROG Balteus Qi comes with 15 RGB zones. Through ASUS’ Armoury II software, you can leave the colors up to one of nine preset options or get fancy and adjust the colors and brightness yourself. Even in well-lit rooms, the RGB has no problem showing off.

ASUS ROG Balteus Qi Vertical Gaming Mouse Pad Tag

ASUS ROG Balteus Qi

Best for Wireless Devices

The ASUS ROG Balteus Qi foregoes fabric for a harder, textured surface that greatly reduces friction. It also has a conveniently placed Qi charging zone.

Pros

  • 10W Qi charging
  • Hard, low-friction surface
  • USB passthrough
Cons

  • Slim pickings for Qi-compatible mice

FAQ

Q: What does RGB stand for?

RGB stands for Red, Green, and Blue. RGB lighting is used in gaming as this combination of colors allows you to make over 16 million other color combinations.

Q: Can you wash an RGB mousepad?

You can clean an RGB mousepad with a wet wipe if you want to ensure it stays nice and clean. Just be careful not to get any of the cleaning fluid from the wipe onto any of the electrical components.

Anything wetter than a wet wipe is not generally recommended due to the risk of liquid seeping into the border of the mousepad.

Q: Why do so many gaming accessories have RGB?

Gamers love RGB lighting as it provides an appealing visual backdrop for their gaming setup, and enhances their overall experience when gaming.

Q: Does RGB cause any input lag or performance?

Generally speaking, RGB lighting won’t adversely affect your PC’s performance. However, if your setup is quite RGB-heavy, there is a chance that this might put some strain on your CPU, which could result in some input lag.

The Best Nintendo Switch Controllers of 2024

If you’re a Switch owner, there’s a great range of wired and wireless controllers out there that can offer you a whole host of gameplay improvements. With six-axis motion controls, rumble functions, mappable button functions, turbo modes, and even LED light displays, you can customize your look and your play style.


A Nintendo Switch Pro Controller on a table
Corbin Davenport / MakeUseOf

Taking into consideration quality, performance, and features, the Nintendo Switch Pro Controller takes the crown. If you’ve used PlayStation or Xbox controllers, you’ll be surprised by how comfortable the Pro feels in your hands.

It comes down to the Nintendo Switch Pro Controller’s button layout. The triggers and face buttons are larger, which is far better, especially if your hands feel cramped using Joy-Cons. It also has an actual D-pad as opposed to the separate directional buttons. The textured grip is the cherry on top.

The Nintendo Switch Pro Controller is also one-for-one with Joy-Cons as far as features go. You still get Amiibo support, motion controls, an NFC reader, and HD rumble. And the semi-transparent style is a nice touch!

switch pro controller

Nintendo Switch Pro Controller

Best Overall

If you prefer a traditional controller, the Nintendo Switch Pro Controller is the next best thing. It has all the same built-in features as the Joy-Cons, excluding splitting into two halves.

Pros

  • Better for long gaming sessions
  • All curves and no sharp angles
  • Perfect replacement if you find the Joy-Cons too small
  • Semi-translucent design is a treat to the eyes
Cons

  • Name brand comes with a premium cost

PDP REMATCH Enhanced Wired Nintendo Switch Pro Controller being held
PDP

If you’re after a handheld controller for your Switch, don’t want to spend a fortune, and don’t care about it being wireless, the PDP Rematch Wired Controller is practically perfect in every way.

This controller is officially licensed by Nintendo and has a cool black and lime green mushroom design that glows in the dark. There are two programmable back paddle buttons, which you can remap button functions to. You can also customize the look of the controller with interchangeable faceplates and thumbsticks.

Volume controls are easy to adjust using the D-pad, and there’s a port for a 3.5mm audio jack so that you can enjoy superior audio with your favorite wired headphones. This lightweight wired controller looks and feels great and is an affordable alternative.

PDP Rematch

PDP REMATCH Wired Controller for Nintendo Switch

Best Budget

$25 $28 Save $3

If you rarely play your Nintendo Switch docked, the PDP Rematch Wired Controller is the most obvious option. It’s comfortable, lightweight, and has a great design that matches the console.

Pros

  • Fun glow-in-the-dark design
  • Lightweight and comfortable to use
  • Officially licensed
  • Headphone port
Cons

  • Not wireless
  • No mappable buttons

super mario themed powera enhanced wireless controller for nintendo switch
PowerA

A wireless controller that’s as vibrant and colorful as the game series that it’s inspired by, the PowerA Enhanced Wireless Controller Mario Pop lets you wear your Mario-loving heart on your sleeve every time you turn on your Switch.

There are two mappable back buttons here that can be used to reassign trigger functions to allow for more intuitive gameplay, and there’s also motion control support. You’ll enjoy a whopping 30 hours of gameplay on a full charge, and a 10-foot USB-C charging cable is also included.

Boasting one of the most colorful designs we’ve seen on a Switch controller, this Mario Pop wireless controller satisfyingly conveys everything that Nintendo is about: endless fun.

powera enhanced

PowerA Enhanced Wireless Controller for Nintendo Switch – Mario Pop

Best for Battery Life

When fully charged, the PowerA Enhanced Wireless Controller offers 30 hours of fun. The extra buttons at the back and the colorful finish are also a welcomed addition.

Pros

  • Joyous Mario-themed design
  • Mappable back buttons offer limited customization
  • Very good battery life
Cons

  • A few more customization options would be good

Best Nintendo Switch Controller for Customization: GuliKit KingKong 2 Pro

white gulikit kingkong 2 pro controller alongside packaging, usb cable and case
GuliKit


The GuliKit KingKong 2 Pro Wireless Controller is a third-party controller that has some neat features to give your gameplay a boost. The KingKong 2 Pro supports motion sense, letting you tilt and or shake the controller for movement. It also has an autopilot function that can record various button presses and repeat them automatically, which is useful for farming items in-game.

Hall effect sensing joysticks act to prevent any drifting or dead zone issues, using magnetic sensors to provide greater accuracy as well as durability. The controller also has an FPS mode, which can be used to allow you to adjust the sensitivity of the joysticks for tighter gunplay.

An NFC sensing function is built-in, and there’s also a one-key wake-up for your Switch console once it has been paired with the King Kong 2 Pro. Additionally, an interchange function allows for a recalibration of the A-B X-Y button functions to suit your gaming preference.

gulikit

GuliKit KingKong 2 Pro Wireless Bluetooth Gamepad

Most Customization

$70 $80 Save $10

If you have felt the sting of controller drift before, the GuliKit KingKong 2 Pro Wireless Bluetooth Gamepad will help you forget the past with its hall-sensing joysticks. It also offers a great set of customization options for tweaking your gaming experience.

Pros

  • No drift joysticks
  • Customizable settings
  • Dedicated FPS mode
  • Good battery life
Cons

  • Triggers may be a little oversensitive

black colored Hori Split Pad Pro attached to a nintendo switch
HORI

The HORI Nintendo Switch Pad Pro is the perfect controller for Switch gamers who lean towards the handheld style of gameplay. Acting like a supersized Joy-Con, this slide-on controller set offers a full-size handheld experience, making your gameplay more immersive.

Featuring a larger and more comfortable grip, as well as larger buttons, triggers, analog sticks, and a D-pad, this feels good to hold. It has assignable rear trigger buttons which offer a small amount of customization, and there’s a Turbo function, too, where you can program rapid button presses in various increments per second.

It doesn’t support motion control, and there’s no HD rumble either. However, if you’re looking for a better handheld experience while gaming on your Switch, this is a great way to do it.

hori controller

Hori Nintendo Switch Split Pad Pro (Blue)

Best Joy-Con Replacements

$42 $50 Save $8

With the Hori Nintendo Switch Split Pad Pro, you can take the experience of a full-sized controller anywhere. It also has several handy features, such as Turbo buttons and mappable rear triggers.

Pros

  • Larger and more comfortable grip
  • Rear triggers can be mapped
  • Turbo function to minimize button presses
  • Cool blue design
Cons

  • No motion control
  • Cannot be used separately like regular Joy-Cons

FAQ

Q: Can I use a third-party controller with the Nintendo Switch?

Yes, you can. In fact, most of the controllers featured in our list are third-party controllers, and they work perfectly. Depending on the third-party controller, it’ll either work as soon as you plug it in or after you’ve attached an adapter.

Q: Can I use a PS5 controller on the Nintendo Switch?

Yes, but it involves using an adapter. If you prefer a slimmer, more traditional controller, you can easily connect PS4 and PS5 controllers to the Nintendo Switch.

Q: Can a pair of Joy-Cons be used as separate controllers?

Indeed, they can. It doesn’t work for every game on the Nintendo Switch, but many of Nintendo’s first-party titles can be played with a single Joy-Con, like Mario Kart 8 Deluxe.

Q: Are Joy-Cons still susceptible to stick drift?

Unfortunately, yes. The good news is that you can send your Joy-Cons to Nintendo for a free repair, even if your system’s warranty has expired. However, if you’re a tech-savvy individual, you can always fix Joy-Con drift yourself.

The Best Apple Watch Ultra Bands of 2024

With a larger 49mm screen, a rugged design, and a more efficient battery, the Apple Watch Ultra takes the wearable lineup in a unique new direction. And to complement your Apple Watch Ultra, you will want to choose one of the best Apple Watch Ultra Bands to show off your smartwatch in style.


Justin Duino / MakeUseOf

The Apple Watch Alpine Loop is tailor-made to match the rugged Apple Watch Ultra. Made with two textile layers that are woven together in one continuous piece, there are no stitches. That makes the band very comfortable to wear, no matter the condition. A titanium G-hook, made to match the Apple Watch Ultra, attaches to one of the open spots on the strap for a secure fit.

You can select from one of three different strap sizes—small, medium, or large—for the best fit, and there’s a choice between green, orange, starlight, olive, blue, and indigo bands as far as color options go. The Alpine Loop for your Apple Watch Ultra is a great choice with its rugged looks and comfortable fit that makes it perfect for the outdoors and pretty much anywhere else.

Apple Watch Alpine Loop Tag

Apple Watch Alpine Loop

Best Overall

The Apple Watch Alpine Loop is a premium wristband that offers plenty of comfort and is rugged enough for every type of activity.

Pros

  • Available in six colors
  • Three sizes for different wrist sizes
  • Tough and durable
Cons

  • G-hook might scratch other metal items

Spigen Lite Fit Ultra Band
Spigen

The Spigen Lite Fit Apple Watch Band proves you don’t have to break the bank to find an Apple Watch Ultra strap. Available in khaki, navy, black, and orange, the stylish strap is also lightweight and flexible, so it will always be comfortable on your wrist.

For the best possible fit, there is an adjustable loop band on the outside of the strap. And, while the Spigen Lite Fit sits flush and sleek around your wrist, the breathable nylon design means comfort all day long. Along with an affordable price tag, the Spigen Lite Fit has easy adjustments, all the comfort you could ask for, and a design that makes you excited about donning your Apple Watch.

Spigen Lite Fit Ultra Band Tag

Spigen Lite Fit Apple Watch Band

Best Budget

Lightweight and flexible, the Spigen Lite Fit Apple Watch Band is still one of the best budget options for the Apple Watch Ultra.

Pros

  • Inexpensive compared to many other options
  • Fits flush on your wrist
  • Four color options

The Best Apple Watch Ultra Band for Water Sports: Apple Watch Ocean Band

Apple Watch Ultra with the Ocean Band laying on a table
Justin Duino / MakeUseOf

As you can guess by the name, the Apple Watch Ocean Band is perfect for any water activity. It’s made with a stretchy material that will wrap around your wrist for a great fit, and the completely waterproof band has small tubes that send water away from your wrist.

An adjustable titanium buckle can be placed in a specific tube to help you customize the best fit. While there is only one size available, there is an optional extension you can also purchase to help with wearing the watch over thick wetsuits. You can take your pick from three colorways: midnight, white, or yellow.

While the Apple Watch Ocean Band is perfect for water activities, the elastomer material is comfortable around your wrist, and the adjustable buckle makes it a great pair for the Apple Watch Ultra any time.

Apple Watch Ocean Band Tag

Apple Watch Ocean Band

Best for Water Sports

The Apple Watch Ocean Band is waterproof, featuring integrated tubes around the strap that funnel water away from your wrist and make it a perfect companion for various water sports and activities.

Pros

  • Completely waterproof
  • Optional extension is designed to fit over wetsuits
  • Compatible with other Apple Watch models

Apple Watch Ultra with the Trail Loop laying on a table
Justin Duino / MakeUseOf

There’s no denying the Apple Watch Trail Loop’s quality. Fashioned with a soft double-layer nylon weave, it’s both comfortable and robust. It features a convenient pull tab on the band, which allows for quick adjustments to be made on the fly.

Introduced with the first-generation Apple Watch Ultra, the Trail Loop fits your smartwatch like a glove and is also compatible with older Apple Watch models. It’s available in small/medium and medium/large sizes, with both offering plenty of room for adjustment. The velcro feels strong and durable, and the band itself is fast-drying and easy to clean. This is a premium quality wristband that will show off your Apple Watch Ultra splendidly.

Apple Watch Band Trail Loop Tag

Apple Watch Band Trail Loop

Most Comfortable

The Apple Watch Band Trail Loop offers lasting comfort and stability with a double-layer nylon weave and strong velcro fastening.

Pros

  • Smooth and comfortable to wear
  • Velcro fastening is strong and durable
  • Quick drying and easy to clean

Nomad Metal Band
Nomad

If you’re looking for something to make your Apple Watch Ultra a bit dressier and don’t mind paying top dollar, this Nomad Metal Band will be up your street. Made from high-grade stainless steel, it instantly turns your smartwatch into formal wear, making it the ideal accessory for meetings, formal events, or networking.

While designed for the 45mm Apple Watch models, this metal band works perfectly with the Apple Watch Ultra. A diamond-like carbon coating makes it durable and highly resistant to staining and offers a decent amount of scratch resistance. It feels satisfyingly heavy on the wrist without ever being uncomfortably so.

The band offers a secure fit, with a strong magnetic clasp that stays put. Adjustments can be made by removing or adding links to achieve the perfect fit, and the overall style here oozes quality.

Nomad Metal Band Tag

Nomad steel band

Best Metal Band

With its sleek and sophisticated looks, the Nomad Steel Band is ideal for turning heads at formal functions.

Pros

  • Highly polished look
  • Can be worn as a dress watch
  • Surprisingly durable

FAQ

Q: What’s the difference between the Apple Watch and Apple Watch Ultra?

The Apple Watch Ultra has a larger display than the Apple Watch (49mm, compared to 41mm or 45mm) and is made from Titanium, making it stronger than the Aluminum and stainless steel blend of the Apple Watch.

It also has a brighter display, with 2,000 nits brightness, compared to just 1,000 nits on the Apple Watch. Additionally, it also boasts improved safety features, such as a built-in siren, a 100-meter water resistance (double that of the Apple Watch), and a greatly improved battery life.

Q: Can I use an Apple Watch band on the Apple Watch Ultra?

Yes, you can use an Apple Watch band on an Apple Watch Ultra, provided that the sizes are compatible with one another. As long as the case size corresponds with the strap size, you’re good to go.

Q: What’s the difference between the Apple Watch Ultra and the Apple Watch Ultra 2?

The Apple Watch Ultra 2 improves many of the features of the Apple Watch Ultra, such as its brightness, which maxes out at 3,000 nits, compared to 2,000 nits on the Apple Watch. It also boasts more processing power, improved storage capacity, and additional input features, such as the Double Tap gesture function.

Q: Can I use an Apple Watch Ultra band on the Ultra 2?

Most Apple Watch Ultra bands will work on the Apple Watch Ultra 2, as long as the strap size and case size are both compatible.

Q: Can I use an Apple Watch without an iPhone?

Apple watches are designed to be used with an iPhone, and pairing the two together is the best way to ensure that you’re able to enjoy the full range of functionality that this provides.

However, with the Family Setup feature, a family member can use an Apple Watch even if they don’t have their own iPhone. This will enable them to use limited features on their Apple Watch, such as making calls, sending messages, or sharing their location.

How to Create and Share Lists in Google Maps

Do you struggle to keep track of all your favorite places and locations you’ve visited in Google Maps? You can use the lists feature to get organized. Whether you use an iPhone or Android device, we’ll help you get started with Google Maps lists.


What Are Lists in Google Maps?

Lists in Google Maps are locations you save in bundles. You can think of a list as a folder for storing a set of places. Google Maps offers a few lists by default, which include Favorites, Want to go, Travel plans, Labeled, and Starred places.

However, in addition to these, you can create new lists and add your desired locations to them. You can access your lists in the Saved tab of the Google Maps app.

How to Create Lists in Google Maps

To create lists in Google Maps, open the app and tap the Saved icon at the bottom of the screen. Tap + New list and select an icon, name, and description for the list. You can choose from one of your favorite emojis for the icon to make each list stand out.

You can also set it to Private or Shared. Once you’re done, tap Save in the top-right corner. The list will now show up under Your lists. You’ll also see it when you try to add a location to a list.

How to Add Locations to Lists

Once you’ve created a list, adding locations to it is easy. This also applies to locations you might find when browsing Google Maps on your PC. Follow these steps:

  1. Search for and find the location in question in Google Maps.
  2. Tap Save. If you can’t find it easily, like in our screenshot below, scroll to the right.
  3. Select the list(s) you want to add the location to and tap Done in the top-right corner.

Alternatively, you can add locations by selecting the list itself. Head to the Shared tab, select the list you want to add locations to, and tap Add.

If you want to remove a location from your list, tap the three dots next to the list and choose Edit list. Then tap the X button next to the name of the place.

How to Share Lists in Google Maps

By default, all lists are private unless you change the list type while creating one. If you want to make a list public for anyone to see, tap the three dots at the right of a list and tap Share list.

If you’re trying to share a private list, you’ll get a pop-up clarifying that anyone with the link can access your list. Tap Continue and select one or more of your contacts. Alternatively, you can copy the link to the clipboard and paste it wherever you want.

On the other hand, if you want to stop sharing a Google Maps list, tap the three dots next to the list and choose Sharing Options. Then, select the Private list type on the next screen.

List sharing is a fantastic way to keep loved ones in the loop for various occasions. You could use it to share your favorite lunch spots with your colleagues or introduce your city to visiting tourists. This, alongside other advanced Google Maps features, makes it the ultimate travel companion.

The Best USB Hubs for the PS5 in 2024

Whether you’re a casual gamer or a competitive pro, the four USB ports on the PS5 can fill up quickly if you’re using a lot of peripherals. Luckily, you can expand the connectivity options with a USB hub for the PS5 and supercharge your gaming experience.


Anker USB hub with four USB A ports
Jason Fitzpatrick / MakeUseOf

The Anker Ultra Slim 4-Port USB 3.0 Data Hub is arguably the best USB hub for anyone with a PS5. It connects to one of the USB-A ports on the console and offers four regular USB-A ports that you can use to connect different PS5 accessories, so you no longer have to constantly switch out devices.

It supports 5Gbps speeds instead of 10Gbps as with the PS5’s USB ports, but it’s not a dealbreaker since most PS5 accessories don’t require USB 3.2 Gen 2 speeds. Only SSD external drives can take full advantage of 10Gbps, but Sony recommends you connect them directly to the console.

The build quality is solid, and it comes with a relatively long (2ft) cable, giving you a lot of flexibility on where to place the hub on your desk. While it’s not powered, this hub can charge your controllers and headsets as long as the console is on.

The Anker Ultra Slim 4-Port USB 3.0 Data Hub

Anker Ultra Slim 4-Port USB 3.0 Data Hub

Best Overall

$10 $18 Save $8

The Anker Ultra Slim 4-Port USB 3.0 Data Hub is a simple, no-frills USB hub that can transform a single USB-A port on your PS5 into four, allowing you to connect more peripherals.

Pros

  • Four 5Gbps USB-A ports
  • Excellent quality from a reliable brand
  • Good cord length
  • Great price
Cons

  • Not ideal for charging multiple devices

The IQIKU PS5 USB Hub attached to the PS5.
IQIKU

The IQIKU PS5 USB Hub is an excellent add-on for PS5 owners with multiple accessories. Designed specifically for the PS5, the hub fits right onto the console’s front USB ports, allowing you to connect up to four USB-A devices and one USB-C device seamlessly and charge a controller or headset.

The hub supports USB 2.0 speeds but works fine with headsets, keyboards, game controllers, and speakers. Additionally, the fast charging port makes charging your controller a breeze. The only downside is that it doesn’t work with the PSVR unit or camera because of the lower bandwidth, but you can plug those into the free ports at the back. The build quality is impressive, especially considering the affordable price tag, and it has a sleek black-and-white design that complements the PS5’s aesthetic.

The IQIKU PS5 USB Hub

IQIKU PS5 USB Hub

Best Budget

Craving a clutter-free PS5 setup? This sleek IQIKU USB hub plugs right into the console’s front ports, expanding your options with four USB-A slots and a lightning-fast USB-C port, all without creating a tangled mess.

Pros

  • Affordable
  • Mix of both USB-A and USB-C ports
  • Can charge controllers
  • PS5 aesthetic
Cons

  • Slow USB 2.0 speeds
  • Only one port supports charging

The Anker 7-Port USB 3.0 Hub on a purple background.
Anker

If you require more ports and reliable charging power, the Anker 7-Port USB 3.0 Hub is a game-changer. This powerhouse hub boasts a staggering seven USB ports, letting you connect all your gaming essentials and more, from controllers and headsets to keyboards and USB microphones.

Powering the hub is a beefy 36W power adapter that ensures rock-solid performance even with multiple devices plugged in. Plus, one dedicated port delivers up to 2.1A charging power, enough to keep your phone, tablet, or controllers charged and ready to go.

While it supports slower 5Gbps speeds, it is more than enough for most gaming accessories. Additionally, you can always plug demanding devices into the free 10Gbps ports on your PS5. The rest of the hub is well-built and compact, and it has a detachable host cable for easy storage.

The Anker 7-Port USB 3.0 Data Hub

Anker 7-Port USB 3.0 Hub

Best for Charging

$45 $50 Save $5

The Anker 7-Port USB 3.0 Hub can accommodate all of your PS5 accessories with its seven high-speed ports and delivers reliable charging for controllers and high-powered devices like phones.

Pros

  • Seven USB ports for ultimate connectivity
  • Reliable performance
  • High-speed charging

The StarTech.Com 4-Port USB-C 10Gbps Hub on a purple background.
StarTech

The StarTech.Com 4-Port USB-C 10Gbps Hub offers a lot of features that make it stand out from the competition, particularly its support for USB 3.2 Gen 2 transfer speeds of up to 10Gbps. It adds four more SuperSpeed USB ports to the console, which Sony recommends to connect PS5 accessories like the HD Camera and PSVR2.

Another standout feature of this hub is that it comes with an external power supply. Whether you want to connect multiple high-powered accessories or charge your devices, this hub will have you up and running in no time. Thanks to the always-on fast-charging port, you can continue charging your accessories even when the PS5 is powered off.

While it may come at a higher cost than other hubs, it offers a bit of everything for serious PS5 gamers, with a mix of both USB-C and USB-A ports, faster 10Gbps speeds, and the ability to charge connected accessories. It also comes with a removable USB-C cable and a universal power adapter, making it ideal for use on the go.

The front panel of the StarTech.com 4-Port USB C Hub.

StarTech.com 4-Port USB-C 10Gbps Hub

Best for Speed

Packing four blazing-fast SuperSpeed USB 3.2 Gen 2 (10Gbps) ports, this compact, powered hub from StarTech.Com is ideal for charging and powering demanding accessories like the PSVR2 without breaking a sweat.

Pros

  • High-speed 10Gbps ports
  • Connects both USB-C and USB-A peripherals
  • Fast charging
  • Detachable cable

The UGREEN 10Gbps USB-C Hub
UGREEN

While the new PS5 Slim gives you an extra USB-C port, the standard model may leave you wanting more. The UGREEN 10Gbps USB-C Hub comes in handy, allowing you to connect multiple USB-C gaming accessories to your console, including wireless headphones, controllers, and more.

Sleek and powerful, this hub transforms a single USB-C port into two, along with two bonus USB-A ports, significantly expanding your accessory options. What makes it even better is its lightning-fast 10Gbps speeds, ensuring zero performance dip compared to connecting your gadgets directly.

The UGREEN 10Gbps 4-Port USB-C Hub

UGREEN 10Gbps USB-C Hub

Best USB-C Hub

$20 $30 Save $10

The UGREEN 10Gbps USB-C Hub is an excellent option if you want to expand your PS5 with both USB-C and USB-A ports. While it doesn’t support charging, it more than makes up for it with faster transfer speeds.

Pros

  • Both USB-C and USB-A ports
  • Faster USB 3.2 Gen 2 (10Gbps) speeds
  • Premium design with a durable cable
Cons

  • Won’t charge power-hungry devices

FAQ

Q: Do USB hubs work on the PS5?

Yes, USB hubs work perfectly on the PS5, offering a great way to expand your connection options beyond the four measly ports that come with the console.

Q: Are USB hubs good for gaming?

Yes, you can use a USB hub to connect various gaming accessories to your PS5, including keyboards, headsets, racing wheels, and more. However, we recommend a USB 3.0 hub or faster for reliable performance.

Q: Will a USB hub work with the PSVR2?

Sony recommends connecting the PSVR2 to the front USB-C port on the PS5, but you can also use a powered USB-C hub with at least 10Gbps speeds.

5 Ways to Fix the “Access Denied” Error on Windows 11

Key Takeaways

  • The “Access Denied” error on Windows 11 indicates a lack of permissions. Check system permissions and grant full control to your user account.
  • Make your account the computer’s administrator to fix Access Denied errors. Set the account to an admin in User Accounts settings to gain access.
  • You can also enable the hidden Administrator account in Windows 11 for unrestricted access to files and folders. Switch to this account to bypass severe access problems.


When you encounter the “Access Denied” error in Windows 11, it can feel like you’re being locked out of your own computer. While having trouble accessing your files, directories, and folders is frustrating, don’t panic—with a few simple tweaks, you can regain access to your system.


Why Are You Getting the “Access Denied” Error?

The Access Denied error is a common issue on Windows systems that indicates you don’t have permission to view a file or folder. This is because your system has not granted access to that directory for the user account you’re currently using. Simply put, you’re using an unauthorized account to access paths, folders, and files on your computer or external drives from other computers.

In some cases, ownership issues and file encryptions can also lead to this error. It’s also possible that your third-party antivirus software has prohibited access. Some programs can mistake a genuine setup wizard as a threat—usually a false positive detection.

Below are some common fixes for the Access Denied error on Windows 11.

1. Check the Filesystem’s Permissions

This is a simple solution you can try to ensure your account has the proper access to the file or folder you are opening:

  1. Locate the file, folder, or directory you are trying to access. Right-click on it and choose Properties from the menu.
  2. Go to the Security tab and click the Edit button.

  3. Choose your username from the list and check the box beside Full control in the Allow column under the Permissions for User section. Then, click OK.
    A screenshot showing the settings for changing permissions for users

Note: If your username is not on the list, you have to add it manually and then change its permissions.

You can also try restoring the default permissions using the icacls command in Command Prompt. Resetting permissions with icacls can help resolve access issues caused by changes to the default permissions.

2. Set Your Account to Administrator

In most cases, the Access Denied error can be fixed by making your user account a computer administrator. Here’s how you can set your account to admin:

  1. Press Win + R to open Run. Type control userpasswords2 and click OK.
  2. On the User Accounts window, check the box beside Users must enter a username and password to use this computer. If this isn’t present, skip this step.
    The users tab displaying users in a computer

  3. Select your account and click the Properties button below it.
  4. Next, go to the Group Membership tab. Choose Administrator from the menu, then click Apply and OK.
    Group membership tab for selecting standard user or administrator account

Now, restart your computer and see if it resolves the problem. Otherwise, move to the next step.

3. Enable the Hidden Administrator Account

Your Windows 11 system has a hidden administrator account with more privileges than a regular account. You can enable this to access files, folders, and paths restricted to regular users—it’s especially helpful if you’re unable to switch your user account from standard to administrator.

  1. Open Windows search by pressing Win + S.
  2. Next, type CMD, right-click Command Prompt, and click Run as administrator.
  3. On the Command Prompt, run the following command: net user administrator /active: yes. This will unlock the administrator account.
    Prompt for enabling the hidden admin account in Windows

  4. Log off the current account and switch to the newly enabled Administrator account. Using this account, you won’t run into access problems, as it has more privileges than a normal admin account.
  5. Once you’re done with the Administrator account, log off and sign into your main account again. Repeat steps 1 and 2, then run this command: net user administrator /active: no. This will disable the Administrator account.

Switching back to your main account will cause the error to appear again. If you need to constantly access the files, use the hidden Administrator account to make the necessary changes to your system and fix the ownership or access issue. You might also consider copying the items to another location your usual account can access.

4. Take Ownership of the File

As mentioned previously, the “Access Denied” error sometimes stems from ownership problems. If this is the cause of the error, taking ownership of the file can instantly give you the access you need:

  1. Locate the folder or file you want to access and right-click on it. Click Properties from the menu.
  2. Go to the Security tab and click the Advanced button.
    Security tab in the Properties tab of a file in Windows

  3. Next, look for the Owner section on the top of the window and click Change. This will open a new dialog box.
    Permissions page for a file in Windows 11

  4. In the Select User or Group window, type your username or Administrators in the Enter the object name field.
    Select user or group tab

  5. Then, click the Check Names and OK buttons to save your changes.
    Select user or group tab for a file

  6. Next, click Apply.
  7. You’ll see a Windows Security prompt. Click OK.
  8. In the main interface, click OK to save changes.

Apart from doing it manually, you can also take ownership of the file using the Command Prompt. Follow the steps below if you prefer typing commands instead:

  1. Open Command Prompt through Windows search by pressing Win + S and typing CMD. Click Run as administrator in the Command Prompt tab from the result.
  2. In the Command Prompt, type or paste the following commands and press Enter after each:
    • takeown /f “path_to_folder”/r /d y
    • icacls “path_to_folder”/grant administrators:F /t

You need to replace the “path_to_folder” section with the path to the inaccessible file or folder. Here’s how you can obtain the path:

  1. Navigate to the file or folder in question.
  2. Right-click it and select Copy as path.
  3. Replace “path_to_folder” with the copied path. For instance, “C:UsersHPDownloadsLiterature review sources”
    Prompt for taking ownership of a file via CMD

Restart your computer once you’re done with the steps above to check if the problem is resolved. But usually, after running these commands, you should regain access to the files and folders.

5. Disable Your Third-Party Antivirus Software

On the off chance that the issue isn’t resolved, consider turning off your third-party antivirus software.

Antivirus software is necessary to protect your system from threats and malicious actors. However, it can cause errors, such as access-denied issues and false positives. For example, many users have reported receiving the “Access Denied” error when attempting to install certain apps, and the main reason ends up being their security program.

To check if this is also your case, temporarily disable your third-party antivirus program and try to access the file or install the program. If the error does not appear, your antivirus software is likely the cause, and you should consider another program to protect your computer. Otherwise, use the Windows 11 built-in security program: Microsoft Defender.

Resolving the “Access Denied” error is straightforward and does not require a lot of technical steps. You can regain control over your files and system by employing a few key strategies. Simply ensure your user account has the necessary permissions and, if needed, elevate your privileges to an administrator level.

The 5 Best Linux Gaming Distros in 2024

Linux isn’t the first operating system that comes to mind for gaming. But while the vast majority of PC gamers use Windows, thanks to platforms like SteamOS, Linux is a growing alternative.


Here are five Linux gaming distros to try.


Linux Gaming in 2024

While the “year of the Linux desktop” may never actually happen, the open source operating system is increasingly prevalent in gaming. The most prominent is SteamOS 3.0, an Arch Linux-based operating system that runs on the Steam Deck handheld.

Our list of the best gaming distros for Linux in 2024 is as follows:

  • SteamOS
  • Fedora Games
  • SparkyLinux Gameover
  • ChimeraOS
  • DraugerOS

Below, we examine these gaming distros in more detail. Download links and minimum system requirements are listed along with each.

Thanks to the Steam Deck, SteamOS has become the most widely used dedicated gaming operating system on Linux.

Developed by Valve, and based on Arch Linux, SteamOS is available in two versions:

  • A dedicated SteamOS 3.0 build for Valve’s Steam Deck portable gaming consoles.
  • As HoloISO, a PC version of the Steam Deck’s operating system.

Note: Older versions of SteamOS for PC and laptop are based on Debian, but do not feature modern drivers, application layers, and other enhancements for running Windows games.

HoloISO is maintained by theVakhovskeIsTaken; no official PC build of SteamOS 3.0 is available.

SteamOS prioritizes your PC or laptop’s resources for games you’re playing, rather than background tasks that a typical desktop OS might favor.

SteamOS is intended to run Steam Deck verified titles (that is, games released for Windows but compatible with the Steam Deck), along with titles published on Linux. Third party games can be installed by switching to desktop mode.

You can interact with SteamOS using most game controllers, or a keyboard and mouse.

HoloISO System Requirements

CPU

64-bit

RAM

4GB

Storage

200GB

GPU

Intel, NVIDIA, or AMD Radeon 8500

Download: HoloISO (Unofficial SteamOS for PC)

2. Fedora Games

Fedora Games spin

The Fedora Games spin is one of the best Linux gaming distros available and ships with a wide variety of games and genres. That’s the reason for the image’s massive 4.1GB size.

The reasoning behind this is that it is big enough to include many games but small enough to fit onto a DVD. You can use Fedora Games as a Live CD or install it on your PC.

Various games ship with Fedora Games. Many of these are open source homages to popular titles, such as Extreme Tux Racer (similar to Mario Kart), Freeciv (a free version of Civilization), Hedgewars (not dissimilar to Worms) and many others.

Fedora Games System Requirements

CPU

2GHz dual-core

RAM

2GB

Storage

15GB

GPU

Integrated graphics

Download: Fedora Games

3. SparkyLinux Gameover—the All-in-One Linux Gaming Distro

Weighing in with a 3.51GB download, the Debian-based SparkyLinux comes preinstalled with the Steam client, Wine, and PlayOnLinux.

SparkyLinux also features APTus Gamer, an easy way to install game console emulators and other tools helpful for gamers. There are emulators for Atari, PlayStation, and Sega systems, among many others.

SparkyLinux also ships with the Lutris gaming platform, which helps you install and manage your Linux games in a unified interface. Using this single interface, you can view all your Linux, Windows, Steam, emulated and browser games.

SparkyLinux distros run on old and new hardware.

SparkyLinux Gameover System Requirements

CPU

64-bit

RAM

256GB

Storage

50GB

GPU

Integrated

Download: SparkyLinux Gameover

4. ChimeraOS

An impressive option for playing games on Linux, ChimeraOS (formerly GamerOS) comes preinstalled with the Steam client, set to Big Picture mode. It also includes Gamescope, the microcompositor found in SteamOS that offers various display enhancements (including upscaling). Along with titles from your Steam library, you can install games from GOG, Epic Games Store, and even Flathub.

ChimeraOS requires zero configuration. Simply install, boot, sign in to your preferred game services, and download the games before playing.

In many ways, it is the complete Linux gaming distro.

ChimeraOS System Requirements

CPU

Dual-core, 2GHz

RAM

4GB

Storage

20GB

GPU

NVIDIA GTX 900 or AMD RX 400 or Intel HD Graphics 500

Download: ChimeraOS

5. Drauger OS

Based on Ubuntu and sporting the Xfce desktop environment and Pipewire audio, Drauger OS has been designed with gaming performance in mind.

Designed “explicitly for gaming,” Drauger OS is maintained by a small community but runs games effortlessly. This has been achieved by making tweaks to the kernel, thereby improving on stock Ubuntu, for the ultimate Linux-based gaming experience.

The downside of this is that Drauger OS is less flexible than a standard Ubuntu installation. While basic productivity tasks should be achievable, some others will not be, or will require longer installation and setup times.

Drauger OS System Requirements

CPU

Dual-core, 1.8 GHz, 64-bit processor

RAM

1GB

Storage

32GB

GPU

Integrated

Download: DraugerOS

Gaming on Linux Has Never Been Better

Linux has come a long way as a gaming OS. Thanks to Valve’s SteamOS 3.0 leading the way on the Steam Deck, the experience is almost perfect. As adoption continues to grow, more and more developers will begin to cater for Linux.

Each of these operating systems has its own community where you can ask questions if you run into any trouble. You’ll also find some great community resources on Reddit for each distro, not to mention Wine’s extensive game-specific pages if you need some direction.

For both console and desktop experiences, Linux is ideal.

How to Create a Photo Collage in Canva

Key Takeaways

  • You can create collages using Canva on the web, your computer, your smartphone, or your tablet.
  • You have the option to create collages from scratch or use pre-designed templates in Canva.
  • Saving your Canva photo collage is easy on all devices, with different steps for computers and mobile devices.


Do you want to know how to create a captivating collage on your desktop or smartphone? After following this Canva guide, you’ll have a ready-made collage for birthday cards, social media posts, and much more. We’ll also show you how to save your creations.


How to Create a Photo Collage Using Canva on Your Computer

The steps to create a photo collage in Canva on your computer are the same for both the desktop app and web browser versions. However, the process will differ depending on whether you want to create a collage from scratch or if you’d prefer to use a template. You’ll find the steps for both in the sections below.

Download: Canva for Windows | macOS (Free, in-app purchases available)

How to Create a Photo Collage From Scratch

First, let’s look at how to create a photo collage from scratch in Canva.

  1. Select Create a design in the top right-hand corner.
  2. Select Custom size at the bottom of the dropdown menu.

  3. Enter your preferred dimensions and hit Create new design.
    Create your Canva custom design dimensions

  4. Click on Elements and scroll down to Grids. Select See all if you want to see the full list of options.
    Select grids for your collage in Canva

  5. Pick your preferred collage layout.
    A collage layout added to a screen in Canva

  6. Add your images to the grid by dragging and dropping them into the boxes. Either go to Uploads to add your own images or Elements > Photos to use images already in Canva.
    Photos added to a collage template in Canva

  7. You can further customize your collage by adding creative elements or text.

How to Create a Photo Collage With a Template

If you want to create a collage in Canva using a template instead, you have two options. The first is to pick a collage layout in portrait or landscape orientation. Alternatively, you can use a social media template if you’re posting on a social platform such as Instagram and need to resize your image.

Here are the steps to create a collage in Canva using a template:

  1. On the Canva homepage, search for collage or your social media platform of choice.
    Search for a collage template in the Canva app via the search bar

  2. Go to Suggested templates and click See all​​​​​​.
  3. Pick your preferred template. Note that the templates with a crown icon are paid options, but you can use everything else for free.
    Choose your preferred collage template in Canva

  4. Select Customize this template.
    The Customize This Template Option in the Canva App

  5. Drag and drop your images onto the photos in the template: they will snap into place. Same as making a collage from scratch, you can upload your own photos or use pictures already in Canva.
    A Completed Collage From a Template in the App

Besides creating designs with other users’ templates, you can also create and publish your own templates on Canva.

How to Create a Photo Collage Using Canva on Your Smartphone or Tablet

You can create photo collages on the go using the Canva app on your smartphone or tablet. Like on a computer, you have the choice to build your designs from scratch or use a pre-existing template. Moreover, your settings will sync across devices so long as you’re signed in.

Download: Canva for iOS | Android (Free, in-app purchases available)

How to Create a Photo Collage From Scratch

Follow these steps to create a Canva collage from scratch after downloading the app on your smartphone or tablet.

  1. Go to Create a design > Custom size.
    Choose your custom sizing in the Canva iPad app via Create a design

  2. Enter your preferred dimensions. If you’re not sure where to begin, use 2,000 x 1,000 px for landscape and 1,000 x 2,000 px for portrait.
  3. Tap Create new design.
    Choose to create a new design in Canva after entering your dimensions

  4. Navigate to Elements and select your collage design in Grids.
    Select your preferred grid in the Canva iPadOS app

  5. Add your images to the grid. You’ll first need to tap to add them to your canvas, then drag and drop them into the part of the grid in which you want them to appear.
    A collage created from scratch in the iPad app

  6. Unlike on your computer, you also have the option to select pictures directly from your Camera Roll. If you do that, you’ll need to allow access when the pop-up window appears.
    Grant Canva permission to access your camera roll in the iPadOS app

If you want to add more elements to your collage, you can use layers in your Canva designs to gain more creative control.

How to Create a Photo Collage With a Template

If you would rather create your Canva collage using a pre-existing template from your smartphone or tablet, follow these steps:

  1. Type the kind of template you want into the search bar on the homepage. Like on your computer, you can decide if you want to use a specific collage template or something with the dimensions you need for social media.
  2. Select See all next to Suggested templates.
    Search for all suggested templates in the Canva iPad app

  3. Choose the template you want to customize.
    Pick the template that you would like to customize in the Canva app

  4. Add the images you want to use into the template. Like when creating a collage from scratch, you can add directly from your Camera Roll, upload from elsewhere, or use images already in Canva.
    A completed collage in the Canva iPad app

How to Save Your Canva Collage

Once you’ve finished editing your collages in Canva, you’re ready to save your creations to your computer or smartphone. The process is slightly different depending on the device that you use, so we’ll break down each method.

How to Save Your Canva Collage on Your Computer

To save your collages via the Canva web or desktop app, follow these steps:

  1. Select Share in the top right-hand corner.
    Select the Share Button in the Canva App to Start Downloading

  2. Hit Download.
    Select Download in Canva after picking Share

  3. Customize your download settings. You can save in PNG, JPEG, and other formats—but PNG is generally the best choice for photo collages. It’s lossless, and Canva PNGs normally don’t consume significant space.
  4. When you’re happy with everything, hit the Download button.
    Select the Purple Canva Download Button to Finalize Your Download

How to Save Your Canva Collage on Your Smartphone or Tablet

When you save the photo collages you’ve created in Canva on a smartphone or tablet, you won’t see the Share button, but some arrow icons instead.

To quickly save your collage in Canva to your smartphone or tablet without adjusting the settings:

  1. Tap the icon with an downward-facing arrow in the top right-hand corner.
    The Quick Download Icon Appearing in Canva

  2. When the pop-up window appears, select Save Image. Alternatively, you can choose to send your design to someone.
    Save Your Image in the Canva iPad App

To customize your save options, follow these steps instead:

  1. Tap the upward-facing arrow in the top right-hand corner.
    Select the Share This Download Icon in Canva

  2. Select Download.
    Tap the Download Button in the Canva App

  3. Customize your file type, size, and anything else you feel is necessary (some options are only available to Canva Pro users).
    Download Your Finalized and Customized Collage in Canva

  4. Hit Download when you’re ready to save your project to your device.

Creating a Canva photo collage is easy across all devices, and you have plenty of customization options. Once you’ve finished, you can share your creations wherever and with whoever you want.

10 Potential Fixes to Try

Is your iPhone’s display reacting without your input, where apps are opening and taking actions on their own without you touching anything? Here are some quick fixes to resolve this “ghost touch” issue on your iPhone.


Which iPhones Are Affected by Ghost Touch?

Ghost touch problems most commonly affect the iPhone X. In November 2018, Apple admitted that it had found some issues affecting the iPhone X’s touchscreen. It also announced that it would provide free repairs to affected customers.

However, reports and complaints online have shown that the iPhone ghost touch issue also happens on newer models. Affected iPhones not only include the iPhone 11, 12, and 13 models but also older models like the iPhone 8, 7, 6, and 5. In other words, ghost touch is something that can, on rare occasions, affect any iPhone.

Whatever model you’ve got, here’s how to fix ghost touch on your iPhone.

1. Clean the Touchscreen

Kamerafreun.de/Shutterstock

It may sound simple, but cleaning your iPhone’s touchscreen can be an effective defense against ghost touch. Doing this will clear away any debris or dust causing your iPhone to think you’re touching the screen.

To clean your iPhone’s screen, first turn it off and unplug any cables. Next, you should find a soft and clean cloth, such as a lint-free cloth for cleaning glasses. You should lightly dampen this cloth with water. Finally, start cleaning the touchscreen by wiping gently but firmly from one end to the other.

While wiping the screen, make sure you don’t get moisture into any openings.

Apple recommends avoiding window or household cleaners, as well as cleaners containing abrasives or hydrogen peroxide, as these could erode the oil-resistant coating Apple puts on your iPhone’s screen.

2. Take Off Your Screen Protector

Screen protectors are thin layers of glass or plastic that you can attach to the iPhone’s touchscreen to protect it from scratching or cracking. While they’re often useful, they can disrupt how the touchscreen operates if they’re of poor quality.

You should, therefore, try removing your screen protector to see if it fixes ghost touch problems. Remove your iPhone’s screen protector very carefully and slowly. Start at one corner, then gradually peel the protector off the iPhone’s screen.

If the protector has been cracked or damaged at all, it might be safer to take your phone to a suitably qualified repair shop (or to Apple) to ensure you don’t cut yourself on the cracked glass.

You should also consider contacting the manufacturer of the screen protector. The manufacturer might be better placed to recommend the best method for removing the protector and may be able to refund you if the screen protector caused your iPhone’s ghost touch problems.

Don’t forget to clean the screen again after removing any screen protectors.

3. Remove Your iPhone’s Case

A slightly twisted screen is another possible cause of ghost touch issues on an iPhone. If your iPhone has such an issue with its screen, you might be able to solve the problem by removing any hard case you’re using. Sometimes, a hard case may twist the screen, and these cases can also get twisted after an accidental drop.

As such, it’s worth trying to remove the hard case if your iPhone has one.

4. Maintain Good Charging Habits

Do you often put off charging your iPhone until the battery percentage drops to single digits? Or perhaps you frequently let the battery die, and your iPhone has no choice but to shut itself down?

Poor charging habits can also cause ghost touch issues on the iPhone. Therefore, it’s best to plug in your iPhone to charge before the battery drops lower than 20 percent. Consider adopting the smartphone charging habits we recommend.

5. Keep Your iPhone Away From Cold Surfaces

Although Apple states that an iPhone works fine in ambient temperatures between zero to 95 degrees Fahrenheit, it’s still best to avoid leaving it on cold surfaces for extended periods.

For example, I used to place my iPhone on the tiled floor next to my bed when I went to sleep. As the air-conditioning filled up the room throughout the night, the tiled floor naturally got colder.

Unaware, I did this for almost a week, and my iPhone started to have ghost touch issues. Once I left my iPhone on my wooden desk instead, the ghost touch problem stopped, and my iPhone worked normally again.

6. Restart Your iPhone

It’s always a good idea to restart your iPhone whenever it has a problem. This also applies to ghost touch issues, since it’s possible that clearing your iPhone’s short-term memory by restarting it could fix any glitch causing the screen to play up.

Similar to restarting your iPhone but noticeably more drastic, you could force restart (or soft reset) your iPhone. You can do this if your iPhone’s ghost touch problem is so severe that you can’t even turn it off properly.

7. Update iOS

If ghost touch is still a problem, you should update your iPhone. This is worth doing because ghost touch could be caused by a software bug that Apple has fixed in a recent update.

To update your iPhone, go to Settings > General > Software Update. Tap Update Now if a newer version is available.

If ghost touch only happens when you’re using a third-party app, you should update that particular iPhone app as well to get the latest bug fixes for it.

8. Perform a Factory Reset

If restarts and software updates don’t stop your iPhone’s ghost touch problem, you should perform a factory reset on your iPhone. This is a good way of removing any underlying software issues that might cause ghost touch.

You should back up your iPhone before performing a factory reset because it will wipe all your data.

To reset your iPhone, go to Settings > General > Transfer or Reset > Erase All Content and Settings. After you’ve performed the factory reset, you’ll have to go through the setup process again. This is where you can choose to restore your iPhone from a previous backup.

9. Reinstall iOS Using Recovery Mode

If a simple force restart doesn’t work, consider putting your iPhone in recovery mode and reinstalling iOS. Once in recovery mode, your computer will show a message that says “There is a problem with the iPhone that requires it to be updated or restored.” You should click Update (if available) or Restore.

Restoring your iPhone from recovery mode will wipe all your data. You should therefore back up your iPhone beforehand, if possible.

If recovery mode doesn’t help, try using DFU mode on your iPhone instead. This is an even deeper version of recovery mode that resolves problems with the firmware.

10. Take Your iPhone to Apple

If your iPhone still suffers from ghost touch issues, you should book an appointment at your nearest Apple Store for a repair. You’ve now exhausted the software fixes, so it must be a hardware issue that’s causing ghost touch on your iPhone. For example, some people have mentioned that improper display assembly or touchscreen seating can cause this problem.

You shouldn’t take your iPhone apart and try fixing it yourself unless you have considerable experience. It’s much safer to turn to Apple Support, where you can book an appointment. Attempting a DIY repair will also void any warranty you have on your iPhone.

If your iPhone needs a hardware repair to fix ghost touch, make sure you contact Apple or an Apple Authorized Service Provider. Low-quality parts or dodgy repairs can cause other problems with your iPhone’s screen.

Overall, it’s a good idea to start by checking if the ghost touch problem lies with your screen protector or phone case. Then, consider whether your usage habits are accidentally causing the issue. You can also restart, update, and, as a last resort, reset your iPhone before taking it to an Apple Store or an Apple Authorized Service Provider for repairs.

How to Change Monitor 1 and 2 in Windows

Easily change the position of your monitors to reflect the physical layout of your setup.

In Windows 10 and 11, you can rearrange multiple displays connected to your computer to reflect their physical arrangements. Similarly, you can also configure any of the monitors as your primary display. Here’s how to change the position of monitors 1 and 2 and also set a main display in a multi-monitor setup in Windows.


How to Change Monitors 1 and 2 on Windows

A common issue in a dual-monitor setup is when you need to move your mouse cursor to the wrong side of the screen to reach the second monitor. You can fix this by rearranging the displays to reflect your monitors’ physical layout. To swap monitors 1 and 2:

  1. Press Win + P to open the Project menu, then choose Extend to extend your desktop across multiple displays. If you can’t extend your display, make sure you have correctly configured your dual monitor setup.

  2. Right-click on an empty area on your desktop and choose Display Settings. Alternatively, go to Settings > System > Display.
    Windows 11 Desktop Showing Context Menu

  3. In Display settings, click Identify. Windows will display numbered boxes on your screens to help you identify monitors 1 and 2 (and others, if you have more than two displays).
    Windows 11 Settings App Showing Display Identify Option With a Numbered Box on the Screen

  4. To rearrange the monitors, drag each display to the left/right or top/bottom position to replicate your physical setup. For example, if you have a vertical dual monitor setup, where display 2 is positioned under display 1, drag and place display 1 above display 2 to mimic the layout.
    Windows 11 Settings App Showing Display Rearrangement Option

  5. Click Apply to save the new display settings. Now, try to move your cursor across displays to test the new setup. It should feel seamless.

How to Set a Main Display in Windows

The main display (primary monitor) shows your taskbar, desktop icons, notifications, system tray, and the quick settings panel. This is also where most new apps will open by default. If you want to change your primary display so all vital content shows there, you can do so from the Settings app.

To set a default display on a dual monitor setup:

  1. Press Win + I to open Settings.
  2. Open the System tab and choose Display.
    Windows 11 Display Settings Showing a Selected Display

  3. Here, select the display you want to set as your primary display.
  4. Click to expand Multiple displays to view more options.
    WIndows 11 Display Settings Showing the Make this my Main Display Options

  5. Select the Make this my main display option. Once done, Windows will move your taskbar items, system tray, desktop icons, and notifications to your primary display.

Rearranging your monitors to reflect their physical layout is necessary to ensure that your cursor moves easily between monitors. Additionally, setting a main display makes sure your taskbar and desktop icons appear on the screen you want. You should also consider using these best dual-monitor management apps to further enhance your multi-monitor setup experience.

The Best Free Music Production Software for Beginners

Key Takeaways

  • Waveform Free 12 is a feature-packed piece of music production software with an improved interface and unlimited third-party plugins.
  • GarageBand is beginner-friendly music-making software on Mac with powerful features and easy integration across Apple devices.
  • Audacity is a versatile audio editor and production software with ongoing updates, Muse Hub integration, and high-quality tools.
  • LMMS is a cross-platform music production app suitable for all kinds of music creation, offering compatibility with third-party apps and a range of synthesizers.
  • Vital Basic is a sleek and intuitive VST synthesizer software with the ability to input your own samples, offering professional-grade sounds for free.
  • Cakewalk by BandLab is Windows-only music-making software with a powerful interface, unlimited tracks, and studio-quality effects.


Whether you’re starting to make music as a hobby or planning to become a world-famous producer, it’s best to begin with free music-making software. If all goes well, you can then switch to a premium option. In this article, we’ve picked out the best free music-making software for beginners across Windows, macOS, and Linux.


1. Waveform Free 12: Best for a Range of Features

Tracktion T7 was once a premium music production app. Rather than drop T7 when the next version came out, Tracktion decided to give it away under a different name, Waveform, making this free music program one of the most feature-packed options on this list.

In 2024, you can get Waveform Free 12, which boasts an improved interface, enhanced performance, and multiple new and improved stock plugins, instruments, and tools. What’s more, you can also download third-party plugins without limitations.

Similarly, there are no track or exportation limits, and no hidden trails. This makes it a great digital audio workstation (DAW) to edit audio, compose with your keyboard as a MIDI controller, add effects, and automate different instrument parameters.

Waveform works on Windows, macOS, and Linux. If you get along well with the free version, you can always upgrade to the Pro version. This version offers even more features, including Groove Doctor, Subtractive Synthesizer, and Celemony Melodyne Essential.

Download: Waveform Free for Windows, macOS, and Linux (Free, premium version available)

2. GarageBand: The Best Free Option on Mac

GarageBand workspace area

When it comes to beginner-friendly music-making software on a Mac, GarageBand is the number one free option. It’s easy enough to download from the App Store, and it teaches beginner musicians how to do some powerful things, like making beats with loops.

GarageBand also happens to be one of the easiest platforms to use for making great music. It allows you to create a song with up to 255 tracks and even offers a virtual session drummer.

To speed up the learning process, we recommend installing it on all of your Apple devices: Mac, iPhone, and iPad. iCloud gives you the flexibility to work on your music no matter where you are or which device you’re using.

If, at some point, you feel that you’ve outgrown this free app, you can transfer all of your GarageBand files to Apple’s premium music production offering: Logic Pro.

Download: GarageBand for macOS | iOS (Free)

3. Audacity: Best for Combining Production and Editing

Audacity audio editing workspace

Unlike the free music software we’ve already covered, Audacity is a digital audio editor, not a digital audio workstation. There are many creative uses for Audacity, though its main purpose is manipulating audio data. But if you’re looking for a combination of free music production and editing software, Audacity is the way to go.

Audacity lets you edit samples, process audio files, and export music in a range of formats, including MP3, WAV, or AIFF. This means that Audacity is a great way to start making music for free.

While Audacity has been around for quite some time, it remains at the top of the pack of free music production software due to its ongoing updates. Changes in late 2023 added a slew of useful tools, such as enhanced time stretching and beat snapping for all your audio files.

In addition, Audacity now offers integration of the Muse Hub application, which lets you import sounds and add effects like reverb and compression directly into your workspace. Download Muse Hub to make the most of this highly versatile feature.

The ongoing support of Audacity creates the perfect blend of an older-looking interface with new and high-quality editing and production tools.

Download: Audacity for Windows | macOS | Linux (Free)

4. LMMS: Best for Third-Party Compatibility

LMMS workspace area

LMMS (which used to stand for Linux MultiMedia Studio) is a cross-platform music production app, now available on macOS, Windows, and Linux. It’s suitable for all kinds of music production and is a great free software option for beginners.

LMMS uses multiple windows to help you create music. You can edit melodies in the Piano Roll and create a rhythm section with the Beat+Bassline Editor. Get an overview of your song’s structure in the Song Editor, and then mix everything together with the FX Mixer.

You can even automate effects and volume using the Automation Editor. LMMS also offers a wide variety of instrument synthesizers, so it’s a great piece of software to make music for free using MIDI controllers.

Most free music production apps are usually limited in their ability to integrate with other music-making software. LMMS shines in its compatibility with third-party apps, and the free music-making software that you already use will likely be included.

The program supports VST and LADSPA plugins, giving you a myriad of effect options to apply to your music. When your project is ready, you can export it as MP3, AIFF, or WAV, or transfer your media files to a different app.

Download: LMMS for Windows | macOS | Linux (Free)

5. Vital Basic: Best for Fans of Virtual Synthesizers

Vital synthesizer interface

Vital Basic is one of the newer additions to the VST synthesizers scene, yet it competes with the latest and greatest VST synthesizers on the market, such as Serum. Electronic music and sound design lovers will not want to miss out on this free music production software.

What makes Vital Basic stand out is its sleek, accessible, and highly intuitive design. This can help you learn and understand the inner workings of most synthesizers. Vital also has one more oscillator and filter available than the Serum synthesizer, which gives you even more tools to create and manipulate sounds like never before.

Another great feature is that you can input your own samples into Vital. For example, an audio recording of your or someone else’s voice can be converted into a fully-fledged synth instrument via its vocode or pitch-splice wavetable converter.

While Vital offers its Plus and Pro versions with additional features, such as more wavetable presets, you can use and develop professional-grade sounds with the free Vital Basic version. The free version offers 25 wavetables along with 75 presets, and it uses the same engine and features as its paid counterparts.

This makes Vital Basic one of the best pieces of music production software you can get for creating, manipulating, and developing your sounds.

Download: Vital Basic for Windows, macOS, and Linux (Free, premium version available)

6. Cakewalk by BandLab: The Best Complete Package

Cakewalk by BandLab demo track

Just like Waveform, Cakewalk SONAR used to be premium music production software that you can now get for free thanks to BandLab buying Cakewalk in 2018.

Rebranded as Cakewalk by BandLab, this free music-making software for Windows is backed by over 30 years of development. It’s another powerful option that you can use to compose, record, edit, mix, master, and share your music.

You can add an unlimited number of audio or MIDI tracks using its award-winning user interface. Then take advantage of Cakewalk’s VST3 software instruments and studio-quality effects, like convolution reverb and dynamic compression.

Cakewalk by BandLab is only available to Windows users, but it’s one of the best free music-making apps for PCs. BandLab recommends you use a computer with a multicore Intel processor and at least 4GB of RAM. To get it, you first need to sign up for and install BandLab. You can choose which instrument and effects packs to download with Cakewalk SONAR using the BandLab app.

Download: Cakewalk by BandLab for Windows (Free)

This list of free music-making software is only the tip of the iceberg. If you’re serious about learning how to make digital music for free, there are many other music production apps still out there to explore. Remember to prioritize free software with upgrade options or transferable knowledge if you want to make the jump into production software later on.

How to Temporarily Disable Sleep Mode in Windows 10/11: 4 Ways

Windows includes options to help you configure power and sleep settings for your PC. By default, Windows will go to sleep after a period of inactivity. But what if you want to keep your PC awake for longer?


1. Keep Your PC Awake with PowerToys

Microsoft PowerToys is a collection of advanced tools that lets you do more with your Windows 10 and 11 systems. Its Awake feature lets you keep your PC awake on-demand, either temporarily or indefinitely. To prevent Windows from sleeping while a program is running:

  1. Go to Microsoft’s GitHub page and download PowerToysSetup-X64.exe. Run PowerToysSetup and install the app.
  2. Next, launch PowerToys and open the Awake tab in the left pane.
  3. Here, toggle the Enable Awake switch to turn it on.

  4. In the Behavior section, click the dropdown for Mode and select Keep awake for a time interval.
  5. Enter the time interval in hours or minutes. For a longer duration, choose Keep awake until expiration and then enter the end date and time. After the interval, your PC will return to the default power plan of your Windows computer. If you select Keep awake indefinitely, your PC will stay awake until you disable this option.
    PowerToys Settings Showing the Keep Screen On Option

  6. Next, toggle the Keep screen on switch to ensure your computer doesn’t turn off its screen when it’s awake.

PowerToys will now keep your PC awake for the specified time. If you need to disable it, change the Behavior Mode to Keep using the selected power plan.

Download: Microsoft PowerToys (Free)

2. Keep Your PC Awake With Insomnia

Windows 11 Desktop Showing the Insomania App Running

Insomnia is a free third-party lightweight utility to disable sleep mode on Windows temporarily. When enabled, it calls the SetThreadExecutionState API to inform the system that it is currently in use, preventing it from entering sleep mode.

When you open the program, a pop-up window with the message “This computer can not go to sleep while this window is open” will appear. You can minimize the window to keep it running in the background, and your PC won’t sleep. Closing the window will end the app and thus restore your system’s default power settings.

On the flipside, it has no option to keep your screen on. If you need to keep your screen on, consider using PowerToys or Don’t Sleep.

Download: Insomnia (Free)

3. Use Don’t Sleep to Lock Sleep and Shutdown

Don’t Sleep offers more power management options than PowerToys and Insomnia. It can block sleep and hibernation and keep your screen on. What’s more, it can also help you block accidental shutdowns. You can use Don’t Sleep to configure both sleep and awake options.

To use Don’t Sleep:

  1. Download and install your preferred version of Don’t Sleep (portable or installed).
  2. Open the Please Don’t Sleep tab.
    Windows 11 Desktop Showing Don't Sleep App Options

  3. Here, you can select the power options to block under Preferences. By default, all the power options are blocked by the app.
    Windows 11 Desktop Showing Don't Sleep App Timer Options

  4. In the Timer tab, set a time to keep your computer awake before the default power scheme is restored.
  5. Click the To-Tray option in the top right corner to minimize the app to your system tray.
  6. To disable the app, select the Disabled option in the top-right corner.

You can also configure Don’t Sleep to set aggressive power management rules based on the battery, CPU, and network parameters of your system. Don’t Sleep features some additional features in the toolbar. For example, click the Monitor option and select Monitor Off to turn off your display or click Computer to access the power options.

Download: Don’t Sleep (Free)

4. Disable Sleep Mode in Settings

You can prevent your computer from entering the low-power sleep state by configuring sleep mode in the Settings app. While this only offers a basic level of control over power and sleep options, it works if you don’t want to use a third-party tool.

To change sleep and screen time in Windows 10 and 11:

  1. Press Win + I to open Settings.
  2. Open the System tab and then click Power & battery. In Windows 10, go to Settings > System > Power & sleep.
    Windows 11 Settings Showing Power & Battery Option

  3. Under Power, click to expand Screen and sleep.
  4. Next, click the dropdown for On battery power, put my device to sleep after and When plugged in, put my device to sleep after, and choose an interval from one minute to five hours. Choose Never to turn off sleep mode completely.
    Windows 11 Settings Showing Screen and Sleep Option

  5. To configure your screen timeout interval, click the drop-down for On battery power, turn off my screen after and When plugged in, turn off my screen after and choose a duration from 1 minute to 5 hours. Choose Never to prevent the screen from turning off.

Not all programs can suppress the default sleep behavior of your Windows computer. If sleep mode disrupts your workflow, you can use these third-party utilities to keep your PC awake for a short or prolonged duration.

The World’s First 8K Action Camera

Key Takeaways

  • Superb image quality, especially in low light, thanks to a large sensor.
  • AI features help save storage and produce compelling short-form videos. The Ace Pro has enhanced software and shot templates that make editing and producing videos easier.
  • The 8K mode doesn’t offer significant improvements, and the Ace Pro may not be suitable for vlogging due to its longer minimum focus distance.


More known for its innovative 360-degree cameras and “shoot now, frame later” editing process, the Ace Pro is Insta360’s first dedicated GoPro-style action camera. With the largest sensor yet and an AI chip on-device, the Ace Pro performs much better than you’d expect in low light. During the daytime, the footage is outstanding. But the 8K mode is largely a gimmick, and the minimum focus distance will give you pause if you’re looking to pick this up for vlogging.

Insta360 Ace Pro

$427 $450 Save $23

The Insta360 Ace Pro offers a headline 8K24 recording, though you’re more likely to use the myriad other 4K modes—including a new PureVideo 4K30 that’s ideal for low light situations. The bigger-than-average sensor leads to a longer-than-average minimum focus distance however, which might not suit vloggers. But for everyone else, the superb image quality combined with AI-enhanced software and shot templates puts this at least equal with the best action cameras on the market today. 

Brand
Insta360

Sensor Size
1/1.3″

Video Resolution
Up to 8K24

Photo Resolution
48mp

Battery
1650mAh (up to 100 minutes)

Connection
USB-C

Size
D71.9 x H52.15 x D38.5mm

Weight
180g (6.4oz)

Water Resistance
10m (up to 60m with optional dive case)

Lens
Leica 16mm (equivalent)

Storage
MicroSD

Display
Rear 2.4″ flip-up color touchscreen, front 0.66″ OLED to show current mode

Pros

  • Superb image quality, especially in low light thanks to a large sensor
  • AI features to save storage and help produce compelling short-form videos
  • Superb editing software for smartphone or desktop
  • Waterproof up to 10m out of the box
Cons

  • 8K mode is mostly a gimmick
  • Minimum focus distance is longer than usual; vloggers beware
  • Non-replaceable lens guard

Design and Accessories: Flip-Up Screen Is the Standout Feature

Upon first booting up the camera, you’ll need to register it with the Insta360 app and install a firmware update. That’s not an optional step; you must register the device, so make sure you’ve done this prior to heading off on your internet-less action-packed vacation.

insta360 ace pro - ace pro screen view
James Bruce / MakeUseOf

The Ace Pro doesn’t appear to break any design conventions when it comes to the highly compact action camera shape. But it does have some neat features that make it even more suited to other tasks.

insta360 ace pro - ace pro front view screen
James Bruce / MakeUseOf

On one side is the compartment for the removable battery, while on the other is a power button, a microSD card, and a USB-C port. All are covered securely with a tight-fitting waterproof cover. Out of the box, it’s waterproof to 10m, and a dive case is available to dive down further.

insta360 ace pro - selfie stick screen mode
James Bruce / MakeUseOf

The Ace Pro also features two screens. The first is the main screen around the rear, a color touchscreen measuring 2.42 inches. This flips up along the top edge, so you can preview your recording from either behind or in front of the camera (or more imaginative angles, like from your waist).

In addition to that is a smaller 0.89-inch screen on the front, which gives a quick indication of the current mode, battery, and remaining recording time. It’s surprisingly useful if you find yourself swapping modes often, and it ensures you won’t accidentally record your vlog in slow motion, for instance.

insta360 ace pro - ace pro screen flipped up selfie view
James Bruce / MakeUseOf

Since the base of the Insta360 Ace Pro contains only a proprietary magnetic quick-latch system and not a tripod screw hole, it’s not directly mountable and must be used with the custom adapter.

The magnetic latch can only be fitted one way around (indicated by a small symbol mimicking which side the lens is on), and I found it can be deceptively loose, so make sure it’s fully pushed in. On my first few attempts, it felt like it was attached and flush to the body of the Ace Pro, but it wasn’t secure at all. Push it in firmly until you’ve heard a click on both sides, or accidents will happen.

The magnetic latch then provides a standard mount point for use with any action camera accessories or with a tripod adapter. In the box is a small “magic” mount that can stick to any flat surface, but you probably already have a mountain of bits with a standard mount point that can be used, too.

insta360 ace pro - mini tripod
James Bruce / MakeUseOf

My test unit was sent alongside a multifunction selfie stick and mini tripod cobranded with Pgytech. This clever accessory is a 3-in-1 Z-shaped extendable selfie stick with small tripod legs that pull out from the base. Including your outstretched arm, this’ll get the camera about a meter away, so it’s an ideal vlogging accessory (though not long enough for extended use, as your arms will get tired).

If vlogging is your primary use case, I’d recommend picking up the official invisible extendable selfie stick; the software will automatically remove the stick from your shots.

insta360 ace pro - tripod fully extended
James Bruce / MakeUseOf

Equipped with an adjustable ball head, the mini tripod and selfie stick combo also means you can securely set the Ace Pro down and film a static location at various angles.

Imaging System: Superb, but Forget 8K

Inside the Ace Pro, you’ll find a 1/1.3 inch sensor; that’s the largest yet in a consumer-level Insta360 camera, tied only with the DJI Osmo Action 4 and larger than the GoPro Hero 12. Insta360’s best prior offering was the 1-inch sensor in the modular One R with a 1-inch Leica mod.

insta360 ace pro - ace pro front view
James Bruce / MakeUseOf

The Ace Pro continues that partnership with Leica, and features a 16mm (full-frame equivalent) f/2.6 wide-angle Summarit fixed lens. Unfortunately, the lens guard isn’t removable, which might be a deal breaker for some thrillseekers. Insta360 offers a one-year free replacement if you do manage to scratch it.

The larger sensor is what enables a headline-grabbing 8K24 resolution, though its usefulness is debatable. Apart from the complete lack of 8K display devices, the quality of 8K video isn’t particularly better than 4K—and by sticking to 4K, you can shoot up to 120FPS. Here’s a short segment stabilized 8K24 video shot on a lovely winter’s afternoon on the moors:

Unfortunately, the maximum resolution YouTube will output is 4K—which illustrates the point of what exactly are you going to do with 8K footage? I then switched to 4K60:

Even on the raw files, I’d have to be honest and say I don’t see a whole lot of difference with 8K, and given the 24FPS limitation there, you’re more than likely going to drop down to 4K to get 60FPS or higher. Curiously, while the base Ace model provides some intermediate video resolutions like 5.7K, the Ace Pro doesn’t—it jumps from 4K to 8K, with nothing in between.

More than headline resolution, though, it’s the sensor size that really makes a difference to image quality, allowing more light to be captured at any time. On the Ace Pro, this is combined with a new dedicated 5nm AI chip for image enhancement.

If you prefer to color grade your own footage, it’s worth noting that the Ace Pro doesn’t output in LOG format / 10-bit color. But, out of the box and in good light, color reproduction is great, details are crisp, and the built-in stabilization results in super smooth video. I wasn’t disappointed on any front. The lack of LOG recording might be a dealbreaker for you, however.

Low Light Performance: Best on the Market, but It’s Still a Small Sensor

The larger sensor inside the Ace Pro means it has more impressive low-light performance than competitors with smaller sensors. But to be clear, this is still a comparatively small sensor, and you shouldn’t expect performance on par with a DSLR.

To test it out, I attempted to film my Christmas lights using all the various modes. The only light source was a few fairy light strings.

ace pro 4k30 low light sample
4K30, low light video sample (James Bruce / MakeUseOf)

I found that 4K30 PureVideo mode produced the best quality—that’s the mode Insta360 recommends for low-light environments, and it’s clear why.

ace pro 4k30 purevideo chrsitmas trree low light best
4K30 PureVideo mode (James Bruce / MakeUseOf)

The 8K24 video mode resulted in unbearably bad video, with a rolling shutter, banding, and a constant delay on the preview screen that made talking the camera incredibly difficult. 4K60 was much the same.

For comparison’s sake, here’s the same video freezeframe taken from an iPhone 15 Pro Max. It’s more tightly cropped, but the quality is just as good.

iphone comparison wide angle video sample low light
iPhone 15 Pro Max 4K60 (James Bruce / MakeUseOf)

Lastly, I shot a little underwater in 4K30 PureVideo:

And the same area in 8K24:

There’s less difference here, as there were still reasonable light levels, but I prefer the 4K30 PureVideo footage.

Vlogging on the Ace Pro: Difficult but Good

With such good video quality, the Ace Pro should be ideal for vlogging—but that large sensor is also a hindrance here, and that’s because it means a longer minimum focus distance is required.

ace pro 4k30 pure video low light vlogging
AcePro vlogging freeze frame in PureVideo mode (James Bruce / MakeUseOf)

Officially, on the Ace Pro, the minimum focus is 40cm or 1.3 feet. In testing, it seems a bit longer. In the sample above, the camera is at arm’s length, and my face is clearly not in focus.

The base Ace model is listed as 60cm, or around 2 feet. That means very close-cropped shots that are typical for vloggers will be difficult on either model, but the Ace Pro is better than the Ace. For that reason alone, if you’re considering the device for vlogging, it’s best to opt for the Ace Pro model.

If you’re set on the Ace Pro as a vlogging camera (because, in every other respect, the footage is superb), you might also consider purchasing a third-party diopter lens (plus a 3D printed lens holder), which will decrease the minimum focus distance.

insta360 ace pro - selfie stick screen extended
James Bruce / MakeUseOf

Another consideration is audio; in that respect, the Ace Pro is perhaps the best-sounding action camera for vocals that I’ve tested yet. It’s perfectly usable in a quiet environment to the point that I wouldn’t even bother with a separate LAV mic. That said, if you are in a noisy environment and need something more focused, you can purchase the optional 3.5mm external mic input adapter for $20.

Software: AI, Everywhere

Insta360 has been hard at work making sure your newest action camera has a healthy dose of AI enhancements—because everything is better with AI.

The first is AI editing and highlights, in which the software can automatically identify and tag features, people, animals, and extract highlights from a longer clip, saving you space on your camera. This has been a feature of the Insta360 app for a while now, and I can’t say I’ve had much success with it, but I don’t typically shoot the kind of travel vlog shots that I suspect this is trained on.

On the Ace Pro, this AI Assistant functionality is now built into the device itself, so you don’t need to load it into software for analysis first. Once enabled, it’ll automatically flag parts of your video. You can manually mark points of interest, too. Then, once you hit stop, you can review the moments it identified, add more if needed, and chop the long video into smaller, more manageable clips—while discarding the unused parts.

The second big new feature is an AI Warp, which lets you apply dazzling AI transformations to short video clips, all processed in Insta360’s cloud servers. Here’s the cyberpunk effect applied to a simple video of me walking down the corridor:

A variety of styles are available to suit whatever video you’ve shot. There’s a limit of three clips per day, and each clip that you send for processing must be 15 seconds or less. In addition, only the middle section of your video is transformed, and it suffers from the usual AI video symptom of inconsistencies between frames. Simply select the clip, choose some music, and optionally slow down the AI warped part by 0.5x or 0.25x.

It’s ideal to jazz up an exciting clip to post on your Instagram or other social feeds. However, it’s nothing comparable to what you can achieve locally with Stable Video Diffusion and a decent graphics card. Still, it’s pretty amazing for a free service to make your clips stand out a little with minimal effort. That’s in addition to all the usual quick video templates within the app, though not all are compatible with Ace Pro footage. The great thing about these templates is that the app tells you exactly how to achieve a particular shot and then deals with the editing for you—you just need to select which clips to use.

In addition to the smartphone app, Insta360 provides desktop software. It’s a lot less featured—there are no templates or AI warping—but you’ll need to use it to output the best-quality video. The smartphone app is limited to 1080p.

The Ace Pro has one final trick up its sleeve: the ability to use it as a webcam. I’m sure a handful of users worldwide will find that useful.

Should You Buy the Insta360 Ace Pro?

I’m a huge fan of Insta360’s cameras, but more for their innovative “shoot now, frame later” One X models and discreet, lightweight Go lifelogging line. Both offer something genuinely unique to compete with the smartphone that’s already in your pocket.

As an action camera, the combination of Insta360’s FlowState Stabilization and large sensor in the Ace Pro makes for crisp, smooth 4K60 video. I’d recommend ignoring the 8K video mode, even if it is the headline feature. It speaks to the quality of the imaging system, but you’ll have more creative freedom in the standard 4K modes and, sometimes, even better quality. Given the unpredictable results from 8K, it’s best ignored.

Related

Insta360 Go 3: Tiny but Versatile All-in-One Vlogging, Lifelogging, and Action Camera

This tiny action cam offers one-touch recording, while the discreet design allows for great POV shots, along with easy-to-use AI editing features.

For low-light situations, the PureVideo mode is stunningly good. It’ll be a huge benefit if you struggle to shoot your action videos at night.

As a general-use or vlogging camera, though, the Ace Pro makes less sense. The minimum focus distance can be problematic for close shots, and you probably already have a better camera in your pocket if you have a latest-generation smartphone. It’s not a bad choice for a small pocket camera, but it’s hard to justify the price.

A non-removable lens guard and lack of LOG support makes the Ace Pro even less attractive to professional producers and those who indulge in extreme sports with an enhanced possibility of lens damage.

But for most people, the Ace Pro is one of the best-quality action cameras combined with superb AI-packed software that makes producing compelling short-form videos simple.

Insta360-Ace-PRO

Insta360 Ace Pro

$427 $450 Save $23

The Insta360 Ace Pro offers a headline 8K24 recording, though you’re more likely to use the myriad other 4K modes—including a new PureVideo 4K30 that’s ideal for low light situations. The bigger-than-average sensor leads to a longer-than-average minimum focus distance however, which might not suit vloggers. But for everyone else, the superb image quality combined with AI-enhanced software and shot templates puts this at least equal with the best action cameras on the market today. 

How to Use “GPT Mentions” to Call Out Custom GPTs in Any ChatGPT Conversation

Quick Links

Key Takeaways

  • OpenAI’s ChatGPT Plus offers a new feature called GPT Mentions, allowing users to combine multiple custom GPTs in one conversation.
  • Users can mention custom GPTs in a conversation using the “@” symbol, similar to mentioning people on social media platforms.
  • The GPT Mentions feature enables users to access different GPTs for specific tasks, such as gathering data, creating graphics, or finding travel information, all within a single chat session.


OpenAI’s premium version of ChatGPT, known as ChatGPT Plus, offers users a range of extra features in exchange for the monthly subscription fee. ChatGPT Plus’s newest feature, GPT call-outs or mentions, may prove very useful to you if you use various GPTs within the ChatGPT interface. So, how does this feature work, and how can it benefit you?


What Is ChatGPT’s GPT Mentions Feature?

As a ChatGPT Plus member, you can enjoy custom GPTs from the Custom GPT Store. These are versions of ChatGPT that are tailored to help with specific tasks. Some popular custom GPTs include…

  • KAYAK: uses the KAYAK travel website to provide you with relevant flight, hotel, and transport information.
  • Canva: takes text-based prompts and uses Canva to create digital graphics.
  • Consensus: uses the Consensus search engine to provide research data from prompts.

You can use any of the custom GPTs available individually, but what if you want to combine two or more custom GPTs in one conversation?

Enter ChatGPT’s new custom GPT Mentions feature. OpenAI began rolling out the GPT Mentions feature in late January 2023 for ChatGPT Plus users.

This feature, which is currently in Beta (i.e. a prototype of the feature is being used temporarily), allows you to mention one or more custom GPTs in a single conversation using the “@” symbol (as you would to mention people on Instagram or X). With GPT Mentions, you can only add custom GPTs you’ve already used to the conversation (i.e. custom GPTs you’ve had conversations with).

So, how can you use this?

How to Use the GPT Mentions Feature

If you’re using a few custom GPTs in separate conversations, you’ll now see the pop-up below displayed above your chat text box.

It’s super easy to use GPT Mentions, so let’s delve into an example of when it would be helpful.

Let’s say you wanted to gather some key data and then create an infographic to introduce what you’ve found. To find the data, you start a chat with the Consensus GPT. Once Consensus gives you the relevant information, you mention Canva in your chat, and click on the Canva GPT option.

screenshot of chatgpt beta mentions feature being used in desktop browser

Now, you’re chatting with Canva until you click “X” on the Talking to Canva tab that will appear above the chat text box.

screenshot of active canva chat using beta gpt mentions feature on desktop browser

You can talk to the Canva GPT while mentioning the above conversation you’ve already had with Consensus. Simply ask Canva to create a graphic introducing the research Consensus provided, and the GPT will get to work providing you with something useful.

screenshot of chatgpt custom gpt callout feature working with canva prompt on desktop

Of course, if you’re not happy with Canva’s initial response, you can make more specific requests to highlight what you’re looking for. Maybe you want a specific font, or want a certain phrase used in the text of the graphic. Just ask, and the custom GPT should be able to comply.

Note that, before a custom GPT connects with any other platform to retrieve data, it’ll ask your permission to do so first. Just click Allow if you’re happy to go ahead.

You can also use this feature to find new places to explore. For instance, you can combine the KAYAK and AllTrails GPTs if you want to go on a hiking or cycling holiday.

To demonstrate this, we asked KAYAK GPT to find us the best spots to stay in Germany, as well as upcoming flights.

screenshot of kayak prompt result with chatgpt on desktop

After getting the results, we added the All Trails GPT to the chat using the GPT Mentions feature, and asked it to find trails near the hotels that KAYAK previously recommended.

screenshot of alltrails gpt being used in chatgpt on desktop

Now, we have hotels, flights, and trails for our trip all in one chat!

There’s no end to what you can do with this new GPT Mentions feature, be it for work or play. If you’re a ChatGPT Plus user, give this handy feature a try today to see what you can do when talking to two or more GPTs at once.

12 Little-Known Microsoft OneNote Features You Will Love

OneNote is great for taking notes of all kinds and keeping them in a digital notebook. But there are plenty of little-known OneNote features that will make you more productive. Here are some of the best.


1. Set a Page Style as the Default Template

Do you have a page style in OneNote that you use for most of your notes? If so, you may want to set it as a default template. Doing so is very simple:

  1. Right-click on the note you want to use as a default template. If you have a Mac, press Control + trackpad click.
  2. Select Set as Default Template when you see the list of options.

You can use OneNote templates in recurring projects to organize notes in a particular way. If you’re the minute taker for office meetings, for example, you can manage attendees, conversations, and key points in a fixed tabular format.

OneNote’s system of organization with a typical notebook, section, and page approach is excellent for organizing notes. However, you can add visual markers to identify information and contextual relationships across your notebooks or sections. To do this, use the Custom Tags feature.

  1. Click on the Home tab.
    Select the Home Tab in Microsoft OneNote

  2. Hover over the list of options where you see To-Do and Important. Then, select the downward-facing arrow and choose Create New Tag.
    Create a New Tag in Microsoft OneNote

  3. Name your tag, choose a symbol, and select Create.
    Customize the new tag that you want to create in OneNote

  4. To access your tag, use the arrow on the right to scroll through.
    Created tab appearing in OneNote

3. Internal and External Linking in OneNote

OneNote has a deep linking structure that helps you quickly engage in knowledge construction, critical thinking, and contextual learning. You can link to different pages and external websites.

To link to different pages in OneNote:

  1. Right-click on the page you want to copy (or press Command + trackpad click on macOS).
  2. Select Copy Link to Page.
    Copy a Link to Your Page in Microsoft OneNote

  3. Highlight the text on your new page where you want to insert the link, then press Ctrl + K (Windows) or Command + K (Mac).
  4. Paste the link and click OK. When you click on the link, you should go to the page you want.
    The option to link internally to a page in OneNote

If you’d rather link to external pages in OneNote (e.g. website URLs), follow these instructions.

  1. Copy the link you want to paste.
  2. Go into OneNote and select the text you want to add the hyperlink to. Select Ctrl + K (Windows) or Command + K (Mac).
    Paste a Link From an External Source in Microsoft OneNote

  3. Paste the link and click OK.

How to Copy a Page in OneNote

Another handy feature in OneNote is the ability to copy a page to another notebook.

  1. Right-click or press Command + trackpad click on the page you want to copy.
  2. Select Copy Page to.
    Copy a Page to Somewhere Else in Microsoft Outlook

  3. Choose the notebook you’d like to copy your page to and click Copy when finished.
    Choose a new notebook to share your pages to in OneNote

4. Use Page Versions to Keep Track of Changes

Every time you make changes to a note, OneNote keeps track of the previous versions instead of completely overriding them. So, if you delete any note by mistake, you can look through the page’s history to find the item you want.

Go to View > Page Versions to use this feature.

Select Page Versions to view previous pages in OneNote

5. Translate Text or the Entire Page

As communication at work is increasingly becoming multilingual, the need to translate text into different languages is becoming essential. Microsoft provides you with powerful Office translation tools to decipher content in various languages and put it into a note.

  1. Go to View > Translate > Set Language if you want to translate the entire page.
    Set a New Language in OneNote to Translate To

  2. Choose your language and select Translate.
    Choose Languages to Translate to in OneNote

To translate just one part of your document:

  1. Go to View > Translate > Selection.
    Language Adjustment Settings in Microsoft OneNote

  2. Select the text you want to translate; if you need further context, you can also type in new words.
    Translate different texts in Microsoft OneNote

  3. Choose the languages you want to translate between.
  4. Choose Insert to add the translation to your note. It will replace what you already have.

Besides OneNote, you can also adjust your language settings for Microsoft Word and other apps.

6. Sort Pages in OneNote

To sort your pages in OneNote, click the Sort button next to your notebook. Then, choose one option from the list: Alphabetical, Date Created, or Date Modified.

Adjust different page views in Microsoft OneNote

7. Save Emails to OneNote

If you want to save an email in OneNote, you can use the Email to OneNote feature. It consists of an email address ([email protected]), to which you can forward email messages (trip confirmation, receipts, or important emails) or share any type of content.

The subject field of the email becomes the title of your OneNote page. Also, any link you include in the body of the message automatically gets expanded into an article and a full-page screenshot.

Here’s how to set up the Email to OneNote feature:

  1. Go to the Email to OneNote setup page.
  2. Select Set up email to OneNote.
    Set up your emails to send to OneNote

  3. Sign in to your Microsoft account.
    Sign Into your Microsoft Account to Set Up Features With OneNote

  4. Choose the default location to save your emailed notes. You should also pick the address that you’ll use to send emails; you have to send them to [email protected] for them to save successfully.
    Email and Location Settings for OneNote to Save Automatically

  5. Select Save once you’re happy with these settings. Then, run a test email in Outlook to confirm that you’ve successfully set everything up.

When using Outlook, you can also encrypt emails that you send to others. Doing so will ensure that you don’t let sensitive information get into the wrong hands.

8. Paste Text Without Formatting

When you copy and paste content, OneNote will paste the text along with its formatting and a source link, whether you use the Ctrl + V shortcut or the Paste option from the context menu.

If you don’t want pasted text in OneNote to have formatting, go to Home > Paste > Keep Text Only.

Keep Text Only Feature in OneNote

Another option to try is selecting Option + Command + Shift + V if you use OneNote on a Mac.

9. Add Equations to Your Notes

While you may know of OneNote as being useful for text, you can also add equations. To do this:

  1. Go to Insert > Equation.
    Insert an Equation Into Your OneNote Document

  2. Enter your equation in the box that appears within your note.

10. Sync All Notebooks

If you have multiple notebooks in OneNote, you can easily synchronize everything. Synchronization is usually on by default, but manually switching the feature on is a good idea if you’ve noticed that it isn’t working properly.

To synchronize all of your notebooks, simply go to File > Sync All Notebooks. You can also choose to synchronize only one notebook if you would prefer.

Synchronize Your Notes in Microsoft OneNote

11. Use Immersive Reader to Read Out the Text

Immersive Reader is an excellent and accessible tool that exists in OneNote and several other Microsoft apps, such as Teams and Outlook. The feature lets you read out text on your screen in full-screen mode.

Enabling Immersive Reader in Outlook is very straightforward:

  1. Tap on View in the toolbar.
  2. Select Immersive Reader.
    The Immersive Reader Settings in Microsoft OneNote

  3. Tap the play button to have OneNote read out your text.
    The Complete Immersive Reader View in OneNote

  4. Choose the left-hand arrow to exit full-screen mode when you’ve finished.

12. Use Paper Style to Structure Your Writing

By default, OneNote gives you a blank page to type on. But if you want to structure your writing better, you can adjust the paper style that you see on your page. Here’s how to do that:

  1. Select View > Paper Style.
  2. Tap the downward-facing arrow.
    Select the Different Paper Style Options in Microsoft OneNote

  3. Choose your preferred paper style when you see the list of options.

OneNote has plenty of helpful features that let you organize your notes more effectively. Beyond that, you can also make visual changes and make your notes more accessible. Try these different features and see which ones enhance your productivity the most.