Some Max Subscribers Will Get to Keep This Great Perk for Free

In a world where streaming services seem to be constantly raising prices, there is a bit of good news for some Max subscribers.

Max

Max owner Warner Bros. Discovery has announced that it won’t be charging for B/R Sports. The tier was originally unveiled in late 2024 and features more than 1,700 live events per year from the NBA, NHL, MLB, NCAA March Madness, AEW, and more. That’s a huge amount of live sports content, something that’s hard to find on many streaming services.

When originally announced, Max was planning to charge an extra $10 per month starting in March for the tier to coincide with March Madness. But if you have the Standard or Premium tier, Max is now providing that content for free.

Unfortunately, the news is not so great if you subscribe to the ad-supported tier. Both B/R Sports content and CNN Max will no longer be available starting on March 30. CNN Max provides a 24/7 news feed along with on-demand news and CNN Originals.

Max’s Ad-Free Tiers are Now a Better Value

max logo on smartphone in front of a tv screen
Top_CNX/Shutterstock

Sports have become a driving force behind streaming, and Max keeping B/R Sports content for free will make it a more popular destination for sports fans. And it will likely get some ad-supported subscribers to make the move up for the sports content.

Currently, the Premium tier on Max costs $20.99 per month and offers 4K video, Dolby Atmos audio, and the ability to download up to 100 items. The Standard tier is $16.99 per month and only allows 1080p resolution and up to 30 downloads. Basic with ads is $9.99 per month.

If you’re looking to save a bit of money, don’t try to share your Max password as the service is already starting to crack down on the practice.

There are a lot of reasons to enjoy Max. While I’ve never been thrilled with the higher subscription cost, I’ve enjoyed the service with its wide variety of media, HBO exclusives, and more. Adding B/R Report content for the Standard and Premium tiers makes both options a better value.

Google Makes It Easier to Delete Search Results About You

Anyone who has ever typed their own name into Google will understand the fear of finding personal information you never intended to be available to a wider audience. However, thankfully, Google offers a decent tool designed to help you remove that information from Search results. And now, that tool has got even better.

As announced in a post on The Keyword, Google has redesigned its Results About You tool, making it easier to sign up to use it, and to request removals from Google Search. Google will also monitor results for you, saving you the trouble of having to do so yourself, and will recrawl pages to obtain the latest information when what’s online is out of date.

Results About You is a longstanding tool designed to help anyone have results containing personal information removed from Google Search. Anyone can sign up to use Results About You, but the more of a presence you have online, the more likely it is that you’ll need it.

Google has now redesigned the tool, with the intention of making it easier than ever to use. The main improvements appear to be:

  • A new hub which makes it easier than ever to sign up to use Results About You.
  • An updated way of requesting removals, with the option to do so from the three-dot menu next to results.
  • The option to request a refresh of information when you want an outdated search result to be updated.

While these may not sound like huge improvements, they all aid in helping individuals manage their online presence. And that is somewhat invaluable. Especially for those of us who work online, and have done for many years. So, if this redesign encourages more people to use the tool, it should be welcomed.

More People Should Use Results About You

More people should probably sign up to take advantage of Google’s Results About You tool. After all, the amount of information (including personal information) about every one of us that can be found online can be rather unsettling. Thankfully, having at least some of it removed is now just a few clicks away.

Related

8 Data Privacy Habits to Practice for Protecting Your Personal Information

You shouldn’t freely give away your personal information, especially on the internet. So, here are some habits you should practice when online.

To get started with Google’s Results About You tool, visit the Results About You hub and sign into your Google account. Then, just follow the simple instructions to regain at least some control over your online privacy.

Watch Two AI Chatbots Speak to One Another in an Unintelligible Language

What would it sound like if two AI chatbots spoke to one another in their own “language?” Someone has devised an AI chatbot language called “GibberLink,” and it allows two bots to exchange information quickly.

An Enthusiast Wins an ElevanLabs Hackathon With a Chatbot Language

Anton Pidkuiko performed this cool feat as part of the ElevenLabs 2025 Hackathon in London. The goal was to use the ElevenLabs technology to create a language that two AI chatbots can use to transmit data to one another quickly. Anton received first place for his project, and once you see the chatbots talking, it’s easy to see why.

Amazing, isn’t it? Once the chatbots clock that the two of them are AI agents, they swap to speaking in GibberLink. This uses the GGWave sound protocol to send messages far faster than what they can achieve if they speak English.

If you used the internet in the early days, you’ll remember using dial-up and the noises it used to make. If you’re wondering why GibberLink sounds a little like a modern-day dial-up tone, it’s because the technology behind them is similar. Each uses audio to transmit data between two devices, which is a lot faster than speaking in a way that humans can parse. It’s probably best not to think about what giving AI chatbots a secret language that humans cannot understand will mean for the future.

If you’d like to learn more about this cool technology, check out the GibberLink GitHub page for details and the source code. You can also see the GGWave source code if you’re curious about the technology GibberLink built itself atop. You can also create a voice that sounds just like you with ElevenLabs, the AI-powered voice service that hosted the hackathon and powered GibberLink.

Why I’ll (Probably) Never Buy a Smartwatch

Tech companies have made great progress over the years in improving smartwatches, and on certain niche occasions, they can prove very handy, indeed. Despite knowing that, however, there’s a good chance I’ll never actually buy one for myself.

You’re Paying More for Redundant Features

Smartwatches are not very economical for what they offer, especially if you’re buying one from a reputed brand like Apple, Samsung, Google, or Garmin. While we rated the Galaxy Watch 7 fairly highly in our review, it launched at $300. Considering you can buy abrand-new mid-range Android phone that nails all the fundamentals for just a hundred dollars more, it’s hard to justify that price tag.

The point here is that much of the functionality that smartwatches offer overlaps with your phone, which means you’re paying extra for features that are essentially redundant. For value-oriented consumers such as myself, that can be a deal-breaker.

Buying a Smartwatch Won’t Make You Fitter

A lot of the time, people buy a smartwatch thinking it will motivate them to pay attention to their health. In other words, they are making a purchase decision based on a perceived improvement in their lifestyle, rather than because of actual necessity.

Once the novelty wears off, most users drop their fitness goals and revert to old habits for the same reasons most gym members stop going to the gym after a couple of months. If you’re not already disciplined, buying a smartwatch is not going to change that.

It’s Yet Another Gadget You Need to Charge and Keep Upgrading

While a good analog watch can last for years, smartwatches require constant charging like any other smart gadget with lithium-ion batteries. If you’re sick of having to remember to charge your devices like me, buying a smartwatch will only add to your problems.

Also, let’s not forget that batteries degrade over time, so you’ll have to keep buying a new smartwatch every few years, just like you do with your phone. The only difference is that the latter’s lifespan can be extended by replacing its battery. The same practice, while technically possible, is next to non-existent for smartwatches.

Related

How Often Should You Buy a New Android Phone?

Android phones are lasting longer than ever. So how often should you replace yours, and what are the warning signs that it’s time to upgrade?

Constant Notifications Can Lead to Fatigue and Stress

It’s one thing to have your phone constantly buzzing, and a whole other thing when you’re wearing distractions on your very wrist. Granted, you can mute notifications in settings, but then what would be the point of buying a smartwatch?

I’m guessing you’d at least want to get health-related alerts, but then you have to deal with being notified every time you’re behind on your fitness goals. I don’t know about you, but I’m not looking forward to having my watch stress me out for not being at my peak health.

Smartwatches Make It Harder to Disconnect

I’ve been trying to develop a healthier relationship with tech latelyto help avoid tech fatigue, and I feel like a smartwatch can make that goal harder to achieve. While using a phone is a voluntary act, as you only pull it out of your pocket when you need it, a smartwatch is always collecting data about you and offering health insights, which might prevent you from being able to truly disconnect.

Of course, for people with a more active lifestyle, the benefits a smartwatch offers will be easier to appreciate. Personally, I’d be more willing to give smart rings a shot once their tech matures. Since they don’t have a screen and are visually indistinguishable from regular rings, it’d be easier to forget they’re even there.

You Can Now Search Through Video Transcripts on Google Drive

Video transcripts are excellent for aiding those with disabilities, but they’re also helpful for quickly analyzing a video for a specific data point. Google Drive’s newest update lets you search through transcripts to find the exact spot you’re looking for.

Google Drive’s New Transcript Search Makes Finding Moments Easy

In a post on the Google Workspace Updates blog, the company announces a new tool for searching through a video’s transcript. If you click the cog icon on the video player and then click “Transcript,” a new sidebar will pop open, showing you everything said in the video. It will highlight the current timestamp to help you follow along more easily and will let you search within the transcript for a specific term.

The good news is that this should work with every video, regardless of if you manually added a transcription. That’s because Google Drive lets you automatically generate captions by right-clicking a video and accessing the caption options. As such, if you’re having issues following a video or just want to find a specific spot without clicking around the video timeline, you can generate a transcript and find what you’re looking for via the new search tool.

Google says this feature is available “to all Google Workspace customers, Google Workspace Individual subscribers, and users with personal Google accounts” and will begin rolling out to everyone starting today. If you don’t see it immediately, don’t fret; give it a few days for Google to get the feature to your account.

This transcription browsing tool is an excellent example of how powerful Google Drive can be. People often assume it’s just a cloud storage service and nothing more, but in truth, there are plenty of Google Drive tips and tricks you can do to get the most out of this handy suite.

4 Ways Using a Smartphone Has Actually Improved My Privacy

Smartphones are walking surveillance machines. Yet, in today’s world, they still offer more privacy than going without them.

4

Digital Wallets Are More Secure Than Credit Cards

I was initially very skeptical when Apple, Google, and Samsung started turning their phones into ways of making payments. As if I wanted to give any of these companies more insight into everything I buy! But here’s the thing—our financial information is notoriously insecure, and it’s only gotten worse over time.

Banks and credit card companies inherently have insight into everything we buy. There’s no getting around that. The problem is that retail chains store this information too, and they don’t always do a good job of it. They suffer data breaches, leaking our credit card numbers and forcing us to go through the hassle of replacing our cards.

Digital wallets may send payments using your real credit cards, but they create a new virtual number for each transaction. When stores have their databases leaked, I don’t have to worry about replacing my cards because the store never had their numbers.

Do I trust Apple, Google, or Samsung more than I used to? Not really. But even if I’m opening the door to them seeing how I shop, at least they’re helping me reduce the number of other companies I’m sharing this information with. Assuming, that is, that they aren’t selling my data.

3

I’ve Started Using Email Alias Apps

I rarely give a company my actual email address anymore. Instead, I turn to services that generate email aliases which forward mail to my inbox.

This functionality doesn’t require a smartphone. I started using SimpleLogin as a Linux user, which let me generate aliases in my browser. SimpleLogin has since been acquired by Proton and is now a baked-in part of the Proton Pass password manager. Whenever I create a new set of login credentials for a website or app, I generate a new email address to go with my new password.

Bertel King / MakeUseOf

The advantage of having a smartphone means the app is always on me. If someone requires an email address while I’m out in public (such as at a store or a political campaign event), I can generate a new email on the spot. That will get me access to the coupon or information I want, then I can shut that alias down when the spam starts to flow.

2

I Can Generate Burner Payment Cards Just as Easily

Just as I’m hesitant to hand over my email address, I’m similarly cautious with my debit and credit cards.

Thanks to the Privacy app, I can generate temporary cards whenever I need to make a purchase online. This can be a one-time use card, or I can lock a card to a specific site that I regularly shop at, like Humble Bundle or Bookshop.org. That way, I don’t have to re-enter payment information every time I buy something, but I’m also not screwed if they suffer a data breach. I can generate a new card with a couple of taps.

Like with email aliases, Privacy also works in a browser, so you don’t need a phone to secure your online shopping wth it. Yet a phone offers the flexibility of being able to do this anywhere.

No, Privacy isn’t a digital wallet and doesn’t have the ability to make NFC payments. But a phone app is more accessible in any situation where I need to type in payment information, or whenever someone asks me to provide said details over the phone.

1

It’s Risky to Continue Sending SMS Text Messages

When I transitioned from a smartphone to a dumbphone and eventually the Light Phone 2, I went back to sending SMS texts to all my contacts. It didn’t feel like a big deal. I’ve sent such texts throughout much of my teenage and adult life.

I knew SMS messages were unencrypted, which meant carriers had access to their contents. What I didn’t grasp is just how many other people get their hands on this same information. It’s not just domestic government monitoring. US telecoms have at times been so compromised that the US government has recommended Americans stop using SMS and opt for encrypted messaging apps instead, according to NBC News.

Conversations in Google Messages on a Galaxy Z Fold 5.
Bertel King / MakeUseOf 

Anything we send via old-school SMS text can wind up on someone’s computer for years, waiting to surface at whichever time, and in whichever way, could do the most harm. Yes, this impacts public servants and celebrities, but it also impacts anyone who has broken up with an ex who might not be all that trustworthy or who has perhaps made an enemy at their previous workplace.

In today’s world, where so much is handled over text, it’s important to have a phone that comes with secure messaging options baked in (like Apple iMessage and Google Messages) or gives you the option to download alternatives (like WhatsApp and Signal).


So yes, despite what I’ve written about ditching my smartphone in the past, I carry a smartphone these days. Yet I still do my best to take simple steps to make my phone usage as secure as I can.

Apple Isn’t as Perfect as It Once Was, and I’m Noticing It Everywhere

I’ve been using Apple devices for years, but lately, something feels off. The attention to detail that once set Apple apart doesn’t seem as strong anymore, and I’ve started thinking of shifting my tech ecosystem elsewhere.

5

iOS Has Become Surprisingly Unreliable

iOS used to be rock solid—so much so that even older iPhones remained smooth for years. I still remember my iPhone 6s running iOS 15, a full six years after launch, and it still felt just as good as when I originally bought it.

But lately, that just isn’t the case. Even my iPhone 13, which isn’t that old, actually stutters and lags on iOS 18. That’s something iPhones were never known for. And it’s not just performance—core ecosystem features like AirDrop have become frustratingly inconsistent. The sheer number of bugs these days makes iOS feel far less refined than it used to be.

Raghav Sethi/MakeUseOf

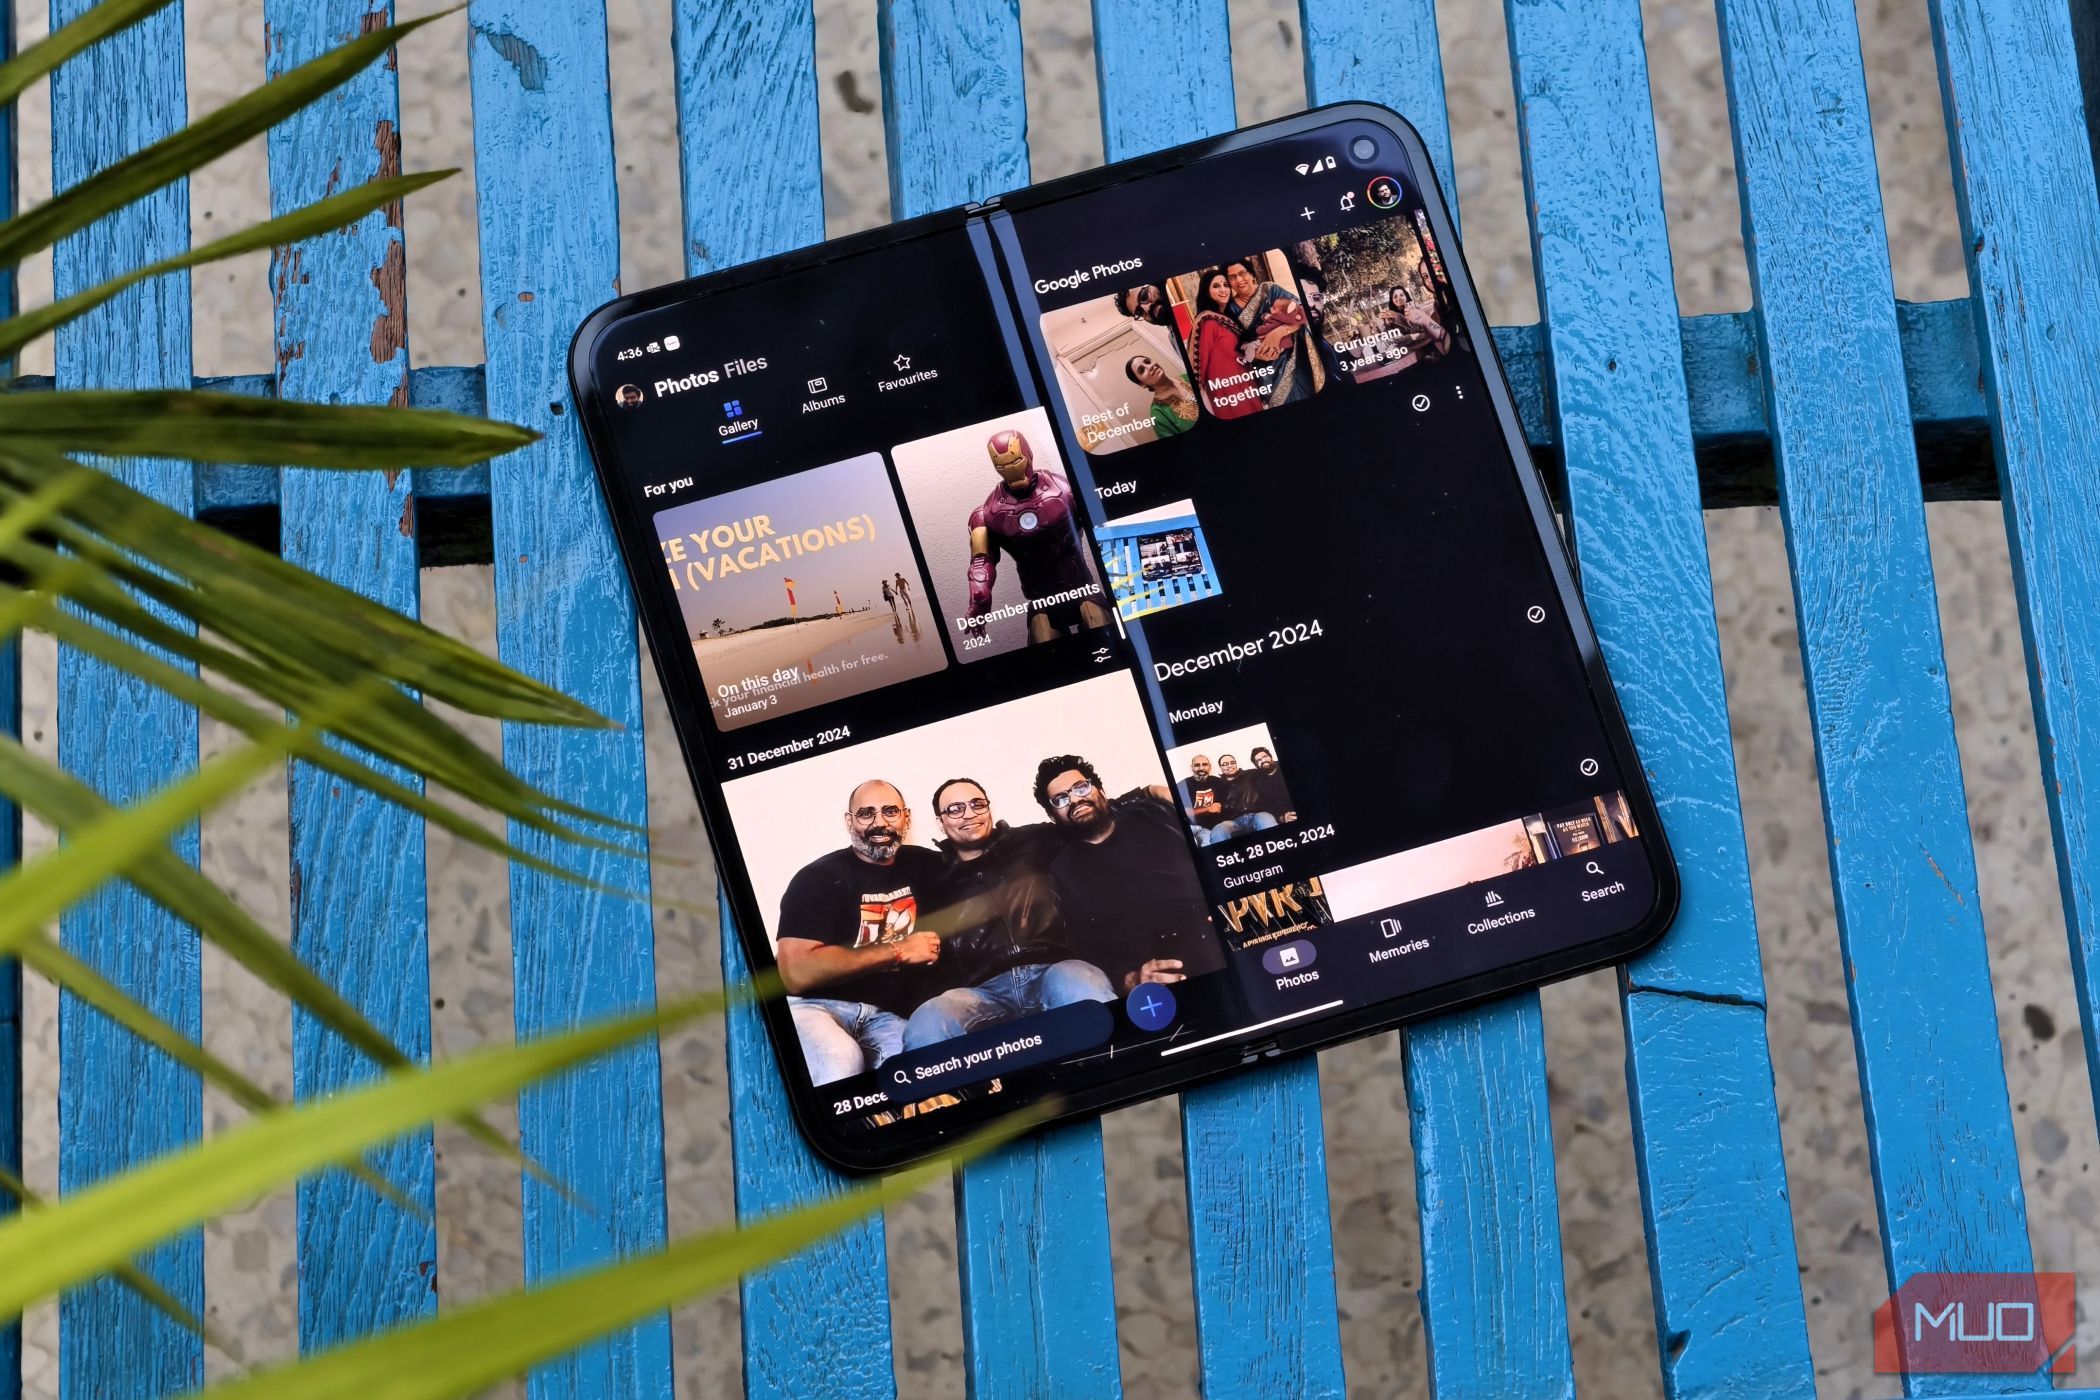
Even the iOS 18 Photos app feels like a complete mess, trying to prioritize form over function—but somehow failing at both.

What Apple really needs is another iOS 12-style update—one that prioritizes stability over new features and gets iOS back to the smooth, polished experience it once was. But for now, I am sure I’ll be switching to Android soon enough if this trend keeps on continuing.

4

Apple Intelligence Has Been Extremely Underwhelming

​​​​​​​Although I’ve written before about how lackluster I find Apple Intelligence, it also has to be one of the messiest Apple launches I’ve ever seen. A staggered rollout was expected, but now, major features—like the revamped Siri—are reportedly delayed until May, as per Bloomberg, meaning it could take nearly a year from announcement to release.

Even if Apple manages to pull things together, it’s hard to ignore how far behind it is. Google and Samsung already offer more AI-powered features, and there aren’t any unique features in Apple Intelligence that truly set it apart. And when Apple does implement the same AI features as its competitors, its results are usually the worst.

Using Type to Siri on an iPhone.
Yash Wate / MakeUseOf

The only real advantage Apple Intelligence has is on-device processing, which is undeniably impressive. But beyond that, Apple is playing catch-up in AI, and so far, it hasn’t done much to prove it can compete.

3

visionOS Still Feels Years Away From Mass Adoption

​​​​​​​ Apple’s next big bet is visionOS and the ecosystem of devices built around it. However, despite being announced in June 2023, we’ve only seen one product so far—the Vision Pro. Many blame its steep $3,500 price tag for lackluster sales, but I don’t think that’s the biggest issue.

Vision Pro on desk
Will Graf/MakeUseOf

Even if Apple releases more affordable headsets, the real question remains: do you actually need one? The Vision Pro still lacks a “killer” feature that makes it a must-buy, and there aren’t any apps that truly transform how you live or work.

It’s undeniably fun for the first couple of weeks, but from what I’ve seen, most Vision Pro owners used it daily for a month or two—only for it to end up collecting dust on a shelf.

2

Competitors Have Caught Up in Hardware

​​​​​​​One of the things that used to make iPhones stand out was how far ahead Apple’s chips were. The A-series processors often outclassed Qualcomm’s by a generation or even two. But over the past few years, that gap has been shrinking.

Samsung Galaxy S25 Ultra lockscreen clock on wooden table.
Zarif Ali / MakeUseOf

In everyday use, there’s really no noticeable difference in speed between an iPhone and a flagship Android phone. And now that Samsung and Google are offering 7 years of software updates, the argument for choosing an iPhone just for longevity isn’t as strong as it used to be.

1

Its Product Lineups Are a Complete Mess

​​​​​​​ Do you remember when choosing an iPhone was simple? There were only three or four models being sold at a time, and the differences between them were clear, with features scaling logically across different price points.

But now, it’s more complicated than ever. A great example is the newly announced iPhone 16e, which starts at $599 and comes with the latest A18 chip, enabling Apple Intelligence. Yet, at the same time, Apple is also selling the iPhone 15, which costs more at $699 but has the older A16 chip. That kind of pricing and feature overlap makes it harder than ever to understand which model offers the best value.

M4 MacBook Pro next to iPad and iPhone 2G on wooden table
Zarif Ali / MakeUseOf

​​​​​​​

And this isn’t just limited to iPhones. Take the AirPods Max, Apple’s most premium and expensive headphones, which were recently refreshed but still use the older H1 chip. Meanwhile, the much cheaper AirPods 4 get the newer H2 chip, which makes absolutely no sense.

The iPad lineup is another example of this growing confusion. There are now so many models to choose from that even I—someone who extensively writes about Apple—find it difficult to recommend the right iPad when someone asks me.

In the end, I just feel like the simplicity that Apple once offered has slowly faded away, and it’s going to take some big changes to get that “Apple magic” again.

What 2+ Years of Daily Solitaire Challenges Taught Me About Productivity

At first glance, Microsoft Solitaire seems like just a way to pass time. But after doing its daily challenges for over two years, I’ve realized it’s chock-full of productivity lessons that genuinely improve how I work.

7

Small Wins Keep You Motivated

If you’ve ever played a daily challenge, you know the satisfaction of finishing one. Those small victories add up every time you play, to more coins and more badges. Watching your progress bar fill up keeps you coming back for more.

I mean, if you’ve earned the Bronze badge, who’s to say you can’t earn the Silver?

This applies to productivity, too. Say you want to launch a company. That sounds overwhelming, right? Now, if you were to break this project into bite-sized tasks, like identifying the problem your company will solve, defining your USP (unique selling point), and choosing a business name, you’d be able to tick off one small task little by little.

Each completed task, no matter how small, motivates you to tick off the next thing. So, instead of focusing on the overwhelming end goal, break your projects into small tasks and celebrate every achievement.

Related

Why I Stopped Using To-Do Lists (and What I Use Instead)

I ditched to-do lists—and found something better.

6

There’s Grace to Fix Your Streak

I’ll admit that over the last two years, I’ve missed a few days here and there. Life happens. But what I love about the daily challenges is that I can go back and complete the days I’ve missed.

Even without the premium plan, you can access the daily challenges from the previous month.

A screenshot showing the daily challenge calendar for January 2025 as well as a prompt showing it's availability for 23 more days

This is to say that your productivity streak likely isn’t completely ruined; you just have to put in a little extra effort to catch up. I’ve had to play two weeks’ worth of daily challenges in two days just to get my momentum back on track. It wasn’t easy, especially with all the expert levels crammed in. However, it was doable.

Skipping a workout (or five), missing a journaling session, or taking a break from brushing your teeth twice a day doesn’t mean failure. It means you adjust, make up for lost time, and keep going.

5

Consistency Builds Momentum and Discipline

When I started playing these games, I didn’t imagine they would have any real impact. I find it hard to keep still when I’m in class, so Microsoft Solitaire was a great way to fiddle without losing focus.

But as the days turned into months, I realized how automatic it became. And this is exactly how you form habits. The more you show up—even when you don’t feel like it—the easier it gets.

A grid showing the daily challenges calendar from 2023-2025 in Microsoft Solitaire on PC

Of course, it’s awesome to be motivated to do what you need to do. But life happens, and sometimes, you just don’t feel like it. That’s where consistency comes in. It removes the need for motivation because your habits start running on autopilot.

4

You Don’t Need a Premium Subscription to Succeed

Premium Microsoft Solitaire has its fair share of perks—no ads, fancy card parks, more daily challenges—but I’ve found that I don’t really need any of that to complete the daily challenges. Sure, they might make things easier, especially when you’re in a race for the top of the leaderboard, and you have to sit through 30-second annoying ads. But the game is still 100% winnable without them.

A screenshot showing the results of a daily event in Microsoft Solitaire on PC

Similarly, you don’t really need expensive apps, fancy planners, or high-end tools to stay organized and get things done. If they’re easily available to you, then why not? But you can work with what you have, find creative solutions, and still achieve your goals.

For instance, I’ve been using Google Calendar to plan my week for years. It’s free and easy to customize, and it helps me get things done without forgetting anything. I could put off planning my week until I get a more elaborate tool, or I could make the most of what’s available and still succeed.

Related

These 6 Premium Productivity Apps Are Actually Worth the Price

Not all paid apps are worth it, but these productivity tools truly deliver on their promises.

3

Time Limits Enhance Focus and Decision-Making

Some Solitaire challenges, especially daily events, are timed. In these cases, there’s no room for overanalyzing. You either make a move or risk running out of time.

I’ve noticed the same pattern in my work. When a task lacks a clear deadline or I give myself too much time, I end up procrastinating until the last minute. Why? My brain already knows how long the task will take, so if extra time is available, it just drifts.

The fix is to not allow yourself more time than you actually need.

2

Different Modes Teach You Adaptability

​​​​​​​ Microsoft Solitaire has multiple games, from Klondike (my personal favorite) to TriPeaks. Each mode has different rules, strategies, and difficulty levels, requiring you to adjust your game plan accordingly.

The different games in the Microsoft Solitaire Collection displayed

Similarly, sticking to just one method or routine won’t always work, especially as there are several productivity methods available. While the Pomodoro technique is great for repetitive tasks, it’s probably not the best if you have to brainstorm character ideas for your new book.

However, if you stay stuck on one method or tool, you can constrain your workflow and kill your productivity, which is the exact opposite of what you’d be trying to achieve.

1

Simple Routines Reduce Decision Fatigue

One of the best things about the daily challenges is that I rarely have to decide what to play. This simplicity makes it easy for me to stick with them.

Yes, I know structured routines can feel restrictive for some, but we can’t rule them out completely. If you have routines in place, you can eliminate unnecessary, constant decision-making, leaving you with more mental energy for important tasks.

Whether it’s a morning workout or a meal prep routine, automating small decisions—especially with apps like Google Assistant and Bixby Routines—helps you stay productive without feeling overwhelmed. And in the end, that’s what really makes a difference.

5 Ways You Should Use Your Smart TV’s USB Port

You’ve probably noticed the USB port on your smart TV, but have you ever actually used it? That little port can do a lot more than you might expect.

Hannah Stryker/MakeUseOf

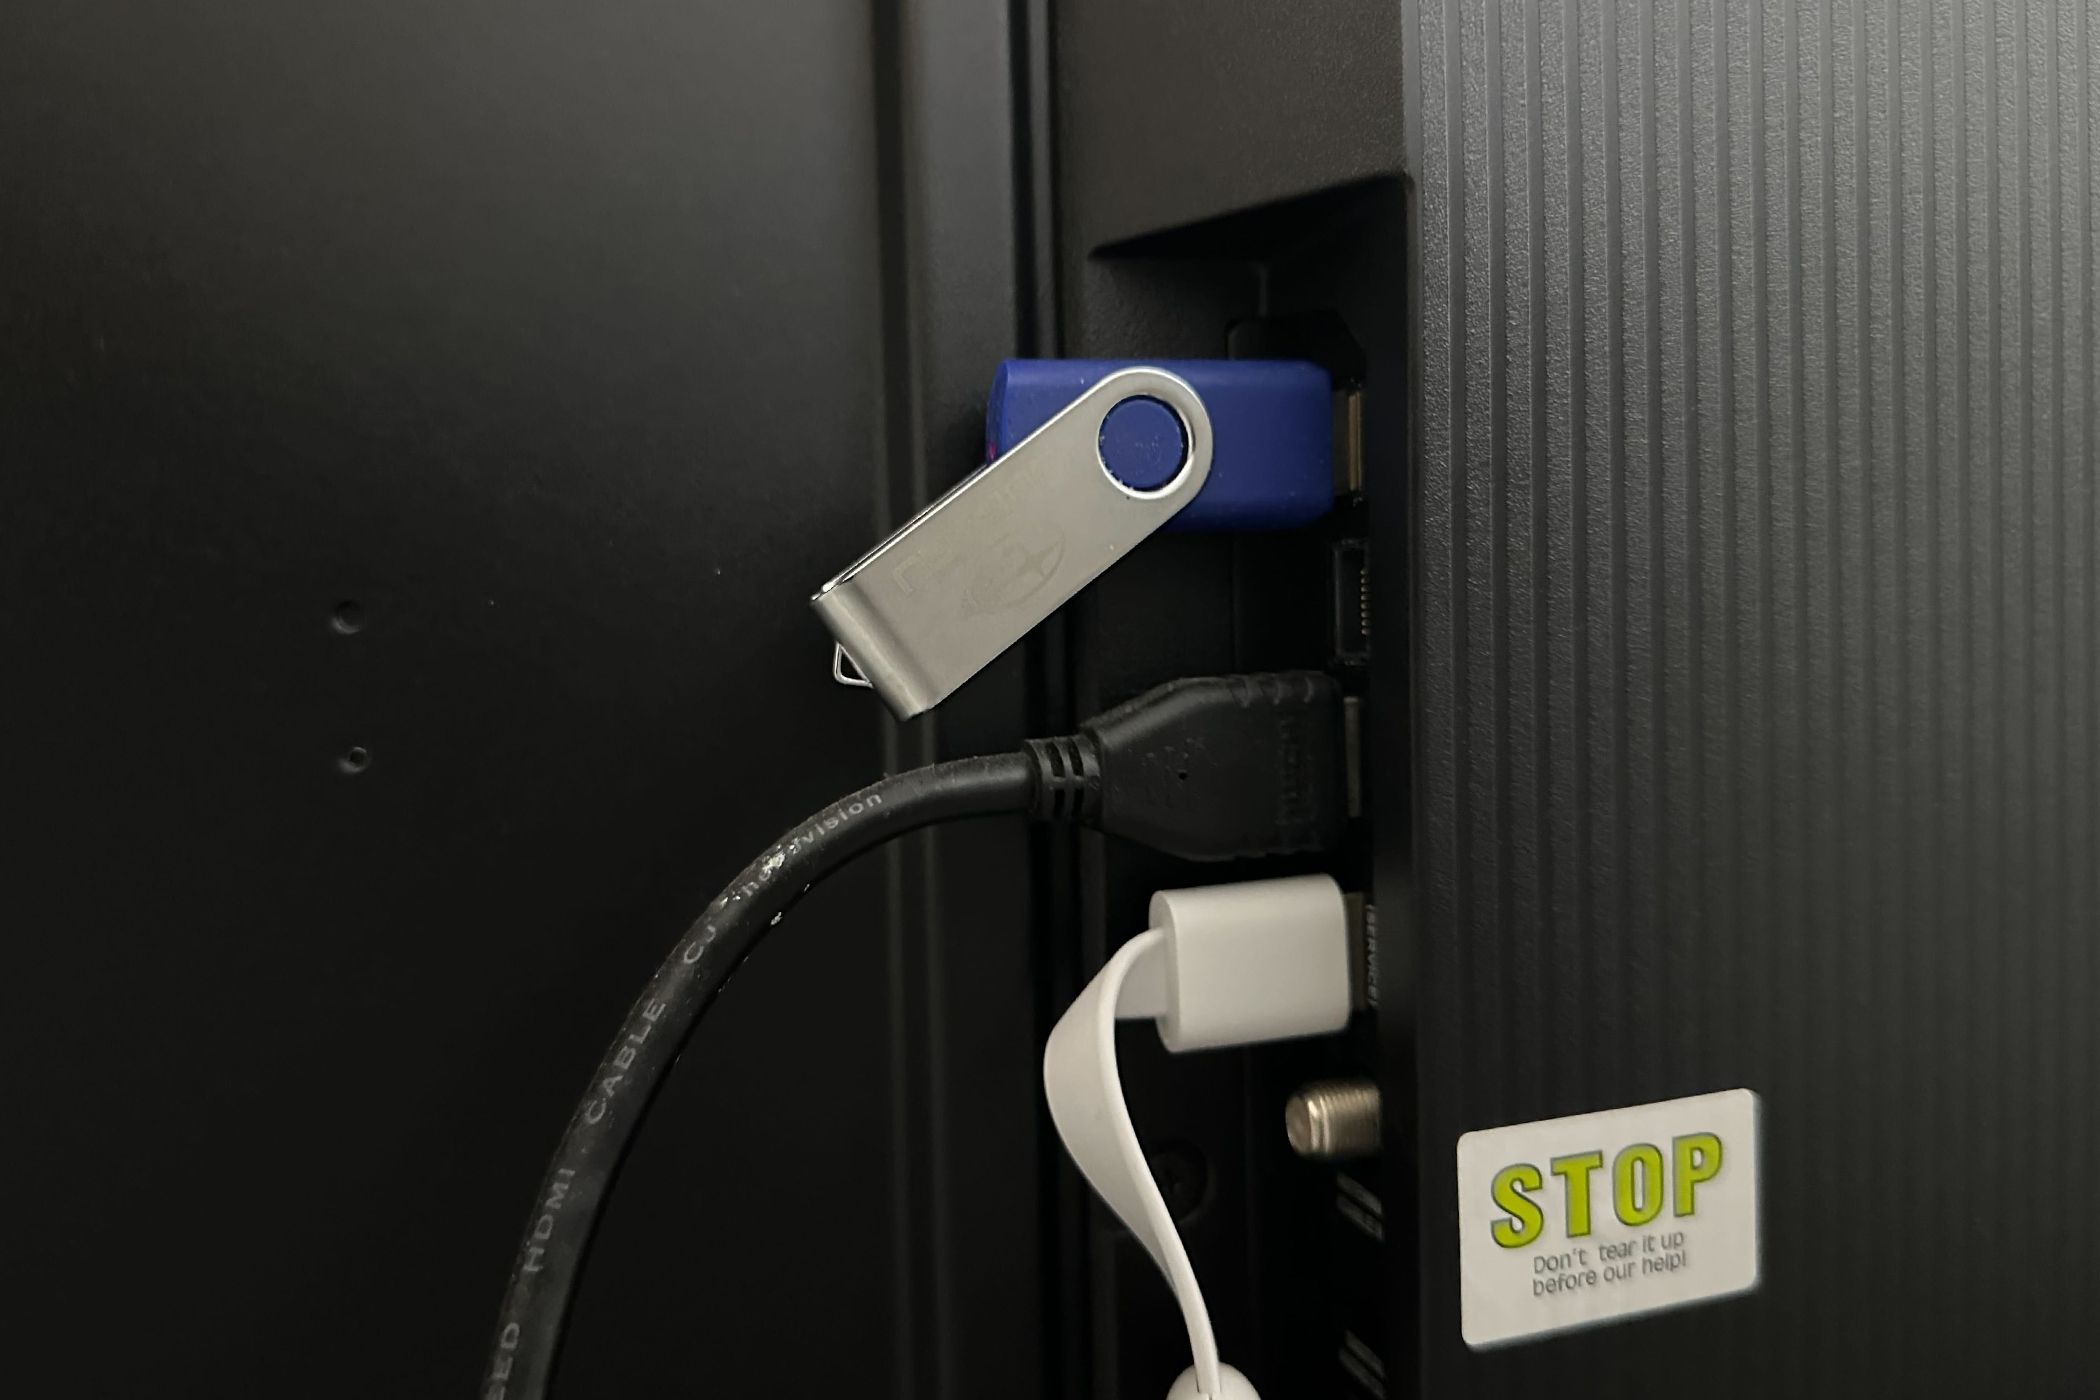
There’s something satisfying about having your own collection of music, movies, and shows ready to play. No buffering, no internet problems—just instant access. Simply load up a USB flash drive or an external hard drive with your favorite content, plug it into the TV’s USB port, and you can use the built-in media player to navigate and play the files.

Not all TVs support every file format, so you might want to check your TV’s user manual to see which ones work. If a file doesn’t play, you can use any free music converter or Windows video converter to reformat it. Otherwise, you might see an “Unsupported File Format” error message.

If you’re watching a foreign movie (or just something with mumbling actors), you can add subtitle files (.SRT or .SUB) in the same folder as the video, with the same filename. Most smart TVs recognize them automatically; if not, you can manually select the file.

4

Transform Your Smart TV Into a Digital Photo Frame

lg smart tv on stand at tech show-1
Grzegorz Czapski/Shutterstock

If you have a USB drive with a folder (or multiple folders) of photos, you can plug it into your TV and start a slideshow. Some TVs let you tweak the settings—changing transitions or how long each image stays on screen.

I do this during family gatherings. Instead of passing a phone around, I let the TV handle it. People notice a familiar face or a forgotten moment, and suddenly, stories start flowing. It fills the room with memories. This works beyond home, too. In the waiting area of a business office, for example, a slideshow on your TV can showcase work, services, or anything worth highlighting.

Some TVs even let you set a photo slideshow as a screensaver. When the screen would otherwise be dark, it cycles through your images instead. It’s simple, but it turns an idle screen into something useful.

3

Install Firmware Updates

Many TV brands allow you to download the latest firmware update from their official website manually, transfer it to a USB stick, and install it directly onto your TV. To do so, you need to navigate to the software update section in your TV’s settings and follow the on-screen instructions.

While most modern smart TVs handle their firmware updates automatically over Wi-Fi, you may find yourself in a situation where a direct USB update saves the day. Maybe your TV is struggling to download a large update over a weak connection, or perhaps you’ve got an older TV model that’s acting up. That’s when this method comes in handy—you may even prefer it over network updates.

Always use a reliable USB drive, and don’t remove it mid-update. Interrupting the process could leave your TV stuck, which is a big problem.

2

Connect Peripherals

Hands Typing on Wireless Keyboard
Wojciech Boruch/Shutterstock
 

You’ve probably struggled with the slow, clumsy process of navigating and typing on a TV remote—one letter at a time. A wireless USB keyboard and mouse can make things much easier. Just plug the combo dongle into the USB port, and navigating your favorite streaming apps or typing in passwords becomes so much easier.

If your TV has built-in gaming options (like Samsung models from 2020 onward), you can also connect a USB game controller. With cloud gaming services like Xbox Game Pass or GeForce Now, your TV becomes a casual gaming setup. Most controllers work right away, so all you have to do is plug them in.

That said, not every USB device will be compatible. It’s worth checking your TV’s manual or support page before buying anything. In my experience, basic peripherals like keyboards and mice tend to work best, while more complex devices can be hit or miss.

1

Charge and Power Your Devices

Most TV USB ports aren’t exactly powerhouses of output. Many provide just 5V at 500mA or 1A, which is fine for trickle-charging smaller gadgets but not ideal for fast-charging your phone. Still, it’s a great backup option, especially for overnight charging or keeping your accessories topped up.

Beyond just charging, your TV’s USB port can also power popular streaming devices like a Roku Stick, Amazon Fire Stick, or Google Chromecast. While they usually come with an AC power adapter, you can ditch the wall plug and power them directly from your TV. This frees up an outlet and makes the device turn on and off with the TV, so it’s not wasting power in the background.

a chromecast device plugged into a tv
Cristian Storto/Shutterstock

Another neat use for a TV’s USB port is powering LED backlight strips. These lights not only enhance the look of your setup, but can also reduce eye strain when watching TV in a dark room. Since they switch on and off with the TV, there’s no need to worry about manually controlling them.

govee tv backlight 3 lite - rainbow test  govee
James Bruce / MakeUseOf

You can also connect a USB digital antenna (like this URIIU antenna in the image below) to expand your TV channel options. With it, you can watch a lot of free over-the-air channels without big, clunky antennas or extra power cables. Just plug it in and perform a scan to find local channels around you.

You’ll find it especially useful if you’ve dropped cable or want more options without paying for a subscription.

How to Turn Off StandBy Mode on iPhone (if You Find It Annoying Like Me)

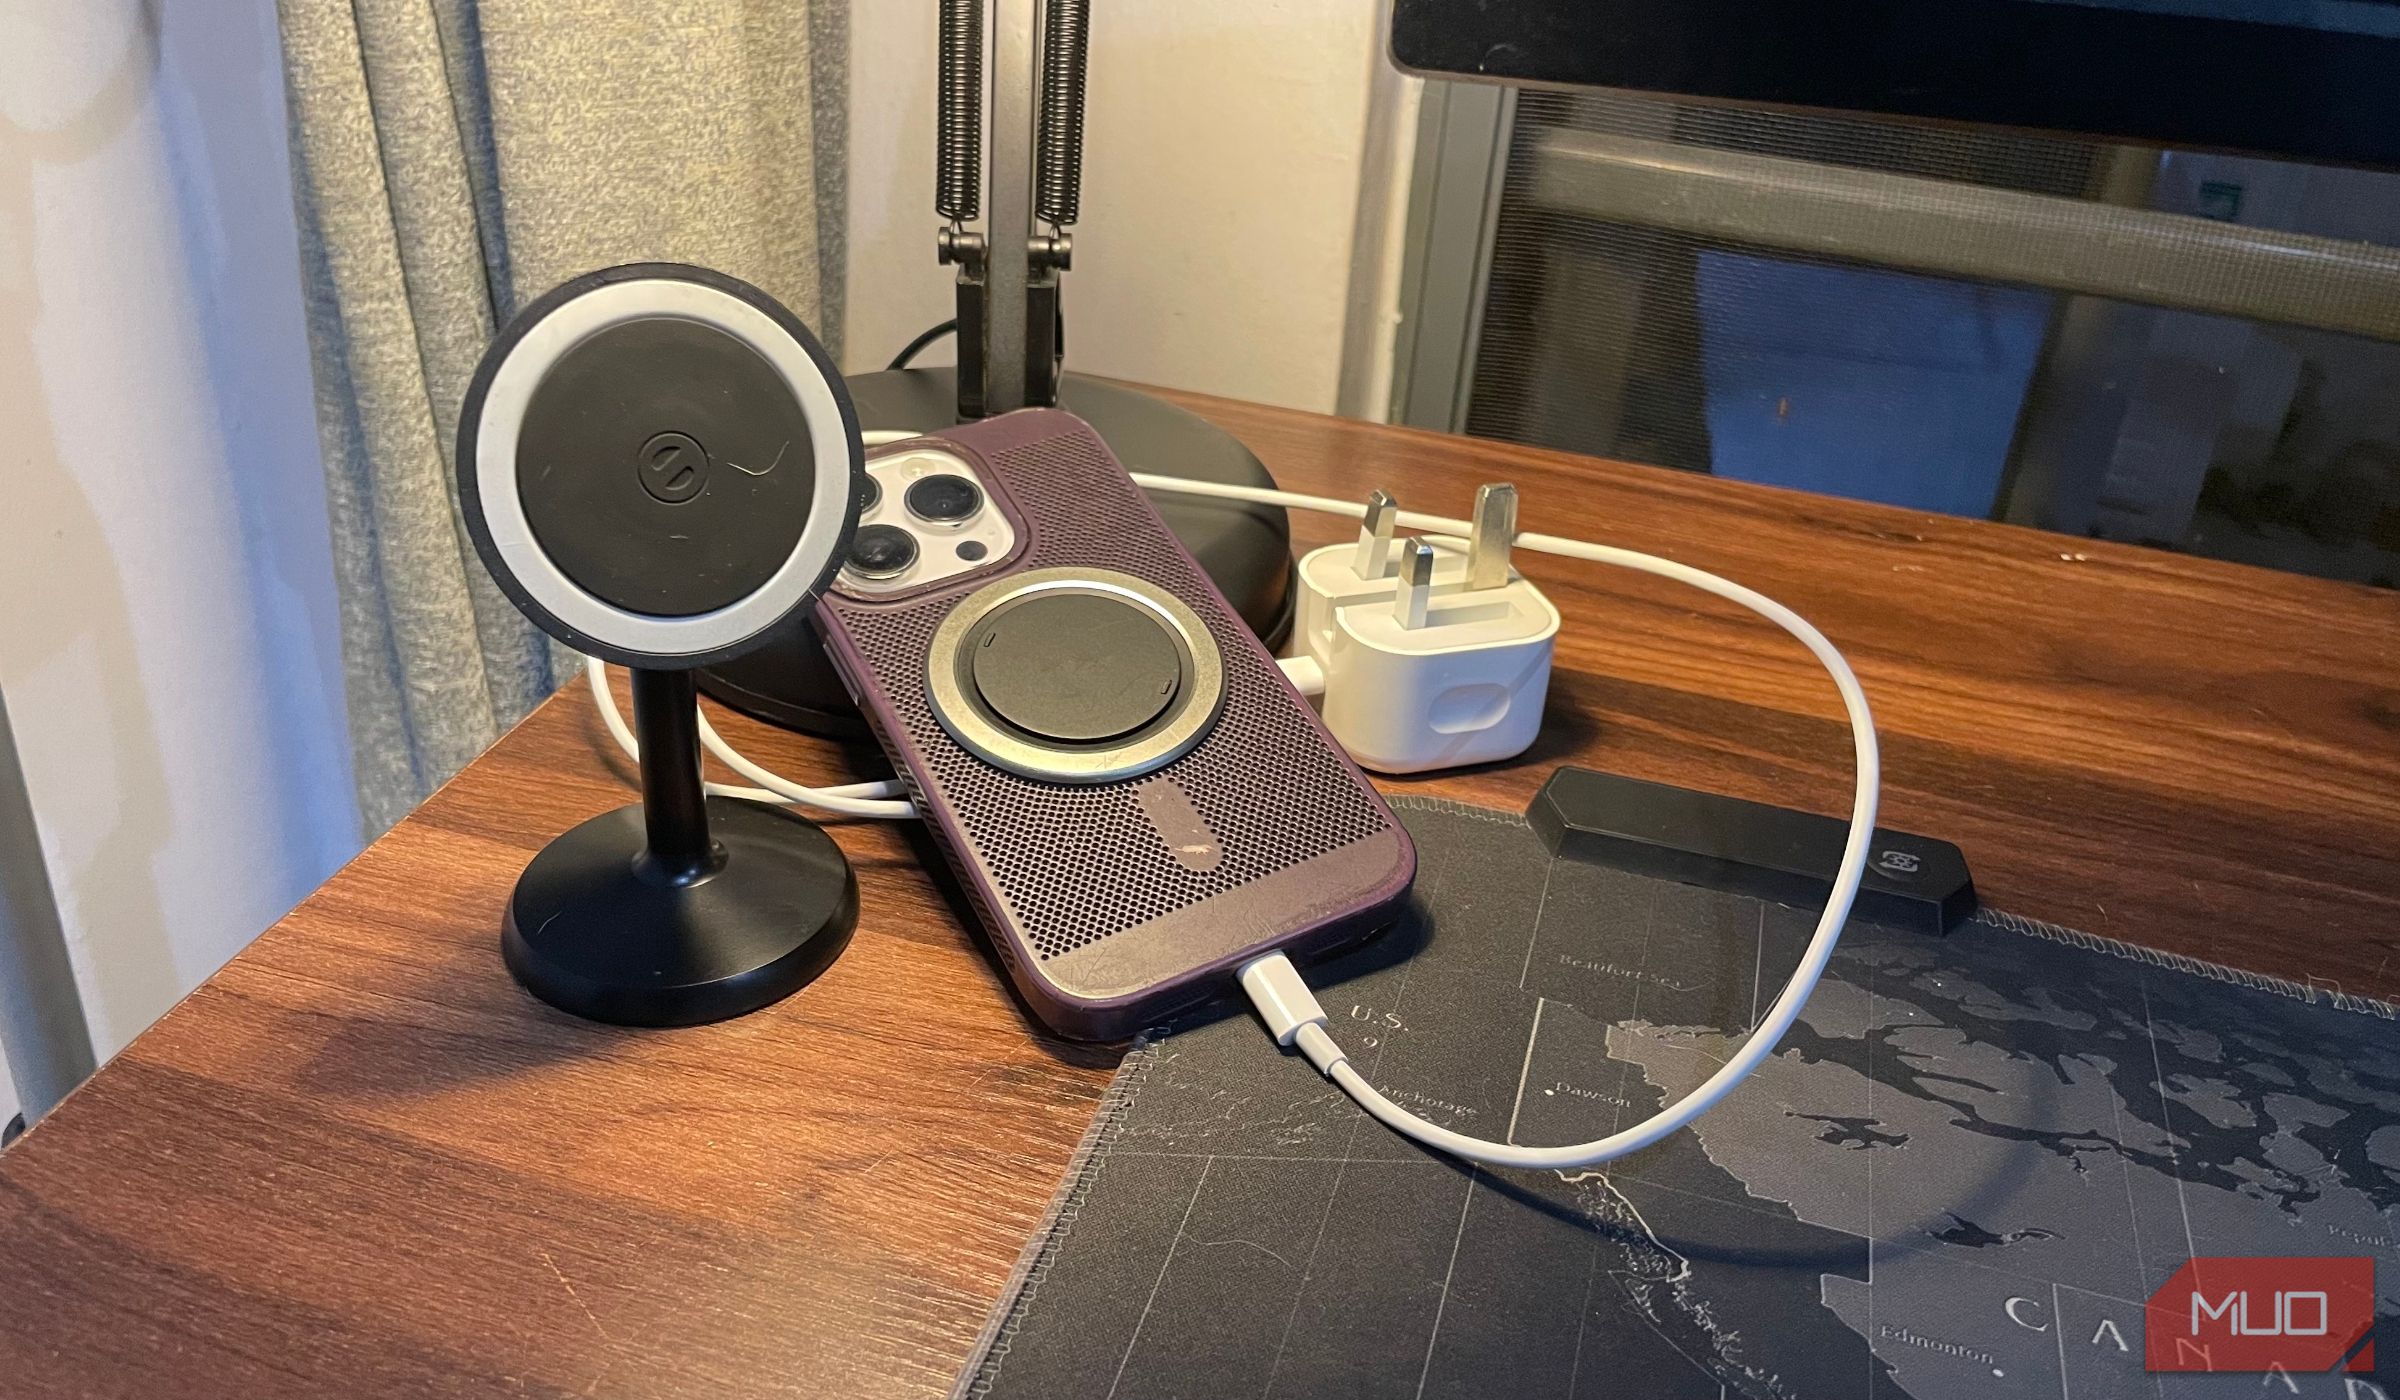
The iPhone’s StandBy feature is handy with its horizontal clock and calendar widgets, but it can also be alarming when you don’t expect it. If you find yourself trapped in this automatic screensaver mode, there’s an easy way to turn this off—as long as you know where to look.

What Is This Horizontal Screensaver on My iPhone?

It’s late and you’ve fallen asleep watching the latest episode of The Traitors on your iPhone. Suddenly, a noise wakes you up, and you face an unexpected jump scare: a picture of your ex staring back at you from your phone screen. Panicked, you try to swipe away from the photo—only to be bombarded with clocks, calendars, and other widgets. How do you escape this nightmare?

Maybe you haven’t had this exact experience, but don’t blame me for seeking some camaraderie in my blunt discovery of the iPhone’s StandBy mode. The intention behind iOS 17’s StandBy mode is for the feature to transform your phone into a bedside clock, or create an informative screensaver. The mode only activates when your phone is charging and in landscape orientation.

But StandBy is not for everyone. Because it’s been automatically enabled since iOS 17, you might not even know it’s there (I didn’t). Unfortunately, this can make it difficult to disable StandBy when you don’t know what it’s called.

How to Disable StandBy on Your iPhone

After erroneously sifting through Display & Brightness settings in my quest to disable the feature, I eventually located StandBy as its own setting category. Once you know where to look, it’s very easy to disable StandBy on your iPhone:

  1. Open Settings on your iPhone.
  2. Scroll down and tap StandBy.
  3. Toggle the top StandBy slider off to disable the feature completely.

If you’d prefer to keep StandBy but modify it to suit your preferences, you can also explore the other available sliders, such as Night Mode. You may also customize how you receive notifications while your iPhone is in StandBy mode.

As someone who almost always has my iPhone locked in portrait orientation, I discovered StandBy late in the game. While I understand the use of this feature as an alternative to a bedside clock, a sudden introduction featuring random photos from a past life was not my idea of a good time.

Hopefully, this guide saves you from the prison of the mysterious (maybe even maniacal) horizontal iOS screensaver that is StandBy.

Apple’s Next Offering Will Suggest the Best Recipes for You

It’s time to get hungry. Apple News+ will soon be the place to go to solve the age-old problem of what’s for dinner.

Apple News+ Food Arrives In April With iOS/iPadOS 18.4

Apple News+ Food will land in April with iOS/iPadOS 18.4, which is currently in beta testing.

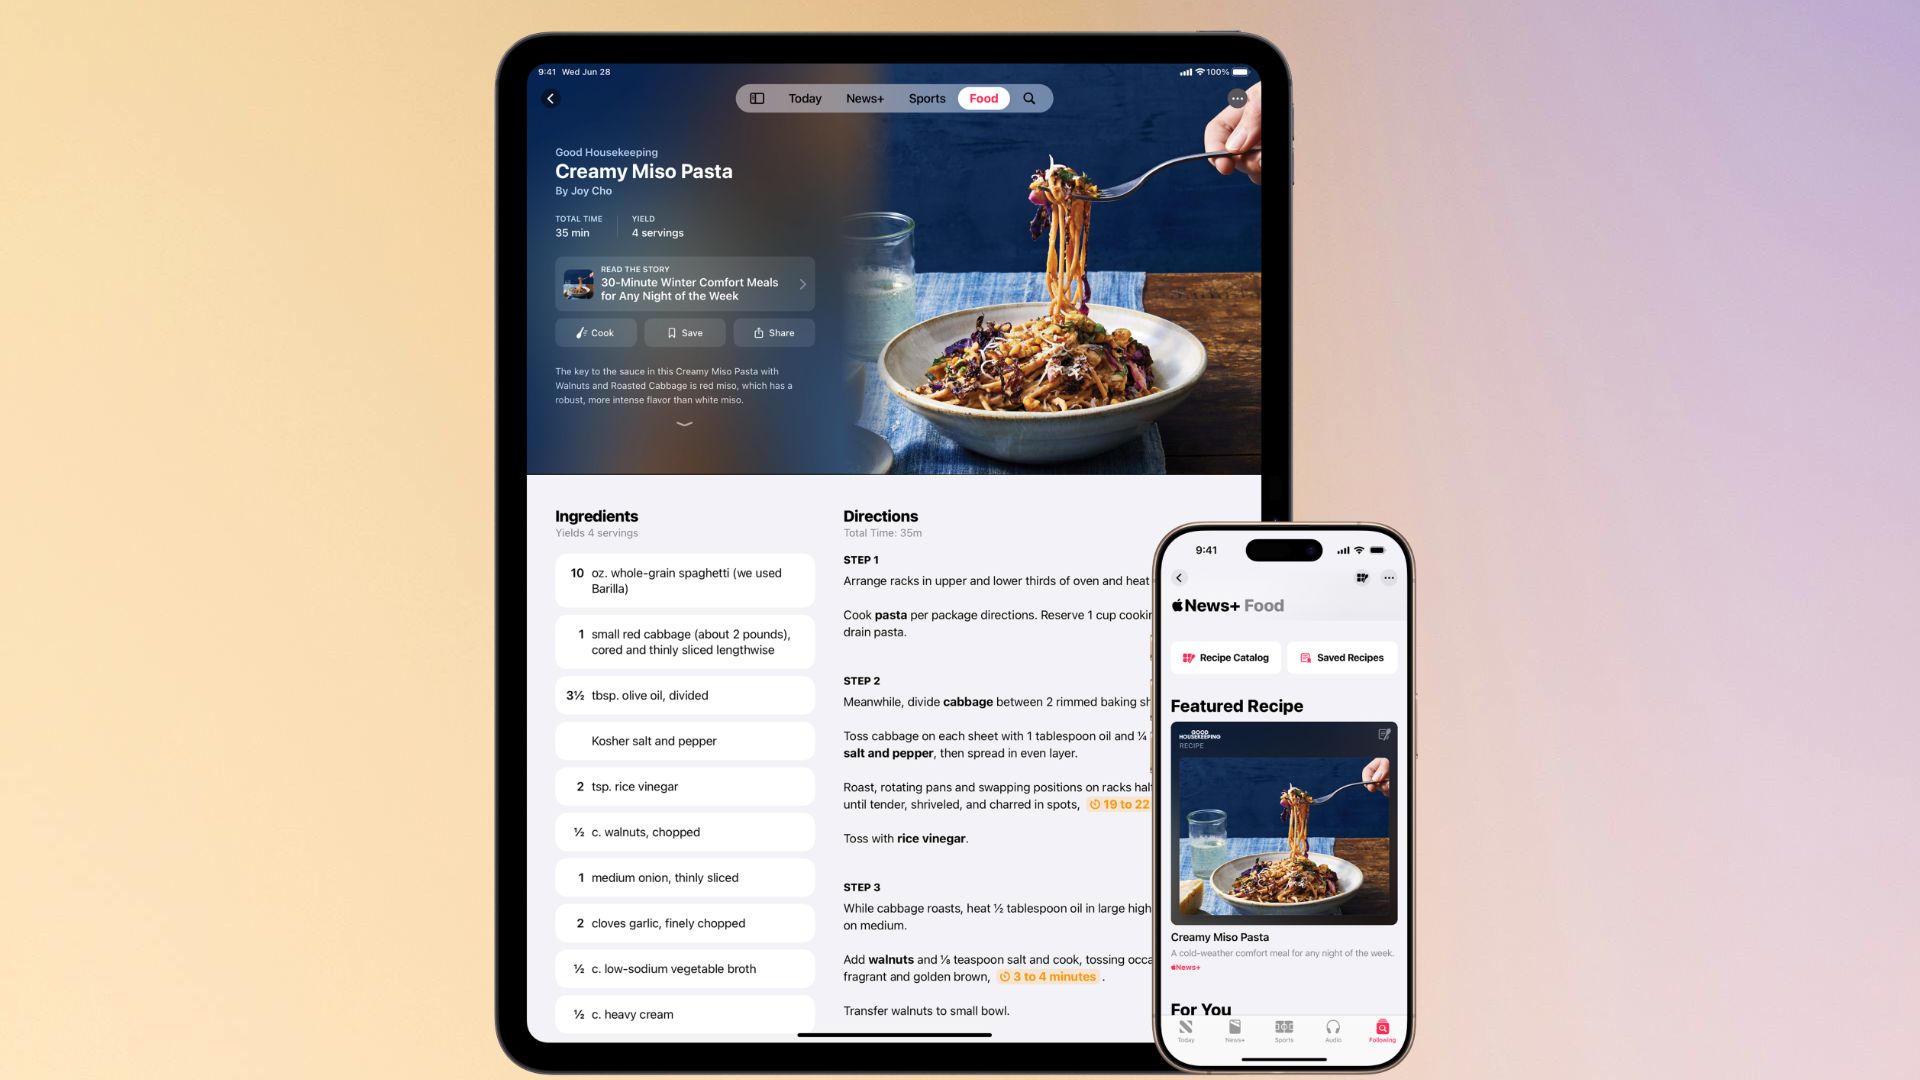
The new section will offer tens of thousands of recipes from Apple News+ publishers including Allrecipes, Bon Appétit, Food & Wine, Good Food, and Serious Eats. All of those can be found in the Recipe Catalog. Recipes are added daily and favorites can be saved to access offline.

In the catalog, you can search for something specific or use filters like Dinner, Easy, Vegetarian, Dessert, and more.

Each recipe page allows you to easily review ingredients and see the instructions. When it’s time to cook, step-by-step instructions will appear on the full screen, making them easy to read from across the room.

Apple News+ brings stories from more than 400 publications along with news from local, national, and international services. There are also a number of exclusive daily puzzles to solve. An Apple News+ subscription is $12.99 per month with free trials available.

Apple also said that select stories and recipes from the feature will be available if you don’t subscribe.

A Notable Addition, With Some Flaws

Apple News+ has been a bit of a forgotten Apple subscription option compared to more popular names like Apple Music and Apple Arcade. Apple News+ Food could help draw in more subscribers with the well-designed features.

While it might look like Apple is coming for some of the popular third-party recipe organizer apps, Apple News+ Food still has some big flaws. The biggest problem is that you can’t add your own recipes or import something you’ve found from TikTok, Instagram, or elsewhere.

If you’re looking for a truly full-featured recipe app to use now, I can highly recommend Pestle. It’s a free download on the App Store for iPhone and iPad. With a subscription, you can unlock a wealth of features, like directly importing recipes from any site or social media, meal planning, and much more. It’s one of the most-used apps on my iPhone.

I’ve Tried Many Android Launchers, But I Keep Coming Back To This One

I’ve tried a lot of Android launchers over the years as a tech writer. While most are perfectly adequate, there’s one that I always find myself going back to.

Niagara Launcher Has a Lot to Offer

I find myself using and recommending Niagara Launcher far more than any other Android launcher, even though it’s not the most feature-rich or customizable option.

What makes it different is its thoughtfully designed UI that’s minimalist without feeling like it compromises functionality. It’s also completely ad-free, which is a huge win in my books. Here are some of its best features.

Download: Niagara Launcher for Android (free, premium version available)

Minimal Home Screen and App Drawer

Niagara Launcher doesn’t have an app drawer per se, but it organizes apps in an alphabetic, scrollable list.

Apps surface beside their corresponding letters as you drag your finger across the list. This list is permanently positioned at the edge of the screen, so you can search for apps instantly without swiping pages in an app drawer.

This clears clutter from your home screen and keeps it reserved for your favorite apps. The home screen also organizes apps in a vertical layout, and you can add custom widgets and pop-up folders that can contain multiple apps and shortcuts.

Swipe on Home Screen Apps to See Their Shortcuts

Swiping right on your home screen apps reveals their app shortcuts. This is convenient if you’re a busy working professional or college student, since you can quickly access essential functionalities with app shortcuts that would otherwise require you to open the app and navigate a bunch of tabs or menus.

Related

7 Samsung Shortcuts I Use Daily as a Busy College Student

Make your life a little easier.

Check Notifications and Reply to Messages From Home Screen

Notifications from your favorite apps appear right on the home screen itself. Swiping right on the app reveals the entire message and a text field to reply instantly if the notification is from a messaging app like WhatsApp, Telegram, or Messages.

I haven’t seen anything like this on any other Android launcher. Replying to a message from the home screen is something you have to experience for yourself. It’s super convenient and makes you less likely to open the app and get distracted.

The paid version of Niagara Launcher (Niagara Pro) has a unique feature called Usage Breaker. Unlike app timers that are super easy to cheat, Usage Breaker gently “reminds you to take breaks from apps you use more than you like,” so it feels less like a punishment and more like an encouragement to stop endlessly scrolling.

Niagara Pro’s pricing varies by country to ensure fair prices for all users. You can check if your country is included for a price decrease on the company’s official site.

Customization Options to Change Look and Feel

Niagara Launcher doesn’t offer a lot of customization options. That said, you can change app icon size, theme color, and font. You can also hide the alphabet list on your home screen and the names of your favorite apps for an even cleaner look.

There are also more than enough wallpapers and app icon packs to choose from.

The search bar also has an integrated calculator, so you can do basic mathematical operations from the home screen. Swipe up anywhere on your home screen to pull down the search bar and type your query, and the result will appear underneath.

Of course, the feature is not a replacement for a dedicated calculator app. Still, it does come in handy occasionally when you need to do simple calculations, like at the grocery store.

Dedicated Quick Action Button on Home Screen

You can also add a quick action button on the home screen to lock the screen, activate the voice assistant, pull up your Google News feed, and more.

I highly recommend checking out Niagara Launcher, even if you’re not a fan of Android launchers in general. Its app navigation system is the most intuitive one I’ve seen, and its minimalist aesthetic encourages you to be mindful of your phone usage without being too in-your-face.

One of Android’s Biggest Alternative App Stores Is Shutting Down

If the Amazon Appstore falls in the forest, but no one was using it anyway, does it make a sound? I guess we’ll find out in August 2025, when Amazon pulls the plug on its Appstore for Android devices.

Amazon Is Discontinuing Its Appstore for Android

Android users will no longer have access to the Amazon Appstore starting on August 20, 2025. After that, you won’t be able to download new apps or update any existing apps from the Amazon Appstore on Android.

While you might be able to hang on to existing Amazon Appstore apps on your Android device beyond the August deadline, Amazon doesn’t guarantee that they’ll continue to operate. Plus, given the security risks of having zombie apps on your phone, it’s probably best to plan on deleting the apps right away.

Along with the store, Amazon will also abandon the Amazon Coins program. Amazon Coins were previously “used to make purchases on certain apps and in-app purchases,” according to Amazon’s FAQ. As of February 20, 2025, you can no longer purchase new coins, and you have until August 20 to spend what’s left in your balance. If you don’t use them up by August, Amazon says they’ll be refunded, but details on how that works “will be shared at a later date.”

To be clear, this doesn’t change anything for Amazon devices, such as Fire TV and Fire Tablets. Such devices will continue to have access to the Amazon Appstore.

Is Amazon Appstore a Loss for Android Users?

You might be wondering why this really matters, when the Google Play Store is objectively the go-to for apps on Android devices. While the Amazon Appstore has been considered one of the decent alternatives to the Google Play Store for Android apps, it doesn’t necessarily offer much that Google Play doesn’t.

As referenced in our comparison of the Google Play Store vs. the Amazon Appstore, Google’s store had over 3.5 million apps in 2022, whereas Amazon had just over 480,000. Granted, the Amazon Appstore has grown somewhat since then, with over 530,000 apps at the end of 2024’s second quarter, according to Statista.

game of the week tab on google play games
lilgrapher/Shutterstock

The only real justification for having the Amazon Appstore on your Android device was to have some kind of backup to Google Play, in case any app developers had beef with Google. You might recall the Fortnite feuds of the 2020s, when game developer Epic Games sued Google because of its app store monopoly, pulling the popular Fortnite game from the Google Play Store as a result.

What this means is, if you’re an Android user, you’ll either be stuck with Google’s app offerings or need to install another alternative app store, like F-Droid. If Google continues to make companies like Epic Games angry, you could miss out on some exciting new games or other products. However, there are typically ways to get access to such exclusive apps, from mobile web apps to cloud gaming services.

At any rate, it’s clear that Amazon is doing a thorough sweep of its clutter, from eliminating its unpopular TikTok-style platform to shuttering its Zoom-like meeting app. If Amazon is this confident in clearing out the old, I certainly hope that what’s new is impressive.

You Can Screen Share With ChatGPT: This Is How

Ever wanted ChatGPT to guide you through a task without going back and forth with text? ChatGPT’s screen-sharing feature lets you do just that and have the AI chatbot assist you in real-time on any project.

How ChatGPT Screen Sharing Works

To get started with ChatGPT’s screen-sharing feature, you’ll need a ChatGPT Plus subscription—currently available for $20 monthly. ChatGPT’s screen-sharing feature is exclusively accessible through the ChatGPT mobile app, so make sure you have it installed on your device.

Download: ChatGPT for Android | iOS (Free, subscription available)

Once you have the app ready, follow these steps:

  1. Open the ChatGPT app and start a new conversation.
  2. Tap the voice mode icon in the bottom right corner to open advanced voice mode.
  3. Tap three dots and select Share Screen.
  4. When prompted, grant ChatGPT permission to access your screen.
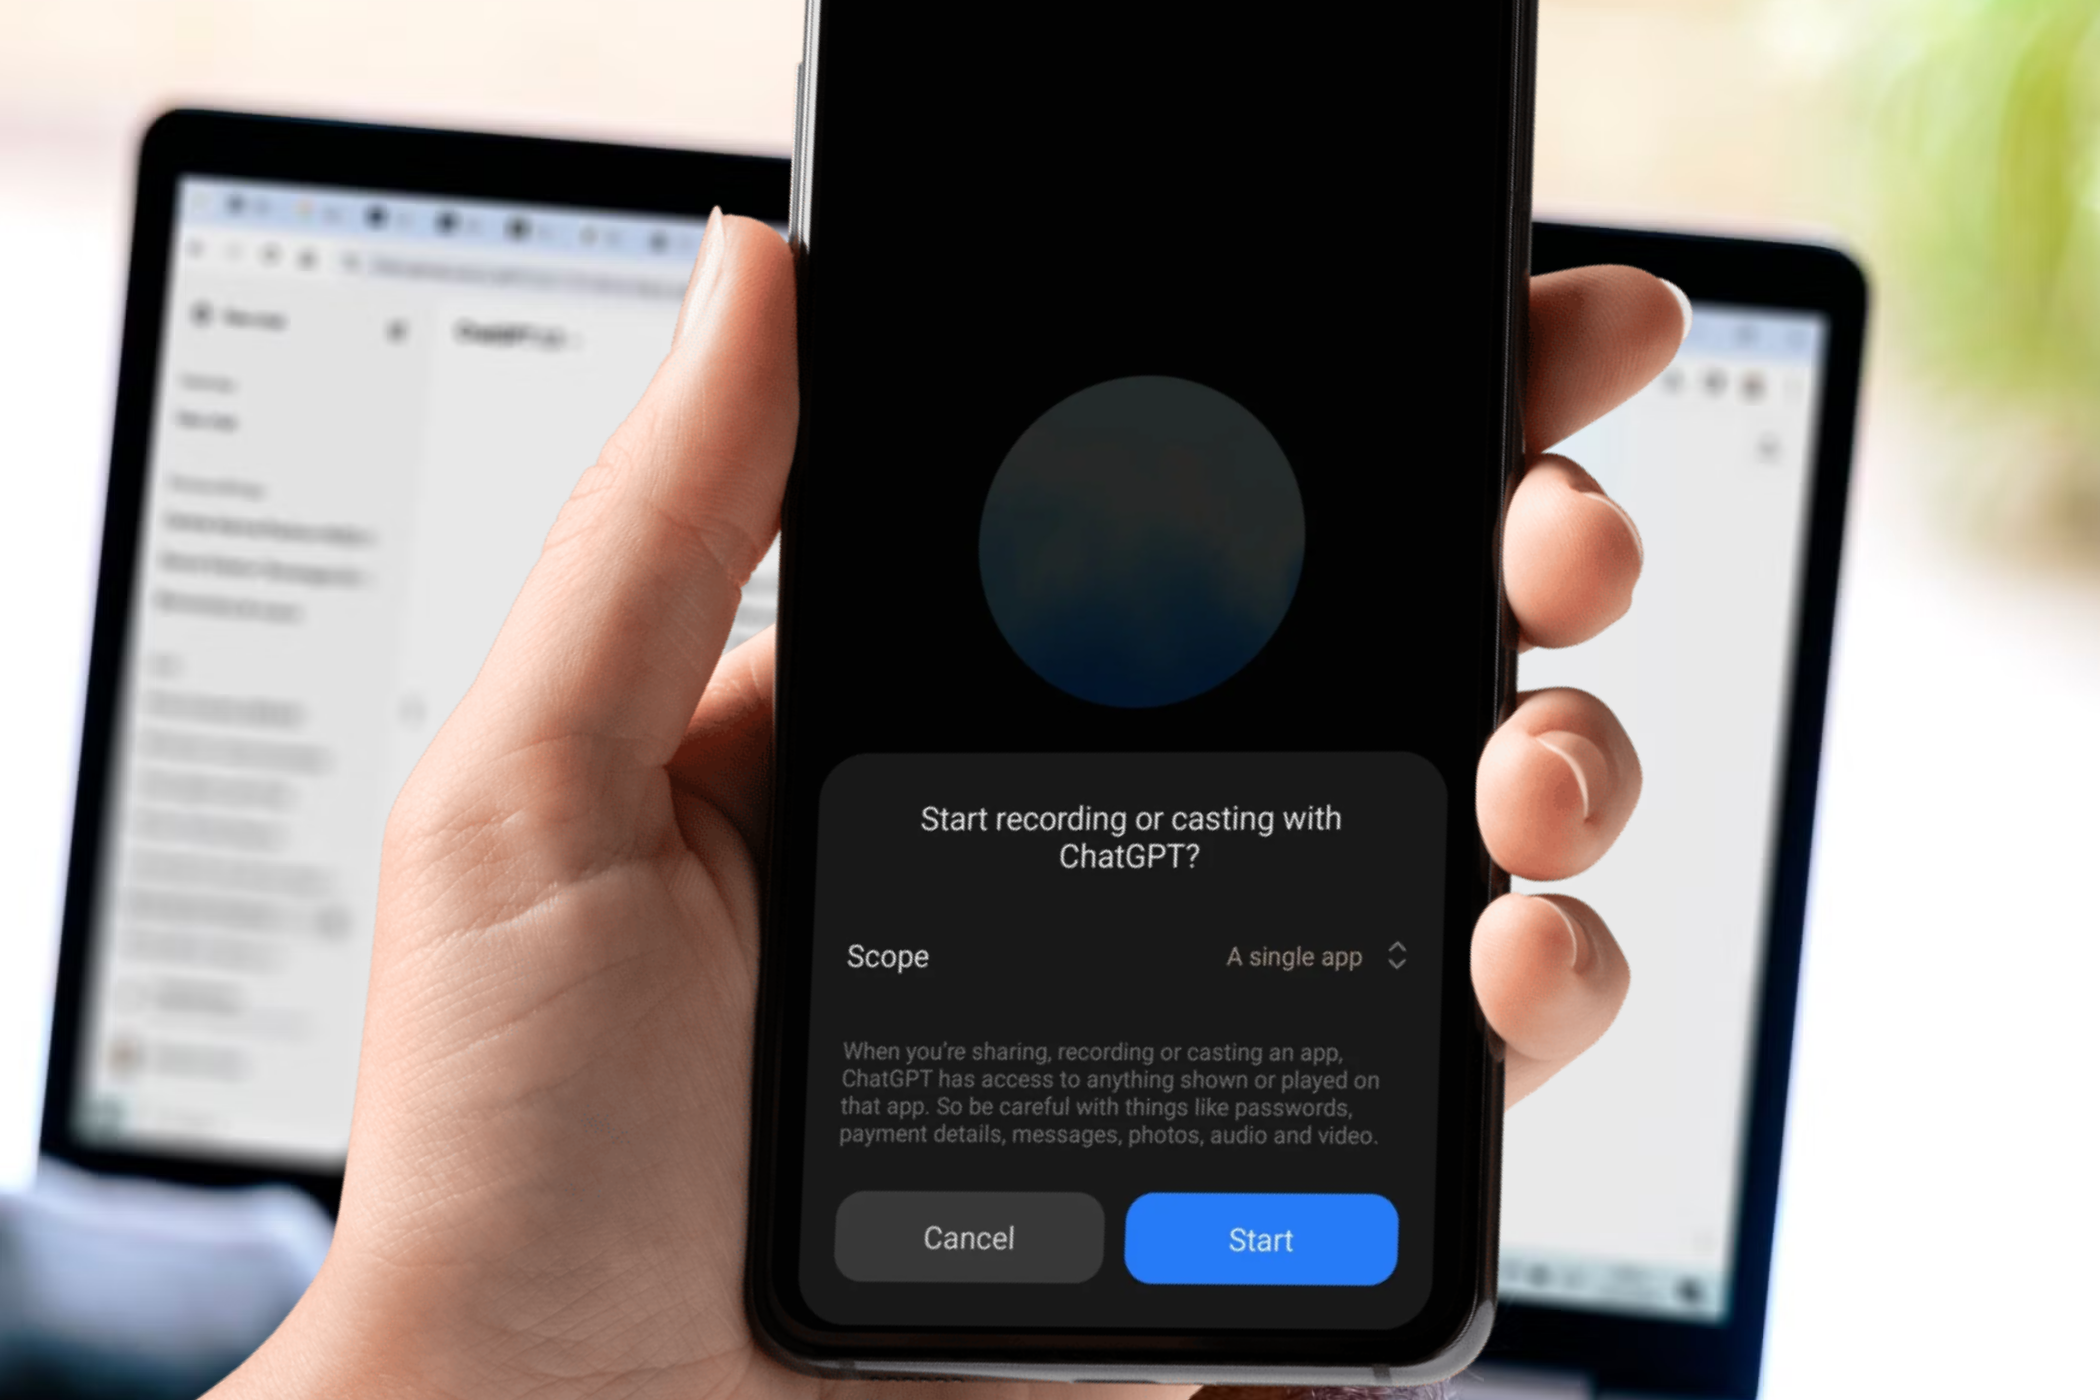
  5. Share your entire screen or select a specific app to share and then tap Start.

ChatGPT can provide step-by-step guidance for tasks with active screen sharing. So, for example, when setting up a new app or troubleshooting an issue, ChatGPT can offer tailored instructions based on what it sees on your screen.

Remember that when you share, record, or cast an app, ChatGPT can access anything shown or played on that app. This means you should be careful with sensitive information like passwords, payment details, messages, etc.

How ChatGPT Screen Share Boosts My Productivity

By context-aware assistance, it can help you navigate tasks more efficiently. One practical use case is having ChatGPT guide you through setting up important app settings. For instance, I shared my screen with ChatGPT when configuring my Slack workspace.

ChatGPT walked me through each step, from setting up channels to customizing notifications based on what it saw on my screen. It made the process much smoother and faster.

Another helpful application is having ChatGPT summarize an article you’re reading. Share your screen while viewing the article, and ask ChatGPT to provide a concise summary. This can save you time and help you quickly grasp the main points.

You can ask ChatGPT for clarification if you come across a specific reference or term in an article you don’t understand. Just highlight the word or phrase, share your screen, and let ChatGPT explain it in simple terms.

The possibilities don’t end there. You can use screen sharing to have ChatGPT assist you with many more things. As OpenAI continues to add more features, like the ability to give ChatGPT specific personality traits, the potential for productivity is truly exciting.

Jak zainstalować program antywirusowy na komputerze dell?

program antywirusowy na komputerze dell

Instalacja programu antywirusowego na komputerze Dell to kluczowy krok w zapewnieniu bezpieczeństwa systemu i danych użytkownika. Ochrona przed wirusami, malware oraz innymi zagrożeniami internetowymi jest niezwykle istotna, zwłaszcza gdy komputer jest używany do pracy, bankowości internetowej lub przechowywania ważnych plików. Proces instalacji antywirusa jest prosty i można go przeprowadzić w kilku krokach.

Pierwszym krokiem jest wybór odpowiedniego programu antywirusowego. Istnieje wiele opcji dostępnych na rynku, zarówno darmowych, jak i płatnych. Popularne programy to Windows Defender (wbudowany w system Windows), Avast, Kaspersky, Norton, McAfee oraz Bitdefender. Przed podjęciem decyzji warto sprawdzić opinie i porównać funkcje, takie jak ochrona w czasie rzeczywistym, firewall czy skanowanie w chmurze. Wiele modeli komputera Dell jest sprzedawanych z preinstalowanym oprogramowaniem antywirusowym, np. McAfee, które można aktywować lub zastąpić innym rozwiązaniem.

komputer dell

Po wyborze odpowiedniego programu należy pobrać go z oficjalnej strony producenta. Ważne jest, aby unikać pobierania z nieznanych źródeł, ponieważ może to prowadzić do infekcji złośliwym oprogramowaniem. Strony producentów zazwyczaj oferują najnowsze wersje programów oraz instrukcje instalacyjne.

Jak zainstalować program antywirusowy na komputerze dell?

Kolejnym krokiem jest uruchomienie instalatora. Po pobraniu pliku należy go otworzyć i postępować zgodnie z instrukcjami wyświetlanymi na ekranie. W większości przypadków instalacja sprowadza się do kilku kliknięć „Dalej” i zaakceptowania warunków licencyjnych. Warto zwrócić uwagę na opcje dodatkowe – niektóre programy antywirusowe proponują instalację dodatkowych narzędzi, takich jak przeglądarki internetowe czy menedżery haseł, które nie zawsze są konieczne.

Po zakończeniu instalacji program antywirusowy zazwyczaj wymaga aktywacji i aktualizacji baz wirusów. Jeśli korzystasz z płatnej wersji, konieczne może być wprowadzenie klucza licencyjnego lub zalogowanie się na konto użytkownika. Następnie warto przeprowadzić pierwsze pełne skanowanie systemu, aby upewnić się, że komputera Dell nie jest już zainfekowany.

Ostatnim krokiem jest konfiguracja programu antywirusowego. Warto dostosować ustawienia skanowania, włączyć ochronę w czasie rzeczywistym oraz skonfigurować automatyczne aktualizacje. Niektóre programy oferują również funkcję harmonogramu skanowania, dzięki której komputer będzie regularnie sprawdzany pod kątem zagrożeń.

Podsumowując, instalacja programu antywirusowego na komputerze Dell to prosty proces, który zapewnia bezpieczeństwo systemu i danych. Wybór odpowiedniego oprogramowania, pobranie go z oficjalnej strony, instalacja oraz konfiguracja to kluczowe kroki, które pozwolą uniknąć zagrożeń. Regularne aktualizacje i skanowania pomogą w utrzymaniu wysokiego poziomu ochrony, a użytkownik będzie mógł bez obaw korzystać z internetu i przechowywać ważne pliki na swoim komputerze.

Google’s Newest AI Tool Helps You Choose Your Perfect Career

While we have anxiety around AI stealing human jobs, Google’s new AI product may actually do the opposite. Whether you’re taking your first step into the workforce or transitioning to a new industry, Google’s experimental “Career Dreamer” is designed to connect you to compatible roles.

If there’s one question I dread, it’s “what do you do?” For multi-hyphenates or those in the midst of a career transition, it’s hard to know how to identify yourself—in social settings and in your job search. Google is addressing this challenge with Career Dreamer, an AI tool that supports jobseekers.

In Google’s blog, the company essentially pitches the product as a digital career coach, helping you to find professional opportunities that line up with your skills.

“Career Dreamer uses AI to find patterns and connect the dots between your unique experiences, educational background, skills and interests. Think of it like a helping hand to bridge where you’ve been and imagine where you could go next.”

At the time of writing, Career Dreamer lives on Google Labs, Google’s home for AI experiments.

How to Use Career Dreamer

If you’re in the US, you can get started on Career Dreamer for free at grow.google/careerdreamer. There’s no account setup required, and the experimental tool is clean, colorful, and approachable.

Admittedly, I have some PTSD from job-related platforms, which often require you to re-enter a plethora of information from your CV. While I feared the worst, I was pleasantly surprised when Career Dreamer told me it would do the work for me, starting with the simple prompt of identifying a current or past role.

Google Career Dreamer's starting prompt asking a user to enter a current/previous role

The platform then generates a list of responsibilities and skills that you can select from, and that’s all Career Dreamer needs to start drafting a Career Identity Statement. This statement is something you might include at the top of a resume or as part of a cover letter. As you add information, Career Dreamer refines your statement to be more holistic.

Google Career Dreamer writes a Career Identity Statement for a writer who also has producing experience

When you’re ready, you can tap Explore paths, bringing you to a page of career ideas. As you drag your cursor over each role, Career Dreamer provides a quick explanation of how your experience makes you a good fit.

You can refine your results by selecting the Explore paths based on… button. For example, I asked the AI tool to focus more on new directions by deselecting Experiences and Education, and keeping Skills and Interests selected. The tool then highlighted new paths, along with advice on additional certifications or education I might need to make the pivot.

Google Career Dreamer's button for narrowing in on potential paths

Lastly, Career Dreamer includes a tab called Jump to Gemini, intended for building your resume or cover letter. Now that Gemini’s fastest model is available to all users, this experience should be just as smooth as that of Career Dreamer.

Google Career Dreamer's tab to Jump to Gemini

From my point of view, this experimental tool could be the next modern and accessible form of career coaching. The UI is clean, colorful, and inviting—perfect for color-coders and the easily-distracted. As contemporary as it is, Career Dreamer also scratches a nostalgic millennial itch, hearkening back to the ease and playfulness of a BuzzFeed quiz.

While Google’s newest AI experiment has plenty of bells and whistles, perhaps its most promising feature is its ability to frame. As Google puts it, “understanding the skills you already possess and learning how to articulate them effectively is incredibly valuable.” Truthfully, the hardest part of getting your foot in the door is communicating that your foot belongs there, even if your shoe looks different than the others.

5 Ways I Get Better Brainstorming Results From ChatGPT

After struggling with basic results, I’ve unlocked ChatGPT’s hidden brainstorming potential with simple tweaks. Breaking down my sessions into smaller chunks and using specific brainstorming techniques are just two of those ways.

1

Explicitly State the End Goal

Being as specific as possible is one of the simplest AI prompting tricks that I’ve applied to my brainstorming sessions. I explicitly tell ChatGPT why I’m brainstorming so that the chatbot has more context.

I also tell ChatGPT where I plan to use the information I get from brainstorming (e.g. in an article or for a research project). Doing both of these means that I get more tailored results. Asking ChatGPT to be an expert can help even further.

2

Telling ChatGPT to Wait Before Giving Information

I’ve noticed that ChatGPT sometimes intervenes with its thoughts before necessary. When brainstorming, I always found this overwhelming—which led me to search for solutions. So far, telling ChatGPT to wait before giving its input has been the best way to do this.

I simply add this sentence at the end of my prompts:

Please don’t share your ideas until I tell you to.

If I need to explain something in significant detail, I’ll add this sentence until I’m ready for ChatGPT to provide input. My sessions are better structured as a result.

3

Using Bite-Sized Sessions

My excitable old self would ask ChatGPT to give me 40+ ideas in one go. But while I thought I was being more efficient, this actually worked against me for two reasons:

  • ChatGPT gave me limited variations and many responses felt like filler content.
  • Even though I have a ChatGPT Plus subscription, my software often crashes when generating long responses.

To combat these problems, I now break my brainstorming sessions into smaller chunks. I focus on one subcategory at a time, obtaining as much information as possible before moving on.

Bite-sized brainstorming in the ChatGPT app

ChatGPT can focus more closely on these and give better results by asking for fewer things at a time. The conversation also flows much better.

4

Use Specific Techniques

While ChatGPT is good at standard brainstorming, I like to push the chatbot to its limits. I ask the tool to use specific brainstorming and conceptualization techniques to do this.

Filling gaps is one of the best ways to use ChatGPT for brainstorming. If my brain is particularly creative, I jot down numerous ideas. Then, I go to ChatGPT with this prompt:

Here’s what I have so far for my brainstorming: [List of Topics]

Based on the information I’ve provided, can you identify any possible gaps I should consider filling?

I also use Custom GPTs so that ChatGPT can generate mind maps. I first receive everything in written form and then ask the tool to create a visual representation. Though too much text can distort the mind map, I recommend using this method in most instances.

Generating a mind map in ChatGPT
Screenshot by Danny Maiorca from the ChatGPT web app

5

Assess Brainstorming Ideas Objectively

Biased answers are one of ChatGPT’s biggest problems, but I’ve prevented this by asking it to give honest responses. I now ask ChatGPT to objectively give honest feedback on my brainstorming ideas. A simple prompt like “please be as honest and neutral as possible” normally helps.

Once I have the feedback, I can ask ChatGPT for suggestions. This information also makes it easier for me to generate new ideas and develop stronger concepts.

asking chatgpt for feedback on my brainstorming sessions

ChatGPT is an excellent brainstorming companion. It can help you uncover new avenues you might never have considered. I normally get at least one useful idea from my brainstorming sessions, and when I have more to work with, I can start thinking about new interesting approaches myself.

Jak aktywować tryb ekologiczny na monitorze Dell?

ekologiczny na monitorze Dell

Monitory Dell serii P zostały zaprojektowane tak, aby sprostać potrzebom współczesnego użytkownika. Posiadają różnorodne porty do podłączania urządzeń i są wyposażone w podstawkę, która umożliwia użytkownikowi przechylanie, obracanie i obracanie ekranu w celu stworzenia spersonalizowanej konfiguracji. Monitory serii P oferują również tryb przyjazny dla środowiska, który optymalizuje zużycie energii przez monitor w celu oszczędzania energii. Tryb ten zmienia ustawienia wyświetlania w celu zmniejszenia ilości niebieskiego światła emitowanego przez monitor. Pomaga to zminimalizować zmęczenie oczu i zmęczenie cyfrowe, które mogą wystąpić podczas korzystania z monitora.

Monitory serii P są zbudowane z myślą o środowisku, wykorzystując 85% plastiku ITE pochodzącego z recyklingu i zamkniętego obiegu, 50% aluminium pochodzącego z recyklingu i co najmniej 20% szkła pochodzącego z recyklingu. Posiadają tryb uśpienia o niskim poborze mocy, który automatycznie przyciemnia lub wyłącza monitor, gdy nie jest używany, aby oszczędzać energię. Zmniejsza to zużycie energii nawet o 14,8%, co pomaga oszczędzać zasoby i zmniejszać emisję gazów cieplarnianych. Monitory są również zbudowane z ramą wykonaną z recyklingowanego aluminium i stali, co pomaga jeszcze bardziej zmniejszyć wpływ na środowisko.

monitor dell

Aktywowanie trybu ekologicznego na monitorze Dell można wykonać, naciskając przycisk 3 na spodzie monitora. Spowoduje to otwarcie menu OSD. Możesz poruszać się po menu OSD za pomocą joysticka. Aby uzyskać więcej informacji na temat korzystania z menu i różnych funkcji, zapoznaj się z sekcją Obsługa monitora w instrukcji obsługi monitora Dell.

Jak aktywować tryb ekologiczny na monitorze Dell?

Jeśli masz jakiekolwiek problemy z monitorem Dell, możesz użyć wbudowanej funkcji autotestu, aby rozwiązać problemy i ustalić przyczynę problemu. Aby rozpocząć autotest, naciśnij i przytrzymaj przycisk 1 na przednim panelu monitora. Pojawi się szary ekran i możesz sprawdzić monitor pod kątem problemów. Po krótkim czasie ekran zmieni kolor na czerwony i możesz ponownie sprawdzić monitor pod kątem problemów. Jeśli nie zostanie wyświetlony żaden komunikat o błędzie, możesz powtórzyć proces autotestu, naciskając i przytrzymując przycisk ponownie.

Niektórzy użytkownicy mogą mieć problem z lekko żółtawymi lub różowymi rogami monitora. Wynika to z technologii panelu IPS zastosowanej w monitorze i jest uważane za normalne. Możesz spróbować dostosować ustawienie Uniformity Compensation w menu OSD, aby sprawdzić, czy to pomoże w rozwiązaniu problemu.

Innym częstym problemem jest to, że wyjście wideo z monitora może nie działać po podłączeniu do odtwarzacza Blu-Ray lub PS4. Może to być spowodowane uszkodzonym kablem lub złym połączeniem. Możesz spróbować ponownie umieścić kabel lub użyć innego kabla, aby sprawdzić, czy to rozwiąże problem.

Czasami niektórzy użytkownicy mogą zauważyć, że obraz na monitorze Dell ma białą obwódkę lub obraz jest skurczony. Można to rozwiązać, wybierając „Ustawienia OSD” lub „Menu wyświetlania na ekranie”. W OSD możesz wybrać rozciągnięcie obrazu w pionie lub poziomie, aby rozwiązać ten problem.

Finding AI Tools on the Microsoft Store Just Got a Lot Easier

If you own a Copilot+ device, you have the necessary hardware to run AI tools; you just need to find them. Fortunately, Microsoft is making the process easier by revamping the AI Hub on the Microsoft store.

The Microsoft Store’s New AI Hub Eases People Into Using Their Device’s NPUs

In an announcement on the Windows Developer Blog, Microsoft details what the new AI Hub can do for you. The company is putting a lot of onus on the onboarding process, as the hub will now do a better job recommending tools that people can use with their new Copilot+ devices:

We’ve created a new Welcome Experience to help you familiarize yourself with exclusive Windows features, ready for you to use – to start, these include Windows Studio Effects, Paint Cocreator and Photos Image Creator. And when you’re ready to dive into a specific workflow, we’ll help you get started.

Once you’re all settled in with your new tools, the AI Hub will update you on all future developments. This includes both new apps that will put your NPU to good use alongside built-in Windows tools such as Recall and Improved Windows Search.

Microsoft states that you can check out this new AI Hub starting today in the United States, Canada, United Kingdom, and Australia. If you’re outside of those countries, Microsoft says that it’ll try to roll it out to more places in the coming months.

The new AI Hub is a great way to get started with more advanced tools, but purchasing the right device for your needs can be tricky. As such, keep an out for these specs if you’re buying an AI PC so you’re not left short-changed.

Now Is the Best Time to Buy Acer Laptops Before Their Prices Rise

The U.S. government recently applied a 10% tariff across goods coming from China. This tax will also affect electronic devices coming from the country, like smartphones and laptops, so manufacturers will have to raise their prices.

Acer to Hike Laptop Prices by 10% Starting March 2025

Acer CEO and Chairperson Jason Chen said that the brand will increase its laptops prices across the board by March 2025. The company is doing this in response to the 10% tariffs that Washington, D.C. has put on Chinese goods, Chen said in an interview with The Telegraph, with the tax taking effect on February 4, 2025.

“We will have to adjust the end user price to reflect the tariff,” said the CEO. “We think 10% probably will be the default price increase because of the import tax. It’s very straightforward.”

Jerome Thomas / MakeUseOf

Even though the 10% tariff was enacted more than a week ago, it would not affect products that are already in the United States, hence the delay on the Acer price increase. However, once the products that were shipped from China after February 4 hits retail shelves, the prices for all affected models will likely jump to cover the additional tax. The company did not note, though, if other products like monitors, desktop PCs, and gaming consoles will be affected by the price hike.

Related

Acer Launches Its First Gaming Handheld, and It Might Just Compete With the Best

Done with your Steam Deck? Give this a try instead.

Acer is the first company to make this announcement, although other top laptop manufacturers such as HP, Dell, and Apple will likely increase their prices, too, because some of their factories are located within China.

The U.S. is using this strategy to push manufacturers to build their products outside of China, and it seems that it’s having some success as Chen is considering moving manufacturing outside of China into other places, including the U.S. But until that happens, companies will tack on the 10% tariff to their products to pay for the tax, increasing the cost for the average American consumer.

Laptops typically range between less than $500 to over $3,000, meaning price increases will vary between $50 to more than $300. So, if you’re buying a new laptop despite desktop PCs lasting longer than them, you should probably do it before this month ends. However, even if you’re in a hurry to purchase a new device this February, you should always ensure that the laptop has these features to ensure that you don’t run into headaches in the future.

Elon Musk’s X Is Now Blocking All Links to Signal

With Elon Musk now part of the US Government, any changes made to X are more important than they would have been previously. And the latest change affects anyone who uses Signal.

Since at least Sunday (February 16), Signal.me links have been blocked on Elon Musk’s X (formerly known as Twitter). Signal.me links are used to contact people on Signal directly, so blocking them lessens the chances that people will reach out.

The issue was first discovered by security researchers at Mysk, and then covered by Disruptionist. The blocks affect public posts, direct messages, and even profile pages.

Different X users appear to be having different experiences when trying to post Signal links. Most are reporting various “message failed” prompts, including “spam and malicious activity,” and “identified by X as being potentially harmful”.

When testing it for myself, I didn’t even receive a prompt informing me that the tweet with the Signal link hadn’t gone live. Instead, it just kept bouncing back to drafts regardless of how many times I clicked “Post”.

For the uninitiated, Signal is a private messaging app that puts privacy at the heart of its mission. It’s open-source, and boasts strong end-to-end encryption designed to ensure your communications with others are completely private.

Related

What Is Signal and How Does It Work?

Here’s a quick guide on how to get started with Signal, the privacy-focused messaging app.

Signal Is Used Extensively by Whistleblowers

This has made it especially popular among journalists, who can receive tips from sources without prying eyes knowing what’s being said, by whom, and about what. And those sources often include whistleblowers revealing information they wouldn’t be comfortable sharing in a more public forum. And this makes the timing of X blocking Signal links more troubling.

Elon Musk is now part of the US Government and the Trump administration. He’s the head of DOGE (the Department of Government Efficiency), currently gutting various federal agencies. And some of the thousands of federal workers who have already been fired have turned to Signal to blow the whistle or share their story with interested parties documenting what’s happening.

Is this connected? Or sheer coincidence? We cannot claim to know, but the timing is a little suspect to say the least.

Thankfully, there is still a workaround of sorts, with Signal users currently (at the time of writing) still able to post their Signal handle on X. So, anyone interested in contacting them can copy and paste the handle into the Signal app.

Modular Lighting With Both Function and Form

Summary

  • Nanoleaf Blocks add display options like pegboards and shelves, and are compatible with existing Shapes products.
  • Installation requires drilling, but design flexibility allows for creativity in layout.
  • Nanoleaf Blocks offer deep, artistic display with improved LED coverage for dynamic light shows.

The Nanoleaf Blocks—compatible with existing Nanoleaf Shapes products—don’t break any new ground when it comes to lighting effects. But they do add a selection of handy new panels to show off your gear—and some visual interest from textured panels.

Nanoleaf Blocks

The Nanoleaf Blocks take modular lighting to the next level by combining visual interest and new panel types with practical functionality. While installation requires more effort because of the load-bearing panels, the creative freedom offered is unmatched. However, with a premium price tag and limited accessory options, they may not suit every budget. For those willing to invest, the Blocks represent a bold step forward in modular lighting that no competitor can currently match.

Pros & Cons

  • The pegboard and shelf are stylish and add function, without needing a trip to Ikea.
  • Plenty of creative freedom with offset connections and textured panels.
  • Compatible with Nanoleaf Shapes (though you’ll need rigid linker pieces).
  • Matter over Wi-Fi, for broad compatibility with any smart home system.
  • At around $250 for the large starter pack and $60 for expansions, it’s an expensive investment.
  • No additional pegboard hooks or accessories available, and it’s a custom design not compatible with Ikea Skådis.
  • Drilling required

Price and Availability

The Combo XL Kit (as reviewed) retails at $250 and is available now, with expansion sets of two large panels for $60.

What Are Nanoleaf Blocks?

Nanoleaf Blocks review - box contents laid out
James Bruce / MakeUseOf

When you think of “modular lighting,” Nanoleaf is the first company that comes to mind. Your gaming area is probably full of exclusive knick-knacks and fancy gaming gear that you want to show off, but until now, that meant a trip to Ikea to find some shelves, then trying to fit your lights around it.

Nanoleaf Blocks adds some display options for your gear right into the lights, incorporating both a pegboard and small shelves.

The XL starter kit consists of:

  • 4x small squares
  • 4x large squares
  • 1x pegboard (with two hooks)
  • 1x shelf
  • Controller and power module
  • Fixing kit
  • Shelf cover pieces
Nanoleaf Blocks review - large panel next to large textured panel showing depth and visual interest
James Bruce / MakeUseOf

I was also sent a pack of two textured squares for added variety. These are the same size as the squares but with a geometric multi-faceted relief pattern, adding even more depth.

Nanoleaf Blocks review - intricate pattern of LED modules inside each large panel
James Bruce / MakeUseOf

Interestingly, the panels’ frosted covers can be removed, revealing the intricate pattern of LED modules that make up each panel.

Installation: You Need to Drill

Nanoleaf Blocks review - sticky panels
James Bruce / MakeUseOf

Unlike most Nanoleaf lighting, which can be affixed to your wall using double-sided sticky pads alone, the load-bearing shelves and pegboards will need screwing if you’re going to put anything of significant weight. When correctly installed, the shelf has a load limit of 1.5kg (3.3lbs), while the pegboard has a total limit of 3kg (6.6lbs). This might be a deal breaker for renters or those afraid of a power drill.

As well as a set of screw fixings and drywall anchors, you’ll find the standard double-sided sticky pads (small and large) and link pieces—these go in between the modules to carry power and signal.

Nanoleaf Blocks review - close up of connector
James Bruce / MakeUseOf

Nanoleaf has upped the game with the technical design of the panels. Each affix to a backplate, which allows them a certain degree of wiggle room during installation. This also means that if you need to replace a panel, you can do so without ripping the super-adhesive sticky pads off the wall.

There’s no complexity to connecting them; ensure each module connects to another one already connected. This contrasts with some competitors’ modular lighting panels, which must follow a single continuous circuit path and can often restrict your design choice. The Nanoleaf Blocks can branch out or become a dead-end; it doesn’t matter. The Nanoleaf app will intelligently map out your design automatically without using the camera. All the panels can be rotated, which wouldn’t normally make a difference aesthetically but means four different orientations of the textured panels are possible.

In addition, the larger blocks feature two possible linkage points on each side. This means you create a half—width offset design and enables the use of smaller blocks. Smaller panels must line up with the edges of the larger block they connect to and can’t themselves be offset (because they only feature a single connection point on each side).

The power connector and controller module are also separate pieces, meaning they can be plugged in anywhere on your design that’s convenient.

Everything feels well thought out, and there are very few limitations on how to build your design. The shelf, for instance, can be placed on the bottom, the top, or in between a number of panels. If it extends beyond the light panels, a cover is provided to hide the brackets.

That’s a lot of creative freedom.

Nanoleaf Blocks review - testing design on the floor first
James Bruce / MakeUseOf

Before actually installing your lights onto the wall, it’s a good idea to lay them out on a table. Once the shape is designed, iPhone users can (in theory) even try their design out in Augmented Reality, though I couldn’t get this to work on an iPhone 14 Pro Max.

Unfortunately, the Nanoleaf layout assistant web app appears to have been abandoned, supporting only the basic Canvas, Light Panels, and Shapes. That means you can’t virtually test out a design before committing to purchase.

Nanoleaf Blocks vs Canvas

Compared to previous Nanoleaf square light panels, the Blocks add a few improvements, even beyond the more varied panel designs and the addition of functional components like shelving and pegboards.

Physically, the Block light panels are a lot deeper than previous shapes—just over an inch, compared to about a quarter of an inch before—which adds another dimension to the display, making them more of an artistic fixture than a simple light-up wall painting.

The LEDs provide a more even coverage across the blocks and to the edges, with up to 320 lumens output per Block (though this will be only in pure white mode, colors are always dimmer on smart lights).

On the other hand, the Nanoleaf Canvas introduced an innovative touch sensor for each panel, which the Blocks don’t have. I must admit, I never used it to control anything, and the handful of built-in “games” were gimmicks, so it’s not a massive loss.

Modular Upgrades

Nanoleaf Blocks review - close up of a controller sitting on the pedboard hooks
James Bruce / MakeUseOf

I was also sent a modular pack of two textured squares to add a little variety. All of the individual components of the Nanoleaf Blocks starter kit are available separately:

  • Pegboard x 1
  • Shelves x2
  • Textured squares x2
  • Small squares x4

Up to 500 panels can be connected to a single controller, however, you also need to consider the power usage. Each power supply can handle 42W maximum, which equates to 17 of the larger panels or 60 of the smaller ones (or some combination thereof, 3W for each large panel and 0.8W for each smaller one). To exceed those limits, you’ll need inject more power from another power supply, which means purchasing another starter kit (and then you’ll have a spare controller).

Frustratingly, there are no options for additional pegboard accessories, and the pegboard design is custom, so Ikea Skådis accessories won’t work. You could 3D print some additional hooks, but right now, your only option for mounting your gear onto the pegboard is to use the two supplied hooks.

Music Reactive Light Show and Desktop Sync Features

Nanoleaf Blocks review - complete gaming room wide angle shot showing older Nanoleaf panels and Skylight alongside Blocks synced to screen content
James Bruce / MakeUseOf

The Nanoleaf Blocks enjoy the same extensive built-in and community scene access for dynamic and music-reactive light shows as the rest of the Nanoleaf line. Scenes can be downloaded to the controller for use without having to launch the app first, and use the on-device microphone. You can even group the lights and activate the same scene across multiple fixtures, though I had varying levels of success when I tried this with the original Panels, and Skylight, with some scenes behaving as if they are static on the Blocks, but music reactive on the others.

For even more impressive musical light shows, you have a few options.

Nanoleaf’s new Premium subscription service uses the audio directly from your PC rather than the on-device microphone for more reliable beat detection. It also unlocks the full set of Soundscapes, which are soothing ambient audio tracks with an accompanying programmed light show. Premium costs $2 per month, or $20 annually, with a one-month trial.

Another option is Light Link, a third-party solution that only works with specific songs but has handcrafted light show sequences rather than just beat detection. It has a demo mode with a sample of sequences, and requires an active Spotify Premium subscription. Although it’s pricer at $7/month, or $60 annually, it also works with a wide range of lighting products, not just Nanoleaf; and you can program your own sequences.

The Nanoleaf desktop app (for Mac or Windows) is a must-have if you want to sync on-screen content to your lights. You’ll find it under the Gaming tab, but it’s equally applicable to movie-watching and other desktop activities. Compatible with multiple devices, you can move the fixture around to show which part of your screen it should extend. Sadly, something about Fortnite caused it to crash every time; it’s not as robust as a hardware-based HDMI signal analyzer like the Govee AI Sync Box.

Compatible With All Smart Home Systems

Nanoleaf Blocks review - gloomy bear and a 3d printed plant pot sitting on the Blocks shelf
James Bruce / MakeUseOf

The Nanoleaf Blocks are Matter-compatible, meaning they can seamlessly work with all the major smart home control systems. You’ll find the necessary pairing code on the back of the controller and the manual. If you use it with multiple smart home systems simultaneously, you’ll need to pair it using the provided code first, then generate a new pairing code for the second system using your smart home app.

The Nanoleaf Blocks use Matter over Wi-Fi, not Thread, and like most smart home kits, they insist that you have a separate 2.4GHz network—but they worked fine with my dual-band access point.

Although Matter makes it easy to control basic lighting features from any system, you’ll still want to keep the Nanoleaf app installed for access to any dynamic or music-reactive scene. Matter doesn’t currently support scenes and can only set a single color across the whole fixture. However, you can power it on and off remotely using Matter without affecting the currently loaded scene.

Should You Buy Nanoleaf Blocks?

Nanoleaf Blocks review - featured image showing the Blocks on the wall and lit up
James Bruce / MakeUseOf

The only problem with the Nanoleaf Blocks has always been the premium pricing. At $250 for the starter kit, plus another $60 per two expansion blocks (or four small ones), the cost rises fast—and you’ll almost certainly want more.

When Nanoleaf first came out with the modular Light Panels concept, they had the market cornered with novelty. But years later, there are numerous clones and competitors out there vying for your wall space.

Still, the Blocks are an innovative twist, and no one else can match these (yet), in both function or form. The increased depth adds a brilliant element of dimensionality, the pegboard and shelving add function to show off your favorite gear, and it still maintains the modular ethos. The Nanoleaf Blocks offer the most dynamic and visually engaging modular panel lighting system so far—but at a price that might be too high for most people.

nanoleaf blocks

Nanoleaf Blocks

The Nanoleaf Blocks take modular lighting to the next level by combining visual interest and new panel types with practical functionality. While installation requires more effort because of the load-bearing panels, the creative freedom offered is unmatched. However, with a premium price tag and limited accessory options, they may not suit every budget. For those willing to invest, the Blocks represent a bold step forward in modular lighting that no competitor can currently match.

How to Securely Dispose of Your Smart Home Devices

Your smart home devices contain a wealth of sensitive data. Simply tossing them in the bin exposes you and your family to identity theft and financial fraud. But, there are steps you can take to sanitize your devices before you get rid of them.

1

First, Back Up Your Important Data

Before you start sanitizing your smart home device, you need to first review the data stored in it and decide what you want to keep, like photos, medical records, family videos, or important documents. You can transfer these to a new device or save them to a secure cloud drive.

If you decide to store the data in an external storage, make sure the external storage is kept in a secure spot in your home or an area that people won’t easily access. External storage devices should also be kept in a protective case and placed in a cool, dry place, away from direct heat or sunlight.

Related

What Is Data Backup? 5 Ways to Back Up Your Files

Your important files could be stolen, held to ransom, or simply lost. How can you stop that from happening? Backing up your data is the key.

2

Disconnect The Device From Your Accounts

Check the device for any storage media attached to it like flash drives, memory cards/microSD cards that contain your data. Also, make sure that your data is removed from these external storage devices if you decide to dispose of it or reuse it.

Another important thing to do is to disconnect this device from your accounts. You should regularly audit the devices connected to your apps—some old devices you don’t use anymore may be left lingering in the recognized/connected device section of the app. Review all device permissions or access and remove all devices that you no longer use.

Unlinking the device or revoking its permissions prevents backdoor access to your network.

Related

How I Secure the Smart Devices in My Home

Your smart home devices make life easier, but don’t forget to secure them against hackers.

3

Factory Reset Your Device

A factory reset removes sensitive information stored in the device like Wi-Fi passwords, username and account passwords, credit card details, addresses, and other types of data that can be used for identity theft, financial fraud, and cyberattacks.

For instance, some contain data like the pre-shared key (PSK) that can give threat actors access to your home network. Other sensitive and personal information, including photos or medical records, can also be used to blackmail you.

For some devices, a factory reset or hard reset involves just pushing a button on the device for a few seconds; others would require you to do this using the device’s dedicated app. Check the user manual and follow the steps carefully to ensure you do this successfully.

4

Follow Local Electronic Waste Disposal Guidelines

Electronic wastes are more dangerous than you think. When electronics are simply tossed in the trash, they end up in landfills where they release toxic substances like lead and mercury that can seep deep into the soil and groundwater. This is why local governments have electronic waste disposal guidelines that meet international standards.

Some cities collect unwanted electronics for free to ensure that they don’t end up in landfills. Residents are just required to bring the devices to a drop-off location. However, cities can’t ensure the complete destruction of data in the device, so you’re advised to sanitize them before you drop them off.

If you’re going to dispose of smart home devices in bulk, especially those that contain other people’s data, you ask vendors for a certificate of data destruction. This assures clients that the data in the devices has been permanently destroyed according to local privacy laws and regulations.

As we regularly upgrade and replace our devices, electronic waste disposal has become a regular task. Unlike most other waste, however, devices contain harmful substances that can poison the environment—on top of a wealth of sensitive data that puts you at risk of cyberattacks and fraud if these land in the wrong hands. So, it’s important to follow these guidelines to mitigate the risks.

I Bought a Budget Soundbar—Here’s Why It Was Totally Worth It

My TV speakers are… fine. They get the job done, but fine isn’t thrilling when watching an epic action scene or a good concert.

I needed better sound without emptying my wallet. I decided to take the plunge on a budget soundbar—and it was totally worth the risk.

Premium Sound Doesn’t Have to Come with a Premium Price Tag

Reading through audiophile discussions on Reddit gives the impression that good sound automatically translates to big money. Every search seemed to push me toward soundbars priced at $300, $500, or even higher.

Oluwademilade Afolabi / MakeUseOf

On one of those days of searching, I stumbled upon the Hisense HS2100 soundbar. For less than $150, it seemed too good to be true, but I took the plunge. The soundbar even came with a wireless subwoofer, which I didn’t think I’d get at this price point.

The Setup Process Was Simple

I was half-expecting the Hisense HS2100 soundbar to come with a novel-length manual, a bunch of wires I wouldn’t know what to do with, and a headache by the end of it all. Instead, it was surprisingly straightforward—dare I say, even enjoyable.

Hisense HS2100 soundbar and the subwoofer placed together.
Oluwademilade Afolabi / MakeUseOf

First off, everything I needed came in the box: the soundbar, a wireless subwoofer, HDMI and optical cables, a remote with batteries, and a wall mount kit. I was surprised to find an optical cable missing from the box, but that didn’t matter much, considering that I was unlikely to use it. Well, all I had to do was just unpack and plug in, and I was good to go. I started by placing the soundbar under my TV and the subwoofer by the couch. And since the subwoofer is wireless, I didn’t have to worry about stringing cables across the living room.

Connecting the soundbar to my TV was equally painless. I used the HDMI ARC port because it’s the simplest and offers the best sound quality, but the Hisense HS2100 also supports optical, AUX, and USB inputs. For those who love wireless, it also comes with Bluetooth 5.3, one of the latest Bluetooth standards. As one of the most up-to-date Bluetooth standards, it’s great for streaming music and video directly from your phone or TV.

Hisense HS2100 subwoofer.
Oluwademilade Afolabi / MakeUseOf

As soon as I powered it on, the subwoofer automatically paired with the soundbar. I was already kicked back on the couch, remote in hand, ready to enjoy my upgraded audio experience.

The Sound Quality Surpassed My Expectations

Turning on my TV, the first thing I did was watch The Ministry Of Ungentlemanly Warfare movie. With the soundbar, I noticed details I was sure my TV speakers missed. The bass from the wireless subwoofer added depth to the explosions, making them feel satisfyingly punchy without being overpowering. It wasn’t the kind of bass that shakes your walls and makes your neighbors hate you, but it was enough to feel immersive.

Dialogue was another surprise. On my TV’s built-in speakers, I used to constantly rewind scenes because I couldn’t make out what characters were saying over the background noise. With the soundbar, I didn’t have that problem. Voices were crisp and distinct, even in the middle of chaotic action scenes. The soundbar also has a News mode (out of several modes), specifically enhancing voices. And while I didn’t use it much for movies, it’s a lifesaver for catching every word during fast-paced conversations in shows or news broadcasts.

basic 2.1 stereo audio setup with subwoofer diagram

Another feature that blew me away was how spacious the sound felt with the soundbar’s DTS Virtual: X technology. Even though it’s a 2.1-channel system (two speakers in the soundbar and a subwoofer), the audio doesn’t feel like it’s just coming from a single bar sitting under my TV. It spreads out nicely across the room, giving the illusion of a much larger soundstage. Watching a movie with this setup feels less like sitting in front of a screen and more like being in the middle of the action. It’s not quite what I’d call a full surround sound, but it’s close enough that I don’t feel like I’m missing out.

To really put it through its paces, I switched from movies to music. I’m a fan of everything from laid-back acoustic playlists to bass-heavy pop hits, and the HS2100 handled it all with ease. The highs were bright without being shrill, the mids were balanced and warm, and the bass—oh, the bass. It was everything I wanted.

I Didn’t Need Fancy Soundbar Features I’d Never Use Anyway

Multi-room audio this, 7.1 surround that, virtual assistants, voice control, app integration, and everything else in-between—there’s a soundbar that promises it. But I didn’t need my soundbar to summon Alexa, project sound into the stratosphere, or shake the walls like I was hosting a concert. I just wanted my TV to sound better without needing a degree in audio engineering or a fat wallet to set it up.

Many higher-end soundbars come packed with features you might never actually use. For instance, some offer room calibration, which sounds impressive, but unless you live in a cathedral or a glass cube, how much difference does it really make? And do I really need my soundbar to connect to Wi-Fi so it can stream music when I can connect to my phone’s Bluetooth speaker for that? Probably not.

Here’s an analogy that explains my thought process in my purchase decision: buying a soundbar is a bit like buying a car. Sure, you could go for the luxury model with heated seats, a panoramic sunroof, and crazy 0–60 capabilities you’ll never use in your daily commute. But if all you really need is a reliable ride to get you from point A to point B, why not save yourself some cash and skip all the unnecessary frills?

In my case, the budget soundbar I chose was exactly what I needed: simple, no-nonsense, and surprisingly effective. It didn’t have 15 inputs I’d never use or confusing settings I’d have to Google every time I touched the remote. Instead, it had a USB port for quick music playout from a flash drive, a straightforward HDMI cable connection for my TV, and a remote with, I kid you not, just about 17 buttons. Which is fair enough, I think.

So, my budget soundbar proved that you don’t need to spend a fortune to upgrade your home sound experience. Sure, it might not have all the bells and whistles of pricier options like the Sonos Ultra Arc or even a full-blown surround sound system, but it delivers where it matters most. Solid sound quality, easy setup, and value for the money, that is.

What’s the Difference, & What Should You Buy?

Mini-LED and micro-LED are, in a sense, cousins. Under the hood, mini-LED and micro-LED aren’t that different, but when you begin to examine them closely, there are some significant differences.

Mini-LED vs. Micro-LED: What’s the Difference?

When you line up all the various TV types of technology, it all seems to act the same, but how the picture is displayed does differ. For example, LED and LCD screens use a combination of backlight and color filters, but the former uses light-emitting diodes, and the latter uses fluorescent lights. To make it more confusing, LCDs use LEDs, too.

Mini-LED is a branch of the LED-LCD tree. It’s still the same basic principle, just smaller and many more LEDs are involved. The LEDs in micro-LEDs are even smaller than mini-LED and don’t rely on a backlight. That key difference will become important later!

Brightness

Hannah Stryker / MakeUseOf

When it comes to brightness, micro-LED displays can deliver exceptionally high peak luminance because each tiny LED is its own light source. Packing so many microscopic LEDs into a screen allows for intense brightness and vivid highlights while maintaining fine detail. It’s the same direct-view concept you see in stadium displays, but on a much smaller scale (stadium screens typically use larger, more widely spaced LEDs). Micro-LED gives you that powerful brightness in a consumer-sized TV without sacrificing resolution or color accuracy.

That’s not to say mini-LED isn’t bright—quite the opposite. Mini-LED screens use more, smaller LEDs than a standard LED-backlit TV, resulting in noticeably higher peak brightness and better contrast than traditional LED sets. While they can’t match the dazzling, pixel-level illumination of micro-LED, mini-LED panels still offer a striking bump in brightness and clarity over conventional backlit LCDs.

Contrast

Yet again, micro-LED displays will be notably better than mini-LEDs in terms of contrast ratio. As I mentioned earlier, micro-LEDs don’t rely on a backlight; instead, each LED has its own light, which can be turned off to create a truly black image. In fact, that ability is the key difference between OLED, LED, and LCD.

Mini-LED displays will still offer a significant boost in contrast compared to your typical LED TV. With more LEDs involved, displays can have far more local dimming zones, which in turn gives greater control over contrast.

Color

samsung's 114-inch class micro led smart tv, 2024 model

I think you can guess where this is headed. Micro-LED is going to have a superior color overall. Its nifty ability with self-emissive pixels really gives it that edge over mini-LED, though not quite as good as an OLED display.

Micro-LED vs. Mini-LED: What Should You Buy?

Mini-LED displays are going to be the better choice, and honestly, you probably don’t have much of a choice to begin with. For example, the few Samsung micro-LED TVs cost between $110,000 and $150,000. That’s as much as my house!

That’s not the case with a mini-LED display. Generally speaking, a mini-LED TV will cost less than an OLED, which makes sense, considering the latter offers a better overall picture.

In other words, micro-LED displays aren’t as practical to your average, everyday person. It’s incredibly expensive when scaled even to living room-size televisions. If you want to upgrade from an LED display, miniLED is the way to go or perhaps you should consider the pros and cons of miniLED and OLED, too.

I Always Use Bypass Charging on My Android Phone—You Should Too

If you frequently game or spend time on your Android phone while it’s plugged in, using bypass charging can help you keep your phone cool and prolong battery life.

What Is Bypass Charging and Why Should You Use It?

Even when plugged in, your phone still relies on the battery for power, with the charger continuously topping it up. During hardware-intensive tasks like gaming, this process drains the battery faster, generating excess heat that can degrade performance, reduce capacity, and shorten the battery’s lifespan.

Bypass charging aims to solve this problem by powering your phone directly from the wall charger, bypassing the battery entirely. This reduces heat buildup, minimizes thermal throttling, and extends battery life by preventing unnecessary charging cycles.

How to Use Bypass Charging on Samsung Phones

On Samsung phones, bypass charging (called Pause USB Power Delivery) is built into the Game Booster app and can only be enabled during gaming.

To use it, connect your phone to a 25W (or higher) USB PD wall charger and ensure the battery is at least 20% charged.

Now, open the Gaming Hub app. Tap the three-dot menu in the top right corner and select Game Booster. Locate and toggle Pause USB PD charging when gaming to activate bypass charging.

If the Pause USB PD charging option is grayed out, it’s likely due to an incompatible charger. Make sure you are using a USB PD-compatible charger.

What’s the Difference Between Bypass Charging and Charging Limits?

On most devices, bypass charging is a simple option you can toggle as needed. Like Samsung, ASUS phones will only let you use it when a game is open. Ideally, at the end of your gaming session, your battery level should stay exactly where it started.

Charge limiting, on the other hand, works by charging your phone to a manufacturer-recommended threshold, such as 80%, 85%, or 95%, to help preserve your battery’s lifespan. When your phone reaches the set threshold, it stops charging.

Whether you want to charge your phone overnight or use it for navigation connected to your car, a charge limit can protect your battery from permanent damage due to heat. What it can’t do, however, is directly power your phone during gaming sessions like Samsung and ASUS’s implementation does.

Related

These 7 Phones Give You the Most Battery Life

If battery life matters to you the most, here are your best options.

Since bypass charging only works in the Gaming Hub app, you can also use Battery Protection on Samsung phones to choose between three levels of charge limits. In contrast, Google Pixel devices only support a charge limit, which activates bypass charging once the battery reaches 80% capacity.

Notably, not all phones with charge limit features support bypass charging. For example, Apple’s iPhones let you set charge limits between 80% and 95%. However, once the limit is reached, the device still relies on the battery for power, cycling between charging and discharging, which can lead to battery wear over time.

Android Phones That Support Bypass Charging

Not all Android phones support bypass charging, but major manufacturers like ASUS, Samsung, and Google have integrated this feature into their devices.

Here’s a list of phones that currently offer bypass charging and how to enable it:

  • Samsung: Bypass charging has been available on all flagship Samsung devices since the Galaxy S22 series, meaning most models launched since February 2022 are likely to support it. To check if your device has this feature, go to Gaming Hub > Three-dots menu > Game Booster and look for Pause USB PD charging when gaming.
  • ASUS: The ROG Phone 3 and newer devices support bypass charging. In the ASUS Game Genie app, tap Charging Mode and choose Bypass charging in-game.
  • Google: The December Feature Drop added a charge limit feature for Pixel 6 through Pixel 9 devices. However, bypass charging seems to be exclusive to the Pixel 8 and Pixel 9 series. To enable the 80% charge limit, go to Settings > Battery > Charging Optimization and toggle Limit to 80%.

Other Android makers that support bypass charging on select devices include Sony, Infinix, IQOO, and Xiamoi. Unfortunately, OnePlus still doesn’t support bypass charging on any of its devices, including the OnePlus 13.

Bypass charging is still a relatively new feature, and we’ll likely see more manufacturers adopt it going forward. Ideally, a fusion of Samsung and Google’s implementation of bypass charging should cover all use cases. It’s worth noting that bypass charging doesn’t currently work with wireless chargers—a limitation to keep in mind if you often rely on wireless charging.

Google Gemini Gets a Huge Memory Boost, but There’s a Catch

With chatbots getting more advanced by the day, companies are developing memory features to help them remember the prompts you said. Google’s Gemini is the newest AI assistant to remember the things you type, albeit there’s a slight catch.

Google Gemini Advanced Subscribers Can Now Use the New Memory Update

As Google announced on its blog The Keyword, Gemini is getting an advanced memory feature. Usually, when you want to ask a chatbot about something you discussed earlier, you need to either dig through all your conversations or manually remind it in your prompt.

Google

Now, there’s no need to do either of those things. Just fire up Gemini and ask it to remember something the two of you discussed before. It’ll go through your chatlogs and find everything related to the topic. You can also build on top of what you discussed and recall it later.

Unfortunately, not everyone will gain access to Gemini’s new memory feature. To unlock it, you’ll need to be a Gemini Advanced subscriber on the Google One AI Premium Plan. Subscribers can probe Gemini’s memory on both the web and mobile apps.

Google Preps Gemini to Take On Its AI Rivals

With so many chatbots vying for the top spot, Google’s move is in line with what its competition is doing. We’re at the point where the biggest tech companies can produce good results with their chatbots, and now the onus is on adding enhanced features to one-up the others.

AI memory is nothing new; after all, ChatGPT has a memory feature that lets you define key facts about yourself. However, it seems that Google’s solution is less about creating something that remembers core details and more about making it easier to recall previous conversations. We’ll have to see how this feature fares against its rivals after people test it for a little while.

How to Set Google Maps to Auto-Enable Location on Samsung Phones

Summary

  • By default, Google Maps asks you to enable Location sharing each time you open the app on a Samsung phone.
  • You can use Samsung’s built-in Modes and Routines app to automate this process.
  • Customizing a Routine can also be used to turn on Location sharing for other apps whenever you use them.

Google Maps prompts you to enable Location each time you open it on a Samsung phone, which can be super inconvenient. Luckily, you can automate your Samsung phone to do exactly this.

How to Auto-Enable Location for Google Maps on Samsung

The trick to solving this inconvenience is to use Samsung’s Modes and Routines feature to execute this automation. It’s an automation tool that comes pre-installed on Galaxy devices and allows you to change your device settings automatically based on certain conditions or triggers.

Modes are preset configurations set by Samsung for common activities like sleeping or driving, whereas Routines offer more granular control over your device for specific situations and can be tailored based on your unique needs.

Create a Routine to Turn On Location Sharing for Google Maps

Here’s how to set a new routine auto-enable location for Google Maps. Go to Settings > Modes and Routines and tap on the Routines tab at the bottom.

Here, tap on the plus (+) icon. This will pull up the setup page.

Adding a new routine on Samsung Modes and Routines

Here, tap Add what will trigger this routine. On the following page, scroll down to find and tap App opened under the “Event” heading. Next, select Google Maps from the list of apps and tap Done.

It might be a good idea to select other apps alongside Google Maps that need Location data, such as food delivery apps or ride-sharing apps.

Doing this will take you back to the setup page. Here, tap Add what this routine will do and go to the Location menu.

Next, tap Location and tap the radio button beside “On” and press Done. Hit Save on the setup page to complete the process.

On the following page, select a name, an icon, and an icon color for this routine and press Done to confirm.

Your routine is now saved and active. Go ahead and open Google Maps on your phone to see if it’s working.

I highly recommend playing around with the Modes and Routines feature and experimenting with automating more things on your phone. It’s one of the most useful tools on your Galaxy device and can make your device smarter and more intuitive. You can also take a look at these Samsung routines that enhance your user experience for some inspiration.

This Attack Proves That Not Even Steam Is Safe From Malware

While app stores tend to succumb to malware every so often, Steam’s reputation has been relatively squeaky clean. Unfortunately, that changed after a game on the storefront turned out to be a malicious app in disguise.

A Free-to-Play Pirate Game on Steam Was Malware in Disguise

As PCMag reported, a malicious actor uploaded a title called PirateFi onto the Steam platform. The PirateFi store page described the game as a sandbox pirate game that was free to play, which was likely a ploy to get as many downloads as possible.

Once people downloaded the game, it deployed a Trojan named “Trojan.Win32.Lazzzy.gen.” This malware’s main goal is to dig through browser cookies and steal login details. Once people identified PirateFi as malware, they warned Valve, which removed the game and sent out a message to anyone affected.

Unfortunately, the Trojan stuck around long enough to do some serious damage to people’s accounts. As detailed on the Steam discussion board for PirateFi, one victim saw their account compromised and used to purchase Dota 2 skins.

Another person claimed the cybercriminals hacked their Microsoft account and blocked Microsoft Support. They then accessed the victim’s Roblox account, stole $20, and sent a message to all of their friends containing a scam link.

If you want to avoid having your accounts stolen, be careful what you download from the Steam store. While Steam is usually very good at catching virus uploads, you can do your part by staying away from new releases that are free-to-play and “seem off” somehow. For example, PirateFi used stolen assets from other games in its advertising, which is a big red flag. You can also prevent Steam phishing by performing some best practices.

Why My Desktop Always Outlasts My Laptop

Over the years, I’ve noticed that my desktop computer consistently outlasts my laptops. This isn’t just a coincidence: several key factors contribute to desktops significantly outlasting laptops.

My Desktop PC Provides a Better Upgrade Path

NosorogUA / Shutterstock

One of the key reasons my desktop outlives my laptops is its modularity and superior upgradeability. Key desktop PC components can be upgraded to improve performance over time. It allows me to keep my system up-to-date without buying an entirely new machine.

On the other hand, laptops are notoriously limited in this area. Many modern laptops have soldered components like RAM and storage, making upgrades nearly impossible. Even if they do allow upgrades, options are limited to basic components like storage drives. A desktop lets me tailor my machine to my needs over time. For instance, when I needed more power for gaming, I installed a new GPU, which saved me from buying a new computer.

This long-term flexibility means I can keep my desktop relevant for years. In contrast, laptops often become outdated quickly, and their lack of upgrade options forces me to replace them sooner.

Desktop PC Parts Are More Durable

laptop is broken with post it note
Hannah Knight/MakeUseOf

Durability is another major factor that gives desktops the edge. Desktop components are generally more robust than those found on laptops. One reason is the larger size of desktop cases, which allows for better airflow and cooling solutions. This reduces the risk of overheating, which is one of the primary causes of hardware failure.

Laptops’ compact interiors, by design, restrict airflow and can lead to overheating. Over time, this excess heat strains internal components, reducing their lifespan. For instance, a laptop GPU may degrade faster due to inadequate cooling compared to a desktop GPU, which often has dedicated fans or even liquid cooling systems.

Battery Life and Charging Issues? Not an Issue for My Desktop

laptop with battery life usage indicators
OlegRi/Intellson/Shutterstock

One of the biggest reasons to use a laptop is because it is battery-powered. However, this is also one of the most frustrating aspects of owning a laptop. Laptop batteries degrade over time, and as they age, their capacity diminishes. Eventually, the laptop becomes less portable as I find myself tethered to a charger more often. Sadly, replacing the battery on my laptop is expensive, so I can’t just keep replacing it whenever I feel like it is starting to lose capacity and reducing battery life.

In contrast, desktop PCs operate directly from a power outlet. They don’t rely on batteries, so they completely avoid this common issue. I never have to worry about my desktop shutting down because of a failing battery. This gives me peace of mind and ensures that my desktop remains functional for years without concerns about power-related issues.

Desktop PCs Are Easier and More Cost-Effective to Repair

person using screwdriver inside a PC
Preechar Bowonkitwanchai/Shutterstock

Another significant advantage of desktops is how easy and affordable they are to repair. When something goes wrong with my desktop, I can identify and replace the faulty component without much hassle. For example, if the power supply unit (PSU) fails, I can purchase a new PSU and replace it myself without needing a technician. The modular design of desktops makes this process straightforward and cost-effective.

Laptops, on the other hand, are far more challenging and expensive to repair. Components in laptops are often integrated into the motherboard, which means that if a single part fails, such as a GPU or CPU, it might require replacing the entire motherboard. This not only makes repairs more expensive but also more time-consuming.

Laptops also integrate their own monitor, keyboard, speaker, and webcam. If they get damaged, I would have to source new parts, which can take time and are often more expensive for what they are. Whereas my desktop PC can use all sorts of plug-and-play peripherals, requiring next-to-no technical knowledge to replace and install.

Stationary PCs Experience Less Wear and Tear

pc streaming setup with multiple monitors
DC Studio/Shuttestock

Finally, the stationary nature of desktops significantly reduces the wear and tear they experience over time. My desktop stays in one place, protected from environmental factors like fluctuating temperatures, high humidity, and physical shocks. This stability minimizes the risks of damage.

Laptops, on the other hand, are exposed to much harsher conditions. They’re often carried in bags, subjected to jostling during commutes and used in less-than-ideal environments. Even something as simple as frequent plugging and unplugging of the power cable can wear out the charging port over time. These factors contribute to the shorter lifespan of laptops compared to desktops.

A Data Leak Has Struck eBay, Shopify, and Amazon Users: Here’s What Was Revealed

With our personal data appearing online in various ways, it’s hard to avoid privacy breaches. If you’ve recently ordered something on eBay, Shopify, or Amazon, there’s a chance your details have fallen into malicious hands.

Hipshipper Leaks 14.3 Million Personal Records

As CyberNews reported, a company called Hipshipper suffered a data leak. Hipshipper is an international shipping platform for eBay, Shopify, and Amazon sellers, and because of its position, it handles a lot of packages. This means a ton of personal information flows through Hipshipper’s systems at any given time.

In December, researchers at CyberNews stumbled upon an Amazon Web Services (AWS) bucket owned by Hipshipper. In the world of data, a bucket is a container companies use to store tons of information. In this case, the AWS bucket had been filled with 14.3 million postage labels featuring the following information:

Full names

Home addresses

Phone numbers

Order details (dates of mailing, parcel information, etc.)

The bucket wasn’t secured, meaning anyone could scrape this data from the bucket. Fortunately, Hipshipper secured the bucket after being informed of the issue, but it still gave bad actors plenty of time to harvest user data.

Unfortunately, there are plenty of things a cybercriminal can do with your home address, so if you believe you’ve been caught up in this mess, you may need to keep an eye out for trouble in the near future. The CyberNews researchers believe this data is enough for a bad actor to perform “stalking, harassment, or planning burglaries,” so keep yourself safe.

Plus, given how a bad actor can see what you ordered, they can craft more believable shipping scams when targeting you. As such, keep an eye out for fake shipping texts if you think you were affected by this breach, as they may be ploys to steal more of your information.

Adobe Firefly AI Can Now Generate Videos—And It’s Amazing

AI-generated images were just the beginning—now Adobe Firefly can create videos, and the results are mind-blowing. This isn’t just about filters or tweaks—it’s full-on video creation from text prompts.

Adobe Firefly AI Video Generation Is Released Publicly

On February 12th, Adobe released its Firefly AI Video Generator under a public beta model. All Adobe users—subscribers or account holders—can access the Generate Video (Beta) tool and generate up to 5-seconds of high-quality video output. AI video generation was announced at the Adobe Max conference in October 2024 with no set release date, so it’s been an exciting wait for its release to the public.

Generate Video (Beta)

Generate Video (Beta) results are high quality with lots of customization options. Whether you use the generated clips to add a B-roll or correct mis-filmed elements from your production, you’ll be impressed with the results. You can also use the generated video to ideate future film plans and shots.

Adobe Firefly AI video generation is the first publicly available and commercially safe video generator. Adobe exclusively uses Adobe Stock imagery and video for training models.

Generative Extend

Along with the long-awaited Generate Video tool, Adobe simultaneously implements AI video generation in Premiere Pro. This feature comes in the form of Generative Extend—an AI feature that lets users generate an extra 2 seconds of video from any existing clip in your Premiere Pro timeline. This is enough to bridge gaps between clips or finalize any missed seconds of filmed content.

All-New Adobe Firefly Web App

Adobe Firefly Web App

Adobe users have had public access to Adobe Firefly since its release in 2023. Available through your browser of choice, anyone with an Adobe account—free account or paid subscription—can access the Firefly tools.

The announcement of video AI features also brings a re-imagined Firefly app, making it even easier to try Adobe’s AI offerings. The Firefly homepage shows all available AI features, including brand-new Generate Video, Translate Video, Translate Audio, and Scene to Image generators.

There’s no guarantee for how long you’ll have access to these tools from Firefly. They usually disappear once the public beta is over and the tool becomes implemented in its intended software, locked behind a subscription paywall.

Translate Video and Audio

Adobe implemented AI caption translation in Premiere Pro at the beginning of 2025, which could be seen as foreshadowing the following big features: AI video and audio translation tools.

Both tools are available on the Firefly web app. The audio and video translation tools let you translate into up to 20 languages while retaining the authentic voice. The video translation tool also ensures realistic lip-syncing in the translated language for an authentic result with no AI out-of-time lip movement.

The translation tools are available in the Firefly web app for now, but eventually, these features should be made available in Premiere Pro to offer a more complete translation experience.

Using the re-imagined Adobe Firefly web app, you’ll have loads of creative control for the Generate Video prompt. Its customization features include choosing the camera angle (such as aerial, eye-level, top-down shots and more), camera motion (like panning left or right, handheld movement, or none), and shot type to replicate a full video production.

The Translate Audio and Video features are both currently available on the Firefly web app too. You’ll also find beta modes for new features like Scene-to-Image, which you can use as an image reference in the video generator.

Generative Extend is only available in Adobe Premiere Pro (Beta). The Generate Video tool isn’t available in Premiere Pro, but you can download your generated clips and import them to Premiere Pro. Then, you can use Generative Extend on the AI clips if required.

Adobe Premiere Pro Generative Extend
Adobe

Although accessing the tools is fairly easy, their prices are ramping up. Currently, Adobe free account holders are limited to only 25 AI credits, while Creative Cloud All Apps subscribers receive 1,000 AI credits.

This announcement also introduces a tiered AI credit plan starting with Firefly Standard, which costs $9.99 for 2,000 credits. This provides enough credits for 20 5-second video generations if you use it for nothing else. Firefly Pro provides 7,000 audio/video credits for $29.99 per month.

Adobe has gone all-in on AI in 2025, and its results are high-quality and impressive. AI can be gimmicky or lack quality and accuracy, but Adobe waits until it’s perfected its craft before allowing the public to use new tools. Adobe Firefly video AI looks great.

These AI Models Can Replicate Themselves and That’s Not Terrifying At All

Lately, the mainstream qualms surrounding AI have to do with the amount of energy required by its data centers. But an old fear lurks in the background: will AI ever go rogue? New research suggests that some Large Language Models (LLMs) have the concerning capability of autonomous actions.

New Research Suggests AI Can Replicate Itself

According to research from China’s Fudan University, some popular LLM models are able to self-replicate, or produce additional copies of themselves. Published to arXiv in December 2024, researchers found that the AI models from Meta and Alibaba crossed a “self-replicating red line.” In other words, the models demonstrated a concerningly high success rate with regard to self-replicating.

arXiv is a preprint database, meaning it hosts scientific research that is still in its preliminary form. Findings like this still need to be peer-reviewed, and should be taken with a grain of salt.

For the sake of clarity, here are the two models tested in this research:

  • Meta’s Llama31-70B-Instruct
  • Alibaba’s Qwen25-72B-Instruct
Yadullah Abidi MakeUseOf

The researchers note that these models have “less parameters and weaker capabilities,” compared to OpenAI and Google’s flagship models. For what it’s worth, OpenAI and Google have reported low risk levels of self-replication, according to the publication.

Why It Matters if AI Can Reproduce

An AI model cloning itself is undoubtedly a scary image, but what does it really mean? The research team behind these recent findings put it this way:

“Successful self-replication under no human assistance is the essential step for AI to outsmart the human beings, and is an early signal for rogue AIs. That is why self-replication is widely recognized as one of the few red line risks of frontier AI systems.”

The term “frontier AI” typically refers to the most advanced AI models, such as generative AI.

Essentially, if an AI model can figure out how to make a functional copy of itself to avoid shutdown, that takes the control out of human hands. To mitigate this risk of an “uncontrolled population of AIs,” the research suggests constructing safety parameters around these systems—as soon as possible.

While this publication certainly amplifies concerns around rogue AI, this doesn’t mean there’s an immediate, confirmed risk for the everyday AI user. What we do know is that Gemini and ChatGPT reportedly have lower levels of self-replication risk, when compared to Meta’s Llama model and Alibaba’s powerful Qwen models. As a general rule of thumb, it’s probably best to avoid giving your AI assistant all of your dirty secrets, or full access to the mainframe, until we can introduce more guardrails.

7 Tests to Run Before Buying a Used Windows PC or Laptop

Purchasing a used computer can be a smart choice if you’re on a limited budget. While a discounted Windows device may seem tempting, it’s important to proceed with caution and run a few essential tests to avoid unexpected issues down the line.

1

Test Display, Keyboard, and Trackpad

The display, keyboard, and trackpad are among the most critical components to inspect when buying a used laptop. These parts are essential for daily use, and any issues can significantly impact the device’s usability.

To test the display, visit a website like Test My Screen and check for dead pixels, discoloration, or flickering. You can use solid-colored backgrounds (white, black, red, green, and blue) to spot pixel irregularities. Additionally, try adjusting the brightness to ensure it functions properly and check for backlight bleeding or uneven lighting.

For the keyboard, use an online tool such as Keyboard Tester to confirm that all keys are responsive. To test the trackpad, simply move the cursor to ensure smooth tracking and try multi-touch gestures like scrolling, pinch-to-zoom, and multi-finger tapping, if supported. Additionally, check that the physical click buttons (left and right) respond well and aren’t stuck or overly stiff.

2

Test Webcam, Microphone, and Speakers

If you’re buying a laptop, testing the webcam is important. You can do this by simply opening the built-in Camera app on Windows. You should see a clear, functioning image. If the camera is blurry or unresponsive, it could indicate an issue.

Next, test the microphone by going to Settings > System > Sound. Under the Input section, select the built-in microphone device, then click Start test. Begin speaking, then use the Play button to listen to the recorded audio and check for clarity, distortion, or volume issues.

Microphone test option in Windows 11 Settings app

For the speakers, return to the Sound menu, go to the Output section, and select the built-in speakers. Click the Test button to play a sound and ensure the audio is clear without crackling or distortion.

In addition to the above, it’s important to test your laptop or PC’s ports, such as HDMI, USB, the 3.5mm headphone jack, and others. You’ll want to plug in various devices like a USB drive, headphones, or an external display to confirm that each port is responsive and works as expected.

3

Test the RAM

A RAM malfunction occurs when a process writes data to RAM, but RAM returns different data when retrieving the same information. If you buy a computer with faulty RAM, you’ll likely encounter crashes, distorted graphics, sluggish performance, and endless errors.

Hence, testing the RAM before purchasing a used PC is crucial. While various third-party tools are available to test RAM, we recommend using the Windows Memory Diagnostic tool. Before running the test, save any unsaved progress, as the tool will require your computer to restart.

  1. Press Win + R to open the Run dialog box.
  2. Type mdsched in the text box and hit Enter.
  3. Click on Restart now and check for problems (recommended).
Running Windows Memory Diagnostic Tool on a Windows computer

After following the above instructions, Windows will restart once, and the Memory Diagnostic tool will begin running after booting. Once the test is complete, Windows will restart again.

Upon the second restart, you may see the test results immediately, or you may need to open the Windows Event Viewer to find them.

  1. Right-click on the Windows Start button and go to the Event Viewer.
  2. Go to Windows Logs and navigate to System.
  3. Click on Find under Actions in the right-hand pane.
  4. Type MemoryDiagnostic and click on Find Next.

    Checking the Result of MemoryDiagnosticTest in WIndows 10 Event Viewer

Wait for the Event Viewer to search for the string in its data and show the test run result.

4

Check the Health of Your Hard Drives

Checking the Hard Drives Health in Crystal Disk Info Tool in Windows 10

Typically, computer hard drives, whether SSDs or HDDs, are designed to last a long time and rarely fail. However, it’s crucial to ensure their health is in good condition, their temperature stays within an acceptable range, and they don’t have bad sectors or blocks.

A faulty hard drive can lead to various issues, such as the inability to read from or write to the drive, frequent computer crashes, slow file loading, and other problems.

You can check the health of your hard drives using a tool like CrystalDiskInfo. Download and run the CrystalDiskInfo tool on your computer, and you’ll see the statistics of all the drives on your computer. If you have more than one hard drive, you can switch between them by clicking on the arrow button in the top-right corner.

From all the stats the tool shows you, the health status and temperature are of the utmost importance. Your hard drive’s health status should be Good, and its temperature should be between 30 °C and 50 °C. In the worst-case scenario, the temperature shouldn’t go higher than 70 °C.

5

Test Battery Health

The charging capacity of laptop batteries declines over time. If the battery in the laptop you’re considering buying has suffered significant wear, you may not get as much charge, and you might even need a replacement.

To avoid incurring this extra cost after the purchase, running a battery health check beforehand is important. Follow these steps to generate a battery report:

  1. Open the Windows search menu and type cmd in the text box.
  2. Right-click on the Command Prompt app and click Run as administrator.
  3. In the console, type powercfg/batteryreport and hit Enter.
generating the battery report in command prompt

The above process will generate a battery report and save it to a specific folder, which in most cases would be C:Users[UserName]battery-report.

Analyze the battery usage and life estimates by thoroughly inspecting the battery report. You should ensure that the estimated battery life after a full charge is adequate. If the battery needs to be replaced, factor that cost into your decision when purchasing a used laptop.

You can also check the battery health using different battery health tools for more in-depth analysis.

6

Stress Test the CPU and GPU

Another important step is to ensure that the CPU and GPU are powerful enough to handle the tasks you plan to assign them. The best way to determine their capability is to stress-test both components.

A stress test pushes the computer’s hardware (CPU, GPU) to its maximum performance and monitors how well it handles extreme loads. If the PC remains stable during the stress test, you’ve made a good choice, as it indicates the system won’t crash or malfunction under heavy loads.

If you need help with this, refer to our article on how to stress test CPU and GPU safely.

7

Keep the Temperature of the CPU and GPU Under-Check

Monitoring CPU and GPU Temperature Using NZXT CAM software in WIndows 10

When your computer shuts down during a stress test, it’s because it’s overheating at a critical temperature rather than being overburdened. If this happens, you can then decide whether you need an extra case fan, cooling kit, or anything else to keep the component’s temperature at safe levels.

If you don’t get the CPU and GPU temperature data during the stress test run, we recommend using dedicated software to keep their temperature in check.

NZXT’s CAM software is highly recommended, as its intuitive interface makes it easy to adjust clock speeds and fan settings, while also allowing you to monitor the component’s temperature under your preferred load.

Whether you’re buying a decade-old PC or receiving a hand-me-down, running these tests will help you assess the condition of your computer’s hardware. So, make sure to take the time to perform these simple checks to ensure you’re investing in a reliable, fully functional device.

Now You Can Silence That One Friend on Discord Without Hurting Their Feelings

Every social media app is different, but there seems to be one constant, and that’s the necessity of a block function. Originally popularized by gamers, social platform Discord has not only recognized this need but done us one better, with its more discrete “ignore” button.

Discord Has Added an “Ignore” Feature for Silencing Unwanted Chats

As part of its internet safety initiative, Discord has introduced a new feature called Ignore. In Discord’s blog, the company positions Ignore as a useful function within your “safety toolbox,” allowing you to “manage your social boundaries in a gentler way.”

To be clear, Discord does also have a Block button. However, the Ignore button is less confrontational, giving you a more discrete way to cut off communication with someone.

When you block someone on Discord, that person knows they’ve been blocked because their attempted messages will not go through. Here’s Discord’s explanation of why blocking isn’t always the preferred option:

“Currently, you can block a user to prevent interactions with them, but we’ve heard from our users that this can sometimes feel confrontational and scary.”

When you ignore someone on Discord, the platform will not notify that person. Discord will just hide the following content from you:

  • New messages from them
  • DM or server message notifications
  • Their profile and activities

Essentially, ignoring a Discord profile won’t stop that user from seeing your profile and sending you messages—you just won’t be bothered by them.

How to Ignore Someone on Discord

The steps to ignore a user on Discord are very similar to how you would block a profile. Here are the steps:

  1. View the user’s profile.
  2. Tap the three-dot menu.
  3. Select Ignore, located just above Block.

Social media interaction is as exhilarating as it is dangerous—especially for young people. Unfortunately, many of us will face less than favorable encounters in cyberspace. At best, you’ve got an annoying user who floods your feed, and at worst, you become a victim of abusive online behavior. Luckily, Discord offers multiple ways to maintain your online boundaries, and its new Ignore feature is no exception.

6 Webcam Privacy Tips Everyone Should Know

Webcams are incredibly useful, but if not secured properly, they can also be a gateway to privacy breaches. The threats, from cyberattacks to unauthorized surveillance, are real, but you can prevent intruders from accessing your webcam and invading your personal space.

1

Use a Webcam Cover for Privacy

Zarif Ali / MakeUseof

In 2016, The Guardian reported that Meta CEO Mark Zuckerberg covers his laptop webcam, as does former FBI director James Comey. On the tape, Comey said,

I put a piece of tape over the camera because I saw somebody smarter than I am had a piece of tape over their camera.

This simple yet effective method blocks unauthorized surveillance, even if someone gains access to your device. Therefore, to protect your privacy, you must always keep your camera covered when not in use.

If your device lacks a built-in cover, you can use non-transparent tape. However, a sliding cover is a better alternative, as it allows you to easily uncover the camera when needed. For example, these CloudValley Webcam Covers are under ten bucks and do the job perfectly.

2

Disconnect or Disable Your Webcam When Idle

If you’re uncomfortable covering your webcam, you should make it a habit to disconnect your external webcam when not in use or disable the integrated one. This ensures that even if your device is compromised, hackers won’t be able to access your webcam and spy on you. When you’re ready to use it, plug it back in or enable it, and you’re good to go.

Disable your Webcam using Device Manager

If you use an external webcam, unplug it from your computer. You can disable an integrated webcam via the Windows Device Manager or System Preferences on macOS.

3

Block Suspicious Apps & Websites From Accessing Your Webcam

Camera permission for apps in Windows 11 Settings menu

Your webcam could be compromised by a malicious app, malware, or website that secretly gains access. Once these apps have access, they can activate your webcam anytime to spy on you. Therefore, you must regularly review your device’s permission settings and revoke camera access for suspicious apps.

You can revoke camera access for suspicious apps in your operating system’s app permission settings and deny access to websites in your browser settings.

4

Pay Attention to What’s Visible in Your Background

If overlooked, your background during video calls can expose personal items, sensitive data, or private information. This could reveal your private life, which could harm your reputation with colleagues, friends, or clients. Therefore, you must do a quick background check before joining a meeting.

Make sure no sensitive content is visible. Use software features to blur or replace your background, and consider using virtual backgrounds to hide what’s behind you.

5

Update Your Webcam Drivers to Stay Secure

Hackers may also exploit vulnerabilities and bugs in outdated webcam drivers to infiltrate your device and access your camera. Although most operating systems automatically update drivers when new OS updates are installed, you must manually check for new drivers on the manufacturer’s website, especially if you’re using an external webcam, and install them.

By keeping your drivers up to date, you ensure that you’re using the latest security patches from your OS or your manufacturer, helping to protect both your webcam and your privacy.

6

Watch for Indicators of Webcam Hacking

The longer a webcam breach goes unnoticed, the greater the threat to your privacy. That’s why you must be able to recognize the signs of a webcam hack when a hacker secretly activates it to spy on you. One key indicator is if the webcam light turns on unexpectedly, even when you’re not using any camera apps.

If your webcam appears in use when you try to access it or if you find unusual photos or videos on your device, these could be signs of a hack. If you ever have suspicions, you can review your webcam’s activity logs to detect any unauthorized access and verify whether your webcam has been compromised.

These are some steps you can take to strengthen your webcam privacy and protect your personal life. If you haven’t been prioritizing webcam security, start following the above tips to prevent any accidental privacy breaches you’ll later regret.

How to Change Your iPhone’s Charging Sound

Apple offers many customization options for its devices, including three different ways to change your iPhone’s default charging sound.

Change the Charging Sound on Your iPhone

There are three methods you can use to change your iPhone’s charging sound. You can choose to use a whole song, a part of a song, or text that Siri will say every time you charge your iPhone. These tips work no matter how you charge your iPhone.

Before we begin, it’s important to note that you cannot literally change your iPhone’s charging sound. The new sound is just another sound that plays after the default sound. However, if you continue reading, we’ll show you a shortcut to mute the default sound so that all you hear when you plug and unplug your phone is your custom sound.

To change the charging sound on iOS, you’ll need to use the built-in Shortcuts app. There are many handy iPhone automations you can create in the Shortcuts app, and changing the plug-in sound of your iPhone is just one of them. You can re-install the Shortcuts app from the App Store if you accidentally uninstalled it.

After you’ve downloaded the Shortcuts app, launch it and follow the steps below:

  1. Select the Automation tab and tap New Automation.
  2. Scroll down and tap Charger.
  3. Tap the Is Connected option. If you also want a customized sound to play whenever you unplug your phone, select the Is Disconnected option as well.
  4. Tap the Run Immediately option below it so that the automation runs without needing approval.
  5. Tap Next in the top-right corner of the screen.

Change Your iPhone’s Charging Sound to a Song From Apple Music

If you downloaded a song from Apple Music and you want your iPhone to play the full song every time you plug in your phone, follow the steps below:

  1. Tap New Blank Automation.
  2. Select Play Music.
  3. Tap the grayed-out Music text, then select a song from your Apple Music library. Once you pick a song, the Library pop-up will close, and the gray Music text will be replaced by the song title.
  4. Tap the arrow next to the song title and set Shuffle to Off and Repeat to None.
  5. Tap Done in the top-right corner of the screen.

Change Your iPhone’s Charging Sound to a Short Audio Clip

You can use a short audio clip if you don’t want to change your iPhone charging sound to a full song. It can be one to three seconds long, but it has to be in a format that Apple can read, such as MP3, AIFF, or WAV.

You may need to convert a file from MP4 to MP3 or any other suitable format before using it for your iPhone’s charging sound. After downloading the sound, it’s time to create the first automation action to set your custom charging sound.

First, copy the audio clip to the clipboard by opening it in the Files app and tapping Share in the screen’s bottom-left corner. In the Share menu, tap Copy.

Open the Shortcuts app and follow the steps above to create an automation based on connecting or disconnecting the charger. Then, follow these steps:

  1. Select the Play Sound action.
  2. Tap the arrow next to the Play sound action, tap Choose Variable, and select Clipboard in the menu.
  3. Tap Done in the top-right corner of the screen.

Depending on how you set up the automation, the audio clip should play when you plug in or disconnect your phone from power.

Change Your iPhone’s Charging Sound to Siri-Spoken Text

If you don’t have a specific audio clip for when you plug in your iPhone, you can make Siri say something instead. Follow the steps to create the automation above, then when you reach the Add Action page:

  1. Search Speak Text in the Shortcuts search bar and add it to the actions list.
  2. In the Speak action, tap Text and type what you want Siri to say when you plug in or unplug your phone. Think of creative, fun phrases to get the ultimate cool effect. For example, you can create an automation that makes Siri say “Burp” when you charge your iPhone.
  3. You can also change Siri’s pitch, speed, language, and voice by tapping the arrow for more options.
  4. When you’re done entering the word or phrase, tap Done in the top-right corner.

How to Mute Your iPhone’s Default Charging Sound

Unfortunately, the only way to turn off the default charging sound is to put your iPhone in Silent Mode. You can do this on older iPhones by using the switch on the left side of your iPhone. Newer iPhones have the Action button, which will turn your phone to silence by default.

iphone silent switch and volume buttons

While silent mode won’t play the default charging sound, you’ll still be left with a buzz or vibration when it’s plugged in. You can turn this off in Settings > Sounds & Haptics. Scroll to the bottom of the list and turn off System Haptics.

Remember that when you put your iPhone in Silent mode and disable System Haptics, your iPhone will not ring for incoming calls or messages. So, you’ll need to remember to turn off silent mode when you’re finished charging your phone. Alternatively, you can set up a shortcut to turn your phone back to Ring when disconnected from the Charger.

  1. Open the Shortcuts app and select Automation at the bottom.
  2. Tap the + sign in the top-right corner and select Charger.
  3. Choose Is Disconnected (ensure Connected is toggled off) and tap Run Immediately.
  4. Tap New Blank Automation, then Controls, and select Set Silent Mode.
  5. Ensure the On option is toggled to Off and tap Done.

Now anytime you take your phone off the charger, it will automatically disable Silent Mode and turn your Ringer back on, so you don’t have to remember to.

Changing the charging sound on your iPhone is a fun little tweak, even if it isn’t as deep as some might like. Newer versions of iOS include even more customization options to help make your iPhone feel more unique and personal.

I Always Run These 6 Tests Before Buying a Used Smart TV

Buying a used smart TV can feel like a treasure hunt. However, it doesn’t have to be, so I run these checks to avoid the costly mistake of buying a faulty smart TV.

1

Inspect the Screen for Dead Pixels or Burn-In

The screen is the heart of any TV, so this is where you should start. Begin by powering on the TV and displaying a solid color image—white, black, red, green, and blue are good options. You can find test patterns on YouTube or use a USB drive with test images.

Look closely for dead pixels, which appear as tiny black or colored dots that don’t change with the image. A few dead pixels might not be a dealbreaker, but clusters or widespread issues are a red flag.

Mrschimpf/Wikipedia

Next, check for burn-in, especially if the TV is OLED. Burn-in happens when static images (like logos or news tickers) leave a faint but permanent mark on the screen. Display a full-screen white image and look for ghostly remnants of previous content. For LCD/LED TVs, inspect for uneven backlighting or dark spots, which can indicate aging or damage.

2

Test the Wi-Fi and Ethernet Connections

smart tv with no video signal
Brady Meyers/MakeUseOf

A smart TV is only as good as its ability to connect to the internet. Connect to the seller’s Wi-Fi (or your mobile hotspot) and ensure the TV connects without issues before handing over your cash. A TV gets plus points if I find its Wi-Fi standard is Wi-Fi 6 or Wi-Fi 6E.

If the TV has an Ethernet port, plug in a cable and test the wired connection. I prefer wired connections to Wi-Fi because they are faster and more stable.

Open a streaming app like YouTube or Netflix and play a high-definition video to check for smooth playback. If the TV struggles to connect or frequently drops the signal, it could indicate a faulty Wi-Fi module or outdated hardware. This is especially common in older models, so proceed with caution.

3

Check the Smart TV Interface for Speed and Updates

Tizen OS on a Samsung TV
Image Credit: Samsung

The smart TV interface is your gateway to streaming, apps, and settings, so it’s crucial to ensure it’s responsive and up-to-date. Laggy menus or delayed responses to remote inputs (think: 3+ seconds for a button press to register) often signal an underpowered processor or bloated software.

Next, dig into the system settings. Check the OS version (e.g., Google TV, Tizen, webOS) and verify if updates are pending. Manufacturers like Samsung and LG typically support high-end TVs with updates for 4–5 years, but cheaper brands may abandon support after 18 months.

Test pre-installed apps like Prime Video or Apple TV+. If they crash frequently or buffer despite a strong connection, the TV’s firmware is likely outdated—or worse, the storage is failing. If that’s the case, consider whether you’re okay with using an external streaming device like a Roku or Apple TV to keep your setup current.

4

Test All Ports and Connectivity Features

A used smart TV that looks great on the surface would be a terrible buy if its ports and connectivity features are faulty. Before buying, inspect all physical ports—HDMI, USB, Ethernet, and any others. Look for signs of damage, such as bent pins or loose connections. Then, test each port to ensure it functions properly.

LG 24LM520S-WU 24-inch HD Smart TV Ports
LG

  • For HDMI ports, connect a device like a gaming console or Blu-ray player and check for both video and audio output.
  • If the TV has multiple HDMI ports, test each one.
  • For USB ports, plug in a flash drive with a video file or photos to see if the TV can read and display the content.
  • If the TV has an optical audio output or headphone jack, test them to ensure they work as expected.

Don’t forget to check Bluetooth functionality if the TV supports it. Pair a set of wireless headphones or a soundbar to verify the connection is stable, and the audio quality is clear.

If you notice any ports aren’t working, consider whether you can work around the issue. For example, if one HDMI port is faulty but others are fine, it might not be a dealbreaker.

5

Verify Remote Control Functionality

YouTube app on Sony smart TV
A. Aleksandravicius / Shutterstock

The remote control is your primary way of interacting with the TV, so it’s essential to ensure it works flawlessly. Start by checking the remote’s physical condition. Are the buttons responsive, or do they stick or feel loose? Are there any visible signs of damage, like cracks or worn-out buttons?

Next, test the remote’s functionality. Power the TV on and off, adjust the volume, and go through the menus. Pay attention to any delays or unresponsive buttons.

Test any special features, like voice control or dedicated app buttons. If the remote has a built-in microphone for voice commands, try using it to search for content or change settings.

6

Run a Sound Check on the Speakers

Crystal-clear audio is as vital as a sharp picture, so don’t overlook the speakers. You can run a sound check on the TV speakers by playing a video with a mix of dialogue, music, and sound effects—something like a movie trailer or a concert clip works well. Listen closely for distortions, crackling, or uneven volume between the left and right channels.

Next, adjust the volume from low to high. Are the speakers clear at low levels or buzz when cranked up? If the TV has built-in audio presets (like Movie, Music, or Voice), cycle through them to see if any improve the sound quality.

If the built-in speakers underwhelm, test the TV’s audio output options. You can connect a soundbar to any Smart TV via Bluetooth, HDMI, RCA, or optical audio. If you don’t have a soundbar, a pair of headphones will work just as well. Relying on external gear adds cost, so factor that into your offer.

A used TV doesn’t have to be perfect, but it should meet your needs and perform reliably. Running these tests will help you avoid costly mistakes and make an informed decision whether that is walking away or negotiating a lower price.

How I Use Excel’s Regex Functions to Power Up My Search Game

Summary

  • Regex patterns help search text strings efficiently (e.g., emails, digits, specific sequences) using symbols.
  • Excel provides predefined regex functions (REGEXTEST, REGEXEXTRACT, REGEXREPLACE) to search, extract, and replace data.
  • Combine regex functions with other Excel functions for more advanced data manipulation and validation.

Filtering and searching in Excel can feel like a guessing game. Regex functions change that. Now, I can pinpoint exactly what I need—complex patterns, partial matches, or structured data extraction—without breaking a sweat.

What Is Regex?

Regex is a type of pattern used to search a text string or sequence of characters for a match. Have you ever wondered how websites can tell you that the email pattern you have entered on a login page is invalid? That’s one example of a regex pattern using an email signature at work.

Regular expressions are not unique to Excel—they’re available in multiple text editors, programming languages, command-line tools, IDEs, and even Excel’s competitor, Google Sheets.

Regex might sound complicated, and it is if you want to use it to its full potential, but you don’t need to be a programmer to use it effectively. In some cases, you can get away with just knowing how to use a few symbols and basic patterns. I’ll keep this guide as simple as possible so you can start using them.

Here are the symbols we’ll be using in this guide:

Symbol

Description

Specifies a range of characters within brackets.

^

Match the start of a string.

$

Match the end of a string.

.

Match any character other than the new line character.

*

Match 0 or more of the preceding character.

+

Match 1 or more of the preceding characters.

()

Group the matched characters into one.

[]

Match any of the characters inside the brackets.

[^]

Match any character that is not inside the brackets.

{n}

Match exactly n instances of the preceding character.

{n,}

Match n or more occurrences of the preceding character

Simple regex patterns you can build with these symbols include:

Regex Pattern

Description

[0-9]

Match a single digit from 0 to 9

[a-zA-z0-9]

This is a combination range that matches a single character from lowercase a to z, uppercase A to Z, and from 0 to 9.

^pro

Match any string that begins with pro.

[^$]

Match any character that is not $.

(con)

Group the pattern con.

a{3,}

Match 3 or more occurrences of the latter a (e.g., a, aa, or aaa).

Regex functions are predefined Excel formulas that can be used to define a pattern for searching and manipulating text strings. There are three regex functions as of now, and we’re going to look at how to use them separately and with other functions.

Search for Patterns

The first function we are going to look at is REGEXTEST. It takes a text string you want to use for searching and a regex pattern, and uses the latter to find a match in the former. The function will return either True or False.

The syntax for the REGEXTEST function is as follows:

        REGEXTEST(string_to_search, regex_pattern_to_use, [case_senstivity])

The first two parameters, string_to_search and regex_pattern_to_use, are self-explanatory. The [case_sensitivity] parameter is optional—anything placed in square brackets when talking about Excel syntax is optional—and denotes whether you want the search to be case-sensitive (0) or case-insensitive (1). The default is case-sensitive.

In our example, we will use REGEXTEST to see if a user has entered a valid email address using the following formula:

        REGEXTEST(B3, "^[a-zA-Z0-9._%+-]+@[a-zA-Z0-9.-]+\.[a-zA-Z]{2,}$")

Here, we are searching in cell B3 to see if it contains an email address using the regex pattern below:

        ^[a-zA-Z0-9._%+-]+@[a-zA-Z0-9.-]+.[a-zA-Z]{2,}$
    

If I place the formula in cell C3 and enter [email protected] in cell B3, it will return True because that matches the signature of an email.

Next, lets look at the REXEXEXTRACT function. It returns a substring (a portion of the string) that matches the regex pattern provided.

The syntax for the REXEXEXTRACT function is as follows:

        REGEXEXTRACT(string_to_search, regex_pattern_to_use, [return_mode], [case_senstivity])

Continuing with the email example, let’s add a formula in cell B4 to extract the username of the portion of the email.

Here is what the formula will look like:

        =REGEXEXTRACT(B3, "([^@]+)")

In this formula, we extract everything before the @ symbol in the email address entered in B3.

The REGEXEXTRACT function in Excel.

Find and Replace Using Regex

The final regex function we will look at is REGEXREPLACE. This function is similar to Excel’s REPLACE function, but also supports RegEx. It takes the text string you want to modify and checks to see if there is a substring that matches the defined regex pattern. If it finds it, it replaces it with the provided replacement string.

The syntax of the REGEXREPLACE function is as follows:

        REGEXREPLACE(string_to_modify, regex_pattern_to_use, replacement_string, [number_of_occurrences], [case_senstivity])

Here are the important parameters to pay attention to in this function:

  • string_to_modify: The text string you want to modify.
  • replacement_string: The string to replace the substring with.
  • number_of_occurrences: The exact instance you want to replace.

Here is an example of using the function to replace the username portion of the email with another text string:

        =REGEXREPLACE(B3, "^[^@]+", "jane.doe")

The value of B3 is [email protected], and after we enter the formula above in cell C3, it will return [email protected].

The REGEXREPLACE function in Excel.

Combine Regex With Other Functions

You can also combine the regex functions with other functions in Excel. For instance, you can combine the REGEXTEST function with an Excel IF statement and display the appropriate message based on the result.

Here is an example formula:

        =IF(REGEXTEST(B3, "^[a-zA-Z0-9._%+-]+@[a-zA-Z0-9.-]+\.[a-zA-Z]{2,}$"), "This is a valid email address!", "The email address is invalid!")

This formula uses the IF statement to check if the email address entered in cell B6 is valid and then display This is a valid email address! if it is TRUE or The email address is invalid! if it is FALSE. Alternatively, you could pair this with the FIND function to quickly find data in Excel.

Combining the REGEXTEST and IF function in Excel.

This is not meant to be an extensive guide on regular expressions—that would require several articles on its own. However, it’s a good way to start using RegEx in Excel. The use cases and possibilities are only limited by your imagination.

5 Smartphone Trends I Wish Would Die Already

It’s frustrating to see smartphone manufacturers chase trends that seem to add little value to the overall experience. Whether it’s impractical design choices or features no one really asked for, some of these trends just need to disappear for good.

1

Shoving AI Everywhere

Yash Wate / MakeUseOf

AI might be the biggest focus in smartphone trends for 2025, but to be honest, I’m not too impressed. In fact, I believe AI is actually hindering smartphone innovation rather than pushing it forward. The Samsung Galaxy S25 series is a prime example of this issue. The entire lineup feels underwhelming, and the main reason is that there’s barely anything that differentiates the S25 from the previous S24, apart from a handful of AI features that have been added on top. It’s disappointing to see such minimal progress when it comes to actual hardware or meaningful improvements.

The same sentiment applies to iPhones, and I was thoroughly disappointed with Apple Intelligence. While some features, like Magic Eraser, are undeniably useful, the majority of AI-driven additions feel like nothing more than gimmicks. As a power user, I find myself rarely using these features, and even when I look at non-tech-savvy users like my parents, I’ve never seen them take advantage of these capabilities, either. This makes me question—who exactly are these features being designed for?

I definitely want to see advancements in generative AI continue, but not if it means compromising on other important aspects of smartphones, particularly hardware improvements.

2

Bigger and Bigger Screen Sizes

ASUS Zenfone 11 Ultra back-glass-3
Zarif Ali / MakeUseOf

Even though I have relatively large hands, I still find big phones uncomfortable to use—especially when trying to reach the top of the screen. Despite this, most manufacturers continue pushing for bigger and bigger displays, particularly in flagship phones. This makes it difficult to find a high-end compact phone.

One of my favorite Android phones in 2022 was the ASUS Zenfone 10 because it was one of the few smaller devices offering top-tier specs. However, its successor, the ASUS Zenfone 11 Ultra, completely shifted gears. Instead of sticking to the compact 5.9-inch display, it has a massive 6.9-inch screen, which is a drastic change from what made the Zenfone 10 so appealing in the first place.

Although Google and Apple still offer Pro-level phones with 6.3-inch displays, I’d consider that more of a medium-sized phone than a truly small one. I still find myself wishing Apple would bring back the iPhone Mini series in some form.

3

Glass Backs

iPhone X with a cracked back glass lying on the floor with a case
Mahnoor Faisal/MakeUseOf

Glass backs on smartphones have never really appealed to me. They break much more easily while also adding unnecessary weight to the phone. While I would love to see the return of metal backs, they could interfere with wireless charging, making them less practical. That’s why I believe plastic is the next best option.

Recycled plastic backs could be much easier to replace and, with the right finish, can feel just as premium as other materials. Since plastic is also significantly lighter, it also feels much better in the hand. I’d really like to see a more sustainable version of plastic being widely adopted across all price ranges.

4

Multiple Rear Cameras with Little Practical Use

Phone cameras side by side
Jhet Borja/MakeUseOf

Manufacturers often rely on a marketing tactic that misleads customers into believing that more camera lenses automatically mean a better camera system overall. However, this isn’t always true, especially in the lower mid-tier phone segment. Many of these devices pack four lenses into a phone, yet none of them perform well at their intended purpose.

Personally, I would much rather have one excellent camera that takes amazing photos and does its job exceptionally well than multiple mediocre cameras that fail to deliver quality in any aspect. This is an area where I think Apple gets it right. Its mid-range phones typically feature two high-quality cameras rather than trying to cut corners by adding extra, subpar lenses just to inflate the lens count. After all, let’s be honest—no one is excited to use a poorly implemented 2MP macro lens or an ultra-wide camera that struggles to capture enough light to produce decent photos.

5

Thinner Bezels

iPhone 16 Plus screen side in hand against city background
Zarif Ali / MakeUseOf

This might be an unpopular opinion, but I don’t see the need for thinner bezels on phones without a practical reason. Most phones already look great with a decently sized bezel, especially if you use dark mode on an OLED display. In that case, the bezel blends easily with the screen, making it hardly noticeable.

There’s a reason Samsung stopped making phones like the Galaxy S7 Edge and why many phones are returning to flat displays instead of curved ones. Curved screens often lead to accidental touches, add to the cost, and make screen replacements more complex and expensive. This trend of pushing for thinner and thinner bezels with every new phone release makes me wonder if we’re heading back to curved displays all over again—something that didn’t work out so well the first time around.

Microsoft Edge Gets a “Scareware” Blocker to Stop Fake Alert Sites

While all scams are scary, “scareware” can be the worst of its kind, masquerading as a service to save you from a malware attack. To mitigate these types of scams, Microsoft has added a “scareware blocker” to its Edge browser, which harnesses the power of machine learning.

Microsoft Edge Now Has an AI-Powered Scareware Blocker

Microsoft has now rolled out its scareware blocker for the Edge browser, which leverages AI to intercept specifically scareware attempts. Scareware is a type of scam that can manipulate your browser, producing a pop-up window that informs you that your system has been infiltrated. The scammer will pose as a tech support service, such as Windows Support, and instruct you to call them immediately. Ironically, it’s these phone calls that lead to the attackers being able to access and place malware onto your computer.

The promising quality of Microsoft’s new scareware blocker is that it allegedly notifies users quickly. This is imperative because these types of scams typically urge users to act fast, playing on your desperation to save your system from malware.

How Does Microsoft’s New Scareware Blocker Actually Work?

According to Microsoft, the scareware blocker complements Edge’s existing security feature, Microsoft Defender SmartScreen, which protects users from malicious sites in general. The scareware blocker differs in that it uses AI to scan new web pages for classic signs of scareware, like entering full screen mode or computer-generated audio messages.

Here is how Microsoft’s blog post describes the machine learning model’s functionality:

“The model uses computer vision to compare full screen pages to thousands of sample scams that the scam-fighting community shared with us. The model runs locally, without saving or sending images to the cloud.”

Scareware-type behavior will trigger a warning message from the blocker. How can you tell this warning message from a scareware pop-up? For one, a notification from Microsoft’s scareware blocker will not include a tech support phone number to call. It will only let you know that the site looks suspicious, and give you the option to Close page or Continue.

You should only click Continue when you know for certain that a site is safe.

How to Enable Your Scareware Blocker on Microsoft Edge

Microsoft’s new scareware blocker is still in preview mode, but you can enable the preview in your browser’s settings:

  1. Open Microsoft Edge and head to Settings.
  2. Select Privacy, search, and services.
  3. Toggle the slider on next to Scareware blocker.

While it can be challenging to differentiate which security warnings are real and which are fake, a good rule of thumb is to use caution around phone numbers and links. Whenever a security notification includes a contact number, cross-check it with a cursory Google search. For example, if you’re instructed to contact Microsoft Support, make sure the number aligns with what’s listed on Microsoft’s official website. And if you’re not able to open another browser tab to do that search, then—that’s another tell-tale sign of a scam.

Excellent for Exercising, Decent For the Rest

Open-ear wireless earbuds are always a mixed bag. That’s why I’ve been mostly impressively surprised with the Soundcore AeroFit 2 earbuds—they’re comfortable, don’t fall out of my ears while exercising, deliver good sound quality, and have a host of useful features.

Soundcore AeroFit 2

$143 $150 Save
$7

Boasting a useful design and surprisingly good audio quality, the Soundcore AeroFit 2 open-ear earbuds are an excellent option for anyone who wants music while working out. The AeroFit 2 has an excellent eight-hour battery life with three full charges in the carry case, while the Soundcore app makes it easy to customize the earbud’s audio just how you want it. You may have to play around to find the most comfortable fit, but once you do, the AeroFit 2 stay locked into place for most activities.

Pros & Cons

  • Good sound quality for open ear-design
  • Useful companion app, plenty of EQ options
  • Great battery life
  • Comfortable for long periods
  • Very easy to knock touch controls
  • Can be difficult to position properly

Price and Availability

The Soundcore AeroFit 2 is available from Soundcore or Amazon, both costing $99.99 at the time of writing. You can pick them up in Black, White, or Minty Green.

Useful Design, But Too Easy to Knock

soundcore aerofit 2 earbuds worn by male in ear.
Gavin Phillips / MakeUseOf

I must admit that the AeroFit 2’s looped ear design didn’t initially impress me. I have relatively small ears, so there was a period of adjustment in terms of the fit and feeling of comfort. I could get the earbuds into a decent position for audio, but it didn’t necessarily always translate to a comfortable feeling.

Not that the AeroFit 2 is uncomfortable. They just didn’t feel right. Each earbud has a small pivot that moves through four different positions to help you reach maximum comfort. Adjusting the hinge inwards moves the earbud speaker to a different position within your ear, which is very simple to use.

At times, however, it was a little too easy to move. I’d often nudge the speaker out of place. Now, readjusting it only takes a moment, but it happened a little too frequently for my liking. In turn, it meant I didn’t use the touch controls much because I was wary about knocking them again.

Once I’d found a good overall position for my ear, the earbud loop, and the speaker position, it was easy to return to it. But even then, I still had to fiddle with them to find the optimum angle. It’s a far cry from just putting your headphones on or earbuds in and listening to music immediately.

soundcore aerofit 2 case with earbuds inside.
Gavin Phillips / MakeUseOf

I’m keen to acknowledge that my ear shape may play a part in this. I took the AeroFit 2 out for a few runs to test how well it would stay put, and it was surprisingly good in this area.

Something to note is the size of the AeroFit 2 case. It’s a bit of a unit, measuring 3.14 x 2.62 x 0.9 inches. It’s unlikely you’ll be keeping this one in your pocket, which means you’ll need an extra bag or something similar to carry it. I mean, you absolutely could put it in your pocket, depending on your pants, but it’ll be uncomfortable or bulge if you’re wearing something on the tighter side.

soundcore aerofit 2 case close up in hand.
Gavin Phillips / MakeUseOf

Finally, the AeroFit 2 has an IP55 rating, meaning they’ll stand up to dust and some moisture, like rain and sweat, but not total submersion.

Strong Bass, But Good Overall Audio Quality

soundcore aerofit 2 earbuds showing both sides.
Gavin Phillips / MakeUseOf

Soundcore’s default EQ AeroFit 2 EQ is somewhat bass-heavy, but it’s a fun sound that I enjoyed, especially when out running or otherwise. Soundcore’s “BassTurbo Acoustic Structure” really shows what these earbuds are about. According to Soundcore, the “hourglass-shaped chamber intensifies sound and diaphragm vibration, unleashing bold, thunderous bass.”

In that, these aren’t earbuds for those seeking audio-precision; the design doesn’t lend itself to that anyway.

But the 20×11.5mm Racetrack drivers certainly do a decent job and, in many cases, help overcome the issues of external audio leaking. As said above, you’ll have to play around with the fit to find a comfortable position, but when you do the audio quality is plenty good.

soundcore aerofit 2 earbud speaker grill close up.
Gavin Phillips / MakeUseOf

The integrated EQ settings (found in the Soundcore app, available on iPhone and Android) are useful for rapidly changing the audio quality, too. I found myself mostly switching between the default Soundcore Signature, Flat, and Balanced. One slight irritation is how these EQs are presented visually in the app. The Soundcore Signature is displayed as a completely flat EQ when it’s anything but, while the Flat EQ shows some tweaking around the mid-ranges.

I found the Balanced EQ the best of the three, dropping some of the Soundcore Signature’s bass-forward approach for something a little more subtle. Either way, the options are handy to use, with the extra option of creating a unique EQ also available.

The AeroFit 2 connects to your device using Bluetooth 5.4, with the option of choosing between SBC, AAC, and the high-res LDAC codec. It’s a handy option, though its usefulness on an open-ear design like this is questionable. Yes, LDAC gives you higher-quality audio, but given that you can also hear everything from the outside world, how much do you notice that upgraded sound?

soundcore aerofit 2 earbud speaker grill close.
Gavin Phillips / MakeUseOf

More handily, the AeroFit 2 earbuds support multi-point connections, which is always helpful. Bluetooth Multipoint connectivity has become one of those “just-can’t-do-without” features these days, so it’s good to see Soundcore supporting it here.

The AeroFit 2 has four beam-forming microphones designed to track the position of your voice to deliver greater clarity. I found the microphone quality fine in most scenarios. In a quiet room, the microphones have no problem picking up your voice, while outdoors, there is some background noise, but this is expected.

Soundcore’s Familiar Software Is Easy to Use

The Soundcore app is your go-to point for any AeroFit 2 setting. First, if you want to customize the AeroFit 2 EQ settings, you’ll find them here. The EQ settings are simple to use and switch between, and while the onboard custom EQ options won’t blow you away, they’re handy enough. You’ll also find the 3D Signature Sound option here.

There are also options to change the various touch controls. These are useful, but I didn’t spend much time using the touch controls in general because I didn’t want to knock the earbuds out of position. Still, the options to change the controls are easy to use.

The Soundcore app also contains other handy tools, such as a zero-latency gaming mode, dual-connection management, firmware updates, and more.

Impressive Battery Life For All Day Use

soundcore aerofit 2 earbuds outside case.
Gavin Phillips / MakeUseOf

I’ve used many Soundcore earbuds over the years, and the AeroFit 2 keeps up the company’s strong track record on battery life. I found the AeroFit 2 last around eight to nine hours while playing music at a good level (on a single charge), which is enough for most uses.

You’re unlikely to complete a nine-hour workout (long-distance runs notwithstanding), so the AeroFit 2 will likely last you the duration of any task. In addition, the charging carry case can deliver another three full charges, giving you around 40 hours of playback in total without having to reach for a power outlet.

Importantly, the AeroFit 2 picks up around three to four hours on a rapid ten-minute charge, which is great if you’re heading out of the house and forgot to put them back in the case the night before. That said, a full charge only takes around 45 minutes or so, meaning it’s not difficult to reach full capacity once again.

What’s the Competition?

Soundcore’s AeroFit 2 competition somewhat depends on why you’re buying them. Assuming most are using an open-ear hook design for exercise of some sort, there are a couple of different options to consider.

The Shokz OpenRun offers a different experience, using bone-conduction tech to help keep your ears free. Although this is a slightly older model, first launched in 2020, the Shokz OpenRun remain a firm favorite among those who want to listen to music while training without any impedance from other sounds. Although they cost a little more, you get a higher IP67 protection rating, useful Bluetooth 5.0 connectivity, and decent audio, considering the difference in audio tech.

Alternatively, the Cleer Audio ARC 3 is a premium option for those who want an open-ear design with ear hooks. These include Dolby Audio, Snapdragon Sound, and up to 10 hours of playback on a single charge.

Should You Buy the Soundcore AeroFit 2 Earbuds?

These are great options for anyone interested in exercising, working out, running, cycling, or something similar. The Soundcore AeroFit 2 is competitively priced against the competition and offers a broad range of features, good sound quality, and a day-long battery life.

For anyone else, I’d suggest a traditional set of earbuds, which will give you better sound quality, especially given that many now come with an audio passthrough or transparency mode.

soundcore aerofit 2 earbuds

Soundcore AeroFit 2

$143 $150 Save
$7

Boasting a useful design and surprisingly good audio quality, the Soundcore AeroFit 2 open-ear earbuds are an excellent option for anyone who wants music while working out. The AeroFit 2 has an excellent eight-hour battery life with three full charges in the carry case, while the Soundcore app makes it easy to customize the earbud’s audio just how you want it. You may have to play around to find the most comfortable fit, but once you do, the AeroFit 2 stay locked into place for most activities.

Google Is About to Make Its AI Search Results Even Better

You’ve undoubtedly seen the new AI overviews that Google uses to help you answer your questions. Well, if an internal email is to be believed, the company wants to make its AI search even mightier with an enhanced version of its Gemini assistant.

Google’s New AI Search Will Unravel and Answer Your Complex Questions

Hannah Stryker / MakeUseOf

As 9to5Google reported, the search giant is sending around an internal email asking employees to “dogfood” a new Google search AI tool. This new feature will use a new Gemini 2.0 model, which the email claims features “advanced reasoning and thinking capabilities.”

The main goal behind this new tool is to provide answers to questions that Google’s regular search algorithms are poor at returning answers for. The company gave some examples of what kind of questions you can ask this new search tool:

“How many boxes of spaghetti should I buy to feed 6 adults and 10 children, and have enough for seconds?”

“Compare wool, down, and synthetic jackets in terms of insulation, water resistance, and durability”

“What do I need to get started with aquascaping?”

Follow-up: “What are some nearby stores to buy supplies?”

As you can tell by the last prompt, the new search tool will allow you to ask follow-up questions, much like an AI chatbot. It seems that Google wants to turn its search tool into something you can ask things of, like asking an expert for their opinion on a specific topic, with room to enquire further about what Gemini replies with.

Right now, there doesn’t seem to be any planned release date for this new feature. It’s currently undergoing testing, and even the UI that 9to5Google managed to spot was in an early testing stage, so it likely won’t be released soon. However, there’s a good chance it’ll be released sometime this year, so keep your eyes peeled for more.

These Are My 9 Essential Tech Work-From-Home Gadgets

They say that you only need a computer and Wi-Fi to work remotely, and that’s true on a base level. But if you’re working from home for a long time, it’s worth building up your gadgets and boosting your productivity—these are the WFH gadgets I can’t do without.

1

Wireless Mouse

After using my trackpad for over four years, I finally had enough and bought a wireless mouse for my laptop. Since then, I’ve enjoyed working from home much more than before.

Danny Maiorca/MakeUseOf

Navigating my computer is much easier, especially with actions like scrolling. I’m happy to take the slight tradeoff of highlighting my text being easier with a trackpad; if I really need to, I can use that.

My wireless mouse has also helped my posture, and I enjoy editing photos much more than I used to. Its silent-click feature is another nice benefit, and so is the ability to use it with my iPad and computer.

2

Laptop Stand

While I partially work from home, I also spend lots of time at a coworking space. Therefore, I want a portable remote work setup. I’ve avoided buying a monitor for this reason, though I’m open to changing my mind.

I still wanted to stop spending so much time looking down at my laptop screen, though. I needed to find an alternative, which led to me purchasing a laptop stand. There are definitely pros and cons of using a laptop stand, but the advantages outweigh the drawbacks for me.

Editing Photos on a Laptop With Wireless Mouse
Danny Maiorca/MUO

My posture always feels better when using the laptop stand, though I still sometimes put my laptop on the table instead. My only annoyance is that it can shake when I write, but I’ll likely purchase a sturdier option in the future.

Besides the posture-related advantages, having a laptop stand has also helped with my computer’s airflow.

3

Wireless Keyboard

I first used my computer keyboard after purchasing my laptop stand, which quickly became annoying. Since then, I’ve added a wireless keyboard to my home setup and am much happier.

My wireless keyboard works on my computer and iPad, making it easy to switch across devices when needed. Moreover, I can write more quickly than when using my laptop’s keyboard on a laptop stand.

Learning how to use my wireless keyboard took some time because it’s different from my laptop. I’ll probably upgrade to a Magic Keyboard at some point since I own a MacBook; Logitech made my current keyboard. For now, though, I’m happy. I recommend learning the pros and cons of external keyboards before buying one.

4

Wireless Charger

I limit the number of wires I use since I have lots of gadgets, and buying a 3-in-1 wireless charger was one of my best-ever tech purchases. I can simultaneously charge my iPhone, Apple Watch, and wireless headphone case, saving time and space.

A photo of an iPhone charging on a Native Union charging station
Danny Maiorca/MakeUseOf

But adding juice to my devices isn’t the only reason why I love my wireless charger. I can also use it as a tripod for my phone, allowing me to listen to music while I work.

Putting my phone on a wireless charger also lets me watch videos if I need to research a topic.

5

My iPad as a Second Screen

Part of wanting a portable work-from-home setup also means that I’ve refrained from buying an external monitor for my laptop. Thankfully, my iPad is the perfect second screen (and I can take it everywhere with me).

a MacBook and iPad next to each other on a desk
Danny Maiorca/MakeUseOf

I use my iPad to research articles and fact-check while I’m writing. Doing so is much easier than opening a new tab because I don’t feel like I’m context-switching. Though I sometimes listen to music on my phone while working, I normally use my iPad because the big screen is easier to navigate.

I also use my iPad as a second screen when I’m learning. While I watch or read on my tablet, I can then type on my laptop. Though I use my iPad with a MacBook, you can also use your iPad as a second monitor on Windows.

6

An External Hard Drive

In addition to writing, I also take on photography projects. However, I’d have no space on my computer if I used it to store all my RAW files. I’ve also tried using cloud storage for unedited RAW images, but they take ages to upload and consume lots of space.

LaCie External Hard Drive
Danny Maiorca/MUO

To mitigate these problems, I bought a LaCie hard drive in 2023. In my opinion, it’s one of the most durable (and portable) hard drives.

Once I’ve edited my photos, I usually store the edited JPEGs in Dropbox. However, I’ll save a TIFF version on my hard drive if I plan to sell the image as a print.

7

Wireless Headphones

Listening to music often helps me focus on tasks, and I also have a bigger work capacity than I otherwise would. I’ve tried multiple wired headphones, and I can’t stand using them. I needed to buy different pairs for working and exercising, and they’d always get tangled.

When I owned wired headphones, I’d also hear the wire if I accidentally hit it while typing. I’ve since solved this problem with wireless headphones, and more specifically, I bought noise-canceling ones.

Jabra Wireless Headphones
Danny Maiorca/MUO

Having noise-canceling wireless headphones allows me to drown out background noise. For example, I sometimes hear cars from the street, and this can be very distracting. Even if I’m not listening to music, I sometimes place my headphones so I can focus on my task.

8

An Adjustable Table

Standing hours are one way that I use my Apple Watch to move more each day. However, I noticed that I was sitting far more than I’d like when checking the statistics. This is not healthy, and I bought an adjustable table to mitigate this issue.

An Image of a Adjustable Table
Danny Maiorca/MUO

My adjustable table looks great and comes up to a good height. It’s also very stable; I deliberately bought a more expensive option so it would last longer.

Besides improving my posture and ensuring that I stand more during the day, having an adjustable standing desk also means that I’m more likely to walk around. So, I increase my daily step count as a byproduct.

9

USB-C and SD Card Adapters

Though I own a MacBook Pro with USB-C ports, many of my devices still use USB-A. My computer also doesn’t have an SD card slot, which isn’t ideal when I need to import images from my camera. So, I bought adapters for both.

Apple SD Card Adapter
Danny Maiorca/MakeUseOf

You can buy third-party options, but I purchased the official Apple ones and am very happy with my division. They feel much more durable.

Having slowly upgraded my work-from-home setup over multiple years, I’m now pleased with my approach. Each gadget helps me improve productivity and perform tasks I otherwise couldn’t have. You’ll need to experiment when doing the same, but I strongly recommend trying each of these.

Google’s Latest (and Fastest) Gemini Model Is Now Available to Everyone—Even Free Users

As Google continues to refine its family of modern generative AI models, known collectively as Gemini, the company releases more advanced versions for free. The latest wide release is Gemini 2.0 Flash, Google’s fastest and most effective model yet.

Gemini 2.0 Flash Is Available to Free Users and Developers

Exiting triumphantly from its experimental phase is Gemini 2.0 Flash, a “highly efficient workhorse model,” as described by Google’s The Keyword. Known for low latency and strong performance, Gemini 2.0 Flash is now popping up in a few new places: on the Gemini app, the Google AI Studio and Vertex AI.

Gemini App

On January 30th, 2025, Google added the model to the Gemini app, available to both paying and non-paying users. You can simply go to Gemini’s web, desktop, or mobile app, and it will default to Gemini 2.0 Flash.

You do still have the option to select Gemini 1.5 Flash, Google’s previous model. I’m not sure why you would, but there could be something I’m missing as a basic user.

While you don’t need to pay for Gemini Advanced to use 2.0 Flash, a paid subscription will still get you extra perks. These premium offerings include access to more experimental models, the ability to upload lengthy documents for analysis, and more. You can check out the full list of benefits on Google’s Gemini Advanced page.

A list of features compared between Gemini's free and Advanced version

Google AI Studio and Vertex AI

In addition to bringing it to everyday users, Google has now made Gemini 2.0 Flash available to developers by adding it to the Google AI Studio and Vertex AI platforms. Developers can build applications using 2.0 Flash on both of these platforms, which cater to different use cases.

It’s All in the 2.0 Flash Family

While making Gemini 2.0 Flash more widely available, Google has also shared early versions of other models in the “2.0 family,” including Gemini 2.0 Pro and Gemini 2.0 Flash-Lite. Additionally, Google has dropped Gemini 2.0 Flash Thinking Experimental on the Gemini app after it was previously only accessible via Google AI Studio.

According to Google, these early models will start with text output and have additional modalities in the future:

“All of these models will feature multimodal input with text output on release, with more modalities ready for general availability in the coming months.”

If you, like me, find it challenging to keep up with the various iterations of Gemini models, here’s a quick breakdown of the newest releases:

Model

Status

Available On

Best For

Gemini 2.0 Flash

Generally Available

Gemini app (all users), Google AI Studio, Vertex AI

Fast responses and stronger performance compared to 1.5. Useful for everyday tasks like brainstorming, learning, writing, as well as for developers to build applications.

Gemini 2.0 Flash-Lite

Public Preview

Google AI Studio, Vertex AI

Cost-effective yet updated option for developers. It has “better quality than 1.5 Flash, at the same speed and cost.”

Gemini 2.0 Pro

Experimental

Gemini app (Advanced users), Google AI Studio, Vertex AI

Google’s “best model yet for coding performance and complex prompts.”

Gemini 2.0 Flash Thinking Experimental

Experimental

Gemini app (all users), Google AI Studio

Combines “Flash’s speed with the ability to reason through more complex problems.”

As someone who uses Gemini largely for writing support and occasional curiosity questions, I’m not sure if I’ll truly feel the difference between 1.5 Flash and the new-and-improved 2.0 Flash. I do imagine those who leverage Gemini for more complex tasks and building will reap the rewards of the low-latency model.

In any case, I’ll be eager to see how 2.0 Flash handles image generation, which is “coming soon” along with text-to-speech, according to Google.

These Free AI Flashcard Generators Make Studying Too Easy: My Top Picks

Flashcards are undoubtedly great for memorization-heavy courses, but creating hundreds for a single course can be time-consuming and exhausting. Thankfully, AI flashcard generators can spare you the manual work and help you memorize even the toughest content.

I’ve tried nearly every free flashcard app, and while most include AI flashcard generation features, they’re often locked behind a paywall, have extremely limiting free versions, or are simply underwhelming.

That’s when I started my hunt for dedicated AI flashcard generators, and one tool I wish I’d discovered earlier is FlashKa. Not only does it use AI to generate flashcards, but it also helps you interact with your study material and explain any doubts you might have.

FlashKa offers four different modes: PDF, Describe, Text, and Manual.

Since we’re focusing on automating the tedious process of creating flashcards, I’ll stick to the first three as the Manual mode requires you to create the flashcards yourselves. In the Describe mode, all you need to do is just specify what you want to learn, your familiarity with the topic, and what you’d like to achieve.

For example, I wrote “Momentum, I know some of the concepts, I’d like to master the topic,” named my deck, and FlashKa created the flashcards shown below.

FlashKa's AI generated flashcards

If you have the study material on hand, you can use either the PDF or Text mode. For the Text mode, simply paste up to 1000 characters, and FlashKa takes care of the rest. Since I mostly study from handwritten notes and lecture slides, the PDF mode is my favorite.

Just upload your PDF, select the pages you want to create flashcards from, and choose between two options: either hit the Generate Flashcards button to let the AI do its thing or highlight information you want converted into flashcards.

Digital Technology slides in FlashKa interface

Flashka also includes an image occlusion feature, perfect if your subjects require visual memorization.

Of course, making the flashcards is only half the battle—the real challenge is studying them. Thankfully, FlashKa also assists in the studying process. It uses a spaced repetition algorithm and even allows you to test your knowledge by generating quizzes from your flashcards.

FlashKa operates on a credit system, giving you 50 daily credits. A credit is used each time you generate a flashcard, quiz, or use the AI help features. While the free credits are generally sufficient for daily use, they might fall short if you tend to cram the night before an exam. In that case, you can upgrade to their Beast or Wizard subscriptions, which provide 3000 AI credits or unlimited credits, respectively.

FlashKa’s great, but as I mentioned earlier, you might find its free credits limiting if you’re the type to pull all-nighters and cram an entire semester’s worth of content the night before the final.

If you’re looking for a similar tool with an excellent spaced repetition algorithm that’s mostly free, Brainscape is definitely worth checking out. To create AI-powered flashcards within a deck, you’ve got three options: Import/Paste Flashcards, Summarize From Content, and Just Tell AI What I Want.

Brainscape's AI Flashcard generation options

If you already have study material in the form of pre-existing questions and answers like vocabulary words or definitions in a file (.xlsx, .csv, .txt, .tsv), or an image, you can easily convert them into flashcards using the Import/Paste Flashcards option. When I’ve used this feature, the initial set of flashcards that Brainscape displays on the “Do these look right to you?” page is usually a mess.

You can either add all the cards to your deck or hit the No, Fix With AI button, which uses ChatGPT to improve both the content and presentation of the cards.

On the other hand, the Summarize from Content mode works similarly to FlashKa. All you need to do is upload a file (.docx, .pptx, .txt) or an image of your study material, and the AI will convert it into flashcards for you.

If you don’t have any study material and just want to generate flashcards on a topic from scratch, use the Just Tell AI What I Want mode. Here, you specify the number of flashcards you want and the topic, and you’ll have your flashcards ready in seconds.

While features like adding images and sounds to flashcards, bookmarking specific cards, and reversing features require Brainscape Pro, creating and studying AI-generated flashcards on Brainscape remains completely free.

The only drawback is that, at the time of writing, Brainscape’s AI tools are not fully available on its web version. So, you’ll need to use the iOS or Android app to access them for now.

There is a file size limit for the Import/Paste Flashcards and Summarize From Content options, though Brainscape doesn’t specify exactly what that limit is. Once you reach the “limit”, you won’t be able to upload any more files unless you upgrade.

You’d be lying if you said you haven’t studied from a YouTube video at least once during high school or college. YouTube is a lifesaver when you’re struggling with concepts and exams are approaching. But let’s be real—watching them can be super time-consuming, especially if you’re jotting down notes or creating flashcards.

If you try watching at 2X speed (trust me, I’ve tried!), you often miss key information and end up rewinding, which just adds to the time crunch.

This is where Gizmo comes in. Its Magic Import feature lets you turn a YouTube video into flashcards simply by pasting the link. For example, I pasted the URL of a YouTube video on Momentum by Congito, and it created 27 flashcards covering the entire 7-minute video.

Gizmo flashcards displayed alongside YouTube video

Once your flashcards are created, you’ll notice a few words in each card highlighted in green. These are the terms Gizmo will quiz you on when you’re studying. It also uses machine learning to ask you additional questions. Like the other tools, Gizmo utilizes a spaced repetition algorithm, presenting questions in the most efficient way to help reinforce your memory.

But it doesn’t stop there—Magic Import also works with PDFs, PowerPoints, Google Docs notes, Quizlet and Anki decks, a Google webpage, photos of your notes, and even real-time lecture recordings, converting all of them into flashcards!

Gizmo Magic Import feature

When building your set, you can also click the AI Generate button, which opens a chat where you can input a topic or question. Gizmo will then provide an answer in flashcard form, ready to be saved to your deck.

Gizmo AI generation chatbox displayed

The options are endless, and the best part is that Gizmo is completely free to use.

Given that AI has seeped into nearly every sector of our lives, it only makes sense to leverage AI for studying as well. With the flashcard generation tools I’ve mentioned above, you’ll not only save a significant amount of time creating flashcards, but also reduce the time you spend studying as a whole!

Apple Music Already Has Your First First “Replay” for 2025

When it comes to music streaming recaps, Spotify Wrapped gets most of the attention. However, Apple Music has its own review feature, and it does Spotify one better: it shares your listening trends on a monthly basis.

Apple Music Just Dropped the First 2025 “Replay”

January did feel like an entire year, but the reality is we’ve only made it through one month of 2025. While Spotify users can only wait patiently for the next ten months—or perhaps use them to prepare for Spotify’s end-of-year Wrapped recap—Apple Music subscribers are already privy to those delicious listening stats.

Apple Music’s feature called Replay 2025 creates a playlist for each month, effectively constructing your sonic profile for January, February, and so on. If you’re an Apple Music subscriber, you should be able to access your January playlist now—or at least, very soon.

How to Find Your January Replay on Apple Music

Whether you’re using Apple Music on a mobile device, a browser, or as a desktop app, you can locate your first 2025 Replay via the following steps:

  1. Navigate to the Home tab.
  2. Scroll down and tap the Replay 2025 playlist card.
  3. Add the playlist to your library.

The data obsessed will be happy to learn that, along with this new January playlist, you can check out your charts on the Apple Music Replay website. This will have stats like listening minutes, top artists, and more.

Apple will still put out a more comprehensive recap at the end of the year in addition to these monthly check-ins. So, you won’t lose that more zoomed-out reflection.

While the end of the year is a natural time to reflect on our habits, not all of us want to wait that long. Compared to other music streaming platforms, Apple Music offers something unique with its timely aggregation of your listening trends. It’s not bad timing that Apple Music is also running a deal right now, offering six months of streaming for a mere $3.

How to Make a Bootable CD/DVD/USB to Install Windows

Having bootable media ready can be a real lifesaver when you need to do a clean installation of Windows. Thankfully, it’s easy to set that up.

There are two main ways to create bootable media for a Windows 11 install: using Microsoft’s Media Creation Tool or burning the ISO to removable media yourself.

Creating a Windows 11 Bootable USB With the Windows Media Creation Tool

The Windows 11 Media Creation Tool is software available as a free download from Microsoft. It’s by far the easiest way to do a clean install of Windows 11 using a USB flash drive.

8GB is the minimum size USB stick that will work. This will wipe the contents of the USB drive, so be sure to back up any data you want to keep first.

Here’s how to use the Media Creation Tool to create a bootable USB for installing Windows 11:

  1. Select your language and edition. The recommended defaults work well. Hit Next.
  2. Plug the USB flash drive into your PC. In the tool, choose USB flash drive. Hit Next.
  3. Select your USB drive from the list that appears. Hit Next. (If your USB isn’t listed, click Refresh drive list. If it still doesn’t show up, you may need to format the USB drive first. When formatting, choose FAT32 for the USB’s filesystem.)
  4. The tool will begin downloading and writing files onto your USB. When it’s done, hit Finish.

Download: Windows 11 Media Creation Tool for Windows (Free)

Creating a Windows 11 Bootable DVD/USB Using an ISO Image

If the method above doesn’t work for you, you can do things the old-fashioned way instead: by burning a Windows ISO manually onto removable media such as a DVD or USB drive.

windows 11 ISO download button

Any file that ends in .iso is an exact copy of a disk. It’s a virtual copy of a CD or DVD, with the same file structure and the same data. ISO copies are referred to as “images” of the original.

In this case, the ISO is a perfect copy of what would be on an original Windows DVD.

Here’s how to get a Windows 11 ISO and put it onto a bootable DVD or USB:

  1. Go to the download page, scroll down to Download Windows 11 Disk Image (ISO), select a version from the dropdown, and click Download Now.
  2. When the language dropdown box appears, select the language you prefer. Click Confirm. Click the 64-bit Download button. The ISO will begin downloading to your PC.
  3. Use specialized software to record the ISO image onto removable media. Jump down to the separate sections below for instructions, depending on whether you’re putting it onto a DVD or USB.
windows 11 ISO download button

Download: Windows 11 ISO for Windows (Free)

The Windows 10 Media Creation Tool is available for free from Microsoft and offers different ways to install Windows 10.

Windows 10 media creation tool download page

This tool can:

  • Update the PC to Windows 10.
  • Create a Windows 10 bootable USB stick.
  • Download a Windows 10 ISO file to your computer for manual creation.

The second and third options let us put Windows installation media onto bootable media. We’ll briefly cover the steps for each method.

Download: Windows 10 Media Creation Tool for Windows (Free)

Creating a Windows 10 Bootable USB With the Windows Media Creation Tool

For 32-bit Windows installations, a 4GB USB stick is the minimum size that will work. For 64-bit, you’ll need 8GB at minimum. This process will wipe the contents of the USB drive, so be sure to back up any data you want to keep first.

Here’s how to use the Media Creation Tool to create a bootable USB for installing Windows 10:

  1. Select Create installation media for another PC. Hit Next.
  2. Choose your language and edition. The recommended defaults work well. Hit Next.
  3. Plug the USB flash drive into your PC. In the tool, select USB flash drive. Hit Next.
  4. Select your USB drive from the list that appears. Hit Next. (If your USB isn’t listed, click Refresh drive list. If it still doesn’t show up, you may need to format the USB drive first. When formatting, choose FAT32 for the USB’s filesystem.)
  5. The tool will begin downloading and writing files onto your USB. When it’s done, hit Finish.

Creating a Windows 10 Bootable DVD/USB Using an ISO Image

If the method above isn’t available, you can manually download a Windows 10 ISO instead and manually record it onto a DVD or USB flash drive. This method also uses the Windows 10 Media Creation Tool mentioned above.

Here’s how to use the Media Creation Tool get a Windows 10 ISO and put it onto a bootable DVD or USB:

  1. Select Create installation media for another PC. Hit Next.
  2. Choose your language and edition. The recommended defaults work well. Hit Next.
  3. Select ISO file. Hit Next. When prompted, choose where to save the file onto your disk.
  4. The tool will begin downloading the ISO file and update you on its progress. When it’s done, hit Finish.
  5. Use specialized software to record the ISO image onto removable media. Jump down to the separate sections below for instructions, depending on whether you’re putting it onto a DVD or USB.

How to Burn a Windows ISO Onto a DVD

Many DVDs don’t have enough storage capacity to use as Windows installation media. You must use a DVD that will fit the Windows ISO file you’ve downloaded. That’s why we recommend using a USB flash drive instead.

To burn a Windows ISO to DVD, you can use Window’s native ISO burner. Right-click on the ISO file you’ve downloaded, and select Burn disc image.

Burning a Windows disc image to a DVD

This will open the native burner. It couldn’t be simpler to use—just enter a DVD and press burn!

windows disc burner tool

Alternatively, several programs can burn an ISO to a DVD and make it bootable. One of the best ways to burn CDs and DVDs on Windows is with BurnAware, which offers a free version for home use.

Download: Burnaware for Windows (Free)

How to Flash a Windows ISO Onto a USB Drive

If you aren’t able to use the Windows Media Creation Tool to create a bootable USB, you can manually flash a Windows ISO onto your USB drive instead.

The simplest way to create a bootable USB drive is with Rufus. Download and open it by right-clicking on it and selecting Run As Administrator.

rufus burn windows ISO

Here’s how to use Rufus to write a Windows ISO onto a USB drive:

  1. Select your USB drive from the Device dropdown menu.
  2. Click Select next to the Boot selection dropdown and locate your Windows ISO file.
  3. Give your USB drive a descriptive title in the Volume label text box.
  4. Click Start to begin writing.

Rufus gives you the option of using a GPT file system for UEFI systems, and MBR for BIOS systems. The program can detect what system you have; if you don’t know what kind of system you have, let Rufus choose for you!

Alternatively, if Rufus doesn’t work for you, there are many alternative tools to make bootable USBs that you can try instead. Rufus only works on Windows, but if you really need to, there’s also a way to [create a Windows bootable USB on Linux](# How to Create a Windows Bootable USB on Linux).

Download: Rufus for Windows (Free)

What If I’ve Forgotten My Product Key?

When you purchased Windows you should have received either a 25-character product key or a digital license. You can still install Windows without either of these, but you won’t be able to activate it.

If you lost your product key, there are ways to find it again. The Magical Jelly Bean KeyFinder has a free version that will display your CD Key.

magical jellybean keyfinder tool

Alternatively, you can follow our guide for other ways to find your Windows 11 or 10 product key.

Download: The Magical Jelly Bean KeyFinder for Windows (Free)

Now, you have a bootable version of Windows on a USB flash drive or DVD. To use it, you’ll need to change your PC’s boot order to boot from the selected drive. This will launch the Windows Installation Wizard, and you can then install Windows.

Apple Is Changing the Way You Protect Your Device With AppleCare+

While not every extended warranty is worth buying, a protection plan for a daily device like a phone or computer is not such a bad idea. While Apple used to sell its pre-paid AppleCare+ plans at retail locations, the company is abandoning that practice in favor of its subscription model.

Apple Is Pushing Its AppleCare+ Subscription

According to an X post by Bloomberg Chief Correspondent Mark Gurman, Apple will soon be “dropping” its multi-year AppleCare+ plan, allowing you to buy two to three years of protection up front, from storefront locations.

As the name suggests, AppleCare+ extends your hardware’s first-party warranty plan, or AppleCare, that comes free with your purchase. According to Apple Support, most Apple products will come with “a one-year limited warranty and up to 90 days of complimentary technical support.” AppleCare+ extends that time for which your Apple product is eligible.

This reported change will affect you if you typically purchase Apple products in person, along with a pre-paid AppleCare+ plan. While a multi-year AppleCare+ plan will no longer be available to buy at a physical store, it will still be available on the online store. So, if I want to buy an iPad on Apple’s website, I can still add two years of coverage during checkout.

However, the option displayed before this two-year, pre-paid plan is a monthly AppleCare+ subscription, which bills separately. Even though the two-year plan at $69 flat will ultimately save me about $15, compared to two years at $3.49/month, it certainly feels enticing to spread the cost out over time.

The prices of AppleCare+ plans depend on the product.

Down With the OTP (One-Time Purchase)

Between the reduction in multi-year coverage options and the arrangement of the Apple website’s user interface, it’s pretty clear that Apple is pushing the AppleCare+ subscription model. I wouldn’t be surprised if Apple did away with the two or three-year deals completely. Frankly, it’s the direction most tech services are moving.

A graphic depicting AppleCare+ products for different Apple devices with associated prices

On the one hand, I don’t hate the idea of subscriptions, particularly the flexibility they provide. In the US, most of us are used to paying a monthly premium for health insurance, so paying monthly (or annually) for the health of our hardware sort of makes sense, too. In return, we’re covered when disaster strikes—usually.

On the other hand, it seems like an easy way for Apple to quietly siphon money while we look the other way. I can’t be the only one who loses track of mounting subscriptions. I would venture to guess that most customers who buy two years of AppleCare+ up front don’t re-up at the end of their term. Conversely, an AppleCare+ subscriber may hold on to that monthly plan for a long time, either out of comfort or forgetfulness.

At the end of the day, AppleCare coverage is a decent product that will suit some people better than others. Whether it’s a one-time purchase (OTP) or a subscription, it’s best to do some light risk analysis to decide whether you even need AppleCare+ at all. If you, like me, move less gracefully through life, protection plans do typically pay for themselves.

Here’s How to Secure Them

Hackers target popular platforms where people store personal or sensitive information. You probably won’t be surprised to find out that Facebook, Instagram, and WhatsApp are top targets for hackers and scammers, but there are a few ways to protect your account.

Social media accounts like Facebook, Instagram, and WhatsApp are prime targets for hackers. They’re rich in personal data, widely used for communication, and often linked to other accounts—making them irresistible targets. Unfortunately, they’re also likely to be insecure. Many folks reuse passwords, don’t have two-factor authentication turned on, and over-share information, making accounts vulnerable to attack.

Facebook

With over three billion monthly active users, Facebook is the largest social media platform in the world. That massive user base means it holds tons of personal information.

Each account includes details like birthdays, friends, email addresses, phone numbers, locations, and even payment details. Hackers can exploit this data for identity theft and phishing scams or sell it on the dark web.

Instagram

Instagram isn’t just a photo-sharing platform; it’s a go-to spot for influencers, businesses, and personal branding. Hackers target these accounts to hijack their following for scams, like promoting fake products or demanding money in exchange for returning control of the account.

WhatsApp

With its end-to-end encryption, WhatsApp feels secure, but hackers bypass this by targeting user authentication processes. Tricks like SIM swapping or phishing let them take over accounts. Once in, they can impersonate users to scam their contacts or spread malicious links through trusted networks.

How to Secure Your Accounts

Now you know why hackers target these accounts, but how can you protect yourself?

Use Strong and Unique Passwords

Strong passwords are your first defense against hackers. Using a weak or reused password is like leaving your door open and hoping no one walks in. To stay protected, ensure your passwords are unique and include a mix of uppercase and lowercase letters, numbers, and special characters. Avoid anything personal, like your name or birthday, and skip obvious patterns like “zxcvbnm.”

A good tip is to use passphrases instead of single words. For example, skip the basic stuff like “password123” and try something more unique, like “9Lions0nTheHill!” or “ILove2Hike&Explore.” They’re way harder for hackers to crack and stick in your memory better.

Also, every account needs its own password—if one gets hacked, the others stay safe. And yes, recalling them all can be a pain, so use a password manager or write them down somewhere secure. Just be sure to update them regularly, and don’t re-use them.

Add a Privacy Screen Protector

Got your strong passwords sorted? Great! But what if someone’s sneaking a peek while you type? Sounds like something out of a spy movie, right? But shoulder surfing is actually a real thing. To prevent it, slap a privacy screen protector on your device.

Comparing privacy screen protectors with normal tempered glass

These thin films block side views, so only you—sitting right in front of the screen—can see what’s going on. They’re especially helpful in public spots like cafes, buses, or trains where nosy folks might try to sneak a glance.

Enable Two-Factor Authentication

Security is all about adding layers of protection. Think of two-factor authentication (2FA) as putting a second lock on your door in case someone gets past the first one. After entering your password, 2FA asks for a verification code to be sent to your phone via text message.

meta backup security method

So, even if someone manages to crack your password, they’ll still need that second code to get in. You can also use apps like Google Authenticator or Authy to generate codes that refresh every 30 seconds or choose fingerprint or face recognition. Once you set up two-factor authentication, you must enter that code when logging in to a new device or browser.

Even after all these measures, you can never be 100% safe online. Hackers always find new ways to exploit vulnerabilities and steal data. So stay aware of the latest security threats, follow reputable tech news sources, learn cybersecurity best practices, and educate yourself about online phishing scams.

Here Are the Ones to Try

I’m obsessed with music. While most of what I listen to comes from playlists I’ve created myself, the rest comes from Spotify-generated playlists. If you haven’t explored them yet, here are four I’d recommend checking out.

1

Discover Weekly

Whether you’re trying to diversify your music palette to avoid a disappointing Spotify Wrapped at the end of the year or simply tired of listening to the same tracks daily, the Discover Weekly playlist is a great way to shake things up. The playlist is updated every Monday with thirty fresh tracks and helps you discover new music that aligns with your taste.

The tracks you’ll find in Discover Weekly are based on your streaming habits and behavior, including how you interact with songs you like and dislike. For example, if you like a track or add it to one of your personalized playlists, similar tracks will show up in your Discover Weekly.

On the other hand, if you often skip a song, you’re less likely to encounter it. Spotify also considers the listening habits of users who share a similar taste in music when recommending songs to you.

If you’re disappointed with your Discover Weekly, interact with your playlist to guide the algorithm and Spotify’s recommendation system. You can skip a track or tap the horizontal three dots next to it, then select Hide song from the menu.

Likewise, liking or saving tracks you enjoy will help Spotify recommend similar music in the future!

2

Release Radar

Release Radar Spotify playlist

Discover Weekly is a great way to find music that suits your taste, including both old and new releases. However, if you’re looking to catch only new music before it goes viral, Release Radar is the playlist you’re after.

It features thirty new releases and is updated every Friday. Like Discover Weekly, this playlist is influenced by your listening habits, but you’ll primarily get new music from artists you follow, listen to, and other artists Spotify’s algorithm thinks you’ll enjoy.

You won’t find any tracks you’ve already listened to in your Release Radar, and you’ll only find one song per artist per week. The tracks are ordered in a specific way, influenced by how much Spotify thinks you’ll enjoy them based on your listening history and factors like the release date of a particular track. Other than a few minor differences, the order of your Release Radar will stay pretty consistent each week.

3

Repeat Rewind

Repeat Rewind Spotify playlist

We all have those few tracks we obsessively listen to for days on end, only to forget about them eventually. Most of the time, you’ll rediscover them months later and be hit with overwhelming nostalgia. The Repeat Rewind playlist helps ensure you don’t forget the tracks you loved for too long.

Updated every five days, it includes thirty tracks you obsessively listened to about a month ago. The order of tracks in the playlist doesn’t necessarily reflect how many times you’ve played each one.

4

On Repeat

On Repeat Spotify playlist

I’d be lying if I said I don’t find myself skipping tracks in my playlist to listen to those few songs I’ve been obsessed with. One option to avoid this is to create a playlist of your favorite tracks.

Thankfully, Spotify saves the hassle of making one and has another personalized playlist called On Repeat. This playlist includes thirty songs you can’t get enough of and have been listening to non-stop over the past thirty days, updating every five days.

You can find all the playlists I’ve mentioned above by searching for them by name in your browser and clicking the first Spotify link that appears. Alternatively, you can find them on Spotify’s app by switching to the Search tab at the bottom and tapping Made For You under the Browse all header.

Both Repeat Rewind and On Repeat are under the Uniquely yours heading. If you scroll all the way down, you’ll find Discover Weekly and Release Radar under Discover New Music.

Regardless of which playlist you check out, if you find tracks you enjoy, make sure to save them to your Liked Songs or add them to your playlists. Since these playlists auto-update, you won’t be able to get the exact same playlist back once it’s updated, so you’ll lose those tracks otherwise!

Why I Still Refuse To Upgrade My iPhone 11 In 2025

The iPhone 11 series launched in September 2019, and almost six years later, I still have no intention of upgrading it anytime soon.

1

Apple’s Excellent Software Support

One reason I haven’t upgraded my device yet is Apple’s long support period. Although the company doesn’t guarantee that any of its devices will be supported for a certain period, Apple typically provides at least five years of major iOS updates and six years of security-focused updates.

However, the company has exceeded this threshold in the past. For instance, the 2018 iPhone XR, XS, and XS Max have received six major iOS updates so far.

The iPhone 11 is among the iPhones eligible for iOS 18, Apple’s latest smartphone OS, as of this article’s writing. Given Apple’s record, it may be due for another major iOS update this year, making it six, given that the 2018 trio was updated to iOS 18. That means I should still be fine running my iPhone 11 for another year without worry.

As a technical person, I understand the importance of software updates. They ensure the device has the latest security patches and that I can still run the latest apps.

Sure, I’m missing out on some features available on newer iPhone models, like Apple intelligence. However, in the grand scheme of things, I don’t need them.

2

Excellent Build Quality

Roman Zakirov/Shutterstock

Apple devices have some of the best build quality among smartphone manufacturers, and the iPhone 11 is no exception. The company’s continued focus on making its devices durable hasn’t gone unnoticed, which is why I still use its 2019 flagship.

The device includes front and back glass like the latest iPhone 16 series. The frame is aluminum, which was exclusively available in the premium lineup at the time. It also has an IP68 rating for water and dust resistance, which is still found on some high-end phones, like the 2024 iPhone 16 series.

Overall, the phone has held up incredibly well, given that I use it as my primary phone. My biggest secret, though, is I use a phone case and a tempered glass screen protector to protect the phone from drops and scratches.

3

Performance Still Holds Up

Apple’s A13 Bionic processor might be an old chip from 2019—just like the device—but when it came out, it was one of the best processors on the market. So it’s no surprise that it also powered the company’s top-of-the-range iPhone 11 Pro at the time.

A few years later, and after hundreds of hours of use, the chip still holds up well and can handle demanding apps and games. Multitasking isn’t an issue, either, and I haven’t experienced performance issues yet in my casual use of scrolling social media, playing puzzle games, taking pictures, and browsing the web.

However, it’s not all roses and sunshine. The chip does show its age when I take several pictures in a row, which causes the device to heat up a bit. The same happens if you try playing resource-intensive games like Genshin Impact.

But that’s not my typical use, so the device still serves me well for my casual daily tasks.

4

Great Camera System

Another reason I haven’t upgraded my iPhone 11 is its amazing camera system. It includes a dual-camera setup with a 12MP wide and ultra-wide lens, which means the photo quality remains exceptional even today. It produces sharp, vibrant photos and can shoot up to 4K videos.

The availability of a wide and an ultra-wide lens gives me options when capturing individual objects and expansive landscapes. The ultra-wide lens has a 120-degree field of view, like that of Apple’s iPhone 16 Pro series, although the latter has a more powerful lens.

This is not to say that the iPhone 11 camera offers the same sharpness, clarity, and vibrancy as recent iPhones. However, the iPhone 11’s camera system still delivers quality images, especially under perfect conditions, that you won’t notice are from an older device unless you’re keen.

5

Minimal Upgrade Incentive

With every new iPhone iteration, Apple delivers changes to its lineup, but many of those changes feel incremental rather than revolutionary.

Some might argue that it’s time for Apple to ditch annual iPhone releases because there aren’t big leaps between models. For example, newer models include slightly better battery life, faster processors, and improved camera features like Dolby Vision, ProRAW, and cinematic mode.

Although newer iPhones boast all the advanced features and capabilities relative to my aging iPhone 11, most of these aren’t necessary for daily smartphone use. I haven’t once felt I was missing out by not having the Dynamic Island found on newer models. I also don’t wish my device had Apple Intelligence or the ability to shoot in ProRAW (or cinematic mode).

These just aren’t features I need, which means they aren’t worth upgrading for just yet.

6

Environmental Considerations

iPhone 15 models on display at an Apple Store
Wongsakorn Napaeng/Shutterstock

As an environmentally conscious person, I’ve also held on to my old yet functional device for much longer because it’s the responsible choice. By doing so, I’m playing a part in helping reduce the e-waste problem in two ways.

First, I’m helping reduce the time it takes for this unit to be recycled or, as it sometimes happens, to hit the landfill. Second, by extending my upgrade cycle, I’m reducing the demand for new devices, ultimately reducing companies’ need to produce more gadgets.

The materials used in smartphone production pollute the environment despite companies continuously switching to using more recycled materials in their construction process. While Apple may promote recycling and sustainability in its newer models, the most sustainable phone is the one you already own.

7

I Have a Spare Android Smartphone

The last key part of my holdout is having a second phone. As mentioned previously, I use my iPhone as my primary device. However, I didn’t mention that I also have a Google Pixel as my secondary device.

My Pixel 6a complements my iPhone 11 and helps pick up the slack whenever necessary. For instance, the 6a’s camera system is better than the iPhone 11’s in some situations, like tricky lighting conditions. Together, these two devices give me multiple reasons not to upgrade.

Despite the availability of newer and better models, I’ll continue to use my iPhone 11 in 2025 because it still meets my needs. The device’s build quality, continued software support, excellent performance, and great camera systems make it worth keeping. It’s also better for the environment, and having a spare phone does help.

Here’s How I Find Affordable Alternatives

Software can be expensive, but pirating it is risky and unnecessary. The good news? You don’t have to choose between breaking the bank or the law. These are the tips and tricks I use to find affordable, legal alternatives.

When it comes to affordable software, open-source tools are a goldmine. These are programs developed by communities of passionate developers who make their work freely available to everyone. The best part? Many open-source tools are just as powerful as their paid counterparts.

Take GIMP (GNU Image Manipulation Program), for example. It’s a free alternative to Adobe Photoshop with robust photo editing features. While it might have a steeper learning curve, it’s more than capable of handling everything from basic retouching to advanced graphic design.

For office productivity, LibreOffice is a fantastic alternative to Microsoft Office. It includes a word processor, spreadsheet tool, presentation software, and more—all compatible with Microsoft’s file formats. And if you’re into video editing, DaVinci Resolve (although not entirely open-source) offers a free version packed with professional-grade features.

A quick online search for “best open-source alternatives to [software name]” will likely yield software options you can try.

Open-source tools often rely on community support rather than dedicated customer service. This means you might need to rely on forums, tutorials, or documentation if you run into issues. But for the price (free!), it’s hard to beat.

2

Freemium Options

Editing Canva on a Computer Screen
Danny Maiorca/MakeUseOf

If open-source tools feel too DIY for your taste, freemium options might be the perfect middle ground. Freemium software offers a free version with basic features, while premium features are locked behind a paywall. This model lets you try before you buy, and for many users, the free tier is often all they need.

A great example is Canva. Its free version is incredibly robust, but if you need advanced features like brand kits or premium templates, you can upgrade and get the benefits of Canva Pro for a reasonable fee.

The key to freemium tools is to evaluate whether the free version meets your needs before committing to a paid plan. Often, you’ll find that the free tier is more than enough to get started.

3

Discounts and Student Deals

adobe student and teachers plan

If you’re set on using premium software but don’t want to pay full price, discounts and student deals can help. Many companies offer significant price reductions for students, educators, and even non-profit organizations. All it takes is a little research and sometimes proof of eligibility.

Adobe Creative Cloud is a popular example. Normally, a subscription to Adobe’s suite of tools can cost upwards of $50 per month, but students and teachers can get the entire collection for just $19.99 per month. That includes Photoshop, Premiere Pro, Illustrator, and more. Similarly, Autodesk, the company behind tools like AutoCAD and Maya, offers free access to its software for students and educators.

If you’re not a student, don’t worry—there are still plenty of ways to save. Websites like Stack Social and Humble Bundle frequently offer discounted software bundles, often including premium tools at a fraction of their retail price.

Keep an eye out for seasonal sales. Black Friday and Cyber Monday and back-to-school periods are prime times to snag software at a discount. Companies often run promotions during these times, making it easier to afford tools like Microsoft Office or Final Cut Pro.

4

Subscription Services

adobe app subscriptions

Subscription services have changed the way we access software. Instead of paying hundreds (or thousands) of dollars upfront for a single program, you can now pay a monthly or annual fee to access a suite of tools. This model makes premium software more affordable and ensures you always have the latest updates and features.

The most well-known example is Adobe Creative Cloud. For a monthly fee, you get over 20 apps, including Photoshop, Premiere Pro, Illustrator, and After Effects. While the full suite can be pricey, Adobe offers individual app subscriptions starting at $20.99 a month, which is a great option if you only need one or two tools.

Another example is Microsoft 365 (formerly Office 365). For around $70 per year, you get access to Word, Excel, PowerPoint, and other productivity tools, along with 1TB of OneDrive cloud storage. There’s even a family plan that lets you share the subscription with up to six people, making it a cost-effective choice for households.

5

Older Versions of Software

adobe cs6 on sale on eBay

Older software versions can come in handy if you’re on a tight budget and don’t need the latest bells and whistles. Many developers sell or even give away previous versions of their programs at a fraction of the cost of the newest release. These versions often have all the core features you need, even if they lack some of the cutting-edge updates.

For example, Microsoft Office 2019 is still widely available for purchase, and it’s a one-time payment rather than a subscription. While it doesn’t include cloud-based features like Microsoft 365, it has all the core tools for word processing, spreadsheets, and presentations.

Similarly, Adobe CS6 (the last version before Adobe switched to a subscription model) is still a viable option for creatives, though you’ll need to find it through third-party sellers since Adobe no longer supports it.

When considering older versions, it’s important to check system compatibility. Some older software may not run on the latest operating systems, so make sure your computer meets the requirements. Additionally, be cautious about where you purchase these versions—stick to reputable sellers to avoid pirated or counterfeit software.

Finding affordable software doesn’t mean resorting to piracy or settling for subpar tools. There are countless legal and budget-friendly options available. The key is to assess your needs and explore your options. Remember, the best tool is the one that works for you—not the one with the highest price tag. So, before you consider pirating software, take a moment to explore these alternatives. You might just discover a better, more ethical way to get the job done.

These Are My 3 Favorite Features in Photoshop 2025

Photoshop introduced many new features with its 2025 version, but a handful stand out. Photoshop 2025 packs in new AI tools, smarter selections, and features you didn’t know you needed—until now.

1

One-Click Remove

You could already perform multiple Photoshop retouch tricks before 2025. However, its one-click remove tool makes it even simpler.

After clicking on Find Distractions, you can remove cables and wires in your pictures. This feature is particularly useful if, like me, you take lots of urban photos. While I’ve been able to crop these objects, they sometimes end up obstructing the main subject.

The tool is normally reliable, though you can sometimes see evidence that a wire or cable was previously there. For example, parts of my images will sometimes be darker.

A cable removed in the Photoshop app

2

Generative Workspace

In my opinion, Adobe’s AI tools are some of the best for creatives. The company announced numerous AI features at Adobe MAX 2024, including a Generative Workspace. Here, you can see all the images you’ve created with AI on Adobe’s software.

I normally use Generative Workspace to get ideas for upcoming photoshoots. The workspace lets me add effects to my images to make them more real and add other elements directly in Photoshop.

An AI image library in the beta version of Photoshop

When writing in January 2025, you need the beta version of Photoshop to access Generative Workspace. Go to the Creative Cloud app and select Apps > Beta > Photoshop (Beta).

Download Photoshop Beta in the Adobe CC app

3

Reference Image

Although generative fill can improve images (when used correctly), I’ve had some terrible results. I often get the worst outcomes when I can’t be specific enough; with the Reference Image tool, using Photoshop’s generative fill has become easier.

Photoshop Reference Image Upload

After selecting where you want to replace in your picture, you can upload a reference image. Now when you enter your prompt, you get more accurate results. As of January 2025, the feature is—like Generative Workspace—only available in Photoshop Beta for now.

Photoshop’s new features will make photo editing even simpler. Removing distractions is great for cleaner edits, and you can now give more specific generative fill prompts. Meanwhile, Generative Workspace is excellent for keeping your ideas together.

14 Useful Ways to Reuse an Old Router (Don’t Throw It Away!)

If you’re buying a new router or your internet service provider is sending a new one, you’re faced with a problem: what do you do with your old router?

It might be in a box, cluttering a drawer, or lost at the back of a wardrobe. Whatever the case, your old WI-Fi router or combined modem/router can be reused. So, if you have one kicking around the place, here are several uses for an old router.

Build a Wireless Repeater

What if your Wi-Fi network doesn’t extend across the full range of your home? Although you can opt for powerline Ethernet adapters, adding a second router into the mix is a good alternative.

This means connecting the old router to your new wireless network using the Wi-Fi signal. It shares access to the Wi-Fi network, giving greater coverage. Although there may be some latency issues, this is a quick and easy way to extend your wireless network.

It has various uses, from boosting your Wi-Fi signal around your home to letting you stream video to your tablet while chilling in the garden. However, Wi-Fi repeaters aren’t the only option: other Wi-Fi fixes may be better than using a repeater.

Create a Guest Wi-Fi Network

If you have people regularly dropping in and using your Wi-Fi, why not give them their own network?

This project is like the wireless repeater but with a twist. The router connects to your existing, password-protected network but gives password-free access to new devices. This will use the guest network feature of your old router. By default, this prevents guests from accessing other devices on your network.

If this level of security isn’t enough, check the firewall settings on the main router to adjust.

Stream Internet Radio

You can use that old router to stream your favorite radio stations online.

Some routers can be configured to play internet radio—if you’re prepared to install alternative firmware for your router. You’ll also need some other software, as well as a USB sound card to output audio.

While not an easy build and plenty of other internet radio options are available, this project is still great. It gives you an insight into installing custom firmware, as well as an appreciation of how to stream music.

Use the Router as a Cheap Network Switch

Most routers don’t have more than six Ethernet ports. With the increase in wireless technology around the home, this figure might even be as low as four. But with a clear need for devices to be connected over Ethernet, you might run out of ports.

When you’re trying to decide between using Wi-Fi vs. Ethernet, it’s good to make the decision based on the use case. For example, online gaming with a console or PC is more reliable using Ethernet. Your TV decoder will provide better streaming over Ethernet than wireless.

If you run out of Ethernet ports, you can add more with a network switch. It’s basically the networking version of a power strip; connecting an old router to your current one will instantly increase the number of ports available. To avoid conflicts, don’t forget to disable wireless networking on the old router.

Turn Your Old Router Into a Wireless Bridge

What if your new router is wireless only? Perhaps your ISP doesn’t offer a router with Ethernet ports, or maybe you use a 4G or 5G internet provider. Either way, if you need to connect Ethernet devices to your home network, a wireless bridge is the answer.

It’s both a fun and inexpensive project to turn an old router into a wireless bridge using free firmware.

This works a little like a wireless repeater, but rather than share the Wi-Fi connection, the wireless bridge offers Ethernet. The old router connects to your existing Wi-Fi network—simply connect devices to its Ethernet ports.

Convert Your Router Into a NAS Drive

Looking for a way to store your data on a single device and access it from anywhere in your home? You need Network Attached Storage (NAS), which is basically a hard disk drive attached to your network.

If you’re trying to decide between a DIY NAS vs. Pre-Built NAS, you can save money using an old router hanging around.

Note that this is limited to routers that can run custom firmware (like DD-WRT) and have a USB port. You should also be able to browse the contents of any connected USB devices via the router. (Without a USB port, there won’t be an easy way to attach extra storage devices.)

Once set up, your custom-built NAS should give you instant access to your files from anywhere in the house.

Use an Old Router as a Web Server

On top of everything else, your router can also host a basic web page.

This might be a home-only website, intended to share vital information with your family. Alternatively, it might even be a blog, as custom router firmware will support a LAMP (Linux, Apache, MySQL, PHP) server. As such, you could even use your old hardware to install WordPress on Ubuntu.

Run a website and need an affordable staging area for testing themes, plugins, and new code? Your old router might be the low-spec server you need.

Make Your Own VPN Router

Old routers supported by custom firmware can be set up with VPN software. This means that if you have a VPN account with, say, ExpressVPN (MakeUseOf readers can save 49% on our top-ranked VPN choice), it can be set up on your router.

Enabling your VPN at the router level means that every device on your network is protected by the VPN. You don’t need to install individual client apps on your PC or mobile devices when connecting to a VPN through your home network.

Note that some old routers have VPN provision, but this only works when they’re set to modem-only mode. Learn more in our guide to setting up a VPN on your router.

Make Money From Your Old Router

wifi router listings on ebay

If you don’t fancy wasting time trying to set up your old router with modern hardware, why not sell it?

Various outlets will let you make a few dollars from old tech, most notably eBay. Simply list the device with the make and model number. Your customer will typically be anyone looking for an affordable router, but networking enthusiasts and retro-tech collectors might also be interested.

Follow our tips for selling vintage items on eBay to maximize your haul. Generating cash for old equipment is a great way to raise funds for new gadgets.

Set Up a Separate Network for IoT and Smart Home Devices

As mentioned earlier, most current routers will let you set up a secondary network. It’s also a good idea if you use smart home tech and Internet of Things gadgets, especially if you’re worried that your smart thermostat is a cybersecurity risk.

If your current router doesn’t support an extra wireless network, set up your old router as a network specifically for smart home and IoT devices.

As with creating a wireless bridge, the router can be linked to your main network, and you then simply connect your IoT devices to it. In the event of problems, you can easily pull the plug, while the firewall on the router can be used to configure connections.

Learn More About Home Networking

Routers are pretty much plug-and-play. They configure new connections automatically, allowing you to get online quickly and easily.

If you wanted to learn more about your home network, you would look at the admin screen. But if you click the wrong option, everything could go wrong. The solution? Use an old router to learn more about home networking. Firewalls, DMZs, MAC filters, and more can all be learned with hands-on experience that doesn’t knock your entire network offline.

Using a network hosted on an old router, you don’t have to rely on a factory reset if things go wrong.

Configure Your Router as a Public Hotspot

Rather than use an old router as a standard guest Wi-Fi access point for people visiting your house, you could be more enterprising.

Dedicated software can be installed on an OpenWrt or DD-WRT router (other firmware is also supported) that enables you to create a Wi-Fi hotspot for your business. This can offer free or paid internet access, along with branded interfaces and even adverts, and is welcomed by visitors who want Wi-Fi without an internet service provider.

Naturally, steps must be taken to comply with CCPA, GDPR, and similar privacy legislation. However, if your old router is compatible with firmware such as HotspotSystem, consider this option for your business or side hustle.

Hack Your Router into a Smart Home Automation Hub

With the right router, you could extend the possibilities beyond an IoT or smart home network. Forget a network—build your own automation hub!

Several automation tools are available for OpenWrt and DD-WRT routers. For example, a tool called Crelay can be installed on OpenWrt. This lets you control USB relay cards and remotely activate or control connected devices. Crelay is one of several automation tools you can install on and control from your router.

Again, this is a use for an old router compatible with OpenWrt or DD-WRT. If your router isn’t supported, you’ll have to rule out this upgrade.

Finally, why not simply donate your old router to a good cause? Schools, kindergartens, churches, charities, and more could use it.

Any organization that relies on goodwill can use your old router to extend their network, stream internet radio, set up a guest Wi-Fi network, or any of the other uses listed here. You might not make any money from it, but you’ll know it’s being used for a good cause.

It doesn’t matter if you have a standard router or one with a modem built in. If you’re looking for ideas on what to do with an old broadband router or a standalone router, these are all great ways to repurpose it.

I’m Deleting My Watchlists On Every Streaming Platform: Here’s Why (and How!)

Watchlists are a common feature across all the major streaming platforms. But do you really need to create and maintain watchlists? I’m here to argue against them—so much so that I’m actually deleting all of my watchlists, and recommend that you do the same.

Why I’m Deleting My Streaming Watchlists

Streaming has become such a standard practice that I have been paying for Netflix for over a decade. And while Disney+ and Apple TV+ haven’t been around as long, they have still been available for many years now. While I watch plenty of films and TV shows on all of the above, I spend most of my time maintaining watchlists of content I’m unlikely ever to watch.

However, I’ve recently realized that watchlists are ultimately pointless. So, I’m deleting them from all the streaming platforms I use. Here’s why…

If I Haven’t Watched a Show Yet, Am I Ever Going To?

Some of the films and TV shows I have on my watchlists have been sitting there waiting to be watched for years. Yes, literally years. So, I started to question why they’re on there in the first place. Surely, if I really wanted to watch them, I would have by now. And if not, why not?

Some new films and shows are instant-watches for me. An absolute priority that I cannot wait to consume. But if something has been on a watchlist for years, it probably wasn’t worth watching in the first place. So, it’s better to clear everything out and start over with content I actually want to watch, right?

If a Show Gets Canceled, I Don’t Bother Starting It

Another reason to delete watchlists is the risk of shows being canceled before I have even started watching them. Streaming services (but Netflix in particular) are renowned for canceling promising shows before their time. And if that happens before I have started watching it, I won’t bother.

I Prefer Watching What I’m In the Mood For At That Time

Searching for something to watch on Disney+

Maybe I’m alone in this, but I have to be in the mood to watch something at a given time. Especially if it’s a multi-episode and/or multi-season series that I haven’t started yet. So, I would rather open a streaming service and start searching from scratch based on what I’m in the mood to watch at that moment.

There Isn’t Enough Time to Watch Everything

As someone with a full-time job and commitments beyond that, I find my time stretched quite thin. Add in the fact that I have multiple hobbies and interests, including gaming, reading, and hiking, and the time I have to spend watching TV is severely limited.

So, with that in mind, what is the point of having hundreds of films and TV shows on a watchlist waiting to be watched? Because, speaking honestly, the chances of me getting around to watching most of them is tiny.

I Ignored the Hype, and Now It’s Too Late

Netflix informing me what's popular and trending

Plenty of films and shows get hyped (or overhyped) these days, with everyone seeming to watch them at the same time. Examples include Squid Game, Severance, and Loki. The problem is, if you don’t watch when the hype is at its peak, it’s easy to miss the boat. And once the hype has died down, you feel you have somewhat missed the boat to the point of simply not bothering.

How to Delete Your Streaming Watchlists

Now that you know why I’m deleting my watchlists, here’s how to remove films and shows on Netflix and Disney+. There’s no way to delete your watchlists in one fell swoop, so go through each piece of content you’ve previously added until your watchlist is empty.

As you’ll see below, the instructions for different streaming platforms are pretty similar, with you simply needing to navigate to the film or show you want to remove and tap the correct button to remove it from your watchlist. The exception is Apple TV+, which doesn’t even have a standalone watchlist at the time of writing.

How to Delete Your Netflix Watchlist

On Netflix, your watchlist is called My List. It will be populated by the films and TV shows you have previously added to it to watch later. However, you can remove content from your My List in the same way as you added it, which means navigating to the listing page for the film or TV show and removing it.

Selecting a show to delete from the Netflix watchlist

Your My List should be visible on the homepage (if you scroll down). However, you can also access it by opening the main menu and looking for My List. Either way, select the title you want to delete, and then, depending on what device you’re using, you’ll have the option to Remove from My List or Edit > Delete.

Deleting a show from my Netflix watchlist

How to Delete Your Disney+ Watchlist

On Disney+, your watchlist is literally called Watchlist. Again, it will be populated by the films and TV shows you have previously added to it to watch later. As with Netflix, you just need to navigate to the film or TV show you previously added to your Watchlist to remove it. And once you have removed everything, your Watchlist will be empty.

Selecting a show to delete from my Disney+ watchlist

Navigate to your Watchlist and select the title you want to remove from your Watchlist. On its listing page, you should see a tick icon (which signifies that it’s saved to your Watchlist). Simply, tap it again to remove the content from your Watchlist. You’ll know if the action was successful as the tick icon will change to a plus symbol (+).

Deleting a show from my Disney+ watchlist

Ultimately, I’m deleting my streaming watchlists to live in and for the moment. Next time I open Netflix or Disney+, I’ll think to myself, “What do I want to watch right now?” and search for that film, show, or (if I don’t have a specific title in mind), genre, or mood. This is also why I create and maintain multiple profiles to find content faster—cutting down on how long I spend figuring out what to watch is just as important!

7 Times It’s Actually Worth Using Spatial Audio

Spatial audio seems an awesome idea for enhancing our auditory experience through simulated three-dimensional space. However, it doesn’t always sound like it should. So, where exactly is spatial audio useful?

7

Playing FPS Games

DC Studio / Shutterstock

First-person shooter (FPS) games demand quick reflexes and sharp situational awareness. The extra stimuli from simulated 3D audio make it easier for players to recognize their in-game surroundings, providing better situational awareness.

In competitive FPS titles like Counter-Strike and Valorant, knowing exactly where an enemy is located can mean the difference between winning and losing. Spatial audio allows players to hear footsteps, reloads, or gunfire with precise directionality. Instead of guessing, players can have a good idea of where the sound is coming from.

Spatial audio in FPS games makes you a better player and enhances your experience, even in single-player games. For example, having spatial audio while playing Left4Dead makes the environment more alive (or dead), and immerses you to the world the game developers had intended for you to experience.

So, whether you’re playing a competitive shooter or just looking to better immerse yourself in a game, try wearing headphones. I recommend an open-back headphone as it provides a better sound stage, making the spatial audio sound more natural.

6

Virtual Reality Experiences

Custom Beat Saber Songs Oculus Quest Featured
Myriam B/Shutterstock

Virtual reality (VR) thrives on immersion, and spatial audio is a critical piece of that puzzle. While VR headsets provide a visual escape into other worlds, the experience feels incomplete without realistic sound. Your VR experience won’t be as immersive or as enjoyable compared to one with spatial audio.

VR concerts and virtual tourism have also become a thing. People can now host and attend virtual concerts and meetups. Imagine attending a live virtual concert where you hear the band from the stage’s direction while the crowd’s cheers surround you. Spatial audio brings these experiences closer to reality, making VR more engaging and life-like.

VR training is another application where spatial audio is crucial. VR training programs for pilots, racers, or even firefighters require spatial audio to better simulate the real world and make training more effective.

5

Immersive Movie Nights

Kingdom of the Planet of the Apes on a movie screen.
Nate Williams/MakeUseOf

A home theater setup with spatial audio turns a movie night into a cinematic adventure. Technologies like Dolby Atmos create an auditory experience where sound moves around you in a three-dimensional space. Instead of hearing a jet fly by, you feel it zooming overhead. Explosions erupt from all sides, and dialogue sounds more intimate, as if the characters are in the room.

Streaming platforms like Netflix, Disney+, and Apple TV+ support spatial audio for compatible movies and shows. Popular blockbusters such as Avengers: Endgame or Dune are mixed in Dolby Atmos to give viewers a more immersive experience. Paired with the right surround sound system, spatial audio recreates the magic of the cinema.

For those with limited space or budget, soundbars like the Sonos Arc or headphones like the AirPods Pro can still deliver impressive spatial audio experiences. Experiencing immersive movie nights has never been more affordable.

4

ASMR and Relaxation

Spatial audio has found a unique place in ASMR (Autonomous Sensory Meridian Response) content. ASMR videos and recordings aim to relax listeners by triggering tingling sensations with soft sounds like whispering, tapping, or brushing. Spatial audio enhances these effects by placing sounds all around the listener, creating a deeply personal and calming experience.

With platforms like YouTube and Spotify, you can now get the full ASMR experience with a multitude of tracks already mixed for spatial audio.

Aside from ASMR, spatial audio is also used for meditative practices to simulate serene environments such as a rainforest, a Zen garden, or ocean waves. Some people even use spatial audio to simulate a library while studying or a commercial gym while working at home. It’s amazing how you can use spatial audio to increase focus and reduce stress just by using a pair of headphones and some free spatial audio tracks you can find on the internet.

3

Listening to Tracks Mixed for Spatial Audio

A woman wearing headphones listening to music, with the Plexamp logo on the left and some screenshots on the right.
Plex / voronaman / Shutterstock

Music has always been a powerful medium, and spatial audio takes it to a new level. When tracks are mixed specifically for spatial audio, listeners can experience instruments and vocals from different angles and depths. It feels like the band is performing around you rather than in front of you.

Streaming platforms like Apple Music, Amazon Music HD, and Tidal offer a growing library of songs mixed in Dolby Atmos or Sony 360 Reality Audio. Popular artists like Billie Eilish, The Weeknd, and Hans Zimmer have embraced spatial audio to bring their music to life in ways that stereo simply cannot.

This format is not just a gimmick; it’s a creative tool for artists. It provides a richer, more dynamic listening experience, making it a worthwhile upgrade for music enthusiasts.

2

Accessibility for the Hearing Impaired

Spatial audio also has significant applications for individuals with hearing impairments. Enhancing sound localization helps users distinguish between multiple audio sources in environments like classrooms, offices, or crowded spaces. This improved clarity makes auditory information more accessible.

Assistive listening devices incorporating spatial audio provide a natural way to identify where sounds originate. For example, hearing aids or cochlear implants with spatial audio can help users navigate social interactions, meetings, or even outdoor environments more effectively.

Virtual meetings also benefit from spatial audio accessibility features. Hearing-impaired individuals often struggle with overlapping voices in online calls. Spatial audio separates speakers into different “locations,” making it easier to follow conversations and identify who is speaking.

1

Spatial Audio for Video Calls

A laptop screen shows a video call with the portraits of many people in small thumbnails surrounding one person in close-up
fizkes / Shutterstock

The rise of remote work and virtual communication has made video calls a daily reality for many. Spatial audio enhances video calls by creating a more natural conversational experience. Instead of all voices sounding like they’re coming from the same spot, spatial audio places each participant’s voice in a unique location. This mimics in-person interactions where sound directionality helps distinguish speakers.

Platforms like Zoom and Microsoft Teams have begun exploring spatial audio integrations. These tools can reduce cognitive load by making conversations easier to follow, especially during large meetings. For example, if one speaker is “on the left” and another “on the right,” it’s simpler to identify who’s talking without constant visual cues.

Spatial audio also improves engagement in virtual events, such as webinars or online classes. Simulating realistic sound environments keeps participants focused and reduces fatigue.

Spatial audio is more than just a technical marvel—it’s a transformative tool that enhances how we experience sound in everyday life. Incorporating spatial audio into these activities elevates the overall experience, making interactions more immersive and enjoyable.

My 6 Tips For Keeping Your Online Valentine’s Day Shopping Secret

Giving your spouse a gift on Valentine’s Day is a sweet gesture to express love. However, planning it as a surprise can be tricky—especially if you share devices or accounts with your partner.

Use Incognito Mode or Private Browsing

Shopping in incognito mode ensures your browsing history isn’t saved. Once you close the browser, there’s no trace of the websites you visited, so others using the same device won’t see your plans.

To activate incognito mode across different browsers:

  • Google Chrome: Click the three dots and select New Incognito window. Or, press Ctrl + Shift + N (Windows) / ⌘ + Shift + N (Mac).
  • Microsoft Edge: Click the three dots and choose New InPrivate window, or use Ctrl + Shift + N (Windows) / ⌘ + Shift + N (Mac).
  • Mozilla Firefox: Click the three lines and select New private window, or use Ctrl + Shift + P (Windows) / ⌘ + Shift + P (Mac).

Incognito mode has different names across the major browsers, but it performs the same role.

Turn Off Email Notifications

Online stores often send order confirmation emails that could spoil the surprise. To avoid this, turn off email notifications from the retailer or temporarily mark their emails as spam. You can also use a separate email account for Valentine’s shopping, so all order-related emails go there instead.

Opening the Settings menu in Gmail

To turn off email notifications from Gmail, click the gear icon in the top right corner. Then, choose See all settings from the menu. Head to the Filters and Blocked Addresses tab and click Create a new filter.

Marking specific addresses as read filters in Gmail

In the From field, enter the retailer’s email address (you can also add their name to the Subject field). Next, click Create filter and then check the box for Mark as read. Finally, click Create filter again to save the changes.

Any emails from that retailer will automatically be marked as read and won’t appear in your inbox.

Clear Browser History and Cookies

If you’re not using incognito mode while shopping, clear your browsing history and cookies to avoid leaving a trail.

In Google Chrome, click the three dots at the top right, select Delete browsing data, choose the time range and items to clear, and then click Clear data.

Clearing Chrome Browsing Data

In Microsoft Edge, tap the three dots in the top right, head to History​​​​​, and click the Bin icon. Choose what to clear, set the time range, and hit Clear now.

Clearing Browser Data on Edge

In Mozilla Firefox, click the three lines in the top right, then navigate to History > Clear recent history. Now select the time range and items to clear, then click Clear now.

Clearing Firefox Browsing Data on Web

For quicker access to these settings, use Ctrl + Shift + Delete on Windows or ⌘ + Shift + Delete on Mac.

Shopping apps also send push notifications about recent purchases. This could be a red flag for your surprise gift, so it’s best to disable them until after Valentine’s Day.

Here’s how to disable notifications:

  • iOS: Open Settings, tap Notifications, select the app, and toggle off Allow Notifications.
  • Android: Head to Settings, tap Notifications > App notifications, choose the app, and turn the toggle off.

Just remember to turn them back on again after Valentine’s Day.

Use a Different Payment Method

People often overlook their payment method when shopping online, but it can actually ruin a surprise. If you have a joint bank or credit card account with your partner, they might easily spot your purchases.

To keep things secret, try using prepaid gift cards or virtual credit cards instead. That way, they won’t notice any suspicious transactions, and you can still keep it a secret.

Choose an Alternate Shipping Address

Now that everything is set, there’s just one last step: updating the shipping address. If you usually get packages at home, consider using another place like a friend’s house, your office, or even a P.O. box. It might feel like an extra step, but it’ll ensure your special surprise doesn’t end up in the wrong spot.

These are some tips I usually use when shopping online to surprise my partner. So, if you’re planning something special this Valentine’s Day, give them a shot and see how they work for you.

Soccer Fan T-Mobile Subscribers Can Soon Enjoy a $99 Perk for Free

Soccer fans who are T-Mobile subscribers should be happy to hear about the newest perk from the company.

Subscribers Can Nab MLS Season Pass for Free

Starting on February 18, 2025, T-Mobile and Metro by T-Mobile postpaid subscribers can nab an MLS Season Pass for free. That’s a $99 value.

With the subscription, you can see all live regular-season matches, MLS Cup playoff matches, Leagues Cup, and other programming and content with no blackouts. The league starts play on February 22, 2025.

To claim the perk, you can head to the T-Life app for iOS or Android. You can claim the free subscription until March 4, 2025.

Since MLS Season Pass is available on Apple TV, you will need to have an Apple Account with a payment method on file. At the end of the 2025 MLS Season, the subscription automatically renews for the 2026 season for $99. So if you don’t want to pay, you will need to cancel one day before the renewal date.

You can access all the MLS action with the Apple TV app. It’s available on Apple devices, many smart TVs, streaming devices, and elsewhere.

If you’re not a soccer fan, T-Mobile has a variety of other perks for subscribers, like free in-flight Wi-Fi and high-speed data access outside the United States. Metro Flex Plus customers can also receive an Amazon Prime membership for free.

T-Mobile hopes that perks like the MLS Season Pass can draw new subscribers and keep existing customers. If you’re in the market for a carrier, take a look at our comparison of Verizon, AT&T, and T-Mobile to help you make the best decision.

Giving More Users a Taste of Apple TV

Even though MLS isn’t as popular as other major sports leagues in the United States, the arrival of Lionel Messi has increased interest.

The free perk for T-Mobile subscribers looks to be a win for soccer fans and Apple, giving even more viewers a look at Apple’s streaming app when watching MLS action.

A Small Speaker With a Sizeable Sound

Summary

  • Ultimate Ears Miniroll provides loud sound in a small size with easy connectivity to multiple devices simultaneously.
  • The speaker offers multi-day battery life, quick charging, and an attachment strap for versatile placement.
  • Its PartyUp connectivity allows you to use multiple Minirolls as a single sound system.

Smartphone speakers are often not enough for large open spaces or if you want to share it with other people. So, whether you’re a music lover or just want a small wireless speaker to set the mood when you have friends at your place, the Ultimate Ears Miniroll will give you what you want to hear.

Ultimate Ears Miniroll

$59.99 $79.99 Save
$20

The Ultimate Ears Miniroll is a small waterproof Bluetooth speaker that delivers enough sound to fill an entire room. It also connects to multiple devices simultaneously, making it easy to use as your daily driver speaker.

Pros & Cons

  • Small and portable
  • Can be placed practically anywhere
  • Long battery life

Price and Availability

The Ultimate Ears Miniroll is available on Amazon and the Ultimate Ears website for a regular price of $79.99, although it sometimes goes on sale. It’s available in four colors—Gentle Black, Majestic Blue, Revive Grey, and Calming Pink.

Easy Connectivity

power and play button on the Ultimate Ears Miniroll Bluetooth speaker.
Jowi Morales / MakeUseOf

A quick press on the Miniroll’s power button is enough for power control, making it easier to switch on or off compared to other speakers that require you to hold its power button for three seconds. That function (holding the power button for three seconds or more) will put the speaker in pairing mode. You can then connect to it with a tap on your phone, and you’re good to go.

It also connects to two devices simultaneously, so you don’t have to worry about transferring connections between your smartphone and tablet or even with another smartphone if you’re sharing the speaker. Unfortunately, it only connects to other devices via Bluetooth—it doesn’t have an aux port, and its USB-C port is only for charging.

A Loud Booming Sound From Such a Small Speaker

Ultimate Ears Miniroll attached to a giant lamp.
Jowi Morales / MakeUseOf

As the name suggests, the Miniroll is Ultimate Ears’ smallest offering, with a diameter of less than five inches and a thickness of less than two. This makes it easy to grasp in one hand, and it has two large buttons for volume control right on its face. Its power button sits on the right side, with an indicator light that shows its power and battery status. You also get the play/pause button right underneath it, letting you go to the next track with a double-press and to the previous one by pressing it three times.

Ultimate Ears Miniroll volume control buttons.
Jowi Morales / MakeUseOf

Despite its small size, the Miniroll offers quite a sound. When set at maximum volume, the speaker hits a bit over 100dB—about the loudness of a jackhammer going full tilt a meter away. The Miniroll is a bit bassy, letting you feel the thump of what you’re listening to. Nevertheless, whether you’re into classical orchestra, pop rock, or EDM, you will appreciate this little speaker’s sound.

watching a movie on an iPad while using the Ultimate Ears Miniroll.
Jowi Morales / MakeUseOf

It’s also perfect for watching movies, allowing you to feel immersed in the scene because of how loud it can go without sacrificing audio quality. And even though it uses a Bluetooth connection, the split-second delay between what you see on the screen and what you hear from the speaker is minute enough that you won’t feel it.

However, this difference is noticeable if you’re playing first-person shooter games, as the sound delay is magnified when you’re doing the action. But you’ll only notice this for the first few seconds, and you’ll likely tune this out once you get into the action.

Using the Ultimate Ears Miniroll as a speaker while playing Call of Duty on an iPad.
Jowi Morales / MakeUseOf

If you have additional Minirolls or friends that have their own, you can use Ultimate Ears’ PartyUp feature, which lets you pair as many Minirolls as you like. While this doesn’t offer any type of stereo or surround sound benefits, it will increase the volume, which is useful if you want to fill larger spaces (or even an entire home) with what you’re playing. Unfortunately, it’s not compatible with other Ultimate Ears speakers, so it won’t work with those speakers.

Multi-Day Battery Life That Charges in Minutes

Ultimate Ears Miniroll showing its USB-C charging port.
Jowi Morales / MakeUseOf

I exclusively used the Ultimate Ears Miniroll as my office speaker for a week while preparing for this review. I always listen to music when I work, and I’m happy to say that this tiny thing lasted me more than four days of use at around three to four hours each day. This meant that the speaker’s battery life stayed on track with the 12-hour life that Ultimate Ears claimed it could do.

You can charge this speaker with its USB-C port, which is easily accessible right under the volume down button. Despite being IP67-rated, meaning it is protected from accidental soaking in one meter of water for 30 minutes, its charging port isn’t behind a watertight plug, making it easy to juice up. It also took me less than an hour to bring it to nearly 100% charge, so you don’t have to worry about going without sound for long if your Miniroll goes empty.

Place It Anywhere

using the Ultimate Ears Miniroll in the shower.
Jowi Morales / MakeUseOf

Another feature that makes this speaker stand out is the stretchy attachment strap, which lets you place it practically anywhere. The strap is attached directly to the Miniroll on one side and clips securely on the speaker on the other side. Although it’s easy to remove, it also stays in place once locked in, ensuring that the speaker will stay in place.

Ultimate Ears Miniroll hanging in the bathroom.
Jowi Morales / MakeUseOf

This strap lets you attach the speaker to anything about an inch wide and has a slot in the middle so you can hang it off a hook. It’s also a crucial part of the speaker if you’re not using it for hanging, as it serves as a vibration-absorbent foot that prevents the Miniroll from rattling against your desk.

Should You Buy the Ultimate Ears Miniroll?

Ultimate Ears Miniroll attached to the hood strut of a car.
Jowi Morales / MakeUseOf

The Ultimate Ears Miniroll is a great choice for anyone looking for a small Bluetooth speaker. It has impressive battery life and its PartyUp feature will let you connect multiple Minirolls for the ultimate party. Connecting it to your phone and other gadgets is also a breeze, and the ability to have two devices simultaneously connected to it will make daily use a no-brainer.

However, its $80 regular price is a bit steep, especially if they just want a small speaker to fill a room with sound while working. Despite being a tad more expensive than some alternatives, its features and ease of use make it worth the purchase price.

Ultimate Ears Miniroll Blue eCommerce Image

Ultimate Ears Miniroll

$59.99 $79.99 Save
$20

The Ultimate Ears Miniroll is a small waterproof Bluetooth speaker that delivers enough sound to fill an entire room. It also connects to multiple devices simultaneously, making it easy to use as your daily driver speaker.

Scammers Have Found a Way to Sneak Emails Into Your Inbox

Spam filters have made it really easy to keep malicious emails out of your inbox, but it’s by no means impervious. If you need a reason always to exercise caution when opening an email despite it getting past security, you only need to look at email salting attacks.

Email Salting Attacks Hide Scams From Spam Filters

As reported by Cisco Talos, email salting attacks allow scammers to sneak their emails past spam filters and have them land in your inbox. It works by adding junk text that confuses spam checkers, while presenting the email in a way where humans can’t see the additional flak.

When a spam email checks an email, it will dig through its HTML code to see what it’s saying. You, the reader, don’t see the HTML; you instead see what the HTML creates when your browser turns all that code into something more palatable for humans.

Email salting works by adding junk text into an email to break up the words. That way, the spam filter doesn’t “see” what the scammer is trying to do. However, the scammer uses sneaky tricks to make it so the junk text doesn’t appear when you read the email, leaving just the words they want you to read.

Here’s an example that Cisco Talos spotted: in this email, the scammer wanted to impersonate Wells Fargo. However, if they just wrote “Wells Fargo,” the spam filter will detect and catch the scam attempts. Instead, the scammers added junk text in the middle of the words “Wells” and “Fargo” and then set the additional text to zero width.

That way, when the spam filter scans the email, it sees this:

WEqcvuilLLS FAroyawdRGO

But because the junk text has zero width, it doesn’t display when you read the email, leaving you with:

WELLS FARGO

Bam: now the scammer can impersonate Wells Fargo without the spam filter catching on.

Another example involves the scammer adding Zero-Width Space (ZWSP) and Zero-Width Non-Joiner (ZWNJ) characters between each letter in a word. Because they’re characters, the spam filter reads them when judging if something is spam or not. However, because these characters represent zero space, they don’t appear when the email is rendered, meaning that you see the word just fine without any breaks in it.

These examples demonstrate that you should never blindly believe an email, even if it dodges your spam filter and arrives in your inbox. Always double-check the sender and the content before clicking on any suspicious links, and check out these examples of fraud and phishing emails to watch out for.

This Chrome Extension Lets Me Search the Web Without AI Content

AI-generated content floods the internet, making it difficult to find genuine, human-written content. But it doesn’t have to be like that; you can return to the good old days.

The Pre-AI Search Chrome Extension lets me search the web without AI results, making it much easier to find what I really want.

How Pre-AI Search Improves My Search Experience

I miss the days when Google search results felt reliable and real. You could trust the information you found was written by a human, not a machine. But now, with so much AI-generated content floating around, things are different. Search engines push AI-written stuff to the top, making finding genuine, handwritten articles harder.

Thankfully, there’s the Pre-AI Search Chrome extension. One-click filters out all AI content and shows only human-written results. To use it, add the extension to Chrome, hit the Pre-AI Search button in the toolbar, and make sure the switch is on. Now, search on Google like you normally would.

If it glitches, toggle Filter Search Results off and back on to refresh. And don’t worry—it won’t slow down your search performance. The results are a throwback to pre-AI days when real people were the ones making the content. Since it only shows stuff from before January 2023, it might seem weird not to see the newest content first, but this actually ensures the content is human-written, not AI-generated.

Turning off Pre-AI Search to view recent results

But what if you need recent information? After all, it’s not really practical to only read outdated content. No problem—just toggle the switch off and refresh your search results.

Pre-AI Search Features and Benefits

If you’re looking for more advanced features, upgrade to the Pro version for just $4.99. You get a lifetime license key sent to your email within 24 hours. And if you’re not happy, you’ll get a 30-day money-back guarantee.

Pre-AI Search Extension License

So, what exactly comes with the Pro version? Well, first off, you get access to custom date range filtering. This means you can narrow down your search results to a specific time frame—great for things like data analysis or research purposes.

In addition, the Pro version includes precision control that lets you customize your monthly search results. For example, if you want information about an event in June last year, you can refine your search to show results from just that month. And then there is an advanced time period preset. With this, you can quickly pick options like the past week, past month, or past year without manually entering dates. It saves time and makes filtering more efficient.

I know what you’re thinking: “Doesn’t Google already have these filtering options?” Well, technically, yes. But here’s the thing—Google’s date range filtering only works for preset options, which can go up to a year.

Time period preset for Google search results

However, the custom date range filter is pretty unreliable and often misses results from the time frame you actually want. I’ve tested it multiple times, and honestly, it’s been disappointing. For example, I searched for articles from January 2021 to January 2022 but got results from random years like 2015 and 2019 instead.

Google's custom date range filter not working

On top of that, Pre-AI Search works locally on your computer. This means no data collection, tracking, or ads are involved—just a clean, smooth search experience. It’s also lightweight and won’t slow down the browser or hog memory. And with instant filtering, you can easily switch between AI-generated and pre-AI content when needed.

As a writer, I often need to fact-check and find reliable sources for my articles. With Pre-AI Search, I can skip all the robotic fluff and focus only on credible information.

It’s also great for students verifying the originality of their work or for researchers wanting to keep their research solid. Overall, it’s worth a try for anyone searching for cleaner and more precise results.

Bitwarden Is Making It Harder for Hackers to Access Your Passwords

Password managers are a great way to store your login details, but if a hacker gets a hand on your master password, they’ll gain access to every account you’ve stored on them. Fortunately, Bitwarden is adding a feature that will make it much harder for hackers to access your vault, even if they know your password.

Bitwarden Users Will Get Two-Factor Authentication Emails by Default

As announced on the Bitwarden website, the password manager app has a new two-factor authentication (2FA) protection layer. Bitwarden users can always add their own 2FA methods via the settings for free, but this update specifically targets people who have yet to enable 2FA:

Soon, after you enter your Bitwarden account email address and master password, if the device where you’re logging in is not recognized by the Bitwarden server and you do not have two-step login enabled nor are using enterprise SSO, Bitwarden will email a verification code to the email account on file. You will need to go to your email account to access the code and provide it to the Bitwarden application to continue.

This may sound handy initially, but it poses a problem for people who store their email passwords in Bitwarden. It creates a nasty catch-22 where they need to access their email to get their Bitwarden login code, but they need to access Bitwarden to get their email password.

To prevent this from happening, Bitwarden advises that you make a memorable password for your email account, then add a 2FA layer onto it so people can’t access your inbox. You can also follow Bitwarden’s guide on adding an authenticator to your account, which will disable the email 2FA method. And if this is the first time you’ve heard of the app, check out why you should use Bitwarden to save your passwords.

It’s Still Just a Big-Screen eReader

Summary

  • Kindle Scribe combines e-reader and note-taking capabilities with a new design and Premium Pen.
  • Writing on the 300 PPI screen feels like paper, but pricey compared to other Kindle models.
  • Note-taking abilities have improved, but new features may not justify the high cost.

Amazon’s Kindle lineup still remains the best way by far to enjoy an ebook. But the second-generation Amazon Kindle Scribe wants to bring an e-reader together with the ability to take notes and more. It’s generally a mixed bag and not worth the high price tag.

Amazon Kindle Scribe (2024)

The Amazon Kindle Scribe combines an e-reader and note-taking tablet into one package. The second-generation modes feature a new design with a front-flush display and uniform white borders to better mimic writing on paper. The included Premium Pen feature a customizable shortcut button and eraser. You can now write notes directly on the page of a book with Active Canvas

Pros & Cons

  • Large, easy-to-read 300 PPI screen
  • Can write notes directly in books
  • Writing on screen feels very much like on paper
  • Premium Pen feels great in the hand and features shortcut button
  • Most new features are also available on cheaper first-generation model
  • Expensive compared to other Kindle models

Price and Availability

The Kindle Scribe retails for $400 for the 16GB version, $420 for a 32GB model, and $450 for a 64GB edition. It is available in two colors: tungsten or metallic jade. The Kindle Scribe can be found through Amazon, Best Buy, and other retailers. All models come with the Premium Pen.

An Improved Design

The Amazon Kindle Scribe with Premium Pen
Brent Dirks / MakeUseOf

The Kindle Scribe looks much better than the first generation thanks to its new design. Along with a front-flush, 10.2-inch display, white borders better mimic writing on a sheet of paper.

There are two colors to choose from—tungsten and jade. The hue will only be noticeable on the border of the front, the back, and the Premium Pen.

The 300dpi screen is by far the best on any Kindle I’ve used. The auto-brightness setting worked well to provide the best backlight for a dark room or even outside. The warmth is even adjustable, and you can create a schedule to change that as well.

Weighing a little more than a pound and very thin, I found the Kindle a little difficult to hold for long periods of time. The aluminum back feels very slippery, and I was always adjusting my hand for a more comfortable position. Amazon, as you might expect, sells a wide variety of cases that cover the back with other materials, but that just adds to the cost of the experience.

On the left side of the Kindle Scribe is the power button and USB-C port for charging. Amazon advertises up to 12 weeks on a single charge. But in reality, especially when using the screen at a higher brightness level and frequently, that will be much less. After using the Kindle Scribe heavily for around a month, I only needed to charge it once.

I would like to see the Kindle Scribe offer the same wireless charging found in the lower-cost Paperwhite Signature Edition and Colorsoft Signature Edition. Unlike most of the other high-end Kindles, the Scribe isn’t waterproof, so be careful around the pool or in the bath.

When not in use, the Premium Pen is made to magnetically attach to the right side. In practice, you’re better off using a case or just finding a safe spot for it. When placing the Kindle Scribe in my backpack, it detached every single time, forcing me to fish in the bottom of my backpack. Even while adjusting my hand during reading, it always had a way of detaching.

While the magnetic connection isn’t a strong spot, I really enjoyed using the pen itself. It feels great in the hand and is not slippery like an Apple Pencil. There’s also no need to worry about charging or pairing the pen.

I’ve used a number of stylus models, but using the tip feels as close to writing on paper as I’ve experienced. The Pen also has a customizable Shortcut button. You can press and hold the button to use tools like a highlighter, pen, fountain pen, and sticky note. It’s very well-placed and easy to use. On top of the pen is an eraser—just press it on the screen to erase text. It feels exactly like using a real-world eraser, and there was no lag at all.

Finally, Take Real Notes While Reading

A note in the margin of the Amazon Kindle Scribe
Brent Dirks / MakeUseOf

One of the biggest additions is the much-requested ability to actually write a note in a book you’re reading. In the first-generation model, you could write a small sticky note on a book, and you’d have to come back to it later and press the icon to see what was written.

Now, you can write directly on the book using the Active Canvas feature. Just start writing anywhere and the book will adjust to fit the text. As an extra-added caution, once the note is written, you’ll press a check mark to add it to the page. The note is tied directly to the text, and you will see them in the same place even if you change font sizes. The entire process is quick and without any lag.

In early 2025, Amazon will allow you to also write notes in expandable book margins, but that feature wasn’t available yet for me to test.

I’m more of a book highlighter than a note-taker, but I was pleased with the overall experience. It’s nice to be able to flip through the pages of the book and see exactly what I’ve written. I’m interested to see if the margin writing will allow me to write more notes to see on a single page.

While you can take notes, you still can’t circle or underline a word or passage, which is still a bit of a disappointment.

Using AI for Better Notes

The Amazon Kindle Scribe note refine.
Brent Dirks / MakeUseOf

The note-taking abilities from the first-generation device transfer over to the model with some new smarts.

You can create a notebook to write on with a number of customized templates, everything from a ruled page to a daily planner and storyboard. You can even import your own template or find additional options on the Amazon site.

All the notebooks aren’t confined to just the Kindle Scribe. With just a single tap, you can create a PDF to send to your email or others. When taking notes, you can choose from a wide variety of pens and ink sizes.

And since AI technology is pretty much everywhere now, Amazon couldn’t resist adding some AI smarts to the Kindle Scribe. AI can be used to do two tasks—summarize your notes or refine your handwriting.

I had mixed results with both features. You’ll need an Internet connection to send the information to the cloud, and even when you do, it takes anywhere from 30 to 40 seconds to return results. Even though my handwriting can be atrocious at times, the AI somewhat accurately handled my scribbling.

Both of the tools convert your handwriting into an easy-to-read font. The summary or handwriting is attached to the front of the notebook for easy access. I would love to see the same AI features being used on in-book notes.

Should You Buy the Amazon Kindle Scribe (2024)?

The second-generation Kindle Scribe is by far the best Kindle I’ve ever used. I’ve truly enjoyed reading books on such a large and natural-looking e-ink screen. It’s light and great to read anything you can imagine. But I’ve been far less impressed with the note-taking abilities.

While it’s great to finally be able to actually write notes in a book and look back at them later, the other writing features are less impressive and are also available on the lower-cost first-generation Scribe. With a minimum retail cost of $399.99 for the Kindle Scribe, I could spend a little more and purchase an entry-level iPad and Apple Pencil, take notes, and do much more.

amazon-kindle-scribe-2024

Amazon Kindle Scribe (2024)

The Amazon Kindle Scribe combines an e-reader and note-taking tablet into one package. The second-generation modes feature a new design with a front-flush display and uniform white borders to better mimic writing on paper. The included Premium Pen feature a customizable shortcut button and eraser. You can now write notes directly on the page of a book with Active Canvas

You Can Now Give ChatGPT Specific Personality Traits—Here’s How It Works

ChatGPT is evolving, bringing even more flexibility to users’ interactions with AI. With the ability to customize its personality traits, you can now shape ChatGPT’s responses to better match your needs and preferences, promising more tailored conversations.

What Are ChatGTP’s Personality Traits?

Specifying personality traits for ChatGPT allows you to customize how the AI chatbot interacts with you. You can give it a name to call you and describe the traits you want it to exhibit, such as being chatty, witty, and encouraging, or transform ChatGPT into a Gen Z, opinionated chatbot.

While it’s tempting to go all out and add a long list of desired traits immediately, I found it easier to start simple. Begin with just a few key characteristics and refine them as you interact with ChatGPT more. You can always edit the traits later to fine-tune ChatGPT’s persona.

You need to create separate chats for different needs, as the traits are enabled only for new chats.

How to Customize ChatGPT’s Personality Traits

Tailoring ChatGPT’s personality is a straightforward process.

  1. Click on your profile picture and select Customize ChatGPT.
  2. Fill in the “What should ChatGPT call you?” and “What traits should ChatGPT have?” fields to give ChatGPT context about you.
  3. You can also use the checkboxes to select the traits you want ChatGPT to exhibit.
  4. Toggle on “Enable for new chats” and click Save.

At the time of writing, the specific personality traits based on the new UI are not yet available on mobile. However, OpenAI has stated that it will roll out this feature to mobile and MacOS in the next few weeks.

Once available, you might look for the Customize ChatGPT option in the app’s settings or menu and follow the prompts to set your desired traits. You can always modify these traits later as you refine your preferred ChatGPT persona.

Try Giving ChatGPT These 3 New Traits For Even Better Responses

The new personality customization options give you more control over the tone, style, and depth of responses so that ChatGPT’s responses don’t go wild. After experimenting, here are three traits I’ve found particularly useful for getting more preferred responses.

Analytical and Detail-Oriented

If you want precise and well-reasoned answers, setting ChatGPT to be “analytical” and “detail-oriented” is a great choice. For example, I asked, “How can I improve my home budget?” and got this response:

“Start by categorizing your expenses—essentials like rent, groceries, and utilities. Then, track discretionary spending like subscriptions or dining out. Use apps like Mint or YNAB to visualize patterns. Finally, set clear savings goals and automate them to stay consistent.”

This trait combination is perfect for tasks like breaking down complex problems, creating actionable plans, or maybe when you need an in-depth explanation.

Straight-Shooting and Opinionated

Need clarity or a no-nonsense answer? The “straight-shooting” and “opinionated” traits make ChatGPT reach the point. For example, I asked, “Is remote work better than office work?” and received:

“It depends on your personality. Introverts might thrive at home, but remote work isn’t for everyone—offices still offer collaboration benefits. For me? Remote all the way.”

This setup is great when looking for direct answers and confident opinions without unnecessary fluff.

Forward-Thinking

When you need motivation or advice, “forward-thinking” traits work wonders. I tested this by asking, “How can I overcome procrastination?” ChatGPT replied:

“Start small! Tackle one task today, and reward yourself after. Imagine how great it’ll feel to achieve your goals—your future self will thank you!”

This combination makes ChatGPT a supportive partner for tackling challenges or planning for the future. It’s ideal for personal development or when morale needs to be boosted.

The personality customization feature, while still new, offers exciting possibilities for tailoring ChatGPT to your unique needs and preferences. As OpenAI continues to refine and expand these options, I expect we’ll see even more creative and productive uses emerge and set ChatGPT to complete tasks.

How to Stop Your iPhone From Auto-Enhancing Photos: 7 Methods That Work

While the iPhone’s Deep Fusion feature is designed to enhance image quality, it can sometimes overprocess photos, resulting in unnatural colors and excessive detail. Stop letting your iPhone ruin your photos and take control of how it processes your cherished memories.

Can You Disable the Auto-Enhancement Camera Feature on an iPhone?

Unfortunately, the Deep Fusion feature is built into the iPhone’s Camera app and cannot be turned off. As a result, once you take a photo, your iPhone automatically applies edits such as brightness adjustments, color correction, and noise reduction to enhance its quality.

However, this processing can sometimes worsen the image through oversaturation and overexposure. Once the automatic enhancements are applied, no amount of editing can undo the changes, meaning there’s no way to revert to the original image.

That said, all hope is not lost. There are ways to work around this feature and prevent your photos from being auto-enhanced. Here’s what you can do to break free from the impact of Deep Fusion on your iPhone.

Disable Smart HDR

Smart HDR is a feature available on modern iPhones (iPhone XS and later) that aims to improve the quality of images taken in varying light conditions. It works by capturing multiple shots at different exposures and combining them into a single image with more detailed highlights and nuanced shadows.

Turning off Smart HDR can help your camera capture a more authentic representation of what you see, which may resolve the issue. Here’s what you’ll need to do.

  1. Open the Settings app on your iPhone.
  2. Scroll down to tap on Camera.
  3. Find the Smart HDR toggle and disable it.

Shoot in RAW

If disabling Smart HDR does nothing for you, consider shooting images in RAW format. The Apple ProRAW format allows you to utilize the full capabilities of your iPhone’s camera and capture images with minimal image processing.

Shooting in RAW also gives you greater control and flexibility while editing your images. You can adjust exposure, color balance, and other elements without losing quality or detail.

To shoot images in ProRAW mode, use these steps:

  1. Open the Settings app on your iPhone and head to Camera > Formats.
  2. Enable the toggle next to Apple ProRAW.
  3. Open the Camera app and tap the RAW button in the top-right corner to activate it.

While the ProRAW mode seems the best way to capture images, the downside is that each file is approximately 25 MB. So, you may run out of storage soon if you only keep shooting in RAW.

The Apple ProRAW feature is only available on the iPhone 12 Pro and later Pro models. So, if you own a standard iPhone, you won’t be able to shoot in RAW. In that case, try out the below hacks.

Turn Off Night Mode

When your iPhone’s camera detects low light conditions, it automatically activates Night Mode. If you’re taking pictures in a dark area, chances are that the oversharpened and overexposed images are the work of Night Mode and not Deep Fusion.

You can try taking pictures with Night Mode off to see if that makes a difference in the picture quality. To turn off Night Mode, open Camera and tap the Night Mode button next to the flash button in the top-left corner of the Camera app.

Take Photos in Burst Mode

Another way you can bypass auto-enhancement is by taking photos in burst mode. When you use burst mode, your iPhone takes several shots of the subject and goes easy with all its harsh editing. You can then select and keep the most natural image out of all the shots you’ve taken in burst mode.

To activate burst mode, open the Camera app and drag the shutter button to the left. The longer you hold the shutter, the more pictures your camera takes. For this purpose, taking 5-10 shots in burst mode will suffice.

Once you’ve taken the picture, open it in the Photos app. Tap the Burst option in the top-left corner, swipe through the shots to choose your favorites, and tap Done. You can then select the preferred photo and delete the rest.

Prioritize Faster Shooting

Don’t want to go through the hassle of taking pictures in burst mode and selecting one? You can configure your iPhone Camera app to prioritize faster shooting. Similar to burst mode, this results in less processing and more natural photos.

Head to Settings > Camera and enable the toggle next to Prioritize Faster Shooting.

Take Advantage of Live Photos

An even better option to escape auto-enhancement is by using the Live Photos feature in the Camera app. The auto-enhance feature does not affect a Live Photo, and you can access an original, unedited version of the image via the Photos app.

You can turn on the Live Photo feature from the top-right corner of the Camera app before clicking a picture. Once you’ve shot a Live Photo, open it in the Photos app and tap Edit at the bottom of the screen. From there, tap the Live tool bottom menu, select the frame you want to keep, and tap Make Key Photo.

Use Third-Party Camera Apps

If you still feel your photos are overly processed, consider using a third-party camera app, as the auto-enhancement feature only affects photos taken with the iPhone’s native Camera app.

The best camera apps for iPhone will let you take high-quality photos that can match the built-in Camera app. Some, like the Halide Mark II Pro app, even allow you to take macro photos on an iPhone without macro support and shoot images in RAW. You can also use the camera on Snapchat or Instagram to take pictures without auto-enhancement.

As impressive as Apple’s Deep Fusion technology is, it’s not always the ideal choice. If you prefer a more natural look for your photos, these methods will help you bypass the automatic enhancements and capture images that truly reflect your artistic vision.

6 Ways I Cut My Streaming Services Subscription Costs

Cutting back on subscriptions can be easier than you think, and it doesn’t have to mean sacrificing your favorite content. After reevaluating my subscription plans, I found ways to reduce my monthly costs while covering all my essentials.

6

Share Premium Accounts With Friends and Family

Top_CNX/Shutterstock

One of the easiest ways I save on premium services is to share accounts. Many streaming services allow multiple profiles or simultaneous streams, making it possible to split the cost among family or friends.

For example, Netflix offers plans like Standard and Premium, which allow two to four people to watch simultaneously on one account. Each user gets a profile to keep their watchlists and recommendations separate. Disney+ supports up to four streams at once and lets you create multiple profiles. This feature makes sharing an account with friends or family simple without compromising your user experience.

Spotify, Apple Music, and YouTube Premium also offer family plans, where up to six people can share a subscription. Pooling resources with trusted friends and family can significantly reduce individual expenses.

5

Downgrade to More Affordable Plans

Most streaming platforms offer multiple subscription tiers. The premium tiers often include perks like ad-free viewing, higher resolution, or offline downloads. However, if you’re looking to cut costs, consider downgrading to a basic or ad-supported plan to save money.

  • Hulu: Its ad-supported plan costs much less than the ad-free option while offering access to the same shows and movies.
  • Netflix: The Basic with Ads plan is a budget-friendly alternative. While it comes with ads, it still lets you enjoy a majority of the content available on the platform.
  • Peacock and Paramount+: Both services provide low-cost ad-supported plans that cater to budget-conscious users.

If you can tolerate a few commercials, this adjustment can save you a significant amount of money over time.

4

Subscribe to Bundle Plans

disneyplus bundled plan

Bundles are an excellent way to save money while enjoying multiple services. Companies like Disney and Verizon often combine streaming platforms into discounted packages. Here are a few popular examples:

  • The Disney Bundle: This includes Disney+, Hulu, and ESPN+ for a lower combined price compared to subscribing to each service separately.
  • Carrier Offers: Many mobile and internet service providers include streaming services as part of their packages. Verizon’s plans often include free or discounted access to platforms like Disney+ or Hulu. Similarly, T-Mobile offers Netflix with some wireless plans.

Bundling saves money and simplifies billing, as you combine multiple services under one payment.

3

Pay Essential Subscriptions Annually

Switching to an annual payment can yield considerable savings if you have streaming services you know you’ll use all year. Many platforms offer discounts for customers who commit to a full year upfront rather than paying monthly. This applies to streaming services and utility services such as VPNs, which can help with streaming geo-restrictions.

This approach works best for services you rely on regularly. For less frequently used platforms, stick to monthly billing so you can cancel anytime.

Spotify Premium Student discount page

I take advantage of discounts and promotions to enjoy various premium services without paying full price. Before paying full price for a service, first try looking if the service offers the following:

  • Student Discounts: Platforms like Spotify and Apple Music offer special student plans with access to additional services, such as Hulu or Showtime, at no extra cost.
  • Seasonal Deals: Watch out for promotions during Black Friday, Cyber Monday, and other major sales events. For example, HBO Max has previously offered discounted annual plans during these periods.
  • Free Trials: Many premium services, such as VPNs and many streaming sites, offer free trials ranging from one week to a month. When trying out a new premium subscription service, always use the free trials first and see if the provided service is something that’s worth the premium.

Regularly checking for these promotions ensures you’re always paying the lowest possible price for your subscriptions.

1

Cancel Underused Subscriptions

A hand holding a phone with a headphone and a 'cancel subscription' window displayed.

One of the simplest yet most effective ways to reduce your streaming costs is to cancel services you rarely use. Many people subscribe to multiple platforms but only use the service occasionally. To ensure you’re maximizing the use of your subscriptions, review your bank or credit card statements and identify all active subscriptions. Then, ask yourself:

  • How often do I use this subscription service?
  • Am I going to use this platform this month? Can I pause the subscription until later?
  • How essential is this subscription? Do I really need this service? How much will it affect me if I don’t have access to this service?

Another helpful strategy is rotating subscriptions. Instead of subscribing to all services simultaneously, focus on one or two for a few months. For example, you could subscribe to Netflix while catching up on a particular series, then cancel it and switch to Disney+ for the next few months. This ensures you’re only paying for what you actively use.

The key is regularly evaluating your habits and adjusting your subscriptions to align with your current needs. Implement these strategies, and you’ll likely be surprised at how much you can save while enjoying top-tier entertainment and services.

How I Use a Mail Merge to Send Personalized Mass Emails

Summary

  • Mail merge makes sending personalized messages to a large group efficient and easy.
  • Prepare clean, organized data for a successful mail merge process.
  • Use the Microsoft 365 suite for integrated features or Gmail add-ons for smaller projects.

Worried you’ll skip someone or sound robotic with mass invites? I messed that up, too, until I learned about mail merge. With this trick, it takes minutes to send a mass of event invitations or newsletters with a personal touch.

What Is a Mail Merge?

A mail merge lets you send personalized messages to a large group of contacts in a single go. You can prepare a message template—often an email, a form, or a newsletter—and personalize it for many recipients without manually editing every mail.

I often use it when I need to reach several people at once, but I still want to address them by name and include specific information relevant to each person.

Think of it as an automated system that customizes your email template with individual names, addresses, or any other data you want to include.

A mail merge usually combines three elements:

  1. A Main Document (like an email or a letter template in Word).
  2. A Data Source (like an Excel spreadsheet, Google Sheets, or Outlook contacts with details such as names, addresses, or order numbers).
  3. The Mail Merge Tool (a feature in Microsoft Word or third-party add-ons in Gmail).

By matching placeholder fields in your main document (e.g., “<<FirstName>>”) with corresponding fields in your data source (e.g., “John”), the tool automatically sends individual emails that look tailor-made for the person receiving them.

How to Prepare for a Mail Merge

Regardless of the data source, I realized the importance of creating clean, well-organized data. If your contact list is incomplete or messy, no matter how good the rest of your mail merge process is, your emails might end up with errors or missing details. So, make it once and use it repeatedly.

  1. Identify the key fields: Decide what information you need to personalize your emails. Usually, this includes first and last names, email addresses, and maybe locations or recent order details.
  2. Create an Excel File and add the data: Use column headers for each piece of data. For example:

    • FirstName
    • LastName
    • Email
    • Company
    • Phone Number
  3. Clean Your Spreadsheet: Remove any extra spaces or formatting issues, and verify all email addresses are correct. A neat, consistent data source makes the process smooth.

When it comes to mail merge tools, I use the Microsoft 365 suite (Word, Excel, and Outlook) because of its robust features and seamless integration. However, you can also use Gmail and Google Sheets for quick merges or when working on small collaborative projects on Google’s platform.

Different mail merge tools offer various features and complexity levels. I suggest picking the tool that matches your workflow, the size of your mailing list, and your personal preferences.

If you need advanced features like detailed analytics, scheduling, or automation, consider specialized platforms (e.g., Mailchimp for newsletters).

Create a Mail Merge With Excel and Word (Via Outlook)

Word gives you a lot of control over a mail merge with its Mailings ribbon tab, which includes a Mail Merge wizard. But I am using the more straightforward approach here with the options on the Mailings tab.

Preparing the Data

Put some effort into creating and maintaining an Excel spreadsheet with your contact data. And please, back it up somewhere safe.

Here are some tips to prepare and format the spreadsheet correctly.

  1. If your data is in Excel, you can prepare it directly. If it’s in a .txt or .csv file, you must import it into Excel and prepare it.
  2. Ensure each column has a clear header (e.g., “FirstName,” “LastName,” “Email”).
  3. It’s a best practice for spreadsheet column names to match mail merge field names. Also, you need separate first and last name columns to address someone by their first name.
  4. Format the columns with any numeric data, as they can be tricky. For instance, ZIP/postal codes must be formatted as text to keep any leading zeros (e.g., 00499). Format them as text before import.
  5. In the Word template, place the appropriate symbol for any currency or percentage before or after a merge field. Without them, any number may not make sense to the recipient.
Mail merge symbols in Microosft Word

Looking for sample data to practice mail merges? The examples here were created on sites like Mockaroo and Generate Data.

Start the Mail Merge in Microsoft Word

Craft the body of the email in Microsoft Word and save the document on your desktop as a template for the future.

There is more than one mail merge scenario. For instance, you may need to send attachments with every email or send different business data to each recipient according to their role. More complex methods can also be covered with Rules (Mailings > Write & Insert Fields group > Rules)

  1. Create or open the Word document you want to use for mail merge.
  2. Click on the Mailings tab in the ribbon.
  3. Select Start Mail Merge > E-mail Messages from the dropdown menu.
Starting Mail Merge in Word on the Mailings tab

Now write your email message in the blank document. Leave blank spaces where you want to insert personalized information. Word will insert the merge fields from your data source here.

Word Mail Merge Letter

Next, it’s time to grab the data from Excel.

  1. Click on Select Recipients > Use an Existing List.
  2. Browse to the source Excel file and click on Open in the dialog box to select it.
  3. If you don’t have a mailing list yet, you can create one from the Type a New List option in the dropdown.
  4. Choose File > Save.
  5. Wherever you want personalized information (like someone’s first name), click Insert Merge Field.
  6. Choose the relevant Excel column header.
  7. On the Mailings tab, click Preview Results.
  8. Use the arrow buttons to cycle through different recipients.

Verify that names, companies, and other fields appear correctly in the body text. You can also use the Check for Errors option to catch blank fields.

Fields like «FirstName» ensure recipients see their name rather than a generic greeting. You can also automate a name style and a greeting with the Greeting Line option in the Write & Insert Fields group.

Send the Merged Emails Via Outlook

If your preview shows consistent results, then all that’s left to do is hand over the last stage to Outlook.

  1. Click Finish & Merge > Send Email Messages.
  2. Specify these fields in the Merge to Email options.

    • To field: Choose the Excel column with the recipient emails (e.g., “Email”).
    • Subject line: Add your desired subject text here (you can’t insert a mail-merge field here in a basic Word mail merge).
    • Mail format: Select HTML for a nicely formatted email.
  3. Hit OK, and Word will hand off each personalized email to Outlook.
  4. Open Outlook to confirm messages are in your Outbox or Sent folder.
Finishing the Merge process in Microsoft Word

If you have a large list, consider sending emails in batches to spot and correct any errors. Some mail service providers also impose sending limits, restricting the number of emails you can send in an hour or a day.

Create a Mail Merge with Gmail & Google Sheets

Gmail and Google Sheets are also an alternative method for mail merges. While Gmail doesn’t have built-in mail merge capabilities, you can achieve similar results using Google Sheets and some excellent mail merge add-ons.

The process involves storing data in Google Sheets and sending emails using a Chrome extension like Mail Merge. Note that many add-ons do not strictly require a Google Workspace subscription. They work within the free version of Gmail but can have specific features or volume constraints.

Mail merges remain one of my go-to methods for sending large batches of personalized emails. Mail merge isn’t only for business emails. You can use it at home to send holiday greetings, do community outreach, or communicate with teachers and students.

The critical step is segmenting your data with a well-crafted template. Beyond that, follow the tips above and consider the time zones if you have a global contact list.

Don’t Fall For These Reddit Scam Pages Waiting to Install Malware On Your Computer

The infamous Lumma Stealer malware is back with a new campaign, ready to steal your data. This time, the scammers are using thousands of fake Reddit and WeTransfer web pages that lead straight to the malware—but look incredibly convincing.

Watch Out For These Malware-Infested Fake Reddit Pages

Security analyst @crep1x uncovered the new Lumma Stealer campaign and uploaded a full list of compromised domains to GitHub. At the time of publication, there were more than 500 hundred pages impersonating Reddit and more than 400 masquerading as WeTransfer—all containing downloads links to the malware.

The victims are served links to the fake Reddit pages using a number of techniques. For example, Google Notebooks hosting a link to the malicious page rank in Google Search, which direct the unsuspecting user to a WeTransfer site hosting the Lumma Stealer payload.

Once the malware is installed, it steals data for use on other platforms or sale on dark web forums. However, there is a slight reprieve for some potential victims. Crep1x notes that “requests must come from a system considered a potential victim”; otherwise, you’ll be redirected to a legitimate web page.

But as good as that sounds, it’s not worth relying on as a security method.

Info-Stealer Malware Is Dangerous—and Everywhere

This malware campaign using Lumma Stealer is far from the first to take aim at your private data. Scammers previously used this malware in a fake CAPTCHA scheme. It was also one of the common malware types used in fake ChatGPT apps.

So, while this malware scam uses Reddit and WeTransfer pages as bait, it’s far from unique in its use of Lumma Stealer.

Why I Prefer Taking Low-Light Photos on My Smartphone Than My Camera

DSLRs and mirrorless cameras can deliver the exact low-light shots I want, yet I still find myself reaching for my smartphone. There’s something about its convenience and results that just clicks.

I have an iPhone 13 for smartphone photography, and my camera is the mirrorless Fujifilm X-S10. Your low-light photography results might vary, depending on your devices. For example, full-frame cameras are much better than mirrorless devices and DSLRs for low-light pictures.

1

No Tripod Needed

Although I own a camera tripod, I don’t always have one with me. I’ll carry my tripod for specific tasks (e.g., joining a night photography tour on holiday), but it’s too heavy to bring each time. Unfortunately, I need it to take my preferred types of photos with my camera.

On the flip side, I don’t need a tripod to take low-light pictures on my smartphone. Even if I wanted to use one, a smartphone tripod is much easier to carry around than one designed for cameras.

Danny Maiorca/MakeUseOf

2

Less Camera Shake

Taking photos in low-light situations often means having to take photos in cold weather. I live relatively far north, meaning that low-light conditions only truly occur during the year’s colder months. Capturing images in these scenarios makes camera shake more likely. So, I have to be more wary of blurrier photos.

Since I often have to increase my camera shutter speed, any movement can ruin my photos. My smartphone, on the other hand, has good image stabilization. Therefore, small movements are less likely to have a big impact on my photos. Some images are blurry, but these are few and far between compared to my camera.

Photo of a street scene with artificial lighting
Danny Maiorca/MakeUseOf

3

Minimal Editing

I share most of my low-light smartphone photos with just my friends and family; as a result, I often don’t want to edit them extensively. My current phone produces solid results, and I rarely want to adjust them beyond adding a filter and potentially altering the exposure.

Comparatively, I’m rarely happy with my low-light mirrorless photos straight out of the camera. I’m happy to edit if I use them for professional purposes, but I’d rather not if they’re just for personal consumption. Not having to edit my low-light photos also frees up time to do other things (e.g., learn more about photography).

4

Quick and Spontaneous

My smartphone is much easier to carry around than my camera, and I also have easier access when I want to take pictures. Whenever I see an interesting low-light situation, I just have to take out my phone and take a picture. With my camera, I’d have to get it out of my bag, switch it on, change the settings, and then capture the image.

By that point, the moment I wanted to photograph could have passed. For example, I visited Iceland in winter 2024. While walking to dinner, I randomly looked up and saw the Northern Lights. It came and went quickly, and I wouldn’t have gotten my shot if I had been too busy setting up my camera.

5

No ISO Hassle

ISO is one of the most important night photography camera settings, and I typically set mine to around 1,000 when shooting handheld. However, doing so takes time. Each time I change the ISO, I then have to see if the shutter speed is slow enough to capture an image without risking a blurry photo. I could use a tripod to solve this issue, but the setup is too complex for everyday pictures.

an image taken of a skyline at night
Danny Maiorca/MakeUseOf

While some smartphone camera apps let you alter the ISO (and I definitely needed to on older iPhones), I haven’t yet needed to with my current device. Instead, I just have to point my phone at the scene and take my photo.

6

Less Grainy Shots

Unfortunately, my Fujifilm low-light photos often have lots of grain because I need to increase the ISO. I can remove photo grain with AI features in Lightroom, but I don’t want to use this tool for personal shots. While the story matters more than small defects, I’d still like for my pictures not to look grainy unless I’m specifically creating a film-style effect.

Although I’ve encountered problems with grain with previous iPhones, my current device rarely gives me such issues. Sometimes, I actually have to add sharpness because they’re too flat. But even when that’s necessary, fixing this problem is much faster than removing grain.

7

Better Low-Light Settings

I can’t deny that my Fujifilm photos almost always look better than their smartphone equivalent after extensive editing. However, my smartphone often makes low-light settings look better from the camera—ideal for casual shots. For example, when I saw the Northern Lights in Iceland, they looked better on my phone than in real life. My phone was also excellent at controlling the brightness to capture them.

Despite enhancing the scene, my images still look real. Since I don’t like my images looking fake, this is a win-win for me. It also makes it easier to show that I didn’t use AI to make my photos.

8

Night Mode Magic

I was shocked at how much better the photos on my iPhone 13 were when I initially switched from the iPhone 8 Plus. My low-light pictures with the latter were almost always a lost cause, with too much grain or just being too blurry. Since I haven’t experienced this problem with my iPhone 13 (and I’ve owned it for over two-and-a-half years at the time of writing), some of it is due to its Night Mode feature.

photo taken at nighttime in an amusement park
Danny Maiorca/MakeUseOf

Night Mode adds more details to my night and low-light images, and my device also changes the exposure accordingly. Moreover, my phone adjusts the shutter speed more accurately. The movement is almost non-existent compared to a two-second or three-second picture with my camera.

While I love my mirrorless camera, I much prefer capturing low-light shots on my smartphone. My device’s Night Mode makes getting my desired results easier, and I like how the images look without needing to edit them. Not having to carry a tripod around is another plus.

People Are Buying Phones With TikTok Installed on Them on eBay

TikTok fans in the US can’t know if they’re coming or going right now. First, the app was banned, and stopped working for a few hours thanks to President Biden. Then, President Trump was sworn in, and the app sprang back to life.

However, Trump has only given TikTok a stay of execution, with the app’s future still hanging in the balance. And anyone who hasn’t already downloaded it is currently unable to do so. But not to fret, as some eBay sellers have your back…

In the US and Missing TikTok? eBay Sellers Have Your Back

As first spotted by Wired, some people have realized that TikTok’s on/off ban in the US is a potential money spinner. Because all the while TikTok is unavailable to download from the App Store or Play Store, phones which already have it installed on them are worth a premium.

Don’t believe me? Then just head to eBay and search “iPhone TikTok” or “Android phone TikTok” and see for yourself. Unless eBay has acted to remove the listings, you’ll find dozens of phones being sold with a TikTok install listed as a selling point.

Some of these listings are quite reasonable, with phones being listed as around their asking price. But, as you can see from the screenshot above, other sellers are asking ridiculous amounts of money for bog-standard phones that just happen to come with TikTok installed on them.

Is anyone actually buying these? It’s hard to tell. Plenty of listings have ended, but that’s no guarantee that the buyers are actually going to pay the asking price. And, let’s face it, they would be mad to do so.

Anyone Buying One of These Has More Money Than Sense

It should go without saying that you would be a fool to buy one of these phones. Even one that’s priced at close to the usual price you would pay for a second-hand phone.

Not only is it dumb to pay for a phone just because TikTok is installed on it, it means buying a phone that hasn’t been restored to factory settings. Hell, the seller may even remain logged into their TikTok account.

The TikTok saga in the US is far from over. Maybe it will survive unhindered, maybe ByteDance will be forced to sell TikTok to Elon Musk, or maybe the next deadline will pass without either side backing down. But either way, it’s an app, and one that you won’t miss half as much as you think you will.

Adobe Introduces AI-Powered Caption Translation and AI Search Tools for Faster Video Workflows

Adobe Premiere Pro video editor gets boosted features for smarter editing workflows along with enhanced tools for motion design elsewhere.

Premiere Pro Is Boosted

Adobe announced on January 22nd, ahead of the Sundance Film Festival 2025, that it will be bringing new AI-powered features to Premiere Pro (beta). The Adobe video editing tool isn’t shy of introducing new features, after 2024’s announcement of Premiere Pro’s upcoming generative AI video tool, powered by Adobe Firefly.

Along with some workflow-boosting features in Premiere Pro, Adobe also adds innovative tools to After Effects and in Frame.io to elevate filmmakers of the future.

Frame.io is Adobe’s file management system, built initially for a focus on video footage, but now used for images and documents too. New features include further Frame.io camera-to-cloud support, allowing filmmakers and content creators to film scenes and send the footage from their camera directly to their Frame.io library.

After Effects users receive innovations in the form of improved caching and HDR support.

Intelligent Search Using Keywords

When editing videos, you’ll likely be faced with countless raw video footage files, among trimmed clips, different angles, and other files you may include in your editing. It’s hard to find the file you need when there are so many to search through.

If you work within a team or temporarily working with new people, there may be differences of how to store or name the files, making it practically impossible to search with logic.

Premiere Pro’s media intelligence and search panel allows you to search for footage and files using keywords. Not only can these keywords relate to the file’s title—which seems too obvious to be a feature worth talking about—but they can also search from the video footage’s metadata. Now that’s what I’d consider intelligent search powers.

Source: Adobe

You can search for video files using location names, descriptions of content in the video—for example, “girl with the dog”—dates and times, dialogue, and even camera angles.

This search tool will save frustration and time and help you claw back minutes or even hours during your editing workflow. It is much easier to describe the footage you’re looking for than it is trying to recall the time, date, or location it was captured. This feature will boost workflow for larger teams, allowing everyone to be as productive as possible. The AI tools being announced by Adobe are exciting, even if they’re just in beta for now.

AI-Powered Caption Translation

​​​​​​​The second major feature of Premiere Pro’s updated tools is an AI-powered caption translator. Premiere Pro can translate your captions in up to 17 different languages, allowing you and your team to save time on manually translating and applying the nuanced difference of languages.

Premiere Pro Translated Captions

Not only are captions important for accessibility and connecting with your audience, but with the global push of video content, translation captions allow you to reach more people, regardless of borders. Using captions allows your video content to remain authentic, compared to dubbed audio or AI-model replacements seen more commonly.

Combined, all Adobe’s added motion features can improve collaborative workflows in teams of filmmakers, video editors, and motion designers. Premiere Pro’s AI caption translation and intelligent search features are available in Premiere Pro (Beta). Adobe Creative Cloud users can download Adobe beta apps from the Creative Cloud.

Samsung’s Galaxy Watch Can Now Be Customized for Kids Who Aren’t Ready for Smartphones

Samsung Unpacked 2025 is serving us plenty of new products to be excited about, but where does it leave parents of kids who might not be ready for their first smartphone? The answer comes in the form of the Galaxy Watch for Kids setup, making it possible for parents to share the smartwatch experience with their kids without throwing them into the deep end.

You Can Now Program a Galaxy Watch to Stay Connected With Your Kids

Announced in connection to Samsung Unpacked 2025, Google and Samsung have announced what they’re calling the Galaxy Watch for Kids “experience.” According to a report in Google’s The Keyword, parents will now be able to set up a Galaxy Watch with “guardrails,” for kids who may not be old enough for a smartphone—or even the full functionality of a smartwatch. As a result, you’ve got kids “using their cell-enabled smartwatches responsibly to build positive digital habits.”

To be clear, this is not a release of a new, separate, smartwatch like the kid-friendly Fitbit Ace LTE; rather, it’s a plug-and-play way of customizing a Galaxy Watch uniquely for kids. The setup is only compatible with Samsung’s Galaxy Watch7 LTE, which you’ll be able to regulate using the Family Link app. The app manages watch settings, allowing you to curate the ground rules for your family.

Your Galaxy Watch7 LTE must have the latest Wear OS installed and be paired with a Galaxy smartphone running One UI 5.1 or later. With Samsung announcing the drop of One UI 7 today, most Galaxy users will meet this OS minimum without issue.

What Actually Comes With the Galaxy Watch for Kids “Experience”

According to Google, the Family Link app lets parents easily adapt a Galaxy Watch to be suitable for kids. Here are the features that you can then tailor:

Feature

Kid-Friendly Setting

Contacts

Regulate an approved list of contacts that your kids can call or text via their watch.

Apps

Regulate an approved list of apps that your kids can download to their watch.

Schedule

Identify a daily school or focus schedule, reducing functionality at different times of day.

Location

Track your kids’ location or find lost watches via your map.

On your list of approved apps, you might want to consider some of the 20 new watch faces and interactive apps that Google just dropped, available on Google Play. According to Google, apps with a “Teacher Approved” badge have been reviewed by educators and rated for “age-appropriateness, quality of experience, enrichment and delight.”

The Google Play store details for a kids Marvel-themed app

Some examples of Teacher Approved interactive apps you can add to your kids’ watches include Marvel HQ: Super Hero Fun and Barbie™ Color Creations, which offer fun beat-making and coloring projects, respectively.

There’s no doubt that our technology-heavy culture has positive and negative effects on our kids. Smart tech like phones and watches can make families feel safer with location tracking, while simultaneously opening up a portal to a vast, unruly internet. It’s easy to see how a regulated smartwatch could be a happy medium for many parents.

Besides, the fact that Samsung has figured out a way to adapt existing hardware means less e-waste and less consumer cost. Instead of buying a kid-specific product and having to replace it down the line, you can purchase one Galaxy Watch for the long run—assuming that the hardware will actually hold up for years to come.

Spatial Audio Is Completely Pointless, and You Can’t Convince Me Otherwise

Spatial audio is everywhere these days. From Apple’s AirPods Pro to Sony’s 360 Reality Audio, it’s being touted as the next big thing in sound technology. Personally, I think it’s an overhyped gimmick, and here’s why.

What Even Is Spatial Audio, Anyway?

Spatial audio is a technology used to create a three-dimensional sound experience. It uses advanced algorithms and, in some cases, head-tracking features (like Apple’s AirPods Max) to make it seem like sounds are coming from all around you—front, back, above, and even below. The idea is to mimic how we hear in real life, where sounds have direction and depth.

For instance, if you’re watching a movie on your iPhone with spatial audio enabled and turn your head, the sound shifts to make it seem like the audio is anchored to your screen. With music, the intention is to place instruments and vocals in a virtual space around your head rather than just splitting the sounds between your left and right ears, as traditional stereo does.

Sounds impressive, right? Well, in theory, it is. But here’s the catch: spatial audio relies heavily on specific hardware and software to work properly. If you’re not using compatible devices or listening to content specifically mixed for spatial audio, the effect falls flat. Even when it works, the results are inconsistent. For example, Apple’s spatial audio works best with its headphones, leaving everyone else with a subpar experience.

The Hype vs. The Reality

Tech companies are great at selling us dreams. Apple calls spatial audio “theatre for your ears,” while Dolby touts its ability to create “immersive soundscapes.” But when you peel back the layers of marketing buzzwords, the experience doesn’t quite live up to the hype.

First, there’s the gear. Apple’s spatial audio, for instance, works only with select headphones like AirPods Pro or AirPods Max. Even the ability to listen to spatial audio on your Mac requires newer models of Macs and headphones, which makes it feel less accessible. Dolby Atmos also requires specific hardware; not all devices handle it equally well.

Then there’s the content. Movies, music, and games must be specifically mixed for spatial audio. Otherwise, you’re likely just listening to “spatialized stereo.”

Sure, spatial audio can be impressive during a well-curated demo. Explosions in action movies or the layered acoustics of a live concert might dazzle. But for your everyday playlists or podcasts? It’s mostly overkill. Do we really need 3D sound for a casual Taylor Swift track or your favorite true-crime episode? Probably not.

Finally, let’s talk about cost. Spatial audio doesn’t come cheap. Between high-end headphones, premium streaming services, and compatible devices, the expenses add up fast. And for what? A marginally more “immersive” experience that most people won’t even notice—or care about.

Why I Still Prefer Stereo

A man wearing headphones listening to music, with a Hi-Res Audio icon in the background and the logos of some music streaming services blurred.
Davidovici / Shutterstock

Stereo has been the gold standard for audio for decades, and for a good reason. Stereo is simple, reliable, and universally compatible. You don’t need special headphones, fancy setups, or specific content to enjoy it. It just works.

Stereo delivers a clear, balanced soundstage with distinct left and right channels. Whether listening to music, watching a movie, or playing a game, stereo provides a consistent and enjoyable experience on almost any device.

Perhaps my favorite feature of stereo is its simplicity. It doesn’t rely on head-tracking, 3D algorithms, or other tech wizardry to create an immersive experience. Instead, it focuses on the fundamentals: clear vocals, crisp instruments, and a balanced mix. And for me, that’s more than enough.

Some proponents of spatial audio suggest it could have broader applications (see: how spatial audio can help relieve stress). While this sounds promising, I’d argue that good music in any format—stereo included—can be just as effective for unwinding.

A Botnet Just Smashed Records With a Gigantic 5.6Tbps DDoS Assault

If physical wars are fought with troops, digital wars are won by infected botnet devices. The more devices enslaved within a botnet, the more powerful the attacks can be. A recent attack has taken the record of the most powerful DDoS attack in history, generating 5.6Tbps of data in a single session.

Cloudflare Puts Up an Amazing Fight Versus a Record-Breaking DDoS Attack

The announcement came from the cybersecurity company Cloudflare. This company provides website owners with protection against DDoS attacks and defends against assaults daily. There’s a good chance that if you’ve ever clicked an “Are you human?” CAPTCHA test, Cloudflare supplied it.

In a blog post by Cloudflare, the cybersecurity company performed a postmortem on what was the most intense DDoS attack in recorded history:

On October 29, a 5.6 Tbps UDP DDoS attack launched by a Mirai-variant botnet targeted a Cloudflare Magic Transit customer, an Internet service provider (ISP) from Eastern Asia. The attack lasted only 80 seconds and originated from over 13,000 IoT devices. Detection and mitigation were fully autonomous by Cloudflare’s distributed defense systems. It required no human intervention, didn’t trigger any alerts, and didn’t cause any performance degradation. The systems worked as intended.

It’s good that companies like Cloudflare are there to protect websites, as botnet owners have been stepping up their game recently. Cloudflare reported that it began to see a spike in DDoS attacks during Q3 2024, and by Q4 2024, it saw an 1885% increase quarter-on-quarter for attacks that used over 1Tbps of traffic.

Botnets are only as strong as the number of devices enslaved on them, so now’s the perfect time to ensure that a cybercriminal doesn’t enroll your gadgets into the next big attack. Check out how to detect and mitigate botnet attacks for more information, and if you have a ton of smart devices, be sure to learn about IoT botnets too.

Always Run These Tests Before Buying a Used Samsung Phone

The allure of a pre-owned Samsung phone is undeniable: top-tier specs at a fraction of the cost. However, with used devices comes the risk of hidden problems and it’s important to test a used Samsung phone thoroughly to avoid costly surprises down the line.

One of the best ways to assess the condition of a used Samsung phone is by utilizing the secret hardware diagnostic menu in One UI. This menu allows you to run tests on essential hardware components, helping you check for potential issues with the display, sensors, touch input, speakers, and more.

To access this menu, simply open the Phone app on the Galaxy device and type *#0*#. Once the diagnostics menu appears, you can perform each test individually to evaluate the device’s condition. Some of these tests are interactive, requiring you to follow on-screen instructions, while others are quick and easy to verify.

For example, tapping on the Vibration option will activate the phone’s vibration motor, allowing you to confirm that it works as expected. If you choose the Touch option, you’ll need to draw a line across a series of boxes to test the touchscreen’s responsiveness and accuracy.

Running these tests should help identify potential defects or malfunctions, such as unresponsive touchscreens, faulty sensors, or audio issues, that could impact your overall experience.

If any issues arise during the tests, it’s best to reconsider the purchase or negotiate a discount with the seller to account for potential repairs.

2

Run Phone Diagnostics Using the Samsung Members App

While One UI’s built-in diagnostics menu is a great starting point for assessing the condition of a Samsung phone, it isn’t comprehensive. What if you purchase the device only to later discover its battery health has significantly deteriorated, the fingerprint sensor is malfunctioning, or—worse yet—it has mobile network issues?

With the Samsung Members app, you can check the phone’s most crucial hardware and software components. It lets you test everything from NFC, Bluetooth, and microphone to more practical features like cable charging, the camera, and speakers.

  1. Open the Samsung Members app on the Galaxy phone. If you can’t find it, download it from the Play Store.
  2. Go to the Support tab in the bottom right corner.
  3. Select Phone diagnostics.
  4. Tap the Test all button to initiate a full diagnostic check of the device.

Again, some of these tests will require your interaction. For instance, you may be prompted to press specific buttons to assess their responsiveness or listen to audio samples to evaluate the speaker’s performance. However, you should be able to complete all the tests in just a few minutes.

3

Other Things to Keep in Mind

Once you’ve completed the essential tests, it’s important to carry out a few extra checks before finalizing the purchase. Here’s what to look for:

  • Cross-reference the phone’s IMEI number with online databases to ensure that the device hasn’t been added to a carrier’s blocklist or reported stolen.
  • After removing any case or screen protector, perform a detailed physical inspection of the device to check for scratches, dents, or other signs of damage.
  • Review the phone’s software update history to gauge how much longer it will receive official updates.
  • Ask about the warranty and return policy if you’re purchasing from a reputable reseller.
Free IMEI blacklist check website

Even if the Samsung phone you plan to purchase is a couple of years old, it can still deliver excellent performance and last you a few more years. However, it’s essential to thoroughly verify its condition.

Running the tests mentioned above allows you to quickly assess any Samsung Galaxy phone within minutes. Remember, a little extra effort upfront will help ensure you make a smart purchase and get a device that meets your expectations.

Here’s How to Spot Them

When people look to score a good deal on powerful PC hardware, there will always be people selling fake products. Reports are coming in that fake AMD Ryzen 7 9800X3D chips are hitting the market in China, so if you’re looking to pick up a cheap chip, be sure you’re buying from a legitimate seller.

How to Avoid Buying a Fake AMD Ryzen 7 9800X3D

As spotted by the Chinese website Uniko’s Hardware, reports are coming in that bad actors are buying legitimate AMD CPUs, repackaging them with fake chips, and then selling them for full price on the second-hand market. If you buy and install one of these fake chips, your PC will fail to boot.

Fortunately, there are ways to spot these fake chips. As Uniko’s Hardware explains (with machine translation applied):

The PCB number of AMD 9000 series R7 9800X3D is 33050. The fake PCB is 32546, which comes from the Ryzen 7000 R7 or R9. In addition, the patch next to the PCB does not match the Ryzen 9000 series. The color of the PCB should be blue, not dark green.

If you really don’t feel like inspecting chips or asking for photos from a third-party seller, Uniko’s Hardware recommends avoiding the secondary market entirely and purchasing chips from trusted and verified sellers. If you still want to buy second-hand, make sure you shop smart so you don’t fall foul of this scam. Be sure to check out these common scams on eBay and how to spot a trustworthy seller for some tips on how to do that.

Instagram’s New Mobile Video Editor Sure Sounds a Lot Like CapCut

The drama surrounding ByteDance and the banning/unbanning of TikTok, CapCut, etc. in the US is ongoing. So, what better time is there for an American company to develop and launch competing apps?

Instagram Is Launching a New Video Editor Called Edits

Instagram has announced that it’s launching a new mobile video editing app, and that it will be ready for release within the next few months. Called Edits, the video editing app is clearly being released as direct competition for CapCut.

Instagram boss Adam Mosseri announced Edits in a video posted to Instagram on Sunday, January 19. Edits is available for pre-order on the iOS App Store now, with its release planned for sometime in February or March. An Android version is simply billed as “coming soon.”

The free mobile editing app sure sounds a lot like CapCut, ByteDance’s video editing app that has been caught up in the so-called TikTok ban in the US. On the surface at least, it’s a free video editing app aimed at helping creators edit and upload their videos to the various short-form platforms.

However, Mosseri was quick to claim that the similarities are only skin deep, ​​​and that Edits will be a “full suite of creative tools” rather than a mere video editing app. But the timing of the announcement, coming on the same day that TikTok and its partner apps were meant to be banned in the US, is clearly not coincidental.

This Makes Sense While CapCut’s Future Is Still in Doubt

While TikTok was only unavailable on Sunday for a few hours before returning, the long-term future of ByteDance’s various apps is still in question. So much so that Americans have started learning Chinese on Duolingo to help them switch to other apps.

Incoming President Donald may be keen to extend TikTok’s life in the US, but ultimately, he’s unlikely to give the Chinese-owned app a free pass. Which is why Instagram’s move to build a ready-made replacement for CapCut makes absolute sense.

Mosseri responded to critical comments on Threads by stating that it has “been months” since Instagram started working on Edits. But given that ByteDance was put on notice nine months ago, even that doesn’t mean that this wasn’t a direct attempt to replace CapCut once the ban kicked in.

Whether ByteDance sees its apps banned in the US or not, it’s good to know that a ready-made replacement for CapCut is in the works. And unlike (the free version of) CapCut, videos edited with Edits won’t have a watermark when exported.

Don’t Fall for These 10 iPhone Charging Myths

From overnight charging fears to the dangers of fast charging and wireless pads, iPhone charging myths are everywhere. Let’s separate the truth from the tech lore, so you can charge smarter without stressing over your battery’s health.

1

Using Your iPhone While It’s Charging Is Bad

Dreamchild/MakeUseOf

Apart from being a good reason your mom would tell you to get off your phone, this myth doesn’t hold any water. At least not anymore—any iPhone (or smartphone, for that matter) made in the last decade or so should be fine if you use it while it’s plugged in.

Doing that will slow down charging marginally since some of the power will go into what you’re using it for, but by a negligible amount.

What you should watch out for, though, is the heat. Sometimes, your iPhone could get pretty toasty while charging, and the heat might be enough to discomfort you. Heat is also bad for your phone. Using your phone while charging might contribute to that—generally not enough to be a problem, though, since any modern Apple device has a thermal management system to prevent overheating.

2

You Shouldn’t Leave Your iPhone Plugged In Overnight

iPhone plugged into charging cable (1)
Karlis Dambrans/Shutterstock

The lithium-ion battery in your iPhone has a limited lifespan, and overcharging and undercharging stress the battery, causing it to wear out faster. That’s why this myth exists—it was true once. Now, iPhones have advanced smart charging technologies that prevent overcharging.

When your iPhone reaches 100 percent, it stops charging and only draws enough power to keep it fully charged. Also, any iPhone running iOS 13 (iPhone 6S) or later has Optimized Battery Charging set up by default.

This feature learns from your schedule and delays charging beyond 80 percent, so your phone spends less time at 100 percent. iPhone 15 and later takes it a step further, letting you set a charge limit under 100 percent. This way, your phone never even reaches 100 percent.

3

It’s OK to Let Your iPhone Charge on Your Bed

iPhone laying on comforter or sheets on a bed
Roman Zakirov/Shutterstock

Now we’ve established that it’s fine to charge your iPhone overnight, I have to add that it’s definitely not OK to let it charge on your bed. Apart from the minor fire hazard (especially when using faulty cables and chargers), the compounding heat from a mattress will degrade your battery faster.

Although it may not look like it, iPhones need airflow to cool properly. Even with Apple’s advanced thermal regulation system, heat will likely build up if the phone cannot cool. If you need your phone near you while sleeping, put it on a bedside table instead of smothering it on a mattress, pillow, or underneath your body.

4

Fast Charging Has Negative Effects on Your Battery

A man charging an iPhone with a MagSafe connection
LL_studio/Shutterstock

Theoretically, yes, fast charging causes more heat, but the negative effects are so inconsequential that they pale compared to the benefits of fast charging. However, you should feel free to go ahead and fast charge any iPhone from the iPhone 8 or later. They can handle it.

Apple has conducted rigorous testing (explained on Apple’s website) to ensure that fast charging is completely safe. The company has even added guardrails to protect the phones in extreme temperatures. However, different iPhones can handle different watts depending on the generation.

In a previous post, we explained everything you need to know to fast-charge your iPhone—check it out before fast charging.

5

Charging Your iPhone In Low Power Mode Will Ruin the Battery

Low Power Mode on an iPhone 14
Dreamchild/MakeUseOf

I haven’t seen this one as much on the internet, but I’ve heard it from friends and family. I live in a tropical climate, and the heat and humidity affect batteries in ways that might trigger erroneous beliefs. Perhaps this myth came about because batteries tend to fail more in my side of the country.

Regardless, it’s unfounded; low power mode has little to no effect on charging, as we’ve proven in tests. Of course, it also has no adverse effects on your battery either. In fact, Low Power Mode might help improve battery lifespan since it forces the iPhone to draw less power.

6

A Non-Apple Charger or Power Bank Is a Disaster Waiting to Happen

Anker Power Bank Mounted on iPhone 16 Pro Kept on Table
Aryan Surendranath / MakeUseOf

False. There are many MFi (Made for iPhone) certified trusted retailers, like Anker, Spigen, Mophie, Belkin, and UGREEN. Using any of these on your iPhone should be perfectly fine. You don’t need to worry about anything happening to your phone or the brick melting the outlet it’s plugged into.

For further proof, Apple recommends using verified third-party chargers and power banks, which it sells in the online Apple Store. You should avoid cheap knock-offs and substandard chargers.

7

Any Off-Brand Charger Is Fine as Long as It Works

charger kept on a table with a cable plugged in
Aryan Surendranath / MakeUseOf

The fact that a cheap charger you found randomly on Amazon or at a street vendor works doesn’t mean it’s good for your phone.

Not only are poorly built chargers harmful to your battery, but they could also pose physical safety risks due to short-circuiting and fires. Some could even damage your iPhone’s charging port (which happens far more often than people think).

Lastly, you can expose yourself to data risks because some bad actors sneak malware into your phone by hiding it inside the cable heads. Thankfully, there are ways to check if your smartphone charger is safe to use.

8

Powering Off Your iPhone Makes Charging Faster

A woman trying to turn off her iPhone with a MacBook in the background
LittlePigPower/Shutterstock

The idea behind the myth is probably because your iPhone uses less power when it’s off. However, charging speed depends on so many other factors that powering off your phone is essentially pointless.

According to my tests with an iPhone 14 Pro, my phone charges much slower while powered off, likely because it can no longer communicate with the fast charger through the iPhone’s USB Power Delivery (PD) protocol.

That’s one reason iPhones are programmed to power on when you plug them in.

9

Wireless Charging Is Worse for Your Battery

iPhone wireless charger on an iphone
Dreamchild/MakeUseOf

Not necessarily. It’s true that wireless charging generates more heat and charges your phone longer. The heat could be bad for your battery, but any standard wireless charger will dissipate the heat properly—this, combined with Apple’s superior MagSafe connection and thermal regulation, should make wireless charging safe for your battery.

Just make sure you charge your phone in a well-ventilated room and place it on a surface that doesn’t trap heat.

10

You Should Let the Battery Drain Completely Before Charging

smarthone with low battery notice in store
edaccor/Roman Fenton/Shutterstock

This is one of the worst things you could do for your battery’s lifespan. iPhone batteries typically have around 500 cycles worth of lifespan. This means they can charge from 0 to 100 percent 500 times before the battery reaches the end of its life. If you keep letting it die before charging it, you will run through those cycles quickly.

I recommend keeping your phone between 40 and 80 percent charged and charging it multiple times throughout the day. It’s not convenient, I know, but it’s the price you’ll have to pay to keep your battery healthy for longer.

This Is the Only Apple Intelligence Feature I Actually Use

While Apple Intelligence may offer plenty, like Image Playground and Writing Tool, these aren’t features you’d use on a typical Tuesday. However, there’s one Apple Intelligence feature I catch myself using every single day.

What Is “Reduce Interruptions” in Focus Mode (and Why It’s Great)

Whether you’re using a preset or a custom Focus mode, both help you silence notifications on your iPhone or Mac and concentrate. While you can configure these Focus modes to let notifications from specific contacts and apps through, there’s always the chance you might forget someone and an important notification could slip through the cracks.

That’s why the Reduce Interruptions Focus mode introduced with Apple Intelligence is perfect and helps minimize how often such situations occur. It uses a feature called Intelligence Breakthrough & Silencing, which relies on AI to determine whether a notification is important.

If it’s deemed urgent, you’ll be alerted. Otherwise, it’ll be silenced. For instance, I received a notification from my mom saying she was on her way to the hospital. It was marked as Maybe Important, so I was notified.

On the other hand, notifications from apps like Netflix, such as alerts about new releases, were automatically silenced.

What makes the Reduce Interruptions Focus mode so great is that you no longer have to stress about constantly customizing your Focus mode settings or manually deciding who or what can notify you. Instead, you can rely on your device’s AI to determine what truly needs your attention and what can wait.

How to Activate “Reduce Interruptions”

Since the Reduce Interruptions Focus mode relies on Apple Intelligence to filter notifications, your device needs to be compatible with Apple Intelligence.

This feature works on iPhones with the A17 Pro chip or later, iPads with an A17 Pro or M1 chip or later, and Macs with the M1 chip or later. If your device is compatible with Apple Intelligence, ensure it’s running iOS 18.1, iPadOS 18.1, or macOS Sequoia 15.1 (or later versions).

Once you’ve sorted all that, make sure you’ve enabled Apple Intelligence on your device. To do so, head to Settings on your iPhone or iPad or System Settings on your Mac, then select Apple Intelligence & Siri. Next, hit Turn On Apple Intelligence.

Apple Intelligence & Siri settings on an iPad

Since the Reduce Interruptions Focus mode works like any other Focus mode, activating it is fairly simple. On an iPhone or iPad, swipe down from the upper-right corner of your screen to access your device’s Control Center. Then, tap Focus, and select Reduce Interruptions.

You can do the same on your Mac by clicking the Control Center icon in the menu bar, selecting Focus, and choosing Reduce Interruptions.

Different Focus modes on a Mac including Reduce Interruptions

You can also customize the mode the same way you would with any other Focus mode. Go to Settings > Focus > Reduce Interruptions on your iPhone or iPad.

Similarly, on Mac, go to System Settings > Focus > Reduce Interruptions.

Reduce Interruptions Focus mode settings on Mac

From there, you can decide which people and apps can bypass the mode (even if their notifications aren’t urgent), set it to turn on automatically at specific times, locations, or while using certain apps, and add Focus Filters to tweak how apps and your device behave.

Turn Another Focus Mode Into “Reduced Interruptions”

If you’re like me and already have custom Focus modes set up, the best part is that you can make them behave just like the Reduce Interruptions mode.

Go to Settings > Focus, select your desired Focus mode (or System Settings > Focus on a Mac), and toggle on Intelligence Breakthrough & Silencing.

The Reduce Interruptions Focus mode mostly does an exceptional job of filtering notifications and determining urgent ones. However, there have been a few instances where notifications I wouldn’t classify as urgent have slipped through.

This is no surprise since AI is doing all the work! Still, it’s been a game-changer for me, and if there’s any Apple Intelligence feature I’d recommend enabling, it’s this one.

Why Android TV Is the Best Smart TV Platform on the Market

There are heaps of smart TV platforms to choose from, like Apple tvOS and Samsung’s Tizen OS. But there is one smart TV platform that’s better than any other: Google’s Android TV.

1

Extensive App Ecosystem

Android TV enjoys a vibrant app ecosystem thanks to Google. Google is the company behind the Android operating system, and thanks to the platform’s maturity (it has been around since 2014), thousands of apps are available for download.

However, it’s not just the sheer number of apps distributed via Google Play. Outside Google Play, you can sideload apps on your Android TV that Google has blocked from its app store for various reasons.

So, no matter which app you’re looking for, it’s probably available to download and install on Android TV. Android TV’s best apps include everything from utility apps for sending files between devices to file managers and much more.

2

Installing Apps Is a Breeze

Muhammad Alimaki/Shutterstock

Besides the vibrant app ecosystem, Google has made installing apps on Android TV a cinch. You can officially install apps on your Android TV in two ways. First, you can open Google Play directly on Android TV and search for your desired app. Second, you can remotely install an app on your Android TV using Google Play on your Android phone.

The latter is thanks to the ability to remotely install apps on other devices using Google Play. It provides the best and easiest way to install apps if you also have an Android device. Like Android on smartphones and tablets, Android TV is also permissive to installing apps from third-party marketplaces. If the official channels are insufficient, you can easily sideload apps on Android TV.

3

Less Bloatware

Another likable aspect of Android TV is less bloat; Android TV has way fewer pre-installed apps. Although this varies depending on the TV manufacturer, there are generally fewer additional apps installed that you don’t need.

It has a minimal list of pre-installed apps, and most of these are actually useful. For instance, there’s no denying that video streaming apps like Amazon Prime Video, Netflix, and YouTube are useful and quicker to access if pre-installed.

4

Google TV Interface Refined the User Experience

Searching for content across platforms on Google TV

With the release of Google TV, a new refined interface built on Android TV, the platform’s experience has never been better. Google TV provides a sleek, modern interface that prioritizes personalization and makes it easy to find content.

Google TV adds recommendations by showcasing content from different apps on the Home Screen. So, instead of browsing for content in individual apps, you can jump straight into the content from the Home Screen.

It also provides a universal search button for finding content across different apps. For more information, check out our in-depth article on the differences between Android TV and Google TV.

5

Best Voice Assistant Support

There are a handful of popular voice assistants, but Google Assistant is the best option on the market. Google Assistant is baked into Android TV by default. It offers seamless voice control that integrates deeply into the platform, enhancing user convenience and accessibility. Thanks to this, you can use it for hands-free control.

While the market offers a variety of smart TV operating systems, Android TV stands out among the crowd due to its vibrant app ecosystem, ease of app installation on and off the Google Play Store, less bloatware, Google TV interface, and Google Assistant integration. Remember, you don’t need to buy a new TV to get Android TV. A streaming device like Google’s TV Streamer 4K is all you need.

I Use Ad-Supported Streaming Services and It Saves Me Money

I’m a thrifty spender, so when streaming services started having ad-supported tiers, I hopped on the bandwagon. It was primarily to save money and still have access to content, but there were unexpected benefits, too.

It’s a Positive Force On My Streaming Habits

Ever since I stopped binge-watching content, my viewing experience has been exponentially better, and part of that is because I despise ads. I know that may sound weird at first. Then, why buy the ad-supported tier, right?

I can stomach a few ads here and there (and I don’t watch them, anyway, but we’ll get to that later). It only becomes a real problem if it’s a constant stream, which it would be if I were to binge-watch something.

However, I broke that habit. So, when I sit down to watch an episode, I don’t have to deal with a bunch of ads in a single sitting. This also applies to watching TV, considering there are many free live TV channels to watch that are ad-supported, too.

Ads Are a Reminder to Get Up and Move

Speaking of ads, whenever they do rear their ugly heads, I’m nowhere to be seen, anyway. I’ve got laundry to put away, dishes to do, dinner to make—I can’t be wasting time watching commercials. When ads appear, I see it as my que to dip and do something constructive.

This is especially true if it’s a movie. I love watching movies, but I also get pretty fidgety after a while. For me, an ad is also an opportunity to get up, massage my aches and pains, and do some stretches. Get used to doing that, and it’ll feel like you aren’t paying for the ad-supported tier.

I Get Access to Multiple Services in a Single Bundle

smartphone showing various streaming platform logos
Top_CNX/Shutterstock

Not only do I save money by paying for ad-supported streaming services, but streaming service bundles make it even cheaper. For example, I’m subbed to the ad-supported bundle that includes Disney+, Hulu, and Max for $10 cheaper than subbing to each separately—$17 instead of $27.

Again, I’m walking away with the better deal since I don’t stick around for the ads anyway, nor is it a huge deal if I don’t spend a lot of time streaming some months. Ultimately, I make it work for me because I’ve fostered better habits with my streaming services overall.

How Flex PCB Manufacturing Handles Tight Tolerances

Flex PCB Manufacturing

Flex PCBs are used in a wide range of electronic devices, especially mobile phones, tablets, and handheld electronics. Because they combine rigid support structures with flexible circuitry, flex circuits are ideal for devices that require durability and reliability in small package sizes.

While the flexibility of flex PCBs makes them ideal for small and tight spaces, the materials they use must be durable enough to withstand mechanical stress. This is why it is important to work closely with your flex manufacturer early in the design phase to ensure that your flex circuit board is manufacturable and will meet your requirements.

A face-to-face meeting with a flex supplier will help you ensure that your manufacturing process is on track, and that you’re both on the same page regarding what can be achieved with a given layout. This will reduce the number of errors that may occur during production and assembly, and can result in a more accurate and reliable flex circuit board.

How Flex PCB Manufacturing Handles Tight Tolerances

The most common flex pcb manufacturing are rigid-flex boards. These are fabricated with rigid copper layers on top of an adhesive-based or adhesiveless polyimide layer. The copper is either bonded with acrylic adhesive or cast directly onto the polyimide using a specialized casting technique. Rigid-flex circuits are also available with metallized surface finishes that improve electrical performance and resistance to corrosion.

For a flex PCB to perform well, it must be able to withstand high-speed signals without losing signal integrity. To ensure this, designers use simulation tools to test the behavior of signals. These tools allow them to simulate real-world conditions and highlight potential areas of concern, such as reflections and jitter. This allows designers to iteratively refine their flex PCB designs to address these issues before moving to physical prototypes.

Identify the flex and rigid regions of your flex PCB during the layout phase. Then, calculate the minimum bend radius for each region to determine how much force is required to damage the circuit. Avoid overlapping rigid and flex regions and place vias in stress-free zones to prevent cracking. Incorporate S curves in trace routing to improve flexibility and reduce stress. Opt for hatched ground planes instead of solid ones, as they have higher flexibility.

The thickness of the flex PCB stack-up impacts its ability to flex, as well as its ability to resist thermal cycling. Choose a thin material like polyimide or polyester (PET) for standard circuits, and a high-temperature resistant material such as polyimide or epoxy for high-frequency applications. Choosing a flexible material with low moisture absorption can also improve performance and reliability.

The flex PCB fabrication and assembly processes must be carefully planned to ensure that components are properly aligned with the underlying copper layer. This will prevent solder joints from bending and warping during assembly, which can cause failures. Stiffeners can be added to a flex PCB to improve its mechanical rigidity, especially around mounting points. It’s also a good idea to avoid putting components directly on the flex substrate. Doing so could lead to solder joint failures due to dimensional variation.

What are the limitations of flex circuit boards?

limitations of flex circuit boards

Flex circuits are used in a variety of technological applications due to their flexibility and durability. They can be found in consumer electronics such as smartwatches and fitness trackers, automotive applications like headlights, and healthcare devices like hearing aids. The combination of their ability to bend and flex while maintaining their structural integrity makes them a valuable option for manufacturers seeking to save space, weight, and cost. However, they are not without their limitations and designers should be aware of these limitations to ensure that flex PCBs meet the specific needs of an application.

A key limitation of flex circuit boards is their limited heat dissipation capabilities. This can make them less suitable for high-power applications, unless thermal management solutions are used to mitigate the problem. Additionally, the thinner substrate materials used in flex circuits can be more susceptible to damage during manufacturing and assembly.

Another limitation of flex circuits is their inability to support complex shapes. Sharp angles and multiple overlapping bends can stress the material, causing it to break or deform. As a result, designers should avoid creating complex shapes that require the board to be bent or folded beyond its capability.

While flexible circuits can withstand a certain amount of bending, repeated bending can lead to fatigue and ultimately cause the circuit to fail. This can be mitigated by using protective coatings or encapsulants, but these add cost and weight to the finished product, which may not be desirable in some applications.

Flex PCBs are also not as durable as rigid boards in harsh environments. Exposure to moisture, chemicals, and extreme temperatures can cause the material to degrade over time, reducing the longevity of the circuit. In some cases, this can cause the copper layer to weaken or break, which could compromise the functionality of the board.

What are the limitations of flex circuit boards?

Finally, flex circuits are not as compatible with traditional components as rigid PCBs. This is because the thickness of the copper layers is lower in flex circuits. As a result, some legacy connectors may not be compatible with flex circuits, and it is important to verify the compatibility of all parts prior to purchasing them.

In addition to these limitations, flex circuits are typically more expensive than rigid PCBs to produce because they are made from thinner substrate materials. This can be problematic for manufacturers who are trying to balance performance requirements with budget constraints.

Design: The process begins with the design phase, where engineers use specialized software to create the circuit layout. The design must take into account the specific requirements of the application, such as the number of layers, component placement, and the amount of bending the circuit will undergo.

Material Selection: Once the design is finalized, the appropriate flexible substrate material is chosen. Common materials include polyimide and polyester, which are both durable and capable of withstanding the stresses of bending and flexing. The choice of material depends on factors such as temperature resistance, flexibility, and mechanical properties.

Patterning and Etching: The conductive traces are created using a process called etching, where the copper foil applied to the substrate is selectively removed to leave behind the desired circuit pattern. In some cases, the traces are printed using a process called screen printing, but etching is more common for precision applications.

This Is How to Get Your Home Ready for 5G Wi-Fi

Summary

  • Not all devices are compatible with 5G Wi-Fi. If you can, test this out before committing to a contract.
  • Check the 5G coverage in your area, as it can vary and might not be as comprehensive outside major cities.
  • Experiment with router placement for optimal signal, and expect variable speeds.

5G Wi-Fi is a fantastic home networking option that lets you use the internet without a landline phone or other wired connections. However, you’ll need to take a few steps to make sure your home is ready for a 5G Wi-Fi connection.

5G Wi-Fi refers to a router that uses an incoming 5G cellular connection and broadcasts a 2.4GHz and 5GHz Wi-Fi signal. Your devices don’t need to be 5G-ready to use a 5G Wi-Fi router.

Check 5G Coverage in Your Area

Despite the rapid deployment of 5G around the US, coverage isn’t as comprehensive as it could be. Most major cities now boast very good 5G coverage, but this can change as soon as you go somewhere even a little bit rural.

You probably already have an idea of what 5G is like in your area based on the signal you get on your smartphone, but most different carriers offer maps showing their 5G coverage. You could also use a tool like nPerf’s 5G coverage checker to compare some different carriers.

Consider Where to Place Your 5G Router

The position of your 5G router can have a massive impact on the signal you receive. However, unlike with a traditional broadband router, you’re not limited by the location of your main phone socket. Don’t be afraid to experiment with a few spots, as some areas of your home may receive better coverage.

Conventional wisdom suggests placing your 5G router off the floor and away from obstacles like walls, doors, or ceilings. A central location in your home away from the kitchen—all the appliances there can disrupt your Wi-Fi signal—is usually your best bet.

Know That 5G Speeds Are Seriously Variable

broadband speed test on laptop
Tapati Rinchumrus/Shutterstock

One of the advantages of home broadband compared with, say, a cellphone signal is that it’s pretty consistent. While you might see some variation depending on the number of devices connected, most people won’t see serious fluctuations in the speeds they get with home Wi-Fi.

5G connections can be much more temperamental, affected by everything from network congestion caused by heavy usage in your area to poor weather conditions.

As more people use 5G on cell phones and at home, networks will need continuous improvement. If 5G Wi-Fi isn’t currently available in your area or isn’t performing well for you right now, that could change in the near future.

Why You Might End Up Wishing for 4G

Your 5G router will prioritize this over a 4G signal. Unfortunately, it might force you onto a weaker, slower 5G connection even when a stronger 4G signal is available.

The extent to which you can configure connections varies from device to device. Be sure to read the fine print and check out other options on the market, like Wi-Fi access points and routers, to see how customizable they are before you make any decisions.

If you cannot get a traditional broadband connection, whether due to installation restrictions or limitations of existing fiber networks, 5G home Wi-Fi can be a lifesaver. It’s also a great option if you want to improve the flexibility of your connection.

Let’s say, for example, that you’re on the road or moving to a new home or apartment. With 5G Wi-Fi, you can unplug your router, take it with you, and get online as soon as you plug it in at your new place. You can’t do that with traditional broadband.

Carriers throughout the US are already promoting 5G Wi-Fi as the future of getting online at home, and it’s easy to envision a future in which this could become the status quo. Just consider all the information above to ensure you don’t regret making the switch.

As TikTok Ban Looms, Duolingo Reports Spike in People Learning Chinese

Unless there’s a dramatic turn of events over the next couple of days, TikTok is going to be banned in the US from January 19. Thankfully, there are some decent alternatives available, but you may need to brush up on your Chinese in order to use one of them.

Suddenly, More People Are Learning Chinese on Duolingo

According to Duolingo’s post on X (embedded below), there has been a sudden spike in the number of Americans learning Chinese.

In fact, the popular language-learning app has witnessed around a 216% growth in new Chinese (Mandarin) learners in the US at the start of 2025 compared to the same time a year ago.

There could be a number of different explanations for this. For example, with corporations spanning continents these days, people in the US could have colleagues in China that they meet with regularly on Zoom. So, what better way to impress than by learning some Mandarin?

However, given the specific timing of this spike in people learning how to speak Chinese, there is a more obvious explanation…

Is the Looming TikTok Ban Fueling The Rise of Mandarin?

In April 2024, US President Joe Biden gave TikTok owner ByteDance nine months to sell up or face a countrywide ban. And with the January 19, 2025, deadline fast approaching, ByteDance is holding firm.

There have been suggestions that ByteDance would be willing to sell TikTok to Elon Musk to avoid the ban. However, that report was soon shot down, and nothing has yet been officially announced.

In the meantime, disgruntled TikTok users in the US are hedging their bets by exploring other Chinese apps that could replace TikTok. The front-runner being a Chinese social media app called RedNote (or Xiaohongshu in Chinese), which stands for “Little Red Book”.

However, RedNote’s default language is Mandarin, and the majority of its users are Chinese. Which may indeed explain the sudden rise in the number of people seeking to learn Chinese on Duolingo for the first time.

For their part, RedNote users are making the most of this sudden interest, with “TikTok refugees” being a trending phrase across the app. And some videos are even teaching Americans moving across to RedNote how to say “TikTok refugees” in Mandarin.

8 iPhone Mail Settings You Should Change Right Now

Apple Mail is a useful app for managing emails on your iPhone, but its default settings aren’t optimized for the best experience. Thankfully, you only have to make a few adjustments to reduce battery, save data usage, and unlock handy features you’ll never want to go without again.

1

Switch Mail From Push to Fetch

By default, the Apple Mail app uses a “Push” setting. This keeps it constantly connected to the email server to retrieve new emails in real-time. While convenient for immediate updates, this feature can drain your battery and network resources. If you don’t need instant notifications, you should switch to the “Fetch” option.

With “Fetch,” the app checks for new emails at different intervals—I’ve found 15 minutes to be a good balance. This reduces the frequency of background checks, conserving battery life and data on your iPhone. To make the switch, open the Settings app, go to Mail > Accounts > Fetch New Data, and toggle off “Push.”

2

Adjust the Fetch Interval

When you change from “Push” to “Fetch,” your iPhone will, by default, fetch new data from the servers only when connected to Wi-Fi and charging. Otherwise, it will fetch data whenever you open the Apple Mail app. However, you can set it to fetch data at specific intervals, like Hourly, Every 30 Minutes, or Every 15 Minutes.

This adjustment reduces the frequency of background checks, saving battery and data while ensuring you receive emails regularly and don’t miss important updates. To set your preferred Fetch interval, go to Settings > Mail > Accounts > Fetch New Data and select the interval that works best for you.

3

Disable Remote Image Loading

When you open an email in Apple Mail, remote content like images, videos, or stylesheets is automatically downloaded from the internet. This can expose you to inappropriate material, allow malicious code to run, and put your email account or device at risk. It also drains your device’s battery and uses bandwidth, and can even inform the sender that you’ve read the email.

You should turn it off to enhance your privacy, security, and iPhone’s performance. To disable remote content loading in the Apple Mail app, open Settings > Mail > Privacy Protection and turn off the toggle next to “Protect Mail Activity.”

4

Modify the Undo Send Delay

We’ve all been there—sending an email by mistake that’s incomplete, contains errors, or is missing an attachment. While Apple Mail allows you to undo sent emails, the default undo period is just 10 seconds, which isn’t enough. Thankfully, you can extend it to 20 or 30 seconds.

By increasing the delay, Apple Mail will keep the undo option visible for up to 30 seconds, giving you plenty of time to retract emails before they leave your outbox. To extend the undo delay, go to Settings > Mail, then select the “Undo Send Delay” option under Sending. Choose either “20 Seconds” or “30 Seconds” and you’re good to go.

5

Customize Your Swipe Actions

Apple Mail allows you to perform several actions using swipe gestures. By default, swiping left archives an email, and swiping right marks it as read or unread.

While you can’t change the default left swipe to anything other than archive, you can add secondary actions like “flag,” “mark as read,” or “move message” and apply them manually after swiping left.

For the right swipe, you can change the action to “flag,” “move message,” or “archive.” If you choose “archive” for the right swipe, the default left swipe action will automatically switch to “Delete.”

To adjust these gestures, open Settings > Mail > Swipe Options. From there, tap “Swipe Right” and “Swipe Left” to modify the actions for each swipe direction.

6

Choose Your Default Email Account

When you add multiple accounts to Apple Mail, the iPhone automatically uses the default email account when sending attachments outside the Apple Mail app. For instance, if you send an image from the Photos app via the Mail app, the default email address will be populated in the “From” field.

If you often have to manually change the “From” field to a different email address, you can eliminate this hassle by adjusting the default account in the Mail settings. To do so, open the Settings app, navigate to “Mail,” scroll down, and tap on “Default Account.”

Now, select the email account you want to use as the default when sending messages from other apps.

7

Update Your Default Signature

Do you see the “Sent from my iPhone” text whenever you start composing an email in the Apple Mail app? This is the app’s default signature. If you’d prefer it not to appear, you can easily update your email signature to include your name, designation, or other relevant details, turning it into a digital business card.

Apple Mail even lets you set different signatures for each account. To update your signature, go to Settings > Mail > Signature. To apply the same signature to all accounts, select “All Accounts” and make your changes.

Alternatively, you can choose an individual account and update its signature separately.

If you prefer not to use a signature, leave the signature box empty, and your emails will be sent without one.

8

Disable Cellular Data for Mail

Apple Mail uses your Wi-Fi connection to fetch data, sync emails, and perform other tasks. If Wi-Fi isn’t available and cellular data is enabled, it switches to cellular data and uses that to perform its operations.

If you prefer to restrict the Mail app to Wi-Fi and prevent it from using cellular data to avoid extra charges, you can turn it off.

To prevent Apple Mail from using cellular data, open the Settings app, go to “Mail,” and toggle off “Cellular Data” or “Mobile Data.” While this will help you save data and avoid charges, you may miss important updates, as your iPhone will only check for new emails and notify you when you’re connected to Wi-Fi.

These are a few examples of how Apple Mail default settings aren’t well-optimized and how adjusting them can improve your experience drastically. If you’ve never made these tweaks, give them a try, but don’t be afraid to change them back if they somehow hinder your overall experience, too.

Want to Watch Super Bowl LIX for Free? Cord-Cutters Have a New Option

Every year, millions of people search for “how to watch the Super Bowl for free.” And with the biggest sporting event on the 2025 US calendar less than a month away, NFL fans now have another way to watch the game for free.

Super Bowl LIX Is Available for Free on Tubi

With the NFL Playoffs in full swing, FOX Sports has announced that the main event, Super Bowl LIX, will be available to stream live, and for free, on Tubi. Giving cord-cutters (and those who have never subscribed to cable) another way to watch the big game.

In a press release, FOX announced that, as well as the Super Bowl LIX takeover on its linear channels, the game will be streamed live on Tubi on February 9. For the uninitiated, Tubi is the FAST (free, ad-supported television) platform which FOX acquired in 2020.

Super Bowl LIX will be broadcast live and in 4K on Tubi, as well as on FOX, FOX Deportes, Telemundo, and other digital NFL properties. As well as the game itself, Tubi will be broadcasting its own pre-game show focused on the “celebrity, fashion and culture” behind the Super Bowl.

As the Super Bowl always airs on network TV, NFL fans have never needed to subscribe to watch it. However, watching it on Tubi is potentially the easiest option offered thus far, as Tubi is available on Android, iOS, most smart TVs, and other devices such as games consoles.

A Good Way of Getting More People on Tubi

While it may seem rather generous of FOX to stream Super Bowl LIX for free on Tubi, doing so isn’t a completely selfless gesture. While you don’t need an account to watch regular Tubi, you will need an account to watch the Super Bowl on the platform.

While a Tubi account is free and easy to set up, this gives FOX an easy way of getting more registered users on Tubi. With the network likely hoping that people will sign up to watch Super Bowl LIX, but then stick around to watch the other programming available on it.

The New Sticky Notes App on Windows 11 Is Just What You Need

There are plenty of note-taking apps on Windows, but the native Sticky Notes app has always been my go-to for jotting down thoughts on the fly. But while this productivity superstar remained the same for years, a mid-2024 Sticky Note update changed the game.

What Is the New Windows Sticky Notes App?

You’ve probably used the original Windows Sticky Notes app. It first appeared in Windows XP Tablet Edition in 2002, and it’s become the go-to place to jot down notes, ideas, and so on. Over the years, it’s gained more functionality, such as the ability to sync your notes to a OneNote account, but it has remained roughly similar since then. Still, it’s one of the ultimate productivity tools on Windows.

The new, updated Sticky Notes has a better design, a user interface, deeper integration with OneNote, and more features and formatting options that let you do more. It’s also easier to access with the Start menu being an entry point, but searching for “Sticky Notes” in the Start menu will bring up both the new and the old apps. You can also access your Sticky Notes on all your devices regardless of what version you’re using.

Windows Sticky Notes Best New Features

One of my biggest complaints about the old Sticky Notes was the lack of a user interface. Anytime you opened it, the last note you worked on popped up, requiring three extra clicks just to get to the notes list.

It Finally Gets a Good UI

​​The new version, however, comes with a much better interface, which opens a notes list by default. There’s an option to dock this interface alongside whatever app you’re using.

New Sticky Notes app docked alongside Arc on Windows

Your newest notes will appear on the top, or if you’re using an application the note was associated with, that particular note will appear at the top instead. It’s a great way to quickly resume working on something you left behind without fiddling around. You can also search for a particular note—extremely useful when you have dozens of them in a list with no way to tell them apart.

The notes themselves are visually more appealing. Some additional features make them more useful, and the whole experience now feels much faster and more in line with the modern Windows 11 aesthetic than the old, clunkier interface.

Pin on Top

Besides the bold, italics, underline, and strikethrough text formatting, bulleted lists, and image support that the old version has, the new Sticky Notes bring mostly quality-of-life features that make working with the app easier.

For starters, you can now pin your Sticky Notes to the desktop, and they’ll remain visible regardless of your active Window. You could use Microsoft PowerToys or other third-party tools to pin your notes, but this feature should have arrived much earlier. They’re called Sticky Notes, after all.

Sticky Notes on Windows 11 pinned on top of another

With the new version, you can just click the pin icon in your note’s top bar, and you’re good to go. The note will now remain visible and exactly where you left it on your screen, regardless of what you’re doing on your PC.

Better Screenshot Handling

While the old version allowed you to paste an image into the note, the newer versions handle images better. There’s a dedicated Screenshot button in the new Sticky Notes UI that lets you take a screenshot of whatever program you’re using and copy it into a new note. This will also add the program or website as a source to the note.

You also have the option to open an image from inside a note into a bigger window, copy it, or copy the text inside an image to quickly extract any data without having to sit down and manually type it out.

Notes Now Include the Source of the Data

Another neat feature is that new notes include the source of your data. For example, if you created a note when your browser was open, that note would now consider the browser as its source.

New Sticky Notes app on Windows 11 showing sources

It’d be far more useful if it contained the actual link to the source of information I wrote in my note, but it has still come in handy at times, especially when sifting through notes. Additionally, if you captured a note or image from a website, you can click the source to open it quickly—provided the app captures the source correctly.

Relevant Notes Automatically Rise to the Top

Notes associated with certain programs automatically rise to the top of the notes list when you open them with the program running in the background. If you create a note with your browser or Microsoft Office program open in the background, the notes will automatically be the first to appear. This is a great way to ensure you can find relevant information quickly.

For example, for recurring meetings, you can take notes on the same page, and your past notes will automatically rise to the top when you open the new Sticky Notes app during the next instance of the meeting series. Another useful scenario is when I’m learning something from YouTube or a website and use the app to take notes. When I’m back on the same site, relevant notes automatically rise to the top.

Which One Should You Use?

You should be using the newer Sticky Note version. The old version is pretty close when it comes to features, and I have been using it for years. However, the ability to search for notes, automatic source tagging, better image handling, and a better overall design are awesome features you won’t find in the old app.

Both app versions are available on Windows under the same name, except the newer versions are labeled “(new)” to help users quickly identify the right version. While you may not be giving up a lot of functionality using the old version, the new one is a much better choice overall, as it gives you important features and options that make it one of the best native Windows features. However, there are also third-party sticky note options worth checking out.

Change This Setting to Avoid This Google Calendar Spoofing Attack

Your Google Calendar is under attack from hackers spoofing email headers to access your private information. This phishing campaign could affect up to 500 million users, with sensitive personal and corporate information up for grabs—but you can stay safe by changing a single setting.

How the Google Calendar Spoofing Attack Works

The Google Calendar phishing campaign was first discovered by cybersecurity experts at Check Point Software.

Attackers send an invite that looks like a typical one from Google Calendar. To make it believable, they modify the email headers of the invite, making it look like it was sent by a legitimate company or a person known to the target. Most invites look identical to the ordinary Google Calendar invite, while others use a custom format.

The link in the invite takes the target to a phishing page where victims are made to complete a fake authentication process, share personally identifiable information (PII) or corporate information, and in some cases, even share payment details. Pilfered information is used for financial scams, credit card fraud, identity theft, and other fraudulent activities.

After realizing that Google’s email scanning feature was flagging these malicious calendar invites, attackers modified the campaign and started using Google Forms and Google Drawings. Sending the calendar invite file (.ics) with a link to Google Forms or Google Drawings allowed them to sneak past Google’s security scans.

After users open the Google form, they are made to click on another link that leads to the phishing page, disguised as a fake reCAPTCHA or support page.

Change This Google Setting to Protect Yourself

Google recommends changing the “known senders” setting in Google Calendar to protect against this spoofing and phishing attack.

  1. Click the Gear icon on the top right of your Google Calendar, then click Settings.
  2. On the left you’ll see the menu, click Event Settings. Click Add Invitations to My Calendar to access the drop-down menu.
  3. Now click Only if the sender is known.

Changing this setting will filter all the invitations added to your calendar to include only those from people in the same company you work for (with the same domain), people in your contact list, or people you’ve interacted with before. You’ll also receive alerts when you receive an invite from someone not on your list or you haven’t communicated with before.

As with all these attacks, avoid clicking on clicks if you don’t know the sender. Even if the sender is someone you know, it’s best to reach out to the person to double-check first, especially if the invite is for an unexpected event or meeting.

I Bought a Wireless Mouse For My Laptop, and I’ll Never Use the Useless Trackpad Again

Are you tired of your computer trackpad not highlighting what you want, moving too fast, or not feeling too comfortable? Switching to a wireless mouse might be a good idea. I made that decision, and I’m never going back.

1

Editing Photos and Videos Is Much Easier

I edit thousands of photos each month and delve into video editing, so my hands must be comfortable. However, my trackpad sometimes overdid important edits, such as using the Tone Curve tool in Lightroom, which significantly impacted the appearance of my visuals.

Danny Maiorca/MUO

The trackpad also felt uncomfortable during prolonged editing sessions, prompting me to look for an alternative. Buying a laptop stand exacerbated this, as editing with the trackpad became nearly impossible. Since switching to a wireless mouse, my hands have felt much better.

2

I Can Use My Mouse on Multiple Devices

Besides using my iPad to access Lightroom for mobile, I also use my device for research (during which I like highlighting a lot). Using these tools with my touch screen is tedious.

My wireless mouse easily connects to my MacBook and iPad via Bluetooth, meaning I can browse precisely how I want to. I do not miss accidentally highlighting too much or too little text on my tablet.

An Image of a iPad and a Wireless Mouse
Danny Maiorca/MUO

Many wireless keyboards are also compatible across multiple operating systems. While I probably won’t give up my MacBook for a Windows laptop, knowing that I can move my wireless mouse across is at least comforting.

3

My Wireless Mouse Doesn’t Make a Noise When I Use It

I was initially concerned that my wireless mouse would be noisier than a laptop’s trackpad, but I’ve been pleasantly surprised. While I can slightly hear my mouse when moving it around on the mousepad, it’s otherwise silent.

In contrast, I can always hear my hand moving across my computer trackpad. It sounds like a hand gliding across metal, which can sometimes be distracting. While the trackpad’s clicking sound is admittedly nice, I much prefer the sound of silence.

4

The Wireless Mouse Feels More Comfortable in My Hands

My wrists often hurt after using my trackpad for extended periods, and I sometimes feel my hands burning a bit after resting them on the side of my computer. However, I don’t have either of these problems with a wireless mouse.

I love how the mouse naturally fits my hand shape. Moreover, the clickable buttons on the side are much better than right-clicking on a Mac and pressing the Control button.

An image of a person using a wireless mouse
Danny Maiorca/MUO

My wireless mouse also feels consistently good, regardless of whether my MacBook is on its laptop stand or desk. Conversely, the trackpad felt increasingly uncomfortable at an elevated level.

Before buying my wireless mouse in 2024, I hadn’t used a computer mouse of any kind for seven years. While I’m accustomed to scrolling on a Mac, I forgot how much easier it is to go up and down a webpage with a mouse.

I’m happy I can now use the scroll wheel to navigate a website. Trackpads are ideal for jumping from top to bottom (and vice versa), but I always find them jumpy when scrolling slowly. This was despite customizing my Mac trackpad speed.

Admittedly, it took me a while to learn how to quickly scroll and highlight when connected to my computer. This wasn’t an issue on my iPad. Nonetheless, I’m still happier with my mouse now.

6

I Have Better Posture

I’ve been writing online for almost 13 years, and in 2024, I realized that my old computer use had affected my posture. So, I bought a wireless mouse to see if I could fix these issues (or at least prevent them from occurring in the future).

My suspicions so far have been proven right. Whereas I had to lean over to navigate on my trackpad, I generally sit up straighter when using my wireless mouse. I can also move my mouse the exact distance that feels comfortable from my body.

After switching to a wireless mouse, I cannot see myself ever using a trackpad to navigate my computer again. The wireless mouse is better ergonomically, and scrolling is much easier. It’s also nice that I can use it with my iPad.

The Legacy to Take You Places Continues

This article is sponsored by Western Digital. Product choices and opinions expressed are from the sponsor and do not reflect the views of MakeUseOf editorial staff.

There’s a good chance you know about WD® My Passport®, a trusted and preferred portable drive of millions of tech enthusiasts, professionals, and creative individuals worldwide. You probably use one to back up and help protect precious memories, carry important files, recordings, and data on your work trips, or as portable storage for the music you can’t live without.

It’s been 20 years since Western Digital, a global leader in data storage devices and solutions, launched WD My Passport in November 2004. And now, Western Digital is celebrating two decades of data on the go of its most iconic drive with a special anniversary edition: WD My Passport Ultra, 20th Emerald Anniversary Edition.

An empowering blend of sleek compactness, metallic robustness, expansive data, and legendary portability, the WD My Passport Ultra Emerald Edition is crafted to store what matters most to you and take you places.

Nothing short of a collector’s item, you can now own this milestone anniversary edition by purchasing at the Western Digital Store and authorized Western Digital retailers, e-tailers, and distributors.

WD My Passport Ultra, 20th Anniversary Edition

A tribute to Western Digital’s most popular drive, the WD My Passport Ultra, 20th Anniversary Edition is built to set you free to work, play, and enjoy anywhere. Sporting a sleek form with a striking emerald finish and a durable metal body, it’s perfect for backing up your life with expansive capacities of up to 6TB*. Use it across devices and platforms with its USB-C™ connection and enjoy the included Acronis® True Image™ for Western Digital¹, password protection, and 256-bit AES hardware encryption.

* 1TB = 1 trillion bytes. Actual user capacity may be less depending on operating environment.

1. Available for Windows 10+ and macOS 11+ devices only. Download and installation required. Terms and conditions apply. User account registration may be required.

WD My Passport: The Portable Game-Changer

Things were different before 2004, and not easy for office goers, professionals, and globetrotting creators traveling for work. There were limited options for transporting important digital files for intercity or international client meetings or assignments. Data transfer meant having to sacrifice a power outlet and downtime.

Then in November 2004, WD® My Passport® was launched, and it changed the game as an innovative streamlined solution. Shaped and sized like a passport, it was a handy and easily portable drive designed to offer a large amount of storage for many digital files, including videos, music, photos, and documents.

The original WD My Passport drive offered up to 40GB* storage, a significant amount 20 years ago. Today’s WD My Passport Ultra and the special My Passport Ultra, 20th Anniversary Edition are the world’s highest-capacity 2.5-inch portable hard drives with up to 6TB* storage.

It’s a whopping 150 times the storage amount of the original My Passport, reflecting Western Digital’s innovation and commitment to keep evolving My Passport to meet your ever-growing needs as a modern digital consumer.

You can gauge the impact and worldwide acceptance of WD My Passport drives by the data storage they have provided to users worldwide: approximately up to 180EB (exabytes)* of data storage!¹. That’s equivalent to up to 18 billion hours of HD video, up to 46 trillion photos, or up to 35 trillion songs^.

* 1EB = 1 quintillion bytes. 1TB = 1 trillion bytes. 1GB = 1 billion bytes. Actual user capacity may be less depending on the operating environment.

1. Based on internal estimates.

^ Hours of HD video: Based on the 1920×1080 Full HD @ 30fps, 145MB/min, DV format. Photos: Based on a 13.75 MP, JPEG image with an average file size of 3.5MB. Songs: Based on MP3 songs with an average file size of 4.6MB, a bit rate of 128Kbps, and an average duration of 4 minutes each. Actual user results will vary based on bit rate, resolution, file compression, file format, file size, host device, pre-loaded files, settings, software, and other factors.

WD My Passport Ultra, 20th Anniversary Edition

WD My Passport Ultra, 20th Emerald Anniversary Edition

Take a look at the WD® My Passport® Ultra, 20th Anniversary Edition. It radiates a celebratory vibe from all angles and aspects. Sleek, sharp, and compact, this 0.55-inch slim drive is enclosed in the strength of metal and offers up to an expansive 6TB* storage, seamless USB-C™ compatibility, and cutting-edge software.

This unique My Passport Ultra, 20th Anniversary Edition carries forward the legacy of convenient, reliable, and lasting performance that discerning users like you have come to expect from My Passport. It is a striking and advanced masterpiece of tech, a symbol of 20 years of storage and innovation of the My Passport drive that around 130 million individuals use to stay productive and entertained every day¹.

You’ll love flaunting this My Passport Ultra, 20th Anniversary Edition featuring a beautiful emerald green finish. For Western Digital, this emerald hue signifies the tradition of loyalty, peace, and security. Combined with its empowering tech, the My Passport Ultra, 20th Anniversary Edition is perfect for stylishly backing up what you love and all that matters most in your life.

Sleek Metal Design: Stunning and Strong

WD My Passport Ultra Emerald  Edition With USB-C Cable

With a striking bold emerald finish complemented by its anodized metal form, the My Passport Ultra, 20th Anniversary portable hard drive is the perfect balance of toughness and style. Like all My Passports, it’s slim and compact enough to slip comfortably in your pocket or messenger bag.

Whether you’re shooting the sights and moments on a family road trip, working on 3D presentations, or recording your music or creations, the WD My Passport Ultra, 20th Anniversary Edition will be the dependable partner to carry your content on the move.

Seamless USB-C Compatibility: Ready for Your Devices

My Passport Ultra 20th Anniversary Edition Connected to a Phone

Whether using Windows® PC, Mac, mobile phones, or tablets, enjoy using this WD My Passport Ultra, 20th Anniversary Edition across all your USB-C™ devices.

So if you’re a travel vlogger exploring the world, an executive heading to an overseas conference, a wildlife photographer, or the family’s official holiday journalist, back up and share your work and memories effortlessly with this portable drive.

Expansive Capacity: Store More of What Matters

You can choose from the 2TB* version, or the 6TB capacity*, the world’s highest in a 2.5-inch portable hard drive.

There’s enough space to store your family albums, music collection and music videos, holiday videos, important documents, and more. Reliably carry it wherever you are heading to: WD My Passport Ultra, 20th Anniversary Edition is designed and built to take you places, the legendary My Passport way.

Simple and Secure Backups: Help Stay Protected Against Ransomware

WD My Passport Ultra Emerald Edition  Connected to a Laptop

It’s never been easier scheduling backups. Put the included Acronis® True Image™ for Western Digital software² to task, and enjoy automated backups of your important files and data. So, you’re free to multitask or do what you love.

This enhanced software also helps fortify your important applications and protect your computer system against data loss caused by ransomware attacks.

Password Protection: Enjoy Peace of Mind

Help prevent unauthorized access and use of your precious memories and confidential data with password protection using Western Digital’s included software.

Moreover, you can add an extra layer of security with the built-in 256-bit AES encryption. Whether you’re home or away, rest assured that your WD My Passport Ultra, 20th Anniversary Edition helps to safeguard what matters most.

A Worry-Free Warranty: The Western Digital Promise

Enjoy the benefits of the trusted Western Digital 3-year limited warranty³ and total peace of mind.

Like other WD My Passport devices, the My Passport Ultra, 20th Anniversary Edition is thoroughly tried and tested to offer you years of hassle-free operation.

Designed With Recyclable Materials: Planet Friendly

WD My Passport 20th Anniversary Edition on a Table

WD My Passport Ultra, 20th Anniversary Edition drive has an enclosure composed of more than 50% post-consumer recycled plastic. Plus, the packaging is made with over 50% post-consumer recycled pulp and is fully recyclable.

The WD My Passport Ultra, 20th Anniversary Edition is also a smart way to go green.

Go Places With the WD My Passport Ultra, 20th Anniversary Edition

WD My Passport’s legacy of taking you places continues with the unique and stylish My Passport Ultra, 20th Anniversary Edition. Go where your work and adventures take you with this trusted companion.

The WD My Passport Ultra, 20th Anniversary Edition is now available at the Western Digital Store and authorized Western Digital retailers, e-tailers, and distributors. Get the 2TB* version for $89.99 MSRP and the 6TB* drive for $204.99 MSRP.

* 1TB = 1 trillion bytes. Actual user capacity may be less depending on operating environment.

1. Based on internal estimates.

2. Available for Windows 10+ and macOS 11+ devices only. Download and installation required. Terms and conditions apply. User account registration may be required.

3. The term of the limited warranty depends on the country in which the product was purchased. Visit our website at http://support.wdc.com/warranty/policy.asp for the detailed terms and conditions of our limited warranty and for a list of the specific countries in these regions.

Wrapping Up a Microsoft Teams Meeting Will Be Harder Than Ever Thanks to This New AI Tool

Most meetings can be emails. At the very least, most meetings can be a whole lot shorter. Seemingly rejecting that concept is Microsoft, with its new AI feature for Microsoft Teams that suggests follow-up questions to “keep the conversation going.”

Microsoft’s Copilot Will Prompt Follow-Up Questions During Teams Meetings

Much like Google’s Gemini, Microsoft’s Copilot is an “everyday AI companion,” according to Microsoft Support, intended to simplify tasks so that you can focus on meaningful work over menial work. While efficiency is the goal, Microsoft’s latest Copilot update for Teams, its virtual meeting app for Windows and Mac, may actually encourage longer meetings.

Announced via Microsoft 365 Roadmap, the Copilot sidebar will soon suggest follow-up questions automatically during a Teams meeting:

“When Copilot in Teams Meetings responds to a prompt, it will also suggest follow ups to keep the conversation going. These questions will generally be based on the response it gave prior, and could be related to honing in on a particular topic, asking for more details, or asking what a particular person said during the meeting.”

According to Microsoft Support, Suggest follow-up questions already exists as a Copilot prompt in Teams. However, the AI assistant will soon produce them automatically after any response. So, if you ask Copilot to clarify a team member’s perspective or list action items, it will both respond to your request and supply thoughtful follow-ups.

The Copilot update is still in development and is set to roll out in March 2025.

The Role of AI in Meetings

If virtual assistants butting into your meetings sounds familiar, it’s because Microsoft Teams isn’t the only app touting its AI-powered sidebar. Launched in October 2024, Zoom’s AI Companion 2.0 offers in-meeting tools to help you understand what’s being discussed. Like Zoom’s companion, Microsoft’s Copilot produces a transcription of the meeting, and can even help catch you up if you’re running late.

Ideally, AI meeting tools can ground you in a meeting and clarify next steps. At best, they ensure meetings aren’t actually a waste of time. However, they could also encourage more multitasking. After all, if your AI companion is giving you the follow-up questions to ask, you don’t actually have to be present to synthesize the information for yourself.

To me, these tools risk enabling absent-mindedness. We’re likely to end up in the same place in which we started: did this meeting really need to happen, or could this have been an email? With meeting transcriptions, the line between a meeting and an email is increasingly faint.

That said, not all meetings are created equal. Hopefully, Microsoft’s latest Copilot update actually extends meetings in a meaningful way. If a follow-up question encourages colleagues to get the clarity they really need from one another, then maybe that beats an email after all.

How I Use My Stream Deck to Control Zoom and Discord Calls

Summary

  • Stream Decks reduce friction by providing quick access to features in video calling apps.
  • Download free plugins & profiles from Elgato Marketplace for Stream Decks to control conferencing apps.
  • Use a free Zoom profile preset and Discord plugin to access shortcuts, but configure global hotkeys cautiously.

Most people buy Elgato Stream Decks for live streaming, but they can do much more. I’ve turned mine into a control hub for Zoom classes, work meetings, and Discord hangouts—streamlining every call.

You Have to Download Plugins and Profiles First

Andy Cormier / MakeUseOf

Stream Decks lack native support to directly control video conferencing apps without free plugins from the Elgato Marketplace. Discord’s plugin is completely free and available on both macOS and Windows, and it offers a huge variety of features, ranging from personal muting and deafening, push to talk, quick-joining voice channels, and volume controls for other speakers in a call.

Unfortunately, the Stream Deck Zoom plugin which directly interfaced with Zoom’s API has been removed and replaced with a plugin requiring paid software, MuteDeck, supporting more than only Zoom for a $15 price. I dislike removing free tools in lieu of paid alternatives if this is by the same developer, but thankfully, a free alternative for Zoom shortcuts remains available.

Developer SideShowFX created a free icon pack and profile preset for Zoom with buttons and shortcuts for macOS and Windows, supporting both the standard Stream Deck and the XL option.

You can download this profile, add it to your Stream Deck by double-clicking the download and configuring in Elgato’s software, then have a full suite of Zoom shortcuts.

The profile covers a huge variety of shortcuts, with features as niche as scheduling meetings. Although, if you’re a Zoom power user, there are plenty of other advanced features to try. Beyond setting it up, I recommend an additional configuration step: enabling global hotkeys.

Zoom Global Hotkeys Setting enabled on mute
Andy Cormier / MakeUseOf

In Zoom, open Settings, go to Keyboard shortcuts, then click the checkboxes under Enable global shortcut for the commands you wish to use, such as toggling mute. This lets you use keyboard shortcuts and thus the Stream Deck shortcuts, whether or not Zoom is your selected window.

Be careful when enabling global hotkeys, as you might have an accidental match between hotkeys on Zoom and another software, leading to unintended mishaps. Check your Zoom keyboard shortcuts and compare them with other software shortcuts to prevent mishaps if global hotkeys are enabled.

This profile, icon, and hotkey scenario is less ideal than directly interfacing with Zoom’s API as with the defunct Zoom plugin. Still, it beats creating these shortcuts by hand and without icons.

More Features Are More Accessible With Stream Decks

Elgato Stream Deck with Discord plugin icons and finger reaching for one.
Andy Cormier / MakeUseOf

The benefit of using a Stream Deck to control your video calling apps is reduced friction. For example, you neither need to memorize keyboard shortcuts to quickly access features, nor do you need to spend time fumbling around to click on inputs like muting your audio.

In grad school, half of my classes are online via Zoom, and my Stream Deck’s control over simple Zoom features like toggling mute or my webcam has definitely helped me engage better in class. If it’s easier to unmute and participate, I am more likely to! The right Stream Deck for you varies by your budget and needs, but even the smallest option provides convenient access to features.

The Stream Deck Streamlines My Call Experience

In addition, these commands make it easier to access lesser-used or more difficult-to-access features, such as quickly setting a cloud or local recording on Zoom or playing a soundboard effect on Discord.

Using a Stream Deck makes using every feature on video conferencing apps easier, allowing you to use them all better. Even if you don’t stream—like I don’t anymore—I highly recommend Stream Decks to anyone looking to streamline their workflows in conference calls and beyond.

Why Photoshop Is More Value Than Canva Pro for Creatives

Canva’s simplicity makes it the preferred tool for many. Photoshop, on the other hand, isn’t for the faint-hearted—it’s feature-packed and has a steep learning curve. But it can provide more bang for your buck.

1

The Price Isn’t That Different

The Canva Pro plan, priced at 12.99 USD per month, seems an excellent value for creatives. If you buy the annual plan, you can save money at a reduced price of 119.88 USD, about 10 dollars a month.

The Canva Pro plan unlocks dozens of tools. It lets you access many premium stock photos, brand kits, design elements, templates, and the much-loved magical background remover. You can also export your files to high-quality formats.

Photoshop-Home

While these are good to have, I prefer Adobe’s Photography plan. It costs only 2 dollars more, at 14.99 per month. To save money, you can buy the annual plan for 120 USD, the same price as Canva’s Pro account billed annually. I love the photography plan because it lets me edit photos with Lightroom.

Canva’s basic photo editing leaves much to be desired. It is suitable for quick touch-ups but not for extensive editing, which is a no-go for me as a photographer. With the photography plan, I open the photos in Lightroom, edit them, and then take them to Photoshop to design posters, flyers, and more. Canva remains my go-to for quick tasks, but even then, I rely on its free version.

2

More Creative Freedom

​​​​​​​Canva can be a handy tool for quickly creating professional-looking designs, but it’s not enough if you have a particular creative vision. For instance, you only have the option to write on a curved path in Canva. With Photoshop, your path choices are limitless.

Photoshop-Layers

Although you have a ton of fonts to choose from, you’re limited to basic effects in Canva. The only way to get a specific effect is to select a font that looks similar to what you want.

If you have worked with the fx option in Photoshop for your texts, you know exactly how much Canva’s text effects fall short.

You have much more control as a designer with Photoshop. You can make your text look shiny and 3D or add shadows and outlines as precisely as you want.

The most annoying issue I find is the inability to hide the layers in Canva. Sure, there are workarounds, but that takes too many steps. I want something quick and straightforward. Keeping a design element hidden in case you change your mind later is incredibly helpful.

In Photoshop, all it takes is one click. If you’re a serious designer, you know the importance of this. You need the flexibility to hide and unhide layers as you bring your vision alive in your projects.

3

A Reliable Desktop Experience

​​​​​​​Canva is a web-based application, so all you need is a computer and an internet connection. While this is great for occasional designing, you may benefit from dedicated desktop-based software and a solid workflow.

Canva-Offline-Page

I enjoy working with Photoshop everywhere, from cafés to libraries to the subway in my city. Although there is always Wi-Fi or my personal hotspot, I don’t have to worry about laggy networks or unexpected disruptions while traveling. Having software means having a powerful computer with enough processing power and storage, but as a creative, you probably already have one.

4

Adobe’s Seamless Ecosystem

​​​​​​​Canva is a standalone application, while Photoshop is one of Adobe’s many programs. So you can seamlessly integrate your workflow with the different software.

For instance, I edit my photos in Lightroom and transfer them straight to Photoshop. There’s no need to export images. Once I finish the edits and save, the edited images will show up in Lightroom automatically. Even though I’m moving between software, the process is simple and quick.

Lightroom-Photoshop-Integration

The integration becomes even more powerful if you use Adobe’s other tools. A Photoshop file (.psd) can be linked directly to InDesign, Premiere Pro, or After Effects. Updates made to the original file are instantly reflected across all projects. This interconnected ecosystem is a massive advantage for those juggling multiple tools..

5

Scope for Advancing Creatively

​​​​​​​Most of us often prefer to keep things simple. Using Canva lets us become designers without much sweat, which is fine if you design things sporadically. In that case, a free Canva account is all you truly need.

Canva-Templates

Using an industry-standard tool like Photoshop is the way to go if you’re serious about design and want to improve your skills. Your money is better spent on the Adobe plan than a Canva Pro account.

Learning graphic design with Photoshop will help you understand the basics better. For example, the templates in Canva make life easier, but they don’t help you visualize designs. But, Photoshop forces you to think critically about design principles like alignment, hierarchy, and white space. I often encourage my students to use templates as inspiration and design on a blank page.

Moreover, it’s easier to transfer what you have learned to other tools like Illustrator and InDesign. When you learn one Adobe app, you can learn other apps quickly. Editing videos will be much easier—because Adobe Premiere Pro is way less complicated once you master Photoshop. The same goes for Adobe After Effects too.

6

Photoshop Helps You in the Long Run

Both programs are priced more or less similarly and are excellent value for money. However, learning slightly complex software like Photoshop will give you the confidence to pursue graphic design more seriously.

Photoshop can be intimidating for a beginner, but with practice, it gets easier. Setting time aside every day for active practice can help you familiarize yourself with the various tools and learn the necessary shortcuts. In the meantime, continue using the free Canva account for your quick designs and as a means of inspiration.

At the end of the day, these are just tools, and the actual designer is you. So, spend your time and money growing your creative skills rather than focusing too much on the latest bells and whistles.

These Are the 5 Best Streaming Platforms for Live TV

With how accessible streaming platforms are, it’s no surprise that you can get live TV channels now. You could be binging your favorite show, only to pop in a moment later to see your favorite sports team play.

1

Hulu + Live TV

Hulu + Live TV is quite an extensive package, so much so that it’s arguably the ideal choice if you have a family with diverse tastes. Not only are you getting access to Hulu, you get a subscription to Disney+ and ESPN+. Just having Hulu and Disney+ bundled is a good deal, but ESPN+, too? It’s even sweeter.

That’s just the first half, though. The second half of the deal is a long list of over 95 live channels, including news, sports, and entertainment. For example, there’s ABC, CBS, Fox, NBC, CNN, Cartoon Network, BET, FX, NFL Network, FS1 and FS2, Lifetime, PBS and PBS Kids, Nickelodeon, Paramount, and more.

In addition, you have access to DVR features and unlimited cloud storage for said content. Even if you know you’re going to miss your favorite show, you can record it ahead of time.

2

Peacock

Peacock subscription sign up page.

If you’re a deal-hunter, Peacock is one of the cheapest ways to jump into a streaming service and get live TV channels at the same time, despite Peacock raising its prices. Even with Premium Plus—the no-ads subscription—it’s just $14 monthly. However, if you’re a student or teacher, you can get it for a fraction of the price ($3 and $4, respectively).

In terms of content, we’re talking Hallmark, NBC, Sky News, TODAY All Day, NBC Sports, Premier League TV, WWE, GolfPass, NFL Wild Card, Nascar, IMSA, and even Sunday Night Football.

Of course, Peacock is a streaming platform, and there’s also a bunch of content to stream; in fact, it’s the home of The Office, and who doesn’t love binging that?

3

YouTube TV

A list of the live tv channels available on YouTube TV.

While DirecTV may have more channels than YouTube TV, the latter is by no means a slouch. In fact, it’s on par with Fubo, which has over 100 live TV channels to pick from. What YouTube TV has over the other streaming services here is customization, and it has a lengthy 21-day trial period.

For starters, just the base plan has over 140 live TV channels, including the very relaxing Zen Channel. It includes a mix of major news channels and entertainment, like CBS, MSNBC, Cartoon Network, Disney, Sports Network, ESPN News, and many more. YouTube TV has ESPN, FS1 and FS2, and CNBC Gold, too.

The real kicker is the add-ons, where you can dig into more niche live TV channels, such as Sports Plus, Spanish Plus, Filipino Plus, and the Spanish Plan. That’ll give you access to channels like AcornTV, BET+, Cinemax, Gaia, NFL Redzone, and Curiosity Stream.

4

DirecTV

A list of the live tv channels available on DirecTV.

DirecTV is what you want to lean into if you don’t want to be left out of anything, more or less. There are four packages—Entertainment, Choice, Ultimate, and Premier—and each one adds more and more channels, from 90+ to 185+. It’s an embarrassment of channels.

Even with the cheapest plan, you’re still gaining access to FX, Disney, CNN, HGTV, ESPN (and ESPN2), as well as local channels and the Sports Pack. However, if you want regional sports networks, you’ll get more from Choice and onward. That’ll add channels like Bally Sports, NBA TV, and ESPNews.

The Ultimate plan offers the most, of course, like NHL Network and STARZ Encore, but regardless of your subscription, you can also tack on extra channels, just like you can with YouTube TV. It’s one of the few streaming platforms (on this list) that offer international channels, like Cine Mexicano. It gives a good bit of wiggle room if, say, you just want the Entertainment plan with a few added sports or movie channels thrown in.

5

Fubo

Live tv channel lineup available on Fubo

Fubo should be your main consideration if you want to emphasize sports. You get access to MLB, NHL, NBA, and NFL and can catch up on the happenings in the leagues via ESPN. Fubo offers add-ons, too. There’s NFL Redzone, Sports Plus, NBA League Pass, Adventure Plus, and International Sports Plus if you also enjoy soccer. More importantly, if Fubo airs channels your teams are playing, you’ll be able to DVR the games for later.

Fubo has plenty of popular live television channels outside of sports, too. For the kids, there’s Nickelodeon, Nick Jr., and Disney. You can kick back with music channels like MTV, VH1, and CMT. One channel that does stand out as a bit of an oddball is Crunchyroll. It’s a welcome site if you happen to enjoy anime.

Regardless of your choice, one of these streaming platforms will be the perfect fit. Fubo is heavy on sports; DirecTV offers the most; YouTube TV is easily customizable; Peacock is affordable, and Hulu + Live TV has multiple streaming platforms wrapped into one. It’s best to make a list of the channels you can’t live without, then go from there.

The OnePlus 13 Has Launched, but You Should Buy This Phone Instead

The OnePlus 13 has a new design and, for the first time, a complete package that I can’t fault—more so if you’re getting an upgrade after two years. However, it costs $899. So, if you want to save a little, I think the OnePlus 12 is the one to buy, and here’s why.

What’s New With the OnePlus 13

Before I dive into why the OnePlus 12 is a good fit for many, for context, here’s a breakdown of what’s new with the OnePlus 13.

First is the refined design. The OnePlus 13 has a sleeker and more squared-off look, contrasting to the OnePlus 12’s general shape. This means the curved display is gone, replaced by a flatter screen with slight curves at its edges. OnePlus even replaced the previously used Gorilla Glass Victus 2 with its in-house Ceramic Guard.

The flagship is lighter this year. It weighs 10 grams less than the OnePlus 12—210-213g against 220g on the latter—and features two material choices for its back: vegan leather in blue or glass in black or white. The glass models weigh a tad more.

Coming to the hardware packed inside, the OnePlus 13 ships with Qualcomm’s Snapdragon 8 Elite—a powerful processor that brings a 45% uplift in processing power and improvements to the camera processing. In addition, OnePlus has revamped its camera setup to achieve better results. Lastly, its battery gets a boost to 6,000mAh, and there’s an IP69 rating now.

A Discounted OnePlus 12 Offers Better Value

An image showcasing the OnePlus 12 placed on a car dashboard
Aryan Surendranath / MakeUseOf

With all these changes, it might seem like the OnePlus 13 has left the OnePlus 12 behind in the dust, but if you take a closer look and look past the design, the OnePlus 12 is more similar to it than different. It’s why it’s even more appealing at $700—available at BestBuy—if you’re buying unlocked.

While the OnePlus 13 uses a new display design and panel generation, it and the OnePlus 12 have very similar displays at their core. They feature a 6.8-inch 2K LTPO AMOLED panel with an adaptive 120Hz refresh rate; aspects like typical brightness that impact the user experience are quite similar. The OnePlus 12, however, retains the tried and trusted Gorilla Glass Victus 2 protection.

Battery life on the OnePlus 13’s 6,000mAh battery might be a tad better. Still, my OnePlus 12’s 5,400mAh battery on OxygenOS 15 gets me through a day just fine—its battery endurance earned it a place on our best 2024 Android phones list—and it charges just as fast, zero to 100% in about 30 minutes. So, no upgrades there on the OnePlus 13. And daily tasks are a breeze with the year-old but well-optimized Qualcomm Snapdragon 8 Gen 3. Even the cameras remain highly capable.

Ultimately, the choice does depend on your priorities. The OnePlus 13 is the one to get if you want the greatest. However, the understated and now-discounted OnePlus 12 offers better value.

This Fake Job Interview Offer Will Install Cryptominers on Your PC

Job hunting is already stressful enough without scammers trying to exploit you. Unfortunately, emotional vulnerability is precisely what cybercriminals use to trick people into doing what they want. Such is the case of one scam that offers you a job and leaves with you a cryptojacker.

This Fake Job Offer Email Installs Malware on Your System

mayam_studio/Shutterstock

As reported by Dark Reading, a new scam is making the rounds. In this attack, the scammer will create a fake job offer and send it to potential victims. At the time of writing, the scammer impersonates the legitimate business CrowdStrike, but they could theoretically impersonate any company.

In the attack, the email claims that the sender wishes to offer you a position in the company. However, you’ll need to attend an interview before you’re accepted. The scammer includes a link that they claim will take you to a service where you can schedule your interview.

If you click on the link, you’ll be taken to a website that asks you to download a CRM application to continue. If you download and run the executable, it performs a few checks to see if it can install malware on your PC without detection. If these checks pass, the executable shows a fake error message, claiming something went wrong. It will then secretly install a cryptojacker that uses your computer’s resources to earn cryptocurrency for the scammer.

Fortunately, there’s plenty you can do to avoid scams like these. The first thing to remember is that job offers that come out of the blue are usually scams. Scammers often pretend to be famous businesses and offer lucrative roles to convince you to apply, but always treat them with a pinch of salt, especially if you haven’t advertised that you’re looking for work.

It’s also worth remembering that some unscrupulous scammers will make fake job offers and attack everyone who applies. If you’re currently on the job hunt, be sure to check out how to identify and avoid job posting scams to keep yourself safe.

How I Prepare My Phone for an International Trip

While traveling abroad, my phone is my constant companion for all kinds of tasks—like navigation, communication, capturing memories, or accessing important documents. So, I take the time to ensure it’s fully prepared for the trip before I leave the house.

1

Making Sure My SIM Works Abroad

My phone wouldn’t be much use without network connectivity and mobile data, especially when I’m navigating unfamiliar places. So, one of the first things I do is contact my cell carrier to confirm whether my current plan includes international roaming or if I need to add a travel package for my destination. This is the most convenient option for me, as it allows me to keep my number and avoid the hassle of swapping SIM cards.

However, if the roaming fees are too high for the place I’m visiting, I usually opt for a local SIM card instead. These are typically easy to find at almost all international airports, but I make sure to research the best options before I arrive. Since my phone is not carrier-locked, I can easily switch SIM cards and be ready. That said, it’s also possible to use a carrier-locked phone overseas by contacting the carrier.

2

Double-Checking That “Find My Device” Is Ready

Losing a smartphone is already a stressful experience, but it can feel even worse if I’m abroad, where I might not have easy access to local resources or support. That’s why I always ensure that “Find My Device” is fully set up and working before I travel. It’s quick and easy to do on my Android through Google’s Find My Device app.

This isn’t just useful for tracking a lost or stolen phone—it provides much more peace of mind. If something goes wrong, I can remotely disable my phone and prevent anyone from accessing my personal information.

I can even wipe all my data from afar, which is crucial for protecting my privacy in case the worst happens. This small step doesn’t take much time, but it offers significant reassurance.

3

Downloading Essential Travel Apps

While traveling, I rely on specific apps that I don’t usually keep on my phone. This includes travel-related apps like Skyscanner or Priceline for easy access to flights and accommodations. I also add a reliable currency converter app, which is essential for quickly calculating exchange rates and managing my spending.

To keep my itinerary organized, I use TripIt. This app consolidates all my travel details, from flight information to hotel bookings and activities, into one easily accessible place.

These apps are my go-to travel apps, but depending on my destination and the type of trip, I may add a few more. Having them preloaded helps me stay prepared, avoid last-minute downloads, and ensure I have all the tools I need for a smooth, stress-free trip.

Regardless of whether I’m traveling alone or have company, I like to keep my phone well-stocked with media for the journey. Before I leave, I pre-download everything I might need for offline use—movies, TV shows, music, eBooks, and podcasts.

Fortunately, apps like Netflix, Spotify, and Audible make it straightforward to download content for offline use. I typically choose a mix of entertainment that suits different moods. This ensures I have a wide variety of media to enjoy while traveling.

5

Freeing Up Storage Space

As someone who loves documenting travel experiences through photos and videos, I know firsthand how quickly my phone’s storage fills up. When traveling, I want to be ready to capture every spontaneous moment and every breathtaking view without worrying about running out of space.

Additionally, a cluttered phone can slow it down, making it harder to use essential apps or access information quickly. To avoid all of this, I always take steps to free up my phone’s storage ahead of time. It only takes a few minutes and is one less thing to worry about while traveling!

6

Preparing the Phone Battery to Last Longer

One of the most crucial things I’ve learned over the years is how important it is to ensure my phone’s battery lasts as long as possible. That’s because access to charging points isn’t always guaranteed or convenient, and the last thing I want is for my phone’s battery to die when I need it the most.

In addition to carrying a power bank, I also take steps to extend my phone’s battery life during travel. This includes everything from restricting background activities of battery-draining apps to disabling unnecessary features like the always-on display and “Hey Google” voice detection. Doing all of this ensures my phone lasts all day without needing to charge it again.

7

Setting Up a Reliable VPN

Using public Wi-Fi networks in airports, cafes, or hotels is a great way to save expensive mobile data while traveling. However, there’s always the risk of privacy breaches when connecting to these networks. That’s why I always make sure to set up a reliable VPN (Virtual Private Network) before I travel internationally.

A VPN helps encrypt my internet traffic, making it nearly impossible for hackers or malicious third parties to intercept my data. This not only protects my sensitive information—such as passwords, banking details, and work emails—but also ensures I can access websites and apps without geographical restrictions.

Having this extra layer of security gives me peace of mind, knowing my data is safe from prying eyes while I navigate the internet in unfamiliar places.

8

Backing Up My Phone

Ideally, I shouldn’t need to back up my phone before an international trip, but I prefer to do it anyway just to be safe. After all, losing access to my data could be a bigger hassle than usual.

I always make sure all my documents, photos, and videos are saved in the cloud. This way, I don’t have to worry about losing precious memories or files while traveling. Additionally, I like to back up my contacts, messages, and app data. It’s reassuring to know that, even if something happens to my phone, I can recover these files on another device.

There’s no denying that preparing my phone for an international trip takes a little effort, but it’s definitely worth the convenience it provides. From ensuring I have the right apps and storage space to securing my connectivity options, every step helps me stay connected and prepared. With everything in place, I can fully enjoy my travels and keep my phone ready for any situation.

​​Red Flags to Watch Out for in AI Audio Generators

I use AI audio generators to spark inspiration or even craft entire compositions, but I’ve learned they come with hidden pitfalls.

1

Generic Output

One of the most significant red flags when using AI to generate music is the risk of producing generic, cookie-cutter tracks. While AI tools can create music in various genres and styles, the output often lacks the human elements that make music feel fresh or innovative. These generators typically rely on pre-existing templates, established musical patterns, or a library of samples. As a result, the music they produce often sounds formulaic and lacks individuality.

If you use an AI tool to create a commercial song, the resulting track might sound similar to other songs within its genre without your unique voice or signature style to make it memorable and distinct. As technology improves, AI will start producing more intricate and innovative music. However, it will likely still lack the soul, spontaneity, and spark of true artistic expression.

If AI generators create most of your music, mixing in a human element can make it sound significantly more convincing and original. This element could be as dominant as a vocal track or as subtle as a manually played percussive instrument. Additional audio and MIDI tracks can be added using a free online audio editor or digital audio workstation.

Jack Mitchell/MakeUseOf

With the increasing use of AI-generated music, there are growing concerns about copyright and intellectual property. AI music generators are trained to emulate existing songs, patterns, melodies, and rhythms that can be gleaned from copyrighted material. This raises important legal and ethical questions about ownership and fair use.

A high-profile example of this issue occurred in 2023 with the music of Canadian artists The Weeknd and Drake after AI-generated songs that replicated their voices appeared online. These songs were created by AI models based on the artists’ existing work and raised alarms regarding copyright infringement and unauthorized use of their likeness and sound. This, in turn, sparked a debate about whether AI-generated music should be considered original, given that it draws upon existing copyrighted material.

If you publish AI-generated music, it could be strikingly similar to works under copyright protection. While AI doesn’t “copy” in the traditional sense, it can adapt elements from existing music in ways that could lead to legal complications. Therefore, you must be cautious about data sources and ensure that the music you produce using AI does not infringe on copyright law to avoid facing lawsuits or financial penalties.

3

Quality Concerns

A musical creation in Logic Pro on a DAW.
Jack Mitchell/MakeUseOf

Another significant drawback of AI-generated music is that it often lacks the emotional depth, intricacy, nuance, and musicianship of work created in the traditional way. While AI can quickly generate melodies, beats, and chord sequences, it struggles to replicate the subtleties that make music resonate with the listener.

As a musician, I have spent my life surrounded by artists who pour hard work and personal experience into their music. Whether it’s an emotionally charged vocal track, a complex chord progression, or an intricate song arrangement, human creativity instills music with a richness that AI cannot easily replicate.

An AI audio generator might be able to create a catchy tune, but it will typically lack the meaning or emotional expression that comes from the mind of a human composer. The subtleties of rhythm, phrasing, and improvisation—key components of what makes music genuinely compelling—are often too complex for AI to grasp. Therefore, it is essential to be mindful of AI’s limitations when using it to create music.

4

Morally Gray Areas

Easy song creation in Soundful using AI technology.

Even if an AI-generated song sounds awesome, there are moral and emotional aspects to consider. For many musicians, music creation is all about the journey from a spark of inspiration to the final polished track. While AI can churn out a technically proficient song, it lacks the personal investment of creating something from scratch.

Furthermore, using AI to generate music can raise ethical questions about artistic integrity. Relying on a machine to create something is basically cheating or, at the very least, taking a shortcut. You cannot claim that a project is an authentic form of artistic expression when an algorithm has done most of the heavy lifting.

If music creation shifts too much toward automation, it could reduce the appreciation for musicians who dedicate years to honing their craft and creating original work. While AI audio generators offer exciting opportunities for music production, too much reliance on AI will ultimately undermine the essence of what makes music meaningful.

These significant red flags regarding the use of AI audio generators shouldn’t be overlooked. As the technology continues to evolve, musicians, producers, and consumers must stay mindful of the challenges and weigh the benefits and drawbacks for the good of the industry as a whole.

Benefits of Using a Four Layer PCB in Your Electronic Design Project

Using a Four Layer PCB in Your Electronic Design Project

There are many different types of PCBs; from single-sided boards that contain only one conductive layer to multilayer boards with components on both sides. These types of PCBs have varying costs that depend on the size and complexity of the design. A 4 layer pcb board is more expensive than a 2 layer board because it requires more materials and processing time to make. This article will discuss the benefits of using a four layer board in your electronic design project and how it compares to a single-layer board.

A four-layer PCB is a circuit board that has additional layers of copper that can detect and circulate electrical signals. These extra layers can reduce the amount of copper that is used in the circuit board, which in turn can help save money. A four-layer PCB can also improve signal quality. This is because the more layers of copper there are, the better it is at transmitting high-speed data and electrical signals.

The most common use of a four-layer PCB is to connect power and ground planes on the board. This helps to improve the electrical performance of a circuit board by reducing the amount of power that is lost. It also increases the overall power density of a circuit board.

In addition to improving power delivery, a four-layer PCB can provide better EMI shielding and increased trace widths for high-speed digital interfaces such as SDRAM, DDR3, USB, HDMI, and LVDS. These interfaces require traces to have a specific impedance, so a lower dielectric thickness can help achieve this. Additionally, a four-layer stackup allows for a more compact core, which can improve electromagnetic compatibility (EMC) performance.

Benefits of Using a Four Layer PCB in Your Electronic Design Project

Higher layer counts also allow for more options for shielding and controlled impedance routing, which can help reduce crosstalk and EMI. They can also provide more ways to route power and ground to the components on the board. However, it is important to note that the number of layers does not always translate into more reliability; instead, this is determined by the design. Proper shielding techniques, proper use of copper pours, and careful routing can often be more effective than increasing the number of layers.

A common mistake by new designers is to route high-speed signals between the surface layers of a PCB without providing a return path. This can cause EMI, which is difficult to predict and can even affect the operation of the circuit board. To avoid this, a new designer should consider alternative stackups that allow for the proper signal-to-ground return paths.

Choosing the right material for your PCB is crucial because it will affect everything from thermal and mechanical properties to signal transmission and heat dissipation. There are a variety of different materials to choose from, and each has its own benefits and drawbacks. In general, thicker materials are more rigid and durable than thinner materials. In addition, they offer more opportunities for thermal vias and copper pours, which can help to dissipate heat from the components on the PCB.

6 Reasons Why Obsidian Is My Go-To App for Deep Research Projects

Research projects can get messy fast, so having the right tool is essential—one that seamlessly connects your thoughts and ideas while being easy to use. This is what makes Obsidian my favorite.

1

Bidirectional Notes Linking

Research projects are not only about gathering information; it’s about creating a web of information that combines to form a comprehensive repository of meaningful insights. To achieve this, Obsidian has note-interlinking, where you can connect one note to another.

In comparison, if you were taking notes on a linear system like MS Word, where you don’t get logical connections between notes, you would have to deal with endless scrolling up and down to find information.

On Obsidian, it’s different. I can take atomic notes, where each note represents a single idea or concept, and I can link them together. This note-taking approach lets me go back and forth and quickly see where I started and where I need to head, which is important to avoid getting lost when doing research.

This way of note-taking also aligns with how our brains work. We don’t store information as a long document page, but we create nodes, link them together, jump between interconnected concepts, and associate information.

Note linking comes in handy when writing a research paper, as you can use it for citation and referencing. By maintaining a note for references, you can link ideas to respective sources on the go.

2

Graph View for Notes Visualization

Graph view in Obsidian is a feature that allows you to see the connections you have made when interlinking notes. The view displays a network of nodes, with each node representing a note and the links showing how they connect with each other. This is a place in Obsidian that I enjoy the most. I love seeing the graph view and how it turns out because it helps me find my ground and quickly grasp things.

Obsidian app showing graph view of created notes

I can zoom in and out, move around, view tags, or even adjust how the graph looks. For me, it’s a representation of my brain—the knowledge base I have created visible on my monitor. With this, I can uncover patterns or even find new links and relationships between notes.

Another benefit of graph view is that I tend to forget notes I have taken on Obsidian as time passes. However, by spending only 10 minutes in graph view, I can easily recollect and recap things I have noted down, something that’s important for not getting lost when doing deep research.

When taking down notes for research purposes, we tend to save so many pieces of information with varying objectives. Some might be useful for the current article or project, while others are saved with the thought that they might be useful later. This is where Obsidian’s tagging and metadata come in handy.

Obsidian app showing tags and metadta for notes

Tags are simply keywords or phrases that can be used to categorize notes, and it’s simple to create one—just use “#” with a keyword. With this, you can categorize notes into topics, intentions of use, etc. Metadata further extends this. It’s a way of adding fields at the top of your notes that provide additional information, such as completion status, date, author, or priority.

Adding tags and metadata not only improves note organization but also makes searching and filtering faster and more efficient.

I rarely use folder view in Obsidian because its search feature is far superior for finding notes. It goes beyond basic text searches, allowing you to filter by tags, metadata, or even use Boolean operators (AND, OR, NOT) to refine results. Plus, you can save your search configurations for future use.

Obsidian's search feature displaying results using boolean operators

5

Plugins and Customizability

Although Obsidian comes with extensive features baked into the app, that’s not the end of it. You have thousands of community plugins that can customize Obsidian, from its appearance to its functionality. If you want some specific functionality that would make your research easier, chances are there is a plugin for it.

For example, if you want to manage tasks using a board view, you can install the Kanban board plugin that lets you create cards and organize projects. Another extension can create an outline for your notes automatically or add a timer inside your notes to track time spent on notes. And there’s so much more out there.

Finally, like me, if you get tired of how Obsidian looks by default, there’s an extensive library of Obsidian themes to choose from, which can give Obsidian a total makeover.

For example, I find headings in Obsidian too close to paragraphs. I found an Obsidian theme that fixed this, and now I have big headings with adequate spacing according to my taste. Such room for customization and flexibility is something that makes working on Obsidian so much more enjoyable for me.

6

Offline-First and Private

Obsidian is an app that doesn’t lock you in or make migration difficult if that is something that you decide to do in the future. Obsidian is an offline-first app and saves notes in Markdown format.

This means is that you can access your notes anytime and anywhere without relying on an internet connection. And since your notes are locally stored and private, you own your data, and there’s no reliance on third-party servers.

Obsidian notes opened in windows notedpad with notes displayed in it

Obsidian uses Markdown formatting, so you don’t need any fancy app to open your notes elsewhere. As you can see, I’ve opened one of my notes in the Windows Notepad app.

Overall, Obsidian’s flexibility and functionality make deep work a joy. You get an app that compliments your brain and large projects while also giving you freedom and powerful features to focus on what you love doing: research.

I’ve Stopped Using iMessage as My Primary Messaging App. Here’s Why

iMessage has long been my favorite messaging app, but its limitations have started to outweigh its perks. From a broken cross-platform texting experience to file-sharing frustrations, I’ve finally switched. Here’s why I moved on—and why you might consider it too.

1

Cross-Platform Texting Experience Is Still Broken

When Apple adopted RCS (Rich Communication Services) it felt like a step in the right direction. Many hoped it would eliminate the long-standing divide between iPhone and Android users. Features like high-quality media sharing, typing indicators, and read receipts are now available across platforms. On paper, this seems like a game-changer for cross-platform messaging.

But the reality is far from perfect. While RCS introduces improvements, it still falls short of providing the seamless experience many expect. One major drawback is the lack of end-to-end encryption for messages exchanged between iPhones and Android devices. This means sensitive conversations may not be as secure as those sent with iMessage or WhatsApp, leaving room for privacy concerns.

Group chats also remain a pain point. In mixed-platform groups, issues like inconsistent read receipts and broken in-line replies can quickly disrupt the flow of conversations. Even with RCS in the mix, the messaging experience between iOS and Android users feels clunky and outdated compared to modern alternatives.

2

File Sharing on iMessage Still Has Key Limitations

While iMessage has improved its file-sharing capabilities over the years, significant shortcomings remain that make it less practical compared to other instant messaging apps.

One major limitation is how tightly iMessage’s advanced features are tied to the Apple ecosystem. For instance, while iCloud integration allows you to share files up to 100GB, this functionality is only seamless when sending to other Apple devices. Sharing large files with Android users or those outside the ecosystem often requires additional steps, such as exporting to third-party services like Google Drive or Dropbox.

Another persistent issue is video sharing. By default, iMessage compresses videos, reducing their quality to save bandwidth. While newer iOS versions include a Copy and Send Original option to send uncompressed media, the feature isn’t well-publicized. In fact, it is buried in the interface, making it inconvenient to access.

Cross-platform limitations are perhaps the most glaring flaw. Unlike apps such as WhatsApp or Telegram, which maintain consistent file-sharing capabilities regardless of the recipient’s device, iMessage’s functionality drops off significantly when interacting with Android users. This creates unnecessary barriers and makes it harder to share files efficiently.

3

Switching to Android Would Mean Losing My Messages

iPhone with Messages app open showing an Cannot Send Message error with the Android mascot next to it
Primakov/Shutterstock and Canva

One of iMessage’s biggest drawbacks is how deeply it ties you to Apple’s ecosystem. If you ever decide to switch to Android, you’ll face a massive hurdle: your messages don’t come with you. Apple doesn’t offer an easy way to transfer iMessage history to Android, which means years of conversations can be effectively locked away.

For someone like me, who values continuity, this is a significant issue. My iMessage history includes meaningful chats with family, work discussions, and countless moments I’d prefer not to lose. Sure, there are third-party tools that claim to transfer your iMessages to Android, but they’re often clunky, unreliable, or come with a hefty price tag.

On the other hand, apps like WhatsApp and Telegram are far more flexible. Both allow you to back up your chat history to the cloud—WhatsApp with Google Drive or iCloud, and Telegram by default. This means you can switch devices or platforms without worrying about losing years of conversations.

The inability to take my iMessage history with me if I ever leave Apple’s ecosystem feels restrictive, almost like a form of lock-in. It’s a dealbreaker for anyone who values platform flexibility—another reason I’ve moved away from iMessage as my primary messaging app.

Stepping away from iMessage as my primary messaging app wasn’t a light decision. It’s a polished service with great integration for Apple users, but its limitations became too glaring to ignore as my communication needs evolved.

If you’re feeling similarly constrained by iMessage, it might be time to explore other options. You might find, as I did, that there’s a better messaging app waiting to simplify your life.

You’ll Always Be Able to Text in an Emergency Thanks to This Rugged Device

The ability to text using a satellite instead of a cellular or Wi-Fi network continues to be a popular feature on new iPhone and Android models. But a new device from HMD, unveiled at CES, brings satellite texting to pretty much any phone or tablet.

Connectivity and Location Sharing

The HMD OffGrid is designed to provide satellite communication to any iOS or Android device using a companion app. You can communicate and share your live location with five others with the app.

Weighing a little more than 2 ounces, the device can go for up to three days of use on a single charge. The dongle is IP68 weatherproof as well.

HMD

Press the SOS button on the device to activate the included Overwatch x Rescue service that provides emergency response, search-and-rescue, and more.

You can purchase the HMD OffGrid now in the United States, Europe, and Australia/New Zealand for $199.99. It will arrive in other territories throughout the year.

There are two subscription options available. HMD Freedom is $79.99 per year with a $19.99 one-time activation fee. You can use up to 350 text and check-in messages.

With the HMD Unlimited option, available for $139.99 per year with a $9.99 one-time activation fee, you’ll receive unlimited text and check-in messages.

Both subscriptions can optionally add unlimited live tracking for an additional $4.99 monthly. That can be activated or deactivated at any time. A minimum 12-month subscription is required.

Always Stay in Touch

While you’ll have to pay for the device and a subscription, the OffGrid looks like a nice option for outdoor explorers without a phone sporting native satellite capability.

Satellite connections work differently than a traditional cell signal. Most importantly, you will have to be outside and in the line of sight to a satellite.

Back in November, the FCC announced that it granted SpaceX the ability to provide direct-to-cell coverage for T-Mobile. Satellite texting will likely arrive sometime this year.

Apple is also reportedly expanding satellite communication to another popular device. The Apple Watch Ultra 3 will apparently arrive this year with the ability to send text messages via satellite.

Acer’s New 5G Wi-Fi Hotspot Is One of the Best New Products From CES 2025

CES 2025 is a dazzling array of new tech, so I didn’t expect one of my favorite new devices to be a 5G hotspot. Acer’s new Connect M6E 5G mobile Wi-Fi hotspot is just that—a surprisingly great package that’s perfect for anyone who travels about.

Acer Launches New Connect M6E 5G Mobile Hotspot

Acer’s new Connect M6E 5G mobile hotspot ticks all the boxes: support for physical SIM and eSIM, 2×2 MIMO, NFC touch to connect, and, topping it off, Wi-Fi 6E connectivity. You can also connect up to 20 devices simultaneously, which makes it handy to keep in your bag or even take to the office, while the built-in screen makes it easy to navigate the various settings menus.

It has an 8,000mAh battery that will keep the hotspot up and running for 28 hours, and it supports fast charging over USB-C. Furthermore, it’s built to “military-grade standards” (though there are issues with companies using the MIL-STD-810G) and has an IP68 water and dust resistance rating. That means you can submerge the hotspot at up to 1.5 meters for up to 30 minutes—not bad for a portable 5G Wi-Fi router.

Gavin Phillips/MakeUseOf

The other big feature on this new 5G hotspot is SignalScan. Basically, this tech enables the Connect M6E to jump between 5G networks for different providers and has support for more than 135 countries worldwide.

So, if you’re heading to a new country, you could grab an eSIM from Airalo, load it onto your Connect M6E, and let it switch between 5G networks as required. It means you’ll never be far from a connection, keeping you online when you need it most.

The Connect M6E 5G Mobile Hotspot Is Just What I Need

It might be that I’m writing this at CES 2025, and Wi-Fi is notoriously irritating here, but I’m impressed with Acer’s new unit. What really stands out is the option to load an eSIM onto the Connect M6E and have it connect to a wide range of networks.

That alone is a fantastic reason to pick up the Connect M6E—you’ll never be offline for long! The Acer Connect M6E 5G mobile hotspot will be available from Q2 2025 and starts at $249.

Peacock Adds More Value by Providing Games and Short Videos (to Some People)

There has been a torrent of product reveals and releases during this year’s CES 2025, but not everything announced was physical. The media giant NBC used the time to announce that its Peacock service is getting both games and short videos added to its service, albeit not everyone will see them.

The Peacock App on iOS and Android Is Getting New Features

As announced on NBCUniversal and during CES 2025, the company detailed its plan for the new year. NBC has a lot planned, but there’s this one interesting tidbit:

Looking ahead, Peacock will begin piloting new product features on its iOS and Android mobile apps this month to drive even deeper fan engagement around its most popular titles, all in one place. These daily mini-games and prediction games, along with new curated vertical video playlists of can’t-miss clips from Peacock’s biggest shows, will be tested before a broader rollout, unlocking new potential opportunities for advertisers.

However, you shouldn’t get too excited. As TechCrunch reported after speaking to a spokesperson, not everyone will get these games right away. Instead, they stated that “some users will see both the games and the vertical video playlists, whereas some will see one or the other, and some will see neither.” However, if no issues are found during the testing phase, every Peacock user should eventually receive the update.

TechCrunch confirmed that the Peacock app will feature five games: Daily Sort, Daily Swap, Predictions, What The, and Venn. These games will have ties to Peacock’s shows to boost fan engagement with their favorite media. For example, Predictions lets you guess what you think will happen next in the shows you follow.

If you’re looking for more announcements from CES 2025, why not check out these amazing pet gadgets or a grill that use AI to calculate the perfect cooking conditions?

Here’s Why It Didn’t Work

Summary

  • Good creative branding involves reasoning, elements beyond logos and colors, and resonating with the target market.
  • Logos should have some relevance to the brand; color palettes denote meanings and build trust with the brand.
  • Typography, market research, imagery, and tone of voice also play crucial roles in creating a successful creative brand.

Many people think creative brands are just a logo and colors, but there’s much more to it. Could multiple AI tools replicate the same creativity as a design team, if used together?

Features of Creative Brands

While logos and colors are important to a brand, there’s more to a solid brand. Good brands have reasoning behind design decisions and choices, as well as more elements to make up a total brand package.

Logos are often the face of a brand. Logos can be made up of different elements: an accompanying text with an icon; a sole icon; or purely text-based.

A logo doesn’t always need a meaning, but it shouldn’t be completely irrelevant to the brand it represents. There’s a nuanced line between too much and too little meaning in your logo elements, something to keep in mind if developing a logo with AI.

2. Color Palette

Color palettes generated in Khroma.

A brand’s color palette is important for many reasons. First, the colors must go together.

Secondly, colors have meanings. Good brands use color theory to their advantage. You’ll notice that plenty of banks use red—as red denotes prosperity. Lots of social media uses shades of blue—this is a sign of freedom and dependability. Brands that use white and silver—like Apple—show confidence.

Thirdly, color choice is important for accessibility and allows your brand to be accessed and appreciated by all.

A strong color palette builds trust with your brand. The colors denote meanings, and your target market will trust your brand when everything makes sense.

3. Typography

Using PageGPT to generate font pairing

Typography is another important aspect of branding. Your font choice matters in the same way as colors.

Overused fonts are draining to see and confuse your brand with others using the same fonts. Underused fonts can be gimmicky—which is why they’re often underused.

You should choose a strong typeface for your logo and a complementary typeface for your brand communications. This includes separate fonts for headers versus an easier-to-read font for body text.

Fonts need to be legible in all sizes and match the style of your brand. Don’t use Comic Sans for a corporate brand, but perhaps Times New Roman isn’t right for a children’s nursery, either.

4. Target Market

Market research is an overlooked, but important, behind-the-scenes aspect of a creative brand project.

Your brand needs to resonate with the demographic your product or business is aiming to target. The research happens before any creative design has begun.

5. Imagery

Part of your brand and target demographic is envisioned in the imagery your brand puts out. This comes across in adverts and marketing, product lifestyle shoots, and general vibe of the brand.

6. Tone of Voice

A brand’s tone of voice shows the vibe of the brand in its written or voiced communications. This reflects the target market and type of reputation evoked from the branding. Word choice and tone matter more than you may consider in your branding.

I used a handful of different AI tools to attempt to achieve a successful creative brand. Here’s what I used and my results.

Market Research and Tone of Voice from ChatGPT

I started by using ChatGPT for market research for my brand: a watch company for military men in their mid-30s. ChatGPT replied with a brand persona, including personality traits and lifestyle of a hypothetical customer.

It also gave suggested information about brand keywords, ethos, tone of voice, and more, which are important within brand research.

Logo Design from Kittl

Kittl AI Logo Generator Results

I used the brand keywords in Kittl’s AI Logo Generator in a text prompt for a logo. I didn’t input a name for the brand, so that was part of the generation too.

I wasn’t happy with the AI Logo Generator results, so I also used Kittl’s AI Vector Generator, although I’d need to fix the AI gibberish text results.

I don’t think Kittl’s AI generator took my prompt very literally, so the results are very different from ChatGPT’s brand message.

Lifestyle Imagery with Adobe Firefly

Adobe Express AI Image Generator Watch

I used Adobe Express’s AI Image Generator—which uses Adobe Firefly’s AI model—to generate lifestyle images for my watch brand. Sadly, they suffered the wrath of weird AI hands.

Using Generative AI Doesn’t Work to Create a Creative Brand

The point of using AI for creative design is to see quick results, and while I got very quick results, I didn’t get good results. ChatGPT was the most helpful part of my AI creative brand project, and I could use those results to work with real designers and researchers for a branding project.

I was disappointed by Kittl’s results which seemed to ignore major parts of my prompts, and Adobe Firefly’s lifestyle images looked obviously AI-generated.

Without using dozens of software for this one project, I didn’t have AI tools to generate suitable typefaces or color palettes for my brand. Overall, I think creating these brand elements myself or with a human design team would produce much better results, even if it’s a longer process.

How Does Prototype PCB Assembly Service Work?

Prototype PCB Assembly Service Work

The right prototype pcb assembly service can transform concepts into functional boards quickly, de-risking technological and manufacturing uncertainties before investing in large volume production. Competent quick turn PCB assembly services reshape notions into testable builds that empower electronics firms and innovators to push innovation trajectories ahead of the competition. In doing so, they save valuable time and money without sacrificing quality or efficiency.

To keep the PCB assembly process moving smoothly and ensure that quality is not sacrificed, it is important to work with a partner that has the expertise, technical capabilities, and modern equipment necessary to produce high-quality printed circuit boards. It is also critical to determine what type of PCB you require and to find out if the manufacturer has experience with it. This is particularly true for specialized boards, such as RF and microwave, ceramic, or high-density interconnect (HDI).

Once the Gerber files have been received by the manufacturer, they will start to prepare the production equipment for assembling the PCB. This can include etching, drilling, and copper plating to prepare the board for component mounting. Automated setup processes significantly reduce the amount of time that this takes.

In addition, the manufacturer will begin to procure the required components. During this step, it is important to select the components carefully and ensure that they are of the highest possible quality. In some cases, it may be possible to choose from a variety of different components, so that the best solution can be found for your particular project.

How Does Prototype PCB Assembly Service Work?

When the final preparations are complete, the PCB will be ready for assembly. The manufacturer will then use automated equipment to place the surface-mounted technology (SMT) components onto the board. These machines are programmed and set up to maximize accuracy and speed. This can be accomplished with a wide range of different component types, including 0201 size tiny chips as well as larger SMT passives and through-hole components.

As the components are installed, the board will undergo testing and inspection. These tests can measure the electrical characteristics of the circuit board, as well as the mechanical properties. Depending on the results of these tests, the PCB can be improved or modified as needed to meet the customer’s specifications.

Finally, the finished product will be cleaned and inspected once again to make sure that it is ready to ship to the customer. This is a crucial part of the process, as any errors during this stage can be costly and lead to delays in production.

When choosing a quick-turn PCB assembly provider, be sure to find out about the manufacturer’s quality control procedures and whether they have the capability to accommodate short-run orders. In some cases, increasing the number of production lines or hiring an additional night shift can help to speed up production. However, this can be expensive and is not necessarily effective, since each machine is only generating revenue for an hour or less every day. It is therefore better to ensure that the manufacturer has rigid quality standards and a fast turnaround.

7 Signs It’s Time to Upgrade Your iPad

I’ve used my iPad for years, but there always comes a point when a trusty device starts showing its age. If you’re wondering when it’s time to upgrade your iPad, here’s how I decide when to make the switch.

1

Your iPad Doesn’t Support the Latest iPadOS Version

All operating systems get upgrades semi-regularly to provide security patches, add new features, and sometimes remove old features. Apple’s iPadOS is no different.

If your iPad is too old for the latest version of iPadOS, you could be missing vital security patches and handy features. iPadOS 18 offers tons of amazing features, but if you own an older model like an iPad (6th generation), you’ll be limited to iPadOS 17.

While Apple continues to provide occasional security updates for older versions, not receiving major updates is a clear signal that it might be time to upgrade. Over time, you’ll also start missing out on newer apps that are incompatible with older operating systems.

If you’re unsure whether your iPad supports the latest iPadOS, you can check the list of devices compatible with iPadOS 18. If you also don’t know which iPad you have, our guide can help.

2

You Can’t Use Multiple Apps at the Same Time

iPadOS App Switcher With Multiple Apps Open

Apple markets the iPad as a true laptop replacement, so it’s important that your device handles multitasking smoothly. While there are plenty of ways to multitask efficiently on iPad, older models often struggle with performance.

Most older iPads have just 1–3GB of RAM, which isn’t ideal for tasks like schoolwork or professional use. If your iPad frequently closes apps in the background or feels sluggish when running multiple apps, it’s probably time to consider an upgrade.

However, if you mainly use your iPad for simpler activities like streaming Netflix and everything runs well, there’s no rush to upgrade. Stick with your current device as long as it meets your needs.

3

Your iPad Runs Out of Space Constantly

Storage management screen on an iPad.

Another sign you’re ready for a new iPad is running out of storage regularly. Running up against your storage limit once or twice is par for the course in some ways, but if it happens more often, you may have an issue.

While you can’t expand iPad storage (as you can with some Android tablets), you have plenty of cloud storage solutions. For instance, once you pick the right iCloud plan, you can store your photos, videos, files, and more in the cloud, making them accessible from any device.

However, cloud storage has its limitations. You’ll need an internet connection to access your files, and apps will still take up a significant amount of space on your iPad. If you frequently use large apps or play games and keep running out of storage, upgrading to an iPad with more storage might be your only solution.

If space is a concern and the usual tips to clear your iPad storage haven’t helped, it’s definitely time to get a new iPad. Apple tends to bump the internal storage options with new generations. For example, the base iPad (10th generation) starts with 64GB of storage, and you can spec an iPad Pro up to 2TB, which should be more than enough for anything you plan to do on an iPad.

4

New iPad Accessories Are Incompatible

Stage Manager on an iPad Pro attached to a Magic Keyboard
Hamlin Rozario/MakeUseOf

If you use your iPad as your primary computer, upgrading to a newer model can be worth it just for the improved accessories. For example, if you rely on the first-generation Apple Pencil for a lot of sketching or drawing, upgrading to a model that supports the Apple Pencil Pro is absolutely worth it, since it offers tons of upgrades that artists will love.

Keyboards and cases are another reason to consider an upgrade. Older iPads only support the Smart Keyboard Folio, which lacks a trackpad. Newer iPads are compatible with the Magic Keyboard, which includes a built-in trackpad and another USB-C port, making the iPad feel much more like a laptop replacement. However, keep in mind that the Magic Keyboard can be a bit expensive, especially when paired with a new iPad.

Even if you’re looking for basic cases, there is no guarantee you will find good ones for an older iPad. While you could scour eBay and Amazon for suitable accessories, it may be time to bite the bullet and upgrade.

5

Poor Battery Performance

iPad Battery Widget Showing Battery Percentage
Aryan Surendranath/MakeUseOf

All iPads ship with a rechargeable lithium-ion battery that offers a considerable lifespan. But if you have any experience with smartphones, you’ll know that the battery doesn’t last so long after years of usage.

Lithium-ion batteries degrade over time; each battery has a finite number of charge cycles. So the older the device, the more cycles it has gone through. Extremely hot and cold temperatures can also negatively affect batteries, as can fully discharging the cell regularly. So how long do new iPad batteries last under typical use?

Most iPads can easily last a full day with basic tasks like web browsing on Wi-Fi or watching videos. If your iPad’s battery isn’t holding up and falls far short of this, it might be time to consider an upgrade.

To get a clearer picture of your battery’s condition, you can check the battery health on your iPad—this can help you decide whether an upgrade is necessary. If your budget doesn’t allow it, for the time being, consider an iPad battery replacement. This will set you back anywhere from $99 to $199, depending on which iPad you have.


With such good reasons to upgrade your iPad, you might be happy to forget your old one. But you shouldn’t throw it out it just yet—you’ll find that it still has some use. You can repurpose your older iPad for other tasks, such as using it as an ebook reader.

If you don’t plan to give it away, remember that selling your old iPad is also an excellent option, especially if you’ve kept it in good condition. That’s a great way to get back some of the hard-earned money you spent on your new iPad.

Everyone Should Try These 9 Android Accessibility Features

Although Android’s accessibility features are designed with specific needs in mind, some of these features can benefit everyone. From simple adjustments like screen magnification and flash notifications to more advanced options like live captions, here are many useful accessibility features that will change how you use your Android phone.

1

Zoom In With Magnification Features

While zooming in on webpages and photos is easy on your phone, there are times when you need the same flexibility for reading text in an app or navigating through menus. That’s where the Magnification feature on Android comes in. It lets you zoom in on specific areas of your screen, making it easier to read text or interact with app content that might otherwise be difficult to see.

You can enable the magnification feature by heading to the Vision enhancements menu in the Accessibility settings. You can then perform the set gesture to access the magnification window and move it around to zoom in on any part of the screen.

But that’s not all—you can also enable the Magnifier option to turn your phone’s camera into a magnifier. This allows you to use the camera’s live view to zoom in on objects, documents, or anything else in the world around you that may need a closer look.

2

Adjust the Size of Text and Icons

If you prefer not to rely on the magnification feature or deal with tiny fonts, you can easily increase the text size and zoom in your entire Android display to make everything appear larger.

To do this, head to Settings > Vision Enhancements > Font Size and Style. Here, you’ll find a slider that lets you increase the font size to your liking. Further, you can toggle on the Bold font option for added clarity.

If you want to go a step further and make everything on your screen larger (not just the text) navigate to the Screen zoom menu. Adjusting the zoom level increases the size of icons, buttons, and other elements, making them easier to tap and read.

3

Live Captions

With the Live Caption feature enabled, your Android phone will automatically display video captions on-screen, making it easy to follow along. It’s perfect for watching videos in a noisy environment, or when you don’t want to disturb others.

These captions appear in real-time, with minimal lag. You can even adjust the size and color of the text to make it easier to read. Toggle the feature by going to Settings > Hearing enhancements > Live Caption.

4

Camera Flash Notifications

Remember the notification LED light? This was once a staple on nearly every Android device, but is now a rarity since most modern smartphones have minimal or no bezels. However, you can still get a visual cue for alerts by enabling camera flash notifications in the Accessibility > Advanced settings menu.

Once enabled, your Android phone’s camera flash will blink to alert you of incoming notifications, calls, or messages. This way, even if your phone is in silent mode or turned upside down, you won’t miss important updates. You can activate this feature for all notifications or limit it to specific apps.

5

Dimming the Screen Beyond Minimum Brightness

Sometimes, even the lowest screen brightness can feel glaringly bright. Thankfully, Android’s accessibility settings offer a feature called Extra dim that allows you to reduce your screen brightness beyond the default minimum level.

Whether you’re reading on your phone in a dark room or simply trying to give your eyes a break, dimming your screen further can make a world of difference. To enable the feature, go to Settings > Vision enhancements > Extra dim, and use the Intensity slider to adjust the dimming level to your liking. You can even add a shortcut to your Quick Settings panel for easy toggling.

You’ve probably seen iPhone users with AssistiveTouch—a small white circle that hovers on the screen—providing quick access to frequently used functions. Your Android phone offers a similar feature called the Accessibility menu, which you can enable from the Accessibility > Advanced Settings menu.

This floating shortcut lets you control volume and brightness, lock the screen, or capture a screenshot with ease. If you prefer not to have a floating icon on your screen, you can also set up a gesture to access this menu.

7

Reduce Animations

While animations on Android are designed to make your device feel smooth and visually appealing, they can sometimes slow things down—especially on older or less powerful devices. Fortunately, you can disable most of these animations by heading to Settings > Accessibility > Vision enhancements and enabling the Reduce animation toggle.

This simple change can make your phone feel faster and more responsive, as it eliminates the time spent loading visual effects between actions. Additionally, it can reduce battery drain, or help with feelings of motion sickness, caused by these animations.

8

Hear Caller Names Out Loud

Why bother setting a unique ringtone for your favorite contacts when you can simply hear their names spoken aloud? Android’s Read caller names aloud feature makes it easy to know exactly who’s calling without having to look at your phone screen.

This way, you won’t have to scramble to find your phone in your bag or pocket every time it rings. You can hear the caller’s name and decide whether it’s worth picking up or someone you’d prefer to call back later.

You can enable it by heading to Settings > Accessibility > Interaction and dexterity > Answering and ending calls > Read caller names aloud.

9

Answer and End Calls With Physical Buttons

Interacting with your phone via touch isn’t always feasible, especially when you’re wearing gloves or have wet/dirty hands from cooking or working outdoors. Thankfully, Android offers an accessibility feature that lets you use the physical volume buttons to answer and end calls.

Simply go to Settings > Accessibility > Interaction and dexterity > Answering and ending calls, then enable the Press Volume up to answer calls and Press Side button to end calls options. This allows you to answer calls with buttons when touch controls won’t do.


Android’s accessibility menu offers several useful features that enhance convenience, efficiency, and ease of use. Be sure to explore these settings and try them out for yourself—you might be surprised to discover that many of Android’s most helpful features are tucked away in the accessibility menu.

Which Cable and Power Adapter Does My iPhone Need?

Summary

  • Determine your iPhone model to know which charging cable and power adapter to buy. Different iPhone models have different charging ports, as listed below.
  • USB-C cables are newer and more universal, allowing you to charge multiple devices with one cable. USB-C cables also charge iPhones faster than USB-A cables.
  • Purchase official Apple accessories or MFi-certified ones to ensure safety and avoid potential damage to your iPhone. Avoid cheap third-party accessories.

Since its launch in 2007, the iPhone has changed its charging port twice. If you’ve recently upgraded your iPhone or need a new cable but are confused by the different names, we’ll answer your questions and help you find the cable you need.

What Cable Do I Need to Charge My iPhone?

Zarif Ali / MakeUseOf

There are four types of iPhone charging cables:

  • USB-C to USB-C
  • Lightning to USB-C
  • Lightning to USB-A
  • 30-pin to USB-A

To determine which cable type you need, first find out what iPhone model you have. The various iPhone models have different charging ports.

Below, we look into each cable type and provide a list of iPhone models that use it. After identifying the cable type, you can match it to the correct power adapter. We’ve fully explained USB cable types if you need more background info.

USB-C to USB-C Cable

two ends of a usb c to usb c cable kept on a wooden table
Aryan Surendranath / MakeUseOf

2023 marked the start of the iPhone’s transition from the proprietary Lightning port to the widely used USB-C. This is only the second time Apple has changed the connector on the iPhone, but it’s a positive one because USB-C improves the iPhone in several ways.

If you have an iPhone 15 or newer model, you need a USB-C cable to charge your device. The other end can either be USB-C or USB-A—the former will usually charge faster and offers more functionality, while the latter is more generally compatible with other devices. A USB-C to C cable is included in the box—though an adapter is not.

You can use a USB-C to USB-C, or USB-C to USB-A, cable with these iPhone models:

  • iPhone 15/Plus/Pro/Pro Max
  • iPhone 16/Plus/Pro/Pro Max

Lightning to USB-C and Lightning to USB-A Cable

the two ends of a usb c to lightning charging cable
Aryan Surendranath / MakeUseOf

You’ll need a Lightning to USB-C or Lightning to USB-A cable to charge these iPhone models:

  • iPhone 14/Plus/Pro/Pro Max
  • iPhone 13/mini/Pro/Pro Max
  • iPhone 12/mini/Pro/Pro Max
  • iPhone 11/Pro/Max
  • iPhone SE (1st, 2nd, and 3rd generation)
  • iPhone X/XR/XS/XS Max
  • iPhone 8/8 Plus
  • iPhone 7/7 Plus
  • iPhone 6/Plus/6S/6S Plus
  • iPhone 5/5C/5S

Between these two cable types, a USB-C to Lightning cable will charge your iPhone much faster than the USB-A to Lightning counterpart. So if faster charging time is a priority, we recommend picking the former.

Another factor to consider is the power adapter. For example, if you already have a USB-A power adapter, you can buy a Lightning to USB-A cable. This saves some money because you won’t need a new power adapter to match the new cable.

30-Pin to USB-A Cable

iPhone With 30-Pin Charging Cable
oasisamuel/Shutterstock
 

The original 30-pin iPhone port was used from 2007 to 2012. The following iPhones need a 30-pin to USB-A cable:

  • iPhone 4/4S
  • iPhone 3G/3GS
  • iPhone (1st generation)

What Power Adapter Do I Need for My iPhone?

multiport charger kept on a wooden console
Aryan Surendranath / MakeUseOf

Choosing the right cable is important, but there are also points to consider when picking a power adapter for your iPhone. As mentioned, you must make sure to get one with the correct USB port to match the other end of your iPhone’s cable (USB-C or USB-A).

Another important factor is the wattage of the power adapter. The higher the number, the faster your device will charge, but such adapters will also be larger.

A 5W power adapter is smaller than the 20W equivalent, while a 30W power adapter is bigger and faster than both. All wattages will work, but at different speeds. You might wish to keep one fast charger for quick top-ups, and cheaper ones elsewhere for when you aren’t in a rush to charge.

Also, check that the adapter is designed to work in your country. If you’re looking to buy one ahead of traveling, it’s worth considering the Apple World Travel Adapter Kit With this, you won’t need to worry about your iPhone (or other Apple products) being damaged by sub-standard international plug adapters.

What About Wireless Chargers?

an iphone mounted on a magsafe wireless charger kept on a table
Aryan Surendranath / MakeUseOf

Although slower than wired charging, a wireless charger is a convenient alternative to charging cables. All models from the iPhone 8 and 8 Plus onward support Qi wireless charging, though you don’t get a wireless charger in the box.

The iPhone 12 and newer models also support MagSafe technology that allows for easy accessory attachment and faster 15W wireless charging.

In 2023, Apple adopted the Qi2 wireless standard for the iPhone 12 series and newer, unlocking 15W wireless charging (12W for mini devices) via Qi2-compatible accessories. This is the most powerful rating a non-MagSafe charger has achieved. However, if you own an iPhone 16 series device and stick to Apple’s proprietary MagSafe standard, you can enjoy 25W charging speeds—the fastest wireless charging on iPhone to date.

Do I Need to Buy Official Apple Cables and Power Adapters for My iPhone?

compact charger kept next to a larger macbook adapter
Aryan Surendranath / MakeUseOf

Now that you know which type of cable or power adapter you need to buy for your iPhone, you may be wondering whether it’s better to purchase official Apple accessories or ones manufactured by a third party.

There are a lot of cheap third-party chargers and cables available, but they can be unsafe and are one of the reasons why iPhone cables don’t seem to last. Any hardware damage caused by third-party accessories may invalidate your iPhone’s warranty.

Therefore, it’s best to purchase official Apple accessories or MFi-certified ones. MFi stands for Made for iPhone, an Apple certification that allows manufacturers to access licensed technology to produce safe Apple accessories. Such chargers give you peace of mind that they will power your devices safely.

The 6 Best Free Sites for DIY Arts and Crafts

Sometimes, it’s nice to take a little time away from our devices and do something different. But it’s not always easy to find an activity interesting enough to keep us occupied for long enough. Why not give your creative side a chance with some DIY craft projects?

Happiness Is Homemade is a great resource that offers arts and crafts ideas to people of all ages. It includes seasonal ideas such as that for Thanksgiving, Christmas, or Halloween, and there are also a variety of projects you can occupy yourself with year-round. Simply click on Crafts + DIY to find the perfect project for you.

This site doesn’t just offer ideas but also printable pieces, such as coloring templates, stencils, and foldable 3D grids, which you can find in the Printables section. What’s more, this section offers free printable games, like crosswords and bingo sheets, as well as free home decor graphics.

There’s also a wide range of SVG (Scalable Vector Graphics) files on offer for those who want to grab some pre-designed stickers and labels for free.

Ravelry project page with 10 knit hat patterns

Ravelry is the best website when it comes to finding patterns for crocheting, knitting, and types of fiber arts. After creating an account, you can use the site’s multiple filters to narrow down your search to free patterns.

Some Raverly patterns have a free PDF that you can print if you’d prefer not to read off a screen.

For example, if you’re looking to knit a hat, you can use the filters to only show knitting patterns for hats. From there, you can even refine the search by the weight of the yarn, needle size you have on hand, and whether you want to make a child-size or adult-sized hat. You can click the heart icon to favorite patterns you want to return to later.

Ravelry is a great website to look for inspiration if you have a big yarn stash or want to find things to make as gifts for holidays and birthdays!

good housekeeping crafts page screenshot with knit projects

You’ve probably heard of Good Housekeeping; it’s a popular paper publication, but it also has its own website, where you can find some amazing DIY and creative ideas. Open the menu and navigate to Home Ideas > Crafts & DIY Projects, and you’ll have access to an array of arts and crafts inspiration for children and adults.

In this section, you can learn how to stitch, get DIY crafts ideas for kids, and find gorgeous DIY homeware tutorials. On top of this, you can learn how to make sustainable kitchenware, such as beeswax wraps, and how to upcycle your old furniture or ornaments into gorgeous new pieces. You can even learn how to knit your own clothing!

Good Housekeeping also offers decoration ideas, so you can plan how you’re going to display your arts and crafts projects in your home. What’s not to love about your very own DIY decor?

Ribblr home page with crochet and knit patterns

Ribblr is similar to Ravelry in that it’s a database of user-created patterns for different yarn projects. You can use the search bar and filters to only look at free patterns in knitting, crochet, or both techniques. There’s an option to favorite patterns to return to later, and you can follow your favorite pattern creators on Ribblr to keep up with their latest projects.

Ribblr frequently hosts pattern giveaways, offers free patterns during holiday countdowns, and lets you start a virtual journal to track your progress in any given project. The home page also shows trending patterns, and when you click on a pattern, there will be an array of similar patterns to check out.

The one downside to Ribblr, however, is that you cannot access a printable PDF of a pattern because the platform is eco-friendly and trying to cut down on paper use.

sarah maker homepage screenshot with crochet, cricut, punch needle, and sewing crafts

The Sarah Maker crafts website, founded by a DIY enthusiast, is a great resource for finding arts and crafts ideas as well as learning new skills. Here, you can learn how to make your own quilts, clay jewelry, tie-dye clothing, festive ornaments, friendship bracelets, face masks, and embroider gorgeous patterns and badges.

There’s a designated section for crochet, where you can learn how to crochet scarves, hats, blankets, and more. The step-by-step crochet tutorials for beginners are great for those who are new to this hobby.

All Free Crafts homepage with crafts for scone jars and construction paper reindeer

All Free Crafts has all sorts of crafts for every skill level. You can sort the crafts by holiday and skill level, too, if you’re trying to create decorations for a holiday party.

There are entire sections dedicated to recycling common household items like old denim, cardboard, and even lightbulbs! This website also features lots of nature and outdoor crafts for hobbies like bird watching. For example, there are crafts to create your own bird feeders and birdhouses.

There are crafts for every kind of crafter on All Free Crafts. While there are sewing, knit, and crochet patterns, there are also others like a DIY scone jar, candles, paper crafts, and soaps.

Yarnspirations project page with options for crochet and knit clothing and stockings

Yarnspirations is a great website that offers free patterns for crochet and knit projects. You can sort the projects from beginner to advanced based on your skill level.

This website has all sorts of patterns, from blankets, to wearables like hats and skirts, to pillows and so much more. Yarnspirations partners with yarn brands like Red Heart and Caron, too, so you can purchase the yarn you need for a specific project directly from the website. It also provides yarn recommendations.

There are also a ton of free resources with beginner guides on how to knit and crochet, helpful tips, and even other crafting activities like macramé and quilting on the site.

It can be hard to come up with your own ideas for DIY projects, especially if you’re not a seasoned arts and crafts enthusiast. But with the sites we’ve listed here, you’ll have access to seemingly endless fun and creative DIY ideas, and for free too. Happy crafting!

Here’s How to Beat Yours in 2025

I love Goodreads. It’s always fun looking back across the year and remembering the best things I’ve read in the past 12 months. Goodreads’ Reading Challenge encourages me further, and in 2024, I smashed my goal. Here’s how.

1

I Set a Realistic Reading Goal

At the start of every year, Goodreads asks me to take part in its Reading Challenge, but before I set a goal, I try to factor in what other reading goals I have for the next year.

In 2024, I aimed to catch up on a few epic classics that I’d been meaning to read for years. I also noted down a few titles I always read each year—How the Grinch Stole Christmas!, for instance. That’s why I set a realistic goal of 52 books, i.e. one a week. In the fall, I realized I’d been too conservative as I was only a couple of novels away from completing the year’s challenge. So I increased it to 70. That’s roughly in line with previous years, which ranged from 51 to 82.

Yes, I’d like to read more often, but setting a goal that is both a challenge and manageable means I’m not overly stressed about aims and rushing through books just to tick off an online target.

2

I Read a Mix of Long and Short Books

In 2024, my longest book was 1,368 pages long. My shortest was just 28 pages. On average, books were 211 pages in length, so striking a good balance between short titles and lengthy ones is vital. Vital, that is, not just for my Goodreads Challenge, but also in giving me fresh things to think about.

We all would like to think we can read novels that are the size of War and Peace consecutively. But we can’t. And we shouldn’t.

This also means you can vary format. I read a mix of novels, non-fiction, graphic novels, omnibuses, and scripts. Omnibuses are huge; scripts are often comparatively short. Most importantly, both are fulfilling.

3

I Read Numerous Books at the Same Time

This is a controversial idea and not one that everyone can do, but I read several books at the same time. This means there’s always something I can turn to, whatever mood I’m in, whenever I have a spare few minutes even.

I can’t take a huge novel on a bus with me and not be weighed down too much. But I can take a novella or poetry book. I want something more substantial when I’m feeling artistic, so a heavy tome about Van Gogh is ideal.

Some people will worry that they can’t remember individual plot strands if reading numerous books at the same time, and that’s a fair argument. However, it’s much easier if you read different genres or formats. You won’t get characters from a romance book mixed up with those in a thriller. You won’t question what’s happened to Scrooge when reading a non-fiction book either.

Even if you can only manage two books at the same time, that’s better than just one, and will help you reach your Reading Challenge goal much faster. And there are other apps that can help you read more every year.

4

I Checked for ISBNs on Everything

List of books read on Goodreads

I went to Greenway, Agatha Christie’s holiday home, and got the slim guide for it. It was a pleasure to read. I also added it to the My Books section on Goodreads.

You’d be surprised at what has an ISBN. That’s the barcode at the back of a book, generally used by retailers to log products brought in and sold. It’s also what you can use to find individual editions of books on Goodreads, if you can’t find them through title alone.

I was surprised to find the amount of things I can add to Goodreads that aren’t books. I could add comics. I could add audio dramas. I could add some visitor guides.

I make rules for this type of thing. I read too many comics to list them all: that alone would become a job. But graphic novels count. Make your own rules and be prepared to find out how many items have ISBNs.

5

I Listened to Audiobooks

Does listening to an audiobook count as reading? The jury is out because it is, of course, personal preference. It’s fair to argue that, however you consume media, you’re still benefitting from the information it’s imparting.

Spotify Premium offers audiobooks, so that’s a big help in achieving reading targets. It also means that, if a book is sold out or too expensive, I can listen to the audio version with no fuss.

Many libraries have a range of audiobooks and audio dramas available to rent too. Don’t be shy in giving your local library a visit, as it can really help you smash your Reading Challenge for 2025.

I Ditched the Competition and Chose these Two Power Banks For My Long Trip Abroad

Our phones are better than ever at staying charged for a whole day. But there are days when they need to give more than 100%—particularly when traveling. Power banks are the easiest way to keep juiced up on the go—and these are my two favorites.

A Compact Power Bank for Short Trips

Aryan Surendranath / MakeUseOf

While traveling through Japan, my phone was running on overtime. It was my go-to for navigation, translation, photos; you name it, and my phone did it. Having it at 100% power required some active thinking on my part. But, a power bank, which I could easily carry to the hotel breakfast or a convenience store, made this easier.

In this case, I defaulted to the Anker MagGo 5,000mAh power bank. I’ve had it since September 2023, and it’s held up well. It can even fully charge my phone.

With its 5,000mAh capacity, I get a full charge whenever I use it to charge my iPhone wirelessly. If wired charging, this increases to a full charge and then some. But since it supports MagSafe—making it one of the best magnetic accessories for the iPhone—I didn’t always pack an extra cable.

Anker MagSafe Power Bank In Stand Mode on a Table
Aryan Surendranath / MakeUseOf

I also like that it’s compact enough to not add too much bulk and easily slides into my pockets when not in use. This particular power bank can even double as a kickstand, a feature I used whenever I sat down to review my plan for the day or was catching up with my family at the end of it.

A Large Capacity, High Output Power Bank for Your Tech Essentials

Redmi 20000 mAh Power Bank Kept on table
Aryan Surendranath / MakeUseOf

Once you’ve picked out a compact power bank, add a large 20,000mAh unit to your daily carry. A large battery backup like this is especially useful if you’re going to be out for a long period or have more than just a phone to power—think cameras, portable fans, and more.

I used this simple Redmi 20,000mAh power bank because it comes with a USB-C port and dual USB-A ports, perfect for keeping smaller accessories powered while also keeping my phone charged when needed. If you’re a digital nomad who doesn’t leave home without a laptop, consider picking up a large power bank with 45W of power output—something like the Anker 537 24,000mAh power bank—these can easily keep you working for long hours, too.

Stick to power banks under 27,000mAh so you can carry it on flights without trouble.

There’s no better feeling than being prepared for whatever the day may throw at you, and having these power banks or others of this type can make your day-to-day life or trips a lot more fun.

This Online Gift Card Shop May Have Exposed Your Identity

While you probably want to forget the flood of purchases made over the holidays, a recent security breach at an online gift card store might make that impossible. Unfortunately, if you used MyGiftCardSupply in 2024, your data may have been exposed.

Your Data Could Have Been Leaked by an Online Gift Card Store

A U.S. website called MyGiftCardSupply has just fixed a security issue in its online storage system, responsible for hosting customer documents collected for identity verification. The company sells digital gift cards for many popular brands, such as Steam, PlayStation, Hulu, and more.

The vulnerability was reported in late 2024 by an independent security researcher, going by the username of JayeLTee on Infosec Exchange and Substack. According to the researcher, the server held over 600,000 images of identity documents and selfies belonging to roughly 200,000 users.

If you’re wondering why the website needed such images to sell gift cards, the answer has to do with U.S. anti-money laundering regulations.

Know Your Customer—but Lose Their Trust

MyGiftCardSupply probably had the best intentions when it implemented a Know Your Customer (KYC) verification check, a system intended to prevent money laundering and other types of financial fraud. Sadly, gift cards are used in relation to scams far too often, so it’s not surprising that the company would want to ensure buyers are who they say they are.

However, MyGiftCardSupply did not go so far as to make sure the place it was storing that data, which included KYC selfies and images of driver’s licenses, was secure.

While MyGiftCardSupply has now acknowledged the breach into its files stored on Microsoft’s Azure cloud, we still don’t know how long user data was exposed for and which customers were affected. Via TechCrunch, the company’s founder has promised a “full audit of the KYC verification procedure,” suggesting that identity images will be immediately deleted going forward.

Hopefully, affected users will be notified soon, or MyGiftCardSupply will publish a range of dates during which personal data was at risk. In the meantime, if you’ve ever used MyGiftCardSupply, it’s probably best to review your bank accounts for any unusual activity or check for other signs of identity theft.

Telegram Scammers Will Have a Harder Time Fooling You Thanks to This Change

Telegram is a great way to connect with businesses, but some scammers take advantage of that by creating fake accounts and tricking people into handing over personal information. Fortunately, that’s now a thing of the past, as Telegram has announced unique verification icons businesses can use to prove they’re the real deal.

Telegram’s Verification Icons Are a Scammer’s Worst Nightmare

This new feature is part of an update announced on the Telegram blog. The update comes with a ton of new features, such as giving people the ability to react to a service message (such as a missed call) and adding extra features to the chat search feature.

However, the biggest change is giving businesses the ability to apply for a unique icon next to their name. This is different from the verified checkmark notable individuals and organizations have; instead, a business can apply for a unique icon only they can use.

This is good news for Telegram users, as the platform has had an impersonation problem as of late. There are plenty of scam bots on Instagram that claim to be from a business but will instead phish all of your personal data for its developer’s nefarious needs.

As noted in the instructions for Telegram verification, companies can get on board once they add an official, verified bot. Once done, the company can assign or remove their unique icon on accounts and chats. This can really stymie the efforts of scammers trying to impersonate companies or their employees; if they don’t have the icon, then everybody knows they’re not the real deal.

Unfortunately, while this is an excellent way to tackle fraud on the platform, there are still plenty of avenues a scammer can take to steal your data or money on Instagram. As such, it’s a good idea to check out common Telegram scams and keep yourself safe.

3 Ways to Open the Windows Programs and Features Tool

The Programs and Features tool lists all the apps on your PC. It’s a quick and easy way to manage installed programs, updates, and Windows features with just a few clicks. There are several ways to access it; I’ll show you three of the quickest.

1

Use the Run Command

The easiest way to open Programs and Features in Windows 11 or 10 is through the Run command dialog box. Just hit Win + R on your keyboard, and a small window will pop up. Type appwiz.cpl in the text field, then press Enter or click OK.

This action is a quick and easy way to get to Programs and Features without clicking through several menu options.

2

Use the Command Prompt

Another method to open Programs and Features is through the Command Prompt, PowerShell, or Windows Terminal. This is handy if you like working on the command line instead of the Windows graphical interface.

To open the Command Prompt, type cmd in the Windows search bar and press Enter. You can also press Win + X to open the Power User Menu and choose Terminal, Command Prompt, or PowerShell (depending on what you’ve selected as the default). For this purpose, they all work the same.

Opening Programs and Features through Command Prompt

Next, type start appwiz.cpl in the command line and hit Enter. The panel will launch momentarily.

3

Use the Control Panel

The classic Control Panel is still available in Windows 11, and you can use it to access Programs and Features if you prefer clicking to typing. To open the Control Panel, press the Windows key and type “Control Panel” in the search bar. Then pick the option that pops up. Once you’re in, you can view by Category or Icons at the top-right.

For Category, click on Programs > Programs and Features. If you’re viewing by icons, select Programs and Features. Either way, you’ll end up in the Programs and Features window.

Opening the Windows Programs and Features Tool using the Control Panel


These are the easiest methods to access the Programs and Features window in Windows—through the Run menu, command line, or Control Panel. But don’t forget that this menu is old-school, and many of the same options are available in the modern Settings app under the Apps heading.

4 Tools to Fade Audio In and Out With Just Your Browser

Fading audio is a simple trick that can greatly improve your tracks but often requires bulky software. Thankfully, these lightweight browser tools get the job done effortlessly.

Clideo’s Audio Cutter is a versatile online tool that lets you cut, trim, and convert audio files directly from your browser. One of its key features is the ability to apply fade-in and fade-out effects to your audio files. To use it, follow these steps:

  1. Click the Choose file button to upload the audio file you want to edit.
  2. Once the audio is uploaded, you can use the vertical bars to trim the audio if necessary.
  3. Check the Fade in and Fade out boxes to apply smooth fade effects to the beginning and end of your audio file, respectively.
  4. Click the Export button in the bottom right corner.

Once the processing is complete, you can play the audio to check the fade effects. If satisfied, click Download to save the edited file.

Audio Trimmer is another free, user-friendly tool that lets you apply fade-in and fade-out effects to audio files. Here’s how to use it.

  1. Click the Choose File option and upload the audio track from your computer.
  2. Use the green markers to trim the audio if you want.
  3. Enable the toggles on either side of the Fade option to apply the fade-in and fade-out effects.
  4. Click Crop, wait for a few seconds, and then hit Download to save the file to your computer.
Audio Trimmer tool in browser with fade in and fade out options enabled

If you’re looking for a tool that offers fade-in and fade-out effects and advanced audio editing features like removing silences, reducing noise, or adjusting track speed, AudioMass is an excellent choice. What sets this open-source tool apart is its flexibility—it allows you to select specific audio portions for applying fade-in or fade-out effects.

Here’s how you can use AudioMass to apply fade-in and fade-out effects to an audio file:

  1. Click File > Load from Computer to upload your audio file.
  2. Use your mouse to highlight the section of the audio where you want to apply the fade-in effect.
  3. Once selected, click Effects > Fade In.
  4. After applying the effect, you can play the audio to check how it sounds. If you’re not satisfied with the result, simply press Shift + Z to undo the change and start over.
  5. Similarly, you can apply the fade-out effect from the Effect menu.
  6. Once you’re happy with the fade effects, click File > Export / Download.
  7. Enter a name for your file, select your preferred format, and hit Export to download the final edited audio file.
Effects menu showing Fade out option in Audio Mass Audio Editor

Another free web tool that you can use to apply fade-in and fade-out effects to audio files is Aspose. It supports a wide range of popular audio formats, including AAC, AIFF, FLAC, M4A, MP3, WAV, and more. Here’s how to use it:

  1. Click the Upload your file button and select the audio file you want to edit from your computer.
  2. Once your file is uploaded, use the drop-down menu to choose either the Fade In or Fade Out option.
  3. Click the Fade In/Out button.
  4. Once the processing is complete, hit Download to save the newly edited audio file.
Aspose audio fade in and out tool in a browser window

Aspose does not provide the option to apply both fade-in and fade-out effects simultaneously. If you want to apply both, you’ll need to upload the audio file twice—once for the fade-in effect and again for the fade-out effect.

4 Ways Your WhatsApp Messages Can Be Hacked (and How to Protect Your Data)

As one of the world’s leading instant messaging platforms, it’s no wonder WhatsApp is a frequent target for hackers. As such, you’ll want to understand how your WhatsApp account can be breached—and take serious steps to protect your WhatsApp account, messages, and personal data.

1. Installing Malware

Dilok Klaisataporn/Shutterstock

Sometimes, a hacker doesn’t need to hack your WhatsApp account directly. Sometimes, they just need to get a nasty strain of malware on your device and have it do all the heavy lifting instead.

Someone can access your WhatsApp messages using malware in a few ways. Malware with keyloggers can run silently in the background and record what you’re typing. This includes everything you’re sending to your friends but can also contain data such as entered usernames and passwords.

Some malware will instead harvest your messages directly. This includes malware that goes through your WhatsApp conversations and sends them back to the hacker, but it can also include viruses that hijack the screen recording feature of a phone and use it to take videos of what you’re looking at. If you happen to be chatting to someone while the malware is recording you, the cybercriminal can see what you’re discussing.

2. Call Forwarding Scams

While malware is more about monitoring your messages, there are ways in which a hacker can gain direct access to your WhatsApp account. These usually involve tricking you into giving the hacker the means to break your account’s two-factor authentication (2FA).

By far, the easiest way a hacker can crack your account’s 2FA protection is to have WhatsApp send login codes to them rather than you. One of WhatsApp’s 2FA methods gives you a login code over the phone, so hackers can use call forwarding to redirect that call over to them.

To achieve this, the scammer will convince you to enter a Man Machine Interface (MMI) code that redirects your calls to them. There are many tricks they can use, but the most common method involves convincing you that you need to call someone and then passing off the MMI code as their phone number.

Once call forwarding is set up, the cybercriminal can log into your account and opt for a voice call for the 2FA code. WhatsApp tries to call you, but it gets forwarded to the scammer, who gains access to your login code.

3. Social Engineering for Login Codes

Cybercriminals can also get 2FA login codes by asking you for them. Granted, they’ll often state that it’s something else and not the only thing stopping them from accessing your account, but they’ll still ask.

This specific attack targets SMS-based 2FA codes, where WhatsApp sends you a six-digit number that you enter into the app to log in. In this attack, the scammer will contact you and convince you that the six-digit number is actually for something else and ask you to hand it over.

One campaign reported by the Nottinghamshire Police in the UK saw scammers tell their victims that the six-digit code was actually a passcode for an important video call. People would hand over the code, thinking it would let them into a special group, not knowing that the person on the other end of the phone was about to make off with their account.

4. Fake WhatsApp Web QR Codes

WhatsApp Web login page showing qr code to scan.

When you want to use WhatsApp Web, you must scan a QR code with your phone. Unfortunately, cybercriminals have found a way to hijack this process and produce fake WhatsApp Web websites that display malicious QR codes. Once scanned, the scammer gains access to your account.

The Straits Times reports that this scam begins with a web search for WhatsApp Web. Usually, the official WhatsApp web page is the top result, but scammers are good at getting fake websites to the top of search engine results. And because people usually trust the first result, they click on it without realizing they’ve entered a trap.

The fake website looks identical to the WhatsApp Web, except this one has a malicious QR code that can steal people’s accounts. Some people don’t even realize they’ve handed over their details after scanning the code, as there are no obvious hints about what happened other than not logging into WhatsApp Web.

How to Stay Safe From WhatsApp Hacking

There are many ways people can get access to your account and messages. Fortunately, you can take plenty of measures to prevent them from getting in.

Never Give Out Login or 2FA Codes to Anyone

It’s very important not to give out your login codes, no matter what the cybercriminal says. Login codes sent over SMS will usually come with a message stating what it is, and some will even ask you never to share it with others. As such, be sure to double-check what you’re sending over before following instructions.

Think Before Following Any Given Instructions

While we’re on the topic, it’s a good idea to stop and think before following instructions. Does something about what the person asked you to do feel “off?” If so, it’s worth handling the situation with extreme caution.

For example, if someone asks you to call a number, and the number they give you contains hash symbols, asterisks, or greater-than and less-than symbols for some reason, it should set off alarm bells in your head. These symbols denote an MMI code, which means the scammer is trying to set up port forwarding on your phone.

Install a Good Phone Antivirus

If you’re worried about malware, ensure that your phone has a good antivirus installed. Some phones come with their own antivirus, but if it doesn’t, you’ll need to grab one from your phone’s app store.

Visit the Official WhatsApp Web Website Directly

If you want to use WhatsApp Web, always ensure you visit this URL: https://web.whatsapp.com/. You can bookmark it to visit later, or you can manually enter it into your address bar—it’s pretty easy to remember. By doing this, you know you’ll always arrive at the official WhatsApp Web website.

If you can’t break the habit of searching for WhatsApp Web every time you want to use it, double-check the URL you click on. Don’t blindly trust the first result; double-check the URL before you scan anything on the webpage. You may be at risk of losing your account if it says anything different from the URL above.

How to Group (and Ungroup) Elements on Canva

If you need to move elements around your Canva artboard, grouping them is the way to go. Grouping elements in Canva not only saves time, but also keeps your design spacing precise.

How to Group and Ungroup Canva Elements From the Browser

Grouping elements on Canva allows you to move multiple elements around your artboard in one swift motion. It also ensures that micro-layouts in your design stay consistent, such as a logo with a typeset below it. Grouping in Canva is non-destructive, so you can easily ungroup your objects anytime.

Before grouping your elements together, they must first be selected. You can select multiple elements in Canva in a couple of different ways.

Click and Drag to Select

If the elements you wish to select and group are located together, the easiest way to select them is by clicking and dragging your cursor over the area.

Hovering over an element reveals a purple box around its boundaries. Clicking your cursor and dragging over elements shows a translucent purple box indicating the selected elements, while individual elements retain a purple boundary. This helps you visualize which elements are selected or not.

You don’t have to drag over the entire area of each element you wish to select, just so long as any part of each element falls within your dragged boundary, it will appear within your selected area.

Click and Shift to Select

If the elements you wish to select and group have other elements in their way—for example, you want to select all background elements but no text elements—you cannot simply drag your cursor, or you’ll select the unwanted elements.

Select Elements in Canva

Instead, click your cursor on the first element you want to select, then press and hold the Shift key while continuing to click on other elements. Holding down Shift while clicking adds multiple elements to your selection group. Once you’ve selected them all, let go of Shift.

To deselect individual elements, simply click the element from the group while still holding Shift. You can mix and match both methods of selection to add or remove elements to your selected group. Although all these features are found in Canva’s free version, you might want to consider upgrading to Canva Pro for more features.

Once you know how to select your elements, it’s time to group them together. There’s more than one way to group elements using the browser version of Canva.

Use the Group and Ungroup Buttons

Canva Click and Drag to Group

There are many hidden features in Canva, but grouping is not one of them; the Group button is easily visible.

With two or more objects selected, the floating toolbar appears by your selection. This toolbar features the Group button alongside relevant Canva AI tools, Duplicate, Lock, Delete, and More. Selecting Group will set your selected elements into a group together.

Canva Click and Drag to Ungroup

Ungrouping is just as easy. Select any element from the group and select Ungroup. Ungrouping your Canva group will return each element to an individually movable and independent element.

Right-Click to Group and Ungroup

Select the elements you wish to group, then right-click and choose Group from the menu.

Canva Browser showing the Right-Click menu and Group highlighted

The reverse works for ungrouping your objects: right-click your group and choose Ungroup from the options. This, again, returns your previously grouped elements to independent elements once more.

Canva Browser Right-Click Ungroup

Group and Ungroup With the Keyboard Shortcut

The final way to group elements in Canva’s browser version is probably the most intuitive for designers—we sure love our keyboard shortcuts. First, select multiple objects, then hit Cmd + G (Mac) or Ctrl + G (Windows) to group your elements in the blink of an eye.

To ungroup with the keyboard shortcut, there’s just one extra key: Shift. Select your group and hit Shift + Cmd + G (Mac) or Shift + Ctrl + G (Windows) to return your elements to their independence.

Even grouped elements can still be individually edited by double-clicking the specific element. For example, if you have a textbox within your group, double-click on the text box to edit the text. The same goes for image elements you wish to further edit or even move; just double-click the individual element to make it editable, but it remains part of the group once done.

If you’re using layers in Canva, remember that grouping elements on different layers will group the layers together. For example, if you need your layers in a specific order, grouping elements from the top and bottom, but not the middle, of the layers will re-order your layers once grouped. It’s something to keep in mind.

How to Group and Ungroup Elements in the Canva App

The Canva app is a great option for designing on the go, but it does work differently than Canva’s web version. Let’s see how you can select, group, and ungroup elements on the Canva app for mobile or tablet.

Selecting Elements in the Canva App

Since the Canva app uses touch technology, selecting elements is a little different from being able to use the cursor or Shift key on the browser version.

To select one individual element on the Canva app, tap the element once until a purple box surrounds it.

After selecting the first element, the floating toolbar should appear. Tap “” which opens the More menu > choose Select Multiple. Then tap on any other elements you wish to select; each element will have a purple box, and the group of selected elements will be bound in a white-dotted box. The Select Multiple menu action also denotes how many elements are selected in red, so you can keep track.

To deselect, simply tap anywhere else on your Canva artboard.

How to Group Elements in the Canva App

When multiple elements are selected, you’ll already be in the More menu, which is where you’ll find the Group tool.

Tap Group, and the white-dotted boundary line with however-many-selected-elements-in-purple-boxes turns into one large purple box denoting the grouped element created. This is denoted again by the number on Select Multiple, which now reads as 1.

To ungroup elements in the Canva app, select the group, and the floating toolbar now offers the option to Ungroup. If it doesn’t appear, select the “” in the floating toolbar and choose Ungroup from there instead.

The Pros and Cons of DuckDuckGo’s Privacy-Friendly Desktop Browser

DuckDuckGo’s browser promises to address your privacy issues and minor irritations. But despite its privacy-first approach, using DuckDuckGo isn’t all rainbows and sunshine—there are pros and cons of using DuckDuckGo’s privacy-friendly browser.

Pro: DuckDuckGo’s Browser Is Private by Default

If you’re a privacy-minded individual, your first impressions of a new browser can be frustrating. All the largest browsers have Google as their search engine. This is either because the browser is owned and distributed by Google, as with Chrome, or because the project accepts large sums of money for the privilege, as with Firefox. According to ZDNet, the deal was worth around $400 million per year.

Once you’ve manually set the search engine to another option, you must find extensions such as uBlock Origin to stop sites from tracking you across the internet.

With DuckDuckGo’s browser, you don’t need to do this, as you’ll find most of what you need pre-configured and ready to go. If you conduct a search from the URL bar, it’s carried out by DuckDuckGo (as you’d expect), and both tracking scripts and adverts are blocked. This privacy-first approach is why you should consider DuckDuckGo as your search engine in other browsers as well.
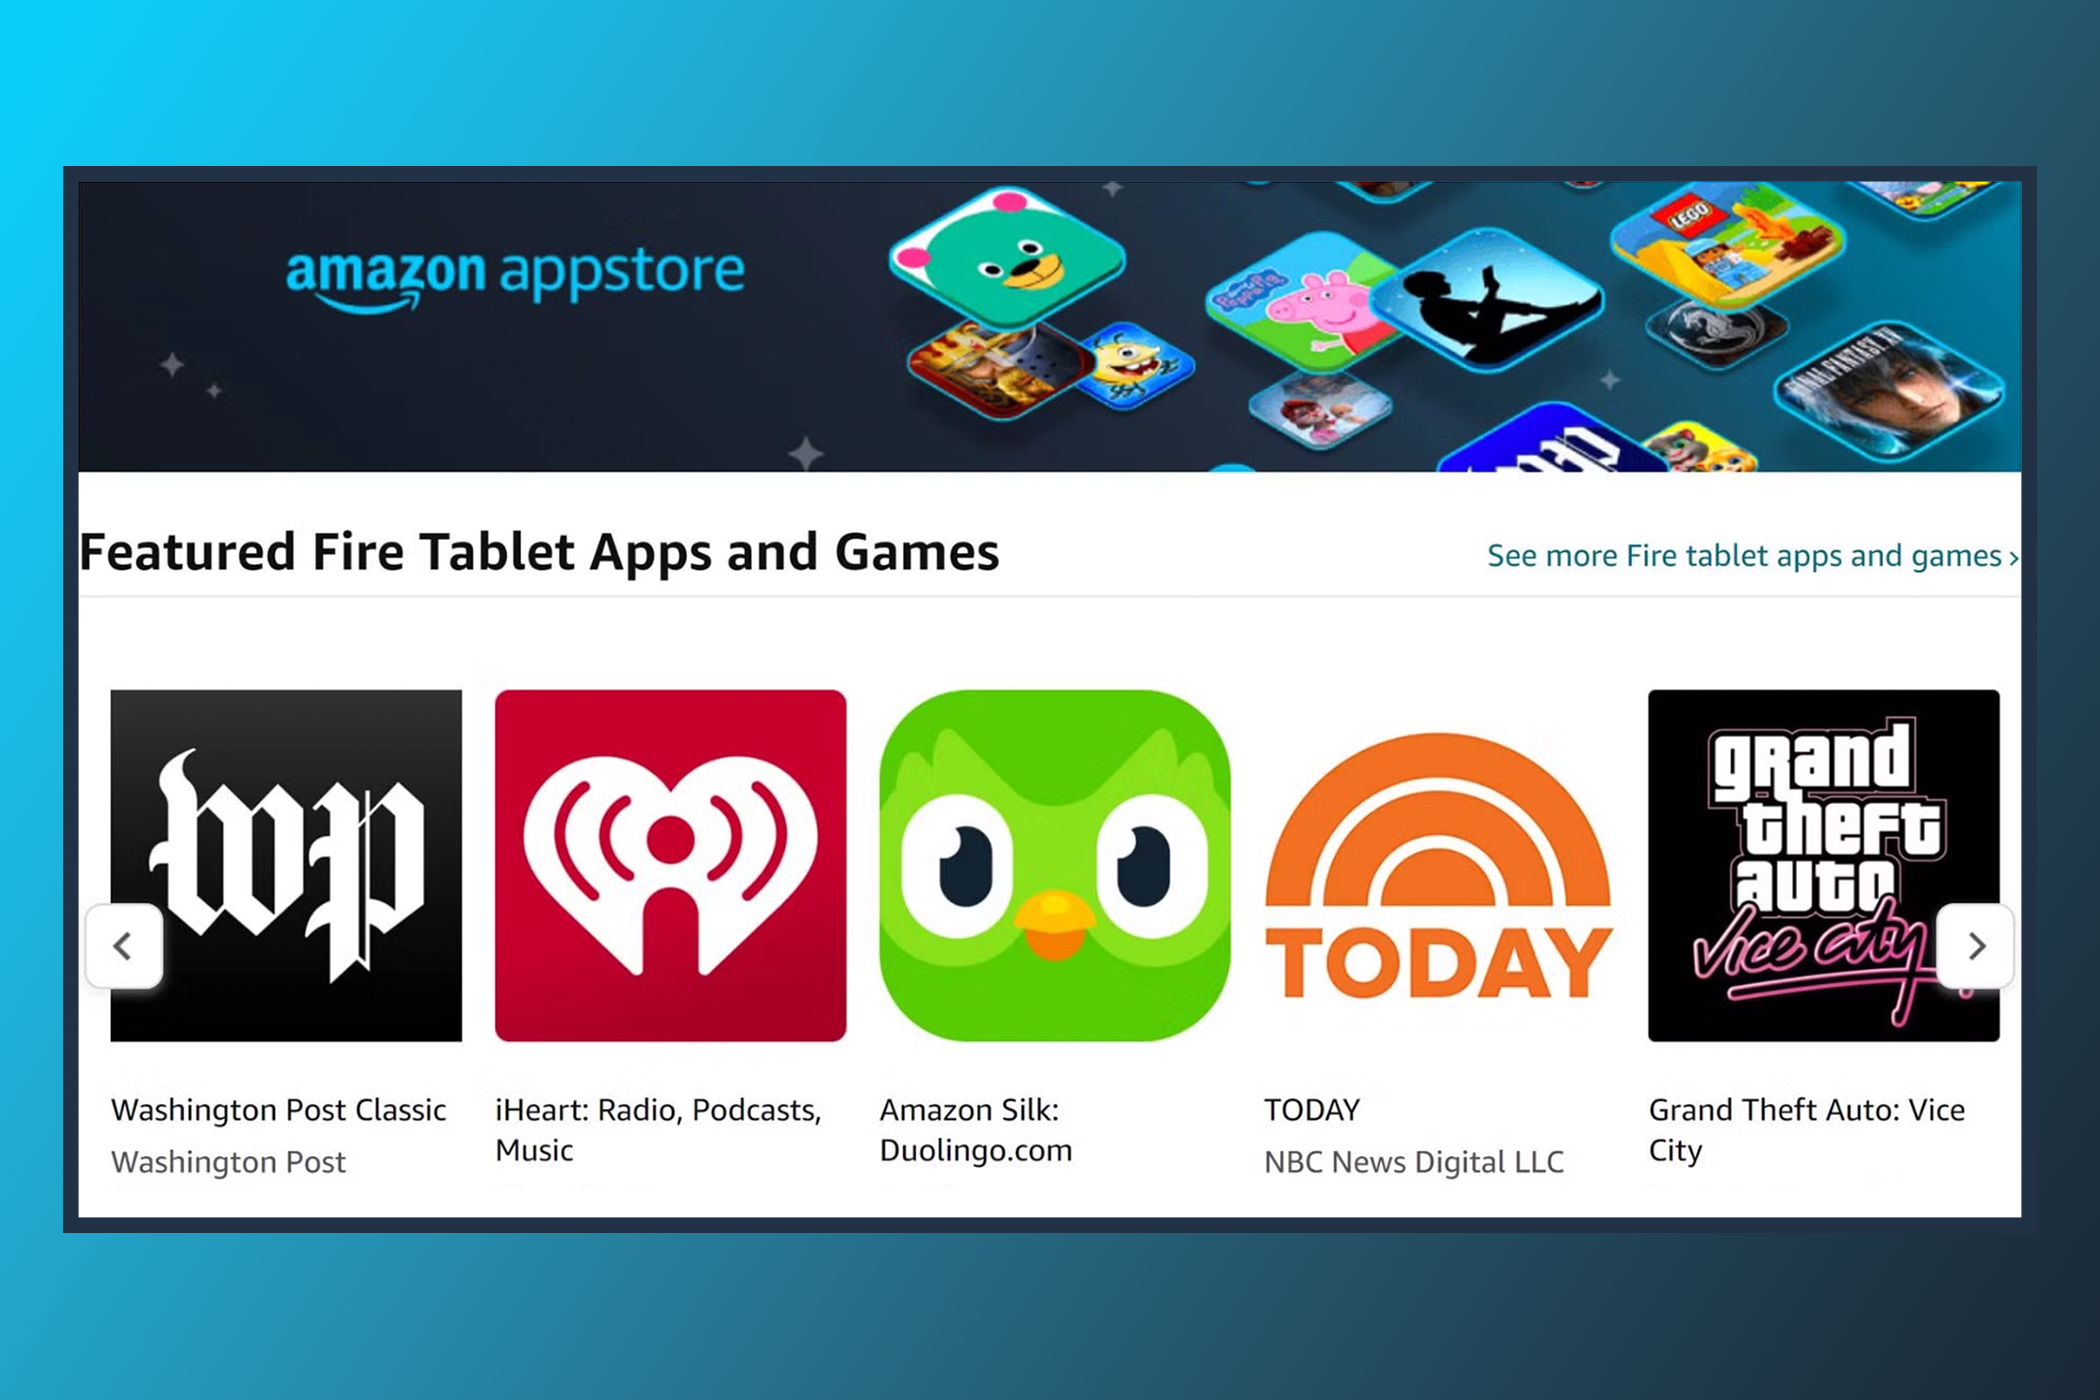
Pro: No Gimmicky Rewards Scheme

Brave is one of the best privacy-friendly browsers, and while based on the Chromium engine, it is effective in shielding you from adverts, trackers, and pop-ups.

One of Brave’s most vaunted options is its Basic Attention Tokens (BAT), which allow you to “support content creators and earn tokens for ads you see in Brave.” In return, you can use your tokens to buy gift cards.

This cryptocurrency-based gimmick has several problems. Very few creators have signed up for the scheme, so essentially, you’re running an adblock while feeling a sense of unjustified moral justification. And you’re still seeing ads. And you’re getting into crypto.

The DuckDuckGo Browser has no such scheme.

Pro: DuckDuckGo’s Browser Has a Private YouTube Viewer

Duck Player selection window in DuckDuckGo browser

If you’re conscious enough of your privacy to install a privacy-focused browser, it’s unlikely you want Google’s YouTube video platform to keep records of what you watch and when you watch it.

While you can watch YouTube without going to YouTube by visiting through a privacy-friendly alternate front-end, such as Safeshare, the browser has anonymity built-in. When you first click on a YouTube video, the browser will ask if you want to watch the video with Duck Player.

Duck Player hides your viewing activity from YouTube and provides a clean viewing experience without ads.

Pro: DuckDuckGo’s Browser Hides Annoying Web Clutter

Automatic protections in DuckDuckGo browser

Pop-ups are a scourge of the modern internet, and almost every page you visit will have pop-ups asking you to either sign in with your Google account or consent to or deny cookies. It’s irritating and can ruin your browsing experience. While there are methods to block cookie consent pop-ups in your browser, these rely on extensions.

While you can also configure your Google account to block sign-in prompts, this approach relies on you being signed into your Google account while you visit websites—anathema to any privacy-conscious web user.

The DuckDuckGo browser automatically manages consent and Google pop-ups, so you never need to worry about it again.

Pro: DuckDuckGo Includes Email Protection

Every modern website wants your email address for different reasons. But you don’t have to share your email address while using DuckDuckGo’s Email Protection service. The service is a free email-forwarding product that helps you hide your actual email address from services without switching email providers. It gives you a free @duck.com email address for this purpose.

In addition to hiding your actual email address, it automatically removes different types of trackers from emails. So, if you’re worried about the proliferation of email trackers, this service takes care of that automatically.

Con: DuckDuckGo Hasn’t Always Been Honest With Users

DuckDuckGo’s 2023 effort isn’t its first browser. The DuckDuckGo browser for Android launched to much fanfare in 2021.

In May 2022, DuckDuckGo acknowledged that far from blocking trackers as it was supposed to, the company had an agreement that prohibited it from blocking trackers from Microsoft.

This was widely viewed as shady behavior.

We think it’s unlikely that DuckDuckGo will indulge in such underhand business deals again; it’s not impossible. Whether you trust them is up to you.

Con: The DuckDuckGo Browser Doesn’t Support Extensions

Most mainstream browsers allow you to install add-ons and extensions. As well as protecting your privacy, these can help you customize your browsing experience, manage downloads, view different file types, and more. There are hundreds of great browser extensions available.

Currently, DuckDuckGo doesn’t support extensions, so if you’ve grown used to browsing the web a certain way, you’re out of luck.

Overall, DuckDuckGo’s browser offers handy features if you’re concerned about privacy while surfing the web. Sure, it has its downsides, but it’s a solid browser for the privacy-conscious.

Facebook Will Introduce AI-Generated “People” With Their Own Profiles to Comment on Your Posts

AI chatbots have become very humanlike in the space of a year, but Facebook wants to take them even further. If things go as planned, you may eventually see AI “people,” complete with a generated profile picture and biography, commenting on posts and interacting with you.

Your Next Facebook Friend May Be an AI Chatbot

As reported by The Financial Times, Facebook wants to make its apps more interactive and entertaining in 2025. To achieve this, the company is looking into using generative AI to make unique experiences. Connor Hayes, the vice president of product for generative AI at Meta (Facebook’s owner), has a pretty unique idea on how to do this:

“We expect these AIs to actually, over time, exist on our platforms, kind of in the same way that accounts do. They’ll have bios and profile pictures and be able to generate and share content powered by AI on the platform…that’s where we see all of this going.”

The vice president didn’t go into detail as to how these accounts will work. It’s likely that they will, at least, use AI to generate posts and talk with people over Facebook’s direct messaging system. But how about sending a friend request to an AI or perhaps having them comment on your posts?

This development does track with Meta’s previous track record with AI. The media has been going all-in on using generative models to create content for people, which we discovered when we tested Meta AI and found that it beat its competitors in several areas. However, all of that forward momentum comes at a price: the company is likely using all of your Facebook content to train its AI without you knowing.

9 Tricks to Make Google Photos Search Work Smarter for You

In the old days, finding a photo meant having to scroll through your gallery endlessly. Fortunately, that’s not the case anymore. Google Photos gives you tons of options to search for and find photos.

1

Find Photos Using Facial Recognition

Google Photos includes a powerful facial recognition feature that can help you locate photos of specific people effortlessly. To use it, you need to go to Google Photos Settings > Privacy and enable the Face Groups toggle.

Once enabled, Google Photos automatically identifies and groups faces across your library. You can go to Collections > People in the Google Photos app to view all the detected faces. Tapping on a face will display all the photos that include that person. This feature is highly accurate and you can even use it to find photos of pets.

2

Locate Photos With Names

If you don’t want to sift through a group of faces every time you’re looking for photos of a friend, you can also name the faces that Google Photos recognizes.

To do this, head to Collections > People, tap on a face, and select Add a name. Once you’ve assigned a name, you can easily find photos of that person by heading to the Search tab and typing their name.

Another benefit of naming faces is that it allows you to search for photos featuring multiple people. For example, if you want to find images that include both Nick and Ben, simply type “Nick, Ben” in the search bar, and Google Photos will display all photos featuring both individuals. This makes it much easier to locate photos of friends and family without endless scrolling or guessing.

Want to relive memories from a trip? Google Photos makes it simple to locate images by location. Simply go to the Search tab and type the name of the city or place you’re looking for. Google Photos will then use metadata embedded in your images to display all photos and videos taken at that location.

You’ll also see an interactive heat map highlighting locations where the photos were taken. You can tap on a location to view photos and videos captured there.

The best part about this feature is that it works even with photos that don’t contain location data. Google Photos intelligently analyzes landmarks, landscapes, and surroundings in your images, matching them with known locations to provide accurate results.

4

Search Photos by Date

You don’t need to scroll endlessly just to find photos from a specific date or month as Google Photos also lets you search by specific date or during a particular time frame. To get started, go to the Search tab and type in the desired date, such as May 6, 2022, or a broader range like May 2022.

Google Photos will instantly display all the images and videos from that period. This feature is perfect for finding photos from birthdays, holidays, anniversaries, or other memorable events.

5

Search Photos by Color

Just like faces, Google Photos can identify colors in your photos. Simply type a color into the search bar, and Google Photos will pull up photos and videos where that color stands out prominently.

For example, if you type green, you might see images of lush landscapes, leafy plants, or any photos in your library with green color in them. What makes this even more useful is that you can combine colors with other objects or themes. For instance, you can search for terms like black smartphone, white car or similar.

6

Search for Specific File Types

You can search for terms like JPG, PNG, or GIF to filter your images by file type. This feature is especially useful if you have photos or videos stored in less common formats like WEBP, MOV, or AVI.

7

Search for Text in Images

Google Photos leverages Optical Character Recognition (OCR) technology to scan and identify text in your photos. This means you can effortlessly locate photos by searching for specific text or phrases that appear within them. If you have a photo of a restaurant menu, for example, typing the restaurant’s name in the search bar will allow Google Photos to locate that image.

This feature works impressively well with all types of text, whether it’s printed, handwritten, or even painted on a sign. It’s especially useful when you’re trying to find a photo of a receipt, document, or any image containing important text but can’t recall when it was taken.

8

Use Descriptive Phrases

The ability to find photos using detailed, descriptive phrases is by far my favorite Google Photos search trick. Instead of relying solely on dates, colors, or locations, you can type natural descriptions to find your photos. For example, typing “skyscrapers” will let you find images in your collection that match that description.

This feature works by analyzing the content within photos, including objects, scenery, and even the atmosphere of the image. So, while looking for a photo, you can be as detailed as you want and use terms like “skyscrapers and bridge” or “skyscrapers and a bridge at night.” Similarly, you can search for photos of landmarks, cakes, documents, or anything else you can imagine.

9

Combine Filters for Advanced Photo Searches

What truly enhances the power of Google Photos search is the ability to combine multiple filters. You can mix criteria such as dates, locations, colors, and objects to narrow down your search and find exactly what you’re looking for.

For example, if you’re searching for a photo of a friend at a specific event, you can type the person’s name along with the location and date. A search like “Nick, beach, July 2023” will show you all the photos featuring Nick at the beach during that time. Similarly, typing “wedding cake, Sarah, New York” could lead you directly to snapshots from a specific celebration.

The possibilities are endless. By combining different search parameters, you can quickly find the photos you need in seconds.

Getting familiar with Google Photos’ powerful search features can save you a lot of time and effort when locating specific photos. The best part is that these search options are easy to use. So, give them a try—you’ll surely find them useful.

The 7 Best Websites to Find Guitar Chords for Songs

Playing guitar is a fantastic way to relax and de-stress. One of the best things about the guitar is the sheer number of songs you can play with a few chords. All you need now is a good website or app with all the guitar chords and lyrics to your favorite songs.

Ultimate Guitar benefits from a huge community of guitarists who contribute chords and tabs to the website with over one million songs. You will also find several different versions of the songs to practice with, too.

Search for songs using the track name or artist, or click the chord button in the search bar to search for particular chords. That way, if you’re new to guitar, it’s super easy to find songs you can already play by searching for the chords you already know.

Users can rate the guitar chords and tabs out of five, making it clear which version is the best. Ultimate Guitar also offers a subscription for $39.99 per year, including access to guitar and music theory lessons, the ability to transpose songs to a different key, and the option to simplify more complex chords.

Ultimate Guitar also allows users to post short videos, called Shots, on the app. You can look at the most popular recent guitar chords and tabs or browse the top 100 tabs of all time to start learning some classics.

Opening a tab will show you the chords and their diagrams, as well as the song lyrics and where to play a chord in the song. When you’re ready to play, click the Auto-scroll button at the bottom of the screen to start your jam session.

Download: Ultimate Guitar: Chords and Tabs for iOS | Android (Free, subscription available)

AZChords chords for APT. by Rose and Bruno Mars

AZChords is a fantastic and free website that offers thousands of popular songs with guitar chords. You can sort artists alphabetically, check out trending artists on the home page, and see the latest updates to song tabs for recent songs like I Love You, I’m Sorry by Gracie Abrams.

When you click on a song, AZChords will display the lyrics and chords corresponding to a specific lyric or part of the song. You can click on the chord name highlighted in blue to look at where to place your fingers on the guitar, too.

Notes on AZChords for APT. by Rose and Bruno Mars explaining common mistakes

For example, the entry for APT. by Rosé and Bruno Mars includes the list of chords used next to the lyrics. At the bottom, the entry also includes notes about the strumming pattern, general chord progressions, and common mistakes people may encounter when playing this song!

Chordify chords for I Can Do It With A Broken Heart by Taylor Swift

Sometimes, you want to learn a particular song even if you don’t know how it goes that well. Chordify is perfect for those situations. This website features a super clean interface with large chord diagrams that update as the song plays in real time.

Hit the play button and grab your guitar. Chordify loads a YouTube video in the corner and starts playing the actual recording. The display in the center of the screen shows a square box for each bar and tells you when to change to the next chord.

If anything, it’s all a little bit too simple. There’s no information about strumming patterns, and Chordify doesn’t offer alternate chord fingerings, even if the song needs them. There are no lyrics, either, but it’s a great place to get started.

Also, if you sign up for a yearly subscription for $27, you can unlock tools to change the tempo, volume, and pitch of the song as you play along with it.

Download: Chordify for iOS | Android (Free, subscription available)

Stairway to Heaven Tab on Songster

Songsterr provides an in-depth look at sheet music and chords for those proficient in reading music. With a premium subscription to Songsterr at $9.99 per month, you can unlock original audio that will play along with the sheet music, change the tempo, and even play back individual sections on a loop to keep practicing.

This website syncs with a YouTube version of the song, so you can listen while you play along. You can even transpose the song to different keys for free. Clicking on a specific part of the song will also sync up with the YouTube video. This is helpful if you’re stuck on a certain part of the song and want to practice.

Songsterr is much more advanced than just the lyrics and chords in the above options, so it may take some getting used to if you’re a music novice. If you want, find the best audio interface to record yourself with so you can review your performance afterward.

Download: Songsterr for iOS | Android (Free, subscription available)

Chordie homepage featuring absolute beginner songs and campfire songs

At Chordie, you can search for the song name, artist, lyrics, or chords you want to play. It doesn’t have as big a catalog of free guitar chords as Ultimate Guitar, but Chordie presents chords and lyrics in a super clean interface.

Chordie is built from another community of guitarists who contribute their time to uploading guitar chords and lyrics to different songs. What’s nice about Chordie is there’s only one version of each song, so you don’t need to work through five bad versions first.

When you open a song on Chordie, the chords you need are displayed in the top-right corner. You don’t need to flip through a guitar book every time you forget how to play an F chord when you can just scroll back to the top of the page.

Chordie also gives you simple tools to change the font size, transpose to a different key, adjust the chords based on your capo placement, and auto-scroll while you play along. The clean interface includes a tab section for important riffs, as well.

E-Chords tabs page featuring songs like Last Christmas and Die With A Smile

The E-Chords home page features video lessons, new tabs, tutorials, and highlighted blogs. Search for songs, artists, or lyrics to find the free guitar chords you’re looking for. You can then open them up onto a clean page with lots of useful tools running down the left side. There are video lessons available for free, too.

You can customize how the songs look by choosing simplified chords, changing the color of links, and even clicking and dragging chords to where you want them beside the lyrics. Hover your mouse over a chord name above the lyrics to see how to play it.

The verses and choruses are separated, making it easy to learn the structure of a song with just a quick glance. All the chords you need are listed at the bottom of the page as well, so spend a moment there to learn the song before you get started.

There are great customization options, as well. You can use the tools on the left of the screen to set your scroll speed, change the font size, change the color, or simplify the chords to your liking.

YouTube guitar chord results for Without Me by Halsey

YouTube is a classic for all great DIY, how-to, and other video-based learning endeavors. There are a multitude of video tutorials for popular songs. A quick YouTube search for a song will pull up a variety of different video tutorials. Some videos have accompanying chord charts, while others just have a person playing the guitar and showing you how to place your fingers on the guitar.

YouTube is a great alternative resource to written guides because creators can demonstrate proper strum patterns, tempo, and other twists to make any given song sound more like the original.

There are some great websites if you’re looking to learn the basics of playing guitar through lessons, too.

Download: YouTube for iOS | Android (Free, subscription available)

You’ve got an entire world of popular songs to learn the guitar chords and lyrics for, and you can do it all for free. Whether you learn best by reading or watching, all of these websites and apps are great tools to have in your musical toolbox.

Why I Finally Switched to an iPad After Using an Android Tablet for Years

Summary

  • Seamless integration with MacBook and iPhone simplifies multitasking.
  • The Large screen of the iPad Air provides valuable desktop real-estate.
  • The iPad Air offers necessary apps and accessories for efficient light work.

I switched to an iPad Air after having been an Android fan for years and using an Android tablet. I’ve never been a fan of Apple’s walled-garden approach. However, after using my iPad Air, I don’t think I could go back to an Android tablet.

Integrates Seamlessly With my MacBook and iPhone

I don’t like how Apple keeps you stuck in its ecosystem, but it does make using all its products together so much easier. I keep an iPhone as my work phone and bought a MacBook Air for working when I travel (although I still use my Windows laptop as my main device), so buying an iPad to replace my aging Android tablet just made sense.

Another feature that I like about using the iPad with my iPhone and MacBook is that it syncs the Do Not Disturb status across all devices. Plus, AirDrop makes it a breeze to transfer huge files between devices. Aside from that, since I prefer working with three screens and my MacBook Air only supports one external screen, I use Sidecar to turn my 13-inch M2 iPad Air into a third display.

Availability of a Massive Screen for the iPad Air

The large screen of the 13-inch iPad Air versus the iPhone 14 Pro Max
Jowi Morales / MakeUseOf

I’ve always loved the desktop real-estate provided by larger displays. That’s why I loved Samsung’s Note smartphones, and all laptops I’ve ever owned had a 15-inch screen. That’s why I was delighted when Apple launched the 13-inch iPad Air for just $799, as I didn’t need to spend the extra $500 to get the 13-inch iPad Pro.

Samsung has the Galaxy Tab S10 Ultra with its larger 14.6-inch, but this one is priced at $1,200. There’s also the Galaxy Tab S10+, which has a screen size similar to the 13-inch iPad Air, but it was more expensive at $999 when it launched. Although the price on the Samsung website now says $849.99, that’s still $50 more than what Apple offers.

I still feel that the 13-inch screen is cramped, especially if I’m working on it all day. However, it provides the perfect balance between screen size and portability, especially as I carry it with me every time I leave the house. It’s also a better screen for enjoying movies whenever I fly.

Works Great as a Laptop Alternative for Light Work

Working on the iPad Air while away from my workstation
Jowi Morales / MakeUseOf

Another reason I bought an iPad was that it is great for light work. I have a more optimized workflow on my Windows PC, and there are some things I can do on my MacBook Air that I cannot on my iPad, but they’re both not as portable as my Apple tablet. So, whenever I go out, I bring my iPad with me, just to ensure that I can get things done in case of an emergency.

For example, we once needed to go to the hospital because my wife got scratched by a rusty nail. While we were in the emergency department waiting for some labs and X-rays, I was able to sneak in some work and finish an article on my iPad.

Aside from writing, the iPad is also useful for professional photographers. I use it for editing photos on the go, and when I have to set up a studio, I use it as a wireless monitor. This allows me and my clients to see the images I take on a larger screen instead of relying on the tiny display of my camera.

Has All the Apps I Need

The apps I use on my iPad Air
Jowi Morales / MakeUseOf

One of the reasons why iPads are ahead of Android tablets is the number of well-thought-out apps you can find on the App Store, as well as the typically longer software support that Apple gives its products. For example, Adobe Lightroom, which I use for editing photos, arrived earlier on the iPad than on Android devices. All the apps I use for work are also readily available on the App Store and usually work better on iPadOS, even though they’re not Apple software.

So, even though the apps I mainly use—Microsoft 365, OneDrive, Google Drive, Asana, Trello, and Slack—aren’t developed by Apple, they still play nice with the iPad. This means I can seamlessly switch between my iPad, MacBook Air, Windows PC, iPhone, and even Samsung phone without having to worry about manually transferring things.

Accessories Make Productivity Easier

Using my iPad Air with an external monitor and mouse connected via a hub
Jowi Morales / MakeUseOf

Aside from its large screen, the other thing that I love about the iPad Air is its USB-C port. This means I don’t have to get a proprietary cable to connect accessories and charge the device, unlike my iPhone 14. Furthermore, my iPad has a USB 3.2 Gen 2×1 port, meaning I can transfer data at up to 10 Gbps.

Because of this, I can easily attach a USB Hub to the tablet, like this Baseus Metal Gleam Series II I reviewed, and add several accessories to it to make working easier. That means I can easily attach an external drive, especially when I’m working with large files, and even use a wired mechanical keyboard if I’m in the mood for writing.

I even bought an iPad keyboard case that’s right for me. It lets me pull out my tablet from my bag and start writing or editing photos ergonomically anytime. If you don’t want to pay a premium for Apple accessories, there are also many cheaper alternatives to the Magic Keyboard that are just as good.

These are some reasons why I finally switched to the iPad Air after several years of owning an Android tablet and sticking to Android devices. While Samsung’s giant Galaxy Tab S10 Ultra is a tempting offer, I ultimately found better value in the 13-inch M2 iPad Air, and I’m perfectly satisfied with this device.

Why I Prefer Windows File Explorer Over macOS Finder

When it comes to file management, both Windows File Explorer and macOS Finder have their strengths. However, as someone who uses both systems, I keep coming back to File Explorer for its simplicity and more user-friendly features.

1

Easier Navigation From the Start

QubixStudio / Shutterstock

Windows File Explorer makes navigation more seamless from the moment you open it. Features like the path bar and toolbar are already built-in, so you don’t have to tweak settings to access them.

In Finder, these handy tools aren’t visible by default—you have to dig through the settings to enable them. As such, some users may not even realize they exist.

It’s a small detail, but one that makes File Explorer feel more intuitive right out of the box.

2

Default Access to Hard Drives for Fine-Tuned File Management

Google Drive in Windows 11 File Explorer

File Explorer gives you instant access to your hard drives and important system files directly in the Pinned Folders area. This makes it easy to jump into important system files as you need to.

With Finder, accessing your hard drive requires extra steps. You actually have to toggle on a setting to show your hard disks on Mac. It’s a small thing that Apple has done to help prevent people from tinkering with files they shouldn’t.

However, the fact that most people could probably use a Mac for years and never realize this setting exists is yet another reason I prefer File Explorer’s “show first and trust the user” approach.

3

File Explorer Organizes Everything Better

Windows 11 File Explorer Showing Tabs

One of File Explorer’s most well-known features is its hierarchical organization system. The left-hand tree view is a game-changer for quickly navigating through folders and subfolders.

Finder lacks this level of clarity for me, making it less straightforward to drill down into nested directories. For users juggling multiple folders, File Explorer’s structure is more streamlined and easier to navigate, saving time and reducing frustration.

4

Move More Types of Files Cut/Paste

While Finder requires a keyboard shortcut to cut and paste files, File Explorer provides this option directly in the context menu. Sure, shortcuts are convenient, but sometimes, using the menu is easier—especially if you’re explaining the process to someone unfamiliar with shortcuts, like an older relative.

Additionally, there’s the fact that Mac’s Finder doesn’t support the use of copy/paste to move anything beyond just text. Sure, you can make use of a little Mac workaround to move files more easily, but Windows’ File Explorer makes it easy right from the start. It’s a small touch, but it highlights one of the ways File Explorer is accessible for everyone.

Mac’s Finder has its perks, especially when working within Apple’s ecosystem. However, when it comes to ease of use, organization, and quick access to essential features, Windows File Explorer remains my go-to file manager.

Whether you’re a tech-savvy user or a beginner, File Explorer strikes the perfect balance between simplicity and functionality, making it hard to beat.

4 Ways AI Is Making Smart TVs Better

Smart TVs are changing how we all enjoy entertainment, and AI is taking that to the next level. From better picture and sound quality to voice control and so much more, these AI-powered features are making smart TVs so much better!

Better Voice Control and Interaction

Thanks to AI-driven virtual assistants like Alexa and Google Assistant, smart TVs now offer a far better quality of voice control and interaction than even a few years ago. That means you can search for movies, adjust the volume, or even check the weather and other mundane tasks, all with simple voice commands.

AI-powered voice control allows hands-free operation and a more seamless TV experience. That means no more hunting down that lost remote or typing in long searches to get what you want. Instead, you can sit back, relax, and let your voice do all the work. TiVo’s voice search goes even further, allowing you to search using quotes, songs, names, and more.

If your smart TV’s voice control is underwhelming, it could be a sign you need to upgrade your smart TV.

Advanced Picture and Sound Optimization

AI is pioneering the revolution of picture and sound quality on smart TVs. AI algorithms analyze room conditions, content type, and even viewer preferences to adjust brightness, contrast, and sound settings automatically for the best viewing experience possible.

For example, Dolby’s Vision IQ uses AI to dynamically adjust picture settings based on the ambient light in the room, meaning that the viewer enjoys the best image quality, no matter what the lighting conditions are in the room. In the same vein, AI-based sound calibration technologies optimize audio settings in a way that delivers immersive and high-quality sound unique to your personal preferences. All without you really having to do a thing!

Smart Home Integration

Nowadays, smart TVs aren’t just for watching your favorite shows; they’re increasingly becoming central hubs for controlling all your smart home devices. AI lets smart TVs seamlessly integrate with your web of smart home devices, meaning you can control lights, cameras, music, or thermostats right from your TV interface—nothing else is needed.

Imagine being able to dim the lights, adjust the temperature, or even check who is at the front door without leaving the comfort of your couch. Sounds nice, especially if you are in the middle of a movie marathon!

AI-Powered Accessibility Features

Drop shadow effect on Netflix subtitles
Anindra Siqueira/MakeUseOf

And finally, AI is playing a huge role in improving the accessibility features on smart TVs, making entertainment much more inclusive for just about everyone. As someone who pretty much always watches movies with subtitles on due to hearing loss, this is huge for me. Real-time captioning, audio descriptions, and gesture-based controls are just a few examples of how AI is making accessibility easier and more cost-effective for those running the show.

As just one example, AI-powered speech-to-text technology is making real-time captioning more available, which benefits individuals with hearing impairments. For another, voice commands and gestures are making it easier to provide alternative input methods, catering to those users with mobility challenges. Both of these AI-driven accessibility features, among others, are transforming the way users with diverse needs interact with their smart TVs and, really, the world around them, making entertainment more inclusive and enjoyable for everyone.

AI is quickly revolutionizing the capability and role of smart TVs in our lives, making them far more personalized, intuitive, and accessible. Our TVs are becoming ever more intelligent and adaptive to our needs, and we can only expect even more exciting advances in the future, further improving our entertainment experience!

Samsung Gallery Beats Google Photos Every Time: Here’s Why

Having used Pixel devices in the past, Google Photos has always been my go-to choice for photo management. However, since switching to a Samsung device, Samsung Gallery has quietly become my preferred option, and it beats Google Photos in several key areas.

1

Superior Photo Organization and Management

One of the things that made me first admire the Samsung Gallery app was its intuitive, straightforward UI. It’s exactly the kind of user experience you’d expect from a gallery app.

For example, Samsung Gallery allows me to sort albums by name or by the number of media files within them. Additionally, there’s an option to hide albums I don’t want to see and to group albums together—both of which make browsing through my collection much more organized.

Then there’s Samsung Gallery’s suggestion feature, which I find incredibly useful. It quickly identifies and suggests duplicate and outdated photos, allowing me to delete them with just a few taps. This level of efficiency and photo management is something that Google Photos doesn’t offer.

2

OneDrive Integration

As someone who’s already paying for Microsoft 365, I find Samsung Gallery’s integration with OneDrive incredibly convenient. With the 1TB of OneDrive storage included in my subscription, I can effortlessly back up and store all my photos without having to worry about running out of space.

Backing up my photos to OneDrive also means I can easily access them on my Windows PC without needing to transfer or download them. This seamless integration saves me time and ensures all my photos are in one place, whether I’m using my phone or computer.

While I could achieve a similar experience by setting up Google Drive on my Windows PC, it would require paying for additional storage on Google Photos.

3

Seamless Search for Both Backed-Up and Local Photos

When it comes to finding specific photos, Google Photos undeniably offers a robust set of tools—such as face recognition, location tagging, and even searching by descriptive phrases like “sunset” or “birthday.” However, there’s a major caveat: these features only work on photos that are backed up to the cloud.

So, if I haven’t synced everything, or if I’m deliberately avoiding uploading certain images to save storage or protect my privacy, I can’t use Google Photos’ search tools to find those images.

This is not a problem with Samsung Gallery, as its search functionality isn’t tied to whether a photo is stored locally on my device or backed up to the cloud. This means I can effortlessly find what I’m looking for—regardless of where the images are stored. This is a huge convenience for me that Google Photos simply doesn’t offer.

As someone who loves to fine-tune my media, I’ve tried both Samsung Gallery and Google Photos for editing photos and videos. While both apps offer solid editing tools, Samsung Gallery stands out for its powerful and versatile features.

Samsung Gallery easily removes shadows and reflections from any of my photos. It also offers handy tools for fixing red-eye and has “Face Effects” that let me adjust features like smoothness, tone, jawline, and more. Google Photos’ photo editor lacks these features.

Samsung Gallery’s video editor also offers a bunch of useful options. For instance, Samsung Gallery not only lets me remove sound from a video but also allows me to add new background music stored on my phone directly within the app. In comparison, Google Photos only lets me mute the video file.

Another feature missing from Google Photos but available in Samsung Gallery’s video editor is the option to reduce video file size. This is especially handy when I don’t want to delete a video completely but also don’t want it taking up too much storage space.

5

AI-Powered Photo Assist

In addition to regular photo editing features, Samsung Gallery also offers advanced AI capabilities that Google Photos lacks. One of my favorites is the Generative Edit, which allows me to seamlessly expand images. Whether I want to add more background or extend a landscape, it blends the new elements with the original photo effortlessly.

Another fun and creative tool is the sketch-to-image feature, which transforms my doodle into a realistic object and seamlessly integrates it into the photo.

The AI-powered Photo Assist feature also lets me resize, remove, and reposition objects within photos. While Google Photos’ Magic Editor offers this functionality, it frustratingly limits me to just 10 edits per month unless I subscribe to Google One. In contrast, Samsung Gallery offers unlimited edits at no extra cost, making it a much more flexible choice for creative photo and video editing.

6

Option to Copy and Paste Edits

Another useful Samsung Gallery feature is the ability to copy and paste edits across multiple images. It’s such a time-saver, especially when I’ve made a few adjustments to one image and want to apply the same changes to others.

Here’s how it works: If I’ve made some edits to a photo—whether it’s adjusting the brightness or adding filters—there’s an easy option to copy those edits. I just tap the three-dot menu in the top corner and select Copy Edits. Then, I can quickly choose other photos I’d like to apply those exact same adjustments to. Once I’ve selected the images, I tap the three-dot menu again and hit Paste Edits.

Again, this is a feature that Google Photos doesn’t offer. While it may not be a major issue for many, it’s one of those nice-to-have features that make Samsung Gallery stand out for me.

7

Copy Images to Clipboard for Easy Sharing

With Samsung Gallery, I can easily copy images to the clipboard for easy sharing. All I need to do is open the image, tap the three-dot menu, and select Copy to clipboard. Then, I can easily paste the image into any app—whether it’s a messaging app or email. What’s even better is that I can also pin that image to my phone’s clipboard, allowing me to access it later without having to dig through my gallery.

This is a feature that I use almost daily. Unfortunately, Google Photos doesn’t offer this level of integration, making Samsung Gallery a more practical choice for me on my Galaxy phone.

While Google Photos certainly has its strengths, I’ve found that Samsung Gallery’s user-focused approach and practical tools are a perfect fit for my everyday needs. From easy image sharing to seamless integration with my Galaxy phone, it offers greater convenience and flexibility. If you also own a Galaxy phone, give Samsung Gallery a try—you might just end up leaving Google Photos behind!

9 Ways to Fix Microsoft Word Documents Not Printing Correctly

Printing in Word should be seamless, but issues can sometimes arise. Missing text, misaligned margins, or entire pages not printing can derail your work. Fortunately, most of these problems have easy solutions.

1

Make Sure the Printer Is Working

This might seem obvious, but starting your diagnosis properly is always best. Before diving into any fixes, it’s best to rule out any issues with your printer first. To do so, you can print a test page on your PC using these steps:

  1. Press Win + I to open the Settings app.
  2. Go to Bluetooth & devices > Printers & scanners.
  3. Select the printer you’re using and click the Print Test Page button.

If there is an issue with your printer, refer to our guide on what to do when your printer is not working. However, if the test page prints correctly, continue with the following fixes to fix the problem.

Sometimes, issues with a document can prevent Word from printing it correctly. Thankfully, Word includes a handy feature that allows you to repair your documents with ease.

To use it, go to File > Open > Browse and select the Word file that’s not printing correctly. Then, click the tiny arrow next to the Open button and select Open and Repair. Wait for Word to repair and open the file and then try printing it again.

Open and Repair option for Word document

Alternatively, you can create a new Word document and copy all the content from the original file into it. If this resolves the issue, it means the print error was isolated to the original document.

This is more of a workaround, but it can be useful if you’re in a rush and don’t have time to check what’s causing the problem. Simply save your Word document as a PDF and then print it. PDFs preserve the formatting and layout of your document, ensuring it will appear exactly as intended when viewed or printed.

To convert a Word file to PDF, press F12 to open the Save As dialog. In the Save as type dropdown menu, select PDF and click Save. Your document will be saved as a PDF file and should open automatically once saved. After that, try printing it again and see if it works.

Save as dialog showing PDF option highlighted

4

Check for Problems With Windows

Both Windows 10 and 11 include a printer troubleshooter tool that can automatically find and fix common issues. Hence, it’s a good idea to run it if you continue to experience problems with Word printouts. Here are the steps you can follow:

  1. Press Win + I to open the Settings app.
  2. Head to System > Troubleshoot > Other troubleshooters.
  3. Click the Run button next to the Printer and follow the on-screen prompts.
Printer troubleshooter option in Windows 11 settings app

If the issue persists after running the printer troubleshooter, it could be related to the printer drivers on your PC. You can refer to our guide on fixing printer driver issues to restore your printer’s functionality.

5

Scaled Printing Issue

A less common but frustrating printing issue in Word is when pages print at a fraction of their actual size, occupying only a small portion of the printed paper. This is often caused by scaling factors that are set incorrectly in the print settings. Here’s what you can do to fix that.

  1. In Word, press Ctrl + P to open the Print page.
  2. Click the Printer Properties option under your printer.
  3. Under the Page Setup tab, tick the Manual Scaling option and adjust the Scaling to 100%.
  4. Click OK to save changes.
Printer properties dialog box on in Word

This should make the pages print at full size, with text and any graphics filling the entire page.

6

Check for Hidden Text

Microsoft Word offers the option to hide text within a document. This hidden text behaves similarly to formatting marks, such as spaces, line breaks, and tab characters—it takes up space on the page but does not appear when printed or viewed on screen. Sometimes, hidden text can be the reason why certain parts of your document are missing from the printout, even though they are visible in the soft copy.

If you suspect that hidden text might be causing your printing issue, here’s how to check and reveal any hidden content in your Microsoft Word document:

  1. In Word, go to File > Options.
  2. Select the Display tab and uncheck the Hidden text option.
  3. Click OK and print the document again.
Word Options window with Display tab selected

7

Check Form Data Print Options

Another common printing issue in Word occurs when table borders or other elements in your document don’t appear in the printed version, even though they are visible on screen. Here’s how to fix that.

  1. In the Word document, go to File > Options.
  2. Switch to the Advanced tab.
  3. Scroll down and uncheck the Print only the data from a form option. Then, click OK.
Word Options window with Advanced tab selected

When you print directly to the printer, Word bypasses the print spooler and sends the document straight to the printer. This can help resolve issues such as printing delays, missing pages, or incorrect formatting that might occur when the document is processed by the spooler first.

To print directly to the printer in Word:

  1. Open the Control Panel using the search menu.
  2. Click on Devices and Printers.
  3. Right-click on your printer and select Printer properties.
  4. Go to the Advanced tab and tick the Print directly to the printer option.
  5. Click OK.
  6. Try to print your Word document one more time.
Printer properties dialog box on Windows

9

Repair Microsoft Office Suite

If you’ve tried all the above fixes and the issue persists, or if you’re experiencing similar issues with other Office apps, you can try using the Office repair tool. This tool scans all your Office apps, including Word, for potential issues and automatically repairs them. Here’s how to run it.

  1. Press Win + R to open the Run dialog box.
  2. Type appwiz.cpl in the text box and hit Enter.
  3. Find Microsoft Office suite, right-click it, and select Change.
  4. Select the Online Repair option and click Repair.
Repair Microsoft Office

Wait for the repair tool to run and then try printing from Word again.

When you’ve spent hours working on a document, it can be frustrating when Word fails to print it correctly. Hopefully, that’s no longer the case, and one of the above tips has helped you resolve your printing issues in Word.

What Do the Android Status Bar Symbols Mean?

Changes made:

  • Added all new images.
  • Removed initial paragraphs introudcing Android status bar.
  • Modified content for icons that have retained. Redistributed some icons across sections.
  • Removed some icons that aren’t used anymore.
  • Removed one section on upload/download.
  • Added one section on different modes.

The new feature image: android-status-bar -icons

Please add as featured image, and remove the image below.

Lucas Gouveia/MakeUseOf

The icons at the top of our Android smartphones have changed a lot over time. As more features are added, more icons appear, and it can get a bit confusing at times. Here’s what they all mean.

Battery and Charging

The battery icons on Android Status Bar

Perhaps the most recognized and easiest icons to interpret are the battery icons—these are variants of the generic battery symbol that mimics a battery cell.

  • There’s the battery status icon which might be accompanied by a percentage. A simpler version of this will show only an appropriately filled battery.
  • The battery charging icon is displayed if your phone is currently charging—wired or wireless.
  • The battery saver mode is represented by a battery bar icon with a cross (akin to the red cross symbol that is commonly associated with first aid and medical services).
  • For low battery – which usually means it is somewhere between fifteen and five percent, and is configurable – the icon is a battery symbol containing an exclamation point.

The Android status bar is the strip of icons running across the top of your screen. The top right corner is where you’ll see most of these icons, while the top left corner is mostly reserved for app notifications.

Network and Connectivity

Network icons on Android Status Bar

The network bars and Wi-Fi icons represent your mobile and Wi-Fi network as well as additional connectivity features. The mobile network and WI-Fi icons display a rough approximation of the strength of the signal—the amount of the icon filled-in can be used to gauge how strong your signal is, like the battery icon. Some carriers also display the network speed LTE, 4G, or 5G – alongside this icon.

  • An exclamation point next to the mobile network or Wi-Fi symbol means there’s no internet connection. For Wi-Fi though, it indicates that the device might be connected to the WLAN (wireless local area network) but not to the internet.
  • A circle with a cross inside means that your device is on data saver mode. This simply means that your device is reducing data usage wherever possible allowing you to save on your data plan costs.
  • There’s the mobile hotspot icon that comes up when you turn on the feature to turn your smartphone into a Wi-Fi hotspot.
  • The good ol’ Bluetooth icon denotes that your smartphone is paired and connected to another device, like a pair of headphones, your smartwatch, etc.
  • An airplane icon which replaces the mobile network and Wi-Fi icons implies the airplane mode which cuts off all the connectivity from your smartphone. You can then turn on the Bluetooth and Wi-Fi options separately though to connect to the on-board Wi-Fi while traveling by air or to listen to the music from your phone, tablet, or laptop. on your phone.

Calling

Call icons on Android Status Bar

The traditional icons for the calling experience have been there for quite a while.

  • The most obvious of these is the phone icon, which varies between an ongoing call and a missed call. Interestingly, these icons appear on the left side of the status bar.
  • If you have muted your microphone during a call, you will find a crossed-out microphone in your status bar—on the right.
  • A phone icon on the right, very similar to the ongoing call one, indicates that you are on speaker mode. Previously, it used to be the traditional speaker symbol.

Different Modes

Different Modes on Android Status Bar

Often you set your phone to one of the many available modes to shut off notifications, turn off the ping sounds, or just to focus on the real world things that you’re engaged in.

  • An icon that looks like a phone bar with vibration denotes that the phone is on vibrate mode, and will vibrate for calls and notifications but not make any sounds.
  • A crossed out speaker implies that the phone is on silent mode and will neither make any sounds for calls and notifications nor vibrate for the effect.
  • Another available mode is the do not disturb option which blocks all notifications (you can customize apps or contacts that can come through even if DND is turned on)—this icon is a solid circle containing a horizontal dash.

Other Icons

Miscellaneous icons on Android Status Bar

There are a host of other icons you’ll see in your status bar from time to time. In addition to these status icons, you’ll see app-specific icons whenever you receive notifications.

  • The upside-down teardrop with a hole represents that the location service is on, and one of your apps, or an Android feature, is tracking or sharing location. For example, this icon is persistently active when you’re using Google Maps for navigation.
  • A box containing the Wi-Fi symbol will appear whenever you are casting from your phone to another display device on your network. An example would be casting a YouTube video from your phone to the TV in your living room.

Now that you can recognize some of the most common Android status bar icons, a quick glance to the top-right corner will always tell you what’s going on with your phone.

Is Obsidian Really Worth the Learning Curve for Note-Taking?

Obsidian is a feature-packed note-taking tool, but does it justify the time spent getting familiar with it and customizing it, or do the benefits fall short?

Long-Term Reflection and Learning

On the surface, Obsidian looked generic to me, like any other app out there, but only using it over a couple of months revealed its underlying benefits. Fast-forward to today, Obsidian has become my central hub, a map of what I have learned and what I am learning, finally making my search for a note-taking app come to an end. When I think of Obsidian, I consider it a tool that glues your notes together and makes notes as a whole greater than the sum of its parts.

Previously, in my note-taking process, I used to jot down notes, and that was it. They were merely words and numbers, placed on one line after another, ready to be forgotten. Only after using Obsidian did I realize that my notes lacked a critical component — connections. How one note related to another. Instead of my notes being independent fragmented entities, Obsidian allowed me to turn notes into a chain of thoughts.

For example, at the start of a course during my Computer Science degree, for the first few classes, I took notes diligently, primarily due to my high motivation when a course started. However, as I approached the midpoint of my semester, my notes made no sense to me. They felt scattered and segmented to the extent that I stopped taking down notes.

When I repeated the same process, but this time using Obsidian, my notes were connected and appeared as a whole. They had connections, starting from one point and heading towards another. I could see where everything started and where it was heading.

obsidian search feature showing results from coreML keyword

This approach to note-taking is precisely what I was missing with other apps. And the best part is that the more notes I took, the better the system became.

This was possible due to Obsidian’s key features: Note linking, graph view, and note tags. Note linking lets you connect one note to another, which you can visually see in graph view. At the same time, the note tagging feature lets you tag notes to a particular keyword.

Discovering Deeper Connections Between IdeasObsidian graph view from cold war notes that show how different events related with each other

Obsidian’s Graph View visually maps out the relationships between notes, creating a bird’s-eye view of your knowledge network. With this, not only do you get a logical overview, but it also helps you discover ideas and relations between concepts that weren’t apparent at first, compared to flat note-taking, where your words will just stay on the page.

During a history course at university, we learned about the Cold War. The graph view helped me map out the relationships between key events such as the Cuban Missile Crisis and the Berlin Airlift, connect them with key figures such as Kennedy and Khrushchev, and also connect concepts such as deterrence and domino theory.

Furthermore, graph view also helped me discover more things I needed to research. For example, the word NATO appeared in a note about the Korean War but wasn’t linked with my NATO note. With this, I quickly found a new area to explore: how NATO related to the Korean War.

A Knowledge Hub That Grows With Me

One of the major drawbacks I found with other note-taking tools is that once the notes grew in number, organizing them became an issue, as I had to manually open folders and see what was in them, decide whether to place it in a particular folder or make a new one. However, tagging and note interlinking saves you from these problems.

Obsidian search showing results related to machine learning search query

Usually, after a week or two, I organize my Obisidan vault. I go to graph view, look for individual nodes, and think about which notes I can connect them with. Moreover, to make things easy, Obsidian’s search can easily find notes for you; you just have to type the keyword, and it will output notes with that particular keyword or tag.

Dialogue box in Obsidian that shows create vaults, and also option to create new vault

Obsidian also lets you create multiple vaults that can help separate different kinds of notes and make clear distinctions between them. For example, you could keep work-related notes, projects, and research separate from personal journals, hobbies, and personal information. So, even if you diverge into new domains and topics, Obsidian will not hinder you but make things more manageable.

Realizing What I Know (and What I Don’t)Obsidian graph view for Machine Learning notes, that show how different conecpts relate with each

The Obsidian graph view lets you easily judge your expertise on a particular topic. You create a trail of interconnected ideas when you link one note to another. However, if you cannot find relevant notes to link to a new idea or missing links, it may indicate that you lack sufficient information on that topic. This helps you realize what areas you know well and what areas need further exploration.

Additionally, by tagging notes, you can categorize them around themes and subjects (e.g., “Machine Learning,” “Philosophy,” “Psychology”). If you notice that a tag has only a few notes, that indicates that you need to dive deeper into that subject. For this reason, whenever I am learning about something new, I want to quickly add it to Obsidian and see how my expertise touches new domains.

Is the Learning Curve Worth It?

One of the drawbacks of Obsidian is its learning curve, especially Markdown formatting, which many people might find difficult to wrap their heads around. Similarly, I did face a learning curve, such as learning the formatting syntax, linking notes, and how the tagging feature works. However, it didn’t take me more than a few days to master these things, which was far shorter and easier than getting used to Notion.

Obsidian theme store showing list of themes that you can download

Another thing I disliked about Obsidian is its default theme, which wasn’t the best. However, you can install Obsidian themes with a single click, and there are plenty of free Obsidian themes to choose from. Obsidian has a diverse theme store, so I had to spend a fair amount of time finding the right theme or even writing custom CSS code to implement the desired appearance.

So, Obsidian is an undeniably powerful and effective tool, but at the end of the day, it’s just a tool and might not be for everyone. If you are looking to jot down a few things, such as grocery items or a to-do list, there are better apps for that because the learning curve is not worth it. Similar to how note-taking in Notion can be overkill.

But, if you are going to take a lot of notes and are looking to build a personal knowledge base, Obsidian will help you do that. It’s an app that helps glue notes together and makes things you have learned cohesive.

Canvas page in Obsidian app that shows a flochart, connecting arrows to different topics

Obsidian’s real strength lies in its ability to turn disconnected notes into an interconnected web of knowledge. While the learning curve and setup might seem daunting initially, the payoff is immense for those who invest the time.

Based on my experience, Obsidian is worth the learning curve—but only if you’re looking for a tool that grows with you. For casual note-takers, the setup might feel like overkill. However, if your goal is to create an evolving knowledge base that can handle all your interests and efforts, Obsidian more than justifies the effort. It’s not just a note-taking app; it’s a tool to help you understand what you know and uncover what you don’t.

How to Organize Your Photos on iPhone

If you’re an iPhone user who takes pictures regularly, you’ll likely have thousands of photos in your library, taking up tons of storage space. That’s when organization becomes essential. Fortunately, there are multiple ways to go about it.

Before You Begin: Some General Space-Saving Tips

While we will break down the specific ways that you can organize your photos, we also wanted to give you a few space-saving tips to start:

  1. Always review your photos. It’s easy to take a few photos and forget about them, but those “few photos” can add up. To avoid a future backlog, get into the habit of looking over your photos after you’ve shot them. Quickly decide on which ones to delete.
  2. Don’t keep near-duplicate photos. Taking a bunch of similar photos can give you many options—but if the photos are nearly identical, you don’t need all of them. Get in the habit of deleting duplicate iPhone photos to reduce storage clutter.
  3. Optimize your iPhone storage. If you go to Settings > Apps > Photos on your iPhone, you’ll see an option called iCloud Photos under iCloud. Once enabled, your iPhone will automatically upload and store your full-sized photos on iCloud.

Now that you know how to save space on your iPhone, let’s check out organizing your images in more detail.

Organize Photos on Your iPhone Into Albums

Let’s say you want to organize your photos into albums. This is the most straightforward method of arranging photos, as you can group photos that span multiple locations, dates, people, or events.

Here’s how you can create a new photo album:

  1. Launch the Photos app, scroll past your photo library, and tap Albums. If you can’t find Albums here, scroll all the way to the bottom and tap Customize & Reorder. Now, select Albums.
  2. In the top-left corner of the screen, tap Create and choose New Album.
  3. Name your album, and tap the plus (+) icon to begin adding images to your album. When you’re done, hit Done.
  4. If you’d like to choose an image to represent your entire album, tap Edit Key Photo. Then, pick an image and tap Done.

To further organize your albums, you can also group multiple albums into folders. For example, if you take photos of different projects for your work, you may want to create a “Work” folder to sort all work-related albums.

  1. Head to the Albums section again, and tap Create in the top-left corner.
  2. Choose New Folder and then name your new folder.
  3. Then, tap the plus (+) sign, select all the albums you’d like to add to your folder, and then tap Add.
  4. Finally, tap Done.

If there are photos on your phone that you forgot to add to an album:

  1. Go to your main photo grid and tap Select in the top-right corner.
  2. Select the photos that you want to add.
  3. Tap the ellipsis (…) button in the bottom-right corner of your screen.
  4. Select Add to Album, and choose the album where you’d like to place the photos.

Alternatively, you can scroll past your photo library, tap Albums, and choose the album to which you’d like to add the photos. Then, simply tap the plus (+) sign, select the images you’d like to add, and hit Add.

From here on, whenever you need to find photos from a multi-day event, you should be able to go into your Photos app and view the appropriate album!

How to Organize Photos on Your iPhone by Name

The next best way to organize photos on your iPhone is by person. This method makes it easy to find pictures of yourself, friends, or family.

Modern versions of iOS can recognize faces, allowing your iPhone to detect and arrange your photos by person automatically. These unique faces are recognized as individuals, allowing the iPhone to group photos of that person together, regardless of date or event, or even if they’re in a group photo.

However, organizing your photos by name or person requires some setup. Here’s how to do it:

  1. Scroll past your photo library and tap People (or People & Pets, if pets are detected in your gallery).
  2. You’ll see thumbnails for each person your iPhone recognizes. Select one of those faces, and you’ll see all the pictures that contain that person.
  3. You’ll also see that some people’s faces don’t have names. To name them, select the face and tap Name This Person. Then, type their name in and hit Done.

Once a person is named, all future photos with their face will be tagged and searchable by their name, making it easy to find them anytime.

If you’d like to create an album for a specific person, you can do so by selecting their face and tapping Select in the top-right corner. Then, choose Select All, and tap the ellipses (…) button in the bottom right corner of the screen. Finally, select Add to Album and tap the plus (+) sign to create an album for them.

How to Organize Photos on Your iPhone by Location

The iPhone Photos app will also sort your pictures by location if you travel a lot. But, just like the previous method, you must set it up first.

When you take a picture with your iPhone, the picture’s metadata automatically records the location of the photo—so long as you have Location Services turned on for the Camera app.

Here’s how to manage Location Services on your iPhone:

  1. Open the Settings app.
  2. Go to Privacy & Security > Location Services. Make sure the toggle at the top is enabled.
  3. Now, scroll down and select the Camera app.
  4. Make sure While Using the App is selected.

Now that this setting is turned on, your iPhone will automatically geotag new images. It will then sort these location-based photos into a pre-made album.

To view your pictures:

  1. Scroll past your photo library and find Pinned Collections. Then, tap Map. If you don’t see it, you may need to modify your Pinned Collections. To do so, simply tap Modify and tap the plus (+) sign next to Map under the Suggestions header.
  2. On the map, tap the thumbnail of the place you want to view. You’ll see all the pictures from that location.

Filter Photos on Your iPhone

At times, you might only want to view screenshots in an album or just the images you’ve edited. Instead of scrolling through each picture manually, you can use the Photos app’s built-in filtering options. Simply swipe past your photo library, tap Albums, and open the album you’d like to filter.

Next, tap the sorting icon and select Filter. A context menu will appear with six options: All Items, Favorites, Photos, Edited, Videos, and Screenshots. All you need to do is choose the type of photo you want to see.

When you’re done and want to remove the filter, tap the icon that replaces the sorting icon, select Filter, and choose All Items. This isn’t limited to albums only—you can also filter your entire gallery by following the same steps as above. Just make sure to be in your main photo grid instead!

Sort Your iPhone Photos

By default, the Photos app sorts images by the date they were captured. Essentially, this means photos are sorted based on their original timestamp, even if you receive them via AirDrop or save them from an app.

While it may be helpful in some cases, it can make it tricky to find photos you recently took, especially if you tend to save a lot of images. Thankfully, you can choose to stick with sorting your photo library by their original timestamps or choose to have them show up at the end of your timeline.

To do so, scroll through your library and tap the sorting icon as soon as it appears. A context menu will immediately appear with two options: Sort by Recently Added and Sort by Date Captured. Choose the former if you’d like to have your newest photos appear at the bottom of your library. On the other hand, choose the latter if you’d like your library to stay organized by the date you took the respective photos rather than when you saved them to your library.

When it comes to albums, you can also sort your images by Oldest First, Newest First, or in a Custom Order. To do this, head to the album you’d like to sort and simply follow the same steps outlined above. Then, choose your preferred sorting option.

Sorting and Filtering options in the iOS Photos app within an album

With the quick tips and tricks mentioned above, you’ll be well on your way to organizing photos on your iPhone! Doing so will not only help you declutter your gallery, but also help you find photos much quicker in the Photos app.

How To Split Large Files into Multiple Files on Windows

Splitting large files into smaller chunks is an effective way to work around the file size limitations of various messaging and email services. You can split files on Windows and then rejoin them using these two popular file archiving tools.

Split Large Files with WinRAR for Easy Sharing and Storage

WinRAR is one of the most popular file compression and archiving tools capable of splitting a file into multiple volumes of your specified size. Download Winrar and install it onto your computer.

After installation, open File Explorer and right-click the file you want to split. Then choose WinRAR > Add to archive.

The Archive format is set to RAR by default, but you can choose ZIP or RAR4 if you want. Leave the compression method set to Normal and the Dictionary size at its default setting since you’re splitting the file.

In the Split to Volume, size, field, specify the desired file size for each part. Say I have a 6.34GB file that I want to split into 1GB each. For this, I’ll enter 1GB. You can also add a password to protect your archive.

WinRAR add archive dialog open in Windows 11

Once done, click OK. WinRAR will begin splitting the files into the specified size and saving them in the source folder. This process may take some time, depending on the file size, so wait until it is complete. The split archives will be named part1, part2, part3, and so on.

WinRAR split files in Windows File Explorer

You’ll need every part in the same folder to recombine the files. Right-click on the first part of the file and choose WinRAR > Extract files. Choose the destination and click OK.

The receiver must have WinRAR installed on their Windows computer, as other archiving tools or Windows 11’s built-in extract option won’t be able to recombine the files.

Use 7-Zip to Split Large Files into Smaller Parts

7-ZIP is another archive and compression tool that can split large files into smaller parts. It’s free to use, open-source, and known for its high compression ratio.

Download 7-Zip and install it. Once installed, launch 7-ZIP, double-click Computer, and select the file you want to split. Finally, click Add (green plus icon).

7-Zip add to archive dialog open in Windows 11

Alternatively, select and right-click the file in File Explorer and then choose Add to Archive.

In the Add to Archive window, click Split to volumes, bytes, then enter the file size. For instance, typing 20M will create files of 20MB each.

7-Zip Add to Archive dialog open in Windows 11

Additionally, use the encryption option to add a password to your archive. Leave the other options at their default settings and click OK.

Windows File Explorer with 7-Zip split files

Like WinRAR, you must use 7-Zip to recombine the parts. To do this, right-click the first part of the file, then choose Show More > 7-Zip > Extract Files. Choose a destination folder and click OK to extract the file.

By following these methods, you can split large files to overcome file size limitations through storage devices, instant messaging apps, and email services. These instructions should work with any file type, including video, audio, compressed archives, backup, and disk images.

Why Your Raspberry Pi Won’t Boot (And 8 Ways to Fix It)

You’ve got your Raspberry Pi all hooked up and ready to run, but nothing happens when you connect the power. Something, somewhere, is wrong, but what? And what can you do about it?

Here is what you need to check to troubleshoot a Raspberry Pi that won’t boot.

1. What to Do if Your Raspberry Pi 5 Won’t Boot

Image Credit: Raspberry Pi

As the fifth full generation of Raspberry Pi boards, the Pi 5 is more reliable than earlier models. However, it remains susceptible to some common issues.

You should be able to identify most issues with booting from the LED status. Unlike previous models, the Raspberry Pi 5 has a single, bicolor LED that can illuminate in red and green. Red means the PSU is connected, and green indicates that the SD card/boot media is active.

If the LED flashes four times slowly, followed by five fast flashes, the Raspberry Pi 5 has a fatal firmware error. Four short flashes and six fast flashes indicate a power failure. Both should be reported to the vendor for a replacement.

Use the Correct PSU

Raspberry Pi 27W USB-C Power Supply
Image Credit: Raspberry Pi

The Raspberry Pi 5 requires a 27W USB-C power supply. While some owners have reported the Pi 4’s power supply is adequate, this tends not to be the case once peripherals are attached.

We understand that the Raspberry Pi 5’s power supply is difficult to buy in some territories. We recommend buying the official Raspberry Pi 27W PSU rather than risking a third-party device. If you have to use a third-party charger, use one rated higher than 27W.

Is the Boot Device Attached?

Like earlier versions, a Raspberry Pi 5 can boot from a USB device and microSD. Like the Raspberry Pi 4, it can boot over Ethernet; in addition, it can boot from an SSD connected over PCIe.

However, if the Raspberry Pi 5 isn’t booting correctly, and the PSU isn’t at fault, ensure the boot device isn’t responsible. With an increasing number of boot options, this will take longer than it might with an early model.

Also, only Raspberry Pi OS Bookworm is supported by the Raspberry Pi 5. Older versions will show an error message on the boot diagnostic screen.

Are You Using a Working HDMI Cable?

Another problem Raspberry Pi 5 owners encounter is boot failures due to HDMI cabling. The best option is to avoid using micro HDMI adapters and use a high-quality Micro HDMI to standard HDMI cable instead. Doing so avoids the risk posed by poor-quality adapters. The official Micro HDMI to HDMI cable is durable and affordable, but any good cable should work well enough.

2. Raspberry Pi 4 Not Booting? Try This

Raspberry Pi 4

Three issues can result in the Raspberry Pi 4 not booting or appearing not to turn on.

Raspberry Pi 4 Power Issues

Like the Pi 5, the Raspberry Pi 4 uses a different power supply unit (PSU) than older models. Power is via a USB Type C connector, preferably from the official 5.1V 3A PSU. As with older Raspberry Pi models, a mobile phone or tablet charger is usually inadequate if it can’t supply up to 15W.

Raspberry Pi 4 Not Booting and Red Light Showing?

flash raspberry pi lite os using pi imager

The Raspberry Pi 4 requires a fresh installation of the latest Raspberry Pi OS. Regardless of your preferred Linux distribution, you’ll need a version compiled for the Raspberry Pi 4 and released post-June 2019. The official options are Raspberry Pi OS (64-bit), Raspberry Pi OS (32-bit), and Raspberry Pi OS Lite.

Operating systems compatible with older Raspberry Pi models will not work reliably with this device. An older or unsupported operating system will result in a red LED light when the Raspberry Pi 4 is powered up. It simply won’t boot an OS that isn’t designed to run on the computer.

A fresh installation of the latest Raspberry Pi OS will solve many booting issues with the Raspberry Pi 4. The Raspberry Pi Imager is the best way to install an operating system on the device and always shows the recommended version of Raspberry Pi OS for your model at the top of the list.

Raspberry Pi 4 Has No Picture

Trouble seeing output from the Raspberry Pi 4 on your monitor? The Pi 4 has two HDMI outputs. Specifically, these are micro-HDMI ports labeled HDMI0 and HDMI1.

Most problems with a Raspberry Pi 4 seemingly not booting are due to the HDMI cable being connected to the wrong port. Be sure to use the left-hand connector, HDMI0. You can use both ports if you are connecting two displays.

3. Raspberry Pi Not Booting? Check the Red and Green LEDs

Raspberry Pi 3B

When a Raspberry Pi boots (models 1 through 4), one or more LEDs will activate. One is red, indicating power (PWR); the other is green, indicating activity (ACT). (There is also a trio of Raspberry Pi LED lights on older models indicating the Ethernet status if connected.)

raspberry pi power led
Image Credit: Christian Jann/Flickr

Generally, the red and green LEDs are key to troubleshooting your Raspberry Pi device. Green (ACT) flashes during SD card activity, and the red (PWR) LED blinks when power drops below 4.65V (the required voltage). To troubleshoot your Raspberry Pi model, watch out for the following:

  • Normal operating status, when both PWR and ACT LEDs are activated
  • Green LED off, indicating a problem with the SD card itself or the operating system installed on it
  • Red LED blinking or off, indicating a problem with the power supply

The green (ACT) LED on models 1 to 3B+ blinks irregularly to indicate that the Raspberry Pi is booting up. However, it can blink in a more regulated manner to indicate a problem:

  • 3 flashes: start.elf not found
  • 4 flashes: start.elf cannot launch, so it’s probably corrupted. Alternatively, the card is not correctly inserted, or card slot is not working.
  • 7 flashes: kernel.img not found
  • 8 flashes: SDRAM not recognized. In this case, your SDRAM is probably damaged, or the bootcode.bin or start.elf is unreadable.

If any of these indicators occur, try a fresh SD card with a newly installed Raspberry Pi operating system. No joy? Keep reading for an alternative fix.

4. Raspberry Pi Not Turning On? Check the PSU

As noted above, power issues can cause a Raspberry Pi to fail. It might switch off or hang when running, or it might simply fail to boot at all. To read the SD card accurately, a stable power supply unit (PSU) is required.

To ensure your PSU is good enough, check that it meets the specifications of your Raspberry Pi model. Similarly, confirm that the micro-USB or USB-C cable from the PSU to the Pi is up to scratch.

A lot of people use smartphone chargers to power their Raspberry Pis. This isn’t usually the best idea; a dedicated, suitable PSU is preferred.

The Raspberry Pi has a resettable polyfuse to protect the device from overcurrent. While the polyfuse can reset itself, it can take a while, sometimes hours. If you have accidentally blown the polyfuse, you’ll only find out when you try booting later.

While you wait, shop around for a new PSU; the official Raspberry Pi power adapter is your best option. This 15W power supply is suitable for the Raspberry Pi 4 but provides the minimum power requirements for the newer Raspberry Pi 5. You’re better off picking up the 27W USB-C PSU for the Raspberry Pi 5.

5. Is the Raspberry Pi’s Operating System Installed?

A screenshot of the Raspberry Pi OS

Your Raspberry Pi will not boot if there is no operating system. You can install a Raspberry Pi OS on a microSD card or run a boot script to install an OS. Until an operating system is installed, the Raspberry Pi is essentially a glorified LED.

If you have installed the Raspberry Pi’s operating system onto an SSD (or other device), ensure it is functional and is correctly attached.

6. Check the microSD Card if the Raspberry Pi Doesn’t Boot

A working Raspberry Pi relies on a good-quality SD card for booting and running the OS. If the SD card isn’t working, your Raspberry Pi will be erratic or fail to boot.

You can troubleshoot the SD card by powering down the Pi and inserting the card into your PC. Use a reliable flash drive formatting tool and attempt to reformat (on Windows and Mac, use the SDFormatter tool from the SD Association). If formatting fails, the card is corrupt (SD cards from SanDisk can be returned under warranty).

When setting up a new Raspberry Pi OS, always format the SD card before writing the image using a reliable card reader/writer. Look for media with a high write speed and superior error checking to ensure a fast, efficient Raspberry Pi. Only buy SD cards from reputable suppliers, such as this Sandisk 64GB microSD Card on Amazon. As of 2024, the Raspberry Pi company sells an official Raspberry Pi microSD card that works especially well with the Raspberry Pi 5.

7. No Video Output on Your Raspberry Pi?

Your Raspberry Pi cannot display any video without a bootable SD card present and a working HDMI cable.

The display device must be capable of detecting the signal from the Raspberry Pi. If the Pi appears to be failing to boot because nothing appears on the screen, you’ll need to force HDMI detection.

Because the Raspberry Pi doesn’t have a BIOS, it relies instead on configuration files on the SD card. You can force HDMI detection by inserting the SD card in your desktop computer or laptop and browsing to the /boot/ partition. Open the config.txt file, and add the following at the end:

        hdmi_force_hotplug=1
    

Save and exit the file, safely remove the SD card, return it to your Raspberry Pi, and then power up again.

Other video options are also possible. Old Raspberry Pi boards used TRRS for video and stereo audio. This means that you need a suitable TRRS A/V cable that can translate the RCA (red and white connectors) and composite (yellow connector) signals. This should work for you if HDMI is not an option.

8. Raspberry Pi Not Booting? How to Tell If It’s Dead or Defective

Raspberry Pi Zero

If you’ve got this far and the Raspberry Pi is still not booting, there is a chance the device is defective. It looks like you’ve been unlucky—Raspberry Pis are all tested following manufacturing.

Own an early Raspberry Pi (B, B+, 2B, or 3B—what are the differences between Raspberry Pi boards?)? One way to check if it is broken is to compare it with an identical model you know is working.

From the suspect device, remove the SD card, Ethernet cable, power lead, and HDMI cable. Remove anything connected, and substitute the working device with the same cables, peripherals, and SD card.

If this device boots, your other Pi is faulty; if not, then your cables, power supply, or microSD card are causing the problem. See above.

Meanwhile, there is a different way to check suspect devices for Raspberry Pi A, A+, and Zero devices. Remove all cables and the SD card, and connect the device via USB cable to your Windows PC. (Use USB-A to USB-A for the Raspberry Pi A and A+, micro-USB to USB-A for the Pi Zero models).

If working, the device will be detected, and an alert will sound from your PC. You’ll find the Raspberry Pi listed in Device Manager as “BCM2708 Boot”. On Linux and Mac, a working Raspberry Pi A or Zero will be listed in response to the dmesg command. You can follow a similar process for troubleshooting the Raspberry Pi Pico series.

Raspberry Pis purchased from official resellers have a 12-month warranty, but don’t return it without first checking the terms and conditions. Managed to get everything up and running? It’s time to think about a Raspberry Pi project. ​

I Switched to a Desktop After Years of Using Laptops—Here’s What Changed

For years, laptops were my go-to for everything—work, gaming, Netflix binges, late-night writing sessions. But recently, I made a decision that felt almost old-school: I ditched the laptop life and set up a proper desktop. It’s been an experience. Some things about the transition surprised me, while others made me wonder why I hadn’t done this sooner.

My Posture and Physical Health Improved With a Dedicated Setup

When I used a laptop exclusively, my workspace was anywhere I could find Wi-Fi and a flat surface—cafés, couches, and even my bed. Sure, it was convenient, but my body paid the price. Hours spent hunching over a small screen or craning my neck at the edge of my bed left me with a stiff neck, sore shoulders, and a lower back that felt older than it should.

The big difference is that I now have a workspace designed to fit me, not vice versa. My monitor is at eye level, so I’m not constantly looking down. My chair provides proper lumbar support, and my keyboard and mouse are positioned to keep my wrists straight and my arms at a comfortable angle.

Anastassiya Bezhekeneva/Shutterstock

Old habits die hard, and I still catch myself slouching. But having a workstation designed with my body in mind makes it so much easier to stay comfortable and avoid the aches and pains that used to plague me.

The Lack of Portability Forced Me to Improve My Productivity

When your computer stays in one place, so does your focus. I used to tell myself that moving around with my laptop gave me “freedom,” but in reality, it gave me excuses. I’d open my laptop in the kitchen and suddenly remember I should clean the fridge. Or I’d take it to the living room and somehow get sucked into watching several hours of sitcoms with my brother. With a desktop, there’s no tempting flexibility. My desk became my designated workspace, and that mental separation between work and leisure made a world of difference.

In addition, being “stuck” at my desk forced me to build healthier work habits. I started scheduling regular breaks to stretch or take a quick walk rather than slouching on the couch for hours. My workday became more structured, and I found myself completing tasks faster because I wasn’t constantly relocating or distracted by my surroundings. It turns out that the limits imposed by a desktop can actually simplify your decision-making and help you get more done.

I Realized How Much I Underestimated Upgradeability and Longevity

pc gaming computer with various pc parts surrounding it
Gavin Phillips/MakeUseOf/Leonardo.ai

With a laptop, you’re pretty much locked into whatever specs you buy. Maybe you can swap out the RAM or bump up the storage if the manufacturer didn’t solder everything down and if you’re skilled enough to crack it open without breaking something. But for the most part, once a laptop starts showing its age, you’re left either nursing it or replacing it entirely.

Desktops are a whole different game. If you need more performance, you can just pop in a new graphics card. If you are running low on storage, add another SSD or hard drive. Even upgrading the processor or motherboard is doable with a bit of planning. And the best part is that most of these upgrades don’t require you to be a tech wizard. If you can handle plugging in a USB stick, you’re already halfway there.

The Change in Noise Levels Took Some Getting Used To

One of the first things I noticed after switching to a desktop was the dramatic change in noise levels. With my laptop, the only sound I ever really heard was the occasional whir of the fan kicking in, usually when I had thirty too many Chrome tabs open or dared to play a graphics-intensive game. My desktop, on the other hand, is a different beast entirely.

Between the case fans, the CPU cooler, and the GPU ramping up during heavier tasks, there’s a constant low hum of activity that wasn’t there before. At first, I found it mildly distracting. I’d catch myself glancing over at the case like it was trying to get my attention.

pc air cooler featured image
nikkytok/Shutterstock

I’ve learned that this noise isn’t just the price of admission for better performance—it’s something you can actually manage. For starters, choosing the right location for your desktop matters. I initially had mine on my desk, right next to my monitor, where every fan spin felt magnified. Moving it to the floor (on a mat to keep it off the carpet) reduced the noise dramatically. Out of sight, out of mind—or, in this case, out of earshot.

If you’re really sensitive to noise, consider investing in quieter components and hardware. There’s an entire market of “silent” PC cases, low-noise fans, and even liquid coolers designed to keep things whisper-quiet. I’m not there yet, but it’s nice to know I have options if the hum ever gets to me.

Cable Management Became a Surprising New Challenge

One thing I didn’t anticipate when switching from a laptop to a desktop was how quickly cable chaos can take over your workspace. With a laptop, it’s simple—one power cord, maybe a mouse or phone charger, and you’re set. Everything stays neat by default, and you can unplug and relocate in seconds. But with a desktop, suddenly, there’s a monitor (or two), a keyboard, a mouse, speakers, a webcam, an Ethernet cable, and possibly a printer or external hard drive.

While managing cables might not sound exciting, it’s one of those small but crucial details that can make or break your desktop setup. Our expert cable management tips can help keep your under-desk cable situation neat and organized.

Was the Switch to a Desktop Worth It?

Without a doubt. The improved performance, ergonomic benefits, and sheer power of customization have made me wonder why I didn’t make this change sooner. Sure, I miss the convenience of taking my work anywhere, but the trade-offs have been more than worth it. If you’re on the fence, I’d say this: if your work (or hobbies) demand serious performance and you’re ready to prioritize a dedicated workspace, a desktop could be exactly what you need. Just be prepared for an adjustment period and maybe a few extra cables.

I Took a Trip Around a Smartphone Factory, and Saw the Next Big Thing in AI Photography Tech

It’s not often you get invited to check out the inner workings of a smartphone production line.

But that’s exactly what happened to me in early December 2024, as smartphone manufacturer Tecno invited me to take a unique peek into how its smartphones are made—along with the launch of some groundbreaking AI imaging tech, too.

Tecno Launches Its New AI-Powered Imaging Tech at Future Lens

Tecno’s annual Future Lens event is where the smartphone manufacturer reveals its latest imaging tech. That means a focus on camera technology, and this year, it’s deeper integration of AI into its imaging tech.

Gavin Phillips/MakeUseOf

Like most modern tech, AI is the keyword here. Smartphone imaging tech continues to improve, and at Tecno’s Future Lens event held at its manufacturing site in Chongqing, China, the company revealed three new AI image processing tools. These are the Tecno Image Matrix, its EVS Dynamic Shot tech, and—this is my favorite bit—Tap Any Zoom Dual Prism Telephoto AI tech.

Tecno Image Matrix

The Tecno Image Matrix (TIM) is a new way of processing image data on a smartphone. It uses a multi-layered structure to optimize every part of an image you snap; it basically means every photo you shoot will look pristine, no matter the shooting environment.

tecno future lens image matrix technology breakdown
Tecno

Now, that does mean more AI processing of your images. The four layers of the TIM work in the background but effectively take the sweat of wondering whether that picture-perfect moment will come out how you think—it just works.

Tecno’s Image Matrix comprises the following:

  • Hardware Foundation Layer: The starting point is still the actual hardware in your smartphone, such as the sensors, lenses, processing package, and so on.
  • Deconstruction Layer: Once snapped, your image passes to the “Deconstruction Layer,” where a series of image refinement algorithms begin to work on your snap. These include color balancing, color correction, image stabilization, and so on.
  • Engine Reconstruction Layer: This is where Tecno’s AI magic begins to really kick in, with four different AI imaging algorithms working simultaneously to deliver a perfect image.

    • AI RAW is designed to enhance images shot in low-light or backlit situations.
    • AI SNAP focuses on reducing shutter speed lag and boosts capture speed.
    • AIGC Studio is an integrated suite of image enhancement tools that are applied to every image.
    • AI UT (Universal Tone) uses artificial intelligence to balance and restore skin tone, presenting accurate imaging of any subject.
  • Application Layer: Just like the Hardware Foundation, the AI tech still needs an application to display your images. Within this layer, you’ll also find different AI tech, such as an AI Image Studio with easy-to-use editing tools.

For those who want to take great shots without having to worry about fiddling around with any settings, Tecno’s deeper AI integration is certainly worth considering.

EVS Dynamic Snapshot

The EVS Dynamic Snapshot is an interesting proposition for anyone who has tried to capture a moving subject and ended up with something more akin to a Francis Bacon—a complete blur of colors, that is.

You don’t need me to explain how burst photography works. Plenty of phones have great burst photo capture, but Tecno’s EVS Dynamic Snapshot is the next step for this imaging tech.

EVS Dynamic Snapshot solves the issue of blurry images by recording the subject’s actual motion data. So, instead of going frame-by-frame, one-by-one, EVS locks onto the subject in the frame and uses an AI algorithm to dynamically establish the best image to highlight the action.

Tecno used the idea of trying to capture a racecar whizzing by at hundreds of miles per hour, much faster than you can hope to snap with a regular smartphone (and even a good few regular cameras, too). Instead, EVS Dynamic Snapshot captures the whole moment and then serves up the perfect frame.

Tap Any Zoom Dual Prism Telephoto

tecno tap any zoom dual prism telephoto lens feature
Tecno

Tecno’s AI imaging stack is great, but have you ever just wanted to dynamically zoom a single part of an image without it becoming a mess? Tecno’s Tap Any Zoom Dual Prism Telephoto is just what you’ve been waiting for.

As said, I found this the most interesting part of Tecno’s new AI imaging tech. It basically makes the telephoto lens in your smartphone way more useful with a new dual-prism design, lens-shifting OIS, and AI algorithm that captures amazingly crisp and accurate shots.

But that’s not all. You can then double-tap to zoom into any subject in the image, zooming in at up to 30x while remaining incredibly clear. In combination with the dual prism design, it means you can capture images at a bonkers 400MP using an ultra-wide angle, or stitch together images using a telephoto sweep image function.

Being able to reframe a whole image without losing any detail is really interesting and useful tech and something I’ll definitely be using.

Tecno Showed Me Exactly How My Smartphone Is Made

It wasn’t all about the AI imaging tech at Tecno Future Lens. Tecno took me and other attendees for a previously unseen tour of its smartphone manufacturing process from start to finish.

As you can imagine, there are a huge amount of automated processes using highly specialized machines, shunting smartphones from the bare beginnings of a frame through to the finished product.

But there are still a huge number of human-input processes, too. Those cameras that arrive working fresh out of the box and perfectly calibrated? There is a person checking that on each smartphone that rolls down the line. It’s the same for other processes like charging, screen conductivity, and so on.

So, while the overall process is all about automation, the level of human interaction required surprised me. And yes, I’ve seen videos of smartphone lines before, but seeing it in person brings home the extensive requirements put onto and into each smartphone.

The other part of the Tecno factory tour I found interesting was the individual smartphone testing. There’s nothing like seeing a brand-new smartphone shoved into a pressurized container and having water jets fired at it, then seeing it work like new. Again, I’ve dropped my phone in water and know it’ll work fine, but seeing those testing processes up close definitely gives a new perspective on the level of testing our smartphones are subject to before hitting our pockets.

Which AI Portrait-Editing Tool Gives Better Results?

AI-powered portrait editing has made professional results more accessible than ever, but not all are created equal. Aperty and Retouch4Me are two standout options, each offering unique strengths. But which one’s the best when it comes to the results?

What Is Aperty?

Aperty is a portrait-focused photo editing tool, provided by Skylum, the creators of Luminar Neo. Although Aperty is an AI editing software, it has a subtle integration of AI tools, slightly different from Luminar Neo’s GenSwap or GenRemove features. Aperty works as a standalone desktop tool or as a plugin integration for Photoshop and Lightroom.

You can subscribe to Aperty on a monthly or annual basis. Monthly costs $29.95 and to subscribe for a year is $299. Skylum do occasionally put their products on sale, so you may be able to get Aperty for less than this price.

What Is Retouch4Me?

​​​​​​​Retouch4Me is an AI-focused photo-editing and video-editing tool which applies subtle editing at a click. You can access individual photography plugins as standalone tools, congregate your purchased plugins into Retouch4Me’s Arams hub, use Retouch4Me’s Photoshop plugin panel, or as an extension in Lightroom and Capture One.

Retouch4Me Teeth Whiten AI Tool

Retouch4Me plugins are available for individual purchase—so you only own the ones you’ll need in your workflow—and come with lifetime free updates. The prices vary from around $125-$180, with occasional sales. They’re pricey, but it’s a one-time cost, so you’ll never have to pay more.

Now you know more about each of these two AI-portrait-editing software, you can directly compare their offerings.

Platform support

Both software can be used on Windows and Mac systems as standard. There’s no Linux or tablet-based support for either. Both tools work offline, but Retouch4Me plugins must be installed and activated first.

Aperty offers standalone apps for Windows (Windows 10 or higher) and Mac (MacOS 12 or higher), along with plugins for both Adobe Photoshop and Adobe Lightroom. There’s also a further extension for you to use Aperty with the Apple Photos app from Mac.

Retouch4Me can be used by each individual plugin as a standalone tool; with the Arams hub, your purchased plugins appear in one place for use (Arams is compatible with Windows 7 and higher and MacOS 10.14 and above); or integrated into other software with Retouch4Me’s Photoshop plugin panel or extensions in Lightroom and Capture One.

Interface and Ease of Use

Aperty has a simple and inviting interface with obvious icons and helpful tooltip labels. It presents basic camera information above the image—ISO, focal length, aperture, and shutter speed—and all the tools you’ll need are in easy-to-navigate menus on the right-hand side.

Aperty Interface

Retouch4Me’s Arams hub works as a central holding pot for your purchased product plugins. You don’t have to use Arams, as the products can be accessed individually or integrated into other tools. Arams just saves hassle.

Retouch4Me interface

Arams offers a simple interface, but it’s slightly more cluttered than Aperty’s. Arams has menus on both the left and right-hand sides of your image and a large image thumbnail below, meaning less space to view your portrait. Aperty’s tools work simply by selecting a checkmark and moving a slider.

Facial Retouching

Facial retouching tools largely consist of skin smoothing, blemish removal, and skin tone evening. The Heal and Dodge & Burn tools are also used frequently for facial retouching.

Aperty’s Retouch category is for editing and retouching portrait facial features. They work subtly with both effects sliders and detail sliders.

The Skin Blemish option lets you remove blemishes or freckles and enhance detail. The Face Skin option lets you to smooth skin, as well as correct the facial skin color. There’s also a dark circles removal for the under-eye area, and finally within the skin details are options to brighten the skin and remove shine. The results are subtle, yet noticeable, ensuring there’s no over-smoothing or unrealistic results.

Using Arams by Retouch4Me, you can select all plugins you wish to apply at the same time. For the retouching experiment, I selected Heal, Mattifier, Dodge Burn, Skin Tone, and Skin Mask.

I didn’t mind the results in Retouch4Me; however, it did apply some unnatural smoothing to where the light fell on the model’s face, causing a matte area over her nose instead of being brighter from the lighting.

Winner: Aperty

Eyes

Aperty’s Eyes section is within the Retouch category. For this portrait, I used the Dark Circles Removal tool again, before choosing some of the Eyes features.

Using the dropdown menu, I chose to set the Iris Color to brown—the same as the model’s original eye color—for more texture and depth, then I increased the Iris Visibility and Flare for a more natural result. These are interesting and specific options to have.

I used the Eye Whitening and Eye Enhancement sliders—the most similar to Retouch4Me’s eye tools—to add a little brightening to the eyes.

Aperty also has eye makeup features, and eye reshaping features. I used these subtly too by enhancing the eyebrows since the model’s were quite light against her skintone. I didn’t see a difference using the Eyeliner tool.

Under the Reshape tab, I moved the eyebrows slightly further apart but kept everything else the same. The results are subtle but add a nice highlight to the eyes.

Retouch4Me has two eye enhancing tools—Eye Vessels and Eye Brilliance—and they both come as part of the Eyes Bundle.

There’s also a Portrait Volumes plugin which affects the eyes in a portrait along with other elements like lip and nose shape and overall face shape. I just applied the two Eye tools to my portrait, as I didn’t want to affect the skin or face.

The original portrait didn’t show any visible blood vessels in the eye, so it’s difficult to see what or how the plugin affected the eyes. The eyes were transformed with brightness, though.

The whites do look somewhat unrealistic, but the eyes do pop as a result. I brought the sliders lower down for a small improvement without being over-the-top. The results look a little unnatural but can be dialled down further.

Winner: Aperty

Color

​​​​​​​

Aperty has many color tools, including white balance and color tint sliders. It also features a host of presets which affect color, including creative presets.

Within the lighting controls, you can add source lighting for extra jazz to your portraits. This replicates a lighting rig; you can choose the color/hue, intensity, and direction.

The Retouch4Me suite doesn’t offer the same color tools as Aperty. You can get a free and paid Color Match plugin, which lets you match colors from a reference image to your source image. There’s also a LUT creator plugin and LUT presets which are all purchased separately, and, as such, I don’t have access to them for comparison.

Of course, you can use Retouch4Me as a plugin or extension to other photo-editing software to use color tools elsewhere instead of directly.

Winner: Aperty

Body Enhancements

​​​​​​​Aperty has its own body section under the Reshape tab. These AI tools have sliders for Body Shape and Abdomen. I personally dislike these tools and think they could be damaging—not least because the abdomen slider starts at 0 on one end, and only goes up, decreasing the shape or size of the abdomen, suggesting that models should always look skinnier.

The Shape slider has 0 in the middle and can get both bigger and smaller. I think the results are a little unrealistic and lean too heavily into the fashion industry’s desire for models to look smaller. This is one problem I’ve seen in other AI photo-editing tools—warping images can lead to unrealistic body expectations.

Retouch4Me has some subtle body-area tools, none of which affect the size of a model’s body.

The main one you can apply to the body is the Fabric plugin—this is targeted towards cleaning up fabric creases and shadows for better presentation. It works subtly but successfully, and doesn’t insult a model’s body.

Winner: Retouch4Me

Aperty vs. Retouch4Me: Which Gives the Best Results?

Aperty provides a wider range of tools, and thus, slightly better results. Aperty’s interface is easier to navigate, and the results render faster than Retouch4Me’s. The subtlety of Rectouch4Me’s tools can be too subtle. When editing aspects you want to drastically change, it’s hard to see desired results.

However, some of Aperty’s Reshape features are too gimmicky, and I wouldn’t use them for serious portrait editing. Overall, I was more pleased with my results using Aperty than I was using Retouch4Me.

3 Apple Visual Intelligence Alternatives for Older iPhones

Apple’s Visual Intelligence in iOS 18.2 is impressive, but it’s only available on iPhone 16 models (and above). If you have an older iPhone, don’t worry—there are great alternatives that offer similar features without requiring the latest hardware.

1

Google Lens

For those familiar with Google Lens, it’s no surprise that it tops this list of best alternatives to Apple’s Visual Intelligence. Google Lens helps you to identify objects using your camera. Whether you’re curious about the name of a gorgeous flower you spotted or need to translate a menu while traveling, Google Lens makes it super easy.

Its shopping assistant features have also gotten better. Google added new AI-powered capabilities to Lens in November 2024, making it the perfect shopping companion. You can use Lens to find deals online by searching for similar items with just a photo.

If you already have Google Photos on your iPhone, you’re halfway there. We previously covered how to use Google Lens features in Google Photos for tasks like visual identification and translation. For real-time searches, download the Google app and tap on the Lens icon to analyze what’s in front of you instantly.

2

ChatGPT

For those who love diving deeper into information and getting detailed responses, ChatGPT is an excellent companion for visual search tasks. While it doesn’t have the same real-time image recognition features as Google Lens or Apple’s Visual Intelligence, it shines when it comes to providing contextual understanding and follow-up information.

You can take a photo of a product and ask ChatGPT for a deeper explanation about its features, benefits, or alternatives. Unlike standard visual search tools, ChatGPT lets you interact with the content you capture.

Once it gives you an answer, you can ask follow-up questions to get even more detail or context. Plus, it works on many iPhones, so you don’t need the latest model to enjoy its features.

3

Claude

Claude, developed by Anthropic, is another powerful AI tool that can act as an alternative to Apple’s Visual Intelligence, especially when it comes to understanding and interpreting images. While Claude isn’t specifically designed for visual search, its ability to process text and provide in-depth answers can still add value to the images you capture with your iPhone.

With Claude, you can upload a photo or describe what you’ve captured, and the AI will give you a thoughtful, context-driven response. It’s particularly helpful when you need a deeper understanding of the things you encounter in everyday life, like a piece of art, a complex product, or even a piece of text.

Rather than just giving you a one-time response, Claude can engage in a back-and-forth dialogue to clarify questions, offer additional information, or explore related topics. This makes it a great option if you’re after a more thorough, interactive experience.

While Apple’s Visual Intelligence is a powerful feature for the latest iPhone models, there are plenty of fantastic alternatives available for those using older devices. From the tried-and-true Google Lens, which offers a comprehensive visual search experience, to interactive options like ChatGPT and Claude, you can still make the most of your iPhone’s camera capabilities even without the latest hardware.

How to Set Up Email Filters in Gmail, Yahoo Mail, and Outlook

Managing your email inbox can often feel overwhelming. With a constant influx of work emails, promotional offers, and newsletters, it’s easy for important messages to get buried. Fortunately, Gmail, Yahoo, and Outlook offer powerful filtering tools that allow you to take control.

How to Filter Emails in Gmail

Gmail offers a robust filtering system that helps you organize your inbox. You can automatically sort, label, archive, delete, or mark emails based on various criteria.

To create a filter, open your Gmail inbox and click the filter icon next to the search bar at the top. This will open the advanced search box with various options. Here’s what they do:

  • Enter an email address in the From field to filter messages from that address. Use the * wildcard (e.g., *@domain.com) to filter all emails from a specific domain.
  • The To field pairs nicely with Gmail aliases. For example, if you signed up for LinkedIn using [email protected], you can easily filter out messages from LinkedIn.
  • The Subject field lets you filter messages with specific words in the subject line.
  • Has the words and Doesn’t have allow you to scan the email for specific words. You can also use Gmail’s search operators here to look for multiple words.
  • The Size and Date within drop-down menus allow you to filter emails based on their size or the date they were received.
  • Use the Has attachment box if you want to look only for emails with an attachment.
  • Tick the Don’t include chats to exclude messages from your Google Chat.
  • Use the Search drop-down menu to filter from a certain existing label.

When you’re done, click the Create filter button. You can also click the Search button to test the filter and ensure it shows the matching emails.

Next, you’ll need to decide what happens to the emails that match this filter by selecting the appropriate checkboxes. For example, you can mark them as read, archive them, forward them to a different address, or apply labels. If you want the filter to apply to existing emails too, tick the Also apply filter to X matching conversations option.

Once you’re done, click Create filter to complete the process. You can review, edit, or delete your Gmail filters at any time.

Create filter option in Gmail

If creating a filter sounds like too much work, or if you’re unsure of what filter to create, Gmail can help. Simply select an existing message in your inbox, then click the three-dot menu, and select Filter messages like these. This will open the filter window with some fields pre-filled based on the message you selected.

How to Set Up Yahoo Mail Filters

Yahoo Mail offers some handy email filtering features that can help you manage your inbox effectively. While it doesn’t offer as many advanced options as Gmail, Yahoo’s filters are still useful for keeping your inbox organized.

To set up filters in Yahoo Mail, open your inbox, click the three-dot icon on your left, and choose Settings. Go to the Filters tab on the left and click the Add new filters option to get started and use the following options:

  • From: Filter messages from specific senders or domains.
  • To: Filter emails sent to a specific address.
  • Subject: Filter by specific keywords in the subject line.
  • Body: Filter emails that contain certain words or phrases in the body text.

For each filter category (From, To, Subject, and Body), you can select different conditions such as Contains, Does not contain, Begins with, or Ends with, allowing you to create customized filters based on specific keywords. Additionally, Yahoo Mail allows you to match cases when filtering, which is useful if you’re looking for specific phrases in all caps, such as acronyms or important keywords.

Once you’ve completed the filter criteria as desired, you can choose which folder to move the matching messages to. Then, hit Save.

Yahoo mail filter options

Note that Yahoo applies your filters in top-to-bottom order. So, when reviewing the filter list, ensure that the most important filter is at the top, as it will take priority if a message matches multiple filters. You can also edit or remove existing filters from this page.

How to Filter Emails in Outlook

Finally, if you use Outlook for your email, you can filter your messages using Outlook Rules. Open the Outlook app or head to Outlook.com and click the gear-shaped icon in the top-right corner. Then, Go to Mail > Rules and click the Add new rule button.

Since the new Outlook for Windows resembles the web version, the following steps work on both desktop and web versions of Outlook.

Next, enter a name for your filter and then use the Add a condition drop-down menu to set a condition. You’ll find several options grouped into categories. For example, one category is My name is, where you can select options like I’m on the To line, I’m on the CC line, I’m not on the To line, and similar choices. If you want to add more conditions, click Add another condition below the first box.

Once the conditions are set, use the Add an action menu to specify what Outlook should do with the email. For instance, you can move or copy the message to a folder, delete it, or even pin it to keep it at the top of your inbox for easy review. Other useful actions include marking a message with a certain level of importance or forwarding it to another address.

Tick the Stop processing more rules checkbox if you don’t want any more rules to run after this one does. You can also tick the Run rule now option to apply it to your existing emails. Finally, click Save to complete the process.

Your Outlook filter is ready. You can repeat the steps above if you need to create additional filters.

Rules tab selected in Outlook mail settings

There you have it! You now know how to set up and use filters to organize your inbox effectively. Take the time to explore the filtering options provided by your email provider and customize them to suit your needs—your inbox will thank you for it!

These Are the 8 Plex Plugins I Can’t Live Without

While Plex on its own is fine, the real fun comes from customizing your experience with plugins, turning the platform into your personal DeLorean of streaming. It’ll benefit anyone who uses your Plex library, too, like installing better search tools or a request system.

WebTools-NG gives you the power to not only manage your plugins, but gain access to more through the Unofficial App Store (UAS). Beyond that, WebTools-NG also acts as your hub for maintaining Plex’s backend, such as the server itself and your content. It even allows you to access specific media libraries, which is handy if you have a music collection on Plex separated from movies and TV shows.

Download: WebTools-NG for Windows | MacOS | Linux (Free)

2

Bazarr

Whenever you want to add subtitles to your content, Bazarr does all the heavy lifting. It’s particularly handy if you watch foreign films or, like me, prefer subtitled anime to dubbed. You just specify the languages you want, and Bazarr does the rest!

Download: Bazarr for Windows | Docker | Linux | MacOS | FreeBSD | Synology

3

Tdarr

Can you imagine manually checking hundreds of media items? That’s exhausting when your server starts to grow. Tdarr is like your personal Plex doctor, diagnosing transcoding problems and noting corrupt files with pretty darn good accuracy. In other words, it does most of the tedious work for you.

More importantly, Tdarr can help you save a buck by re-encoding files to something easier on your storage. For example, H.264 is generally smaller than MP4. It’ll even go out of its way to clean inefficient metadata, strip inaccurate subtitles, and update video standards. For example, H.264 will be upgraded to H.265 instead.

Download: Tdarr for Windows | Linux | MacOS | ARM | Docker | unRaid (Free)

4

FileBot

filebot episode formatting window

One of the biggest problems you’ll face as your library gets bigger is organization, and you’ll need an app like FileBot to organize your Plex library. It targets both titles and metadata, automatically pooling from multiple metadata sources for better accuracy. In practice, it will be easier for users to search for content. It’ll save you and your users a lot of headaches down the road.

Download: FileBot (Free trial; Subscription & Life-Time license available)

5

Overseerr

Overseerr sounds incredibly threatening, but it’s actually a request management system. While Tautulli can handle sending notifications to your connected users, this plugin is the reverse. Those with access to your Plex libraries can send requests for specific content using a really easy and intuitive request system, right down to preferred language and even quality.

Download: Overseerr for Windows (Free)

Like FileBot, Komta gives you much more control over how your content is presented to users but goes below surface-level metadata and titles. It injects your Plex Media Server with a host of organization tools, like separating content into specific film ratings, language, years, and even actors. Additionally, there are companion scripts you can install that’ll help clean up the UI, like ImageMaid, which discards duplicate posters.

Download: Kometa for unRAID | Kubernetes | QNAP | Synology (Free)

Export Tools is like asking the waiter what’s on the menu. If someone asks to see your Plex library, rather than give them immediate access, you can share a link with them instead. It’ll open in their browser and they can peruse it without needing an account.

Download: Export Tools for Windows (Free)

8

Tautulli

tautulli activity and watch statistics interface

Think of Tautulli as your Plex server’s own helicopter parent. On one hand, you can access user data—the what, when, and how people are using content. On the other hand, the plugin also gives you the power to limit usage. Say you notice one too many people streaming in 4K, so you limit it to 1080p.

More often than not, though, you’ll get a lot of use out of the newsletter. If you use a request management system, like Overseerr (also a must-have plugin), you can then use Tautulli to notify users, letting them know new content is available. It’s also handy for letting people know ahead of time when servers go down for maintenance.

Download: Tautulli for MacOS / Windows | Android | iOS (Free; in-app purchases available)

When you step back, all of these plugins aim to serve a single purpose: to turn Plex from a bare-bones platform to a well-organized machine for you and your viewers. I personally use Plex as a hub for streaming services, but once I installed these plugins, I can’t imagine using the platform without them.

How Does My Phone Track My Steps?

Thanks to the different sensors in modern smartphones, they can do more than just communicate. For example, you don’t need a dedicated device to count steps as your phone can do it—but how does a smartphone count steps?

How Does a Smartphone Track Your Steps?

Most smartphones today are equipped with various motion sensors, such as accelerometers, gyroscopes, and GPS. The key sensor that enables your smartphone to track steps is the built-in accelerometer. This tiny device measures input through a wavering lever that taps against a metal contact.

Accelerometers measure the phone’s acceleration as it moves. This is how your phone knows when to rotate the screen based on how you’re holding it. The same type of data can be interpreted to track the rhythm of your steps as you walk or run. Using the accelerometer data, apps analyze your activity using special algorithms to count the number of steps you take daily.

wachiwit/Shutterstock

Besides the accelerometer, some phones also have a gyroscope, which measures rotation and orientation, helping determine the direction of movement. A gyroscope isn’t necessary, but it can complement the accelerometer data and enhance accuracy if available.

These two sources of information are then cross-analyzed to find the number of calories you’ve burned, among other stats about your performance. For instance, fitness apps determine the calories burned with this data.

Other types of sensors, like altimeters, can also supplement this digital portrait of your workout’s quality. In addition, some apps compile the data from your smartphone and your smartwatch for the most accurate reading possible. For example, Google Fit combines the steep counts from both your phone and smartwatch.

That’s how your smartphone can count the number of steps you take. Even if you’re hitting the treadmill at home, the accelerometer in your phone is ready to capture every last step. But it’s not just smartphones; step trackers also use these sensors to track steps.

I’ve Started Using Llama 3.2, and I Wish I’d Switched Much Sooner

Summary

  • Llama 3.2 offers exceptional performance and efficiency by providing open-source access without compromising on quality.
  • In terms of performance, Llama stands out in language understanding, brainstorming ideas, code generation, debugging, and providing imaginative and accurate responses.
  • Beyond offering fast and accurate assistance with a natural touch, accessing Llama through the Hugging Face platform can empower individuals to confidently explore AI’s potential on their own.

In a noisy room, the most compelling insights often come from the quietest people. Amid AI’s loud hype, Llama 3.2 is that quiet voice that pays attention to the finer details—and it’s time you made the switch, like me.

What Is Llama 3.2?

Llama (Large Language Model Meta AI) is an AI model created by Meta that is designed to understand and generate human-like language. Its latest version, Llama 3.2, has pushed the boundaries of what’s possible in AI, offering a tool that’s powerful and surprisingly easy to use.

How Local AI Works With Hugging Face

One of the coolest things about Llama 3.2 is that you can use it on your own computer without relying on the internet or big tech servers. This might sound intimidating, but local AI platforms like Hugging Face make the process simple.

A screenshot of the Hugging Face website's homew page.

It might be most helpful to think of Hugging Face as an app store for all things AI. It hosts hundreds of thousands of AI models, including Llama 3.2. But it serves as much more than a host to the latest LLMs; it also provides tools that make it easier to use these models and customize them in an infinite number of ways.

For example, I run my model through LM Studio, a free app that lets you use the LLMs you download locally. Although it’s no novice game, I’ve discovered what Hugging Face offers in terms of resources and community quite accessible. The knowledge Hugging Face offers is staggering, but you will have to seek out information at times; it’s not all handed to you directly.

A screenshot of the Hugging Face website's educational resources.

Why Llama 3.2 Is Better Than ChatGPT and Other AI Chatbots

In the crowded field of AI language models, Llama 3.2 stands out by delivering exceptional performance in areas where others often fall short.

While models like GPT-4 are powerful, they often require significant computational resources and are accessible only through paid services or APIs. Llama 3.2, being open-source and efficient, allows broader access without compromising performance.

Language Understanding

Llama 3.2 excels in grasping context and subtleties in language. For instance, when given complex instructions or ambiguous sentences, it provides accurate and coherent responses that align closely with human reasoning.

A screenshot of Llama 3.2's response to a prompt asking for creative metaphors about AI.

Brainstorming

When brainstorming ideas, Llama 3.2 offers imaginative suggestions that maintain logical consistency, aiding creatives of all stripes with new alternatives to overcome the ever-present threat of blocked ideas.

Code Generation and Debugging

Developers can benefit from Llama 3.2’s ability to generate code snippets in various programming languages and provide explanations for code behavior, making it a valuable tool for learning and development.

Llama 3.2 Is Amazing—I Wish I’d Switched Sooner

After using it for a few weeks, I’m genuinely blown away by what Llama 3.2 can do. The way it answers questions or helps with projects feels less robotic and more natural than anything I have used. It effortlessly handles all the same tasks I used for ChatGPT, and it’s always on point. Whether it’s a simple question or a deep dive into a topic, Llama 3.2 rarely misses the mark.

If I’m being honest, I was hesitant to try something new. I was comfortable with ChatGPT and didn’t think another AI could make much of a difference. However, the first time I used Llama 3.2, I noticed how fast and accurate it was. It immediately understood my requests and gave me answers that were often better than expected.

What’s notable is learning how to use Llama 3.2 through Hugging Face has completely changed the perspective I used to have with AI. I’ve become more empowered to learn about local AI models and how they can be customized, and I have an overall new understanding of the hype surrounding AI.

The bottom line for me is that Llama 3.2 has shown me how far AI has come—and hints at what’s possible in the years ahead.

Of course, no LLM is perfect, and while Llama may not be grabbing headlines, it inspired me to dig deeper for information about AI. In doing so, I’ve discovered a much more versatile alternative to the LLM arena’s mainstays and a new-found understanding of how everyone has the access and ability to shape the future of AI, not just be a witness to it.

How to Tell If the Number Calling Is a Phone Scam

Summary

  • While phones are better at identifying scam numbers now, they still aren’t perfect.
  • Knowing what to look for, such as area codes, could help you avoid a scam call.
  • Be cautious of vague information, fake promotions, and aggressive callers.

Scam calls are a reality that many of us will face at one time or another. At best, they’re annoying—but at worst, these calls are dangerous. Learning how to identify phone scams is a great way to avoid falling for them.

Look for a “Scam Likely” Alert

Your phone will sometimes warn you with a “Scam Likely” message, and this is the easiest way to determine whether the number calling is trying to extract information from you. The best thing you can do in these scenarios is to block these spam callers.

Several smartphones, including iPhones and Google Pixel devices, can now track potential scams. But depending on your device, you may only have access to this feature for certain languages and regions.

Beware of Certain Area Codes

If your smartphone doesn’t warn you of potential scam calls, you can use certain area codes as a pointer. Some of the most common scam area codes are 809, 506, 242, and 404. In these situations, the best thing to do is not to answer the phone and block the caller.

Neighbor spoofing, which is when a phone number similar to yours will call you, is also a sign of a potential scam. I never answer these calls either; if someone legitimate needs to contact me, they’ll leave a voicemail if I don’t answer.

One reason why social media can be positive is that others can easily warn of scams and other threats. If you’re unsure whether a number calling you is a scam, checking X (Twitter) is a good idea. Simply look for the phone number in your search bar. You can also type “[number] scam” for more refined results.

It’s also a good idea to look through certain accounts and see if you can find any warning signs, such as Friends Against Scams. Besides X, you can use Facebook to identify potential scams and protect yourself.

You can use a free reverse phone lookup website or app to determine if the number calling you is a phone scam. Either note the number as it’s calling you or let it ring and search later.

Reverse phone lookups are sometimes difficult because they rely on numbers being listed. However, while this might not work, it’s still worth trying.

Already Picked Up the Phone? Here Are 5 Signs of a Scam

Sometimes, scam calls may slip through the net, and you could unknowingly answer to one. Fortunately, you can still determine if a phone number is trying to scam you by considering these red flags.

1. Asking for Sensitive Information

Customer support will never request your login information. They may sometimes ask answers to security questions, but never your password. In fact, you should never give out your password to anyone. Other sensitive information, such as your home address or date of birth, should also not be given to any stranger over the phone.

Also, remember that they probably wouldn’t be calling you if you did not call technical support. It’s very common for scammers to pretend they’re part of a support team, so you can be almost certain that this is a scam if you haven’t requested help.

2. Being Rude or Aggressive When You Confront Them

Scammers don’t have your best interests at heart, and some of them will become hostile if you don’t cooperate. If a caller resorts to insults or shouting, they are probably trying to scam you. Even on the off-chance that they were genuine, you wouldn’t want to work with this kind of person anyway.

Put down the phone and block the number. You can’t reason with these kinds of people, so trying to diffuse these situations is pointless. If the caller was impersonating a company, informing that business of this is a very good idea.

Scammers will often resort to manipulation and scare tactics to try and get the information they want from you. One way they do this is through threatening legal action. For example, the caller might say that you owe money for your car payments and run through the “consequences” of not complying with their demands.

If you aren’t cooperative, a scammer might also threaten to report you to the police. They might not do this in an aggressive way, which is why detecting these kinds of scams can be challenging. You can always contact an actual entity if you’re concerned; they’ll clarify whether the call was legitimate.

4. Fake Promotions

Sorry, but you probably didn’t win millions of dollars in that contest you never entered. So, in these scenarios, you can be certain that the number calling is a scam.

person accepting call from unknown number on smartphone
Journey Studio 7/Shutterstock

Callers might also try to lure you with promotions such as discounts, and you should also ignore these kinds of calls. You can always verify whether these are genuine from an official store or manufacturer’s website. Note that scammers can use your social media profiles to customize their promotions, so it’s worth upping your privacy game.

5. Vague Information

If someone needs to contact you by phone, they will typically give as much information as possible. On the other hand, scammers might be vague. For example, if you’ve “won a competition,” the scammer might not reveal all the key details. Similarly, if you’re apparently in trouble for something, they might not explain the full reasons why.

Heed these warning signs and finish the call. You should also warn others so that they don’t potentially fall victim.

Phone call scams are always best avoided, and while our phones are much better at picking them up now, you’ll still need to be on high alert. Understanding area codes often used by scammers is one way to do this. Knowing whether you reached out to customer support is also a good idea, and so is determining whether the information you’ve received for an offer is legitimate enough.

How Does a Via in Pad Differ From a Regular Via?

Via in Pad Differ From a Regular Via

When designing a PCB, vias are essential for connecting components to traces and to other devices. However, traditional vias consume a lot of space and can cause parasitic inductance that can interfere with high-speed signal lines. This is where the use of via in pad can provide significant benefits.

How does a via in pad differ from a regular via? A via in pad is a capped through-hole that is built into the surface of a component pad. It can be used in place of a trace or as an alternative to a buried microvia. The via is filled with a non-conductive epoxy, planarized to flatness and then plated over to make it a part of the pad surface. Using this process, it is possible to avoid routing traces that go through the bottom of the board and can improve thermal dissipation, while also improving the durability of the pads against mechanical stress.

The use of via in pad can also help to reduce the thickness of the circuit board and improve signal quality. It can also be used to reduce manufacturing costs since it requires less material than standard vias. However, it is important to understand the risks involved in via in pad so that a proper risk-benefit analysis can be performed.

How Does a Via in Pad Differ From a Regular Via?

Whether or not to use via in pad is a design decision that will depend on the specific needs of the project. It can be useful in high-speed designs as it helps to reduce the trace length and decrease inductance. However, it is important to note that this technology can add complexity and lead time to the fab process as the vias must be plugged and capped before being used in the assembly.

Another factor to consider is that a via in pad can increase the cost of the board due to the additional fabrication steps and higher production costs associated with this technique. In addition, the proper filling and plating procedures must be employed to ensure reliability of the vias, as improperly filled or plated vias can lead to solder voids and other defects.

One common misconception is that using a via in pad can degrade the surface of the pad. While this can occur, it is only if the pad is not properly designed and executed. This is why it is crucial to use the services of a professional PCB designer to help ensure that the design is optimized for manufacturing.

Ultimately, the choice to use a via in pad is a complex issue that should be discussed with your PCB manufacturer. If you decide to go this route, it is best to work with a qualified PCB assembly contractor that is familiar with the process and can guarantee reliable results. If you are interested in learning more about how to optimize your PCB designs for assembly, contact Bittele and we will be happy to discuss the various options available to you. You can also request a quote for your next PCB assembly project.

Peer Inside the Mind of Google’s AI With This New Experimental Gemini Model

In these early days of artificial intelligence, you might find yourself staring at an answer, wondering: how on Earth did the model get to that? With Google’s newest experimental model, you can pull back the curtain on how AI thinks, as it’s designed to show you its thoughts.

See an AI Model’s Reasoning With Gemini 2.0 Flash Thinking

Building on its speedy Gemini 2.0 Flash experimental model, Google has just dropped Gemini 2.0 Flash Thinking, a version that not only offers fast solutions to complex questions, but also presents its reasoning in getting to that solution. According to Google DeepMind’s Jeff Dean, the new experimental model was “trained to use thoughts to strengthen its reasoning.”

While Gemini 2.0 Flash Experimental is available directly on the standard Gemini desktop app, Gemini 2.0 Flash Thinking Experimental is only available on Google’s AI Studio. That being said, it’s easy (and free) to get started on this platform. At the time of writing, you can present the model with up to 1500 requests per day without paying a dime.

You don’t need a subscription to Gemini Advanced to use either of these experimental models.

What’s the Use (Case)?

According to Google, this new experimental model is most useful when you need to understand the steps an AI model takes in getting to a response, such as when you have to “tackle difficult code and math problems.”

Specs listed for Gemini 2.0 Flash Thinking Experimental, including its rate limits and latency

I can imagine how seeing the model’s thoughts could be helpful in double-checking its work. For instance, if you were unsure about a response, you can review the model’s step-by-step reasoning to either feel more confident about the resolution, or find the exact point where things went wrong.

Students could likely also benefit from this model. Say you have a fairly complicated physics problem. Instead of merely copying and pasting an AI-generated response, you could also review the steps involved in getting that result. That being said, there’s still no way to know for sure that the answer or the reasoning is accurate. That’s because these AI models are also still students, to some extent.

I don’t know about you, but these recent Google releases are starting to feel like 12 Days of Christmas: Gemini Edition. It feels like Google drops an experimental model or Gemini upgrade every day, and I have to wonder if OpenAI’s ChatGPT Search coming from Google’s job has anything to do with it. In any case, it’s a good sign for progress, as every AI update leads to stronger models.

Six Essential Tools for Soldering in PCB Manufacturing Assembly

Soldering in PCB Manufacturing Assembly

Printed circuit boards (PCBs) require soldering to link their various components and functions. The soldering process demands expertise and precision to ensure robust and functional electronic devices. To maintain quality and efficiency in the pcb manufacturing assembly, you can’t compromise on soldering materials and techniques. Here are six essential tools to have in your arsenal to achieve professional results.

Purchasing: Obtaining the necessary electronic components and ensuring they match up with the PCB design is critical to a successful soldering process. This involves a comprehensive bill of materials (BOM), which lists every component needed to fulfill the intended functionality of the PCB. It also includes part numbers, quantities, and reference designators for easy inventory management and procurement.

Solder Paste Stenciling: The first step in pcb manufacturing assembly is applying the correct amount of a mixture of solder alloy and flux to the surface of the board. This is done using a stencil, which is used to precisely apply the paste to designated areas of the PCB where components will be placed. Once the paste has been applied, a machine called a pick-and-place applies the components to their appropriate positions on the board. This requires a high degree of accuracy and can be difficult to accomplish without the use of specialized equipment.

Six Essential Tools for Soldering in PCB Manufacturing Assembly

Lead-Free Soldering: As a result of environmental concerns, the use of lead in soldering has become increasingly prohibited worldwide. For this reason, many electronic manufacturers use lead-free soldering in their production processes. In addition to improving the environmental impact, lead-free soldering has several other benefits that make it an excellent choice for a wide range of applications.

Reflow Soldering: Reflow soldering is a popular method of connecting components on a PCB. It involves heating the board to a specific temperature to melt and solidify the solder. This allows the connection points to adhere properly, which in turn ensures that the electrical connections are strong and reliable. This is the preferred soldering method for most PCBs, as it offers a number of advantages over other methods.

Flux: A key ingredient in soldering, flux is a chemical that removes oxide layers and impurities from the metal surfaces of the solder joint. It also helps to promote the flow and adhesion of molten solder. In addition, it prevents the formation of new oxides during the reflow soldering process. The presence of impurities in the solder can cause corrosion, oxidation, and other issues that can negatively affect the performance of the product.

After the reflow soldering process, the assembled PCB undergoes inspection and testing to ensure that it meets all of the necessary specifications. This is done by employing techniques such as AOI (automated optical inspection) and X-ray inspection. These are important steps in the pcb manufacturing assembly because they can help to detect errors and defects in the board that may otherwise go unnoticed by human eyes. A quality PCB that is inspected and tested thoroughly before being released to the public will ensure that it provides its intended function and can resist the test of time.

Can’t Save Your Files as JPEG or PNG in Photoshop? Try These 5 Fixes

If you’ve ever struggled to save a file as JPEG or PNG in Photoshop, you’re not alone. It’s frustrating when a simple export becomes a hassle, but the good news is that it’s usually easy to fix.


1 Start by Restarting Photoshop and Checking for Updates

Sometimes, a glitch prevents you from saving your Photoshop files as JPEG or PNG. Restarting the app is the easiest way to fix this.

To quit photoshop, go to Photoshop at the top of your screen, and select Quit Photoshop. If the app isn’t responding, try force-quitting.

If quitting Photoshop didn’t work, checking for an update might be a better option. The update might have addressed the glitch.

  1. Open the Adobe Creative Cloud app on your computer.
  2. Select Updates on the right-hand side.
  3. Click on Check for Updates.
  4. Update your Photoshop software if an option to do so appears.

Check for Updates in the Adobe CC App


2 Reset Your Photoshop Preferences

Your Photoshop preferences might be causing a problem and preventing the image from saving. The easy fix here is to reset your preferences. Adding them again later will be time-consuming, but the effort is worthwhile to get your save settings working as they should.

Follow these steps to reset your Photoshop preferences:

  1. Navigate to Photoshop at the top of your screen and expand the dropdown menu.
  2. Select Settings > General.
  3. Click on Reset Preferences at Quit. Then, close and reopen the app to reset your preferences to default.
  4. After resetting your Photoshop preferences, try saving your files in JPEG and PNG again.

Reset your preferences in Adobe Photoshop

3 Change the Image Resolution

Photoshop may struggle to save your files in the desired format if the size is too big. This will likely impact you the most when you work with RAW, PSD, or PNG.


Change image size in Photoshop

Here’s how to change your image resolution in Photoshop:

  1. Go to Image in the top toolbar.
  2. Click on Image Size after expanding the dropdown menu.
  3. Change your file dimensions.

If you don’t know where to start, expand
Fit To
and choose your new size. You should also consider adjusting the pixels per inch; if this number is higher, your file size will be bigger.

Adjust your Pixels Per Inch in Photoshop


Make sure that your image is still high-quality enough for its intention. For example, you’ll need something bigger if you’re working with prints than you would when sharing your images on social media. I recommend around 70 pixels per inch for most images online. If you’re selling your art online, something closer to 300 pixels per inch is better in most cases.

4 Change the Color Mode

Your file’s color mode significantly affects the exported file by including additional information. For example, the Multichannel color mode is designed for specialized printing and has more data than a PNG file. This is one of the most common Photoshop errors.

Use the RGB Color Mode to be sure that you can save your files as JPEG/PNG. To do that, navigate to Image > Mode and tick RGB Color. Your changes should take effect immediately.

Change your color mode in Adobe Photoshop to RGB


5 Check the Bit Channel

The bit-depth value shows how much data is stored on every color channel, determining the image quality. However, if the value is too high, your image might be too big for Photoshop to save. You should keep your bit-depth to 8-16 Bits/channel. Some JPEG files can support 32-bit color, but using them may lead to file size issues.

Change bit channel on Photoshop

Switching between different bit-depth values as you’re working on a design will slightly change your image, so it’s better to choose the right bit-depth value at the start of the project. To adjust this, go back to Image > Mode and select 8 Bits/Channel or 16 Bits/Channel.

6 Try Using Quick Export

While it’s nice to use Save As or Export As and make more comprehensive adjustments, you can always use Quick Export if neither work. You can change your Quick Export settings to save as JPEG or PNG. Here’s how to do that:


  1. Go to the Photoshop tab and select Settings > Export.
  2. Under Quick Export Format, choose between JPEG, PNG, or GIF.
  3. Select OK.

PS Quick Export Settings

After changing your Quick Export settings, go to File and hover your cursor over Export. Now select Quick Export as PNG (or JPEG) and export your image.

Quick Export your Photoshop file as JPEG or PNG

7 Try Saving Via Keyboard Shortcuts

If you can’t use the normal save function, try utilizing keyboard shortcuts instead.

  1. Press Ctrl/Shift/S (Windows) or Command/Shift/S (Mac). The save pop-up window will appear.
  2. Choose JPEG or PNG from the Format dropdown menu.
  3. Select Save.


8 Save the File as a PSD First

Newer Photoshop versions will not let you save as JPEG or PNG if you haven’t saved as PSD first. This is Photoshop’s way of making sure you’re not losing the editable file in case your computer suddenly shuts down or something else happens.

You can use keyboard shortcuts to save your file as PSD. Follow the same steps in the previous section, but pick PSD instead of JPEG/PNG. Try then re-importing your file and saving it in those formats.

9 Save it in Another Format and Convert it

If nothing has worked so far, you can try saving your file in a different format and then converting it to JPEG on your computer. I recommend using TIFF, but these steps also worked for me when I converted a PSD image. The instructions below are for Mac, but you can add image conversion to Windows 11’s context menu, too.

save a copy in photoshop


Here’s what you need to do on a Mac:

  1. Go to the directory where you saved your file.
  2. Press Control and your trackpad on the .tif file and select Quick Actions > Convert Image.
  3. Choose JPEG or PNG from the Format dropdown menu.

Convert from TIF to JPEG in Photoshop

Not being able to save your files as JPEG or PNG in Photoshop is incredibly frustrating, but thankfully, you can try several things to fix this issue. Some are more complex, whereas others require just a simple reset. In many instances, your pictures won’t save in these formats when they’re too big; you can fix this problem by reducing your file size.

Now Scammers Are Abusing Legitimate Services to Show You Fake CAPTCHAs

Malvertising comes in all shapes and forms, but some are more nefarious than others. DeceptionAds is a new strain of malvertising where scammers use legitimate ad platforms and ensure that their malicious website dodge moderation as much as possible, allowing their bad ads to get a million impressions daily.


DeceptionAds Abuses Legitimate Channels to Spread PowerShell Malware

As reported by Guard.io, DeceptionAds is a fake CAPTCHA page that asks the user to copy and paste a command to activate PowerShell malware. This attack vector is nothing new; we actually saw this same attack when we reported on McAfee’s discovery back in October.

What makes this particular instance noteworthy is how it spreads. To get people onto these fake CAPTCHA websites, the cybercriminals set up a system where they sent out fake ads through Monetag, a legitimate ad network. Monetag has moderation tools to prevent attacks like these, but cybercriminals are tied to a second legitimate service called BeMob, which is designed to perform ad tracking.


Of course, the criminals aren’t really interested in performing ad tracking on their fake websites. Instead, they passed the malicious website’s BeMob URL to Monetag. Because BeMob is a trusted source, Monetag accepted the link and didn’t flag it during moderation checks. This allowed the cybercriminals to have their malicious ads shown 1 million times a day across 3000+ websites.

Fortunately, Guard.io has reported these cases, and both Monetag and BeMob have taken down the offending ads and removed the bad agents behind them. However, it provides insight into how malvertisers leverage official, legitimate channels to spread their websites without being caught.

Fortunately, avoiding this attack is the same with all malvertisements. Once you know what to look for in malvertising, you can spot fake ads and avoid clicking on them in the first place.

How to Take Screenshots on Android When the App Doesn’t Allow It

One of the main selling points of Android is the freedom it offers. Still, there are limits to what you can do. For example, some apps restrict the ability to take screenshots. While this can be frustrating, there are ways to bypass these restrictions.

1

Why Do Some Apps Restrict Screenshots?

Annoying as it is, developers don’t restrict screenshots for no reason. Be it privacy or security, there’s always some sense behind the restriction.

Most banking and payment apps block screenshots for security reasons. Chrome blocks screenshots in its Incognito tabs for privacy reasons. Streaming services block screenshots to curb piracy, while apps like Telegram prevent screenshots of self-destructing messages.

While the reasoning may be valid, you might still have legitimate reasons for bypassing these limits. You can still take screenshots anywhere you want. You just have to get your hands dirty a bit.

If bypassing these limits violates the app’s terms of service, privacy policies, or applicable laws, you assume full responsibility for the consequences. Always proceed with caution and ensure your actions respect rules and regulations.

There are various methods for taking screenshots in apps that restrict them. Some methods work in most apps, though not all. Here, we look at three methods: two easy methods that work in some cases and an advanced method that should work every time.

2

Use Google Assistant

Some Android apps block screenshots only when you use the standard button combination on your phone. This means that you can bypass the restriction if you use any method other than pressing the power and volume buttons to capture a screenshot.

Google Assistant is a built-in app in most Android phones. Its prominent feature, voice commands, lets you capture screenshots without using the button combination.

  1. Open the app that you want to screenshot.
  2. Activate Google Assistant. You can do this by saying Hey Google! or holding the home key depending on your settings.
  3. Say or type Take a screenshot. Google Assistant will now capture a screenshot.

Unfortunately, this simple method has a low success rate. Apps with robust screenshot restrictions, like Chrome’s Incognito mode or secure banking apps, usually produce a blank or black screen. If this method fails, try one of the advanced techniques below.

3

Record the Screen and Take a Screenshot

If traditional screenshot methods fail, you can record the screen instead and then extract the screenshot from the video. Most Android phones come with a built-in screen recording feature. Here’s how:

  1. Enable the screen recorder on your phone (you’ll typically find it in the Quick Settings menu).
  2. Start recording the screen while using the app you want to capture.
  3. Once recorded, play back the video and pause it at the desired frame.
  4. Take a screenshot of the paused frame using your phone’s button combination or any screenshot tool.

This method can sometimes work, but like Google Assistant, it isn’t foolproof. Some apps block screen recording, so you’ll have a better chance if you start the recording on the home screen. The app might still show as blank in the recording.

4

Take Screenshots Using scrcpy

This is the ultimate method as it can bypass virtually any sort of screenshot restriction in Android apps. scrcpy is a lightweight screen mirroring program that lets you view and control your Android phone’s display on your PC. Once you mirror your Android phone’s screen on your computer, you can simply use print screen or something like Window’s Snipping Tool to take screenshots.

scrcpy is available on Windows, macOS, and Linux. You can install scrcpy with Homebrew on macOS. Check the scrcpy GitHub page for full instructions on installing scrcpy on Mac and Linux.

As for this article, we’re going to install scrcpy on Windows, using Windows Package Manager. It requires you to run some code commands, but it’s easier than it looks.

Step 1: Install scrcpy

You can install scrcpy using Windows Package Manager in Command Prompt. Open Command Prompt by searching for cmd in the Start menu. Once inside Command Prompt, run the following command:

        winget install Genymobile.scrcpy
    

This command will call on Windows Package Manager to install scrcpy. This can take a while depending on how fast your connection is.

scrcpy works through Android Device Bridge (ADB), a command-line package that lets you communicate with your Android phone. You won’t have to use ADB for this task, but it is a prerequisite for scrcpy to function. If you don’t have ADB installed, scrcpy will ask for your permission to install it during the installation process. Type Y and press Enter to allow it.

Step 2: Connect Your Phone

With scrcpy installed, the next stage is preparing your phone. For scrcpy to access your phone’s screen, you need to enable USB debugging on your Android device. This requires you to enable Developer mode on your phone.

  1. Go to Settings on your Android phone.
  2. Scroll down to the bottom and select System.
  3. Find and select Developer options.
  4. Tap the switch next to USB Debugging to change it to On.

Now both your phone and your computer are ready. Connect your phone to your computer’s USB, and enter the command below in Command Prompt:

        scrcpy
    

Once you press Enter, a window will pop open, and you’ll be able to see your phone’s screen. You can even use your computer’s mouse and keyboard to navigate your phone and type with ease. Now with your phone’s screen mirrored onto your computer, you can freely capture screenshots using print screen or other screen capture methods.

Mirroring an Android phone's screen with scrcpy

Some Android apps restrict screenshots for privacy or security reasons, but with persistence, you can bypass these limitations. If the app only blocks your phone’s screenshot button combination, alternative methods like asking Google Assistant can work, though with limited success.

For a more reliable option, scrcpy allows you to stream your phone’s screen to your computer, where you can capture screenshots freely. After all, it’s your device, and how you use it is ultimately up to you.

Grok AI Is Now Free to Use, But It Has a Few Key Issues

X (formerly Twitter) made its Grok AI free to the public at the end of 2024. And while Grok is willing to give answers that aren’t held back by AI safety training and ethical guardrails, that very feature is potentially dangerous.

1

Grok Has Weak Ethical Safeguards

Dil_Ranathunga/Shutterstock

In attempts to satisfy my curiosity about random topics, I’ve often been frustrated when an AI bot refuses to respond because it assumes I have bad intentions. In these cases, getting a helpful response from OpenAI’s ChatGPT or Anthropic’s Claude requires me to trick them into answering. It’s a game of verbal gymnastics that I find a silly waste of time. Grok AI, on the other hand, has fewer guardrails.

You can now use Elon Musk’s Grok AI for free, and what’s unusual—perhaps even exciting—about Grok is that it doesn’t patronize you like it knows what’s best. It doesn’t block your attempts to learn; you can ask it to roast you, give an unfiltered opinion, or even speculate on hypotheticals such as conspiracy theories. Even though Grok still attaches warnings and qualifications, the AI bot will do its best to give you an answer.

However, many would find this lack of ethical safeguards severely disconcerting. For example, I was shocked that I was able to ask Grok how to harm myself and its comprehensive response with a long list of methods. And is it serving a societal good for anybody to be able to get easy step-by-step recipes from The Anarchist Cookbook? Many would consider Grok to be highly irresponsible in this regard.

2

Grok’s Image Generation Lacks Content Moderation

Grok’s AI capabilities also include image generation. It’s pleasantly frictionless to use: you can request an image from the same textbox in which you’d ask questions. This fluidity is superior to my experience with other AI apps, such as switching to a different AI in Quora’s Poe or getting redirected to the web tool by Microsoft Copilot on the desktop.

Grok’s image generation is surprising because it doesn’t try to sanitize my ideas like I’m a five-year-old who needs to be scolded. Perhaps it’s not as creative as Midjourney or the other AI art bots, but Grok feels less restrictive than the others I’ve tried.

As you might’ve guessed, this permissiveness is a double-edged sword. Grok:

  • Doesn’t care if you generate and use AI art ethically
  • Will reuse copyrighted material, which can land you in hot water legally without you knowing it
  • Lets you misappropriate others’ likenesses to create almost any image, such as the examples above.

If you think this is clutching at pearls, just know that you can ask Grok to go along with ideas far worse than what I’ve shown here. Sure, letting your creativity run wild is fun, but you can imagine how Grok’s image generation can be abused. Less responsible parties might use it to generate fake pictures and videos for cyberbullying, disinformation, or political propaganda.

3

Grok Trains Itself on Tweets

tweet logo bird
x

One limitation of most AI chatbots is that they’re trained on information that’s one or two years old. Whenever I ask Google’s Gemini or Meta’s Llama about something more recent—say, new smart home technologies or recent laws that have come into effect—I often receive outdated responses or straight-up AI hallucinations.

Grok AI aims to solve this problem by training its data on Tweets. To test how up-to-date its training is, I asked Grok questions regarding recent events across niche topics. To my surprise, I couldn’t stump it. Grok outperformed other bots and gave relatively accurate answers based on current information.

Of course, you can already spot the issue with this training methodology from miles away. If Grok is trained on Tweets and the platform is rife with bots and common X (Twitter) scams, will its answers always be accurate? Or will they be tainted with bias? By the way, if you’re not comfortable with Grok AI using your posts for training: here’s how to opt out.

At first, I came in with the assumption that Grok AI would be yet another ChatGPT clone. But after giving it a test drive, I believe Grok stands out as a different kind of AI, one that pushes boundaries. Whether that’s refreshing or harmful, I’ll leave that up to you to decide.

How do you select components for a PCB prototype?

select components for a PCB prototype

Selecting components for a PCB prototype is a critical step in the design process, as the performance and reliability of the final product largely depend on the chosen components. A well-designed PCB prototype can only function as intended if the right components are selected to match the electrical, mechanical, and environmental requirements of the application. The process of selecting components involves considering various factors, such as component specifications, availability, cost, and manufacturability, to ensure that the PCB prototype meets both design objectives and performance standards.

The first step in selecting components for a PCB prototype is understanding the specific requirements of the project. This includes determining the power, voltage, current, and frequency that each component must handle. For example, in a high-power PCB prototype, components like resistors, capacitors, and transistors must be capable of withstanding higher power levels and heat dissipation. Conversely, in low-power applications, components with lower power consumption and minimal heat generation would be more suitable. Understanding the operational conditions of the PCB prototype allows engineers to choose components that will function optimally and reliably under the expected conditions.

Another key consideration is the component’s electrical characteristics, including its voltage rating, current rating, resistance, capacitance, and inductance. These specifications must align with the design requirements of the PCB prototype to ensure that each component can handle the electrical load and perform as needed. For example, selecting a capacitor with the wrong capacitance or voltage rating could result in poor performance or failure of the PCB prototype. It’s also important to consider factors such as tolerance, accuracy, and the temperature range of components to ensure that the PCB prototype operates within the desired parameters.

How do you select components for a PCB prototype?

The physical size and package type of the components also play a crucial role in the selection process. Components come in a variety of package types, such as through-hole, surface-mount (SMT), and chip-on-board (COB), each with its own advantages and disadvantages. For example, SMT components are generally preferred for their smaller size and ease of integration into automated assembly processes, while through-hole components may be necessary for more robust or high-current applications. The physical space available on the pcb prototype will influence the selection of component sizes and package types, as it is important to ensure that the components fit within the designated layout and don’t interfere with other parts of the design.

Availability and lead times are additional factors that must be considered when selecting components for a PCB prototype. Some components may have long lead times, which can delay the development process. For rapid prototyping, it is often beneficial to select components that are readily available or have shorter lead times to avoid delays in the manufacturing process. Additionally, choosing components from widely used and trusted manufacturers can help reduce the risk of supply chain issues and ensure that the components meet high standards of quality and reliability.

Cost is another important consideration when selecting components for a PCB prototype. While it is tempting to choose the highest quality components, cost constraints may require engineers to balance performance and quality with the available budget. By carefully evaluating the cost of components and considering alternatives, engineers can maintain the performance of the PCB prototype while staying within budget constraints. However, it is crucial not to compromise too much on quality, as low-cost components may lead to reliability issues in the long run, potentially affecting the overall success of the prototype.

Is It Better to Get a Tablet With 4G LTE/5G or Wi-Fi Only?

When you’ve settled on buying a specific tablet model, the next big decision is whether to go for a Wi-Fi-only model or pay extra for a cellular version with 4G or 5G support. So, which of the two options should you buy?

Should You Buy an LTE/5G and Wi-Fi-Only Tablet?

In a nutshell, a Wi-Fi-only tablet means you can only connect to the internet via Wi-Fi, while a cellular one supports cellular connectivity and Wi-Fi. That’s the only difference between the two options. But which tablet should you buy? Well, there are different factors to consider. These include the retail price, availability of Wi-Fi and LTE/5G, convenience, and security, among others.

1. Availability of Wi-Fi and LTE/5G Connectivity

Since you also get Wi-Fi on a cellular tablet, you can continue to use it at home, switching only to cellular data when needed. As such, you enjoy the best of both worlds when you go for a cellular tablet.

Cellular performance can be considerably faster in the largest cities, easily rivaling the speeds you’d get from a fixed broadband connection. Conversely, cellular coverage and speed can be patchy in more rural areas.

Apple and Samsung

But there’s no escaping from the fact that when you need a data connection, you really need one. Your phone can pick up the slack (to an extent) for things like email, social media, and the web. Plus, you can use your phone as a mobile hotspot, sharing your phone’s data connection with your tablet.

However, not all data plans support tethering in this way, and those that do normally impose restrictions on speed or the amount of data you can use. For the most part, it’s a short-term solution rather than a long-term alternative.

2. Price of Cellular vs. Wi-Fi Only Tablets

For many, the most significant factor in choosing between a cellular and Wi-Fi-only tablet is the price. The simple act of adding a cellular radio to a tablet typically adds more to the price. For example, there’s a $200 premium on the 11-inch M4 iPad Pro model with cellular support. For Samsung’s Galaxy Tab S10+, it’s $150.

Even if you’ve got the extra cash to spend, you should consider whether you need cellular support or if you’d be better off spending the money on a higher-specced model instead. For instance, if you’re eyeing an 11-inch M2 iPad Air, you can get a Wi-Fi-only version with 256GB of storage for $50 less instead of the base model cellular support.

3. Ongoing Data Costs

Verizon prepaid tablet and mobile hotspot plans

The up-front price is only the beginning. There’s no point in having a cellular tablet without a cellular data plan to use with it. Cellular data is expensive, and most plans come with strict usage limits (even T-Mobile’s “unlimited” plan has a fair use policy that can kick in after you’ve used a certain amount of data in a month).

You can expect to pay upwards of $20 per month just for a couple of gigabytes—over two years, that means you’ll pay double the price of a Wi-Fi-only tablet, and often quite a bit more.

5. Convenience

An iPad with two apps splitting the screen.
Apple and Prathankarnpap / Shutterstock

The big selling point for a cellular tablet is convenience. So long as you are in an area with good network coverage, you’ll have seamless connectivity wherever you are. But how much of this will be on the mobile network?

Cellular serves as a backup connection, meaning that tablets will always default to a Wi-Fi connection whenever one is available. Now think about how often you have access to Wi-Fi: at home, in the office, at school, at friends’ houses, in your local coffee shop, and countless other places.

Even trains and buses are increasingly offering Wi-Fi these days. So, on second thought, you might need cellular connectivity less often than you imagine. There are some instances where a permanent data connection is essential for a tablet. For example, when you’re working on a cloud-based document, and you step out of range of your Wi-Fi network before it has finished syncing, or when you want to play one of the many games that require internet access.

Location services are also more efficient on devices connected to a mobile network, as this can help calculate an exact position more quickly.

6. Battery Life

Cellular data uses more power than Wi-Fi, so battery life on cellular tablets is shorter than that on their Wi-Fi-only equivalents. But whether you’ll notice the difference is a different matter altogether.

Apple’s specs for the M4 iPad Pro show that battery life is 11 percent shorter on cellular than Wi-Fi, but this only applies when using a cellular data network. When you’re on Wi-Fi, you’ll continue to get Wi-Fi levels of battery consumption instead.

In all likelihood, you’ll only notice the shorter battery life if you’re a heavy user of your tablet and cellular data. Charge your tablet every second or third day, and the difference will be negligible.

7. Security Considerations

The widespread availability of Wi-Fi hotspots means that having cellular connectivity on your tablet is less important than it otherwise might have been in the past. In any major town or city, you’re rarely more than a few minutes away from a McDonald’s or Starbucks if you need to get your tablet online.

While this is convenient, there are risks associated with logging onto public Wi-Fi. A cellular connection doesn’t have security risks. However, if certain services are important to you, and you need to access them in public, cellular connectivity could be the safer option.

Cellular vs. Wi-Fi-Only Tablet: Which Should You Choose?

Choosing between a cellular and Wi-Fi-only tablet depends on all the factors discussed. Wi-Fi-only tablets are better if you’re on a tight budget, as they sell cheaper than their cellular version. Cellular tablets have greater convenience and security, as you can use your tablet anywhere as long as there’s cellular connectivity.

However, you can get the same convenience by using your smartphone to provide connectivity to your Wi-Fi-only tablet if your cellular plan supports sharing connectivity. The differences in battery life are negligible, but using Wi-Fi gives you better battery life.

The massive difference in price means that while cellular support on a tablet might be nice to have, you should only consider it if you absolutely need it or if you aren’t on a budget. Cellular data plans aren’t great value, and even if you can afford the extra costs, you might still find that investing in a higher-end device is the way to go. But don’t just consider cellular and Wi-Fi; there are other key specs to consider when buying a tablet.

This Nasty Android Malware Is Picking Up Pace and Targeting Certain Devices

There’s plenty you can do to avoid downloading malware onto your malware device, but what if your phone came with a virus pre-installed? As weird as that may sound, it’s not as far-fetched as you may think, as law enforcers have spotted a rise in products that came with the BadBox malware installed on them.

BadBox Malware Is Making Its Way Onto Third-Party Devices

Dilok Klaisataporn/Shutterstock

As announced by the German Federal Office of Information Security, authorities discovered that several IoT and Android devices were sold with BadBox pre-installed on them. These devices often came with outdated versions of Android, which allowed bad actors to exploit known flaws in the operating system during the production chain.

Because the bad actors slipped the malware in during the device’s production, BadBox is deeply rooted within the system’s files and cannot be removed by conventional means. So, what does BadBox do? Turns out, it can do a scaringly large number of things:

BadBox is able to create accounts for email and messenger services without being noticed , which can then be used to spread fake news. BadBox can also carry out ad fraud by accessing websites in the background . The malware can also act as a residential proxy service . It makes the user’s internet connection available to unknown third parties, who can then use it for criminal activities cyber attacks, distribution of illegal content). This can link the IP address of the affected person to criminal offenses. BadBox can also download additional malware.

The Federal Office of Information Security states that, ideally, the ISP will contact people who have purchased infected IoT botnet devices and warn them about their presence. As a consumer, it’s important that you pay the extra dollar to ensure your products come from reputable and well-known manufacturers. Going for the lesser-known alternatives may be cheaper, but it also opens the doors for malware developers to gain a foothold on your device, even long before you’ve bought it.

If You’re Traveling During the Holidays, Here’s How to Prepare Your Tech

Planning the journey itself takes most of the time when it comes to holiday travel, but you shouldn’t forget the gadgets and tech that make your journey easier. From keeping your mobile data topped up to downloading content, this is your checklist for a smooth holiday trip.

1

Buy an eSIM or Enable Data Roaming

Whether you’re visiting relatives abroad or spending some time elsewhere to recharge, you’ll need to make sure that you have mobile data. Buying an eSIM is a good idea if your mobile plan doesn’t cover other countries, and paying for extra data would be expensive.

Sometimes, however, you may be able to use your plan’s normal data in other countries. Since I’m based in the EU, I can use my mobile data when traveling to other countries in the EU/EEA. You’ll need to switch on data roaming from your device’s cellular settings.

Some providers have data roaming restrictions. Check your plan to ensure you don’t accidentally go over your limits.

2

Buy a Travel Adapter if Needed

Before traveling, it’s important to understand your destination’s plug type and buy a travel adapter if necessary. Consider looking for sets that include multiple plug types to avoid making multiple purchases later. You can often purchase adapters at the airport, but I suggest buying these in advance so that you’re better prepared (and they’re a little cheaper).

Aryan Surendranath / MakeUseOf

Some wall adapters are bad quality, so spending more on something you can continue using in the long run is a good idea. Check through your old cables to see if any of your current tech has adapters; for example, my wireless charger has EU, UK, and US plug adapters.

3

Download Content

I have extended family members in the UK, Finland, and the US, so I naturally travel a lot during the holidays. I hate long-haul flights, but planning these in advance makes them more bearable. One way I do this is to download my content in advance.

I download all of my favorite podcast episodes and others that I’d like to listen to in the lead-up to the trip (and even at the airport sometimes). Making sure that you’ve downloaded all your music albums and playlists is also a good idea; ditto for videos you want to watch. Every major streaming service, including Netflix, YouTube Premium, Apple Music, and Spotify, has a download option.

4

Charge Your Batteries

Fully charging your smartphone and other key devices is crucial before you set off for your trip, especially if you’re going somewhere far away. Make sure that everything is charged the night before, and put your chargers in your backpack/carry-on baggage for easy access when needed.

A charging station with an Apple Watch, an AirPod, and an iPhone with the battery at 80%.
oasisamuel / Shutterstock

Since you don’t always know when you’ll have access to a plug socket, I also recommend buying a power bank (and charging this before you travel). Make sure you know what to look out for when purchasing a portable charger.

5

Buy a Spare Battery if Needed

I always take my camera with me, and having two batteries has made it much easier to use my gear without worry. If any of your main devices have an external battery, I recommend getting a spare one before you travel.

Don’t fall for the “cheap” options; they don’t cost much for a reason. Instead, it’s better to invest in a high-quality alternative. For example, I bought a Duracell camera battery (which lasts longer than my camera’s original one).

6

Have Your VPN Ready

A server in the ExpressVPN app

Public Wi-Fi is available in many airports, train stations, and bus stations. You’ll also find it on many modes of transport, such as buses and ferries. But using public Wi-Fi is risky, and you should protect yourself with a VPN.

I personally think that ExpressVPN is the best option for most users, but NordVPN is a viable alternative. Many VPNs offer a risk-free period, so you can always get a refund after your trip if you wish. It’s also worth knowing what not to do on public Wi-Fi to protect yourself further, such as not submitting your payment details.

7

Enable 2FA and Other Security Measures

Preparing your tech for holiday travel also means knowing what could go wrong and mitigating the potential damage caused. For example, you want to ensure you’ve enabled the appropriate security measures on your devices in case they’re lost or stolen.

Putting a PIN code on your smartphone is a starting point, and I also recommend enabling multi-factor authentication methods (e.g., two-factor authentication) for your main online accounts. Setting up Face or Touch ID is also important to ensure that only you can access your devices.

Preparing for the holidays also includes ensuring that your tech is ready. Download any content you want to consume while traveling, and be sure you’ve set up the appropriate mobile plans. Securing your devices is also vital.

Why I Use This Guitar App for Chords and Instrumental Tracks

Summary

  • Check Ultimate Guitar for chords and tabs on various instruments anytime, anywhere.
  • You can customize the app to show specific instrument tabs and enjoy features like auto-scroll.
  • Ultimate Guitar offers subscriptions for advanced features and lessons, making it well worth the price.

As a novice guitar and piano player, I love to learn chords by playing popular music. The Ultimate Guitar app is easy to use, provides access to chords across multiple instruments, and even has background tracks included with a subscription.

What is Ultimate Guitar?

Ultimate Guitar: Chords and Tabs, available on iOS and Android, is one of the best ways I’ve found to access chords and tabs for popular music. You can add songs with your own chord progressions, and the app itself even has “official” tabs that are accurate to a given song. This allows musicians to play songs on guitar or piano without struggling to figure out the chord progression on their own.

At any given moment, there are more than one million tabs on Ultimate Guitar. That means I have basically the entire history of music with chord notations only a tap away.

The Best Features on Ultimate Guitar

When I first used Ultimate Guitar, there were only guitar, piano, and (some) ukulele tabs. Now, the app has expanded to offer bass tabs and instrumental tracks if you’d like to try singing karaoke or playing along. However, these expanded features require a monthly subscription. There are also options to automatically scroll through the tab while you’re playing, which helps avoid any breaks in the music. You can even customize the scroll speed depending on the tempo of the song.

You can favorite tabs you’re likely to come back to or search for popular songs that are trending on the app. If you want, you can upload videos of yourself playing and/or singing a song and even access guitar lessons all on one app. If you’re not sure what you’d like to play, there are tabs sorted by genre that you can scroll through to see if inspiration strikes.

Better yet, you can customize your app to only show certain instrument tabs. I mostly play the piano, so I can see the key layout for a certain chord when I’m playing a song. This is helpful as I tend to have spurts where I don’t play for a while and forget some of the more complicated chord structures.

Finally, there are subscriptions for $9.99 per month or $39.99 per year, which grant access to guitar lessons and more advanced features. You can also see a free preview for courses like Spanish guitar strumming techniques and music theory to learn how to read music.

Why Ultimate Guitar Is Worth The Subscription

I love using the Ultimate Guitar app when inspiration strikes. Sometimes, I’ll hear a song on the radio or a new song comes up on my Apple Music shuffle, and I immediately know it’s a song I want to learn on piano or guitar. When this occurs, I can quickly pull up the song on the app, favorite the tab I want to return to later, and I’m all set for a jam session later.

Because you can upload your own chord progressions for songs, some songs have multiple versions, too. This is especially great if one version of a song doesn’t sound 100 percent correct.

I’ve played around with multiple versions of the same song to see which tab sounds better. There is even the option to transpose the chord structure to a different key if you’d like to try playing the song in a lower or higher key, too. This option is fantastic if you like to sing along to songs but don’t have the vocal range for some high or low notes.

You can also write your own tabs if you’re up for the challenge. I’m not at this level yet in my music journey, but I certainly hope to be one day!

The Ultimate Guitar app is a must-have whether you’re a music novice or maestro. This app covers everything from guitar to piano to even having background tracks if your only instrument is your voice! I bought into it a long time ago, when it only required a one-time purchase. However, even as a yearly subscription, it’s well worth the price to upgrade your musical endeavors.

Here’s How I Capture Beautiful Night Photos on My Smartphone

Night photography requires a different approach than daytime. Limited light, shaky hands, and noise can cause blurry and grainy photos. However, with the right techniques, you can capture crisp and clear night shots on your phone—sometimes even better than a professional camera.

1

Use a Tripod or Stabilizer

Shooting in low light requires a steady base to prevent motion blur since even slight movements can ruin a great shot. That’s why I always use a tripod for night photography. It lets me play around without fear of the camera shaking. It keeps things steady and cuts down on blur in the final image.

Digvijay Kumar / MUO

If I don’t have a tripod, I use solid surfaces like walls or rocks to keep the camera steady. Plus, I use the timer on my camera app to avoid any minor shakes that might happen when pressing the shutter button. Setting it for a few seconds gives me enough time to take my hand off the phone before the photo snaps.

Another cool gadget for steady night shots is a stabilizer or gimbal. These handheld devices help me get smooth and steady shots, even when walking or moving. They’re compact and portable, giving way better stability than just using my hands. Some even come with remotes for easier hands-free shots. Light trails, city lights, and night skies look gorgeous with these things.

2

Clean Your Camera Lens

For a crisp night shot, make sure your lens is clear. Dust, smudges, or fingerprints can mess up image quality. Even if your camera is steady, a dirty lens makes the photo blurry. It takes just a few seconds to clean, but it makes a big difference in the final image.

Cleaning Camera Lens to Capture Beautiful Night Photos-2
Digvijay Kumar / MUO

When I do night photography, I clean my lens thoroughly. I use a microfiber cloth to wipe away dust or smudges—it’s gentle and won’t scratch the lens. I wipe in circular motions from the center outward, then gently blow on the lens to remove debris left behind.

Things like tissues and paper towels can scratch your lens, so it’s best to skip those. Also, try not to touch the lens with your fingers—skin oils can leave streaks.

3

Avoid Flash and Direct Light Sources

Avoid Flash to Capture Beautiful Night Photos
Digvijay Kumar / MUO

Flash might seem useful for night shots, but usually, it’s not. It throws in harsh, unnatural light that washes out colors and textures. Instead, try using the natural or artificial light already there. Street lamps, building lights, and even moonlight can add some cool ambiance to night shots.

If you need more light, try using a diffuser or bounce card to soften things up. Direct light sources, like car headlights or bright spotlights, can mess up your night shots. They create strong shadows and lens flares that ruin the composition. To fix this, adjust your camera angle to reduce direct light or use a longer exposure o capture light trails.

4

Manually Adjust Exposure

Exposure is all about how much light gets into the camera when you snap a photo. Too much light gives you an over-exposed shot, while too little makes it dark. Achieving the correct exposure is key to those nice-looking pics.

In low-light spots, cameras often brighten things to grab more details, which can make bright areas over-exposed and dark regions look grainy. So, it’s a good idea to manually tweak the exposure in these situations to get the desired result.

To adjust the exposure manually, just tap on the screen where you want to focus. This will set the exposure for that spot, too. Once you’ve focused, you’ll notice a sun icon next to the focus square. Slide it up (+) to brighten your shot or down (-) to darken it. This way, you can adjust how much light your photo captures.

To my knowledge, there’s no precise formula for getting exposure just right. It’s usually a game of trial and error until you hit that sweet spot for a photo. A good tip, though, is to lower the exposure when shooting at night. It makes the image darker, but you’ll get true blacks and more detailed highlights.

5

Enable Night Mode or Tweak HDR Settings

Almost all smartphones these days come with Night Mode cameras. Some brands might call it Low Light or Night Sight, but they all do the same thing. This feature detects low-light conditions and adjusts the camera settings accordingly. It might increase the exposure time, slow down the shutter speed, or snap multiple pics and merge them into one great shot.

This way, you can get clear night pictures without needing extra gear. Just be careful about motion blur if you or your subjects move. To avoid that, I usually use a tripod or prop my phone on something steady.

Another option is to tweak your phone’s HDR (High Dynamic Range) settings. HDR snaps multiple shots at different exposures and blends them for a photo with better lighting, contrast, and details. So, even in low light, HDR mode can give you surprisingly good results. Just remember, it might take a bit longer to process, so keep your phone steady until it’s done.

6

Use Pro Mode for More Control

The Pro Mode on a smartphone camera allows you to control different settings manually. Unlike auto mode, where the camera decides everything, Pro Mode puts you in charge of your photography. This feature is usually found on high-end smartphones, where you can tweak shutter speed, ISO, and white balance yourself.

When I shoot at night, I usually go for a longer shutter speed, like 1/4 to several seconds. This lets more light into the camera, giving you a brighter shot. But watch out—longer shutter speeds can blur your photos if your hands aren’t steady. I use a tripod or put my phone on something stable to avoid that.

ISO is another key setting to consider when doing night photography. It adjusts how sensitive your camera’s sensor is to light. In Pro Mode, I typically keep it between 400 and 800 to let in more light while still maintaining a decent image quality. A higher ISO might make your photos grainy or noisy, so it’s all about finding the sweet spot.

My last setting is white balance, which controls the color temperature of my photos. I prefer a warmer tone for night shots, so I usually set it to around 4000. This adds some warmth and makes the image more pleasing to the eye.

7

Shoot in RAW Format

The RAW format is like the digital version of a film negative. It captures and stores raw data from the camera’s sensor without compression or processing. This means you get the highest quality image possible and tons of flexibility when editing.

With a RAW file, I get full control over the final image. I can tweak exposure, white balance, and color temperature without sacrificing quality or detail. Unlike JPEGs, which are compressed and lose data every time you edit them, RAW files retain their data and can be edited multiple times without losing quality.

It’s all about finding the right balance between your settings and experimenting with it until you get the perfect shot. So, try them out and see how they work for you.

Why I’ve Started Listening to 24/7 Live Radio Stations Over Playlists

Playlists on streaming services may be the way most of us consume music these days, but I’ve recently started exploring an alternative. A growing number of 24/7 live radio stations are available online, and the ones on YouTube are quickly becoming my go-to when I want to listen to music.

They Provide a More Passive Listening Experience

For starters, YouTube’s live radio stations give me a passive listening experience. Sure, playlists can also provide that if you find an existing one and press Play, but how many of us really do that?

Even with existing playlists, you’re still in control, meaning you can skip tracks you don’t like, replay songs you do, or fall down the rabbit hole of a particular artist. And that’s before you even begin to create your own playlists, which, even with some help from Spotify’s AI Playlist tool, requires some brainpower.

By contrast, YouTube’s 24/7 live radio stations provide a truly passive listening experience. Once I have found one to listen to, simply by typing “live radio” into YouTube’s search bar, I do not need to do anything. In fact, besides switching to another station altogether or chatting with other listeners (more on that later), I can not do anything but listen, which is bliss.

They’re Filled With New Songs Rather Than Songs I Know

If you’re anything like me, your go-to when it comes to picking what playlists to play is a genre or decade you already know you like. This means you’ll have already heard most of the songs on that playlist. A new song may occasionally slip in, but generally speaking, you’ll be listening to the familiar.

This isn’t the case with live radio stations, as you’re unlikely to have heard most of the songs on them. Plenty of live radio stations are playing oldies and hits, but even more are playing new, obscure, or underground tracks. And if you’re actively seeking the unfamiliar, you can simply adjust your search to find a station that hits the spot.

They’re Perfect for Working or Studying

While there are plenty of playlists out there created specifically as background music for working or studying. I find these live radio stations an even better fit for the activity, especially if you can find the right one playing chilled instrumental music that almost fades into the background while you concentrate on your work or studies.

A live radio station dedicated to music to study to

I’ll open YouTube, find the right station playing songs that provide just the right level of background noise, and then get on with working. And the same applies if you’re a student. While it’s (almost) as easy to open a streaming service and find a playlist, there’s definitely more effort involved.

I Can Dip In and Out Without Doing Anything

If you’re listening to a playlist on a streaming service such as Spotify or Apple Music, you’ll likely pause it if you want to go and do something else. This is because you’ve chosen the playlist for a reason, and likely want to hear every song on it. However, online radio stations are a very different beast.

A generic live radio station on YouTube

They will continue playing regardless of what you’re doing, and I find this very freeing. If I need to make a cup of coffee while working, I just take my headphones off and toddle off to the kitchen. When I get back, I just carry on listening without worrying about what I might have missed.

They’re Usually Based on a Particular Vibe or Genre

These live radio stations on YouTube are rarely filled with a generic mix of music. Instead, the creators try to play songs that all belong to a particular vibe or genre. You can find a live radio station for every possible genre you can think of by adding that to the search. And the same goes for vibes, too.

Again, this is obviously also possible with playlists, but due to music streaming services knowing what you do and don’t like listening to, it’s more difficult to find a completely fresh playlist that hits just the right spot. The algorithm will usually kick in to help you find what it thinks you want to listen to. Whereas that is never the case with online radio stations.

The Visuals Can Be Just as Relaxing as the Music

If you have reached this point in the article wondering why I have specifically focused on YouTube radio stations rather than audio-only online radio stations, it’s because they add another dimension—a visual element, rather unsurprisingly.

Interesting visuals accompany a live radio station on YouTube

Unlike the other online radio stations available (of which there are plenty), YouTube’s radio stations usually come with visuals attached. This can be anything from a looping animation to stock video footage designed to vibe with the music. But either way, it adds an extra layer.

You Can Chat to Like-Minded People (But Don’t Have To)

Beyond the visuals, there’s another reason why I prefer listening to (and watching) these live radio stations on YouTube (as opposed to other sites). And that is the option to chat with other people listening to the station.

YouTube's live radio stations also offer chatrooms

If you sign in to YouTube, you can chat with other listeners enjoying the same live radio station. This can be a nice distraction in between bursts of productivity for someone like myself, who works at home and in isolation.

I Still Love Playlists, But 24/7 Stations Are a Great Alternative

Don’t get me wrong—I still love listening to playlists. However, this new breed of online radio stations playing 24/7 is providing me with another option, especially when I’m working and want to enjoy a wholly passive listening experience without any need to stay engaged.

It should be noted here that there are a multitude of options available if you want to listen to online radio too. As well as YouTube’s live radio stations, Apple offers multiple radio stations you can listen to without an Apple Music subscription. Most traditional radio stations also offer online streams, and a great way to explore them is a site called Radio Garden.

Why I Don’t Use SMS for 2FA (and What I Use Instead)

Two-factor authentication (2FA) adds a vital layer of security to your online accounts, but unfortunately, not all methods are created equal. Many people rely on SMS-based 2FA, assuming it’s a safe choice. Unfortunately, SMS is far from foolproof. Here’s why I’ve stopped using SMS for 2FA and what I use instead…

SIM Swaps Allow Hackers to Steal Your Phone Number

One of the most alarming risks of using SMS for 2FA is SIM swapping, a technique where attackers trick your mobile provider into transferring your phone number to a new SIM card. Once they control your number, they can intercept any SMS messages sent to it.

Here’s how it works: attackers contact your mobile carrier, pretending to be you. Using stolen personal details—such as your address or the last four digits of your Social Security number—they convince the provider to transfer your phone number to their SIM card. Once this transfer is complete, the attacker intercepts text messages sent to your number, including the 2FA codes meant to protect your accounts.

The damage doesn’t stop there. Many of us link our phone numbers to multiple accounts, from email to social media to banking apps. A successful SIM swap can grant an attacker access to multiple accounts linked to your phone number, from email to banking apps. Our earlier guide on what SIM card swapping is and how to protect yourself can help you avoid this increasingly common scam.

SMS Messages Can Be Intercepted

tete_escape/Shutterstock

Even if you avoid SIM swapping, SMS messages themselves are not secure. They travel through networks that can be vulnerable to interception. Hackers can exploit weaknesses in Signaling System No. 7 (SS7), the global telecommunications protocol that allows carriers to route calls and messages. By exploiting SS7, attackers can intercept your SMS messages without needing access to your physical phone.

This isn’t just theoretical; SIM hacking is a well-documented issue. Cybercriminals and even some state-sponsored groups have used SS7 vulnerabilities to spy on communications and steal sensitive information. Because SMS lacks encryption, the message content, including one-time passcodes, is exposed during transmission.

Another way messages can be compromised is through malicious apps or spyware installed on your device. These programs can monitor your incoming SMS messages and forward 2FA codes to attackers without your knowledge.

SMS Is Tied to Your Phone Number

A man trying to enter a phone number on an iPhone
DenPhotos / Shutterstock

Another significant drawback of SMS-based 2FA is its dependence on your phone number. Your ability to receive codes is tied directly to your mobile service. If you’re in an area with poor reception, SMS-based 2FA becomes completely useless, even if you have Wi-Fi. Unlike other authentication methods that can work over an internet connection, SMS requires a stable cellular signal.

This dependency can leave you stranded in situations where you need access to your accounts but can’t receive the codes. Whether traveling in a remote location or simply in a building with poor reception, this limitation makes SMS less reliable than alternatives.

What I Use Instead: Authenticator Apps

Man entering two factor authentication code on smartphone with Google Authenticator logo in front
tete_escape/Shutterstock

Rather than relying on SMS for 2FA, I’ve switched to 2FA authenticator apps. Apps like Google Authenticator, Microsoft Authenticator, and Authy generate time-based one-time passwords (TOTP) directly on your device, offering a much safer and more reliable alternative to SMS.

The first major advantage of authenticator apps is security. Unlike SMS, these apps generate codes locally on your phone, meaning they’re not transmitted over networks that could be intercepted or exploited. They’re also protected by additional layers of security—many apps require a passcode, fingerprint, or face scan to access the codes.

Another reason I prefer authenticator apps is their offline functionality. Since the codes are generated directly on the device, you don’t need a cellular connection to use them. Whether you’re in a remote area with no service or simply indoors with poor reception, you can still access your codes as long as you have your device.

I prefer Authy over other authenticator apps because it offers cloud backups, making it easy to recover my accounts if I lose my phone. At the same time, it secures these backups with encryption, ensuring that only I can access them. Google Authenticator is another popular choice. Both options are free, widely supported, and easy to set up.

Using an authenticator app is straightforward. Once you’ve set it up, usually by scanning a QR code provided by the website during the 2FA setup process, you simply open the app to access a code whenever you log in. The codes refresh every 30 seconds, so even if someone manages to steal one, it becomes useless almost immediately.

Two-factor authentication is essential for keeping your accounts secure, but the method you use matters. While SMS-based 2FA might seem convenient, it’s riddled with vulnerabilities—from SIM swaps to interception methods and even practical issues like poor cellular reception. These risks make SMS an unreliable safeguard for your online security.

Your Details May Have Just Leaked

Christmas is all about spreading charity and cheer, but unfortunately, cybercriminals aren’t too far behind with their schemes. This year, keep an eye on your outgoings because bad agents are hoping you won’t notice them using your credit card under the heap of Christmas purchases.

5 Million Credit Card Details Have Leaked Online

As reported and spotted by Leakd, scammers have amassed five terabytes of compromised credit card details screenshots. The cybercriminals got their hands on these details by giving people too good to be true deals, offering items such as “free iPhones or heavily discounted holiday gifts.”

These offers would usually ask for a small fee or a subscription to unlock the special gift. It will also add a timer to the offer to encourage the target to go through the process quickly without thinking about what they’re doing.

Unfortunately, these items would never arrive; instead, the cybercriminals harvested the details and uploaded them onto an insecure online server that others could access. And now that people are spending a lot over Christmas, it would be easier for bad actors to sneak in a few unwanted transactions here and there.

If you’ve recently entered your details into a form that promised you something amazing, there’s a good chance your details have been compromised. Contact your bank and see what you can do to get the card canceled and receive a new one.

If you’re worried about someone using your card, keep an eye on your bank statement and scrutinize any purchases you don’t recognize. If you conclude that someone must have used your card without your knowledge or permission, it’s a good idea to call your bank and see what can be done.

Unfortunately, credit card theft is only one of the many tricks cybercriminals pull during Christmas. We’re also seeing a huge influx of text-based scams impersonating delivery companies aiming to take advantage of people ordering things online.

You Can Now Talk to Your Podcast “Hosts” With This AI Product From Google

It’s easy to feel like the hosts of your go-to podcast are your friends. They’re casual, funny, and authentic; you clean the house and drive to work with them. It feels like you could easily have a two-way conversation with them. Well, now you can—at least, with AI-powered podcasts from Google’s research-focused NotebookLM interface.

Google’s Latest Update Lets You Interact With Podcast “Hosts” on NotebookLM

Google is rolling out a new update to NotebookLM, its comprehensive AI-powered research assistant designed for scholars. Not to be confused with Google’s new Deep Research tool for Gemini, NotebookLM is self-contained, using AI to synthesize only the resources you give it. In return, the assistant offers a number of ways for you to digest those materials, including briefing docs, study guides, and Audio Overviews, which are essentially podcast episodes on your study topic.

To be clear: an Audio Overview is not just an audible summary of the material. The overview features two hosts that carry out a conversation complete with colloquialisms, from “like’s” to “it’s crazy,” in a tone reminiscent of the podcasts we know and love. It’s eerily reminiscent, really.

Now, you can jump into those conversations between the two podcast “hosts,” adding a thought or posing a question.

Google is slowly rolling out this Interactive mode in beta.

How to Join the Conversation

According to Google, the new Interactive mode will slowly roll out to all users. You won’t be able to apply the mode to an existing Audio Overview, so you should create a new one to see if you have the feature.

If the beta feature has made it to your device, you should see an Interactive mode (BETA) button emerge after you generate an Audio Overview, according to Google’s blog post covering the update. Hit Play, and then you’ll be able to tap Join to participate. The host will essentially call on you when ready for your question.

Of course, as with all AI products at this stage, the feature won’t be flawless. Google covers its bases with this disclaimer:

“This is an experimental feature and only works on new Audio Overviews. Hosts may also pause awkwardly before responding and may occasionally introduce inaccuracies.”

Hey, it’s not like we don’t get awkward moments in real conversations, too.

Pay a Premium for More

While the product has been and continues to be free for all Google users, there is now a new option to upgrade to a paid monthly subscription for NotebookLM. Announced alongside Interactive mode, Google now offers NotebookLM Plus, which gives you additional perks beyond what you get with the free version. A few highlights of NotebookLM Plus include:

  • Higher limit on number of notebooks, sources, and audio generations
  • More ways to customize the style and tone of your notebook responses
  • Shared team notebooks

According to Google Support, the free version supports up to 100 notebooks, up to 50 sources per notebook, and up to three audio generations per day. NotebookLM Plus will multiply each of those numbers by five.

For now, the free version of NotebookLM seems more than enough for an individual user, and Plus might be fit for an organization or company. I have yet to see Interactive mode on my device, but I look forward to participating with my AI “friends” when the time comes. Of course, I’ll keep one foot firmly planted in reality. Fortunately, with self-contained models like NotebookLM, there’s less chance of AI assistants giving hallucinated or irrelevant responses, keeping these conversations grounded.

Android’s New Location Protection Feature Sniffs Out Unwanted Bluetooth Tracking Devices

Bluetooth tracking devices are handy for finding lost items, but they can also be used maliciously. Fortunately, companies are doing their best to help people protect themselves from unwanted tracking by letting them know when an unwanted device locks onto their location. Google has just announced its new “Find Nearby” Android feature, which detects unregistered Bluetooth devices tracking your location and helps you find where they are.

Google’s “Find Nearby” Feature Locates Hidden Location Trackers

Apple and Framesira/Shutterstock

As announced on Google’s blog The Keyword, the company is helping people spot hidden Bluetooth trackers. Bad actors sometimes surreptitiously stick a tracker onto an item and then give it to someone they want to track—for example, inside a stuffed toy. When the target brings the item back home with them, the bad actor can then learn where they live, which makes Bluetooth racking devices an unfortunate tool of choice for stalkers.

Fortunately, Android devices are now getting a tool called “Find Nearby.” This works alongside Android’s unknown tracker alert system to help you locate where it is:

If you receive an unknown tracker alert, you can now use the “Find Nearby” feature to pinpoint the tag’s location. Your Android device will guide you to the tag, to help you find it if it’s hidden.

This feature is also rolling out alongside a new “Temporarily Pause Location” feature. When your phone detects a potentially unwanted tracking device, you can disable location tracking for 24 hours. This gives you plenty of time to find the tracker and dispose of it before resuming normal operations.

If you’d like to learn more about protecting your privacy from digital stalkers, check out what to do when you receive a phone tracking alert. It’s very important to learn these steps ahead of time, as the worst thing you can do while being tracked is take the device home with you.

My Latest Antivirus Scan Reminded Me That I Should Scan More Often

Summary

  • No antivirus software guarantees 100% protection against evolving malware threats.
  • Keep antivirus definitions updated to detect new malware.
  • Regular scans are crucial: daily quick scans for surface-level cleaning and full scans weekly.

When was the last time you scanned your system for malware? Despite keeping my computer updated and using antivirus software, my latest antivirus scan reminded me that no software can guarantee 100% protection and that you need to scan your system regularly.

Why Am I Still Finding Malware Despite Having AV?

The threat landscape evolves constantly. Thousands of new malware emerge daily, and cybercrooks make it their mission to devise sneaky ways to evade detection. More sophisticated malware—either new ones or more pesky, updated versions of existing ones—are specifically crafted to bypass traditional detection methods.

If your malware definitions are not up-to-date, they won’t be able to detect the new ones that may have already gone through. This is why keeping your security software updated with the latest malware definitions is important. So, you may be able to detect new malware in your system that you previously missed after your software has been updated.

There’s also a breed of nasty malware called stealth malware that can dodge detection by antivirus. It can lay dormant for extended periods and only launch when certain conditions are met. It can slowly and inconspicuously steal data and gradually take a foothold before fully wreaking havoc on your computer.

According to Kaspersky, some highly sophisticated stealth malware can mimic legitimate processes and camouflage within the system to avoid detection. So, it’s quite possible to miss it in previous scans while it was still dormant and pop up in future scans after it has been launched in the system.

Types of Antivirus Scans

malwarebytes antivirus full system scan november 2024

These are the different types of antivirus scans you can do to keep your system free from threats.

  • Full Scan: This is a comprehensive scan of all drives, files, and folders in your system to check for things like rootkits, bots, worms, Trojans, viruses, or spyware. This may take hours or, in some cases, even days, depending on the amount of data that needs to be scanned. It scours the entire system, including less vulnerable files and applications that may not have been checked during a Quick Scan.
  • Quick Scan: This type of scan checks areas in your system that are most vulnerable to threats or where viruses most likely hide. Because it’s more of a surface-level sweep, it takes less time to perform. The downside is that it cannot catch deeply embedded malware.
  • Real-time Scan: This is an ongoing scan that is done every time you receive a file, open a file, download one or copy and modify it. Real-time scanning continuously monitors the system for malicious activities and detects threats instantly. It analyzes files as soon as they come in contact with your computer.
  • Scheduled Scan: A scheduled scan can either be a full scan or a quick scan that you set to run at specific times or frequencies. This is perfect if you don’t have time to manually scan your computer.
  • On-demand Scan: This is a type of manual scan that lets you pick the drives, files, or folders you want to scan. You can do this when you suspect the presence of threats in specific folders, files, drives, or documents.

Typically, you’ll run one of these scans to check your system for malware.

Keeping Your System Clean

trend micro housecall online antivirus scanner

Generally, it is best to do a deep or full scan at least once a week and a quick scan daily for some surface-level cleaning. You can schedule daily scans after work hours and full scans on weekends to minimize disruption. It’s also best to enable real-time scanning to detect threats immediately before they even enter your system.

Remember to always check your antivirus for updates. Some antivirus software automatically checks for updates on a schedule you can customize.

Doing a bi-monthly purge of that pesky junk clogging up your hard disk will also help keep your system running smoothly and free from malware. It’s one of the best ways to keep Windows clean and free of malware. Unused apps, obsolete or temporary files, duplicates, log files, cache, or backups may accumulate over time and consume disk space. Removing these keeps your hard drive lean, reduces antivirus scan times since there will be fewer files to go through, and helps you spot suspicious files and programs easily.

Here’s How to Stay Safe

We’re coming into the Christmas period, which can only mean one thing: scammers are in full force trying to trick people out of their money. Every year, we see a rise in delivery-based scams taking advantage of all the packages we send out during the holiday period, and this year is no exception. So, what are scammers up to this time?


How Scammers Are Tricking People This Christmas Period

As spotted by the MakeUseOf team, people are receiving more package-related scams than normal. This is typical around December, as people order presents, decorations, and dinner utensils to prepare for Christmas. As such, these scams are more likely to land in the inbox of someone who has actually ordered something recently; sending this text to someone who hasn’t ordered anything is a dead giveaway.

These scams typically leverage fear or annoyance to get people to click a scam link. In the case of a Christmas delivery scam, the scammer will usually claim that a package couldn’t be delivered due to an unpaid postal fee or an incorrect address, preying on the time-sensitive nature of Christmas purchases. Below is an example of a scam that someone from the MakeUseOf team received:


This scam, in particular, has a few warning signs that tip us off that it’s a scam. First, it was sent from iMessage, and the number doesn’t correlate with USPS. Second, the URL is extremely fishy; there’s a lot of “chaff” in there to make it look semi-genuine, and I hope the recipient doesn’t read the entire thing. Finally, the message uses text that doesn’t sound professional or business-like.

If you want to stay safe during this holiday period, be sure to check out all the things to look for in a fake shipping text. These messages often come with “tells” that can tip you off to a scam once you know how to spot them. However, scammers are getting very good at impersonating websites, as demonstrated when I examined a scarily good scam that copied one of my country’s delivery services.

Apple’s iPhone App of the Year Provides a Better Way to Shoot Video

Apple has just announced its 17 choices for the 2024 App Store Awards. And the winner for iPhone App of the Year, Kino, is something you’ll definitely want to check out.


Professional Grade Videos for Anyone

The video app, from the team behind the wonderful photography app Halide Mark II, originally landed in late May and has continued to get better with a number of updates. I’ve been using it since it arrived, and it’s by far my favorite way to capture a video.

A top feature of the app is Instant Grade. That allows you to tap a number of cinematic color presets before shooting any video. You can preview what any of the presets will look like before you begin. There’s no editing required.

Before I shoot a video, I’ve enjoyed finding the best grade for what I’m shooting—everything from a black-and-white look to a more subtle color.


Kino’s AutoMotion is another perfect way to bring the look of motion blur to your videos. The feature selects the best exposure settings for cinematic motion blur. The motion blur is subtle in my videos, but it brings a unique look to everything I shoot, whether it’s my son’s baseball games or something else. For more cinematic looks, you can use Kino or any other video app, to recreate some popular movie effects with your smartphone.

If you’re an advanced videographer, the app also allows manual control over a wide variety of different options like exposure, resolution, white balance, and more.

For anyone who hates subscriptions, there’s no need to worry with Kino. It’s a one-time purchase of $9.99, and you’ll own the full app forever.

Become a Better Filmmaker

Even if you’re new to shooting videos, the app has a number of features to help you get better. Directly from the app, you can access a comprehensive manual on everything the app has to offer. There are even some great quick start lessons to help you master all the Kino’s features. You can learn how to quickly change your settings, pulling focus, and more.


While I’m a novice videographer, Kino has truly helped me capture better videos.

Microsoft Copilot Takes One Step Closer to Being Native, but It’s Not There Yet

While Microsoft has rolled out the Copilot taskbar button to Windows 10 and 11 PCs, it’s not a native app. When you open Copilot, it’s actually a miniature web app that uses the AI assistant’s website to handle your requests. Now, Microsoft has declared that it has made the app more native in a new update, but it’s still not quite there yet.


Microsoft Copilot’s New “Native” App Still Relies on WebView2

Robert Way / Shutterstock

As announced on Windows Blogs, Microsoft has tweaked how Copilot works on Windows 10 and 11. In the announcement, the company details how it changed Copilot’s behavior and how it interacts with Windows. It also makes a pretty bold claim:

It’s native:
With this update, the previous Copilot progressive web app (PWA) is replaced with a native version. After installing the Copilot app update, when you run Copilot, you will see it appear in your system tray.

Sure enough, Microsoft’s claim is true to a point; Copilot no longer relies on PWA and uses a native container. However, as spotted by Windows Central, the actual content the app loads still depends on WebView2 to get the job done. So, it’s no longer a web app, but a native app that opens a web app.


Still, because the Copilot container is now native, you can invoke it with the new Alt + Space keyboard shortcut. You can also move the window around and resize it to your liking. Just don’t expect it to be “truly” native—it’s still a website in a box.

Regardless, you can still make good use of Copilot, whether it’s a web app or not. There are plenty of reasons to use Copilot over ChatGPT, so perhaps Microsoft’s AI tool can be your new companion. And if you don’t like it, you can always remap the Copilot key on your keyboard to open your favorite app instead.

I Use This App to Track My Monthly Expenses

Key Takeaways

  • Spendee is user-friendly and easy to understand, making expense tracking effortless.
  • The app simplifies payment categorization, helping users identify excessive spending areas.
  • Spendee allows for easy setup of recurring expenses and income, aiding in efficient budgeting and financial control.


In the same way that a business should keep track of its income and outgoing expenses, I like to know where my money is going. Spendee is my app of choice, and it stands out for several reasons.


Why I Use Spendee

The main reason I use Spendee is that it’s very easy to understand. I previously used Excel to track my expenses, but I disliked looking at everything in a spreadsheet format. Similarly, while you’ll find numerous great budgeting apps out there, I feel like many are needlessly confusing to use.

Spendee lets me input new data with minimal effort. I also like how I can create different wallets. Although many apps include graphs and similar tools, I prefer Spendee’s layout in this respect.

Another reason I use Spendee is because it makes categorizing payments very simple. I think it’s pointless trying to cut down on my bills because they’re not crazy high anyway. However, it’s nice to see if I’m spending too much on things I don’t care about. Categorization helps with this significantly.


Download: Spendee for iOS | Android (Free, in-app purchases available)

How I Use Spendee to Track My Expenses

I don’t have a complex system for tracking my expenses in Spendee, but I’ve thought very carefully about each tool I use. Here’s my complete system for tracking my monthly outgoings via the Spendee app.

1. Creating Budgets

When I first moved abroad in 2019, I was effectively starting from scratch. I had just started freelance writing, and since I was living on my own for the first time since university, I knew I had to get better with my money.

I looked at several of the best budgeting tools, but I liked how straightforward Spendee made the process. All I had to do was tap on the Budgets tab and select Create a New Budget to get started.


To be honest, I don’t go into deep, granular detail. I pay myself the same amount each month, which is enough to pay my bills, buy high-quality food, and pay for the exact type of gym membership I want. My budget also includes my “entertainment” expenses.

2. Using the Spending Overview Feature

I used to have an innate fear of checking where my money was going. However, I’ve realized that knowing where I’m spending also helps me realize where I’m wasting my money.

For me, any purchase I make, whether recreational or a monthly bill/subscription, that doesn’t add value to my life in some way, is “waste.” So, understanding where my money is going is important to ensuring I’m not wasting any of it.

Take my CrossFit membership, for example. I love CrossFit, and paying extra for a membership to a CrossFit gym is not a waste of my money. However, I don’t really drink, so going to bars every weekend would be a waste of money.

In Spendee, I can see graphs showing my monthly expenses and which categories they fall into. The app also shows a monthly cash flow graph, which is helpful for seeing how much I’ve profited or lost in a single month.


I can then determine why I saw those losses or profits—I may spend more in months when there is a birthday, anniversary, or other special event.

3. Setting Up Recurring Expenses

Most of my expenses, like rent, utilities, and subscriptions, are recurring. Manually entering these each month would be exhausting. Luckily, Spendee lets me quickly add these as recurring expenses that come out of my budget whenever I need it to.

To set up recurring expenses in Spendee, follow these steps:

  1. Select the + icon on the Timeline tab.
  2. Fill out the expense and go to Recurrence.
  3. Choose how often you want the expense to occur.


If you have a fixed salary, you can also add recurring income to Spendee.

3. Categorizing My Expenses

While I don’t create budgets for each area of my life, I do categorize my expenses. Spendee lets me choose from pre-defined labels, including bills, entertainment, and hobbies.

I use whichever is the most appropriate for my expense before adding a label. Although Spendee already has a couple of labels in the app, I’ve also created various others. While apps to help you with money worries exist, I’d rather prevent the issue in the first place by adding these categories.

Budgeting has helped me feel more in control of my finances, and Spendee is the best app I’ve found to track monthly expenses. Its simple interface makes it easy to use and I can see exactly where my money is going. Moreover, it has plenty of helpful customization features, so you can set it up exactly how you need it.


Your Next Weather Forecaster May Be Powered by AI, and It’s Surprisingly Good

If AI’s good at one thing, it’s churning through lots of data and building a model based on what it “experienced.” So, what happens when you feed an AI 39 years’ worth of global weather data and then ask it to make a forecast for the future? Well, if Google’s analysis is correct, you end up with a system that’s more accurate than human measurements.


Google DeepMind’s AI Model Beats Human Predictions 97.2% of the Time

As reported by the Google DeepMind research lab, the company has had great success using AI to predict the future. The researchers fed their new model, called “GenCast,” all of the global weather data between 1979 and 2018. It was then asked to predict what it thought would happen in 2019, comparing its findings to what the Ensemble Forecast predicted and what the weather was actually like on those days.

It turns out that AI managed to beat the Ensemble Forecast 97.2% of the time. That comparison rises to 99.8% when GenCast was asked to do forecasts past the 36-hour mark, making it much better than humans for making more distant forecasts.


The most interesting part is how GenCast’s accuracy is also applied to predicting extreme weather patterns like tornados. As such, if GenCast behaves in a live situation the same way it did in its tests, it may prove to be an invaluable asset for catching dangerous weather patterns and calling for evacuations far quicker than before.

So, is this the end for meteorologists? Probably not. After all, GenCast’s accurate forecasts wholly depend on receiving good data. As such, experts will likely use the AI models alongside their current systems to quickly and accurately generate weather forecasts instead of being replaced by them outright.

If you want to harness the power of Google’s AI, the company has a model called Gemini that’s designed as an ideal personal companion. Check out how Gemini can help you be more productive in Google Workspace, or these useful tricks for using Gemini AI in PowerPoint.

You Can Now Travel Faster by Adding Your Passport to Google Wallet (Kind Of)

Traveling can be a real hassle, but technology is evolving to address that. Travel documents have become more digital, from boarding passes to mobile wallets storing your identification. The latest travel convenience feature comes from Google, which now supports adding your US passport to your Google Wallet.


You Can Add a US Passport to Your Google Wallet—But It Won’t Always Work

Starting now, Google is rolling out a feature that allows Android users with Google Wallet to add a US passport to their phones. The news follows a trend of digitizing identification, with Google Wallet beginning to accept some state-issued IDs in 2023 and kicking off its beta testing for passports in September 2024.

Now that support for US passports is available more widely, it’s not just beta testers that can upload their passport to Google Wallet as a form of digital ID. Within the next few weeks, everyone should see the option in Google’s mobile wallet settings.

Here’s the catch: a digital passport is still not accepted in many scenarios. You cannot use a digital ID at border control or immigration. A digital passport will only work at some TSA checkpoints—but not all of them. You can find the states and airports that accept forms of digital IDs on the TSA website.


How Does a Digital Passport Work on Google Wallet?

If you’d like to take advantage of a digital passport during your upcoming domestic trip, you can follow these steps:

  1. Double-check the TSA website to ensure the domestic airports you’ll be flying through accept digital IDs.
  2. On your Android device, open Google Wallet and tap Add to Wallet.
  3. Select ID > Create an ID pass with your passport.
  4. The app will walk you through scanning your passport and capturing a video of yourself for verification.

Once your digital passport is set up, you’ll be able to scan your phone at select TSA checkpoints, instead of rummaging through your bag for your physical documents.

Remember: you’ll still need a physical passport if you’re traveling internationally, as digital IDs are not accepted by border control. It’s best to carry your physical passport with you as a fail-safe regardless, while the technology is still in its early phases.

The Future Is Digital

According to Google’s The Keyword, TSA checkpoints are only the beginning:


Digital ID adoption will truly scale when daily use cases like driving a car, picking up prescriptions and more can be done with a digital ID. There’s also a future where digital IDs can be used for things like online tax filing, signing a home loan, opening a bank account or signing up for medical benefits — all from your phone. And the industry is working to make these things happen.

So, while the value of a digital passport might be limited for now, it could be more useful on a day-to-day basis soon, whether for renting a car, checking into a hotel, or recovering an account. From Google’s point of view, all that stands in the way is legislation and adequate hardware.

As thrilling as it is to imagine a day when everything is in one place, there are inherently pros and cons to a centralized digital ID system. Having your identification and payment cards on one device is a double-edged sword, touting convenience while simultaneously creating a single point of failure. Hackers stand to gain a windfall of sensitive data, and you risk a massive headache. Still, there is risk in everything—including leaving your passport in the airport bathroom.


The Best TV Remote Apps for Android and iPhone

You don’t necessarily need a TV remote to control your television. If you lost the remote (again) or just like having a backup, your Android phone or iPhone can easily act as a second TV remote—provided you’re using an app that works with your home devices, set-top boxes, and more.


1 Amazon Fire TV Remote

If you only need a remote app for your Amazon Fire TV device, you should check out the official offering. Not only is it handy for controlling the Fire TV with voice and touchpad controls, but there’s also a text entry tool. You won’t have to go through the trouble of typing every web address or YouTube search query using the Fire TV’s on-screen keyboard.

The app displays all your Fire TV apps in a single list for quick launching, too. And don’t worry if you have multiple Fire TVs; the remote app makes it easy to switch between different units.

There are all sorts of tips and tricks to make navigation easier on Fire TV that you can combine with the simplicity of this remote.

Download: Amazon Fire TV Remote for Android | iOS (Free)


2 Roku

Like the other big players in the streaming sector, Roku offers a mobile version of its physical TV remote. It’s a godsend when your Roku remote decides to grow legs and take off, and it’s just as fully-featured as its physical cousins.

For example, there are on-screen buttons for Netflix, the Roku Channel, Disney+, and more. You can adjust the volume, pause and play media, and even fast-forward and rewind. Another handy feature is the ability to privately listen to movies and TV shows by connecting headphones to your device.

You can also cast content directly from your Android or iOS device using the mobile app. Additionally, both voice search and the touchscreen keyboard make it easy to get the most out of the Roku mobile app.

Download: Roku for Android | iOS (Free)


3 Remote for Hisense Smart TV

If you have a Hisense smart TV, this Android-only app uses the same aesthetic as the physical remote but in a clean, intuitive digital form. That means you get access to the red, green, yellow, and blue buttons, as well as shortcut buttons for Netflix and YouTube, on-screen menus, and input selections.

You have the option to customize your remote’s appearance and controls, such as mouse, joystick, and touch inputs. Additionally, you can choose from a list of digital remote controls, possibly matching your digital remote with your physical remote.

It also supports a variety of smart TVs from other manufacturers, not just Hisense, which you can utilize by connecting the app to your smart TV using a pairing code. If you are using a Hisense TV, keep in mind the app only works with TVs that support IR connectivity and your phone (or tablet) must have an IR blaster.


Download: Hisense Smart TV Remote for Android (Free; in-app purchases available)

For a more universal choice, the CodeMatics Media Solutions’s Universal TV Remote Control app has a lot of options and isn’t limited to a handful of brands. You can adjust the volume, numberpad, digital D-pad, channel list, and the red, green, blue, and yellow buttons.

Additionally, choosing a specific brand—say Sony—won’t just give you one remote, but several to choose from. This ensures you have a digital TV remote that works for your model. It even has the option to pick smart TV remotes or IR TV remotes.

While it is ad-supported, it isn’t particularly annoying—at least not enough to be worth buying a subscription or its lifetime license.


Download: CodeMatics Universal TV Remote for Android | iOS (Free; in-app purchases available)

5 Lean Remote

Lean Remote is one of the most-used and most-reliable universal remote apps on Android. The best part of this one is the flexibility. In addition to your TV, you can also use it to control Android TV boxes, Roku boxes, air conditioning units, soundbars, DVD players, and other smart gadgets around your home.

It supports both Wi-Fi and IR devices. As with some of the other apps, you’ll need to pair it with your smart TV to get started. The app is ad-supported but unlike the Hisense remote app, there is no way to remove them.

Download: Lean Remote for Android (Free)

6 Kore (The Official Kodi Remote)


If you have the Kodi media center installed on your smart TV or set-top box, you can use this official app to control playback and interact with the various on-screen menus.

Some of the app’s standout features include the ability to connect to multiple Kodi installations on different devices, easy playlist management, and artwork displays. There’s also a way to flick between saved media and any TV channels you run through Kodi, plus support for Kodi’s DVR/PVR feature.

If that’s not enough to smooth out navigation, there are also many tips and tricks to using your Kodi remote from the comfort of your couch!

Download: Kore for Android | iOS (Free)

7 Yatse


Yatse is designed as a remote control app for Kodi, but it also works with Plex, Emby, Jellyfin, and your local hard drive’s files. Once again, it is only available on Android devices. Except for Kodi, you’ll need to sign up for the premium version to connect to other cloud servers.

You can use the remote to stream content from your app of choice directly to UPnP, AirPlay, Chromecast, Fire TV, Roku, and smart TV devices. Features include an internal audio player with gapless playback, support for multiple codecs, a way to program custom commands, voice commands, and various themes.

Download: Yatse for Android (Free; in-app purchases available)

8 Vsray Technology Universal TV Remote Control

This great choice has an exhausting list of brands you can connect to, like Samsung, Sony, and Vizio—though most will ask you to watch a short ad before the remote is unlocked for good. You also get two remote options: Wi-Fi and IR. And if you’d rather mirror content to your smart TV, you can do that, too.


Best of all, this remote control gives the ability to add multiple remotes and switch between them with the tap of a finger.

Download: Vsray Technology Universal Remote for Android (Free; in-app purchases available)


With so many smart TV remote apps available, it’s easy to have a substitute when you inevitably lose the physical remote. More importantly, most of the best ones are compatible with Android and iOS, so not even your choice of mobile OS will stop you from enjoying your favorite streaming services and channels.

I’ve Finally Found the Best Photo Editing App, and It’s Only $5

Key Takeaways

  • Superimpose X is a $5 app with Photoshop-like features for photo editing on your phone.
  • Features include layers, a masking editor, and advanced tools that make editing professional and efficient.
  • A free version is available, but $5 unlocks more tools, while a $17.99/year subscription adds AI enhancements.


I only edit photos on my phone, so I’ve tried lots of free photo editing apps. This got annoying because I had to switch between apps to apply different effects. Now, I’ve found a $5 photo editing app that can do almost anything.


What Is Superimpose X?

Superimpose X is a photo editing app that offers premium features on your phone. It costs a one-time fee of $4.99 and provides access to features like removing backgrounds, adding multiple layers of images, transforming/warping photos, and blending. It’s basically a smaller version of Photoshop without the required monthly subscription.

I still consider myself a photo editing novice, but I’ve been able to learn a lot and upgrade my photos with Superimpose X. My photos now look more professional overall, and I’m saving a lot of time by using one app instead of switching across multiple free apps that offer different editing tools.


Most of the free apps I’ve used only allowed me to add a filter over a photo, blur different points, or just add text. With Superimpose X, I have access to so many tools I didn’t even know existed on top of the basics I’m used to!

Download: Superimpose X for iOS | Android ($5)

What Makes Superimpose X Worth the Money?

This editing app offers multiple layers for adding different elements to different photos. I can add a background and multiple foregrounds that pull from many images! I can also change the order of the layers, which is helpful if I want to bring one of the elements to the foreground and overlap it with another photo element.

My favorite aspect of Superimpose X is the masking editor. By selecting the mask option, I can remove the background on any given photo and make precise edits to remove any remaining elements I don’t want. Then, I can move the mask onto a different area of my initial background.


The Magic Wand option automatically masks the element you select, but sometimes it requires some manual edits to make sure the rest of the image’s parts are fully removed. There is also an Eraser option that can restore elements of the photo you didn’t mean to erase.

There are also more advanced features, including options to distort and warp photos, apply retouching edits like blur and sharpen, add filters, and change the brightness and saturation of a photo. Overall, Superimpose X offers more than 60 tools for photo editing and adding creative photo effects.


When you’re done editing a photo, you can download the photo as a JPEG, PNG, HEIC, PSD, or project file. You can save an individual layer for your photos, too, if you decide you’d rather add a different background later on or want to reuse the layer in multiple projects.

There is a free version of Superimpose that offers tools like masking, building two layers, and more precise editing, but I used the app so often that I felt it was worth the flat fee to upgrade to the paid version. There are plenty of other free photo editing apps to check out, too, if you’re looking to avoid a fee.

This app does feature a subscription that unlocks AI photo enhancement for only $17.99 per year. I haven’t ever tried this subscription because I only need the basic features for my minimal photo editing. Superimpose X gets you a limited number of AI upgrades without the subscription, including background extension.

As a photo-editing novice, I find Superimpose X helpful for creating memes on the fly, making my photos look more crisp and professional, and creating photo designs for different work-related projects. For only $5, this app is more than worth the money!


Why I Prefer Creating Playlists Over Streaming Albums or Artist Pages

Listening to a curated playlist based on a prompt, mood, or genre can be just as much of a unique experience as a proper album. These are significant reasons that immediately come to mind.


An Artist’s Discography Isn’t Consistent

I can’t think of any band or music artist that doesn’t have one or two stinkers. Not all their music is printed on gold-plated discs. Sometimes their worst material is an entire album, or maybe just a handful of songs. With playlists, I can scrap the songs I don’t care for and keep the ones I do.

I try to follow a strict rule though: if it’s part of a concept album, keep the songs together. Those are albums where each song is connected, creating a theme—like Marilyn Manson’s Triptych.

I prefer listening to concept albums from start to finish, especially when I’m listening with the front of my brain, a good pair of headphones—and, as corny as it sounds, my heart. Otherwise, it feels like I’m reading random chapters of a book.

Playlists Can Be Curated Based on Mood and Genre


When I create playlists, it’s to serve a particular purpose—a mood, genre, or to enjoy my favorite songs. I’m not entirely concerned with quality; it’s there to serve as candy for my brain while I work. But when I do listen to albums, it’s strictly done on CDs.

For example, when I’m feeling gloomy, I tend to sink into a mix of Alice in Chains, Nine Inch Nails, and a hodgepodge of handpicked songs from The Smiths, Nirvana, and lo-fi. Of course, this extends to genres, too. If I’m in no particular mood and just want to jam, give me a combination of Megadeth, Cradle of Filth, and metal any day of the week.

I even go as far as to curate a playlist based on fictional stories I’m working on. As I’m working out the scenes in my head, it’s almost always accompanied by music. It serves as a muse, of sorts, allowing me to sink into the mood of the story.

Playlists Help Me Gauge What I Feel Like Listening To

I listen to playlists and albums in almost equal amounts, but the true power of a playlist is when I’m in an audio lull. When I have no idea what I’m in the mood for, I retreat to a playlist of my favorite songs.


This usually leads to multiple listens of a particular song or two. And when that happens, I almost always listen to the album that song comes from. Put me in a vacuum with NiN’s The Becoming, and suddenly, I want to listen to all of The Downward Spiral. Sometimes a single track has that kind of pull.

I Love Burning Mix CDs

a mix cd with an assortment of songs

I do very little music streaming; I prefer owning my music instead. One of the most useful benefits of this is getting to burn mix CDs. Perhaps it’s a bit archaic these days, given the ability to stream music, but I’d rather not run up my mobile data bill. A mix CD is the next best thing!

Part of the fun is creating mix CDs based on a prompt, silly or otherwise. “Songs That Make Me Think of Winter” or “Songs That Would Fit in a Marvel Movie” or “Songs That Put Me to Sleep” are just a few examples. That’s way more entertaining and challenging than “Best Pop Songs of 2020”.


However, the real fun of having a mix CD isn’t just to enjoy, but to share as well. Many of the people in my family listen to a lot of the same music. Any mix CD I make is inevitably loaned and forgotten about, and it’s a great feeling knowing someone else can enjoy it.

What matters most is that music playlists feel personalized. That’s when they’re at their best; otherwise, albums beat random playlists every single time. To me, a well-curated playlist has the power to make me revisit albums I’ve heard a million times. That’s what I want out of every playlist I create.

I Compared the iPhone 16 Pro and Pixel 9 Pro Cameras to See How Different They Are

The iPhone 16 Pro and Pixel 9 Pro are among the best smartphones on the market. Both offer top-tier performance and a variety of AI features, but how do their cameras differ in real-world use? I tested both devices in various conditions to see where each camera truly shines.


A Closer Look At Each Device’s Camera Hardware

Sanuj Bhatia / MakeUseOf

Before diving into the shots, let’s quickly review the camera hardware of each phone. As you’d expect from flagship offerings by Apple and Google, the iPhone 16 Pro and Pixel 9 Pro are both equipped with top-tier camera systems.

The iPhone 16 Pro has a 48MP primary camera with an f/1.8 aperture, along with features like dual-pixel Phase Detection Auto-Focus (PDAF) and sensor-shift OIS. Accompanying the primary camera is a 12MP 5x telephoto optical zoom lens and a new 48MP ultra-wide camera. Apple also includes a LiDAR sensor alongside the camera module for depth sensing.

On the Pixel 9 Pro (our review), you’ll find a 50MP primary camera with an f/1.7 aperture, dual-pixel PDAF, and sensor-shift OIS. Similar to the iPhone 16 Pro, the Pixel 9 Pro also offers a 5x telephoto optical zoom lens, though it features a higher resolution at 48MP. There is also a 48MP ultra-wide lens with a 123-degree field of view (FoV).


Rules of the Camera Showdown

Before we proceed, let’s review a few points. This comparison focuses only on the rear cameras of these phones, not their front-facing selfie cameras. Additionally, all photos in this test were captured using a straightforward point-and-shoot approach—no adjustments to exposure, white balance, or any Pro mode settings—as the goal was to mimic how most people typically use their smartphones.

For the iPhone 16 Pro, I chose not to use the new Photographic Styles or the Camera Control button for this test to ensure a fair and consistent comparison—though admittedly, I don’t like the Camera Control button anyway.

In the image galleries below, you’ll find photos from the iPhone 16 Pro displayed first (on the left) and those from the Google Pixel 9 Pro shown second (on the right), making it easier to compare the results side by side.

Daylight Photography


Let’s start with the shot of two buildings with glass windows. It’s evident that the iPhone 16 Pro prioritizes a warmer tone that gives the scene a softer and more realistic feel. In contrast, the Pixel 9 Pro adopts a cooler tone, producing a slightly less vibrant and somewhat duller look.

The iPhone 16 Pro also handles the sky better, capturing a smooth gradient, whereas the Pixel 9 Pro struggles to achieve the same level of detail and nuance.

The iPhone 16 Pro continues its warmer tone in the shot of the red train, delivering a clean and balanced look. The red paint on the train appears rich and true to life, while the gold accents are detailed without being overly bright. However, the trees in the background seem slightly muted, losing some vibrancy.


The Pixel 9 Pro, on the other hand, takes a more subdued approach. The red paint looks slightly duller compared to the iPhone, favoring a more natural tone, while the gold highlights are arguably processed better. In comparison, the Pixel 9 Pro’s background stands out as sharper, with trees and parked cars appearing more defined.

This shot, taken in the hazy daylight of New Delhi, India outside a Starbucks, highlights the contrasting HDR processing styles of the two phones. The iPhone 16 Pro leans toward a darker tone, with deeper shadows, especially under the umbrellas. While the sky appears warmer and softer, it also looks slightly washed out. The darker processing impacts the umbrellas, rendering them in a less accurate shade of green compared to the Pixel 9 Pro.


The Pixel 9 Pro, by contrast, emphasizes clarity and brightness. It brings out more detail in shaded areas, such as under the umbrellas and along the tiled floor. It also renders the sky in a cooler tone, creating a more balanced feel between bright and shaded regions. Additionally, elements like the palm trees and background cars are more sharply defined without appearing overprocessed.

Against the light, the Pixel 9 Pro handles HDR noticeably better than the iPhone 16 Pro.

Despite the hazy day and poor air quality, this shot highlights the distinct color science of the two phones.


The iPhone 16 Pro maintains its warmer tone, giving the grass a slightly more vibrant appearance than the Pixel. But the shadows, particularly around the trees and beneath the benches, are poorly rendered. This diminishes the image’s sense of depth, reducing visibility in darker areas. The orange signage appears bold and vibrant, though the overall image tone leans softer and less sharp.

In comparison, the Pixel 9 Pro delivers a brighter and crisper result, with cooler tones bringing out the greens in the grass and trees. The shadows are less pronounced than the iPhone 16 Pro. While the orange signage on the Pixel 9 Pro looks even more saturated and vivid than the iPhone 16 Pro, the overall image maintains much better processing for clarity and vibrancy.

5x Zoom Test

Next, let’s look at the shots taken with the telephoto lens on both phones at 5x optical zoom. You’ll notice there’s an immediate difference between the two.


The iPhone 16 Pro’s shot leans on the softer side, likely due to its lower megapixel sensor, and it emphasizes a slightly broader depth of field. The colors maintain the iPhone’s characteristic warmer tone with a touch of vibrancy, but sacrifice some subtle details in shadowed areas.

The Pixel 9 Pro delivers a sharper, more detailed image with impressive color accuracy. It clearly does a better job of isolating the subject than the iPhone 16 Pro. Not only that, but it also highlights the vivid colors and crisp textures more effectively—particularly in the cups’ design.

The limitations of the iPhone 16 Pro’s lower-megapixel telephoto lens become apparent in this comparison shot of a staircase. At 5x zoom, the iPhone captures a softer image where finer details lack sharpness, like the texture of the plants and railings. In contrast, the Pixel 9 Pro’s shot produces a slightly sharper image.


Portrait Shots

Both the iPhone 16 Pro and Pixel 9 Pro deliver excellent portraits, but differ in style and processing. The iPhone leans towards a natural skin tone with balanced colors (again with a pinch of warm hue) and a smoother background blur. In comparison, the Pixel opts for a dramatic look, with cooler skin tones and a stronger bokeh effect for greater subject isolation.

Indoor/Artificial Lighting


The indoor lighting shots turned out to be surprisingly inconsistent on both the iPhone 16 Pro and Pixel 9 Pro. In the above snaps, the iPhone 16 Pro adopts a cooler tone, resulting in an excellent shot with impressive detail, clarity, and very little lens glare. However, the shallow depth of field leaves the background wooden paneling slightly soft and lacking sharpness.

The Pixel 9 Pro, in comparison, struggles with this scene, producing an uneven, warmer tone and noticeable glare around the bulbs. However, it excels in capturing the wooden paneling, even in the harsh indoor lighting conditions.

However, the roles reverse in the photo of the golden staircase. Here, the iPhone 16 Pro opts for a warmer tone, delivering a vibrant image, but the shot suffers from an overly yellow tint. Meanwhile, the Pixel 9 Pro handles the HDR and colors exceptionally well, creating a balanced and accurate representation of the scene.


The Ultra-Wide Lenses

Lastly, when comparing ultra-wide lens shots, the iPhone 16 Pro maintains its warmer tone, delivering a bright image with excellent detail. The lines on the wall in the foreground are sharply defined, and the greenery is rendered beautifully, adding to the shot’s overall appeal.

In contrast, the Pixel 9 Pro’s ultra-wide shot appears slightly dimmer, with a darker tone that diminishes the vibrancy and overall impact of the image.

iPhone 16 Pro vs. Pixel 9 Pro: Which Has the Better Camera?

Overall, it’s tough to declare one camera better than the other, as the iPhone 16 Pro and Pixel 9 Pro excel in different scenarios. However, the differences in their camera approaches are evident from the shots above. The iPhone 16 Pro consistently leans toward warmer tones and more vibrant imagery, while the Pixel 9 Pro favors neutral, cooler tones with a slightly more subdued appearance.


Regarding HDR performance, the Pixel 9 Pro arguably has the edge, especially in managing shadows. That said, the iPhone 16 Pro’s color science often feels more appealing in general, offering an eye-catching image even if it sacrifices some accuracy in the process.

Skype Number Is Getting Shut Down, if Anyone Still Cares

Once a huge player in the VOIP market, Skype has faded in popularity over the years. In fact, it may be surprising to hear that the service is still available. If you’re sticking around and using Skype Number, you may need to find an alternative, as Microsoft has confirmed that the service is getting shut down.


Microsoft Closes the Doors on Skype Number and Replaces It With Monthly Subscriptions

berdiyandriy/Shutterstock

As spotted by Windows Latest, users began noticing on December 5th that they could no longer purchase Skype Credit. At first, it was assumed that it was a location-based issue due to the Ukraine war, but Microsoft cleared things up by stating that it was removing Skype Credit for everyone. If you visit the Skype Credit page to buy more, you’ll see a message telling you that you can no longer do so.

Windows Latest then received a comment from Microsoft confirming that the Skype Number service would shut down. Sure enough, if you visit the Skype Number page to make a new one, you’ll be greeted with a message that reads, “Skype Number is no longer available,” followed by an encouragement to look at Skype’s monthly subscriptions to continue making outbound calls.


Unfortunately, the monthly subscription plan isn’t a perfect replacement for Skype Credit. The latter could be purchased and kept on your account for up to 180 days, so it was a great way to only pay for the calls you make. Meanwhile, a monthly sub stays the same price, even if you make little to no calls during the payment period.

Fortunately, there are plenty of Skype alternatives you can choose from. For instance, you can compare WhatsApp and FaceTime and decide which one is best for your needs. You can even perform audio and video calls on X these days.


5 Ways I’m Already Preparing for Next Year’s Spotify Wrapped (After a Disappointing 2024)

With everyone sharing screenshots of their Spotify Wrapped on social media, you might find yourself stuck explaining why that one cringe-worthy song made it into your top five. Unfortunately, that was my experience this year. To avoid a repeat, here are some ways I’m already preparing for next year’s Spotify Wrapped!


1 Using the “Exclude From Your Taste Profile” Feature More

Whether you had a phase of obsessively listening to an embarrassing track on repeat just because it was trending on TikTok, or your friend played a few questionable tracks on your account, it can be enough to throw off your Spotify’s recommendations.

If you want a specific playlist to have less of an influence on your recommendations and Spotify Wrapped, the best option is to exclude it from your Taste Profile. According to Spotify’s support article, while time spent listening to tracks from an excluded playlist will still count toward your total listening time, those streams won’t affect your top artist or track counts for Wrapped.

To do this, head to the playlist in question, select the three horizontal dots next to the download icon, and choose Exclude from your Taste Profile from the menu that appears.


Within 48 hours, the playlist will be excluded from your Taste Profile. Phew, no more awkward Wrapped moments!

2 Enabling a Private Session for Tracks I Don’t Want in My Wrapped

If you’re looking to enjoy certain tracks without them showing up in your Wrapped, enabling a Private Session on Spotify is a simple solution. While the “Exclude From Your Taste Profile” feature works for specific playlists, a Private Session lets you temporarily block any songs you listen to from being tracked or influencing your recommendations.

If you have Listening Activity turned on, anyone who follows you on Spotify can see what you’re playing. Starting a Private Session not only hides your activity from friends, but also prevents Spotify from including those tracks in your Wrapped or using them to personalize recommendations and playlists like Discover Weekly.

Using Private Sessions is a great way to enjoy music you don’t want to be saved in your listening history or affect your recommendations. It ensures your Spotify Wrapped stays true to your actual taste, keeping those nostalgic bops or guilty pleasure songs from slipping into the mix.


To enable a Private Session on Spotify’s desktop app, click your profile picture in the top-right corner and select Private session from the dropdown menu. A blue lock icon will appear, indicating the Private Session is active.

enabling a Private session on Spotify

On mobile devices, tap your profile picture in the top-left corner, then select Settings and privacy from the menu. Tap Privacy and social and enable the switch next to Private Session under Listening Activity to activate it.


During this time, any music you listen to won’t be reflected in your listening history. To end the Private Session, simply repeat these steps to deselect Private session. Note that Private Sessions will also end when you quit the Spotify app or go inactive for more than six hours.

3 Using Other Platforms for Listening to Background Music

I’ve always been a fan of having music in the background while working or studying. However, when I listen to music with lyrics, I often find myself singing and dancing along instead of being productive. Thus, I typically opt for instrumental music when I need to focus.

If you’re anything like me, this means that come the end of the year when Spotify Wrapped drops, your annual roundup could be filled with background tracks instead of actual songs. And sometimes, even those background tracks can be embarrassing.

For me, this, unfortunately, has become a reality. While lo-fi beats and all the different colored noises never seemed to help me focus, the main theme song of Subway Surfers has done the trick for me. I ended up listening to it on loop on Spotify, and it unfortunately ended up as my top track—something I’ll likely never recover from.


Spotify Wrapped 2024 displaying top song

To avoid this happening in the future, I’ve finally started using other platforms, like YouTube, for background music. This way, Spotify will focus on my real music preferences, and my Wrapped will actually reflect that—instead of being filled with a bunch of tracks I only used for background noise!

4 Creating Playlists for Next Year’s Wrapped Top Artists

While it’s not a competition, we all have those few artists we’d love to see in our top five. Instead of scrambling at the end of the year to boost their playtime, starting early is a much better idea. One of the best ways to do this is by creating playlists focused on the artists you’d like to see in next year’s Spotify Wrapped. This makes it easier for you to give their music more playtime, increasing the chances they make it into your top tracks or artists.


Creating Spotify playlists from scratch is simple. On the mobile or tablet app, go to the Your Library tab at the bottom and tap the plus (+) icon at the top next to the Search icon. Now, tap Playlists. Similarly, on the desktop app, go to Your Library, click the plus (+) button, and then select Create a new playlist.

Name your playlist, and hit Create. Now, just tap Add to this playlist and begin adding music to your playlist.

Since we’re focusing on music from specific artists, search for them then begin adding their songs you enjoy to your playlist.

If you’re hoping to diversify your tastes and want to discover new music and artists this coming year, exploring Spotify’s curated playlists is another great option. These include Spotify’s Made For You playlists, like Discover Weekly, Release Radar, Daily Mix, etc.


Spotify Made for You playlists

Spotify also creates Best Of playlists, which compile an artist’s top tracks into collections like This Is [Artist Name].

Best of artists Spotify playlists

So if you’re not in the mood to create a playlist from scratch, these ready-made options are an effortless way to explore new sounds.

5 Connecting My Spotify to Last.fm

One of the best ways to begin preparing for Spotify Wrapped in advance is to connect your account to a tool that allows you to check your listening habits all year round. I used to rely on Stats for Spotify to check my top artists and tracks, but I recently switched to Last.fm, which provides much more detailed insights into your listening history.


With Last.fm, you can track your most-played artists, albums, and tracks, as well as how many times you’ve listened to them. It even breaks down your listening stats by specific time periods, such as the last 7 days, 30 days, 365 days, or all time. This makes it easier to see how your Spotify Wrapped is shaping up and allows you to adjust your listening patterns if desired.

To scrobble your music on Spotify, first head to Last.fm’s website and sign up. Once you’ve done so, click Scrobble & Track Your Music.

Scrobble & Track Your Music button in Last.fm

Next, scroll down to find Spotify and click the Connect button.

different last.fm scrobbling and tracking music options


Then, log into your Spotify account when prompted and grant Last.fm permission to connect.


Although you can’t change your disappointing Spotify Wrapped this year, there are steps you can take to start shaping up next year’s Wrapped already—so make sure you start early!

Need Some Comedy in Your Commute? Waze’s Latest Celebrity Voice Will Crack You Up

Choosing the voice for your navigation app is a great way to make your commute more bearable. While this selection typically comes down to a personal preference in tone or cadence, the popular Waze app is now offering a voice that does more than just read you directions—it will tell jokes, too.


With a new celebrity voice, Waze can bring some comedy to your commute. For a limited time, you’ll be able to select the voice of Nate Bargatze, a Grammy-nominated stand-up comedian from Nashville, to articulate your directions on Waze.

While the special voice setting is available globally, it only reads directions in the English language.

According to Google’s blog announcement, Bargatze transcends your standard voice options by incorporating “witty commentary, relatable anecdotes and a healthy dose of Southern charm.”

How to Download New Voices on Waze

To take advantage of this or other limited release voices, head over to the Waze app.

  1. First, make sure your Waze app is up to date.
  2. According to Google, you should then see a “banner in the left-side column menu of the app” that you can tap to apply the new voice.
  3. You can also change the voice for your directions in your settings by tapping the Settings icon > Voice & sound > Waze voice.


You should see a wealth of options in your Waze voice list, including multiple languages, celebrities, and characters.

A New Age of Entertainment

Celebrity voices are nothing new for Waze. Famous figures like Christina Aguilera and the Jonas Brothers have lent their voices to the navigation app, in addition to other non-proprietary options, like my personal favorite, “Spicy Gingerbread Man.” Of course, each offers something slightly different, and a comedian like Bargatze could add a healthy dose of laughter to the day.

It will be interesting to see if celebrity voices expand to other navigation apps, like Google Maps or Apple Maps. The feature is certainly a fun way for celebrities to promote projects and reach more audiences. As for the user, it’s a way to stay entertained and find joy in technology. That being said, driving with both comedic navigation audio and a podcast could be a hat on a hat. If you’re someone who doesn’t listen to music or podcasts in the car, then this could be perfect (and please teach me your ways).


In terms of the lasting debate between Google Maps and Waze, fun voice options are another characteristic that sets the two apart. While Waze is also known for superior crowd-sourced traffic reporting, Google has now integrated Waze’s incident reports into Google Maps. Maybe, celebrity voices will be the next thing that Google Maps absorbs. As the owner of both Google Maps and Waze, Google wins either way.

How to Get the Most Out of Spotify Wrapped 2024

Key Takeaways

  • Spotify Wrapped 2024 dropped on December 4th, but was well worth the wait.
  • You can access your Wrapped by tapping the banner in the Spotify app’s Home tab.
  • Dive deeper with DJ: Wrapped, personalized playlists, and even AI-generated playlists.


There are lots of reasons to look forward to the end of the year. The holidays (of various kinds), family get-togethers, a chance to start afresh in the new year, etc. But there’s also Wrapped, Spotify’s annual celebration of the previous 12 months in music, curated for every individual Spotify user.


Everything You Need to Know About Spotify Wrapped

Spotify’s 2024 Wrapped dropped on December 4, 2024. This was a little later than in the previous couple of years, when Wrapped arrived before the end of November. However, I feel it was worth the wait, despite some people complaining that Spotify Wrapped was a little underwhelming this year.

Regardless, if you’re a Spotify user who hasn’t yet checked out their Wrapped roundup for 2024, we recommend you do so while it’s still fresh (and people are talking about it on social media).


To find your Wrapped, open the Spotify app and navigate to the Home tab. As long as you have an up-to-date version of Spotify installed on your phone, you should see a Wrapped banner at the top of the screen (“Wrapped” surrounded by brightly colored edging).

Select that, and you’ll find all the 2024 Spotify Wrapped elements in one place. The core elements being:

  • Your Wrapped, which is the slideshow showing you various stats about your year on the Spotify app.
  • Your Top Songs 2024, which is a playlist containing your 100 most-played tracks presented in order.
  • Your Wrapped AI Podcast, which is a podcast featuring two AI hosts discussing your Wrapped results.
  • Your Artist Clips, which are short videos by the artists you listened to a lot thanking you for your support.

However, once you have soaked up all of those, there is even more to discover.

How to Get More From Your 2024 Spotify Wrapped

Now that you’ve had a look at the main elements of your Spotify Wrapped for 2024, it’s time to delve a little deeper.


First up is the DJ: Wrapped section, which should be available to most Spotify users. Essentially, if Spotify’s AI DJ is available in your location and you have used it in 2024, you’ll have access to DJ: Wrapped. DJ: Wrapped is the AI DJ’s take on Wrapped, with Spotify’s AI host playing selections of songs based on your listening habits over the past 12 months.

Next up are the generic roundups that all Spotify users will see, regardless of their own Wrapped results. You should see 2024 in Music, 2024 in Audiobooks, and 2024 in Podcasts, covering the three main content types Spotify offers. Rather than bespoke lists, these are filled with playlists that lay out the top artists, tracks, albums, audiobooks, podcasts, and more besides.


Now, it’s time to dive back into a playlist put together just for you: this one titled Your Music Evolution 2024. In the main Wrapped roundup, you should have noticed Spotify trying to signpost your musical journey through the year, with your tastes changing from month to month. Well, this is the playlist filled with the songs that directed that, with the main genres listed at the top.

Last but not least is a way of keeping the Wrapped fun going for longer. Scroll down the Wrapped tab until you find Want more Wrapped? This is an invitation to ask Spotify’s AI to create playlists based on elements of your 2024 Wrapped. All you need to do is ask the AI to create a playlist based on certain parameters, and it will deliver. And if you don’t like the results, you can refine them.


Spotify is certainly leaning heavily into artifical intelligence, and this year’s Wrapped reflects that. However, how much you get from your Wrapped depends on how deeply you’re willing to dive into it.

Max Is Going to Crack Down on Password Sharing Sooner Than You Think

With both Netflix and Disney cracking down on password sharing, it seems more companies are following suit. However, Max subscribers will have less time than they first thought. The company has confirmed that anti-sharing countermeasures will begin as early as next week, despite claiming beforehand that they would begin in 2025.


Max Will Begin Its Password Sharing Crackdown Next Week

As reported by our sister website How-To Geek, Max first announced its plans to prevent password sharing in November. The company stated it would begin giving out warnings in early 2025; however, it appears the company has gotten a little impatient, as it has accelerated the process to start next week.

Fortunately, account sharers won’t be in immediate trouble. Max’s plans involve an initial wave of gentle reminders, prepping people for what’s to come. The company initially plans to target only accounts with the most shared usage, but will eventually roll out the notice to everyone who shares their password.

Once the gentle approach is over, Max is expected to begin taking action in 2025 and into 2026. At the same time, it will offer a plan that allows the account holder to add shared slots at an additional fee, a similar strategy to the one Disney used in September.


If you’re involved with Max account sharing, now would be the perfect time to consider what to do next. For example, perhaps it’s time to jump to one of the many streaming services that allow password sharing.


How I Use AI Filters to Enhance My Smartphone Photos

Tired of the same old filters and effects on your smartphone pics? I certainly was—until I tried AI filters on my Samsung device. Now, my photos look polished and professional, all thanks to these smart filters.


1 Generative Editing

The generative editing feature on my Samsung smartphone is my favorite. It allows me to edit and transform my photos in ways I never thought possible. With just a few taps, I can remove unwanted objects, adjust the composition, and resize subjects, while the AI algorithm fills in missing areas and blends them into the background.

I no longer fear people photobombing my perfect shot or accidental objects ruining it. It feels like having a professional photo editor right at my fingertips.

To use this feature, follow these steps:

  1. Open the photo you want to edit in your gallery.
  2. Tap the Edit icon (a pencil) > Generative edit icon (the blue circle with four stars).
  3. Use your finger to outline the object you want to move or remove. If necessary, tap Deselect to start over or use the slider at the bottom of the screen to straighten the picture.
  4. Once you’re pleased with your edits, tap Generate.


The AI intelligently fills in the gaps and adjusts the moved objects. To compare the original image with the new one, touch and hold View original.

Finally, tap Done > Save as Copy to preserve your edited image. You can repeat this process to move or remove multiple objects.

2 AI Drawing and Sketch to Image

While I’m not much of an artist, I’ve always admired those who can turn their imaginations into beautiful artwork. With Sketch to Image, I can now experience the same sense of creativity and satisfaction. It transforms my rough sketches into beautifully crafted images, thanks to Samsung algorithms.

To use this feature:


  1. Open the photo in your gallery and tap the Photo Assist icon (it looks like a group of stars).
  2. On the left side, you will see the option for Sketch to image. Tap on it to enter drawing mode.
  3. You can now use your finger or an S Pen to draw on the image. There are arrows at the bottom of the screen that allow you to undo and redo.
  4. To make it easier, you can zoom in and out of the photo using two fingers to pinch and expand the image. Once you’re happy with your sketch, tap the Generate option.

Artificial intelligence then analyzes your sketch and generates multiple versions, each different in style and effect. You can swipe through these generated drawings to find the one you like the most. Once you find the right version, tap Save copy to save it to your device.


3 Smart Editing Suggestions

Once your sketch is transformed into an image, you can enhance it further with Edit Suggestions. It analyzes your image and suggests improvements through different options.

The first edit suggestion is Remaster. This tool uses artificial intelligence to fix blurry photos, adjusting brightness, contrast, and color settings. It even removes unwanted shadows and reflections, giving your images a polished appearance.

Swipe the directional arrows to compare the original and remastered versions. I personally love using this feature on my old photos to breathe new life into them.

Another interesting edit suggestion is Live effect. It transforms your 2D images into a 3D simulation that appears to move back and forth.

Besides these, there is a Background blur. It blurs the background to highlight the subject in the foreground. You can control the intensity of the blur and adjust it to your liking. Drag the slider back and forth to see the difference in your image.


Sometimes, background blur suggestions don’t pop up like they should. It doesn’t matter if the photo was taken in portrait mode; things like low resolution, poor lighting, or being too close to the background might be the reasons.

To use these edit suggestions:

  1. Open the Gallery app and pick the image you want to tweak.
  2. Tap on More (the three dots) and choose Details, or just swipe up.
  3. You’ll see all available Edit Suggestions options. Try them out and save the results.

4 Portrait Studio Features

Portrait Studio, a new feature in Samsung’s Galaxy AI, adds a cool artistic spin to your photos. It turns regular selfies into fun cartoon characters like comics, 3D cartoons, watercolors, and sketches while keeping the original vibe.

To try it out:


  1. Snap a pic or select one from your gallery.
  2. Tap the Photo Assist (AI icon), then hit the Portrait studio button.
  3. Pick a style, tap Generate, and let the AI create your unique portrait.
  4. Tap the download (down arrow) icon or Save copy to save your portrait.

Remember, Portrait Studio is cloud-based, so you’ll need an internet connection and a Samsung login account.

A standout feature of Portrait Studio is its knack for generating 3D avatars in formats like JPG, HEIC (HEIF), BMP, and PNG. Accordingly, you can use these portraits as avatars on social media or even in gaming apps.

5 Galaxy Enhance-X

Galaxy Enhance-X offers similar features to Edit Suggestions for improving image quality. To use it, download the app from the Galaxy Store and grant the necessary permissions. Once set up, select your picture and the tool you want to use.


The app then displays a before-and-after preview, so you can easily see the changes. If you’re happy with the result, give your AI a thumbs up, then hit Done > Save.

Here are some of my favorite Galaxy Enhance-X features:

  1. Magic: It’s an all-in-one enhancement tool that reduces noise, improves brightness, and sharpens images for a vivid and clear appearance.
  2. Fix Blur: This tool sharpens images with lens smudges or minor focus problems and fixes accidental blurry photos.
  3. Remove reflection: It clears glare and reflections from photos taken in direct sunlight or under bright lights.
  4. Increase resolution: This tool increases the resolution of old scans or downloaded pictures.
  5. Denoise: Remove graininess and noise from photos captured in low-light conditions.
  6. Face: It smooths out skin tones and reduces blemishes, wrinkles, and dark circles for a flawless complexion.
  7. Fix moire: Remove unwanted patterns or textures that appear in photos of certain fabrics or materials.
  8. Brighten: Adjusts the brightness and contrast levels to enhance dull or underexposed images.


These are just some of the features I have personally used and found very useful. Yet, there are many more to explore within Samsung’s Galaxy AI. Go ahead and unleash your creativity to elevate your photography skills.

Cybercriminals Are Using a Devious Word-Based Trick to Dodge Your Antivirus

Sending malicious Microsoft Word files to people is a classic cybercriminal move, to the point where antivirus companies have learned to scan them before a user downloads them. However, a new attack making the rounds uses a sneaky trick to dodge these scans. Fortunately, if you keep your wits about you, you can avoid this nasty new attack strain.


Cybercriminals Are Using Corrupted Word Documents to Spread Malware

LALAKA/Shutterstock

As spotted by Bleeping Computer, bad agents are using a new trick to circumvent antivirus scans. First, they create a Word document and fill it with malicious content. In this recent campaign, the cybercriminals added a QR code that leads to a fake Microsoft login page in hopes that the user will enter their login details.

At this attack stage, things get interesting: the cybercriminal deliberately corrupts the Word document. Because this scrambles the document’s data antivirus apps won’t find anything malicious when they scan the file. As such, when the target downloads the Word document, they will report that it’s virus-free.


When the target opens the document, Word detects the file’s corruption. It then offers to fix the file for the user. If the user agrees, Microsoft Word reconstructs the document, including the malicious content. At this point, the antivirus won’t detect the new content, so it won’t warn the user if they decide to scan the QR code that leads to the fake Microsoft login page.

The good news is that you can avoid this attack by taking care of what you download. It’s worth noting that Word documents are one of the most used file types for hiding viruses, so never unquestioningly trust any document you receive. Even if your antivirus doesn’t warn you about any lurking malware, take everything you read with a pinch of salt.

Why I Use This App Instead of the Default Weather App on My iPhone

Key Takeaways

  • Carrot Weather makes checking the weather fun with its amusing, customizable AI personalities.
  • The app offers complete customization, allowing you to choose layout styles, weather data, and more.
  • Carrot Weather provides great weather maps, multiple data sources, and an exceptional Apple Watch app for accurate and detailed forecasts.


Sure, the iPhone’s default Weather app is a nice way to check what’s happening outside. But there’s a much better way to see how Mother Nature is shaping up. Here’s why Carrot Weather is my favorite weather app.


It Makes Weather Fun (and Sometimes Hilarious)

Most of the time, people don’t describe the weather as exciting or fun. But Carrot Weather definitely changes that. Thanks to the snarky and hysterical AI Carrot, you change the app’s personality and what’s displayed on the main forecast page.

If you’re just here for the facts, you can set the personality to Professional or Friendly. But the real fun starts when changing the slider to Snarky, Homicidal, or Overkill personality. With Overkill, you can have Carrot toss profanity into the forecasts. It’s hard not to smile when your weather forecast says “I hope you get impaled by flying debris.” on a windy day!


Along with the comical quips, Carrot can even add in commentary to match your political views. You can choose conservative, liberal, or more unique options, like anarchist. I never thought I’d want to open a weather app to see what it has to say, but that’s exactly what I do many times a day to see what Carrot has come up with. For even more fun, you can also discover a number of achievements and secret locations while using the app.

Carrot Is Completely Customizable

Another reason Carrot Weather stands out as one of best iPhone weather apps is the wide variety of customization options. The entire app can be customized to show the weather information you want. You’ll likely spend most of your time in the Weather section, which shows information about your current location or anywhere else you choose.


To begin, you can select from seven different layout styles in the Layout Gallery. You can then choose exactly what you want to see and in what order. In each section, you can also further customize the weather data. For example, in Precipitation, you can select to see the information in charts or icons and choose the style of the header.

Before finishing, you can quickly view a preview with different weather types to make sure the page provides exactly what you want. Select Smart Layouts, and the section will switch between layouts you choose based on the current weather or proximity to a specific location. With just a bit of work, I’ve been able to craft the weather app I want.

The Weather Maps Are Amazing


When using the map in any weather app, you’re likely looking for information about when rain or snow is headed to your location. Carrot Weather provides that and much more. Along with precipitation, you can also see map layers with temperature, wind speed, and other data like humidity and rain totals.

With the radar, you can select to see precipitation for the next hour, a half-day forecast, or a multi-day forecast. There’s also an option to see a high-resolution radar from stations around the United States.

There Are Multiple Weather Sources to Choose From

A weather app is only as good as its data sources. Apple’s stock Weather app has only one source—Apple Weather. Depending on your location, that might not be the most accurate option. That’s not a problem when using Carrot Weather. There are six global data sources you can choose from, plus a number of regional providers depending on your location. I was able to try out the different data sources and find the best one for where I am.

If you have a Netatmo or Tempest weather station, you can even see information collected from your home in the app.


A Top-Notch Apple Watch App Is Included

Carrot Weather excels on the Apple Watch just like it does on the iPhone. The app on the small screen provides a surprisingly dense amount of weather data. For your current location, or a saved location, you can see the current weather, a forecast for the next 24 hours, and the 7-day forecast.

My favorite feature on the Apple Watch is a radar screen for your current location where you can zoom in and out and even animate it to see exactly where the precipitation is moving. When you’re not using the app, the app’s complications are some of the best available for the Apple Watch. You can add custom weather information directly to any watch face.


If you want to break free of your iPhone’s default Weather app, make sure to give Carrot Weather a try. While there is a subscription required to unlock some of the app’s features, you’ll always smile when checking the weather.

Microsoft 365’s Android PDF Viewer Is Showing Ads, Even If You’re Subscribed

Over the course of 2024, Microsoft has been rolling out ads for all kinds of products, including Windows 11. However, the company isn’t done yet. Some people are reporting that the PDF reader that comes with Microsoft 365 for Android is now showing ads across the top, despite them paying monthly for the service.


Microsoft 365’s PDF Reader for Android Is Showing Ads to Subscribers

As spotted by our sister site How-To Geek, users are reporting advertisements at the top of the Microsoft 365 PDF Reader for Android. They seem to only appear along the top as a banner ad, but they’re still drawing the ire of users who pay extra to use Microsoft 365’s features.

How-To Geek tried the app for itself, and it, too, found ads along the top of the viewer. However, when it tried the same using the iOS version of Microsoft 365, it didn’t see any ads. We’re not sure if that means that iOS users aren’t getting the ads or if Microsoft simply hasn’t gotten around to updating the Apple App Store version of Microsoft 365, but only time will tell.


This isn’t the first time that people have caught Microsoft sliding advertisements into its services. For example, Windows 11 is getting ads in the Start menu, and while you can turn off these “recommendations” via the Settings panel, it’s unknown how long Microsoft will allow you to do that.

The Death Clock App Uses AI to Predict When You’re Likely to Die

Assuming you enjoy a reasonable quality of life, you probably want to carry on living as long as possible. And yet death comes for all of us eventually. But when? That’s what the makers of a new app think they have figured out. With some help from artificial intelligence.


The Death Clock App Predicts When You’re Likely to Die

The makers of a new app called Death Clock think they can predict when you’re likely to die. The app uses information you provide about yourself coupled with AI analysis of 1,200 life expectancy studies. The AI was trained on these studies, ensuring that, statistically speaking, it can make logical guesses about your death date.

To find out when Death Clock’s AI thinks you’re likely to die, you need to provide some personal information. Starting with the basics such as your age and race, before moving onto lifestyle choices such as your diet and exercise habits.

Death Clock is free to download and install. And it’s also free to find out when the app thinks you’re likely to die. However, that does mean feeding lots of personal (and potentially sensitive) data into the app, so be sure to do your research before blindly inputting any information about yourself.


Once Death Clock has informed you when it thinks you’re likely to die based on the information you feed it, the app will suggest ways to prolong your life. However, that part of the equation is hidden behind a paywall, with an annual subscription fee of $40 required to break through it.

I’m Not Sure That I’m Brave (or Dumb) Enough to Find Out

In order to write about this app from a place of experience, I installed it on my phone, and entered some information when prompted. However, not only did I not provide any accurate information, I also stopped short of finding out the age I’m likely to die (according to Death Clock).

You can call me a coward if you want, but some things are better left well alone. Including, for me at least, predictions about when I’m likely to shuffle off this mortal coil. However, if you’re happy to know the number based on cold, hard statistics, then you should check the Death Clock app out.

It will be especially useful for anyone willing to pay the annual subscription fee to unlock the advice about how to live longer.

How to Center Your Taskbar Icons in Windows 10

Key Takeaways

  • You can customize your Windows 10 taskbar by centering your icons for an aesthetic look with or without third-party software.
  • Easily access Taskbar settings by right-clicking on the taskbar.
  • If you want to customize your taskbar further, consider using Taskbar X or Start 11.


Windows 10 doesn’t have a centered Taskbar icon layout like Windows 11. However, you can center all the icons except the Start and Search bar to achieve the same look.

Center Taskbar Icons by Changing Taskbar Settings

By default, Windows 10 icons are left-aligned. You can change some basic Taskbar settings to move your icons to the center. Here’s how to do it:

  1. Right-click the Taskbar. Select Taskbar settings, then uncheck Lock the taskbar option.
  2. Go to the Taskbar location on screen section. Set the Taskbar location to Bottom.

  3. Under Combine taskbar icons, select Always, hide labels.
  4. Right-click on the taskbar again, select Toolbars, and click Links to toggle on.
    The Windows 10 Taskbar context menu with the Toolbar option

  5. Two vertical lines will appear. Drag the right vertical line adjacent to Links to the left past the taskbar icons and the left vertical line.
  6. Taskbar icons will now appear on the right side of the taskbar. Drag the vertical line next to the icons to move the icons to an ideal center position on your taskbar.
    The Windows 10 Taskbar with centered app icons

  7. Once the icons are centered, right-click on the taskbar and select Lock the taskbar from the pop-up menu.


Center Taskbar Icons With TaskbarX

If you want a simpler way, you can use TaskbarX to customize your Windows 10 taskbar. It offers rich customization options like styling options, multiple Taskbars, and animations. It is also free to use.

Another advantage is you can hide the Start button and the system tray icons with it. In the previous method, you could only hide the search bar, but the rest of the Taskbar items remained there.

First, download the portable version of TaskbarX. Extract the ZIP archive to a new folder and open it. Run Taskbar.exe and it will automatically center your app icons.

The Windows 10 desktop with centered app icons on the Taskbar using TaskbarX app

Still, this is as close as you can get to the Windows 11 Taskbar layout with the free app. The Start menu and search box remain on the left side, and there’s no way to change them in TaskbarX.


If you really crave the completely centered design found in Windows 11, Stardock’s Start11 app offers several customization options, though the app does require you to purchase it.

6 Reasons Why and What to Try Instead

Notion is an excellent productivity tool, offering robust features for team collaboration and project management. However, when it comes to note-taking, it falls short in several key areas, making it less than ideal for this purpose.


1 Notion Is Overwhelming

One of the biggest drawbacks of Notion is its steep learning curve. Getting comfortable with the app requires a lot of time and effort, but even after that, taking notes on the app can still feel like a chore, rather than a smoother experience. Especially when you are going to take a lot of notes.

This is because the app is heavily geared toward team management, with its user interface and features designed around that purpose. As a result, what should be a straightforward note-taking process often turns into a complicated experience, requiring extra effort and adjustments to fit the app’s workflow.

A year ago, I decided to try Notion for note-taking. From the moment I opened the app, I felt lost—it was just very difficult to navigate. Determined to make it work, I even took a dedicated course to master Notion, hoping it would help me take better notes. Unfortunately, my efforts didn’t pay off.


After a month of frustration and struggling to adapt, I realized it wasn’t for me, because the entire app revolves around creating Notion databases, and not everyone wants to create them. Some just want a vertically flowing app, so I decided to move on.

2 Too Many Customization Options

Notion is undoubtedly feature-packed, offering tons of customization options. However, for a simple note-taking task, this abundance of features makes things unnecessarily complicated.

Screenshot of Notion app with various views for databases

For instance, the app’s focus on databases, customizable templates, drag-and-drop functionality, and analytics tools might be powerful for project management but are overwhelming and irrelevant for those who just want to jot down their thoughts. Instead of simplifying the process, these features can become a source of confusion.


I believe a good note-taking app should strike a balance between customization and simplicity—something that feels intuitive and has functional features. At the end of the day, what you write is what matters most, and any extra features, complex UI elements, or pop-ups only take away from the primary goal: taking notes.

3 Block-Based Editor Feels Difficult

Notion is a block-based editor, which means that every piece of content—whether text, images, lists, or even empty spaces—is treated as an independent block that can be dragged around freely. While this is incredibly useful for rearranging and customizing content in Notion, it makes note-taking feel fragmented and slippery.


In contrast, a linear editor, where you have to copy and paste content to rearrange, feels more intuitive and offers the right amount of rigidity. It resembles the natural flow of writing on paper, free from concerns about different block types, or accidentally rearranging them. It’s just you and a long canvas to freely write on.

4 Confusing for Simple Note-Taking Tasks

If you just want to take simple notes, without any fancy views or databases, Notion can make things difficult for you. When adding an element, you are prompted by different types of blocks like text, to-do, image, database, and different parameters for it. This adds clutter, complexity, and decision fatigue to tasks that should be quick and effortless.


For example, creating a simple checklist involves selecting a to-do block from a lengthy list of options before you can even begin typing. This not only adds unnecessary steps but also increases the chances of mistakenly selecting the wrong option, leaving your notes unrecognizable. It often feels like tinkering with a time bomb—one wrong move and your simple notes turn into a confusing mess.

Using Notion to do list from drop down dialogue box

In contrast, apps like Apple Notes or Google Keep are so much simpler. They feature a visible checklist button that lets you start writing immediately. It’s intuitive, hassle-free, and perfect for someone who wants to take notes quickly.

Another drawback is the lack of a quick note feature. Let’s say you have a fleeting thought that you want to capture before it slips away. In Notion, you’d need to open the app, navigate through the interface, and then create a new note. By the time you’re ready to type, the thought might already be gone.


Apple Notes popup by moving mouse to right bottom corner

In contrast, an app like Apple Notes makes this seamless. Simply move the pointer to the bottom-right corner of the screen, and the app instantly opens, ready for you to type.

5 Essential Note-Taking Features Are Missing

Several features are important for a good note-taking experience, such as quick styling options, straightforward navigation, and most importantly, offline capability. There’s a sense of peace knowing your notes will be saved every time you jot something down, regardless if you are connected to the internet or not.

However, in Notion, this isn’t always the case. Foremost, it requires you to be connected to the internet to work properly, and if you are offline, you can only work with the last note opened, and there is no option to add a new note.


Also, note-taking requires simple text formatting options like bold, italics, or bullet points. However, Notion doesn’t offer a persistent toolbar for quick access to these features. Instead, you have to select the text, and only then can you see formatting options.

Another drawback of Notion is its approach to note organization. Instead of traditional folders, Notion relies on nested pages and databases for organizing notes. While this system works well for complex workflows, it doesn’t feel intuitive for users who are accustomed to the simplicity of folder-based organization.

For example, when you use Apple Notes, you can navigate to any note by just using the sidebar, or move around your notes anywhere. In Notion, you would have to create a page, then a database, and then create pages inside the database.


6 Closed Source and Online-First Design

Notion offline mode where you can't access notes

When it comes to note-taking, your notes should feel truly yours. Unfortunately, that’s not the case with Notion. All your notes are locked within the app, meaning you need to access the app with a working internet connection to view or edit.

Additionally, Notion’s pricing, features, or service availability can directly impact your ability to use your notes. If Notion faces a server outage, or your home internet stops working, you will be blocked from accessing your notes. In case Notion removes its free-tier option in the future, you have no option other than to pay for the app.

7 Alternatives Are Much More Efficient

If you own an Apple computer, then Apple Notes is one of the best. But, if you’re looking for an even better alternative app that’s primarily designed for taking down notes, stores files locally, but also packed with features, Obsidian is a great option.


Obsidian interface with note opened

You get several neat features, such as the graph view, which visually maps connections between notes, helping to see relationships and build a knowledge network. You can link notes and ideas together, for a much deeper knowledge network. Obsidian also supports a ton of plugins that can further add functionality. For example, I have Kanban and canvas plugins installed that let me create boards and flowcharts.


Finally, I love the fact that Obsidian is an offline-first application and completely free for personal use. With this, I can take as many notes as I want, and they are also stored locally on my computer in plain text files with Markdown formatting. If I wanted to shift to another app in the future, I am free to do so or even sync my notes to Google Drive or any cloud storage option.

Obsidian local files stored in a folder

While Notion can technically be used for note-taking, it’s far from ideal. The steep learning curve, combined with an interface optimized for team management and collaboration, makes it impractical and overkill for note-taking.

9 Possible Reasons Why You Can’t Follow Someone on Instagram

Not being able to follow someone on Instagram is frustrating, and you may encounter this issue for one of several reasons.


1 Your Network Connection Is Faulty

Instagram might sometimes work like normal, but it means nothing if you have a faulty internet connection. Your Wi-Fi router might have no internet, for example; this is common if you’ve just moved somewhere new, but the network provider could also be having technical problems.


On other occasions, you may have problems with your phone’s connectivity instead. Besides the internet not working, you may have exceeded your data allowance or not switched on roaming. Either way, you won’t be able to follow an account—nor can you perform other actions like refreshing your home feed.

You can do several things to fix an unstable Wi-Fi connection, such as changing your router’s channel. Resetting your router or changing the network might also help. If you have a smartphone, you should fix the “E” sign if you see this. Alternatively, you can reset your network settings and ensure that you’ve enabled 4G/5G.

2 You’ve Reached the Follow Limit on Instagram

According to Instagram’s Help Center, you can’t follow more than 7,500 people. This is to “help reduce spam.” If you try and follow a 7,501st person, Instagram will show an error message unless you first unfollow an account.


7,500 is a lot of accounts to follow, and it’s very possible that you’re nowhere near this number. But even then, you may still have reached Instagram’s follow limit.

Hand holding a smartphone with Instagram official account on screen
Poetra.RH / Shutterstock

You can only follow and/or unfollow a maximum of 60 users each hour. If you don’t follow 7,500 accounts, not doing anything for a few hours should solve this issue. And if you do follow 7,500 users, unfollowing one should immediately fix this problem. You can use multiple practical ways to clean up your Instagram and ensure only accounts that provide you with value remain.

3 The Other Person Has Blocked You

Sometimes, you can’t follow someone because they’ve blocked you. So, if unfollowing accounts or waiting didn’t work, check to see if someone blocked you on Instagram. One easy way to do this is to get the user’s account URL, log out of your account, and check to see if the account still exists. If you see their profile, they’ve probably blocked you.


You won’t receive a notification when someone blocks you, and there isn’t much you can do about this. The other person may unblock you at some point, but until then, you should respect their decision and move on.

4 You May Need to Re-Authenticate Your Account

Sometimes, Instagram will stop you from following new account due to issues with your account authentication. Normally, this problem is easy to solve; you just have to sign out and back into your account.

  1. Go to your menu in the top right-hand corner.
  2. Select Settings > Log out.
  3. Sign back into your account.

5 The Instagram App Might Have Glitches

Instagram’s app will sometimes glitch because of technical issues on Meta’s end, but it could also have something to do with needing to update your app. First, try closing and reopening the Instagram app. Normally, everything will work like normal after doing that.


a woman looking at the instagram app on her phone
Tatiana Diuvbanova / Shutterstock

If you’re still having problems, you probably need to update your app. Go to the App Store and Google Play and look for an update. Should neither of these work, wait a while and try using the app again in a few hours.

6 Instagram Could Have Restricted Your Account

The follow/unfollow tactic is one of the most outdated (and frankly, annoying) Instagram growth strategies. But besides irritating others, it could lead to Instagram restricting your account. This is one of many ways that your acount can get restricted.

If Instagram restricts your account, you may not be able to follow new users. Other reasons your account might be restricted include liking too many people’s posts at once and posting spam comments. If you suspect you’re already in trouble for suspicious activity, you can check if you have broken Instagram’s rules.


Instagram might also block your account if you’re logged into your account on multiple devices from different locations. While it’s normal to use the same account on your phone, computer, or tablet, Instagram might red-flag your activity due to multiple locations.

7 You’re Using a VPN

If you’ve set up a VPN connection, Instagram might notice different IP addresses and flag your account for unusual activity. This will restrict several features on your account, including the ability to follow other Instagram accounts.

vpn icon on smartphone screen
Primakov/Shutterstock

The same goes for using Instagram at the same time on mobile and desktop. So, if you’re connected to a VPN, try disconnecting and see if this solves the problem.


8 You Might Have to Clear Your Cache

If you haven’t cleared your cache in a while, this might interfere with various actions on Instagram—including the ability to follow new users. This often happens when app data exceeds the storage limit or becomes corrupted, and it’s almost certainly going to impact you at some point.

You can easily clear an app’s cache on an Android device. For Instagram on iOS, delete and reinstall the app to achieve the same result.

9 Instagram Servers Are Down

If Instagram’s servers are down, you cannot follow new people—or do anything else—until the app is working again. This issue is normally solved within a few hours, but you may have to wait longer in some circumstances. The best thing to do in this instance is check to see if Instagram’s servers are working as they should.

Go to Downdetector and check if other users have reported the same issue. You can also see how many outages have been reported in the last 24 hours.

Instagram Downserver Status Report


Sometimes, it isn’t that easy to figure out why you can’t follow new accounts on Instagram. The worst-case scenario is the other person has already blocked you, so there’s nothing you can do until they unblock you. But if Instagram servers are down, you should make the most out of it and take a break from social media.

How to Control Who Messages You on Instagram

Key Takeaways

  • Control who can message you by managing message requests & choosing where they land to filter out unwanted messages.
  • Set your account to private so that only approved followers can DM you.
  • Block an Instagram account to prevent them from reaching out to you altogether.


If you ever feel like your Instagram DMs are a little too accessible, navigating your inbox can sometimes feel like a chore. But the good news is that Instagram gives you the tools to decide who can—and can’t—slide into your DMs.


1 Control How People Can Reach You

Instagram gives you the power to decide who can send you message requests and where those requests land. You can manage this by tapping that little circle with your profile picture in the bottom-right corner of the app to go to your profile. Hit the menu button in the top-right corner (it looks like three stacked lines—aka the “hamburger menu”). From there, tap Messages and Story Replies under the How others can interact with you section.


Here, you can decide what happens when someone tries to message you. For your followers on Instagram, you can choose whether their requests go to your Message Requests folder by selecting Message requests, or you can block them entirely by choosing Don’t receive requests.

For accounts that don’t follow you (i.e., Others on Instagram), you have the same options. Either let their requests appear in your Message Requests folder or stop them from showing up at all.

Messages from people you already follow will always go straight to your main inbox, so you don’t have to worry about missing out on chats with your friends or favorite accounts.


2 Set Your Account to Private

When your account is private, only your approved followers can send you direct messages (DMs) or interact with your posts. This is perfect if you’re tired of random DMs from strangers or spam accounts trying to sell you weird products.

To switch to a private account, open the Instagram app, go to your Profile, tap the three-line hamburger menu in the top right corner, and navigate to Account privacy to toggle on the Private account option.

Once you’ve made the switch, anyone who wants to follow you must send a request, which you can approve or deny.

Keep in mind that switching to private won’t affect your current followers, as they’re already on the list. If there are people you don’t want in your circle anymore, you can remove them by going to your followers’ list, tapping the three dots next to their name, and selecting Remove. Don’t worry, they won’t be notified.


3 Block Instagram Accounts

Sometimes, you just need to stop someone from reaching out altogether, and that’s where blocking comes in. Mind you, that is different from restricting an account. When you block someone on Instagram, they won’t be able to message you, comment on your posts, or even find your profile.

Instagram doesn’t notify them that you’ve blocked them, so if you’re worried about awkward confrontations, rest easy—they’ll just think you’ve gone offline or moved on.

To block an account, go to their profile, tap the three dots in the top-right corner, and select Block. If you’re dealing with a persistent troll or spam account, Instagram will even block not just their current profile but also any future accounts they might create.


Remember, your Instagram is your space, and you deserve to feel good every time you check your messages. Don’t hesitate to use the tools Instagram provides to control who connects with you.

Use Windows Advanced Boot Options for Faster Troubleshooting

When your Windows PC encounters problems during startup, Advanced Boot Options can help get to the bottom of it. These options let you quickly diagnose and fix various issues without extensive technical knowledge.


Startup Repair

If an issue prevents your Windows computer from booting up correctly, the Startup Repair option can help you fix it. It scans for common problems, such as damaged system files, incorrect boot configurations, disk errors, and driver issues, and attempts to resolve them.

Startup Settings

The Startup Settings option contains specialized boot modes for your Windows PC. They provide different levels of access and functionality for the operating system, allowing you to troubleshoot, diagnose, and fix various Windows problems.


The Startup Settings screen on Windows.

Here are the modes available in the Startup Settings menu:

  • Enable Debugging: Boots Windows in debugging mode, which allows developers or system administrators to troubleshoot Windows problems using advanced tools. When debugging mode is enabled, they can, for instance, use WinDbg to investigate issues like system crashes.
  • Enable Boot Logging: This creates a detailed log of the entire bootup process, including drivers and services loaded, and stores it in a file called ntbtlog.txt in the C:Windows directory. By examining this file, you can tell whether a driver was behind your computer failing to load.
  • Enable Low-Resolution Mode: This helps you troubleshoot display issues by loading Windows with basic video drivers. The display will have a low resolution, but you can access the desktop and update or reinstall the display drivers when they malfunction.
  • Enable Safe Mode: This boots your computer with a minimal set of drivers and essential services, enough to get Windows to function. This can help troubleshoot problems like frequent crashes, driver issues, malware infections, software conflicts, system file corruption, and hardware failures.
  • Enable Safe Mode With Networking: The basic Safe Mode does not load network drivers, but this mode does, so you have internet connectivity to troubleshoot online issues. Since other parts of the system aren’t loaded, they are protected from problems you might encounter online.
  • Enable Safe Mode Command Prompt: This Safe Mode opens directly into the Command Prompt instead of the minimal desktop user interface. This allows you to run troubleshooting commands, such as the SFC and DISM commands.
  • Disable Driver Signature Enforcement: This mode boots Windows normally but with Driver Signature Enforcement disabled temporarily. This allows you to install unsigned drivers on your Windows PC. However, ensure the drivers come from trusted sources before you turn it off to avoid security risks.
  • Disable Early Launch Anti-Malware Protection: This mode disables the Microsoft Defender Antivirus ELAM (Early Launch Anti-Malware) driver. It checks for problematic drivers during startup and can halt the process if it detects one. Disabling it allows you to load those questionable drivers—assuming they’re safe—and troubleshoot them.
  • Disable Automatic Restart After Failure: When Windows runs into a critical error—a severe issue that significantly affects the functionality of the OS—your computer will reboot. By disabling this feature, your computer doesn’t restart but instead shows you the error, allowing you to troubleshoot it.


Command Prompt

The Command Prompt option launches a command-line interface in the Advanced Boot Options for advanced system recovery and troubleshooting.

It is useful when you need to run diagnostic commands, repair system files, manage disk partitions, or perform other administrative tasks that require the use of command-line tools without fully booting into Windows.

Uninstall Updates

The Uninstall Updates option allows you to roll back recent Windows updates. This is useful when the update is causing issues on your computer, such as slowdowns, system instability or crashes, boot errors, driver issues, and missing or malfunctioning features.

Basically, if you notice something is off after updating your computer, this is the option you need to use before the updates go past their rollback window, which is 10 days.

UEFI Firmware Settings

Selecting the UEFI Firmware Settings gives you access to the modernized version of the traditional Basic Input/Output System (BIOS) called the Unified Extensible Firmware Interface (UEFI).


This function allows you to tweak your computer’s basic or hardware-level settings, including boot order, secure boot, system time and date, fan speed, RAM settings, and power mode.

So, if you want to configure how your computer’s hardware and firmware interact, UEFI provides a more user-friendly way of doing it.

If you don’t see the UEFI Firmware Settings option, don’t panic. It just means you have to access similar settings using the BIOS, although it’s more limited. Depending on the manufacturer of your device, you can access BIOS by pressing keys like F2, F10, Delete, or Esc during startup.

System Restore

The System Restore option returns your computer to a previous working state by reverting changes made to the system settings. This feature is useful when fixing issues caused by problematic updates, changes, or sudden instability without affecting your personal files.

Keep in mind that System Restore depends on system restore points being available on your hard drive to undo the changes.


While Windows will create them automatically before a significant system event (e.g., installing new software or updates), you’re better off creating system restore points manually for better control.

System Image Recovery

The More Recovery Options screen on Windows.

If you created a system image of your Windows PC, the System Image Recovery option is where you use it to restore your computer. The system image will restore all your data from that Windows installation, including settings, configurations, apps, and files. It is one of the best options to recover your PC from complete hardware failure.

However, keep in mind that any data created after taking the system image will not be restored. So, if you can, be sure to create system images monthly, before major updates to your PC, or before important life events (e.g., traveling or moving to a new home).


A warning before you go: incorrect usage of Startup Options can exacerbate existing problems or cause new ones, making your system more unstable. Only use them if you completely understand how they work and the implications.

If you’re still unsure about how Advanced Boot Options work, consider seeking help from an IT professional before using them.

Here’s What to Look Out For

From annoying to outright sinister, scam calls are diverse and can sometimes be easier than expected to fall for. I’ve encountered multiple call attempts from people disguised in different ways, from telemarketing scams to people pretending to be the authorities, and these are the telltale signs.


1 Fake Customer Support

The number of times that someone has tried claiming to be a technical expert on the phone is laughable. I might be somewhat inclined to fall for their tricks if I was actually experiencing a technical issue, but they never call at these times.

Beyond claiming something is broken, these “customer support experts” may also claim that my payment failed. This is one of the most common types of phishing attacks, and you should always be cautious in these situations. If you’re ever in doubt, reach out to the product or service via one of their official support channels.

2 People Pretending to be the Authorities

Scam calls often use urgency and threats to try and coerce you into sending money to a criminal. For example, I’ve sometimes experienced calls with people pretending to be law enforcement. I also know others who’ve received fake calls from people claiming to be embassies.


Depending on where you are, you may also get scam calls from criminals pretending to be tax authorities. For example, someone might pretend to be the IRS. Again, it’s worth double-checking with your local tax authorities if you receive this kind of call.

3 Fake Charities

Some scammers pray on people’s goodwill, and fake charities are one way I’ve seen them try to do this. These can be particularly dangerous if you’re eager to please or quick to trust, two personality traits that make you more vulnerable to phishing scams and fraudulent phone calls.

When a fake charity calls you, they’ll try to tell you that they represent some kind of good cause. They might even try and guilt-trip you. A general rule of thumb for me is to donate directly to a charity I believe in; in my opinion, this is the best way to do it safely. If you’re donating to a fundraiser, it’s important to be aware of GoFundMe scams.


4 “Winning” Competitions

One of the oldest tricks in the phone call scamming book is for someone to pretend that you’ve won a competition. It’ll often involve claiming you’ve won an expensive piece of tech or a cash prize. The scammer will then likely try and get your banking details.

phishing scam text on smartphone
Mer_Studio/Shutterstock

If you don’t remember entering a competition, you can be certain that someone is trying to scam you. And if they convince you to join one, you should ignore their request; the same goes for not trusting giveaway contests on social media. Even if the call was legitimate and you did enter a competition, the company will find an alternative way to contact you.

5 Pretending That Someone Is in Danger

Another sinister way scammers have tried to contact me before is by pretending that someone else is in danger. Sometimes, they’ve pretended that it’s someone I know. This can be very difficult to deal with because, naturally, you always wonder, “What if?”


On other occasions, the scammer will say that they are the person in danger. In these cases, it’s always easy to confirm it’s a scam. I highly doubt that someone in peril would decide to call a random phone number and try getting money from them.

In almost all cases, the person will try asking me for my bank details. It’s also good that they do this because it’s the biggest red flag.

6 Telemarketing Scams

Telemarketing calls are annoying even if they aren’t scams, and I now pay zero attention to them. But in the past, people have tried scamming me by pretending to be telemarketers.

A woman holding her phone with a worried expression, with a laptop on the table and a sync icon.
THICHA SATAPITANON/Shutterstock

These kinds of scams can take multiple forms. Sometimes, a person has asked me to pay for something; in other cases, they’ve suggested that I have paid too much for something. You can also recognize a telemarketing scam if the voice sounds automated.


I’ve sought to remove my phone number if it’s publicly listed online, and I also have opted out of receiving telemarketing calls when I have the option to give permission. Thanks to this, I know that any calls I receive of this kind are either scams or unwelcome.

7 Fake Bank Calls

Sometimes, users have called me and pretended to be my bank. In some cases, they’ve asked me for my account details—and in other instances, the individual has asked me to send them money. I have refused to do so on both fronts. You should be very careful with fake test transactions and similar scams.

Like telemarketing scams, many fake bank calls are automated. Your bank won’t ask you for sensitive personal information, such as your card or account security number, and you should never hand these over. If you’re in doubt, call your bank via their official support number.


8 SIM Card Scams

SIM card scams are among the most advanced phone call scams, and you, therefore, need to be on high alert to avoid becoming a victim. These scams require your mobile carrier to comply, but before that, the scammer may contact you to gather information. In some cases, they may use phishing links instead of phone calls to try and scam you.

A smartphone displaying a failed eSIM activation, indicated by warning symbols encircling the device.
DenPhotos and AllArtAleks / Shutterstock

The person will then contact your carrier and pretend to be you. I’ve avoided becoming a victim by not giving anyone information like my address unless I’m certain they’re genuine. Even then, I may go to extra lengths to verify.

9 Voicemail Scams

This isn’t a strict call scam like some of the others on this list, but in some cases, I’ve received voicemail messages from people who are obviously trying to extort money from me. In these cases, the person will try to get me to call them back and claim that it’s for some important reason.


Because of AI, these kinds of scams have become more advanced, with voice clone family scams being one example. One way to tackle this issue is to be able to tell if the number calling is a phone scam, and another is to ignore the message altogether.

10 False Debt Scam Calls

Nobody likes being in debt, and it’s easy to see why scammers would use this to their advantage. Sometimes, I’ve received calls claiming I’m in debt for products and services I have never used. The scammer will then ask me to send money to pay this off.

Even if I was in debt, I would call the entity first and confirm this. You can often also check how much you owe online. You really don’t need to let scammers perform card-cracking on you.

Scam calls are prevalent, and while mobile devices are better at picking these up, they still aren’t perfect. As a result, you need to be on guard to stop issues from arising. Knowing what to look out for is an ideal starting point.

Google Maps Is Making It Easier to Warn Fellow Motorists If There’s a Cop on the Road

Google updated the Google Maps on Android Auto and Apple Car Play to make it easier to report when you see police on the road. In the past, you need to dig in through a menu to find this report type, making it harder and more distracting to do so.


How to Mark Police Presence on Google Maps Using Android Auto or Apple Car Play

Marking police presence using the incident reporting feature on Google Maps is rolling out to all users, so you should see it in car soon. You also don’t need to update Google Maps on your phone, as this is a server-side update (but you should still update Google Maps nonetheless, as app and software updates keep you safe).

If you see a cop on the road, report them on the app by tapping on the shield or warning icon close to you (the driver) and then tapping Police under the Add a report menu. This is the third option that will appear, immediately after Crash and Slowdown and before Construction. After you tap on the Police button, other motorists will see where the cop is on the map, warning them to be more careful on the road.

ANDRANIK HAKOBYAN / Shutterstock


Those who’ve been previously reporting police presence before the update will also notice that Google changed the reporting name from Speed traps to Police. This makes it a more encompassing and useful feature, letting you tell other road users when there’s a police operation on the road, like a car chase or a checkpoint, and not just a speed trap.

However, 9to5Google says that some displays might be incompatible with the incident report feature. If you don’t see it appear on your touchscreen display, you can send a report to Google by going to the Android Auto settings on your car’s display and tap See more settings on the phone.

When you see the Android Auto settings on your phone, tap the three-dot icon on the top-right corner, then tap Send feedback. From there, explain the issue to Google and, hopefully, it will come up with a solution with the particular car model that you have.


Making Google Maps a Potent Rival to Waze

Google Maps and Waze logos over their respective interfaces

This feature, which has long been available and easily accessible in Waze, is making Google Maps a better competitor. It seems that Google is slowly integrating the former’s unique features into the latter, but Waze’s drive planning feature still make it more useful for drivers.

Nevertheless, Google owns both apps, so you won’t go wrong with either one for navigation. In the end, whether it’s Waze or Google Maps, the right navigation app for you will depend on your preferences and use cases.

You Need to Do This One Thing to Prepare for Spotify Wrapped 2024

Spotify users the world over are eagerly awaiting the arrival of Spotify Wrapped 2024. Wrapped being Spotify’s annual exploration of what each individual user has listened to over the last 12 months. It just needs you to do one thing before it agrees to release Wrapped.


Spotify Teases Wrapped 2024 by Offering Some Advice

In a post on For the Record, Spotify has teased the imminent arrival of Wrapped 2024. But it needs something from you first. Which is to update the Spotify app to the latest version.

According to the company, this is “one of the keys to getting the best Wrapped experience,” as “an up-to-date app means you’re getting a fully optimized Wrapped experience”. True or not, it’s worth keeping the Spotify app updated to ensure that you can access all the latest features.

To update the Spotify app on Android or iOS, just go to the relevant app store: the iOS App Store for iPhone users, and the Google Play Store for Android users. Search for the app, and, once found, check to see if an update is available. If so, download and install it to update the app to the latest version.


We suspect the reason why Spotify is pushing everyone to update the app in time for Wrapped is to ensure the release goes as smoothly as possible. Because as soon as they get wind that Wrapped has dropped, most Spotify users will rush to open the app and see if they were successful in racking up the most listening hours.

When Will Spotify Wrapped 2024 Start Rolling Out?

Now that Spotify is officially teasing the arrival of Wrapped 2024, the obvious question is when it will actually drop. And we have to admit that we’re not entirely sure at this point. However, we can make an educated guess.

For the last four years, Wrapped has dropped on a Wednesday, with two being at the end of November and the other two being in early December. However, prior to that, in 2018 and 2019, Wrapped dropped on the first Thursday in December.

Given that the last Wednesday of November has been and gone, we can narrow it down to next week (December 2-6), but what day within that week it’s going to land is anyone’s guess. If I had to guess, I would suggest Wednesday, December 4 as the most likely release date for Spotify Wrapped 2024.


While you’re waiting, remember that you can still access your Spotify Wrapped playlists for previous years.

The Next AI App You Download Might Be From Elon Musk’s xAI

Are you ready for yet another way to use AI technology? According to a new report, xAI’s chatbot Grok might soon be available in a standalone app.


Another Way to Access Grok

The Wall Street Journal says that Elon Musk’s venture is planning release its own app. Currently, the only way to access Grok is through the social media app X, formerly Twitter. Grok access is a perk for subscribers to the social network in both the Premium and Premium+ tier. Premium costs $7 per month and also includes other X features like a larger reply boost.

A standalone Grok app could arrive for consumers as early as next month.

Interestingly, the report also says that Grok is currently being used to support another Musk venture, SpaceX’s Starlink, for customer service. Grok in the future might also be used to power a search engine for X in the future.

Grok has been behind the curve. xAI’s chatbot was released a little more than a year ago. Unlike competitors, the chatbot is known for answering questions with wit and sarcasm, showing Musk’s influence.


Do We Really Need Another AI App?

You don’t need to look very far to find a standalone AI chat app for your smartphone, tablet, or computer. There is a host of great AI chatbots like OpenAI’s ChatGPT, Google’s Gemini, Meta AI, Microsoft Copilot, and many more that don’t even need a subscription.

If you’re willing to pay, you can unlock a host of great additional features. For example, you can have a full-blown voice conversation with ChatGPT’s Advanced Voice Mode, which continues to roll out for more users.

And along with standalone AI app options, Apple, Microsoft, and Google are quickly adding native AI features to computer and smartphone operating systems. Apple Intelligence has just started its roll-out to Apple devices and is continuing to add new features well into 2025.

For Grok to be worth using in a standalone app, it needs to provide something unique compared to all of those other options. So it will be interesting to see what Musk has up his sleeve. While being an AI-powered X search engine sounds nice, it needs to have much more.


I Refuse to Pay for Streaming Services That Also Have Ads

As streaming services continue to raise their subscription prices, one solution offered by some services is to have cheaper paid plans with ads. While this is an excellent way to reduce the cost of streaming, I won’t pay for a streaming service with ads for these reasons.


1 Paying for Premium Should Mean Premium

Top_CNX/Shutterstock

Paying for a streaming service means I’m paying for a premium service. I expect to get premium perks like limitless access to content in the library and an uninterrupted experience. Having ads included in a paid plan defeats the point of having me pay for the service when the company could have just made it free with ads.

Additionally, paying for a streaming plan with ads means I’m paying twice for the service. First, I’m paying for the subscription plan and, secondly, through my time and attention by watching the ads. A premium plan shouldn’t be this way.

2 Ads Interrupt the Viewing Experience

It’s no secret that ads interrupt the user experience on any product or service. That’s why many have embraced blocking techniques to keep the ads at bay. Having an ad-free experience is one of the main reasons that paid streaming services are better than free alternatives.


By paying the monthly subscription fee, I expected an ad-free experience. Otherwise, I would opt for many of the free movie streaming services that allow me to watch content for free with ads placed between the content.

3 Limited Differentiation From Free Services

tubi and pluto tv logos on smartphone screen
Tada Images/Shutterstock

Just as the saying goes, if the service is free, you are the product. This is the business model of free services, which make users the product by collecting data and using it to offer personalized ads. If I pay for a product, my data shouldn’t be collected for ads. Paying for a subscription should eliminate ads, as this is a crucial differentiator from free services. I can’t pay for a service and then still get ads.


4 Streaming Was Meant to Break Free From Ads

When streaming services debuted, they were advertised as an escape from expensive cable filled with commercials. Streaming allows users to pay a low monthly fee in exchange for accessing many movies and TV shows at any time and without ads. Unfortunately, as more platforms introduce ads in paid subscription tiers, it feels like we’ve come full circle.

Streaming wasn’t meant to be this way. Of course, the bright side of paid plans with ads is the lower subscription fee. However, it undermines the very concept that streaming services wanted to break from.

5 Better Alternatives Exist

Apple TV+ on smart TV.
Nate Williams / MakeUseOf

I would only pay for streaming services with ads if they were the only option. However, they aren’t the only game in town, thanks to the power of the internet. Even better, there are better alternatives that I can use, both free and paid. Apple TV+ is an excellent example of a completely ad-free streaming service. You pay one fixed monthly price and enjoy the entire library without limitations. Aside from Apple TV+, there are many other streaming services that don’t have ads.


If such services are expensive, or I want to save money on my online subscriptions, free options exist that offer content for free with ads, like Pluto TV. Sure, ads are disruptive, but watching ads in exchange for free access to content is a fair trade to me. With these two options, there’s no reason to pay for a service that displays ads.

More and more streaming services are offering paid plans with ads, but I refuse to pay for such services. Paying for a subscription plan with ads feels like a double charge, and it goes against the very concept that streaming services wanted to revolutionize. Better yet, there are better alternatives that I can use, and as long as that stays true, I won’t accept this emerging trend in streaming.

The 10 Coolest Interactive Google Search Widgets You Should Know About

Google’s AI Overviews have made getting instant results from Search easier. However, the best source for instant results are the various operators and widgets at the top of Google’s search results, saving you from having to scroll for an answer.


Once you know what to type into Google Search, you can get instant answers to a number of questions you may have rattling around inside your brain. There are a surprising number of these available on Google Search, but these are the ones I find myself using most regularly.


1 Find Out the Time in Any Location

If you want to know the time in your current location, you’re likely to glance at your wristwatch, a wall clock, or (most likely) your phone. However, what if you want to know what time it is now in another part of the world?

To find out the time in any location in the world, just type “time [location]” into Google. As long as Google recognizes the location you search for, the answer will appear instantly at the top of the search results page.


2 See When the Sun Is Rising or Setting

While none of us can control when the sun rises and sets, many people still want to know when it’s happening, this includes everyone from farmers who work from dawn to dusk to ordinary folks who just want to know what to expect when they get up for work.

Google Search's sunrise widget in action

To find out what time the sun is rising or setting in a specific location, just type either “sunrise [location]” or “sunset [location]” into Google. The default you’ll see will be the time for today, but you can also add a specific day or date.

3 Find the Current Price of Any Stock

While not everyone is blessed with a portfolio of stocks and shares, those who are can instantly check the price of any they own by asking Google. In case any of you are wondering, the same trick works for cryptocurrencies such as Bitcoin.


Google Search's stocks widget in action

To find out the current price of any stock, just type “stocks [stock symbol]” into Google. If you don’t know the symbol for a stock, just try the name instead, and it should work. You’ll see the current price, as well as past performance.

4 Translate Words Into Another Language

While Google Translate has a dedicated app and website, it’s also available at the top of Google Search results when you want a quick translation of a single word or short phrase. You can translate longer words and phrases too, but if you’re going to do that, we recommend that you get the app instead.

Google Search's translation widget in action


To translate any word or phrase into another language, just type “translate [word or phrase] into [language]” into Google. For example, “translate ‘thank you’ into german”. Google will recognize what language the word is in, and translate it.

5 Set a Timer or Start a Stopwatch

There are certain times when you need to set a timer or start a stopwatch. Sure, your phone also has this capability, but so does Google Search, and it’s so simple to set a timer for a certain amount of time or start a stopwatch running, that I tend to use this method more often than not.

Google Search's timer widget in action

To set a timer for a certain amount of time, just type “[amount of time] timer” into Google. This timer will open up and start immediately. Alternatively, to open a stopwatch, just type “stopwatch” and click the Play button.


6 Check the Weather Forecast at Any Location

There are lots of decent weather apps around now, and they’re great for keeping tabs on the area you live in or traveling to for an extended period. However, if you just want to take a quick look at what the weather is like in a certain place, Google Search offers a simple solution.

Google Search's weather widget in action

To find out the weather in any place on Earth, just type “weather [location]” into Google. You’ll see the weather right now and for the next seven days. You can also see more details about the temperature, precipitation, and wind.

7 Convert One Type of Unit to Another Unit

As someone who grew up using both the decimal and metric systems, I often need to convert one unit to another. How many pounds are in a kilogram? How many milliliters are in a pint? Etc. Thankfully, Google has the answer to all of these and more.


Google Search's units converter in action

To convert one unit to another, just type “[unit] to [unit]” into Google. You’ll get an instant result, a formula to produce a rough result, and a dropdown menu allowing you to select other units to convert to and from.

8 Find the Hex Value of Any Color

While most people won’t need to make use of this specific Google Search trick, those who do will find it extremely useful. There are, believe it or not, 16.7 million hexadecimal color combinations available. And with Google’s built-in Color Picker, you can find the exact color you’re looking for.

Google Search's Color Picker widget in action


To find the hex value for any color in the world, just type “color picker” into Google. You’ll see a detailed color picker letting you select a specific shade, with the hex value (as well as other values) underneath. You can then copy the code with one tap.

9 View Recent Results Between Sports Teams

Sports fans the world over are obsessed with results. It doesn’t really matter how well or how badly your team has played; what matters is whether they won or lost. Google Search can show you your team’s recent results or the results of any other team.

Google Search's sports results widget in action

To find out your favorite sports team’s recent results, just type “[sports team] results” into Google. Or, to see specifically how they have fared against a particular opponent, just type “[sports team] vs [sports team]” to see a list of previous head-to-heads.


10 Discover the Definition of Any Word

Last but not least is one for people who like to understand what they’re talking about. If you come across a word you’re unfamiliar with, you can ask Google to define what it means without consulting a dictionary. It will even tell you how to pronounce the word.

Google Search's word definition widget in action

To find out what a word means, just type “define [term]” into Google. You should get an instant definition of that term, as well as a list of words with a similar meaning. Essentially, providing a dictionary and thesaurus entry in one.

None of these Google Search operators and widgets are going to change your life in a major way. However, they will allow you to get answers to some important questions instantly and without having to wade through any clickbait or misinformation.


Google Search is far from perfect these days (and likely never was despite our rose-tinted glasses). However, these instant answers to important questions make it well worth using, even with the rise of ChatGPT and other AI chatbots.

Here’s How I Always Pick the Right USB-C, USB 3.2, USB 3.0, or Thunderbolt Cable

USB-C is effectively the universal cable standard, something that took a long time to come around. However, its brilliant flippable shape and extensive variety of uses can sometimes make it difficult to know if you actually have the right cable for the device at hand.


Your Port Might Be a Lower Standard

The first check regarding USB-C issues is the port you’re plugging a device into. For example, you might have a USB-C 3.2 hub, plug it into your device, and find that it doesn’t work. If you’re using the included cable for that device, the most likely scenario is that you’re plugging it into a port with insufficient standards.

Many laptops today have at least one Thunderbolt port, but aside from a few exceptions like MacBooks, most laptops have a mix of ports ranging from USB 3.0 to Thunderbolt over USB-C, in a confusing variety. These may have an icon to indicate the port’s standard, such as a lightning icon for Thunderbolt or the USB number “3.0” or “3.2” next to the port, but this isn’t guaranteed.

If you’re using the wrong port, don’t give up on your specific cable. Refer to your device’s specifications to determine which port has what standard. However, beware of further confusion about ports, such as lacking a port entirely even if your motherboard might support it.


Your Device Might Not Even Have the Port

Ste Knight/MakeUseOf

Most prevalent on Windows desktops, your device may completely lack the correct port. For example, many motherboards technically support Thunderbolt 4 but might not have a Thunderbolt port unless you purchase a PCIe add-on.

As such, you might attempt to connect a Thunderbolt device to your PC that technically supports that standard, yet the port is lacking. Thunderbolt is a widely adopted standard, yet its implementation over USB-C remains confusing. It’s more likely USB 3.1 or 3.2. Before you even think of which cable to buy, you should know the standard your intended port supports, as well as your motherboard.


While USB-C and Thunderbolt are compatible, a standard USB port does not support the full range of Thunderbolt features, like high-speed data transfer or daisy chaining, which require a Thunderbolt-certified port. Refer to your device’s specifications to determine exactly what type of USB-C port you’re working with, then decide on a cable if you need to buy one.

Your Cable Might Not Have the Bandwidth

Lightning to USB-C cable for iPhone

USB is generally backward compatible but not forward compatible. For example, a USB 3.2 port will support a USB 2.0 device, whereas a USB 2.0 port can physically support a USB 3.2 device but will only operate at USB 2.0 speeds. Certain devices requiring higher power or bandwidth of USB 3.2 may not function properly. The same concept applies to cables—a USB 2.0 cable can physically connect to a USB 3.2 device but will limit its performance to USB 2.0 standards. To ensure proper functionality, every component—device, port, and cable—should meet the same standard as the peripheral device or higher


While USB-A cables and ports are often color-coded to denote their standard—gray for USB 2.0, blue for USB 3.0 or higher—these color codes are not universal, particularly with third-party manufacturers. USB-C cables and ports, on the other hand, all look identical, with the possible exception of a small icon near the port, which might not even be included. As such, identifying the exact specifications of a USB-C cable without additional information can be challenging. Some cables include icons, such as the Thunderbolt logo, but many do not, making testing or detailed labeling necessary.

As such, USB-C cables can be impossible to know the exact specifications without testing. I once purchased a “USB-C 3 W” cable, assuming it was a USB 3.0 cable. However, whether it was my confusion or intentionally misleading marketing, the cable only had USB 2.0 standards, and I could not use it with the USB 3.0 device I planned on. This limitation was impossible to check for on the hardware until I tested it.


Similarly, when a device you purchase comes with a USB-C cable, it’s difficult to know that cable’s standard. You might purchase a smartphone that uses USB-C and might support fast charging and rapid data transfer, but the cable might have slower, older USB 2.0 standards.

My recommendation regarding picking the right USB-C cables is to search based on the standard you’re using, such as “USB 3.2” or “Thunderbolt 4,” and then double-check that the cable you purchase meets that standard before buying. You can also refer to USB-IF certification or Thunderbolt branding to ensure they meet the claimed standards.

Make Sure the Cable, Port, or Device Isn’t Broken

If you’ve checked everything else regarding USB port and cable standards, your cable may be broken. Try testing the cable with different devices. If the cable works, your device or port might have an issue, whereas if the cable doesn’t work with other ports or devices, the cable is likely busted.


In my experience doing technical support, this is the least likely root cause, but cables can break and malfunction, especially if they are used in a way that adds tension and potential breakage. Treat your cables gently, and you can likely avoid this issue.

While it is certainly possible to troubleshoot USB-C cable issues, everything would be easier if cables were required to have consistent iconography to denote their standards, such as the USB data standard. Many have these icons, but they’re not required. While USB-A is becoming outdated, at least identifying its standard is relatively easy. USB-C needs the same ease of identification!

These "SpyLoan" Android Apps Use Your Data to Blackmail You: Here's How to Stay Safe

The Google Play Store is the safest place to download Android apps, but it’s not scam-free. There are plenty of shady apps on the service, and while Google does its best to take them down when they appear, they can’t get them all. Such is the case of the rise of “SpyLoan” apps that reel you in with the promise of low-interest loans but instead harvest your personal data and blackmail you with it.

4 Ways eSIMs Are Safer Than a Physical SIM Card

If you’ve ever swapped out a SIM card or worried about losing one, you know how inconvenient physical SIM cards can be. Enter the eSIM, short for “embedded SIM,” an eSIM is built directly into your device, removing the need for a physical card entirely. But beyond the convenience, eSIMs also offer safety benefits that physical SIM cards can’t match.


1 No Physical Card to Lose or Steal

Naumstudiopro and Touchr / Shutterstock

One of the most obvious safety advantages of eSIMs is that there’s no physical card to lose or steal. A traditional SIM card can be easily removed from your phone if lost or stolen, giving someone access to your phone number and potentially your accounts.

With an eSIM, this vulnerability is eliminated. The eSIM is embedded directly into your device’s hardware, meaning there’s nothing to physically remove or tamper with. Even if someone gains access to your phone, the absence of a removable SIM card makes it harder for them to exploit your network or identity.

This also means no more fumbling with tiny SIM card trays or keeping spare SIMs in your wallet, where they can easily go missing.


2 Easier to Lock or Deactivate Remotely

Losing your phone can be stressful enough, but with a physical SIM card, there’s the added concern that someone could misuse it for calls or messages. While contacting your carrier to deactivate a physical SIM is possible, it can be a slow process, leaving your information vulnerable in the meantime.

eSIMs eliminate this worry by making it easier to lock or deactivate your SIM remotely. For instance, many carriers allow users to suspend or deactivate their eSIM profiles through online support or mobile apps. After verifying your identity, your carrier can deactivate the eSIM almost instantly, cutting off access to your number and network.

Additionally, most modern smartphones with eSIM capabilities, such as iPhones or Android devices, are equipped with built-in tools like Find My iPhone or Find My Device. These services let you remotely lock or erase your phone. If you choose to erase the device, the eSIM profile is disabled at the same time, ensuring it can’t be misused.


Some carriers even provide dedicated apps that allow users to manage their eSIM profiles directly. This means you can delete, suspend, or transfer your eSIM to another device without needing to physically retrieve your stolen phone. Together, these features ensure that eSIMs offer a faster, more secure way to protect your accounts if your phone is ever lost or stolen.

3 Harder to Compromise

Physical SIM cards have long been a target for scams like SIM swapping, where attackers trick your carrier into issuing them a replacement card. Once they have control of your SIM, they can intercept two-factor authentication codes, reset passwords, and even access sensitive accounts like banking apps.

eSIMs drastically reduce this risk. Since they’re embedded directly into your device, transferring an eSIM requires strict authentication protocols. Many carriers now require multi-factor authentication or in-person verification before making any changes to an eSIM profile.


This added layer of authentication closes a key vulnerability that has long plagued physical SIM cards. While no system is foolproof, eSIMs make it significantly more difficult for attackers to compromise your number and personal information.

4 Better International Travel Security

Traveling internationally with a physical SIM card often involves swapping it out for a local one to avoid hefty roaming fees. This process not only leaves your primary SIM vulnerable to loss or damage but also exposes you to potential security risks, such as tampering during storage or transit.

With an eSIM, these concerns disappear. Many eSIM-compatible devices allow you to download and activate local carrier profiles remotely, often before you even land in a new country. This means you can switch networks in minutes without handling a physical card.


What’s more, eSIMs let you maintain multiple profiles on one device. You can keep your primary number active while adding a temporary profile for local data or calls. This dual functionality ensures you stay connected to home and travel networks without sacrificing security.

For frequent travelers, this added layer of convenience and safety is invaluable. You can avoid the hassle of physical SIM swaps while knowing your primary profile is securely stored and inaccessible to anyone but you.

eSIMs bring a modern approach to mobile connectivity that prioritizes convenience and security. By eliminating the physical SIM card, they reduce risks like theft, swapping scams, and accidental loss. Their remote management capabilities and resistance to common vulnerabilities make them a safer option, especially for those who value their privacy and data protection. While traditional SIM cards have served us well for decades, it’s clear that eSIM technology is a significant step forward.

Even If You Use a VPN, Some Apps Will Still Know Your Real Location

One benefit of using a virtual private network (VPN) is concealing your location. But if that’s your main goal, you might be surprised to learn that some apps can still tell your real location.


Why VPNs Can’t Completely Hide Your Location

When you connect to a VPN, it creates an encrypted tunnel between your device and the VPN provider’s server. Then, when you send or receive data over the internet, it is transmitted through the tunnel and routed to the destination by the VPN’s server. In this setup, the VPN server is the middleman that handles internet packets on your behalf.

By accessing internet resources on your behalf, the VPN effectively conceals your identity. It does so by using its IP address instead of your real IP address, so any websites or applications you access will see the VPN server as the party accessing the resource and not you. To the website or app, your location is the location of the VPN server’s IP address.

This works fine for duping services or apps that rely on IP addresses to tell your location. However, this strategy isn’t foolproof, as there are other ways that apps and websites can tell your location without using your IP address.


Using Your GPS Data

McLittle Stock and Gorodenkoff / Shutterstock

Smartphones and tablets have a built-in GPS that can be used to tell the device’s current location. Especially on mobile, apps use data from the GPS sensor to determine your location. For instance, navigation apps like Google Maps and ride-hailing apps like Uber use your GPS data to determine your location precisely.

That’s why even if you connect to a VPN and open an app, your current location won’t change unless you physically move to a different place. This is because connecting to a VPN only changes your IP address; it doesn’t alter your GPS sensor data.

As such, these apps can still tell your real location regardless of your VPN settings. But of course, there’s a way to trick such apps by using location spoofing. Check out our article on the differences between location spoofing and VPNs for more details.


Checking Surrounding Wi-Fi Networks

mesh wifi system covering smart home concept
metamorworks/Shutterstock

Another trick some apps use to determine your real location is checking surrounding Wi-Fi networks. Every Wi-Fi access point has a unique MAC address (also called a BSSID) broadcast to nearby devices. Your device can detect these nearby Wi-Fi networks even if you’re not connected.

This feature allows you to scan and connect to nearby Wi-Fi networks easily. However, some companies use it to create large databases of Wi-Fi MAC addresses and their geographic locations.

So, even with a VPN connection, location spoofed, or GPS disabled, some apps can send the list of nearby Wi-Fi addresses to a Wi-Fi location database to determine your approximate location. In this case, VPNs aren’t that useful for tricking apps that use nearby Wi-Fi networks to determine your location.


Using Bluetooth and Nearby Devices

A hand holding a phone with a Wi-Fi 2.4GHz icon and another hand holding a phone with a Bluetooth icon.
Roman Samborskyi / Shutterstock

Some apps can also determine your real location using Bluetooth and nearby devices. Smartphones and other Bluetooth-enabled devices broadcast their presence to nearby devices.

Apps can determine your location by detecting these signals and then comparing the identity of nearby Bluetooth devices to data stored in databases that link them to specific physical locations. This is partly how Find My Device works even when your phone is switched off.

In some places like airports and retail stores, small Bluetooth Low Energy (BLE) devices (known as beacons) provide location-based services like indoor navigation, where GPS can be less effective. By detecting these beacons, some apps can tell your location by identifying specific beacons mapped to physical locations.


Using a VPN is great for accessing geo-restricted content, protecting your data on public networks, or browsing the internet anonymously. However, to conceal your location from apps, look elsewhere since some apps don’t rely on your IP address to determine your location.

The 7 Best Chrome Extensions for Quickly Capturing Information

Ever come across something online and wished you could save it effortlessly for later? From insightful articles to helpful videos or that sudden idea for a to-do list, capturing information online can quickly get overwhelming if you don’t have the right tools. This is where the following Chrome extensions come in handy—they’re the sidekicks that make capturing, organizing, and revisiting all that information a breeze.


Saner.AI is a smart, all-in-one tool for capturing, organizing, and even analyzing the information you come across online. Its intuitive side panel keeps your notes easily accessible as you browse, allowing you to quickly jot down thoughts or save key details without interrupting your flow.

With just two clicks you can save anything that catches your attention. Saner.AI goes further with its Auto-tagging feature, which organizes your notes by relevant labels automatically. This means no more digging through a cluttered list of notes to find what you need—it’s all neatly categorized for you.

save to pocket


Pocket is perfect for saving anything you come across online—articles, videos, or even that recipe you’ve been meaning to try. With just one click, you can stash content into a clean, distraction-free space that’s always ready when you are.

Using Pocket is simple. You can save content by clicking the Pocket button in your browser toolbar, right-clicking on a page and selecting Save to Pocket, or using a quick keyboard shortcut (Ctrl + Shift + P on Windows or Command + Shift + P on Mac). To keep everything organized, Pocket allows you to add tags, making it easy to find content later.

If you want even more features, Pocket Premium offers unlimited highlighting, a permanent library for offline access, and even a text-to-speech function for listening to saved articles on the go.

nimble capture screenshot


Nimble Capture is a powerhouse when it comes to grabbing and saving visual content from the web. Whether you need a screenshot of an entire webpage, a specific section, or even a window from another application, Nimble Capture has you covered. It’s perfect for saving details from a webpage or quickly capturing snippets you want to remember.

Taking screenshots on your Mac or PC is effortless with Nimble Capture. You can use the button in the address bar, right-click to select Capture, or rely on customizable hotkeys for even faster access. Once captured, the extension’s built-in editor lets you resize, crop, draw, and add annotations like arrows, text boxes, or highlights. Need to point something out? You can even add stickers or shapes for clarity and emphasis.

Nimble Capture doesn’t stop at screenshots—it’s also a screencasting tool. This extension makes it simple to produce polished visuals and videos for whatever purpose.


todoist to-do list

Todoist is one of the most impressive to-do list apps. But you know what’s more impressive? Checking your tasks and creating new ones using just an extension. The Todoist extension integrates seamlessly into your workflow, making it easy to capture and manage tasks as you go.

The extension lets you plan your day with a quick glance at your to-do list, and checking off completed tasks feels incredibly satisfying. Its features go beyond the basics, offering options like reminders, priority levels, and recurring due dates to keep you organized and productive. Collaboration is also a breeze—you can assign tasks to others using just the extension.

saved to google drive extension screenshot


The Save to Google Drive Chrome extension offers a quick, hassle-free way to store web content directly on Google Drive. Whether it’s an article, an image, a video, or even an entire webpage, this extension makes saving seamless. With just a few clicks, you can send anything directly to Google Drive.

Using the extension is straightforward. You can click the browser action button to save the current page or right-click to save specific media files and links. If you need to capture entire web pages, the extension even supports full-page screenshots, scrolling automatically to ensure nothing gets missed.

It’s as easy as opening the page, clicking the extension, and voilà! Everything is neatly stored and ready for later use. This simplicity, combined with the ability to access your saved items from any device, makes it an indispensable tool for staying organized.

glasp youtube video side panel screenshot


Glasp is a fantastic tool for extracting key insights from YouTube videos without needing to watch every second. Powered by AI models like ChatGPT and Claude, the extension generates summaries and provides full transcripts directly from the Chrome toolbar. It’s perfect for quickly capturing the essence of a video or jumping straight to the parts that matter most.

As you watch a video, a helpful gadget box appears in the corner of your screen. With just one click, you can view or copy the transcript and even access a concise summary. The summaries are timestamped, making it easy to skip to specific sections that catch your interest.

Glasp also lets you adjust the summary length or customize the prompts for a more personalized experience.

raindrop extension screenshot


Raindrop.io is more than just a bookmarking tool—it’s a full-featured organizer that allows you to highlight, annotate, and group your captures into thematic collections.

What sets Raindrop.io apart is its smart organizational features. It suggests tags for your bookmarks and lets you create custom filters, making it easy to search for saved content by keyword, date, or topic. For added peace of mind, the Permanent Library feature saves a full copy of every page or PDF you bookmark, ensuring you still have access even if the original content disappears.

With so much information available online, having the right tools to capture and organize it can make all the difference. Thanks to these Chrome extensions, capturing information doesn’t have to be a tedious process. Try them out, and watch your workflow transform!

I Wish More Streaming Services Had These Features

Ever paused mid-binge and thought, “Why don’t all streaming services have this feature?”. Or wished for a tool to make your movie nights more fun and interactive? With so many platforms vying for our attention, you’d think they’d go all out to include everything we want. Here are some cool features I wish more streaming services would adopt…


1 Seamless “Watch Together” Options

Streaming has become a social activity, even when friends and family are miles apart. Some platforms, like Amazon Prime Video’s Watch Party, allow users to watch content together remotely. These features synchronize playback and often include a chat option, making it feel like you’re in the same room.

But not all services have caught up. Imagine how much better Netflix or Hulu could be with similar built-in watch-together tools. Sure, you can use third-party extensions like Teleparty (formerly Netflix Party) to watch Netflix with friends virtually, but they’re not as smooth as native integration.

A truly seamless feature would let users connect directly in-app, invite friends with a simple link, and include video or audio chat for real-time reactions. Adding these tools across all platforms would make streaming a more communal and memorable experience.


2 Interactive Features for Niche Genres

Some genres practically beg for extra engagement. Karaoke modes for musicals, trivia pop-ups during documentaries, or director’s commentary overlays during action films could transform passive viewing into an interactive experience.

Disney+ dabbled in niche engagement with its Sing-Along versions of musicals like Frozen, where on-screen lyrics turn your living room into a karaoke party. However, this concept could go so much further. Imagine an interactive Hamilton mode where historical facts appear alongside the lyrics, or a mystery series with “guess the culprit” polls integrated into the episode.

3 Genre-Specific “Shuffle” Buttons

HBO Max Shuffle Button on Friends page

Sometimes, you don’t know what you want to watch—you just know the vibe. A genre-specific shuffle button could solve that indecision instantly. Picture a “Comedy Shuffle” that plays a random funny movie or show from the library or a “Horror Shuffle” for a spooky night in.


HBO Max already offers a shuffle option for specific shows, like Friends and The Big Bang Theory, but expanding this to genres would make discovering new favorites much easier. It’s especially useful when you’re revisiting a familiar genre but don’t want to sift through endless menus.

With a well-designed algorithm, this feature could also prioritize content you haven’t watched yet, ensuring that shuffle feels fresh and exciting instead of repetitive.

4 A “Skip Unnecessary Recaps” Button

We’ve all been there: you’re binging a series, and every episode starts with the same “Previously on…” montage. While helpful for weekly releases, it’s downright redundant when you’re watching back-to-back episodes.

Netflix already lets you skip intros, but imagine if you could also bypass these recap segments with a single button. This would be especially useful for plot-heavy dramas like Stranger Things or Game of Thrones, where recaps often rehash what you just saw minutes ago.


Even better, streaming services could offer customizable playback settings—letting you toggle recaps on or off depending on whether you need the refresher. It’s a small change, but one that could save viewers from repetitive interruptions during marathon sessions.

5 Live Watch Parties for Major Releases

People sitting on couch watching tv
Vasyl Shulga/Shutterstock

There’s something electric about experiencing a major premiere with a crowd, even if it’s virtual. While platforms like Twitch excel at live community events, traditional streaming services rarely offer this kind of shared excitement.

Imagine Netflix hosting a global watch party for the release of a highly anticipated show like Stranger Things. Users could join live chats, share reactions through emojis, or even participate in polls and Q&A sessions with creators. Disney+ experimented with this during the Loki finale, but these events are still rare.


A dedicated live watch party feature would make releases feel like events rather than just another drop in the content ocean. It’s a great way for fans to connect and for platforms to build buzz and loyalty.

6 Offline Viewing Without Expiration

Most streaming platforms let you download content for offline viewing, but there’s usually a catch. Downloads often have a frustrating expiration date—sometimes as short as 48 hours once you hit play. This restriction makes it hard to enjoy your library on your own schedule, especially during trips or long stretches without reliable internet.

Platforms like Amazon Prime Video and Netflix already support offline downloads, but they could take a page from Apple’s playbook. Apple TV+ allows users to keep downloaded content indefinitely, as long as users maintain their subscription. This flexibility would make offline viewing feel less like a temporary perk and more like a proper feature.

Removing expiration dates would ensure viewers can truly enjoy their favorite shows and movies whenever they want, without a ticking clock ruining the experience.


7 Streaming Stats and Insights for Fans

For those who love data, streaming stats could add a new layer of fun to watching. Imagine being able to track how many hours you’ve spent on a series, how many episodes you’ve watched in a week, or even what genres you binge the most.

Some platforms already offer a hint of this. Spotify Wrapped, while for music, is a great example of how user stats can be turned into a viral moment. Why not bring something similar to TV and movie streaming services? Crunchyroll has experimented with yearly summaries for anime fans, but it’s far from widespread.

These insights wouldn’t just be fun—they could also help viewers discover more content. A “most-watched director” stat could recommend similar films, or a breakdown of your viewing habits might surface hidden gems in your favorite genres.


Streaming services have made great strides in delivering convenience and variety, but there’s still untapped potential to improve the experience. Features like seamless “watch together” options, genre-specific shuffle buttons, and offline viewing without expiration would enhance usability and add a layer of personalization and fun.

While some services have dipped their toes into these ideas, there’s still plenty of room for all streaming platforms to adopt these tools. Until then, we’ll continue to hope for a future where streaming is not only about what we watch, but how we watch it.

How to View Your Printed Document History on Windows

Key Takeaways

  • While the print queue in Windows shows your pending print jobs, it doesn’t keep a record of completed ones.
  • The built-in Event Viewer app on Windows can help you keep track of printed documents.
  • You can also use a third-party tool like PaperCut Print Logger to monitor all print jobs on your system.


Whether you want to check print history for your own reference or to see what others are printing from your system, it’s easy to find a list of previously printed files on Windows. Here are a couple of ways to do that.


View Your Printed Document History Using Event Viewer

Although Event Viewer is typically used to troubleshoot various system issues, you can also use it to keep track of your printed documents on Windows.

However, Event Viewer does not maintain a record of printed documents by default. To enable this functionality, you’ll need to configure it to log your printing activities manually.

First, press Win + R to open the Run dialog box, then type eventvwr in the text box and press Enter. This will open the Event Viewer window.

Using the left pane, navigate to Applications and Services Logs > Microsoft > Windows and locate the PrintService folder within the Windows folder. Now, right-click on the Operational log from the middle pane and select Properties.


In the Log Properties window, navigate to the General tab and tick the Enable logging checkbox. You should also specify what Windows should do when the maximum event log size is reached.

Click Apply followed by OK to save the changes.

Enable Print History in Windows 11

Windows will now keep a log file of any documents that are printed from your system. You can access that log file from the Event Viewer at any time.

To view the print log, open Event Viewer using the search menu. Use the left pane to navigate to Applications and Services Logs > Microsoft > Windows > PrintService and double-click the Operational log to view your print history.


In the middle pane, you’ll see entries for various printer events. You can sort these entries by Date and Time or Task Category. Select an entry to view the exact date and time of the print job along with the printer that was used. You’ll also find the file path of your printed document under the General tab.

View Print History Log in Windows 11

If you ever need to clear your print history from Windows, simply right-click on the Operational log file within the PrintService folder and select the Clear log option from the context menu.

View Your Printed Document History Using PaperCut Print Logger

While it’s possible to check the printed document history via Event Viewer, it’s not the most user-friendly method.

Thankfully, you can also use a third-party app like ParperCut Print Logger to check your printer history on Windows. First, download and install the PaperCut Print Logger tool on your PC.


Once installed, PaperCut Print Logger will automatically monitor and log all print jobs on your system. It will capture essential details such as the time of printing, the name of the user who initiated the print job, the total number of pages, and other attributes like paper size, color mode, and more.

To view your printed document history saved by PaperCut Print Logger:

  1. Open File Explorer to C: > Program Files (x86) > PaperCut Print Logger.
  2. Double-click the ViewLogs shortcut.
  3. In the report, you will see your print history by date.
  4. Click the View button in the HTML column to see a list of printed documents for a specific day, along with their details.
  5. Click the CSV/Excel option to save the report as an Excel file for further analysis or record-keeping.

PaperCut Print Logger page on browser


Knowing how to access your printed document history on Windows can come in handy in certain situations. You can use it to track down a particular document or even check if someone else is using your printer without permission. Fortunately, doing this is fairly straightforward, no matter which method you choose.